
Patriotic 4th of July Cake-Mix Cookie Bars (Quick & Easy)
Celebrate with 4th of July Cake-Mix Cookie Bars: A Sweet Way to Honor Independence Day
Hello, sweet friends! If you’re like me, you’re all about celebrating every little moment with a big, beautiful treat. And as we gear up for a magnificent 4th of July celebration, there’s no better way to honor our independence than with a colorful, festive dessert. Today, I’m thrilled to share my recipe for 4th of July Cake-Mix Cookie Bars — they’re easy to whip up, irresistibly delicious, and bring a burst of red, white, and blue to your table.
Imagine this: warm, gooey cookie bars studded with white chocolate chips, and crunchy M&M’s — they melt in your mouth and are so simple to make. They’ll have your friends and family gathering around the dessert table, and maybe even returning for seconds (or thirds!). So, grab your apron and let’s dive into this delightful, festive treat!
A Sweet Memory: Baking with Mom
I can still remember the thrill of watching my mom whip up a batch of cookies in our cozy kitchen. The air would become sweet and warm, filled with the comforting aroma of baking. One summer, she decided to host a backyard barbecue for our neighborhood, and we made a giant batch of colorful cookies to celebrate the holiday.
Those cookies weren’t just snacks; they were little tokens of joy, sprinkled liberally with love and laughter. With bowls of red and blue sprinkles scattered across the countertops, we talked about our dreams while flour danced through the air. The best part? Watching our neighbors’ faces light up as they took a bite, transforming the simple gathering into a cherished memory.
It’s that spirit of joy and togetherness that inspired me to create these 4th of July Cake-Mix Cookie Bars. They embody the same feelings of love and camaraderie — perfect for sharing with friends and family during summer festivities!
Ingredients
Here’s what you’ll need to create these delightful cookie bars:
-
1 box cake mix (red velvet or vanilla)
A classic cake mix makes this recipe super simple! Either option will work beautifully, but red velvet adds an extra pop of color and flavor. -
1/2 cup vegetable oil
This ingredient keeps our bars moist and delicious. You could substitute it with melted coconut oil for a hint of tropical flavor. -
2 large eggs
These bind our ingredients together, providing structure and richness. If you’re in a pinch, use 1/2 cup of unsweetened applesauce per egg for a great vegan substitute! -
1/2 cup funfetti sprinkles (red, white, and blue)
Rainbow sprinkles bring joy to any dessert and are perfect for our patriotic theme! You can swap these for chocolate sprinkles or omit them if you prefer a more classic look. -
1/2 cup white chocolate chips
They add a creamy sweetness that balances the flavors perfectly. If you’re not a fan of white chocolate, feel free to use semi-sweet chocolate chips or even butterscotch chips for a fun twist. -
1/2 cup blue M&M’s
These festive treats add crunch and color! Swap them out for any colored candy to suit seasonal celebrations or personal favorites. -
1/2 cup red M&M’s
Just like the blue ones, these will provide that lovely crunch. You can easily replace them with peanut M&M’s for an extra layer of flavor.
Step-by-Step Instructions
Let’s get cookin’! Follow these simple steps to create your 4th of July Cake-Mix Cookie Bars:
-
Preheat the Oven: Start by preheating your oven to 350°F (175°C). This ensures that your cookie bars bake evenly and come out perfectly golden brown.
-
Prepare Your Baking Pan: Grease a 9×13-inch baking pan with non-stick spray or line it with parchment paper for easy removal. This is a little chef hack to make sure your cookie bars don’t stick and are easy to cut into neat squares later!
-
Mix the Ingredients: In a large mixing bowl, combine the cake mix, vegetable oil, and eggs. Give it a good stir with a spatula until everything is well mixed. Be careful not to overmix — we want these bars chewy, not tough!
-
Add the Fun Stuff: Gently fold in the funfetti sprinkles, white chocolate chips, and both red and blue M&M’s. Enjoy the beautiful colors as they swirl into the batter — it’s like a little celebration in the bowl!
-
Pour the Batter: Scrape the cookie batter into your prepared baking pan. Use an offset spatula or the back of a spoon to spread it out evenly in the pan. It might be a little thick, but that’s okay!
-
Bake: Place the pan in the preheated oven and bake for about 20-25 minutes. Start checking around the 20-minute mark. You want the edges to be lightly golden and a toothpick inserted in the center should come out mostly clean, meaning a few crumbs are okay — that’s what keeps it chewy!
-
Cool and Cut: Once baked to perfection, take the pan out of the oven and let it cool on a wire rack. Once cooled, carefully lift the bars out using the parchment (if you used it) and cut them into squares.
-
Serve and Enjoy: These bars can be enjoyed warm or at room temperature, but I suggest serving them slightly warm with a scoop of vanilla ice cream for an extra indulgent treat!
Serving Suggestions
When it comes to serving your 4th of July Cake-Mix Cookie Bars, presentation is key! Here’s a simple way to elevate them:
- Plate the bars on a large, colorful platter and sprinkle a few extra funfetti sprinkles around for a festive touch.
- Drizzle a little melted white chocolate on top for a touch of elegance.
- Add fresh berries like strawberries and blueberries around the bars for a pop of natural color and a refreshing balance to the sweetness.
Recipe Variations
Let’s get creative! Here are a few fun variations to customize your cookie bars:
-
Chocolate Chip Cookie Bars: Substitute half of the white chocolate chips for milk chocolate or dark chocolate chips for a classic flavor twist.
-
Nutty Bars: Stir in 1/2 cup of chopped walnuts or pecans for an added crunch and richness.
-
Peppermint Twist: Add ½ teaspoon peppermint extract and replace M&M’s with crushed peppermint candies for a winter holiday twist.
-
Gluten-Free Version: Use a gluten-free cake mix and ensure your other ingredients are gluten-free to make these bars suitable for those with gluten intolerance.
-
Fudge Brownie Bars: Use a brownie mix instead of cake mix for a decadent, fudgy treat your chocolate-loving friends will adore.
Chef’s Notes
This recipe has evolved over my years of baking. I initially started with a basic cookie recipe, but as I learned from friends and family, I incorporated fun flavors and colors to match the lively atmosphere of festive gatherings. Now, these cookie bars are not just a summer favorite but a year-round delight, customizable for any occasion.
One funny memory? I once forgot the eggs! Can you imagine my surprise when the mixture turned out more like a pancake batter? Lesson learned: always double-check your ingredients before mixing!
FAQs and Troubleshooting
-
What should I do if my bars are too chewy?
If your bars turn out too chewy, it might be from overmixing. Next time, mix just until combined and avoid overbaking. A higher ratio of cake mix to liquid can also cause this; always ensure you’re following the measurements closely. -
How do I store leftover cookie bars?
Store your cookie bars in an airtight container at room temperature for up to 4 days. You can also freeze them for later; just wrap them tightly in plastic wrap and then place in a freezer-safe container. -
Can I use another type of cake mix?
Absolutely! Any cake mix flavor can work well. Try chocolate, lemon, or even pumpkin spice for a festive twist depending on the season! -
Why did my cookie bars puff up?
If your bars puffed up while baking, it could be due to overmixing or them being overbaked. Just keep an eye on the baking time and aim for a chewy, slightly underbaked finish!
Nutritional Info
(Optional but helpful: If you wish to include this, it could look something like this):
- Serving Size: 1 bar
- Calories: 210
- Total Fat: 10g
- Saturated Fat: 4g
- Cholesterol: 30mg
- Sodium: 150mg
- Total Carbohydrates: 26g
- Dietary Fiber: 1g
- Sugars: 14g
- Protein: 2g
So there you have it; my delightful 4th of July Cake-Mix Cookie Bars recipe! I hope they add a burst of color and sweetness to your celebrations, just like those cherished memories in my kitchen. It’s all about connection, joy, and a touch of magic in every bite. Happy baking, friends, and let’s make this Independence Day one to remember!
Tie on your apron, pour yourself a sparkling drink, and let’s get baking!
Print4th of July Cake-Mix Cookie Bars

Celebrate Independence Day with these colorful and easy cake-mix cookie bars, perfect for summer festivities!
- Prep Time: 10 minutes
- Cook Time: 25 minutes
- Total Time: 35 minutes
- Yield: 12 servings 1x
- Category: Dessert
- Method: Baking
- Cuisine: American
- Diet: Vegetarian
Ingredients
- 1 box cake mix (red velvet or vanilla)
- 1/2 cup vegetable oil
- 2 large eggs
- 1/2 cup funfetti sprinkles (red, white, and blue)
- 1/2 cup white chocolate chips
- 1/2 cup blue M&M’s
- 1/2 cup red M&M’s
Instructions
- Preheat the oven to 350°F (175°C).
- Prepare a 9×13-inch baking pan with non-stick spray or parchment paper.
- Mix the cake mix, vegetable oil, and eggs in a large mixing bowl until just combined.
- Add the funfetti sprinkles, white chocolate chips, and both red and blue M&M’s.
- Pour the batter into the prepared baking pan, spreading it evenly.
- Bake for 20-25 minutes, until edges are lightly golden and a toothpick comes out mostly clean.
- Cool the bars on a wire rack, then cut into squares.
- Serve warm or at room temperature, optionally with vanilla ice cream.
Notes
For added flavor, substitute half the white chocolate chips with milk or dark chocolate chips. Store in an airtight container for up to 4 days.
Nutrition
- Serving Size: 1 bar
- Calories: 210
- Sugar: 14g
- Sodium: 150mg
- Fat: 10g
- Saturated Fat: 4g
- Unsaturated Fat: 6g
- Trans Fat: 0g
- Carbohydrates: 26g
- Fiber: 1g
- Protein: 2g
- Cholesterol: 30mg
Keywords: 4th of July, dessert, cookie bars, cake mix, festive treats

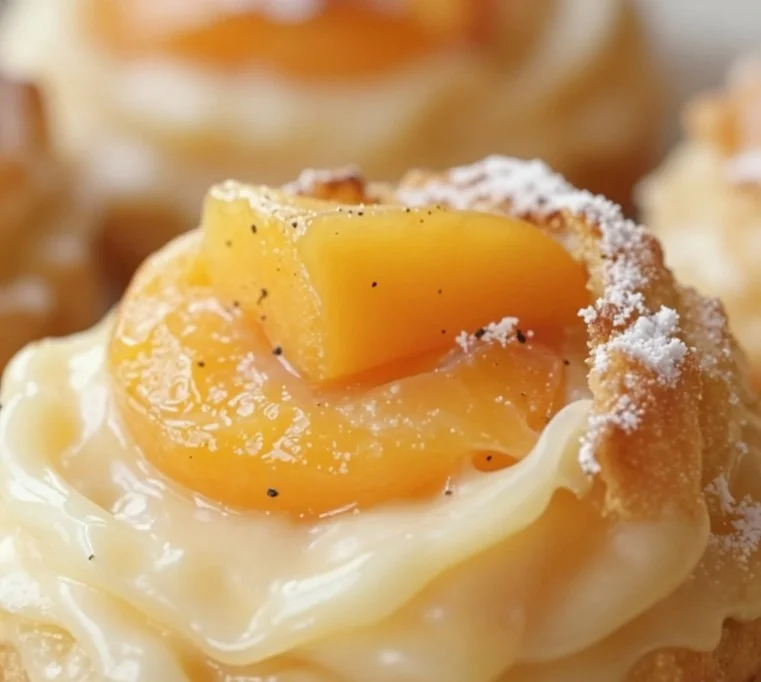
Ingredient Mini Peach Cream Cheese Tarts in 20 Minutes
Mini Peach and Cream Cheese Tarts: A Slice of Summer Bliss
Hello, my dear friends! Today, I’m thrilled to share a delightful treat that embodies summer sweetness and a touch of elegance: Mini Peach and Cream Cheese Tarts. These tarts are the perfect marriage of rich cream cheese and juicy, ripe peaches, all wrapped up in flaky puff pastry. Imagine your kitchen filled with the aroma of baked pastry and cinnamon while you indulge in these bite-sized delights.
Cooking is all about creating memories, and I’m excited to take you on this journey. So, tie on your apron, grab your favorite drink, and let’s dive into this scrumptious recipe that’ll have your taste buds singing!
A Slice of My Childhood
Growing up, summer meant peach season. Our local farm would host a peach-picking day, and I can still recall the thrill of plucking those fuzzy gems right from the tree. As we loaded up our baskets, my mother would talk about her favorite peach desserts, each story woven with laughter and love. One afternoon, after a long day of picking, she surprised us all with a batch of mini tarts, topped with fresh fruit and a creamy filling.
Those tarts were little miracles! Each bite was a memory, a warm hug on a sunny afternoon. As I watched my family gather around the table, enjoying those tarts, I realized that food has an incredible power to connect us. That’s why I wanted to recreate something similar here—an easy yet impressive treat that encourages you to gather your loved ones and share stories over something delicious.
Ingredients
For these Mini Peach and Cream Cheese Tarts, you’ll need the following ingredients:
-
Puff Pastry: This flaky pastry is the perfect base for our tarts. If you don’t have puff pastry on hand, you can use pie crust or even phyllo dough for a different texture. Just remember to pre-bake it according to the package instructions.
-
Fresh Peaches, Sliced: The star of the show! Ripe, juicy peaches bring sweetness and color. If peaches are out of season, feel free to use nectarines or even canned peaches (drained) in a pinch.
-
Cream Cheese Slices: Cream cheese adds that luscious, creamy texture we all crave. For a lighter option, consider using Neufchâtel cheese or a vegan cream cheese alternative.
-
Cinnamon: This spice not only warms the flavor but also enhances the natural sweetness of peaches. For a twist, you could try nutmeg or allspice instead.
-
Lemon Juice: A splash of lemon juice brightens up the flavors and keeps the peaches from browning. If you don’t have lemon, lime juice works nicely too.
-
Honey: This natural sweetener adds a touch of sweetness without overwhelming the dish. Maple syrup or agave nectar can be good substitutes if you prefer.
Each ingredient works together harmoniously, creating a balance of flavors that’s absolutely irresistible.
Step-by-Step Instructions
Now, let’s get down to business! Follow these steps for crafting your Mini Peach and Cream Cheese Tarts:
-
Preheat Your Oven: Start by preheating your oven to 400°F (200°C). The warm air will help your tarts puff up beautifully, creating that flaky texture we love.
-
Prepare the Puff Pastry: Roll out your puff pastry on a lightly floured surface. It should be about ¼ inch thick. Using a round cutter (or a glass), cut out circles—about 3 to 4 inches in diameter. You should have enough for a dozen mini tarts. Place the pastry circles on a parchment-lined baking sheet.
Chef’s Tip: If you want an extra golden finish, brush the edges of the pastry with an egg wash (1 beaten egg mixed with a splash of water).
-
Pre-bake the Pastry: Prick the centers of each pastry circle with a fork to prevent it from puffing up too much. Bake in the preheated oven for 8-10 minutes, or until they are lightly golden.
-
Craft the Filling: While the pastry is baking, it’s time to prep the filling. In a small bowl, combine your cream cheese, honey, and a splash of lemon juice. Beat everything together until smooth. You want it to be creamy and spreadable.
Little Hack: If your cream cheese is too firm, pop it in the microwave for a few seconds to soften it up!
-
Slice the Peaches: Take your fresh peaches and slice them into thin wedges. If peaches are really ripe, you might want to chill them slightly to make slicing easier.
-
Assemble the Tarts: Once the pastry is done and has cooled for a few moments, spread a generous layer of cream cheese mixture in the center of each tart. Then, carefully arrange the peach slices on top in a circular pattern. Sprinkle a light dusting of cinnamon over the peaches for that warm spice flavor.
-
Final Bake: Return the tarts to the oven and bake for an additional 5-7 minutes, until everything is warmed through and your kitchen is filled with an intoxicating aroma. The peaches should be tender but not mushy.
-
Cool and Serve: Let the tarts cool on the baking sheet before transferring them to a serving platter. Drizzle a little extra honey on top for that added touch of sweetness.
Serving Suggestions
To make your presentation shine, serve these Mini Peach and Cream Cheese Tarts on a beautiful platter, garnished with fresh mint leaves or edible flowers for that touch of whimsy. Pair them with a scoop of vanilla ice cream or a dollop of whipped cream for an extra indulgent experience. Perfect for a summer gathering or a cozy family dessert night!
Recipe Variations
Feel free to get creative with this recipe! Here are a few variations you might enjoy:
-
Berry Medley: Swap out the peaches for mixed berries like strawberries, blueberries, and raspberries for a delightful twist.
-
Spiced Up: Add a pinch of cardamom to the cream cheese filling for an exotic flavor profile.
-
Nutty Delight: Top the tarts with crushed almonds or pecans before baking for added crunch.
-
Chocolate Drizzle: Finish with a drizzle of melted chocolate for something truly decadent.
-
Gluten-Free Option: Use gluten-free puff pastry to make this treat accessible for everyone.
Chef’s Notes
As always, each time I whip up these tarts, I remember that sunny day in the orchard with my family. Cooking isn’t just about food; it’s about those feelings of nostalgia and connection. These Mini Peach and Cream Cheese Tarts have become a summer staple in my kitchen, and I hope they will become a cherished recipe in yours too!
FAQs and Troubleshooting
-
What if my puff pastry gets soggy?
- Make sure to prick the pastry before baking and avoid overloading with the cream cheese filling.
-
Can I make the filling ahead of time?
- Absolutely! Prepare the cream cheese mixture a day in advance, but keep it stored in the fridge, covered. Assemble the tarts just before baking.
-
How do I store leftover tarts?
- Store any leftover tarts in an airtight container in the fridge for up to 2 days. They taste best fresh, so enjoy them ASAP!
-
How do I know when the peaches are ripe?
- Look for peaches that are slightly soft to the touch but not mushy. They should have a fragrant aroma, signaling sweetness!
Nutritional Info
While I won’t bore you with all the numbers, these Mini Peach and Cream Cheese Tarts are a lovely balance of indulgence and fresh ingredients. Each tart is a delightful treat and can definitely be enjoyed in moderation as part of a balanced diet!
I hope you enjoyed this culinary journey into my kitchen! These Mini Peach and Cream Cheese Tarts are not just about satisfying your sweet tooth; they’re about making memories, sharing love, and connecting with the people around you. So gather your ingredients, bring your friends together, and let’s create something beautiful. Happy baking, friends! 🍑✨
PrintMini Peach and Cream Cheese Tarts

A delightful treat that combines rich cream cheese with juicy peaches wrapped in flaky puff pastry.
- Prep Time: 15 minutes
- Cook Time: 20 minutes
- Total Time: 35 minutes
- Yield: 12 servings 1x
- Category: Dessert
- Method: Baking
- Cuisine: American
- Diet: Vegetarian
Ingredients
- 1 sheet Puff Pastry
- 2 Fresh Peaches, sliced
- 4 oz Cream Cheese, sliced
- 1 tsp Cinnamon
- 1 tbsp Lemon Juice
- 2 tbsp Honey
Instructions
- Preheat your oven to 400°F (200°C).
- Prepare the puff pastry by rolling it out to ¼ inch thickness and cutting circles of 3 to 4 inches.
- Pre-bake the pastry circles for 8-10 minutes until lightly golden.
- Craft the filling by combining the cream cheese, honey, and lemon juice until smooth.
- Slice your peaches into thin wedges.
- Assemble the tarts by spreading the cream cheese mixture on each pastry and topping with peach slices.
- Return the tarts to the oven and bake for an additional 5-7 minutes.
- Cool the tarts on a baking sheet before serving.
Notes
Serve with mint leaves or edible flowers and pair with ice cream or whipped cream for a perfect treat.
Nutrition
- Serving Size: 1 tart
- Calories: 200
- Sugar: 10g
- Sodium: 150mg
- Fat: 10g
- Saturated Fat: 5g
- Unsaturated Fat: 4g
- Trans Fat: 0g
- Carbohydrates: 22g
- Fiber: 1g
- Protein: 3g
- Cholesterol: 15mg
Keywords: peach tarts, cream cheese, dessert, summer, baking

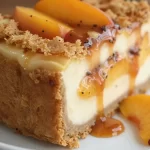
Ingredient Peach Cobbler Cheesecake
Sweet Harmony: Peach Cobbler Cheesecake Recipe
Hello, dear friends! Today, I’m excited to bring you a delightful fusion of two classic desserts: Peach Cobbler and Cheesecake. Yes, you heard that right! This Peach Cobbler Cheesecake combines the creamy decadence of cheesecake with the warm, comforting essence of summer peaches and that buttery, crumbly topping we all love. It’s like a dreamy hug on a plate, and let me tell you, it’s a showstopper that’ll impress your guests or make a quiet evening at home feel extra special.
A Slice of Nostalgia
Before we jump into this enticing recipe, I want to share a little story with you. Growing up, my family would gather every summer for a big peach-picking weekend. The smell of ripe peaches filled the air, and the sun-kissed fruits glistened like jewels on the trees. We would spend the day plucking peaches and brainstorming all the delicious things we could make with them.
One summer, my grandmother introduced me to her famous peach cobbler. I can still picture her in the kitchen, humming to her favorite tunes as she mixed and poured. She taught me that cooking is about love, creativity, and, most importantly, sharing. Her cobbler was always a hit, and the leftovers (if there were any!) would mysteriously vanish by morning. This recipe is a tribute to those cherished memories and the joy of sharing good food with loved ones.
Ingredients
Here’s what you’ll need to create this Peach Cobbler Cheesecake masterpiece:
-
1 ½ cups graham cracker crumbs
These provide the perfect buttery base and a subtle crunch. If you’re feeling adventurous, try using crushed vanilla wafers for a twist! -
½ cup unsalted butter, melted
This binds the crumbs together and gives the crust its delicious richness. Make sure it’s unsalted to control the overall saltiness of the dessert. -
2 cups cream cheese, softened
The star of our cheesecake! It creates that rich, creamy texture. If you’re looking for a lighter option, you can use Neufchâtel cheese (it’s lower in fat!). -
1 cup granulated sugar
This sweetens our cheesecake filling. If you’re trying to cut back on sugar, consider using a sweetener like monk fruit or a reduced-sugar alternative. -
1 teaspoon vanilla extract
For that warm, aromatic flavor that makes everything better! A splash of almond extract can also elevate the taste. -
3 large eggs
They add structure and help set the cheesecake. Want an egg-free version? You can substitute each egg with ¼ cup unsweetened applesauce. -
2 cups fresh peaches, sliced
Use ripe, juicy peaches for the best flavor. If peaches are out of season, frozen peaches work too—just make sure to thaw and drain them well first! -
½ cup brown sugar
This gives an extra caramel-like flavor to the peaches and enhances their sweetness. Don’t have brown sugar? A mix of white sugar and a bit of molasses can do the trick! -
1 teaspoon cinnamon
A warm spice that complements the peaches perfectly. Feel free to experiment with nutmeg or even pumpkin pie spice! -
1 tablespoon cornstarch
This helps thicken the peach mixture and gives it that delectable saucy quality. Arrowroot powder can be substituted if preferred. -
1 tablespoon lemon juice
A splash of acidity to balance the sweetness. Lime juice can be a nice alternative and adds a fun twist!
Step-by-Step Instructions
Alright, let’s get cooking! Follow these steps to create your Peach Cobbler Cheesecake.
-
Preheat Your Oven:
Begin by preheating your oven to 325°F (163°C). This allows the cheesecake to bake evenly, creating that perfectly creamy texture we all love. -
Prepare the Crust:
In a mixing bowl, combine the graham cracker crumbs and melted butter until the mixture resembles wet sand. Press this mixture firmly into the bottom of a 9-inch springform pan. Make sure it’s compact, as this will hold everything together. Plus, a little tip: you can use the bottom of a measuring cup to smooth it out perfectly! -
Bake the Crust:
Pop the crust into your preheated oven for about 8-10 minutes or until it’s lightly golden. This helps set the crust, ensuring it holds up against the creamy cheesecake filling. Let it cool while we work on the filling. -
Make the Filling:
In a mixing bowl, beat the softened cream cheese until smooth (about 2 minutes). Gradually add the granulated sugar and beat until combined. We want that mixture creamy and dreamy! Scrape down the sides of the bowl to catch any lumps—no one likes unexpected lumps in their cheesecake! -
Add Vanilla and Eggs:
Stir in the vanilla extract. Then, add the eggs, one at a time, beating on low speed after each addition until just combined. Be careful not to over-mix here; we want a light and fluffy texture, not an airy one. -
Prepare the Peach Layer:
In a small bowl, toss the sliced peaches with brown sugar, cinnamon, cornstarch, and lemon juice. Let them sit for about 10 minutes until they’re nice and juicy. The natural flavors will meld beautifully, creating an incredible topping for our cheesecake. -
Layer It Up:
Pour half of the cheesecake mixture over the cooled crust, then carefully layer half of the peach mixture on top. Follow with the remaining cheesecake filling and sprinkle the rest of the peaches on top. Don’t worry about perfection; this is all part of the charm! -
Bake the Cheesecake:
Bake in the oven for about 60-70 minutes until the edges are set, but the center still slightly jiggles (it will set more as it cools). Here’s a little chef hack: to prevent cracking, you can place a shallow pan of water in the oven alongside the cheesecake. It creates steam and keeps your cheesecake from drying out. -
Cool and Chill:
Once it’s done, turn off the oven and leave the cheesecake inside for an additional hour, cracking the door slightly. This allows it to cool gradually, reducing the chances of cracks. After an hour, let it cool fully before transferring it to the refrigerator to chill for at least 4 hours (or overnight if you can handle the wait!).
Serving Suggestions
When it’s finally time to serve your Peach Cobbler Cheesecake, carefully run a knife around the edge of the springform pan before releasing the sides. You can serve it plain, or dress it up with a dollop of whipped cream or a scoop of vanilla ice cream on the side—you can never go wrong with that classic combination!
Recipe Variations
- Add Crunch: Mix in some chopped pecans or walnuts to the peach layer for added texture.
- Flavor Substitutions: Try using blueberries or raspberries instead of peaches for a berry cobbler cheesecake surprise.
- Healthy Twist: Swap out the graham crackers for almond flour or oat flour to make a gluten-free crust without sacrificing flavor.
- Celebrate Fall: Feel free to mix in some pumpkin puree into the cheesecake batter for a seasonal variation!
- Dairy-Free Delight: Use cashew cream and a dairy-free butter substitute to make a vegan version without sacrificing creaminess.
Chef’s Notes
This recipe has evolved from my traditional peach cobbler. Initially, I had a simple, straightforward way of making it, but over the years it morphed into a creamy cheesecake that carries that nostalgic flavor of my grandma’s cobbler. I’m constantly amazed at how the simplest of ingredients can turn into something so exquisite. I still remember one time making it for a picnic—by the time we reached our destination, the cheesecake was gone! Everyone raved about it, wanting the recipe immediately. I couldn’t help but smile, knowing it brought a little joy to their day!
FAQs and Troubleshooting
Q: Why does my cheesecake have cracks on the surface?
A: Cracking can happen due to overmixing the batter or baking it at too high of a temperature. Always mix on low speed and try to bake it in a water bath for extra moisture.
Q: How do I know my cheesecake is done?
A: The edges should be set, but the center will still have a slight jiggle when you gently shake the pan. It will firm up more as it cools.
Q: Can I freeze my Peach Cobbler Cheesecake?
A: Absolutely! To freeze, cover the cooled cheesecake tightly with plastic wrap and then again with aluminum foil. It can be frozen for up to 2 months. Just thaw in the fridge overnight before serving.
Q: What if I don’t have fresh peaches?
A: No worries! Frozen peaches work perfectly. Just be sure to thaw and drain any excess liquid to avoid a soggy cheesecake.
Conclusion
And there you have it, my dear friends! A beautiful Peach Cobbler Cheesecake that’s sure to become a treasured recipe in your collection. Not only does it blend two beloved desserts into one, but it also carries with it a personal story—a reminder of the joy that comes from gathering around the table and sharing moments with those we love.
So, gather your favorite people, tie on your apron, and get ready to create something incredible. And remember, as you whip up this delightful dessert, it’s not just about the ingredients; it’s about the love and intention you put into it. Enjoy every bite, and happy cooking!
PrintPeach Cobbler Cheesecake
A delightful fusion of creamy cheesecake and warm, comforting peach cobbler, perfect for impressing guests or enjoying at home.
- Prep Time: 20 minutes
- Cook Time: 70 minutes
- Total Time: 90 minutes
- Yield: 8 servings 1x
- Category: Dessert
- Method: Baking
- Cuisine: American
- Diet: Vegetarian
Ingredients
- 1 ½ cups graham cracker crumbs
- ½ cup unsalted butter, melted
- 2 cups cream cheese, softened
- 1 cup granulated sugar
- 1 teaspoon vanilla extract
- 3 large eggs
- 2 cups fresh peaches, sliced
- ½ cup brown sugar
- 1 teaspoon cinnamon
- 1 tablespoon cornstarch
- 1 tablespoon lemon juice
Instructions
- Preheat your oven to 325°F (163°C).
- Combine the graham cracker crumbs and melted butter until the mixture resembles wet sand. Press into the bottom of a 9-inch springform pan.
- Bake the crust for about 8-10 minutes until lightly golden. Let it cool.
- Beat the softened cream cheese until smooth, then gradually add the granulated sugar and mix.
- Stir in the vanilla extract and add the eggs one at a time, mixing on low speed until just combined.
- Toss the sliced peaches with brown sugar, cinnamon, cornstarch, and lemon juice, then let sit for about 10 minutes.
- Pour half of the cheesecake mixture over the cooled crust, layer half of the peach mixture on top, then add the remaining cheesecake filling and the rest of the peaches.
- Bake in the oven for about 60-70 minutes until the edges are set but the center still jiggles.
- Cool the cheesecake inside the oven for an hour with the door slightly cracked, then refrigerate for at least 4 hours.
Notes
Serve plain or with whipped cream or vanilla ice cream. You can also mix in nuts for added texture or swap fruits for variations.
Nutrition
- Serving Size: 1 slice
- Calories: 400
- Sugar: 25g
- Sodium: 300mg
- Fat: 25g
- Saturated Fat: 15g
- Unsaturated Fat: 5g
- Trans Fat: 0g
- Carbohydrates: 45g
- Fiber: 2g
- Protein: 6g
- Cholesterol: 90mg
Keywords: peach cobbler, cheesecake, dessert, summer dessert, fruity cheesecake

Seasonal Nectarine Galette: Quick Summer Dessert Recipe
Indulge in the Sweet Simplicity of a Nectarine Galette
Hello friends! Welcome back to the cozy corner of my kitchen. Today, we’re diving into a dish that embodies the essence of summer: the Nectarine Galette. This rustic dessert is not only a feast for the eyes but also an easygoing recipe that brings the charm of a fancy bakery right to your table. Imagine a flaky, buttery crust enveloping juicy, sweet nectarines, all beautifully rustic and just waiting for a scoop of vanilla ice cream on the side. Let’s roll our sleeves up and get to it!
The Story Behind the Galette
Growing up in a household where the kitchen was the heart of the home, many of my fondest memories are wrapped in the warmth of oven-baked goodies. One particular summer evening stands out in my mind—the sun setting, painting the sky in pastel hues, while my mother asked, “What do you want for dessert, Savannah?” Without hesitation, I yelled, “Peach galette!” Unfortunately, we had no peaches, but we had a bowl overflowing with nectarines from a recent trip to the farmer’s market.
So, we improvised! My mom and I dove into the kitchen, laughter echoing off the walls as we rolled out dough, sprinkled flour like confetti, and sliced nectarines, each one more glorious than the last. The smell of baking softened the summer night’s anticipation. The first bite was magical—sweet, tangy, and perfectly rustic! That evening, surrounded by family, sparked my love for this humble dessert, reminding me how simple ingredients can create something extraordinary. I’ve tweaked that original recipe over the years, but the spirit remains: uncomplicated, elegant, and utterly delicious.
Ingredients You’ll Need
Let’s gather our stars—these are the ingredients that’ll help us achieve a show-stopping Nectarine Galette:
-
2 cups all-purpose flour
The backbone of our galette, all-purpose flour gives the crust that perfect flaky texture. If you’re looking for a gluten-free option, try using a 1:1 gluten-free flour blend! -
1/2 cup unsalted butter, chilled and cubed
Butter is key to that flaky crust! I prefer unsalted to control the seasoning better. You can substitute it with coconut oil or vegan butter if you’re going dairy-free. -
1/4 cup sugar
This sweetens the dough slightly. For a more natural option, you might substitute it with coconut sugar or even honey in a pinch (just reduce the liquid in the dough slightly). -
1/4 teaspoon salt
A pinch of salt elevates the flavors. An essential ingredient, don’t skip this! -
6-8 nectarines, sliced
The star of the show! These nectarines bring a sweet and juicy punch. You can also mix in peaches, plums, or even apples if you want a flavor twist. -
1 teaspoon ground cinnamon
This warm spice enhances the sweetness of the nectarines beautifully. Feel free to swap it for nutmeg or allspice for a different kick! -
1 teaspoon vanilla extract
Vanilla adds a lovely depth. Don’t have any? A splash of almond extract will work wonders too! -
1-2 tablespoons sugar (for sprinkling)
A little extra sweetness on top to caramelize as it bakes. Try using brown sugar for a more caramelized finish! -
1 egg (for egg wash)
To create that golden, glossy finish on the crust. If you’re vegan, a plant-based milk would do the trick for brushing!
Let’s Get Cooking!
Are you ready to make some magic? Follow these steps and you’ll have a Nectarine Galette that you’ll want to make again and again.
-
Make the Dough
In a large bowl, combine the flour, 1/4 cup sugar, and salt. Add the cubed butter. Using your fingers, a pastry cutter, or two forks, gently work the butter into the flour mixture until it resembles coarse crumbs. This process is essential—don’t rush it! You want that lovely, crumbly texture. -
Chill the Dough
Once your mixture is ready, add about 4-5 tablespoons of cold water to the dough. Mix just until combined—it shouldn’t be sticky! Shape it into a disc, wrap in plastic, and pop it in the fridge for at least 30 minutes. Trust me, chilling allows the butter to firm up, resulting in the flakiest crust. -
Preheat the Oven
While the dough chills, preheat your oven to 400°F (200°C). A hot oven is vital for that perfect crust! -
Prepare the Nectarines
Slice your nectarines evenly and toss them in a bowl with the cinnamon, vanilla extract, and a tablespoon of sugar. Allow those juices to mix and mingle while the dough continues to chill. -
Roll Out the Dough
After chilling, on a lightly floured surface, roll out your dough into a rough circle, about 12 inches in diameter. Don’t stress about making it perfect—rustic is the name of the game! Transfer the rolled dough onto a parchment-lined baking sheet. -
Assemble the Galette
Arrange the sliced nectarines in the center of the dough, leaving about a 2-inch border. Fold the edges of the dough over the nectarines, creating a little enclosure—don’t worry if they peek out a bit! It adds to the charm. -
Brush and Sprinkle
Whisk the egg and brush it over the visible crust, then sprinkle with a coarse sugar. This step is what transforms your rustic galette into a showstopper with golden edges! -
Bake to Perfection
Pop your galette in the oven and bake for about 30-35 minutes, or until the crust is golden and the nectarines are bubbly. Your kitchen will smell divine, and you might have a hard time waiting! -
Cool Down
Once it’s out of the oven, let it cool for about 10 minutes before serving. This time allows it to set a bit more, making it easier to slice.
Serving Suggestions
Serving up this Nectarine Galette? Here’s a lovely idea: While it’s still warm, slice it into wedges and serve with a generous scoop of vanilla ice cream or a dollop of whipped cream. Garnish with a sprinkle of fresh mint for that extra pop of color and freshness. Trust me, a little texture from crushed nuts on top elevates it further while adding a delightful crunch!
Recipe Variations
Now, let’s get those creative juices flowing! Here are a few inspiring twists:
- Mixed Stone Fruits: Combine nectarines with peaches and plums for a vibrant fruit medley.
- Rustic Berry Galette: Swap nectarines for blueberries or raspberries. A little lemon zest in the filling can elevate the flavor!
- Spiced Autumn Variation: Add pumpkin spice seasoning with apples for a fab fall dessert!
- Nutty Addition: Sprinkle slivered almonds or chopped pistachios over your nectarines for a delightful crunch.
- Vegan Option: Substitute butter with coconut oil and use a plant-based milk for the egg wash.
Chef’s Notes
Over the years, this recipe has become a staple at gatherings and during the summer months when fruits shine their brightest. I recall an impromptu picnic at the park where I whipped up this galette. The reactions were priceless—spoonfuls of joy, smiles all around! One of my friends even asked if I had a pastry chef’s secret to share, and I chuckled; the truth is, my only secret is to love what you cook!
FAQs and Troubleshooting
Q1: My dough is too crumbly. What did I do wrong?
Don’t panic! You might need to add a tablespoon or two of cold water. Ensure not to overwork the dough; it should be slightly sticky but still hold together.
Q2: My nectarines are tough and not juicy. What gives?
It could be that the nectarines aren’t ripe enough. Make sure to choose ripe nectarines that yield slightly to pressure when you squeeze them for the best results.
Q3: Can I make this galette ahead of time?
Absolutely! You can make the dough a day in advance and store it in the refrigerator. Just don’t bake it until you’re ready to serve—it’s best when fresh!
Q4: How do I store leftovers?
Store any leftovers in an airtight container in the fridge for 2-3 days. Just pop it back in a warm oven for a few minutes to revive that crust!
Nutritional Info (Optional)
If you’re keeping track, a slice of this Nectarine Galette generally has around 250 calories, depending on the portion size and additional toppings. It’s a delightful treat worth every bite!
And there you have it! A delightful nectar-filled galette that’s perfect for summer days, family gatherings, or simply treating yourself. I hope you enjoy making it as much as I do. Remember, cooking should always feel like a joyful journey. So tie on that apron, gather your loved ones, and whip up this delightful recipe! Happy cooking!
PrintNectarine Galette

A rustic and easy-to-make dessert featuring a flaky crust and juicy nectarines, perfect for summer gatherings.
- Prep Time: 30 minutes
- Cook Time: 35 minutes
- Total Time: 65 minutes
- Yield: 8 servings 1x
- Category: Dessert
- Method: Baking
- Cuisine: American
- Diet: Vegetarian
Ingredients
- 2 cups all-purpose flour
- 1/2 cup unsalted butter, chilled and cubed
- 1/4 cup sugar
- 1/4 teaspoon salt
- 6–8 nectarines, sliced
- 1 teaspoon ground cinnamon
- 1 teaspoon vanilla extract
- 1–2 tablespoons sugar (for sprinkling)
- 1 egg (for egg wash)
Instructions
- Make the Dough: In a large bowl, combine flour, 1/4 cup sugar, and salt. Add cubed butter and work it into the flour mixture until it resembles coarse crumbs.
- Chill the Dough: Add 4-5 tablespoons of cold water until combined, shape into a disc, wrap in plastic, and refrigerate for at least 30 minutes.
- Preheat the Oven: While the dough chills, preheat oven to 400°F (200°C).
- Prepare the Nectarines: Toss sliced nectarines with cinnamon, vanilla extract, and a tablespoon of sugar.
- Roll Out the Dough: On a floured surface, roll out dough to a rough circle, about 12 inches in diameter.
- Assemble the Galette: Arrange nectarines in the center, folding the edges of the dough over, leaving some nectarines exposed.
- Brush and Sprinkle: Whisk the egg, brush the crust, and sprinkle with coarse sugar.
- Bake to Perfection: Bake for 30-35 minutes until the crust is golden and nectarines are bubbly.
- Cool Down: Let cool for about 10 minutes before serving.
Notes
Serve warm with vanilla ice cream or whipped cream, and garnish with fresh mint.
Nutrition
- Serving Size: 1 slice
- Calories: 250
- Sugar: 10g
- Sodium: 200mg
- Fat: 14g
- Saturated Fat: 8g
- Unsaturated Fat: 5g
- Trans Fat: 0g
- Carbohydrates: 30g
- Fiber: 2g
- Protein: 3g
- Cholesterol: 50mg
Keywords: nectarine galette, rustic dessert, summer dessert, easy recipe
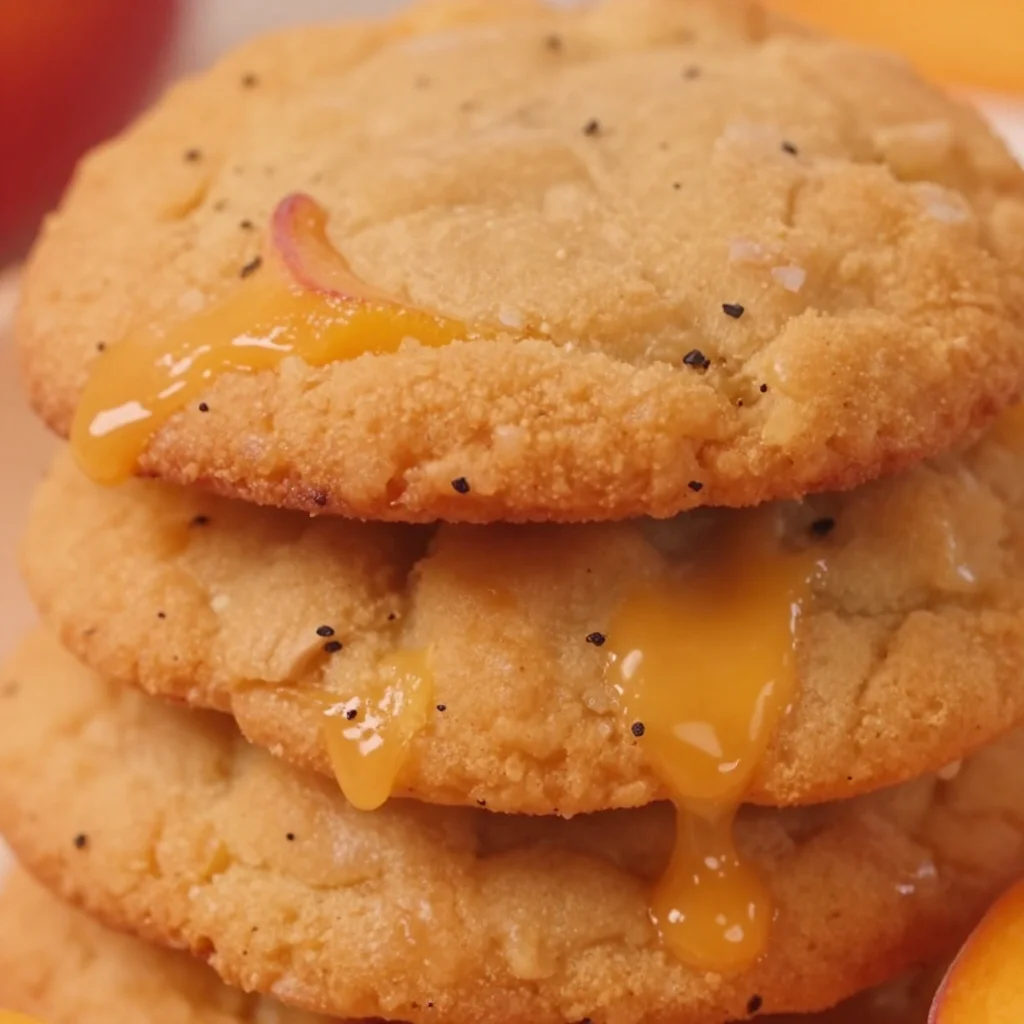
Peach Cookies
The Sweetest Peach Cookies: A Taste of Summer
Hello, dear food lovers! Today, we’re diving into a deliciously unique treat that brings a burst of summer to your kitchen — Peach Cookies! If you’re like me, you have a sweet spot (pun absolutely intended) for all things peachy. Whether you relish a juicy slice eaten right over the sink or revel in peach cobbler, there’s magic in the flavor of this succulent fruit, and these cookies are no exception!
Imagine a warm afternoon, the scent of freshly baked cookies wafting through the air, and the laughter of friends gathered around your table. There’s something so delightful about sharing baked goods with the people you love. And that’s exactly the vibe I want to achieve with these Peach Cookies! They’re inviting, mildly sweet, and just perfect for any occasion. So, grab your apron, and let’s get baking!
My Peachy Memory
Let me take you back to my childhood, a time when summer meant my grandmother’s backyard, a large wooden picnic table, and the sweetest, juiciest peaches you can imagine. Every summer, my family would gather for our annual peach-picking adventure. We’d arrive at the orchard, sun hats on, laughter filling the air, and carts ready to be filled. I can still picture my grandmother, a basket in one hand, a peach in the other, proclaiming that you couldn’t find a better peach than the ones right from the tree!
Once our baskets were filled to the brim, we’d head home, and that’s where the magic happened. Grandma would whip up her famous peach cobbler, but she always kept a secret stash of fresh peaches for her cookies. Those peach cookies were a staple at every family gathering, and they quickly became my favorite treat. The memories of those hot summer days, mingled with the sweet aroma of cookies baking in the oven, are forever etched in my heart. Now, I can’t help but recreate those moments, blending nostalgia with new culinary adventures.
Ingredients to Get You Started
To make these delightful Peach Cookies, you’ll need the following ingredients:
-
2 1/8 cups all-purpose flour: This is your base ingredient. For a gluten-free option, try using almond flour or a 1:1 gluten-free flour blend.
-
3/4 teaspoon salt: Just a pinch of salt enhances the sweetness and balances the flavors.
-
1/2 teaspoon baking soda: This will help your cookies rise perfectly. Don’t skip it!
-
1/2 cup unsalted butter (softened): The creaminess from butter gives the cookies their rich flavor. If you want to cut back on dairy, coconut oil can work well!
-
1/2 cup granulated sugar: This will keep your cookies sweet and give them a delightful crunch.
-
1/2 cup firmly packed light brown sugar: Brown sugar adds depth and moisture. If you don’t have it, you can substitute with more granulated sugar, but the flavor won’t be as rich.
-
1 large egg: This is essential for binding the ingredients together. For a vegan version, use a flax egg (1 tablespoon ground flaxseed mixed with 2.5 tablespoons water).
-
1/2 teaspoon vanilla extract: Vanilla brings out the sweetness and enhances the peach flavor.
-
2 large ripe peaches (peeled, pitted, and cut into 1/4-inch pieces; about 1 to 1 1/2 cups): Fresh peaches are the star of this recipe! If peaches are out of season, you can use canned peaches, just drain them well.
-
1/3 cup peach preserves: This adds a lovely sweetness and texture. You can substitute with apricot or raspberry preserves for a twist.
-
3 tablespoons sanding sugar: Use this for a sparkly finish on your cookies. Turbinado sugar works too!
-
1/4 teaspoon ground cinnamon: A hint of cinnamon elevates the overall flavor. If you’re a cinnamon lover, feel free to add more!
Step-by-Step Instructions
Now that we have our ingredients laid out, let’s get cooking! Here’s how to craft these Peach Cookies from scratch:
-
Preheat Your Oven: Start by preheating your oven to 350°F (175°C). This little step is essential for successful baking!
-
Prepare Your Baking Sheet: Line a baking sheet with parchment paper. This prevents the cookies from sticking and makes cleanup a breeze.
-
Mix Dry Ingredients: In a medium bowl, whisk together the all-purpose flour, salt, baking soda, and ground cinnamon until well combined. The simple act of whisking aerates the flour, making for lighter cookies!
-
Cream Butter and Sugars: In a large mixing bowl, beat the softened butter, granulated sugar, and brown sugar together until the mixture is light and fluffy (about 3–4 minutes). This is where the magic begins — it’s all about that air incorporated into the butter!
-
Add Egg and Vanilla: Next, add the egg and vanilla extract to the butter mixture. Beat until fully combined. Don’t rush this part; it’s key to creating that creamy texture!
-
Combine Wet and Dry Ingredients: Gradually add the dry ingredients to the wet ingredients. Mix until just combined; overmixing can lead to tough cookies.
-
Fold in Peaches and Preserves: Gently fold in the peach pieces and peach preserves. Watching those luscious chunks of peach tumble into the dough is part of the fun!
-
Scoop and Shape: Using a cookie scoop or tablespoon, drop rounds of dough onto the prepared baking sheet, leaving space between each cookie. Sprinkle a little sanding sugar on top for that extra sparkle!
-
Bake: Pop your baking sheet into the preheated oven and bake for 10–12 minutes, or until the edges are lightly golden. The center may look a little soft, but don’t worry! They will firm up as they cool.
-
Cool and Serve: After baking, let the cookies cool on the sheet for a few minutes before transferring them to a wire rack to cool completely.
Serving Suggestions
These Peach Cookies are delightful on their own, but if you want to elevate the experience, serve them warm alongside a scoop of vanilla ice cream. Trust me, there’s something magical about the combination of warm cookies and cold ice cream that creates a little party in your mouth! You can also drizzle them with honey or a light glaze for extra sweetness!
Recipe Variations
Here are a few fun twists you can try with this recipe:
-
Berry Peach Fusion: Add 1/2 cup of diced strawberries or blueberries to the peach mixture for a mixed berry version.
-
Nuts for Peaches: Incorporate chopped pecans or walnuts for some crunch.
-
Herbal Peach Twist: Add a teaspoon of fresh mint or basil to the dough for a refreshing herbaceous note.
-
Spicy Peaches: Want a zesty kick? Mix in a sprinkle of cayenne pepper with your dry ingredients for a sweet-and-spicy combo!
-
Vegan Delight: Utilize a flax egg in place of the regular egg, and switch the butter for coconut oil for a fantastic vegan treat.
Chef’s Notes
Creating these cookies has been a delightful journey for me. I often think about the time my kitchen became a mini peach paradise, with sticky fingers and laughter filling the air. And I remember the time I accidentally added too much cinnamon — I was worried my cookies would taste like Christmas rather than summer. But guess what? They turned out to be a surprising hit, and now, sometimes I throw in a bit extra just for fun! It’s all about experimenting and letting your kitchen adventures unfold.
FAQs and Troubleshooting
1. My cookies spread too much! What did I do wrong?
- If your cookies spread too much, it could be due to too warm butter or not enough flour. Make sure your butter is softened but not melted and be sure to measure your flour accurately.
2. Can I use frozen peaches?
- Yes! You can use frozen peaches. Just make sure to thaw them and drain any excess moisture before folding them into the dough.
3. My cookies burned on the bottom! How can I prevent that?
- Always check your oven’s temperature with an oven thermometer; it could be running hotter than the dial reads. Also, if your baking sheet isn’t insulated, consider placing it on top of another baking sheet.
4. Can I make the dough ahead of time?
- Absolutely! You can prepare the dough, wrap it well, and store it in the refrigerator for up to 2 days — just make sure to let it sit at room temperature for a bit before scooping and baking.
Nutritional Info (per cookie, estimated)
- Calories: 150
- Total Fat: 7g
- Saturated Fat: 4g
- Cholesterol: 20mg
- Sodium: 90mg
- Total Carbohydrates: 21g
- Dietary Fiber: 1g
- Sugars: 9g
- Protein: 2g
With that, your Peach Cookies are ready! I hope you enjoy these as much as I do. There’s nothing quite like a home-baked treat to sweeten up your day, and sharing them with your loved ones makes it all the more special. Now, wipe your hands, tie that apron string a little tighter, and let’s create more timeless moments in the kitchen together! Happy baking! 🍑✨
PrintSweet Peach Cookies

Delicious and inviting peach cookies that bring a taste of summer to any occasion.
- Prep Time: 15 minutes
- Cook Time: 12 minutes
- Total Time: 27 minutes
- Yield: 24 cookies 1x
- Category: Dessert
- Method: Baking
- Cuisine: American
- Diet: Vegetarian
Ingredients
- 2 1/8 cups all-purpose flour
- 3/4 teaspoon salt
- 1/2 teaspoon baking soda
- 1/2 cup unsalted butter (softened)
- 1/2 cup granulated sugar
- 1/2 cup firmly packed light brown sugar
- 1 large egg
- 1/2 teaspoon vanilla extract
- 2 large ripe peaches (peeled, pitted, and cut into 1/4-inch pieces)
- 1/3 cup peach preserves
- 3 tablespoons sanding sugar
- 1/4 teaspoon ground cinnamon
Instructions
- Preheat your oven to 350°F (175°C).
- Prepare a baking sheet lined with parchment paper.
- Mix together the flour, salt, baking soda, and cinnamon in a medium bowl.
- Cream the butter, granulated sugar, and brown sugar until light and fluffy.
- Add the egg and vanilla extract; mix until combined.
- Combine the dry ingredients with the wet ingredients until just combined.
- Fold in the peaches and peach preserves.
- Scoop rounds of dough onto the prepared baking sheet, spacing them apart.
- Bake for 10-12 minutes or until edges are lightly golden.
- Cool on the baking sheet for a few minutes before transferring to a wire rack.
Notes
Serve warm with a scoop of vanilla ice cream for an extra treat!
Nutrition
- Serving Size: 1 cookie
- Calories: 150
- Sugar: 9g
- Sodium: 90mg
- Fat: 7g
- Saturated Fat: 4g
- Unsaturated Fat: 2g
- Trans Fat: 0g
- Carbohydrates: 21g
- Fiber: 1g
- Protein: 2g
- Cholesterol: 20mg
Keywords: peach cookies, summer dessert, baking

Peach Lemonade
Refreshing Homemade Peach Lemonade: A Summer Delight
Hey there, fellow food lovers! I’m so thrilled you’re here with me today as we dive into the juicy, sun-soaked world of summer drinks. Today, we’ll be crafting a delightful Peach Lemonade that’s as refreshing as a breeze on a hot day. This recipe encapsulates the essence of summer and perfectly balances the sweetness of ripe peaches with the zing of freshly squeezed lemons. Are you ready to make your taste buds dance? Let’s get started!
A Nostalgic Sip of Summer
Growing up, summers meant visiting my grandma’s house in the countryside. It was an enchanting place, surrounded by sprawling peach orchards that felt like they went on forever. One of my fondest memories was walking through the orchard, picking the juiciest peaches with sticky hands and sun-kissed cheeks. Once we collected a bounty, Grandma would whisk us into the kitchen, where the air was filled with the sweet aroma of ripe peaches.
She had this magical old lemonade stand recipe that was always a hit, especially during those sweltering afternoons. After picking peaches, we would blend them into her classic lemonade, which turned out to be the highlight of our summer days. Fast forward to today, and I’ve taken that sentimental recipe and given it a little fun twist. This Peach Lemonade embodies those joyful childhood memories and brings a refreshing blast of flavor to any gathering!
Ingredients
Let’s talk about what you’ll need for this Peach Lemonade. I want you to feel empowered and excited to head into your kitchen, so here’s a quick breakdown of the ingredients:
-
Homemade Lemonade (or 8 cups of your favorite lemonade):
- You can easily whip up your own lemonade using freshly squeezed lemons, water, and sugar. It’s a game changer! But, feel free to use store-bought if you’re in a pinch. Just choose a variety that isn’t overloaded with sugars and preservatives.
-
4-5 Ripe Peaches:
- The star of the show! Choose peaches that are slightly soft to the touch and fragrant. If you can’t find fresh peaches, you can use frozen ones or even canned peaches (just make sure they’re not in syrup).
-
1 Tablespoon Fresh Mint + More for Garnish:
- Fresh mint adds a wonderful, refreshing note to the drink. If you can’t find mint, you can substitute it with basil or just omit it altogether. The lemon and peach flavors will still shine!
Step-by-Step Instructions
Now, let’s get into the fun part: making this refreshing Peach Lemonade! Follow these steps to create a drink that makes every sip feel like a sunny embrace.
-
Make the Lemonade:
- If you’re making homemade lemonade, start by squeezing about 6-8 lemons to get roughly 1 cup of juice. Combine the lemon juice with 1 cup of water and 1 cup of sugar in a pitcher. Stir until the sugar dissolves completely. Taste and adjust the sweetness and acidity to your preference; some like it sweeter, while others prefer it more tart.
-
Prepare the Peaches:
- While the lemonade is chilling, slice your ripe peaches. You can peel them if you like, but I usually leave the skin on for added texture and all those lovely nutrients. Slice them into wedges or chop them into chunks; either way works beautifully for infusing flavor.
-
Muddle the Mint:
- Take a few mint leaves and muddle them gently at the bottom of your pitcher or in a glass. This releases their aromatic oils and infuses the lemonade with a refreshing minty twist. Be careful not to over-muddle; you just want to bruise the leaves lightly.
-
Combine Everything:
- Add the sliced peaches to your pitcher of fresh lemonade. Pour in 4 cups of cold water and give it a good stir. You can also blend the peaches with a bit of lemonade for a smoother texture if that’s your jam!
-
Chill:
- Let your Peach Lemonade chill in the refrigerator for at least an hour. This allows all the fabulous flavors to meld together beautifully. If you’re short on time, you can skip this step, but letting it steep will give it a more robust taste.
-
Serve:
- When you’re ready to serve, give it a good stir, and taste again to see if you want to adjust the sweetness with more sugar or a little more lemon juice. Pour the lemonade into glasses over ice, and garnish with mint leaves and extra peach slices for a gorgeous presentation!
Serving Suggestions
Isn’t it just stunning? To elevate your serving game, consider presenting this Peach Lemonade in clear glasses, where the vibrant colors can shine. You can even sugar the rim with a mix of sugar and lemon zest for a fun twist. For a festive touch, why not serve it in mason jars? It’s a charming way to capture that rustic summer essence!
Recipe Variations
Feeling creative? Here are a few variations to keep your Peach Lemonade exciting:
- Sparkling Peach Lemonade: Add sparkling water or lemon-lime soda for a fizzy kick!
- Herbal Infusion: Try using fresh rosemary instead of mint for a unique herbaceous flavor.
- Peach-Mango Twist: Blend in some fresh mango for an extra tropical vibe.
- Spicy Kick: For the adventurous, muddle a slice of fresh jalapeño with the mint for a sweet and spicy combination.
- Mocktail Version: If you’d like an alcohol-free drink, simply serve as is. But for a cocktail, add a shot of vodka or gin for a delightful adult beverage!
Chef’s Notes
This recipe has beautifully evolved over time! Initially, I was a bit hesitant about muddling the mint, fearing I’d overpower the delicate peach flavor. But once I embraced it, it completely transformed the drink! Each summer I tweak this recipe slightly, trying different herbs or ratios of peach to lemonade, but the nostalgic flavors of my grandma’s recipe remain front and center. There’s something so special about making it each year, and it reminds me of all the joy and love that goes into cooking.
FAQs and Troubleshooting
-
What if my lemonade is too sweet?
- Simply add more lemon juice or a splash of water to balance the sweetness. It’s all about finding that perfect flavor harmony!
-
How can I store leftover Peach Lemonade?
- Store any leftovers in an airtight container in the refrigerator for up to 2 days. The flavors will intensify, but the peaches might get a bit mushy.
-
Can I use other fruits?
- Absolutely! Feel free to swap the peaches for any of your favorite fruits, like strawberries, raspberries, or even watermelon!
-
What if I can’t find ripe peaches?
- If ripe peaches aren’t available, consider using frozen peaches or canned ones (in juice, not syrup) as a backup. They’ll still provide that wonderful fruity essence.
Nutritional Info (Optional)
While I don’t have precise nutritional information for this recipe at my fingertips, homemade lemonade generally contains about 50 calories per cup, primarily from sugar. Peaches are a low-calorie, nutrient-rich fruit, packed with vitamins A and C, as well as antioxidants. Enjoying this delightful drink in moderation can be part of a balanced lifestyle.
And there you have it! Your very own Peach Lemonade, a tribute to all the wonderful memories and sunshine-filled days. Whether you’re sipping it by the pool, at a picnic, or simply enjoying it on a quiet afternoon, this drink is guaranteed to bring a smile to your face. Tie on that apron, gather your ingredients, and let’s make some magic in the kitchen. Cheers to delicious summer vibes!
PrintRefreshing Homemade Peach Lemonade

A delightful Peach Lemonade that perfectly balances the sweetness of ripe peaches with the zing of freshly squeezed lemons, making it a refreshing summer drink.
- Prep Time: 15 minutes
- Cook Time: 0 minutes
- Total Time: 60 minutes
- Yield: 8 servings 1x
- Category: Beverage
- Method: Mixing
- Cuisine: American
- Diet: Vegetarian
Ingredients
- 8 cups Homemade Lemonade (or store-bought)
- 4–5 Ripe Peaches
- 1 tablespoon Fresh Mint + More for Garnish
Instructions
- Make the Lemonade: If you’re making homemade lemonade, start by squeezing about 6-8 lemons to get roughly 1 cup of juice. Combine the lemon juice with 1 cup of water and 1 cup of sugar in a pitcher. Stir until the sugar dissolves completely.
- Prepare the Peaches: Slice your ripe peaches. You can peel them or leave the skin on for added texture.
- Muddle the Mint: Take a few mint leaves and muddle them gently at the bottom of your pitcher.
- Combine Everything: Add the sliced peaches to your pitcher of fresh lemonade. Pour in 4 cups of cold water and give it a good stir.
- Chill: Let your Peach Lemonade chill in the refrigerator for at least an hour.
- Serve: Pour the lemonade into glasses over ice, and garnish with mint leaves and extra peach slices.
Notes
You can use frozen or canned peaches if fresh ones aren’t available. Adjust sweetness and acidity to your liking.
Nutrition
- Serving Size: 1 cup
- Calories: 60
- Sugar: 12g
- Sodium: 5mg
- Fat: 0g
- Saturated Fat: 0g
- Unsaturated Fat: 0g
- Trans Fat: 0g
- Carbohydrates: 15g
- Fiber: 1g
- Protein: 0g
- Cholesterol: 0mg
Keywords: peach lemonade, summer drink, refreshing beverage, homemade lemonade

Ingredient No-Bake Patriotic Red, White & Blue Jello Cups
Patriotic Delights: Red, White, and Blue Jello Cups
Hello, fellow food lovers! Today, I’m bubbling with excitement as I share one of my all-time favorite warm-weather treats: Red, White, and Blue Jello Cups! 🎉 These delightful and colorful desserts are not only a feast for the eyes but also bring back the essence of childhood memories—simple, playful, and oh-so-delicious. Perfect for celebratory gatherings like the Fourth of July or Memorial Day, these festive cups are sure to impress your guests and delight the kiddos.
Introduction
Imagine a warm summer day; the sun is shining, friends and family gather in the backyard, and the air is filled with laughter and conversation. What better way to celebrate than with a treat that embodies the spirit of the occasion? Enter the Red, White, and Blue Jello Cups! With their vibrant colors and creamy layers, they provide a sweet sense of nostalgia while making you feel like a master chef. It’s like a culinary time machine that whisks you back to summer cookouts and family picnics, all wrapped up in a charming cup.
The beauty of these cups lies not just in their presentation but also in their versatility. You can customize the flavors, adjust the sweetness, and even swap out ingredients to fit your dietary preferences. So, whether you’re hosting a festive backyard barbecue, a kids’ birthday party, or just want to cool down on a hot day, these Jello Cups have got you covered.
Ready to dive in? Let’s whip up something deliciously festive that will have everyone oohing and aahing over your creation! Gather your ingredients, put on your apron, and let’s get crafting these exquisite Red, White, and Blue Jello Cups.
Personal Story
I first encountered Jello Cups at a family gathering when I was around 8 years old. My grandma, with her charming southern drawl, would whip them up for every holiday and special occasion. I can still picture her in the kitchen, vigorously stirring her concoction while a symphony of laughter erupted from the living room. The anticipation was palpable as we all awaited the reveal—would it be green and yellow, or maybe pink and purple?
But the ultimate showstopper was always the Red, White, and Blue Jello Cups. They became a tradition, each layer a representation of our family history and pride. As a kid, the joy of cutting into that gleaming red layer, followed by the creamy white, and finishing with the vibrant blue, felt almost magical. Little did I know that I would one day be sharing my version of this cherished classic with you all! Each cup is now a reminder of those happy moments, making the act of creating them feel like a warm hug from my grandma.
Ingredients
Let’s gather our colorful cast of ingredients for this fun dessert! Here’s what you’ll need:
-
1 box blue jell-o (3oz box, any flavor)
- Chef’s Insight: The blue raspberry is a favorite, but feel free to experiment with other flavors. Just remember, they should all complement one another!
-
1 cup boiling water
- This hot water will help dissolve the Jell-O granules, making it come to life!
-
1 cup cold water
- This balances out the temperature of the Jell-O, making sure it sets up just right.
-
2 packets Gelatin (unflavored)
- This is the secret ingredient that adds creaminess to your white layer. You can substitute it with agar-agar if you’re looking for a plant-based option.
-
½ cup cold water
- Used to bloom the unflavored gelatin, ensuring it integrates well for a silky texture.
-
1 cup boiling water
- Another round of boiling water helps manage the transition from liquid to gel for our creamy layer.
-
1 can sweetened condensed milk (14oz/395g)
- This decadent ingredient adds a wonderfully rich and creamy taste. If you’re looking for a lighter option, try coconut milk or even almond milk.
-
1 box red jell-o (3oz box, any flavor)
- A classic choice would be strawberry or cherry flavor. Match it with a complementary flavor of blue for the best effect!
-
1 cup boiling water
- Yes, we’re back to boiling hot water—this is necessary for dissolving the red Jell-O.
-
1 cup cold water
- Because we want a nice, balanced texture in our jell-o!
-
Whipped cream
- For that ultra-decadent finish. You can also opt for coconut whipped cream for a dairy-free version.
-
Red, white and blue sprinkles
- These cute little touches will make your dessert even more festive! Go ahead and sprinkle generously.
Step-by-Step Instructions
Now that we have our ingredients ready, let’s dive into the process! Follow along step-by-step, and remember, this is a fun journey—don’t stress about perfection!
-
Prepare Your Blue Jello Layer:
- In a medium bowl, combine the blue Jell-O powder with 1 cup of boiling water. Stir for about 2 minutes until the gelatin is fully dissolved. This part is essential—make sure all those granules are melted away!
-
Add Cold Water:
- Next, stir in 1 cup of cold water. This helps cool the mixture and prepares it for setting. Once combined, pour the blue Jell-O into clear cups or glass containers. Aim for about 1/3 of the way full so you have room for the other layers. Place them in the refrigerator and let them chill for roughly 1 hour.
-
Whip Up the Creamy Layer:
- While the blue Jell-O is setting, we can create that luscious white layer! In a separate bowl, sprinkle the unflavored gelatin over ½ cup of cold water. Let it sit for about 5 minutes to soften.
-
Heat for Blooming:
- After the gelatin has bloomed, add 1 cup of boiling water and whisk until fully dissolved. Now, stir in the sweetened condensed milk until the mixture is smooth. This creamy goodness is what makes the cups truly special!
-
Layer the Cream:
- Carefully take the blue Jell-O from the fridge and gently spoon the white mixture on top, making sure not to disturb the blue layer below. Return your cups to the fridge and let them set for another hour.
-
Create the Red Layer:
- Now, we’re on to the final layer! Just like before, combine the red Jell-O powder with 1 cup of boiling water and stir until dissolved. Add in 1 cup of cold water. Once blended, it’s time to layer! Pour this red mixture carefully on top of the white layer, filling the cups almost to the top.
-
Final Chill:
- Let these beauties set in the fridge for another hour or until fully firm. This will give you time to brew your favorite drink and enjoy some peaceful moments in the kitchen!
-
Time to Serve:
- Once set, top with whipped cream and sprinkle on the red, white, and blue sprinkles for that festive touch. Your stunning Jello Cups are ready to wow your guests!
Serving Suggestions
These delightful Jello Cups are best served chilled right out of the fridge. Arrange them on a vibrant tray or colorful tablecloth to set the mood. If you’re hosting a party, consider placing them at a fun dessert station where your guests can grab and enjoy. They also look lovely garnished with fresh berries or mint leaves for that extra flair.
Recipe Variations
Feeling creative? Here are some fun variations to consider:
-
Fruit Infusion: Add diced strawberries or blueberries to the individual layers for a fruity twist! This not only adds flavor but also elevates the visual appeal.
-
Flavor Fusion: Instead of using traditional flavors, think outside the box! Consider using tropical flavors like passion fruit, mango, or lime for an unexpected twist.
-
Dairy-Free Delight: Swap the sweetened condensed milk with coconut cream or cashew cream for a dairy-free version while still retaining that rich, creamy texture.
-
Make It Boozy: Add a splash of flavored vodka to the layers for an adult version! This could be especially fun for summer parties.
-
Layered Surprise: Instead of keeping the layers simple, try adding different textures like crushed graham crackers or small pieces of cake between layers for a dessert with bite!
Chef’s Notes
As simple as they are, these Jello Cups have evolved over time in my cooking journey. I remember a time when Jell-O was just a party treat, but now, with a bit of effort and creativity, we can make it an elegant masterpiece. Just a few sprinkles and a dollop of whipped cream can elevate it so beautifully!
I once made these Jello Cups for a last-minute gathering, leading to some hilariously fun mishaps as I tried to layer them quickly. Let’s just say it was a colorful explosion! But the laughter they brought when everyone dug in? Absolutely priceless.
FAQs and Troubleshooting
Here are a few common questions and tips to keep in mind when making your Red, White, and Blue Jello Cups:
-
Q: Why isn’t my Jello setting properly?
- A: Ensure you’ve completely dissolved the gelatin and let the mixture cool before layering it. Also, double-check the gelatin-to-water ratios; using too much water can lead to soupy layers!
-
Q: Can I make these in advance?
- A: Absolutely! They can be prepared the day before your gathering. Just keep them covered in the fridge until you’re ready to impress your guests.
-
Q: How can I get cleaner layers?
- A: Let each layer set for at least one hour to allow it to firm up before adding the next layer. Patience here is key for achieving those distinct, vibrant layers!
-
Q: What if I don’t have clear cups?
- A: No worries! Any clear glass or even a fun dessert dish can work. Just be mindful of how the colors will show through.
Nutritional Info
While I usually focus on the joy of cooking and sharing, I know some of you like to keep an eye on nutritional information. Each serving of these Jello Cups typically contains roughly:
- Calories: 120
- Total Fat: 2g
- Carbohydrates: 25g
- Sugar: 20g
- Protein: 2g
Of course, nutritional values can vary based on the ingredients used and portion sizes, especially if you opt for different flavors, alternatives, or toppings.
So there you have it! With just a little time and love, you can create stunning Red, White, and Blue Jello Cups that not only taste amazing but also encapsulate the joy of gathering and celebration. I can’t wait for you to try this recipe and add your personal touch! Happy cooking, everyone—let’s make delicious memories together! 🌟
PrintRed, White, and Blue Jello Cups

A festive dessert composed of vibrant layers of red, white, and blue jello, perfect for celebrations.
- Prep Time: 15 minutes
- Cook Time: 15 minutes
- Total Time: 60 minutes
- Yield: 8 servings 1x
- Category: Dessert
- Method: Chilling
- Cuisine: American
- Diet: Vegetarian
Ingredients
- 1 box blue jell-o (3oz box)
- 1 cup boiling water
- 1 cup cold water
- 2 packets Gelatin (unflavored)
- ½ cup cold water
- 1 cup boiling water
- 1 can sweetened condensed milk (14oz/395g)
- 1 box red jell-o (3oz box)
- 1 cup boiling water
- 1 cup cold water
- Whipped cream
- Red, white and blue sprinkles
Instructions
- Prepare Your Blue Jello Layer: In a medium bowl, combine the blue Jell-O powder with 1 cup of boiling water. Stir for about 2 minutes until the gelatin is fully dissolved.
- Add Cold Water: Stir in 1 cup of cold water and pour the blue Jell-O into clear cups or glass containers, and chill for roughly 1 hour.
- Whip Up the Creamy Layer: In a separate bowl, sprinkle the unflavored gelatin over ½ cup of cold water, let it sit for about 5 minutes, then add 1 cup of boiling water and whisk until fully dissolved. Stir in the sweetened condensed milk.
- Layer the Cream: Spoon the white mixture gently on top of the blue layer and return to the fridge to set for another hour.
- Create the Red Layer: Combine the red Jell-O powder with 1 cup of boiling water, stir until dissolved, add 1 cup of cold water, and layer it on top of the white mixture.
- Final Chill: Let set for another hour or until firm.
- Time to Serve: Top with whipped cream and sprinkles for a festive touch.
Notes
To add a fun twist, consider adding diced fruits or different flavors of jello. These cups can be prepared a day in advance!
Nutrition
- Serving Size: 1 cup
- Calories: 120
- Sugar: 20g
- Sodium: 50mg
- Fat: 2g
- Saturated Fat: 1g
- Unsaturated Fat: 1g
- Trans Fat: 0g
- Carbohydrates: 25g
- Fiber: 0g
- Protein: 2g
- Cholesterol: 5mg
Keywords: jello, dessert, patriotic, festive, summer, kids
Peach Pie Cruffins: Flaky, Gooey Summer Breakfast Treat
Peach Pie Cruffins: A Delightful Twist on a Classic Treat
Welcome, baking enthusiasts! Today, we’re embarking on a delicious journey to create something that’s bound to impress: Peach Pie Cruffins! Now, you might be wondering, what’s a cruffin? Well, my friends, it’s the delightful lovechild of a croissant and a muffin, filled with sweet peach pie filling and baked to golden perfection. This recipe is all about indulgence without the intimidation. So, grab your apron and let’s get baking!
A Whiff of Nostalgia
Let me take you back to my childhood. Growing up, my Grandma used to make the most delectable peach pie every summer when the fruit was at its peak. The aroma would fill her cozy kitchen, mingling with the sound of laughter and the clinking of dishes. Those pies became a tradition—not just a dessert, but a celebration of family and the joys of sharing a table.
When it came to summer gatherings, nothing could compare to the golden crust, sweet and spiced peach filling, and the whipped cream dolloped generously on top. But as I grew older, I started to think about how I could put a twist on that beloved classic. That’s when the cruffin idea hit me! Combining the flaky, layered texture of a croissant with the fruity memories of my grandma’s pie? Absolute genius!
That’s the beauty of cooking, isn’t it? It allows us to honor our past while exploring new flavors and techniques. So, let’s dive in and create something that not only tastes divine but also tells a story of summer sweetness.
Ingredients
Here’s what you’ll need to create these scrumptious Peach Pie Cruffins:
-
1 package puff pastry sheets (thawed)
The star of our show! Puff pastry gives these cruffins their signature flaky layers and airy texture. If you don’t have puff pastry, you can try using crescent roll dough, but the texture will be different. -
1 can (15 oz peach pie filling)
Easy and sweet! This convenient filling simplifies the process. If you’re feeling adventurous, you can make your own filling from fresh peaches—just cook them down with some sugar, cinnamon, and a squeeze of lemon juice. -
2 tablespoons granulated sugar (optional)
This is for those who love it a little sweeter. You can adjust this depending on your taste or omit it entirely if you prefer a more natural flavor. -
1 teaspoon ground cinnamon
Cinnamon adds a warm, comforting flavor that perfectly complements the peaches. Use freshly ground cinnamon for the best flavor, or try pumpkin spice for a fun twist! -
1 egg (for egg wash)
This will give your cruffins that beautiful golden-brown finish. If you’re vegan, you can use a bit of non-dairy milk or aquafaba for a similar effect. -
1 tablespoon water
Simply mixed with the egg for our wash. You can swap this for milk for a richer finish. -
½ cup powdered sugar
We’ll whip this into a glaze for the final touch. If you’re watching your sugar, coconut sugar can work in a pinch, though it will alter the color. -
1 tablespoon milk or cream (for glaze)
This will help you achieve that silky glaze. Feel free to use your plant-based milk options for a dairy-free version!
Step-by-Step Instructions
Now, let’s get our hands floury and bring these cruffins to life!
-
Prep Work
Preheat your oven to 400°F (200°C). Line a muffin tin with paper liners or grease it lightly to prevent sticking. This is key for our cruffins to have that perfect shape! -
Roll Out the Puff Pastry
Take your thawed puff pastry sheets out and roll them out lightly on a floured surface. We want to stretch them just a bit to ensure they’re ready for layers. You’ll want to roll them out to about 12×12 inches. If they’re slightly uneven, don’t worry—this adds character! -
Apply the Sugar and Cinnamon
In a small bowl, mix your granulated sugar and cinnamon together. Sprinkle this mixture evenly over the rolled-out pastry. This is the magic layer that transforms our cruffins into something truly special! -
Add the Peach Filling
Spread the peach pie filling over the cinnamon-sugar layer. Use a spatula to ensure an even spread, leaving about half an inch of pastry around the edges. Don’t go overboard—too much filling might cause spillage but, hey, if that happens, consider it a rustic touch! -
Shape the Cruffins
Starting from one edge, carefully roll the pastry up like a jelly roll or cinnamon roll, ensuring it stays tight. Once rolled, slice the log into about 6-8 equal pieces. This is where the beautiful layers come together! -
Position in the Muffin Tin
Place each rolled piece (cut side up) into the muffin tin. Make sure to give them a little space; they will puff up and spread as they bake! -
Egg Wash
In a small bowl, whisk together the egg and water. Brush this mixture gently over the tops of your cruffins to give them that irresistible golden sheen. (Remember, don’t get it on the edges; we want those to puff up nicely!) -
Bake
Pop those beauties in the preheated oven and bake for 20-25 minutes, or until they’re golden brown and flaky. Your kitchen is about to smell like summer! -
Prepare the Glaze
While the cruffins are baking, mix your powdered sugar and milk/cream until smooth to create the glaze. If you allow it to sit, it will thicken a bit, making it easier to drizzle. -
Finish and Serve
Once the cruffins are done baking, let them cool for a few minutes in the tin, then transfer them to a wire rack. Drizzle the glaze over the still-warm cruffins and watch it melt into all those flaky layers!
Serving Suggestions
To elevate the experience, serve these cruffins alongside a scoop of vanilla ice cream or a dollop of whipped cream. You could even add fresh peach slices for a lovely garnish that screams summertime. A hint of mint on top will give it that pop of color and freshness!
Recipe Variations
Feeling creative? Here are a few ideas to switch up this delightful treat:
-
Berry Medley: Swap the peach pie filling for a mixture of your favorite berries. Blueberries and raspberries are a delicious combo!
-
Savory Spin: Try a savory version with spinach, feta, and sun-dried tomatoes for a brunch twist!
-
Nutty Add-In: Stir in some crushed pecans or walnuts with the peach filling for extra crunch and flavor.
-
Spiced Twist: Add a dash of nutmeg or cloves to your cinnamon-sugar mix for a seasonal twist.
Chef’s Notes
These Peach Pie Cruffins have become a staple in my kitchen. Over the years, I’ve experimented with different fillings and even tried making my own puff pastry (talk about a labor of love!). Each attempt has brought its own delightful results, but there’s something comforting about the simplicity of using store-bought pastry and canned filling.
Whenever I serve these at gatherings, they spark joy and nostalgia. They remind me of my grandma’s kitchen, where love was always the main ingredient. Plus, they’re always a hit—I’ve yet to see one survive the first round!
FAQs and Troubleshooting
Q: My cruffins didn’t rise as much as I hoped. What went wrong?
A: This can happen if your puff pastry was overworked or if the oven temperature was too low. Ensure your pastry is kept cool until you’re ready to bake, and make sure your oven is thoroughly preheated.
Q: Can I use fresh peaches instead of canned filling?
A: Absolutely! Just cook down the fresh peaches with sugar, a bit of cinnamon, and a little cornstarch to thicken it up before spreading it on the pastry.
Q: How do I store leftovers?
A: Keep them in an airtight container at room temperature for up to 2 days. You can also refrigerate them for a few more days but reheat them slightly to regain some of that flakiness.
Q: Can I freeze these cruffins?
A: Yes! You can freeze them before baking or after. Just make sure they’re completely cool, then wrap them well in plastic wrap. Bake them straight from the freezer; just add a few extra minutes to the cooking time!
Nutritional Info (Optional)
While this recipe is all about indulgence, a serving contains approximately:
- Calories: 250
- Total Fat: 12g
- Carbohydrates: 32g
- Sugars: 10g
- Protein: 3g
These values can vary based on portions and specific ingredients used.
And there you have it—a delightful Peach Pie Cruffin that melds together the best of flavors, memories, and rich textures. Thank you for joining me on this culinary adventure! I can’t wait to see how yours turn out. Don’t forget to tie on your apron and bring a bit of love to your table—the world could always use a little more of that! Happy baking!
PrintPeach Pie Cruffins

A delightful twist on a classic peach pie, these Peach Pie Cruffins combine flaky croissant-like pastry with sweet peach filling.
- Prep Time: 15 minutes
- Cook Time: 25 minutes
- Total Time: 40 minutes
- Yield: 6-8 servings 1x
- Category: Dessert
- Method: Baking
- Cuisine: American
- Diet: Vegetarian
Ingredients
- 1 package puff pastry sheets (thawed)
- 1 can (15 oz) peach pie filling
- 2 tablespoons granulated sugar (optional)
- 1 teaspoon ground cinnamon
- 1 egg (for egg wash)
- 1 tablespoon water
- ½ cup powdered sugar
- 1 tablespoon milk or cream (for glaze)
Instructions
- Preheat your oven to 400°F (200°C). Line a muffin tin with paper liners or grease it lightly.
- Roll out the thawed puff pastry sheets onto a floured surface to about 12×12 inches.
- Mix the granulated sugar and cinnamon in a small bowl, then sprinkle over the rolled-out pastry.
- Spread the peach pie filling evenly over the cinnamon-sugar layer.
- Roll the pastry up tightly and slice into 6-8 equal pieces.
- Place each piece cut side up into the muffin tin.
- Whisk together the egg and water for the egg wash, then brush over the tops of the cruffins.
- Bake for 20-25 minutes until golden brown and flaky.
- Mix the powdered sugar and milk/cream to create the glaze.
- Let the cruffins cool for a few minutes, then drizzle with glaze.
Notes
Serve warm with a scoop of vanilla ice cream or a dollop of whipped cream for an extra treat.
Nutrition
- Serving Size: 1 cruffin
- Calories: 250
- Sugar: 10g
- Sodium: 100mg
- Fat: 12g
- Saturated Fat: 6g
- Unsaturated Fat: 4g
- Trans Fat: 0g
- Carbohydrates: 32g
- Fiber: 1g
- Protein: 3g
- Cholesterol: 30mg
Keywords: peach pie, cruffins, dessert, summer baking, croissant, cozy dessert

4th of July Chocolate-Covered Strawberries: 15-Minute Treat
Celebrate Independence Day with 4th of July Chocolate Covered Strawberries
Hello, fellow food lovers! Savannah here from Ivory Apron, and with the 4th of July just around the corner, it’s time to whip up something delicious and festive. What better way to celebrate this day of independence than with a delightful treat that’s as sweet as a summer afternoon? We’re diving into the world of Chocolate Covered Strawberries, decked out in red, white, and blue to make your holiday sparkle.
A Sweet Summer Memory
When I think back to the 4th of July, my mind floods with memories of warm evenings spent outdoors, the smell of barbecues wafting through the air, and laughter echoing around our picnic table. One such summer, I decided to surprise my family with dessert. I was young, maybe ten or eleven, and brimming with enthusiasm.
I can still picture the pristine strawberries basking in the sun as I dipped them in melted chocolate. It felt like magic—a simple act of dipping transformed these berries into a celebration all on their own. I topped them generously with bright sprinkles and presented them on a classic white platter. When they were unveiled, gasps of excitement filled the air! Those bright, shiny strawberries became the star of the evening.
That moment inspired my love for cooking—a reminder that you don’t need extravagant ingredients or expensive kitchen gadgets to create joy. Sometimes, all it takes is a little creativity and a desire to share delightful tastes with loved ones.
What You’ll Need
Ready to create your own festive 4th of July Chocolate Covered Strawberries? Let’s gather our ingredients!
-
24 Strawberries: Look for bright red, firm strawberries with fresh green tops. They should be plump and as free from blemishes as possible. If you can’t find strawberries, ripe bananas or other fruits also work beautifully for dipping!
-
1 Cup White Candy Melts or White Chocolate Melting Wafers: Candy melts are great for those beautiful, smooth coatings. If you prefer white chocolate, make sure to get high-quality chocolate for better melting and that delightful sheen. Dark or milk chocolate can also be tempting alternatives!
-
1/2 Cup Red, White, and Blue Nonpareil Sprinkles: What’s a 4th of July treat without a bit of festive flair? These sprinkles add fun color and texture! If you can’t find them, use finely crushed nuts or other colored sprinkles you have on hand.
Step-by-Step Instructions
Now that we’ve got our ingredients, let’s jump into the process!
-
Prepare Your Strawberries:
- Rinse the strawberries under cold water, then gently pat them dry with a paper towel. Ensure they are completely dry; any moisture can hinder the chocolate from adhering properly.
-
Melt the Candy Melts:
- In a microwave-safe bowl, place the white candy melts. Microwave them in 30-second intervals, stirring between each until they are fully melted and smooth. This is where a bit of patience pays off—don’t be tempted to rush this step!
-
Dip the Strawberries:
- Hold a strawberry by the green tops and dip it into the melted chocolate, swirling it around to coat it evenly. You want a beautiful, thick layer so that the chocolate stands out. Lift it up and let the excess chocolate drip off back into the bowl.
-
Add Sprinkles:
- Before the chocolate sets, immediately liberally sprinkle your festive decorations onto the chocolate-dipped strawberries. This is where you can get creative!
-
Set the Strawberries:
- Place the dipped strawberries on a parchment-lined baking sheet. Once you’ve dipped all your strawberries, put them in the refrigerator for about 30 minutes or until the chocolate hardens completely.
-
Serve These Delightful Treats:
- Arrange the strawberries on a platter and watch as they transform from simple berries to the centerpiece of your holiday dessert table!
Serving Suggestions
When it’s time to serve your gorgeous chocolate-covered strawberries, arrange them on a nice platter, perhaps in the shape of a flag or a simple circular design. For an extra touch, sprinkle some fresh mint leaves around the base for color and flavor. Don’t forget to garnish with a few extra sprinkles for that added festive pop!
Recipe Variations
- Flavor Enhancements: Try infusing your melted candy melts with a drop of peppermint or almond extract for a unique twist.
- Darker Appeal: Swap the white chocolate for dark or milk chocolate if you prefer a richer taste.
- Fruity Toppings: Drizzle with a contrasting color by melting some dark chocolate or use a pop of color with colorful edible glitter.
- Nutty Crunch: Roll the dipped strawberries in chopped nuts (like pistachios or walnuts) for added texture and flavor.
- Make it a Brownie Treat: Place a small brownie bite at the base of each strawberry for added sweetness and structure.
Chef’s Notes
Chocolate-dipped strawberries are one of those recipes that evolve beautifully with each passing season. I’ll never forget the time I decided to make a batch for a holiday party but accidentally left the chocolate in the microwave a tad too long. The chocolate seized, leaving me with a clumpy mess. While it was a bit of a catastrophe, I learned two lessons: always keep an eye on the microwave and, secondly, those mangled berries were still gobbled up by guests who declared them “rustic” strawberry bites!
Over the years, I’ve experimented with different toppings and flavors, but no matter how they turn out, they always bring smiles to faces. That’s what cooking is all about, isn’t it?
FAQs and Troubleshooting
-
Why is my chocolate not smooth when melted?
- If your chocolate seizes and turns clumpy, it’s likely that water got into it. Make sure your bowls, utensils, and strawberries are completely dry!
-
Can I make these ahead of time?
- Yes! You can make them a day in advance and store them in an airtight container in the fridge. Just keep in mind that they lose a bit of that fresh plump look after a day, so make them close to your event if you can!
-
What if I don’t have nonpareil sprinkles?
- No problem! Use any type of sprinkle you have, or even crushed graham crackers for a different look. Get creative!
-
How can I get a perfect chocolate coating?
- Dip quickly, and don’t linger! Swirl the strawberry to ensure an even coating. Remember, practice makes perfect, and every try will get you closer!
Nutritional Info
While I won’t be providing exact nutritional stats for these festive strawberries, they are a fun treat that can fit in moderately as part of a balanced diet. Strawberries are rich in antioxidants and vitamins, while the light coating of chocolate makes for a sweet indulgence!
I hope these 4th of July Chocolate Covered Strawberries ignite your creativity in the kitchen! Whether you’re hosting a big family celebration or enjoying a quiet evening watching fireworks, these beauties will elevate your dessert game. So go ahead, tie on your apron, and let’s create something delicious together! Cheers to sweet summer nights and beautiful memories made around the table!
Print4th of July Chocolate Covered Strawberries

Delicious and festive chocolate-covered strawberries perfect for celebrating Independence Day.
- Prep Time: 15 minutes
- Cook Time: 5 minutes
- Total Time: 20 minutes
- Yield: 12 servings 1x
- Category: Dessert
- Method: Dipping
- Cuisine: American
- Diet: Vegetarian
Ingredients
- 24 Strawberries
- 1 Cup White Candy Melts or White Chocolate Melting Wafers
- 1/2 Cup Red, White, and Blue Nonpareil Sprinkles
Instructions
- Prepare your strawberries: Rinse the strawberries under cold water, then gently pat them dry with a paper towel. Ensure they are completely dry.
- Melt the candy melts: In a microwave-safe bowl, place the white candy melts. Microwave them in 30-second intervals, stirring until fully melted and smooth.
- Dip the strawberries: Hold a strawberry by the green tops and dip it into the melted chocolate, swirling it around for an even coat.
- Add sprinkles: Before the chocolate sets, immediately sprinkle your festive decorations onto the dipped strawberries.
- Set the strawberries: Place dipped strawberries on a parchment-lined baking sheet and refrigerate for about 30 minutes or until chocolate hardens.
- Serve these delightful treats: Arrange the strawberries on a platter for a beautiful presentation.
Notes
These chocolate-covered strawberries can be made a day in advance. They are best enjoyed fresh for optimal appearance.
Nutrition
- Serving Size: 2 strawberries
- Calories: 150
- Sugar: 20g
- Sodium: 25mg
- Fat: 8g
- Saturated Fat: 5g
- Unsaturated Fat: 3g
- Trans Fat: 0g
- Carbohydrates: 18g
- Fiber: 2g
- Protein: 1g
- Cholesterol: 0mg
Keywords: 4th of July, chocolate covered strawberries, festive dessert

Patriotic Fruit Pizza: Quick 15-Minute American Flag Dessert
American Flag Fruit Pizza: A Slice of Summer Joy
Hello there, kitchen adventurers! Savannah Pierce here, and today I’m excited to whip up one of my absolute favorite treats: the American Flag Fruit Pizza. This dish is a dazzling dessert that’s perfect for summer celebrations, picnics, or just a fun night in with friends. It brings together the delicious flavors of a fruity topping, creamy richness, and that classic cookie base that everyone loves — all while looking like a culinary masterpiece. So grab your aprons, and let’s get started on this stunning dessert that’s bound to impress!
A Slice of Nostalgia
As I reminisce about family gatherings during the summer months, I can’t help but remember those vibrant barbecues filled with laughter, sunshine, and the sweet scent of my grandma’s fruit pizza wafting from the kitchen. I was always drawn to the colorful layers of grapes, strawberries, and blueberries arranged to resemble the American flag. It was more than just a dessert; it was a tradition! Grandma would let me help assemble the pieces, showing me how to layer the fruits just right to create that beautiful flag.
Now, every time I make this dessert, it brings me back to those carefree days of childhood. As I spread the creamy layer and arrange the fruits, I can almost hear her laughter echo in the kitchen. This American Flag Fruit Pizza is a joyful reminder that food is about connection, celebration, and the love we share around the table.
Ingredients
Before we dive into the cooking process, let’s gather our delicious ingredients. Here’s what you’ll need for this vibrant American Flag Fruit Pizza:
-
1 tube Refrigerated Sugar Cookie Dough (16.5 oz)
This cookie dough provides a sweet, buttery base for our fruit pizza. If you’re feeling adventurous, you can swap it for a homemade sugar cookie recipe! -
8 oz Cream Cheese (softened)
Cream cheese adds a rich and creamy texture to our pizza topping. If you’re looking for a lighter option, try using Greek yogurt for a tangy twist! -
2/3 cup Sugar
A little sweetness goes a long way in balancing out the flavors. You can reduce the sugar for a less sweet pizza, or use a sugar substitute if you’re watching your sugar intake. -
1 teaspoon Vanilla
This adds a lovely aromatic flavor to the cream cheese layer. Feel free to experiment with almond extract for a unique flavor profile! -
8 oz Whipped Topping (thawed)
This gives our dessert a light, fluffy texture. You can substitute it with homemade whipped cream if you prefer a more natural option. -
12 oz Fresh Raspberries (about 3 to 4 cups)
Raspberries add a burst of color and tartness. If they aren’t in season, strawberries make a great substitute, or you can use a combination of both! -
1 dry pint Fresh Blueberries (about 2 cups)
Blueberries bring a beautiful hue and a mild sweetness. For variety, consider adding blackberries, which would also look amazing!
Step-by-Step Instructions
Now that we have our ingredients, let’s jump into the steps to create this beautiful American Flag Fruit Pizza!
-
Preheat Your Oven
Preheat your oven to 350°F (175°C). This step is crucial for ensuring that our sugar cookie base bakes evenly. While it warms up, it’s a good moment to prepare your baking sheet by lining it with parchment paper for easier cleanup later. -
Bake the Cookie Base
Open that tube of refrigerated sugar cookie dough and spread it evenly onto the prepared baking sheet. Use your fingers to pat it down into a large rectangle, about a quarter of an inch thick. This is the canvas for our delicious toppings! Bake for about 12-15 minutes or until the edges are golden brown. -
Cool the Cookie Base
Once it’s out of the oven, allow it to cool completely on the baking sheet. Patience is key here; if you try to spread the cream cheese layer on when it’s still warm, it might melt too much and change the texture. -
Mix the Cream Cheese Layer
In a mixing bowl, combine the softened cream cheese, sugar, and vanilla. Use a hand mixer (or a whisk if you’re feeling strong!) to blend until smooth and creamy. This step is where the magic happens! You want it fluffy and well-combined, so take your time here to get that perfect consistency. -
Fold in the Whipped Topping
Gently fold in the thawed whipped topping, being careful not to deflate the mixture. This airy layer will bring texture and lightness to our dessert, making it truly irresistible! -
Spread the Cream Cheese Mixture
Once your cookie base has cooled, it’s time to spread that creamy layer over the top. Use a spatula to ensure an even layer across the entire cookie, reaching all the corners. The cream cheese mixture not only tastes divine but will also act as the adhesive for our beautiful fruit toppings. -
Arrange the Fruit
Here comes the fun part! Use the fresh raspberries to create the stripes of the flag, lining them up in rows across the top. Next, position the blueberries in the upper left corner to represent the stars. You can create a 3×5 grid for a true American flag feel, or you can just sprinkle them around. Don’t be afraid to express your artistic flair here; the more colorful, the better! -
Chill Your Creation
Once you’ve arranged your fruit, place the dessert in the refrigerator for at least one hour. This will help the flavors meld together and firm up the cream cheese layer. Plus, chill desserts are always a hit during hot summer days! -
Slice and Serve
When you’re ready to serve, cut it into squares or triangles, depending on your presentation preferences. Trust me; you’ll want to make sure every slice has a bit of that delicious fruit topping!
Serving Suggestions
For serving, plate your American Flag Fruit Pizza on a beautiful platter, or keep it rustic by cutting it directly on the baking sheet. Garnish with a sprig of fresh mint for a pop of color and a hint of freshness. It also looks gorgeous with some extra whipped topping drizzled around the plate. Whatever you choose, just make sure it’s inviting and reflects the fun spirit of the dish!
Recipe Variations
Want to get a little creative with this classic? Here are a few variations:
- Different Fruit: Swap out raspberries for strawberries or add kiwi slices for a vibrant green accent in the flag!
- Gluten-Free: Use gluten-free sugar cookie dough for a version that everyone can enjoy.
- Dairy-Free: Try coconut cream in place of cream cheese and whipped topping for a dairy-free alternative. Just whip well for that fluffy texture.
- Zesty Kick: Add a teaspoon of lemon or lime juice into the cream cheese mixture for a refreshing citrus twist.
- Chocolate Lovers: Drizzle some melted chocolate over the top for an indulgent touch that’s sure to please!
Chef’s Notes
Creating this fruit pizza has become a cherished tradition in my home. With each passing year, I try to improve upon my technique or elevate the flavors while still keeping it simple. It reminds me of those sunny days with my grandma and the joy of sharing food with family and friends. Sometimes, when I’m feeling adventurous, I play around with berry compotes or even add a sprinkle of lemon zest to the cookie dough for a unique spin!
Every time I serve this dessert, I see the same look of delight on everyone’s faces, just like the first time I introduced it to my guests. It magically brings people together, and I can’t help but smile. Plus, it’s great for any celebration, from the 4th of July to birthday parties!
FAQs and Troubleshooting
1. My cookie base turned out too tough. What went wrong?
Overbaking will lead to a tough base, so be sure to keep an eye on it and remove it when it’s just golden around the edges.
2. Can I use canned fruit instead?
Absolutely! Just be sure to drain it very well to avoid excess moisture that could make the cream cheese soggy.
3. How do I store leftovers?
This dessert is best eaten fresh, but you can keep it covered in the refrigerator for up to 2 days. Just know it may lose some of its vibrant fruit appearance!
4. My whipped topping didn’t fluff up. What did I do wrong?
Make sure your cream cheese is softened adequately, and don’t rush this step. If it’s too cold, it will be lumpy and won’t whip properly.
Nutritional Info
While I won’t delve deeply into numbers here, remember that every slice of this festive treat comes packed with a serving of fresh fruits, so you can feel a little less guilty while indulging in something sweet!
And there you have it, my friends! Whether you’re channeling nostalgia, celebrating freedom, or just craving a delightful dessert, the American Flag Fruit Pizza is your go-to recipe. I hope you enjoy making it as much as I do, and remember: it’s all about the love you pour into your cooking. Happy baking, and let’s keep gathering around our tables, creating beautiful memories one slice at a time!
PrintAmerican Flag Fruit Pizza

A dazzling dessert featuring a fruity topping on a creamy sugar cookie base, perfect for summer celebrations.
- Prep Time: 15 minutes
- Cook Time: 15 minutes
- Total Time: 60 minutes
- Yield: 12 servings 1x
- Category: Dessert
- Method: Baking
- Cuisine: American
- Diet: Vegetarian
Ingredients
- 1 tube Refrigerated Sugar Cookie Dough (16.5 oz)
- 8 oz Cream Cheese (softened)
- 2/3 cup Sugar
- 1 teaspoon Vanilla
- 8 oz Whipped Topping (thawed)
- 12 oz Fresh Raspberries (about 3 to 4 cups)
- 1 dry pint Fresh Blueberries (about 2 cups)
Instructions
- Preheat your oven to 350°F (175°C) and prepare your baking sheet with parchment paper.
- Open the tube of refrigerated sugar cookie dough and spread it evenly onto the prepared baking sheet, then bake for about 12-15 minutes.
- Cool the cookie base completely on the baking sheet.
- Mix the softened cream cheese, sugar, and vanilla until smooth and creamy.
- Fold in the thawed whipped topping gently.
- Spread the cream cheese mixture evenly over the cooled cookie base.
- Arrange the fresh raspberries to create the stripes, and position the blueberries in the upper left corner.
- Chill the dessert in the refrigerator for at least one hour.
- Slice and serve your American Flag Fruit Pizza on a beautiful platter.
Notes
Garnish with fresh mint for added freshness. This dessert can be adapted with different fruits or sugar substitutes.
Nutrition
- Serving Size: 1 slice
- Calories: 350
- Sugar: 20g
- Sodium: 200mg
- Fat: 15g
- Saturated Fat: 8g
- Unsaturated Fat: 5g
- Trans Fat: 0g
- Carbohydrates: 45g
- Fiber: 3g
- Protein: 5g
- Cholesterol: 30mg
Keywords: fruit pizza, summer dessert, American flag dessert, festive dessert, cookie base dessert