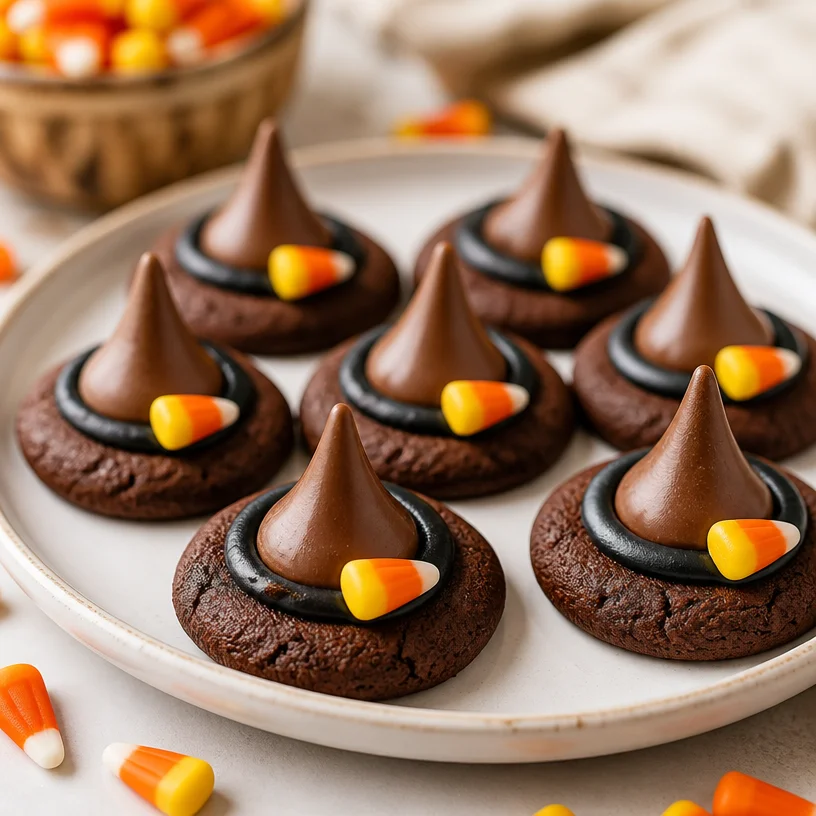
Witch Hat Cookies: 15-Minute Halloween Treats for Busy Moms
Spook-tacular Witch Hat Cookies: A Halloween Treat to Make Magic Happen!
Hello, my fellow food lovers! As Halloween creeps upon us, it’s time to conjure up some deliciously spooky treats. Today, I’m thrilled to share a delightful recipe for Witch Hat Cookies that’s not only fun to make but also a charming addition to any Halloween gathering. Whether you’re hosting a spooky soirée, bringing treats to a classroom party, or simply getting into the spirit of the season, these cookies will put a spell on you and your guests!
As we dive into this recipe, just imagine: crunchy cookies adorned with luscious chocolate kisses and candy corn, creating the perfect witch hat silhouette. It’s like a Halloween costume for your taste buds! Throughout the post, I’ll sprinkle in my personal anecdotes and tips to help you cook like a pro, even if you’re just starting out in the kitchen. So, grab your apron, and let’s brew some magic together!
A Whimsical Memory: The First Batch of Witch Hat Cookies
I still remember the first time I made Witch Hat Cookies with my little niece, Ava. She was just five years old, filled with that irresistible child-like wonder that every Halloween seems to ignite. We spent the afternoon in my cozy kitchen, splattered with flour and sugar, crafting these adorable hats. Her giggles echoed around like a sweet melody as we tried to stack the kisses on top of the cookies without them toppling over!
As we put the finishing touches on our creations, she proudly declared they were "the best witches ever!" The fearless confidence and enthusiasm in her eyes reminded me that the kitchen should always be a place of joy and exploration. Even though they may have been a little wonky—one hat even sported a candy corn that was a bit crooked—we couldn’t stop snacking on our charming little witch hats. Every bite was a reminder that cooking is about more than the food; it’s about the memories we create and the laughter we share.
Ingredients
Here’s what you’ll need to whip up your own batch of Witch Hat Cookies:
-
1 batch of chocolate chip cookie dough (store-bought or homemade)
Using chocolate chip dough gives these cookies a classic flavor. If you prefer, you can use sugar cookie dough for a sweeter base. Just watch the baking time! -
Chocolate kisses (approximately 24)
These will be the tops of our hats. You can substitute with any chocolate candies that are slightly pointed on top—like Rolos or Tootsie Rolls. Just note that you may need to adjust the baking time! -
Black icing (store-bought or homemade)
This icing will add a touch of elegance and detail. If black isn’t your preference, feel free to use purple or orange for a more colorful approach! -
Candy corn (for decoration)
Candy corn adds a fun pop of color, but if you’re not keen on it, consider using mini chocolate chips or even sprinkles as a cute alternative.
Step-by-Step Instructions
Now that we’ve gathered our magical ingredients, let’s get cooking! Follow these steps to create your very own Witch Hat Cookies:
-
Preheat the oven to 350°F (175°C). This is crucial, as starting with a preheated oven helps the cookies bake evenly.
-
Scoop the dough: Using a cookie scoop or a tablespoon, portion out the cookie dough onto ungreased baking sheets, spacing them about two inches apart. This allows room for spreading.
-
Shape the cookies: Lightly flatten each cookie dough ball with your fingers to create a more uniform shape. This step is crucial because the cookies will look more like hats if they’re firmer and thinner.
-
Bake the cookies: Pop those trays into the oven and let them bake for about 10–12 minutes until they’re just golden around the edges. Don’t worry if they seem a little soft; they’ll firm up as they cool!
-
Add the chocolate kisses: Once you take the cookies out, press a chocolate kiss gently into the center of each cookie while they’re still warm. This step allows the chocolates to meld with the cookie, almost gluing them together. Let them cool for about 5–10 minutes on the tray—it’s a crucial resting period to ensure you don’t burn yourself!
-
Decorate with icing: When the cookies have cooled and the chocolate is set, use your black icing to create a little swirl around the base of the chocolate kiss. This mimics the appearance of a witch hat and adds a delightful pop of color!
-
Crown with candy corn: Finally, place a piece of candy corn on top of the chocolate kiss—point downwards—to complete the whimsical witch hat look!
Serving Suggestions
These Witch Hat Cookies can be served on a festive platter, perhaps alongside other Halloween treats like ghost cupcakes or pumpkin-shaped brownies. For an added touch, consider arranging them on a slate board with faux spider webs or little plastic spiders. Just be sure to keep the spooky theme a fun and lighthearted one!
Recipe Variations
Let’s get creative! Here are a few fun variations to consider:
-
Flavor twist: Swap the chocolate chip cookie base for oatmeal cookie dough to ramp up the texture.
-
Nutty cookies: Add chopped nuts or crushed pretzels into the cookie dough for crunch and a deeper flavor.
-
Frosting swap: Use orange frosting instead of black for a seasonal touch that matches the candy corn.
-
Gluten-free option: Substitute regular flour with a gluten-free flour blend to accommodate gluten-sensitive guests.
-
Chocolate overload: Drizzle some melted dark chocolate over the finished cookies for an extra layer of decadence.
Chef’s Notes
Whenever I make these cookies, I can’t help but chuckle over my many attempts to create the perfect witch hat shape. I once accidentally melted the kisses too long, resulting in hats that were pancake flat! Those “pancake witches” didn’t last long. The kids loved them anyway, saying they were “wobble hats” — and that’s the magic of cooking! Remember, it doesn’t have to be perfect; the fun is in the process, and people love treats made with heart.
FAQs and Troubleshooting
What can I do if my cookies spread too much?
If your cookies flatten out too much, it’s usually because the dough is too warm. Make sure to chill the dough for at least 30 minutes before baking, especially on a warm day.
How can I make the icing thicker?
If your black icing is too runny, try adding a little powdered sugar to thicken it. If using store-bought icing, give it a good stir to mix it well before using.
Can I use other candies besides candy corn?
Absolutely! Mini chocolate chips, gummy candies, or other seasonal candies can add creative flair to your witch hats. Let your imagination fly!
How long do these cookies stay fresh?
Stored in an airtight container, these cookies will last about 5 days. You can even freeze the unbaked dough for up to 3 months and bake them fresh whenever you need a spooktacular treat!
Nutritional Info
This part is optional, but if you’d like to know, one cookie is approximately 130 calories. (Note: This may slightly vary depending on your specific ingredients.)
There you have it, folks! An enchanting recipe for Witch Hat Cookies that’s sure to delight. Cooking, much like magic, is all about the journey as much as the destination. So tie on your apron, invite over some friends or family, and celebrate the spirit of Halloween with these whimsical treats. After all, the best memories are made around the table—especially when those tables are filled with delicious, creative food. Happy baking, everyone!
PrintWitch Hat Cookies
Delicious and fun Witch Hat Cookies, perfect for Halloween gatherings.
- Prep Time: 15 minutes
- Cook Time: 12 minutes
- Total Time: 27 minutes
- Yield: 24 cookies 1x
- Category: Dessert
- Method: Baking
- Cuisine: American
- Diet: Vegetarian
Ingredients
- 1 batch of chocolate chip cookie dough (store-bought or homemade)
- Chocolate kisses (approximately 24)
- Black icing (store-bought or homemade)
- Candy corn (for decoration)
Instructions
- Preheat the oven to 350°F (175°C).
- Scoop the dough onto ungreased baking sheets, spacing them about two inches apart.
- Shape the cookies by lightly flattening each dough ball.
- Bake the cookies for about 10–12 minutes until golden around the edges.
- Add a chocolate kiss into the center of each cookie while they’re still warm.
- Decorate the cooled cookies with black icing around the base of the chocolate kiss.
- Crown with candy corn on top of the chocolate kiss, point downwards.
Notes
Chill the dough for at least 30 minutes before baking if it is warm. Decorate creatively with different candies.
Nutrition
- Serving Size: 1 cookie
- Calories: 130
- Sugar: 8g
- Sodium: 100mg
- Fat: 5g
- Saturated Fat: 2g
- Unsaturated Fat: 3g
- Trans Fat: 0g
- Carbohydrates: 18g
- Fiber: 1g
- Protein: 1g
- Cholesterol: 10mg
Keywords: Halloween cookies, Witch Hat Cookies, festive treats
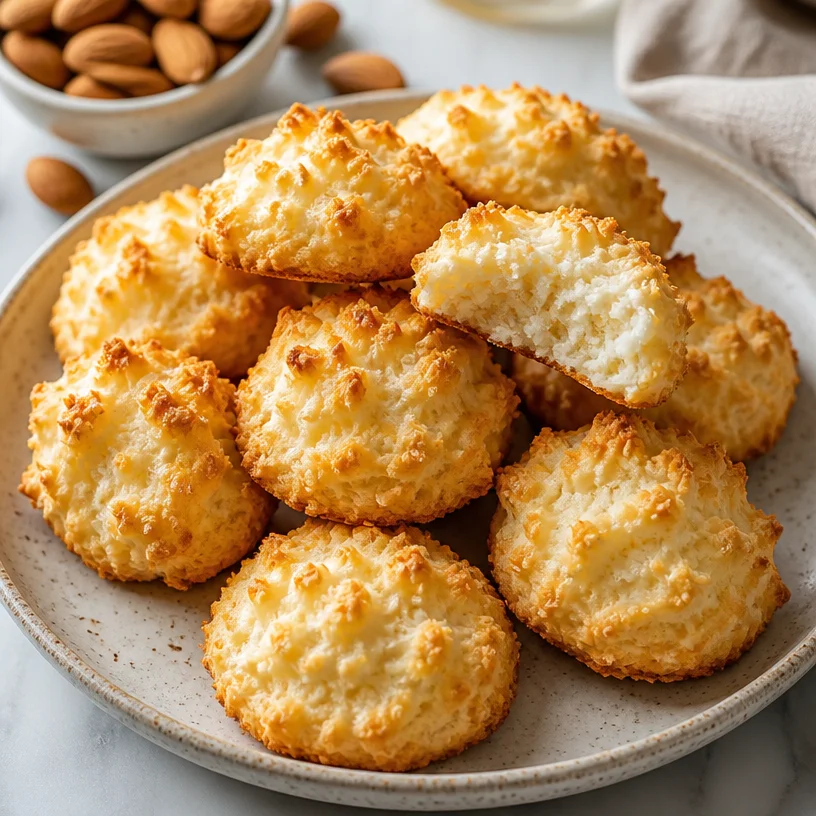
Beginner-Friendly Almond Cloud Cookies (15-Minute Bake)
Almond Cloud Cookies: A Whimsical Treat That Dances on Your Taste Buds
Hello, my fellow foodies! Today, we’re diving into the delightful realm of Almond Cloud Cookies—a treat that’s as whimsical as a cloud and as comforting as a hug from a loved one. These cookies are light, airy, and packed with almond flavor that will make your taste buds sing! What could be better than a dessert that feels like a little indulgence but is surprisingly simple to whip up?
A Little Taste of Nostalgia
Let me take you back to my grandmother’s kitchen. Picture this: I was a curious kid, standing on a stool, peering over the counter as she carefully measured out ingredients. The joy on her face when she pulled those puffy, golden cookies from the oven was infectious. Almond Cloud Cookies were an absolute favorite in our family. We would gather around the table, and she’d serve them warm with a sprinkle of powdered sugar, her eyes sparkling with delight as we munched on them, crumbs flying everywhere!
Those moments instilled in me a love for baking—not just for the delectable cookies but for the laughter, stories, and connections that were shared over a plate of homemade goodness. When I recreate these cookies in my own kitchen today, I’m reminded of those sweet memories and the joy that baking can bring, not just to our taste buds, but to our hearts. So, are you ready to create some clouds of your own? Let’s get started!
Ingredients
Here’s what you’ll need to make these ethereal Almond Cloud Cookies:
-
2 cups almond flour
- A nutty, gluten-free alternative to traditional flour. It gives these cookies their distinct flavor and texture. If you’re looking for a substitution, you could try hazelnut flour for a unique twist, but the texture may vary slightly.
-
1 cup sugar
- Sweetness in its most universal form! You can use granulated sugar, but feel free to swap in coconut sugar for a caramel-like taste or for a lower glycemic index. Just keep in mind, it might slightly change the color of your cookies.
-
3 egg whites
- These little wonders are what give our cookies that light, airy cloud-like texture. If you’re vegan, aquafaba (the liquid from canned chickpeas) is a fantastic substitute—3 tablespoons of aquafaba equals one egg white!
-
1 teaspoon vanilla extract
- Vanilla adds a warm, comforting aroma and flavor. For an extra touch of elegance, you could infuse your vanilla with a splash of almond extract, which will amplify the almond taste in these cookies.
-
1/4 teaspoon salt
- Just a pinch! Salt enhances the overall flavor, balancing out the sweetness. If you’re feeling adventurous, a dash of sea salt on top just before baking adds a delightful contrast.
Step-by-Step Instructions
Ready to kitchen magic? Here we go!
-
Preheat the Oven
- Start by preheating your oven to 325°F (163°C). This is essential—I can’t stress enough how important it is to have your oven ready, like a warm embrace on a cozy day!
-
Prepare Your Baking Sheet
- Line a baking sheet with parchment paper. This not only prevents sticking but also helps in evenly baking your cookies. A little tip? Lightly spray the parchment with cooking spray for an even smoother release.
-
Combine Dry Ingredients
- In a large mixing bowl, whisk together the almond flour and sugar until they’re well combined. No lumps allowed in the cloud!
-
Beat the Egg Whites
- In a separate bowl, using a mixer, beat the egg whites until they form soft peaks. You want the texture to be fluffy and light, like a gentle spring breeze. This should take about 2-3 minutes. A pro tip: Ensure your bowl and whisk are completely clean and dry—any bit of oil can prevent your egg whites from whipping up perfectly.
-
Incorporate the Wet Ingredients
- Gently fold the beaten egg whites into the almond flour mixture using a spatula. This step is crucial, so take your time and do it slowly! You want to maintain the airiness of the egg whites while ensuring everything is combined nicely.
-
Add Vanilla and Salt
- Once combined, add the vanilla extract and salt. Gently fold these in as well until everything is well blended.
-
Scoop and Shape
- Using a cookie scoop or two spoons, drop dough rounds onto your prepared baking sheet, leaving space between each one to allow for spreading. If you’re feeling fancy, lightly dust the tops with powdered sugar before baking for that delightful finish.
-
Bake to Perfection
- Place the baking sheet in the oven and bake for about 15-18 minutes, or until the edges start to turn a light golden brown. Keep an eye on them—oven temperatures can vary!
-
Cool and Enjoy
- Once baked, remove the cookies from the oven and allow them to cool on the baking sheet for about 5 minutes before transferring them to a wire rack to cool completely. This cooling step allows for their cloud-like texture to set just right.
Serving Suggestions
For a presentation that will have your guests oohing and aahing, stack several Almond Cloud Cookies on a ceramic cake stand, dust them with powdered sugar, and garnish with a few sprigs of fresh mint or edible flowers. Pair these cookies with a cup of tea or a nice cold glass of milk for the perfect treat!
Recipe Variations
Feeling adventurous? Here are a few ways you can shake things up with this cookie recipe:
- Chocolate Chip Variation: Add half a cup of mini chocolate chips to the batter for a sweet touch of decadence.
- Citrus Zest: Grate some lemon or orange zest into the dough for a bright citrus flavor that complements the almond beautifully.
- Spiced Clouds: Incorporate a teaspoon of ground cinnamon or cardamom into the mixture for a warm spice note.
- Nutty Delight: Mix in chopped pistachios or walnuts for added texture and richness!
- Dairy-Free: Swap the regular sugar for maple sugar or coconut sugar for a more wholesome dessert option.
Chef’s Notes
Every time I make these cookies, I remember my grandmother’s laughter echoing in the kitchen. Through the years, I’ve slightly tweaked the recipe, experimenting with different nut flours and flavors. I learned that a little creativity goes a long way in the kitchen. One day, I added a pinch of espresso powder to the batter, and to my surprise, it added a whole new layer of depth—who knew almond and coffee could dance so well together?
FAQs and Troubleshooting
1. Why are my cookies too flat?
- If your cookies spread too much, it could be due to overmixing the egg whites or not using enough almond flour. Make sure you’re gently folding the mixtures together and measuring accurately.
2. How can I store these cookies?
- Almond Cloud Cookies can be stored in an airtight container at room temperature for up to a week—if they last that long! For longer storage, you can freeze them layered with parchment paper and sealed in a freezer bag for up to three months.
3. Can I replace almond flour with regular flour?
- I wouldn’t recommend it as the texture and flavor will change dramatically. However, if you need to avoid nuts, try a gluten-free flour blend that’s suitable for baking, but do keep in mind that this recipe is crafted specifically for almond flour.
4. What’s the best way to know when they are done?
- The cookies should have lightly golden edges and might appear slightly underbaked in the center. They will continue to firm up as they cool, yielding that lovely chewy texture!
Nutritional Info (if applicable)
Each cookie contains approximately:
- Calories: 90
- Fat: 5g
- Carbohydrates: 8g
- Fiber: 1g
- Protein: 2g
(Please note this is an estimation based on the recipe’s ingredients.)
And there you have it! An enchanting journey into the world of Almond Cloud Cookies. I hope these little treats bring as much joy to your kitchen as they have in mine. So grab your apron, gather your ingredients, and let’s make some delicious memories! Happy baking, friends!
PrintAlmond Cloud Cookies
Light and airy Almond Cloud Cookies packed with almond flavor, reminiscent of cherished family memories.
- Prep Time: 10 minutes
- Cook Time: 18 minutes
- Total Time: 28 minutes
- Yield: 24 cookies 1x
- Category: Dessert
- Method: Baking
- Cuisine: American
- Diet: Gluten-Free
Ingredients
- 2 cups almond flour
- 1 cup sugar
- 3 egg whites
- 1 teaspoon vanilla extract
- 1/4 teaspoon salt
Instructions
- Preheat the oven to 325°F (163°C).
- Line a baking sheet with parchment paper.
- In a large mixing bowl, whisk together the almond flour and sugar.
- In a separate bowl, beat the egg whites until they form soft peaks.
- Gently fold the beaten egg whites into the almond flour mixture.
- Add the vanilla extract and salt, folding until well blended.
- Scoop dough rounds onto the prepared baking sheet, leaving space between each.
- Bake for about 15-18 minutes, until edges are light golden brown.
- Allow to cool on the baking sheet for 5 minutes before transferring to a wire rack.
Notes
For a touch of elegance, dust with powdered sugar before serving.
Nutrition
- Serving Size: 1 cookie
- Calories: 90
- Sugar: 8g
- Sodium: 5mg
- Fat: 5g
- Saturated Fat: 0.5g
- Unsaturated Fat: 4.5g
- Trans Fat: 0g
- Carbohydrates: 8g
- Fiber: 1g
- Protein: 2g
- Cholesterol: 0mg
Keywords: almond, cookies, gluten-free, dessert, baking, light
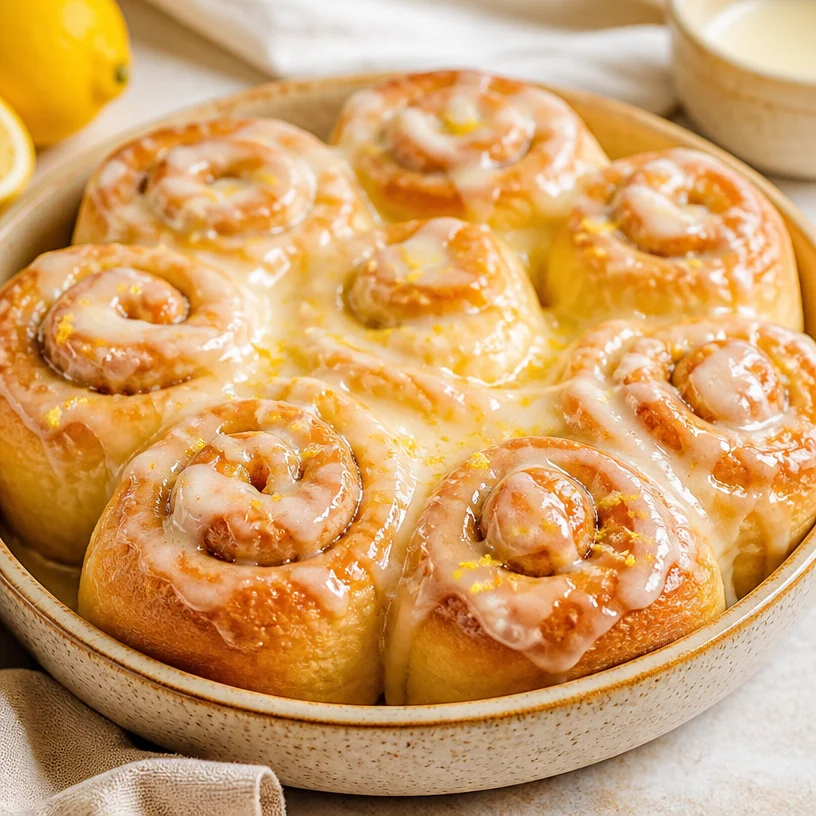
Minute Lemon Rolls with Gooey Sticky Citrus Glaze
Sticky Lemon Rolls: A Bright Treat for Your Table
Hello, dear friends! If you’ve ever craved a sweet treat that’s not only delicious but also brightens your day, you’re in for a special treat with these Sticky Lemon Rolls. Fluffy, tangy, and oh-so-sweet, these rolls are everything you need for a cozy brunch or a delightful dessert.
Imagine waking up to the warm aroma of freshly baked rolls infused with lemon zest and sweetness, and then drizzling them with a creamy lemon glaze. It’s pure magic! Whether you’re looking to impress guests or simply want a comforting homemade indulgence, these rolls are the perfect recipe to tie on your apron for.
A Trip Down Memory Lane
Let me take you back to my childhood, where one of my fondest memories revolves around baking with my grandmother. Every Saturday morning, I would race to her kitchen, the excitement bubbling inside me like a pot of boiling water. She’d whip up her famous cinnamon rolls, and I was always her eager assistant.
One day, as I watched her kneading the dough, I noticed a fresh lemon resting on her counter. Curiously, I asked, “Why not add some lemon next time?” With a twinkle in her eye, she responded, “Why not indeed? Let’s make something new!” That impulsive suggestion kicked off our “Lemon Roll Saturdays,” where we experimented with fresh flavors and learned that cooking is all about creativity and joy.
Fast forward to today, and here I am, recreating that delightful spirit of experimentation with my own twist—to these Sticky Lemon Rolls! They blend nostalgia with bright, vibrant flavors, hoping to create stories around your table as they did around mine.
Ingredients
Here’s what you’ll need to whip up a batch of these fantastic Sticky Lemon Rolls:
-
2 cups all-purpose flour
A versatile base for your dough. If you’re looking for a gluten-free option, try using a gluten-free all-purpose blend! -
1/4 cup granulated sugar
Sweetens the dough just enough without overpowering the lemon flavor. You can substitute with coconut sugar for a lower glycemic option. -
1 packet (2 1/4 teaspoons) active dry yeast
The magic ingredient that makes your rolls fluffy! Remember, it should be fresh, or it won’t rise. -
1/2 teaspoon salt
Enhances the flavor of the dough. You can use sea salt for a finer taste. -
1/2 cup milk
Adds richness and moisture to the dough. Almond or oat milk works as a dairy-free alternative. -
1/4 cup unsalted butter
The fat that makes everything better! If you prefer a vegan version, try using coconut oil. -
1 large egg
Acts as a binder and contributes to a tender texture. For a vegan swap, try a flax egg (1 tablespoon ground flaxseed + 3 tablespoons water). -
Zest of 1 lemon
Adds a bright and refreshing flavor. Pro tip: Use a microplane to avoid the bitter pith! -
1/4 cup fresh lemon juice
We’re using fresh juice for a vibrant zing! Bottled lemon juice won’t give you the same fresh taste. -
1/2 cup cream cheese
This luscious ingredient brings richness to the glaze. You can substitute non-dairy cream cheese for a dairy-free version. -
1 cup powdered sugar
Sweetness for the glaze! You can replace it with a sugar-free powdered blend if needed. -
1 tablespoon lemon juice (for glaze)
A little extra tartness to balance the sweetness. Fresh is always best!
Step-by-Step Instructions
Let’s dive into creating the magic of these Sticky Lemon Rolls! Follow me step by step:
-
Activate the Yeast
In a small bowl, combine the warm milk (around 110°F or just slightly warmer than body temperature), 1 teaspoon of the sugar, and the active dry yeast. Stir gently, and let it sit for about 5-10 minutes until it’s frothy. This means your yeast is active and ready to rise! -
Make the Dough
In a mixing bowl, combine the flour, remaining sugar, and salt. Stir well! Add in the yeast mixture, softened butter, egg, lemon zest, and fresh lemon juice. Mix until a dough begins to form. (I find that using a dough whisk helps make this process a breeze!) -
Knead the Dough
Turn your dough onto a floured surface. Knead it for about 8-10 minutes until it’s smooth and elastic. Take a moment here—give it a gentle tap with your palm. This is where the love and energy go into the rolls! -
First Rise
Place the dough in a lightly greased bowl, cover it with a clean kitchen towel, and let rise in a warm place for about 1-2 hours or until it doubles in size. Use this time to sip on your morning coffee or tea; you deserve it! -
Preheat Your Oven
Preheat your oven to 375°F (190°C) so it’s nice and warm when your rolls are ready to bake. -
Roll Out the Dough
After the dough has risen, punch it down and transfer it onto a lightly floured surface. Roll it out into a rectangle (about 12×8 inches). Keep it about 1/4 inch thick. The more you spread it out evenly, the better it will rise! -
Create a Sticky Filling
Spread softened cream cheese evenly over the dough. Drizzle with more lemon juice and sprinkle some sugar on top. You can even sprinkle a dash of lemon zest here for added punch! -
Roll it Up
Tightly roll the dough from the long end into a log and pinch the edges to seal. Then slice the log into 1-1.5 inch pieces. Use a sharp knife or dental floss for clean cuts! -
Second Rise
Place the rolls in a greased baking dish (a 9×13 inch works perfectly) and let them rise again for about 30 minutes until they’re slightly puffed. It’s worth the wait—I promise! -
Bake
Pop those beauties into the preheated oven and bake for 20-25 minutes or until golden brown on top. Your house will smell divine! -
Prepare the Glaze
While the rolls are baking, get your glaze ready! Beat the cream cheese until smooth and add in powdered sugar and lemon juice. Mix until you achieve a velvety consistency. -
Glaze the Rolls
Once the rolls are out of the oven and still warm, slather the glaze all over them. Watch it melt into the crevices—it’s a sight to behold!
Serving Suggestions
To serve, I recommend plating the rolls on a gorgeous cake stand or a rustic wooden board. Feel free to garnish with some extra lemon zest or fresh berries for color. Trust me; it elevates your presentation and makes your guests go “ooh” and “ahh.”
Recipe Variations
Want to mix things up? Here are a few variations to try:
- Blueberry Lemon Rolls: Add fresh blueberries into the filling for a delicious twist.
- Ginger Lemon Rolls: Sprinkle in some grated fresh ginger for a spicy kick!
- Lemon Poppy Seed Rolls: Stir in poppy seeds into your dough for an added texture and flavor.
- Lemon Lavender Rolls: Add dried culinary lavender for a floral touch that pairs beautifully with lemon.
Chef’s Notes
This recipe has come a long way from that kitchen memory with my grandmother. It started with just cinnamon rolls, but as I grew to love freshness and tanginess, lemon became my beloved star ingredient. There have been some epic kitchen mishaps—like the time I forgot the yeast! Spoiler: flat rolls aren’t great, but they make for funny stories!
FAQs and Troubleshooting
-
Why didn’t my dough rise?
A common culprit is inactive yeast. Always check the expiration date! Make sure you’re using warm (not hot) milk when activating the yeast. -
Can I make these ahead of time?
Absolutely! You can prepare the dough, fill and roll the rolls, and then refrigerate them overnight before baking. Just let them come to room temperature for about 30 minutes before putting them in the oven. -
How do I store leftovers?
Keep any leftover rolls in an airtight container at room temperature for up to 2 days, or refrigerate them for a week. You can also freeze them! Just thaw and warm them gently before serving. -
What if my glaze is too runny?
If your glaze is too thin, don’t panic! Add a bit more powdered sugar until you reach the desired consistency.
Nutritional Info (Optional)
While I usually focus on the joy of baking rather than strict nutritional content, each roll comes out to approximately 200 calories. Just remember, they’re truly best enjoyed with family and friends!
So there you have it, dear friends! These Sticky Lemon Rolls are a blend of heartwarming memories, delightful flavors, and the perfect recipe for bringing people together. I can’t wait to hear about the stories you create around your table with them. Happy baking! 🍋🥐
PrintSticky Lemon Rolls

Fluffy, tangy, and sweet rolls infused with lemon zest, perfect for brunch or dessert.
- Prep Time: 15 minutes
- Cook Time: 25 minutes
- Total Time: 45 minutes
- Yield: 12 servings 1x
- Category: Dessert
- Method: Baking
- Cuisine: American
- Diet: Vegetarian
Ingredients
- 2 cups all-purpose flour
- 1/4 cup granulated sugar
- 1 packet (2 1/4 teaspoons) active dry yeast
- 1/2 teaspoon salt
- 1/2 cup milk
- 1/4 cup unsalted butter
- 1 large egg
- Zest of 1 lemon
- 1/4 cup fresh lemon juice
- 1/2 cup cream cheese
- 1 cup powdered sugar
- 1 tablespoon lemon juice (for glaze)
Instructions
- Activate the yeast by combining warm milk, 1 teaspoon sugar, and yeast in a bowl. Let it sit until frothy.
- Make the dough by mixing flour, remaining sugar, and salt. Add the yeast mixture, butter, egg, zest, and lemon juice, and mix until dough forms.
- Knead the dough on a floured surface for 8-10 minutes until smooth and elastic.
- Place the dough in a greased bowl, cover, and let it rise in a warm place for 1-2 hours until doubled in size.
- Preheat your oven to 375°F (190°C).
- Roll out the dough into a rectangle about 12×8 inches.
- Spread softened cream cheese, drizzle lemon juice, and sprinkle sugar on the rolled-out dough.
- Roll the dough tightly from the long end into a log and slice into 1-1.5 inch pieces.
- Place the rolls in a greased baking dish and let them rise for about 30 minutes until puffed.
- Bake for 20-25 minutes or until golden brown.
- Prepare the glaze by beating cream cheese and mixing in powdered sugar and lemon juice.
- Glaze the warm rolls and enjoy!
Notes
You can prep the dough the night before and refrigerate it before baking.
Nutrition
- Serving Size: 1 roll
- Calories: 200
- Sugar: 8g
- Sodium: 150mg
- Fat: 8g
- Saturated Fat: 4g
- Unsaturated Fat: 3g
- Trans Fat: 0g
- Carbohydrates: 28g
- Fiber: 1g
- Protein: 3g
- Cholesterol: 30mg
Keywords: lemon rolls, sticky rolls, brunch recipes, dessert recipes, baking
Seasonal Pumpkin Pecan Cobbler (Quick Prep, Budget-Friendly)
A Cozy Slice of Fall: Pumpkin Pecan Cobbler Recipe
Hello, fellow food enthusiasts! Today, we’re diving into a delicious realm that celebrates one of the best flavors of the season: pumpkin! As the leaves turn golden and the air gets crisp, there’s nothing quite like the comforting aroma of freshly baked goods wafting through your home. Enter my Pumpkin Pecan Cobbler — a delightful dessert that strikes the perfect balance between cozy and indulgent!
This charming dish takes the sweet, warm goodness of pumpkin pie and adds a twist with a crunchy pecan topping. It’s a wonderful way to embrace autumn, not only because it tastes like a hug in dessert form but also because it evokes fond memories of family gatherings, laughter around the kitchen table, and the enchanting scent of cinnamon and nutmeg. Let’s roll up our sleeves and create this seasonal masterpiece together!
A Little Trip Down Memory Lane
Growing up, the arrival of fall always meant two things in my house: the changing colors of the leaves and the sweet scent of pumpkin pie. My grandmother had a wonderful knack for baking, and every year, she’d invite us to her sunny kitchen, which was filled with the warmth of her oven and the sweet aroma of holiday spices.
One of my favorite memories is when she introduced me to her Pumpkin Pecan Cobbler. As a little girl, I watched in awe as she whisked together caramel-colored pumpkin puree, fragrant spices, and blended them to create something magical. I remember asking questions a mile a minute as she gracefully poured it all into the baking dish. The best part? The anticipation of waiting for the cobbler to finish baking was absolutely torturous, but oh so worth it!
Every gooey, pumpkin-spiced bite was like indulging in autumn itself. This dessert wasn’t just food; it was a celebration of family, laughter, and love. It’s this experience that inspired me to perfect my own version of Pumpkin Pecan Cobbler, bringing that tradition into my home and sharing it with all of you. So, let’s rekindle those memories and create some new ones!
Ingredients You’ll Need
Here’s what you’ll need to whip up this delightful dessert:
-
1 cup + 3 tablespoons all-purpose flour: The base of our cobbler. You can use whole wheat flour for a nuttier flavor or gluten-free all-purpose flour as a substitute.
-
2 teaspoons baking powder: This helps our cobbler rise beautifully. Be sure it’s fresh for the best results!
-
1/2 teaspoon salt: A must to balance the sweetness and enhance the flavors.
-
3/4 cup granulated sugar: This keeps the cobbler sweet, but you could reduce the amount to taste or use coconut sugar for a healthier option.
-
1 teaspoon cinnamon: The warm, comforting spice that makes us think of fall.
-
1/2 teaspoon nutmeg: Uplifts the flavor profile and adds a warm aroma.
-
1/2 teaspoon cloves: Just a pinch adds a nice depth of flavor.
-
1/2 cup pumpkin puree: The star of our dish! Try to use pure pumpkin puree, not pumpkin pie filling, for better control over the sweetness.
-
1/4 cup milk: This adds moisture to the batter. You can swap it out for almond milk or oat milk for a dairy-free option.
-
1/4 cup melted butter or vegetable oil: This keeps everything moist. Use coconut oil for a subtle flavor jump!
-
1 1/2 teaspoons vanilla: Adds warmth and depth to the dish.
-
1/2 cup granulated sugar (for the topping): This acts as a sweet, crunchy topping that contrasts perfectly with the pumpkin filling.
-
1/2 cup brown sugar: Adds a hint of molasses flavor and extra moisture to the topping.
-
1/4 cup chopped pecans: They bring a delightful crunch and contrast. You can use walnuts if you prefer!
-
1 1/2 cups very hot water: This is poured on top before baking to create a gooey, custard-like layer.
Step-by-Step Instructions
Now, let’s get our kitchen warmed up and dive into the cooking process!
-
Preheat Your Oven: Start by preheating your oven to 350°F (175°C). Getting your oven ready early ensures an even bake for your cobbler.
-
Mix the Dry Ingredients: In a large mixing bowl, combine the 1 cup + 3 tablespoons all-purpose flour, 2 teaspoons baking powder, 1/2 teaspoon salt, 3/4 cup granulated sugar, 1 teaspoon cinnamon, 1/2 teaspoon nutmeg, and 1/2 teaspoon cloves. Whisk together until well combined.
Tip: Using a whisk helps to break up any clumps and ensures that the baking powder is evenly distributed for the best rise!
-
Combine the Wet Ingredients: In another bowl, mix the pumpkin puree, 1/4 cup of milk, 1/4 cup melted butter (or oil), and 1 1/2 teaspoons vanilla. Stir well until it all comes together.
Chef Insight: Use room temperature ingredients for a smoother batter. It also helps to reduce lumps when combining.
-
Create the Batter: Pour the wet mixture into the bowl with dry ingredients and gently fold everything together until just combined. Be careful not to overmix; a few lumps are perfectly fine!
-
Prepare the Baking Dish: Pour the batter into a greased 9×13-inch baking dish. Spread it evenly with a spatula.
-
Make the Topping: In a small bowl, mix the 1/2 cup granulated sugar, 1/2 cup brown sugar, and 1/4 cup chopped pecans. Sprinkle this mixture evenly over the batter in the baking dish.
-
Pour the Hot Water: Carefully pour the 1 1/2 cups of very hot water over the cobbler without stirring. Yes, it will look a bit unusual, but trust me; this step creates that wonderful custard-like layer on the bottom!
Little Chef Hack: If you want to minimize splashes, you can use a ladle or pour from a measuring cup to gently distribute the water.
-
Bake: Slide the baking dish into your preheated oven and let it bake for about 45-50 minutes, or until the top is golden and set.
Chefs’ Insider Tip: If your oven tends to run hot, keep an eye on it! You want those edges crispy and the center slightly jiggly.
-
Cool and Serve: Allow the cobbler to cool for at least 15 minutes before serving. This allows the flavors to settle and the cobbler to firm up a bit.
Plating Your Masterpiece
For a beautiful presentation, serve your Pumpkin Pecan Cobbler warm in individual bowls with a generous scoop of vanilla ice cream on top! The creamy, cold ice cream juxtaposes perfectly with the warm, gooey cobbler. You can also drizzle a little caramel sauce or sprinkle some extra pecans for that gorgeous finishing touch.
Recipe Variations
Want to mix it up a bit? Here are some fun twists to try:
-
Spiced Rum Infusion: Add a tablespoon of your favorite dark rum or spiced rum to the wet ingredients for that extra flavor kick.
-
Cranberry Burst: Toss in a handful of fresh or frozen cranberries into the batter before baking for a tangy contrast.
-
Nutty Chocolate Chunk Cobbler: Mix in some dark chocolate chunks in place of pecans for a decadent twist that’s absolutely fantastic.
-
Dairy-Free Delight: Swap out milk and butter entirely with coconut milk and coconut oil for a delightful dairy-free variation.
Chef’s Notes
When I first embarked on perfecting this Pumpkin Pecan Cobbler, I had a few failed attempts — trust me, lumpy batter is no fun. But in those early trials, I learned a vital lesson: each mistake brought me closer to understanding the heart of the dish. This dessert is all about balance and connection. Every time I return to it, I can’t help but smile and think of my grandmother. It’s more than just a recipe; it’s a legacy filled with love and warmth. So don’t be afraid to make it your own!
FAQs and Troubleshooting
Q: My batter seems too thick. What did I do wrong?
A: This could be due to over-measuring your flour. Always spoon the flour into your measuring cup before leveling it off, rather than scooping directly from the bag!
Q: Can I make this ahead of time?
A: Absolutely! You can prepare the batter and toppings ahead, cover with plastic wrap, and keep it in the fridge. Just pour the hot water right before baking.
Q: What can I substitute for pumpkin puree?
A: You can use butternut squash puree or even apple sauce for a different flavor profile. Just keep in mind it will change the overall taste!
Q: My cobbler is too soggy! What happened?
A: This might occur if too much water was added or if it wasn’t baked long enough. Make sure to measure water accurately and allow sufficient baking time for that perfect texture.
Nutritional Information
(If applicable, you may want to add this at the end.)
While this recipe is all about the joy of cooking and community, it’s always good to be mindful of what goes into our bodies. Remember, balance is key!
So there you have it, a guide to creating a delightful Pumpkin Pecan Cobbler that not only tastes divine but also weaves wonderful memories and stories in every bite. Now, let’s gather around our tables and make some memories together. Cheers to cozy kitchens and loved ones! Happy baking!
PrintPumpkin Pecan Cobbler
A delightful dessert that combines the sweet warmth of pumpkin pie with a crunchy pecan topping.
- Prep Time: 15 minutes
- Cook Time: 50 minutes
- Total Time: 65 minutes
- Yield: 8 servings 1x
- Category: Dessert
- Method: Baking
- Cuisine: American
- Diet: Vegetarian
Ingredients
- 1 cup + 3 tablespoons all-purpose flour
- 2 teaspoons baking powder
- 1/2 teaspoon salt
- 3/4 cup granulated sugar
- 1 teaspoon cinnamon
- 1/2 teaspoon nutmeg
- 1/2 teaspoon cloves
- 1/2 cup pumpkin puree
- 1/4 cup milk
- 1/4 cup melted butter or vegetable oil
- 1 1/2 teaspoons vanilla
- 1/2 cup granulated sugar (for topping)
- 1/2 cup brown sugar
- 1/4 cup chopped pecans
- 1 1/2 cups very hot water
Instructions
- Preheat Your Oven: Start by preheating your oven to 350°F (175°C).
- Mix the Dry Ingredients: In a large mixing bowl, combine flour, baking powder, salt, granulated sugar, cinnamon, nutmeg, and cloves. Whisk together until well combined.
- Combine the Wet Ingredients: In another bowl, mix pumpkin puree, milk, melted butter (or oil), and vanilla. Stir well until it all comes together.
- Create the Batter: Pour the wet mixture into the bowl with dry ingredients and gently fold together until just combined.
- Prepare the Baking Dish: Pour the batter into a greased 9×13-inch baking dish and spread it evenly.
- Make the Topping: In a small bowl, mix granulated sugar, brown sugar, and chopped pecans. Sprinkle this evenly over the batter.
- Pour the Hot Water: Carefully pour the hot water over the cobbler without stirring.
- Bake: Slide the baking dish into your preheated oven and bake for about 45-50 minutes, or until golden and set.
- Cool and Serve: Allow the cobbler to cool for at least 15 minutes before serving.
Notes
Serve warm with a scoop of vanilla ice cream and drizzle with caramel for an indulgent treat.
Nutrition
- Serving Size: 1 serving
- Calories: 350
- Sugar: 25g
- Sodium: 200mg
- Fat: 14g
- Saturated Fat: 7g
- Unsaturated Fat: 5g
- Trans Fat: 0g
- Carbohydrates: 51g
- Fiber: 3g
- Protein: 5g
- Cholesterol: 30mg
Keywords: pumpkin, cobbler, dessert, fall recipes, Thanksgiving desserts

One-Pan Pumpkin Crunch Cake: Easy Fall Dessert in 30 Minutes
Pumpkin Crunch Cake: A Cozy Slice of Fall Happiness
Hello, friends! Today, we’re diving into the warm, nostalgic world of Pumpkin Crunch Cake. If you’re like me, the scent of pumpkin and spices takes you back to those crisp autumn days, the kind best spent nestled in a cozy kitchen, surrounded by family and friends. What’s more delightful than a cake that looks inviting, tastes divine, and doesn’t require a culinary degree to whip up? A cake that brings everyone together is surely what we need as the leaves begin to change and the air turns a little cooler. So, let’s roll up our sleeves, tie on our aprons, and create something truly special!
Personal Story
One of my fondest memories featuring pumpkin crunch cake is from a family gathering several years back. My aunt, armed with her trusty recipe cards, decided it was high time to host a pumpkin-themed dinner. As we sipped warm apple cider, the tantalizing smell of spices wafted through the house. When it came time for dessert, she unveiled her Pumpkin Crunch Cake, and the room erupted in exclamations of delight. The golden crust on top gave way to a rich, moist, pumpkin center, topped off with a dollop of whipped cream—pure perfection. I remember stealing a slice while no one was looking and savoring that moment alone in the kitchen. It was pure bliss! Today, I get to share this lovely recipe with all of you, so let’s make some memory-worthy moments of our own.
Ingredients
Here’s what you’ll need to make this scrumptious Pumpkin Crunch Cake:
-
1 box yellow cake mix
This is your base! The cake mix provides a great foundation for a moist and tender crumb. You can substitute it with a homemade cake mix if you’re feeling adventurous! -
1 can (15 oz) pumpkin puree
Pumpkin is the star here! It gives the cake that earthy flavor and a beautiful orange hue. You could use sweet potato puree as a substitute for a unique twist. -
1 can (12 oz) evaporated milk
Evaporated milk enriches the cake, making it creamy and luscious. If you’re looking for a lighter version, use almond milk or coconut milk instead. -
3 large eggs
Eggs add structure and richness to the cake. You can substitute with ground flaxseed mixed with water for a vegan alternative. -
1 cup sugar
Sugar sweetens your cake, but you can swap half for brown sugar for a deeper flavor, or use coconut sugar for a healthier alternative. -
1 tsp cinnamon
This spice is essential for that comforting, warm flavor. Feel free to experiment with a pumpkin pie spice mix for even more complexity. -
1/2 tsp nutmeg
Nutmeg adds a lovely aromatic note that pairs beautifully with pumpkin. If you don’t have nutmeg, a pinch of allspice can work wonders in a pinch. -
1/2 cup butter, melted
Butter brings richness to the cake while helping it stay moist. If you’re aiming for a dairy-free option, use melted coconut oil instead! -
1 cup chopped pecans or walnuts
Nuts give delightful crunch and added flavor. If you have an almond allergy, feel free to leave them out or replace them with pumpkin seeds. -
Whipped cream for serving (optional)
A dollop of whipped cream is the perfect (and tasty) finishing touch for this cake. You can use cool whip or a vegan whipped topping to make it accessible for everyone!
Step-by-Step Instructions
Now that we have our ingredients ready, let’s dive into making this delightful Pumpkin Crunch Cake!
-
Preheat your oven!
Start by preheating your oven to 350°F (175°C). Preheating is crucial to ensure your cake bakes evenly, giving it that lovely rise. It’s also a great time to line your baking dish with parchment paper or grease it lightly—you want that cake to come out beautifully! -
Mix the pumpkin goodness!
In a large mixing bowl, combine the pumpkin puree, evaporated milk, eggs, sugar, cinnamon, nutmeg, and melted butter. Grab your whisk and beat everything together until smooth. Keep that energy up; we’re building flavor here! -
Incorporate the cake mix!
Next, gently fold in the yellow cake mix. Don’t overmix; just blend until there are no dry patches left. The batter will be a little thick—that’s what we want. -
Nuts about it!
Now, fold in the chopped pecans or walnuts. This step adds texture and a delightful crunch, which provides contrast to the creamy pumpkin filling. -
Pour and distribute!
Pour the batter into your prepared baking dish (about 9×13 works perfectly). Use a spatula to spread the batter evenly and get those nuts nestled in there! -
Time to bake!
Pop the dish in the preheated oven and let it bake for about 40-50 minutes. You’ll know it’s done when you see a golden crust forming on top and a toothpick inserted in the center comes out clean (or with just a few moist crumbs). -
Cool it down!
Once baked, remove your cake from the oven and allow it to cool for a bit in the pan. This is crucial so that it can firm up a bit and become easier to slice. About 15-20 minutes should do! -
Serve with flair!
Cut yourself a generous slice, add a dollop of whipped cream, and maybe even sprinkle a pinch of cinnamon on top for that finishing touch. You’re ready to impress your guests (or yourself)!
Serving Suggestions
Place your Pumpkin Crunch Cake on a rustic wooden board or a fragrant autumn-themed platter. It looks stunning with a bit of whipped cream on top and a sprinkle of chopped pecans on the side. Don’t forget to serve it with a hot cup of apple cider or coffee to elevate your dessert experience!
Recipe Variations
-
Vegan Twist: Substitute eggs with flaxseed, use almond milk instead of evaporated milk, and replace the butter with coconut oil for a yummy vegan version.
-
Chocolate Lovers: Mix in some chocolate chips into the batter for a delightful contrast of flavors.
-
Spicy Kick: Add a teaspoon of ginger or a pinch of cayenne for a subtle spicy warmth.
-
Fruitful Addition: Toss in some fresh cranberries or chocolate chunks for a pop of color and flavor!
Chef’s Notes
I’ve been tinkering with this recipe for years, and honestly, it continues to evolve with every dinner party I host. I remember one Thanksgiving when my cousin thought he could outsmart me and decided to use pumpkin pie spice instead of individual spices—let’s just say it took a minute for everyone to figure out what was different! Every mishap in the kitchen is a learning experience that makes us better cooks, right? So embrace your unique kitchen adventures—who knows what delicious mistakes might come out of them!
FAQs and Troubleshooting
1. Why did my cake sink in the middle?
Overmixing your batter or not allowing it to bake long enough can cause it to sink. Remember the gentle folding motion and rely on that toothpick to check for doneness.
2. Can I make this cake ahead of time?
Absolutely! You can make it a day in advance. Just store it covered at room temperature, and it’ll taste even more flavorful the next day!
3. My cake is too dense. What went wrong?
This can happen if the cake mix isn’t blended well or the eggs weren’t beaten enough. Make sure to mix until everything is just combined.
4. Can I freeze this cake?
Yes! Allow the cake to cool completely, then wrap it tightly in plastic wrap and foil. It can stay frozen for up to three months. Thaw it overnight in the fridge before serving.
Nutritional Info
For those curious about nutrition, each slice of Pumpkin Crunch Cake (based on 12 slices) has approximately:
- Calories: 250
- Protein: 5g
- Fat: 10g
- Carbohydrates: 38g
- Fiber: 1g
Well, there you have it! A friendly take on making a timeless Pumpkin Crunch Cake that has the power to spark joy in every bite. I hope this warms your kitchen and fills your hearts with happiness. Remember, cooking should be a delightful experience—so let’s enjoy making this beautiful cake together! Happy baking, and as always—let’s set the table!
PrintPumpkin Crunch Cake

A cozy and delightful dessert perfect for fall, combining the warmth of pumpkin spices with a crunchy topping.
- Prep Time: 15 minutes
- Cook Time: 50 minutes
- Total Time: 65 minutes
- Yield: 12 servings 1x
- Category: Dessert
- Method: Baking
- Cuisine: American
- Diet: Vegetarian
Ingredients
- 1 box yellow cake mix
- 1 can (15 oz) pumpkin puree
- 1 can (12 oz) evaporated milk
- 3 large eggs
- 1 cup sugar
- 1 tsp cinnamon
- 1/2 tsp nutmeg
- 1/2 cup butter, melted
- 1 cup chopped pecans or walnuts
- Whipped cream for serving (optional)
Instructions
- Preheat your oven to 350°F (175°C).
- Mix the pumpkin puree, evaporated milk, eggs, sugar, cinnamon, nutmeg, and melted butter in a large mixing bowl until smooth.
- Incorporate the yellow cake mix gently until no dry patches remain.
- Fold in the chopped pecans or walnuts.
- Pour the batter into a prepared baking dish (about 9×13).
- Bake for about 40-50 minutes until golden and a toothpick comes out clean.
- Cool the cake in the pan for 15-20 minutes.
- Serve with whipped cream and a sprinkle of cinnamon.
Notes
This cake can be made a day in advance for enhanced flavor. For a vegan version, substitute the eggs with flaxseed and the dairy products accordingly.
Nutrition
- Serving Size: 1 slice
- Calories: 250
- Sugar: 20g
- Sodium: 150mg
- Fat: 10g
- Saturated Fat: 5g
- Unsaturated Fat: 4g
- Trans Fat: 0g
- Carbohydrates: 38g
- Fiber: 1g
- Protein: 5g
- Cholesterol: 50mg
Keywords: Pumpkin, Cake, Fall Dessert, Cozy, Spices
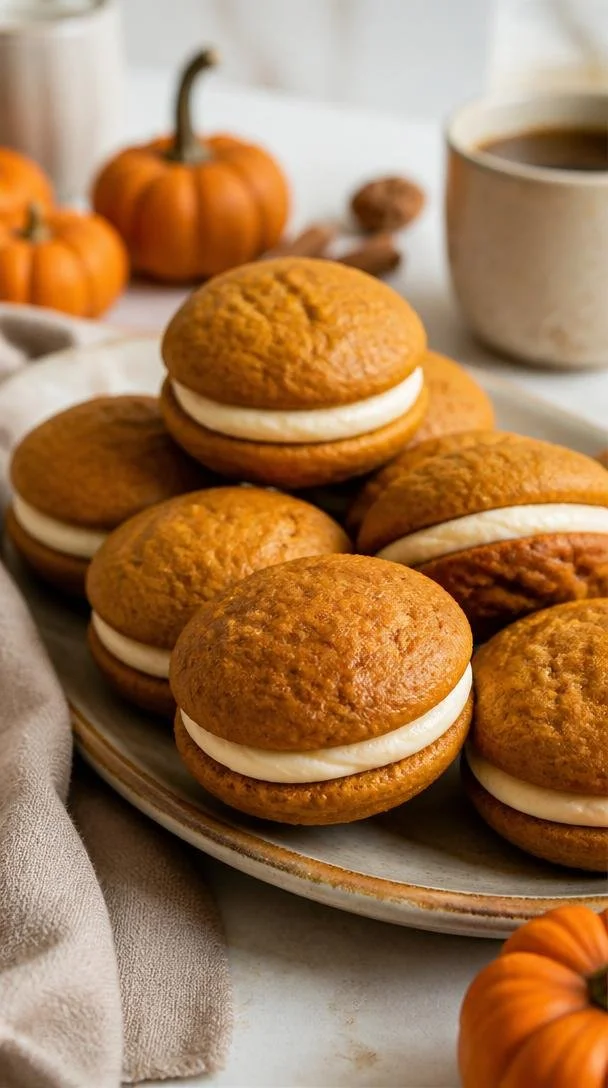
One-Bowl 30-Minute Pumpkin Whoopie Pies (Fall Comfort Treat)
Pumpkin Whoopie Pies: An Autumn Delight
Hello, friends! Today, I’m thrilled to share with you one of my absolute favorite autumn treats — Pumpkin Whoopie Pies! When the leaves start to turn and that crispness fills the air, there’s nothing quite like the warm, spicy aroma of pumpkin goodies baking in the oven. Trust me, this recipe will not only fill your kitchen with delightful scents but will also transport you to a cozy fall afternoon, sipping cider while savoring these tasty treats.
Personal Story
As a kid, there was nothing more exciting than the annual autumn bake-off in my neighborhood! Everyone brought their best creations, and I remember my mom whipping up pumpkin whoopie pies that quickly became the star of the show. I’d watch as she mixed the ingredients, the vibrant orange pumpkin swirling into the batter, and I loved the way she would sneak a taste of the creamy filling before it made its debut between those soft, spiced cakes. The joy on everyone’s faces when they took that first bite is something I still cherish today. It made me realize how food has this magical power to bring people together and create lasting memories, no matter how simple the dish may be.
Ingredients
Here’s what you’ll need for these scrumptious Pumpkin Whoopie Pies, along with some handy tips:
-
2 cups all-purpose flour
A staple in most kitchens, this is the base for our whoopie pies. If you need a gluten-free option, try substituting with a gluten-free all-purpose blend. -
1 teaspoon baking powder
This helps our pies rise just right. Ensure your baking powder is fresh for optimal fluffiness! -
1 teaspoon baking soda
Another leavener that works in tandem with baking powder. The combination gives our pies that perfect texture. -
1 teaspoon cinnamon
A warm spice that’s essential for flavoring! Feel free to swap with pumpkin pie spice for an all-in-one flavor boost. -
1/2 teaspoon nutmeg
Adds depth and warmth to the pumpkin flavor. If you’re lacking nutmeg, a touch more cinnamon can be a decent substitute. -
1/2 teaspoon salt
Balances out the sweetness and enhances the flavors. Don’t skip this; it’s necessary for a well-rounded pie. -
1 cup pumpkin puree
Use canned or homemade — just ensure it’s pure pumpkin, not pumpkin pie filling! This is where our signature flavor comes from. -
1/2 cup vegetable oil
This keeps our whoopie pies moist. If you prefer, you can replace it with melted coconut oil for a different flavor profile. -
1 cup brown sugar
Brown sugar adds that lovely caramel flavor and moisture. Light or dark works here, depending on how deep a flavor you desire. -
1 egg
Acts as a binder. If vegan, you can swap it for a flax egg (1 tablespoon ground flaxseed mixed with 2.5 tablespoons water). -
1 teaspoon vanilla extract
A hint of sweetness and depth. Always go for pure vanilla extract when possible; it makes a difference. -
1 cup cream cheese
The star of our filling. Allow it to soften at room temperature so it blends beautifully! -
1/2 cup powdered sugar
Sweetens our filling. Feel free to adjust to your taste — add more or less! -
1/4 cup maple syrup
Adds a deliciously complex sweetness to the filling; you can also use honey if you prefer.
Step-by-Step Instructions
Now, let’s dive into the fun part — baking these beauties!
-
Preheat the Oven
Preheat your oven to 350°F (175°C). While it heats, you can gather the rest of your ingredients and make sure your baking sheets are ready. -
Mix the Dry Ingredients
In a medium bowl, whisk together the flour, baking powder, baking soda, cinnamon, nutmeg, and salt. This ensures everything is evenly distributed so your whoopie pies rise and flavor nicely. -
Combine the Wet Ingredients
In a larger bowl or a stand mixer, combine the pumpkin puree, vegetable oil, brown sugar, egg, and vanilla extract. Mix until everything is smooth and well combined; the mixture should be thick and luscious. -
Incorporate Dry Ingredients
Gradually add your dry mix into the wet, stirring gently until just combined. Overmixing can lead to tougher cakes, so stop once you see no dry flour patches. -
Scoop and Bake
Using a cookie scoop or two spoons, drop even amounts of batter onto your prepared baking sheets, spacing them about 2 inches apart. Bake for 12-15 minutes, or until they spring back when lightly pressed. Let cool on the sheets for a few minutes before transferring them to a wire rack. -
Prepare the Filling
While the cakes cool, let’s whip up the filling! In a bowl, beat together the cream cheese and powdered sugar until smooth, then add the maple syrup. Mix until creamy. You can adjust the sweetness based on your preference — feel free to taste and tweak! -
Assemble the Whoopie Pies
Once your cakes are completely cooled, pair them up (a big one with a big one for maximum filling!). Spread or pipe a generous amount of filling on the flat side of one cake, then top with another. -
Chill and Enjoy
For best results, refrigerate the whoopie pies for at least 30 minutes before serving. The flavors meld beautifully, and it makes them easier to handle.
Serving Suggestions
Serve these Pumpkin Whoopie Pies on a beautiful platter; perhaps with a sprinkle of cinnamon or a drizzle of melted chocolate for added flair! Pair them with a cup of spicy chai tea or hot cider to complete the cozy vibe.
Recipe Variations
Feel free to mix things up with these creative twists for your whoopie pies:
- Chocolate Pumpkin Whoopie Pies: Substitute half of the flour for cocoa powder for a chocolate-dusted delight.
- Spiced Cream Cheese Filling: Add a bit of cinnamon and nutmeg to the cream cheese filling for extra flavor.
- Nutty Texture: Incorporate chopped walnuts or pecans into the batter for added crunch.
- Vegan Version: Use aquafaba instead of egg and swap to a vegan cream cheese substitute for the filling.
Chef’s Notes
These whoopie pies have evolved so much from my mom’s original recipe! I’ve played with flavors and fillings over the years, and I truly enjoy adding unique ingredients that excite the palate. Plus, they freeze wonderfully! You can make a batch, freeze them, and treat yourself to a warm pie anytime you’re craving that pumpkin taste. A quick zap in the microwave for about 10 seconds brings them right back to life!
FAQs and Troubleshooting
-
Why are my whoopie pies flat?
Make sure your baking soda and baking powder are fresh! Old leavening agents can cause them not to rise. -
Can I use fresh pumpkin puree?
Absolutely! Just ensure your pumpkin is well-cooked and drained of excess moisture. -
What do I do if my filling is too runny?
You can add more powdered sugar to thicken it up; start with a tablespoon at a time until you reach your desired consistency. -
How do I store leftover whoopie pies?
Keep them in an airtight container in the refrigerator for up to a week or freeze them for longer storage.
Nutritional Info
If you’re curious about the nutritional breakdown, a single Pumpkin Whoopie Pie (including filling) is approximately:
- Calories: 200
- Carbs: 28g
- Protein: 2g
- Fat: 9g
- Fiber: 1g
So there you have it! The perfect pumpkin whoopie pie recipe is ready to grace your table with warmth and flavor this fall. I can’t wait for you to try this delectable treat — I promise it will become a cherished favorite like it is in my home! Happy baking! 🍂
PrintPumpkin Whoopie Pies
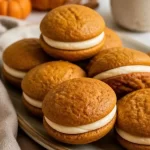
Delicious pumpkin whoopie pies that bring the warmth and flavors of autumn into your kitchen.
- Prep Time: 15 minutes
- Cook Time: 15 minutes
- Total Time: 30 minutes
- Yield: 12 servings 1x
- Category: Dessert
- Method: Baking
- Cuisine: American
- Diet: Vegetarian
Ingredients
- 2 cups all-purpose flour
- 1 teaspoon baking powder
- 1 teaspoon baking soda
- 1 teaspoon cinnamon
- 1/2 teaspoon nutmeg
- 1/2 teaspoon salt
- 1 cup pumpkin puree
- 1/2 cup vegetable oil
- 1 cup brown sugar
- 1 egg
- 1 teaspoon vanilla extract
- 1 cup cream cheese
- 1/2 cup powdered sugar
- 1/4 cup maple syrup
Instructions
- Preheat your oven to 350°F (175°C).
- Mix the dry ingredients: flour, baking powder, baking soda, cinnamon, nutmeg, and salt.
- Combine the wet ingredients: pumpkin puree, vegetable oil, brown sugar, egg, and vanilla extract until smooth.
- Incorporate the dry ingredients into the wet until just combined.
- Scoop even amounts of batter onto prepared baking sheets, spacing them about 2 inches apart.
- Bake for 12-15 minutes until springy when lightly pressed and let cool.
- Prepare the filling by beating cream cheese and powdered sugar until smooth, then add maple syrup.
- Assemble the whoopie pies by spreading filling between two cooled cakes.
- Chill the final pies for at least 30 minutes before serving.
Notes
These whoopie pies can be frozen and reheated. Adjust sweetness of the filling to taste.
Nutrition
- Serving Size: 1 pie
- Calories: 200
- Sugar: 15g
- Sodium: 200mg
- Fat: 9g
- Saturated Fat: 3g
- Unsaturated Fat: 5g
- Trans Fat: 0g
- Carbohydrates: 28g
- Fiber: 1g
- Protein: 2g
- Cholesterol: 30mg
Keywords: pumpkin, whoopie pies, autumn dessert, fall baking, cozy treats

Japanese Cream Puff: 30-Minute Fluffy Choux Recipe
Indulge in Deliciousness: Japanese Cream Puffs You Can Master at Home
Hello, friends! Today, we’re diving into the delightful world of Japanese cream puffs. These airy confections, known as “choux” pastry in French, are just as breathtaking to the eye as they are to the taste buds. Soft, delicate, and filled with luscious cream, they are the perfect treat to elevate any gathering or simply brighten your day. From the first puff to the last, I can promise you a mini culinary adventure in your kitchen!
There’s something inherently sophisticated about a cream puff that feels both celebratory and cozy. Perhaps it’s the elegant shape, or the delightful cream filling that surprises with every bite. But don’t let the fancy name fool you—making these beauties at home is easier than you might think! Get ready for an excellent opportunity to tie on that ivory apron and impress your friends and family.
My Cream Puff Journey
Let me take you back to my very first encounter with Japanese cream puffs. Picture this: a quaint little café tucked away in the bustling streets of Kyoto. I vividly remember the afternoon sun filtering through the café windows, casting a warm glow over a display of pastries that seemed to defy gravity. It was there that I tasted my first cream puff, its delicate shell crumbling against my fingers, revealing a luscious filling that burst with flavor. I remember closing my eyes, savoring every bite—it was pure bliss!
From that moment on, my heart was set on mastering the art of making cream puffs. I experimented tirelessly in my kitchen—encouraged by my friends and family, who became my taste-test champions. Each time I perfected the recipe, I felt as if I were capturing a tiny piece of that magical café moment to share with everyone. Now, I want to share that joy with you!
Ingredients
Here’s what you’ll need to create these fluffy clouds of goodness:
- 3 tablespoons (40g) butter: Adds flavor and richness to the choux. For a dairy-free option, you can use coconut oil.
- 2 teaspoons (10g) sugar: Just the right amount to bring a hint of sweetness to the pastry. You can substitute with honey or maple syrup if desired.
- 1/2 cup (100 ml) water: This provides steam to help your choux puff up beautifully. If you want an extra hint of flavor, use brewed tea instead!
- 1/2 cup (60g) all-purpose flour: The foundation of your pastry. For a gluten-free alternative, try a gluten-free flour blend.
- 2 small eggs: These help bind the mixture and create that fluffy texture. If you’re avoiding eggs, you can experiment with flaxseed eggs (1 tablespoon ground flaxseed + 3 tablespoons water = 1 egg).
- 2 egg yolks: They add richness and contribute to a more vibrant color. You can omit them if you choose to keep it lighter.
- 1/4 cup (60g) caster sugar: This finely ground sugar dissolves quickly, creating a smooth texture for your pastry cream. Regular granulated sugar works too, but caster sugar is preferred for its fine texture.
- 2 tablespoons (20g) all-purpose flour (for the pastry cream): This thickens your filling, ensuring it’s both creamy and stable.
- 1 cup (200ml) milk: The base for your pastry cream. Feel free to use almond milk or soy milk for a vegan option.
- 1 tablespoon (14g) butter (for shine and firmness): This makes your cream filling luxurious. You can substitute with coconut cream if you’d like to keep it dairy-free.
Step-by-Step Instructions
Step 1: Making the Choux Pastry
-
Preheat your oven to 375°F (190°C). A hot start is key to getting those puffs to rise perfectly!
-
In a medium saucepan, combine butter, sugar, and water. Heat over medium until the butter melts and the mixture begins to boil.
-
Add the flour all at once and stir vigorously with a wooden spoon or spatula. Keep mixing until the dough forms a ball and pulls away from the sides of the pan—this should take about 2–3 minutes. Pro tip: The goal is to cook off some of the moisture; a slightly dry dough leads to fluffier choux!
-
Remove from heat and let it cool for about 5 minutes. You don’t want it too hot when adding the eggs, or you’ll end up scrambling them!
-
Incorporate the eggs one at a time. After each addition, stir until the dough is smooth and glossy. The mixture should be thick but falls easily from the spoon—this is when you know you’ve hit the sweet spot!
-
Transfer the dough to a piping bag fitted with a large round tip, or you can use a Ziploc bag with the corner snipped off. Pipe the dough onto a parchment-lined baking sheet, creating small mounds about 1.5 inches apart, leaving room for them to puff up.
-
To give your puffs a glossy finish, lightly brush them with an egg wash (made from beaten eggs). This step is optional, but it adds such a beautiful sheen!
-
Bake for about 20-25 minutes, or until they’re golden brown and puffed up. The best part? Don’t open the oven door too soon; we want these babies to rise and hold their shape!
Step 2: Preparing the Pastry Cream
-
In a medium saucepan over medium heat, combine the milk and half of the caster sugar. Stir to dissolve the sugar and let the mixture come to a gentle simmer.
-
While that’s heating, whisk together the egg yolks, the rest of the caster sugar, and the 2 tablespoons of flour in a bowl. You want a smooth and pale mixture—this is where the magic happens!
-
Slowly pour the hot milk into your egg mixture, whisking continuously to temper the eggs. This step is crucial! If you add the hot milk too quickly, you’ll end up with scrambled eggs.
-
Now, pour everything back into the saucepan. Cook over medium heat, whisking constantly until it thickens (about 3-5 minutes). The mixture should be thick enough to coat the back of a spoon.
-
Once thickened, remove from heat and whisk in the 1 tablespoon of butter. This not only adds shine but also gives the cream a rich flavor.
-
Strain the pastry cream through a fine sieve into a clean bowl to ensure it’s super smooth. Wish away any lumps!
-
Cool the pastry cream by covering the surface with plastic wrap to prevent a skin from forming. Let it chill in the refrigerator while your puffs cool too!
Step 3: Filling the Puffs
-
Once your cream puffs are completely cooled, use a small knife to make a slit in the side of each puff. This helps release some steam and makes filling easier.
-
Grab your chilled pastry cream and transfer it to a piping bag. Pipe it into each puff until they feel satisfyingly full. You want them to be plump and indulgent!
-
Once filled, you can dust the tops with powdered sugar or even dip them in chocolate for a decadent touch.
Serving Suggestions
Arrange your elegant cream puffs on a beautiful platter or cake stand to display their charming shape. Drizzle some chocolate ganache or raspberry sauce over the top for a pop of color and added flavor. Alternatively, serve them with fresh seasonal fruit on the side—think strawberries or blueberries for a delightful contrast!
Recipe Variations
- Matcha Cream Puffs: Add 1-2 teaspoons of matcha powder to your pastry cream for a delightful green tea flavor.
- Chocolate Ganache: Melt some chocolate and mix it with cream for a rich chocolate filling. Swirl it with the pastry cream for a marbled effect.
- Lemon Zest: Fold in some lemon zest to the pastry cream for a bright citrus twist that’s refreshing!
- Mocha Madness: Add a shot of espresso to your pastry cream for a coffee-flavored delight.
- Fruit-Filled Cream Puffs: Fold fresh fruit or fruit puree into the pastry cream for a refreshing twist! Think strawberries, mangoes, or even a hint of passion fruit.
Chef’s Notes
Ah, the beauty of choux pastry! I’ve had my fair share of trials and errors—believe me; I’ve watched puffs collapse and come out flat as pancakes more times than I can count. That’s when I learned the power of patience and a good preheated oven! One time, I forgot to add the eggs, thinking I was being “strategic” to avoid scrambling. Spoiler alert: the dough didn’t rise. So many lessons learned, but every misstep only made those successful puffs more rewarding!
FAQs and Troubleshooting
Q: Why didn’t my cream puffs rise?
A: Ensure that your dough is properly cooked and that you didn’t open the oven door too early. Both factors can cause deflation.
Q: Can I make the dough in advance?
A: Yes! You can prepare choux dough ahead of time and store it in the fridge. Just be sure to bake them fresh to keep that puff intact.
Q: How do I store leftover cream puffs?
A: Store unfilled puffs in an airtight container at room temperature for up to two days. Filled puffs are best eaten the same day, but you can refrigerate them for a day. Just know, they might get a little soggy!
Q: Can I freeze cream puffs?
A: Absolutely! Freeze the unfilled choux puffs and fill them soon after defrosting. Just make sure they are airtight to prevent freezer burn.
Nutritional Info (Optional)
Per cream puff (filled):
- Calories: ~120
- Fat: 6g
- Carbohydrates: 15g
- Protein: 3g
- Sugar: 5g
Now that you have everything you need, I hope you’re excited to whip up these delicious Japanese cream puffs! Cooking should feel like a joyous adventure, and I can’t wait for you to experience the delight as these puffs come together in your kitchen. Remember, good food is about gathering and sharing, and I’m so thrilled to be on this journey with you.
So tie on that apron, pour yourself a glass of something sparkling, and let’s create some culinary magic together! Happy baking!
PrintJapanese Cream Puffs

Light and airy Japanese cream puffs filled with luscious pastry cream, perfect for any occasion.
- Prep Time: 15 minutes
- Cook Time: 30 minutes
- Total Time: 45 minutes
- Yield: 12 servings 1x
- Category: Dessert
- Method: Baking
- Cuisine: Japanese
- Diet: Vegetarian
Ingredients
- 3 tablespoons (40g) butter
- 2 teaspoons (10g) sugar
- 1/2 cup (100ml) water
- 1/2 cup (60g) all-purpose flour
- 2 small eggs
- 2 egg yolks
- 1/4 cup (60g) caster sugar
- 2 tablespoons (20g) all-purpose flour (for pastry cream)
- 1 cup (200ml) milk
- 1 tablespoon (14g) butter (for filling)
Instructions
- Preheat your oven to 375°F (190°C).
- Combine butter, sugar, and water in a saucepan over medium heat until boiling.
- Add the flour all at once and stir until a ball forms, about 2–3 minutes.
- Remove from heat and cool for 5 minutes.
- Incorporate eggs one at a time, stirring until smooth and glossy.
- Transfer to a piping bag and pipe onto a lined baking sheet.
- Brush with egg wash for gloss, if desired.
- Bake for 20-25 minutes until golden brown.
- Combine milk and half the caster sugar in a saucepan over medium heat to simmer.
- Whisk egg yolks, remaining sugar, and 2 tablespoons flour in a bowl.
- Slowly pour hot milk into the egg mixture, whisking continuously.
- Cook the mixture back in the saucepan until thick, about 3-5 minutes.
- Whisk in 1 tablespoon of butter and strain through a sieve.
- Cool the pastry cream covered with plastic wrap.
- Make a slit in each cooled puff and fill with pastry cream using a piping bag.
- Dust with powdered sugar or dip in chocolate if desired.
Notes
Make sure not to open the oven door early for the best puff rise.
Nutrition
- Serving Size: 1 cream puff
- Calories: 120
- Sugar: 5g
- Sodium: 50mg
- Fat: 6g
- Saturated Fat: 3g
- Unsaturated Fat: 2g
- Trans Fat: 0g
- Carbohydrates: 15g
- Fiber: 0g
- Protein: 3g
- Cholesterol: 50mg
Keywords: cream puffs, Japanese dessert, choux pastry, pastry cream, baking
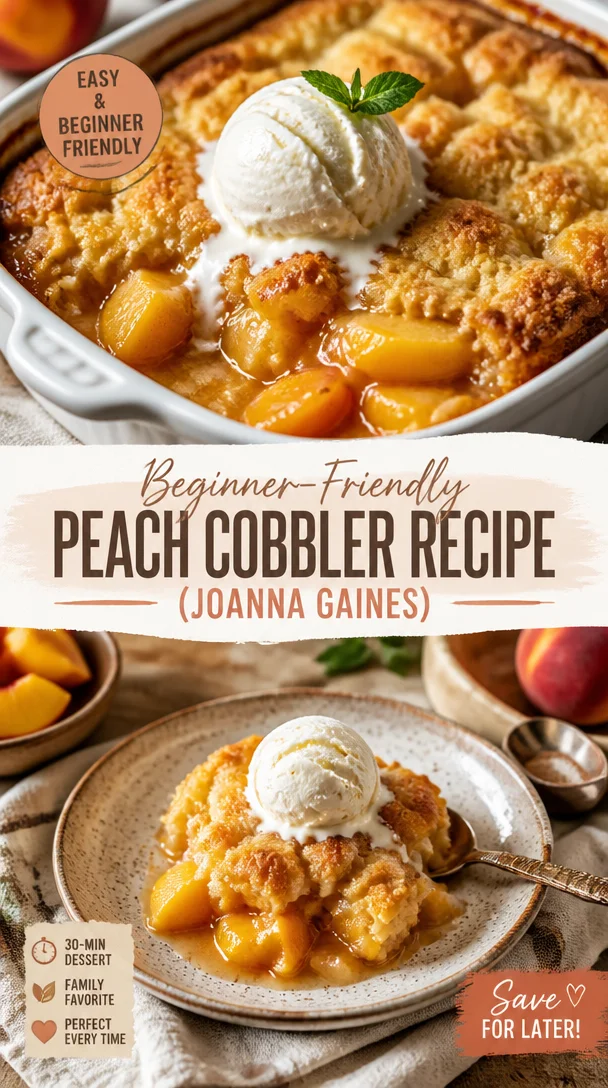
Beginner-Friendly Peach Cobbler Recipe (Joanna Gaines)
Joanna Gaines’ Peach Cobbler Recipe: A Flavorful Slice of Nostalgia
Hello, fellow food lovers! There’s something about a warm, bubbling peach cobbler that instantly transports me to golden childhood summers spent in my grandmother’s cozy kitchen. As a recipe creator and passionate host, I believe that cooking isn’t just about feeding our bodies; it’s about nurturing our souls and creating memories. Today, I am thrilled to share with you my take on Joanna Gaines’ Peach Cobbler recipe — a delightful dessert that promises to be a sweet centerpiece at your table, invoking comfort and nostalgia like nothing else.
Growing up, our family gatherings always revolved around food, and my grandmother’s peach cobbler was the crown jewel. I still remember the enticing scent wafting through the air as we mingled around the dining table, laughter echoing and stories flowing. As the cobbler cooled on the counter, we would eagerly await the moment we could scoop a warm serving onto our plates, topped with a generous dollop of vanilla ice cream. The combination of sweet, juicy peaches and buttery, flaky crust made my heart sing. It was more than dessert; it was a hug on a plate, a reminder of love and togetherness.
So, tie on your apron, gather your loved ones, and let’s make a peach cobbler that will add a touch of sweetness to your life!
Ingredients
Here’s what you’ll need for this epic peach cobbler, along with a few tips to ensure your dessert shines:
-
6 cups fresh peaches, peeled and sliced
Fresh peaches are the star of the show! If you can’t find fresh ones, feel free to substitute with frozen or canned peaches (just drain them well). Look for ripe and fragrant peaches for the best flavor. -
1 cup granulated sugar (for peaches)
This sugar enhances the natural sweetness of the peaches. If you’re aiming for a lower sugar option, you could use coconut sugar or honey, but adjust to taste, as these sweeteners can vary in sweetness level. -
¼ cup water
This helps to create a lovely syrup as the peaches cook. You can substitute with fruit juice (like apple or orange juice) for added flavor. -
1 tablespoon fresh lemon juice
This brightens the flavor of the peaches and adds a touch of tartness, balancing the sweetness. Lime juice works too if that’s what you have! -
½ cup unsalted butter
Butter brings richness and flavor. For a dairy-free option, try using coconut oil or a vegan butter substitute. -
1½ cups all-purpose flour
The base of your batter! If you’re gluten-sensitive, you can substitute with a gluten-free blend, but be aware that the texture may differ slightly. -
1 cup granulated sugar (for batter)
Sweetness is key in the batter, making it golden and delightful. You can use cane sugar or rapadura sugar as a substitute. -
2 teaspoons baking powder
This is your leavening agent, helping the batter rise. Baking soda could work in a pinch, but you’ll need to ensure your recipe has an acid to react with. -
½ teaspoon salt
Salt enhances all the flavors in the cobbler; don’t skip it! If you’re on a low-sodium diet, feel free to reduce the amount. -
1 cup whole milk
This adds moisture to your batter. For a non-dairy version, almond milk or oat milk works beautifully. -
1 teaspoon pure vanilla extract
The essence of vanilla gives a warm flavor note to the cobbler. Feel free to experiment with almond extract for a nutty twist. -
½ teaspoon ground cinnamon
Cinnamon adds warmth and coziness to this dessert. If you love it, don’t hesitate to add a pinch more! -
¼ teaspoon ground nutmeg
Just a touch enhances the complexity of flavors. If you’re not a fan, you can leave it out entirely.
Step-by-Step Instructions
Now that we have our ingredients prepped and ready, let’s dive into the step-by-step cooking process. Cooking is just as much about enjoying the journey as it is about savoring the end result!
-
Preheat Your Oven
Preheat your oven to 350°F (175°C). This step is crucial for a perfectly baked cobbler, ensuring that the butter melts thoroughly and the batter rises beautifully. -
Prep the Peaches
In a large bowl, combine the sliced peaches, 1 cup of granulated sugar, water, and fresh lemon juice. Stir gently to coat the peaches. Let this mixture sit for about 15-20 minutes to allow the flavors to meld and the juices to form. This step creates a luscious syrup that will soak into your cobbler. -
Melt the Butter
In a 9×13 inch baking dish, place the ½ cup of unsalted butter. Put it in the preheated oven until it’s melted and bubbling. This will take about 5 minutes—don’t let it burn! -
Prepare the Batter
While the butter is melting, in a mixing bowl, whisk together the flour, 1 cup of granulated sugar, baking powder, salt, whole milk, vanilla extract, ground cinnamon, and nutmeg. Mix until just combined; it’s okay if there are a few lumps. Note: Over-mixing can lead to a tough texture, so be gentle! -
Combine and Bake
Once your butter has melted, take the baking dish out of the oven. Carefully pour the prepared batter over the melted butter. Do not stir! Spoon the peach mixture and syrup on top of the batter. Again, resist the urge to mix—it’s all about that gorgeous layered look. -
Bake to Perfection
Bake your peach cobbler in the oven for about 40-45 minutes, or until the top is golden brown and a toothpick inserted in the batter comes out clean. The aroma will be heavenly, filling your kitchen with a sweet, inviting scent. -
Cool and Serve
Once baked, remove it from the oven and let it cool for about 10 minutes before serving. This little resting period allows the juices to settle, making it easier to scoop out portions.
Serving Suggestions
To serve, dish up generous scoops of your peach cobbler into bowls or dessert plates. For a touch of elegance (and yum!), top each serving with a scoop of vanilla ice cream or a dollop of fresh whipped cream. A sprinkle of cinnamon or a few mint leaves will add a pop of color and flavor, elevating your presentation. Trust me, your guests will be swooning!
Recipe Variations
This peach cobbler is a classic, but there’s always room for creativity! Here are a few fun variations to consider:
-
Mixed Fruit Delight: Add berries (like blueberries or raspberries) for a mixed fruit cobbler that’s bursting with color and flavor.
-
Spiced Peach Cobbler: Experiment with spices like ginger and cloves for a warm, aromatic twist.
-
Nectarine Swap: If peaches aren’t your thing, substitute with ripe nectarines for a slightly tangy flavor.
-
Oat Topping: Mix oats into the topping for a heartier cobbler, giving it a chewy and nutty texture.
-
Gluten-Free: Use a gluten-free flour blend to make this dessert celiac-friendly without compromising on taste!
Chef’s Notes
As I worked on perfecting this peach cobbler recipe, I encountered the usual kitchen mishaps. There was the time I forgot to add the sugar (yikes!). It was a lesson learned and a reminder that cooking is all about balance and attention to detail. Each iteration brought me closer to this beautiful recipe. The key takeaway I discovered along the way? Cooking should be fun! Don’t stress over minor mistakes; they often lead to delightful surprises and new variations.
FAQs and Troubleshooting
-
Why is my cobbler not bubbling?
If your cobbler isn’t bubbling, it may need more time in the oven. Make sure to bake until the peach juice is simmering and the top is golden. -
What if my peaches are tart?
If your peaches are on the tart side, feel free to add a bit more sugar to the peach filling. A pinch of cinnamon can also balance the flavor! -
Can I make it ahead of time?
Absolutely! You can prepare the peach filling a day in advance and store it in the fridge. Just assemble and bake when you’re ready to serve. -
How do I store leftovers?
Store any leftover cobbler in an airtight container in the refrigerator for up to 3-4 days. Reheat in the oven to enjoy it warm again!
Today’s peach cobbler recipe is more than just an indulgent dessert; it’s a labor of love that evokes the warmth of memories and invites new ones to be created. I can’t wait for you to experience the joy of sharing this sweet delight at your table. So, grab your apron and your favorite people, and let’s make some delicious memories together!
PrintJoanna Gaines’ Peach Cobbler

A heartwarming peach cobbler recipe that captures the nostalgia of childhood summers spent in the kitchen.
- Prep Time: 20 minutes
- Cook Time: 45 minutes
- Total Time: 65 minutes
- Yield: 8 servings 1x
- Category: Dessert
- Method: Baking
- Cuisine: American
- Diet: Vegetarian
Ingredients
- 6 cups fresh peaches, peeled and sliced
- 1 cup granulated sugar (for peaches)
- ¼ cup water
- 1 tablespoon fresh lemon juice
- ½ cup unsalted butter
- 1½ cups all-purpose flour
- 1 cup granulated sugar (for batter)
- 2 teaspoons baking powder
- ½ teaspoon salt
- 1 cup whole milk
- 1 teaspoon pure vanilla extract
- ½ teaspoon ground cinnamon
- ¼ teaspoon ground nutmeg
Instructions
- Preheat your oven to 350°F (175°C).
- Combine the sliced peaches, 1 cup of granulated sugar, water, and lemon juice in a large bowl. Stir gently and let sit for 15-20 minutes.
- Melt the butter in a 9×13 inch baking dish in the oven until bubbly, about 5 minutes.
- Whisk together the flour, 1 cup sugar, baking powder, salt, milk, vanilla extract, ground cinnamon, and nutmeg in a mixing bowl until just combined.
- Pour the prepared batter over the melted butter. Spoon the peach mixture and syrup on top without stirring.
- Bake your peach cobbler for 40-45 minutes, or until the top is golden and a toothpick comes out clean.
- Cool for about 10 minutes before serving.
Notes
Serve with vanilla ice cream or whipped cream for an extra treat.
Nutrition
- Serving Size: 1 serving
- Calories: 350
- Sugar: 25g
- Sodium: 150mg
- Fat: 15g
- Saturated Fat: 9g
- Unsaturated Fat: 4g
- Trans Fat: 0g
- Carbohydrates: 45g
- Fiber: 3g
- Protein: 4g
- Cholesterol: 30mg
Keywords: peach cobbler, dessert, comfort food, summer recipe, Joanna Gaines
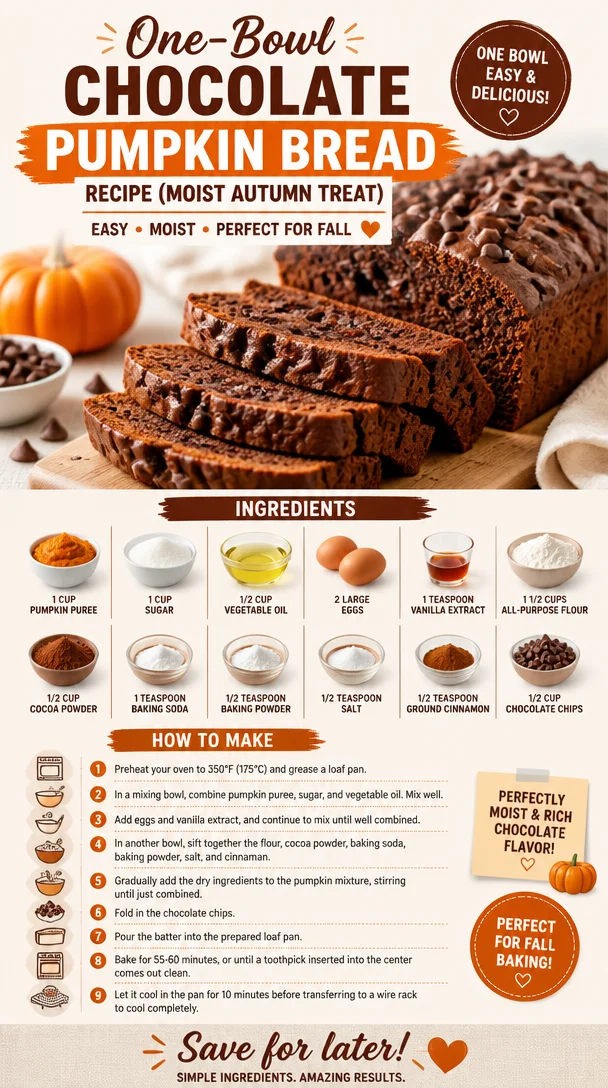
One-Bowl Chocolate Pumpkin Bread Recipe (Moist Autumn Treat)
The Ultimate Chocolate Pumpkin Bread Recipe: A Cozy Culinary Hug
Hello, fellow food lovers! Savannah here, and I can’t wait to share one of my absolute favorite cozy recipes with you: Chocolate Pumpkin Bread. This delightful loaf is perfect for crisp fall mornings, holiday gatherings, or simply when you need a little sweet comfort in your life. Trust me, this bread embodies the very essence of joy and warmth, making it the perfect treat to share with family and friends.
Now, let’s dive into this recipe that’ll have your kitchen smelling heavenly and your taste buds dancing!
A Slice of My Story
As a kid, I remember autumn weekends spent navigating the bustling pumpkin patches with my family, the smell of freshly baked goodies wafting through the air. Pumpkin spice lattes weren’t the only cozy flavors of the season; it was all about the rich, satisfying taste of pumpkin bread. One particular memory that stands out is when my grandmother and I decided to give her traditional pumpkin bread a modern twist by adding chocolate.
We whisked together ingredients in her tiny kitchen, draping a welcoming haze of cocoa powder and pumpkin spice. When we pulled our creation from the oven, the aroma was intoxicating. The first taste was pure bliss; the chocolate and pumpkin danced together in perfect harmony. It’s this blend of nostalgia and comfort that always brings me back to the kitchen, and today, I want to share that same warmth with you.
Ingredients
Before we jump into the nitty-gritty of baking, here’s a list of what you’ll need to create this luscious chocolate pumpkin bread.
-
1 cup pumpkin puree: This is the star of the show! You can use canned pumpkin puree for convenience or make your own by roasting fresh pumpkins. Don’t confuse this with pumpkin pie filling, which has added sugar and spices.
-
1 cup sugar: Regular granulated sugar works beautifully here, but you can swap it for brown sugar for a richer flavor or use coconut sugar for a slight caramel undertone.
-
1/2 cup vegetable oil: This keeps the bread moist and delicious. If you prefer a healthier option, you could use melted coconut oil or unsweetened applesauce for a lower-fat version.
-
2 large eggs: Eggs help bind the ingredients together and add moisture. For a vegan option, substitute with flax eggs (1 tablespoon of ground flaxseed mixed with 2.5 tablespoons of water per egg).
-
1 teaspoon vanilla extract: A must for that beautiful depth of flavor. You can always substitute with maple extract for a unique twist.
-
1 1/2 cups all-purpose flour: This provides the structure. For a gluten-free version, use a 1:1 gluten-free baking flour blend.
-
1/2 cup cocoa powder: Unsweetened cocoa powder deepens the flavor. For a more intense chocolate hit, go for Dutch-processed cocoa.
-
1 teaspoon baking soda: This is our leavener, ensuring our bread rises beautifully.
-
1/2 teaspoon baking powder: Works hand-in-hand with baking soda to achieve that fluffy texture.
-
1/2 teaspoon salt: A pinch of salt enhances all those sweet flavors.
-
1/2 teaspoon ground cinnamon: Adds warmth; you can also mix in nutmeg if you’re feeling adventurous.
-
1/2 cup chocolate chips: Go for semi-sweet or dark chocolate, whichever you adore. You can even use white chocolate or peanut butter chips for a fun variation.
Step-by-Step Instructions
-
Preheat Your Oven: Start by preheating your oven to 350°F (175°C). This ensures even baking right from the get-go!
-
Prepare Your Loaf Pan: Grease a 9×5 inch loaf pan with butter or non-stick spray, or line it with parchment paper for easy removal later. I always recommend this step so your bread slides out without fuss!
-
Mix the Wet Ingredients: In a large mixing bowl, whisk together the pumpkin puree, sugar, vegetable oil, eggs, and vanilla extract. You want a smooth mixture with no lumps. This is the heart of our bread, so make sure it’s well combined.
-
Sift the Dry Ingredients: In another bowl, mix the flour, cocoa powder, baking soda, baking powder, salt, and cinnamon. Sifting these ingredients helps avoid clumps and ensures an even distribution—no one wants a surprise bite of flour!
-
Combine the Mixtures: Gradually fold the dry mixture into the wet mixture using a spatula or wooden spoon. Be gentle! Overmixing can lead to tough bread. You just want it combined until there are no dry spots left.
-
Add the Chocolate Chips: Once your batter is ready, it’s time for the chocolate chips! Gently fold them in to distribute evenly throughout the batter.
-
Pour and Bake: Pour the batter into your prepared loaf pan. Use a spatula to smooth the top if needed. Bake in the preheated oven for about 50-60 minutes, or until a toothpick inserted in the center comes out clean. Keep an eye on it! Oven times can vary.
-
Cool Before Slicing: Once baked, allow the bread to cool in the pan for about 10 minutes before transferring it to a wire rack to cool completely. This cooling time helps maintain texture, ensuring your bread doesn’t crumble when sliced.
Serving Suggestions
To serve your chocolate pumpkin bread, slice it into generous, warm pieces, and arrange them on a beautiful platter. Drizzle with a touch of honey or a dollop of whipped cream for extra indulgence. Pair it with a steaming cup of coffee or spiced chai for a cozy afternoon treat.
Recipe Variations
- Nutty Surprise: Toss in some chopped walnuts or pecans for a delightful crunch.
- Spice it Up: Add a teaspoon of pumpkin pie spice for an even warmer flavor profile.
- Dairy-Free: Swap chocolate chips for dairy-free options to keep the recipe vegan-friendly.
- Pumpkin Chocolate Swirl: For a marbled effect, reserve half of the batter, mix some additional cocoa in, and layer them before baking.
- Frosted Delight: Top your cooled bread with a simple cream cheese or chocolate frosting for an exquisite dessert twist!
Chef’s Notes
This chocolate pumpkin bread recipe has come a long way since that initial experimental batch with my grandmother. We’ve adjusted flavors, swapped ingredients, even played around with glazes. It’s a recipe that brings back fond memories, and every bite evokes a sense of nostalgia. Plus, I just love how forgiving this bread is; you can mix in whatever you have on hand and still come out with a delightful result!
FAQs and Troubleshooting
Q: My bread came out dense. What went wrong?
A: Dense bread usually results from overmixing or using too much flour. When combining wet and dry mixtures, mix just until incorporated.
Q: Can I freeze this bread?
A: Absolutely! Let it cool completely, then wrap it tightly in plastic wrap and foil before placing it in the freezer. It can last up to 3 months!
Q: What if I didn’t have pumpkin puree?
A: No pumpkin? No problem! Use unsweetened applesauce for a similar moisture level, but just keep in mind the taste will be different!
Q: How do I know when my bread is done?
A: A toothpick inserted in the center should come out clean or with just a few moist crumbs attached. Be sure not to open the oven too early, though, as this can affect the rise.
Nutritional Info (optional)
You can approximate your nutritional information with the ingredients you’ve selected, but keep in mind this might vary based on your substitutions!
Thank you so much for joining me today in the kitchen! I hope you feel inspired and ready to whip up this Chocolate Pumpkin Bread wherever you are. Now, grab your apron, tie it on, and let’s make something timeless together. Happy baking, friends!
PrintUltimate Chocolate Pumpkin Bread
A delightful loaf of chocolate pumpkin bread perfect for fall mornings and holiday gatherings, combining cozy flavors of pumpkin and chocolate.
- Prep Time: 15 minutes
- Cook Time: 60 minutes
- Total Time: 75 minutes
- Yield: 8 servings 1x
- Category: Dessert
- Method: Baking
- Cuisine: American
- Diet: Vegetarian
Ingredients
- 1 cup pumpkin puree
- 1 cup sugar
- 1/2 cup vegetable oil
- 2 large eggs
- 1 teaspoon vanilla extract
- 1 1/2 cups all-purpose flour
- 1/2 cup cocoa powder
- 1 teaspoon baking soda
- 1/2 teaspoon baking powder
- 1/2 teaspoon salt
- 1/2 teaspoon ground cinnamon
- 1/2 cup chocolate chips
Instructions
- Preheat your oven to 350°F (175°C).
- Prepare a 9×5 inch loaf pan by greasing it or lining it with parchment paper.
- Mix the pumpkin puree, sugar, vegetable oil, eggs, and vanilla extract in a large bowl until smooth.
- Sift the flour, cocoa powder, baking soda, baking powder, salt, and cinnamon into another bowl.
- Combine the dry mixture into the wet mixture gently until no dry spots remain.
- Add the chocolate chips and fold them in evenly.
- Pour the batter into the prepared loaf pan and smooth the top.
- Bake for 50-60 minutes or until a toothpick inserted comes out clean.
- Cool in the pan for 10 minutes before transferring to a wire rack.
Notes
Serve with a drizzle of honey or whipped cream, and enjoy with coffee or chai.
Nutrition
- Serving Size: 1 slice
- Calories: 250
- Sugar: 15g
- Sodium: 180mg
- Fat: 10g
- Saturated Fat: 1.5g
- Unsaturated Fat: 8g
- Trans Fat: 0g
- Carbohydrates: 35g
- Fiber: 3g
- Protein: 4g
- Cholesterol: 25mg
Keywords: chocolate, pumpkin, bread, fall, dessert
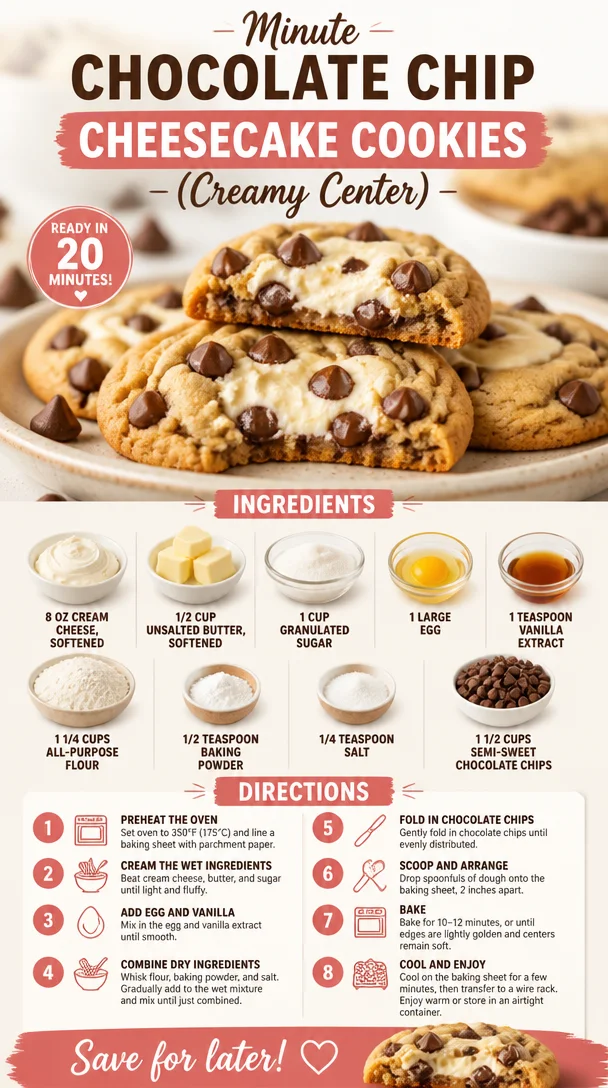
Minute Chocolate Chip Cheesecake Cookies (Creamy Center)
Indulge in Delight: Chocolate Chip Cheesecake Cookies
Hello there, fellow food lover! Are you ready to embark on a delicious journey that brings together the creamy perfection of cheesecake with the comforting charm of cookies? Yes, you heard me right! Today, we’re diving into the world of Chocolate Chip Cheesecake Cookies. This delightful treat combines the best of both worlds and is sure to make your taste buds dance!
Creating these cookies is not just about baking; it’s a walk down memory lane, full of laughter, love, and a sprinkle of culinary magic. So, let’s roll up our sleeves, tie on our aprons, and whip up a batch of these irresistible cookies that’ll have your friends and family coming back for seconds—if not thirds!
My Culinary Journey with Cookies
Let me take you back to one of my fondest childhood memories. It was a sunny Saturday afternoon, and my mom and I were in the kitchen, surrounded by a colorful array of ingredients. I can still picture the kitchen filled with the sweet aroma of vanilla and melting chocolate. We were on a mission to create something spectacular for that night’s family gathering.
Mom had her old, trusty recipe book out, flipping through the yellowed pages, when she suddenly exclaimed, “What do you think about combining cheesecake with cookies?” My eyes lit up! I had always loved cookie dough straight from the bowl, and cheesecake was my ultimate weakness. To my delight, we started mixing, measuring, and laughing our way to a delightful concoction.
After a few experimental batches and some epic kitchen fails (like the time we forgot the baking powder), we finally perfected it: the Chocolate Chip Cheesecake Cookie. My family raved about them, claiming they were the best cookies they had ever tasted! This recipe became a staple in our household, and every time I make them, I’m reminded of those joyful moments spent in the kitchen with my mom.
Ingredients You’ll Need
Let’s gather our ingredients for these scrumptious cookies! Here’s what you’ll need:
-
8 oz cream cheese (softened)
This rich and creamy base adds the cheesecake element to our cookies. If you’re looking for a lighter version, try using Neufchâtel cheese. It offers a similar taste with less fat! -
1/2 cup unsalted butter (softened)
Butter brings flavor and creates that delightful melt-in-your-mouth texture. You can substitute with coconut oil for a dairy-free option! -
1 cup granulated sugar
Sweetness is key! This helps to balance the tanginess of the cream cheese. You could swap it with brown sugar for a hint of molasses flavor or use coconut sugar for a healthier alternative. -
1 large egg
The egg binds everything together beautifully. If you need an egg substitute, a flax egg (1 tablespoon ground flaxseed mixed with 2.5 tablespoons water) works well! -
1 teaspoon vanilla extract
Vanilla adds depth and warmth to the cookies. If you want to change it up, almond extract can add a lovely twist! -
1 1/4 cups all-purpose flour
This is the backbone of our cookie. For a gluten-free option, try using a 1:1 gluten-free baking mix. -
1/2 teaspoon baking powder
This helps our cookies rise and gives them that perfect fluffiness. For a bit of a twist, consider using baking soda for a different texture! -
1/4 teaspoon salt
A pinch of salt enhances all the flavors in the cookies. You can use sea salt for a touch of gourmet! -
1 1/2 cups semi-sweet chocolate chips
These beauties are the cherry on top! Feel free to swap for dark chocolate chips, white chocolate, or even butterscotch for a fun variation.
Baking Up a Storm: Step-by-Step Instructions
Now, let’s bake these beauties! Follow these steps, and you’ll have perfectly decadent Chocolate Chip Cheesecake Cookies in no time.
-
Preheat your oven
Let’s get the oven warmed up to 350°F (175°C). Preheating is critical because it ensures your cookies bake evenly and develop that amazing texture! -
Cream the butter and cream cheese
In a large mixing bowl, beat together the softened butter and cream cheese until smooth and creamy. This will take about 2-3 minutes. Make sure to scrape down the sides so everything is mixed evenly. Pro tip: Use a hand mixer or a stand mixer for a perfectly fluffy texture. -
Add sugar and egg
Gradually add the granulated sugar to the creamed mixture, continuing to beat until it’s light and fluffy. Then, add in the egg and vanilla extract. Mix until well combined. Your batter should have a silky smooth consistency now! -
Combine the dry ingredients
In a separate bowl, whisk together the flour, baking powder, and salt. This step ensures that the baking powder is evenly distributed and prevents any bitter bites in your cookies. -
Gradually add dry to wet
Slowly mix the dry ingredients into the wet mixture, stirring until just combined. Be careful not to overmix; a few floury pockets are okay! This will keep your cookies tender. -
Fold in the chocolate chips
Now comes the fun part! Gently fold in the chocolate chips until they’re evenly distributed throughout the dough. Do taste the dough! That’s a must! -
Scoop and bake
Using a cookie scoop or tablespoon, drop rounded balls of dough onto a lined baking sheet, spacing them about 2 inches apart. Bake in your preheated oven for about 12-15 minutes, or until the edges are lightly golden. They might look slightly underbaked, but trust me—this is where the magic happens! They’ll continue to cook as they cool. -
Cool and enjoy
Let the cookies cool on the baking sheet for about 5 minutes before transferring them to a wire rack to cool completely. This waiting period allows them to set up just right!
Serving Suggestions
When it comes to serving, these cookies are delightful on their own, but why not elevate the moment? Serve them warm with a scoop of vanilla ice cream on top for the ultimate dessert experience! Drizzle with a bit of chocolate sauce or even a dusting of powdered sugar to make them even more charming.
If you’re presenting them at a dinner party, stack them on a beautiful platter and watch the compliments roll in. Trust me; they’ll be the centerpiece of your dessert table!
Recipe Variations
Here are a few fun twists to keep things exciting:
- Nutty Delight: Stir in some chopped walnuts or pecans for an added crunch.
- Spiced Twist: Add a dash of cinnamon or pumpkin spice to the dough for a seasonal touch.
- Fragrant Citrus: Stir in some lemon or orange zest for a bright, citrusy flavor that cuts through the richness.
- Decadent Fudge: For an ultra-rich treat, swap half of the chocolate chips for brownie bits!
- Gluten-Free: Use a gluten-free flour blend in place of all-purpose flour, and you’re all set!
Chef’s Notes
Every time I whip up these Chocolate Chip Cheesecake Cookies, I’m reminded of the laughter-filled afternoons with my mom. It’s amazing how a simple recipe can hold such heartwarming memories! Over the years, I’ve played around with different flavors and textures, but the classic version remains unbeatable.
Once, I even tried incorporating espresso powder for a mocha twist, and they vanished within minutes! I have to say, sharing these cookies with loved ones and seeing their faces light up is the real joy of cooking.
FAQs and Troubleshooting
Q1: My cookies flattened out too much! What went wrong?
A: Flattening can happen for a few reasons! Make sure your butter and cream cheese are at room temperature, not overly melted. Additionally, ensure you’re measuring your flour correctly—too little flour can lead to flat cookies.
Q2: Can I store these cookies?
A: Absolutely! Store your cookies in an airtight container at room temperature for up to a week. They also freeze well for up to three months. Just thaw them at room temperature when you’re ready to enjoy!
Q3: Why are my cookies doughy in the middle?
A: If your cookies are doughy in the center, they may not have baked long enough. Always keep an eye on them in the last few minutes of baking; they should be slightly golden around the edges but soft in the middle.
Q4: Can I use lower-fat cream cheese?
A: Yes, you can! Just keep in mind that the texture may be slightly different, but the flavor will still shine through.
Indulging in Goodness
These Chocolate Chip Cheesecake Cookies are more than just cookies; they’re a celebration of flavors and memories. Whether you’re whipping them up for family, friends, or simply indulging by yourself (no judgment here!), I hope you find joy in every bite.
So, let’s get to baking! Just remember, it’s not just about the final product; it’s about the experience. Grab your apron, have fun, and create some lovely moments in your kitchen.
Happy baking, and let’s make some delicious memories!
PrintChocolate Chip Cheesecake Cookies
Delightful cookies combining the creamy essence of cheesecake with the classic charm of chocolate chip cookies.
- Prep Time: 15 minutes
- Cook Time: 15 minutes
- Total Time: 30 minutes
- Yield: 24 cookies 1x
- Category: Dessert
- Method: Baking
- Cuisine: American
- Diet: Vegetarian
Ingredients
- 8 oz cream cheese (softened)
- 1/2 cup unsalted butter (softened)
- 1 cup granulated sugar
- 1 large egg
- 1 teaspoon vanilla extract
- 1 1/4 cups all-purpose flour
- 1/2 teaspoon baking powder
- 1/4 teaspoon salt
- 1 1/2 cups semi-sweet chocolate chips
Instructions
- Preheat your oven to 350°F (175°C).
- Cream the butter and cream cheese in a large mixing bowl until smooth and creamy.
- Add sugar and egg, mixing until light and fluffy.
- Combine the dry ingredients in a separate bowl.
- Gradually add the dry mixture to the wet mixture, stirring until just combined.
- Fold in the chocolate chips until evenly distributed.
- Scoop rounded balls of dough onto a lined baking sheet, spacing them about 2 inches apart.
- Bake for 12-15 minutes, or until edges are lightly golden.
- Cool on the baking sheet for 5 minutes, then transfer to a wire rack.
Notes
Serve warm with vanilla ice cream or a drizzle of chocolate sauce for an extra treat.
Nutrition
- Serving Size: 1 cookie
- Calories: 170
- Sugar: 10g
- Sodium: 150mg
- Fat: 8g
- Saturated Fat: 4g
- Unsaturated Fat: 3g
- Trans Fat: 0g
- Carbohydrates: 21g
- Fiber: 1g
- Protein: 2g
- Cholesterol: 25mg
Keywords: chocolate chip cookies, cheesecake cookies, dessert recipes