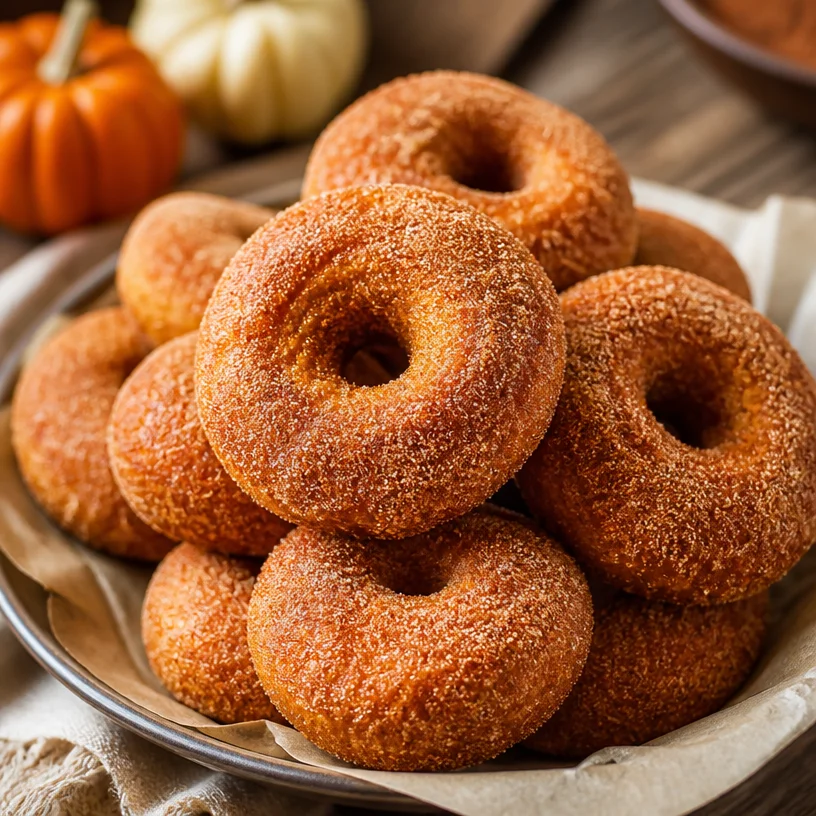
Min Gluten-Free Baked Pumpkin Donuts for Fall Harvest
Baked Pumpkin Donuts: A Slice of Autumn Happiness
Hello, fellow food lovers! I’m so thrilled to share this delightful autumn recipe that’s sure to warm your heart and home—Baked Pumpkin Donuts! There’s something truly special about the aroma of spices wafting through your kitchen, especially as the leaves turn and the air gets crisp. Whether it’s a chilly morning, a festive gathering, or just a cozy afternoon, these gluten-free donuts will be the perfect sweet treat to make you smile.
Now, you might be wondering why I chose to whip up donuts instead of something traditional like cookies or cake. Well, donuts hold a special place in my heart, transporting me back to my childhood when my family would take Sunday morning trips to the local bakery. The sights, sounds, and smells were always so magical. Everyone would be buzzing with excitement, eagerly waiting to pick out their favorite flavors, and I could never resist the spiced pumpkin options!
Fast forward to today, and I’ve developed my own spin on those nostalgic treats. My Baked Pumpkin Donuts are an elevated yet approachable version that’s incredibly straightforward to make. With just the right amount of sweetness, a hint of spice, and that lovely pumpkin flavor, these donuts are soft, moist, and downright delightful—perfect for sharing!
Personal Story
One of my fondest memories involving donuts is pulling them out of the oven on a crisp fall morning, the whole house filling with that cozy scent of pumpkin and warm spices. I remember the first time I made these baked wonders. It was a rainy Saturday, and I was craving something special but didn’t want to brave the storm to hit up the bakery. I gathered the ingredients and set to work, and as I poured the batter into the donut pan, I remembered those Sunday mornings from my childhood—something about that batter reminded me of the unpredictable joy of still-warm donuts with a hot cup of cider.
When those donuts emerged from the oven, golden and fluffy, I knew I had captured that magical moment once again—one bite was all it took to rekindle all those warm feelings. Whether dressed in a simple sprinkle of cinnamon sugar or a drizzle of glaze, these donuts are perfect for enjoying with friends or savoring in solitude with your favorite book. Now, let’s get to creating this delightful treat together!
Ingredients
Here’s what you’ll need to whip up a batch of these scrumptious Baked Pumpkin Donuts:
- 1.5 cups canned pumpkin puree: Make sure you choose pure pumpkin puree, not the sweetened pie filling. This will give you that rich, authentic pumpkin flavor without the extra sugar.
- 4 large eggs (at room temperature): Ensure your eggs are at room temperature for easy mixing and better incorporation into the batter.
- 1/4 cup melted coconut oil: This adds richness and moistness! If you prefer, you can substitute with melted butter or even your favorite neutral oil.
- 1.5 cups granulated sugar: Perfectly sweetens the donuts. You can try coconut sugar for a healthier twist, but it may alter the overall color.
- 1.5 teaspoons baking powder: This helps your donuts rise beautifully. Make sure it’s fresh for the best results!
- 1.5 teaspoons pumpkin pie spice: A vital player in the flavor department! You can make your own blend or sub in cinnamon if needed.
- 1/2 teaspoon ground cinnamon: Because who doesn’t love a little extra warmth?
- 1/4 teaspoon ground nutmeg: This spice adds depth and a comforting warmth that’s quintessentially fall!
- 1/4 teaspoon salt: A little salt enhances all those sweet flavors perfectly.
- 1 + 3/4 cup gluten-free all-purpose flour: Ensures that everyone can enjoy these donuts! Opt for a blend with xanthan gum for the best texture.
- 1/2 teaspoon cornstarch: This helps to create a lighter crumb. You can swap it for arrowroot powder if needed.
- 1 cup granulated sugar (for coating): To roll the donuts in after baking for that extra sweetness.
- 1/4 cup ground cinnamon (for coating): Mix this with the sugar for a classic touch! You’ll feel like a kid again with each bite.
- Melted butter (optional): For brushing the donuts before rolling in the sugar-cinnamon mixture, this adds extra indulgence and helps the coating stick.
Let’s dive into the cooking process, shall we?
Step-by-Step Instructions
1. Preheat and Prepare
Start by preheating your oven to 350°F (175°C). Grease your donut pan with a little coconut oil or non-stick cooking spray. This is key to ensuring your donuts come out perfectly without sticking—nobody likes a donut that won’t release!
2. Mix the Wet Ingredients
In a large mixing bowl, combine the canned pumpkin puree, eggs, and melted coconut oil. Whisk them together until smooth, creating a lovely, creamy base. Tip: I love using a handheld whisk here—it’s quick and gets the job done!
3. Add the Sugars
Next, add in the granulated sugar and mix until combined. The mixture should start to feel slightly thick and luscious. That’s what we want—this is going to lead to moist donuts!
4. Combine the Dry Ingredients
In a separate bowl, whisk together the gluten-free all-purpose flour, baking powder, pumpkin pie spice, ground cinnamon, ground nutmeg, cornstarch, and salt. Mixing these dry ingredients first helps to evenly distribute the baking powder and spices, ensuring uniform flavor throughout.
5. Bring It All Together
Now, gradually add the dry mixture to the wet ingredients, stirring just until combined. Be careful not to overmix here! A few lumps are perfectly fine. You want a soft, thick batter that holds its shape.
6. Fill the Donut Pan
Using a piping bag or a spoon, fill each cavity in the donut pan about 3/4 of the way full. This is where the magic happens, so don’t skimp on the batter!
7. Bake Away!
Place the pan in your preheated oven and bake for 15-18 minutes, or until a toothpick inserted into the center comes out clean. The sweet aroma will start to fill your kitchen, luring everyone in!
8. Cool and Coat
Once they’re out of the oven, let the donuts cool in the pan for about 5 minutes before transferring them to a wire rack. This is important to avoid soggy bottoms! While they’re still warm, brush them lightly with melted butter (if using) and roll them in the sugar-cinnamon mixture.
Serving Suggestions
These gorgeous donuts are best enjoyed fresh! Serve them warm, dusted with cinnamon sugar, along with a hot cup of coffee or a cozy mug of apple cider. Feel free to arrange them on a beautiful cake stand for a lovely presentation at your next brunch, or simply enjoy them as a sweet little pick-me-up during the day!
Recipe Variations
Looking to shake things up? Here are a few creative twists you might enjoy:
- Maple Glaze: Instead of cinnamon sugar, drizzle with a warm maple glaze made from powdered sugar and maple syrup for an extra touch of sweetness.
- Chocolate Drizzle: Top with melted dark chocolate for a decadent twist on your pumpkin delights.
- Nutty Crunch: Add chopped pecans or walnuts to the batter for a lovely crunch and nutty flavor.
- Fillings: Pipe in some cream cheese frosting or a spiced apple filling for a delightful surprise in each donut.
- Dairy-Free: Keep it dairy-free by substituting the butter and eggs for vegan alternatives like aquafaba and plant-based butter.
Chef’s Notes
Pumpkin donuts have come a long way for me! I experimented with various recipes, swapping this and that, before landing on this delightfully gluten-free version. The first time I baked these, I thought I’d lost them to the dark abyss of the oven—half of them stuck to the pan! A quick fix with a little more greasing and the right flour made a world of difference. Now, they pop right out, and every bite takes me back to those cherished bakery memories.
FAQs and Troubleshooting
1. Can I use fresh pumpkin instead of canned?
Absolutely! Just make sure to puree it until smooth and slightly reduce the liquid to avoid a watery batter.
2. Why are my donuts dense?
Overmixing or not using fresh baking powder can lead to dense donuts. Be gentle when combining the wet and dry ingredients.
3. Do I have to use a donut pan?
If you don’t have one, you can use a muffin tin! Just adjust the baking time a bit—muffins may take a few more minutes.
4. Can I freeze these donuts?
Yes! After they’ve cooled, wrap them tightly and store them in the freezer. Thaw at room temperature when you’re ready to enjoy again!
Nutritional Info
While I typically focus on flavorful recipes, I know nutritional value is important too! These baked pumpkin donuts are:
- Gluten-Free: Perfect for those with gluten sensitivities.
- Rich in Fiber: Thanks to the pumpkin, they offer a healthy dose of fiber.
- Low in Fat: With our baked method versus frying, you’re treating yourself to a lighter donut.
So, there you have it! My beloved Baked Pumpkin Donuts are not just a recipe but a heartfelt way to connect with joyful memories and those you love. I hope you enjoy making them as much as I do—so tie on that apron and let the baking begin!
PrintBaked Pumpkin Donuts
Delightful gluten-free baked pumpkin donuts that capture the essence of autumn with spices and pumpkin flavor.
- Prep Time: 15 minutes
- Cook Time: 18 minutes
- Total Time: 33 minutes
- Yield: 12 servings 1x
- Category: Dessert
- Method: Baking
- Cuisine: American
- Diet: Gluten-Free
Ingredients
- 1.5 cups canned pumpkin puree
- 4 large eggs (at room temperature)
- 1/4 cup melted coconut oil
- 1.5 cups granulated sugar
- 1.5 teaspoons baking powder
- 1.5 teaspoons pumpkin pie spice
- 1/2 teaspoon ground cinnamon
- 1/4 teaspoon ground nutmeg
- 1/4 teaspoon salt
- 1 + 3/4 cup gluten-free all-purpose flour
- 1/2 teaspoon cornstarch
- 1 cup granulated sugar (for coating)
- 1/4 cup ground cinnamon (for coating)
- Melted butter (optional)
Instructions
- Preheat your oven to 350°F (175°C) and grease your donut pan.
- Combine the pumpkin puree, eggs, and melted coconut oil in a large mixing bowl and whisk until smooth.
- Add in the granulated sugar and mix until combined.
- Whisk together the gluten-free flour, baking powder, pumpkin pie spice, ground cinnamon, ground nutmeg, cornstarch, and salt in a separate bowl.
- Gradually add the dry mixture to the wet ingredients, stirring just until combined.
- Fill each cavity of the donut pan about 3/4 of the way full with batter.
- Bake for 15-18 minutes or until a toothpick comes out clean.
- Cool in the pan for 5 minutes before transferring to a wire rack and roll in the sugar-cinnamon mixture while warm.
Notes
These donuts are best enjoyed fresh, served warm with a sprinkle of cinnamon sugar.
Nutrition
- Serving Size: 1 donut
- Calories: 180
- Sugar: 20g
- Sodium: 200mg
- Fat: 7g
- Saturated Fat: 4g
- Unsaturated Fat: 3g
- Trans Fat: 0g
- Carbohydrates: 26g
- Fiber: 2g
- Protein: 3g
- Cholesterol: 50mg
Keywords: pumpkin donuts, gluten-free donuts, autumn recipes, baked donuts, fall desserts

Ingredient Blueberry Lemon Popsicles: Quick Summer Treat
Cool Off with Homemade Blueberry Lemon Popsicles: A Delightful Summer Treat
Summer is here, and you know what that means — it’s time to embrace the sun, relax by the pool, and indulge in some refreshing homemade treats! Today, I want to share with you one of my all-time favorite recipes: Blueberry Lemon Popsicles. Picture this: a sunny afternoon, the scent of fresh blueberries wafting through the kitchen, and the anticipation of biting into a creamy, tangy popsicle. Doesn’t that sound delightful?
These popsicles aren’t just a treat; they’re an experience. Made with juicy blueberries and the zesty kick of fresh lemon juice, they strike the perfect balance of sweet and tart. And the best part? They are incredibly simple to make and can be enjoyed by the whole family. Plus, you can get a little creative with them and make them your own! So, grab your popsicle molds and let’s dive into the delicious world of Blueberry Lemon Popsicles.
A Nostalgic Memory
I have such fond memories of summer afternoons growing up. My siblings and I would dash out of the house, giggling and shouting as we raced to the ice cream truck hovering just around the corner. But my favorite treats weren’t always those store-bought ice cream bars — no, my heart belonged to the homemade popsicles my mom would whip up. She would toss together fresh fruits with the absolute minimum of ingredients and freeze them in quirky molds. The process was always messy and so much fun; we’d blend and pour, smothering our hands in sticky juiciness.
As we would sit on our porch or run through the sprinklers, those popsicles were the perfect antidote to the summer heat. They were sweet, flavorful, and full of love — just like these Blueberry Lemon Popsicles. Each time I make them, it brings back that rush of nostalgia, and I can’t help but smile at the memories. Now, I’m passing down this delightful tradition to you, because everyone deserves a favorite popsicle recipe in their life!
Ingredients
-
3 cups Blueberries (fresh or frozen): Blueberries are the star of the show here, providing that sweet burst of flavor. If you’re using frozen blueberries, they’ll work just as well. I often like one cup frozen and two cups fresh for that perfect balance of flavors and textures.
-
2 Tablespoons Fresh Lemon Juice (½ of a lemon): Freshly squeezed lemon juice brightens the popsicles and adds a refreshing tartness that perfectly complements the sweetness of the blueberries. You can adjust this amount based on your taste preferences!
-
¼-⅓ cup Honey (depending on how sweet your berries are): Honey adds a natural sweetness, but it’s flexible based on the berries you’re using. Feel free to swap with maple syrup or agave for a vegan option!
Step-by-Step Instructions
-
Prep Your Ingredients: Start by rinsing your fresh blueberries under cool water. If you’re using frozen blueberries, there’s no need to thaw them — they’ll blend just perfectly frozen! Squeeze the juice from your lemon and set it all aside.
-
Blend It All Together: In a blender, combine your blueberries, fresh lemon juice, and honey. Blend on high for about 30 seconds or until you achieve a smooth consistency. If you like a little chunkiness (I sure do!), pulse a few times to leave some blueberry bits intact.
-
Taste & Adjust: Here’s where the magic happens! Taste your mixture to see if it needs more sweetness or lemon — everyone’s taste buds are different! If it’s sweet enough but still lacking that zesty kick, squeeze in a little more lemon juice.
-
Fill the Molds: Carefully pour your blueberry mixture into popsicle molds, leaving a bit of space at the top for expansion while freezing (trust me, that’s a fun mess you want to avoid!). You can add in extra blueberries or lemon zest here if you’re feeling fancy.
-
Insert Sticks: If your molds have a slot for popsicle sticks, place them in now. If they don’t, just freeze them about 1-2 hours until semi-firm before inserting the sticks. This ensures they stay standing without sinking!
-
Freeze: Pop those molds into the freezer for at least 4-6 hours, or overnight if you can hold off on that sweet, refreshing treat!
-
Unmold the Popsicles: Once frozen solid, it’s time for the fun part! Run warm water over the outside of your molds for a few seconds to loosen them up. Gently pull them out — voilà, your popsicles are ready to enjoy!
Serving Suggestions
These Blueberry Lemon Popsicles are lovely served on their own, but feel free to get creative! Serve them in fun bowls or on colorful napkins, perhaps with a sprig of mint for a pop of color. They also pair wonderfully with a sparkling lemonade for those hot summer gatherings; it’s all about setting the mood!
Recipe Variations
- Berry Blend Pops: Swap out some blueberries for raspberries or strawberries for a mixed berry twist.
- Yogurt Pops: For a creamy texture, blend in some Greek yogurt or coconut yogurt for a nourishing treat.
- Herbed Lemon Pops: Infuse with a bit of fresh basil or mint for an aromatic touch. It’s wonderfully refreshing!
- Lower Sugar Option: Replace honey with mashed ripe bananas or use stevia for a lower-calorie treat.
- Coconut Cream: Add a layer of coconut cream before pouring in the blueberry mixture for a tropical flair.
Chef’s Notes
Looking back, I can’t help but chuckle at the first time I attempted these popsicles. I was overzealous with the lemon juice, thinking more would elevate the flavor — let’s just say “pucker up” doesn’t quite express the experience! Over time, I’ve learned that balance is key, and I’m excited to share that knowledge with you.
This recipe has evolved into a family favorite, as it’s easily adaptable and can cater to everyone’s preferences. I’ve made them with other fruits, drizzled melted chocolate on top, and had so much fun experimenting — each batch becomes a delicious creation to enjoy on a sunny day.
FAQs and Troubleshooting
Q: What should I do if my popsies won’t come out of the mold?
A: If your popsicles are stuck, try running warm water over the outside of the mold for a few seconds. This will help loosen them and make removal a breeze!
Q: Can I use sweetened frozen blueberries?
A: Absolutely! Just be cautious with the amount of honey you add, as these might already be sweet enough.
Q: How long do these popsicles last in the freezer?
A: They typically stay good for about 1-2 months if stored properly in an airtight container, but let’s be honest — they’ll be gone long before that!
Q: Can I use something other than honey for sweetness?
A: Yes, you can use maple syrup, agave nectar, or even coconut sugar! Just keep in mind it may slightly alter the flavor profile.
Nutritional Info
Per popsicle (based on 10 servings):
- Calories: 55
- Total Fat: 1g
- Carbohydrates: 14g
- Sugars: 11g
- Protein: <1g
There you have it! The ultimate guide to making scrumptious Blueberry Lemon Popsicles that are sure to bring joy and refreshment to your summer days. I can’t wait for you to try this recipe and create your special memories around the table — or in the sun, I should say. Happy popsicle-making, friends! 🌞🍦
PrintBlueberry Lemon Popsicles

A refreshing homemade treat made with juicy blueberries and zesty lemon juice, perfect for hot summer days.
- Prep Time: 10 minutes
- Cook Time: 0 minutes
- Total Time: 360 minutes
- Yield: 10 servings 1x
- Category: Dessert
- Method: Freezing
- Cuisine: American
- Diet: Vegetarian
Ingredients
- 3 cups Blueberries (fresh or frozen)
- 2 Tablespoons Fresh Lemon Juice
- ¼–⅓ cup Honey
Instructions
- Prep your ingredients: Start by rinsing your fresh blueberries under cool water. If you’re using frozen blueberries, there’s no need to thaw them.
- Blend it all together: In a blender, combine your blueberries, fresh lemon juice, and honey. Blend on high for about 30 seconds.
- Taste & adjust: Taste your mixture to see if it needs more sweetness or lemon.
- Fill the molds: Carefully pour your blueberry mixture into popsicle molds, leaving space at the top for expansion.
- Insert sticks: If your molds have a slot for popsicle sticks, place them in now.
- Freeze: Pop those molds into the freezer for at least 4-6 hours.
- Unmold the popsicles: Once frozen solid, run warm water over the outside of your molds for a few seconds.
Notes
These popsicles can be served on their own or paired with a sparkling lemonade for summer gatherings. Experiment with ingredients for different flavors!
Nutrition
- Serving Size: 1 popsicle
- Calories: 55
- Sugar: 11g
- Sodium: 1mg
- Fat: 1g
- Saturated Fat: 0g
- Unsaturated Fat: 0g
- Trans Fat: 0g
- Carbohydrates: 14g
- Fiber: 1g
- Protein: <1g
- Cholesterol: 0mg
Keywords: popsicles, blueberry, lemon, summer treat, homemade, dessert
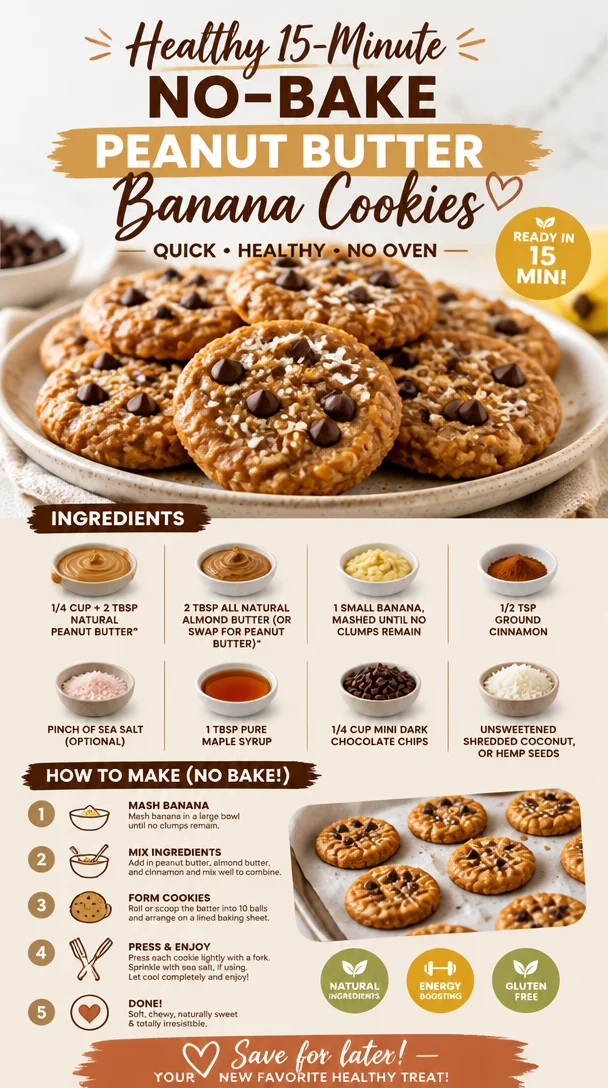
Healthy 15-Minute No-Bake Peanut Butter Banana Cookies
Healthy Peanut Butter Banana Cookies: A Sweet and Nutritious Treat
Welcome, fellow food enthusiasts! Today, I’m thrilled to share one of my absolute favorite recipes that’s perfect for anyone seeking a delicious treat without the guilt—Healthy Peanut Butter Banana Cookies! These cookies are not only a delightful snack but also packed with wholesome ingredients that are sure to charm your taste buds.
Imagine sinking your teeth into a soft, chewy cookie that tastes indulgent yet is nutritious enough to enjoy any time of the day. The combination of natural peanut butter, ripe bananas, and a hint of cinnamon creates a nostalgic flavor that reminds me of cozy afternoon baking sessions in my grandma’s kitchen. With just a few simple ingredients, you can whip up a batch that’s perfect for school lunches, post-workout snacks, or a midday treat that will keep you energized!
The best part? This cookie recipe is gluten-free, dairy-free, and completely customizable to suit your dietary preferences. So grab your apron because we’re about to dive into a fun kitchen adventure that will leave your home smelling delicious and your heart feeling full!
My Sweet Connection to These Cookies
I can vividly recall the first time I experimented with peanut butter and banana cookies. It was a rainy Saturday afternoon, and my cozy kitchen was filled with the scent of freshly baked goods. I had just finished an intense workout and wanted something satisfying yet healthy. Inspired by my childhood love for peanut butter sandwiches, I wanted to create a cookie that could indulge my sweet tooth without all the sugar.
After a few rounds of trial and error (and a fair number of taste tests that I graciously conducted on my unsuspecting friends), I finally landed on the perfect blend. This memory holds a special place in my heart because it encapsulates the joy of cooking—transforming simple ingredients into a delightful creation that brings people together.
Every time I make these cookies, I’m reminded of how food can connect us—whether it’s sharing them with friends or savoring a solitary moment with a warm cookie and a glass of milk. Now, let’s gather our ingredients and get cooking!
Ingredients
Here’s what you’ll need for these scrumptious Healthy Peanut Butter Banana Cookies:
-
1/4 cup + 2 tablespoons natural peanut butter
Look for peanut butter that’s free of added sugars and oils. You can substitute with almond butter if you’re going nut-free! -
2 tablespoons all-natural almond butter (or swap for peanut butter)
Almond butter adds a lovely creaminess and complements the peanut flavor beautifully. Any nut butter works wonders here! -
1 small banana, mashed until no clumps remain
Use a ripe banana; the more speckles the better! This not only sweetens the cookies but also helps bind everything together. -
1/2 teaspoon ground cinnamon
This magic spice adds warmth and a hint of sweetness—plus, it’s great for metabolism! -
Pinch of sea salt (optional)
A little pinch can elevate flavors. Just a touch will do; you don’t want it too salty! -
1 tablespoon pure maple syrup
Pure maple syrup adds an extra layer of sweetness. You can replace it with honey or agave syrup for a vegan alternative. -
1/4 cup mini dark chocolate chips
These are optional but highly recommended for a touch of indulgence—dark chocolate is great for your health in moderation! -
Unsweetened shredded coconut or hemp seeds
These add texture and nutrients. Feel free to skip them, but they make for an interesting addition!
Step-by-Step Instructions
Now that we’ve gathered our ingredients, it’s time to put everything together! Follow these steps carefully, and I promise you’ll end up with a batch of cookies that will disappear in no time.
-
Preheat Your Oven
Preheat your oven to 350°F (175°C). This is crucial for getting those cookies to bake evenly. If you skip this step, your cookies might spread too much in the oven. -
Mix Your Wet Ingredients
In a medium-sized mixing bowl, combine the peanut butter, almond butter, mashed banana, and maple syrup. Use a fork or spatula to mix everything until it’s creamy and well-blended. Don’t worry if it’s thick; that’s exactly what you want! -
Incorporate the Dry Ingredients
Add the ground cinnamon and pinch of sea salt to the wet mixture. Stir to combine. If you’re feelin’ fancy, you can sift the cinnamon—though I usually skip this step because, let’s be real, I’m all about saving time! -
Fold in Your Chocolate Chips
Gently fold in the mini dark chocolate chips (and shredded coconut or hemp seeds, if you’re using them). The goal is to incorporate these ingredients without overmixing the batter. -
Scoop and Shape the Dough
Using a spoon or a cookie scoop, place heaping tablespoons of dough onto a parchment-lined baking sheet. Be sure to leave some space between each scoop since they’ll spread slightly while baking. No need to flatten them out; they’ll spread nicely in the oven. -
Bake to Perfection
Place your baking sheet in the oven and bake for about 10-12 minutes or until the edges are golden brown. Keep an eye on them; different ovens can vary! -
Cool and Enjoy
Once baked, let them cool on the baking sheet for a few minutes before transferring them to a wire rack to cool completely. This allows them to firm up a bit before you dive in. Trust me, the wait is worth it!
Serving Suggestions
Serve these delightful cookies warm or at room temperature. Create a cute cookie platter adorned with fresh fruits and nuts for a lovely presentation. Pair them with a glass of almond milk or your favorite plant-based yogurt for a well-rounded treat. You can also enjoy them alongside a cup of herbal tea for a cozy afternoon snack!
Recipe Variations
Feel free to get creative with these cookies! Here are some ideas to mix things up:
- Nut-Free Version: Swap out both the peanut and almond butter for sun butter or tahini.
- Add Some Crunch: Mix in chopped nuts like walnuts or pecans for an extra crunch.
- Flavor Twists: Add vanilla extract or replace cinnamon with pumpkin spice for a seasonal twist.
- Protein Boost: Toss in a scoop of your favorite protein powder to make them a post-workout snack.
- Dried Fruits: Experiment with dried cranberries or raisins for added sweetness.
Chef’s Notes
Each time I make these cookies, I’m reminded of how versatile and forgiving this recipe is! The first time I made them, I accidentally used crunchy peanut butter instead of creamy. To my surprise, it turned out quite delicious, adding a delightful texture.
Also, these cookies tend to be less sweet than your average cookie, which is part of their charm. If you prefer sweet treats, you might want to add a tad more maple syrup or throw in more chocolate chips. Kitchen experimentation is all part of the fun, right?
FAQs and Troubleshooting
1. My cookies spread too much! What happened?
This can happen if your dough was too warm when placed in the oven or if you didn’t chill it beforehand. If you find your dough runs a little soft, you can refrigerate it for about 30 minutes before scooping.
2. Can I make these cookies vegan?
Absolutely! Just make sure to use maple syrup and ensure your chocolate chips are dairy-free. Both of these swaps keep the cookies plant-based.
3. How can I make these cookies chewier?
If you like a chewier texture, try adding an extra banana or a dash of almond milk to the dough.
4. Can I freeze these cookies?
Yes! You can freeze the cookies either before baking or after. Simply place them in a freezer bag, and they’ll last up to three months. Thaw them in the fridge overnight before enjoying.
Nutritional Info
These cookies are not just delicious—they’re also a healthier alternative to traditional cookies. Packed with protein and healthy fats, they can be a great post-workout snack or a quick breakfast on the go. The exact nutritional values can vary, but here’s an estimate per cookie (based on a batch of 12):
- Calories: 100
- Protein: 3g
- Carbohydrates: 12g
- Fat: 5g
- Fiber: 1g
Conclusion
Healthy Peanut Butter Banana Cookies are the perfect way to satisfy your sweet cravings while keeping your nutrition on track. With their delightful flavor and simple preparation, these cookies are a staple in my kitchen, and I hope they become a favorite in yours too!
So, roll up those sleeves, tie on your apron, and let’s bake up some delicious memories together. Don’t forget to share your cookie creations with your loved ones—or keep them all to yourself. Happy baking!
PrintHealthy Peanut Butter Banana Cookies
Delicious and nutritious treat packed with wholesome ingredients, perfect for any time of the day!
- Prep Time: 10 minutes
- Cook Time: 12 minutes
- Total Time: 22 minutes
- Yield: 12 cookies 1x
- Category: Snack
- Method: Baking
- Cuisine: American
- Diet: Gluten-Free, Dairy-Free, Vegan
Ingredients
- 1/4 cup + 2 tablespoons natural peanut butter
- 2 tablespoons all-natural almond butter
- 1 small banana, mashed until no clumps remain
- 1/2 teaspoon ground cinnamon
- Pinch of sea salt (optional)
- 1 tablespoon pure maple syrup
- 1/4 cup mini dark chocolate chips
- Unsweetened shredded coconut or hemp seeds (optional)
Instructions
- Preheat your oven to 350°F (175°C).
- Mix the peanut butter, almond butter, mashed banana, and maple syrup in a medium-sized mixing bowl until creamy and well-blended.
- Incorporate the ground cinnamon and pinch of sea salt into the wet mixture and stir to combine.
- Fold in the mini dark chocolate chips (and shredded coconut or hemp seeds, if using).
- Scoop heaping tablespoons of dough onto a parchment-lined baking sheet, leaving space between each scoop.
- Bake for about 10-12 minutes or until edges are golden brown.
- Cool on the baking sheet for a few minutes before transferring to a wire rack.
Notes
Feel free to customize with different nut butters, add chopped nuts, or experiment with dried fruits.
Nutrition
- Serving Size: 1 cookie
- Calories: 100
- Sugar: 3g
- Sodium: 50mg
- Fat: 5g
- Saturated Fat: 1g
- Unsaturated Fat: 4g
- Trans Fat: 0g
- Carbohydrates: 12g
- Fiber: 1g
- Protein: 3g
- Cholesterol: 0mg
Keywords: cookies, peanut butter, banana, healthy snacks, gluten-free
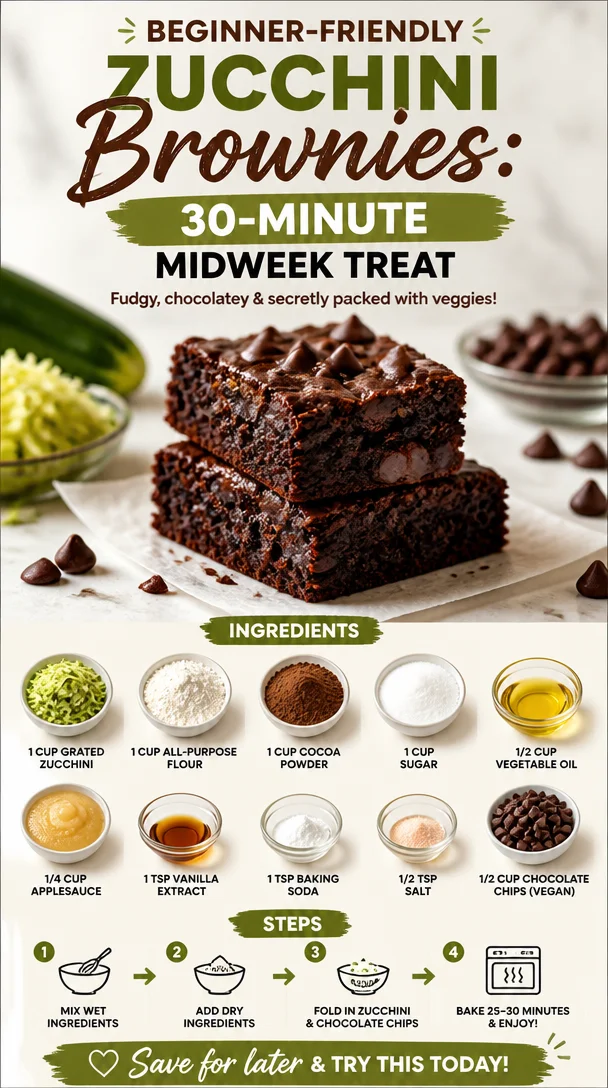
Beginner-friendly Zucchini Brownies: 30-Minute Midweek Treat
Zucchini Brownies: A Deliciously Surprising Treat
Hey there, foodie friends! Are you ready to dive into a dessert that will change the way you think about vegetables? Today, we’re whipping up Zucchini Brownies — a delightful twist on a classic favorite that’s not just indulgent but also surprisingly good for you! Whenever I think of brownies, I can’t help but reminisce about those blissful afternoons spent in my grandmother’s kitchen, sneaking spoonfuls of warm batter from the bowl. It was a sacred ritual that filled the air with sweet, chocolatey goodness.
Brownies have a special place in my heart, and I believe every kitchen should have a go-to brownie recipe. But wait! What if I told you that we could sneak some greens in without compromising that rich chocolaty flavor? That’s right! Zucchini is our secret weapon here, adding moisture and a subtle sweetness while remaining completely undetectable. You might even find yourself in a happy debate over whether zucchini deserves its spot in dessert land.
As we journey through this recipe, I invite you to embrace the unexpected and delight in the whimsical nature of cooking. Grab your apron, gather your ingredients, and let’s create something magical together!
A Little Kitchen Story
Let me take you back to a sunny afternoon in my childhood. Picture this: my grandmother, donned in her favorite apron, exuded warmth as she reigned over her domain — the kitchen. The comforting aroma of chocolate was intoxicating. I stood on a stool beside her, eager to learn her secret brownie techniques. I watched as she combined rich cocoa powder, sugar, and butter, the mixture bubbling joyously in the bowl.
One day, while rummaging through the fridge, she pulled out a surprising addition: zucchini! I was skeptical, to say the least. “Zucchini in brownies? No way!” But her reassuring smile melted my doubts. “Trust me, dear.” And trust her I did! The result was a batch of gooey, fudgy brownies that were every bit as indulgent as they were mysterious.
Now, every time I whip up a batch of Zucchini Brownies, I fondly think of Grandma and her surprising little twist. They’ve become a beloved family recipe, proving that you can sneak in the good stuff while keeping the rich and decadent flavor we all crave. This recipe is about more than just baking; it’s about creating memories and inviting loved ones to partake in your culinary adventures.
Ingredients
Let’s talk about the stars of the show! Here’s what you’ll need to recreate these delightful Zucchini Brownies:
-
1 cup grated zucchini
Zucchini adds moisture and a hint of sweetness without being detectable. You can substitute it with shredded carrots for a different flavor, though the texture may vary slightly. -
1 cup all-purpose flour
A basic but essential ingredient, providing structure. For a gluten-free version, you can use a 1:1 gluten-free flour blend, and the result should still be delightful. -
1 cup cocoa powder
This rich cocoa powder is what gives our brownies that signature chocolate flavor. Use Dutch-processed cocoa for a deeper flavor, or if you’re feeling adventurous, try a blend of dark and regular cocoa! -
1 cup sugar
Sweetness is key in brownies! You can use organic cane sugar, brown sugar for a hint of caramel, or even coconut sugar for a healthier option if you prefer. -
1/2 cup vegetable oil
This keeps the brownies moist and fudgy. You can use melted coconut oil for a wonderful flavor twist, or swap it for unsweetened applesauce for a lighter version, but keep that in mind since it will change the texture slightly. -
1/4 cup applesauce
This adds additional moisture and helps cut down on oil. Feel free to use homemade or store-bought. If you want to keep things simple, just double the vegetable oil. -
1 tsp vanilla extract
Vanilla brings all the flavors together in harmony. Make sure to use real vanilla extract for the best flavor — it makes a big difference! -
1 tsp baking soda
Our leavening agent that will help the brownies rise to the occasion. Don’t substitute with baking powder; they have different leavening properties. -
1/2 tsp salt
A crucial element that enhances all the flavors. It may sound small, but a pinch of salt balances the sweetness beautifully. -
1/2 cup chocolate chips (vegan)
These are the cherry on top! Choose vegan chocolate chips if you’re keeping it dairy-free. You can also use white chocolate chips or nuts for a different flavor profile.
Step-by-Step Instructions
Now that we have our ingredients lined up, let’s dive into the baking process! Trust me, this is going to be a breeze.
-
Preheat Your Oven
Start by preheating your oven to 350°F (175°C). This step is crucial for achieving that perfect fudgy texture in your brownies. While the oven heats up, line an 8-inch square baking pan with parchment paper for easy removal later. -
Prepare the Zucchini
Wash and grate your zucchini; a box grater works wonders here! Don’t worry about peeling it; the skin packs a ton of nutrients. After grating, squeeze out any excess moisture using a clean kitchen towel. This prevents the brownies from getting too soggy. -
Mix the Wet Ingredients
In a large mixing bowl, combine the vegetable oil, applesauce, sugar, and vanilla extract. Whisk them together until it’s smooth and all the ingredients are well combined. Feel free to let loose here — mix with joy! -
Add the Dry Ingredients
Next up, sift in the flour, cocoa powder, baking soda, and salt. Sifting helps prevent clumps and ensures even distribution of the dry ingredients. Gently fold the mixture using a spatula until just combined. Avoid over mixing; we’re aiming for tender brownies here! -
Incorporate the Zucchini and Chocolate Chips
Gently fold in the grated zucchini and 1/2 cup of chocolate chips until evenly distributed. You can reserve a few chips to sprinkle on top for that irresistible melty finish! -
Pour the Mixture into the Baking Pan
Spread the brownie batter evenly in the greased baking pan, using a spatula to smooth out the top. Don’t worry about perfection; those little imperfections add character! -
Bake to Perfection
Slide the pan into the preheated oven and bake for 25-30 minutes or until a toothpick inserted in the center comes out with a few moist crumbs. Remember, it’s better to underbake slightly for a fudgy texture! -
Cool and Serve
Once baked, remove the brownies from the oven and let them cool in the pan for about 10 minutes. Then, carefully lift them out using the parchment paper and let them cool completely on a wire rack. This helps set the fudgy texture; patience is key! -
Slice and Enjoy
Once cooled, slice into squares (or rectangles, if you’re feeling fancy) and serve. Optional but recommended: dust with powdered sugar for some extra flair!
Serving Suggestions
When it comes to serving these Zucchini Brownies, a little creativity goes a long way! Consider presenting them warm with a scoop of vanilla ice cream or a dollop of whipped cream on top. If you want to impress, drizzle some melted dark chocolate over the brownies for that “wow” factor. You could even sprinkle some crushed nuts or sea salt on top for added texture and flavor. These brownies can be enjoyed on their own or with a freshly brewed cup of coffee for that cozy afternoon treat!
Recipe Variations
Ready to mix things up? Here are a few fun ideas to personalize your Zucchini Brownies:
- Nutty Bliss: Fold in 1/2 cup of chopped walnuts or pecans for a crunchy texture that complements the brownies beautifully.
- Minty Fresh: Add 1 tsp of peppermint extract for a refreshing mint chocolate brownie twist!
- Fruity Addition: Throw in a handful of dried cherries or cranberries to add a sweet and tangy fruit element.
- Spicy Kick: For a fall-inspired treat, add a pinch of cinnamon or pumpkin spice for warmth and depth.
- Swaps for the Health-Conscious: Substitute half the sugar with a natural sweetener like maple syrup or agave nectar for a healthier version.
Chef’s Notes
Ah, the beauty of Zucchini Brownies! They bring all sorts of delicious memories and a few funny kitchen stories along. I once attempted to bake these brownies for a friend’s birthday party and realized I had run out of cocoa powder! In a moment of creativity, I used dark chocolate bars melted down instead, and guess what? They turned out even better than the original recipe! This little mishap reminded me that sometimes the best recipes evolve through experimentation.
Every time I bake these brownies, I think about how far they’ve come from my grandmother’s original recipe — add a little zucchini here, a dash of this there — and it has become a sweet tradition in my family. I love seeing how each batch brings joy to others as they indulge in the rich flavors.
FAQs and Troubleshooting
Why are my brownies dry?
Dry brownies can result from overbaking. Always keep an eye on them and test with a toothpick for gooeyness. Slightly underbaking can give you a more fudgy brownie.
Can I make these brownies ahead of time?
Absolutely! Zucchini Brownies store well in an airtight container for up to 3 days at room temperature. For longer storage, try freezing them for up to a month.
What can I substitute for eggs?
Although this recipe does not contain eggs, if you ever have a version that does, you could replace each egg with 1/4 cup of unsweetened applesauce or 1/4 cup of mashed banana for moisture.
What if I can’t find vegan chocolate chips?
If you can’t find vegan chocolate chips, feel free to finely chop up your favorite chocolate bar. Just ensure it’s dairy-free!
Nutritional Info
While I love focusing on taste and experience rather than strict nutrition, it’s worth noting that these Zucchini Brownies carry health benefits thanks to the zucchini! They’re a great source of vitamins while still satisfying that sweet tooth. Each brownie (based on 16 servings) contains approximately:
- Calories: 130
- Carbohydrates: 22g
- Protein: 2g
- Fat: 5g
- Fiber: 1g
Keep in mind these values can vary based on ingredient choices.
So there you have it, my dear kitchen companions! Zucchini Brownies are not just a delicious dessert; they’re a canvas for creativity and a testament to how we can embrace the unexpected in our kitchens. The next time you’re tempted to sneak a veggie into a dessert, I say go for it — you may just create a new favorite recipe that your family will cherish for years to come. Happy baking! 🍫✨
PrintZucchini Brownies
A delightful twist on classic brownies, incorporating zucchini for added moisture and sweetness.
- Prep Time: 15 minutes
- Cook Time: 30 minutes
- Total Time: 45 minutes
- Yield: 16 servings 1x
- Category: Dessert
- Method: Baking
- Cuisine: American
- Diet: Vegetarian; Vegan
Ingredients
- 1 cup grated zucchini
- 1 cup all-purpose flour
- 1 cup cocoa powder
- 1 cup sugar
- 1/2 cup vegetable oil
- 1/4 cup applesauce
- 1 tsp vanilla extract
- 1 tsp baking soda
- 1/2 tsp salt
- 1/2 cup chocolate chips (vegan)
Instructions
- Preheat your oven to 350°F (175°C) and line an 8-inch square baking pan with parchment paper.
- Prepare and grate your zucchini, then squeeze out excess moisture using a clean towel.
- Mix the vegetable oil, applesauce, sugar, and vanilla in a large bowl until smooth.
- Add the flour, cocoa powder, baking soda, and salt, sifting them into the bowl and folding gently until just combined.
- Incorporate the grated zucchini and chocolate chips until evenly distributed.
- Pour the batter into the prepared baking pan and spread evenly.
- Bake for 25-30 minutes, testing with a toothpick for doneness.
- Cool for about 10 minutes in the pan before transferring to a wire rack to cool completely.
- Slice into squares and serve, optionally dusted with powdered sugar.
Notes
For added creativity, try mixing in nuts, mint extract, or dried fruits. Store in an airtight container for up to 3 days.
Nutrition
- Serving Size: 1 brownie
- Calories: 130
- Sugar: 12g
- Sodium: 200mg
- Fat: 5g
- Saturated Fat: 1g
- Unsaturated Fat: 4g
- Trans Fat: 0g
- Carbohydrates: 22g
- Fiber: 1g
- Protein: 2g
- Cholesterol: 0mg
Keywords: Zucchini Brownies, Dessert, Vegan Brownies, Healthy Brownies, Chocolate Dessert

Smoky Grilled Watermelon: Quick 15-Min Summer Snack
Smoky Grilled Watermelon: A Flavorful Summer Delight
Hello, fellow food lovers! Today, I’m thrilled to share a unique recipe that perfectly captures the essence of summer—Smoky Grilled Watermelon. Now, I know what you might be thinking: “Watermelon on the grill? Really?” Trust me, this dish is a delightful revelation. The sweet fruit takes on a smoky char that’s both surprising and utterly delicious, making it the perfect addition to your summer barbecues or even as a light appetizer on a warm evening. So, grab your apron, and let’s dive into this deliciously adventurous culinary journey together!
Personal Story
This recipe takes me back to one of my favorite summer nights a few years ago. I had gathered a group of friends for a backyard barbecue, complete with sizzling burgers and fresh corn on the cob. As the sun dipped below the horizon, casting a golden glow over our happy gathering, I wanted to serve a dessert that felt special yet didn’t take me away from the laughter and stories being shared. That’s when I grabbed a watermelon from the kitchen and decided to take a chance.
After cutting it into thick slices and tossing them on the grill, the magic happened. The watermelon developed those gorgeous char marks, and when I drizzled it with honey, a squeeze of lime, and a sprinkle of fresh cilantro, I knew I was onto something. Each smoky, sweet bite had everyone raving and scratching their heads in delight at how something so simple could taste so good. This Smoky Grilled Watermelon became a staple at our summer gatherings, and I can’t wait for you to experience it too!
Ingredients
-
1 small watermelon: The star of the show! Choose a ripe watermelon that feels heavy for its size. If you can’t find a small one, a larger one works just as well; just adjust the cooking time accordingly.
-
2 tablespoons honey: This natural sweetener adds a lovely depth to the dish. If you prefer, you can swap it with agave syrup or maple syrup for a different flavor profile.
-
Juice of 1 lime: The acidity from lime juice brings balance to the sweetness of the watermelon. If limes aren’t available, try lemon juice as a substitute.
-
Fresh cilantro, chopped: This herb adds a refreshing touch to the grilled watermelon. If you’re not a fan, mint would be a delightful alternative, or you could leave it out altogether for a simpler flavor.
-
Salt and pepper to taste: It might sound unconventional, but a little seasoning enhances the overall taste. Sea salt or flaky salt works beautifully here.
-
Olive oil: A drizzle of olive oil helps enhance the grill marks and prevents sticking. You can also use avocado oil or a flavored oil for an extra kick.
Step-by-Step Instructions
-
Prepare the Watermelon:
Start by cutting the watermelon into thick slices, about 1-inch thick. The thickness is key; too thin, and they might fall apart on the grill, but too thick will not absorb the smoky flavor as well. If the watermelon is particularly seedy, feel free to remove the seeds to make eating easier. -
Preheat the Grill:
Heat your grill to medium-high. It’s essential for achieving those perfect grill marks and a smoky flavor. If you’re using a charcoal grill, allow the coals to turn white and ashy for even cooking. -
Drizzle with Olive Oil:
Lightly brush both sides of the watermelon slices with olive oil. This step not only adds flavor but also keeps the melon from sticking to the grill. If you have a grill pan, that works like a charm, too! -
Grill the Watermelon:
Place the watermelon slices on the hot grill. Let them cook for about 3-4 minutes on each side, or until you see lovely grill marks and the edges start to caramelize. Don’t walk away—this is when magic happens! -
Prepare the Honey-Lime Drizzle:
While the watermelon is grilling, mix honey and lime juice in a small bowl. This glaze is the secret weapon to elevating your grilled watermelon. -
Season and Serve:
Once the watermelon is grilled, remove it from the heat. Drizzle your honey-lime mixture over the warm slices and sprinkle with chopped cilantro, salt, and pepper. -
Presentation:
Serve warm, either as a starter or a spectacular dessert. I love to plate it alongside crispy prosciutto or even a tangy feta cheese for a savory-sweet combo that’s out of this world!
Serving Suggestions
When it comes to plating, keep it simple yet elegant! Arrange the grilled watermelon on a rustic wooden board or a vibrant platter. Drizzle some extra honey over the top, and let those fresh herbs shine. You can add crumbled feta or a sprinkle of chili flakes for a touch of heat to impress your guests. Trust me; this simple act of presentation will elevate your dish from ordinary to extraordinary!
Recipe Variations
-
Spicy Grilled Watermelon: Add a sprinkle of cayenne pepper or smoked paprika to the honey-lime drizzle for some heat that perfectly complements the sweetness.
-
Fruit Salad Spin: Chop the grilled watermelon into bite-sized pieces and toss it into a refreshing fruit salad with blueberries and mint.
-
Watermelon Salsa: Dice the grilled watermelon and combine it with diced red onion, jalapeño, cilantro, and lime juice for a unique salsa to serve with chips.
-
Skewered Delight: For a fun twist, thread the grilled watermelon onto skewers with shrimp or sausage for a delightful barbecue treat.
-
Dessert Twist: Incorporate a scoop of vanilla ice cream on top of a warm slice for a refreshing yet decadent dessert.
Chef’s Notes
Every time I make Smoky Grilled Watermelon, it reminds me of those warm summer nights filled with laughter and good company. Over the years, I’ve perfected this recipe, adding layers of flavor through fresh herbs and tangy drizzles. It’s evolved beyond just a side dish; it’s become an experience—an adventure for the palate! Plus, watching people’s faces light up as they taste something that appears so simple yet is wonderfully complex is truly gratifying.
FAQs and Troubleshooting
Q: Can I prepare the watermelon in advance?
Absolutely! You can grill the watermelon a few hours ahead of time. Just keep it in the fridge until you’re ready to serve. A hint of warmth before serving will make it even more tantalizing.
Q: What if I don’t have a grill?
No problem! You can use a grill pan on your stovetop or even roast the watermelon slices under the broiler in your oven. Just keep an eye on them to prevent burning!
Q: Can I use larger watermelon pieces?
You can, but larger thick cuts may require longer grilling times and could be harder to manage while cooking. Stick with 1-inch thick slices for best results.
Q: How do I know when the watermelon is done?
Look for nice grill marks and a slightly caramelized edge. It should feel warm to the touch and have softened just a bit, yet still hold its shape!
Nutritional Info
While the nutritional values can vary based on the size of the watermelon and the amount of honey used, a typical serving of grilled watermelon with the ingredients listed contains around 100 calories, making it a delightful guilt-free treat!
Now that you have the lowdown on how to create this stunning Smoky Grilled Watermelon, it’s time to gather your friends and impress them with your culinary prowess! Remember, cooking is about exploration and joy—so don’t be afraid to make this dish your own. Happy grilling, friends!
PrintSmoky Grilled Watermelon

A flavorful summer delight that combines smoky charred watermelon with a honey-lime drizzle, perfect for barbecues or as a light appetizer.
- Prep Time: 15 minutes
- Cook Time: 10 minutes
- Total Time: 25 minutes
- Yield: 4 servings 1x
- Category: Appetizer
- Method: Grilling
- Cuisine: American
- Diet: Vegetarian
Ingredients
- 1 small watermelon
- 2 tablespoons honey
- Juice of 1 lime
- Fresh cilantro, chopped
- Salt and pepper to taste
- Olive oil
Instructions
- Prepare the watermelon: Cut into thick slices about 1-inch thick.
- Preheat the grill to medium-high for optimal flavor.
- Drizzle both sides of the watermelon with olive oil.
- Grill the watermelon slices for 3-4 minutes on each side until grill marks appear.
- Prepare the honey-lime drizzle by mixing honey and lime juice in a small bowl.
- Season and serve by drizzling the honey-lime mixture over grilled watermelon and sprinkling with cilantro, salt, and pepper.
Notes
Serve warm as a starter or dessert, optionally pairing with crispy prosciutto or feta cheese.
Nutrition
- Serving Size: 1 serving
- Calories: 100
- Sugar: 15g
- Sodium: 50mg
- Fat: 3g
- Saturated Fat: 0.5g
- Unsaturated Fat: 2g
- Trans Fat: 0g
- Carbohydrates: 24g
- Fiber: 1g
- Protein: 2g
- Cholesterol: 0mg
Keywords: grilled watermelon, summer recipe, vegetarian appetizer, smoky flavor, barbecue side
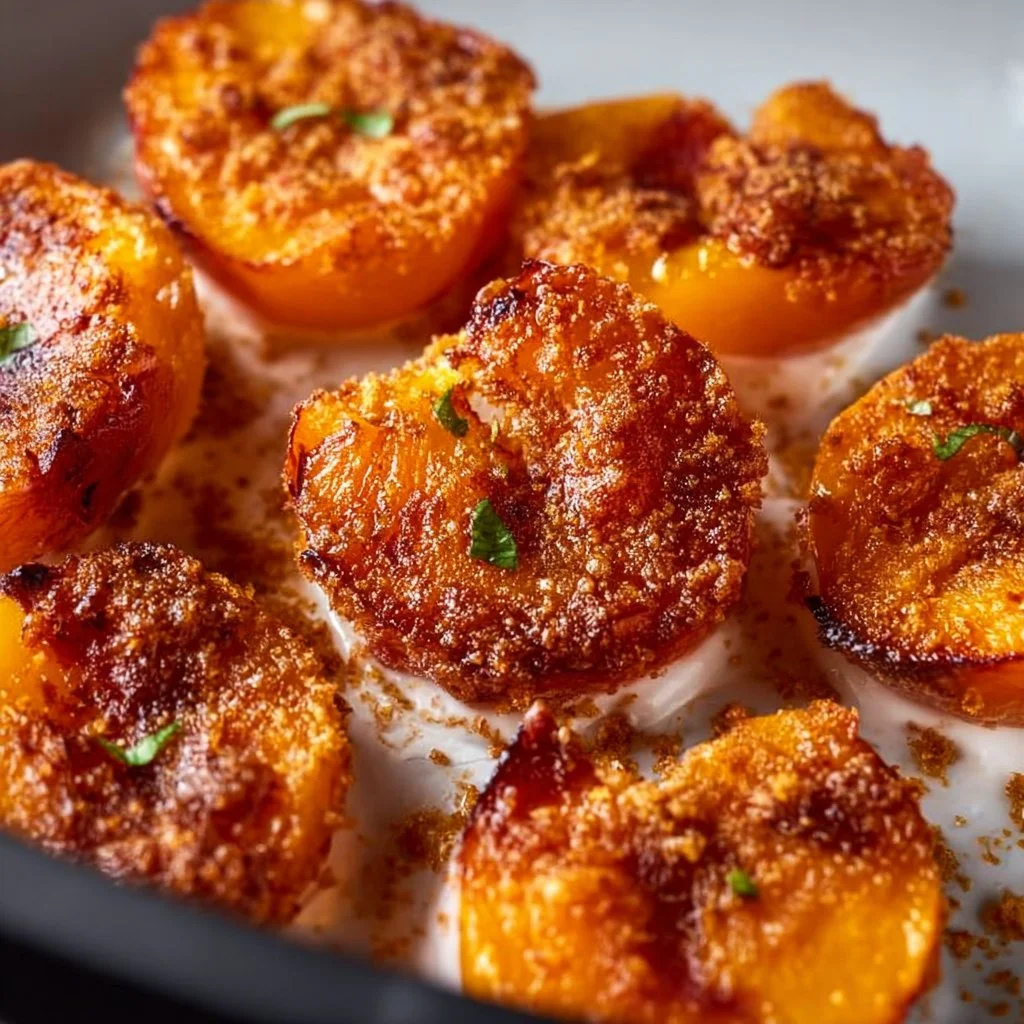
Air Fryer Peaches
Air Fryer Peaches: The Delightful Summer Treat You Need
Hello, fellow food lovers! Today, I’m thrilled to share with you one of the simplest yet most delightful desserts that captures the essence of summer: Air Fryer Peaches. Think about juicy, sweet peaches enveloped in a slight caramelization, all topped off with a scoop of creamy vanilla ice cream. It’s simplicity meets heavenly flavor! Whether you’re hosting a casual get-together or just treating yourself after a long day, this recipe will have your friends and family asking for seconds—and maybe even thirds.
I have a soft spot for peaches. Growing up, my family would always visit this charming little orchard during the summer months. I can still picture the sun-drenched rows of trees, the vibrant yellow and orange hues of ripe peaches hanging just out of reach, and the fragrant sweet scent in the air that made my mouth water. My siblings and I would race to see who could collect the most peaches, and at the end of the day, we’d feast at a picnic table, savouring the fresh fruit as a sweet reward for our hard work.
In that essence of enjoying simple pleasures and flavors in their purity, this air fryer recipe perfectly encapsulates everything I adore about summer sweets. It’s approachable, elegant, and oh-so-satisfying. Plus, using an air fryer means these beauties are ready in a flash! So, let’s roll up our sleeves and dive into this delightful dish.
Personal Story
One particular summer stands out in my memory—a visit to the orchard that felt larger than life. The sun glistened off the peaches like jewels, waiting to be plucked. My family and I spent the day laughing, climbing trees, and, of course, tasting the fruits right off the branches. Once we had our bounty, we decided to host a peach-inspired dinner party at our home. I got to play chef, and we whipped up a peasant-style meal featuring fresh peach salsa, grilled chicken, and, of course, my mother’s famous peach cobbler for dessert. While I adored the cobbler, I wished I could elevate the fresh peaches even more, and that’s where my air fryer comes to the rescue years later!
Every time I prepare these air fryer peaches, I’m whisked back to those carefree summer days—gathering around the table, sharing food, and creating memories that last long after the last bite is gone.
Ingredients
Let’s dive into what you’ll need for our air fryer peaches:
-
4 ripe peaches: Look for peaches that are slightly soft to the touch. If they’re not quite ripe, a little extra time on the counter will make all the difference. You can substitute nectarines if you’re feeling adventurous!
-
2 tablespoons brown sugar: This adds a caramelized sweetness that enhances the natural flavor of the peaches. You can use coconut sugar or maple syrup if you prefer a healthier alternative.
-
1 teaspoon cinnamon: A warm spice that pairs perfectly with peaches. Feel free to experiment with nutmeg or allspice for a different aroma and taste.
-
Vanilla ice cream (for serving): It’s the crown jewel on this delightful dish, adding creaminess that beautifully contrasts with the peaches. Consider dairy-free ice cream if you’re looking for a vegan option!
Step-by-Step Instructions
Now onto the fun part—let’s cook! Follow these step-by-step instructions, and I promise you’ll have a delightful dessert in no time.
-
Prep the Peaches: Start by washing your peaches under cold running water to remove any natural pesticides. Pat them dry with a clean towel.
-
Halve and Pit: Carefully, using a sharp knife, cut each peach in half, twisting the two halves apart gently. Pop out the pit. You can scoop out a little more flesh with a spoon to create a small, sweet "bowl" if you like. This will hold the delicious brown sugar and cinnamon mix!
-
Season the Halves: In a small bowl, mix together the brown sugar and cinnamon. Generously sprinkle this mixture over the cut sides of the peach halves. Don’t hold back—the more, the merrier!
-
Preheat the Air Fryer: Preheat your air fryer to 350°F (175°C). This step is crucial as it ensures the peaches cook evenly and beautifully.
-
Air Fry: Place the peach halves in the air fryer basket, cut side up. Make sure they’re not overcrowded—give them a little space to breathe and get caramelized. Air fry them for about 8-10 minutes. You’ll know they’re done when they’re tender and slightly golden.
-
Serve: Remove the peaches carefully (they’ll be hot!), and let them cool for a minute. Then, plate them and add a scoop of vanilla ice cream on top while they’re still warm. A drizzle of honey or a sprinkle of crushed nuts on top can take this to the next level!
Serving Suggestions
Presentation can elevate any dish, so don’t forget about plating! Arrange the air-fried peach halves on a charming dessert plate, drizzled with a little extra honey or maple syrup for flair. The contrast of the warm peaches and the cold ice cream is not just delicious—it’s downright Instagrammable! Serve with a sprig of mint for that pop of color and surprise element.
Recipe Variations
Here are some delightful twists to consider for your air fryer peaches:
-
Spiced Peaches: Add a pinch of nutmeg or even a dash of cayenne for a sweet-spicy kick.
-
Grilled Peaches: For an even smokier flavor, try tossing your peaches in a bit of olive oil before air frying for that BBQ feel.
-
Nutty Crunch: Toss some crushed pistachios or almonds over the top with your vanilla ice cream for an added crunch.
-
Berry Bliss: Add fresh or frozen berries in the center of the peach halves before air frying for a fruity burst!
-
Vegan Version: Use almond or coconut milk ice cream as a delightful non-dairy alternative.
Chef’s Notes
Let me share a little funny story from my kitchen adventures. One summer, I was excited to showcase these air fryer peaches at a friend’s barbecue. However, I had accidentally purchased under-ripe peaches! Let’s just say I ended up with something resembling peach-flavored rocks instead. Luckily, I had a backup plan with some frozen peaches in the freezer, and all was saved! Always taste your fruit beforehand, my friends!
Over the years, my air fryer peach recipe has evolved into something beautifully simple yet packed with nostalgia. The recipe has become a staple in my kitchen, reminding me of those summer days filled with laughter, love, and delicious bites.
FAQs and Troubleshooting
1. What if my peaches are too firm?
If your peaches are not quite ripe and firm, you can either let them sit at room temperature for a few days or bake them in the air fryer for a few extra minutes to soften them.
2. Can I use frozen peaches?
Absolutely! While the texture may differ, frozen peaches can still work wonderfully. Just add an extra 2-3 minutes to the cooking time, and keep an eye on them.
3. What if I don’t have an air fryer?
No air fryer? No problem! You can grill or roast the peaches in the oven at 400°F (200°C) for about 15-20 minutes until tender. You won’t get that same degree of caramelization, but they’ll still be delicious!
4. How can I make these peaches sweeter?
If you have a sweet tooth, feel free to increase the amount of brown sugar or even add a drizzle of honey or maple syrup right before serving.
Nutritional Info
While I believe in enjoying food in moderation, here’s a rough nutritional breakdown per serving (two peach halves with a scoop of vanilla ice cream):
- Calories: Approximately 250-300, depending on the ice cream
- Fat: 10g
- Carbohydrates: 35g
- Protein: 3g
- Sugar: 20g
Cooking is about sharing joy and creating memories. And with these air fryer peaches, you can do just that. So tie on your apron, gather around the table, and let’s whip up something timeless together. Happy cooking, and enjoy those sweet summer moments!
PrintAir Fryer Peaches: The Delightful Summer Treat You Need

A simple and delightful dessert featuring juicy peaches, caramelized to perfection, and topped with creamy vanilla ice cream.
- Prep Time: 10 minutes
- Cook Time: 10 minutes
- Total Time: 20 minutes
- Yield: 4 servings 1x
- Category: Dessert
- Method: Air Frying
- Cuisine: American
- Diet: Vegetarian
Ingredients
- 4 ripe peaches
- 2 tablespoons brown sugar
- 1 teaspoon cinnamon
- Vanilla ice cream (for serving)
Instructions
- Prep the peaches: Wash the peaches under cold water and pat dry.
- Halve and pit: Cut each peach in half and remove the pit.
- Season the halves: Mix brown sugar and cinnamon, then sprinkle over the cut sides of the peaches.
- Preheat the air fryer: Set it to 350°F (175°C).
- Air fry: Place peaches in the air fryer and cook for 8-10 minutes until tender.
- Serve: Top with vanilla ice cream and enjoy.
Notes
For extra flavor, try adding honey or crushed nuts on top. Don’t forget you can use frozen peaches if fresh ones are unavailable.
Nutrition
- Serving Size: 2 peach halves with ice cream
- Calories: 275
- Sugar: 20g
- Sodium: 5mg
- Fat: 10g
- Saturated Fat: 5g
- Unsaturated Fat: 3g
- Trans Fat: 0g
- Carbohydrates: 35g
- Fiber: 2g
- Protein: 4g
- Cholesterol: 30mg
Keywords: Air Fryer, Peaches, Summer Dessert, Easy Recipe, Healthy Treat
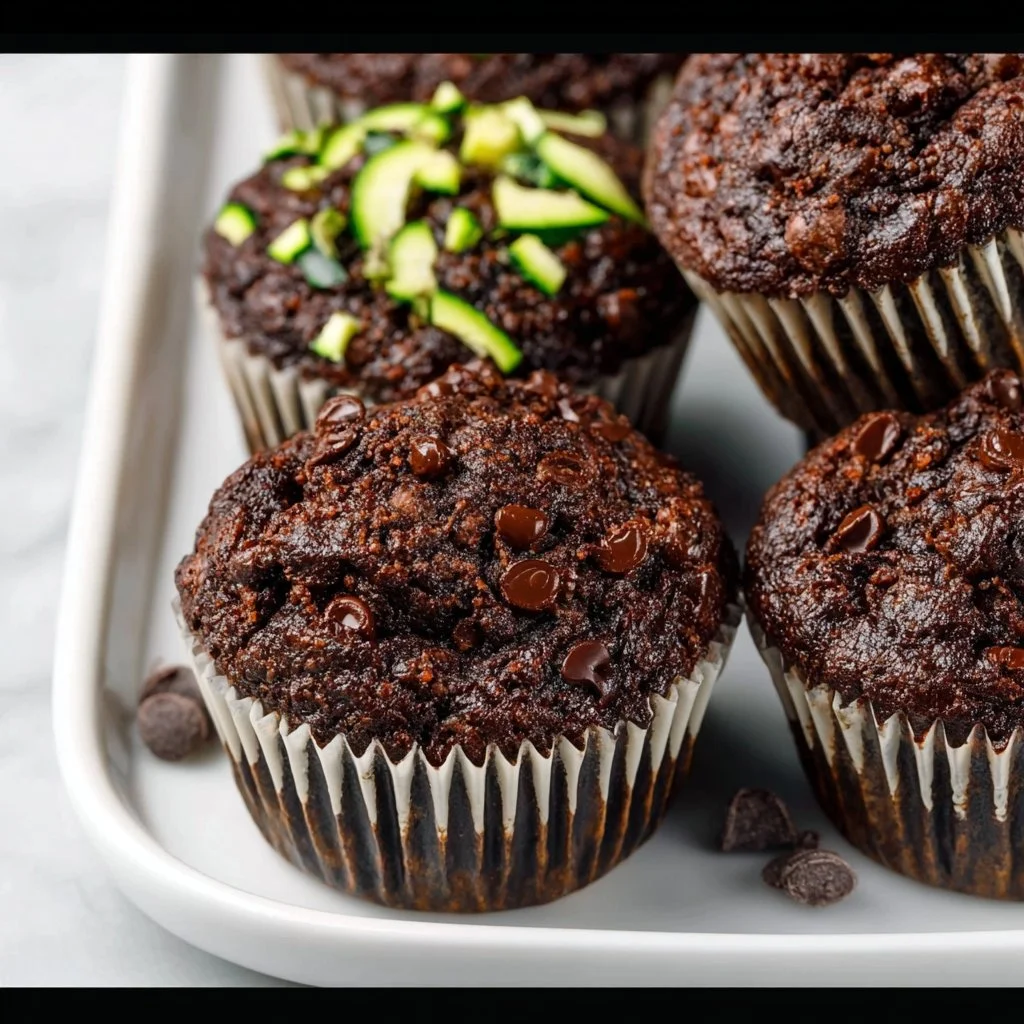
Healthy & Moist Chocolate Zucchini Muffins
Moist Chocolate Zucchini Muffins: A Healthier Indulgence
Hello, fellow food lovers! Today, I am thrilled to share one of my absolute favorite recipes that perfectly embodies my philosophy of cooking—it’s elegant yet never intimidating. If you’re like me, always on the lookout for ways to sneak more veggies into your diet without sacrificing flavor, then you’ll absolutely adore these Healthy & Moist Chocolate Zucchini Muffins.
Imagine a muffin that’s not only delicious and satisfying but also invites a bit of garden goodness right into your breakfast or snack time. These muffins are rich, chocolatey, and incredibly moist, thanks to our secret star ingredient: grated zucchini! The beauty of this recipe lies in its simplicity and versatility—you can whip them up for a quick breakfast, an afternoon snack, or even a delightful addition to your next brunch gathering.
Now, let me take you on a little stroll down memory lane. I’ll never forget the first time I discovered the magic of pairing chocolate and zucchini. It was during my college days, and I had a dear friend who was a baking aficionado. One rainy afternoon, we had a spontaneous baking session, and she introduced me to her family’s famous chocolate zucchini bread. The first bite was like a hug in muffin form! Ever since that day, I’ve been enamored with the idea of creating my version that embodies health, indulgence, and, of course, fun!
So grab your apron, set that oven to preheat, and let’s indulge in a chocolatey creation that feels decadent but offers a nourishing twist.
Personal Story
As I mentioned before, my love affair with chocolate zucchini treats began in college, but the true heart of the story lies with my little sister, Emma. Growing up, she was notoriously picky—veggies were the enemy, and desserts were her best friend. One summer, while visiting our family cabin, I decided it was time to change her mind (and her palate!). Armed with fresh zucchini from a neighbor’s garden and a trusty old cookbook, I concocted a batch of chocolate zucchini muffins.
As I folded in the ingredients, I could hear Emma in the background questioning my sanity. “Zucchini in muffins? Gross!” But knowing her penchant for all things chocolate, I smiled and assured her that she wouldn’t taste a thing! The moment those muffins emerged from the oven, the entire cabin was filled with an irresistible fragrance. When I finally convinced Emma to take a bite, her face was priceless. She took a second bite, then a third—and just like that, I had turned her into a zucchini fan!
Now, every year, we make our muffins together, reminiscing about that fateful summer. It’s become a tradition that brings us joy and laughter, and I’m thrilled to share this recipe with you all—because who doesn’t want to spread a little love in the kitchen?
Ingredients
Let’s gather our ingredients and channel our inner bakers! Here’s what you’ll need for the Moist Chocolate Zucchini Muffins:
-
1½ cups grated zucchini
- Tip: Measure the zucchini before squeezing out the moisture to ensure accurate portions! If you don’t have zucchini, you can swap it out for grated carrots or even apples for a fruity twist.
-
2 large eggs
- Substitution: For a vegan option, try using flax eggs (1 tablespoon ground flaxseed mixed with 2.5 tablespoons water per egg, let it sit for 5 minutes to thicken).
-
¼ cup avocado oil (or olive oil)
- Chef Insight: Avocado oil is mild and buttery, perfect for baked goods, but you can use olive oil for a more robust flavor.
-
⅓ cup maple syrup
- Substitution: Honey or agave syrup would work wonderfully in place of maple syrup, adding a hint of sweetness.
-
2 teaspoons vanilla extract
- Quick Tip: Always use pure vanilla extract for the best flavor—trust me, it makes a difference!
-
⅔ cup unsweetened applesauce
- Why it Works: This ingredient not only adds moistness but also a subtle sweetness. Unsweetened is key here to keep sugar levels balanced.
-
1¼ cups whole wheat flour
- Substitution: You can use a gluten-free all-purpose blend for a gluten-free muffin that still delivers on texture.
-
¼ cup unsweetened cocoa powder
- Chef Hack: Sift it before adding to eliminate lumps and ensure even mixing. You can chocolate-ify these muffins even more with dark chocolate cocoa powder!
-
½ teaspoon baking soda
- Tip: Make sure it’s fresh! Baking soda can lose its potency over time, so always check the expiration date.
-
1 teaspoon baking powder
- Why Both?: The combination of soda and powder gives our muffins the perfect rise.
-
1 teaspoon cinnamon
- Chef’s Secret: Cinnamon adds warmth and depth to the chocolate flavor. Don’t skip it!
-
½ teaspoon salt
- Why Salt?: Salt enhances the sweetness and balances the flavors of the muffins—just a pinch is all you need.
-
⅓ cup chocolate chips (plus extra for topping)
- Customization Tip: Use dark, semi-sweet, or even white chocolate chips based on your preference!
Ready to bake? Let’s do it!
Step-by-Step Instructions
-
Preheat Your Oven: Start by preheating your oven to 350°F (175°C). This step is key to fluffy muffins; you want the oven to be hot when they enter!
-
Prep Your Muffin Tin: Line a muffin tin with paper liners or generously grease them with non-stick spray. This makes for an easy release when you enjoy your muffins later.
-
Grate the Zucchini: Grate the zucchini on a box grater or use a food processor. Remember to measure it first before squeezing out excess moisture with a clean kitchen towel. This helps keep our muffins moist without being soggy!
-
Mix Wet Ingredients: In a large mixing bowl, whisk together the eggs, avocado oil, maple syrup, vanilla extract, and unsweetened applesauce. Keep whisking until fully combined—this mixture is the heart of our muffins!
-
Combine Dry Ingredients: In another bowl, whisk together the whole wheat flour, cocoa powder, baking soda, baking powder, cinnamon, and salt until uniform. This is where your muffins will get that chocolatey goodness.
-
Combine Wet and Dry: Gradually add the dry ingredients to the wet mixture. Stir gently until just combined—overmixing can create dense muffins, and nobody wants that!
-
Fold in Zucchini and Chocolate Chips: Gently fold in the grated zucchini and chocolate chips. It will look like a chocolatey, lush batter—what could be better? Reserve a few chocolate chips for topping later!
-
Fill Muffin Tins: Using a spoon or ice cream scoop, fill each muffin tin about ¾ full—this ensures they rise beautifully without overflowing.
-
Top with Extra Chips: Add those reserved chocolate chips on top for a little extra flair.
-
Bake Time: Place the muffin tin in your preheated oven and bake for 18-20 minutes. They’re ready when a toothpick inserted comes out clean (though a few chocolate streaks are okay).
-
Cool and Enjoy: Once baked, let them cool in the tin for about 5 minutes before transferring them to a wire rack. And remember, patience is not just a virtue—it allows those flavors to deepen!
Serving Suggestions
These muffins are perfect fresh out of the oven—serve them warm with a drizzle of nut butter or a dollop of yogurt. For an extra touch of elegance, try dusting them with a light sprinkle of powdered sugar or cacao powder. You can even serve them alongside fresh fruit, or break them apart and indulge with a rich cup of coffee or tea. It’s all about creating a lovely moment at your table!
Recipe Variations
Ready to get creative? Here are a few fun twists:
- Nutty Delight: Add ½ cup of chopped walnuts or pecans to the batter for crunch.
- Spicy Kick: Mix in a pinch of cayenne pepper for a surprise warm flavor!
- Fruity Zing: Incorporate some blueberries or raspberries for a burst of freshness.
- Double Chocolate: Use chocolate protein powder instead of some flour for an extra chocolatey muffin.
- Gluten-Free Option: Swap whole wheat flour for a gluten-free blend, and enjoy the same moist muffins!
Always taste as you go, and remember: cooking is all about making it your own!
Chef’s Notes
Every time I bake these muffins, I’m reminded of how adaptable they are—you really can’t go wrong! When experimenting, I once tried adding banana to the batter. While the result was tasty, it turned the muffins a bit too sweet for my liking. I learned that balance is key, and sometimes keeping it simple yields the best results. I love how these muffins can spark creativity in the kitchen!
FAQs and Troubleshooting
Why are my muffins too dense?
- It may be due to overmixing the batter. Mix until just combined, and check that you’re using fresh baking soda and powder!
Can I freeze these muffins?
- Absolutely! Let them cool completely, then store them in an airtight container or freezer bag. They’ll stay fresh for up to 3 months!
How do I know when my muffins are done?
- Stick a toothpick in the center; it should come out clean or with a few moist crumbs attached. If wet batter sticks, give them a few more minutes.
What if I don’t have maple syrup?
- You can substitute with honey, agave, or coconut sugar dissolved in warm water for similar sweetness.
Nutritional Info (Optional)
For those curious about the numbers, here’s a rough breakdown per muffin (assuming you make 12 muffins):
- Calories: 160
- Protein: 4g
- Carbohydrates: 26g
- Fat: 6g
- Fiber: 2g
- Sugar: 5g
Conclusion
There you have it—Healthy & Moist Chocolate Zucchini Muffins that are not only scrumptious but also a delightful way to incorporate wholesome ingredients into your day! Whether you’re snuggling up with a cup of coffee or hosting a brunch with friends, these muffins bring the joy and charm of homemade goodness right to your table. Remember, cooking is all about sharing—and I hope you enjoy these muffins as much as I do.
So go ahead, tie on your apron, and let’s get baking! Cheers to beautiful moments in the kitchen! 🍫🥒💖
PrintMoist Chocolate Zucchini Muffins
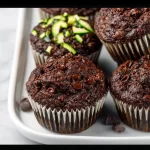
Delicious and moist chocolate muffins featuring grated zucchini for a healthier treat.
- Prep Time: 15 minutes
- Cook Time: 20 minutes
- Total Time: 35 minutes
- Yield: 12 muffins 1x
- Category: Baked Goods
- Method: Baking
- Cuisine: American
- Diet: Vegetarian
Ingredients
- 1½ cups grated zucchini
- 2 large eggs
- ¼ cup avocado oil (or olive oil)
- ⅓ cup maple syrup
- 2 teaspoons vanilla extract
- ⅔ cup unsweetened applesauce
- 1¼ cups whole wheat flour
- ¼ cup unsweetened cocoa powder
- ½ teaspoon baking soda
- 1 teaspoon baking powder
- 1 teaspoon cinnamon
- ½ teaspoon salt
- ⅓ cup chocolate chips (plus extra for topping)
Instructions
- Preheat your oven to 350°F (175°C).
- Prep your muffin tin by lining it with paper liners or greasing it.
- Grate the zucchini and squeeze out excess moisture.
- Mix the wet ingredients in a large bowl: eggs, oil, syrup, vanilla, and applesauce.
- Combine the dry ingredients in another bowl: flour, cocoa, baking soda, baking powder, cinnamon, and salt.
- Combine the wet and dry ingredients, stirring gently.
- Fold in the grated zucchini and chocolate chips.
- Fill muffin tins about ¾ full.
- Top with reserved chocolate chips.
- Bake for 18-20 minutes.
- Cool for 5 minutes before transferring to a wire rack.
Notes
These muffins can be stored in an airtight container or frozen for up to 3 months.
Nutrition
- Serving Size: 1 muffin
- Calories: 160
- Sugar: 5g
- Sodium: 200mg
- Fat: 6g
- Saturated Fat: 1g
- Unsaturated Fat: 5g
- Trans Fat: 0g
- Carbohydrates: 26g
- Fiber: 2g
- Protein: 4g
- Cholesterol: 30mg
Keywords: chocolate muffins, zucchini muffins, healthy baking
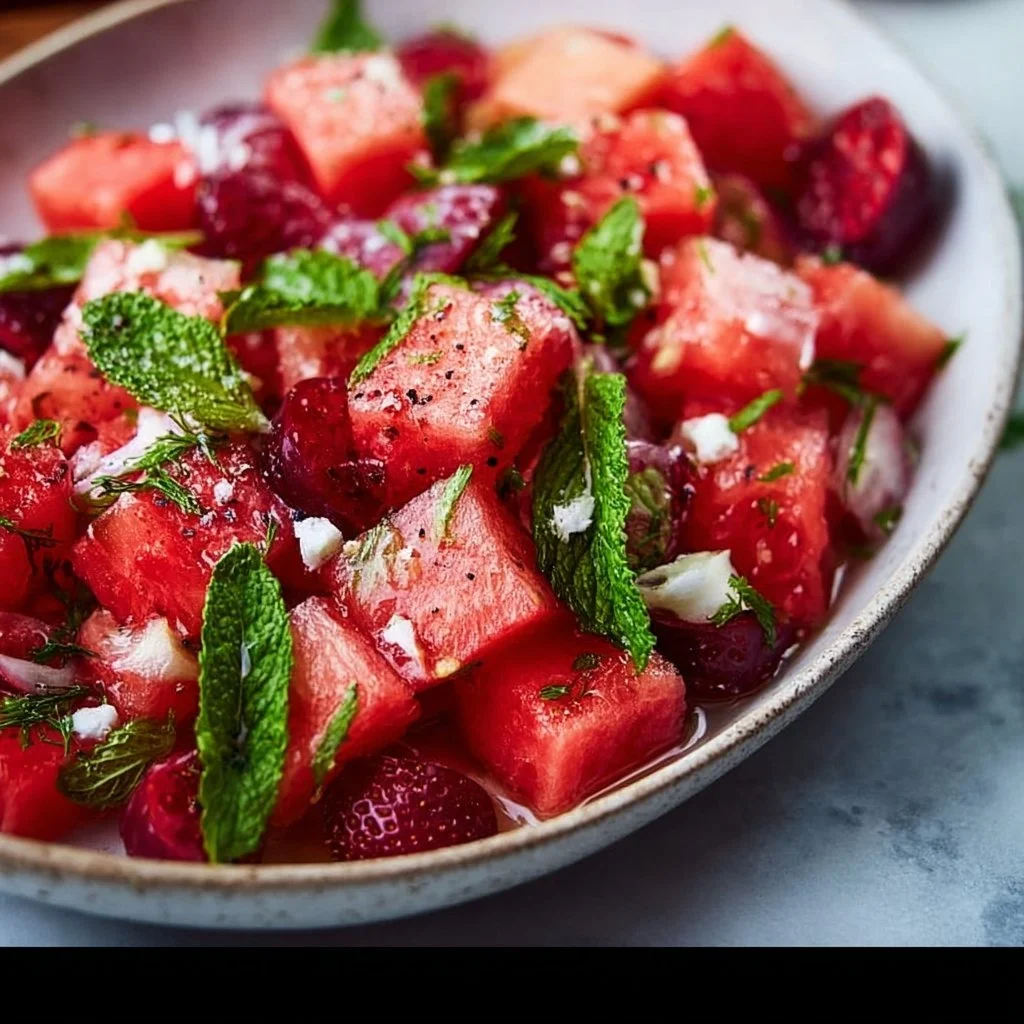
Easy Keto Watermelon Fruit Salad with Lime Mint Dressing
Easy Keto Watermelon Fruit Salad with Lime Mint Dressing
Hello there, fellow food lovers! Today, we’re diving into the world of refreshing summer treats with a vibrant twist — an Easy Keto Watermelon Fruit Salad with Lime Mint Dressing! This dish embodies everything we adore about summer: juicy fruits, fresh herbs, and a zesty kick that’ll make your taste buds dance.
You’re probably thinking, “Savannah, how is this keto-friendly?” Well, here’s the scoop: watermelon is low in carbs, making it a fantastic option for anyone following a keto lifestyle. Paired with crunchy cucumbers and a homemade lime mint dressing, this salad is not just a feast for the eyes, but also a guilt-free indulgence.
I remember sun-soaked summer afternoons where mixed fruit salads were the highlight of backyard gatherings — a splash of color and sweetness that just screams celebration. Imagine sitting outside, laughter mingling with the sound of the rustling leaves, as I whip up this delightful salad for my friends and family. With each bite, you’re transported back to those sunlit days filled with joy and connection.
So, roll up your sleeves and get ready to create something truly special! This salad is perfect for picnics, BBQs, or even as a refreshing side with dinner. Let’s gather those ingredients and create a dish that celebrates summer on a platter!
Personal Story
One of my fondest memories revolves around summer family gatherings at my Aunt Martha’s house. She had the biggest backyard, complete with an old oak tree that provided the perfect shade for gatherings. Every summer, she would host the most delightful BBQs, where the centerpiece was always an enormous bowl of fresh fruit salad.
While Aunt Martha’s fruit salad boasted everything from strawberries to blueberries, my favorite addition was always the watermelon. It was crisp, juicy, and the perfect antidote to the summer heat. I remember the bliss of taking a big bite, the juice dribbling down my chin, laughing with my cousins as we raced for the last scoop.
As I grew older and started hosting my own gatherings, I realized that food is about sharing those moments — the laughter, the stories, and the connections made around the table (or picnic blanket!). This Easy Keto Watermelon Fruit Salad with Lime Mint Dressing is my homage to those lovely summer days, with a modern twist that’s just as enjoyable.
Ingredients
To create this refreshing salad, you’ll need the following ingredients:
-
4 cups watermelon, cubed
A summertime superstar! Watermelon is hydrating and refreshing, with only 8 grams of carbs per cup. You can substitute it with cantaloupe for a different flavor, but stick to the keto-friendly fruits! -
1 cup cucumber, diced
Crisp and hydrating, cucumbers add that delightful crunch we crave. You can swap them for zucchinis if you’d like a milder flavor. -
1/4 cup fresh mint leaves, chopped
Mint delivers a cooling flavor that pairs beautifully with the watermelon. If you don’t have fresh mint, you might consider using a sprinkle of dried mint — just remember it’s more concentrated, so use sparingly! -
1 lime, juiced
Freshly squeezed lime juice adds zing and brightness to your dressing. If you don’t have lime, fresh lemon juice works just as well. -
1 tablespoon olive oil
A splash of quality extra-virgin olive oil enhances the dressing’s richness. Feel free to use avocado oil if you prefer a more subtle taste. -
Salt to taste
Just a pinch of salt elevates all the flavors. If you’re watching sodium intake, just skip or use Himalayan pink salt for a mineral boost.
Step-by-Step Instructions
Alright, friends! Let’s get cooking, or should I say, assembling!? This recipe is as easy as it gets.
-
Prepare Your Ingredients
Start by washing your watermelon and cucumber. You’ll want your watermelon seedless for that juicy, hassle-free eating experience! Cut the watermelon into manageable cubes and dice the cucumber into small pieces. -
Chop the Mint
Rinse your fresh mint leaves gently and pat them dry. Stack the leaves in a pile, roll them up loosely, and slice thinly to create a fine chiffonade. This method not only looks pretty but also releases the mint’s essential oils. -
Juice the Lime
Cut the lime in half and squeeze it over a small bowl or measuring cup. If you have a juicer, use it for maximum juice extraction! Be sure to remove any seeds that may accidentally drop in — no one wants a crunchy surprise! -
Make the Dressing
In a bowl, combine the lime juice, olive oil, and a pinch of salt. Give it a good whisk until it’s beautifully blended, creating that zesty dressing we adore. A little pro tip — to emulsify the dressing, whisk the olive oil in slowly while stirring. -
Combine Everything
In a large bowl, add the cubed watermelon and diced cucumber. Toss gently — you don’t want to crush those lovely watermelon cubes. Now, sprinkle the chopped mint on top. -
Dress the Salad
Drizzle your lime-olive oil dressing over the salad and gently toss again to coat everything nicely. As you mingle the ingredients, the aroma of lime and mint will fill your kitchen. It’s pure heaven! -
Taste and Adjust
Give it a taste! Maybe it needs a touch more lime or a sprinkle of salt? This is your salad; adjust the flavors to your liking!
Serving Suggestions
Now it’s time for the fun part: presentation! Serve your Easy Keto Watermelon Fruit Salad in a beautiful bowl or platter. If you want to pop the visual appeal, garnish with a few whole mint leaves or a lime wedge on the side. This salad is best served cold, so consider chilling it in the fridge for half an hour before serving. It’s such a showstopper and guarantees to wow your guests!
Recipe Variations
Feeling inspired? Here are a few fun twists to kick it up a notch:
-
Add Feta or Goat Cheese: Crumbled feta or goat cheese can be a delightful addition for a creamy, tangy contrast. Just sprinkle a handful over the salad before serving!
-
Spicy Kick: Add minced jalapeño or a sprinkle of chili flakes for a bit of heat contrast with the sweetness of the watermelon.
-
Extra Citrus: Try adding other citrus fruits like orange segments or a splash of grapefruit juice for an extra layer of flavor.
-
Nuts for Crunch: For added texture, toss in a handful of toasted pumpkin seeds or walnuts. They give a satisfying crunch and a nutritional boost!
-
Herb Swap: If mint isn’t your favorite, feel free to swap in freshly chopped basil or cilantro for a unique flavor profile.
Chef’s Notes
Let me share a little insider wisdom: sometimes, the simplest dishes are the most memorable. I learned this the hard way after preparing a complicated layered cake for a friend’s birthday (let’s just say it didn’t end well!). This salad, on the other hand, is a beautiful reminder that elegance doesn’t have to be overdone.
Over the years, I’ve played around with variations of this salad, and I can assure you, it’s adaptable and always a crowd-pleaser. Whether you’re at a backyard picnic or just serving dinner at home, it adds that refreshing flair!
FAQs and Troubleshooting
1. Can I prepare this salad ahead of time?
Absolutely! You can prep all the ingredients ahead of time and combine everything just before serving. Just keep the dressing separate and add it immediately prior to serving to avoid sogginess.
2. What if my watermelon isn’t sweet?
Not all watermelons are created equal! If your watermelon is lacking sweetness, a drizzle of honey or agave (keep an eye on your keto diet though!) can enhance the flavor. Alternatively, a touch more lime juice can help balance it out.
3. Can I use frozen watermelon?
You can! Just remember it’ll be more like a slushy salad. Thaw and drain any excess liquid before mixing in.
4. How can I keep my salad from getting watery?
If you’re prepping in advance, cut the watermelon cubes a bit larger to reduce juicing before serving and chill it separately. If you notice excess moisture in the bowl, simply drain it before serving.
Nutritional Info
While this salad is keto-friendly, here’s a rough breakdown per serving (about 1 cup):
- Calories: 60
- Fat: 3g
- Carbohydrates: 7g (Net Carbs: 4g)
- Protein: 1g
And there you have it! A gorgeous, refreshing Keto Watermelon Fruit Salad that’s as delicious as it is simple! I hope you enjoy making it as much as I love sharing it. Remember, food is about connection, so gather your loved ones and enjoy this incredible dish together. Happy cooking! 🍉🌿
PrintEasy Keto Watermelon Fruit Salad with Lime Mint Dressing
A refreshing summer salad featuring juicy watermelon, crunchy cucumbers, and zesty lime mint dressing, perfect for keto diets.
- Prep Time: 15 minutes
- Cook Time: 0 minutes
- Total Time: 15 minutes
- Yield: 4 servings 1x
- Category: Salad
- Method: No cooking
- Cuisine: American
- Diet: Keto
Ingredients
- 4 cups watermelon, cubed
- 1 cup cucumber, diced
- 1/4 cup fresh mint leaves, chopped
- 1 lime, juiced
- 1 tablespoon olive oil
- Salt to taste
Instructions
- Prepare Your Ingredients: Wash your watermelon and cucumber. Cut the watermelon into cubes and dice the cucumber.
- Chop the Mint: Rinse and pat dry the mint leaves, then slice thinly.
- Juice the Lime: Squeeze lime juice into a small bowl, removing any seeds.
- Make the Dressing: Combine lime juice, olive oil, and salt in a bowl, whisk until blended.
- Combine Everything: In a large bowl, add watermelon and cucumber, toss gently.
- Dress the Salad: Drizzle dressing over salad and toss to coat.
- Taste and Adjust: Adjust flavors as needed to your preference.
- Serve in a bowl, optionally garnish with mint leaves or lime wedge.
Notes
Best served cold; chill the salad for half an hour before serving for optimal refreshment.
Nutrition
- Serving Size: 1 serving
- Calories: 60
- Sugar: 5g
- Sodium: 10mg
- Fat: 3g
- Saturated Fat: 0g
- Unsaturated Fat: 3g
- Trans Fat: 0g
- Carbohydrates: 7g
- Fiber: 1g
- Protein: 1g
- Cholesterol: 0mg
Keywords: keto salad, watermelon salad, summer dessert, healthy salad, refreshing salad
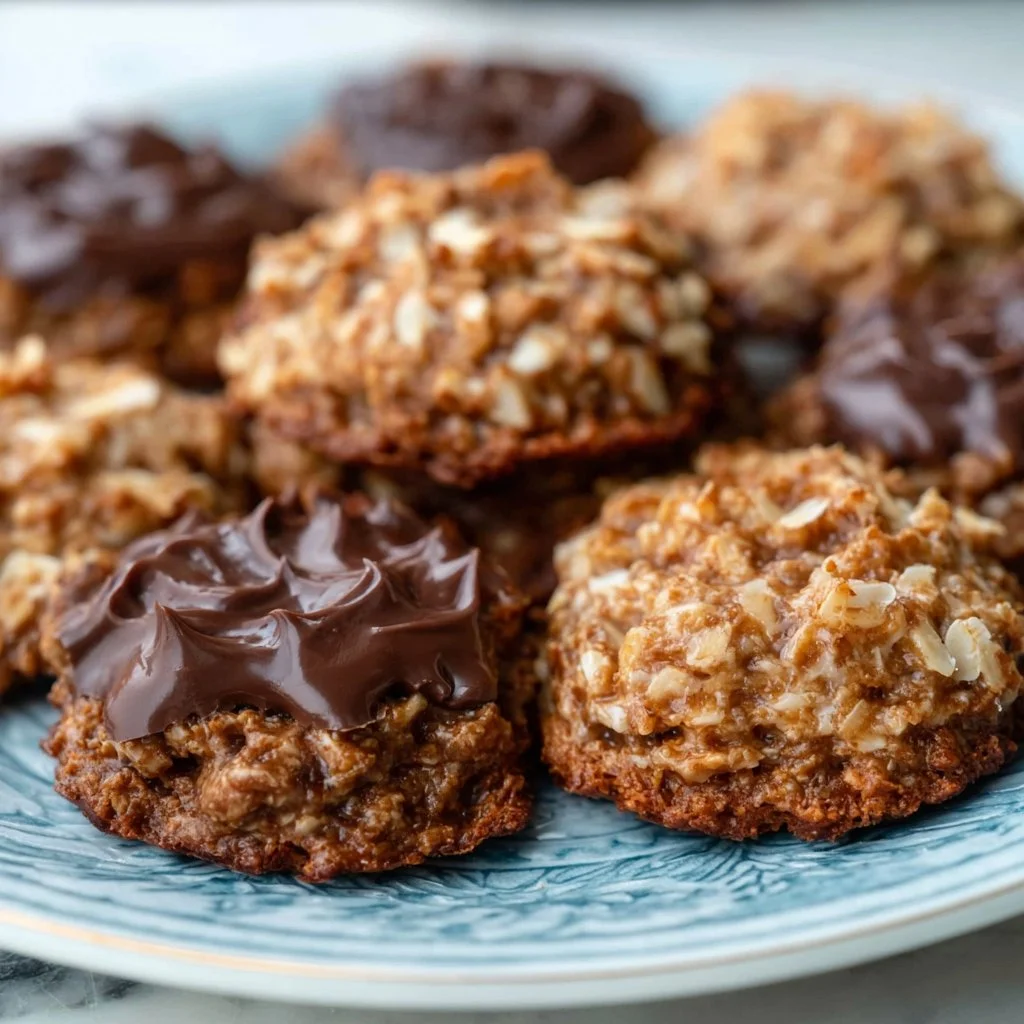
Easy No-Bake Keto Cookies (Low Carb & Delicious!)
Easy No-Bake Keto Cookies (Low Carb & Delicious!)
Hello, fellow foodies! Welcome back to my little corner of the culinary world, Ivory Apron. Today, we’re diving into a deliciously simple treat that’s all about flavor without the fuss—No-Bake Keto Cookies! If you’re following a low-carb lifestyle or just want a sweet pick-me-up without all the guilt, these cookies are both a game changer and a lifesaver.
Picture this: It’s a cozy afternoon, you’ve got your favorite playlist humming in the background, and you suddenly crave something sweet. But here’s the kicker—you don’t want to spend hours slaving away in the kitchen, and you certainly don’t want to turn on the oven in the heat of summer! That’s where these no-bake wonders come in. They’re super easy to whip up and boast ingredients that keep you on track while satisfying that sweet tooth.
These delightful cookies combine rich flavors and healthy fats, making them the perfect snack or dessert option. Plus, you can customize them to suit your taste buds, and they are totally kid-approved! So grab your apron (or just a mixing bowl if you prefer), and let’s create something scrumptious together!
Personal Story
You know, my love for no-bake desserts goes way back to my childhood. I vividly remember those long summer days spent in my grandmother’s kitchen. She had a knack for showing me just how enjoyable cooking can be, and one of her favorite treats was her famous no-bake chocolate oat cookies. The chocolate would melt in your mouth, sweetened just right with a hint of peanut butter.
We would often make a batch to share with family and friends, and honestly, it seemed like they were gone in an instant. It became our little summer tradition; the laughter, the mess, and the sweet smell of chocolate were all part of the experience. Fast forward to today, and while I’ve certainly refined the recipe a bit to fit my keto lifestyle, those warm, nostalgic feelings of joy and togetherness still inspire me to share these delightful No-Bake Keto Cookies with you.
Ingredients
Here’s what you’ll need to make these easy-peasy No-Bake Keto Cookies:
-
1 cup unsweetened almond butter
A creamy, rich base that complements our flavors. If you’re allergic to nuts, you can substitute it with sunflower seed butter or even tahini for a different twist! -
1/3 cup unsweetened cocoa powder
This adds that deep chocolate flavor we all love. Look for a good quality cocoa powder to really elevate your cookies. If you want a hint of sweetness, you can use carob powder instead! -
1/4 cup keto-friendly sweetener (like erythritol or stevia)
This will sweeten your cookies without the carbs! Experiment with different blends to find your perfect level of sweetness. You can use monk fruit sweetener here too! -
1/4 cup coconut oil, melted
Melted coconut oil helps bind everything together while adding a subtle flavor. You can easily replace this with unsalted butter if that’s more your style! -
1/2 teaspoon vanilla extract
A classic addition that brings warmth and depth. Don’t skip it—it makes all the difference! You can experiment with almond extract for a fun variation too. -
1/4 cup unsweetened shredded coconut
This adds a lovely texture and flavor! If you’re not a fan, you can leave this out or substitute it with chopped nuts for an extra crunch. -
1/4 cup sugar-free dark chocolate chips
Totally optional but recommended if you’re a chocolate lover! You could swap these for dried fruit like cranberries or chopped dates—just keep an eye on the carbs!
Step-by-Step Instructions
Ready to get started? Here’s how to whip up your No-Bake Keto Cookies in no time!
-
Gather Your Ingredients
Take a moment to measure out all your ingredients. This not only speeds up the process, but it also ensures you don’t forget anything. You’ll need a medium mixing bowl and a rubber spatula for folding everything together. -
Mix Wet Ingredients First
In your medium bowl, combine the almond butter, melted coconut oil, and vanilla extract. Stir them together until well incorporated. The almond butter should be creamy and smooth. This is where the magic starts! -
Add Dry Ingredients
Now, sprinkle in the unsweetened cocoa powder, keto-friendly sweetener, and shredded coconut. Use your spatula to fold the dry ingredients into the wet mixture gently. You should see a rich, chocolate-y batter starting to form.Chef Tip: If you’re finding the mixture too thick, feel free to add a splash of coconut milk to loosen it up.
-
Incorporate Chocolate Chips
Finally, fold in your sugar-free dark chocolate chips (if using). Make sure they are evenly distributed across your cookie mixture. You want that delicious burst of chocolate in every bite! -
Form the Cookies
Using a tablespoon, scoop out portions of the batter and place them onto a parchment-lined baking sheet. Flatten them slightly with the back of the spoon or your fingers to create a cookie shape.Chef Hack: Wet your hands with a little coconut oil for easier handling!
-
Chill in the Fridge
Pop your baking sheet in the fridge for at least 30 minutes to allow the cookies to set. This is the hardest part! Try not to eat all the batter (although I won’t tell if you sneak a bite!). -
Enjoy!
Once they’re firm, take them out and enjoy these delightful no-bake treats! Store any leftovers in an airtight container in the fridge for a quick go-to snack.
Serving Suggestions
To plate these cookies perfectly, simply arrange them on a rustic wooden board or a pretty plate. You can garnish with a sprinkle of shredded coconut or a drizzle of melted dark chocolate if you’re feeling fancy. They also pair wonderfully with a tall glass of almond milk or your favorite herbal tea—perfect for an afternoon treat.
Recipe Variations
-
Nut-Free Version: Substitute almond butter with sunflower seed butter for a nut-free alternative. This adds a new flavor profile while keeping it low-carb!
-
Chewy Texture: Add 1/4 cup of ground flaxseed or chia seeds for extra fiber and a bit of chewiness.
-
Spicy Twist: A pinch of cinnamon or cayenne pepper can make the flavor profile pop! This is a fun way to give them a bit of a kick.
-
Caramel Lovers: Drizzle in some sugar-free caramel sauce before chilling for that silky sweetness.
-
Nutty Crunch: Fold in some chopped pecans or walnuts for added crunch and healthy fats!
Chef’s Notes
Creating no-bake desserts became a sort of personal mission for me—not only do they save time, but they evoke a sense of nostalgia. Each time I whip up these cookies, I think back to those sweltering summer afternoons spent with my grandmother. It’s incredible how something so simple can carry such vibrant memories.
Over the years, I’ve played with the recipe to make it more versatile and appealing to a wider range of dietary preferences. It keeps evolving, just like my cooking journey, and every batch comes out a little different depending on what I’m feeling that day.
FAQs and Troubleshooting
1. Can I use a different nut butter?
Absolutely! Any nut butter will work, but make sure it’s creamy rather than chunky for the right texture.
2. What if my cookies are too crumbly?
If your cookies are crumbling apart, try adding a bit more melted coconut oil or almond butter. This will help them bind better.
3. How can I store these cookies?
Keep these cookies in an airtight container in the fridge for up to a week. They also freeze well if you want to keep a stash for later!
4. Can I omit the cocoa powder?
Yes, if you prefer a more classic cookie flavor, you can leave out the cocoa powder entirely and maybe add a bit more vaniller or coconut for flavor!
Nutritional Info (Optional)
Each No-Bake Keto Cookie contains approximately:
- Calories: 120
- Total Fat: 10g
- Net Carbs: 2g
- Protein: 4g
So there you have it! These easy No-Bake Keto Cookies are not just a delightful treat but a chance to create memories in the kitchen. Whether you’re indulging solo or sharing with friends, they’re bound to shine. Now, put on your apron, gather your ingredients, and let’s make something delicious together. Happy baking (or no-baking!), everyone!
PrintEasy No-Bake Keto Cookies

Deliciously simple no-bake cookies that are low-carb and perfect for satisfying your sweet tooth without guilt.
- Prep Time: 10 minutes
- Cook Time: 30 minutes
- Total Time: 40 minutes
- Yield: 12 cookies 1x
- Category: Dessert
- Method: No-Bake
- Cuisine: Keto
- Diet: Low Carb
Ingredients
- 1 cup unsweetened almond butter
- 1/3 cup unsweetened cocoa powder
- 1/4 cup keto-friendly sweetener (like erythritol or stevia)
- 1/4 cup coconut oil, melted
- 1/2 teaspoon vanilla extract
- 1/4 cup unsweetened shredded coconut
- 1/4 cup sugar-free dark chocolate chips (optional)
Instructions
- Gather your ingredients.
- Mix wet ingredients first: combine almond butter, melted coconut oil, and vanilla extract.
- Add dry ingredients: sprinkle in cocoa powder, keto sweetener, and shredded coconut.
- Incorporate chocolate chips (if using).
- Form the cookies: scoop portions onto a parchment-lined baking sheet.
- Chill in the fridge for at least 30 minutes to set.
- Enjoy! Store leftovers in an airtight container.
Notes
Feel free to customize with nut substitutes or additional flavors like cinnamon or chopped nuts.
Nutrition
- Serving Size: 1 cookie
- Calories: 120
- Sugar: 1g
- Sodium: 50mg
- Fat: 10g
- Saturated Fat: 8g
- Unsaturated Fat: 2g
- Trans Fat: 0g
- Carbohydrates: 2g
- Fiber: 1g
- Protein: 4g
- Cholesterol: 0mg
Keywords: no-bake, keto, cookies, low carb, dessert