
Minute One-Pan Cheesy Ground Beef and Rice Casserole
Cheesy Ground Beef and Rice Casserole: A Comforting Classic for Every Table
Hello, fellow food enthusiasts! Today, we’re diving into a dish that embodies cozy, intimate dinners and the comforting embrace of home-cooked meals. I’m excited to share my recipe for Cheesy Ground Beef and Rice Casserole, a classic that’s not only easy to whip up but also loaded with delicious flavors. So, grab your apron, and let’s get cooking!
Introduction: A Comfort Food Dream Come True
There’s something about casseroles that instantly brings a sense of nostalgia and warmth. For many of us, these one-pan wonders hold the essence of family dinners, lazy Sundays, and the simple joy of sharing a meal. The way a good casserole can fill a room with its rich aroma, and the way it brings loved ones together, is truly magical.
This Cheesy Ground Beef and Rice Casserole is one of those dishes that can turn any gathering from ordinary to extraordinary with minimal effort. Imagine a warm, cheesy layer of goodness topped with golden brown edges, enticing everyone at the table to dig in! It’s hearty, satisfying, and best of all—flexible! Whether you’re hosting a casual dinner party, feeding a hungry family, or just in need of some comfort food on a chilly evening, this casserole has got your back.
I remember the first time I made a version of this recipe for a big family dinner. I was a bit nervous—would everyone enjoy it? My heart raced as I pulled the bubbling casserole out of the oven, the mouthwatering scent enveloping the kitchen. But the moment I set it down on the table and watched everyone dive in, the joy on their faces washed over my nerves like the first sip of a smooth, velvety wine. They were loving it, reaching for seconds—or even thirds! That evening was more than just a meal; it was a reminder that good food has the power to create connections and evoke smiles.
Personal Story: A Family Tradition Reimagined
I want to take a moment to share a nostalgic memory tied to this comforting casserole. Growing up, my grandmother had a way of turning humble ingredients into something extraordinary. She often made her famous rice casserole, which inspired me to create my own version after her passing. I still remember sitting at her cozy kitchen table, surrounded by the laughter of family members, all thumbing through her well-worn recipe book as she recounted the stories behind each dish.
One particular evening, she let my siblings and me in on her secret: the key ingredient was love. And of course, plenty of cheese! I can still picture her laughing as she melted a hefty chunk of cheddar into her casserole, and how she would always say, “You can never have too much cheese!” Those lessons in patience, creativity, and cooking with intention have stuck with me ever since. This Cheesy Ground Beef and Rice Casserole serves as a delicious tribute to her infallible spirit and her extraordinary talent for bringing people together through food.
Ingredients: Gathering Your Essentials
Let’s get into the nitty-gritty of what you’ll need to create this culinary masterpiece! Below are the ingredients for our Cheesy Ground Beef and Rice Casserole, along with some chef insights and substitution tips to make your preparation a breeze.
-
1 lb lean ground beef: This is your protein of choice, but you can substitute it with ground turkey or chicken for a lighter version. If you’re looking to go meatless, try using a meat substitute like lentils or chickpeas!
-
1 small onion, diced: Onions add a foundational layer of flavor. If you’re not a fan, try shallots or green onions. You can even skip them entirely for a simpler taste!
-
2 cloves garlic, minced: Garlic infuses the dish with aromatic richness. If you’re in a pinch, garlic powder can work, but fresh is best!
-
2 cups cooked white rice: This is what binds everything together. Feel free to swap in brown rice or quinoa for a nutty flavor and higher fiber content.
-
1 can (10.5 oz) cream of mushroom soup (or cream of chicken): This creamy base brings everything together. You could also make a homemade version using heavy cream, chicken broth, and sautéed mushrooms for a fresh twist.
-
1/2 cup milk or beef broth: This adds moisture to the casserole. Use vegetable broth for a vegetarian version, or even almond milk for a dairy-free option.
-
2 cups shredded cheddar cheese (divided): Cheddar is a classic, but don’t hesitate to experiment! Gouda, pepper jack, or a blend of your favorites would bring stunning flavor.
-
1 tsp paprika: This adds a hint of smokiness. If you’re feeling adventurous, try smoked paprika for an extra layer of depth.
-
Salt and pepper to taste: Essential to elevate the flavors—don’t skip this step!
-
Optional: chopped parsley for garnish: A sprinkle of parsley adds a fresh touch and a pop of color to your beautifully layered casserole.
Step-by-Step Instructions: Crafting Your Casserole
Ready to get started? Let’s take it step-by-step to whip up this irresistible Cheesy Ground Beef and Rice Casserole. Trust me, it’s simpler than you might think!
-
Preheat your oven: Start by preheating your oven to 350°F (175°C). This step is crucial, as it ensures your casserole cooks evenly.
-
Brown the ground beef: In a large skillet over medium heat, add the lean ground beef, breaking it apart with a spatula. Cook until browned, which should take about 5-7 minutes. Drain excess fat if necessary. Pro tip: adding a pinch of salt while browning the meat helps bring out its flavor!
-
Sauté the vegetables: Add the diced onion and minced garlic to the skillet, stirring to combine with the beef. Cook for an additional 3-4 minutes until the onion becomes translucent and the garlic is fragrant. This is where you’re building layers of flavor!
-
Combine the creamy base: In a large bowl, mix together the cream of mushroom soup and milk (or broth) until smooth. This will be the luxurious glue that holds our casserole together!
-
Add the rice and seasonings: Stir in the cooked rice along with the paprika, salt, and pepper. Mix well to ensure all ingredients are fully combined. This dish is all about creating harmony in flavors!
-
Fold in the beef mixture: Incorporate the sautéed beef, onion, and garlic into the creamy rice mixture, ensuring an even distribution of all those delicious ingredients. This is where the casserole magic begins!
-
Layer with cheese: Divide the shredded cheddar cheese in half; add half of it into the mixture and stir to combine. Add the rest on top of the casserole for that glorious bubbling crust you desire!
-
Transfer to a casserole dish: Pour the entire mixture into a greased 9×13 inch baking dish, spreading it out evenly. I like to use a spatula to smooth the top for a beautiful presentation.
-
Bake to perfection: Cover your dish with aluminum foil and bake in the preheated oven for 20 minutes. Then, remove the foil and bake for another 15-20 minutes, or until the cheese is melted and bubbly, with golden edges. Keep an eye on it to prevent over-browning!
-
Garnish and enjoy: Once out of the oven, let your casserole rest for about 5 minutes, then sprinkle with chopped parsley before serving. And voilà! You’re ready to impress.
Serving Suggestions: Plate Up with Style
This Cheesy Ground Beef and Rice Casserole is spectacular on its own, but a little thoughtful presentation can take it to the next level. Serve it straight from the baking dish for that homey, inviting feel, or portion it onto plates for a more refined touch. A sprinkle of fresh parsley not only adds color but also a refreshing flavor burst that beautifully contrasts the richness of the dish. Pair it with a crisp green salad and some crusty bread for a complete meal that your guests (or family) will rave about!
Recipe Variations: Get Creative in the Kitchen!
Feeling inspired to take this casserole to new heights? Here are a few variations to get your creative juices flowing:
-
Tex-Mex Twist: Add some black beans, corn, and diced bell peppers for a Southwestern flair. Top with some jalapeños for a spicy kick!
-
Vegetarian Delight: Swap out the ground beef for sautéed mushrooms, zucchini, or your favorite veggie mix for a satisfying meatless meal.
-
Herbed Delight: Incorporate fresh herbs like thyme or rosemary into the rice mix for an aromatic touch. Trust me, this will elevate your casserole!
-
Spicy Kick: Mix in some hot sauce or diced green chiles for a little heat—perfect for those who crave a bit of spice in their meals!
-
Cheesy 3-Way: Use a combination of different cheeses (like mozzarella and pepper jack) for a flavor explosion! Experiment with what you have on hand!
Chef’s Notes: A Recipe Close to My Heart
This Cheesy Ground Beef and Rice Casserole has truly evolved through the years. What started as a well-loved family recipe has transformed into my personal celebration of flavors. The beauty of cooking is its adaptability! I often recall funny kitchen mishaps—like the time I mistakenly grabbed powdered sugar instead of salt and ended up with a slightly sweet (but still delicious) version of this casserole that had my family roaring with laughter! Embrace your kitchen journey—it’s all about experimenting and having fun!
FAQs and Troubleshooting: Let’s Clear Things Up
1. can I make this casserole ahead of time?
Absolutely! You can prepare the casserole up to the baking step. Just cover it tightly with plastic wrap or foil and store it in the refrigerator. When you’re ready to bake, allow it to come to room temperature and then follow the baking instructions.
2. why is my casserole too dry?
If your casserole comes out dry, it’s likely that the creamy mixture didn’t have enough moisture to begin with. Next time, add a bit more milk or broth or cover it with foil for a longer time to trap steam.
3. can I freeze leftovers?
Yes, this casserole freezes beautifully! Simply let it cool completely, then transfer it to an airtight container or freezer bag and label it. It should last up to three months—just reheat in the oven until warmed through!
4. how can I ensure golden cheese on top?
To achieve that perfect golden crust, broil your casserole on low for the last couple of minutes of baking. Just keep a close eye on it, as things can get toasty very quickly!
Nutritional Info
While I believe in enjoying good food without restraint, here’s a rough estimate of the nutritional info per serving for our Cheesy Ground Beef and Rice Casserole (say, based on 6 servings):
- Calories: 455
- Protein: 25g
- Carbohydrates: 42g
- Fat: 22g
- Fiber: 1g
This is a comfort dish, so the occasional indulgence is totally okay—especially when shared around the table with loved ones!
Conclusion
I hope you’ve enjoyed this journey into the creation of my Cheesy Ground Beef and Rice Casserole as much as I love sharing it with you. Remember, good cooking is about connection, creativity, and a generous sprinkle of laughter. So, lace up that apron, invite some friends over, and make it a special dinner to remember.
If you try this recipe, don’t forget to share your culinary creations with us at Ivory Apron. Let’s keep the spirit of beautiful, intentional cooking alive! Happy cooking, everyone!
PrintCheesy Ground Beef and Rice Casserole

A comforting and cheesy casserole perfect for family gatherings and cozy dinners.
- Prep Time: 15 minutes
- Cook Time: 35 minutes
- Total Time: 50 minutes
- Yield: 6 servings 1x
- Category: Main Course
- Method: Baking
- Cuisine: American
- Diet: None
Ingredients
- 1 lb lean ground beef
- 1 small onion, diced
- 2 cloves garlic, minced
- 2 cups cooked white rice
- 1 can (10.5 oz) cream of mushroom soup
- 1/2 cup milk or beef broth
- 2 cups shredded cheddar cheese (divided)
- 1 tsp paprika
- Salt and pepper to taste
- Optional: chopped parsley for garnish
Instructions
- Preheat your oven to 350°F (175°C).
- Brown the ground beef in a skillet over medium heat for 5-7 minutes; drain excess fat.
- Sauté the onion and garlic with the beef for 3-4 minutes until fragrant.
- Combine the cream of mushroom soup and milk (or broth) in a large bowl.
- Add the cooked rice, paprika, salt, and pepper, and mix well.
- Fold in the beef mixture, ensuring even distribution.
- Layer in half of the shredded cheese, then pour the mixture into a greased 9×13 inch baking dish.
- Bake covered for 20 minutes, then uncover and bake for an additional 15-20 minutes until cheese is bubbly.
- Garnish with parsley before serving.
Notes
Perfect for meal prep and can be frozen for later.
Nutrition
- Serving Size: 1 serving
- Calories: 455
- Sugar: 3g
- Sodium: 800mg
- Fat: 22g
- Saturated Fat: 10g
- Unsaturated Fat: 8g
- Trans Fat: 1g
- Carbohydrates: 42g
- Fiber: 1g
- Protein: 25g
- Cholesterol: 70mg
Keywords: casserole, comfort food, cheesy, ground beef, easy recipe
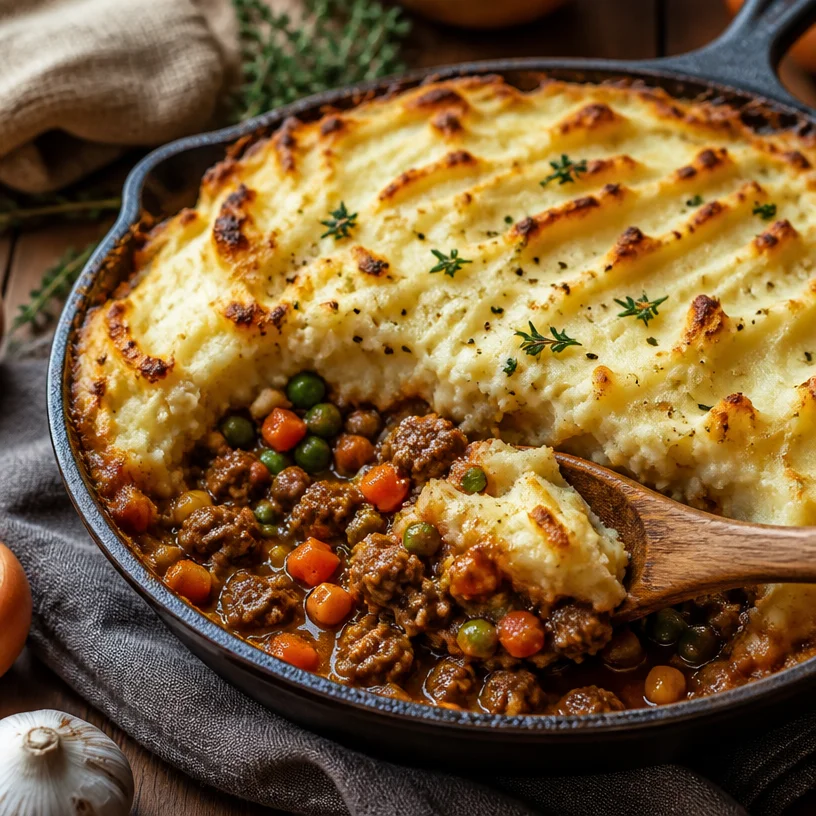
Minute One-Pan Shepherd’s Pie for Busy Weeknights
Easy Shepherd’s Pie: Comfort Food with a Twist
Hello, my lovely foodies! Today, I’m super excited to share with you a delightful recipe that’s truly close to my heart — Easy Shepherd’s Pie. This dish is the epitome of cozy comfort food, perfect for those chilly evenings when you want something hearty and delicious. The best part? It’s so simple to make! So let’s roll up our sleeves, gather our ingredients, and dive into the warmth of the kitchen together.
A Cozy Little Story
Growing up, my family had a tradition of gathering around the dinner table every Sunday. No matter how busy life got, Sunday dinners were sacred. My mom would whip up a big pot of Shepherd’s Pie because she knew it was a crowd-pleaser. I can still remember the aroma wafting through the house, making my stomach rumble before we even sat down.
I’d help her in the kitchen, peeling potatoes and stirring the filling. Those moments were about more than just food; they were about love, laughter, and bonding. As we’d dig into that savory pie, I’d watch my family’s eyes light up with each bite. It’s one of those meals that warms your heart and brings people together, and it’s a tradition I’m thrilled to carry forward.
So today, I invite you to share in that spirit of togetherness as we create our own Easy Shepherd’s Pie. Trust me, your family will cherish it just as much as mine did!
Ingredients
Here’s what you’ll need to make this comforting delight:
-
1 lb ground lamb or beef
You can choose between lamb for a more traditional taste, or beef for a heartier option. If you’re looking for a leaner choice, ground turkey works too! -
2 cups mixed vegetables (carrots, peas, corn)
Fresh or frozen, these veggies add color and nutrition. If you’re feeling adventurous, you can substitute with green beans or diced bell peppers. -
1 onion, chopped
Onions give the dish a fantastic depth of flavor. Yellow onions are great, but red onions can add a bit of sweetness. -
2 cloves garlic, minced
Garlic is a flavor powerhouse! Feel free to adjust the amount to suit your palate — more for garlic lovers! -
1 cup red wine
A splash of red wine enriches the sauce with complexity. If you prefer not to use alcohol, replace it with beef broth for a non-alchoholic version. -
2 cups mashed potatoes
Home-cooked is best! Or you can use store-bought for a quick shortcut. Any mashed potato recipe works, so feel free to add herbs or cheese. -
1 cup beef broth
This will keep your shepherd’s pie moist and flavorful. Chicken broth can also work if you’re using chicken. -
2 tablespoons Worcestershire sauce
This adds that umami kick we all love. For a vegetarian option, try soy sauce or a vegan Worcestershire sauce. -
Salt and pepper to taste
Always essential for bringing out flavors. Adjust according to your preference! -
Olive oil for cooking
A light drizzle of olive oil gives a wonderful flavor and helps in sautéing. You can opt for any cooking oil or butter if you prefer.
Step-by-Step Instructions
-
Prep your Ingredients:
Start by gathering all your ingredients on the counter. Pre-chop your vegetables, and have everything ready to go. This makes the cooking process smooth and fun! -
Cook the Meat:
In a large skillet or frying pan, heat a tablespoon of olive oil over medium heat. Add the chopped onion and minced garlic. Sauté them together until they’re soft and fragrant — about 3-5 minutes. Then, add the ground lamb or beef, breaking it up with a spatula. Cook until browned, about 7-10 minutes. This is where your kitchen starts to smell incredible! -
Add the Vegetables:
Toss in your mixed veggies. Stir well to combine everything while letting those flavors meld together for another 5 minutes. -
Pour in the Red Wine:
Now, here comes the fun part! Pour in the red wine and let it simmer for 5 minutes. You want to reduce the wine just a bit, concentrating those lovely flavors. If you prefer not using wine, add a splash of beef broth and let it steam off a little. -
Combine Broth & Season:
After the wine has reduced, add the beef broth and Worcestershire sauce. Season with salt and pepper. Let this simmer gently for about 10 minutes, allowing everything to get cozy. If the mixture seems too runny, you can thicken it with a bit of cornstarch mixed with water. -
Prepare the Mash:
While your meat and veggies are bubbling away, if you’re making homemade mashed potatoes, now’s the time to whip them up. You want them to be creamy and smooth. If you’re using store-bought, follow the package instructions to warm them up. -
Assemble the Pie:
Preheat your oven to 400°F (200°C). In a baking dish, spread the meat and vegetable mixture evenly at the bottom. Then, dollop the mashed potatoes on top, spreading them out gently to cover everything. Don’t worry about being perfect — rustic is beautiful! -
Bake to Perfection:
Pop the assembled shepherd’s pie into the oven and bake for about 25-30 minutes, or until the top is golden and the edges are bubbling. You can broil for an extra 2-3 minutes if you want that nice crusty top. -
Serve It Up:
Once done, take the pie out of the oven and let it rest for a few minutes. This helps all those delicious juices settle in. Then, use a large spoon to serve it up!
Serving Suggestions
When it comes to serving Shepherd’s Pie, I like to keep it simple. A hearty slice on a plate alongside a fresh green salad with a tangy vinaigrette makes for a beautiful balance. You can also serve it with a dollop of crème fraîche or a sprinkle of fresh herbs, like parsley or chives, to elevate the dish even further.
Recipe Variations
Here are a few fun twists you can try with your Shepherd’s Pie:
-
Vegetarian Version: Substitute the meat with lentils or diced mushrooms, and use vegetable broth instead of beef broth. You can also add more vegetables like zucchini or spinach.
-
Cheesy Mash: Mix some shredded cheese into your mashed potatoes for an indulgent creamy top.
-
Spicy Kick: Add a teaspoon of chili flakes or a dash of hot sauce to the meat mixture for a little heat!
-
Curry Twist: Mix in some curry powder with the vegetables for a unique flavor profile that adds warmth and spice.
-
Root Veggie Mash: Swap regular potatoes for sweet potatoes, parsnips, or a blend for added natural sweetness and nutrition.
Chef’s Notes
This recipe is one of those that has naturally evolved over time. I’ve tried countless variations, but my simple, cozy version always takes me back to my mom’s kitchen. I love how easy it is to modify depending on what’s in my fridge. Plus, it’s a fantastic way to use up leftover veggies!
One time, I had a mishap with some overly salty broth — yikes! It made me get creative by adding a bit of cream to the mash, which balanced everything beautifully. So, don’t be afraid to make adjustments based on your taste preferences or what you have available.
FAQs and Troubleshooting
-
Q: What if my meat is too dry?
A: If your meat filling becomes dry, add a little more beef broth or red wine to bring moisture back into the dish before topping it with the mash. -
Q: Can I freeze Shepherd’s Pie?
A: Absolutely! It’s great for meal prep. Assemble it, cover it tightly, and pop it in the freezer. Just adjust the baking time when you’re ready to cook it from frozen. -
Q: My potatoes are lumpy. What did I do wrong?
A: Lumpy mashed potatoes usually come from not mashing them enough or using cold butter. For the creamiest mash, use hot potatoes, and mash until smooth! -
Q: Can I make this in advance?
A: Yes! You can prepare the filling ahead of time and store it in the fridge. Just assemble and bake when you’re ready to serve.
Nutritional Info (Optional)
While I usually focus on the comfort of enjoying your food, a serving of this Easy Shepherd’s Pie contains roughly 450 calories, depending on the specific ingredients used. It’s a satisfying meal that provides a good mix of protein, carbs, and veggies!
So there you have it, my delightful food lovers! Easy Shepherd’s Pie is not just a recipe; it’s a way to create cherished moments around your table. I hope you enjoy making it as much as I do. Remember to have fun, and don’t stress about perfection — it’s all about feeling good and sharing those joyful flavors with your loved ones. Happy cooking, and let’s savor the warmth of togetherness through every delicious bite!
PrintEasy Shepherd’s Pie

A hearty and comforting shepherd’s pie made with your choice of ground lamb or beef, mixed vegetables, and topped with creamy mashed potatoes.
- Prep Time: 15 minutes
- Cook Time: 40 minutes
- Total Time: 55 minutes
- Yield: 4 servings 1x
- Category: Main Course
- Method: Baking
- Cuisine: British
- Diet: None
Ingredients
- 1 lb ground lamb or beef
- 2 cups mixed vegetables (carrots, peas, corn)
- 1 onion, chopped
- 2 cloves garlic, minced
- 1 cup red wine
- 2 cups mashed potatoes
- 1 cup beef broth
- 2 tablespoons Worcestershire sauce
- Salt and pepper to taste
- Olive oil for cooking
Instructions
- Prep your ingredients: Gather all your ingredients and pre-chop your vegetables.
- Cook the meat: Heat olive oil in a skillet, add onion and garlic, then cook until soft. Add ground meat and cook until browned.
- Add the vegetables: Stir in mixed veggies and cook for another 5 minutes.
- Pour in the red wine and let it simmer for 5 minutes to reduce.
- Combine broth and season: Add beef broth and Worcestershire sauce, season with salt and pepper, and simmer for 10 minutes.
- Prepare the mash: Make your mashed potatoes, aiming for a creamy texture.
- Assemble the pie: Spread the meat mixture in a baking dish, top with mashed potatoes.
- Bake to perfection: Bake at 400°F (200°C) for 25-30 minutes until golden.
- Serve it up: Let the pie rest for a few minutes before serving.
Notes
This recipe can be customized with various vegetables or by using a vegetarian option. It’s also great for meal prep and can be frozen.
Nutrition
- Serving Size: 1 serving
- Calories: 450
- Sugar: 5g
- Sodium: 600mg
- Fat: 20g
- Saturated Fat: 7g
- Unsaturated Fat: 10g
- Trans Fat: 0g
- Carbohydrates: 35g
- Fiber: 4g
- Protein: 25g
- Cholesterol: 70mg
Keywords: Shepherd's Pie, comfort food, hearty meal, family recipe

One-Pan Chicken Romano: 20-Minute Weeknight Dinner
Crave-Worthy Chicken Romano: An Incredible Ultimate Recipe
Hey there, fellow food lovers! I’m so excited to share this amazing recipe for Chicken Romano with you. If you’re looking for a dish that feels elegant and comforting all at the same time, look no further! This dish, with its crispy golden exterior and cheesy, savory flavor, can transform any weeknight dinner into a special occasion, and it’s sure to impress even the most discerning palates.
Ellie, my dear friend—and let me tell you, she has quite the knack for finding the latest trendy restaurants—raved about a Chicken Romano dish at a little bistro downtown. As she described it, I could just envision the crispy panko crust, that lovely Romano cheese flavor, and the beautiful plating. Instantly, I was inspired to recreate it at home, not just for her but to make it a staple in my own kitchen.
This recipe is all about balance and joy. The flavors meld together beautifully, while the crispy texture plays perfectly against the tender chicken. Whether you’re hosting friends for a cozy dinner party, cooking for your family, or just indulging a little yourself on a Tuesday night, I promise this dish is here to elevate your dining experience. Plus, it’s so easy to prepare that you’ll find yourself whipping it up again and again!
So, grab your apron, pour yourself a glass of your favorite wine, and let’s dive into this crave-worthy Chicken Romano recipe!
Personal Story
Let me take you back to a delightful summer barbecue we had a few years ago. It was one of those perfect weekends, where the sun shone brightly, and the smell of good food hung in the air. I had invited over some friends and family, and I was determined to make the experience unforgettable. In the lineup was this fantastic Chicken Romano that quickly became the star of the show.
As I prepared the dish, I recalled my grandmother’s kitchen, where she taught me the importance of patience and care in cooking. I can still picture her, apron on, leaning over the stove with a spoon in hand and that cheeky grin, reminding me that cooking is an art. By the time the Chicken Romano was plated, everyone was gathered around, their conversations fading as they eyed the food in excitement. It was one of those magical moments when laughter, good vibes, and delicious smells danced around the table.
As I served the Golden Chicken Romano, I felt that familiar warmth of connection. From the first bite, everyone was hooked! It’s moments like these that fuel my love for cooking, reminding me that food is not just about sustenance; it’s about those shared experiences that linger in our hearts long after the plates are cleared.
Ingredients
So, let’s break down the ingredients you’ll need for this lovely dish!
-
4 boneless, skinless chicken breasts: The star of the show! Make sure they’re even in thickness for even cooking. If you want to substitute for a leaner option, turkey cutlets work well too.
-
1 cup grated Romano cheese: This is where the flavor magic happens. Romano has a sharper taste than Parmesan. If you can’t find it, feel free to swap it out for another hard cheese like Pecorino.
-
1 cup breadcrumbs (preferably Italian-style): They’ll give the chicken that delightful crunch. You can use panko for an extra crispy coating, or make your own from stale bread.
-
2 large eggs: These help bind everything together beautifully. For a vegan option, try using a flaxseed mixture (1 tablespoon of ground flaxseed mixed with 3 tablespoons of water) as a binding agent.
-
2 tablespoons all-purpose flour: A light dusting before you dip it into the egg mixture gives the perfect base. If you need a gluten-free option, almond flour can work wonderfully!
-
1 teaspoon garlic powder: For that extra punch of flavor! You could use fresh minced garlic, but keep in mind it might stick to the breadcrumbs.
-
1 teaspoon dried oregano: A classic herb that adds a Mediterranean flair. Fresh oregano could be chopped and substituted if available!
-
1 teaspoon salt: Essential for flavor enhancement. Adjust to taste, especially if you’re watching your sodium intake!
-
1/2 teaspoon black pepper: Just a touch for that subtle kick.
-
1/4 cup olive oil: We need this to pan-fry our chicken, creating that irresistible golden crust.
-
Fresh parsley, for garnish (optional): A beautiful touch of color and flavor. If you want to mix it up, try adding some fresh basil!
Step-by-Step Instructions
-
Prep Your Chicken: Begin by placing your chicken breasts between two pieces of plastic wrap. This helps to even them out. Grab a meat mallet or rolling pin, and gently pound the chicken until it’s about 1/2 inch thick. This not only ensures even cooking, but it also makes for a tender bite. Set aside.
-
Set Up Your Breading Station: In one shallow bowl, combine the flour, garlic powder, oregano, salt, and pepper. In a second bowl, whisk together the eggs. In a third bowl, spread out the breadcrumbs, and mix in half of the grated Romano cheese. Clear a space on your countertop to lay out the bowls in an assembly line style—trust me; this makes everything easier!
-
Dredge the Chicken: First, take each chicken breast and dip it into the flour mixture, shaking off any excess. Then, dip it into the egg mixture, ensuring it’s fully coated. Finally, press it gently into the breadcrumb mixture, making sure to cover all sides thoroughly. Place the breaded chicken on a plate.
-
Heat the Oil: In a large skillet, heat the olive oil over medium-high heat. You’ll know it’s ready when a pinch of breadcrumbs sizzles upon contact. This step is critical because it will create that crispy, golden layer we’re looking for.
-
Cook the Chicken: Once the oil is hot, carefully place the breaded chicken breasts into the skillet without overcrowding (you may need to do this in batches). Cook for about 4-5 minutes on each side, or until they’re golden brown and cooked through. To check for doneness, insert a meat thermometer into the thickest part of the chicken—160°F is your target!
-
Drain and Rest: Once cooked, transfer the chicken to a paper towel-lined plate to drain excess oil. Let them rest for a few minutes—this allows the juices to redistribute, making for an even juicier bite!
-
Plate and Garnish: Now it’s time for the fun part! Arrange your Chicken Romano on a serving platter or individual plates and sprinkle the remaining Romano cheese over the top along with fresh parsley for that beautiful visual appeal.
Serving Suggestions
This Chicken Romano is perfect served beside a fresh arugula salad tossed with lemon vinaigrette for a lovely contrast. You can also go for a simple pasta with marinara sauce or some roasted seasonal vegetables. And don’t forget a slice of crusty artisan bread to soak up all those delicious flavors!
Recipe Variations
Feeling adventurous? Here are some creative twists for your Chicken Romano:
-
Add a Kick: Try mixing crushed red pepper flakes into your breadcrumb mixture for a spicy touch.
-
Herb Variation: Swap out oregano for fresh basil or thyme for a different herbal note.
-
Cheesy Delight: Mix in some shredded mozzarella with the Romano cheese for an extra cheesy texture.
-
Zesty Twist: Add some lemon zest into the breadcrumb mixture for a refreshing citrus flavor.
-
Veggie Version: For a meatless option, try using eggplant or zucchini slices, breading them just like the chicken.
Chef’s Notes
Oh, how this recipe has evolved! It originally started as a simple breaded chicken dish, but over time, with every gathering and dinner party, it transformed into this crave-worthy Chicken Romano that I can’t get enough of. Each time I make it, I learn something new about flavors and textures that come together beautifully.
And let’s not forget the joyful moments that come along with cooking. I still chuckle when I think about the time I forgot to add the salt. My friend Sarah took a bite and, with the utmost politeness, asked, "Was it supposed to be a low-sodium version?" Lesson learned—always taste as you go!
FAQs and Troubleshooting
1. Why is my Chicken Romano soggy?
If your chicken ends up soggy, it might have been overcrowded in the pan or not cooked long enough. Ensure enough oil is heated before frying and avoid overcrowding, which can lower the oil temperature.
2. Can I bake Chicken Romano instead of frying?
Absolutely! Preheat your oven to 400°F, place the breaded chicken on a greased baking sheet, and bake for about 20-25 minutes or until golden brown and cooked through.
3. What can I serve with Chicken Romano?
This dish pairs beautifully with garlic mashed potatoes, a bright green salad, or even a side of pasta. You can choose sides based on the vibe you want to create for your meal!
4. Can I freeze Chicken Romano?
Yes, you can freeze the breaded raw chicken for up to 3 months. Just be sure to separate pieces with parchment paper to prevent sticking. When ready to cook, thaw overnight in the fridge and follow the cooking instructions as usual.
Nutritional Info
While nutritional values can vary based on specific brands and preparation methods, here’s a basic estimate for one serving of Chicken Romano (based on this recipe yielding 4 servings):
- Calories: 350
- Protein: 30g
- Fat: 20g
- Carbohydrates: 10g
- Fiber: 1g
And there you have it, folks! A delightful, delicious, and utterly crave-worthy Chicken Romano recipe that will not only satisfy your tastebuds but may even bring back your best kitchen memories. So get cooking and enjoy every moment around your table! Good food isn’t just about what’s on your plate; it’s about the love and laughter shared while you savor it. Happy cooking!
PrintCrave-Worthy Chicken Romano

A delightful Chicken Romano recipe featuring crispy, golden chicken coated in Romano cheese, perfect for any occasion.
- Prep Time: 15 minutes
- Cook Time: 30 minutes
- Total Time: 45 minutes
- Yield: 4 servings 1x
- Category: Main Course
- Method: Pan Frying
- Cuisine: Italian
- Diet: None
Ingredients
- 4 boneless, skinless chicken breasts
- 1 cup grated Romano cheese
- 1 cup breadcrumbs (preferably Italian-style)
- 2 large eggs
- 2 tablespoons all-purpose flour
- 1 teaspoon garlic powder
- 1 teaspoon dried oregano
- 1 teaspoon salt
- 1/2 teaspoon black pepper
- 1/4 cup olive oil
- Fresh parsley, for garnish (optional)
Instructions
- Prep your chicken: Place chicken breasts between plastic wrap and pound to about 1/2 inch thick. Set aside.
- Set up your breading station: Combine flour, garlic powder, oregano, salt, and pepper in one bowl; whisk eggs in another; spread breadcrumbs and mix in half of Romano cheese in a third bowl.
- Dredge the chicken: Dip each breast in flour, egg, and then breadcrumbs, ensuring all sides are coated.
- Heat the oil: In a large skillet, heat olive oil over medium-high until ready.
- Cook the chicken: Place breaded chicken in the skillet and cook for 4-5 minutes on each side until golden and cooked through.
- Drain and rest: Transfer cooked chicken to a paper towel-lined plate to drain excess oil. Let rest a few minutes.
- Plate and garnish: Arrange on a serving platter, sprinkle remaining Romano cheese, and add fresh parsley.
Notes
Serve alongside arugula salad, pasta with marinara, or roasted vegetables for a delicious meal.
Nutrition
- Serving Size: 1 serving
- Calories: 350
- Sugar: 1g
- Sodium: 400mg
- Fat: 20g
- Saturated Fat: 5g
- Unsaturated Fat: 10g
- Trans Fat: 0g
- Carbohydrates: 10g
- Fiber: 1g
- Protein: 30g
- Cholesterol: 150mg
Keywords: Chicken Romano, Italian recipe, comfort food, weeknight dinner, savory dish
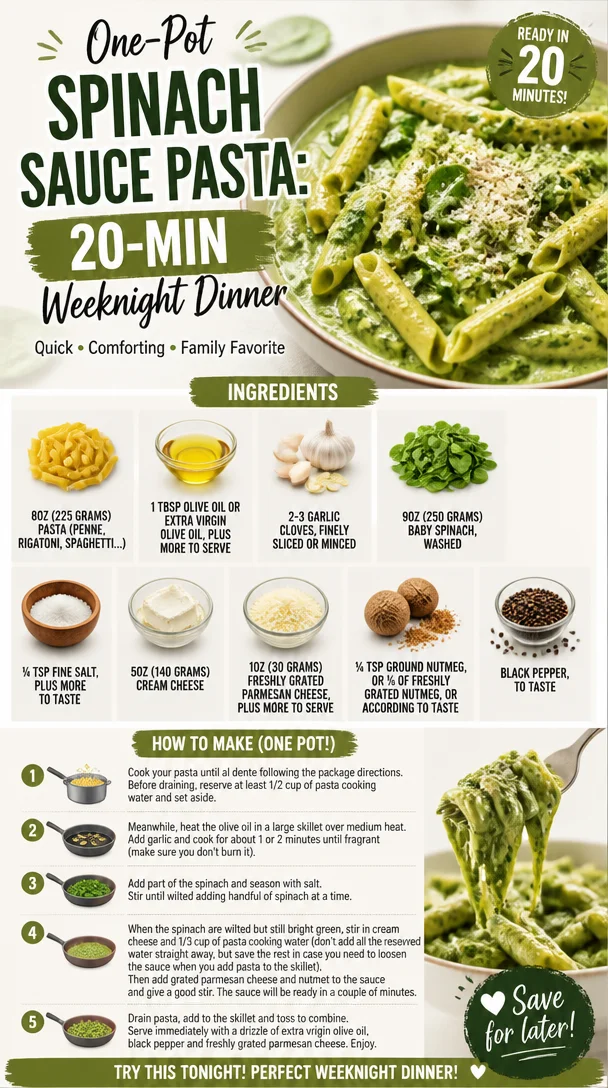
One-Pot Spinach Sauce Pasta: 20-Min Weeknight Dinner
Creamy Spinach Sauce Pasta: Elegant, Easy, and Effortlessly Delicious
Hey there, fellow foodies! Welcome back to my cozy corner of the kitchen, where we’re all about creating meals that feel luxurious but are oh-so-simple to whip up. Today, I’m excited to share one of my favorite recipes that captures the essence of elegance and comfort: Pasta with Spinach Sauce. This dish is deliciously creamy, green, and ready to impress your guests or make your weeknight dinner feel a little more special. Ready to dive in? Let’s set the table!
A Taste of Nostalgia
Let me take you back to a sunny afternoon spent at my grandmother’s house. I was about eight years old, standing on a stool, peering over the kitchen counter where she was deftly moving about, preparing one of her famous pasta dishes. The air was filled with the fragrant scent of sautéed garlic, and I remember the vibrant green of the spinach as she tossed it into the pan.
"Cooking is like magic," she said, with a twinkle in her eye, "You take a few simple ingredients and turn them into something extraordinary." Watching her toss the spinach into a glorious sauce and combine it with the freshly cooked pasta was nothing short of spellbinding.
That memory stuck with me, not just for the culinary skills my grandmother imparted but for the love and warmth that filled her kitchen. Today, when I cook this Creamy Spinach Sauce Pasta, I channel that same joy and sparkle. It’s not just about the food; it’s about creating beautiful moments around the table, just like Grandma used to do.
Ingredients
Here’s what you’ll need for this delightful pasta dish:
-
8oz (225 grams) pasta (penne, rigatoni, spaghetti, or your favorite)
- Use any pasta shape you love! Just keep an eye on the cooking time as different shapes can vary.
-
1 Tbsp olive oil or extra virgin olive oil
- A drizzle of high-quality olive oil adds richness. Don’t have olive oil? Any light oil will do in a pinch, but it’s worth the upgrade!
-
2-3 garlic cloves, finely sliced or minced
- Garlic is our aromatic superstar here! Want a milder flavor? Try roasting the garlic first for a sweeter profile.
-
9oz (250 grams) baby spinach, washed
- Fresh spinach is best for this recipe, but frozen spinach can work too; just make sure it’s thawed and drained.
-
¼ tsp fine salt, plus more to taste
- Seasoning is key! Start with less and add to your preference as you taste.
-
5oz (140 grams) cream cheese
- This creates that luscious creaminess! Don’t have cream cheese? You could use mascarpone or ricotta as alternatives.
-
1oz (30 grams) freshly grated parmesan cheese, plus more to serve
- Fresh cheese enhances flavor! If you’re in a pinch, pre-grated can work but won’t melt as beautifully.
-
¼ tsp ground nutmeg, or ⅓ of freshly grated nutmeg, or according to taste
- A tiny pinch of nutmeg warms up the flavors. Not a fan? Leave it out or switch it up with a dash of smoked paprika for a different vibe.
-
Black pepper, to taste
- Freshly cracked pepper adds a lovely kick! For a spicier twist, try red pepper flakes.
Step-by-Step Instructions
-
Cook the Pasta
Bring a large pot of salted water to a boil. Add your pasta and cook according to package instructions until al dente. Make sure to reserve about 1 cup of pasta water before draining! This starchy goodness will help you create a beautiful sauce. -
Sauté the Garlic
In a large skillet, heat the olive oil over medium heat. Once shimmering, add the minced garlic. Sauté for about 1-2 minutes, or until fragrant and golden. Be careful not to burn it—it can turn bitter! -
Add the Spinach
Toss in the baby spinach and sprinkle with salt. Cook, stirring occasionally, until the spinach wilts down, about 3-4 minutes. The vibrant color will remind you of sun-soaked days! -
Create the Sauce
Reduce the heat to low. Stir in the cream cheese until it melts and forms a creamy mixture. Add the reserved pasta water a little at a time until you reach your desired sauce consistency. This is where the magic happens! -
Flavor it Up
Add the grated parmesan and nutmeg. Stir until everything is well combined. Taste the sauce and adjust salt and pepper as needed. A good chef always tastes! -
Combine Pasta and Sauce
Add the drained pasta directly to the skillet. Toss gently to coat the pasta evenly with the spinach sauce. If the sauce is too thick, add more reserved pasta water, a tablespoon at a time. -
Serve
Plate your pasta, adding more parmesan and a drizzle of olive oil on top for that finishing touch. A sprinkle of pepper or a few fresh herbs could also brighten the plate.
Serving Suggestions
For an elegant presentation, twirl the pasta into a nest using a fork and spoon and place it in the center of your favorite plate. Add a light drizzle of olive oil and a sprinkle of fresh parmesan for a polished look. You can also toss in some toasted pine nuts or a squeeze of fresh lemon juice to brighten the flavors and make it pop!
Recipe Variations
Here are a few fun twists you can take with this dish:
-
Add Protein: Toss in some grilled chicken or shrimp for a heartier meal. You could also stir in some cannellini beans for a veggie-packed option!
-
Go Vegan: Substitute cream cheese with cashew cream (soaked blended cashews with a little water) and nutritional yeast instead of parmesan for a creamy sauce.
-
Pack a Punch: Incorporate sun-dried tomatoes or roasted red peppers for a burst of flavor and color.
-
Herb it Up: Fresh or dried herbs like basil or thyme can add an aromatic layer to your sauce. Sprinkle some in while cooking for a fragrant finish!
-
Extra Greens: Mix in other greens like kale or arugula for a nutritional boost and a flavor twist.
Chef’s Notes
This recipe has come a long way since my grandmother taught me the basics of cooking! Over time, I’ve learned the importance of balance in flavors and the joy of using fresh ingredients. I remember the first time I made this dish for a dinner party. I was nervous, but when my friends took their first bites, the compliments poured in. That moment solidified my belief that food is a love language, and a simple pasta can bring people together. Every time I make this dish, I reminisce about those early days in the kitchen with Grandma—her laughter echoing with each turn of the spatula.
FAQs and Troubleshooting
Q: My sauce seems too thick; how can I fix it?
A: No worries! Just add in a couple of tablespoons of reserved pasta water until it reaches your desired consistency.
Q: I ran out of garlic! Can I skip it?
A: While garlic adds tons of flavor, you can substitute with shallots or even a pinch of garlic powder in a pinch for a hint of that beloved garlic taste.
Q: Is it possible to make the sauce ahead of time?
A: Absolutely! You can make the sauce ahead and store it in the fridge. Just warm it up gently before adding the pasta and adjust the consistency with pasta water as needed.
Q: Can I freeze leftovers?
A: It’s best to consume this dish fresh; however, if you have leftovers, you can freeze the sauce separately. Just know that the texture may change a bit when thawed.
Nutritional Info (Optional)
For a single serving of this creamy spinach pasta:
- Calories: Approximately 450
- Protein: 14g
- Carbs: 55g
- Fat: 20g
- Fiber: 3g
This could vary based on the pasta choice and additional ingredients, of course!
And there you have it, my delightful Pasta with Spinach Sauce! I hope it brings as much joy to your kitchen as it does to mine. Remember, cooking is about having fun in the kitchen and enjoying the company of loved ones. So, grab your apron, gather around the table, and let’s keep those beautiful kitchen moments alive together. Happy cooking!
PrintCreamy Spinach Sauce Pasta

An elegant and easy pasta dish featuring a creamy spinach sauce that is perfect for impressing guests or enjoying a cozy dinner at home.
- Prep Time: 15 minutes
- Cook Time: 20 minutes
- Total Time: 35 minutes
- Yield: 4 servings 1x
- Category: Main Course
- Method: Baking
- Cuisine: Italian
- Diet: Vegetarian
Ingredients
- 8oz (225 grams) pasta (penne, rigatoni, spaghetti, or your favorite)
- 1 Tbsp olive oil or extra virgin olive oil
- 2–3 garlic cloves, finely sliced or minced
- 9oz (250 grams) baby spinach, washed
- ¼ tsp fine salt, plus more to taste
- 5oz (140 grams) cream cheese
- 1oz (30 grams) freshly grated parmesan cheese, plus more to serve
- ¼ tsp ground nutmeg, or according to taste
- Black pepper, to taste
Instructions
- Cook the Pasta: Bring a large pot of salted water to a boil. Add your pasta and cook according to package instructions until al dente. Reserve about 1 cup of pasta water before draining.
- Sauté the Garlic: In a large skillet, heat the olive oil over medium heat. Add the minced garlic and sauté for about 1-2 minutes until fragrant and golden.
- Add the Spinach: Toss in the baby spinach and sprinkle with salt. Cook, stirring occasionally, until the spinach wilts down, about 3-4 minutes.
- Create the Sauce: Reduce the heat to low. Stir in the cream cheese until it melts and forms a creamy mixture. Add the reserved pasta water gradually until reaching your desired consistency.
- Flavor it Up: Add the grated parmesan and nutmeg. Stir until well combined and adjust seasoning as needed.
- Combine Pasta and Sauce: Add the drained pasta directly to the skillet. Toss gently to coat the pasta evenly with the sauce.
- Serve: Plate your pasta, adding more parmesan and a drizzle of olive oil on top. Optionally, sprinkle with pepper or fresh herbs.
Notes
For an elegant presentation, twirl the pasta into a nest and top with additional parmesan and a drizzle of olive oil. You can also add toasted pine nuts or a squeeze of fresh lemon juice.
Nutrition
- Serving Size: 1 serving
- Calories: 450
- Sugar: 5g
- Sodium: 400mg
- Fat: 20g
- Saturated Fat: 10g
- Unsaturated Fat: 8g
- Trans Fat: 0g
- Carbohydrates: 55g
- Fiber: 3g
- Protein: 14g
- Cholesterol: 35mg
Keywords: Creamy, Spinach, Pasta, Easy Dinner, Vegetarian Recipe
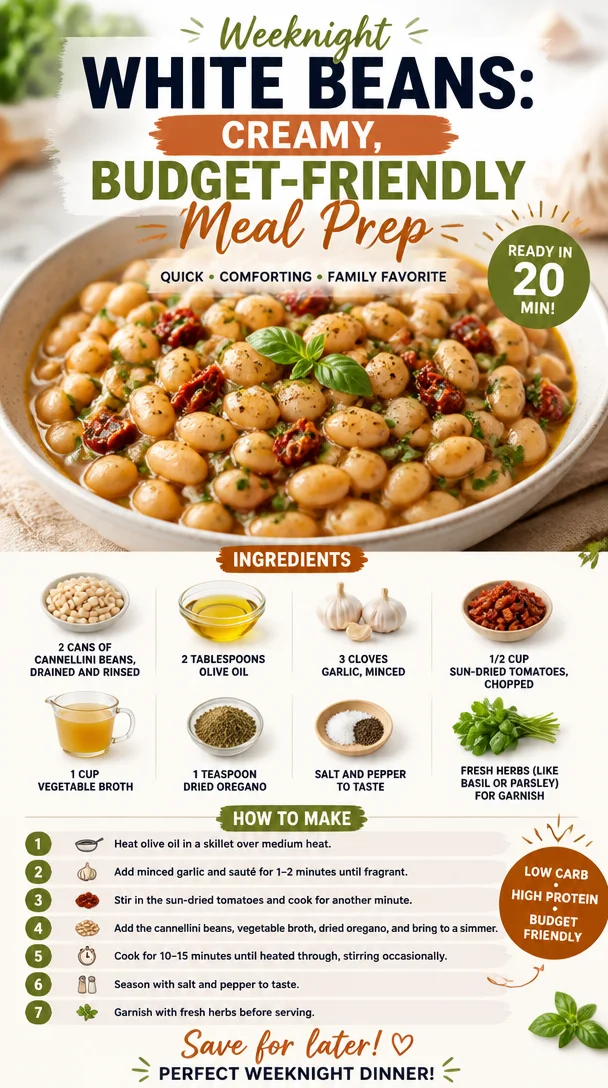
Weeknight White Beans: Creamy, Budget-Friendly Meal Prep
Marry Me White Beans: A Recipe Worth a Proposal
Welcome back, fellow food lovers! Today I am excited to share a dish that not only warms the heart but also has a way of creeping its way into conversations about love and commitment. Yes, you guessed it—today we’re diving into the irresistible, luscious world of Marry Me White Beans. This dish is inspired by my own kitchen adventures, and I promise it’s a game changer, whether you’re trying to impress a date or just craving a comforting bowl of goodness on a chilly afternoon.
A Cozy Love Story in a Bowl
Let me take you back to a summer night, a time filled with laughter, twinkling fairy lights, and the intoxicating scent of garlic wafting through the air. It was one of those dinner parties where friends turned into family, and we all gathered around the table, sharing stories, bold flavors, and a dash of whimsy.
That evening, I decided to experiment with what I had on hand—cannellini beans, sun-dried tomatoes, and an assortment of fresh herbs from my patio garden. Little did I know that this haphazard concoction would spark a culinary love story that would soon spread beyond my kitchen. Each bite was met with “Mmm”s and “Oh wow!”s, and by the end of the meal, a dear friend declared, “If food could propose, these white beans would marry me!”
From that night forward, Marry Me White Beans officially entered the culinary hall of fame in my circle—a dish that not only satisfies the palate but also makes memories that linger long after the plates are cleared. Now it’s time for you to create your own love affair with this dish!
Ingredients
Let’s gather the stars of our flavorful show:
-
2 cans of cannellini beans, drained and rinsed
These creamy beans are buttery and delicate—perfect for soaking up all the lovely flavors we’ll create. If you’re looking for a substitution, navy beans or great northern beans work wonderfully as well! -
2 tablespoons olive oil
A staple in any kitchen, olive oil adds richness. If you’re on a health kick, feel free to swap in avocado oil—it’s just as delightful! -
3 cloves garlic, minced
Garlic is the heart of this dish, imparting aromatics that are simply enchanting. Don’t skimp on it! For those who enjoy a milder flavor, roasted garlic is a fantastic alternative. -
1/2 cup sun-dried tomatoes, chopped
These little gems bring a burst of concentrated flavor and color. If you can’t find them, fresh tomatoes can be used—just add them a bit earlier during the cooking process to let their juices infuse the dish! -
1 cup vegetable broth
A must for added depth and richness. Chicken broth is also a fine choice if you’re not catering to strict vegetarians. Want to make your own? Just simmer a medley of veggies for a lovely homemade option! -
1 teaspoon dried oregano
This herb introduces warmth and earthiness. If you’re feeling adventurous, try substituting it with Italian seasoning for a more complex flavor profile. -
Salt and pepper to taste
Essential for balancing and bringing out all the flavors—adjust according to your preference! -
Fresh herbs (like basil or parsley) for garnish
Finishing with fresh herbs elevates every dish. You could also use chives or even arugula for a peppery twist!
Step-by-Step Instructions
Now that we have our ingredients ready, let’s get cooking! Follow along closely, and I promise you’ll have everyone swooning over your culinary magic.
-
Prep Your Kitchen: Start by gathering all your ingredients and utensils. This way, you’ll be organized and ready to roll. Have a pot, cutting board, knife, and a wooden spoon on hand.
-
Sauté the Garlic: In a medium-sized pot, heat the olive oil over medium heat. Once it shimmers, add the minced garlic and sauté for about 1-2 minutes until it becomes fragrant but not brown. Chef’s Tip: Keep stirring to prevent burning! We want sweet, aromatic garlic, not bitter.
-
Add Sun-Dried Tomatoes: Toss in the chopped sun-dried tomatoes. Cook for another 2 minutes, allowing their essence to blend beautifully with the garlic. Here’s a fun fact—sun-dried tomatoes can soak up a lot of flavor, making them a fantastic addition to various dishes!
-
Gently Fold in Cannellini Beans: Next, add the drained and rinsed cannellini beans to the pot. Use your wooden spoon to fold them in gently, careful not to mash the beans. We want them whole for texture!
-
Pour in the Broth: Time to add the vegetable broth! Pour it in and give everything a good stir. Bring the mixture to a gentle simmer and let it bubble away for about 10 minutes. This allows the beans to absorb all those beautiful flavors. Little Chef Hack: Taste the broth as it simmers; if you feel it needs more seasoning, don’t hesitate to sprinkle in a pinch of salt or pepper!
-
Season with Oregano: After 10 minutes, sprinkle in the dried oregano. Give everything one final stir! Let it simmer for another 5 minutes so that the flavors can deepen beautifully.
-
Finish with Fresh Herbs: Before serving, taste one last time to adjust the seasoning. Once satisfied, remove the pot from the heat and stir in fresh herbs for that final flourish.
And voilà! Your Marry Me White Beans are ready for their moment in the spotlight!
Serving Suggestions
Serve these lovely beans in warm bowls, drizzled with a touch of extra virgin olive oil for that finishing touch. A generous sprinkle of freshly chopped basil or parsley not only looks beautiful but adds a pop of freshness that will make your heart sing. Pair your beans with crusty bread for that added comfort, or serve them over a bed of fluffy rice for a heartier meal.
Recipe Variations
Feeling adventurous? Here are some creative twists on the original recipe:
-
Spicy Kick: Add a pinch of red pepper flakes while sautéing the garlic for a delightful kick. Perfect for those who like a little heat!
-
Lemon Zest: Brighten the dish with a touch of fresh lemon zest added just before serving. It’ll elevate the flavors to a whole new level.
-
Creamy Addition: For a richer dish, stir in a spoonful of cream or a dollop of ricotta cheese just before serving.
-
Protein Boost: Toss in some cooked sausage or shredded chicken for added protein and heartiness.
-
Herb Swap: Experiment with different fresh herbs based on what you have, such as dill or cilantro, for a unique twist!
Chef’s Notes
You know, Marry Me White Beans has become a staple in my go-to repertoire. Each time I make it, I’m reminded of that fun summer evening filled with laughter and love. It always brings my friends and family together, reminding me that food truly has a magical ability to create connections. It’s fascinating how an experiment in the kitchen can spawn a dish that resonates so deeply with people. It’s these moments that inspire me to keep cooking, creating, and sharing with all of you.
Oh, and just a heads up: while this dish is creamy and comforting, it thickens quite nicely as it cools. So if you happen to have leftovers (if that’s possible!), add a splash of water or broth when reheating for that perfect consistency.
FAQs and Troubleshooting
1. Can I use dried beans instead of canned?
Absolutely! If you prefer to use dried beans, soak and cook them ahead of time according to package instructions. About 2 cups of cooked beans will work perfectly in this recipe.
2. The dish seems too thick; how can I fix it?
If your beans turned out thicker than desired, simply add a bit more vegetable broth or water while reheating to achieve your preferred consistency.
3. I don’t like sun-dried tomatoes; what can I substitute?
No worries! You can use roasted peppers, fresh tomatoes, or even sautéed mushrooms for depth and flavor.
4. How do I store leftovers?
Store any leftover beans in an airtight container in the fridge for up to 4 days. They also freeze well if you want to save some for later!
Nutritional Info
While the main focus of this dish is the love and joy it brings to your table, here’s a quick nutritional scoop:
- Calories: Approximately 230-250 calories per serving
- Protein: 12g
- Carbohydrates: 34g
- Fat: 7g
- Fiber: 8g
Whether you’re celebrating a newfound romance or cherishing a delicious meal solo, Marry Me White Beans is sure to become a beloved dish in your home. So, tie on that apron and get cooking; love is just a spoonful away! Happy cooking!
PrintMarry Me White Beans
A heartwarming dish featuring creamy cannellini beans, sun-dried tomatoes, and fresh herbs, perfect for impressing a date or enjoying on a cozy afternoon.
- Prep Time: 10 minutes
- Cook Time: 20 minutes
- Total Time: 30 minutes
- Yield: 4 servings 1x
- Category: Main Course
- Method: Stovetop
- Cuisine: Italian
- Diet: Vegetarian
Ingredients
- 2 cans of cannellini beans, drained and rinsed
- 2 tablespoons olive oil
- 3 cloves garlic, minced
- 1/2 cup sun-dried tomatoes, chopped
- 1 cup vegetable broth
- 1 teaspoon dried oregano
- Salt and pepper to taste
- Fresh herbs (like basil or parsley) for garnish
Instructions
- Prep your kitchen: Start by gathering all your ingredients and utensils.
- Sauté the garlic: In a medium-sized pot, heat the olive oil over medium heat. Add minced garlic and sauté for about 1-2 minutes until fragrant.
- Add sun-dried tomatoes: Toss in the chopped sun-dried tomatoes and cook for another 2 minutes.
- Gently fold in cannellini beans: Add the drained and rinsed beans to the pot and fold them in gently.
- Pour in the broth: Add the vegetable broth and bring the mixture to a gentle simmer for about 10 minutes.
- Season with oregano: After 10 minutes, sprinkle in the dried oregano and let it simmer for another 5 minutes.
- Finish with fresh herbs: Taste and adjust seasoning; then stir in fresh herbs before serving.
Notes
This dish thickens as it cools, so add a splash of water or broth when reheating to maintain consistency.
Nutrition
- Serving Size: 1 serving
- Calories: 250
- Sugar: 4g
- Sodium: 350mg
- Fat: 9g
- Saturated Fat: 1g
- Unsaturated Fat: 6g
- Trans Fat: 0g
- Carbohydrates: 34g
- Fiber: 8g
- Protein: 12g
- Cholesterol: 0mg
Keywords: white beans, casseroles, vegetarian, comforting, easy recipe
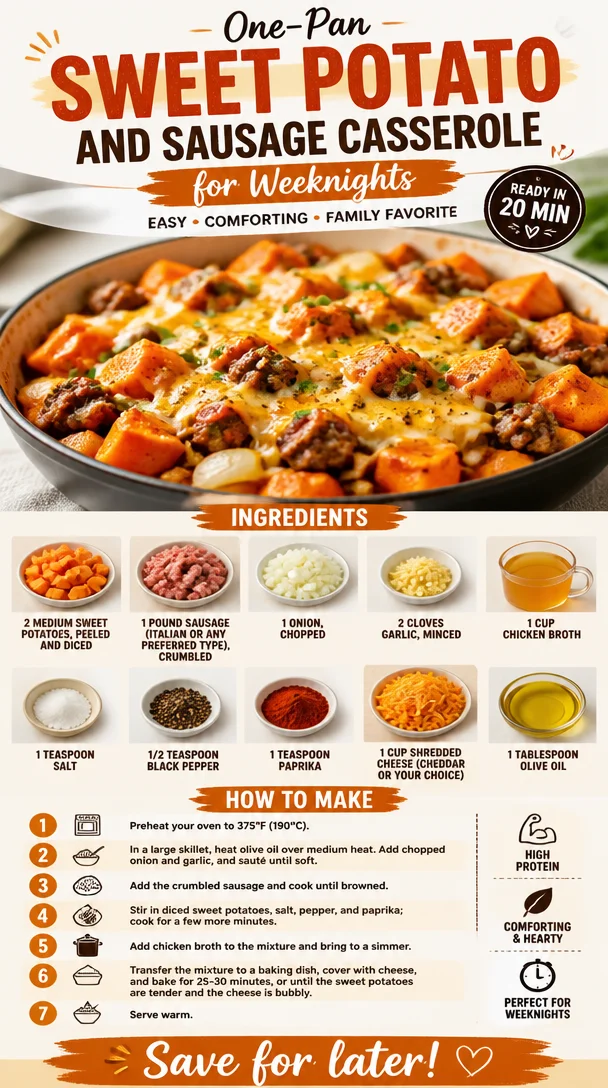
One-Pan Sweet Potato and Sausage Casserole for Weeknights
Sweet Potato and Sausage Casserole: A Heartwarming Delight
Hello, my lovely foodies! Today, we’re diving into a recipe that’s not just a meal but a cozy hug in a dish: Sweet Potato and Sausage Casserole. If you’re looking for comfort food that is both hearty and comforting, you’ve struck gold! This recipe takes simple ingredients and spins them into magic, perfect for any night of the week.
The Warmth of Family Gatherings
Let me take you back for a moment. It was a chilly autumn evening at my family’s home, and the comforting scent of sweet potatoes roasting filled the air. My mom was busy in the kitchen, and I sat perched on a stool, watching her like a hawk. The kitchen was warm, laughter echoed as my siblings ran around, and the calming tunes of our favorite playlist set the mood. This is where my love for home-cooked meals was born — in the warmth of those cherished moments.
One dish that stood out was a savory casserole that combined the earthiness of sweet potatoes with the savory zing of sausage. It has since become one of my go-to meals for family gatherings and casual weeknight dinners alike. This type of food brings people together, and every bite carries a hint of nostalgia. So, grab your apron and let’s whip up this delightful dish together!
Ingredients
Here’s what you’ll need for our Sweet Potato and Sausage Casserole:
-
2 medium sweet potatoes, peeled and diced
Sweet potatoes provide a natural sweetness and are a great source of vitamins. You can swap them for white potatoes if you’re in a pinch, but the flavor will be different. -
1 pound sausage (Italian or any preferred type), crumbled
Italian sausage adds a delightful spice and depth to the dish. Need a lighter option? Chicken or turkey sausage works like a charm! -
1 onion, chopped
Onions are the base of so many wonderful flavors. Don’t have onion? Leeks or shallots can step in for a milder taste. -
2 cloves garlic, minced
Garlic is essential for that aromatic punch. If you’re not a fan of fresh garlic, try garlic powder — just remember, it’s not quite the same! -
1 cup chicken broth
Broth infuses the casserole with moisture and richness. Vegetable broth will do the trick if you want a vegetarian option. -
1 teaspoon salt
Salt enhances all the flavors in your dish. Always taste to adjust — you know your palate best! -
1/2 teaspoon black pepper
Black pepper adds a mild kick. Feel adventurous? Try a sprinkle of cayenne for extra heat! -
1 teaspoon paprika
This adds a subtle smokiness that’s simply sublime. Smoked paprika? Even better! -
1 cup shredded cheese (cheddar or your choice)
Cheese makes everything better! Cheddar is classic, but feel free to swap in Monterey Jack or even a dairy-free option. -
1 tablespoon olive oil
Olive oil is great for sautéing and provides healthy fats. Avocado oil can be a lovely alternative!
Step-by-Step Instructions
Ready to get cooking? Let’s break this down into easy-to-follow steps:
-
Preheat your oven to 375°F (190°C). A warm oven is essential for a perfectly baked casserole.
-
Sauté the sausage: In a large skillet, heat the olive oil over medium heat. Once hot, add the crumbled sausage. Break it apart with a spatula and cook for about 6-8 minutes until golden and cooked through. You want those caramelized bits of flavor!
Chef’s Tip: If you prefer, you can cook the sausage ahead of time. This can save you a few minutes on a busy weeknight.
-
Add the onions: Toss in the chopped onion once the sausage is browned. Cook for about 3-4 minutes until they soften and turn translucent.
Chef Hack: To avoid tears, try chilling the onion in the fridge for about 10 minutes before chopping!
-
Introduce the garlic: Add minced garlic to the mix and sauté for another 1-2 minutes until fragrant. Your kitchen will start to smell divine!
-
Mix in the sweet potatoes: Next, add your diced sweet potatoes, salt, black pepper, and paprika. Pour in the chicken broth and give everything a gentle stir to combine.
Note: If you like a little more texture, consider adding chopped bell peppers at this stage for a colorful twist.
-
Simmer and soften: Cover the skillet with a lid and allow it to simmer for about 10 minutes, or until the sweet potatoes begin to soften. This step helps to create a cozy, melded flavor in your casserole.
-
Transfer to a baking dish: Pour the sausage and vegetable mixture into a greased 9×13 inch baking dish.
Pro Tip: A little cooking spray or a light brush of olive oil on the dish will ensure an easy release when serving!
-
Sprinkle the cheese: Top the mixture generously with your shredded cheese. Who doesn’t love melted cheese?
-
Bake: Pop it in the oven and bake for about 25-30 minutes, until the sweet potatoes are tender and the cheese is golden and bubbly.
Serving Suggestions
Once out of the oven, let your Sweet Potato and Sausage Casserole cool for a few minutes. It’s so tempting to dive right in, but allowing it to rest will help it set—and make for easier serving! For an elevated touch, serve it with a fresh green salad or some crusty bread on the side. It creates a lovely contrast with the warm, savory casserole.
Recipe Variations
Now, the beauty of this recipe is its versatility! Here are a few delectable twists to keep things exciting:
- Spicy Variation: Add in some diced jalapeños for a spicy kick!
- Cheesy Delight: Mix in some cream cheese for a creamier casserole.
- Herbaceous Touch: Stir in fresh herbs like thyme or rosemary for an aromatic lift.
- Veggie-Loaded: Toss in some spinach or kale right before baking for a pop of color and nutrition.
- Gluten-Free: Substitute regular sausage with gluten-free sausage and ensure your broth is certified gluten-free.
Chef’s Notes
This casserole is the kind of dish that can either be prepared ahead of time or assembled in a rush, making it a fantastic option for busy evenings or spontaneous guests. I once had a friend drop by unexpectedly, and a quick turn in the kitchen transformed simple ingredients into a feast! Over the years, I’ve played around with this recipe—sometimes adding a sprinkle of nuts for crunch or even a drizzle of maple syrup for some added sweetness. This dish constantly evolves, and I love that it’s as flexible as my schedule!
FAQs and Troubleshooting
1. What if my sweet potatoes are still hard after baking?
No worries! If they’re not as soft as you’d like, cover the dish with foil and bake for another 10-15 minutes.
2. Can I use frozen sweet potatoes?
Absolutely! Just be sure to thaw them and drain any excess water before adding them to the dish.
3. How can I store leftovers?
Store any leftovers in an airtight container in the refrigerator for up to 4 days. Reheat in the microwave or oven.
4. Can I make this dish vegetarian?
Definitely! Swap the sausage with plant-based sausage or make a veggie-only version, adding lots of colorful vegetables.
Nutritional Info
While I don’t typically dive into numbers, this casserole is packed with nutrients! Sweet potatoes are high in fiber, vitamins A and C, and the sausage provides protein. Add a salad, and you’ve got a well-rounded meal!
There you have it, my dear friends! Your very own Sweet Potato and Sausage Casserole, crafted with love and perfect for sharing. Remember, cooking is all about joy. I hope this dish becomes a part of your kitchen repertoire, just like it has in mine. Let’s gather around that table, create memories, and continue to enjoy the beautiful art of cooking together. Happy cooking! 🍽️
PrintSweet Potato and Sausage Casserole

A heartwarming Sweet Potato and Sausage Casserole that’s perfect for family gatherings and cozy dinners.
- Prep Time: 15 minutes
- Cook Time: 30 minutes
- Total Time: 45 minutes
- Yield: 4 servings 1x
- Category: Main Course
- Method: Baking
- Cuisine: American
- Diet: Gluten-Free
Ingredients
- 2 medium sweet potatoes, peeled and diced
- 1 pound sausage (Italian or any preferred type), crumbled
- 1 onion, chopped
- 2 cloves garlic, minced
- 1 cup chicken broth
- 1 teaspoon salt
- 1/2 teaspoon black pepper
- 1 teaspoon paprika
- 1 cup shredded cheese (cheddar or your choice)
- 1 tablespoon olive oil
Instructions
- Preheat your oven to 375°F (190°C).
- Sauté the sausage: In a large skillet, heat the olive oil over medium heat. Once hot, add the crumbled sausage. Break it apart with a spatula and cook for about 6-8 minutes until golden and cooked through.
- Add the onions: Toss in the chopped onion and cook for about 3-4 minutes until they soften and turn translucent.
- Introduce the garlic: Add minced garlic to the mix and sauté for another 1-2 minutes until fragrant.
- Mix in the sweet potatoes: Add diced sweet potatoes, salt, black pepper, and paprika. Pour in the chicken broth and give everything a gentle stir to combine.
- Simmer and soften: Cover the skillet and allow it to simmer for about 10 minutes, or until the sweet potatoes begin to soften.
- Transfer to a baking dish: Pour the sausage and vegetable mixture into a greased 9×13 inch baking dish.
- Sprinkle the cheese: Top the mixture generously with shredded cheese.
- Bake: Pop it in the oven and bake for about 25-30 minutes, until the sweet potatoes are tender and the cheese is golden and bubbly.
Notes
This casserole can be prepared ahead of time or assembled quickly. It’s versatile; try adding nuts for crunch or a drizzle of maple syrup for sweetness.
Nutrition
- Serving Size: 1 serving
- Calories: 400
- Sugar: 6g
- Sodium: 700mg
- Fat: 20g
- Saturated Fat: 7g
- Unsaturated Fat: 10g
- Trans Fat: 0g
- Carbohydrates: 35g
- Fiber: 6g
- Protein: 25g
- Cholesterol: 60mg
Keywords: sweet potato, casserole, sausage, comfort food, family recipe
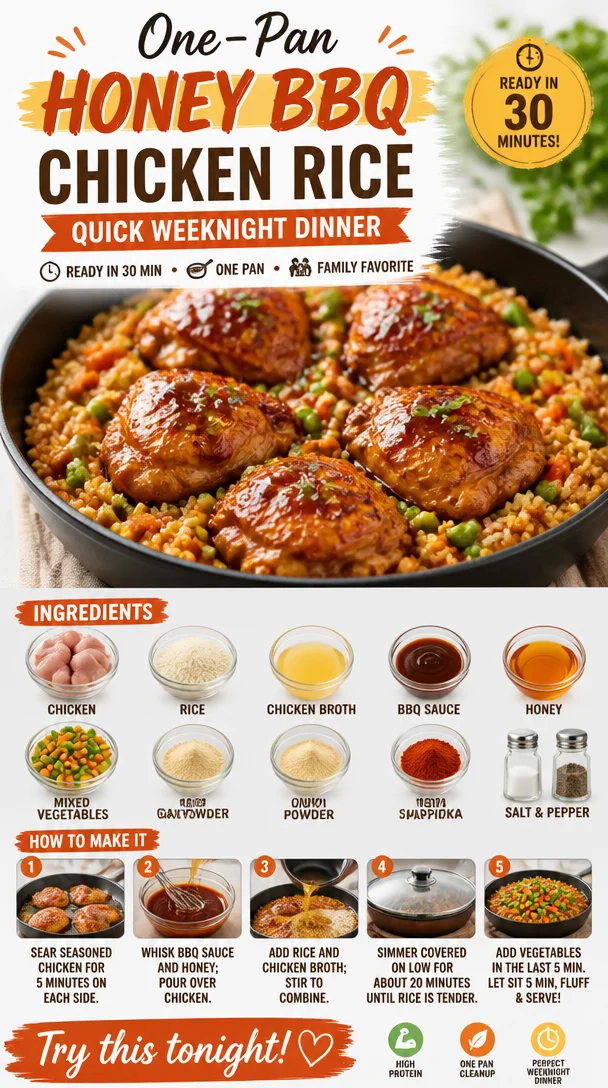
One-Pan Honey BBQ Chicken Rice: Quick Weeknight Dinner
One-Pan Bold Honey BBQ Chicken Rice: A Symphony of Flavor
Hello, fellow food enthusiasts! Are you ready to dive into a delicious dish that will not only satisfy your taste buds but also simplify your weeknight cooking? Today, I’m excited to share my One-Pan Bold Honey BBQ Chicken Rice recipe with you. This is a delightful meal that marries rich BBQ flavors with tender chicken, fluffy rice, and vibrant veggies—all cooked in one convenient pan. Who doesn’t love a recipe that’s easy to make and clean up?
Cooking is a journey, and I believe every dish we create tells a story. This one, in particular, is close to my heart because it encapsulates the joys of gathering friends and family around the dinner table. Honestly, what could be better than a gathering full of laughter and delicious scents wafting through the air? So, let’s grab our aprons and get ready to make some memories with this easy, flavorful dish!
A Trip Down Memory Lane
Growing up, my family had this tradition of Sunday dinners. We would all gather around the table, and my mom would whip up something that could feed an army. One of our favorite meals was her BBQ chicken. The aroma would fill our home, enticing everyone to come to the table. I remember watching her pour that sticky-sweet BBQ sauce over the chicken, giggling as the sauce splashed while she tossed everything together. There was just something magical about those moments—the laughter, the warmth, and, of course, the food.
Fast forward a few years, and I found myself hosting my first dinner party. With the memory of those Sunday dinners fresh in my mind, I thought, “Why not recreate that magic?” But in true Savannah fashion, I wanted to keep it simple and easy. That’s when I developed my One-Pan Bold Honey BBQ Chicken Rice recipe! It’s a dish that embodies everything I love about cooking: simplicity, flavor, and the joy of bringing people together.
Ingredients
Let’s talk about what you’ll need to whip up this mouthwatering meal:
-
1 lb boneless, skinless chicken thighs or breasts
You can’t go wrong with either cut! I love thighs for their juicy texture, but breasts work just as well. If you’re looking for a leaner option, chicken breasts are the way to go! -
1 cup long-grain rice
Long-grain rice beautifully fluffs up and is perfect for absorbing the BBQ sauce. If you’re in a pinch, jasmine or basmati rice will work like a charm, too! -
2 cups chicken broth
This is the secret to tender, flavorful rice! You can use low-sodium broth if you’re watching your salt intake, or make your own for a personal touch. -
½ cup BBQ sauce
Choose your favorite brand or homemade sauce! Got a spice tolerance? Opt for a spicy BBQ sauce to kick things up a notch. -
¼ cup honey
This is the sweetness that balances the BBQ flavors. Light or dark honey works; if you’re looking for a swap, maple syrup can also bring that lovely sweetness. -
1 cup mixed vegetables (frozen or fresh)
I love using a colorful mix of bell peppers, carrots, and peas. Feel free to swap in your favorites! -
1 tsp garlic powder
A flavor powerhouse! Fresh minced garlic can be used as well; just be cautious about adding too much. -
1 tsp onion powder
Onion powder adds depth. If you have a fresh onion on hand, sautéing it with the chicken can bring even more flavor! -
½ tsp smoked paprika
This adds a delicious smoky flavor. Regular paprika can work in a pinch, though the smokiness is divine! -
Salt and pepper to taste
Always adjust according to your preference! Don’t be shy—seasoning makes all the difference in elevating your dish.
Step-by-Step Instructions
Ready to get cooking? Let’s jump right in! This dish is as concise as it is delicious:
-
Prep Your Ingredients
- Before you begin, gather all your ingredients. This makes the cooking process smoother. Chop your mixed veggies if you’re using fresh ones, and season your chicken thighs or breasts generously with salt, pepper, garlic powder, and onion powder.
-
Sear the Chicken
- In a large skillet or a deep frying pan over medium-high heat, heat a splash of oil. Once hot, place the chicken in the pan. Sear each side for about 4-5 minutes until golden brown. This step locks in the juices and adds flavor. Chef’s Tip: Do not overcrowd the pan; cook them in batches if needed!
-
Make Your BBQ Sauce Mixture
- While the chicken is searing, in a bowl, whisk together the BBQ sauce and honey. This flavorful combo will become the star of your dish!
-
Add the Rice and Broth
- Once the chicken is nicely browned, remove it from the pan (it will continue cooking later) and add your rice to the same pan. Stir it for about a minute to coat it in the drippings left behind. Then, pour in the chicken broth. Stir gently to combine and bring to a gentle simmer.
-
Stir in Your Chicken
- Place the seared chicken back into the pan, then drizzle the BBQ-honey mixture all over it. Give everything a gentle stir to ensure the chicken and rice are coated.
-
Add the Vegetables
- Finally, stir in your mixed vegetables. Cover the skillet with a lid and reduce the heat to low. Let it all simmer for about 20-25 minutes, or until the rice is cooked through and has absorbed all the delicious liquid. Chef’s Hack: Check occasionally to ensure the rice isn’t sticking; give it a gentle stir if needed.
-
Fluff and Serve
- Once done, turn off the heat and let it sit for an additional 5 minutes. This resting time allows the flavors to meld together beautifully. Fluff up the rice with a fork, ensuring everything is mixed well.
Serving Suggestions
Now comes the best part—serving it up! Plate a generous scoop of the chicken and rice in a bowl and drizzle any remaining BBQ sauce over the top. Garnish with freshly chopped parsley or even some sliced green onions for a pop of color! You can also serve this dish with a simple side salad or some crusty bread to soak up all that lovely sauce.
Recipe Variations
Feeling a bit adventurous? Here are some creative twists you can try:
-
Spicy Kick: Add a splash of hot sauce or crushed red pepper flakes to the BBQ honey mixture for a fiery twist.
-
Herb-Infused Rice: Add fresh herbs like thyme or rosemary to the broth for an aromatic twist.
-
Southwest Style: Substitute the BBQ sauce with a chipotle sauce and include corn and black beans for a southwestern flavor profile.
-
Quinoa Substitute: Swap out the rice for quinoa for a protein-packed dish!
-
Vegetarian Version: Replace the chicken with chickpeas or tofu for a plant-based meal that retains all those wonderful flavors.
Chef’s Notes
This recipe has been a staple in my home, and it has evolved over time. It began with just the chicken and BBQ sauce, but I couldn’t resist adding rice and veggies to enhance the dish’s substance. The flavors are bold, but the approach remains effortless. One of my fondest memories is the first time I served this at my dinner party—everyone went back for seconds! A little laughter mixed with good food creates an unforgettable evening.
FAQs and Troubleshooting
-
Q: My rice turned out mushy! What went wrong?
A: It’s likely that it absorbed too much liquid. Always measure your broth carefully, and avoid stirring too much while cooking. -
Q: Can I make this dish ahead of time?
A: Absolutely! You can prepare it in advance and store it in the fridge. Just reheat it gently on the stove or in the microwave before serving. -
Q: What if I don’t have chicken broth?
A: Water will work in a pinch! Just season to taste, or you can use vegetable broth for a lighter option. -
Q: How can I store leftovers?
Transfer them to an airtight container and refrigerate for up to 3 days. It also freezes well, so keep that in mind for future meals!
Nutritional Info
If you’re curious about the nutritional benefits of this dish, here are the estimated values per serving (based on 4 servings):
- Calories: 425
- Protein: 30g
- Carbohydrates: 50g
- Fat: 9g
- Fiber: 3g
There you have it, my friends! A deliciously easy, one-pan meal that’s perfect for any evening when you want something hearty yet simple. I hope you embrace the joy of cooking as much as I do and enjoy making the One-Pan Bold Honey BBQ Chicken Rice. Remember, it’s all about the little moments around the table—happy cooking!
PrintOne-Pan Bold Honey BBQ Chicken Rice

A delightful meal that marries rich BBQ flavors with tender chicken, fluffy rice, and vibrant veggies—all cooked in one convenient pan.
- Prep Time: 10 minutes
- Cook Time: 30 minutes
- Total Time: 40 minutes
- Yield: 4 servings 1x
- Category: Main Course
- Method: Stovetop
- Cuisine: American
- Diet: None
Ingredients
- 1 lb boneless, skinless chicken thighs or breasts
- 1 cup long-grain rice
- 2 cups chicken broth
- ½ cup BBQ sauce
- ¼ cup honey
- 1 cup mixed vegetables (frozen or fresh)
- 1 tsp garlic powder
- 1 tsp onion powder
- ½ tsp smoked paprika
- Salt and pepper to taste
Instructions
- Prep Your Ingredients
- Sear the Chicken
- Make Your BBQ Sauce Mixture
- Add the Rice and Broth
- Stir in Your Chicken
- Add the Vegetables
- Fluff and Serve
Notes
Feel free to personalize this recipe with your favorite BBQ sauce or additional vegetables!
Nutrition
- Serving Size: 1 serving
- Calories: 425
- Sugar: 20g
- Sodium: 500mg
- Fat: 9g
- Saturated Fat: 2g
- Unsaturated Fat: 7g
- Trans Fat: 0g
- Carbohydrates: 50g
- Fiber: 3g
- Protein: 30g
- Cholesterol: 70mg
Keywords: BBQ chicken, one-pan meal, easy dinner, flavorful rice, weeknight cooking
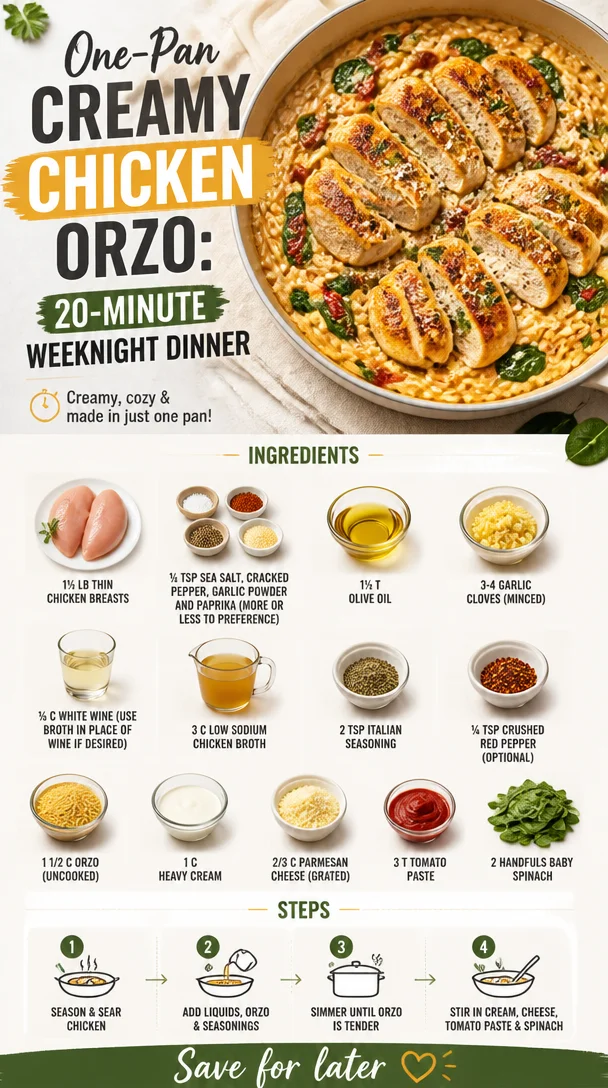
One-Pan Creamy Chicken Orzo: 20-Minute Weeknight Dinner
Creamy Orzo With Chicken: A Delightful Dish for Any Occasion
Hello, my fellow food lovers! Today, we’re diving into a dish that’s become a staple in my kitchen: Creamy Orzo with Chicken. This cozy, wholesome meal has a unique way of wrapping you up in its creamy goodness, making it perfect for weeknight dinners or even those special occasions. Whether you’re cooking for a loved one or yourself (hey, self-care with food is legit!), this dish is sure to deliver comfort and elegance without the fuss.
A Kitchen Memory to Relish
Let me take you back to a chilly autumn evening a few years ago. My friends and I decided to host a cozy gathering filled with hearty recipes and laughter. It was one of those nights where golden leaves swirled outside, and the air was tinged with the warmth of candles flickering on the dining table. I had planned to impress everyone with a very ambitious recipe for a traditional risotto. Spoiler alert: It didn’t go as planned!
Halfway through cooking, I realized I’d bitten off more than I could chew—pun intended—when I found myself standing over a bubbling pot, constantly stirring, and a bit frazzled. Suddenly, one of my friends stepped in and suggested we pivot to something easier yet elegantly delicious. That’s when we whipped together creamy orzo with chicken. Everyone jumped in to help, and, let me tell you, it became the star of the night. We served it straight from the stovetop, and amidst the laughter and clinking glasses, it dawned on me that sometimes, the best memories are created around the table with good food and even better company. Since then, this recipe has become my go-to for cozy get-togethers, and I can’t wait to share it with you!
Ingredients
Let’s gather our ingredients! Here’s what you’ll need to whip up this luxurious dish:
- 1½ lb thin chicken breasts: Tender and quick-cooking, these are perfect for this dish. If you’re after a leaner option, turkey breast can work too.
- ½ tsp sea salt: This brings out all the flavors; feel free to adjust based on your taste.
- Cracked pepper, garlic powder, and paprika: A touch of seasoning tailored to your palate! Adjust according to how bold you want the flavors.
- 1½ T olive oil: Adds richness and helps in a lovely sear for the chicken. You can substitute it with avocado oil for a similar effect.
- 3–4 garlic cloves (minced): Fresh garlic infuses the dish with irresistible flavor. You can use garlic powder in a pinch, but fresh truly elevates the dish.
- ⅓ c white wine: Adds depth! If you prefer not to cook with wine, feel free to substitute it with chicken broth or a splash of lemon juice.
- 3 c low sodium chicken broth: Helps cook the orzo and add flavor. Vegetable broth is a great substitute if you’re going for a vegetarian twist!
- 2 tsp Italian seasoning: A great shortcut to add herby goodness. You can substitute with a mix of dried basil, oregano, and thyme.
- ¼ tsp crushed red pepper (optional): For a bit of heat! Skip this if you prefer a milder dish.
- 1.5 c orzo (uncooked): This small pasta shape absorbs flavors beautifully. You could use other small pasta shapes if you’re in a pinch.
- 1 c heavy cream: This gives the dish its creamy texture! You can swap this with coconut cream or a dairy-free alternative if desired.
- ⅔ c Parmesan cheese (grated): Adds richness and a savory depth. Nutritional yeast is a great dairy-free alternative if you’re avoiding cheese.
- 3 T tomato paste: A touch of sweetness and acidity that helps balance the dish. You could try using fresh tomatoes or tomato sauce instead.
- 2 handfuls baby spinach: For a pop of color and nutrients! Kale or Swiss chard can be good substitutes if you prefer.
Step-by-Step Instructions
Are you ready to dive into cooking? Let’s do it!
-
Season the Chicken: Start by sprinkling the chicken breasts with sea salt, cracked pepper, garlic powder, and paprika on both sides. Give it a gentle rub to let those spices get cozy with the chicken. This will create a flavorful base for your dish!
-
Sear the Chicken: Heat the olive oil in a large skillet over medium-high heat. When the oil shimmers, add the chicken. Sear for about 5-7 minutes on each side, or until golden brown and cooked through (an internal temperature of 165°F). Don’t crowd the skillet; you’ll want to maintain that sizzle!
-
Remove the Chicken: Once cooked, remove the chicken from the skillet and set it aside to rest. Cover it with foil to keep it warm. Resting is crucial—the juices redistribute, keeping your chicken tender!
-
Sauté the Garlic: In the same skillet (don’t you dare wash it—flavors!), add the minced garlic. Sauté for about 30 seconds until fragrant, stirring to avoid burning. Your kitchen will start smelling divine at this point!
-
Deglaze with Wine: Pour in the white wine, scraping any lovely brown bits from the pan. This step is magic; it incorporates all the flavors. Let it simmer for about 2-3 minutes, allowing the wine to reduce a bit.
-
Add Broth and Seasonings: Pour in the chicken broth. Stir in the Italian seasoning and crushed red pepper (if using). Bring this flavorful mixture to a gentle boil.
-
Stir in the Orzo: Add the uncooked orzo to the skillet, stirring thoroughly so it doesn’t clump together. Lower the heat to a simmer and cook, stirring occasionally, until the orzo is al dente (about 10 minutes).
-
Add Cream and Cheese: Once the orzo is cooked, reduce the heat to low. Stir in the heavy cream, cheese, and tomato paste. This will create a creamy sauce that envelopes the orzo beautifully. Keep stirring until everything is combined and the cheese melts into magical gooeyness.
-
Incorporate Spinach: Toss in the baby spinach and stir until it wilts and integrates into the dish. The vibrant green color makes this dish visually appealing!
-
Return the Chicken: Slice the rested chicken and place it back in the skillet. Give everything a good stir to combine; this is where the magic happens!
Serving Suggestions
Now that your creamy orzo is ready, it’s time to plate. Serve it warm in shallow bowls, with a sprinkle of freshly grated Parmesan and a few cracks of black pepper on top. If you want to add an elegant touch, consider a light drizzle of extra virgin olive oil or a few extra spinach leaves as a garnish. Pair it with a crisp garden salad and a glass of white wine to round out this wonderful meal!
Recipe Variations
Let’s get creative! Here are some variations you can try out:
- Mushroom Medley: Add sautéed mushrooms along with the garlic for an earthy flavor.
- Herbed Lemon Zest: Finish with a squeeze of lemon juice and some lemon zest for brightness.
- Sun-Dried Tomato Bliss: Mix in chopped sun-dried tomatoes for a sweet and tangy twist.
- Vegetarian Delight: Swap chicken for chickpeas and use vegetable broth for a satisfying plant-based meal.
- Cheesy Broccoli: Add steamed broccoli florets for extra texture and nutrients—this makes it even more colorful!
Chef’s Notes
This recipe has evolved over the years in my kitchen, often changing based on what I have on hand or my cravings. One evening, I threw in some leftover roasted vegetables, and wow—what a delight! I also love to play around with different herbs based on the season, so don’t hesitate to customize! Cooking should be enjoyable and a little adventurous.
Also, a funny story: one time, I got distracted while stirring the orzo, and thanks to my curious cat, who found a way to sneak onto the counter, I nearly lost half the dish! Thankfully, a quick toss saved the day. Lesson learned: keep an eye on both your food and your furry friends!
FAQs and Troubleshooting
Q: My orzo turned mushy! What happened?
A: This could happen if it cooks too long. Keep an eye on it, as orzo cooks quickly! Check the package instructions for timing.
Q: Can I make it ahead of time?
A: While this dish is best fresh, you can prepare the components and combine them right before serving. Reheating can make the orzo stick together.
Q: What if I don’t have chicken broth?
A: No worries! Water will work in a pinch, but you might want to add extra seasoning.
Q: How do I store leftovers?
A: Store in an airtight container in the fridge for up to three days. Reheat gently on the stovetop with a splash of broth or cream to loosen it up.
Nutritional Info (per serving)
- Calories: 650
- Protein: 40g
- Carbs: 40g
- Fat: 30g
This is an estimate and can vary based on specific ingredient brands and preparation methods.
There you have it! Creamy Orzo with Chicken is not just a recipe; it’s a celebration of flavors, comfort, and togetherness. I hope you enjoy making it as much as I do, and may it create lovely memories around your table, just like it has in mine. Happy cooking!
PrintCreamy Orzo with Chicken

A cozy and wholesome dish that wraps you in creamy goodness, perfect for weeknight dinners or special occasions.
- Prep Time: 15 minutes
- Cook Time: 30 minutes
- Total Time: 45 minutes
- Yield: 4 servings 1x
- Category: Main Course
- Method: Stovetop
- Cuisine: Italian
- Diet: None
Ingredients
- 1½ lb thin chicken breasts
- ½ tsp sea salt
- Cracked pepper, garlic powder, and paprika to taste
- 1½ T olive oil
- 3–4 garlic cloves (minced)
- ⅓ c white wine
- 3 c low sodium chicken broth
- 2 tsp Italian seasoning
- ¼ tsp crushed red pepper (optional)
- 1.5 c orzo (uncooked)
- 1 c heavy cream
- ⅔ c Parmesan cheese (grated)
- 3 T tomato paste
- 2 handfuls baby spinach
Instructions
- Season the chicken breasts with sea salt, cracked pepper, garlic powder, and paprika.
- Sear the chicken in olive oil over medium-high heat for 5-7 minutes on each side until cooked through.
- Remove the chicken from the skillet and let it rest.
- Sauté minced garlic in the same skillet for about 30 seconds.
- Deglaze the pan with white wine and let it simmer for 2-3 minutes.
- Add chicken broth, Italian seasoning, and crushed red pepper; bring to a gentle boil.
- Stir in uncooked orzo and cook for about 10 minutes until al dente.
- Add heavy cream, cheese, and tomato paste; stir until combined.
- Incorporate baby spinach until wilted.
- Return the sliced chicken to the skillet and stir to combine.
Notes
Serve warm with extra Parmesan and a drizzle of olive oil. Great with a garden salad.
Nutrition
- Serving Size: 1 serving
- Calories: 650
- Sugar: 5g
- Sodium: 800mg
- Fat: 30g
- Saturated Fat: 15g
- Unsaturated Fat: 10g
- Trans Fat: 0g
- Carbohydrates: 40g
- Fiber: 3g
- Protein: 40g
- Cholesterol: 120mg
Keywords: creamy orzo, chicken, pasta, comfort food, main course
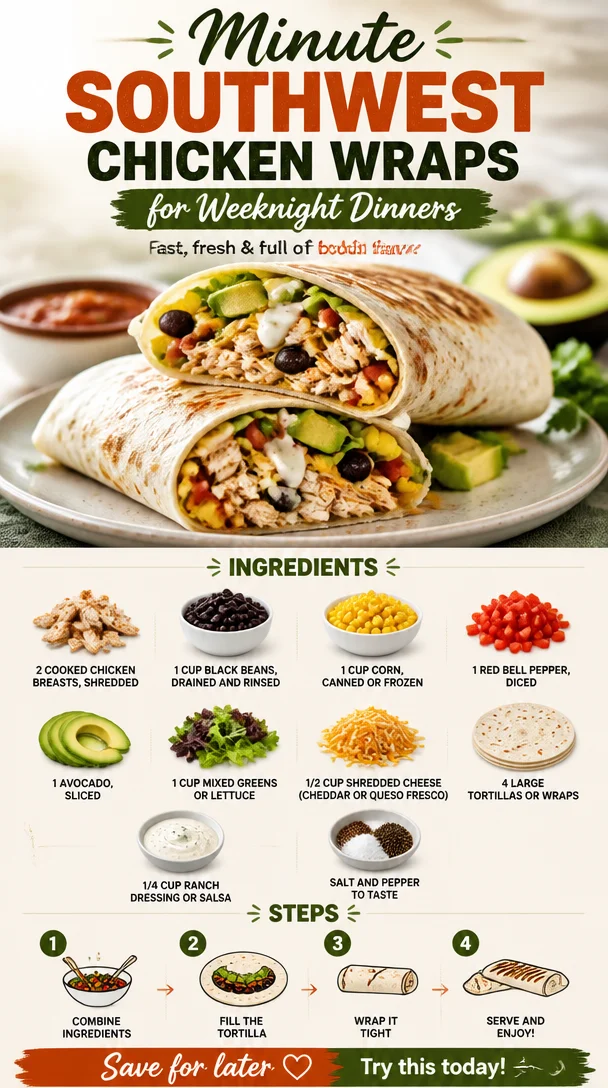
Minute Southwest Chicken Wraps for Weeknight Dinners
Southwest Chicken Wraps: A Flavorful Journey to Your Kitchen Table
Hello, fellow food lovers! Today, we’re diving into a dish that’s not only scrumptious but also a fiesta of flavors: Southwest Chicken Wraps! This recipe is close to my heart for many reasons, from its vibrant ingredients to its effortless preparation. It’s the perfect balance of health, satisfaction, and a touch of fun that makes it an ideal meal for any day of the week! So, grab your apron, and let’s whip up something truly delightful.
A Taste of Nostalgia
One of my fondest memories is from a lazy summer afternoon spent at my best friend Mia’s house. With the sun pouring through her kitchen window and laughter filling the air, we decided to make wraps for lunch—specifically, Southwest Chicken Wraps. I vividly remember the clatter of the knife against the cutting board as we diced bell peppers, the sound of laughter as we debated which dressing was the best, and the satisfaction of rolling our wraps with just the right amount of filling.
Mia’s mom, an expert home cook, quietly guided us while also sharing stories from her childhood in the Southwest. Each ingredient came with a story and a sprinkle of love. Once we sat down to devour our creations, it felt less like a meal and more like a celebration. Every bite was a burst of flavor, and we felt like culinary geniuses. That day instilled in me the joy of cooking for friends and family—something I cherish deeply and aim to replicate with my own recipes today.
Ingredients
Now, let’s talk about what you’ll need to create these delightful Southwest Chicken Wraps. Each ingredient is a key player in shaping the dish—a mix of textures and flavors that come together harmoniously.
-
2 cooked chicken breasts, shredded
For the best results, use grilled or rotisserie chicken. You can substitute with turkey or even chickpeas for a vegetarian twist! -
1 cup black beans, drained and rinsed
These not only add protein but also give a wonderful creamy texture. You could swap them out for pinto beans if you prefer. -
1 cup corn, canned or frozen
Sweet corn brings a burst of freshness. If you’re feeling adventurous, try roasted corn for deeper flavor! -
1 red bell pepper, diced
Sweet, crunchy, and colorful! Feel free to use yellow or orange peppers for a different taste palette. -
1 avocado, sliced
Creamy goodness! If avocados are out of season, consider using guacamole—just keep the seasoning in check! -
1 cup mixed greens or lettuce
Any green will do! Spinach or arugula can add a peppery kick. -
1/2 cup shredded cheese (cheddar or queso fresco)
Add a layer of creaminess with cheese! Try pepper jack for an extra kick or vegan cheese for a dairy-free option. -
4 large tortillas or wraps
Choose whole-wheat for a healthier option or a gluten-free wrap if necessary. -
1/4 cup ranch dressing or salsa
This is where you can really play with flavors! Swap ranch for a creamy chipotle dressing, or go full salsa for something fresher. -
Salt and pepper to taste
Always taste as you go to get the seasoning just right!
Step-by-Step Instructions
Let’s get cooking! Here’s how to bring these mouthwatering Southwest Chicken Wraps to life.
-
Prepare the Chicken
In a large bowl, shred your cooked chicken breasts using two forks. If you’re short on time, pre-shredded chicken from the store could also work! Season with salt and pepper and toss in with a tablespoon of salsa or ranch dressing for added flavor.
Little tip: If you’re using leftover chicken, warming it slightly in a pan can enhance the flavor! -
Mix in the Goodies
Add the drained black beans, corn, diced red pepper, and a pinch of salt to the bowl with the chicken. Mix thoroughly to combine the ingredients. You’re aiming for a colorful combination that looks as good as it tastes!
Commentary: Tossing the ingredients allows the black beans to soak up some of the chicken’s juices, making everything even more flavorful! -
Assemble the Wrap
Lay out your tortillas on a clean surface. Begin by placing a generous scoop of the chicken mixture in the center of each tortilla. Layer on a few slices of avocado, a handful of mixed greens or lettuce, and a sprinkle of cheese. Drizzle with more ranch or salsa if desired.
Chef hack: Always keep your filling towards the center, leaving space on the sides to fold in! -
Rolling It Up
To wrap, fold in the sides first, then roll from the bottom upwards to create a neat little parcel. Make sure to tuck as you roll to keep everything in place!
Pro tip: If you’re worried about your wrap falling apart, you can secure it with a toothpick or wrap it in parchment paper for serving! -
Finish with a Toast
If you’re feeling fancy and want to add a touch of crispiness, place the wraps seam-side down in a skillet over medium heat. Cook for about 2-3 minutes on each side or until golden brown.
Little chef secret: This step not only crisp up the wraps but also warms them nicely!
Serving Suggestions
Now that your Southwest Chicken Wraps are ready, it’s time to plate! Cut each wrap in half to showcase the colorful filling inside. Serve with a side of extra salsa or even guacamole for dipping. You might want to include some tortilla chips or a light salad on the side to balance the meal. Enjoyably messy, these wraps are meant to be eaten with your hands—perfect for a casual gathering or weeknight dinner!
Recipe Variations
A little creativity goes a long way! Here are some fun twists on our Southwest Chicken Wraps:
- Spicy Southwest Wrap: Add diced jalapeños or a drizzle of hot sauce for that extra kick.
- Mediterranean Twist: Swap chicken for shredded lamb or falafel and add tzatziki sauce instead of ranch.
- Vegan Delight: Replace chicken with grilled portobello mushrooms and use hummus instead of ranch.
- Breakfast Wrap: Fill with scrambled eggs instead of chicken, along with sautéed veggies and cheese for a hearty breakfast!
- Mango Salsa Kick: Toss in a spoonful of mango salsa for a sweet and savory flavor.
Chef’s Notes
Making Southwest Chicken Wraps reminds me of those sun-soaked afternoons with friends. They’ve been a staple in my kitchen since that summer, evolving along the way as I experimented with different flavors and ingredients. What started as a fun lunch has blossomed into a delightful dinner favorite.
I must tell you—a funny story: the first time I made these wraps, I was so excited to impress my friends that I forgot the avocado and ran out to the grocery store mid-prep! I laughed at myself for the extra trip, but that’s the beauty of cooking—there’s always room for a little improvisation.
FAQs and Troubleshooting
1. What if my wraps fall apart?
To avoid this, don’t overfill your wraps. Tuck the filling in tightly while rolling, and consider using a toothpick to hold them together until serving.
2. Can I make these wraps ahead of time?
Absolutely! Assemble the wraps, and wrap them tightly in plastic or parchment paper. Store in the fridge for up to 24 hours. Just wait to add the avocado until right before eating to keep it fresh.
3. What if I don’t like ranch dressing?
No problem! You can always swap ranch for your favorite dressing, or simply use a squeeze of lime and sprinkle of cumin for a fresh, zesty flavor.
4. Can I freeze these wraps?
Not ideal for freezing as the veggies may lose their crispness upon thawing. However, you can freeze the chicken mixture and assemble the wraps fresh when you’re ready!
Nutritional Info (Optional)
If you’re interested in the nutritional content of these delicious Southwest Chicken Wraps, a typical serving provides approximately:
- Calories: 450
- Protein: 30g
- Carbohydrates: 40g
- Fat: 18g
(Note: Nutritional values may vary based on specific ingredients used.)
So there you have it, a comprehensive guide to crafting your own Southwest Chicken Wraps from scratch! I hope you find joy in preparing these tasty wraps as much as I do. Remember, cooking is about sharing love and laughter, and there’s no better way to do that than around the table. Until next time, happy cooking, and don’t forget to tie on your apron!
PrintSouthwest Chicken Wraps
A flavorful journey with succulent chicken, black beans, corn, and fresh veggies wrapped in a tortilla, perfect for casual gatherings or weeknight dinners.
- Prep Time: 15 minutes
- Cook Time: 10 minutes
- Total Time: 25 minutes
- Yield: 4 servings 1x
- Category: Main Course
- Method: Assembling and Cooking
- Cuisine: Mexican
- Diet: None
Ingredients
- 2 cooked chicken breasts, shredded
- 1 cup black beans, drained and rinsed
- 1 cup corn, canned or frozen
- 1 red bell pepper, diced
- 1 avocado, sliced
- 1 cup mixed greens or lettuce
- 1/2 cup shredded cheese (cheddar or queso fresco)
- 4 large tortillas or wraps
- 1/4 cup ranch dressing or salsa
- Salt and pepper to taste
Instructions
- Prepare the Chicken: In a large bowl, shred your cooked chicken breasts using two forks. Season with salt and pepper and toss in with a tablespoon of salsa or ranch dressing for added flavor.
- Mix in the Goodies: Add the drained black beans, corn, diced red pepper, and a pinch of salt to the bowl with the chicken. Mix thoroughly to combine the ingredients.
- Assemble the Wrap: Lay out your tortillas on a clean surface. Place a generous scoop of the chicken mixture in the center of each tortilla. Layer on a few slices of avocado, a handful of mixed greens or lettuce, and a sprinkle of cheese.
- Rolling It Up: Fold in the sides first, then roll from the bottom upwards to create a neat little parcel. Tuck as you roll to keep everything in place!
- Finish with a Toast: If desired, place the wraps seam-side down in a skillet over medium heat. Cook for about 2-3 minutes on each side or until golden brown.
Notes
These wraps can be made ahead of time. Store in the fridge for up to 24 hours. Consider using a toothpick to secure wraps while serving.
Nutrition
- Serving Size: 1 wrap
- Calories: 450
- Sugar: 2g
- Sodium: 600mg
- Fat: 18g
- Saturated Fat: 4g
- Unsaturated Fat: 10g
- Trans Fat: 0g
- Carbohydrates: 40g
- Fiber: 8g
- Protein: 30g
- Cholesterol: 70mg
Keywords: Southwest chicken wraps, easy wrap recipe, Mexican wraps, healthy wraps, chicken recipes