Ingredient Cinnamon Roll Bites: Quick Gooey Snack
Quick Cinnamon Roll Bites: A Deliciously Easy Treat
Hello, fellow food lovers! If you’re anything like me, there’s something simply magical about the aroma of cinnamon filling the kitchen. It evokes a sense of warmth and nostalgia that wraps around you like a cozy blanket on a chilly evening. Today, I’m excited to introduce you to one of my favorite cozy treats: Quick Cinnamon Roll Bites.
These delightful little morsels are perfect for breakfast, snacking, or even a sweet treat after dinner. They embody all the flavors of traditional cinnamon rolls but come together in a snap, making them a fantastic choice for busy days when you still want to serve something homemade. With hardly any fuss, these bites will transform your kitchen into a bakery filled with heavenly scents — and trust me, everyone will be asking for seconds!
A Sweet Memory to Share
I vividly remember my grandmother’s kitchen, where the delicious scent of cinnamon wafted through the air every Saturday morning. She’d gather us around the table as she rolled out dough and sprinkled it with your classic cinnamon-sugar mixture. It was less about the recipe and more about the experience — the laughter, the spilled flour, and those tiny little hands helping to knead the dough just a bit too hard.
One particular Saturday, I was tasked with mixing the filling. I added an extra pinch of cinnamon because, why not? I thought it was a genius move until I realized we couldn’t taste anything but spice! We all had a good laugh, and my grandma never let me live it down. She said, “You can’t overpower sweetness with spice, dear!” Since then, I learned how to strike that precious balance, and today, I promise you’ll find just that in these Quick Cinnamon Roll Bites. Let’s dive into making a batch that will create sweet memories of your own!
Ingredients You’ll Need
-
1 can refrigerated crescent dough: This handy ingredient makes everything super quick and easy! You can substitute with any flaky dough or puff pastry if you’re feeling adventurous. Just keep in mind that cooking times may vary slightly.
-
1/4 cup melted butter: This adds richness and helps the sugar stick. You can replace it with coconut oil for a dairy-free option.
-
1/2 cup brown sugar: This sweet ingredient melts beautifully while baking, creating a luscious caramel flavor. If you’re out of brown sugar, you can simply mix white sugar with a spoonful of molasses for a quick substitute.
-
1 tablespoon ground cinnamon: The star of the show! Cinnamon brings that warm, sweet flavor that’s essential for any cinnamon roll. If you’re looking for a twist, try cardamom or pumpkin spice for a unique flavor.
-
1/2 cup powdered sugar: This is for our quick glaze! It creates that sweet finish to our bites. You can use agave syrup or honey instead if you prefer something less processed.
-
1-2 tablespoons milk or cream: Just enough to thin out the glaze to your desired consistency. You can use any plant-based milk as an alternative!
-
1/2 teaspoon vanilla extract: A splash of vanilla adds depth to the glaze. Feel free to get creative here and swap it out with almond extract for a different dimension.
Step-by-Step Instructions
-
Preheat the Oven: Let’s get that oven heated to 375°F (190°C). This step is crucial for that perfectly golden pastry outcome. While the oven preheats, you’ll have time to prep everything!
-
Prep the Dough: Open the can of refrigerated crescent dough and unroll it on a clean surface. It can be a little tricky, but simply press together any perforations to create a single sheet. This will be your canvas for creativity!
-
Make the Filling: In a small bowl, mix together the melted butter, brown sugar, and cinnamon until well combined. This mixture will act as your sweet glue, so make sure everything is thoroughly mixed!
-
Spread the Filling: Use a spatula to spread the cinnamon-sugar mixture evenly over your crescent dough. Go all the way to the edges — you don’t want to miss any delicious bites!
-
Roll It Up: Starting from the widest end of the dough, roll it up tightly into a log. Feel free to channel your inner pastry chef here! Once rolled, cut it into bite-sized pieces — about 1 inch thick. You should get around 12-15 bites from this one roll.
-
Transfer to Baking Sheet: Line a baking sheet with parchment paper or a silicone mat for easy cleanup. Place your little bites on the sheet, giving them some space to spread out while baking.
-
Bake Them Up: Pop those adorable morsels in the preheated oven and bake for about 12-15 minutes, or until they turn golden brown and the kitchen starts smelling heavenly. Keep an eye on them! Since ovens vary, you don’t want to overdo it.
-
Make the Glaze: While they’re baking, whisk together your powdered sugar, milk (or cream), and vanilla extract until smooth. If it’s too thick, add a splash more milk until you achieve that drizzly consistency we love.
-
Glaze and Enjoy: As soon as the bites come out of the oven, give them a generous drizzle with your sweet glaze while they’re still warm. This step is crucial for maximum gooey goodness!
Serving Suggestions
To serve, simply arrange the Cinnamon Roll Bites on a beautiful cake stand or a rustic wooden platter. You could even sprinkle a pinch of cinnamon or extra powdered sugar on top for a touch of elegance! Let guests help themselves, and watch those bites disappear in no time.
Recipe Variations
-
Fruity Twist: Add sliced bananas or apples to the filling for a fruity kick.
-
Nutty Delight: Toss in some chopped pecans or walnuts into the cinnamon mixture for added crunch.
-
Pumpkin Spice: Trade out some of the cinnamon for pumpkin spice for an autumnal flair.
-
Chocolate Drizzle: Drizzle some melted chocolate over your glaze for an indulgent touch.
-
Cream Cheese Icing: Mix cream cheese with powdered sugar and a splash of milk for a richer topping instead of glaze.
Chef’s Notes
These Quick Cinnamon Roll Bites have become a go-to recipe in my kitchen — especially when unexpected guests drop by or when I need a sweet fix. They are forgiving, fun to make, and so versatile! Plus, they remind me of those kitchen adventures with my grandmother, where food was never just about the final dish but the joy in creating something special together.
One time, I hosted a brunch and made these bites with a variety of fillings, from whipped cream cheese with lemon zest to spiced apple butter. It was a hit! Guests loved choosing their own fillings and really made the experience enjoyable.
FAQs and Troubleshooting
1. Why did my cinnamon bites flatten out?
If your bites flatten out during baking, it might be due to using a soft dough or not wrapping them tightly enough. Make sure to roll them firmly and use cold dough for better shape retention.
2. Can I make these ahead?
Absolutely! You can prepare the rolls, cut them, and refrigerate them overnight. Just add a few extra minutes to the baking time.
3. How do I know when they’re done?
Your bites should be golden brown on top and firm to the touch. If they’re still doughy, give them a couple more minutes in the oven.
4. What do I do with leftovers?
They’re best eaten fresh, but if you have leftovers, store them in an airtight container in the refrigerator for up to 2 days. You can reheat them in the microwave or oven until warm.
Nutritional Info
(Optional, but here’s a rough estimate if you want to include it!)
- Serving Size: 1 bite
- Calories: ~150
- Total Fat: 7g
- Saturated Fat: 4g
- Carbohydrates: 22g
- Sugars: 10g
- Protein: 2g
And there you have it — a fabulous recipe for Quick Cinnamon Roll Bites that should take you right back to those cozy kitchen moments! I hope you enjoy making these as much as I do, and I can’t wait to hear your own stories as you gather friends and family around your table. Let’s keep the tradition of love and warmth alive through our kitchen creations! Happy baking!
PrintQuick Cinnamon Roll Bites
Easy and delightful cinnamon roll bites perfect for breakfast or snacking, embodying the flavors of traditional cinnamon rolls.
- Prep Time: 10 minutes
- Cook Time: 15 minutes
- Total Time: 25 minutes
- Yield: 12-15 servings 1x
- Category: Dessert
- Method: Baking
- Cuisine: American
- Diet: Vegetarian
Ingredients
- 1 can refrigerated crescent dough
- 1/4 cup melted butter
- 1/2 cup brown sugar
- 1 tablespoon ground cinnamon
- 1/2 cup powdered sugar
- 1–2 tablespoons milk or cream
- 1/2 teaspoon vanilla extract
Instructions
- Preheat the oven to 375°F (190°C).
- Open the can of refrigerated crescent dough and unroll it on a clean surface.
- Mix together the melted butter, brown sugar, and cinnamon in a small bowl.
- Spread the cinnamon-sugar mixture evenly over your crescent dough.
- Roll it up tightly from the widest end into a log and cut into bite-sized pieces (about 1 inch thick).
- Line a baking sheet with parchment paper and place the bites on it.
- Bake for 12-15 minutes or until golden brown.
- Whisk together powdered sugar, milk, and vanilla extract until smooth to make the glaze.
- Drizzle the glaze over the bites while they’re still warm.
Notes
These bites can be prepared in advance and refrigerated before baking. Customize with various fillings or toppings as desired!
Nutrition
- Serving Size: 1 bite
- Calories: 150
- Sugar: 10g
- Sodium: 200mg
- Fat: 7g
- Saturated Fat: 4g
- Unsaturated Fat: 2g
- Trans Fat: 0g
- Carbohydrates: 22g
- Fiber: 1g
- Protein: 2g
- Cholesterol: 20mg
Keywords: cinnamon rolls, quick dessert, easy recipe, baking, sweet snacks

Minute Broccoli Pasta Salad for Weeknight Meal-Prep
The Best Broccoli Pasta Salad Recipe: A Vibrant Twist on a Classic Dish
Hello, fellow food enthusiasts! Today, I’m thrilled to share a gem from my kitchen: the Best Broccoli Pasta Salad. This dish is a show-stopper in its simplicity, bursting with flavors and colorful ingredients that make it perfect for summer gatherings or cozy weeknight meals. If you’re looking for a recipe that’s as easy to prepare as it is delightful to eat, you’ve hit the jackpot!
Why I Love This Broccoli Pasta Salad
Picture this: the sweet smell of fresh broccoli mingling with the nuttiness of pasta, bright cherry tomatoes, and the sprinkle of crumbled feta cheese. Each bite of this salad takes me back to sunny afternoons spent in my backyard garden, surrounded by friends and laughter. I remember the first time I whipped up this dish for a summer BBQ. My friends arrived with their usual favorites—burgers and hot dogs—but when they tasted my broccoli pasta salad, they were taken aback. “Wow, you need to keep this on rotation!” they said, and with that, a star was born!
This dish is not just a pasta salad; it’s a celebration of fresh ingredients that come together effortlessly. It’s packed with nutrients, flavor, and color, making it a feast for the eyes as much as for the tastebuds. Trust me, this is one recipe you’ll want to keep in your culinary arsenal!
Ingredients
Let’s dive into what you’ll need to whip up this delightful salad. Here’s the ingredient list, along with a few insights on each!
-
2 cups broccoli florets
Fresh broccoli adds a nice crunch and a bright green color. If you don’t have fresh, you can use frozen florets—but be sure to thaw and drain them! -
8 ounces pasta (e.g., rotini or penne)
Whole-grain pasta is a fantastic option if you’re looking for something healthier. Gluten-free pasta works too! -
1 cup cherry tomatoes, halved
These little gems add sweetness and juiciness. Feel free to use grape tomatoes or even diced regular tomatoes in a pinch. -
1/2 cup red onion, diced
Red onion offers a sharp, slightly sweet crunch. If you prefer something milder, sweet onions or green onions are great substitutes. -
1/2 cup shredded carrots
For a pop of color and a hint of sweetness, shredded carrots are just the ticket! If you’re short on time, pre-packaged shredded carrots work perfectly. -
1/2 cup feta cheese, crumbled
Feta’s tang complements the salad beautifully. If you want to make it dairy-free, you can substitute with a vegan cheese or simply leave it out. -
1/4 cup olive oil
Use high-quality extra virgin olive oil for the best flavor. Avocado oil is a wonderful alternative if you’re looking for something more neutral. -
2 tablespoons lemon juice
Freshly squeezed lemon juice brightens up the salad. For a zesty twist, try lime juice instead! -
Salt and pepper to taste
A must! Freshly cracked pepper adds a lovely kick. Don’t shy away from seasoning; it can transform your dish.
Step-by-Step Instructions
Now, let’s get cooking! Follow these detailed steps, and you’ll whip up this Broccoli Pasta Salad in no time.
-
Cook the Pasta
Start by bringing a large pot of salted water to a boil. Add your pasta and cook according to the package directions until al dente. This usually takes about 8–10 minutes. Remember, you want a little bite to your pasta, as it will absorb some of the dressing later. -
Blanch the Broccoli
While your pasta is cooking, grab a separate pot of boiling water and add the broccoli florets. Blanch them for about 2 minutes until they turn bright green. This keeps them crisp and vibrant! Remove the broccoli from the hot water and plunge it into an ice bath immediately to halt the cooking process. This trick will keep your broccoli crunchy. -
Prepare the Vegetables
In a large bowl, combine the halved cherry tomatoes, diced red onion, and shredded carrots. The combination of these fresh ingredients will create a beautiful rainbow effect within your salad. -
Mix the Dressing
In a small bowl, whisk together the olive oil and lemon juice. Season with salt and pepper to taste. I like to add a pinch of garlic powder for an extra flavor burst—totally optional, but delicious! Set the dressing aside for later. -
Combine It All
Drain your pasta and rinse it under cool water to stop the cooking. This helps to prevent the pasta from getting mushy. In your large bowl with the vegetables, add the cooked pasta and blanched broccoli. Gently toss everything together. -
Add Feta and Dressing
Now it’s time to bring everything together! Sprinkle the crumbled feta cheese on top, and drizzle your dressing over the mixture. Gently toss again until it’s all well combined. This is where the magic happens as the flavors mingle together! -
Taste and Adjust
Give it a taste and adjust the seasoning if needed. This salad is all about your preferences! You can add more lemon juice for tartness or more salt if you like it a little zingier.
Serving Suggestions
To serve your Broccoli Pasta Salad, try a beautiful large serving bowl to showcase its vibrant colors! I love to garnish it with extra feta and a sprinkle of fresh herbs like basil or parsley for that restaurant-style touch. This salad can be served chilled or at room temperature, making it a versatile option for any occasion. It pairs perfectly with grilled meats or as a standalone dish at a picnic!
Recipe Variations
Want to mix things up? Here are some fun variations to try with your Broccoli Pasta Salad:
- Add Protein: Toss in some grilled chicken, shrimp, or even chickpeas for a heartier meal.
- Swap the Cheese: Experiment with mozzarella pearls or grated Parmesan for a different flavor profile.
- Spice It Up: Add a pinch of red pepper flakes or diced jalapeño for a spicy kick!
- Herb It Up: Fresh dill or mint can add a refreshing twist to the flavor.
- Nutty Crunch: Sprinkle in some toasted walnuts or almonds to give an extra crunchy texture.
Chef’s Notes
This recipe has evolved over time from a simple idea to a colorful medley of my favorite summer ingredients. I even once made this salad while camping, improvising with canned vegetables and a squeeze of lemon from my cooler. It reminded me that cooking doesn’t need to be complicated to be delicious! The beauty of this dish is in its adaptability—if you have extra veggies in your fridge, throw them in!
FAQs and Troubleshooting
-
What if my pasta is overcooked?
If you accidentally overcook your pasta, don’t worry! Just add an extra splash of dressing to help rejuvenate it, and mix in plenty of crunchy veggies. -
How long can I store leftovers?
This salad keeps well in the fridge for about 3–4 days. Just keep in mind the broccoli can lose its crunch over time. -
Can I make this salad vegan?
Absolutely! Just omit the feta cheese or replace it with a dairy-free version. You can also amp up the flavors with nutritional yeast for a cheesy taste. -
How can I prevent my pasta from sticking?
Make sure to rinse the pasta under cold water before mixing it with the other ingredients, and toss it with a bit of olive oil after draining.
Nutritional Info
While calorie counts can differ based on specific ingredients, a generous serving of this Broccoli Pasta Salad typically contains about 350 calories. It’s a great source of fiber, vitamins, and healthy fats from the olive oil and veggies!
So there you have it, my lovely foodies! The Best Broccoli Pasta Salad is not just a dish; it’s a blend of memories, creativity, and comfort. Whether you’re hosting friends or simply enjoying a quiet evening at home, this salad is sure to impress. Tie on your apron, gather your ingredients, and let’s create something timeless together! Happy cooking!
PrintThe Best Broccoli Pasta Salad

A vibrant twist on a classic dish, this Broccoli Pasta Salad is bursting with flavors and colorful ingredients, perfect for summer gatherings or weeknight meals.
- Prep Time: 15 minutes
- Cook Time: 10 minutes
- Total Time: 25 minutes
- Yield: 4 servings 1x
- Category: Salad
- Method: Mixing
- Cuisine: American
- Diet: Vegetarian
Ingredients
- 2 cups broccoli florets
- 8 ounces pasta (e.g., rotini or penne)
- 1 cup cherry tomatoes, halved
- 1/2 cup red onion, diced
- 1/2 cup shredded carrots
- 1/2 cup feta cheese, crumbled
- 1/4 cup olive oil
- 2 tablespoons lemon juice
- Salt and pepper to taste
Instructions
- Cook the pasta by bringing a large pot of salted water to a boil, adding the pasta, and cooking according to package directions until al dente (about 8–10 minutes).
- Blanch the broccoli in a separate pot of boiling water for about 2 minutes, then plunge it into an ice bath to keep it crisp and vibrant.
- Prepare the vegetables by combining halved cherry tomatoes, diced red onion, and shredded carrots in a large bowl.
- Mix the dressing by whisking together olive oil and lemon juice, seasoning with salt and pepper to taste.
- Combine the cooked pasta and blanched broccoli with the vegetables in the large bowl and toss gently.
- Add the crumbled feta and drizzle the dressing over the mixture, tossing gently to combine.
- Taste and adjust seasoning as needed.
Notes
This salad can be served chilled or at room temperature, making it versatile for any occasion. Garnish with extra feta and fresh herbs for a restaurant-style touch.
Nutrition
- Serving Size: 1 serving
- Calories: 350
- Sugar: 5g
- Sodium: 400mg
- Fat: 12g
- Saturated Fat: 4g
- Unsaturated Fat: 6g
- Trans Fat: 0g
- Carbohydrates: 45g
- Fiber: 3g
- Protein: 15g
- Cholesterol: 30mg
Keywords: broccoli pasta salad, vegetarian salad, summer salad

Minute Cucumber Strawberry Salad for Quick Summer Meals
Cucumber Strawberry Salad: A Refreshing Delight
Hello, friends! Today, I’m excited to share a recipe that will delight your taste buds and brighten your table: the vibrant Cucumber Strawberry Salad. This dish perfectly embodies the spirit of summer and bringing friends and family together, making it an ideal companion for lunch or dinner gatherings.
The Beginnings of a Beloved Salad
I’ll never forget the first time I whipped up a Cucumber Strawberry Salad. It was a sweltering summer day—a quintessential picnic-perfect kind of day. I had just moved into a new place and decided to host a little gathering for my friends. As I pottered around my tiny kitchen with excitement, I wanted to create something light, fresh, and oh-so-appealing. I remembered a dish my grandmother used to make, bringing together ingredients of vibrant colors and enticing flavors.
With a few fresh strawberries from the local farmers market and a crisp cucumber from our neighbor’s garden, I crafted a salad that wasn’t just a dish but a canvas of summer. It turned out to be a hit! My friends couldn’t get enough of the sweet-tart strawberries paired with the refreshing crunch of cucumber. That’s when I realized how simple ingredients can transport you to cherished memories and create new joys around the table. It was the perfect introduction to my journey with cooking—delicious food, laughter, and the warm glow of camaraderie.
Ingredients: What You’ll Need
Let’s dive into the pretty details of what makes this salad a complete sensation:
-
1 cup strawberries, hulled and sliced
These juicy gems bring sweetness and a touch of tartness. Look for ripe, fragrant berries. If strawberries aren’t in season, feel free to use blueberries or raspberries. -
1 large English cucumber (or 3 Persian cucumbers), thinly sliced
English cucumbers are wonderfully crisp and have fewer seeds, giving your salad a delightful texture. Persian cucumbers are a tad sweeter and smaller but equally refreshing. -
1/4 cup crumbled feta or goat cheese (optional)
This cheese adds a creamy and tangy kick to each bite, but you can also skip it for a dairy-free option or substitute it with your favorite vegan cheese. -
2 tbsp chopped fresh mint or basil
Fresh herbs elevate the flavor profile and add a fragrant burst of freshness. Use whichever herb you love—mint is refreshing, while basil offers a sweet, aromatic touch. -
2 tbsp slivered almonds, sunflower seeds, or walnuts (toasted, optional)
These crunchy elements offer a delightful textural contrast. Toasting them brings out their nuttiness, so don’t skip this step! You can also use pumpkin seeds for a nut-free option. -
1 tbsp fresh lemon juice or balsamic vinegar
The acidity is crucial for balancing the sweetness. Citrus delivers brightness, while balsamic offers a deeper, sweeter tang. -
1 tsp honey or maple syrup
Just a little sweetness helps to bring all the flavors together. For a vegan option, stick with maple syrup. -
2 tbsp olive oil
A good quality olive oil will add richness. If you prefer a lighter touch, you could use a citrus-infused oil to enhance the summery vibe! -
Salt and black pepper, to taste
Always season your salads; it makes a world of difference.
Step-by-Step Instructions: Creating Magic in Your Kitchen
Now, let’s get cracking on this colorful dish! Don’t worry; it’s incredibly straightforward.
-
Prep Your Ingredients
Start by hulking and slicing those strawberries into colorful halves or quarters, depending on your preference. Next, grab your cucumber and slice it thin. For an extra flair, consider using a mandoline for those paper-thin cucumber slices. They look stunning and will absorb the dressing beautifully. -
Toss in Fresh Herbs
Chop your fresh mint or basil and add it to your bowl of strawberries and cucumbers. Just a gentle stir will infuse those lovely herbal notes throughout! -
Mix Your Dressing
In a separate small bowl, whisk together the lemon juice (or balsamic vinegar), honey (or maple syrup), and olive oil. Add a pinch of salt and black pepper to taste. As you whisk, visualize your loved ones gathering around your table; that energy will add flavor to your dressing! -
Combine Everything
Pour your dressing over the cucumber and strawberry mixture. Gently toss all the ingredients, ensuring everyone is coated in deliciousness. I love using my hands for this—it feels so much more connected. -
Add Cheese and Nuts
If you’re using cheese, sprinkle it in now, along with your toasted nuts or seeds. Give everything a final, gentle toss. Don’t worry about making it perfect; the charm lies in its rustic quality! -
Taste and Adjust
Here comes one of my favorite parts—taste testing! This is your chance to adjust flavors. Need more sweetness? Add a splash more honey. Want a pop of acidity? A squeeze of lemon might do the trick! -
Chill It Out
Let your beautiful creation sit for about 10-15 minutes before serving. This allows the flavors to meld beautifully. Plus, it also gives you a moment to enjoy a glass of sparkling water or wine—cheers to that!
Serving Suggestions: Plating with Grace
Plate your Cucumber Strawberry Salad in a large, shallow bowl or individual plates for an elegant touch. I love to garnish each serving with a few whole strawberry slices and a sprig of fresh mint on top. A drizzle of olive oil or a sprinkle of nuts right before serving adds that extra wow factor! Remember, presentation doesn’t have to be perfect—think of it as invitingly rustic.
Recipe Variations: Switch It Up!
Get creative! Here are a few twists to keep things exciting:
-
Berry Blast
Add in blueberries or raspberries for an even fruitier experience. -
Southern Comfort
Swap out the feta for pimento cheese for a spicy, southern twist! -
Nutty Delight
Substitute regular almonds with candied pecans for an unexpected sweetness contrast. -
Vegan Avenue
Skip the cheese entirely and substitute maple syrup or dates for sweetness. -
Grilled Goodness
For a smoky twist, grill the cucumber slices to enhance their flavor.
Chef’s Notes: Keep the Love Alive
This salad is one of those dishes that truly evolves with the seasons. In the summer, I love to use fresh local produce; in the winter, a touch of pomegranate seeds or mandarin oranges adds that bit of brightness. One time, I had an impromptu picnic and accidentally grabbed balsamic glaze instead of vinegar. Not only did it work beautifully, but it elevated the salad to a whole new level of deliciousness! Cooking is an adventure, and I love culinary surprises.
FAQs and Troubleshooting
Q: Can I prepare this salad ahead of time?
A: While the salad is best enjoyed fresh, you can prep the ingredients ahead and mix them right before serving to keep everything crisp.
Q: What if I don’t have fresh herbs?
A: No worries! Dried herbs can substitute, but you’ll need less (about a teaspoon) since they are more concentrated. Just crush them between your fingers to release the aroma!
Q: How can I store leftovers?
A: Store in an airtight container in the fridge for up to 2 days. However, keep the nuts separate to maintain their crunch!
Q: Can I use other types of cheese?
A: Absolutely! Goat cheese adds a softer texture, while blue cheese can give a funkier taste. Get creative!
Nutritional Info (Optional)
While I don’t focus too much on numbers here, this salad is packed with vitamins, antioxidants, healthy fats, and a great mix of macronutrients, making it a nice addition to a balanced diet.
Now it’s your turn! Get into your kitchen, embrace the joy of healthy cooking, and let this Cucumber Strawberry Salad remind you of all the beautiful moments to be made around your table. Happy cooking! 🍽️
PrintCucumber Strawberry Salad

A vibrant and refreshing salad featuring strawberries and cucumbers, perfect for summer gatherings.
- Prep Time: 15 minutes
- Cook Time: 0 minutes
- Total Time: 15 minutes
- Yield: 4 servings 1x
- Category: Salad
- Method: No Cook
- Cuisine: American
- Diet: Vegetarian
Ingredients
- 1 cup strawberries, hulled and sliced
- 1 large English cucumber (or 3 Persian cucumbers), thinly sliced
- 1/4 cup crumbled feta or goat cheese (optional)
- 2 tbsp chopped fresh mint or basil
- 2 tbsp slivered almonds, sunflower seeds, or walnuts (toasted, optional)
- 1 tbsp fresh lemon juice or balsamic vinegar
- 1 tsp honey or maple syrup
- 2 tbsp olive oil
- Salt and black pepper, to taste
Instructions
- Prep your ingredients by hulking and slicing strawberries, then thinly slicing cucumber.
- Toss in fresh herbs by adding chopped mint or basil to the bowl.
- Mix your dressing in a separate bowl with lemon juice, honey, and olive oil.
- Combine everything by pouring the dressing over the mixture and gently tossing.
- Add cheese and nuts if using, and give a final gentle toss.
- Taste and adjust flavors as needed.
- Chill for 10-15 minutes before serving to let flavors meld.
Notes
For an even fruitier experience, add blueberries or raspberries. You can substitute cheese with pimento cheese for a spicy twist or skip it entirely for a vegan option.
Nutrition
- Serving Size: 1 serving
- Calories: 180
- Sugar: 10g
- Sodium: 150mg
- Fat: 10g
- Saturated Fat: 3g
- Unsaturated Fat: 7g
- Trans Fat: 0g
- Carbohydrates: 18g
- Fiber: 3g
- Protein: 5g
- Cholesterol: 5mg
Keywords: salad, summer, strawberries, cucumber, refreshing

Minute Grilled Mediterranean Veggie Wrap with Zesty Sauce
Grilled Mediterranean Veggie Wrap with Zesty Herb Sauce
Introduction
Hello, fellow food lovers! If you’re looking to elevate your lunch game with a dish that bursts with flavor and is as vibrant as a Mediterranean summer, you’ve landed in just the right spot. Meet the Grilled Mediterranean Veggie Wrap with Zesty Herb Sauce — a colorful, nutrient-packed delight that’s simple to whip up yet presents beautifully for guests or a mid-week treat.
Let’s face it, in our busy lives, finding time to prepare nourishing meals can feel like a challenge. That’s why I’m here to help you embrace the kitchen with confidence, armed with my culinary wisdom and a sprinkle of joy. This wrap captures the essence of fresh seasonal veggies, all grilled to perfection and enveloped in a warm whole wheat wrap. The kicker? A Zesty Herb Sauce that is like a mini-vacation for your taste buds. Seriously, it’s that good!
But before we dive into the ingredients and cooking steps, let me take you on a little journey through my memories that brought this delightful dish to life. Grab your apron, pour yourself a little something sparkling, and let’s get cooking!
Personal Story
You know how food has the magical ability to transport you back in time? One specific memory comes to mind as I chat about these Mediterranean wraps. Picture it: a sun-drenched summer afternoon spent with my family at our backyard barbecue. The air was filled with the aroma of grilled vegetables, laughter, and the sound of kids splashing in the pool. My dad took on the role of the grill master, meticulously tending to his prized veggies and attempting to convince me that they were “just as good as hot dogs.” Spoiler alert: he was right!
I remember feeling a mix of skepticism and the eagerness to prove him wrong as I pondered over boring, overcooked zucchini and peppers. But, oh, how that memory changed when I took my first bite of a grilled veggie wrap drizzled with my mom’s zesty yogurt sauce. It was bursting with flavor, freshness, and that perfect char you crave when vegetables hit the grill. This simple meal embodied love, laughter, and the joy of gathering around the table. Fast forward to today, and here I am sharing that spirit of warmth and hospitality with you through this delicious Grilled Mediterranean Veggie Wrap!
Ingredients
Now, let’s gather our ingredients for this delightful dish. Here’s what you’ll need to create your own flavor masterpiece:
-
1 medium zucchini, sliced into rounds
- Brings a tender texture and mild flavor. Substitute with yellow squash if you’re feeling adventurous!
-
1 medium red bell pepper, sliced into strips
- Adds sweetness and vibrant color. You can swap it out for green bell pepper for a more earthy taste.
-
1 medium yellow bell pepper, sliced into strips
- Offers a lovely contrast to the red pepper. Feel free to use orange if yellow isn’t available!
-
1 medium red onion, sliced into rings
- Provides a sharp flavor that mellows when grilled. You can use sweet onions for a milder hit or scallions for a fresh twist.
-
1 cup cherry tomatoes, halved
- Adds juiciness and a pop of sweetness. Regular tomatoes can work too; just chop them into bite-sized pieces.
-
2 tablespoons olive oil
- Essential for grilling – it helps achieve that gorgeous char. Avocado oil also works great if you prefer a higher smoke point.
-
Salt and pepper, to taste
- A foundational pair that enhances flavors across the board. Don’t hesitate to add a little cumin or smoked paprika for extra flair!
-
4 large whole wheat wraps or tortillas
- Great for wrapping up all the goodness. Corn tortillas are a gluten-free alternative that works beautifully!
-
1 cup hummus (store-bought or homemade)
- Brings creaminess and a delicious tang. Try making your own by blending chickpeas, tahini, and garlic, or use flavored varieties for a twist!
-
1 cup fresh spinach or arugula
- Adds a crunchy, fresh layer to the wrap. You can easily swap it out for mixed greens or baby kale if desired.
For the Zesty Herb Sauce:
-
1/2 cup Greek yogurt
- Acts as a creamy base with a protein boost. Feel free to use dairy-free yogurt for a vegan option.
-
1 tablespoon fresh lemon juice
- Brightens the entire sauce and enhances freshness. Lime juice can be a refreshing substitute.
-
1 teaspoon lemon zest
- Provides an aromatic lift that’s simply delightful. You can skip this if you only have juice, but I promise the zest adds magic!
-
1 tablespoon fresh dill, chopped
- Brings a herby, fragrant note. Fresh parsley is an excellent substitute if you can’t find dill.
-
1 tablespoon fresh parsley, chopped
- Adds a touch of brightness. Try basil or cilantro for a different flavor profile!
-
1 clove garlic, minced
- A must-have for that delicious kick! Consider roasted garlic for a sweeter flavor.
-
Salt and pepper, to taste
- Season to your liking!
Step-by-Step Instructions
Alright, let’s get those grilling skills on fire! Here’s a breakdown of the cooking steps to a mouthwatering Grilled Mediterranean Veggie Wrap.
-
Prep Your Veggies:
- Start off by washing all your veggies under cool running water. Slice the zucchini, bell peppers, and onion. Halving the cherry tomatoes adds that juicy pop of flavor.
-
Preheat the Grill (or Grill Pan):
- Heat your outdoor grill to medium-high or preheat a grill pan on the stovetop. Lightly oil the grates or pan to prevent sticking. This is crucial for those gorgeous grill marks!
-
Toss with Oil & Seasoning:
- In a large bowl, combine the sliced veggies with the olive oil, salt, and pepper. Toss everything together to coat evenly. This simple step infuses flavor and ensures that the veggies will grill perfectly!
-
Grill the Veggies:
- Place the veggies directly on the grill. Grill for about 4-6 minutes per side, or until they’re tender and have nice char marks. Keep an eye out for the onions; they may take a little longer to soften. Don’t be shy about moving them around to get all sides kissed by the flames!
-
Prepare the Zesty Herb Sauce:
- While the veggies are grilling, it’s sauce time! In a small bowl, mix together the Greek yogurt, lemon juice, lemon zest, dill, parsley, garlic, and season with salt and pepper. Adjust to taste — the goal is a bright flavor that complements our wraps.
-
Assemble the Wraps:
- Once the veggies are perfectly grilled, it’s assembly time! Lay a whole wheat wrap on a clean surface. Spread a generous layer of hummus over the wrap, leaving a small border around the edges. Add a handful of fresh spinach or arugula, followed by a mound of those delectable grilled veggies.
-
Drizzle with Sauce:
- Drizzle that beautiful Zesty Herb Sauce over the veggies. Don’t hold back – it brings everything to life!
-
Roll It Up:
- Fold in the sides of the wrap and then roll from the bottom, tucking in as you go, to create a tight roll. Cut in half to reveal those vibrant, colorful layers inside.
-
Serve:
- Place the wraps on a platter, and enjoy them warm. A side of extra Zesty Herb Sauce for dipping makes a delightful accompaniment!
Serving Suggestions
For a beautiful presentation, serve your Grilled Mediterranean Veggie Wraps on a rustic wooden board or a simple white platter. You can garnish them with sprigs of fresh herbs to enhance the visual appeal. A side of crispy sweet potato fries or a light salad pairs beautifully, elevating the whole experience of your meal.
Recipe Variations
Feeling creative? Here are a few delicious twists to consider:
- Spicy Kick: Add sliced jalapeños or a spicy sauce to give your wraps a fiery flavor.
- Cheesy Goodness: Sprinkle some feta or goat cheese inside the wrap for a creamy twist!
- Protein Power: Layer in grilled chicken, turkey, or chickpeas for added protein to power up your meal.
- Roasted Veggies: Swap out grilling for oven-roasting the veggies for a deeper flavor and tender texture.
- Joyful Greens: Experiment by swapping in kale or radicchio instead of spinach for a bit of bitterness and crunch.
Chef’s Notes
This recipe has evolved over the years, inspired by countless summer gatherings and the adventures of exploring Mediterranean flavors. Each time I make these wraps, it brings back cherished memories of those backyard barbeques with family and friends. The beauty of this dish lies in its adaptability. Whether hosting a casual lunch or whipping up a quick dinner, it’s a favorite for gathering around the table. And if you do have leftovers (which is rare!), these wraps make a fantastic snack cold, dipped in the zesty sauce!
FAQs and Troubleshooting
1. My wraps fell apart! What did I do wrong?
- No worries! Ensure you’re rolling the wrap tightly and not overstuffing it. Less is often more. A good rule of thumb is to leave about an inch on the sides and roughly half the wrap open at the bottom for easy rolling!
2. Can I make this vegan?
- Absolutely! Swap out the Greek yogurt for a dairy-free alternative, and be sure to use a plant-based hummus. The veggies and herbs remain the same, keeping it vibrant and fresh!
3. Can I grill the wraps?
- Yes! Grilling the assembled wraps for just 2-3 minutes on each side can yield a deliciously crispy outside and warm contents. Just use a grill pan or a panini press for great results.
4. What if my veggies are too soggy?
- If this happens, consider pre-salting them to draw out excess moisture before grilling. Keep an eye on your grilling time; veggies should be tender but still have some crunch!
Nutritional Info
(Click here for a convenient nutritional breakdown of this recipe.)
For a wrap that nourishes both body and soul, this Grilled Mediterranean Veggie Wrap with Zesty Herb Sauce is a game changer. It’s not only a treat for your taste buds but also a way to create connections over good food. I hope you enjoy cooking this recipe as much as I enjoyed sharing it with you. Let’s continue to celebrate good food and wonderful moments around the table—one meal at a time. Happy cooking!
PrintGrilled Mediterranean Veggie Wrap with Zesty Herb Sauce

A vibrant and flavor-packed wrap filled with grilled seasonal veggies and drizzled with a zesty herb sauce.
- Prep Time: 15 minutes
- Cook Time: 20 minutes
- Total Time: 35 minutes
- Yield: 4 servings 1x
- Category: Main Course
- Method: Grilling
- Cuisine: Mediterranean
- Diet: Vegetarian
Ingredients
- 1 medium zucchini, sliced into rounds
- 1 medium red bell pepper, sliced into strips
- 1 medium yellow bell pepper, sliced into strips
- 1 medium red onion, sliced into rings
- 1 cup cherry tomatoes, halved
- 2 tablespoons olive oil
- Salt and pepper, to taste
- 4 large whole wheat wraps or tortillas
- 1 cup hummus
- 1 cup fresh spinach or arugula
- 1/2 cup Greek yogurt
- 1 tablespoon fresh lemon juice
- 1 teaspoon lemon zest
- 1 tablespoon fresh dill, chopped
- 1 tablespoon fresh parsley, chopped
- 1 clove garlic, minced
- Salt and pepper, to taste
Instructions
- Prep your veggies: Start off by washing all your veggies under cool running water. Slice the zucchini, bell peppers, and onion. Halving the cherry tomatoes adds that juicy pop of flavor.
- Preheat the grill (or grill pan): Heat your outdoor grill to medium-high or preheat a grill pan on the stovetop. Lightly oil the grates or pan to prevent sticking.
- Toss with oil & seasoning: In a large bowl, combine the sliced veggies with the olive oil, salt, and pepper. Toss everything together to coat evenly.
- Grill the veggies: Place the veggies directly on the grill. Grill for about 4-6 minutes per side, or until they’re tender and have nice char marks.
- Prepare the Zesty Herb Sauce: In a small bowl, mix together the Greek yogurt, lemon juice, lemon zest, dill, parsley, garlic, and season with salt and pepper. Adjust to taste.
- Assemble the wraps: Lay a whole wheat wrap on a clean surface. Spread a generous layer of hummus over the wrap, then add fresh spinach or arugula, followed by grilled veggies.
- Drizzle with sauce: Drizzle the Zesty Herb Sauce over the veggies.
- Roll it up: Fold in the sides of the wrap and roll from the bottom, tucking as you go.
- Serve: Place the wraps on a platter and enjoy them warm with additional sauce for dipping.
Notes
For serving, garnish with fresh herbs and pair with sweet potato fries or a light salad.
Nutrition
- Serving Size: 1 wrap
- Calories: 300
- Sugar: 4g
- Sodium: 350mg
- Fat: 10g
- Saturated Fat: 2g
- Unsaturated Fat: 8g
- Trans Fat: 0g
- Carbohydrates: 38g
- Fiber: 7g
- Protein: 9g
- Cholesterol: 5mg
Keywords: vegetarian, Mediterranean, grilled veggies, wrap, healthy lunch
Quick Chickpea & Feta Wraps with Veggies & Yogurt Sauce (Meal Prep)
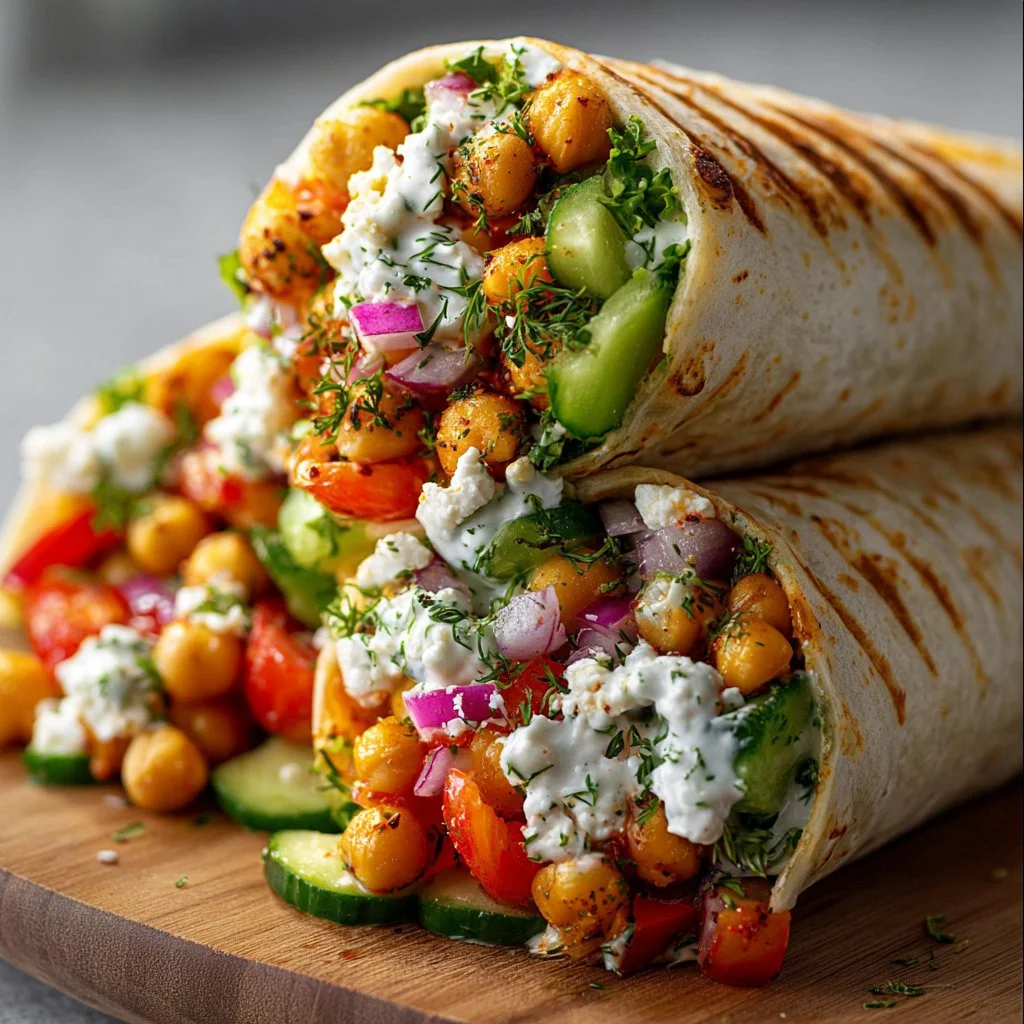
Chickpea & Feta Wrap with Veggies & Yogurt Sauce – 5 Quick Flavorful Ways!
Hello, fellow food lovers! Today we’re diving into a recipe that is not only bursting with flavor but also incredibly easy to whip up – the Chickpea & Feta Wrap with Veggies & Yogurt Sauce. This dish is perfect for those busy weeknights when you still crave something wholesome and tasty. The best part? It can be customized in so many delightful ways!
Introduction: A Flavorful Escape
Imagine this: the sun is shining bright, you’re soaking in some rays at your outdoor table, the gentle breeze rustles the leaves around you, and there you are, taking a generous bite of a wrap filled to the brim with creamy feta, vibrant veggies, and tangy yogurt sauce. Ah, bliss! That’s the magic of these wraps.
Cooking is not just about nourishment for me; it’s about creating moments, building memories, and sharing experiences with your loved ones. With this wrap recipe, you can kick-start your culinary adventure in the kitchen and impress your family or friends without breaking a sweat. Plus, you’ll have the opportunity to go wild with different flavors!
In this blog post, we’re going to explore one of my all-time favorite recipes that I often turn to when I want something fresh, healthy, and ridiculously satisfying. Who knew that chickpeas, some seasoning, and wholesome veggies could become your go-to dish?
Now, let me take you through the delightful journey of this wrap, complete with inspirations from my kitchen stories, handy tips, and exciting variations. So, are you ready? Let’s roll up those sleeves and get cooking!
Personal Story: A Trip Down Memory Lane
Growing up in a household where food was the center of all gatherings, I can’t help but recall the chaotic yet joyful nights we’d spend in the kitchen. I vividly remember my mom whipping up all sorts of dishes, ranging from hearty stews to refreshing salads, each infused with love and a pinch of creativity.
One particular summer evening stands out to me. My friends and I were munching on these homemade wraps my mom had concocted with whatever colorful veggies we had lurking in the refrigerator. I can see it now – us huddled together in the kitchen, a vibrant spread of chopped cucumbers, sun-ripened tomatoes, crumbled feta, and, of course, a jar of creamy yogurt sauce placed in the middle of the table.
At first, it was a simple meal, but the laughter and stories exchanged over those wraps made it an unforgettable feast. It was then that I realized that meal prep doesn’t have to be a chore; it can be a festive occasion. Meals become cherished moments when shared with love and creativity. That evening inspired my own cooking adventures and encouraged me to craft my own versions of those simple yet fulfilling wraps.
Ingredients
-
1 cup canned chickpeas, drained and rinsed: These little legumes are a protein powerhouse. If you’re out of chickpeas, feel free to swap them with black beans or even cooked quinoa for a different texture.
-
1 tbsp olive oil: This brings richness to your mix. No olive oil? Go for canola or avocado oil instead, as they both have lovely flavors too.
-
1/2 tsp paprika: This spice adds warmth and color to the dish. If you want more kick, smoked paprika offers a delightful smokiness, while cayenne pepper adds heat.
-
1/2 tsp ground cumin: For that earthy aroma! If you don’t have cumin on hand, coriander could serve as an interesting swap.
-
Salt and black pepper to taste: Essential for enhancing flavors. Adjust according to your taste preference!
-
1/2 cup crumbled feta cheese: This creamy cheese brings a tangy punch. If you want a dairy-free option, try crumbled tofu with a splash of lemon juice and nutritional yeast.
-
1 cup cucumber, diced: Cucumbers add a refreshing crunch. Swap out for bell peppers if you prefer a bit more sweetness.
-
1/2 cup cherry tomatoes, halved: Bursting with juice, these beauties are fantastic! Regular tomatoes can work too, just make sure to remove some of the excess moisture.
-
1/4 cup red onion, thinly sliced: These add a zesty bite. If you’re aiming for a milder flavor, opt for green onions instead.
-
4 large flour tortillas or wraps: Perfect for wrapping! Whole wheat or corn tortillas make excellent alternatives if you want a different flavor or texture profile.
-
1 cup plain yogurt: This is the base for our delightful sauce. If you’re dairy-free, coconut yogurt works wonderfully here!
-
1 tbsp lemon juice: A squeeze of citrus brightens everything up. In a pinch, lime juice could be a refreshing alternative.
-
1 clove garlic, minced: For that irresistible aromatic kick. Fresh garlic is best, but garlic powder can work in a pinch.
-
1 tbsp olive oil (for the sauce): Gives a smooth finish. Again, substitute with another oil if you wish.
-
Salt to taste: Just enough to tie all those fabulous flavors together!
Step-by-Step Instructions
-
Prep the Chickpeas:
- In a medium bowl, combine the drained chickpeas with 1 tablespoon of olive oil, paprika, cumin, salt, and black pepper. Toss them until they’re well coated. This step is essential to infuse the chickpeas with delicious flavor before we cook them.
-
Cook the Chickpeas:
- Heat a small skillet over medium heat. Once hot, add the seasoned chickpeas, sautéing them for about 5-7 minutes until they’re warmed through and slightly crispy on the outside. This step adds a lovely texture and makes the chickpeas even more inviting.
Chef Tip: If you want a bit of a crunch, feel free to let the chickpeas cook a minute longer until they’re golden!
-
Make the Yogurt Sauce:
- While the chickpeas are cooking, in another bowl, combine the yogurt, lemon juice, minced garlic, olive oil, and a pinch of salt. Stir well until it’s creamy and smooth! This sauce is the secret star of the dish, adding a refreshing zing that pairs beautifully with the warm chickpeas and crisp veggies.
Chef Hack: If you’re short on time, you can simply mix in a tablespoon of store-bought tzatziki to skip a step!
-
Prepare the Wraps:
- Take your tortillas or wraps, and place them on a clean surface. Begin layering with a generous spread of the yogurt sauce, adding the chickpeas next, then the fresh cucumber, cherry tomatoes, red onion, and last but not least, sprinkle on some crumbled feta.
-
Wrap It Up:
- Now, fold in the sides of the tortilla and roll it up tightly. Slice in half for easy eating and to show off that beautiful filling! This presentation makes your wrap not only tasty but visually appealing.
Bonus Tip: If you’re packing these for lunch, tightly wrap them in foil or parchment paper to keep everything snug.
Serving Suggestions
Plating these wraps is about celebrating fresh, colorful ingredients. Place them on a platter with extra lemon wedges, a small bowl of the yogurt sauce for dipping, and perhaps a sprinkle of fresh herbs like cilantro or parsley for a pop of color. You can even add a side of crispy sweet potato fries for that perfect lunch or light dinner combo!
Recipe Variations
-
Mediterranean Twist: Add olives and roasted red peppers for a more traditional Mediterranean flare. Serve with a side of tabbouleh for added freshness.
-
Spicy Kick: Mix in some chopped jalapeños or a dash of sriracha into your yogurt sauce for some heat!
-
Herbaceous Delight: Incorporate fresh herbs like dill or mint into your yogurt sauce for a refreshing flavor profile.
-
Whole Grain Goodness: Swap out traditional flour tortillas for whole grain or gluten-free wraps to suit any dietary needs.
-
Hearty Addition: Add some cooked quinoa or brown rice to the wraps for extra protein and texture!
Chef’s Notes
This recipe has traveled with me throughout my culinary journey and has evolved many times over, reflecting seasonal ingredients and global influences. I fondly recall a friend who travels often bringing exotic spices from around the world; we once made a Moroccan-inspired version by adding harissa to the chickpeas! I love how this dish welcomes creativity and experimentation, making it a perfect blank canvas.
FAQs and Troubleshooting
-
Can I make these wraps ahead of time?
- Absolutely! You can prepare the filling and sauce ahead of time. Just assemble the wraps when you’re ready to eat to keep everything fresh.
-
What if I don’t like chickpeas?
- No worries! Substitute them with black beans or cooked lentils for a different flavor and texture.
-
How can I make these wraps vegan?
- Simply swap out the yogurt for a plant-based alternative and leave out the feta or use a vegan feta version instead.
-
My wraps are falling apart; how do I fix this?
- Make sure to warm the tortillas slightly before wrapping to help them stay together better. Keeping the ingredients within the center without overstuffing can also help.
Nutritional Info
(You may want to add this section depending on if you’d like to provide it. Here’s an example):
- Calories: Approximately 400 per wrap (with yogurt sauce)
- Protein: 15g
- Carbohydrates: 50g
- Dietary Fiber: 10g
- Fats: 15g
Conclusion
There you have it – the chickpea & feta wrap that can easily become a staple in your kitchen! With countless ways to twist this recipe, you’ll never get bored and can cater to every taste bud. I hope you’re inspired to tie on that lovely apron of yours and play around with this delightful dish. Happy cooking, friends! Let’s gather around the table and share those beautiful moments, one wrap at a time!
PrintChickpea & Feta Wrap with Veggies & Yogurt Sauce

A quick and flavorful wrap filled with chickpeas, creamy feta, vibrant veggies, and a tangy yogurt sauce.
- Prep Time: 15 minutes
- Cook Time: 10 minutes
- Total Time: 25 minutes
- Yield: 4 servings 1x
- Category: Main Course
- Method: Wrapping
- Cuisine: Mediterranean
- Diet: Vegetarian
Ingredients
- 1 cup canned chickpeas, drained and rinsed
- 1 tbsp olive oil
- 1/2 tsp paprika
- 1/2 tsp ground cumin
- Salt and black pepper to taste
- 1/2 cup crumbled feta cheese
- 1 cup cucumber, diced
- 1/2 cup cherry tomatoes, halved
- 1/4 cup red onion, thinly sliced
- 4 large flour tortillas or wraps
- 1 cup plain yogurt
- 1 tbsp lemon juice
- 1 clove garlic, minced
- 1 tbsp olive oil (for the sauce)
- Salt to taste
Instructions
- Combine the drained chickpeas with olive oil, paprika, cumin, salt, and black pepper in a medium bowl. Toss until well coated.
- Heat a small skillet over medium heat and add the seasoned chickpeas. Sauté for about 5-7 minutes until warmed through and slightly crispy.
- Mix the yogurt, lemon juice, minced garlic, olive oil, and a pinch of salt in another bowl until creamy and smooth.
- Layer your tortillas with a generous spread of yogurt sauce, followed by the chickpeas, cucumber, cherry tomatoes, red onion, and crumbled feta.
- Fold in the sides of the tortilla and roll it up tightly. Slice in half to serve.
Notes
Feel free to customize the wraps with different vegetables or proteins. You can also prepare the filling and sauce ahead of time.
Nutrition
- Serving Size: 1 wrap
- Calories: 400
- Sugar: 5g
- Sodium: 300mg
- Fat: 15g
- Saturated Fat: 4g
- Unsaturated Fat: 8g
- Trans Fat: 0g
- Carbohydrates: 50g
- Fiber: 10g
- Protein: 15g
- Cholesterol: 30mg
Keywords: wraps, chickpea, feta, vegetarian, healthy, quick meal

Minute Healthy Chicken Enchiladas: Easy Weeknight Dinner
Quick & Healthy Chicken Enchiladas: A Delicious Journey Awaits
Hello, fellow food lovers! Are you ready to embark on a flavorful trip that’s both quick and healthy? Today, we’re diving into a dish that’s sure to become a cherished staple in your kitchen: Chicken Enchiladas! Imagine tender, shredded chicken wrapped in warm tortillas, blanketed in a tangy enchilada sauce, and topped with ooey-gooey cheese. Sounds dreamy, right? Let’s make that dream a reality while keeping it light and wholesome!
Cooking has always been my way of expressing love, and this recipe represents the blend of tradition and everyday simplicity. Enchiladas hold a special place in my heart, not just for their incredible flavor, but for the beautiful memories they evoke. Picture this: it was a chilly evening, and my friends were gathered in my cozy kitchen, laughter filling the air as I dished out my batch of homemade enchiladas. Their smiles and warm compliments were everything.
So, roll up your sleeves, tie on that apron, and prepare for some culinary magic. I promise you’ll feel like a rockstar in the kitchen!
My Chicken Enchilada Story
Growing up, weekends were often filled with vibrant gatherings of family and friends around a table brimming with delicious food. Enchiladas were a crowd favorite, and I can still recall the excitement of helping my grandmother roll each tortilla, her laughter ringing out as we spilled a bit of filling. I learned that cooking is more than just about the food; it’s about the memories we create around it. One night, we decided to host an impromptu dinner party, and enchiladas were the star of the show. The kitchen was filled with the intoxicating aromas of spices and salsa, as we plated the colorful enchiladas for our guests. With each bite, their smiles grew wider, and that warmth spread through our hearts like a cozy blanket.
Now, let’s bring that same joy into our homes — without needing hours in the kitchen!
Ingredients
Here’s what you’ll need to whip up these scrumptious chicken enchiladas:
-
2 cups cooked shredded chicken: Use rotisserie chicken for a quick option, or cook your own for a fresher flavor. It’s a perfect way to use leftovers too!
-
1 cup black beans, drained and rinsed: These add protein and fiber. If you’re not a fan, feel free to swap them out with pinto beans or even quinoa for a twist.
-
1 cup corn: Fresh, frozen, or canned — corn brings a delightful sweetness that balances the spices beautifully.
-
1 cup diced tomatoes: You can use fresh tomatoes or canned diced tomatoes for convenience. The juicy texture helps keep the enchiladas moist!
-
1 teaspoon chili powder: This spice gives our dish a warm kick. Adjust the amount according to your spice tolerance; a little goes a long way!
-
1 teaspoon cumin: This earthy spice adds depth to the flavors. If you’re out, smoked paprika can offer a unique twist!
-
8 small whole wheat tortillas: Whole wheat tortillas add fiber. If you prefer corn tortillas, go for it! Just be gentle when rolling them as they can be more fragile.
-
1 cup shredded cheese (e.g., cheddar or Mexican blend): Cheese is the magical glue of this dish! Feel free to use dairy-free alternatives if you want a healthier option.
-
1/2 cup enchilada sauce: Store-bought or homemade, just make sure it’s full of flavor to elevate our dish. You can also use salsa if you’re in a pinch!
-
Fresh cilantro for garnish: This bright herb adds a pop of color and flavor. If cilantro isn’t your thing, try fresh parsley or even green onions.
Step-by-Step Instructions
Ready to get cooking? Let’s break it down into simple steps along with some tips and tricks that’ll make this process a breeze!
-
Preheat the Oven: Preheat your oven to 375°F (190°C). This ensures your enchiladas will cook evenly, resulting in that perfect gooey cheese on top!
-
Prepare the Filling: In a large bowl, combine the cooked shredded chicken, black beans, corn, diced tomatoes, chili powder, and cumin. Give it a gentle stir to mix all those delicious flavors together.
-
Soften the Tortillas: If using corn tortillas, lightly heat them in a skillet or microwave for about 20 seconds until they’re pliable. This prevents them from cracking as you fill them!
-
Assemble the Enchiladas: Take a tortilla, place some of the filling in the center (about 1/4 cup should do), and roll it tightly. Place seam-side down in a lightly greased baking dish. Repeat until all tortillas are filled.
-
Pour on the Enchilada Sauce: Once all the enchiladas are in the dish, pour the enchilada sauce evenly over the top. Use the back of a spoon to spread it out, covering every delicious inch!
-
Cheese It Up: Sprinkle the shredded cheese all over the enchiladas. Cheese lovers rejoice; you can always add more if you want that melty magic!
-
Bake to Perfection: Place the baking dish in the preheated oven and bake for 20-25 minutes, or until the cheese is bubbling and golden. Your kitchen is about to smell heavenly!
-
Garnish and Serve: Once they’re done, take them out of the oven, let them cool for a few minutes, then garnish with fresh cilantro.
Serving Suggestions
For the ultimate presentation, serve your chicken enchiladas on a large platter, drizzled with extra enchilada sauce and sprinkled with fresh cilantro. Pair with a simple side salad of mixed greens tossed in a zesty vinaigrette, and perhaps some homemade guacamole or a dollop of Greek yogurt for creaminess.
Recipe Variations
Looking to switch things up? Here are a few creative ideas:
-
Vegetarian Enchiladas: Replace the chicken with sautéed vegetables like zucchini, bell peppers, and mushrooms for a wholesome veggie alternative.
-
Spicy Kick: Add diced jalapeños or a pinch of cayenne pepper to the filling for an extra punch of heat.
-
Cheesy Veggie Delight: Toss in some sautéed spinach or kale into the filling for a nutrient boost.
-
Taco Style: Use taco seasoning instead of chili powder and cumin for a twist that will bring a fun, familiar flavor.
-
Gluten-Free Option: Substitute the whole wheat tortillas with corn tortillas or gluten-free tortillas to accommodate dietary preferences.
Chef’s Notes
I’ve played around with this recipe over the years, and the beauty lies in its flexibility. There was a time when I experimented with different types of cheese — a smoked gouda added a layer of flavor that was to die for! Cooking enchiladas can still lead to accidental spills or misadventures (I once dropped an entire tray face-first on the floor — oops!). But it’s those little mishaps that make the kitchen feel alive and full of laughter.
FAQs and Troubleshooting
Here are some common questions and a few troubleshooting tips to ensure your enchiladas turn out amazing:
1. What if my tortillas break while rolling?
No worries! Simply heat them a bit more to soften them. Alternatively, you can layer them like a lasagna instead of rolling. It’s just as tasty!
2. How can I make my enchiladas extra saucy?
Use more enchilada sauce and even consider drizzling some on top before serving! You can adjust the amount based on your preference.
3. How do I store leftovers?
Store covered in the refrigerator for up to 3 days. To reheat, pop them in the oven or microwave until heated through.
4. Can I freeze these enchiladas?
Absolutely! Just assemble them without baking, wrap them tightly, and freeze. When ready to eat, bake them straight from the freezer, allowing for extra cooking time.
Nutritional Info (Optional)
For a rough estimate, each enchilada contains approximately:
- Calories: 300
- Protein: 24g
- Carbohydrates: 35g
- Fat: 10g
(Note: nutritional information may vary based on specific ingredients.)
So there you have it — an inviting, easy-to-follow recipe that’s bound to impress! I’m thrilled to have shared this journey with you. May every bite elevate your dining experience and create memories around your table. Now, grab your apron, and let’s recreate that special kitchen magic! Welcome to the realm of quick, healthy chicken enchiladas — your taste buds will thank you!
PrintQuick & Healthy Chicken Enchiladas

Delicious and wholesome chicken enchiladas wrapped in warm tortillas with a tangy sauce and melted cheese.
- Prep Time: 15 minutes
- Cook Time: 25 minutes
- Total Time: 40 minutes
- Yield: 4 servings 1x
- Category: Main Course
- Method: Baking
- Cuisine: Mexican
- Diet: Healthy
Ingredients
- 2 cups cooked shredded chicken
- 1 cup black beans, drained and rinsed
- 1 cup corn
- 1 cup diced tomatoes
- 1 teaspoon chili powder
- 1 teaspoon cumin
- 8 small whole wheat tortillas
- 1 cup shredded cheese (e.g., cheddar or Mexican blend)
- 1/2 cup enchilada sauce
- Fresh cilantro for garnish
Instructions
- Preheat the oven to 375°F (190°C).
- Combine the cooked shredded chicken, black beans, corn, diced tomatoes, chili powder, and cumin in a large bowl.
- Heat corn tortillas in a skillet or microwave for about 20 seconds until pliable.
- Take a tortilla, place about 1/4 cup of the filling in the center, and roll it tightly. Place seam-side down in a greased baking dish.
- Pour the enchilada sauce evenly over the top of the enchiladas.
- Sprinkle shredded cheese all over the enchiladas.
- Bake in the preheated oven for 20-25 minutes, until the cheese is bubbling and golden.
- Garnish with fresh cilantro before serving.
Notes
Feel free to customize the filling and toppings to your taste. This recipe is flexible and works well with various ingredients.
Nutrition
- Serving Size: 1 enchilada
- Calories: 300
- Sugar: 5g
- Sodium: 400mg
- Fat: 10g
- Saturated Fat: 4g
- Unsaturated Fat: 6g
- Trans Fat: 0g
- Carbohydrates: 35g
- Fiber: 8g
- Protein: 24g
- Cholesterol: 60mg
Keywords: chicken enchiladas, healthy recipe, easy dinner, Mexican food

Crispy 15-Minute Cheesy Taco Sticks: Weeknight Snack
Cheesy Taco Sticks: A Flavorful Twist on a Comfort Classic
Welcome to my kitchen, food lovers! Today, I’m super excited to share a dish that will not only bring joy to your taste buds but also remind you of those cozy family gatherings where laughter and delicious aromas filled the air. I’m talking about Cheesy Taco Sticks!
These delectable bites are the perfect blend of savory ground beef, zesty taco seasoning, and gooey cheese, all wrapped in warm, fluffy pizza dough. It’s a recipe that combines the beloved flavors of tacos and pizza to create a fun, handheld treat that’s a hit with both kids and adults alike. Whether you’re hosting a dinner party, having a game night with friends, or just craving something irresistibly tasty on a weeknight, these Cheesy Taco Sticks are sure to be the star of the show!
So grab your apron and let’s dive into this cheesy culinary adventure together!
My Taco Story
Growing up, Taco Tuesdays were a sacred family ritual in my home. My mom would whip up her famous taco filling, which always seemed to have that magical flavor that only moms can create. After dinner, we’d gather at the table, each person crafting their own taco creations with all the relevant toppings — shredded lettuce, diced tomatoes, and oh, the mountains of cheese!
But it wasn’t just about the food; it was about the time spent together. I fondly remember sneaking little bites of the taco filling before it even made it to the table and my sister and I trying to outdo each other with the tallest taco stacks. Fast forward a few years, and I’d often find myself experimenting with leftovers, one evening transforming our beloved tacos into a whimsical party snack. That’s how these Cheesy Taco Sticks came to life—a delightful twist on a nostalgic favorite that instantly transports me back to those laughter-filled evenings.
Ingredients
Here’s what you’ll need to whip up your own batch of Cheesy Taco Sticks:
-
1 lb ground beef (or turkey)
- Ground beef is classic for this recipe, but feel free to substitute it with ground turkey for a leaner option. For a vegetarian twist, try crumbled tempeh or lentils.
-
1 packet taco seasoning
- This seasoning blend is a game-changer! You can use store-bought or make your own with chili powder, garlic powder, onion powder, cumin, and paprika.
-
1 cup shredded cheese (cheddar or Mexican blend)
- Cheddar adds a wonderful sharpness, but a Mexican blend gives that authentic taco flavor. For a dairy-free option, try cashew cheese or nutritional yeast for a cheesy flavor.
-
1 package refrigerated pizza dough
- Store-bought pizza dough saves time, but feel free to make your own! You can even use crescent roll dough for a flaky twist.
-
Salsa (for dipping)
- Salsa adds a fresh zing. Choose your heat level—mild, medium, or hot!
-
Sour cream (for dipping)
- A cooling contrast to the spiced taco filling. For a dairy-free alternative, use coconut cream or a cashew-based sour cream.
-
Chopped green onions (optional, for garnish)
- These add a pop of color and fresh flavor.
Step-by-Step Instructions
Let’s get cooking! Follow these steps closely, and you’ll have those Cheesy Taco Sticks ready for everyone to enjoy in no time.
-
Preheat Your Oven: Set your oven to 375°F (190°C). This allows it to reach the perfect temperature while you prepare your ingredients.
-
Cook the Ground Beef: In a skillet over medium-high heat, add your ground beef (or turkey). Cook until browned, about 7-10 minutes. As it cooks, use a spatula to break it into small pieces. This ensures you’ll have evenly cooked filling in every bite!
-
Season It Up: Once your meat is cooked, drain any excess fat, if necessary. Now sprinkle in the taco seasoning and stir well. Add about 1/3 cup of water and let the mixture simmer for an additional 3-5 minutes. This allows the flavors to meld beautifully!
-
Prepare Your Dough: While your meat simmers, open the package of pizza dough. Lightly flour your countertop and roll out the dough. You want it to be about 1/4 inch thick. If you’re using crescent roll dough, just seal the seams together.
-
Assemble the Taco Sticks: Using a pizza cutter, cut the dough into rectangles—about 3 inches by 4 inches is perfect. On one half of each rectangle, spoon a heaping tablespoon of your taco filling, then sprinkle a generous amount of cheese on top.
-
Seal It Up: Fold the dough over to enclose the filling, pressing the edges with a fork to seal them well. This is crucial! You don’t want that cheesy goodness leaking out while they bake.
-
Bake to Perfection: Line a baking sheet with parchment paper, and place your sealed taco sticks on top. Brush with a little bit of olive oil or melted butter for that gorgeous golden finish. Bake for 15-20 minutes, or until they’re puffed up and beautifully golden brown on top.
-
Serve with Love: Once they’re out of the oven, allow the Cheesy Taco Sticks to cool for a few minutes. Serve them hot with salsa and sour cream for dipping, and don’t forget the chopped green onions for that extra touch!
Serving Suggestions
I love to serve these Cheesy Taco Sticks on a large platter, with colorful bowls of salsa and sour cream for dipping. You can garnish with fresh cilantro or diced avocado for an extra colorful presentation. Your guests will be drawn to this vibrant display, and each bite will taste even better when paired with good company and laughter.
Recipe Variations
Feeling adventurous? Here are a few ways to mix things up:
-
Spicy Twist: Add diced jalapeños to your taco filling for a kick. You can also mix some diced green chilies into your cheese blend for extra flavor.
-
Vegetarian Option: Swap the meat for black beans or sautéed veggies like bell peppers and corn for a hearty vegetarian dish.
-
Different Cheeses: Experiment with Monterey Jack or pepper jack cheese for a creamier or spicier filling. Experimenting is part of the fun!
-
Herb-Infused: Add fresh herbs like cilantro or oregano to the taco mixture for a burst of freshness.
-
Sweet and Savory: Fold in some caramelized onions or even pineapple for a unique twist!
Chef’s Notes
These Cheesy Taco Sticks have evolved over time as I’ve played with different fillings and dough options. I once experimented by using leftover chili as a filling, and let me tell you, it was a hit! It’s one of the great things about cooking: it’s all about creativity and making it your own. They’ve become a staple in my home, serving as a bridge to connect generations through food.
Oh, and don’t be surprised if you find yourself snacking on the filling straight from the skillet! It’s hard to resist that savory goodness!
FAQs and Troubleshooting
1. My taco sticks burst open while baking. What happened?
This usually happens if they were overfilled or not sealed properly. Make sure to press the edges firmly with a fork and avoid overstuffing them.
2. Can I make these ahead of time?
Absolutely! You can assemble the Cheesy Taco Sticks, place them on a baking sheet, cover them tightly with plastic wrap, and refrigerate for a few hours before baking. Add a few extra minutes to the baking time!
3. How do I store leftovers?
If you have any leftovers (highly unlikely, but just in case!), store them in an airtight container in the fridge for up to 3 days. Reheat in the oven or air fryer for best results!
4. What can I serve alongside these?
These pairs wonderfully with a simple side salad, tortilla chips, or even some Mexican rice. It’s a complete meal that’s easy to customize!
Nutritional Info
While I typically focus on taste, I know the nutritional aspect can be important too. Here’s a rough estimate per Cheesy Taco Stick depending on the specific ingredients used:
- Calories: 200-250
- Protein: 12-15g
- Carbohydrates: 20-25g
- Fat: 10-15g
And there you have it, my friend: a delicious adventure into the world of Cheesy Taco Sticks! Cooking should be fun and accessible, and I’m thrilled to be your guide. So tie on that apron, gather your ingredients, and let’s create some memorable moments around your table! Happy cooking!
PrintCheesy Taco Sticks

A flavorful twist on classic tacos and pizza, these Cheesy Taco Sticks combine savory ground beef, zesty seasoning, and gooey cheese wrapped in warm pizza dough.
- Prep Time: 15 minutes
- Cook Time: 20 minutes
- Total Time: 35 minutes
- Yield: 4 servings 1x
- Category: Appetizer
- Method: Baking
- Cuisine: Mexican
- Diet: Omnivore
Ingredients
- 1 lb ground beef (or turkey)
- 1 packet taco seasoning
- 1 cup shredded cheese (cheddar or Mexican blend)
- 1 package refrigerated pizza dough
- Salsa (for dipping)
- Sour cream (for dipping)
- Chopped green onions (optional, for garnish)
Instructions
- Preheat your oven to 375°F (190°C).
- Cook the ground beef in a skillet over medium-high heat until browned, about 7-10 minutes.
- Season the meat with taco seasoning, add 1/3 cup of water, and simmer for 3-5 minutes.
- Prepare your pizza dough by rolling it out on a lightly floured countertop.
- Assemble by cutting the dough into rectangles, adding taco filling and cheese to one half.
- Seal the edges by folding the dough over and pressing it with a fork.
- Bake for 15-20 minutes until golden brown.
- Serve with salsa and sour cream.
Notes
Feel free to customize with different fillings and dips. These can be made ahead of time and stored in the fridge.
Nutrition
- Serving Size: 1 stick
- Calories: 200
- Sugar: 1g
- Sodium: 600mg
- Fat: 12g
- Saturated Fat: 5g
- Unsaturated Fat: 7g
- Trans Fat: 0g
- Carbohydrates: 25g
- Fiber: 2g
- Protein: 15g
- Cholesterol: 40mg
Keywords: taco sticks, cheesy snacks, comfort food, easy appetizers, game day recipes

Weeknight Thai Chicken Wraps with Crunchy Asian Slaw
Thai Chicken Wraps with Crunchy Asian Slaw: A Flavor-Packed Adventure
Hello, dear foodies! It’s Savannah from Ivory Apron, and today we’re diving into a deliciously fresh and fun recipe that’s sure to be a hit around your dinner table: Thai Chicken Wraps with Crunchy Asian Slaw! If you’re looking for a dish that’s both vibrant and easy to make, you’ve come to the right place. Let’s get those aprons on because this recipe is sure to impress!
Ah, the joy of wrapping up scrumptious fillings in crisp lettuce or soft tortillas! It’s like a little present waiting to be unwrapped. There’s something so satisfying about creating a meal that’s not just a feast for the stomach but also a visual delight. These Thai Chicken Wraps are not only loaded with flavor, but they also pack a nutrient punch and provide a wonderful crunch thanks to the fresh, colorful slaw.
This dish is perfect for those cozy weeknight dinners or casual get-togethers with friends. Picture this: a warm evening, friends gathered around the table, laughter filling the air, and everyone crafting their own wraps. It’s about connection—and what better way to connect than over a shared meal?
What makes these wraps so special is the contrast of textures and flavors. The tenderness of the shredded chicken mixed with the creamy peanut sauce, combined with the crispness of the slaw, creates a delightful bite that dances on your taste buds. Grab those ingredients, and let’s make it happen!
Personal Story
Whenever I think of wraps, I’m transported back to a sunny summer day spent with my best friends at our favorite picnic spot. We each brought our favorite homemade dishes to share, and I chose to prepare a similar version of these wraps. I remember spreading out the colorful blanket, setting out bowls of fresh veggies, and, of course, my creamy peanut sauce.
As we crafted our own wraps, we swapped stories, laughter, and of course, extra helpings of that delicious sauce! That day was a beautiful reminder of how food brings us all together. The combination of fresh ingredients and vibrant flavors made the meal not just filling but a celebration of friendship and creativity. Ever since then, I’ve been perfecting this recipe, making it a go-to not only for summer picnics but year-round gatherings.
Ingredients
Here’s what you need to whip up these delightful wraps:
-
1 pound cooked chicken, shredded
Use rotisserie chicken for a quick and easy shortcut, or poach chicken breasts for a healthier option. If you’re vegetarian, feel free to swap in some roasted tofu! -
1/2 cup creamy peanut sauce
You can make your own for extra flair; combine peanut butter, soy sauce, honey, and a splash of lime juice. Alternatively, store-bought works just as well! -
4 large lettuce leaves or tortillas
Butter lettuce offers a gentle crunch and wraps beautifully, but any sturdy lettuce or even whole wheat tortillas will do the trick nicely. -
1 cup shredded carrots
They add a lovely sweetness and color. If you’re short on fresh carrots, buy pre-shredded ones in the veggie aisle. -
1 cup red cabbage, shredded
This gives a pop of color and crunch. You can replace it with green cabbage if you prefer a milder flavor or use coleslaw mix for convenience. -
1/2 cup cucumber, sliced
For that refreshing crunch! If cucumbers aren’t your thing, try sliced bell peppers or radishes instead for a peppery kick. -
1/4 cup green onions, chopped
These add a mild onion flavor. You can easily substitute with finely chopped shallots if that’s what you have on hand. -
1 tablespoon soy sauce
Look for low-sodium options if you’re watching your salt intake, or use tamari for a gluten-free option. -
1 tablespoon rice vinegar
This adds a tangy brightness; lemon or lime juice works in a pinch for a similar zing. -
Salt and pepper to taste
Always taste as you go! A little seasoning can elevate the entire dish.
Step-by-Step Instructions
Alright, let’s get cooking! Follow these simple steps to create your Thai Chicken Wraps.
Step 1: Prepare the Chicken
Start with your shredded chicken. If you’re using rotisserie chicken, just shred it directly from the bones into a large mixing bowl. If you’re cooking your chicken, poach it in simmering water or chicken broth until fully cooked (about 15-20 minutes). Then, let it cool slightly before shredding.
Chef Tip: If you season the poaching water with garlic, ginger, and a dash of soy sauce, your chicken will have a lovely depth of flavor straight from the start!
Step 2: Make the Peanut Sauce
In a separate bowl, mix together the creamy peanut sauce and soy sauce. You can adjust the consistency by adding a little water if it feels too thick. Taste and add a splash of rice vinegar for extra tang!
Chef Hack: Need a little kick? Squeeze in a bit of sriracha or chili paste for some heat!
Step 3: Prepare the Veggies
Chop and shred the carrots, cabbage, and cucumbers. Toss them in a bowl, along with the green onions. Add a dash of salt and rice vinegar, and give them a gentle toss to combine.
Tip: Make your slaw ahead of time! This can rest for a short while, allowing the flavors to meld beautifully.
Step 4: Assemble the Wraps
On a clean surface, lay out your large lettuce leaves (or tortillas). Fill each leaf with shredded chicken, then drizzle with peanut sauce. Don’t be shy; the more, the merrier!
Chef Insight: It’s all about the balance! Layer your ingredients so that each bite has a little bit of everything for a flavor explosion.
Step 5: Add the Crunchy Slaw
Pile on the crunchy Asian slaw on top of your chicken and peanut sauce. You want to add enough to give a satisfying crunch without overstuffing.
Step 6: Roll it Up!
Fold the sides in on your lettuce leaves, then roll from the bottom up to encase all those delicious fillings. If using tortillas, it’s similar—fold in the sides, wrap it tightly, and you’re golden!
Fun Fact: If you’re worried about the wrap falling apart, secure it with a toothpick.
Serving Suggestions
For plating, line your wraps beautifully on a large serving platter, surrounded by small bowls of extra peanut sauce for dipping. Garnish with fresh herbs like cilantro or mint for that final touch—trust me, it elevates both the flavor and the presentation!
Recipe Variations
Feeling adventurous? Here are some delightful variations:
- Spicy Thai Chicken: Add sliced jalapeños or a drizzle of hot chili oil for some heat.
- Crunchy Taco Twist: Swap out the traditional ingredients for spiced ground turkey or beef and use tortillas to create a fusion taco wrap.
- Vegan Option: Replace the chicken with chickpeas and make a quick tahini sauce for an exciting new flavor profile.
- Fruit Infusion: Toss in some diced mango or pineapple into your slaw for a refreshing tropical sweetness.
Chef’s Notes
Throughout my culinary journey, I’ve learned that wraps are a canvas for creativity! What started as simple chicken and slaw has evolved into a dish that you can personalize in countless ways. The laughter shared over a thoughtfully constructed wrap is what makes cooking so special. Plus, there’s something so satisfying about watching friends dig into a dish you’ve prepared with love.
And here’s a fun kitchen story for you: My first attempt at these wraps turned into a hilarious mess! I was so excited and wrapped the first lettuce leaf too tightly, resulting in a beautifully exploded filling all over the table. Instead of being frustrated, we renamed that version “open-faced wraps” and laughed about it while we savored every bite. Sometimes, the kitchen adventures that don’t go as planned are the most memorable!
FAQs and Troubleshooting
Q1: My wraps keep falling apart; what can I do?
A: Be sure to choose sturdy lettuce leaves like butter or romaine, which are better for wrapping. If using tortillas, make sure they’re warmed; it makes them more pliable!
Q2: Can I prepare these in advance?
A: Absolutely! You can prep all the ingredients ahead of time—just keep them separately stored to maintain their freshness. Assemble right before serving.
Q3: What if I don’t have peanut sauce?
A: You can substitute with almond butter mixed with a bit of soy sauce and honey for a different twist. Alternatively, a zesty vinaigrette works well too!
Q4: Is this recipe gluten-free?
A: If you use gluten-free soy sauce and lettuce wraps instead of tortillas, you’ll have a gluten-free meal that’s still full of flavor!
Nutritional Info
While I always encourage indulging every now and then, I can assure you these wraps are packed with veggies and lean protein, making them a wholesome choice too. Each wrap can be around 250-300 calories, depending on portion sizes and ingredients used, plus tons of vitamins and minerals from the fresh veggies!
So there you have it—your go-to recipe for Thai Chicken Wraps with Crunchy Asian Slaw! Let’s keep the culinary adventure alive and spread the love around the table. Happy cooking, friends!
Tie your apron, pour yourself something refreshing, and let’s make beautiful memories, one wrap at a time. Thank you for cooking alongside me—can’t wait to hear your stories and see your wraps!
Let’s set the table, shall we?
PrintThai Chicken Wraps with Crunchy Asian Slaw

Enjoy fresh and flavorful Thai Chicken Wraps filled with shredded chicken, creamy peanut sauce, and crunchy Asian slaw, perfect for weeknight dinners or casual get-togethers.
- Prep Time: 15 minutes
- Cook Time: 20 minutes
- Total Time: 35 minutes
- Yield: 4 servings 1x
- Category: Main Course
- Method: Wrap
- Cuisine: Thai
- Diet: Gluten-Free, Dairy-Free
Ingredients
- 1 pound cooked chicken, shredded
- 1/2 cup creamy peanut sauce
- 4 large lettuce leaves or tortillas
- 1 cup shredded carrots
- 1 cup red cabbage, shredded
- 1/2 cup cucumber, sliced
- 1/4 cup green onions, chopped
- 1 tablespoon soy sauce
- 1 tablespoon rice vinegar
- Salt and pepper to taste
Instructions
- Prepare the Chicken: Start with your shredded chicken. If you’re using rotisserie chicken, just shred it directly from the bones into a large mixing bowl. If you’re cooking your chicken, poach it in simmering water or chicken broth until fully cooked (about 15-20 minutes). Then, let it cool slightly before shredding.
- Make the Peanut Sauce: In a separate bowl, mix together the creamy peanut sauce and soy sauce. You can adjust the consistency by adding a little water if it feels too thick. Taste and add a splash of rice vinegar for extra tang!
- Prepare the Veggies: Chop and shred the carrots, cabbage, and cucumbers. Toss them in a bowl, along with the green onions. Add a dash of salt and rice vinegar, and give them a gentle toss to combine.
- Assemble the Wraps: On a clean surface, lay out your large lettuce leaves (or tortillas). Fill each leaf with shredded chicken, then drizzle with peanut sauce.
- Add the Crunchy Slaw: Pile on the crunchy Asian slaw on top of your chicken and peanut sauce.
- Roll it Up! Fold the sides in on your lettuce leaves, then roll from the bottom up to encase all those delicious fillings.
Notes
Feel free to customize with additional veggies or sauces. Enjoy with extra peanut sauce for dipping!
Nutrition
- Serving Size: 1 wrap
- Calories: 300
- Sugar: 5g
- Sodium: 400mg
- Fat: 15g
- Saturated Fat: 2g
- Unsaturated Fat: 10g
- Trans Fat: 0g
- Carbohydrates: 25g
- Fiber: 3g
- Protein: 20g
- Cholesterol: 50mg
Keywords: Thai, Chicken, Wraps, Slaw, Easy Recipe, Healthy Dinner, Gluten-Free

Creamy Vegetarian White Lasagna in 30 Minutes (Weeknights)
Loaded Veggie White Lasagna: A Comfort Food Classic with a Twist
Hello, fellow food lovers! Get ready to dive into a delicious and comforting dish that’s sure to become a staple in your kitchen: Loaded Veggie White Lasagna. As the cool, approachable chef here at Ivory Apron, I’m excited to whisk you away on a culinary journey that’s rich in flavor and warm in memories. This twist on classic lasagna is packed with vibrant vegetables, creamy layers, and oh-so-much cheese. So grab your apron, and let’s get started!
A Cozy Memory in the Kitchen
Back in my early cooking days, I remember hosting a big family dinner. It was holiday season, and I decided to take on the challenge of making a hearty lasagna from scratch. The kitchen was bustling with laughter and the occasional spill — you know how it goes! As I layered fresh pasta sheets with gooey cheese and savory veggie goodness, the aroma filled the house. My little cousin, wide-eyed and curious, watched me assemble the dish. When it came time to dig in, everyone gathered around the table, and we shared stories, jokes, and a lot of cheesy goodness.
That’s the magic of food, right? It brings people together! This Loaded Veggie White Lasagna isn’t just a recipe; it’s an experience. Whether you’re serving it on a special occasion or just a random Tuesday, it sparks joy and creates that cozy atmosphere we all crave.
Ingredients
Here’s what you’ll need to create this scrumptious dish:
- 1/2 cup (113g) butter: The foundation of our creamy sauce! For a lighter option, you can use olive oil.
- 1/2 cup (57g) all-purpose flour: This helps thicken our white sauce. If you’re looking for a gluten-free option, whole wheat flour or a gluten-free blend works great!
- 4 cups (946ml) milk: Use whole or 2% for richness. Almond milk can be a good dairy-free alternative, but choose unsweetened for a savory flavor.
- 1/4 teaspoon nutmeg: Just a pinch adds warmth and sophistication to the sauce without being overpowering.
- 1/2 teaspoon salt: Enhances flavor; remember to adjust if you use salted butter.
- 1/4 teaspoon black pepper: Adds a bit of kick! Feel free to use white pepper if you prefer a smoother look in the sauce.
- 1 tablespoon olive oil: For sautéing the veggies and adding flavor.
- 1 medium onion, chopped: A flavor base every good dish needs! Shallots work wonderfully too.
- 2 cloves garlic, minced: Fresh garlic brings a delightful aroma. Garlic powder is a good substitute in a pinch.
- 1 red bell pepper, chopped: Adds sweetness and color! You can swap this with green bell pepper or even diced tomatoes for a different twist.
- 1 yellow bell pepper, chopped: Enhances that gorgeous color and flavor. Any bell pepper will do for this recipe.
- 1 medium zucchini, chopped: Light and fresh, zucchini soaks up flavors well. Try yellow squash if that’s what you have on hand!
- 1 (10-ounce) package (283g) frozen spinach, thawed and squeezed dry: A classic lasagna ingredient! Fresh spinach can be used as an alternative; just chop and sauté it until wilted.
- 1 (15-ounce) container (425g) ricotta cheese: Creamy and rich, it adds a lush layer to our lasagna. Cottage cheese is a lighter option, but it will change the texture.
- 1/2 cup (50g) grated Parmesan cheese: For that umami depth and cheesy goodness! Nutritional yeast is a great vegan substitute here.
- 1 large egg, lightly beaten: Helps bind the ricotta cheese. If you’re vegan, substitute with flaxseed meal (1 tbsp mixed with 3 tbsp water) for a similar effect.
- 1/4 teaspoon salt: Again, adjust according to your taste preference.
- 1/4 teaspoon black pepper: A classic seasoning choice.
- 9 lasagna noodles: You can use traditional or whole wheat noodles! Or even go for no-boil varieties for quick prep.
- 3 cups (336g) shredded mozzarella cheese: This is the melting crown jewel of our dish! Feel free to use vegan cheese if you’re dairy-free.
Step-by-Step Instructions
Step 1: Create the Creamy Sauce
-
In a large saucepan, melt the butter over medium heat. Once melted, sprinkle in the flour, whisking constantly for 1-2 minutes until it turns golden. This is your roux, and it’s essential for thickening the sauce!
-
Gradually whisk in the milk, ensuring there are no lumps. Keep whisking until the mixture thickens and comes to a soft simmer. This will take about 5-7 minutes. Pro tip: Heating the milk beforehand can speed up this process!
-
Stir in the nutmeg, salt, and black pepper. Taste your sauce — it should be comforting and rich! Add more seasoning if needed.
Step 2: Sauté the Veggies
-
In a large skillet, heat the olive oil over medium heat. Add the chopped onion and cook until translucent, about 3-4 minutes. This will create a fragrant base for your veggies.
-
Toss in the minced garlic, red and yellow bell peppers, and zucchini. Sauté until the peppers soften, around 5-7 minutes. This is where your kitchen should start smelling heavenly!
-
Finally, add the thawed spinach, mixing it into the veggies. Cook for another 2-3 minutes to ensure everything is warmed through.
Step 3: Mix Ricotta Filling
- In a mixing bowl, combine the ricotta cheese, grated Parmesan cheese, beaten egg, salt, and pepper. Mix thoroughly until combined. This creamy layer is what dreams are made of!
Step 4: Layering the Lasagna
-
Preheat your oven to 375°F (190°C). In a 9×13 inch baking dish, start with a layer of the creamy sauce at the bottom. This prevents the noodles from sticking!
-
Place three lasagna noodles over the sauce, followed by half of the ricotta mixture, then half of the sautéed veggie mix, and half of the mozzarella cheese. Drizzle some sauce over the top.
-
Repeat the layers: noodles, remaining ricotta mixture, remaining veggies, more shredded mozzarella, and finish with a final layer of noodles topped with the remaining sauce and mozzarella. Can you hear the harmonious layers coming together?
Step 5: Bake Your Lasagna
-
Cover the dish with foil (avoid touching the cheese!). Bake for 25 minutes, then uncover and bake for an additional 15-20 minutes, until the cheese is bubbly and golden.
-
Allow the lasagna to cool for about 10 minutes before slicing. This step is crucial; it helps the layers set together beautifully!
Serving Suggestions
To serve, slice generous portions of your Loaded Veggie White Lasagna and place them on warm plates. Drizzle a little extra creamy sauce on top and garnish with fresh basil or parsley for a bright finish. Pair it with a simple side salad and a glass of your favorite wine. Voila! You just elevated your dinner game!
Recipe Variations
- Pesto Twist: Incorporate store-bought or homemade pesto into the ricotta mixture for an herby, flavorful spin.
- Protein Punch: Add in cooked chicken, turkey, or any protein of choice to the veggie layer for a heartier meal.
- Spicy Kick: Dice up some jalapeños or sprinkle crushed red pepper flakes in the sauce for a zesty kick.
- Mushroom Medley: Swap out some of the veggies with sautéed mushrooms for an earthy flavor and delightful texture.
- Vegan Delight: Use cashew cheese for the ricotta filling and a dairy-free mozzarella to keep it vegan and still ooey-gooey!
Chef’s Notes
Oh, where to begin? Did I tell you about the time I accidentally used powdered sugar instead of flour for my béchamel sauce? Let’s just say I corrected it in time, but not without a good laugh and a sticky counter! This recipe has evolved in my kitchen over the years, and it’s become a tradition to make this lasagna every holiday season. I love how versatile it is — you can throw in whatever veggies are about to wane in the fridge!
FAQs and Troubleshooting
Q: My lasagna noodles are sticking together; how can I prevent this?
A: When assembling, ensure you’re layering with enough sauce and cheese to create a barrier. Drizzling a bit of olive oil on the noodles can also help!
Q: Can I make this lasagna ahead of time?
A: Absolutely! Assemble it a day in advance, cover it well, and refrigerate. Just add a few extra minutes to the baking time when you’re ready to cook.
Q: Why is my cheese not melting properly?
A: Make sure you’re using good quality cheese and not overbaking it! Cover with foil to trap moisture for a bubbly, melt-in-your-mouth experience.
Q: Can I freeze leftovers?
A: Yes, this recipe freezes beautifully! Just wrap individual portions in plastic wrap and foil to protect from freezer burn. Let them thaw overnight in the fridge before reheating.
Nutritional Info
This dish is packed with veggies, making it a balanced option for a fulfilling meal. Each generous serving typically contains around:
- Calories: 450
- Protein: 25g
- Carbohydrates: 40g
- Fiber: 5g
- Fat: 22g
Of course, this can vary depending on the brands and specific ingredients you choose.
There you have it, my friends — a delectable Loaded Veggie White Lasagna that’s ready to dazzle your dinner table! With every layer, you’re not just cooking a meal; you’re creating memories and inviting warmth into your home. So tie on that apron, gather your loved ones, and let’s make some magic happen! Thank you for joining me on this culinary adventure at Ivory Apron. Happy cooking!
PrintLoaded Veggie White Lasagna

A comforting twist on classic lasagna packed with vibrant vegetables, creamy layers, and plenty of cheese.
- Prep Time: 30 minutes
- Cook Time: 45 minutes
- Total Time: 75 minutes
- Yield: 8 servings 1x
- Category: Main Course
- Method: Baking
- Cuisine: Italian
- Diet: Vegetarian
Ingredients
- 1/2 cup (113g) butter
- 1/2 cup (57g) all-purpose flour
- 4 cups (946ml) milk
- 1/4 teaspoon nutmeg
- 1/2 teaspoon salt
- 1/4 teaspoon black pepper
- 1 tablespoon olive oil
- 1 medium onion, chopped
- 2 cloves garlic, minced
- 1 red bell pepper, chopped
- 1 yellow bell pepper, chopped
- 1 medium zucchini, chopped
- 1 (10-ounce) package (283g) frozen spinach, thawed and squeezed dry
- 1 (15-ounce) container (425g) ricotta cheese
- 1/2 cup (50g) grated Parmesan cheese
- 1 large egg, lightly beaten
- 1/4 teaspoon salt
- 1/4 teaspoon black pepper
- 9 lasagna noodles
- 3 cups (336g) shredded mozzarella cheese
Instructions
- Create the creamy sauce: In a large saucepan, melt the butter over medium heat. Once melted, sprinkle in the flour, whisking constantly for 1-2 minutes until it turns golden. Gradually whisk in the milk and ensure there are no lumps. Stir in the nutmeg, salt, and black pepper.
- Sauté the veggies: In a large skillet, heat the olive oil over medium heat. Add the chopped onion and cook until translucent. Toss in the minced garlic, red and yellow bell peppers, and zucchini. Sauté until soft. Add the thawed spinach.
- Mix the ricotta filling: In a mixing bowl, combine ricotta cheese, grated Parmesan cheese, beaten egg, salt, and pepper until well combined.
- Layering the lasagna: Preheat your oven to 375°F (190°C). In a baking dish, start with a layer of creamy sauce, then three lasagna noodles, half of the ricotta, half of the veggie mix, and half of the mozzarella. Repeat the layers and finish with sauce and mozzarella on top.
- Bake your lasagna: Cover with foil and bake for 25 minutes. Uncover and bake for another 15-20 minutes until cheese is bubbly and golden. Allow to cool for 10 minutes before slicing.
Notes
For a vegan twist, substitute ricotta with cashew cheese and mozzarella with vegan cheese.
Nutrition
- Serving Size: 1 serving
- Calories: 450
- Sugar: 6g
- Sodium: 600mg
- Fat: 22g
- Saturated Fat: 10g
- Unsaturated Fat: 10g
- Trans Fat: 0g
- Carbohydrates: 40g
- Fiber: 5g
- Protein: 25g
- Cholesterol: 70mg
Keywords: lasagna, veggie lasagna, comfort food, Italian, vegetarian

Minute Cinnamon Sugar Blondies: Beginner-Friendly
The Sweetest Indulgence: Easy Cinnamon Sugar Blondies
Hello, fellow food lovers! Today, we’re diving into the world of easy baking with a treat that’s near and dear to my heart: Cinnamon Sugar Blondies. These delightfully chewy, sweet squares are perfect for satisfying your sweet tooth and make your kitchen smell like a cozy fall day—no matter the season.
You might ask, "Savannah, what makes blondies different from brownies?" Great question! Blondies have that rich, buttery goodness and a caramel-like flavor thanks to the brown sugar, while brownies are chocolaty and dense. The best part? Blondies offer a beautiful canvas for flavors like cinnamon, making them perfect for those moments when you want something a little extra special without the fuss. Trust me, once you bake these easy Cinnamon Sugar Blondies, they’ll become a go-to recipe in your collection!
A Sweet Memory
Let me take you back to my childhood for a moment—imagine a cozy kitchen filled with the aroma of warm cinnamon and brown sugar. I remember those rainy Saturdays when my mom would whip up a batch of her famous blondies. We’d eagerly await them cooling on the counter, each of us trying to sneak one before they were officially declared “ready.” Her secret was that extra sprinkle of cinnamon sugar on top that transformed these chewy delights into something magnificent.
Those moments were about more than just the food; they were about laughter, stories shared, and creating memories around our family table. It was during these times that I learned the power of cooking—a simple act that can fill the heart as much as it fills the belly.
Ingredients
Let’s gather our ingredients! You’ll need:
-
1 cup unsalted butter, melted
Butter is the heart of these blondies, giving them that rich flavor and chewy texture. If you’re in a pinch, you can substitute with coconut oil for a different twist! -
1 cup brown sugar
This gives the blondies their delightful caramel flavor. Dark brown sugar can lend a deeper molasses-like taste. -
1/2 cup granulated sugar
A touch of sweetness and balance to the brown sugar. You can replace it with coconut sugar for a more natural alternative. -
2 large eggs
They bind everything together and help create that chewy texture. If you need a vegan option, try flax eggs (1 tablespoon of ground flaxseed mixed with 2.5 tablespoons of water per egg). -
1 teaspoon vanilla extract
A must for flavor! Always opt for pure vanilla extract when possible; it genuinely makes a difference. -
2 cups all-purpose flour
Essential for structure. For a gluten-free option, you can substitute with a gluten-free flour blend. -
1 teaspoon baking powder
This helps the blondies rise a bit without making them cake-like. Be cautious with baking powder—too much can give a metallic taste. -
1 teaspoon ground cinnamon
The star of today’s dish! Cinnamon brings a warm, inviting flavor. You can swap it for pumpkin spice for a seasonal twist. -
1/2 teaspoon salt
A touch of salt enhances all the sweetness. You could also use sea salt for a more complex flavor. -
1/4 cup granulated sugar (for topping)
This gives the blondies a lovely crust and adds a bit of sweetness. -
1 tablespoon ground cinnamon (for topping)
More cinnamon? Yes, please! This is the finishing touch that elevates the dish.
Step-by-Step Instructions
Now, let’s get to the fun part! Here’s how to whip up these Cinnamon Sugar Blondies in simple, easy steps.
-
Preheat Your Oven:
Preheat your oven to 350°F (175°C). This is crucial for even baking. If you jump the gun, you might end up with unevenly cooked blondies! -
Prepare Your Pan:
Grease a 9×13-inch baking pan or line it with parchment paper. The parchment helps with easy lifting and cuts down on clean-up. Who doesn’t love that? -
Melt the Butter:
In a microwave-safe bowl or saucepan, melt the butter until it’s bubbly and just slightly cooled. Be cautious—burnt butter is not the flavor we’re after here! -
Mix the Sugars:
Add the brown and granulated sugar to the melted butter, and whisk until smooth. The mixture should appear glossy. This step is crucial for that chewy texture! -
Add the Eggs and Vanilla:
Next, whisk in the eggs until fully combined, and then add the vanilla extract. The mixture will look thick and creamy—this is a good sign! -
Combine Dry Ingredients:
In a separate bowl, whisk together the flour, baking powder, cinnamon, and salt. This ensures that the baking powder and cinnamon are evenly distributed for perfect bites of flavor. -
Blend Wet and Dry Ingredients:
Gradually add the dry mixture into the wet mixture, folding gently with a spatula until just combined. Avoid over-mixing—this will keep your blondies chewy. -
Spread in Pan:
Pour the blondie batter into your prepared pan. Use an offset spatula or the back of a spoon to spread it evenly. -
Make Cinnamon Sugar Topping:
In a small bowl, mix the 1/4 cup of granulated sugar with the tablespoon of cinnamon. Sprinkle this divine mixture generously over the top of the batter. This step is what makes these blondies stand out! -
Bake:
Bake in the preheated oven for 20-25 minutes. Start checking around 20 minutes—you’re looking for a light golden brown on the edges, with a toothpick inserted in the center coming out with a few moist crumbs. -
Cool and Serve:
Once baked, remove the pan from the oven and let it cool on a wire rack for at least 10 minutes. Then, cut into squares and enjoy!
Serving Suggestions
These Cinnamon Sugar Blondies are delightful on their own, but why not elevate the experience? Serve them warm with a scoop of vanilla ice cream and a drizzle of caramel sauce for an indulgent dessert. Alternatively, a dusting of powdered sugar on top adds an elegant touch. Arrange them on a charming platter, and don’t forget to sprinkle a little extra cinnamon for that artistic flair!
Recipe Variations
Feeling inspired? Here are a few creative twists to make these blondies uniquely yours:
- Add Nuts: Toss in some chopped pecans or walnuts for a delightful crunch.
- Chocolate Chips: Swirl in 1 cup of chocolate chips for a sweet addition.
- Fruity Twists: Fold in some dried cranberries or chocolate-covered raisins for extra flavor.
- Spiced Versions: Experiment by adding a pinch of nutmeg or ginger for a more aromatic profile.
- Gluten-Free: Use a gluten-free flour blend to make these blondies suitable for your gluten-sensitive friends!
Chef’s Notes
I can’t tell you how many batches of these blondies I’ve made over the years! They’ve become a staple for everything from birthday parties to cozy Sunday afternoons. I once tried adding a scoop of peanut butter to the batter, and let me tell you—absolutely divine! But you’ll have to be my taste tester to believe me!
My friends often tease me about my inability to keep my hands off the cinnamon sugar topping—the warm, sweet scent alone is worth the effort. As you’re baking, don’t be surprised if you find yourself sneaking a piece before they cool down.
FAQs and Troubleshooting
1. Why are my blondies too crumbly?
If your blondies turned out too crumbly, it might be due to over-baking or not enough moisture in the batter. Ensure you don’t bake longer than 25 minutes and check for that perfect toothpick test.
2. How do I store leftovers?
Store in an airtight container at room temperature for up to 3 days, or in the refrigerator for up to a week. These treats can also be frozen for up to three months—just wrap them tightly!
3. Can I use light brown sugar instead of dark?
Absolutely! Light brown sugar will yield delicious blondies, but keep in mind they may have a milder flavor.
4. What if I don’t have baking powder?
If you find yourself without baking powder, you can make a substitute with 1/4 teaspoon baking soda and 1/2 teaspoon of vinegar or lemon juice.
Nutritional Info (Optional)
While I believe in enjoying desserts in moderation, if you’re curious, here’s a quick nutritional breakdown per serving (based on 12 servings):
- Calories: 200
- Protein: 2g
- Fat: 9g
- Carbs: 30g
- Fiber: 1g
- Sugar: 15g
Baking these easy Cinnamon Sugar Blondies is about more than just the delicious end product—it’s about remembering those cherished moments spent in the kitchen, surrounded by loved ones. I can’t wait for you to try this recipe. Tie on that apron, and let’s create something truly special together. Happy baking!
PrintEasy Cinnamon Sugar Blondies

Delightfully chewy Cinnamon Sugar Blondies perfect for satisfying your sweet tooth, reminiscent of cozy fall days.
- Prep Time: 10 minutes
- Cook Time: 25 minutes
- Total Time: 35 minutes
- Yield: 12 servings 1x
- Category: Dessert
- Method: Baking
- Cuisine: American
- Diet: Vegetarian
Ingredients
- 1 cup unsalted butter, melted
- 1 cup brown sugar
- 1/2 cup granulated sugar
- 2 large eggs
- 1 teaspoon vanilla extract
- 2 cups all-purpose flour
- 1 teaspoon baking powder
- 1 teaspoon ground cinnamon
- 1/2 teaspoon salt
- 1/4 cup granulated sugar (for topping)
- 1 tablespoon ground cinnamon (for topping)
Instructions
- Preheat your oven to 350°F (175°C).
- Prepare a 9×13-inch baking pan by greasing or lining with parchment paper.
- Melt the butter in a microwave-safe bowl until bubbly and slightly cooled.
- Mix the brown and granulated sugar into the melted butter until smooth.
- Add the eggs and vanilla, whisking until fully combined.
- Combine the flour, baking powder, cinnamon, and salt in a separate bowl.
- Blend the dry ingredients into the wet mixture, folding gently.
- Spread the batter in the prepared pan.
- Make the cinnamon sugar topping by mixing the granulated sugar and cinnamon, and sprinkle over the batter.
- Bake for 20-25 minutes, checking for a toothpick to come out with a few moist crumbs.
- Cool on a wire rack for at least 10 minutes before cutting into squares.
Notes
Serve warm with a scoop of vanilla ice cream or a dusting of powdered sugar.
Nutrition
- Serving Size: 1 square
- Calories: 200
- Sugar: 15g
- Sodium: 200mg
- Fat: 9g
- Saturated Fat: 5g
- Unsaturated Fat: 4g
- Trans Fat: 0g
- Carbohydrates: 30g
- Fiber: 1g
- Protein: 2g
- Cholesterol: 30mg
Keywords: blondies, cinnamon, dessert, easy baking, sweet treats