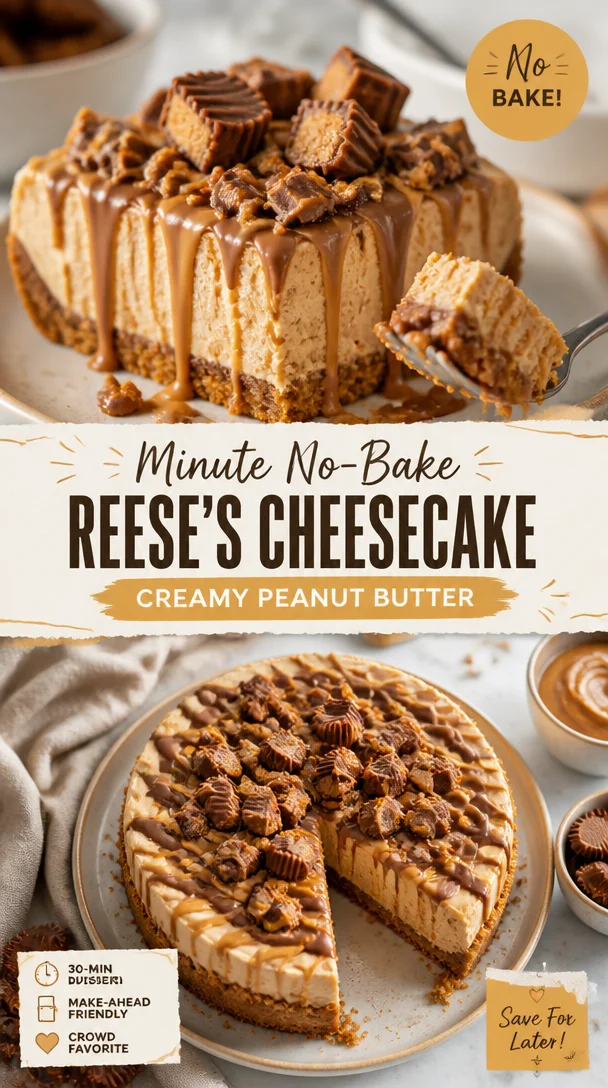
Minute No-Bake Reese’s Cheesecake: Creamy Peanut Butter
Indulge in a Slice of Heaven: Reese’s Cheesecake Recipe
Hello, fellow food lovers! Today, I’m bringing to your kitchen a scrumptious treat that’s bound to sweeten your day—Reese’s Cheesecake. Imagine the velvety creaminess of traditional cheesecake mingling with the rich, nutty flavor of peanut butter and the comforting crunch of Oreo crust. If you’re a peanut butter fan (like I am), this is the dessert for you! So, grab your apron, and let’s dive into this delightful baking adventure together!
A Slice of Nostalgia
Growing up, my family had a tradition of “treat Fridays.” Each week was a culinary surprise: brownies one week, cookies another, and sometimes—even cheesecake. I still remember the excitement of arriving home from school, greeted by a heavenly scent wafting through the house. But it was one Friday that I discovered the magic of peanut butter: my mom whipped up a cheesecake inspired by a recipe she found tucked away in an old cookbook. It featured a chocolate crust and a peanut buttery filling that seemed to have a personality all its own.
We devoured that cheesecake as a family, and the laughter, stories, and crumbs that followed are etched in my heart forever. Since then, I have been on a mission to recreate that moment of joy—with my own twist. So, let’s channel our inner peanut butter lovers and create a masterpiece that’ll evoke those sweet memories while adding a deliciously modern flair.
Ingredients
Gather these ingredients for a cheesecake that will impress everyone at your table:
-
2 3/4 cups (369g) Oreo crumbs (about 31 Oreos)
These provide a rich, chocolatey base. No Oreos? Substitute with graham cracker crumbs mixed with cocoa powder for a similar flavor. -
5 tbsp (70g) unsalted butter, melted
This helps bind the crust. You can swap for coconut oil if you want a different layer of flavor—just ensure it’s melted. -
24 oz (678g) cream cheese, room temperature
Essential for creaminess. Don’t have cream cheese? Mascarpone can be a lovely alternative, yielding a slightly different—but equally delicious—taste! -
1 cup (207g) sugar
Sweetness personified. For a less sweet option, consider using coconut sugar or a sugar substitute if desired. -
3 tbsp (24g) all-purpose flour
This stabilizes the filling. If gluten-free, use almond flour or a gluten-free blend. -
3/4 cup (173g) sour cream, room temperature
The tang balances the sweetness. Greek yogurt works as a great substitute while keeping that creamy texture. -
3/4 cup (210g) creamy peanut butter
The star of the show! For a crunchy touch, use crunchy peanut butter—literally adding that extra crunch. -
2 tsp vanilla extract
Vanilla amplifies flavor. If you’re in a pinch, try almond extract for a different but delightful twist. -
4 large eggs, room temperature
Eggs provide structure. If you prefer a vegan option, you can use flax eggs (1 tbsp ground flaxseed mixed with 2.5 tbsp water = 1 egg) or silken tofu blended until smooth. -
34 (297g) mini Reese’s peanut butter cups, unwrapped, chopped
The little treasures that make every bite feel decadent. You can also use other chocolate candies if you wish to mix it up! -
4 oz (113g) semi-sweet chocolate chips
For a rich topping. Dark chocolate chips or milk chocolate can be substituted based on your preference! -
6 tbsp (90ml) heavy whipping cream
This adds a luscious element to the topping. If needed, coconut cream is a fantastic dairy-free option. -
3/4 cup (180ml) heavy whipping cream, cold
Ensure it’s cold for the best whipped cream! Again, coconut cream can do wonders here. -
1/2 cup (58g) powdered sugar
Sweetens the whipped cream beautifully. You might find success with powdered erythritol if looking for a sugar alternative. -
3 tbsp (48g) creamy peanut butter
You know it—more peanut butter goodness! -
1/2 tsp vanilla extract
A dab here enhances the whipped cream flavor. -
7 full-size Reese’s peanut butter cups, unwrapped and cut in half
These glorious halves crown our cheesecake—an irresistible touch!
Step-by-Step Instructions
Alright, folks, it’s time to bring this beautiful cake to life! Follow these steps, and I’ll sprinkle in some of my favorite tips along the way:
-
Preheat your oven to 325°F (163°C). A warm oven will help the cheesecake bake evenly, creating that perfect texture we crave.
-
Make the Oreo crust: In a mixing bowl, combine the Oreo crumbs and melted butter. Use a fork to mix until the crumbs are well-coated. It should resemble wet sand! Press the mixture firmly into the bottom of a 9-inch springform pan, ensuring it’s evenly distributed. This step is key—don’t skip it! Use the back of a measuring cup for an even, firm crust.
-
Bake the crust: Place your crust in the preheated oven and bake for about 10 minutes. This helps set the crust while adding a subtle toasty flavor. Once done, let it cool while you whip up the filling.
-
Beat the cream cheese: In a large mixing bowl, beat the room-temperature cream cheese until creamy. Ensure there are no lumps—nobody wants a lumpy cheesecake!
-
Add sugar and flour: Gradually add in the sugar and flour, mixing until well combined. This step is crucial for achieving that smooth texture.
-
Incorporate the sour cream and peanut butter: Mix in the sour cream and peanut butter until fully blended. Here’s a tip: feel free to sneak a taste of the filling—it’s divine!
-
Add vanilla and eggs: Next, mix in the vanilla extract, and then add the eggs, one at a time. Be sure to scrape down the sides of the bowl in between—nobody wants missed pockets of cream cheese!
-
Fold in the Reese’s cups: Gently fold in the chopped mini Reese’s cups. This adds bursts of chocolate and peanut butter that’ll make every bite memorable.
-
Pour into the crust: Carefully pour the cheesecake filling onto your prepared Oreo crust, smoothing the top with a spatula.
-
Bake the cheesecake: Bake in the oven for about 50-60 minutes, or until the edges are set but the center still jiggles slightly. This step ensures a creamy texture without overcooking.
-
Let it cool and refrigerate: Once baked, turn off the oven and crack the oven door. Let the cheesecake cool in the oven for about an hour—this helps prevent cracking! Next, refrigerate for at least 4 hours, but ideally overnight.
-
Prepare the chocolate ganache: For the topping, heat the 6 tbsp of heavy cream in a small saucepan until it’s just about to simmer. Pour it over the chocolate chips in a bowl, and let it sit for a couple of minutes. Then, stir until smooth and glossy—oh la la!
-
Make the whipped cream: In a chilled bowl, whip the cold heavy cream until soft peaks form. Gradually add in the powdered sugar, vanilla extract, and peanut butter until your whipped cream is fluffy and light. We want it to hold shape, but not be too stiff.
-
Assemble: After chilling the cheesecake, pour the ganache on top and spread it evenly. Then top generously with whipped cream. Finally, place the halved Reese’s cups around the edge like little crowns on a delicious cake!
Serving Suggestions
Now, it’s time to serve your masterpiece. Slice this beauty into generous pieces, allowing everyone to admire those gooey, chocolatey layers. I recommend serving it on a beautiful platter topped with fresh raspberries or a drizzle of chocolate sauce for a touch of elegance. Let each guest embellish their slice with extra whipped cream or nuts if they’re feeling adventurous!
Recipe Variations
Want to mix things up a little? Here are some creative variations you can try:
-
Nutty Twist: Add crushed nuts like walnuts or pecans to your Oreo crust for extra crunch and flavor.
-
Chocolate Lover’s Delight: Replace half of the peanut butter with melted chocolate for a chocolate-peanut butter cheesecake hybrid.
-
Cookie Dough Swirl: Add dollops of cookie dough throughout the cheesecake before baking for indulgent bites.
-
Banana Lovers: For a fruity touch, mix in mashed ripe bananas into the filling, leaving you with a sweet and creamy banana-peanut butter cheesecake.
-
Vegan Version: Use vegan cream cheese, almond milk yogurt, and plant-based whipped cream for a soulful dessert that everyone can enjoy!
Chef’s Notes
This recipe has had quite the journey! I’ve tweaked it over the years, adjusting the balance of flavors and the textures to make it just right. One of my dear friends once decided to make this cake but forgot the eggs—can you imagine? It turned out more like a mousse! While her creation was still delicious, we all had a hearty laugh, and it became an inside joke. Remember, every little mishap is an opportunity for your kitchen adventure!
FAQs and Troubleshooting
Here are some common questions and tips to make sure your cheesecakes turn out perfectly:
Q: Why did my cheesecake crack?
A: Cracks often happen due to rapid temperature changes. Let your cheesecake cool gradually in the oven with the door slightly ajar.
Q: How can I tell if my cheesecake is done?
A: The edges will be set while the center should still jiggle slightly when you move it. It will continue to set while it cools.
Q: Can I make this cheesecake ahead of time?
A: Absolutely! In fact, I recommend it. Cheesecake tastes even better the next day after all the flavors have had time to mingle.
Q: How do I store leftovers?
A: Store your cheesecake in the refrigerator for up to a week. Simply cover it tightly with plastic wrap or place it in an airtight container.
Nutritional Info
Here’s a basic breakdown (per slice, making about 16):
- Calories: Approximately 400
- Total Fat: 25g
- Saturated Fat: 12g
- Carbohydrates: 42g
- Fiber: 2g
- Sugar: 30g
- Protein: 6g
There you have it—your go-to Reese’s Cheesecake recipe that’s sure to impress and delight. Gather your loved ones, share some laughter, and let the feasting begin! Let’s make memorable moments around the table, one slice at a time. Happy baking, friends! 🍰❤️
PrintReese’s Cheesecake

Indulge in the rich, creamy delight of Reese’s Cheesecake, featuring a decadent Oreo crust and a peanut butter filling, perfect for peanut butter lovers.
- Prep Time: 30 minutes
- Cook Time: 60 minutes
- Total Time: 390 minutes
- Yield: 16 servings 1x
- Category: Dessert
- Method: Baking
- Cuisine: American
- Diet: Vegetarian
Ingredients
- 2 3/4 cups (369g) Oreo crumbs
- 5 tbsp (70g) unsalted butter, melted
- 24 oz (678g) cream cheese, room temperature
- 1 cup (207g) sugar
- 3 tbsp (24g) all-purpose flour
- 3/4 cup (173g) sour cream, room temperature
- 3/4 cup (210g) creamy peanut butter
- 2 tsp vanilla extract
- 4 large eggs, room temperature
- 34 (297g) mini Reese’s peanut butter cups, unwrapped, chopped
- 4 oz (113g) semi-sweet chocolate chips
- 6 tbsp (90ml) heavy whipping cream
- 3/4 cup (180ml) heavy whipping cream, cold
- 1/2 cup (58g) powdered sugar
- 3 tbsp (48g) creamy peanut butter
- 1/2 tsp vanilla extract
- 7 full-size Reese’s peanut butter cups, unwrapped and cut in half
Instructions
- Preheat your oven to 325°F (163°C).
- Make the Oreo crust by mixing Oreo crumbs and melted butter until well-coated. Press firmly into the bottom of a 9-inch springform pan.
- Bake the crust for about 10 minutes, then let it cool.
- Beat the cream cheese until creamy with no lumps.
- Add sugar and flour, mixing until well combined.
- Incorporate sour cream and peanut butter until fully blended.
- Add vanilla extract and then eggs, one at a time, mixing well.
- Fold in chopped mini Reese’s cups.
- Pour the cheesecake filling onto the prepared crust, smoothing the top.
- Bake for about 50-60 minutes, until the edges are set but the center jiggles slightly.
- Let the cheesecake cool in the oven for about an hour, then refrigerate for at least 4 hours.
- Prepare the chocolate ganache by heating heavy cream and pouring it over chocolate chips, stirring until smooth.
- Make the whipped cream by whipping cold heavy cream until soft peaks form; add powdered sugar, vanilla extract, and peanut butter.
- Assemble the cheesecake by pouring ganache on top, spreading whipped cream, and garnishing with halved Reese’s cups.
Notes
Store leftovers in the refrigerator for up to a week.
Nutrition
- Serving Size: 1 slice
- Calories: 400
- Sugar: 30g
- Sodium: 300mg
- Fat: 25g
- Saturated Fat: 12g
- Unsaturated Fat: 8g
- Trans Fat: 0g
- Carbohydrates: 42g
- Fiber: 2g
- Protein: 6g
- Cholesterol: 70mg
Keywords: cheesecake, peanut butter, dessert, chocolate, Oreos

Minute No-Bake Strawberry Cheesecake (Creamy & Fresh)
A Slice of Heaven: Indulging in Homemade Strawberry Cheesecake
Hello, fellow foodies! Today, we’re diving into a dessert that speaks of summer days, sweetness, and pure bliss — Strawberry Cheesecake. Not only is this dessert a showstopper, but it’s also surprisingly simple to make! If you’ve ever been intimidated by cheesecakes, trust me, you’re in for a delightful surprise. This recipe is not only approachable but guaranteed to impress every guest at your table. So, grab your apron, and let’s get cooking!
Personal Story
Let me take you back to my childhood, where summer meant two things: endless sunshine and strawberry picking with my family. There was a quaint little farm just a short drive from our house, and every June, we’d pile into the car with baskets and high hopes. After an afternoon of picking, we would return home, our faces sticky with strawberry juice, ready to create something magical.
One particular summer, I remember deciding to surprise my mom with a homemade dessert. Inspired by our bounty, I attempted to craft my very first strawberry cheesecake. As the mixture baked, the sweet aroma wafted through our kitchen, coaxing my family into the dining room. When that cheesecake came out of the oven, I felt like a superstar! The best part? Watching my mom’s eyes light up as she took that first bite. That memory is what drives my passion today, and I can’t wait to share this piece of nostalgia with you!
Ingredients
For this heavenly Strawberry Cheesecake, let’s gather the following ingredients:
-
1 cup graham cracker crumbs
The backbone of our cheesecake crust! You can use store-bought crumbs or crush your own. Note: If you prefer a healthier option, try substituting with almond flour. -
2 ½ tablespoons butter (melted)
A little fat for flavor and binding! Unsalted is the best choice to control the saltiness. Shortcut: Use a spray butter if you’re in a pinch! -
1 ½ tablespoons sugar
A small amount adds just the right sweetness to the crust. You can swap this for coconut sugar if you’re looking for a less refined option. -
Pinch of salt
Enhances the sweetness in the crust and filling. Flaky sea salt works beautifully here! -
2 (8 oz) packages cream cheese (softened)
The creamy star of our show! Softening it ensures a smooth texture. Tip: Leave it out for about an hour before starting, or microwave it for 10-15 seconds if you’re rushed! -
2 eggs
Provide structure and help the cheesecake set. If you want a dairy-free option, consider using flax eggs (1 tablespoon ground flaxseed mixed with 2.5 tablespoons of water per egg). -
⅔ cup sugar
Sweetens the cream cheese mixture. You can use granulated, brown, or even honey, depending on your sugar preference. -
⅔ cup sour cream
Adds tanginess and richness. Tip: Greek yogurt can be used for a healthier twist! -
1 teaspoon vanilla extract
A staple for flavor enhancement! Homemade vanilla extract truly elevates this dish if you have it. -
¼ teaspoon salt
Balances the sweetness and adds depth to the cream cheese filling. -
1 ½ lbs strawberries
Fresh is best! Tip: If strawberries aren’t in season, you can use frozen berries — just thaw and drain them first! -
1 ½ teaspoons cornstarch
Helps thicken the strawberry topping. If you’re avoiding cornstarch, try arrowroot powder instead. -
3 to 6 tablespoons sugar (adjust as needed)
To sweeten the strawberry topping to your liking; taste as you go! -
1 ½ tablespoons lemon juice
Brings brightness to the strawberries and balances out the sweetness. Freshly squeezed is always the best!
Step-by-Step Instructions
Now that we have our ingredients prepped, let’s jump into the fun part — making the cheesecake!
-
Preheat Your Oven
Preheat your oven to 325°F (160°C). This step ensures an even bake, which is crucial for a perfect cheesecake. -
Prepare the Crust
In a mixing bowl, combine the graham cracker crumbs, melted butter, sugar, and a pinch of salt. Mix until the crumbs resemble wet sand. Chef tip: If you prefer a thicker crust, use a bit more crumbs and butter! -
Press Into the Pan
Firmly press the crumb mixture into the bottom of a 9-inch springform pan. Make sure it’s even and tightly packed. Pro tip: Use the bottom of a measuring cup to help with this! -
Bake the Crust
Place the pan in the preheated oven and bake for about 8-10 minutes until lightly golden. Let it cool while you make the filling. -
Mix the Cream Cheese Filling
In a large bowl, beat the softened cream cheese with an electric mixer until smooth and creamy. Add the sugar, sour cream, vanilla extract, and salt, mixing until combined. Then add the eggs one at a time, mixing just until incorporated. Note: Don’t overmix at this point; you want to maintain a fluffy texture! -
Pour Filling Into the Crust
Carefully pour the cream cheese mixture over your cooled crust, smoothing the top with a spatula. Fun fact: Using a water bath can help achieve a smoother top without cracks! -
Bake the Cheesecake
Bake for 50-60 minutes or until the edges are set, and the center still has a slight jiggle. It will firm up as it cools. Chef’s secret: Turn off the oven, crack the door, and let the cheesecake cool in there for about an hour. This helps prevent cracks! -
Cool Down
Remove the cheesecake from the oven and let it cool to room temperature. Then, refrigerate for at least four hours or overnight for the best results. -
Make the Strawberry Topping
While the cheesecake chills, wash and slice your strawberries. In a saucepan over medium heat, combine the strawberries, cornstarch, and sugar. Stir gently until the strawberries release their juices and the mixture thickens. Tip: Adjust the sweetness based on your taste! -
Chill the Strawberry Mix
Allow the strawberry mixture to cool completely before topping the cheesecake. -
Add Topping and Serve
Once your cheesecake is set, pour the cooled strawberry mixture over the top. Slice and serve chilled, garnished with extra strawberries or whipped cream if desired.
Serving Suggestions
For an elegant presentation, serve your cheesecake on a beautiful platter. Consider adding a dollop of whipped cream on the side or sprinkle fresh mint leaves for a pop of color. To really elevate the experience, pair each slice with a glass of sparkling wine — because dessert is always more fun with a little fizz!
Recipe Variations
- Berry Bliss: Mix in raspberries or blueberries with the strawberry topping for a colorful berry medley.
- Chocolate Swirl: Melt some dark chocolate and swirl it into the cheesecake batter for a chocolate-strawberry twist.
- Nutty Crust: Replace half of the graham cracker crumbs with crushed nuts like almonds or walnuts for added texture.
- Lemon Cheesecake: Add a few extra tablespoons of lemon juice into the cream cheese mixture for a refreshing citrus flavor.
- Vegan Version: Substitute the cream cheese with a plant-based alternative and use coconut cream in place of sour cream.
Chef’s Notes
As with any recipe, my strawberry cheesecake has seen its evolution over the years. In my early baking days, I struggled with the dreaded cracks on the surface. But through experimentation and patience, I learned the art of gentle mixing and proper cooling techniques. Every crack has a story, and now, I embrace those little imperfections! It reminds me that cooking, like life, is about the journey, not just the destination.
FAQs and Troubleshooting
Q1: Why did my cheesecake crack?
A: Cracking usually occurs due to overmixing or rapid temperature changes. Bake slowly and allow it to cool gradually in the oven with the door ajar.
Q2: How do I store leftover cheesecake?
A: Wrap the cheesecake tightly with plastic wrap or store it in an airtight container in the fridge. It should last for about 4-5 days.
Q3: Can I freeze the cheesecake?
A: Yes! You can freeze the cheesecake before adding the topping. Wrap it well and store it for about 2 months. Let it thaw in the fridge overnight before serving.
Q4: What if my cheesecake doesn’t set?
A: If your cheesecake isn’t setting, it may need more time in the oven. Remember, it should be slightly jiggly in the center when you take it out. If it’s too soft after chilling, it might need to be baked a bit longer next time.
Nutritional Info
While we’re focusing on enjoyment here, it’s good to know the nutrition behind this delightful dessert. A slice of strawberry cheesecake typically contains around 350 calories, depending on portion size and ingredients used. It’s a treat, so enjoy it in moderation!
And there you have it! A creamy, dreamy Strawberry Cheesecake that’s sure to become a regular on your dessert menu. Remember, cooking should be as delightful as the food itself, so embrace the process, share the love, and savor every delicious bite. Happy baking, friends! 🍓
PrintHomemade Strawberry Cheesecake

A creamy, dreamy strawberry cheesecake that’s perfect for summer gatherings and guaranteed to impress your guests.
- Prep Time: 15 minutes
- Cook Time: 60 minutes
- Total Time: 75 minutes
- Yield: 8 servings 1x
- Category: Dessert
- Method: Baking
- Cuisine: American
- Diet: Vegetarian
Ingredients
- 1 cup graham cracker crumbs
- 2 ½ tablespoons butter, melted
- 1 ½ tablespoons sugar
- Pinch of salt
- 2 (8 oz) packages cream cheese, softened
- 2 eggs
- ⅔ cup sugar
- ⅔ cup sour cream
- 1 teaspoon vanilla extract
- ¼ teaspoon salt
- 1 ½ lbs strawberries
- 1 ½ teaspoons cornstarch
- 3 to 6 tablespoons sugar (adjust as needed)
- 1 ½ tablespoons lemon juice
Instructions
- Preheat your oven to 325°F (160°C).
- Combine the graham cracker crumbs, melted butter, sugar, and a pinch of salt in a mixing bowl. Mix until the crumbs resemble wet sand.
- Press the crumb mixture into the bottom of a 9-inch springform pan.
- Bake the crust for about 8-10 minutes until lightly golden. Let it cool.
- Beat the softened cream cheese with an electric mixer until smooth and creamy. Add sugar, sour cream, vanilla extract, and salt; mix until combined. Then add eggs one at a time, mixing just until incorporated.
- Pour the cream cheese mixture over the cooled crust.
- Bake for 50-60 minutes or until the edges are set with a slightly jiggly center.
- Cool down by removing from the oven and letting it cool to room temperature, then refrigerate for at least four hours or overnight.
- Wash and slice strawberries. In a saucepan over medium heat, combine strawberries, cornstarch, and sugar, stirring until thickened.
- Allow the strawberry mixture to cool completely before topping the cheesecake.
- Add the cooled strawberry mixture over the cheesecake and serve chilled.
Notes
For a richer flavor, consider adding a dollop of whipped cream on the side.
Nutrition
- Serving Size: 1 slice
- Calories: 350
- Sugar: 25g
- Sodium: 400mg
- Fat: 20g
- Saturated Fat: 10g
- Unsaturated Fat: 8g
- Trans Fat: 0g
- Carbohydrates: 40g
- Fiber: 2g
- Protein: 5g
- Cholesterol: 80mg
Keywords: cheesecake, strawberry, dessert, summer, baking
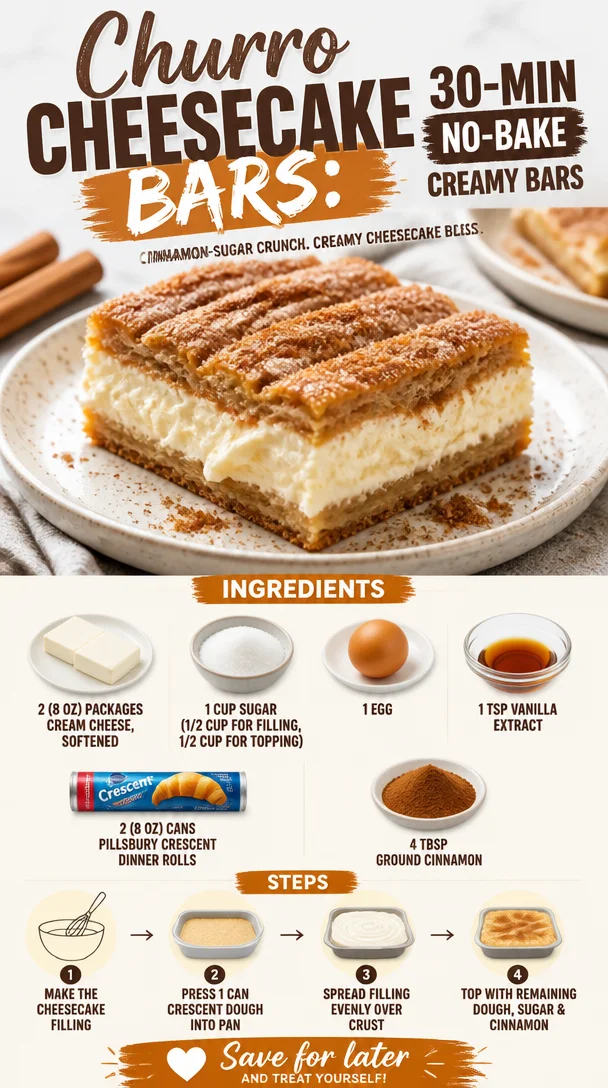
Churro Cheesecake Bars: 30-Min No-Bake Creamy Bars
Churro Cheesecake Bars: A Sweet Delight to Share
Hello, my culinary friends! Today, I’m excited to share a dessert that you won’t just want to make once—you’ll want to whip it up time and again: Churro Cheesecake Bars! These delightful little squares combine the creamy goodness of cheesecake with the cinnamon-sugar magic of churros, and trust me, they are a game-changer for your dessert table. Whether you’re hosting a dinner party or simply indulging for a cozy night in, these bars are sure to impress and delight.
Now, before we dive into the recipe, let’s talk a little about what inspired this creation.
Personal Story
It was a crisp autumn afternoon, and I was in my childhood kitchen, the air filled with sweet aromas wafting from my mother’s oven. She’d always have something magical baking. On this particular day, it was her famous churros. The warm scent of cinnamon and sugar enveloped the room as we gathered around the table, waiting eagerly for those warm, crispy bites.
As I bit into a crunchy churro, the idea sparked in my mind: Why not take the essence of that beloved treat and blend it into a cheesecake? I could almost hear my mom’s laughter and encouragement as I tinkered with recipes in my head. Fast forward a few years, and voilà! Churro Cheesecake Bars were born, each bite unearthing those delicious memories of laughter and love from my childhood. Let’s bring that warmth into your kitchen now!
Ingredients
Now, let’s gather our ingredients. Here’s what you’ll need to create these scrumptious Churro Cheesecake Bars:
-
2 (8 oz) packages cream cheese, softened
Cream cheese is the heart of our cheesecake. Make sure it’s softened to room temperature for a smooth filling. If you’re in a pinch, you can substitute with mascarpone for a slightly different flavor profile. -
1 cup sugar (1/2 cup for filling, 1/2 cup for topping)
Sugar adds sweetness and balances the cream cheese’s tanginess. Use coconut sugar for a more caramel-like flavor. -
1 egg
The egg acts as a binding agent, giving structure to the creamy filling. If you want to make this dish vegan, try a flax egg (1 tablespoon ground flaxseed mixed with 3 tablespoons water) instead! -
1 tsp vanilla extract
Vanilla adds depth to our cheesecake filling. For a twist, consider using almond extract or a splash of bourbon for a richer flavor. -
2 (8 oz) cans Pillsbury crescent dinner rolls
These are a convenient way to create a flaky crust reminiscent of churro dough. You can also use puff pastry if you want a flakier base—just adjust the baking time slightly. -
4 Tbsp ground cinnamon
Of course, cinnamon is our star! It adds warmth and that cherished churro flavor. If you’re feeling adventurous, try mixing in a bit of nutmeg for an interesting twist.
Let’s get cooking!
Step-by-Step Instructions
-
Preheat your oven
Preheat your oven to 350°F (175°C). This step is crucial to ensure your bars bake evenly. -
Prepare your baking dish
Grab a 9×13-inch baking dish and lightly grease it or line it with parchment paper. If you’re feeling fancy, you can create a decorative edge with the parchment—this makes for easy lifting later! -
Make the cream cheese filling
In a mixing bowl, combine the softened cream cheese, 1/2 cup of sugar, egg, and vanilla extract. Using a hand mixer or a stand mixer, whip everything together until it’s creamy and smooth. Don’t rush this step—the better you mix, the creamier your filling! -
Roll out the crescent dough
Open one can of crescent rolls and gently unroll it. Place it into the bottom of your prepared baking dish, pressing the seams together to form a crust. If you’re using puff pastry, roll it out to fit the bottom of the dish, making sure there are no holes. -
Spread the cream cheese filling
Pour your luscious cream cheese mixture over the crust and spread it evenly. You might want to lick the spoon—totally acceptable! -
Top it off
Open the second can of crescent rolls and repeat the rolling process, placing it over the cream cheese filling. It doesn’t need to fit perfectly—those little gaps add charm and create lovely crispy parts! -
Mix cinnamon and sugar for sprinkling
In a small bowl, mix the remaining 1/2 cup of sugar with the ground cinnamon. Sprinkle this heavenly mixture generously over the top of your crescent dough. The aroma will be intoxicating as it bakes! -
Bake to perfection
Place your Churro Cheesecake Bars in the preheated oven and let them bake for 30-35 minutes. Keep an eye on them—the top should be golden brown, and a toothpick should come out clean when poked. -
Let them cool
Once baked, remove the bars from the oven and let them cool for at least 30 minutes. It’s hard, I know, but allowing them to set will make cutting them much neater. -
Slice and serve
Once cooled, cut into squares, serve, and prepare for a chorus of "Wow!" as everyone digs in!
Serving Suggestions
For a beautiful presentation, plate your Churro Cheesecake Bars on a lovely serving platter. Dust with a light sprinkle of cinnamon-sugar for that extra touch! Consider serving them with a scoop of vanilla ice cream or a dollop of whipped cream on the side—they make a fabulous pairing!
Recipe Variations
Want to switch things up? Here are a few variations to inspire you:
-
Nutty Churro Bars: Add chopped pecans or walnuts to your cream cheese filling for a delightful crunch.
-
Chocolate Drizzle: Drizzle melted chocolate over the top of your bars once they’re cooled for an indulgent touch!
-
Spicy Churro Bars: Include a pinch of cayenne pepper in your cinnamon-sugar mix for a unique sweet heat twist.
-
Fruit-Inspired: Swirl in some fresh fruit puree—like raspberry or strawberry—into the cream cheese filling for a fruity burst.
-
Dairy-Free Option: Use non-dairy cream cheese and your preferred dairy-free crescent rolls to create a delicious vegan version.
Chef’s Notes
These Churro Cheesecake Bars are incredibly versatile. I originally developed this recipe for a friend’s birthday party, and it quickly became a hit! Since then, I’ve played around with flavors, turning them into seasonal offerings for various events. Every time I make them, I’m transported back to that cozy kitchen where the aroma of churros filled the air.
One tip: if you ever have leftovers (though, let’s be honest, there probably won’t be), they make for a delightful breakfast treat the next day—just reheat them in the oven!
FAQs and Troubleshooting
Q: My bars turned out too gooey! What happened?
A: If your bars are gooey, it’s likely that they need a bit more baking time. Every oven is a little different, so keep an eye on them as they near the 30-minute mark. They should puff up slightly and have a golden-brown crust.
Q: Can I freeze these bars?
A: Absolutely! Once cooled, cut and wrap individual pieces in plastic wrap, then store in an airtight container. They can be frozen for up to three months. Just thaw in the fridge overnight when you’re ready to enjoy them again!
Q: How can I make sure they don’t stick to the pan?
A: Grease your pan well or line it with parchment paper, allowing for some overhang. This makes for easy lifting and clean-cut portions!
Q: Can I use homemade crescent dough instead of store-bought?
A: Of course! If you’re up for a little kitchen adventure, feel free to use your favorite homemade dough. Just ensure it’s rolled thin enough for that delicious flaky texture.
Nutritional Info
While I focus more on taste than nutritional stats, here’s a basic idea per serving (assuming 12 servings):
- Calories: 280
- Fat: 18g
- Carbohydrates: 30g
- Protein: 4g
Keep in mind that indulgence is part of the fun—these bars are meant to be savored!
And there you have it—Churro Cheesecake Bars that’ll transport you straight to a happy place! Now, gather around, tie on your apron, and let’s create some memories together. Happy baking, my friends!
PrintChurro Cheesecake Bars
A delightful dessert combining creamy cheesecake with cinnamon-sugar churros, perfect for sharing.
- Prep Time: 15 minutes
- Cook Time: 35 minutes
- Total Time: 50 minutes
- Yield: 12 servings 1x
- Category: Dessert
- Method: Baking
- Cuisine: Mexican
- Diet: Vegetarian
Ingredients
- 2 (8 oz) packages cream cheese, softened
- 1 cup sugar (1/2 cup for filling, 1/2 cup for topping)
- 1 egg
- 1 tsp vanilla extract
- 2 (8 oz) cans Pillsbury crescent dinner rolls
- 4 Tbsp ground cinnamon
Instructions
- Preheat your oven to 350°F (175°C).
- Prepare a 9×13-inch baking dish by greasing it or lining it with parchment paper.
- In a mixing bowl, combine the softened cream cheese, 1/2 cup of sugar, egg, and vanilla extract and whip until creamy.
- Open one can of crescent rolls and unroll it into the bottom of the prepared baking dish, pressing seams together.
- Pour the cream cheese mixture over the crust and spread it evenly.
- Open the second can of crescent rolls and place it over the cream cheese filling.
- Mix the remaining 1/2 cup of sugar with ground cinnamon and sprinkle generously over the top.
- Place the bars in the preheated oven and bake for 30-35 minutes until golden brown.
- Remove from the oven and let cool for at least 30 minutes before slicing.
- Serve and enjoy!
Notes
For best results, allow the bars to cool before slicing for neater cuts. These bars can also be frozen for up to three months.
Nutrition
- Serving Size: 1 serving
- Calories: 280
- Sugar: 20g
- Sodium: 300mg
- Fat: 18g
- Saturated Fat: 10g
- Unsaturated Fat: 8g
- Trans Fat: 0g
- Carbohydrates: 30g
- Fiber: 1g
- Protein: 4g
- Cholesterol: 50mg
Keywords: churro cheesecake, dessert bars, sweet treat
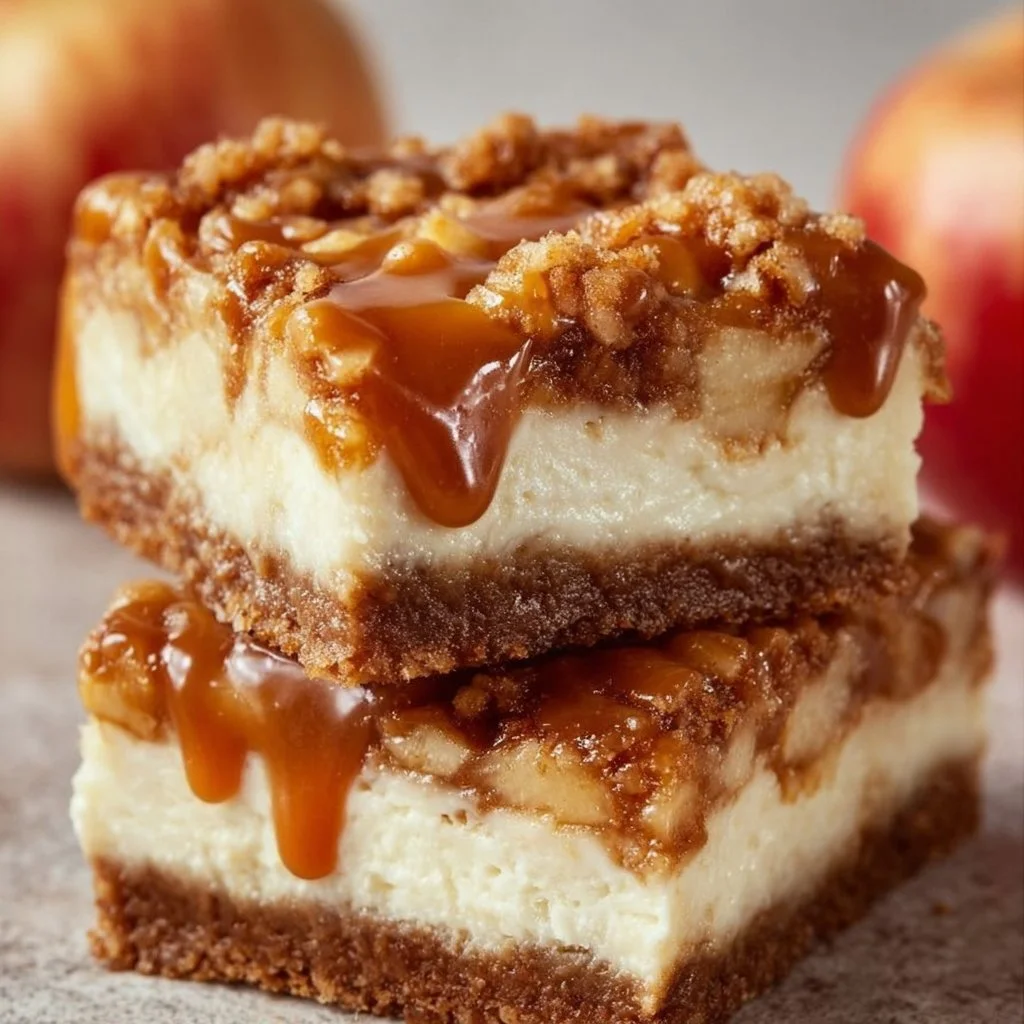
Caramel Apple Cheesecake Bars
Caramel Apple Cheesecake Bars: A Sweet Slice of Nostalgia
Welcome to my kitchen, fellow foodies! Today, we’re diving into a recipe that perfectly captures the essence of cozy autumn afternoons, family gatherings, and sweet nostalgia—Caramel Apple Cheesecake Bars. If you’re anything like me, you appreciate a dessert that feels both indulgent and comforting, a slice of something exquisite that can brighten an ordinary day. Well, grab your aprons, because we’re about to whip up a delightful treat that’s bound to become a family favorite.
Imagine this: it’s a crisp fall day, the leaves are turning brilliant shades of gold and crimson, and the air is filled with the sweet scent of cinnamon and baked apples. That’s the moment I want to recreate with these cheesecake bars. As a child, I would often help my grandma in the kitchen, and one of the recipes that we made together was her famous apple pie. The combination of tart apples, warm spices, and silky creaminess of cheesecake always made my heart flutter. That special connection to my grandma and those priceless moments inspired me to create this recipe—merging that classic apple pie charm with the creamy comfort of cheesecake!
These Caramel Apple Cheesecake Bars are not only easy to make, but they also pack a flavor punch that will have your friends and family clamoring for seconds. Each bar features a buttery graham cracker crust topped with a smooth cream cheese mixture, fresh apples, a hint of cinnamon, and a luscious caramel drizzle. It’s the perfect balance of creamy, crunchy, sweet, and spiced—making it the ultimate crowd-pleaser for any occasion.
Let’s get cooking and create a dessert that you can serve proudly at your next gathering (or just enjoy all to yourself).
Personal Story
Growing up in a bustling household, our kitchen was always the heart of our home. My fondest memories revolve around baking with family, especially during the fall. One autumn, my grandmother decided to surprise us with an apple dessert that would leave a lasting imprint on my heart: her incredible apple cheesecake—much like what we are making today.
She passed down not just her recipe but also her incredible spirit of hospitality. I remember watching her dance around in the kitchen, the leaves fluttering outside the window as she hummed softly while she worked. The moment she pulled that creamy cheesecake out of the oven, the sweet aroma wafted through the house. We gathered around the table, beaming with delight and anticipation, ready to dive into a slice of warm comfort.
Those moments crafted not only delicious memories but also instilled in me a deep passion for creating meals that pull loved ones together. Now, every time I make these Caramel Apple Cheesecake Bars, I remember my grandma and the love she poured into her cooking. It’s not just about the food; it’s about nurturing connections and celebrating life’s sweet moments, one slice at a time.
Ingredients
Before we jump into the cooking, let’s gather our ingredients. Here’s what you’ll need:
-
2 cups of graham cracker crumbs
These crumbs form the sturdy base of our cheesecake bars. If you don’t have graham crackers, you can substitute with crushed vanilla wafers or even chocolate cookie crumbs for a unique twist! -
1/2 cup of unsalted butter, melted
The butter adds richness and helps bind the graham cracker crumbs together. Make sure it’s unsalted; otherwise, you might tip the flavor balance! -
1/4 cup of granulated sugar
Just a bit of sugar helps sweeten the crust. If you’d like an alternative, coconut sugar works nicely to retain that sweet element with a slight caramel flavor. -
2 (8-ounce) packages of cream cheese, softened
Cream cheese is the star of the cheesecake mix, giving it that rich, velvety texture. Soften it up by leaving it out for about an hour before you start. -
1/2 cup of granulated sugar
This sugar sweetens our filling. Again, if you’re watching your sugar intake, feel free to use a sugar substitute like erythritol. -
1 teaspoon of vanilla extract
Vanilla adds depth of flavor and enhances the sweetness. Always opt for pure vanilla extract if possible; it makes a world of difference! -
2 large eggs
The eggs provide structure to your cheesecake. If you are vegan or allergic, a substitute can include 1/4 cup of unsweetened applesauce per egg. -
2 cups of peeled, diced apples
Apples give this dessert its signature flavor! Granny Smith apples work great for their tartness, but feel free to mix and match your favorites. -
1 teaspoon of cinnamon
Cinnamon adds warmth and that cozy, fall-like essence. Ground nutmeg can make a delightful addition for extra spice! -
1/2 cup of caramel sauce
A decadent finish! You can purchase caramel sauce from the store or make your own if you’re feeling adventurous (it’s easier than it sounds!).
Step-by-Step Instructions
Ready to make some magic in the kitchen? Let’s roll up our sleeves and get started on these Caramel Apple Cheesecake Bars!
Step 1: Preheat the Oven
Preheat your oven to 325°F (163°C). This is an essential step so that your cheesecake will bake evenly and turn out just right—nothing worse than a soggy bottom!
Step 2: Prepare the Graham Cracker Crust
- In a mixing bowl, combine the graham cracker crumbs, melted butter, and 1/4 cup of sugar. Mix until the crumbs are well-coated and the mixture resembles wet sand.
- Chefs Tip: If the mixture feels too dry and crumbly, add a splash more melted butter. You want it to hold together when pressed!
Step 3: Press the Crust Into the Pan
- Grab a 9×13 inch baking dish and line it with parchment paper. This will help you remove the bars easily after they’re baked.
- Press the mixture evenly into the bottom of the prepared pan. Use the back of a measuring cup to pack it down firmly.
- Pop it in the oven for about 10 minutes. We want the crust to set and become a bit golden.
Step 4: Prepare the Cheesecake Filling
- While the crust is baking, let’s whip up that luscious filling! In a large mixing bowl, add the softened cream cheese and 1/2 cup of granulated sugar.
- Use an electric mixer on medium speed until it’s smooth and creamy. This is not the time for lumps!
- Next, add in the vanilla extract and eggs, one at a time, mixing after each addition until combined.
- Chefs Insight: Avoid overmixing the batter to keep your bars from cracking – we want a smooth finish, not an earthquake!
Step 5: Mix in the Apples and Cinnamon
- Add in the diced apples and cinnamon, stirring gently until everything is just combined. Your kitchen is going to start smelling divine right about now!
Step 6: Pour the Batter Over the Crust
- Once the crust is done par-baking, remove it from the oven and pour the cream cheese and apple mixture over the crust. Spread it evenly with a spatula.
- Chef Hack: Tap the pan on the counter a few times to release any air bubbles that might have formed!
Step 7: Bake the Cheesecake Bars
- Return the pan to the oven and bake for 30-35 minutes. The edges should look set, but the center will still have a slight jiggle (it will firm up as it cools!).
- Important Note: If you notice the tops browning too much, place a piece of foil gently over the top for the final few minutes of baking.
Step 8: Cool and Chill
- Remove the bars from the oven and let them cool at room temperature for about 30 minutes. Transfer them to the fridge for at least 2 hours (or overnight) to chill fully. Patience is key here!
Step 9: Drizzle with Caramel
- Once they’re set, take them out of the fridge and use the parchment paper to lift them out. Cut them into squares and drizzle with caramel sauce before serving.
- Serving Tip: You can warm up the caramel slightly for an ooey-gooey drizzle that everyone will love!
Serving Suggestions
To elevate your presentation, place the caramel apple cheesecake bars on a beautiful platter. You can garnish each square with extra diced apples, a sprinkle of cinnamon, or even some chopped nuts for texture. If you’re feeling extra fancy, serve them alongside a scoop of vanilla ice cream or a dollop of whipped cream! Trust me, this will make your dessert even more irresistible.
Recipe Variations
Looking to switch things up? Here are a few fun variations you can try with these Caramel Apple Cheesecake Bars:
- Nutty Pecan Crust: Replace graham cracker crumbs with ground pecans for a nutty twist.
- Mixed Fruit Filling: Substitute half of the apples with pears or pears for an interesting flavor profile.
- Caramel Swirl: Drizzle caramel sauce straight into the cheesecake batter before baking for a delightful caramel ribbon effect.
- Spiced Apples: Add a pinch of nutmeg or ginger to the apple mixture for an extra layer of warmth.
- Sugar-Free Option: Use a sugar substitute in the crust and filling to create a guilt-free treat!
Chef’s Notes
Every time I make these Caramel Apple Cheesecake Bars, I think about how food serves as a love language. It brings people together, creates memories, and nourishes our souls. Plus, I can’t help but laugh every time I remember my first attempt at making a cheesecake—it was a glorious failure! The crust crumbled, the opening was a disaster! But it taught me valuable lessons about patience and practice. So don’t worry if your first attempt isn’t perfect; just keep at it!
Over the years, this recipe has evolved from my grandma’s apple pie into these bars. I like to think she’d be proud of this scrumptious homage to our shared kitchen adventures.
FAQs and Troubleshooting
1. Why did my cheesecake bars crack?
Cracking can happen for a few reasons: overmixing the eggs or baking at too high a temperature. Always keep your mixer on medium speed and ensure you don’t bake them too long!
2. My crust is too crumbly; what should I do?
If your crust won’t hold together, it likely needs more butter. Add a tablespoon at a time until it reaches the right consistency.
3. Can I freeze these bars?
Absolutely! Cut them into squares and then freeze them in an airtight container for up to 2 months. Thaw in the fridge before serving.
4. What if I can’t find caramel sauce?
No problem! You can make your own caramel sauce by melting sugar over low heat until it’s golden, then whisking in heavy cream until smooth. It’s simpler than you think!
Nutritional Info (Optional)
A quick note for those interested in the nutritional aspect: Each serving of Caramel Apple Cheesecake Bars (based on 12 servings) contains approximately:
- Calories: 320
- Protein: 4g
- Carbohydrates: 34g
- Fat: 20g
- Sugar: 18g
(Note: These numbers can vary based on ingredient choices and portion size.)
There you have it, a delicious journey into the world of Caramel Apple Cheesecake Bars! I hope you’re inspired to create this warm, comforting dessert that spreads joy and connection. As you gather around the table with loved ones, sharing stories and laughter, remember that cooking is not just about the food itself; it’s the love and intention behind it that makes it truly special. Happy baking, and until next time—let’s keep the good food flowing!
PrintCaramel Apple Cheesecake Bars
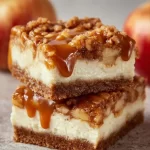
Indulge in these creamy Caramel Apple Cheesecake Bars, perfect for autumn gatherings, featuring a buttery graham cracker crust, smooth cream cheese filling, fresh apples, and a luscious caramel drizzle.
- Prep Time: 15 minutes
- Cook Time: 40 minutes
- Total Time: 55 minutes
- Yield: 12 servings 1x
- Category: Dessert
- Method: Baking
- Cuisine: American
- Diet: Vegetarian
Ingredients
- 2 cups of graham cracker crumbs
- 1/2 cup of unsalted butter, melted
- 1/4 cup of granulated sugar
- 2 (8-ounce) packages of cream cheese, softened
- 1/2 cup of granulated sugar
- 1 teaspoon of vanilla extract
- 2 large eggs
- 2 cups of peeled, diced apples
- 1 teaspoon of cinnamon
- 1/2 cup of caramel sauce
Instructions
- Preheat your oven to 325°F (163°C).
- Combine the graham cracker crumbs, melted butter, and sugar in a bowl.
- Press the mixture into a 9×13 inch baking dish and bake for 10 minutes.
- Add softened cream cheese and sugar in a bowl and mix until smooth.
- Add vanilla extract and eggs, mixing after each addition.
- Mix in diced apples and cinnamon gently.
- Pour the mixture over the crust and spread it evenly.
- Bake for 30-35 minutes until the edges are set.
- Cool at room temperature for 30 minutes, then refrigerate for at least 2 hours.
- Drizzle with caramel sauce before serving.
Notes
For added richness, you can warm the caramel slightly before drizzling. Try adding chopped nuts as a garnish for extra texture.
Nutrition
- Serving Size: 1 piece
- Calories: 320
- Sugar: 18g
- Sodium: 200mg
- Fat: 20g
- Saturated Fat: 12g
- Unsaturated Fat: 8g
- Trans Fat: 0g
- Carbohydrates: 34g
- Fiber: 1g
- Protein: 4g
- Cholesterol: 100mg
Keywords: cheesecake, apple dessert, caramel, fall recipes, autumn desserts, family gatherings