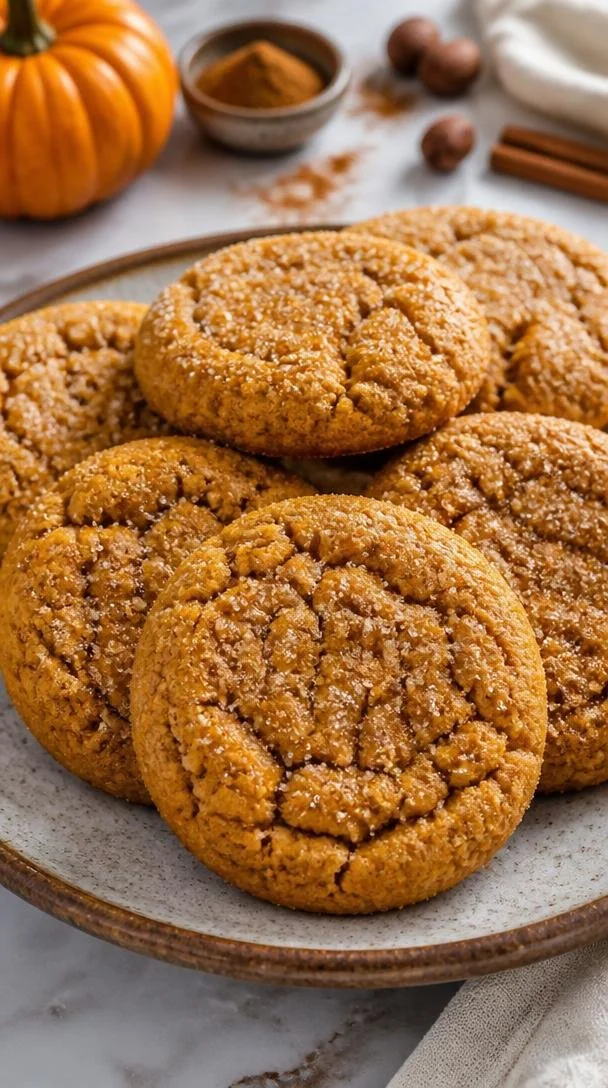
Easy One-Bowl Chewy Pumpkin Cookies in 25 Minutes Flat
Chewy Pumpkin Cookies: A Delicious Fall Treat
Welcome, food lovers! Today, we’re diving into the cozy world of baking with a recipe that brings a taste of autumn right into your kitchen: chewy pumpkin cookies. These delightful treats are perfect for crisp evenings when you want to enjoy something sweet that’s also a bit wholesome. Plus, they’re incredibly easy to whip up, making them a favorite around my table.
I remember the first time I tried a pumpkin cookie. It was at a friend’s autumn gathering, where the air was filled with the rich aroma of spices and baked goods. As soon as I took a bite, I was transported to a haven of fall flavors—the warm spices, the soft texture, and that subtly sweet pumpkin flavor all wrapped up in one cookie. It was love at first taste! Since then, I’ve perfected my chewy pumpkin cookie recipe, and I can’t wait to share it with you.
So, whether you’re cozying up at home, hosting a gathering, or just looking to satisfy a sweet tooth, let’s get started on these scrumptious chewy pumpkin cookies that will make your heart—and tummy—happy!
My Pumpkin Cookie Memory
One of my fondest memories is from a few years ago when I decided to host an impromptu pumpkin-themed gathering to celebrate the season. It was one of those crisp October days; the leaves were changing, and the sun was shining brightly. My friends and I gathered around the kitchen island, sipping spiced apple cider and sharing stories. The star of the show? My chewy pumpkin cookies, of course!
With laughter filling the room, we rolled out dough, sprinkled flour everywhere, and turned what could have been a stressful baking session into a joyful experience. When those cookies came out of the oven, we could hardly wait for them to cool! The sweet scent filled the house, and as we finally took our first bites, you could hear the “Mmm”s echoing through the room. Those cookies not only filled our stomachs but also created a warm atmosphere filled with connection and joy—reminding me that food truly brings people together.
Ingredients
Let’s gather our ingredients! Here’s what you’ll need for these gooey, chewy pumpkin cookies, along with some handy tips for each component:
-
1 cup pumpkin puree
(Canned or homemade, pumpkin puree is the star of the show. If you’re feeling adventurous, you can use butternut squash puree as a fantastic substitute!) -
1 cup brown sugar
(This adds moisture and rich flavor! For a lighter touch, you can swap half of this with coconut sugar or white sugar.) -
1/2 cup granulated sugar
(Gives just the right amount of sweetness without overpowering the pumpkin. Feel free to reduce this slightly for a less sweet cookie.) -
1/2 cup butter (softened)
(Butter contributes to that fabulous chewy texture. If you want to make it dairy-free, coconut oil or vegan butter works well!) -
1 egg
(This binds everything together. You can replace it with a flax egg for a vegan option: mix 1 tablespoon ground flaxseed with 2.5 tablespoons water and let it sit for a few minutes to thicken.) -
2 cups all-purpose flour
(Essential for structure! For a gluten-free version, feel free to use a 1:1 gluten-free flour blend.) -
1 teaspoon baking soda
(This helps the cookies rise and gives them a nice texture. Make sure it’s fresh for the best results!) -
1 teaspoon baking powder
(Works in conjunction with baking soda for extra fluffiness!) -
1 teaspoon pumpkin spice
(A blend of cinnamon, nutmeg, and clove that gives our cookies that wonderful autumn flavor. You can make your own mix too!) -
1/2 teaspoon salt
(Enhances all the flavors! Don’t skimp on this step.) -
1/4 cup granulated sugar (for topping)
(This gives the cookies a lovely sugary crust! You can opt for sparkling sugar for a little extra sparkle.)
Step-by-Step Instructions
Now that we have our ingredients ready, let’s get baking! Follow these steps carefully, and I promise you’ll have a batch of scrumptious pumpkin cookies in no time.
Step 1: Preheat Your Oven
First things first—let’s get the oven preheating! Set it to 350°F (175°C). This ensures our cookies bake evenly and come out perfectly chewy.
Step 2: Cream the Butter and Sugars
In a large mixing bowl, beat together the softened butter, brown sugar, and granulated sugar until the mixture is light and fluffy—about 2-3 minutes. Tip: Using a hand mixer or stand mixer can save you some elbow grease, but a good old wooden spoon works too!
Step 3: Add the Egg and Pumpkin
Next, crack in your egg and add the pumpkin puree, mixing until well combined. This is where the magic starts to happen. The pumpkin will add moisture and flavor, and your mix will have a beautiful orange hue. Chef’s Hack: For a hint of flavor, try adding a touch of vanilla extract to this mix!
Step 4: Dry Ingredients Unite
In another bowl, whisk together the all-purpose flour, baking soda, baking powder, pumpkin spice, and salt. This step ensures that all the leaveners and spices are evenly distributed throughout the flour. Tip: Sifting the flour can provide an even lighter cookie, but it’s not absolutely necessary.
Step 5: Combine Wet and Dry Ingredients
Slowly add the dry mixture to the pumpkin mixture in increments, gently folding until just combined. Pro Tip: Don’t overmix! We want those cookies to stay tender and chewy, and overworking the dough can lead to extra gluten formation.
Step 6: Scoop and Shape
Using a cookie scoop or a tablespoon, drop rounded mounds of dough onto a parchment-lined baking sheet, spacing them about 2 inches apart. This allows room for them to spread! If you want, you can slightly flatten the tops with your fingers for an even bake.
Step 7: Sugar Crust
Before popping them in the oven, sprinkle a little granulated sugar on top of each cookie. This not only gives them a lovely sweet crust but adds a festive touch. Remember to resist eating the dough—though it may be tempting!
Step 8: Bake
Bake your cookies in the preheated oven for 10-12 minutes or until they’re light golden around the edges but still soft in the center. Tip: They will continue to firm up as they cool, so don’t overbake!
Step 9: Cool and Enjoy!
Let the cookies cool on the baking sheet for about 5 minutes before transferring them to a wire rack to cool completely. This waiting period allows them to set while remaining soft and chewy. And now, patience is key, my friends!
Serving Suggestions
When you’re ready to serve, consider plating these cookies on a beautiful platter sprinkled with extra pumpkin spice or a drizzle of white chocolate for added flair. Pair them with a warm cup of spiced chai tea or a latte, and you’ll have an irresistible snack that’s perfect for sharing (if you’re feeling generous!).
Recipe Variations
Want to switch it up a bit? Here are a few ideas:
- Chocolate Chip Twist: Fold in a cup of chocolate chips for a classic combo!
- Nutty Delight: Add 1/2 cup of chopped walnuts or pecans for a crunchy texture.
- Gluten-Free: Use a gluten-free flour blend instead of all-purpose flour.
- Spiced Up: Increase the pumpkin spice to 1.5 teaspoons for an extra kick of flavor.
- Frosted Version: Top with a cream cheese frosting for a decadent dessert!
Chef’s Notes
Ah, these cookies have a special place in my heart! This recipe has evolved over time, adapted from my classic sugar cookie base to incorporate the deliciousness of pumpkin. I vividly remember my first attempt—I accidentally spilled too much pumpkin puree, and that batch turned out a bit too chewy for my liking. But guess what? They were still gobbled up by my friends! The lesson? Often, the best moments in the kitchen come from those happy accidents.
FAQs and Troubleshooting
1. Why are my cookies flat?
If your cookies spread too much, it could be due to too much butter or not enough flour. Always carefully measure your ingredients, and if your butter was too soft, try chilling the dough for 30 minutes before baking.
2. How do I store my pumpkin cookies?
These cookies can be stored in an airtight container at room temperature for up to a week. If you’d like them to last longer, freeze the baked cookies. Just be sure to let them cool completely before freezing and place parchment paper between layers.
3. Can I make these ahead of time?
Absolutely! You can whip up the dough ahead of time and refrigerate it for up to 3 days before baking. Alternatively, freeze the shaped cookie dough balls and bake them directly from the freezer—just add an extra minute or two to the baking time.
4. How do I know when they’re done?
Look for edges that are set and lightly golden; the centers will appear soft. Trust your instinct—it’s the best guide!
Nutritional Info
(For reference, here’s a high-level breakdown of the nutritional info per cookie if you make about 24 cookies—calories may vary.)
- Calories: 108
- Protein: 1.5g
- Fat: 4.5g
- Carbohydrates: 16g
- Fiber: 0.5g
- Sugar: 6g
And there you have it! Your guide to creating these delightful chewy pumpkin cookies. With a warm, inviting texture and a sprinkle of fall flavors, they’re bound to become a favorite in your baking repertoire. I can’t wait to hear about your own kitchen adventures and the wonderful moments these cookies help create. So, tie on your apron, grab that mixer, and let’s bake a batch together! Happy baking, friends!
PrintChewy Pumpkin Cookies

Delicious chewy pumpkin cookies that capture the essence of fall with warm spices and a soft texture.
- Prep Time: 15 minutes
- Cook Time: 12 minutes
- Total Time: 27 minutes
- Yield: 24 cookies 1x
- Category: Dessert
- Method: Baking
- Cuisine: American
- Diet: Vegetarian
Ingredients
- 1 cup pumpkin puree
- 1 cup brown sugar
- 1/2 cup granulated sugar
- 1/2 cup butter (softened)
- 1 egg
- 2 cups all-purpose flour
- 1 teaspoon baking soda
- 1 teaspoon baking powder
- 1 teaspoon pumpkin spice
- 1/2 teaspoon salt
- 1/4 cup granulated sugar (for topping)
Instructions
- Preheat your oven to 350°F (175°C).
- Cream the softened butter, brown sugar, and granulated sugar until light and fluffy.
- Add the egg and pumpkin puree, mixing until combined.
- Whisk together flour, baking soda, baking powder, pumpkin spice, and salt in another bowl.
- Combine the dry mixture with the pumpkin mixture until just mixed.
- Scoop rounded mounds of dough onto a parchment-lined baking sheet.
- Sprinkle granulated sugar on top of each cookie.
- Bake for 10-12 minutes until golden around the edges.
- Cool for 5 minutes on the baking sheet before transferring to a wire rack.
Notes
These cookies can be stored in an airtight container for up to a week. Dough can be refrigerated for up to 3 days or frozen for later use.
Nutrition
- Serving Size: 1 cookie
- Calories: 108
- Sugar: 6g
- Sodium: 200mg
- Fat: 4.5g
- Saturated Fat: 2.5g
- Unsaturated Fat: 2g
- Trans Fat: 0g
- Carbohydrates: 16g
- Fiber: 0.5g
- Protein: 1.5g
- Cholesterol: 30mg
Keywords: pumpkin cookies, fall cookies, chewy cookies, dessert, autumn treats
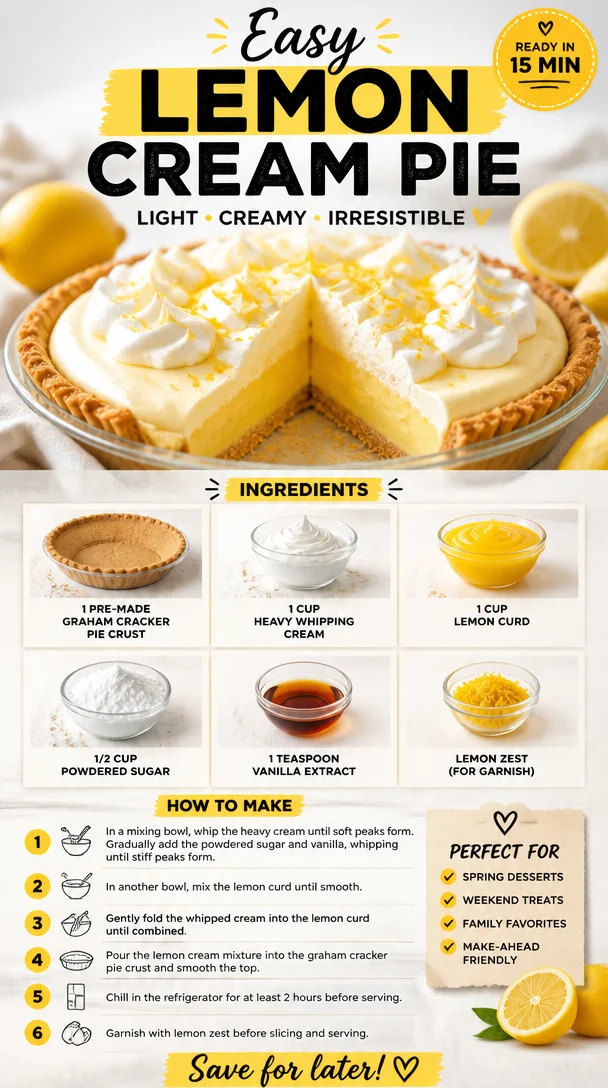
Easy Lemon Cream Pie
Easy Lemon Cream Pie: A Delightful Bite of Sunshine
Hello, my fellow food enthusiasts! Today, we’re diving into a dessert that’s as bright and refreshing as a sunny day: the Easy Lemon Cream Pie. Whether you’re hosting a summer barbecue, planning a holiday gathering, or just want to treat yourself to something sweet, this pie is a delightful choice that strikes the perfect balance between sweet and tangy.
Lemon cream pie is one of those magical desserts that whisk you away to a sun-kissed patio, where laughter dances in the air and the warmth of the sun feels like a warm embrace. And let’s be honest—there’s something incredibly satisfying about combining pantry staples to create a dessert that looks (and tastes!) anything but ordinary.
When I first made this Easy Lemon Cream Pie—a recipe that has become a staple in my kitchen—I was taken back in time to family gatherings where desserts were the highlight of the meal. Warm summers spent outside, sharing stories with family, sipping lemonade, and taking those first heavenly bites of this creamy wonder. It’s that nostalgia that drives me to share this recipe, hoping it can create similar moments for you!
So, grab your apron and let’s get started on the journey to make this delightful dessert.
A Slice of Nostalgia
One of my fondest memories tied to lemon cream pie is the summer I attempted to impress my friends with my “culinary skills.” It was a hot July afternoon, and I was determined to create a dessert that would be crowned the highlight of our get-together. With everything set—music blasting, patio lights twinkling—I decided to whip up this lemon cream pie, inspired by my grandmother’s recipe.
As I mixed the lemon curd and whipped cream, the bright aroma of citrus filled the room. Little did I know that a few minor mishaps would turn my kitchen into a scene from a slapstick comedy! In my excitement, I accidentally knocked over a container of powdered sugar, creating a cloud of confectioners’ fog that left my kitchen looking like a snowstorm had hit. But in true culinary spirit, I rolled with it, scooping the sugar off the counter with a laugh.
When the pie finally set and we cut into it, the first bite was pure bliss—smooth, creamy, bursting with lemon flavor, with a subtle sweetness. The laughter we shared that day made for one of my favorite culinary memories. Now, every time I make this easy lemon cream pie, I remember that playful summer and the joy of creating something that brought everyone together.
Ingredients
Let’s gather the ingredients for this sweet creation! Here’s what you’ll need:
-
1 pre-made graham cracker pie crust: This saves time and effort! You can also use crushed graham crackers mixed with melted butter for a homemade version, but don’t be afraid to go for store-bought if you prefer ease.
-
1 cup heavy whipping cream: This will create a luscious, fluffy texture. If you want a lighter alternative, you can opt for coconut cream, which adds a delightful tropical twist.
-
1 cup lemon curd: You can make your own (which I highly recommend if you have the time) or buy high-quality lemon curd from the store. It’s tangy, sweet, and bursting with lemony goodness!
-
1/2 cup powdered sugar: This helps to sweeten the whipping cream while maintaining that soft, delicate texture. If you’re out of powdered sugar, you can blend granulated sugar until it’s fine.
-
1 teaspoon vanilla extract: This adds a warm undertone that balances the tartness of the lemons and enhances the overall flavor.
-
Lemon zest (for garnish): Not just for looks! The zest provides a fragrant citrus burst that will make your pie look and taste even fresher.
Step-by-Step Instructions
Ready to create a lemony masterpiece? Here’s how we do it, step by step:
-
Prepare Your Ingredients: Start by gathering all your ingredients and set them out on the counter. This makes the process smoother, and you won’t miss any essentials!
-
Whip the Cream: In a large mixing bowl, pour in the heavy whipping cream. Using an electric mixer, whip the cream on medium speed until it starts to thicken. Gradually add in the powdered sugar and continue to whip until soft peaks form. This should take about 3–5 minutes. Here’s a little chef’s hack: Be careful not to over-whip—if you go too far, the cream can turn into butter. We want light, airy clouds of cream, not a dairy disaster!
-
Combine the Ingredients: Gently fold in the lemon curd into the whipped cream using a spatula. It’s essential to do this slowly so as not to deflate the whipped cream—think delicate embraces, not aggressive mixing! Continue folding until the mixture is smooth and creamy. You want to retain that beautiful lightness while blending the flavors.
-
Fill the Pie Crust: Carefully pour the lemon cream mixture into your pre-made graham cracker pie crust. Use a spatula to spread it evenly. Here’s the fun part: Don’t worry about it being perfect! A little rustic charm adds to its homemade allure!
-
Chill: Cover your pie with plastic wrap and place it in the refrigerator for at least 2–3 hours to let it set. If you’re in a hurry, you can freeze it for about an hour but keep an eye on it—you don’t want to serve lemon slush.
-
Garnish and Serve: Once set, remove the pie from the fridge. Before serving, sprinkle lemon zest on top for an extra zing and pop of color. Slice with a sharp knife and watch your guests light up at that luscious filling!
Serving Suggestions
When plating this Easy Lemon Cream Pie, simplicity is key. Slice the pie into generous portions and place them on dessert plates. A drizzle of raspberry sauce (if you’re feeling fancy) or a side of fresh berries can elevate the presentation beautifully. Serve chilled and consider pairing it with a scoop of vanilla ice cream or a dollop of extra whipped cream. Trust me, your guests will thank you!
Recipe Variations
Mix things up a bit! Here are some creative twists you can try:
-
Berry Lemon Cream Pie: Fold in a cup of fresh or frozen mixed berries, like blueberries or strawberries, into your lemon cream for a fruity burst.
-
Meringue Topping: For a more traditional look, add a fluffy meringue topping instead of lemon zest. Bake it in the oven until golden brown for that classic touch.
-
Ginger Snap Crust: Switch out the graham cracker crust for a ginger snap crust for a spiced twist. The warmth of ginger complements the tartness of the lemon perfectly!
-
Coconut Cream Substitution: Swap out half of the heavy whipping cream with coconut cream for a tropical vibe that’s refreshing and unique.
-
Vegan Version: Use a vegan pie crust, coconut cream, and dairy-free powdered sugar to create a stunning vegan lemon cream pie.
Chef’s Notes
This Easy Lemon Cream Pie has stood the test of time in my kitchen. What started as a fun experiment transformed into a staple recipe passed down through friends and family. I love how versatile it is—it’s been the star at birthday parties, holiday gatherings, and casual dinners alike.
And let’s not forget those hilarious cooking mishaps! Like the time I mistakenly estimated a cup of lemon curd as two cups, resulting in a pie that was more like a lemon soup! We all laughed—because even the biggest kitchen blunders often lead to the best stories. Cooking is about experimenting, having fun, and sharing those imperfect moments with loved ones.
FAQs and Troubleshooting
Q: My pie is too runny; what went wrong?
A: If your pie turned out runny, it could be that the heavy cream wasn’t whipped enough, or it didn’t chill long enough. Ensure soft peaks form, and allow time for it to set in the refrigerator for at least 2 hours!
Q: Can I use homemade lemon curd?
A: Absolutely! Homemade lemon curd adds a depth of flavor that’s genuinely delightful. Just be sure it’s properly cooled before mixing it with the whipped cream.
Q: How long does this pie last?
A: Properly covered, this pie will last in the refrigerator for about 3–4 days. Ideal for those who want to savor it over a few days!
Q: Can I freeze the pie?
A: Yes! This pie freezes well. Just make sure you cover it tightly with plastic wrap and foil to prevent freezer burn. When you’re ready to enjoy it, let it thaw in the refrigerator.
Nutritional Info
While we won’t get too bogged down with numbers, this pie is a delicious treat best enjoyed occasionally as part of a balanced diet. One slice packs a punch of creamy goodness, bright lemony flavor, and happiness!
And there you have it—your guide to crafting a delightful Easy Lemon Cream Pie that radiates sunshine and joy! I hope this recipe inspires you to gather around your table, share laughter, and create sweet memories. Remember, cooking is about enjoying the process, having fun, and serving love on a plate. So tie on that ivory apron and let’s make magic happen! Happy baking! 🍋✨
PrintEasy Lemon Cream Pie

A bright and refreshing dessert that strikes the perfect balance between sweet and tangy.
- Prep Time: 15 minutes
- Cook Time: 0 minutes
- Total Time: 180 minutes
- Yield: 8 servings 1x
- Category: Dessert
- Method: Chilling
- Cuisine: American
- Diet: Vegetarian
Ingredients
- 1 pre-made graham cracker pie crust
- 1 cup heavy whipping cream
- 1 cup lemon curd
- 1/2 cup powdered sugar
- 1 teaspoon vanilla extract
- Lemon zest (for garnish)
Instructions
- Prepare Your Ingredients: Gather all your ingredients and set them out on the counter.
- Whip the Cream: In a large mixing bowl, whip the heavy cream on medium speed until it thickens. Gradually add the powdered sugar and continue to whip until soft peaks form.
- Combine the Ingredients: Gently fold the lemon curd into the whipped cream using a spatula.
- Fill the Pie Crust: Pour the lemon cream mixture into the pie crust and spread it evenly.
- Chill: Cover the pie with plastic wrap and refrigerate for at least 2–3 hours to let it set.
- Garnish and Serve: Sprinkle lemon zest on top before serving and enjoy!
Notes
This pie can be frozen; just cover it tightly to prevent freezer burn.
Nutrition
- Serving Size: 1 slice
- Calories: 300
- Sugar: 18g
- Sodium: 150mg
- Fat: 20g
- Saturated Fat: 10g
- Unsaturated Fat: 8g
- Trans Fat: 0g
- Carbohydrates: 30g
- Fiber: 1g
- Protein: 3g
- Cholesterol: 40mg
Keywords: lemon pie, dessert, summer dessert, easy pie recipe, creamy lemon pie

Beginner-Friendly Homemade Fruit Tart: 6-Ingredient Recipe
Delight in Every Slice: Homemade Fruit Tart Recipe
Hello, fellow food lovers! It’s Savannah Pierce here from Ivory Apron, and today we’re diving into the wonderful world of homemade fruit tarts. There’s something simply magical about the vibrant colors and refreshing flavors of a fruit tart, wouldn’t you agree? Not only do they look stunning on any table, but they also taste like a slice of summer, no matter what the season!
Imagine this: a buttery, flaky crust cradling a creamy, dreamy filling, all topped with an array of freshly sliced fruits glistening like jewels. It’s the perfect dessert for any occasion, from casual family dinners to elegant gatherings. And the best part? You don’t need to be a pastry chef to impress your guests with this beauty. All it takes is a little guidance and a sprinkle of love!
In this blog post, I’ll take you through my cherished fruit tart recipe step by step. You’ll hear some of my kitchen stories, get a taste of the techniques that make this dessert shine, and discover ways to customize it to suit your taste. So, tie on that apron, grab your whisk, and let’s create a dessert that’ll bring smiles all around the table!
A Slice of Nostalgia
Let me take you back to my childhood for a moment. I can still picture the scene—my grandmother’s kitchen was always buzzing with activity, the air fragrant with the delicious aromas of baked goods and fresh fruits. Every summer, when the fruits were at their peak, she’d gather us around the table to make her famous fruit tart.
The process was a family affair. My siblings and I would help wash the strawberries, peel the kiwi, and hunt for the ripest blueberries in her garden. Laughter filled the kitchen as we fought over who got to pour the creamy custard into the crust. But the best part? Watching my grandmother carefully arrange the fruits into an elaborate design, as if she was painting a masterpiece.
Those moments taught me that cooking is about more than just food; it’s about love and togetherness. Today, as I share this homemade fruit tart recipe with you, I hope you’ll create your own memories in the kitchen—just like my family did!
Ingredients
Let’s get to the fun part! Here’s what you’ll need to create this gorgeous fruit tart:
-
1 1/2 cups all-purpose flour
The foundation of our tart crust. For a gluten-free option, you can use a 1:1 gluten-free flour blend. -
1/2 cup powdered sugar
This adds just the right amount of sweetness to our crust while keeping it light and tender. If you’re in a pinch, you can blend regular granulated sugar in a blender for a quick substitute. -
1/2 cup unsalted butter, softened
The buttery goodness is what gives our tart its rich flavor and flaky texture. If you’re watching your dairy intake, coconut oil can be a good alternative, though it may alter the flavor slightly. -
1 large egg yolk
This adds richness and helps bind our crust together. Use a flaxseed meal mixed with water for a vegan substitute if needed. -
1 teaspoon vanilla extract
Adds a lovely hint of sweetness and depth to the crust. Feel free to use almond extract for an exciting twist! -
2 cups milk
The base for our creamy custard filling. You can substitute almond milk, coconut milk, or any other milk alternative for a dairy-free version. -
1/4 cup granulated sugar
Balances the flavors in our custard. You can reduce the amount for a less sweet filling, or use honey or maple syrup for a natural touch. -
3 tablespoons cornstarch
Acts as a thickener for our custard. If you don’t have cornstarch, you can use the same amount of all-purpose flour, though the texture might be slightly different. -
1/4 teaspoon salt
A pinch of salt enhances all the flavors and balances the sweetness in our filling. -
1 teaspoon vanilla extract
A repeat here because it just adds that extra zest to our custard. -
Assorted fresh fruits (strawberries, kiwi, blueberries, etc.)
The star of our tart! Feel free to use any fresh fruits you love—mango, peaches, and raspberries make fabulous choices too!
Step-by-Step Instructions
Now that we’ve gathered all our ingredients, let’s get cooking! Here’s how to whip up this delightful fruit tart:
1. Preheat the Oven
Preheat your oven to 350°F (175°C). This will ensure that your crust bakes evenly and turns golden brown. While the oven is heating up, let’s get started on the crust!
2. Make the Tart Crust
In a mixing bowl, combine the all-purpose flour and powdered sugar. Use a whisk to blend them together nicely. Next, add the softened butter and egg yolk. Using a fork or your fingers, mix until the mixture resembles coarse crumbs.
Chef Tip: If your butter is too cold, it’ll be hard to incorporate. Make sure it’s at room temperature and soft to achieve that perfect buttery texture.
3. Form the Dough
Now, add the vanilla extract and mix until the dough begins to come together. If it feels too crumbly, try adding a teaspoon of ice-cold water at a time until it holds together.
4. Chill the Dough
Shape the dough into a disc, wrap it in plastic wrap, and place it in the fridge for about 30 minutes. Chilling helps the butter solidify, which will yield a flakier crust.
5. Roll Out the Dough
Once chilled, sprinkle a little flour on your countertop and roll out the dough to about 1/4-inch thickness. Carefully transfer the dough to a 9-inch tart pan, pressing it into the corners and trimming any excess dough hanging over the edges.
Chef Hack: Use a fork to poke a few holes in the bottom of the crust to allow steam to escape, preventing it from puffing up while baking.
6. Bake the Crust
Line the crust with parchment paper and fill it with pie weights or dried beans to weigh it down. Bake for 15-20 minutes or until the edges are lightly golden. Allow it to cool completely before adding the filling.
7. Create the Custard Filling
In a medium saucepan, combine milk, granulated sugar, cornstarch, salt, and vanilla extract. Whisk this mixture over medium heat until it thickens—this usually takes about 5-7 minutes. Keep stirring constantly to prevent any lumps from forming.
8. Cool the Custard
Remove the custard from heat and let it cool for a few minutes. Pour it into the cooled tart shell and spread it out evenly with a spatula.
Chef Tip: You can place plastic wrap directly on the surface of the custard to prevent a skin from forming as it cools!
9. Arrange the Fresh Fruits
Once the custard has cooled completely, it’s time to decorate! Slice your fresh fruits and artistically arrange them on top of the custard. Have fun with the colors and shapes—this is your chance to get creative!
Serving Suggestions
For serving, consider keeping it simple yet elegant! Slice the tart into wedges and place each piece on a beautiful plate. A sprinkle of powdered sugar on top adds an enchanting touch, while a dollop of whipped cream or a scoop of vanilla ice cream elevates the experience even more.
Recipe Variations
Want to mix things up? Here are some fun variations to consider:
-
Chocolate Custard: Add unsweetened cocoa powder to the custard for a rich chocolate twist.
-
Lemon Zest: Enhance the custard with lemon zest for a refreshing citrus flavor.
-
Nut Crust: Swap half the flour with ground almonds to create a nutty and crunchy crust.
-
Savory Tart: Replace the fruits with roasted vegetables and add goat cheese for a delicious savory option.
Chef’s Notes
This fruit tart recipe has been a staple in my family for years. It’s one of those lovely desserts that you can whip up for any occasion, and it always brings a smile to people’s faces. Over the years, I’ve experimented endlessly with different fruits and flavors, but the classic version still steals my heart.
One of my favorite kitchen anecdotes involves a particularly messy attempt to slice strawberries. I ended up with juice all over my shirt and kitchen counter, but I couldn’t stop laughing at myself. It’s moments like these that remind me that cooking doesn’t have to be perfect—it just has to be enjoyed!
FAQs and Troubleshooting
1. Why is my tart crust soggy?
Make sure to pre-bake the crust fully and allow it to cool before adding the custard. The pie weights are crucial to prevent bubbling.
2. How do I store leftover tart?
Store it in the refrigerator, tightly wrapped in plastic wrap for up to 2-3 days. Note that the fruits may lose some freshness over time.
3. Can I use frozen fruits?
While fresh fruits are ideal for presentation, you can use frozen fruits if they are thawed and properly drained to avoid excess moisture on top of the custard.
4. How do I stop my custard from curdling?
Constant stirring is key! Keep the heat medium—not too high. If you notice it thickening too quickly, remove it from the heat momentarily while you stir.
Nutritional Info (Optional)
While I encourage enjoying desserts like this in moderation, I understand that nutritional details can be helpful! This tart is rich in vitamins from the fresh fruits and provides a delightful balance of carbohydrates and fats from the crust and filling.
And there you have it—a homemade fruit tart that’s as delightful to make as it is to eat! So gather your loved ones, indulge in some kitchen fun, and create a beautiful dessert that will not only satisfy your sweet tooth but also whisk you down memory lane, just like my grandmother did for me. Happy baking, friends!
PrintHomemade Fruit Tart

A delightful homemade fruit tart featuring a buttery crust, creamy custard, and an assortment of fresh fruits.
- Prep Time: 30 minutes
- Cook Time: 20 minutes
- Total Time: 50 minutes
- Yield: 8 servings 1x
- Category: Dessert
- Method: Baking
- Cuisine: American
- Diet: Vegetarian
Ingredients
- 1 1/2 cups all-purpose flour
- 1/2 cup powdered sugar
- 1/2 cup unsalted butter, softened
- 1 large egg yolk
- 1 teaspoon vanilla extract
- 2 cups milk
- 1/4 cup granulated sugar
- 3 tablespoons cornstarch
- 1/4 teaspoon salt
- 1 teaspoon vanilla extract
- Assorted fresh fruits (strawberries, kiwi, blueberries, etc.)
Instructions
- Preheat your oven to 350°F (175°C).
- Combine the flour and powdered sugar in a mixing bowl.
- Add the softened butter and egg yolk, mixing until it resembles coarse crumbs.
- Mix in the vanilla extract until the dough starts to come together.
- Shape the dough into a disc, wrap it in plastic wrap, and chill for 30 minutes.
- Roll out the dough to about 1/4-inch thickness and transfer to a tart pan.
- Line the crust with parchment paper, fill with pie weights, and bake for 15-20 minutes.
- Combine milk, granulated sugar, cornstarch, salt, and vanilla in a saucepan and whisk over medium heat until thickened.
- Remove from heat and let cool, then pour into the tart shell.
- Arrange the fresh fruits on top of the cooled custard.
Notes
For variations, consider chocolate custard, lemon zest, a nut crust, or replacing fruits with roasted vegetables.
Nutrition
- Serving Size: 1 slice
- Calories: 250
- Sugar: 10g
- Sodium: 180mg
- Fat: 14g
- Saturated Fat: 8g
- Unsaturated Fat: 4g
- Trans Fat: 0g
- Carbohydrates: 32g
- Fiber: 2g
- Protein: 4g
- Cholesterol: 40mg
Keywords: fruit tart, dessert, baking, fresh fruits, custard tart

One-Pan Sugar Cookie Flag Fruit Pizza for 4th of July
Sugar Cookie Flag Fruit Pizza: A Celebration of Flavors and Colors
Summer is in full swing, and you know what that means — it’s time for outdoor gatherings, barbecues, and all things vibrant and colorful! Today, I’m excited to share one of my favorite desserts that not only tastes amazing but also looks stunning on any table. Introducing my Sugar Cookie Flag Fruit Pizza — a delightful twist on the classic fruit pizza that celebrates all the colors of the season!
Imagine a sweet, buttery crust made from rich sugar cookie dough, topped with creamy, dreamy frosting, and adorned with a fresh array of seasonal fruits. It’s like a slice of sunshine on a plate! Not only is this dessert a feast for the eyes, but it also creates a joyful experience as friends and family gather to indulge in each colorful bite.
A Sweet Memory: The First Time I Made Fruit Pizza
I still remember the first time I made a fruit pizza. It was a sunny afternoon, and I decided to host a casual get-together for my friends. As I rummaged through my refrigerator, I stumbled upon leftover sugar cookie dough from another baking adventure — you know how it goes! I was inspired to create something fresh and fruity.
With a sense of adventure, I rolled out the dough, baked it into a beautiful round crust, and topped it off with a luscious cream cheese frosting. As I decorated it with strawberries, blueberries, and whipped topping, I couldn’t help but smile at how colorful and festive it looked. When my friends arrived, their reactions were priceless. Each slice brought oohs and aahs, and the laughter that filled the kitchen made my heart warm. This dessert not only tasted good but also created lasting memories. And that’s precisely why I share it with you today — to help you create those same beautiful moments around your table!
The Essential Ingredients
Before we dive into the fun of making this Sugar Cookie Flag Fruit Pizza, let’s go over the star ingredients. Here’s what you’ll need:
-
1 package (17.5 ounces) refrigerated sugar cookie dough
- This dough is a lifesaver for quick desserts. If you’re feeling adventurous, homemade dough works wonderfully too!
-
1 package (8 ounces) cream cheese, room temperature
- Cream cheese gives the frosting a rich, tangy flavor. If you prefer a lighter version, you can use Greek yogurt or mascarpone.
-
1 cup powdered sugar
- This adds sweetness and a fluffy texture to the frosting. For a healthier option, use a sugar substitute, keeping in mind that it may alter the overall taste.
-
1 teaspoon vanilla extract
- This little addition will elevate the flavor of your frosting. Feel free to experiment with almond extract for a subtle twist.
-
Fresh strawberries
- The stars of our show! They add juiciness and a vibrant red color. Substitute with raspberries or cherries if you prefer.
-
Blueberries
- These tiny gems not only look fabulous but also provide a pop of flavor and nutrition. Blackberries are a delightful alternative!
-
Whipped topping
- A dollop of whipped topping adds that finishing touch and cloud-like texture. If you’re looking for a dairy-free option, whipped coconut cream works wonders!
Step-by-Step Instructions to Create the Magic
Now, let’s get into the nitty-gritty of making this delicious dessert. Grab your apron, and let’s get started!
-
Preheat Your Oven
Preheat your oven to 350°F (175°C). A hot oven is crucial for that golden, tender crust! -
Prepare the Sugar Cookie Crust
Unwrap the refrigerated sugar cookie dough and break it into smaller pieces. Place the dough into a mixing bowl (if using homemade dough, roll it out now). Using your hands or a rolling pin, flatten and spread the dough into a large circle on a parchment-lined baking sheet. Aim for about ¼ inch thick for that perfect chewy texture. -
Bake the Dough
Pop the dough into your preheated oven and bake for 15-18 minutes or until it’s lightly golden around the edges. Keep an eye on it, as every oven is different! Once baked, remove it from the oven and let it cool completely (this is crucial, friends!). -
Cream the Frosting
While your cookie crust is cooling down, let’s whip up that cream cheese frosting. In a mixing bowl, blend the room temperature cream cheese with an electric mixer for about 1 minute until smooth. Gradually add the powdered sugar and vanilla extract, mixing until fully combined and fluffy. If it’s too thick, add a splash of milk to reach your desired consistency. -
Spread the Frosting
Once your cookie crust has cooled, spread a generous layer of the cream cheese frosting over the top. Use an offset spatula for a smooth finish; it makes a world of difference! -
Decorate with Fruit
Now comes the fun part! Slice the strawberries into thin pieces and arrange them in rows across the pizza, creating stripes like an American flag (or whatever design speaks to you!). Add blueberries in the top left corner, filling in any gaps and making it as beautiful as possible. The colors should pop and create a lovely visual. -
Top It Off with Whipped Topping
Finally, dollop whipped topping in the empty spaces, or pipe it around the edges for a decorative touch. This fluffy cloud will make your dessert look even more enticing! -
Refrigerate Before Serving
Place your sugar cookie fruit pizza in the fridge for about 30 minutes to allow the frosting to set a bit and help all those flavors meld together. It also makes slicing easier!
Serving Suggestions: Presenting Your Creation
For serving, slide your beautiful fruit pizza onto a cutting board or a decorative platter. Use a sharp pizza cutter or knife to slice into wedges, and if you want to go the extra mile, garnish each slice with more fresh fruit or a sprig of mint. These little touches truly elevate your presentation and make guests smile!
Recipe Variations for Endless Delight
Here are a few creative twists to make this Sugar Cookie Flag Fruit Pizza your own:
-
Chocolate Delight: Swap the sugar cookie crust for a chocolate cookie dough version. Use raspberries or dark chocolate chips for a bold, rich flavor.
-
Tropical Paradise: Top with kiwi slices, mango, and pineapple for a refreshing tropical vibe.
-
Nutty Crust: Substitute ½ cup of the sugar cookie dough for crushed almonds or pecans for extra crunch and flavor.
-
Savory Twist: Add some whipped mascarpone with herbs instead of sweet frosting and pile on vegetables like bell peppers and cherry tomatoes for a savory take.
Chef’s Notes: A Dash of Wisdom
As with any recipe, making it your own is half the fun! I’ve experimented with various fruits, toppings, and even crusts over the years, and it seems each time I make this dessert, it evolves just a little bit. One of my funniest kitchen moments was when I accidentally grabbed salt instead of sugar for frosting. Let’s just say, it wasn’t my finest hour! So, always label your ingredients, my friends!
FAQs and Troubleshooting
How do I store leftovers?
Store any leftovers in an airtight container in the refrigerator for up to 3 days. It may soften over time but will still taste delicious.
Can I make this ahead of time?
Absolutely! You can bake the sugar cookie crust a day in advance. Just frost and decorate right before serving to keep the fruit fresh.
What can I use instead of cream cheese?
If you want a lighter option, you can substitute with Greek yogurt or mascarpone. They offer a slight variation in taste but will hold up well.
What if I don’t have fresh fruit?
While fresh fruit provides that lovely aesthetic, you can also use canned fruit for convenience. Just make sure to drain it well, and it might not look as pretty, but it will taste great!
In Closing
There you have it, my friends! A Sugar Cookie Flag Fruit Pizza that’s not just a dessert but a beautiful way to celebrate life’s moments, big and small. As we gather around table corners, let’s not forget to savor these sweet experiences and fill our lives with laughter, joy, and delicious food.
If you make this recipe, I would love to hear your thoughts and any creative adaptations you try! So, grab your apron, pour yourself a sparkling drink, and let’s make some memories in the kitchen together. Until next time, happy cooking!
PrintSugar Cookie Flag Fruit Pizza

A vibrant and colorful dessert featuring a sweet sugar cookie crust topped with cream cheese frosting and an array of fresh fruits, perfect for summer gatherings.
- Prep Time: 10 minutes
- Cook Time: 18 minutes
- Total Time: 30 minutes
- Yield: 8 servings 1x
- Category: Dessert
- Method: Baking
- Cuisine: American
- Diet: Vegetarian
Ingredients
- 1 package (17.5 ounces) refrigerated sugar cookie dough
- 1 package (8 ounces) cream cheese, room temperature
- 1 cup powdered sugar
- 1 teaspoon vanilla extract
- Fresh strawberries
- Blueberries
- Whipped topping
Instructions
- Preheat your oven to 350°F (175°C).
- Unwrap the refrigerated sugar cookie dough and break it into smaller pieces. Flatten and spread it into a large circle on a parchment-lined baking sheet.
- Bake the dough for 15-18 minutes or until lightly golden around the edges, then let it cool completely.
- Blend the cream cheese with an electric mixer until smooth, then gradually add the powdered sugar and vanilla extract.
- Spread a generous layer of the cream cheese frosting over the cooled cookie crust.
- Slice the strawberries and arrange them in rows across the pizza, adding blueberries in the top left corner for decoration.
- Dollop whipped topping in the empty spaces or pipe it around the edges for decoration.
- Refrigerate the fruit pizza for about 30 minutes before serving.
Notes
Feel free to substitute the fruits based on your preference. Chocolate cookie dough can also be used for a different flavor.
Nutrition
- Serving Size: 1 slice
- Calories: 300
- Sugar: 20g
- Sodium: 200mg
- Fat: 12g
- Saturated Fat: 7g
- Unsaturated Fat: 4g
- Trans Fat: 0g
- Carbohydrates: 38g
- Fiber: 2g
- Protein: 3g
- Cholesterol: 25mg
Keywords: fruit pizza, dessert, summer recipe, easy dessert, colorful dessert
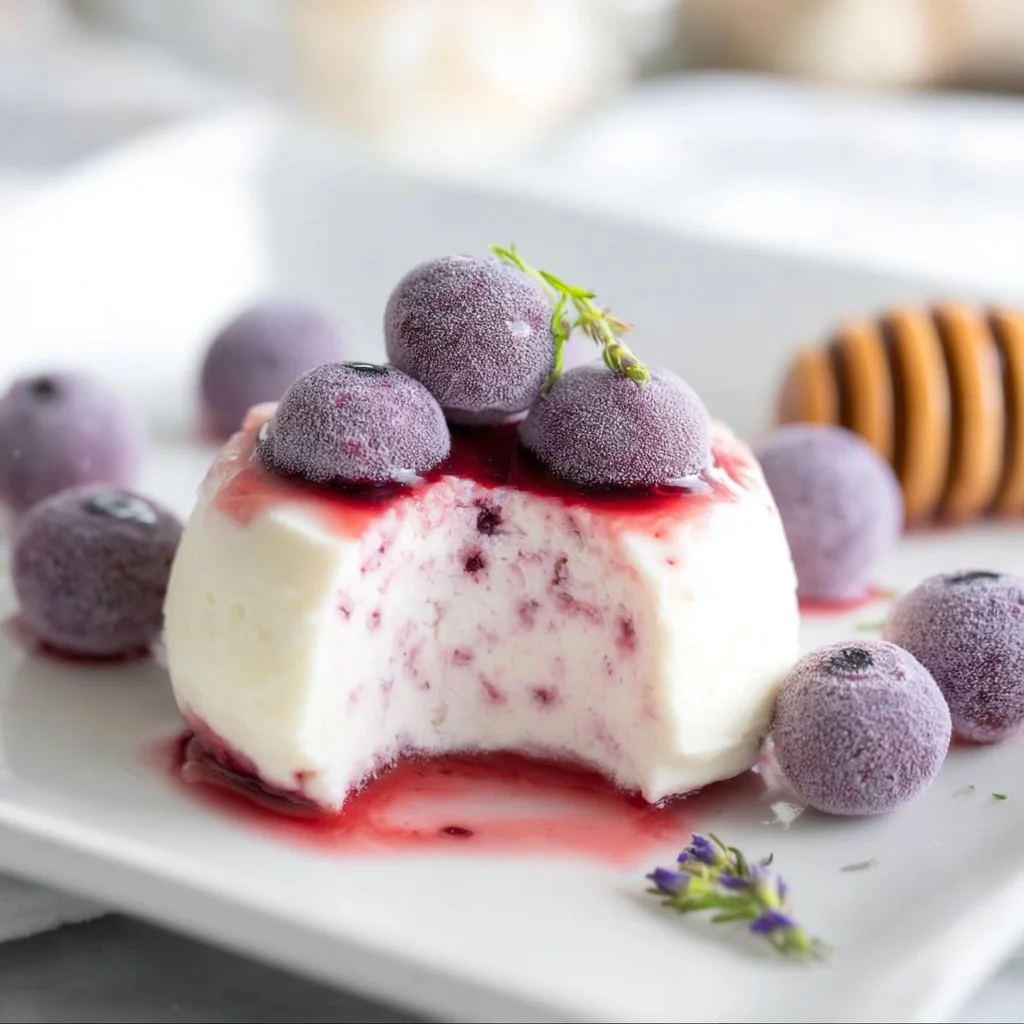
Pin by Crimson Warrior on All no. 1 | Baking sweets, delicious desserts, easy dessert recipes
Indulge Your Senses: The Ultimate Chocolate Chip Cookie Recipe
Hello, fellow foodies! Savannah Pierce here, your go-to recipe creator and host-at-heart from IvoryApron.com! Today, we are diving into the world of Chocolate Chip Cookies — but not just any typical recipe. We’re crafting the kind of cookies that make your house smell like heaven and make you feel like a kid again. So, grab your apron, and let’s get baking!
Introduction
Who doesn’t love a warm, gooey chocolate chip cookie? It’s like a hug in dessert form! There’s something magical about those chunks of chocolate melting into a soft, chewy base. The crispy edges, the tender center, and the pleasantly sweet aroma wafting from the oven — it’s a delightful symphony that invites everyone to gather ‘round.
These cookies are perfect for all occasions: whether you’re hosting a cozy gathering, celebrating a birthday, or simply need a pick-me-up after a long day, you really can’t go wrong. You might even want to double the batch because trust me, these little delights vanish faster than you can say “fresh out of the oven!”
Today, I’ll take you step-by-step through the process of creating the ultimate chocolate chip cookies. But more than just giving you a recipe, I’ll share my personal touches and little chef secrets that elevate this classic treat from ordinary to extraordinary. Let’s embark on this delicious journey together, shall we?
Personal Story
I still remember the summer as a child, when my grandma would invite me to her cozy kitchen. With classic checkered curtains fluttering in the breeze, I watched with wide eyes as she expertly whisked batter, her hands dusted with flour. She always said, "Cookies are meant to bring people together.” Every Sunday afternoon, we’d bake dozens of chocolate chip cookies, and I’d relish the sound of them dropping onto the baking tray with a satisfying plop.
Those moments were more than just about baking; they were filled with laughter, storytelling, and a sprinkle of mischief (like sneaking chocolate chips straight from the bag). Grandma’s chocolate chip cookies became a family staple, the recipe was passed down, each generation adding their unique flair.
Today, as I whip up these cookies in my own kitchen, I feel her spirit with me, guiding my hands. It’s not just about good food; it’s about creating memories, earning smiles, and sharing love, one cookie at a time.
Ingredients
Let’s gather our ingredients! Here’s what you’ll need to create your own batch of chocolate chip happiness:
-
2 1/4 cups all-purpose flour
This is your base! For a healthier twist, try whole wheat flour or even a gluten-free blend — just make sure to adjust the liquid slightly since whole grain absorbs differently! -
1/2 teaspoon baking soda
This helps our cookies rise just enough to give them that perfect fluffy center. You can substitute it with baking powder, but the cookies will have a slightly different texture. -
1 cup unsalted butter, softened
Butter makes everything better! Don’t have unsalted butter? You can use margarine, but make sure to reduce any additional salt in your recipe. -
3/4 cup granulated sugar
This sweetens our cookies and helps achieve that golden color. For a deeper flavor, consider using light brown sugar instead or a mix of both! -
3/4 cup brown sugar, packed
This adds a rich caramel-like flavor and moisture to your cookies. You can use coconut sugar or maple syrup as a substitution, but you’ll need to adjust the liquid content of the other ingredients accordingly. -
1 teaspoon salt
Salt enhances all the sweet flavors. Scale it back a little if you’re sensitive to sodium or using salted butter. -
2 large eggs
Eggs bind everything together and add richness. For a vegan option, try using flax eggs — just mix 1 tablespoon ground flaxseed with 2.5 tablespoons water and let it sit until it thickens (about 10-15 minutes)! -
2 teaspoons vanilla extract
This is a flavor powerhouse! If you don’t have vanilla extract, almond extract can work in a pinch, though it will give a distinctly different flavor profile. -
2 cups semi-sweet chocolate chips
The star of the show! Feel free to mix and match with dark chocolate, milk chocolate, or even white chocolate for variety. You can also use chopped chocolate bars for a more gourmet twist!
Step-by-Step Instructions
Now that we have everything gathered, let’s get our bake on!
-
Preheat the Oven:
Preheat your oven to 375°F (190°C). This is crucial for those perfectly baked cookies that are crispy on the edges but soft in the center. -
Mix the Dry Ingredients:
In a medium bowl, whisk together the flour, baking soda, and salt until fully combined. This ensures that the leavening agent is evenly distributed, giving us that ideal rise in every bite. -
Cream Butter and Sugars:
In a large mixing bowl, beat the softened butter, granulated sugar, and brown sugar together until the mixture is light and fluffy. This typically takes about 2-3 minutes with an electric mixer. The goal here is to incorporate air into the butter, so don’t rush this step! -
Add Eggs and Vanilla:
Next, beat in the eggs one at a time, mixing well after each addition. Then, add the vanilla extract. Scrumptious smells will fill your kitchen at this point! -
Combine Wet and Dry Ingredients:
Gradually add the dry mixture to the wet ingredients, stirring just until combined. Overmixing can lead to tough cookies, and nobody wants that! -
Fold in Chocolate Chips:
With a spatula, gently fold in the chocolate chips. Make sure they are evenly distributed throughout the dough. If you’re feeling adventurous, toss in some chopped nuts for added crunch! -
Scoop the Dough:
Use a cookie scoop or tablespoon to drop dough balls onto a parchment-lined baking sheet, leaving enough space for spreading (about 2 inches apart). -
Bake:
Pop those trays into your preheated oven for 9-11 minutes. Keep an eye on them; they’re done when the edges are golden but the centers still look slightly underbaked. Trust me, they’ll firm up once they cool down! -
Cool Down:
Allow the cookies to cool on the baking sheet for about 5 minutes before transferring them to a wire rack. This little resting period is crucial for that perfect texture!
Serving Suggestions
When it’s time to serve these beauties, consider plating them on a beautiful cake stand to make a statement. A dusting of sea salt on top just before serving will enhance the chocolate flavor and add a touch of sophistication. Pair them with a cold glass of milk or warm coffee for the ultimate treat experience!
Recipe Variations
Want to mix it up? Here are some fun twists on the classic chocolate chip cookie recipe:
-
Oatmeal Chocolate Chip: Add 1 cup of rolled oats to the dough for a chewy texture boost and extra heartiness!
-
Nutty Chocolate Chip: Throw in 1 cup of chopped pecans or walnuts for a delightful crunch.
-
Double Chocolate Delight: Substitute half of the flour with cocoa powder for a rich chocolate version that even the most dedicated chocoholics will adore.
-
Orange Zest: Add 1 tablespoon of fresh orange zest to bring a bright, fragrant twist to your cookies!
-
Chili Chocolate Chip: For the adventurous, a pinch of cayenne pepper can add a surprising kick to your cookies!
Chef’s Notes
As I’ve perfected this recipe over the years, I’ve learned a few essential tips and tricks. Did you know that refrigerating your dough for at least 30 minutes can help improve the flavor and texture of your cookies? It allows the ingredients to meld together beautifully.
Once, while hosting a dinner party, I accidentally used sea salt instead of table salt. The result was a delightful accident — everyone raved about the unique flavor twist it added! Sometimes, the kitchen provides beautiful surprises.
FAQs and Troubleshooting
Q1: My cookies spread too much while baking. What went wrong?
A: This could happen if your butter was too soft or if you didn’t chill the dough long enough. To avoid this next time, make sure your butter is softened but not melted, and consider refrigerating your dough before baking.
Q2: How can I make my cookies softer?
A: If you prefer a softer cookie, slightly underbake them (remove them from the oven when the centers still look a bit doughy). Also, using more brown sugar than white sugar can help achieve a chewier texture.
Q3: Can I freeze the dough for later?
A: Absolutely! Form the dough into individual cookie balls and freeze them in a single layer. Once frozen, transfer them to an airtight container. Just pop them in the oven straight from the freezer, adding an extra minute or two to the baking time.
Q4: What’s the best way to store leftover cookies?
A: Keep your cookies in an airtight container at room temperature for up to a week. For longer freshness, you can refrigerate them, but be aware that they may lose some of their chewyness.
Nutritional Info
While this recipe is all about indulgence, here’s a quick breakdown of the nutritional info per cookie (assuming you make about 24):
- Calories: ~150
- Total Fat: 7g
- Saturated Fat: 4g
- Trans Fat: 0g
- Cholesterol: 20mg
- Sodium: 70mg
- Total Carbohydrates: 20g
- Dietary Fiber: 0.5g
- Sugars: 10g
- Protein: 2g
Let’s Tie on Your Apron!
I hope you feel excited to embark on this chocolate chip cookie adventure with me. Remember, cooking is about joy, creativity, and sharing. So, gather your loved ones, get your hands a little messy, and most importantly, have fun! Let the sweet aroma fill your home, and soon, you’ll have a platter of cookies that will absolutely steal the show. Until next time, happy baking, friends!
Welcome to Ivory Apron! Let’s create something timeless together!
PrintUltimate Chocolate Chip Cookies
Indulge in the warm, gooey goodness of these ultimate chocolate chip cookies that fill your home with delightful aromas.
- Prep Time: 15 minutes
- Cook Time: 11 minutes
- Total Time: 26 minutes
- Yield: 24 servings 1x
- Category: Dessert
- Method: Baking
- Cuisine: American
- Diet: Vegetarian
Ingredients
- 2 1/4 cups all-purpose flour
- 1/2 teaspoon baking soda
- 1 cup unsalted butter, softened
- 3/4 cup granulated sugar
- 3/4 cup brown sugar, packed
- 1 teaspoon salt
- 2 large eggs
- 2 teaspoons vanilla extract
- 2 cups semi-sweet chocolate chips
Instructions
- Preheat your oven to 375°F (190°C).
- Mix the dry ingredients: In a medium bowl, whisk together the flour, baking soda, and salt until fully combined.
- Cream butter and sugars: In a large mixing bowl, beat the softened butter, granulated sugar, and brown sugar together until light and fluffy.
- Add eggs and vanilla: Beat in the eggs one at a time, mixing well after each addition.
- Combine wet and dry ingredients: Gradually add the dry mixture to the wet ingredients, stirring just until combined.
- Fold in chocolate chips.
- Scoop the dough onto a parchment-lined baking sheet, leaving enough space for spreading.
- Bake for 9-11 minutes until edges are golden.
- Cool on the baking sheet for about 5 minutes before transferring to a wire rack.
Notes
Refrigerating the dough for at least 30 minutes helps improve flavor and texture. Use sea salt for a unique flavor twist!
Nutrition
- Serving Size: 1 cookie
- Calories: 150
- Sugar: 10g
- Sodium: 70mg
- Fat: 7g
- Saturated Fat: 4g
- Unsaturated Fat: 2g
- Trans Fat: 0g
- Carbohydrates: 20g
- Fiber: 0.5g
- Protein: 2g
- Cholesterol: 20mg
Keywords: chocolate chip cookies, homemade cookies, baking, dessert, sweet treats
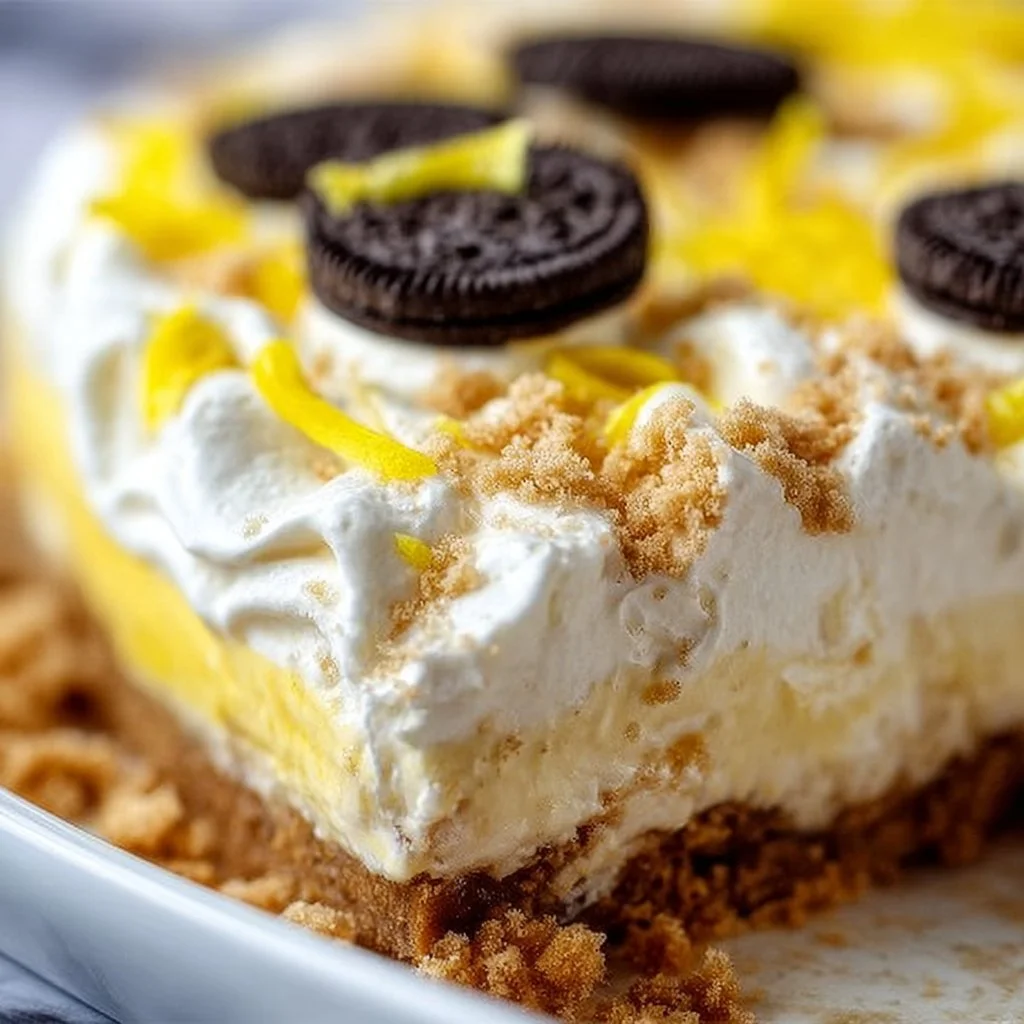
Heavenly Oreo Lemon Dessert
Heavenly Oreo Lemon Dessert: A Delightful Treat to Brighten Your Day
Hello, fellow food enthusiasts! If you’re ready to embark on a culinary journey that harmonizes the rich, chocolatey goodness of Oreos with the zesty, refreshing notes of lemons, then you’ve stumbled upon the perfect recipe! Today, I’m thrilled to share my Heavenly Oreo Lemon Dessert—a sweet indulgence that’s not only super easy to make but also sure to steal the spotlight at your next gathering.
Introduction
Let’s face it—life can sometimes feel a bit heavy, like that feeling when you have too many dishes in the sink or the laundry is piling up. So, what’s a great way to lift your spirits? A beautiful dessert, of course! This Heavenly Oreo Lemon Dessert combines the classic flavors of Oreos with a light, creamy lemon filling that dances on your taste buds. It’s the kind of dessert that brings joy with every bite—perfect for celebrations, picnics, or simply a treat for yourself after a long day.
You know, when I first made this delightful dish, I wasn’t sure how the creamy lemon would pair with the crunchy chocolate crumbs. But after the first taste, I was hooked! The flavors meld so perfectly that they create a blissful medley that’s both indulgent and refreshing. Plus, there’s something unique and playful about using Oreos in a dessert that’s meant to be light and airy. Whether you’re serving it at a dinner party or simply treating yourself on a Tuesday, this dessert will undoubtedly impress!
And here’s the best part: it requires minimal effort and just a few simple ingredients! So, roll up your sleeves and let’s create something extraordinary that’s guaranteed to create beautiful moments around your table.
Personal Story
I remember the first time I rolled out this dessert at a family get-together. My cousin was celebrating her birthday, and I was determined to try a refreshing twist on the traditional chocolate cake. As I whipped together the creamy filling and crushed Oreos, I could hear the cheerful chatter, laughter, and clinking of glasses in the background.
When I brought this dessert out, I was met with curious gazes followed by wide smiles. One bite and everyone was swept away by the refreshing lemon flavor—a perfect complement to the rich, chocolatey crust. That day, my dessert not only stole the show; it also became the highlight of our family gatherings. Now, I can’t make this dessert without thinking of that joyful day filled with love, laughter, and—of course—amazing food. It’s incredible how a simple recipe can create lasting memories!
Ingredients
Here’s what you need for this delightful treat:
-
1 package of Oreo cookies
The star of our crust! You can use regular Oreos or try other varieties like Golden Oreos for a fun twist. -
1/2 cup unsalted butter, melted
This helps bind the crushed Oreos together, creating a deliciously crisp crust. If you’re looking for a dairy-free option, coconut oil works well as a substitute! -
8 oz cream cheese, softened
Adds that rich, creamy texture. For a lighter alternative, consider using Neufchâtel cheese, which has less fat but still delivers on creaminess. -
1/2 cup powdered sugar
Sweetens the filling without adding graininess. If you’re looking for a healthier option, you can substitute it with agave syrup or honey—just adjust the quantity to taste! -
1 cup whipped topping
This gives the dessert a light, fluffy feel. Can’t find ready-made whipped topping? Feel free to whip some heavy cream until soft peaks form—it’ll add an extra luscious touch! -
1 cup lemon juice
The star flavor that brings the zing! Freshly squeezed lemon juice makes a noticeable difference, but you can use bottled juice in a pinch. -
1 tablespoon lemon zest
This enhances the lemon flavor and adds a delightful aroma. Zesting is easy—just make sure to use the outer yellow layer of the lemon without the bitter white pith.
Step-by-Step Instructions
Now that you’ve got your ingredients ready, let’s dive into the cooking process! This dessert is all about simplicity and flavor, so I’ll guide you through each step.
-
Prep the Crust
Start by crushing your Oreo cookies into fine crumbs. You can place them in a zip-top bag and smash them with a rolling pin, or use a food processor—my favorite method! These little beauties will be the foundation of our dessert. Once they’re crushed, transfer them to a mixing bowl. -
Combine with Butter
Pour the melted unsalted butter over the Oreo crumbs. Mix with a fork until the crumbs are evenly coated and resemble wet sand. It’s okay if there are a few larger bits; they’ll add a nice texture! -
Form the Crust
Press the mixture into the bottom of a 9×9-inch square baking pan (or any dish you have on hand). Make sure to pack it firmly; this will help it hold together nicely when you cut into it later. Once done, pop it into the fridge to set while you prepare the filling. -
Make the Filling
In a large mixing bowl, beat the softened cream cheese and powdered sugar together until smooth and creamy. This usually takes about 2-3 minutes. Remember to scrape the sides of the bowl to combine everything thoroughly! -
Add Whipped Topping and Lemon Juice
Gently fold in the whipped topping using a spatula. This helps keep the filling light and airy. Next, add in the lemon juice and zest. Mix until fully combined and oh-so-creamy—this will make your heart sing! -
Spread the Filling
Pour the luscious lemon cream filling over your chilled Oreo crust. Smooth the top with a spatula for a polished finish—you want it to look as good as it tastes! -
Chill to Set
Cover the dish with plastic wrap and chill in the refrigerator for at least 4 hours (or overnight if you can resist!). This allows the filling to firm up and the flavors to meld beautifully. Trust me, the wait will be worth it!
Serving Suggestions
When it’s time to serve, slice this dessert into squares for that perfect bite-sized treat! You can garnish each piece with a sprinkle of extra lemon zest or a dollop of whipped topping for that elegant touch. Pair it with a fresh mint leaf for a pop of color—presentation is key, even for a laid-back dessert!
Recipe Variations
Feeling adventurous? Here are a few delicious twists you can try:
-
Berry Delight: Add a layer of fresh berries (like strawberries or blueberries) on top of your lemon filling before chilling for a fruity burst.
-
Choco-Mint Magic: Mix in a drop of peppermint extract into the filling for a refreshing minty flavor that complements the chocolate crust beautifully.
-
Gluten-Free Option: Use gluten-free Oreo cookies if you want to make this dessert suitable for gluten-sensitive friends or family.
Chef’s Notes
Throughout my culinary journey, I’ve learned that cooking is all about experimentation and fun! The first time I made this dessert, it was just a spontaneous idea after I found a stash of Oreos in my pantry. Now, it’s become a staple in my dessert repertoire! It never fails to evoke fond memories while delighting everyone who takes a bite.
One of my favorite kitchen moments involved me not checking the consistency of the filling before serving it to guests. Let’s just say it turned into an impromptu “scoop your own” dessert night! My friends embraced the sheer chaos and hilarity, turning it into a fun story we still laugh about. Just remember, even if things don’t go as planned, embrace the experience—it’s all part of the journey!
FAQs and Troubleshooting
1. Can I prepare the dessert a day ahead?
Definitely! In fact, doing so allows the flavors to meld and the texture to set perfectly. It’s ideal for parties!
2. Why is my filling too runny?
If your cream cheese wasn’t softened enough, it might not mix well. Make sure to allow it to come to room temperature before starting. If the filling is still too runny, a touch more powdered sugar can help thicken it.
3. How can I store leftovers?
Cover any leftovers (if you’re lucky enough to have some!) tightly in the fridge. They should last for about 3-4 days. Just make sure to enjoy this treat soon—the flavors are best when fresh!
4. Can I freeze this dessert?
Absolutely! Just wrap it tightly in plastic wrap, then foil, and you can freeze it for up to a month. Thaw in the fridge before serving!
Nutritional Info
While focusing on enjoyment and satisfaction when creating this Heavenly Oreo Lemon Dessert, it’s important to acknowledge the nutrition too! Each serving (based on a typical 9×9 dessert) contains approximately:
- Calories: 320
- Total Fat: 18g
- Saturated Fat: 9g
- Carbohydrates: 39g
- Protein: 4g
(Note: These numbers may vary slightly based on specific ingredient brands and amounts used.)
There you have it—an approachable, delightful recipe that celebrates the perfect marriage of chocolate and lemon! I can’t wait for you to try this Heavenly Oreo Lemon Dessert! Each bite is an invitation to savor the moment, whether surrounded by friends or enjoying a quiet evening at home. So tie on your apron, gather your ingredients, and let’s create something beautiful together! Happy cooking! 🍋💕
PrintHeavenly Oreo Lemon Dessert

A delightful dessert that combines the rich chocolatey goodness of Oreos with a zesty lemon filling, perfect for any gathering.
- Prep Time: 15 minutes
- Cook Time: 0 minutes
- Total Time: 240 minutes
- Yield: 9 servings 1x
- Category: Dessert
- Method: Chilling
- Cuisine: American
- Diet: Vegetarian
Ingredients
- 1 package of Oreo cookies
- 1/2 cup unsalted butter, melted
- 8 oz cream cheese, softened
- 1/2 cup powdered sugar
- 1 cup whipped topping
- 1 cup lemon juice
- 1 tablespoon lemon zest
Instructions
- Prep the crust by crushing the Oreo cookies into fine crumbs. Transfer them to a mixing bowl.
- Combine the melted unsalted butter with the Oreo crumbs and mix until evenly coated.
- Form the crust by pressing the mixture into the bottom of a 9×9-inch square baking pan. Chill in the fridge.
- Make the filling by beating the softened cream cheese and powdered sugar until smooth and creamy.
- Add the whipped topping, lemon juice, and lemon zest to the cream cheese mixture and mix until combined.
- Spread the lemon cream filling over the chilled Oreo crust.
- Chill the dessert in the refrigerator for at least 4 hours.
Notes
For a fruity burst, add a layer of fresh berries on top of the lemon filling. Use gluten-free Oreos for a gluten-sensitive option.
Nutrition
- Serving Size: 1 square
- Calories: 320
- Sugar: 19g
- Sodium: 200mg
- Fat: 18g
- Saturated Fat: 9g
- Unsaturated Fat: 6g
- Trans Fat: 0g
- Carbohydrates: 39g
- Fiber: 1g
- Protein: 4g
- Cholesterol: 30mg
Keywords: Oreo dessert, lemon dessert, easy dessert, no-bake dessert, party dessert
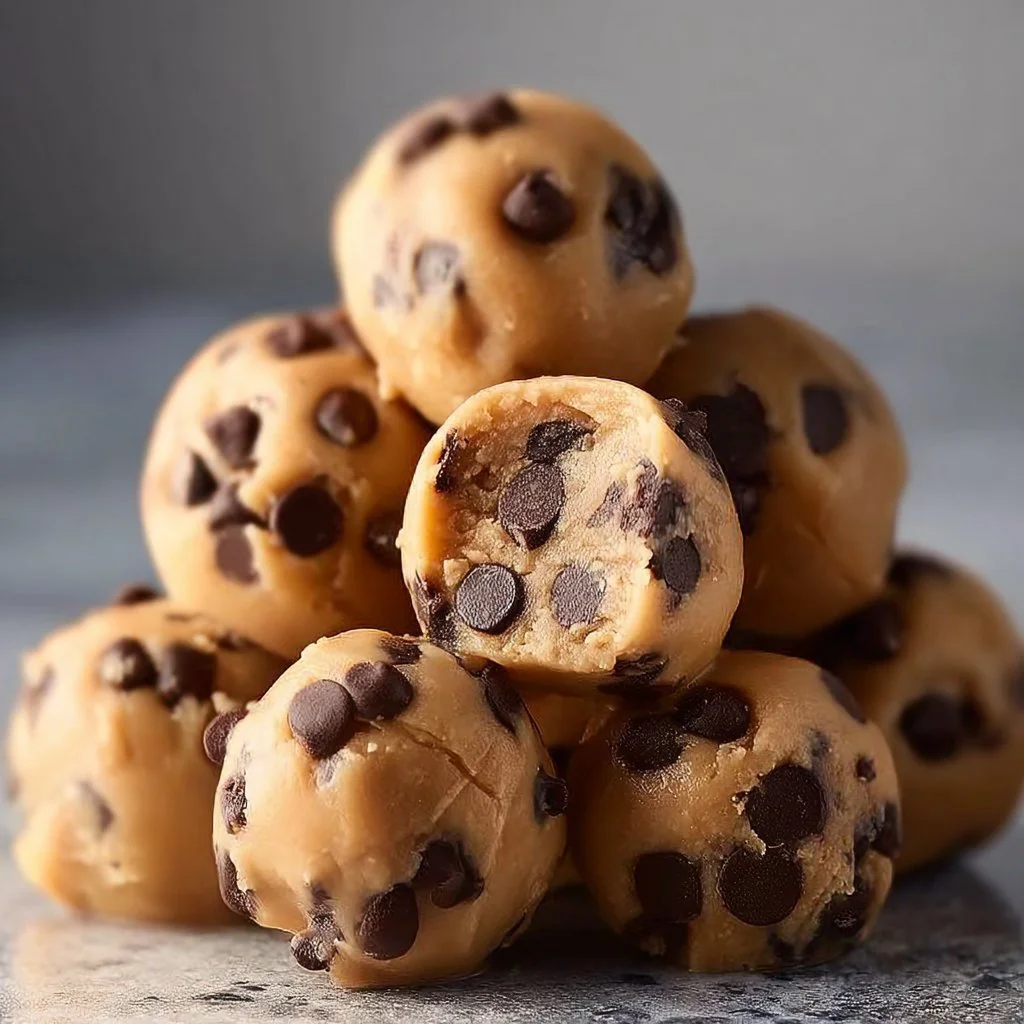
Indulgent No-Bake Cookie Dough Bites Recipe: Easy Dessert Bliss
# Indulgent No-Bake Cookie Dough Bites Recipe: Easy Dessert Bliss

## Introduction

Hello, fellow food lovers! Today, we’re diving into the world of indulgence with a recipe that’s not just easy but downright blissful: No-Bake Cookie Dough Bites! If you’ve ever found yourself craving that nostalgic taste of cookie dough straight from the bowl (you know what I’m talking about!), then hold onto your aprons because this recipe is a game-changer.

Picture this: it’s a Saturday afternoon. The sun is shining through your kitchen window, and there’s nothing on your agenda except indulging in something sweet. These no-bake cookie dough bites come together in a snap! They’re uncomplicated, fun to make, and perfect for satisfying those sweet cravings without turning on the oven.

As I share my tips, tricks, and insights, I want you to feel at home in your kitchen. Let’s whisk together our love for good food and create something delightful that we can share with friends or enjoy all by ourselves (no judgment here!). Ready to roll up those sleeves and create some culinary magic? Let’s do this!

## Personal Story

Whenever I make cookie dough bites, I’m taken back to my childhood—the sweet time when cookie dough was the ultimate treat, and everyone's fingers had a little dough residue. I remember my mom whipping up batch after batch of cookies for family gatherings, and I’d inevitably sneak spoonfuls of that creamy, buttery goodness when her back was turned. We’d laugh at the absurdity of it all, pretending it was our little secret.

One rainy afternoon, with a mix of boredom and hunger, I decided to take matters into my own hands. Armed with my mom’s coveted recipe, I ventured to make cookie dough all by myself. Of course, my first attempt was met with a sprinkle of chaos—flour on the floor, sugar exploding from the bag, and a clear indication that I didn’t quite grasp the concept of “gentle mixing.” Yet, with every failed attempt, to me, the journey was sweeter than the end result. Fast forward years later, and instead of slaving away over a hot oven, I’m bringing you these revamped no-bake bites that capture that same joy and nostalgia.

## Ingredients

Gather your ingredients and let the fun begin! Here’s what you’ll need for these delightful no-bake cookie dough bites:

- **1 stick Unsalted Butter (Softened)**
  This is your foundation for rich, buttery flavor. For a vegan option, simply substitute with dairy-free butter.

- **1/2 cup Light Brown Sugar**
  This adds a hint of caramel flavor, creating that irresistible warmth in the cookie dough. If you're out of brown sugar, you can substitute with granulated sugar mixed with a touch of molasses.

- **2 tablespoons Milk**
  Regular milk or a non-dairy option works great here. The milk helps bring the dough together nicely, so if you're dairy-free, go for almond, soy, or coconut milk; they work perfectly!

- **1 teaspoon Vanilla Extract**
  A must-have for any cookie recipe, this gives depth to the flavor. You can use imitation vanilla in a pinch, but the real stuff elevates the experience.

- **1 cup All-Purpose Flour (Must be heat-treated)**
  Treating your flour is essential for safety since we’re not baking it. To heat-treat, just spread it onto a baking sheet and bake at 350°F (175°C) for about 5-10 minutes, or microwave it in 30-second intervals.

- **1/4 teaspoon Salt**
  This is key for balancing out the sweetness; a touch makes a world of difference!

- **1/2 cup Mini Chocolate Chips**
  Because who doesn’t love chocolate? Mini chips blend in beautifully, offering bites of chocolatey goodness throughout.

- **1 cup Semisweet or Milk Chocolate**
  This will be the outer coating for your bites. Get your favorites here—dark, semisweet, or milk chocolate are all great choices!

- **1 tablespoon Coconut Oil or Vegetable Oil (Optional)**
  Adding this to the chocolate when melting will give it a smoother texture for coating. Plus, it’s an easy way to make the chocolate a little more indulgent.

## Step-by-Step Instructions

Let’s whip up these cookie dough bites and elevate our dessert game!

1. **Prepare Your Flour**: As mentioned, we need heat-treated flour. Spread it on a baking sheet, and pop it in the oven for about 5-10 minutes. This step is crucial to eliminate any potential bacteria since we’re not baking these bites. **Chef Tip**: You can do this ahead of time and store it in an airtight container.

2. **Blend the Butter and Sugar**: In a mixing bowl, cream together your softened unsalted butter and light brown sugar. Using an electric mixer makes this easy-peasy, but don’t worry; a wooden spoon and some elbow grease will do just fine. You want it to be light and fluffy—about 2-3 minutes. **Insider Tip**: Room temperature butter blends better, so don’t forget to take it out of the fridge ahead of time.

3. **Add the Liquid Ingredients**: Mix in the milk and vanilla extract until well combined. This creates a creamy base that will take your cookie bites to the next level.

4. **Incorporate Dry Ingredients**: Once the wet ingredients are mixed together, gradually add in your heat-treated flour and salt. Mix until just combined; this will start looking like the cookie dough you’ve always loved.

5. **Chocolate Chips, Please!**: Stir in the mini chocolate chips. I always find it fun to add just a few extra for good measure—more chocolate, more happiness! **Chef Hack**: If you prefer a chunkier cookie dough, try chopping up a chocolate bar instead.

6. **Chill the Dough**: Now, grab a spatula, and scoop your cookie dough mixture onto a piece of plastic wrap. Form it into a log or a disc shape, wrap it tightly, and pop it in the fridge for 20-30 minutes. This helps the dough firm up a bit, making rolling easier.

7. **Melt the Chocolate**: In a microwave-safe bowl, combine semisweet or milk chocolate with coconut oil (if using). Microwave in 30-second intervals, stirring in between until fully melted and glossy. A double boiler works perfectly if you prefer to melt chocolate the old-school way.

8. **Shape the Bites**: Once the dough is firm, remove it from the fridge. Using a melon baller or your hands, scoop out bite-sized portions and roll them into balls.

9. **Dip Them in Chocolate**: Dip each dough ball into the melted chocolate, using a fork to gently lift it out and let the excess drip off. **Chef Tip**: If you want an even coating, you can double dip after the first coat has set slightly!

10. **Chill Again**: Place the chocolate-coated bites on a baking sheet lined with parchment paper. Refrigerate until the chocolate has set—about 20 minutes more.

11. **Enjoy**: Once set, pop those bites into a cute jar or onto a pretty plate, and watch them disappear in a flash!

## Serving Suggestions

These No-Bake Cookie Dough Bites are perfect for sharing, but they also make a glorious afternoon snack! To serve, arrange them in a stylish bowl or tiered dessert stand, sprinkle with sea salt for a gourmet touch, and garnish with fresh mint or berries for that pop of color. They’re delightful paired with coffee or a glass of milk for a classic treat!

## Recipe Variations

Get creative with these cookie dough bites! Here are some simple twists you can try:

- **Nutty Cookie Dough Bites**: Mix in crushed nuts, like pecans or walnuts, for added crunch.
- **Peanut Butter Heaven**: Swirl in some creamy peanut butter for a rich and delightful flavor.
- **Coconut Bliss**: Add shredded coconut to the dough for a tropical twist.
- **S’Mores Style**: Toss in mini marshmallows and graham cracker crumbs for a fun take on the campfire classic.
- **Gluten-Free Option**: Substitute all-purpose flour with oat flour or a gluten-free all-purpose blend.

## Chef’s Notes

Creating these bites has been such a rewarding experience, blending nostalgia with modern convenience. From my sticky childhood attempts at crafting cookie dough to these no-bake wonders, it’s all about enjoyment in the kitchen. Far too often, we build barriers around cooking, thinking it must be complicated or time-consuming. This recipe serves as a reminder that joy can come from simplicity! Plus, who wouldn't love a treat that's ready in no time?

## FAQs and Troubleshooting

1. **Can I skip the heat-treating step for the flour?**
   - Technically, yes, but it's not recommended! Heating flour kills any potential bacteria, making it safe to consume raw.

2. **How long do these cookie dough bites last?**
   - Store them in an airtight container in the fridge for up to a week. I doubt they’ll last that long, though!

3. **What if my chocolate is too thick for dipping?**
   - If your melted chocolate is too thick, simply add a little bit more coconut oil or vegetable oil until you reach the desired consistency.

4. **Can I freeze these no-bake bites?**
   - Absolutely! They freeze beautifully. Just make sure to allow them to thaw in the fridge before serving for the best texture.

## Nutritional Info

(Per Cookie Dough Bite - Approximately, varies based on size)

- Calories: 120
- Total Fat: 7g
- Saturated Fat: 4g
- Cholesterol: 15mg
- Sodium: 33mg
- Total Carbohydrates: 13g
- Dietary Fiber: 0g
- Sugars: 9g
- Protein: 1g

---

So there you have it — a delightful recipe for No-Bake Cookie Dough Bites that’s guaranteed to make your sweet tooth sing! Whether you’re sharing with friends or keeping them all to yourself (no judgment here!), I hope you find joy in every bite. Let’s make cooking fun, approachable, and absolutely delicious! Happy baking (or should we say, no baking!), and don’t forget to share your creations with me!
Indulgent No-Bake Cookie Dough Bites

Delicious and easy no-bake cookie dough bites that capture the nostalgic taste of cookie dough.
- Prep Time: 10 minutes
- Cook Time: 30 minutes
- Total Time: 40 minutes
- Yield: 12 servings 1x
- Category: Dessert
- Method: No-Bake
- Cuisine: American
- Diet: Vegetarian
Ingredients
- 1 stick Unsalted Butter (Softened)
- 1/2 cup Light Brown Sugar
- 2 tablespoons Milk
- 1 teaspoon Vanilla Extract
- 1 cup All-Purpose Flour (Must be heat-treated)
- 1/4 teaspoon Salt
- 1/2 cup Mini Chocolate Chips
- 1 cup Semisweet or Milk Chocolate
- 1 tablespoon Coconut Oil or Vegetable Oil (Optional)
Instructions
- Prepare Your Flour: Spread it on a baking sheet and pop it in the oven for about 5-10 minutes.
- Blend the Butter and Sugar: Cream together your softened unsalted butter and light brown sugar until light and fluffy.
- Add the Liquid Ingredients: Mix in the milk and vanilla extract until well combined.
- Incorporate Dry Ingredients: Gradually add in your heat-treated flour and salt, mixing until just combined.
- Chocolate Chips, Please!: Stir in the mini chocolate chips.
- Chill the Dough: Scoop your cookie dough mixture onto plastic wrap and form it into a log or disc shape. Refrigerate for 20-30 minutes.
- Melt the Chocolate: Combine semisweet or milk chocolate with coconut oil and microwave in 30-second intervals until fully melted.
- Shape the Bites: Scoop out bite-sized portions of dough and roll them into balls.
- Dip Them in Chocolate: Dip each dough ball into the melted chocolate and let the excess drip off.
- Chill Again: Place the chocolate-coated bites on a parchment-lined baking sheet and refrigerate until the chocolate has set.
- Enjoy: Serve the bites in a cute jar or on a plate and delight in their goodness!
Notes
These cookie dough bites are perfect for sharing or as an afternoon snack. For a gourmet touch, sprinkle with sea salt or garnish with fresh mint.
Nutrition
- Serving Size: 1 bite
- Calories: 120
- Sugar: 9g
- Sodium: 33mg
- Fat: 7g
- Saturated Fat: 4g
- Unsaturated Fat: 2g
- Trans Fat: 0g
- Carbohydrates: 13g
- Fiber: 0g
- Protein: 1g
- Cholesterol: 15mg
Keywords: cookie dough, no-bake dessert, easy sweets, indulgent treats