
One-Pot Creamy Turkey Pumpkin Chili for Busy Weeknights
Creamy Turkey Pumpkin Chili: A Cozy Comfort in a Bowl
Hello, fellow food lovers! Today, I’m so excited to share a dish that perfectly encapsulates the essence of cozy gatherings and heartfelt moments around the dinner table—Creamy Turkey Pumpkin Chili. This comforting bowl of goodness is a delightful blend of flavors that’ll warm your soul, making it a perfect companion for those chilly evenings or a festive post-Thanksgiving feast.
When you think of chili, your mind might go straight to the classic beef version, but let me tell you—ground turkey, especially if you have some savory leftover Thanksgiving turkey, brings a lightness to this dish that’s absolutely irresistible. Plus, the addition of pumpkin lends a subtle sweetness and a lovely creamy texture that elevates traditional chili to a whole new level. Trust me, if you bring this to the table, your guests will be asking for seconds, and maybe even thirds!
A Nostalgic Bowl of Comfort
As a child, one of my favorite autumn traditions was the yearly pumpkin patch trip with my family. We’d spend hours picking out the perfect pumpkins, then come home to warm up with a hearty meal. It was during one of these golden afternoons, while we were waiting for Dad to finish up his famous chili on the stovetop, that I learned the real magic of cooking was in the aromas that wafted through the house and how they swirled together with laughter and stories. The smell of spices dancing through the air, mingling with laughter, became a cherished part of my childhood.
Years later, as I began to venture into my own kitchen, I realized chili became more than just a cold-weather dish; it transformed into my family’s secret love language. I wanted to recreate that comforting feeling, hence the creation of my creamy pumpkin chili. With layers of flavor and warmth, this dish beckons you to gather friends and family around the table, just like those golden autumn afternoons from my childhood.
Ingredients
Let’s chat about what you’ll need to create this delightful chili! Here’s a list to guide you:
-
1.5 lbs ground turkey (or leftover Thanksgiving turkey): A lighter alternative to beef, ground turkey soaks up the flavors beautifully. If you have leftovers, this is a fantastic way to repurpose them!
-
2 carrots (chopped): For a touch of sweetness and color. Feel free to swap with sweet potatoes if you’re craving something heartier.
-
2 stalks celery: Adds crunch and balance. You can easily replace it with bell peppers if you prefer!
-
1 small onion (diced): The flavor base of any good chili! Red onions work well if you want a bit more bite.
-
2 tbsp butter: For richness! You can use olive oil if you want a dairy-free option.
-
15 oz pumpkin puree: A cozy addition that brings a creamy texture. Avoid pumpkin pie filling, which is too sweet and spiced!
-
14.5 oz diced tomatoes: These add acidity and depth. If you want a smokier flavor, try using fire-roasted tomatoes.
-
2 cups chicken broth: Keeps it moist and flavorful. Swap with veggie broth for a lighter touch!
-
15 oz navy beans (drained and rinsed): These add protein and creaminess. Kidney beans are a great substitution if you prefer.
-
15 oz cannellini beans (drained and rinsed): Their velvety texture enhances the dish. You could also use black beans for a fun twist.
-
1 cup fresh spinach leaves (chopped): A healthy touch! Kale works too if you have that on hand.
-
1 tbsp fresh thyme: Brightens the flavors, and dried thyme could be used if fresh isn’t available.
-
2 tbsp chili powder: The heart of the chili! Adjust based on your spice preference.
-
2 tbsp sugar or honey: Cuts the acidity and balances flavors; feel free to leave it out or replace it with maple syrup for a different profile.
-
2 tbsp sour cream: For garnish and creaminess! Greek yogurt is a fantastic substitute.
-
Salt and pepper (to taste): Always season to bring the flavors alive!
Step-by-Step Instructions
Now, let’s get into the kitchen! Here’s how to create your creamy turkey pumpkin chili step by step. Grab your apron, and let’s cook!
-
Sauté the Aromatics: In a large pot or Dutch oven, melt the butter over medium heat. Once bubbly, add the diced onion, chopped carrots, and celery. Sauté for about 5 minutes until everything starts to soften and the onion is translucent. This step builds the flavor base, so take your time!
-
Brown the Turkey: Add the ground turkey to the pot, breaking it up with a spatula. Season generously with salt and pepper. Cook until no longer pink, about 6-7 minutes. If you’re using leftover turkey, just add it when we get to the broth! Browning the turkey gives it a wonderful depth of flavor.
-
Add the Pumpkin and Tomatoes: Stir in the pumpkin puree and diced tomatoes. Mix well and allow it to warm through, about 3-4 minutes. This is where that comforting orange color comes alive!
-
Pour in the Broth: Add the chicken broth, stirring to combine. This is your chili’s liquid gold! Bring everything to a gentle simmer; this should take about 5 minutes.
-
Toss in the Beans: Gently fold in the navy beans and cannellini beans. Don’t forget to add that beautiful chopped spinach! Simmer for an additional 10 minutes to get those flavors melded together beautifully. Stir occasionally, and keep an eye on the texture—you want a nice broth without it being too soupy.
-
Season it Up: Stir in the fresh thyme, chili powder, and sugar or honey. Adjust seasonings as needed, adding more salt, pepper, or chili powder to suit your taste. The key here is to keep tasting—this is where your personal touch comes into play!
-
Finish with Dairy: Right before serving, stir in the sour cream until well incorporated. This is the secret to that creamy texture and richness!
Serving Suggestions
Serve your creamy turkey pumpkin chili in big bowls, perhaps with a dollop of extra sour cream on top, a sprinkle of fresh thyme, and some crusty bread or cornbread on the side. I love to set out toppings like shredded cheese, avocado slices, or even corn chips for a bit of crunch! Remember, presentation is about inviting people to enjoy what you’ve created.
Recipe Variations
Feel free to get creative with your chili! Here are some fun twists:
-
Spicy Kick: Add a diced jalapeño into the aromatic mixture for a spicy twist.
-
Vegetarian Version: Replace the turkey with more beans or roasted vegetables for a hearty vegetarian dish.
-
Sweet & Savory: Toss in a diced apple for a burst of sweetness that complements the pumpkin beautifully.
-
Extra Creamy: Blend some of the chili and then return it to the pot for an ultra-creamy texture.
-
Herb Boost: Experiment with spices like cumin or using fresh rosemary for depth.
Chef’s Notes
Oh, kitchen stories! The other day, I accidentally mistook sugar for salt—and I’m not talking a pinch; I dumped a whole tablespoon in instead! While it wasn’t the best mistake ever (trust me, sugar bombs aren’t ideal for chili), it made everyone laugh and turned into a running joke at the table. Cooking is always an adventure, and that’s a part of the charm!
Over time, this recipe has become a beloved family staple. It’s evolved from a simple pot of basic chili to a full-blown celebration of flavors. Whenever the leaves start falling, you know it’s time to cozy up with a bowl of this goodness.
FAQs and Troubleshooting
Q: Can I freeze this chili?
A: Absolutely! This chili freezes beautifully. Just allow it to cool completely before transferring it to an airtight container. It should keep well for about 3 months.
Q: Why did my chili turn out too watery?
A: If your chili appears too watery, just simmer it a bit longer uncovered. This will allow some of the liquid to evaporate. Alternatively, you can stir in some instant potato flakes for a quick thickening.
Q: Can I use other meats?
A: You can totally switch it up with ground chicken, beef, or even turkey sausage for a different flavor profile. Just make sure to adjust the cooking time based on the meat’s characteristics!
Q: How spicy is this chili?
A: The chili powder adds a gentle warmth, but you control the spice level! Adjust it according to your preference. For a milder version, reduce the chili powder, or add more sugar to balance it out.
Nutritional Info
While the nutritional breakdown will vary based on ingredient choices and serving sizes, this Creamy Turkey Pumpkin Chili is generally a great source of protein, fiber, and packed with vitamins from the veggies. Plus, with its creamy texture, it feels like a treat without all the guilt!
There you have it! Your journey to making an exquisite Creamy Turkey Pumpkin Chili is now complete. I hope you feel inspired to tie on your apron, gather your loved ones, and create beautiful moments around the table. Happy cooking, my friends!
PrintCreamy Turkey Pumpkin Chili

A comforting bowl of creamy turkey pumpkin chili, perfect for cozy gatherings on chilly evenings.
- Prep Time: 15 minutes
- Cook Time: 30 minutes
- Total Time: 45 minutes
- Yield: 4 servings 1x
- Category: Main Course
- Method: Stovetop
- Cuisine: American
- Diet: Gluten-Free
Ingredients
- 1.5 lbs ground turkey
- 2 carrots (chopped)
- 2 stalks celery
- 1 small onion (diced)
- 2 tbsp butter
- 15 oz pumpkin puree
- 14.5 oz diced tomatoes
- 2 cups chicken broth
- 15 oz navy beans (drained and rinsed)
- 15 oz cannellini beans (drained and rinsed)
- 1 cup fresh spinach leaves (chopped)
- 1 tbsp fresh thyme
- 2 tbsp chili powder
- 2 tbsp sugar or honey
- 2 tbsp sour cream
- Salt and pepper (to taste)
Instructions
- Sauté the aromatics: In a large pot, melt the butter over medium heat, add onion, carrots, and celery, sauté for 5 minutes.
- Brown the turkey: Add ground turkey, season with salt and pepper, cook until no longer pink, about 6-7 minutes.
- Add the pumpkin and tomatoes: Stir in pumpkin puree and diced tomatoes, warm through for 3-4 minutes.
- Pour in the broth: Add chicken broth, stirring to combine, bring to a gentle simmer for 5 minutes.
- Toss in the beans: Fold in navy and cannellini beans and spinach, simmer for an additional 10 minutes.
- Season it up: Stir in thyme, chili powder, and sugar or honey, adjust seasonings as needed.
- Finish with dairy: Stir in sour cream right before serving.
Notes
For a vegetarian version, replace turkey with beans or roasted vegetables. Always season to taste.
Nutrition
- Serving Size: 1 serving
- Calories: 350
- Sugar: 6g
- Sodium: 500mg
- Fat: 12g
- Saturated Fat: 5g
- Unsaturated Fat: 7g
- Trans Fat: 0g
- Carbohydrates: 45g
- Fiber: 10g
- Protein: 25g
- Cholesterol: 80mg
Keywords: chili, turkey chili, pumpkin chili, cozy meals, comfort food

One-Pan Creamy Pumpkin Butter Chicken for Fall Weeknights
The Cozy Embrace of Pumpkin Butter Chicken: A Comfort Food Classic
Hello, friends! As the leaves begin to change and the air turns crisp, there’s nothing quite like cozying up in the kitchen and whipping up a comforting dish that warms the soul. Today, we’re diving into a recipe that promises both warmth and flavor: Pumpkin Butter Chicken. It’s the perfect combination of creamy, spiced goodness with a hint of autumnal charm. This dish is all about creating those warm moments with loved ones around the table—so grab your apron, and let’s get cooking!
A Touch of Nostalgia
One of my fondest memories in the kitchen revolves around those first chilly autumn evenings when my family would gather for dinner. My mom would often make chicken curry, filling our home with incredible aromas that wrapped around us like a cozy blanket. It was a dish that sparked laughter, storytelling, and togetherness. Over time, I began to experiment with different flavors and ingredients, and that’s when I stumbled upon the magic of pumpkin in a savory context. Combining pumpkin with traditional spices brought a new level of comfort to our dinner table. I still remember my brother’s surprise when he took his first bite—"Pumpkin in curry? Are you serious?" But once he tasted it, he was sold. That delightful fusion inspired me to create what I now call Pumpkin Butter Chicken, bringing those cherished memories back with every single bite.
Ingredient Rundown
Here’s what you’ll need to create this delightful Pumpkin Butter Chicken:
-
1/2 cup yogurt: I used dairy-free coconut yogurt for a creamy texture, but you can opt for any plain yogurt you love. Greek yogurt is a fantastic option, adding a bit of tang!
-
1 tablespoon minced or grated ginger: This adds warmth and depth. You can also use ground ginger if that’s what you have—just use half the amount.
-
1 tablespoon minced or grated garlic: A must for flavor! If you’re feeling adventurous, try roasted garlic for a sweeter touch.
-
2 teaspoons garam masala: A fragrant spice blend that brings warmth. If you don’t have it, a mix of cinnamon, cumin, and nutmeg will do in a pinch.
-
1 teaspoon ground turmeric: Adds a lovely color and health benefits. If you’re not a fan, you could skip it, but I highly recommend it for its vibrant hue!
-
1 teaspoon chili powder: Adjust according to your spice preference. For a milder version, reduce the quantity or use paprika instead.
-
1 teaspoon salt: Essential for seasoning—but feel free to taste as you go!
-
2 pounds boneless, skinless chicken thighs: Tender and juicy, but chicken breast can work just as well for a leaner option.
-
2 tablespoons coconut oil: For sautéing and adding a rich flavor. You can use any oil you prefer, but coconut oil adds a subtle sweetness.
-
1 white or yellow onion, chopped: A base for flavor. If you’re looking to mix it up, try shallots for a milder taste!
-
2 tablespoons butter or ghee: For creaminess. Use non-dairy butter if you’re avoiding dairy or add more coconut oil.
-
1 1/2 tablespoons minced or grated ginger: Yes, ginger again! It packs a punch, bringing more depth to the dish.
-
1 tablespoon tomato paste: This adds umami and richness. Substitute with a bit of crushed tomatoes if you’re out of paste.
-
1 tablespoon garam masala: More warmth! It’s totally okay to add more if you want a stronger flavor.
-
2 teaspoons curry powder: A gentle nod to the classic curry spices; it’s a versatile option and enhances the flavor beautifully.
-
1 teaspoon ground coriander: Adds a citrusy depth to the dish; if you don’t have it, cumin is a good substitute!
-
1 teaspoon cumin: A spice that pairs perfectly with the earthiness of pumpkin.
-
1 (14 oz) can unsweetened full-fat coconut milk: This gives our dish that creamy, luscious texture. Almond milk won’t work here. Full-fat coconut milk is the star!
-
1 cup (225 g) pumpkin puree: The highlight of our dish! Canned puree is great for convenience, but homemade can elevate the dish if you have time.
Step-by-Step Instructions
Now that we have our ingredients lined up, let’s dive into the cooking process—this is where the magic really happens!
-
Marinate the Chicken:
- In a large bowl, combine the yogurt, minced ginger, minced garlic, garam masala, turmeric, chili powder, and salt. Toss the chicken chunks into the mixture, ensuring they’re well coated. Cover and refrigerate for at least 30 minutes (or overnight, if you’re planning ahead). This step allows the flavors to deeply meld, creating tender, flavorful chicken.
-
Sauté the Aromatics:
- In a large pot or Dutch oven, heat coconut oil over medium heat. Add the chopped onion and sauté until it’s translucent and slightly caramelized, about 5-7 minutes. The smell will be divine! Stir in the ginger and garlic, cooking for another minute until fragrant. Pro tip: Keep your heat moderate to prevent the garlic from burning.
-
Brown the Chicken:
- Add the marinated chicken to the pot, cooking until it’s browned on all sides. This should take about 5-8 minutes. Don’t worry if the chicken isn’t fully cooked through; it will finish cooking later. Browning brings out richer flavors and a beautiful color.
-
The Sauce Adventure:
- Stir in the tomato paste, garam masala, curry powder, coriander, and cumin, letting it toast for a minute. This step intensifies the spices. Next, pour in the coconut milk and pumpkin puree, mixing well to create a luscious sauce.
-
Simmer and Flavor:
- Bring the mixture to a gentle simmer, then reduce heat to low. Cover the pot and let it simmer for about 20-25 minutes, stirring occasionally. This cooking time allows the chicken to become tender and the flavors to deepen! Don’t forget to taste and adjust salt as needed.
-
Finish Strong:
- As the sauce reduces, you’ll notice it thickening into a velvety embrace around the chicken. If it gets too thick, add a splash of water or more coconut milk until it reaches your desired consistency. Once it’s perfectly creamy, it’s time to serve!
Serving Suggestions
Now for one of my favorite parts—plating! Serve your Pumpkin Butter Chicken over a fluffy bed of basmati rice or some warm naan. You can sprinkle fresh cilantro on top for a burst of color and freshness. A drizzle of coconut cream can take it to the next level, both visually and flavor-wise.
Recipe Variations
Here are a few twists to make this dish your own:
-
Add Veggies: Toss in some spinach or kale for added nutrients and color.
-
Spice it Up: If you love heat, add some diced jalapeños or a pinch of cayenne pepper.
-
Switch Proteins: Swap the chicken for shrimp or chickpeas to make it a seafood or vegetarian delight.
-
Coconut-Free Version: Use cashew cream instead of coconut milk for a different creamy base.
-
Sweet and Savory: Add diced apples or raisins for a hint of sweetness that complements the pumpkin.
Chef’s Notes
Making Pumpkin Butter Chicken has become one of my favorite go-to recipes, especially in the fall. I remember one kitchen mishap that still makes me chuckle. I was so focused on adding the pumpkin puree that I accidentally knocked over the entire can. Let’s just say I spent a good twenty minutes cleaning up that orange splatter! Since then, I’ve learned to keep my work area tidy and my ingredients organized. Cooking is a journey, filled with little oopsies that lead to deliciously fun outcomes!
FAQs and Troubleshooting
1. Why is my sauce too thick?
- If your sauce becomes thicker than you’d like during cooking, simply add a splash of water or additional coconut milk to reach your desired consistency.
2. Can I make this ahead of time?
- Absolutely! This dish is perfect for meal prep. Just store it in an airtight container in the fridge for up to three days. Reheat gently on the stove.
3. What’s the best way to store leftovers?
- Keep any leftovers in an airtight container in the fridge for up to four days. To freeze, portion into freezer-safe bags; it can last up to three months!
4. It’s too spicy! What can I do?
- If it turns out spicier than you’d hoped, you can add an extra can of coconut milk to mellow it out and balance the heat.
Nutritional Info
While I won’t bore you with complicated nutritional details, this Pumpkin Butter Chicken is not only delicious but packed with protein, fiber from the pumpkin, and healthy fats from coconut milk. Enjoying a balanced meal doesn’t get much better than this!
So there you have it—my take on a cozy Pumpkin Butter Chicken recipe that blends nostalgia with the beauty of autumn flavors. Whether you’re hosting a gathering or enjoying a quiet night in, this dish is sure to impress and uplift. Remember, cooking is about the joy of sharing, so gather your loved ones around the table, share some laughter, and, of course, enjoy every bite! Happy cooking, my friends!
PrintPumpkin Butter Chicken

A comforting dish that combines creamy pumpkin and traditional spices for a warm autumn meal.
- Prep Time: 30 minutes
- Cook Time: 40 minutes
- Total Time: 70 minutes
- Yield: 4 servings 1x
- Category: Main Course
- Method: Sautéing
- Cuisine: Indian
- Diet: Gluten-Free
Ingredients
- 1/2 cup yogurt
- 1 tablespoon minced or grated ginger
- 1 tablespoon minced or grated garlic
- 2 teaspoons garam masala
- 1 teaspoon ground turmeric
- 1 teaspoon chili powder
- 1 teaspoon salt
- 2 pounds boneless, skinless chicken thighs
- 2 tablespoons coconut oil
- 1 white or yellow onion, chopped
- 2 tablespoons butter or ghee
- 1 1/2 tablespoons minced or grated ginger
- 1 tablespoon tomato paste
- 1 tablespoon garam masala
- 2 teaspoons curry powder
- 1 teaspoon ground coriander
- 1 teaspoon cumin
- 1 (14 oz) can unsweetened full-fat coconut milk
- 1 cup (225 g) pumpkin puree
Instructions
- Marinate the Chicken: In a large bowl, combine the yogurt, minced ginger, minced garlic, garam masala, turmeric, chili powder, and salt. Toss the chicken chunks into the mixture, ensuring they’re well coated. Cover and refrigerate for at least 30 minutes (or overnight, if you’re planning ahead).
- Sauté the Aromatics: In a large pot or Dutch oven, heat coconut oil over medium heat. Add the chopped onion and sauté until it’s translucent and slightly caramelized, about 5-7 minutes. Stir in the ginger and garlic, cooking for another minute until fragrant.
- Brown the Chicken: Add the marinated chicken to the pot, cooking until it’s browned on all sides, about 5-8 minutes.
- Stir in the tomato paste, garam masala, curry powder, coriander, and cumin, letting it toast for a minute.
- Pour in the coconut milk and pumpkin puree, mixing well to create a luscious sauce.
- Bring the mixture to a gentle simmer, then reduce heat to low. Cover the pot and let it simmer for about 20-25 minutes, stirring occasionally.
- Add a splash of water or more coconut milk if the sauce gets too thick. Once creamy, serve!
Notes
Serve over basmati rice or warm naan, and garnish with fresh cilantro and a drizzle of coconut cream.
Nutrition
- Serving Size: 1 serving
- Calories: 500
- Sugar: 7g
- Sodium: 600mg
- Fat: 22g
- Saturated Fat: 17g
- Unsaturated Fat: 5g
- Trans Fat: 0g
- Carbohydrates: 45g
- Fiber: 4g
- Protein: 30g
- Cholesterol: 100mg
Keywords: pumpkin, butter chicken, comfort food, autumn recipes, Indian cuisine
One-Pan 30-Minute Pumpkin Feta Pasta (Weeknight Recipe)
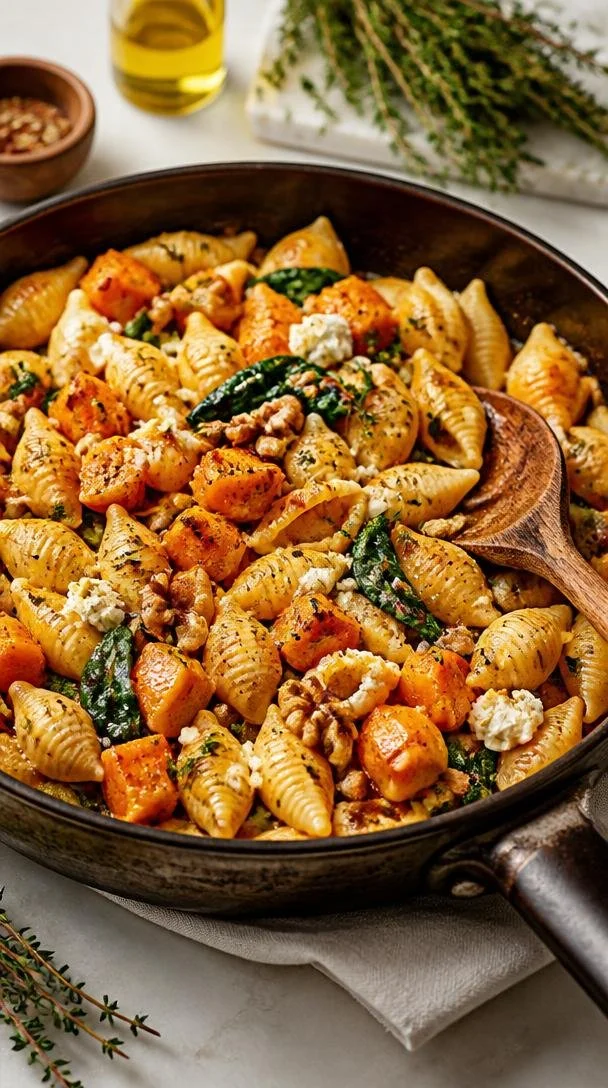
Pumpkin Feta Pasta: A Cozy Fall Delight
Hello, fellow food lovers! Today, I’m excited to share with you a dish that truly embodies the spirit of comfort and warmth as the leaves begin to turn and the air gets a bit cooler. It’s a dish that’s not just about feeding people but about nurturing those you love with flavors that dance on the palate. Let’s dive into making Pumpkin Feta Pasta — a delightful combination of creamy, savory, and slightly sweet, all wrapped up in those adorable pasta shells!
A Little Backstory
I’ll never forget the first time I whipped up a version of this Pumpkin Feta Pasta. It was a crisp autumn evening, the kind that calls for cozy sweaters and hearty meals. I had a few friends over for a casual dinner party, and as I stared at a half a butternut squash sitting on my countertop, inspiration struck. I thought, “What if I roasted this beauty and turned it into a luscious sauce?” The kitchen filled with the scents of garlic and thyme, mingling with laughter and spirited conversation. Watching my friends take that first bite, their eyes lighting up as they experienced that perfect balance of flavors, was a priceless memory. It reminded me of why I started this adventure in the first place — to create beautiful moments around the table.
Ingredients
Now, let’s gather our ingredients! Each element in this dish plays a vital role in creating that soul-warming experience.
- 360g pasta shells: The stars of our dish! Shells hold onto the sauce beautifully. You can substitute with any pasta shape you love. I often go for orecchiette when I want a twist.
- 1kg butternut squash pumpkin: Sweet, nutty, and so versatile! If you’re in a pinch, you can use canned pumpkin puree, but nothing beats fresh roasted squash.
- 8 garlic cloves: Roasted garlic adds a sweet, mellow flavor. If you prefer a stronger profile, feel free to up the amount or use raw garlic, but I recommend roasting for a more delicate taste.
- 180g feta cheese: I adore the creamy, tangy nature of Bulgarian feta here, but feel free to use goat cheese for a different flavor or even vegan feta to keep it plant-based.
- 2 big handfuls baby spinach: Adds a pop of color and a nutritious flair! Kale could work too; just be sure to sauté it a bit longer to soften.
- 1 handful walnuts: A wonderful crunchy contrast! Pecans or even pine nuts can make great substitutions if you want to mix things up.
- ¼ cup extra virgin olive oil: For roasting and bringing everything together! You can swap it with melted butter for a rich flavor kick.
- 8 sprigs of thyme: Fresh herbs elevate any dish! In a pinch, try dried thyme but halve the amount, as it’s more concentrated.
- Salt and pepper to taste: Essential seasonings; don’t skip them!
- Chili flakes (optional): Add some heat according to your taste! A pinch or two will create a lovely warmth.
Step-by-Step Instructions
Let’s get cooking! Trust me; you’ll want to stick around for this.
-
Preheat Your Oven: Start by preheating your oven to 400°F (200°C). A hot oven is key for roasting that butternut squash beautifully!
-
Prepare the Squash: Cut the butternut squash in half lengthwise and scoop out the seeds. Drizzle on some olive oil, sprinkle with salt, pepper, and thyme. Place the squash cut side down on a baking sheet lined with parchment paper. This helps with even cooking and caramelization.
-
Roast the Squash: Pop it in the oven and roast for about 30-40 minutes, or until fork-tender. The sugars will caramelize, creating that lovely depth of flavor.
-
Cook the Pasta: While the squash is roasting, bring a large pot of salted water to a boil. Cook your pasta shells according to package instructions until al dente. Remember to save about a cup of pasta water before draining! It’s liquid gold for binding our sauce.
-
Sauté the Garlic: In a large skillet, drizzle in some olive oil and heat it over medium heat. Toss in the whole garlic cloves and sauté them until they’re golden and fragrant. This usually takes about 5-7 minutes. It’s amazing how the aroma fills your kitchen and sets the stage for what’s coming!
-
Combine It All: Once the squash is done roasting, scoop the flesh into a blender or food processor along with the sautéed garlic. Add in your feta cheese, maybe half the spinach, and a splash of that reserved pasta water. Blend until smooth and creamy. This is the magic sauce!
-
Mix the Pasta: In the skillet, combine the pasta shells and the pumpkin sauce. Stir to coat the pasta thoroughly. If it appears too thick, you can always add more pasta water to achieve your desired consistency. Season with salt, pepper, and chili flakes according to your taste.
-
Add Spinach and Walnuts: Toss in the remaining spinach and walnuts. The heat will wilt the spinach just perfectly, providing that fresh element to our dish.
-
Serve Up the Love: Take a moment to appreciate your creation! Plating is everything!
Serving Suggestions
Serve your Pumpkin Feta Pasta warm, garnished with a sprinkle of extra feta, a drizzle of olive oil, and perhaps some more chili flakes for that extra flair. Adding fresh thyme leaves on top can really elevate the presentation.
Recipe Variations
Here are a few ways to mix things up:
- Creamy Vegan Option: Replace feta with a cashew cream or silken tofu blended with nutritional yeast for a rich, creamy texture.
- Add Protein: Toss in some roasted chicken or sautéed shrimp for a heartier entrée!
- Savory Swaps: Try swapping out the walnuts for crispy prosciutto or bacon bits for a savory crunch.
- Herb Infusion: Experiment with herbs — sage offers a lovely autumnal touch, while basil can brighten up the flavors.
- Add a Twist: For a spicy kick, toss in some roasted red pepper or sun-dried tomatoes to the sauce before blending.
Chef’s Notes
I love how this recipe has evolved over the years. Initially, I made a simple pumpkin sauce, but it felt like it needed a vibrant addition. Enter feta cheese! The moment I introduced that tangy creaminess, the dish transformed into something truly special. Plus, the colors remind me of a warm pumpkin patch, always inspiring me to gather friends around my table.
And a funny little kitchen mishap: the first time I made this, I forgot to reserve pasta water and nearly had a panic moment! I ended up using some chicken broth instead, which actually added another layer of flavor! So, if you forget to save that pasta water, don’t fret — improvise!
FAQs and Troubleshooting
Q: Can I use other pasta shapes?
Absolutely! Shells, fusilli, or even spaghetti work wonderfully. Just keep an eye on the cooking time to achieve the perfect texture.
Q: What if I don’t like feta?
No problem! Swap it with goat cheese, ricotta, or even a vegan cheese alternative.
Q: Is this dish easy to reheat?
Definitely! It stores well in an airtight container in the fridge for up to three days. When reheating, add a splash of water or stock to revive that creamy texture.
Q: Can I prep this dish in advance?
You can roast the squash and prepare the sauce ahead of time. Store in the fridge and cook the pasta fresh when you’re ready to eat!
Nutritional Info
(If applicable, you might want to calculate the nutrition based on specific ingredients used. Alternatively, you can skip this section if you prefer!)
Wrap-Up
I hope this Pumpkin Feta Pasta becomes a staple in your kitchen as it has in mine! Cooking is about creativity, experimentation, and connection. It’s about filling your space with warmth — and nothing says that better than a dish that nourishes both body and soul. So, grab your apron, gather your loved ones, and let’s create some delicious memories together. Cheers to cooking with intention!
PrintPumpkin Feta Pasta

A delightful combination of creamy, savory, and slightly sweet pumpkin and feta cheese, wrapped in pasta shells, perfect for a cozy fall meal.
- Prep Time: 15 minutes
- Cook Time: 40 minutes
- Total Time: 55 minutes
- Yield: 4 servings 1x
- Category: Main Course
- Method: Baking
- Cuisine: Italian
- Diet: Vegetarian
Ingredients
- 360g pasta shells
- 1kg butternut squash pumpkin
- 8 garlic cloves
- 180g feta cheese
- 2 big handfuls baby spinach
- 1 handful walnuts
- ¼ cup extra virgin olive oil
- 8 sprigs of thyme
- Salt and pepper to taste
- Chili flakes (optional)
Instructions
- Preheat your oven to 400°F (200°C).
- Prepare the butternut squash by cutting it in half lengthwise and scooping out the seeds.
- Drizzle olive oil, sprinkle with salt, pepper, and thyme, then place the squash cut side down on a baking sheet.
- Roast for about 30-40 minutes, until fork-tender.
- Cook pasta shells in a large pot of salted water until al dente, saving about a cup of pasta water.
- Sauté garlic cloves in olive oil over medium heat until golden and fragrant, about 5-7 minutes.
- Combine the roasted squash, sautéed garlic, feta cheese, and half the spinach in a blender, and blend until smooth.
- Mix the pasta shells with the pumpkin sauce until well-coated, adding reserved pasta water as needed.
- Add remaining spinach and walnuts, tossing to combine.
- Serve warm with extra feta and a drizzle of olive oil.
Notes
For a vegan option, replace feta with cashew cream or silken tofu. This dish can be prepped ahead by roasting the squash and preparing the sauce in advance.
Nutrition
- Serving Size: 1 serving
- Calories: 350
- Sugar: 5g
- Sodium: 400mg
- Fat: 12g
- Saturated Fat: 4g
- Unsaturated Fat: 6g
- Trans Fat: 0g
- Carbohydrates: 45g
- Fiber: 3g
- Protein: 15g
- Cholesterol: 30mg
Keywords: pumpkin pasta, feta cheese, fall recipes, cozy meals, vegetarian pasta
Seasonal Pumpkin Pecan Cobbler (Quick Prep, Budget-Friendly)
A Cozy Slice of Fall: Pumpkin Pecan Cobbler Recipe
Hello, fellow food enthusiasts! Today, we’re diving into a delicious realm that celebrates one of the best flavors of the season: pumpkin! As the leaves turn golden and the air gets crisp, there’s nothing quite like the comforting aroma of freshly baked goods wafting through your home. Enter my Pumpkin Pecan Cobbler — a delightful dessert that strikes the perfect balance between cozy and indulgent!
This charming dish takes the sweet, warm goodness of pumpkin pie and adds a twist with a crunchy pecan topping. It’s a wonderful way to embrace autumn, not only because it tastes like a hug in dessert form but also because it evokes fond memories of family gatherings, laughter around the kitchen table, and the enchanting scent of cinnamon and nutmeg. Let’s roll up our sleeves and create this seasonal masterpiece together!
A Little Trip Down Memory Lane
Growing up, the arrival of fall always meant two things in my house: the changing colors of the leaves and the sweet scent of pumpkin pie. My grandmother had a wonderful knack for baking, and every year, she’d invite us to her sunny kitchen, which was filled with the warmth of her oven and the sweet aroma of holiday spices.
One of my favorite memories is when she introduced me to her Pumpkin Pecan Cobbler. As a little girl, I watched in awe as she whisked together caramel-colored pumpkin puree, fragrant spices, and blended them to create something magical. I remember asking questions a mile a minute as she gracefully poured it all into the baking dish. The best part? The anticipation of waiting for the cobbler to finish baking was absolutely torturous, but oh so worth it!
Every gooey, pumpkin-spiced bite was like indulging in autumn itself. This dessert wasn’t just food; it was a celebration of family, laughter, and love. It’s this experience that inspired me to perfect my own version of Pumpkin Pecan Cobbler, bringing that tradition into my home and sharing it with all of you. So, let’s rekindle those memories and create some new ones!
Ingredients You’ll Need
Here’s what you’ll need to whip up this delightful dessert:
-
1 cup + 3 tablespoons all-purpose flour: The base of our cobbler. You can use whole wheat flour for a nuttier flavor or gluten-free all-purpose flour as a substitute.
-
2 teaspoons baking powder: This helps our cobbler rise beautifully. Be sure it’s fresh for the best results!
-
1/2 teaspoon salt: A must to balance the sweetness and enhance the flavors.
-
3/4 cup granulated sugar: This keeps the cobbler sweet, but you could reduce the amount to taste or use coconut sugar for a healthier option.
-
1 teaspoon cinnamon: The warm, comforting spice that makes us think of fall.
-
1/2 teaspoon nutmeg: Uplifts the flavor profile and adds a warm aroma.
-
1/2 teaspoon cloves: Just a pinch adds a nice depth of flavor.
-
1/2 cup pumpkin puree: The star of our dish! Try to use pure pumpkin puree, not pumpkin pie filling, for better control over the sweetness.
-
1/4 cup milk: This adds moisture to the batter. You can swap it out for almond milk or oat milk for a dairy-free option.
-
1/4 cup melted butter or vegetable oil: This keeps everything moist. Use coconut oil for a subtle flavor jump!
-
1 1/2 teaspoons vanilla: Adds warmth and depth to the dish.
-
1/2 cup granulated sugar (for the topping): This acts as a sweet, crunchy topping that contrasts perfectly with the pumpkin filling.
-
1/2 cup brown sugar: Adds a hint of molasses flavor and extra moisture to the topping.
-
1/4 cup chopped pecans: They bring a delightful crunch and contrast. You can use walnuts if you prefer!
-
1 1/2 cups very hot water: This is poured on top before baking to create a gooey, custard-like layer.
Step-by-Step Instructions
Now, let’s get our kitchen warmed up and dive into the cooking process!
-
Preheat Your Oven: Start by preheating your oven to 350°F (175°C). Getting your oven ready early ensures an even bake for your cobbler.
-
Mix the Dry Ingredients: In a large mixing bowl, combine the 1 cup + 3 tablespoons all-purpose flour, 2 teaspoons baking powder, 1/2 teaspoon salt, 3/4 cup granulated sugar, 1 teaspoon cinnamon, 1/2 teaspoon nutmeg, and 1/2 teaspoon cloves. Whisk together until well combined.
Tip: Using a whisk helps to break up any clumps and ensures that the baking powder is evenly distributed for the best rise!
-
Combine the Wet Ingredients: In another bowl, mix the pumpkin puree, 1/4 cup of milk, 1/4 cup melted butter (or oil), and 1 1/2 teaspoons vanilla. Stir well until it all comes together.
Chef Insight: Use room temperature ingredients for a smoother batter. It also helps to reduce lumps when combining.
-
Create the Batter: Pour the wet mixture into the bowl with dry ingredients and gently fold everything together until just combined. Be careful not to overmix; a few lumps are perfectly fine!
-
Prepare the Baking Dish: Pour the batter into a greased 9×13-inch baking dish. Spread it evenly with a spatula.
-
Make the Topping: In a small bowl, mix the 1/2 cup granulated sugar, 1/2 cup brown sugar, and 1/4 cup chopped pecans. Sprinkle this mixture evenly over the batter in the baking dish.
-
Pour the Hot Water: Carefully pour the 1 1/2 cups of very hot water over the cobbler without stirring. Yes, it will look a bit unusual, but trust me; this step creates that wonderful custard-like layer on the bottom!
Little Chef Hack: If you want to minimize splashes, you can use a ladle or pour from a measuring cup to gently distribute the water.
-
Bake: Slide the baking dish into your preheated oven and let it bake for about 45-50 minutes, or until the top is golden and set.
Chefs’ Insider Tip: If your oven tends to run hot, keep an eye on it! You want those edges crispy and the center slightly jiggly.
-
Cool and Serve: Allow the cobbler to cool for at least 15 minutes before serving. This allows the flavors to settle and the cobbler to firm up a bit.
Plating Your Masterpiece
For a beautiful presentation, serve your Pumpkin Pecan Cobbler warm in individual bowls with a generous scoop of vanilla ice cream on top! The creamy, cold ice cream juxtaposes perfectly with the warm, gooey cobbler. You can also drizzle a little caramel sauce or sprinkle some extra pecans for that gorgeous finishing touch.
Recipe Variations
Want to mix it up a bit? Here are some fun twists to try:
-
Spiced Rum Infusion: Add a tablespoon of your favorite dark rum or spiced rum to the wet ingredients for that extra flavor kick.
-
Cranberry Burst: Toss in a handful of fresh or frozen cranberries into the batter before baking for a tangy contrast.
-
Nutty Chocolate Chunk Cobbler: Mix in some dark chocolate chunks in place of pecans for a decadent twist that’s absolutely fantastic.
-
Dairy-Free Delight: Swap out milk and butter entirely with coconut milk and coconut oil for a delightful dairy-free variation.
Chef’s Notes
When I first embarked on perfecting this Pumpkin Pecan Cobbler, I had a few failed attempts — trust me, lumpy batter is no fun. But in those early trials, I learned a vital lesson: each mistake brought me closer to understanding the heart of the dish. This dessert is all about balance and connection. Every time I return to it, I can’t help but smile and think of my grandmother. It’s more than just a recipe; it’s a legacy filled with love and warmth. So don’t be afraid to make it your own!
FAQs and Troubleshooting
Q: My batter seems too thick. What did I do wrong?
A: This could be due to over-measuring your flour. Always spoon the flour into your measuring cup before leveling it off, rather than scooping directly from the bag!
Q: Can I make this ahead of time?
A: Absolutely! You can prepare the batter and toppings ahead, cover with plastic wrap, and keep it in the fridge. Just pour the hot water right before baking.
Q: What can I substitute for pumpkin puree?
A: You can use butternut squash puree or even apple sauce for a different flavor profile. Just keep in mind it will change the overall taste!
Q: My cobbler is too soggy! What happened?
A: This might occur if too much water was added or if it wasn’t baked long enough. Make sure to measure water accurately and allow sufficient baking time for that perfect texture.
Nutritional Information
(If applicable, you may want to add this at the end.)
While this recipe is all about the joy of cooking and community, it’s always good to be mindful of what goes into our bodies. Remember, balance is key!
So there you have it, a guide to creating a delightful Pumpkin Pecan Cobbler that not only tastes divine but also weaves wonderful memories and stories in every bite. Now, let’s gather around our tables and make some memories together. Cheers to cozy kitchens and loved ones! Happy baking!
PrintPumpkin Pecan Cobbler
A delightful dessert that combines the sweet warmth of pumpkin pie with a crunchy pecan topping.
- Prep Time: 15 minutes
- Cook Time: 50 minutes
- Total Time: 65 minutes
- Yield: 8 servings 1x
- Category: Dessert
- Method: Baking
- Cuisine: American
- Diet: Vegetarian
Ingredients
- 1 cup + 3 tablespoons all-purpose flour
- 2 teaspoons baking powder
- 1/2 teaspoon salt
- 3/4 cup granulated sugar
- 1 teaspoon cinnamon
- 1/2 teaspoon nutmeg
- 1/2 teaspoon cloves
- 1/2 cup pumpkin puree
- 1/4 cup milk
- 1/4 cup melted butter or vegetable oil
- 1 1/2 teaspoons vanilla
- 1/2 cup granulated sugar (for topping)
- 1/2 cup brown sugar
- 1/4 cup chopped pecans
- 1 1/2 cups very hot water
Instructions
- Preheat Your Oven: Start by preheating your oven to 350°F (175°C).
- Mix the Dry Ingredients: In a large mixing bowl, combine flour, baking powder, salt, granulated sugar, cinnamon, nutmeg, and cloves. Whisk together until well combined.
- Combine the Wet Ingredients: In another bowl, mix pumpkin puree, milk, melted butter (or oil), and vanilla. Stir well until it all comes together.
- Create the Batter: Pour the wet mixture into the bowl with dry ingredients and gently fold together until just combined.
- Prepare the Baking Dish: Pour the batter into a greased 9×13-inch baking dish and spread it evenly.
- Make the Topping: In a small bowl, mix granulated sugar, brown sugar, and chopped pecans. Sprinkle this evenly over the batter.
- Pour the Hot Water: Carefully pour the hot water over the cobbler without stirring.
- Bake: Slide the baking dish into your preheated oven and bake for about 45-50 minutes, or until golden and set.
- Cool and Serve: Allow the cobbler to cool for at least 15 minutes before serving.
Notes
Serve warm with a scoop of vanilla ice cream and drizzle with caramel for an indulgent treat.
Nutrition
- Serving Size: 1 serving
- Calories: 350
- Sugar: 25g
- Sodium: 200mg
- Fat: 14g
- Saturated Fat: 7g
- Unsaturated Fat: 5g
- Trans Fat: 0g
- Carbohydrates: 51g
- Fiber: 3g
- Protein: 5g
- Cholesterol: 30mg
Keywords: pumpkin, cobbler, dessert, fall recipes, Thanksgiving desserts
Ingredient No-Bake Crustless Pumpkin Pie (Seasonal)
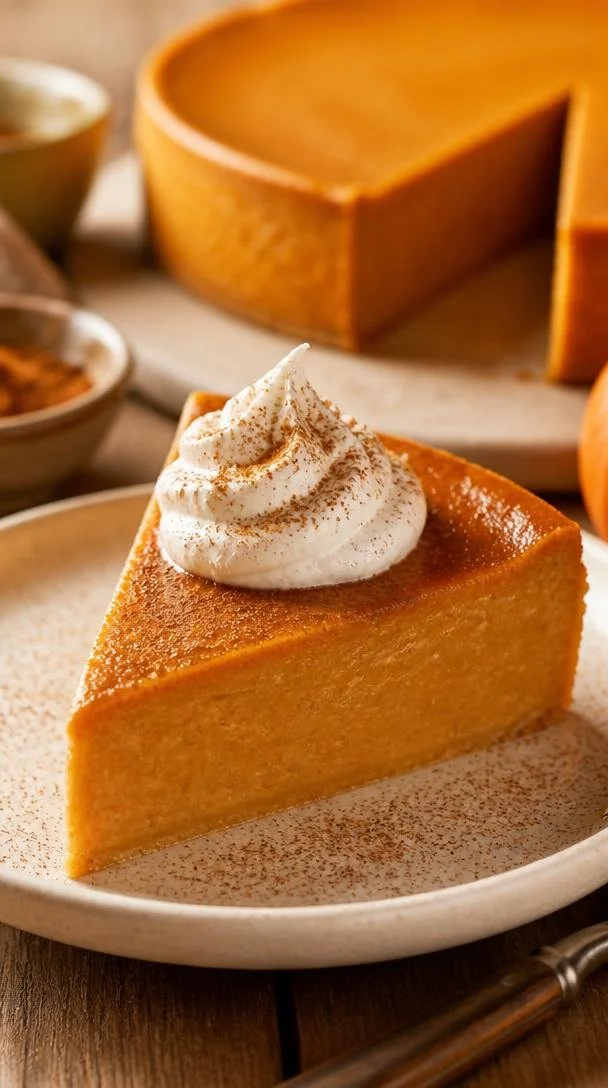
Crustless Pumpkin Pie: A Celebration of Flavor and Simplicity
Hello, my lovely foodies! 🧡 If you’re anything like me, the fall season sparks an undeniable craving for warm, comforting flavors, and what embodies this cozy vibe better than pumpkin pie? Today, I’m thrilled to share my version of a crustless pumpkin pie that’s not only easy to make but also lets the delightful pumpkin flavor shine through without any fuss.
Now, don’t get me wrong—I love a good pie crust. But sometimes, life gets busy, and a crustless creation can save time without skimping on flavor. This recipe is perfect for those moments, reminding us that sometimes simplicity is the key to success.
A Slice of Nostalgia
As a kid, I can still picture my grandmother in her bright yellow kitchen, whipping up her signature pumpkin pie every Thanksgiving. The smell of spices wafting through the air was our invitation to gather around the table. I remember sneaking bites of the filling before it even hit the oven. It was creamy, sweet, and had just the right amount of spice—perfection in a bite!
I remember asking her how she made it, and she smiled, her eyes twinkling as she said, “It’s all about the pumpkins, darling.” That moment stuck with me, and it ignited my curiosity about cooking. Today, I hope to take you back to that feeling of warmth and nostalgia with this crustless version, where we focus on what matters most—the flavor!
Ingredients
Here’s what you’ll need to create this dreamy crustless pumpkin pie. Let’s take a closer look at our star players:
-
1 can (15 oz) pumpkin puree
Pumpkin puree is the heart of this dish. It brings that warm, earthy flavor we love. If you want to go fancy, you can roast and puree your own pumpkins, but canned works just as well—trust me! -
1 cup evaporated milk
This adds a creamy texture without the excess fat of heavy cream. Whole milk can be a substitute if necessary; just know you might lose a bit of that richness. -
3/4 cup sugar
Sweetness is essential, but feel free to reduce this a tad or use maple syrup or honey for a natural alternative! -
3 large eggs
Eggs help bind everything together and give the pie a fluffy texture. If you’re looking for an egg-free version, consider substituting with flax eggs (3 tablespoons water mixed with 1 tablespoon flaxseed meal = 1 egg). -
1 teaspoon vanilla extract
Vanilla enhances the overall flavor, making it even more delightful. If you’re feeling adventurous, try almond extract for a unique twist. -
1 teaspoon ground cinnamon
Cinnamon is the classic spice for pumpkin pie, adding warmth and sweetness. You can also use freshly grated nutmeg if you have it on hand for an extra kick! -
1/2 teaspoon ground ginger
Ginger offers a lovely warmth. If you prefer more zing, fresh ginger can also be an invigorating substitute—just grate a little in! -
1/4 teaspoon ground nutmeg
This spice truly elevates the flavor profile. Don’t skip it! If you’re a nutmeg lover, a bit more won’t hurt! -
1/2 teaspoon salt
Salt balances the sweetness and enhances the flavors. A touch of sea salt can add a delightful contrast!
Step-by-Step Instructions
Ready to create some kitchen magic? Let’s dive right into the step-by-step process of bringing this crustless pumpkin pie to life!
-
Preheat your oven: Start by preheating your oven to 350°F (175°C). This is crucial because a properly preheated oven ensures even baking. Nobody wants a soggy pie!
-
Mix the base ingredients: In a large mixing bowl, combine your canned pumpkin puree, evaporated milk, and sugar. Use a whisk to blend everything together until smooth. Pro tip: If you want a super creamy texture, you can use a hand mixer for this step!
-
Add the eggs: Crack in your three large eggs and whisk again until fully incorporated. Eggs are essential for giving your pie that fluffy, custard-like texture. If your batter seems a bit thick at this point, don’t worry—it’s supposed to be!
-
Spice it up: Time to incorporate those spices! Add in the vanilla extract, ground cinnamon, ground ginger, ground nutmeg, and salt. Whisk vigorously for about a minute to ensure that the spices are evenly distributed. Smelling that aromatic blend yet? I absolutely love this part!
-
Prepare the baking dish: Lightly grease a pie dish (or an 8-inch square baking dish, if you prefer). I often sprinkle a bit of cinnamon and sugar on the greased surface for an extra flavor boost and a delightful caramelization.
-
Pour the batter: Pour your pumpkin mixture into the prepared dish. Make sure to evenly distribute it; a well-centered pie will bake more evenly.
-
Bake it: Pop it in the preheated oven and bake for 45-50 minutes. You’ll know it’s ready when the edges are set and the center has a slight jiggle (think of it as the pie’s little dance!).
-
Let it cool: Once baked, let your pie cool at room temperature. This step is essential for it to set up properly. It’ll also allow all those beautiful flavors to meld together.
-
Chill it: After cooling on the counter for about an hour, place it in the refrigerator to chill. Serve it cold for that classic pie experience!
Serving Suggestions
When it comes to serving, a simple yet elegant presentation goes a long way! Slice your pie into generous wedges and serve it on a beautiful plate. A dollop of freshly whipped cream or a scoop of vanilla ice cream on top can add that finishing touch, making it feel extra special. Drizzle with caramel sauce or sprinkle some crushed pecans for an elegant twist—but let’s be real, that creamy pumpkin filling packs all the flavor you need!
Recipe Variations
If you’re feeling adventurous and want to jazz up this crustless pumpkin pie, here are a few variations to consider:
- Chocolate swirl: Add melted chocolate to half of the batter before pouring it into the dish for a rich twist.
- Maple pecan topping: Stir in chopped pecans and a little maple syrup into the mix for a nutty sweetness.
- Dairy-free: Substitute the evaporated milk with coconut milk for a tropical flair.
- Spiced chai: Add chai spice or more ginger and cinnamon for a warm, spiced flavor.
- Pumpkin spice latte: Incorporate some brewed coffee for an exciting coffee-flavored version!
Chef’s Notes
This crustless pumpkin pie has been a cherished recipe over the years, evolving with my tastes and cooking style. I’ve played with the spices, tried different type of sweeteners, and even experimented with various cooking methods. But the essence remains the same—creating something that warms the heart and invites others to gather.
Funny story—one Thanksgiving, I decided to impress my friends by making two versions: one traditional crust pie and this crustless beauty. Let’s just say the crustless pie vanished before the traditional one! It’s a testament that honesty in flavor doesn’t need an elaborate presentation.
FAQs and Troubleshooting
1. Why is my pie too watery?
If your pie has excess moisture, it might be due to the pumpkin puree. Make sure to use good-quality pumpkin puree that’s thick, or try draining it a bit before mixing.
2. How do I know when it’s done?
The center should be set, with a slight jiggle (not slump) when tapped. If it seems too wobbly, bake for a few more minutes.
3. Can I freeze this pie?
Absolutely! Allow the pie to cool completely and then wrap it tightly with plastic wrap, followed by aluminum foil. Thaw it in the refrigerator before serving.
4. Can I use fresh pumpkin instead of canned?
Yes! Just make sure to cook and puree the pumpkin first. This may require more effort, but fresh adds a lovely depth of flavor!
Nutritional Info
While I typically don’t dive deep into nutritional info here, a slice of this crustless pumpkin pie offers a comforting balance of flavors, making it a delightful treat without the heaviness of traditional pies.
Now, dear friends, it’s time to put on your aprons and whip up this delightful crustless pumpkin pie! I can’t wait to hear how it turns out for you! Remember, cooking is an adventure – enjoy every moment of it! 🧡
PrintCrustless Pumpkin Pie
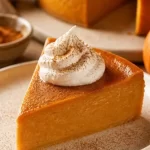
A simple, yet delicious crustless pumpkin pie that highlights the warm flavors of fall.
- Prep Time: 15 minutes
- Cook Time: 50 minutes
- Total Time: 65 minutes
- Yield: 8 servings 1x
- Category: Dessert
- Method: Baking
- Cuisine: American
- Diet: Vegetarian
Ingredients
- 1 can (15 oz) pumpkin puree
- 1 cup evaporated milk
- 3/4 cup sugar
- 3 large eggs
- 1 teaspoon vanilla extract
- 1 teaspoon ground cinnamon
- 1/2 teaspoon ground ginger
- 1/4 teaspoon ground nutmeg
- 1/2 teaspoon salt
Instructions
- Preheat your oven to 350°F (175°C).
- Mix the canned pumpkin puree, evaporated milk, and sugar in a large mixing bowl until smooth.
- Add in the three large eggs and whisk until fully incorporated.
- Spice it up by incorporating the vanilla extract, ground cinnamon, ground ginger, ground nutmeg, and salt. Whisk vigorously.
- Prepare a pie dish by lightly greasing it.
- Pour the pumpkin mixture into the prepared dish.
- Bake for 45-50 minutes until the edges are set and the center jiggles slightly.
- Let it cool at room temperature before chilling it in the refrigerator.
Notes
Serve with whipped cream or ice cream on top for an extra special touch.
Nutrition
- Serving Size: 1 slice
- Calories: 300
- Sugar: 25g
- Sodium: 200mg
- Fat: 10g
- Saturated Fat: 4g
- Unsaturated Fat: 6g
- Trans Fat: 0g
- Carbohydrates: 40g
- Fiber: 2g
- Protein: 6g
- Cholesterol: 80mg
Keywords: pumpkin pie, crustless pie, fall dessert, Thanksgiving dessert
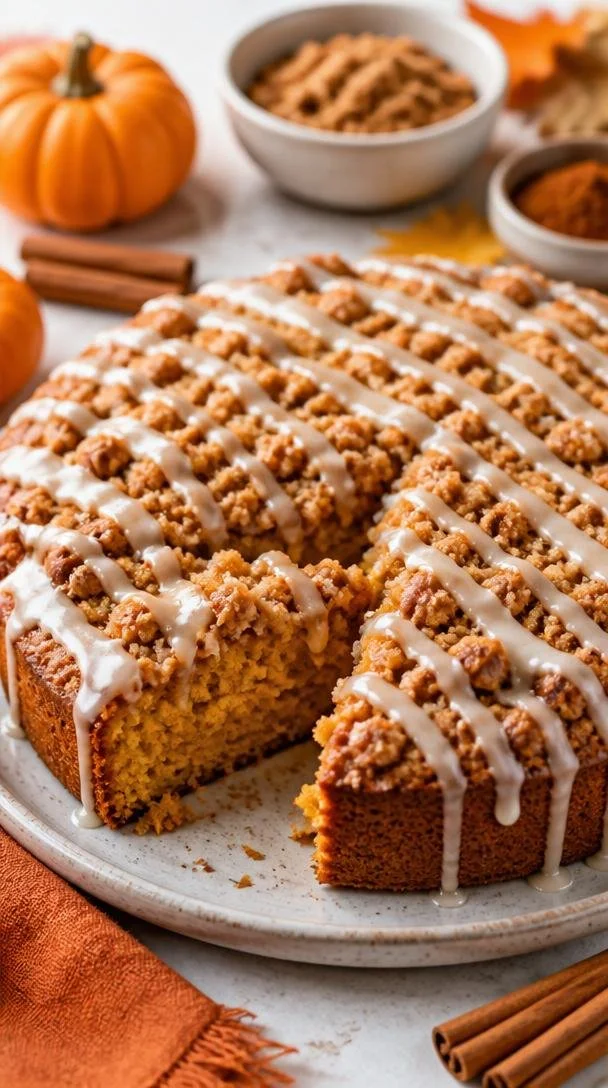
Minute Cinnamon Streusel Pumpkin Coffee Cake (Fall Recipe)
The Perfect Cinnamon Streusel Pumpkin Coffee Cake Recipe
Hello, lovely foodies! Welcome back to my kitchen! Today, I’m excited to share one of my all-time favorite recipes that perfectly marries fall flavors with that comforting, coffee shop vibe: Cinnamon Streusel Pumpkin Coffee Cake. Imagine the aroma of warm spices wafting through your home, wrapping you in a cozy hug while you enjoy a slice with your morning coffee or an afternoon tea. Sounds delightful, doesn’t it?
This cake is not only delicious but also so simple to make. It’s perfect for weekend brunches, holiday gatherings, or just because you’re craving something sweet and spicy. Trust me, this dreamy creation is going to be a staple in your recipe collection!
A Slice of Nostalgia
Let me take you back to my childhood for a moment—a lovely autumn day in my grandmother’s kitchen. I can still picture her standing at the counter, her hands dusted with flour, as she brought to life her famous pumpkin coffee cake. The aroma of cinnamon and nutmeg dancing in the air made the whole house feel like a warm embrace.
I remember sneaking spoonfuls of her special streusel topping, feeling like a little chef in training. We’d sit at her cozy kitchen table, mugs of hot apple cider beside us, and savor each slice of that fluffy cake topped with a crumbly, sweet topping. Those moments inspired my love of baking and cooking as an expression of love and connection, and they still resonate deeply with me today.
This Cinnamon Streusel Pumpkin Coffee Cake is a modernization of that cherished memory, adjusted with my little chef hacks to make it easy for you to recreate that same warmth and joy!
Ingredients
Here’s what you’ll need to whip up this heavenly cake:
-
2 cups all-purpose flour: This is the foundation of our cake. You can swap it for a gluten-free blend if you need a gluten-free alternative.
-
1 cup granulated sugar: For sweetness! You can reduce this to ¾ cup if you prefer a less sweet cake or use coconut sugar for a slightly different flavor.
-
½ cup brown sugar: Adds moisture and a hint of caramel flavor. Light or dark brown sugar works here—use dark for a deeper taste.
-
1 tablespoon baking powder: The magic that makes our cake rise and feel fluffy. Don’t skip this one!
-
½ teaspoon salt: Balances the sweetness. It’s a tiny but mighty ingredient.
-
1 teaspoon ground cinnamon: A warm spice that complements pumpkin wonderfully.
-
½ teaspoon pumpkin spice: This blend usually includes nutmeg and ginger, enhancing the fall flavors. If you don’t have it, a pinch more cinnamon can do the trick!
-
½ cup unsalted butter, softened: Adds richness to the cake. You can use vegan butter or applesauce for a lighter option.
-
1 cup canned pumpkin puree: Make sure it’s pure pumpkin and not pumpkin pie filling, which has added sugars and spices.
-
2 large eggs: Binds everything together and adds moisture.
-
1 teaspoon vanilla extract: Elevates the flavor.
-
½ cup milk: Use whole milk, almond milk, or any milk of your choice.
-
½ cup chopped nuts (optional): Pecans or walnuts add a lovely crunch if you like a bit of texture.
For the Streusel Topping:
-
½ cup flour: To give it a crumbly texture. Substitute with oats for a different twist!
-
½ cup brown sugar: Sweetens and enhances the streusel.
-
¼ cup unsalted butter: Rub into the dry ingredients for that perfect crumb.
-
1 teaspoon cinnamon: A dash of spice to tie it all together.
For the Icing:
-
Powdered sugar: To give your cake a sweet finish.
-
Milk (to desired consistency): Adjust the amount for your preferred thickness.
Step-by-Step Instructions
Alright, foodies, let’s dive into the cooking magic!
-
Preheat Your Oven: First, set your oven to 350°F (175°C) to get it nice and toasty while we mix our ingredients.
-
Grease Your Pan: Grab a 9×13-inch baking pan and grease it lightly with butter or non-stick spray. You want your cake to come out easily!
-
Mix the Dry Ingredients: In a large bowl, whisk together the flour, granulated sugar, brown sugar, baking powder, salt, cinnamon, and pumpkin spice. This ensures that everything is well-distributed and avoids clumps.
-
Cream the Butter: In another bowl, cream the softened butter until it’s light and fluffy. This usually takes about 2-3 minutes. It’s one of those tasks where patience pays off!
-
Incorporate the Wet Ingredients: Add the pumpkin puree, eggs, vanilla extract, and milk to the creamed butter. Mix well until everything is combined. The batter should be smooth and creamy—feel free to lick the spoon!
-
Combine the Mixtures: Gradually add the dry mixture to the wet mixture. Stir until just combined; don’t overmix! We want a soft batter that will produce a tender cake.
-
Prepare the Streusel: In a small bowl, combine flour, brown sugar, cinnamon, and cold butter. Use your fingers or a fork to mix until crumbly. This streusel topping is going to make our cake sing!
-
Pour the Batter into the Pan: Spread the batter evenly into the greased baking pan. It’s time for that gooey goodness!
-
Add the Streusel: Sprinkle the streusel mix generously over the top of the batter. Don’t be shy—this is where the magic happens!
-
Bake Away: Place your cake in the preheated oven and bake for 30-35 minutes. The cake is ready when a toothpick inserted into the center comes out clean. Your kitchen will smell divine, and you’ll be eagerly waiting!
-
Icing Time!: While the cake is cooling, make your icing by whisking together powdered sugar and milk until you reach your desired consistency. Drizzle it over the cooled cake for the final touch!
Serving Suggestions
When it comes to serving this beauty, cut it into squares and serve it warm with a dollop of whipped cream or a scoop of vanilla ice cream on the side. For an extra flair, I love garnishing it with a sprinkle of cinnamon or some edible flowers. Set it on a pretty cake stand, and you’ve got an Instagram-worthy dessert that will wow your guests!
Recipe Variations
-
Chocolate Chip Twist: Add ½ cup of chocolate chips to the batter for a decadent version that chocolate lovers will adore!
-
Apple-Pumpkin Fusion: Fold in some finely chopped apples along with the pumpkin for an extra layer of flavor and texture.
-
Gluten-Free Edition: Use a 1:1 gluten-free flour blend instead of all-purpose flour for a gluten-free version that’s just as delicious.
-
Dairy-Free Delight: Swap out the milk for almond or coconut milk, and use plant-based butter to create a completely dairy-free cake.
-
Nut-Free Option: Skip the nuts altogether or substitute with a seed like pumpkin seeds for that crunchy element without the allergens.
Chef’s Notes
Cooking and baking always come with a side of fun and sometimes mishaps! One time I forgot to add the baking powder, and while the cake was still edible, it turned out more like a flatbread. It’s a great reminder to read the recipe twice (or thrice!) before diving in! Over the years, I have tweaked this original recipe, ensuring it’s simple yet still delivers that “wow” factor. It’s truly a beautiful blend of nostalgia and creativity.
FAQs and Troubleshooting
-
Why is my cake dense?
- A common culprit can be overmixing the batter. Mix just until combined, and ensure your baking powder is fresh!
-
How do I store leftovers?
- This cake keeps well wrapped in foil at room temperature for up to 2-3 days, or you can refrigerate it for up to a week. Reheat in the microwave for a cozy treat!
-
Can I freeze the coffee cake?
- Absolutely! Wrap slices tightly in plastic wrap and foil before freezing. Thaw overnight in the refrigerator when you’re ready to enjoy!
-
What if I don’t have pumpkin puree?
- You can substitute with applesauce, or homemade puréed sweet potatoes can also work in a pinch.
Nutritional Info (Optional)
While I believe in enjoying all foods in moderation, here’s a breakdown of the estimated nutritional info per serving:
- Calories: 250
- Fat: 10g
- Carbohydrates: 38g
- Protein: 3g
- Fiber: 1g
- Sugar: 18g
With these numbers in mind, you can enjoy your slice guilt-free!
So there you have it! A warming, aromatic, and absolutely delicious recipe for Cinnamon Streusel Pumpkin Coffee Cake. Remember, the joy of cooking comes not just from eating but from sharing these moments with loved ones. I hope this recipe brings you as much joy as it does for me. Tie on that ivory apron, and let’s bake something timeless together! Happy cooking!
PrintCinnamon Streusel Pumpkin Coffee Cake

A delightful coffee cake that combines the flavors of pumpkin and cinnamon, topped with a crumbly streusel for a perfect treat.
- Prep Time: 15 minutes
- Cook Time: 35 minutes
- Total Time: 50 minutes
- Yield: 12 servings 1x
- Category: Dessert
- Method: Baking
- Cuisine: American
- Diet: Vegetarian
Ingredients
- 2 cups all-purpose flour
- 1 cup granulated sugar
- ½ cup brown sugar
- 1 tablespoon baking powder
- ½ teaspoon salt
- 1 teaspoon ground cinnamon
- ½ teaspoon pumpkin spice
- ½ cup unsalted butter, softened
- 1 cup canned pumpkin puree
- 2 large eggs
- 1 teaspoon vanilla extract
- ½ cup milk
- ½ cup chopped nuts (optional)
- For the Streusel Topping:
- ½ cup flour
- ½ cup brown sugar
- ¼ cup unsalted butter
- 1 teaspoon cinnamon
- For the Icing:
- Powdered sugar
- Milk (to desired consistency)
Instructions
- Preheat your oven to 350°F (175°C).
- Grease a 9×13-inch baking pan with butter or non-stick spray.
- Mix the dry ingredients in a large bowl: flour, granulated sugar, brown sugar, baking powder, salt, cinnamon, and pumpkin spice.
- Cream the softened butter in another bowl until light and fluffy.
- Incorporate the pumpkin puree, eggs, vanilla extract, and milk into the creamed butter, mixing until smooth.
- Combine the dry mixture with the wet mixture until just combined.
- Prepare the streusel by mixing flour, brown sugar, cinnamon, and cold butter until crumbly.
- Pour the batter into the greased pan and spread evenly.
- Add the streusel topping generously over the cake batter.
- Bake for 30-35 minutes or until a toothpick inserted comes out clean.
- Icing time: whisk powdered sugar and milk until desired consistency and drizzle over the cooled cake.
Notes
Serve warm with whipped cream or ice cream for an extra treat. Customize with chocolate chips or apples for variations.
Nutrition
- Serving Size: 1 slice
- Calories: 250
- Sugar: 18g
- Sodium: 200mg
- Fat: 10g
- Saturated Fat: 6g
- Unsaturated Fat: 3g
- Trans Fat: 0g
- Carbohydrates: 38g
- Fiber: 1g
- Protein: 3g
- Cholesterol: 40mg
Keywords: coffee cake, pumpkin, cinnamon, desserts, fall flavors

One-Pan Pumpkin Crunch Cake: Easy Fall Dessert in 30 Minutes
Pumpkin Crunch Cake: A Cozy Slice of Fall Happiness
Hello, friends! Today, we’re diving into the warm, nostalgic world of Pumpkin Crunch Cake. If you’re like me, the scent of pumpkin and spices takes you back to those crisp autumn days, the kind best spent nestled in a cozy kitchen, surrounded by family and friends. What’s more delightful than a cake that looks inviting, tastes divine, and doesn’t require a culinary degree to whip up? A cake that brings everyone together is surely what we need as the leaves begin to change and the air turns a little cooler. So, let’s roll up our sleeves, tie on our aprons, and create something truly special!
Personal Story
One of my fondest memories featuring pumpkin crunch cake is from a family gathering several years back. My aunt, armed with her trusty recipe cards, decided it was high time to host a pumpkin-themed dinner. As we sipped warm apple cider, the tantalizing smell of spices wafted through the house. When it came time for dessert, she unveiled her Pumpkin Crunch Cake, and the room erupted in exclamations of delight. The golden crust on top gave way to a rich, moist, pumpkin center, topped off with a dollop of whipped cream—pure perfection. I remember stealing a slice while no one was looking and savoring that moment alone in the kitchen. It was pure bliss! Today, I get to share this lovely recipe with all of you, so let’s make some memory-worthy moments of our own.
Ingredients
Here’s what you’ll need to make this scrumptious Pumpkin Crunch Cake:
-
1 box yellow cake mix
This is your base! The cake mix provides a great foundation for a moist and tender crumb. You can substitute it with a homemade cake mix if you’re feeling adventurous! -
1 can (15 oz) pumpkin puree
Pumpkin is the star here! It gives the cake that earthy flavor and a beautiful orange hue. You could use sweet potato puree as a substitute for a unique twist. -
1 can (12 oz) evaporated milk
Evaporated milk enriches the cake, making it creamy and luscious. If you’re looking for a lighter version, use almond milk or coconut milk instead. -
3 large eggs
Eggs add structure and richness to the cake. You can substitute with ground flaxseed mixed with water for a vegan alternative. -
1 cup sugar
Sugar sweetens your cake, but you can swap half for brown sugar for a deeper flavor, or use coconut sugar for a healthier alternative. -
1 tsp cinnamon
This spice is essential for that comforting, warm flavor. Feel free to experiment with a pumpkin pie spice mix for even more complexity. -
1/2 tsp nutmeg
Nutmeg adds a lovely aromatic note that pairs beautifully with pumpkin. If you don’t have nutmeg, a pinch of allspice can work wonders in a pinch. -
1/2 cup butter, melted
Butter brings richness to the cake while helping it stay moist. If you’re aiming for a dairy-free option, use melted coconut oil instead! -
1 cup chopped pecans or walnuts
Nuts give delightful crunch and added flavor. If you have an almond allergy, feel free to leave them out or replace them with pumpkin seeds. -
Whipped cream for serving (optional)
A dollop of whipped cream is the perfect (and tasty) finishing touch for this cake. You can use cool whip or a vegan whipped topping to make it accessible for everyone!
Step-by-Step Instructions
Now that we have our ingredients ready, let’s dive into making this delightful Pumpkin Crunch Cake!
-
Preheat your oven!
Start by preheating your oven to 350°F (175°C). Preheating is crucial to ensure your cake bakes evenly, giving it that lovely rise. It’s also a great time to line your baking dish with parchment paper or grease it lightly—you want that cake to come out beautifully! -
Mix the pumpkin goodness!
In a large mixing bowl, combine the pumpkin puree, evaporated milk, eggs, sugar, cinnamon, nutmeg, and melted butter. Grab your whisk and beat everything together until smooth. Keep that energy up; we’re building flavor here! -
Incorporate the cake mix!
Next, gently fold in the yellow cake mix. Don’t overmix; just blend until there are no dry patches left. The batter will be a little thick—that’s what we want. -
Nuts about it!
Now, fold in the chopped pecans or walnuts. This step adds texture and a delightful crunch, which provides contrast to the creamy pumpkin filling. -
Pour and distribute!
Pour the batter into your prepared baking dish (about 9×13 works perfectly). Use a spatula to spread the batter evenly and get those nuts nestled in there! -
Time to bake!
Pop the dish in the preheated oven and let it bake for about 40-50 minutes. You’ll know it’s done when you see a golden crust forming on top and a toothpick inserted in the center comes out clean (or with just a few moist crumbs). -
Cool it down!
Once baked, remove your cake from the oven and allow it to cool for a bit in the pan. This is crucial so that it can firm up a bit and become easier to slice. About 15-20 minutes should do! -
Serve with flair!
Cut yourself a generous slice, add a dollop of whipped cream, and maybe even sprinkle a pinch of cinnamon on top for that finishing touch. You’re ready to impress your guests (or yourself)!
Serving Suggestions
Place your Pumpkin Crunch Cake on a rustic wooden board or a fragrant autumn-themed platter. It looks stunning with a bit of whipped cream on top and a sprinkle of chopped pecans on the side. Don’t forget to serve it with a hot cup of apple cider or coffee to elevate your dessert experience!
Recipe Variations
-
Vegan Twist: Substitute eggs with flaxseed, use almond milk instead of evaporated milk, and replace the butter with coconut oil for a yummy vegan version.
-
Chocolate Lovers: Mix in some chocolate chips into the batter for a delightful contrast of flavors.
-
Spicy Kick: Add a teaspoon of ginger or a pinch of cayenne for a subtle spicy warmth.
-
Fruitful Addition: Toss in some fresh cranberries or chocolate chunks for a pop of color and flavor!
Chef’s Notes
I’ve been tinkering with this recipe for years, and honestly, it continues to evolve with every dinner party I host. I remember one Thanksgiving when my cousin thought he could outsmart me and decided to use pumpkin pie spice instead of individual spices—let’s just say it took a minute for everyone to figure out what was different! Every mishap in the kitchen is a learning experience that makes us better cooks, right? So embrace your unique kitchen adventures—who knows what delicious mistakes might come out of them!
FAQs and Troubleshooting
1. Why did my cake sink in the middle?
Overmixing your batter or not allowing it to bake long enough can cause it to sink. Remember the gentle folding motion and rely on that toothpick to check for doneness.
2. Can I make this cake ahead of time?
Absolutely! You can make it a day in advance. Just store it covered at room temperature, and it’ll taste even more flavorful the next day!
3. My cake is too dense. What went wrong?
This can happen if the cake mix isn’t blended well or the eggs weren’t beaten enough. Make sure to mix until everything is just combined.
4. Can I freeze this cake?
Yes! Allow the cake to cool completely, then wrap it tightly in plastic wrap and foil. It can stay frozen for up to three months. Thaw it overnight in the fridge before serving.
Nutritional Info
For those curious about nutrition, each slice of Pumpkin Crunch Cake (based on 12 slices) has approximately:
- Calories: 250
- Protein: 5g
- Fat: 10g
- Carbohydrates: 38g
- Fiber: 1g
Well, there you have it! A friendly take on making a timeless Pumpkin Crunch Cake that has the power to spark joy in every bite. I hope this warms your kitchen and fills your hearts with happiness. Remember, cooking should be a delightful experience—so let’s enjoy making this beautiful cake together! Happy baking, and as always—let’s set the table!
PrintPumpkin Crunch Cake

A cozy and delightful dessert perfect for fall, combining the warmth of pumpkin spices with a crunchy topping.
- Prep Time: 15 minutes
- Cook Time: 50 minutes
- Total Time: 65 minutes
- Yield: 12 servings 1x
- Category: Dessert
- Method: Baking
- Cuisine: American
- Diet: Vegetarian
Ingredients
- 1 box yellow cake mix
- 1 can (15 oz) pumpkin puree
- 1 can (12 oz) evaporated milk
- 3 large eggs
- 1 cup sugar
- 1 tsp cinnamon
- 1/2 tsp nutmeg
- 1/2 cup butter, melted
- 1 cup chopped pecans or walnuts
- Whipped cream for serving (optional)
Instructions
- Preheat your oven to 350°F (175°C).
- Mix the pumpkin puree, evaporated milk, eggs, sugar, cinnamon, nutmeg, and melted butter in a large mixing bowl until smooth.
- Incorporate the yellow cake mix gently until no dry patches remain.
- Fold in the chopped pecans or walnuts.
- Pour the batter into a prepared baking dish (about 9×13).
- Bake for about 40-50 minutes until golden and a toothpick comes out clean.
- Cool the cake in the pan for 15-20 minutes.
- Serve with whipped cream and a sprinkle of cinnamon.
Notes
This cake can be made a day in advance for enhanced flavor. For a vegan version, substitute the eggs with flaxseed and the dairy products accordingly.
Nutrition
- Serving Size: 1 slice
- Calories: 250
- Sugar: 20g
- Sodium: 150mg
- Fat: 10g
- Saturated Fat: 5g
- Unsaturated Fat: 4g
- Trans Fat: 0g
- Carbohydrates: 38g
- Fiber: 1g
- Protein: 5g
- Cholesterol: 50mg
Keywords: Pumpkin, Cake, Fall Dessert, Cozy, Spices
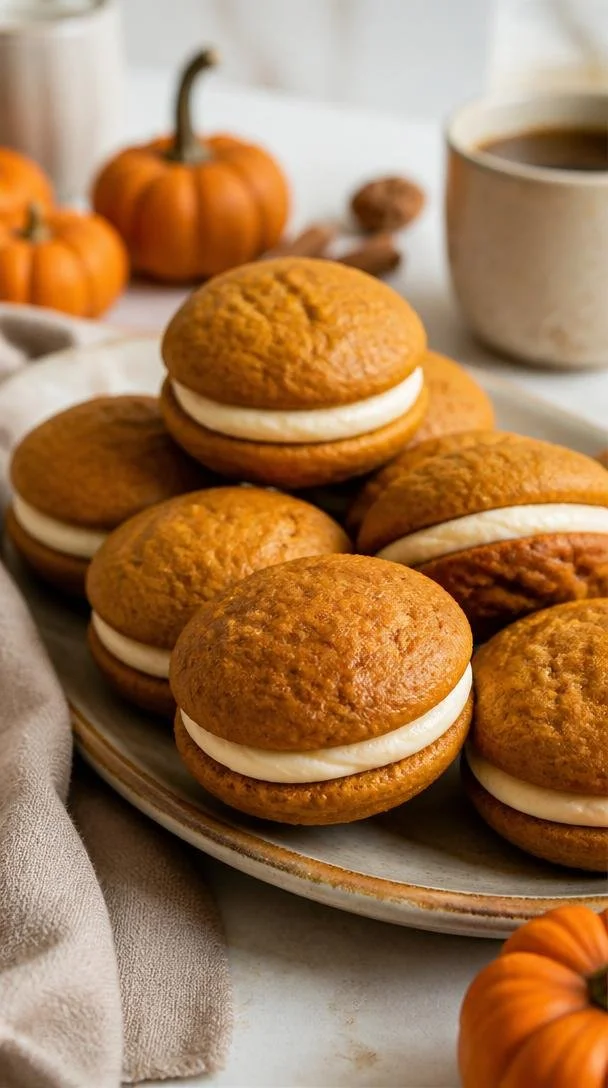
One-Bowl 30-Minute Pumpkin Whoopie Pies (Fall Comfort Treat)
Pumpkin Whoopie Pies: An Autumn Delight
Hello, friends! Today, I’m thrilled to share with you one of my absolute favorite autumn treats — Pumpkin Whoopie Pies! When the leaves start to turn and that crispness fills the air, there’s nothing quite like the warm, spicy aroma of pumpkin goodies baking in the oven. Trust me, this recipe will not only fill your kitchen with delightful scents but will also transport you to a cozy fall afternoon, sipping cider while savoring these tasty treats.
Personal Story
As a kid, there was nothing more exciting than the annual autumn bake-off in my neighborhood! Everyone brought their best creations, and I remember my mom whipping up pumpkin whoopie pies that quickly became the star of the show. I’d watch as she mixed the ingredients, the vibrant orange pumpkin swirling into the batter, and I loved the way she would sneak a taste of the creamy filling before it made its debut between those soft, spiced cakes. The joy on everyone’s faces when they took that first bite is something I still cherish today. It made me realize how food has this magical power to bring people together and create lasting memories, no matter how simple the dish may be.
Ingredients
Here’s what you’ll need for these scrumptious Pumpkin Whoopie Pies, along with some handy tips:
-
2 cups all-purpose flour
A staple in most kitchens, this is the base for our whoopie pies. If you need a gluten-free option, try substituting with a gluten-free all-purpose blend. -
1 teaspoon baking powder
This helps our pies rise just right. Ensure your baking powder is fresh for optimal fluffiness! -
1 teaspoon baking soda
Another leavener that works in tandem with baking powder. The combination gives our pies that perfect texture. -
1 teaspoon cinnamon
A warm spice that’s essential for flavoring! Feel free to swap with pumpkin pie spice for an all-in-one flavor boost. -
1/2 teaspoon nutmeg
Adds depth and warmth to the pumpkin flavor. If you’re lacking nutmeg, a touch more cinnamon can be a decent substitute. -
1/2 teaspoon salt
Balances out the sweetness and enhances the flavors. Don’t skip this; it’s necessary for a well-rounded pie. -
1 cup pumpkin puree
Use canned or homemade — just ensure it’s pure pumpkin, not pumpkin pie filling! This is where our signature flavor comes from. -
1/2 cup vegetable oil
This keeps our whoopie pies moist. If you prefer, you can replace it with melted coconut oil for a different flavor profile. -
1 cup brown sugar
Brown sugar adds that lovely caramel flavor and moisture. Light or dark works here, depending on how deep a flavor you desire. -
1 egg
Acts as a binder. If vegan, you can swap it for a flax egg (1 tablespoon ground flaxseed mixed with 2.5 tablespoons water). -
1 teaspoon vanilla extract
A hint of sweetness and depth. Always go for pure vanilla extract when possible; it makes a difference. -
1 cup cream cheese
The star of our filling. Allow it to soften at room temperature so it blends beautifully! -
1/2 cup powdered sugar
Sweetens our filling. Feel free to adjust to your taste — add more or less! -
1/4 cup maple syrup
Adds a deliciously complex sweetness to the filling; you can also use honey if you prefer.
Step-by-Step Instructions
Now, let’s dive into the fun part — baking these beauties!
-
Preheat the Oven
Preheat your oven to 350°F (175°C). While it heats, you can gather the rest of your ingredients and make sure your baking sheets are ready. -
Mix the Dry Ingredients
In a medium bowl, whisk together the flour, baking powder, baking soda, cinnamon, nutmeg, and salt. This ensures everything is evenly distributed so your whoopie pies rise and flavor nicely. -
Combine the Wet Ingredients
In a larger bowl or a stand mixer, combine the pumpkin puree, vegetable oil, brown sugar, egg, and vanilla extract. Mix until everything is smooth and well combined; the mixture should be thick and luscious. -
Incorporate Dry Ingredients
Gradually add your dry mix into the wet, stirring gently until just combined. Overmixing can lead to tougher cakes, so stop once you see no dry flour patches. -
Scoop and Bake
Using a cookie scoop or two spoons, drop even amounts of batter onto your prepared baking sheets, spacing them about 2 inches apart. Bake for 12-15 minutes, or until they spring back when lightly pressed. Let cool on the sheets for a few minutes before transferring them to a wire rack. -
Prepare the Filling
While the cakes cool, let’s whip up the filling! In a bowl, beat together the cream cheese and powdered sugar until smooth, then add the maple syrup. Mix until creamy. You can adjust the sweetness based on your preference — feel free to taste and tweak! -
Assemble the Whoopie Pies
Once your cakes are completely cooled, pair them up (a big one with a big one for maximum filling!). Spread or pipe a generous amount of filling on the flat side of one cake, then top with another. -
Chill and Enjoy
For best results, refrigerate the whoopie pies for at least 30 minutes before serving. The flavors meld beautifully, and it makes them easier to handle.
Serving Suggestions
Serve these Pumpkin Whoopie Pies on a beautiful platter; perhaps with a sprinkle of cinnamon or a drizzle of melted chocolate for added flair! Pair them with a cup of spicy chai tea or hot cider to complete the cozy vibe.
Recipe Variations
Feel free to mix things up with these creative twists for your whoopie pies:
- Chocolate Pumpkin Whoopie Pies: Substitute half of the flour for cocoa powder for a chocolate-dusted delight.
- Spiced Cream Cheese Filling: Add a bit of cinnamon and nutmeg to the cream cheese filling for extra flavor.
- Nutty Texture: Incorporate chopped walnuts or pecans into the batter for added crunch.
- Vegan Version: Use aquafaba instead of egg and swap to a vegan cream cheese substitute for the filling.
Chef’s Notes
These whoopie pies have evolved so much from my mom’s original recipe! I’ve played with flavors and fillings over the years, and I truly enjoy adding unique ingredients that excite the palate. Plus, they freeze wonderfully! You can make a batch, freeze them, and treat yourself to a warm pie anytime you’re craving that pumpkin taste. A quick zap in the microwave for about 10 seconds brings them right back to life!
FAQs and Troubleshooting
-
Why are my whoopie pies flat?
Make sure your baking soda and baking powder are fresh! Old leavening agents can cause them not to rise. -
Can I use fresh pumpkin puree?
Absolutely! Just ensure your pumpkin is well-cooked and drained of excess moisture. -
What do I do if my filling is too runny?
You can add more powdered sugar to thicken it up; start with a tablespoon at a time until you reach your desired consistency. -
How do I store leftover whoopie pies?
Keep them in an airtight container in the refrigerator for up to a week or freeze them for longer storage.
Nutritional Info
If you’re curious about the nutritional breakdown, a single Pumpkin Whoopie Pie (including filling) is approximately:
- Calories: 200
- Carbs: 28g
- Protein: 2g
- Fat: 9g
- Fiber: 1g
So there you have it! The perfect pumpkin whoopie pie recipe is ready to grace your table with warmth and flavor this fall. I can’t wait for you to try this delectable treat — I promise it will become a cherished favorite like it is in my home! Happy baking! 🍂
PrintPumpkin Whoopie Pies

Delicious pumpkin whoopie pies that bring the warmth and flavors of autumn into your kitchen.
- Prep Time: 15 minutes
- Cook Time: 15 minutes
- Total Time: 30 minutes
- Yield: 12 servings 1x
- Category: Dessert
- Method: Baking
- Cuisine: American
- Diet: Vegetarian
Ingredients
- 2 cups all-purpose flour
- 1 teaspoon baking powder
- 1 teaspoon baking soda
- 1 teaspoon cinnamon
- 1/2 teaspoon nutmeg
- 1/2 teaspoon salt
- 1 cup pumpkin puree
- 1/2 cup vegetable oil
- 1 cup brown sugar
- 1 egg
- 1 teaspoon vanilla extract
- 1 cup cream cheese
- 1/2 cup powdered sugar
- 1/4 cup maple syrup
Instructions
- Preheat your oven to 350°F (175°C).
- Mix the dry ingredients: flour, baking powder, baking soda, cinnamon, nutmeg, and salt.
- Combine the wet ingredients: pumpkin puree, vegetable oil, brown sugar, egg, and vanilla extract until smooth.
- Incorporate the dry ingredients into the wet until just combined.
- Scoop even amounts of batter onto prepared baking sheets, spacing them about 2 inches apart.
- Bake for 12-15 minutes until springy when lightly pressed and let cool.
- Prepare the filling by beating cream cheese and powdered sugar until smooth, then add maple syrup.
- Assemble the whoopie pies by spreading filling between two cooled cakes.
- Chill the final pies for at least 30 minutes before serving.
Notes
These whoopie pies can be frozen and reheated. Adjust sweetness of the filling to taste.
Nutrition
- Serving Size: 1 pie
- Calories: 200
- Sugar: 15g
- Sodium: 200mg
- Fat: 9g
- Saturated Fat: 3g
- Unsaturated Fat: 5g
- Trans Fat: 0g
- Carbohydrates: 28g
- Fiber: 1g
- Protein: 2g
- Cholesterol: 30mg
Keywords: pumpkin, whoopie pies, autumn dessert, fall baking, cozy treats
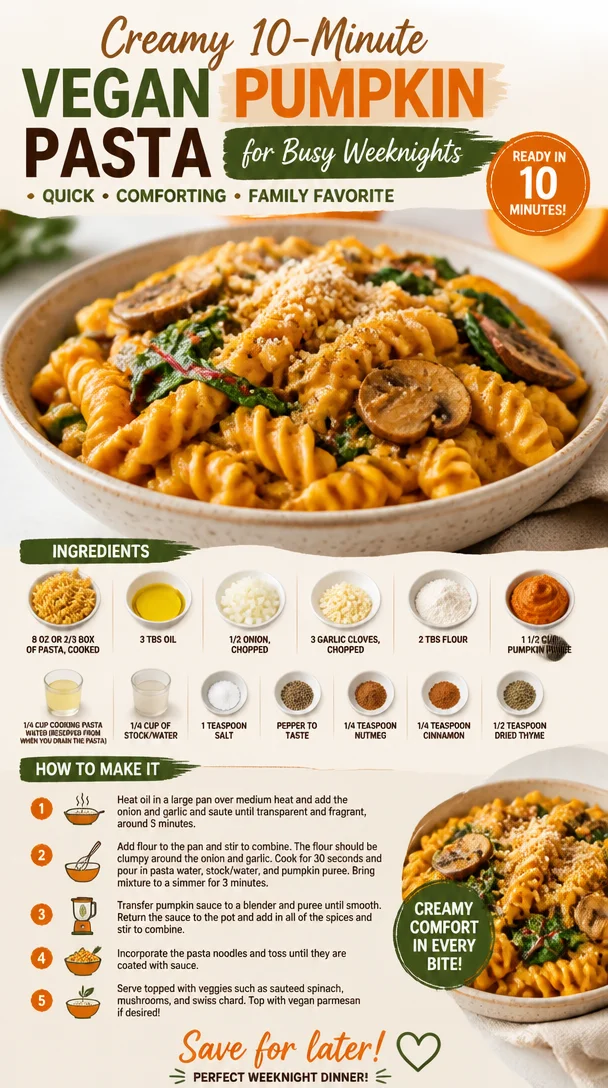
Creamy 10-Minute Vegan Pumpkin Pasta for Busy Weeknights
10-Minute Vegan Pumpkin Pasta: A Delightful Fall Favorite
Hello, fellow foodies! Welcome back to my kitchen, where I’m always excited to share my latest culinary creation. Today, we’re diving into the wonderful world of quick and cozy meals with none other than my 10-Minute Vegan Pumpkin Pasta!
As the leaves turn and autumn rolls in, there’s nothing quite like the warm, comforting flavors of pumpkin to usher in the season. This dish is not only perfect for a busy weeknight dinner but also offers that comforting vibe we all crave as we gather around the table. Ready to embrace some deliciousness? Let’s get cooking!
Personal Story: A Cozy Autumn Tradition
Every year, as the days grow shorter and the air turns crisp, I can’t help but think back to my childhood. My family had this delightful little tradition where we’d gather to carve pumpkins and roast the seeds, setting the stage for all things fall. What sticks out most, though, is the time my sister and I, armed with our little aprons, attempted to concoct our own pumpkin pasta from scratch. We were ambitious, using everything from the pumpkin guts to the last drop of cream. Sure, it was a chaotic mess, but it was filled with laughter, a few flour explosions, and some surprisingly tasty results! That day ignited my passion for making shared meals easy and enjoyable, regardless of skill or time constraints.
Fast forward to today, and I’ve channeled that love into this quick, vegan pasta that embodies all the rich flavors of fall. Let’s bring that comforting feel into your kitchen with this 10-minute wonder!
Ingredients
Let’s take a look at the ingredients you’ll need. Each one is essential for creating this delectable dish, and I’ll share some helpful tips along the way:
-
8 oz or 2/3 box of pasta, cooked
Use any pasta you like! I often opt for whole wheat or gluten-free options to suit different dietary needs. Just remember, if you’re using lentil or chickpea pasta, cooking time may vary slightly. -
3 tablespoons oil
Olive oil is my go-to for its flavor and health benefits, but feel free to use avocado oil or coconut oil if you prefer a milder taste. -
1/2 onion, chopped
Yellow or white onions work beautifully here. For a milder flavor, you can switch to shallots. -
3 garlic cloves, chopped
Garlic adds zest and warmth to the dish. If you’re a fan of garlic, don’t hesitate to throw in an extra clove! -
2 tablespoons flour
This helps to thicken our sauce. You can use all-purpose flour or a gluten-free alternative like cornstarch or chickpea flour. -
1 1/2 cups pumpkin puree
Canned pumpkin is super convenient, but if you’re feeling adventurous, you can roast fresh pumpkin and puree it yourself. Just scoop out the seeds, roast it until soft, and blend! -
1/4 cup cooking pasta water
This liquid is gold when it comes to adding flavor to sauces. Don’t forget to save it before draining your pasta! -
1/4 cup stock or water
Vegetable broth can add depth, but water will work just fine if you’re in a pinch. -
1 teaspoon salt
A must for enhancing the flavors in your dish. Adjust to your taste preference. -
Pepper to taste
Freshly cracked black pepper adds a lovely warmth; feel free to add as much as you like! -
1/4 teaspoon nutmeg
A hint of nutmeg complements pumpkin beautifully. It’s the secret ingredient that makes this dish sing! -
1/4 teaspoon cinnamon
Cinnamon rounds out the sweetness of the pumpkin and adds a cozy touch. -
1/2 teaspoon dried thyme
Adds an earthy component. Fresh thyme is also delightful if you have it on hand!
Step-by-Step Instructions
Let’s bring this pumpkin pasta to life! Here’s your day in the kitchen:
-
Cook your pasta
Start by boiling a pot of salted water. Add your pasta and cook according to package instructions until al dente, usually about 8–10 minutes. Make sure to reserve 1/4 cup of the cooking water before draining! -
Sauté the aromatics
In a large skillet, heat the olive oil over medium heat. Add the chopped onion and sauté for about 3-4 minutes until translucent and fragrant. Add the garlic in the last minute, cooking until soft. This step is essential for that lovely base flavor! -
Thicken it up
Stir in the flour, letting it cook for about a minute, creating a roux. This will help thicken your sauce. Don’t rush this; the flour needs a moment to cook. You’ll notice it starts to form a paste. -
Bring in the star—pumpkin!
Slowly whisk in the pumpkin puree along with the stock or water, mixing until you have a smooth consistency. If it feels too thick, add a splash more liquid until you reach your desired consistency. It should be creamy but not too heavy. -
Season it right
Add in the reserved pasta water, salt, pepper, nutmeg, cinnamon, and thyme. Stir well, allowing the flavors to meld together. Give it a taste here; if it feels like it needs a little kick, go crazy with those spices! -
Combine and serve
Toss your cooked pasta into the skillet, mixing everything thoroughly until each piece is coated in that luscious sauce. You can sprinkle a bit more pasta water in if it looks dry.
Serving Suggestions
Plating this dish should feel effortless, like a warm hug at the end of a long day. Transfer a generous serving of pasta onto a plate or into a shallow bowl. Finish it off with a sprinkle of freshly cracked pepper and perhaps a dash of extra thyme or a swirl of olive oil for that extra flair.
Pair it with a green salad or some crusty bread for a complete meal that feels cozy yet sophisticated.
Recipe Variations
Let’s get creative! Here are a few twists you can try with this recipe:
- Spicy Pumpkin Pasta: Add a pinch of red pepper flakes for a nice kick.
- Herbed Pumpkin Pasta: Mix in fresh herbs like sage or parsley for an herbal touch.
- Creamy Vegan Version: Replace some of the pumpkin puree with cashew cream for an extra creamy texture.
- Protein Boost: Add cooked chickpeas or lentils to round out the meal and add protein.
- Mushroom Delight: Stir in sautéed mushrooms for a hearty addition.
Chef’s Notes
Every recipe holds a special place in my heart, and this one is no exception. It has evolved quite a bit over the years. Initially, it started as a trial and error experience, but through each round of flavor testing, I learned that simplicity is key. Though the original version was more complex, I found that a straightforward approach allows the pumpkin’s natural sweetness and warmth to shine without getting lost in heavy ingredients.
Also, I can’t resist telling you about the time I mistook pumpkin spice for cinnamon! Let’s just say the kitchen ended up smelling pretty festive – much to my surprise!
FAQs and Troubleshooting
1. What type of pasta works best?
You can use any pasta! I love penne or fusilli for this recipe based on their ability to catch that delightful sauce.
2. Can I use fresh pumpkin instead of canned?
Absolutely! Roast the pumpkin until tender, then puree it for an even fresher flavor.
3. My sauce is too thick; how can I fix it?
No worries! Just add a splash more of the reserved pasta water to loosen it up.
4. How do I store leftovers?
Store in an airtight container in the fridge for up to 3 days. Reheat on the stove with a splash of water or broth to keep it creamy.
Nutritional Info
While exact numbers may vary based on portion sizes and specific ingredients used, here’s a rough breakdown of per serving:
- Calories: approx. 350
- Protein: 10g
- Net Carbs: 60g
- Fat: 10g
This quick and easy 10-Minute Vegan Pumpkin Pasta is a celebration of fall’s flavors and autumn comfort. I’m so excited for you to try this! Remember, cooking should bring joy, laughter, and togetherness—so tie on your apron and let’s make some magic in the kitchen!
Happy cooking! 🍂💛
Print10-Minute Vegan Pumpkin Pasta

A quick and cozy meal that celebrates the comforting flavors of fall with pumpkin pasta, perfect for busy weeknight dinners.
- Prep Time: 5 minutes
- Cook Time: 5 minutes
- Total Time: 10 minutes
- Yield: 4 servings 1x
- Category: Main Course
- Method: Cooking
- Cuisine: Italian
- Diet: Vegan
Ingredients
- 8 oz (or 2/3 box) pasta, cooked
- 3 tablespoons olive oil
- 1/2 onion, chopped
- 3 garlic cloves, chopped
- 2 tablespoons flour
- 1 1/2 cups pumpkin puree
- 1/4 cup cooking pasta water
- 1/4 cup stock or water
- 1 teaspoon salt
- Pepper to taste
- 1/4 teaspoon nutmeg
- 1/4 teaspoon cinnamon
- 1/2 teaspoon dried thyme
Instructions
- Cook your pasta: Boil a pot of salted water, add the pasta, and cook according to package instructions until al dente, usually about 8–10 minutes. Reserve 1/4 cup of the cooking water before draining.
- Sauté the aromatics: In a large skillet, heat the olive oil over medium heat. Add the chopped onion and sauté for about 3-4 minutes until translucent. Add the garlic in the last minute, cooking until soft.
- Thicken it up: Stir in the flour and let it cook for about a minute to form a roux.
- Bring in the star—pumpkin!: Whisk in the pumpkin puree along with the stock or water, mixing until smooth. Adjust with more liquid if too thick.
- Season it right: Add in the reserved pasta water, salt, pepper, nutmeg, cinnamon, and thyme. Stir well and taste.
- Combine and serve: Toss your cooked pasta into the skillet and mix until each piece is coated in sauce.
Notes
Serve with freshly cracked pepper and a sprinkle of thyme or a swirl of olive oil for extra flair. Pairs well with a green salad or crusty bread.
Nutrition
- Serving Size: 1 serving
- Calories: 350
- Sugar: 6g
- Sodium: 400mg
- Fat: 10g
- Saturated Fat: 1g
- Unsaturated Fat: 8g
- Trans Fat: 0g
- Carbohydrates: 60g
- Fiber: 4g
- Protein: 10g
- Cholesterol: 0mg
Keywords: pumpkin pasta, vegan pasta, quick meals, fall recipes, cozy dinner
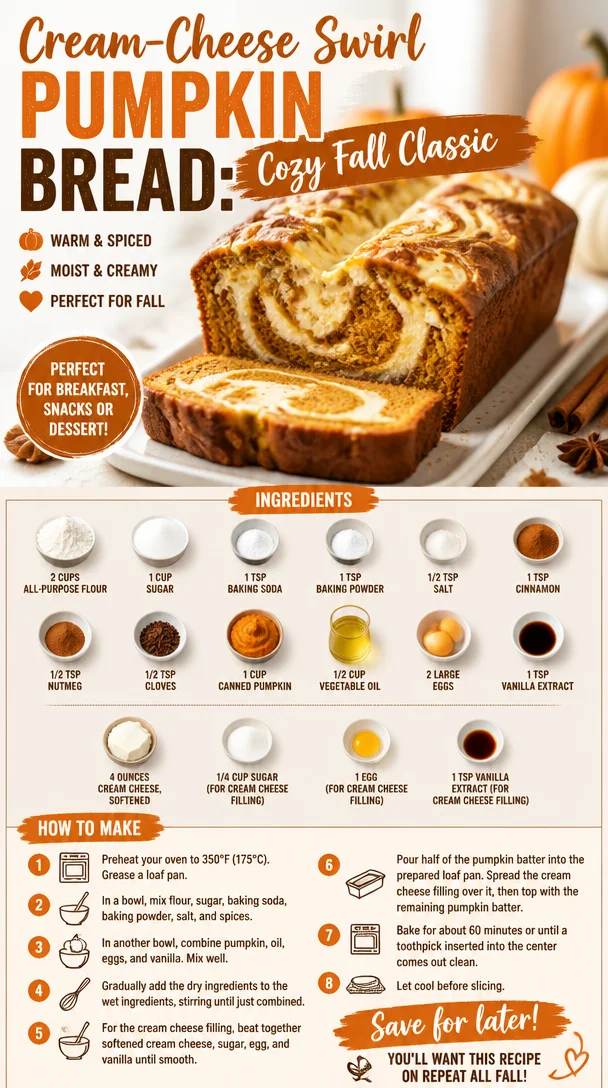
Cream-Cheese Swirl Pumpkin Bread: Cozy Fall Classic
The Ultimate Pumpkin Bread with Cream Cheese Recipe: A Slice of Fall Heaven
Hello, friends! With crisp autumn air, vibrant leaves painting the landscape, and the scent of warm spices filling the kitchen, it’s officially the season for pumpkin bread. There’s something truly magical about this loaf — a blend of cozy flavors that instantly creates the warmest feelings of nostalgia. Whether you’re whipping it up for a Sunday brunch, a cozy gathering, or simply to enjoy with your morning coffee, this pumpkin bread with cream cheese is a must-try!
With every slice, you’re not just satisfying your sweet tooth; you’re embracing the essence of fall. Join me as we dive into this recipe, filled with warmth and a dash of nostalgia that’ll make your kitchen feel like home.
A Slice of My Pumpkin Bread Memory
Let me take you back to my childhood kitchen, where autumn meant two things: the vibrant colors of fallen leaves outside, and the mouth-watering aroma of pumpkin bread wafting through the house. My grandmother, adorned in her worn-out apron, would gather us kids around the counter. Each year, she insisted we get our hands sticky, mixing the batter as we laughed and exchanged stories.
I vividly remember the first time I cracked an egg for the cream cheese filling. It felt like a rite of passage! That simple act of folding in the cream cheese mixture always added a layer of excitement. When that loaf came out of the oven — golden-brown, with a glossy, sugar-dusted top — you could almost hear our collective gasps of delight. It was a family ritual, a moment of pure joy! Today, I pass that same magic on to you with this easy yet indulgent pumpkin bread recipe that captures the essence of those cherished moments.
Ingredients: The Essentials for Your Perfect Pumpkin Bread
Here’s what you’ll need for this incredible pumpkin bread with cream cheese filling, along with a few tips to ensure you’ve got the best results:
-
2 cups all-purpose flour: This forms the structure of your bread. You can substitute with whole wheat flour for a nuttier flavor or gluten-free flour if needed.
-
1 cup sugar: Sweetness is key! You can reduce this by using coconut sugar or maple syrup for a more natural option.
-
1 teaspoon baking soda: It provides that lovely rise you’re after.
-
1 teaspoon baking powder: This helps ensure your loaf is fluffy and not dense.
-
1/2 teaspoon salt: Just enough to balance the sweetness.
-
1 teaspoon cinnamon: The classic fall spice.
-
1/2 teaspoon nutmeg: Adds that distinctive warmth.
-
1/2 teaspoon cloves: A little goes a long way in enhancing flavors.
-
1 cup canned pumpkin: This is where the magic happens! Fresh pumpkin can also work, just make sure it’s properly pureed.
-
1/2 cup vegetable oil: For moisture; you can also use melted coconut oil for a tropical twist.
-
2 large eggs: Acts as a binder for your ingredients.
-
1 teaspoon vanilla extract: Because it’s just better with a splash of vanilla.
-
4 ounces cream cheese, softened: The star of our filling. Make sure it’s at room temperature for smooth mixing!
-
1/4 cup sugar (for cream cheese filling): Enhances the sweetness of the cream cheese.
-
1 egg (for cream cheese filling): Helps bind the cream cheese mixture.
-
1 teaspoon vanilla extract (for cream cheese filling): Adds extra flavor to the filling.
Step-by-Step Instructions: Let’s Get Baking!
Now, let’s roll up our sleeves and bake this lovely bread together! Follow these steps, and you’ll not only have a delicious loaf but will also create memories along the way.
-
Preheat Your Oven: Set your oven to 350°F (175°C) and grease a 9×5-inch loaf pan. A lined pan helps with easy removal later.
-
Mix the Dry Ingredients: In a large bowl, whisk together the flour, sugar, baking soda, baking powder, salt, cinnamon, nutmeg, and cloves. Making sure they’re well combined helps ensure an even flavor.
-
Combine the Wet Ingredients: In another bowl, mix the canned pumpkin, vegetable oil, 2 eggs, and 1 teaspoon of vanilla extract. Make sure everything is blended smoothly. If you love a hint of nuttiness, feel free to add some chopped walnuts or pecans here!
-
Fold them Together: Pour the wet ingredients into the dry ingredients. Gently mix until just combined! A few lumps are perfectly okay. Over-mixing could lead to a dense loaf, and we want it fluffy!
-
Prepare the Cream Cheese Filling: In a separate bowl, beat together the softened cream cheese, 1/4 cup sugar, 1 egg, and 1 teaspoon vanilla extract until smooth. It should be creamy and spreadable.
-
Layer the Mixtures: Transfer half the pumpkin batter to the prepared loaf pan, smoothing it out. Next, dollop the cream cheese mixture over the batter, spreading it gently to create an even layer. Finish off by pouring the remaining pumpkin batter on top. Don’t worry about perfection — it’s the little imperfections that make it homemade!
-
Bake Away: Place the loaf in your preheated oven and bake for about 60-70 minutes. The top should be golden brown, and a toothpick inserted into the center should come out clean.
-
Cool: Once baked, allow the bread to cool in the pan for about 20 minutes before transferring it to a wire rack. This step ensures that the bread holds its shape.
-
Slice and Enjoy: After a bit of patience while it cools, slice the bread and watch the beautiful cream cheese swirl emerge. Heaven!
Serving Suggestions: How to Present Your Pumpkin Bread
For that Instagram-worthy shot (if you’re into that kind of thing!), slice your pumpkin bread and arrange it on a beautiful platter. A drizzle of honey or maple syrup can add a lovely touch. Garnish with a sprinkle of cinnamon or a dollop of whipped cream cheese. Pair it with a hot cup of your favorite spiced latte for an extra cozy vibe.
Recipe Variations: Get Creative!
-
Chocolate Chip Pumpkin Bread: Fold in a cup of chocolate chips to the batter for a decadent touch.
-
Nutty Banana-Pumpkin Fusion: Add a mashed ripe banana for moisture and flavor depth while incorporating some walnuts for crunch.
-
Gluten-Free Version: Swap in gluten-free baking flour and ensure your baking powder is certified gluten-free.
-
Maple Sugar Sweetness: Replace regular sugar with maple sugar for a unique twist that’s perfect for fall.
-
Vegan Option: Use flax eggs (1 tablespoon of ground flaxseed mixed with 2.5 tablespoons of water for each egg) and non-dairy cream cheese to make it vegan-friendly.
Chef’s Notes: A Little Extra Love
Fall has a special place in my heart, and this pumpkin bread takes me back to those cherished moments in my grandmother’s kitchen. Each time I bake it, I’m greeted with the same warmth, just like having her by my side. And since then, I’ve played with this recipe, adapting flavors and filling options — it never fails to inspire creativity in my kitchen. You might find layers of apple or even a hint of bourbon-infused spices when I’m feeling adventurous!
FAQs and Troubleshooting: Let’s Clear Up Your Questions!
-
Why did my pumpkin bread turn out dense?
- This can happen if the batter was overmixed or if you packed the flour too tightly. Ensure you use the spoon-and-level method for measuring flour and mix just until combined.
-
Can I freeze the pumpkin bread?
- Absolutely! Wrap it tightly in plastic wrap and aluminum foil before storing it in the freezer. It should last up to three months. Just defrost at room temperature when you’re ready to enjoy.
-
How do I know when my bread is done baking?
- Aside from the toothpick test, your bread should slightly spring back when you gently press the top and look for a golden-brown color.
-
Is it necessary to add eggs?
- Eggs act as binders and contribute to the moisture content. If you’re looking for an eggless option, flax eggs are a great substitute, or you could use unsweetened applesauce.
Nutritional Info (Optional)
This delicious pumpkin bread offers a little taste of nostalgia while packing a flavorful punch. Although it’s a treat, here’s a rough estimate for one slice (about 1/12th of the recipe):
- Calories: 200
- Total Fat: 9g
- Saturated Fat: 2g
- Cholesterol: 30mg
- Sodium: 160mg
- Total Carbohydrates: 30g
- Dietary Fiber: 1g
- Sugars: 10g
- Protein: 3g
So there you have it, friends! An incredible pumpkin bread with cream cheese recipe that’s not only a treat for the taste buds but a journey back to those moments spent in the kitchen. I hope you’ll create your own beautiful memories as you bake this loaf. Let’s gather around the table, savor each slice, and celebrate the joys of food together. Happy baking!
PrintThe Ultimate Pumpkin Bread with Cream Cheese

This pumpkin bread with cream cheese filling captures the essence of fall with cozy flavors and nostalgia.
- Prep Time: 15 minutes
- Cook Time: 70 minutes
- Total Time: 85 minutes
- Yield: 12 servings 1x
- Category: Dessert
- Method: Baking
- Cuisine: American
- Diet: Vegetarian
Ingredients
- 2 cups all-purpose flour
- 1 cup sugar
- 1 teaspoon baking soda
- 1 teaspoon baking powder
- 1/2 teaspoon salt
- 1 teaspoon cinnamon
- 1/2 teaspoon nutmeg
- 1/2 teaspoon cloves
- 1 cup canned pumpkin
- 1/2 cup vegetable oil
- 2 large eggs
- 1 teaspoon vanilla extract
- 4 ounces cream cheese, softened
- 1/4 cup sugar (for cream cheese filling)
- 1 egg (for cream cheese filling)
- 1 teaspoon vanilla extract (for cream cheese filling)
Instructions
- Preheat your oven to 350°F (175°C) and grease a 9×5-inch loaf pan.
- Mix the dry ingredients: In a large bowl, whisk together the flour, sugar, baking soda, baking powder, salt, cinnamon, nutmeg, and cloves.
- Combine the wet ingredients: In another bowl, mix the canned pumpkin, vegetable oil, 2 eggs, and 1 teaspoon of vanilla extract.
- Fold them together: Pour the wet ingredients into the dry ingredients and gently mix until just combined.
- Prepare the cream cheese filling: In a separate bowl, beat together the softened cream cheese, 1/4 cup sugar, 1 egg, and 1 teaspoon vanilla extract until smooth.
- Layer the mixtures: Transfer half the pumpkin batter to the prepared loaf pan, dollop the cream cheese mixture over it, and pour the remaining pumpkin batter on top.
- Bake for about 60-70 minutes until the top is golden brown and a toothpick inserted into the center comes out clean.
- Cool in the pan for about 20 minutes before transferring to a wire rack.
- Slice and enjoy your homemade pumpkin bread!
Notes
For an Instagram-worthy shot, slice and arrange on a platter. Drizzle with honey or maple syrup and garnish with cinnamon.
Nutrition
- Serving Size: 1 slice
- Calories: 200
- Sugar: 10g
- Sodium: 160mg
- Fat: 9g
- Saturated Fat: 2g
- Unsaturated Fat: 7g
- Trans Fat: 0g
- Carbohydrates: 30g
- Fiber: 1g
- Protein: 3g
- Cholesterol: 30mg
Keywords: pumpkin bread, fall recipes, cream cheese, cozy baking, sweet treats