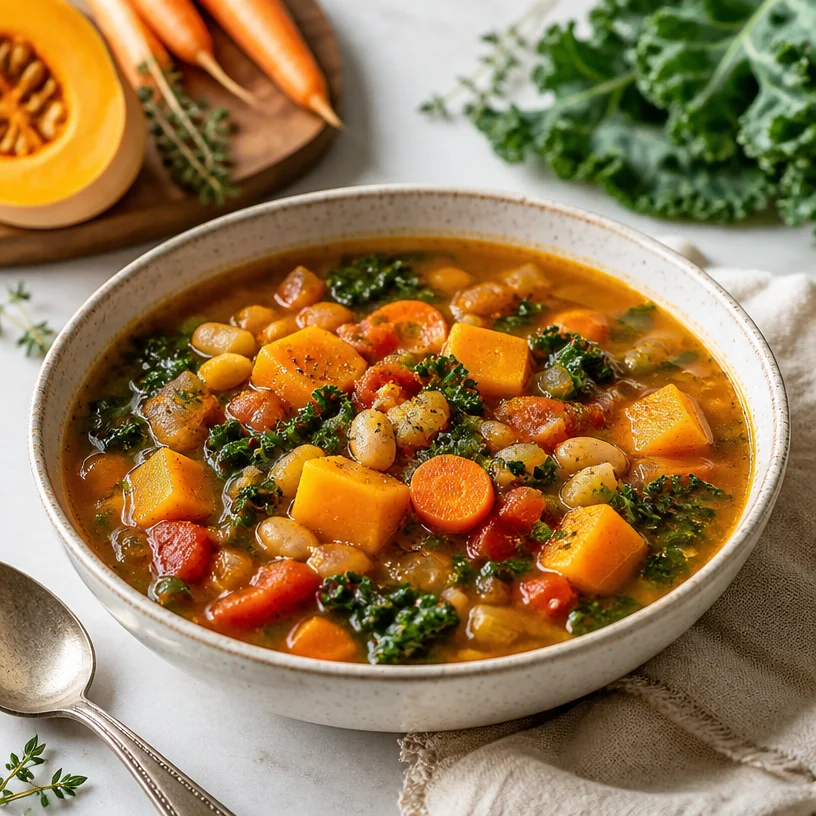
Harvest Vegetable Soup
Harvest Vegetable Soup: A Cozy Embrace of Flavor and Comfort
Hello, fellow foodies! Today, we’re diving into a recipe that feels like a warm hug on a chilly evening: Harvest Vegetable Soup. This dish not only brightens up your dinner table but also brings a heartwarming nostalgia that whispers of campfires and crisp autumn air. Grab your favorite chopping board and let’s get started!
A Taste of Nostalgia
Picture this: a bright fall afternoon, the leaves swirling around in hues of orange and gold, and the sweet aroma of spices drifting through the air. This is where my love for vegetable soup blossomed. Growing up, my grandmother had a magical way of transforming humble vegetables into a comforting bowl of goodness. No matter the season, her kitchen was a sanctuary, filled with laughter and the clinking of pots. She would beckon me into her cozy kitchen, where we’d chop, stir, and season together.
One particular evening, after a long day of playing outside, she surprised me with her signature harvest vegetable soup. As we stirred the bubbling pot, she shared the secret: it was all about fresh, seasonal ingredients. I’ve carried that lesson with me, and today, I want to pass it on to you through this delicious recipe.
Ingredients
Let’s gather our ingredients! Here’s what you’ll need to create this vibrant soup:
-
Squash (Acorn or Butternut): Sweet and nutty, squash adds creaminess to your soup. If you don’t have squash on hand, sweet potatoes make a delightful substitute!
-
Carrots: Bright and crunchy, they provide sweetness and texture. Can’t find carrots? Parsnips work beautifully as an alternative.
-
Kale: This leafy green adds nutrients and a lovely texture. If you’re not a fan of kale, try spinach or Swiss chard for a different yet scrumptious twist.
-
Tomatoes (Canned or Fresh): They bring that essential acidity and body to the soup. Crushed tomatoes or even a bit of tomato paste can serve as substitutes if you’re out of fresh ones.
-
Vegetable Broth: The base of our soup that brings everything together. Homemade is best, but store-bought works just as well. You can always use water in a pinch, although it might lack some depth!
-
Herbs (Thyme and Bay Leaf): Fresh or dried, these herbs elevate our dish beautifully. If you’re out of thyme, rosemary or oregano are fabulous alternatives.
-
Salt and Pepper: Essential for bringing out all those flavors. Consider adding a sprinkle of chili flakes for a bit of heat!
Step-by-Step Instructions
Alright, fellow chefs, it’s time to roll up those sleeves and cook! Here’s how to create this cozy cauldron of comfort:
-
Prep Your Veggies: Start by washing and peeling your squash and carrots. Cut the squash in half and scoop out the seeds. Dice into bite-sized cubes. For the carrots, slice them into half-moons or sticks—whatever tickles your fancy!
-
Sauté the Base: In a large pot, heat a couple of tablespoons of olive oil over medium heat. Add the diced squash and carrots first; allow them to sauté for about 5-7 minutes until they start to soften. Don’t forget to sprinkle a pinch of salt over them—this draws out their natural sweetness!
-
Add the Garlic and Tomatoes: Mince a couple of cloves of garlic (because, let’s face it, what’s soup without garlic?) and toss them into the pot. Sauté for an additional minute until fragrant. Then, pour in those luscious tomatoes. If you’re using canned tomatoes, make sure to stir in any juice!
-
Pour in the Broth: Next, add about 4 cups of vegetable broth to the pot. If you’re feeling adventurous, you can mix in a cup of white wine for added depth. Bring everything to a gentle simmer.
-
Add Kale and Herbs: Once your soup is simmering, it’s time to throw in the kale, thyme, and bay leaf. Let it cook for about 15-20 minutes, stirring occasionally, until all veggies are tender and the flavors meld together beautifully. You’ll know it’s ready when your kitchen smells divine!
-
Adjust Seasonings: Before you ladle out that lovely soup, taste it! Add more salt, pepper, or any other seasonings to make it your own. If you like a bit more acidity, a splash of lemon juice or vinegar works wonders.
-
Serve and Enjoy: Your harvest vegetable soup is now ready to be enjoyed! Ladle it into bowls, perhaps with a sprinkle of fresh herbs on top. How inviting does that sound?
Serving Suggestions
When it comes to plating, let your creativity shine! Serve this hearty soup with a slice of crusty bread for dipping—think sourdough or rye for extra flavor. A dollop of crème fraîche or a drizzle of olive oil over the top can also add a lovely finish. For a cozy feel, consider serving it in rustic bowls or even a hollowed-out bread bowl for added flair!
Recipe Variations
Looking to mix things up? Here are a few fun variations to keep your taste buds dancing:
-
Spicy Harvest Soup: Add some diced jalapeños or a pinch of cayenne pepper for an extra kick.
-
Creamy Version: Stir in a bit of coconut milk or heavy cream towards the end for a luscious, creamy texture.
-
Protein Boost: Toss in cooked quinoa or lentils for a heartier soup packed with protein.
-
Curry Twist: Add a tablespoon of curry powder during the sautéing step for an exotic flavor upgrade!
-
Grain or Pasta: Consider adding cooked rice, barley, or small pasta shapes for a more filling dish.
Chef’s Notes
Ah, this soup has been a canvas for my culinary experimentation! I remember one chilly afternoon when I had a bunch of leftover vegetables in the fridge. I decided to toss them all into the pot, and what came out was a delightful surprise! From that day onwards, I’ve embraced the “clean out the fridge” element of soup-making. It’s all about using what you have and let your taste guide you.
This recipe has evolved since those days spent with my grandmother. I’ve learned that there are no set rules in the kitchen; each bowl of soup tells a different story. Whether you stick to the ingredients listed or play around with your own favorites, you can’t go wrong!
FAQs and Troubleshooting
-
Can I make this soup ahead of time?
Absolutely! This soup actually tastes even better the next day as the flavors meld together. Store it in an airtight container in the refrigerator for up to 3 days, or freeze it for future cozy evenings! -
What if my soup is too thick?
No worries! Simply add a little more broth or water until you reach your desired consistency. Stir well, and let it simmer for a few more minutes. -
Can I add protein to this soup?
Definitely! Shredded chicken or cooked beans can be great additions. Just be sure to adjust the cooking times to ensure everything is heated through properly. -
What if I don’t have fresh herbs?
If fresh herbs aren’t available, dried herbs are just fine! Use about a third of the amount specified for fresh herbs, as dried will have a more concentrated flavor.
Nutritional Info (optional)
While I won’t bog you down with numbers, I can assure you this soup is packed with vitamins, minerals, and plenty of fiber! Each bowl is not only comforting but also nourishing for you and your loved ones.
So there you have it, my friends! The heartwarming recipe for Harvest Vegetable Soup, filled with memories and delicious flavors. I hope you enjoy making (and devouring) it just as much as I do. If you have any fun variations or stories of your own, I’d love to hear about them! Happy cooking! 🍽️
PrintHarvest Vegetable Soup

A warm and comforting vegetable soup that captures the essence of fall with fresh, seasonal ingredients.
- Prep Time: 15 minutes
- Cook Time: 30 minutes
- Total Time: 45 minutes
- Yield: 4 servings 1x
- Category: Soup
- Method: Stovetop
- Cuisine: American
- Diet: Vegan
Ingredients
- 1 Squash (Acorn or Butternut)
- 2 Carrots
- 2 cups Kale
- 2 Tomatoes (Canned or Fresh)
- 4 cups Vegetable Broth
- Herbs (Thyme and Bay Leaf)
- Salt
- Pepper
Instructions
- Prep your veggies: Start by washing and peeling your squash and carrots. Cut the squash in half and scoop out the seeds. Dice into bite-sized cubes. For the carrots, slice them into half-moons or sticks.
- Sauté the base: In a large pot, heat a couple of tablespoons of olive oil over medium heat. Add the diced squash and carrots first; allow them to sauté for about 5-7 minutes until they start to soften.
- Add the garlic and tomatoes: Mince a couple of cloves of garlic and toss them into the pot. Sauté for an additional minute. Then, pour in those tomatoes.
- Pour in the broth: Add about 4 cups of vegetable broth to the pot. Bring everything to a gentle simmer.
- Add kale and herbs: Once your soup is simmering, throw in the kale, thyme, and bay leaf. Let it cook for about 15-20 minutes.
- Adjust seasonings: Taste the soup and add more salt, pepper, or any other seasonings to make it your own.
- Serve and enjoy: Ladle it into bowls and serve with a sprinkle of fresh herbs on top.
Notes
Try serving with a slice of crusty bread or a dollop of crème fraîche for added richness.
Nutrition
- Serving Size: 1 serving
- Calories: 250
- Sugar: 6g
- Sodium: 500mg
- Fat: 8g
- Saturated Fat: 1g
- Unsaturated Fat: 5g
- Trans Fat: 0g
- Carbohydrates: 35g
- Fiber: 7g
- Protein: 6g
- Cholesterol: 0mg
Keywords: vegetable soup, harvest soup, cozy soup, fall recipes

Creamy One-Pot Chicken Parmesan Soup (Weeknight Meal)
Comfort in a Bowl: Chicken Parmesan Soup
Hey there, fellow foodies! 🎉 Welcome to the heart of my kitchen, where soups simmer and memories are blended with flavors. Today, we’re diving into a dish that’s like a warm hug on a chilly evening: Chicken Parmesan Soup. Imagine all the comforting notes of classic Chicken Parmesan transformed into an inviting bowl of soup — it’s hearty, it’s delicious, and it’s oh-so-simple to make!
When I first conjured up this recipe, I was craving two things: the comforting familiarity of a beloved Italian dish and the cozy, warming nature of a soup. The moment I took that first spoonful, it brought me back to my childhood, where I would eagerly await my mom’s legendary chicken parmesan on chilly winter nights. We’d gather around the table, laughter echoing through the air, as we savored every melt-in-your-mouth bite. This soup captures that same magic, making it perfect for both weeknights and special occasions, with the added bonus of being a one-pot wonder!
Cooking should always feel elegant yet never intimidating, and that’s exactly what we’ll embrace today. Let’s roll up our sleeves, tie on our aprons, and create a masterpiece that feels both refined and comforting. Ready? Let’s get cooking! 🍲✨
A Kitchen Memory: The Inspiration Behind the Soup
I’ll never forget the first time my mom made chicken parmesan for our family. It had just enough golden-brown crunch on the outside and was layered with gooey, melted cheese — just divine! She served it with spaghetti, and I remember how we all dug in with gusto, each bite savored as though it was the most important mission of our evening.
But here’s the kicker: every time she made it, the aroma would waft through the house, drawing neighbors in, lured by the scent of garlic and tomato. This inviting atmosphere made me realize that food was not just about nourishment; it was about connection. Each meal was a celebration.
That nostalgia is what inspired me to craft this Chicken Parmesan Soup. I wanted to capture that family atmosphere, the simple elegance of Italian cooking, but in a cozy bowl. Picture that same taste you love, now served piping hot in a soup that warms you from the inside out. That, my friends, is what we are making together today!
Ingredients You’ll Need
Let’s gather our ingredients. Here’s what you’ll need for this delectable dish, along with some pro tips to help you out:
-
Chicken Breasts
Use boneless, skinless chicken breasts for a tender and quick-cooking protein. If you’re in a pinch, rotisserie chicken is a fantastic substitute! Just shred it and toss it in toward the end of cooking. -
Marinara Sauce
A rich marinara sauce forms the base of our soup. Store-bought is totally fine (look for organic ones!), but if you’re feeling adventurous, homemade is the way to go. You can even use a roasted tomato sauce for a deeper flavor. -
Parmesan Cheese
Ah, the star of Chicken Parmesan! Freshly grated Parmesan adds creaminess and flavor. Don’t have any? Try Pecorino Romano for a saltier profile or nutritional yeast for a vegan option. -
Pasta
Use small pasta shapes like ditalini, orzo, or even broken spaghetti. If you want to make it gluten-free, feel free to swap in your favorite gluten-free pasta. Just remember to adjust the cooking time! -
Chicken Broth
This will enrich the flavors of your soup. Either store-bought or homemade works great. If you’re low on broth, water will do in a pinch, but it’ll dilute the flavors a bit. -
Italian Seasoning
A blend of herbs like basil, oregano, and thyme brings that Italian flair to our soup. If you’re fresh out, feel free to use individual dried herbs instead! -
Olive Oil
For sautéing your chicken and aromatics. It adds flavor and healthy fats. In a pinch, avocado oil or butter can also do the trick! -
Fresh Basil
This is optional but highly recommended for garnishing! It adds a lovely freshness to your final dish. Dried basil can stand in if fresh is unavailable, just use it more sparingly.
Step-by-Step Instructions
Let’s get our hands busy and start making this delicious Chicken Parmesan Soup! Follow these easy steps for a delightful culinary experience:
-
Prepare Your Chicken
In a large pot, heat about 2 tablespoons of olive oil over medium heat. Season your chicken breasts with salt, pepper, and a sprinkle of Italian seasoning. Once the oil is hot, add the chicken and sauté for about 5-6 minutes on each side until golden brown and cooked through (an internal temperature of 165°F). Remove the chicken and let it rest for a few minutes before shredding or dicing. -
Sauté the Aromatics
In the same pot, add a splash more olive oil if needed. Toss in minced garlic (about 2-3 cloves) and cook for 30 seconds until fragrant — this is where your kitchen will start smelling heavenly! Add a medium diced onion and sauté until translucent, about 3-4 minutes. -
Add Marinara Sauce and Broth
Pour in your marinara sauce and chicken broth (about 4 cups). Bring to a gentle simmer, stirring occasionally to combine the flavors. This thick and rich mixture is the base of your soup! -
Incorporate the Pasta
Once your broth is bubbling, add in the pasta of your choice. Let it cook according to the package instructions (usually around 8-10 minutes). Remember, al dente is the goal here; the pasta will continue to cook even after you turn off the heat. -
Shred the Chicken
While the pasta is cooking, shred or dice your cooked chicken into bite-sized pieces. Add it back into the pot, allowing it to mingle with the flavors of the soup. -
Bring on the Flavor
Stir in freshly grated Parmesan cheese (at least ½ to 1 cup) and taste the soup. Adjust the seasoning with more salt, pepper, or Italian seasoning as needed. Feel free to add a pinch of red pepper flakes for some heat! -
Finishing Touches
Right before serving, chop up fresh basil and stir it into the soup. This not only enhances the flavor but also adds a vibrant splash of color to your dish. -
Serve
Ladle the soup into bowls and garnish with more Parmesan cheese, a drizzle of olive oil, and maybe another sprinkle of fresh basil for a touch of elegance.
Trust me, your kitchen will be filled with happy vibes and fragrant aromas as people gather around!
Serving Suggestions
Presentation can elevate even the simplest dishes. For serving, I recommend using big, rustic bowls that invite people to dig in. You can sprinkle additional grated Parmesan on top and drizzle a little olive oil for that finishing touch. Pair it with a crusty loaf of bread for dipping, and voilà! You’ve got a meal that’s as beautiful as it is delicious.
Recipe Variations
Looking to mix things up? Here are some fun variations you can try:
- Add Veggies: Toss in some chopped spinach or kale for extra nutrition. They’ll wilt perfectly in the warm soup!
- Creamy Twist: Stir in a splash of heavy cream or dairy-free alternative for a richer texture.
- Protein Swap: Use ground turkey or lean ground beef instead of chicken for a different flavor profile.
- Zoodles: For a low-carb option, swap the pasta for zucchini noodles. Just add them in the last few minutes of cooking.
- Spicy: A bit of diced jalapeño or a dash of hot sauce can bring a delightful kick to your soup.
Chef’s Notes
I love seeing how recipes evolve over time. What started as a simple Chicken Parmesan dish has turned into this cozy soup, perfect for feeding a crowd or simply enjoying on a quiet evening alone. It’s inspired countless warm memories at my table, and I hope it does the same for you! I once made this for an impromptu dinner party and ended up sharing the recipe with everyone who came! It’s truly a crowd-pleaser, and the leftovers (if you have any) are even better the next day!
FAQs and Troubleshooting
-
Why is my soup too salty?
If you find the soup too salty, try adding a pinch of sugar to help balance it out. Alternatively, add more low-sodium broth or water to dilute it. -
Can I use frozen chicken?
Yes! Just make sure you cook it through. You may need to increase your cooking time by a few minutes. Ensure it’s fully cooked before shredding. -
What if my pasta gets mushy?
If your pasta turns out mushy, it’s likely overcooked. Keep a close eye on it while it’s simmering, and remember it will continue cooking off-heat. -
How do I store leftovers?
Store any leftovers in an airtight container in the fridge for up to 3–4 days. To reheat, just warm it gently over the stove, adding a splash of broth to loosen it up.
Nutritional Info (Optional)
While not required, it can be helpful to know the nutritional content of your meals. A standard serving of Chicken Parmesan Soup (around 1.5 cups) might provide approximately:
- Calories: 350
- Protein: 30g
- Carbohydrates: 35g
- Fat: 15g
This can vary based on portions and specific ingredients used.
There you have it! Chicken Parmesan Soup that warms your heart and soul, inviting friends and family to gather around the table. Thanks for joining me today! I hope you try this recipe and experience the love and comfort that comes with it. Don’t forget to share your creations, and let’s keep the conversation going. Happy cooking, my friends! 🍽️💛
PrintChicken Parmesan Soup

A delightful Chicken Parmesan Soup that combines the comforting flavors of the classic dish into a warming bowl of goodness, perfect for chilly evenings.
- Prep Time: 15 minutes
- Cook Time: 30 minutes
- Total Time: 45 minutes
- Yield: 4 servings 1x
- Category: Soup
- Method: Stovetop
- Cuisine: Italian
- Diet: N/A
Ingredients
- 1 lb boneless, skinless chicken breasts
- 4 cups marinara sauce
- 1 cup freshly grated Parmesan cheese
- 1 cup small pasta (e.g., ditalini, orzo, or broken spaghetti)
- 4 cups chicken broth
- 1 tablespoon Italian seasoning
- 2 tablespoons olive oil
- Fresh basil for garnish
- 2–3 cloves minced garlic
- 1 medium diced onion
Instructions
- Prepare your chicken by heating olive oil in a large pot over medium heat. Season with salt and pepper. Sauté for 5-6 minutes on each side until cooked through. Remove and shred.
- Sauté the onion and garlic in the same pot until fragrant and translucent.
- Add the marinara sauce and chicken broth, bring to a simmer.
- Incorporate the pasta and cook according to package instructions until al dente.
- Shred the chicken into bite-sized pieces and return to the pot.
- Bring the soup to taste by adding Parmesan cheese and adjusting seasoning.
- Finishing with fresh basil, ladle into bowls and serve with extra Parmesan on top.
Notes
This soup is perfect for leftovers, and its flavor improves the next day. Pair it with crusty bread for a complete meal.
Nutrition
- Serving Size: 1 serving
- Calories: 350
- Sugar: 6g
- Sodium: 700mg
- Fat: 15g
- Saturated Fat: 5g
- Unsaturated Fat: 8g
- Trans Fat: 0g
- Carbohydrates: 35g
- Fiber: 3g
- Protein: 30g
- Cholesterol: 70mg
Keywords: Chicken Parmesan, Soup, Comfort Food, Italian, Hearty, One-Pot Meal

Reuben Soup
A Cozy Bowl of Reuben Soup: Comfort in Every Spoonful
Hello, lovely foodies! Today, we’re diving into a delectable dish that wraps you up in a warm embrace: Reuben Soup. Yes, you heard that right—soup! It’s a twist on the classic Reuben sandwich that takes all the wonderful flavors of that iconic meal and transforms them into a cozy, creamy soup. Think of this recipe as your new best friend for chilly evenings or when you’re just craving something comforting and hearty.
Now, what makes this Reuben Soup special? It’s not just about blending together ingredients; it’s a celebration of beloved flavors—corned beef, tangy sauerkraut, Swiss cheese, and a whisper of cream. Each spoonful feels like a hug from your grandma, reminding us of simple pleasures in life. And the best part? It is easy, approachable, and downright satisfying to prepare!
So, grab your apron, and let’s get cooking. I can already envision you surrounded by delicious aromas, feeling accomplished as we craft this masterpiece together!
My Reuben Soup Story
Let me take you back to a cozy winter evening from my childhood. Picture this: a dimly lit kitchen filled with the laughter of family and the rich smell of a pot simmering on the stove. My mom would often whip up her famous Reuben sandwiches on those frosty nights. She’d layer the perfectly grilled rye bread with thick slices of corned beef, tangy sauerkraut, and melty Swiss cheese, then press them until golden brown. And oh, how those sandwiches would disappear!
One evening, a surprise guest showed up, and my mom improvised a delightful soup by blending all the sandwich ingredients into a big pot with cream and broth. Wow! What an unexpected treat that was! It became one of our family staples, and I remember savoring those bowls of Reuben Soup while listening to stories from the past.
Now, here I am, passing on this cherished recipe to you! Every time I make this soup, I reminisce about that cozy night, filled with love and laughter. It connects us with our past while bringing joy to our present. There’s something so magical about sharing food, isn’t there?
Ingredients
Here’s what you’ll need to whip up this delicious Reuben Soup:
-
Corned Beef
This isn’t just your average beef—it’s packed with flavor! Look for high-quality corned beef, either leftover from a feast or from your local deli. Need a shortcut? You can use canned corned beef, too, if you’re in a pinch! -
Sauerkraut
The tangy crunch of sauerkraut is a must-have! If you’re not a fan, you can swap it for pickled cabbage for a similar zing. No sauerkraut at all? A splash of vinegar can do the trick too! -
Swiss Cheese
Creamy, melty Swiss cheese gives this soup that authentic Reuben flavor. If Swiss isn’t your favorite, feel free to substitute with Gruyère or even mozzarella for a milder taste. -
Heavy Cream
A splash for richness and creaminess! You could use half-and-half for a lighter version, or go dairy-free with coconut cream if needed. -
Beef Broth
This serves as the soup base. Homemade or store-bought, just ensure it’s low-sodium so you can control the flavor. -
Garlic & Onion Powder
These seasonings add depth. Prefer fresh? Use minced garlic and chopped onions instead—just be careful about browning them too much! -
Dill and Caraway Seeds
These herbs give a traditional Reuben flavor. Feel free to leave them out if they’re not your thing or sub with Italian seasoning if you want a twist!
Step-by-Step Instructions
Let’s get started on creating this Reuben Soup masterpiece! Follow along with these simple steps, sprinkled with some chef tips to help you every step of the way.
-
Prep Your Ingredients
Start by chopping up your corned beef into bite-sized pieces. Think of them like little morsels of joy! If you’re using deli corned beef, grab a sharp knife and slice it thinly. This step is crucial because smaller pieces will meld beautifully with the other ingredients. -
Sauté the Beef
In a large pot over medium heat, add the chopped corned beef. Cook it for about 3-5 minutes until it’s heated through and slightly crispy at the edges. This enhances the flavor and creates a nice texture. Trust me; you’ll want those little crispy bits! -
Add Broth
Pour in 4 cups of beef broth. This is where the magic begins! By bringing it to a gentle simmer, you’re setting the stage for all the flavors to meld. Give it a good stir to lift those yummy bits stuck to the bottom of the pot! -
Stir in Sauerkraut
Now, scoop in that tangy sauerkraut (drain any excess liquid if it’s too sour for your taste). Let it bubble for about 10 minutes, so the flavors dance together. -
Creamy Blues
Lower the heat and pour in 1 cup of heavy cream. Stir well! This creamy addition transforms the soup from simply “good” to “swoon-worthy.” Keep the heat low; we don’t want it to boil—just a gentle simmer! -
Cheese, Please
Gradually add in about 1 cup of shredded Swiss cheese. Stir until it’s melted, bubbling, and gooey. If you want to go wild, add an extra handful—can you ever have too much cheese? I don’t think so! -
Season to Taste
Toss in garlic and onion powder, dill, and caraway seeds. Taste! Don’t be shy about adding salt and pepper as needed. You want a bold flavor to shine through. -
Serve and Enjoy
Once all the ingredients are blended, ladle the soup into bowls. Admire your masterpiece—you did it!
Serving Suggestions
To make your soup presentation delightful, consider garnishing with extra shredded Swiss cheese and a sprinkle of fresh dill. Serve it up alongside a crusty slice of rye bread or some crunchy crackers to dip. Trust me; the combination will make everyone at the table swoon! Also, a dash of hot sauce can add an exciting zing for those who love a kick!
Recipe Variations
Want to switch things up? Here are a few creative variations you can try with your Reuben Soup:
- Vegetarian Option: Swap corned beef for sautéed mushrooms and tofu for a plant-based twist.
- Spicy Kick: Add some diced jalapeños or a sprinkle of red pepper flakes for extra heat.
- Lighter Version: Use low-fat cream and low-sodium broth to keep things on the lighter side without sacrificing flavor.
- Italian Flair: Replace the dill and caraway seeds with Italian herbs for a wonderful twist on the classic.
Chef’s Notes
As I reflect on this recipe, it’s evolved over the years. Originally, it was a rushed throw-together dish on cold nights. Now, it’s a cherished family favorite, with each bowl filled with lovingly prepared ingredients. I often find myself reminiscing about those kitchen evenings with my mom as I make it. And every time I unveil my Reuben Soup to guests, their eyes light up—it’s pure magic.
It’s funny how food has the power to transport us back in time, isn’t it?
FAQs and Troubleshooting
How can I make this soup ahead of time?
Absolutely! This soup tastes even better the day after! Just store it in an airtight container in the fridge. When reheating, do so on low heat to prevent the cream from separating.
My soup is too thick; what do I do?
If you find your soup on the thick side, add a bit more broth or cream until you reach your desired consistency. Stir continuously to ensure a smooth finish!
Can I freeze Reuben Soup?
Yes, but in small portions. Freezing creamy soups can be tricky, as dairy sometimes separates during thawing. When reheating, whisk it vigorously to bring it back together.
It tastes too sour! What can I do?
Balance out the sour flavor by adding a sprinkle of sugar or sweetening it with a bit of honey. This can balance the tartness of the sauerkraut nicely!
Nutritional Info
(Since you requested optional info, I’ll keep it light for now.)
Each serving (1 cup) of Reuben Soup is approximately:
- Calories: 300
- Protein: 15g
- Carbohydrates: 20g
- Fats: 20g
This is a comfort dish, so indulge a little and enjoy its warmth!
And there you have it—my cozy Reuben Soup recipe, perfect for sharing love around your table! Cooking is about creating memories and feelings, so I hope you’ll find joy in every bite. Let’s keep spreading warmth through food, one recipe at a time. I can’t wait to hear how yours turns out! Happy cooking!
PrintCozy Reuben Soup

A creamy and hearty soup inspired by the classic Reuben sandwich, featuring corned beef, tangy sauerkraut, and Swiss cheese.
- Prep Time: 10 minutes
- Cook Time: 30 minutes
- Total Time: 40 minutes
- Yield: 4 servings 1x
- Category: Soup
- Method: Stovetop
- Cuisine: American
- Diet: Meat-Based
Ingredients
- 1 pound Corned Beef, chopped
- 2 cups Sauerkraut, drained
- 1 cup Swiss Cheese, shredded
- 1 cup Heavy Cream
- 4 cups Beef Broth
- 1 teaspoon Garlic Powder
- 1 teaspoon Onion Powder
- 1 teaspoon Dill Seeds
- 1 teaspoon Caraway Seeds
- Salt and Pepper, to taste
Instructions
- Prep your ingredients by chopping corned beef into bite-sized pieces.
- Sauté the chopped corned beef in a large pot over medium heat for 3-5 minutes.
- Add 4 cups of beef broth and bring it to a gentle simmer.
- Stir in the sauerkraut and let it bubble for about 10 minutes.
- Pour in 1 cup of heavy cream and keep the heat low to avoid boiling.
- Add 1 cup of shredded Swiss cheese and stir until melted.
- Season with garlic and onion powder, dill, and caraway seeds. Adjust seasoning with salt and pepper.
- Serve the soup in bowls and enjoy!
Notes
For a vegetarian option, substitute corned beef with sautéed mushrooms. You can also add a dash of hot sauce for an extra kick.
Nutrition
- Serving Size: 1 cup
- Calories: 300
- Sugar: 3g
- Sodium: 700mg
- Fat: 20g
- Saturated Fat: 10g
- Unsaturated Fat: 8g
- Trans Fat: 0g
- Carbohydrates: 20g
- Fiber: 2g
- Protein: 15g
- Cholesterol: 75mg
Keywords: Reuben Soup, Comfort Food, Hearty Meal, Cozy Soup, Winter Recipe

Pizza Soup
Pizza Soup: A Comforting Bowl of Hearty Flavor
Imagine sinking into a cozy chair, a chilly breeze rustling outside, and all you can think about is how to warm up from the inside out. Enter Pizza Soup—a delightful fusion of your favorite pizza flavors served in a comforting, steaming bowl. This dish is not only heartwarming and delicious, but it’s also super easy to prepare. If you’re a pizza lover (and let’s be honest, who isn’t?), this is a recipe that transforms the classic into something new and exciting, perfect for those nights when you crave that cheesy goodness but don’t want to deal with all the dough.
Pizza Soup brings all the familiar flavors we love—Italian sausage, pepperoni, juicy tomatoes, and melty mozzarella—into one harmonious blend. Don’t worry; you won’t need a restaurant-style pizza oven for this one! Just your trusty stove and a pot, and you’ll be well on your way to enjoying a bowl of pizza bliss.
A Personal Story: The First Time I Made Pizza Soup
I’ll never forget the first time I made Pizza Soup. It was a chilly Saturday evening, and I was hosting a few of my closest friends for a cozy get-together. The usual pizza delivery felt too routine, and I wanted to create something special that would surprise them. I rummaged through my fridge and pantry, grabbed some Italian sausage and tomatoes, and thought, “Why not combine all the best parts of pizza into a soup?”
As it simmered on the stove, the savory aroma filled my kitchen, and my guests arrived, instantly intrigued by the delightful smell. We gathered around the table, bowls in hand, and with the very first bite, it became a favorite that we still talk about to this day. It’s that memory—a warm kitchen, good friends, and the joy of sharing a delicious meal—that inspired me to put this recipe together for you. Let’s recreate that magic!
Ingredients
A good recipe starts with quality ingredients! Here’s what you’ll need for this flavorful Pizza Soup:
-
Italian Sausage:
- A flavorful base ingredient that brings richness to the soup. You can use mild or spicy sausage, depending on your heat preference. Ground beef or turkey can also be great substitutes if you prefer something different.
-
Pepperoni:
- The classic pizza topping that’s diced into happy little cubes. It adds a crunchy texture and a punch of flavor. If you’re looking for a lighter option, turkey pepperoni works too.
-
Canned Diced Tomatoes:
- Essential for creating a robust soup base. Choose a brand with no added sugars or preservatives for the best flavor. Fresh tomatoes can be used if you have them in season; just peel and dice them up!
-
Mozzarella Cheese:
- Nothing beats gooey mozzarella melted on top of hot soup. Fresh mozzarella is divine but shredded mozzarella works equally well. Got a dairy allergy? Try a dairy-free cheese or nutritional yeast for a cheesy flavor.
-
Onion and Garlic:
- These aromatic starting ingredients will elevate your soup to new heights. Yellow onion is a good choice, while garlic will provide that robust flavor. If you’re in a pinch, garlic powder will do.
-
Italian Seasoning:
- A blend of dried herbs like basil, oregano, and thyme, Italian seasoning gives the soup that authentic pizza flair. You can use fresh herbs if you have them on hand.
-
Chicken or Vegetable Broth:
- The liquid gold that brings everything together! Homemade is ideal, but low-sodium store-bought works just fine. Feel free to use vegetable broth for a vegetarian version.
-
Olive Oil:
- For sautéing the veggies and adding an additional depth of flavor. You can substitute with avocado oil if you prefer.
Step-by-Step Instructions
Now that you have your ingredients ready, let’s get started! Follow these steps for an easy, aromatic Pizza Soup:
-
Sauté the Aromatics:
In a large pot, heat about 2 tablespoons of olive oil over medium heat. Add a diced onion and sauté for about 5 minutes until translucent. Then, add 3 cloves of minced garlic and stir for another minute. You want that delicious aroma wafting through your kitchen—trust me, it will make your guests curious! -
Brown the Sausage:
Push the onions and garlic to the side, and add 1 pound of Italian sausage directly into the pot. Use a wooden spoon to break it into smaller pieces as it cooks. You want it to be browned and fully cooked—about 7-10 minutes. This step is crucial as it builds the foundation of flavor for your soup! -
Add the Tomatoes and Broth:
Once the sausage is cooked, pour in a 28-ounce can of diced tomatoes (with juices) and 4 cups of chicken or vegetable broth. Give everything a good stir. The vibrant color and smell alone are enough to brighten your day! -
Season It Up:
Stir in 1 tablespoon of Italian seasoning and a pinch of salt and pepper. Let the soup come to a gentle simmer, and reduce the heat. Allow it to simmer for about 15–20 minutes. This step allows the flavors to meld beautifully. -
Incorporate the Pepperoni:
Add around 1 cup of diced pepperoni to the pot. Let it simmer for an additional 5 minutes. This will give your soup a deliciously rich flavor, as the pepperoni releases its oils. -
Final Touches & Cheese:
Just before serving, stir in about 1 to 1.5 cups of shredded mozzarella cheese. If you’re feeling extra indulgent, add more! Allow it to melt into the soup for that gooey goodness that makes every bite comforting. -
Serve Hot:
Ladle the soup into bowls and garnish with fresh basil or more cheese on top if desired. The best part is that you can enjoy this any night of the week!
Serving Suggestions
For an appealing presentation, serve your Pizza Soup in rustic, wide bowls to showcase all of its hearty ingredients. Drizzle a bit of extra virgin olive oil over the top and sprinkle with fresh basil or parsley as garnishes. Don’t forget some crusty garlic bread on the side for dunking—that’s the true pizza experience!
Recipe Variations
Experimenting in the kitchen is part of the fun! Here are a few creative twists on the classic Pizza Soup:
-
Veggie Pizza Soup:
Swap the meat for an assortment of your favorite roasted or sautéed vegetables like bell peppers, mushrooms, and zucchini. -
Spicy Pepperoni:
Use spicy pepperoni or add red pepper flakes to amp up the heat level for those who love a kick. -
Creamy Pizza Soup:
Stir in a splash of heavy cream or a dollop of ricotta cheese just before serving for a rich, creamy texture. -
Whole Wheat Pasta:
Add cooked whole wheat pasta for a more substantial meal and switch things up; it’ll feel just like a cozy pizza night!
Chef’s Notes
I adore how this recipe has evolved over time. Initially, it was just a last-minute solution to a pizza night crisis, but it has now become a staple in my recipe arsenal. The soup is incredibly forgiving—you can adjust the flavors based on what you have available, making it a true weeknight hero. Plus, it’s an easy crowd-pleaser that brings everyone together around the table.
I also have a funny kitchen story from once when I was testing this recipe. I got caught up chatting with a friend while the soup simmered a bit too long and nearly caramelized the bottom. It was a beautiful accident—creating a flavor that turned it into a “Smoky Pizza Soup.” Not every kitchen misadventure turns out so well, but that one made me chuckle!
FAQs and Troubleshooting
-
What if my soup is too thick?
Add a bit more broth or water until you reach your desired consistency. -
Can I make this soup ahead of time?
Absolutely! This soup keeps well in the fridge for 3 to 4 days, and the flavors develop even more as it sits. Just reheat gently. -
How can I store leftovers?
Store leftovers in an airtight container in the refrigerator or freeze them for later. -
Can I make this vegetarian?
Yes! Just omit the sausage and pepperoni, and bulk it up with more vegetables or even white beans for added protein.
Nutritional Info
(Optional: Specific nutritional details like calorie count, protein, fat, and carbs can be added here based on the exact ingredients used, if applicable.)
Pizza Soup is more than just a recipe; it’s a way to gather loved ones together and enjoy warmth, laughter, and delicious comfort food. I hope this dish brings joy to your table as it has mine. Now, go on and tie that apron, grab your ingredients, and let’s create something delectable from your kitchen today!
PrintPizza Soup

A comforting bowl of Pizza Soup that brings all the familiar flavors of pizza into a delicious, hearty soup.
- Prep Time: 10 minutes
- Cook Time: 30 minutes
- Total Time: 40 minutes
- Yield: 4 servings 1x
- Category: Main Course
- Method: Stovetop
- Cuisine: Italian
- Diet: Non-Vegetarian
Ingredients
- 1 pound Italian sausage
- 1 cup diced pepperoni
- 28 ounces canned diced tomatoes
- 1 to 1.5 cups shredded mozzarella cheese
- 1 yellow onion, diced
- 3 cloves garlic, minced
- 1 tablespoon Italian seasoning
- 4 cups chicken or vegetable broth
- 2 tablespoons olive oil
- Salt and pepper to taste
Instructions
- Sauté the aromatics: In a large pot, heat about 2 tablespoons of olive oil over medium heat. Add the diced onion and sauté for about 5 minutes until translucent. Then, add the minced garlic and stir for another minute.
- Brown the sausage: Push the onions and garlic to the side and add the Italian sausage directly into the pot. Break it into smaller pieces as it cooks for about 7-10 minutes.
- Add the tomatoes and broth: Once the sausage is cooked, pour in the diced tomatoes and chicken or vegetable broth. Stir well.
- Season it up: Stir in the Italian seasoning along with a pinch of salt and pepper. Let the soup come to a gentle simmer for about 15-20 minutes.
- Incorporate the pepperoni: Add the diced pepperoni to the pot and let it simmer for an additional 5 minutes.
- Final touches & cheese: Before serving, stir in the shredded mozzarella cheese. Allow it to melt into the soup.
- Serve hot: Ladle the soup into bowls and garnish with fresh basil or additional cheese as desired.
Notes
This soup is perfect for any night of the week and pairs well with crusty garlic bread.
Nutrition
- Serving Size: 1 serving
- Calories: 400
- Sugar: 6g
- Sodium: 750mg
- Fat: 18g
- Saturated Fat: 7g
- Unsaturated Fat: 9g
- Trans Fat: 0g
- Carbohydrates: 25g
- Fiber: 3g
- Protein: 22g
- Cholesterol: 60mg
Keywords: pizza soup, comfort food, easy recipe, Italian soup, hearty soup

Creamy Carrot-Ginger Soup: 20-Minute Weeknight Comfort
Creamy Carrot Ginger Soup: A Warm Hug in a Bowl
Welcome, friend! Are you ready to explore a delightful dish that warms the soul and tickles the taste buds? Today, we’re diving into the heart of comfort food with one of my all-time favorites: Creamy Carrot Ginger Soup. This vibrant, velvety soup is not only a feast for the eyes but also a nourishing embrace for those chilly nights when all you want is a bowl of something cozy to wrap your hands around.
Growing up, my mother often made this soup whenever we had a few extra carrots lying around or when we were in need of a little “pick-me-up.” I can still recall the aroma wafting through our home—the sweet earthiness of carrots mingling with the spicy warmth of ginger, making our kitchen feel like a sanctuary from the outside world. With just a few simple ingredients, she transformed a humble vegetable into something magical, and every spoonful felt like a hug.
Whether you’re serving it as a starter at a dinner party or enjoying it solo for lunch, this soup is a heartfelt reminder that good food doesn’t have to be complicated. Are you ready to get started? Let’s gather those ingredients!
Personal Story
One of my fondest memories associated with this Creamy Carrot Ginger Soup dates back to a rainy afternoon when my friends and I decided to host an “indoor picnic.” We spread out blankets in the living room, filled bowls with fresh veggies and bread, and whipped up a big pot of this soup to share. As we scooped it out into mismatched bowls—my grandmother’s floral china mixed with my modern favorites—we chatted and laughed about everything and nothing at all.
That day, I realized that food is not just about nourishment; it’s about connection, warmth, and shared experiences. The soup became the centerpiece of our gathering, and it sparked discussions about our childhood favorites and family recipes, allowing us to learn and bond with one another amidst the ingredients and flavors. It’s moments like these that truly embody what Ivory Apron stands for: elegance with ease and warmth with intention.
Ingredients
Here’s what you’ll need to make this luscious Creamy Carrot Ginger Soup. Trust me, each ingredient plays a star role in this cozy melody of flavors!
-
Carrots (4 cups, roughly chopped)
Carrots lend their natural sweetness and vibrant color to the soup. Look for firm, bright orange carrots for the best flavor. You can substitute with parsnips if you’re craving something slightly different! -
Fresh Ginger (2 inches, peeled and grated)
Ginger adds a warming spice that invigorates the senses. If fresh ginger isn’t available, you can use ground ginger, but start with a much smaller amount—about a teaspoon—and adjust to taste. -
Onion (1 medium, diced)
This little powerhouse brings depth and sweetness to the soup base. Feel free to substitute with leeks for a more delicate flavor, or shallots for a gourmet touch! -
Garlic (2 cloves, minced)
Garlic enhances the overall flavor profile, adding layers of richness. If you want a milder flavor, consider roasted garlic, which transforms into a sweet and caramelized delight. -
Vegetable Broth (4 cups)
A comforting base for the soup, vegetable broth offers depth without overpowering the flavors of the carrots and ginger. Chicken broth could be used for extra richness if that fits your taste. -
Cream (1 cup, or coconut milk for a dairy-free option)
Cream provides that rich, velvety texture. If you’re aiming for a lighter version, try using a lower-fat option or even plain Greek yogurt; just stir it in at the end, allowing it to warm through. -
Olive Oil (2 tablespoons)
A splash of olive oil adds richness and helps to sauté the vegetables. You can swap it out for butter if you’re in the mood for something a little more indulgent! -
Salt and Pepper (to taste)
Always important! Don’t forget to season as you go to bring out the full flavors of each ingredient. Freshly cracked black pepper elevates the taste wonderfully.
Step-by-Step Instructions
Now that you’ve gathered your ingredients, let’s get your soup simmering! Follow these steps, and you’ll be enjoying a warm bowl of Creamy Carrot Ginger Soup in no time.
-
Sauté the Aromatics:
In a large pot, heat the olive oil over medium heat. Once hot, add the diced onion and a pinch of salt. Sauté for about 3-5 minutes until the onions are translucent. This step is crucial—the onions lay the flavor groundwork! -
Add Garlic and Ginger:
Toss in the minced garlic and grated ginger, stirring for about a minute until fragrant. This is where the magic starts! The aroma of ginger will fill your kitchen, so let it bloom before adding the carrots. -
Incorporate Carrots:
Add the chopped carrots to the pot, stirring to combine. Let them sauté for another 5 minutes. This step enhances the carrots’ natural sweetness, making the soup even more delightful. -
Pour in the Broth:
Now, your pot is ready for broth! Pour in the vegetable broth, ensuring the carrots are fully submerged. Bring to a gentle boil, then reduce the heat to a simmer. Cover and let it cook for about 20 minutes, or until the carrots are fork-tender. -
Blend it Up:
Once the carrots are tender, remove the pot from heat. Carefully use an immersion blender to purée the soup until smooth. If you’re using a regular blender, allow the soup to cool slightly before blending in batches. Just be cautious of hot splashes—trust me, I’ve learned the hard way! -
Add Cream:
Return the smooth soup to the stove over low heat and stir in the cream until well combined. If you’re opting for coconut milk, do the same! Taste and adjust seasoning with salt and pepper as needed. -
Serve Warm:
Keep your soup on low until you’re ready to serve. This soup is best enjoyed warm, so it’s perfect for entertaining or just cozy evenings at home!
Consider garnishing each bowl with a drizzle of cream, a sprinkle of fresh herbs (like chives or parsley), or even some crispy shallots for added texture.
Serving Suggestions
For an elegant presentation, serve your Creamy Carrot Ginger Soup in shallow bowls. A simple sprinkle of freshly chopped herbs, a swirl of cream (or coconut milk), and some crispy croutons or bread on the side create a beautiful tablescape. You could even pair it with warm, crusty bread—perfect for soaking up every last drop!
Recipe Variations
Feeling adventurous? Here are some creative twists you might consider:
-
Curried Carrot Ginger Soup: Add a tablespoon of curry powder at the same time you add garlic and ginger for a warm spice kick.
-
Apple and Carrot Soup: Toss in one chopped sweet apple with the carrots for a touch of fruity sweetness.
-
Creamy Coconut Soup: Use coconut milk exclusively instead of cream for a tropical twist that pairs beautifully with ginger.
-
Roasted Vegetable Soup: Roast the carrots and onions on baking sheets until caramelized before adding them to the pot for extra depth of flavor.
-
Spicy Ginger Soup: Add a pinch of red pepper flakes or a chopped jalapeño for those who love a little heat in their soup!
Chef’s Notes
This Creamy Carrot Ginger Soup has certainly evolved over the years. I remember the first time I made it for a group of friends—I accidentally added too much ginger, making it more of a “spicy adventure” than a comforting soup! We spent the evening laughing and sipping milk to cool our tongues, and ironically, that mishap became a favorite storytelling moment in our friend group.
As I refined the recipe over time, I learned the beauty of balance in flavors. Now, I love how the sweetness of the carrots harmonizes with the gentle spice of ginger, creating an unforgettable blend. It’s a reminder that even the simplest dishes can always evolve, so don’t be afraid to play and make it your own!
FAQs and Troubleshooting
-
My soup is too thick—what should I do?
No worries! Simply add a little more broth or water until you reach your desired consistency. Blend again if necessary. -
Can I make this soup ahead of time?
Absolutely! This soup stores beautifully in the fridge for up to 5 days. Reheat gently on the stove—just be sure to stir frequently! -
How can I make this vegan?
To make this recipe vegan, use coconut milk instead of cream and check that your vegetable broth is plant-based. -
What can I serve with this soup?
A fresh salad, a sandwich, or cheese toasties would complement this soup very well. You can also serve it alongside a light quiche. The options are endless!
Nutritional Info
(Consider providing estimates like calories, fat, fiber, protein, etc.)
With the cooler months approaching, this Creamy Carrot Ginger Soup is the perfect addition to your recipe collection. Not only is it easy to make, but it’s also packed with nutrients and warmth—everything you need to cozy up your kitchen and heart.
So, grab your apron, gather your ingredients, and let’s create something timeless together. I can’t wait to hear about your experiences as you whip up this delightful dish! Happy cooking!
PrintCreamy Carrot Ginger Soup

A vibrant, velvety soup made with carrots and ginger that warms the soul and tickles the taste buds.
- Prep Time: 10 minutes
- Cook Time: 30 minutes
- Total Time: 40 minutes
- Yield: 4 servings 1x
- Category: Soup
- Method: Blending
- Cuisine: Vegan
- Diet: Vegetarian
Ingredients
- 4 cups Carrots, roughly chopped
- 2 inches Fresh Ginger, peeled and grated
- 1 medium Onion, diced
- 2 cloves Garlic, minced
- 4 cups Vegetable Broth
- 1 cup Cream (or coconut milk for a dairy-free option)
- 2 tablespoons Olive Oil
- Salt and Pepper, to taste
Instructions
- Sauté the aromatics in a large pot with olive oil until the onions are translucent.
- Add the minced garlic and grated ginger, stirring for about a minute until fragrant.
- Incorporate the chopped carrots and sauté for another 5 minutes.
- Pour in the vegetable broth, bring to a gentle boil, then reduce to simmer for 20 minutes until carrots are fork-tender.
- Blend the soup until smooth using an immersion blender.
- Add the cream, stirring until well combined and adjust seasoning as needed.
- Serve warm, garnished as desired.
Notes
Serve in shallow bowls with a drizzle of cream and fresh herbs for an elegant presentation. Pairs well with crusty bread.
Nutrition
- Serving Size: 1 bowl
- Calories: 320
- Sugar: 8g
- Sodium: 450mg
- Fat: 20g
- Saturated Fat: 10g
- Unsaturated Fat: 8g
- Trans Fat: 0g
- Carbohydrates: 35g
- Fiber: 5g
- Protein: 6g
- Cholesterol: 30mg
Keywords: soup, carrot, ginger, creamy soup, comfort food
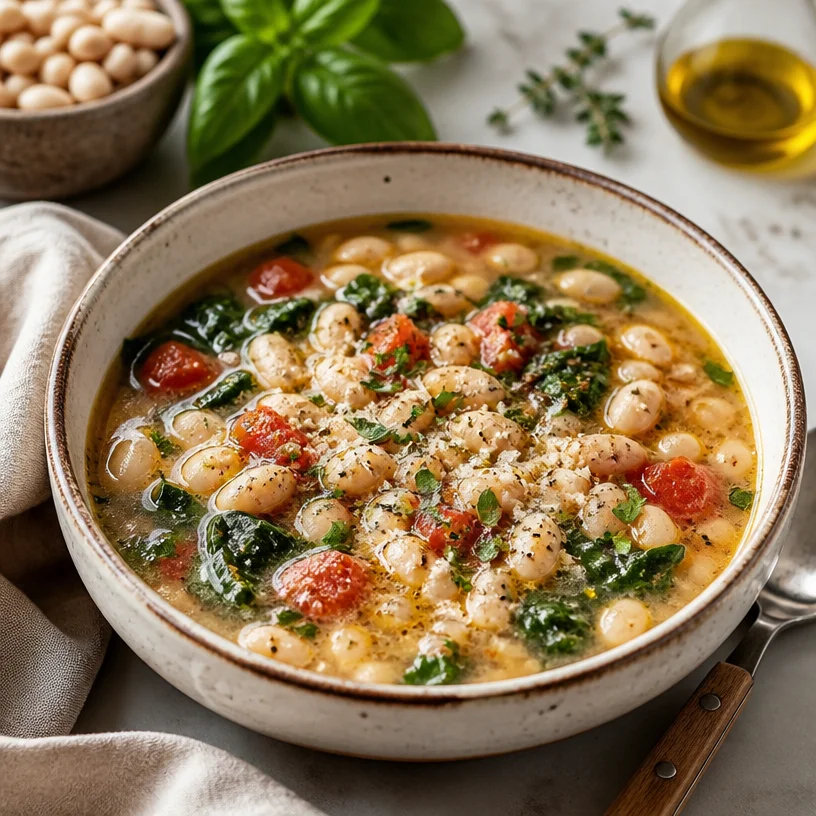
Minute Tuscan White Bean Soup for Weeknight Comfort
A Warm Embrace in a Bowl: Tuscan White Bean Soup
Hello there, fellow food lovers! Today, I’m excited to share with you a bowl of love that’s as comforting as a warm blanket on a chilly evening — Tuscan White Bean Soup. This dish embodies the heart of rustic Italian cooking, taking simple ingredients and transforming them into something truly beautiful and delicious.
Cooking doesn’t have to be elaborate; it’s about the gestures and flavors that make life a little more special. So grab your apron (the ivory one is optional!) and let’s dive into a recipe that’s perfect for family dinners, cozy nights in, or even a fancy dinner party. Ready? Let’s get started!
A Taste of Home
I have a vivid memory that always comes rushing back to me whenever I make this Tuscan White Bean Soup. Picture me, a wee one in the kitchen, perched on a stool next to my grandmother as she gently stirred a bubbling pot on the stove. The aroma wafting through the air was like a hug from the inside. She would often say, “Food is a love letter written to those we cherish.”
One snowy evening, she’d decided to make her famous white bean soup. I can still hear the soft crackle of the fire as we settled in with bowls steamy enough to make our noses tingle. She’d tell her stories of Italy, and as each spoonful warmed our bellies, my heart filled with warmth and nostalgia. That soup was more than just a meal; it was the foundation of our family gatherings, a reminder that food brings people together. Every time I make it, I feel her presence and the love that’s infused into each ingredient, and I hope to share that same warmth with you!
Ingredients
Let’s gather the stars of our culinary show! Here’s what you’ll need for your Tuscan White Bean Soup:
-
White Beans (canned or dried)
- Chef Tip: I usually opt for cannellini beans; they’re creamy and indulgent. If you prefer dried beans, just soak them overnight and simmer until tender.
-
Spinach (fresh or frozen)
- Substitution: Feel free to swap with kale or Swiss chard if you want a twist! Just chop them smaller since they take a bit longer to cook down.
-
Tomatoes (canned or fresh)
- Quick Insight: A can of San Marzano tomatoes will elevate your soup with authentic Italian flavors. If using fresh, opt for ripe Roma tomatoes for the best results.
-
Herbs (fresh thyme, rosemary, or basil)
- Pro Tip: Fresh herbs are a game-changer! Use what you have on hand — just remember that dried herbs can be substituted but use sparingly as they are more concentrated.
-
Garlic (fresh cloves)
- Hint: Make sure to chop them finely; they’re the aromatic backbone of this soup!
-
Onion (yellow or white)
- Substitution: If you’re looking for a milder taste, leeks would be a lovely swap.
-
Vegetable Broth
- Tip: Homemade broth is fantastic in this soup, but store-bought works just fine for a quick meal.
-
Olive Oil (extra virgin)
- Insight: A drizzle of good-quality olive oil at the end really brightens the flavors and brings it all together.
Step-by-Step Instructions
Now that we have our ingredients ready, let’s get cooking!
-
Prep the Ingredients
- Start by rinsing the white beans in cold water. If you’re using dried beans, make sure they’ve been soaked overnight and cooked until tender. Set those aside for later.
-
Sauté the Aromatics
- In a large pot, heat about 2 tablespoons of extra virgin olive oil over medium heat. Toss in the chopped onion and sauté until they begin to soften, around 5 minutes. Then, add in your minced garlic and stir for about a minute until fragrant — this is where the magic begins!
-
Add the Tomatoes
- Next, introduce your diced tomatoes. If you’re using canned, let it simmer so those flavors meld together. If fresh, give them a few extra minutes to break down. Stir in a pinch of salt and pepper. You’ll want to taste often; it’s all about building those layers of flavor!
-
Incorporate the Broth
- Pour in about 4 cups of vegetable broth and bring the mixture to a gentle simmer. This is where the soup starts transforming into something incredible!
-
Mix in the Beans
- Once it’s simmering, add the white beans. If you’re going for pure comfort, mash a few against the side of the pot to thicken the texture — trust me, this step is pure bliss.
-
Herb It Up
- Toss in your herbs — fresh thyme or rosemary work beautifully here. Allow the soup to simmer for another 10-15 minutes, stirring occasionally. The aroma will be heavenly!
-
Add the Spinach
- When you’re ready to serve, stir in the spinach and allow it to wilt for just a few minutes. Remember, bright green spinach is a sign of freshness!
-
Taste & Adjust
- Give your soup a good taste! You may want to adjust with more salt, pepper, or a splash of lemon juice for brightness.
-
Serve It Up
- Ladle into bowls, and drizzle with a bit of olive oil to finish — it not only looks stunning but adds that extra touch of flavor we all crave.
Serving Suggestions
When it comes to plating, you can keep it simple yet elegant. Use wide, shallow bowls to showcase the vibrant soup. A sprinkle of fresh herbs on top, a few croutons for texture, and a nice drizzle of olive oil can elevate the dish’s presentation. Serve with a hunk of crusty bread on the side for ultimate comfort!
Recipe Variations
Let’s mix things up a bit, shall we? Here are some creative twists you can try:
- Mediterranean Twist: Add kalamata olives and a touch of feta cheese for a salty contrast.
- Spicy Kick: Incorporate a dash of red pepper flakes for those who like it hot!
- Creamy Delight: Stir in some coconut milk or heavy cream for a luxurious texture.
- Protein Boost: Toss in some cooked sausage or roasted chicken for added protein.
- Grain Fanatic: Add in quinoa or farro for additional heartiness and texture.
Chef’s Notes
This Tuscan White Bean Soup has been a cornerstone of my cooking journey. I’ve played around with various herbs and spices, and even once tried adding a splash of white wine — divine! It’s a flexible recipe that evolves with the seasons. And yes, this can even be frozen, giving you a cozy meal ready to go for those busier days. The more I make it, the more it reminds me of friends, laughter, and the simple joy of coming together around the table.
FAQs and Troubleshooting
1. Can I use dried beans instead of canned?
Absolutely! Just soak them overnight and cook until tender before adding them to the soup.
2. What if my soup is too thick?
No problem! Just add a bit more broth or water until you reach your desired consistency.
3. Can I make this soup vegetarian?
Yes! Just ensure your vegetable broth is truly vegetable-based, and you’re good to go.
4. How long does leftovers last in the fridge?
They’ll usually keep for about 4-5 days, but I bet they won’t last that long once everyone gives it a taste!
And there you have it — a delightful Tuscan White Bean Soup that encapsulates warmth, flavor, and the joy of cooking! Remember, cooking is all about love and intention, so enjoy every stir and savor the moments. Here’s to gathering around the table and creating beautiful memories — one bowl at a time! Let’s cook!
PrintTuscan White Bean Soup
A comforting Tuscan White Bean Soup that embodies rustic Italian cooking, perfect for family dinners and cozy nights.
- Prep Time: 15 minutes
- Cook Time: 30 minutes
- Total Time: 45 minutes
- Yield: 4 servings 1x
- Category: Main Course
- Method: Simmering
- Cuisine: Italian
- Diet: Vegetarian
Ingredients
- 2 cups White Beans (canned or dried)
- 2 cups Spinach (fresh or frozen)
- 2 cups Tomatoes (canned or fresh, diced)
- 1 tablespoon Herbs (fresh thyme, rosemary, or basil)
- 4 cloves Garlic (fresh, minced)
- 1 Onion (yellow or white, chopped)
- 4 cups Vegetable Broth
- 2 tablespoons Olive Oil (extra virgin)
Instructions
- Prep the ingredients by rinsing the white beans in cold water, setting them aside.
- Sauté the onion in olive oil over medium heat for about 5 minutes. Add garlic and stir for 1 minute.
- Add the diced tomatoes, season with salt and pepper, and let simmer.
- Incorporate the vegetable broth and bring to a gentle simmer.
- Mix in the white beans, mashing some for thickness.
- Herb it up by adding the herbs and simmer for another 10-15 minutes.
- Add the spinach and allow it to wilt before serving.
- Taste and adjust seasoning as needed.
- Serve by ladling into bowls and drizzling with olive oil.
Notes
This soup can be frozen for a cozy meal later. Adjust herbs and spices to your liking.
Nutrition
- Serving Size: 1 serving
- Calories: 300
- Sugar: 4g
- Sodium: 800mg
- Fat: 10g
- Saturated Fat: 1g
- Unsaturated Fat: 7g
- Trans Fat: 0g
- Carbohydrates: 42g
- Fiber: 11g
- Protein: 15g
- Cholesterol: 0mg
Keywords: soup, vegetarian, Tuscan, comfort food, beans

One-Pot Creamy Broccoli Potato Soup for Weeknights
Creamy Broccoli Potato Soup: A Bowl of Warmth and Whimsy
Welcome back, food lovers! Today, I can’t wait to share a recipe that warms my heart and fills my stomach with delight: Creamy Broccoli Potato Soup. This dish is not just a treat for your taste buds; it’s a hug in a bowl! As the weather turns cooler, there’s nothing quite like a hearty, creamy soup to bring comfort and coziness to your dining table. So, let’s dive in and make some magic happen in your kitchen!
A Personal Story: A Soup for Every Season
Growing up, my family had a tradition of gathering for Sunday dinners, and my mom always whipped up something amazing. But the dish that stood out the most was her broccoli potato soup. I remember the excitement in the air as we waited for her to ladle the vibrant green soup into our bowls. It was one of those dishes that smelled just as good as it tasted, filling the kitchen with comforting aromas.
One chilly autumn evening, I asked my mom to teach me how to make it. Armed with a worn-out apron that had seen better days (a true kitchen badge of honor), I followed her every move. Chopping broccoli was a bit of a challenge for my younger self, and my dicing skills left much to be desired. But the laughter we shared while I attempted to mimic her chopping technique made it one of the most cherished moments of my childhood.
As a grown-up, I have refined the recipe a little—not because my mom’s version wasn’t perfection, but because I love playing and experimenting in the kitchen! This Creamy Broccoli Potato Soup is now an integral part of my fall and winter gatherings. The memories of cooking alongside my mom remain ever-present as I ladle this delicious soup into bowls for my own family and friends.
Ingredients: Love in Every Bite
Ready to roll up your sleeves? Here’s what you’ll need to make our dreamy Creamy Broccoli Potato Soup, along with some helpful tips:
- Broccoli: The star of the show! Fresh broccoli florets offer a bright, earthy flavor. If you’re in a pinch, frozen broccoli works, too.
- Potatoes: I recommend Yukon Gold or Russets for their creamy texture when blended. Sweet potatoes can give a delightful twist, if desired.
- Cheddar Cheese: Sharp cheddar adds a layer of rich flavor. Go for a good quality cheese! For a lighter option, you can skip the cheese or use nutritional yeast.
- Onion: A classic flavor base, white or yellow onions are perfect here. They add sweetness when sautéed. Shallots are a lovely alternative for a milder taste.
- Garlic: You can never go wrong with garlic! Use fresh cloves for the best flavor. Garlic powder is a quick substitute if you’re out of fresh.
- Vegetable Broth: A flavorful broth brings everything together. You can also swap it with chicken broth for extra depth or use water in a pinch.
- Salt and Pepper: Essential for seasoning! Adjust these to your taste. Freshly cracked pepper adds an extra kick.
- Cream: For that silky finish. Heavy cream makes the soup luxuriously rich, but feel free to substitute with half-and-half or milk for a lighter version.
Step-by-Step Instructions: Let’s Get Cooking!
Now, let’s turn on that stove and get this soup bubbling! Follow these steps:
- Prep the Ingredients: Begin by washing and chopping your broccoli into small florets. Dice the potatoes (no need to peel them unless you prefer it that way), and finely chop the onion and garlic.
- Sauté the Aromatics: In a large pot, heat about 2 tablespoons of olive oil over medium heat. Add the diced onions and sauté for about 3-4 minutes, or until they become translucent. The smell will be heavenly! Then toss in the minced garlic and sauté for another minute until it’s delightful and fragrant.
- Build the Base: Now, add the diced potatoes and broccoli florets to the pot. Toss them with the onion and garlic, letting them mingle for a minute.
- Add Broth: Pour in enough vegetable broth to cover the veggies—about 4 cups should do the trick. Bring the mixture to a gentle boil, then reduce to a simmer. Cover the pot and allow the soup to cook for about 15-20 minutes or until the potatoes and broccoli are tender.
- Blend for Creaminess: Once the vegetables are tender, it’s time to blend! Using an immersion blender, puree the soup right in the pot until smooth and creamy. If you don’t have an immersion blender, carefully transfer the soup to a regular blender in batches. Just be cautious of the steam!
- Add Cheese and Cream: Stir in your shredded cheddar cheese and cream, allowing them to melt into the warm soup. This is where your soup gets its lovely velvety texture. Keep it on low heat and stir until the cheese is fully melted.
- Season to Perfection: Taste your soup and season it with salt and freshly cracked pepper to your liking. Maybe add a pinch of nutmeg for a unique flavor twist!
- Serve It Up: Ladle the soup into beautiful bowls, feeling that satisfaction of homemade goodness.
Serving Suggestions: Plate with Love
To make your soup even more inviting, consider a few simple serving suggestions! You can swirl a little extra cream on top for an aesthetic touch, sprinkle with freshly chopped chives or parsley, and add a few extra pieces of cheddar cheese for that melt-in-your-mouth experience. Serve alongside some crunchy, toasted bread for dipping, and you’ve created a meal that will have everyone feeling like they’re dining in a cozy café.
Recipe Variations: Put Your Spin on It
This recipe is wonderfully versatile! Here are some creative twists to try:
- Add Protein: Stir in cooked chicken or white beans for a heartier version.
- Spice It Up: Add a pinch of red pepper flakes or diced jalapeños for a spicy kick!
- Herb It Up: Incorporate fresh herbs like thyme or dill for an aromatic twist.
- Swap the Cheese: For a vegan version, try using cashew cream and nutritional yeast instead of cheese and cream.
- Roast Those Veggies: Roast the broccoli and garlic before adding them to the soup for an extra layer of smoky flavor.
Chef’s Notes: From My Kitchen to Yours
Making this creamy wonder often brings back the nostalgia of those Sunday dinners with my family. Over the years, I’ve tweaked the cheese levels, played with seasoning, and even experimented with different broths or creams to suit my taste. One thing that never changes, however, is the laughter shared over a warm bowl of soup. It’s amazing how food has the power to create memories and gather loved ones! Lastly, don’t be discouraged if you over or under-season. Cooking is all about taste-testing and finding your perfect balance—embrace the journey!
FAQs and Troubleshooting: Your Questions Answered
- My soup is too thick; what can I do? If your soup ends up too thick, simply add more vegetable broth or water until you reach your desired consistency.
- Can I freeze leftovers? Yes! This soup freezes beautifully. Just make sure to let it cool completely before transferring it to freezer-safe containers. It can last for up to 3 months frozen.
- What if I don’t have an immersion blender? No problem! A regular blender works just fine. Just be cautious with hot soup—blend in small batches and allow steam to escape.
- How can I make it gluten-free? This recipe is naturally gluten-free; however, always check your broth to ensure it meets gluten-free requirements.
Nutritional Info
While I won’t bore you with too many numbers, this soup is packed with nutrients. Broccoli is loaded with vitamins C and K, while potatoes provide essential potassium. The addition of cheese and cream boosts your calcium intake, making this soup not only delicious but good for your body too!
That’s a wrap, my fellow foodies! I hope you enjoy making (and sharing) this Creamy Broccoli Potato Soup as much as I do. Remember, it’s the love and laughter shared around the table that transforms a simple meal into something truly special. So, don your apron, grab your ingredients, and let’s create some warm memories together!
Bon appétit! 🍽️
PrintCreamy Broccoli Potato Soup

A heartwarming and creamy soup perfect for chilly days, featuring fresh broccoli and potatoes.
- Prep Time: 10 minutes
- Cook Time: 30 minutes
- Total Time: 40 minutes
- Yield: 4 servings 1x
- Category: Soup
- Method: Stovetop
- Cuisine: American
- Diet: Vegetarian
Ingredients
- 4 cups fresh broccoli florets
- 2 medium Yukon Gold or Russet potatoes, diced
- 1 cup sharp cheddar cheese, shredded
- 1 medium onion, diced
- 2 cloves garlic, minced
- 4 cups vegetable broth
- 2 tablespoons olive oil
- Salt and pepper to taste
- 1 cup heavy cream
Instructions
- Prep the ingredients: Wash and chop the broccoli into small florets, dice the potatoes, and finely chop the onion and garlic.
- Sauté the aromatics: In a large pot, heat olive oil over medium heat. Add onions and sauté for 3-4 minutes, then add minced garlic and sauté for an additional minute.
- Build the base: Add the diced potatoes and broccoli florets to the pot and toss with the onion and garlic.
- Add the broth: Pour in vegetable broth to cover the vegetables and bring to a gentle boil. Reduce to a simmer and cover for 15-20 minutes until tender.
- Blend for creaminess: Use an immersion blender to puree the soup until smooth. Alternatively, transfer to a regular blender in batches.
- Add cheese and cream: Stir in shredded cheese and cream until melted and well combined.
- Season to perfection: Taste and adjust seasoning with salt and freshly cracked pepper if needed!
- Serve it up: Ladle into bowls and enjoy!
Notes
Feel free to experiment with different broths or cheese types, and enjoy with crusty bread.
Nutrition
- Serving Size: 1 bowl
- Calories: 350
- Sugar: 4g
- Sodium: 600mg
- Fat: 20g
- Saturated Fat: 10g
- Unsaturated Fat: 8g
- Trans Fat: 0g
- Carbohydrates: 40g
- Fiber: 5g
- Protein: 10g
- Cholesterol: 50mg
Keywords: soup, creamy, broccoli, potato, vegetarian, comfort food

Min Thai Coconut Chicken Soup: One-Pot Weeknight Comfort
Thai Coconut Chicken Soup: A Cozy Bowl of Flavor
Hello, friends! Today, I’m thrilled to share a recipe that warms both the heart and the soul: Thai Coconut Chicken Soup, or Tom Kha Gai, as it’s known in its homeland. This dish is the perfect combination of fragrant herbs, tender chicken, and creamy coconut milk, and it captures the essence of comfort in a bowl. Whether you’re sipping it on a chilly evening or serving it as part of a festive gathering, it’s sure to become a beloved staple in your home. So grab your apron, and let’s dive into the delightful world of Thai cuisine!
A Personal Story: The Beginnings of My Love for Tom Kha Gai
I still remember the first time I tasted Tom Kha Gai. It was during a trip to Thailand with my close friends, an adventure that filled our days with joy and our bellies with delicious food. We stumbled upon a quaint little street food stall, where the air was thick with the aromatic spices of simmering broth.
The vendor handed us bowls of the soup steaming hot, garnished with fresh herbs and a slice of lime. As I took my first bite, the delightful balance of sour, spicy, and sweet flavors swept me off my feet. Memories came flooding back of my grandmother’s kitchen—where love was folded into every meal and laughter echoed off the walls.
Ever since that moment, I knew I had to recreate this soup at home. It became a cherished dish that I prepared for family dinners and special occasions, bridging the gap between my travels and the everyday moments I wanted to share.
Ingredients: Stock Your Kitchen for Heavenly Soup
Before we get cooking, let’s gather our ingredients! Here’s what you’ll need:
-
Boneless Chicken Breast (or Thighs): I recommend boneless cuts for easy cooking. Thighs offer a juicier flavor, while breasts are leaner. Either way, thinly sliced chicken absorbs those marvelous flavors beautifully.
-
Coconut Milk: The star ingredient! Full-fat coconut milk creates a rich, creamy texture. If you’re looking for a lighter option, you can use light coconut milk, but it may be slightly less creamy.
-
Fresh Mushrooms: Shiitake or button mushrooms work wonderfully here. They add earthy depth to the soup. If you’re in the mood for something different, try using oyster mushrooms for a delicate flavor.
-
Lime: Fresh lime juice adds a bright zing that balances the soup’s richness. If you don’t have fresh limes, lemon juice can be a decent substitute, though the flavor profile will be a bit different.
-
Ginger: Fresh ginger awakens the soup with warmth. Grating it finely maximizes its flavor. In a pinch, you can use ginger paste, but fresh really elevates the dish.
-
Garlic: A classic flavor booster! Minced garlic provides depth. If you’re out of fresh garlic, garlic powder can come to the rescue—just remember to adjust the amount since it’s more potent.
-
Fish Sauce: This adds essential umami flavor to the soup and enhances the overall taste. In a vegetarian version, soy sauce or tamari can be used.
-
Chili Peppers: For a spicy kick! Thai bird’s eye chilies are fabulous, but if heat isn’t your thing, feel free to reduce the amount or leave them out altogether.
-
Fresh Cilantro: A vibrant garnish that adds a fresh herbaceous note. If you’re not a fan, try fresh basil instead.
Step-by-Step Instructions: Your Guide to Thai Coconut Chicken Soup
Now that we have our ingredients ready, it’s time to cook! Here’s a simple, step-by-step guide to crafting this masterpiece:
-
Prepare Your Ingredients: Start by slicing your chicken breast or thighs into thin strips. This allows for quick cooking and ensures every bite is tender! Mince your garlic, grate some fresh ginger, and chop your mushrooms. Set everything aside. This is often referred to as "mise en place," or everything in its place—trust me, it makes the cooking process so much smoother!
-
Sauté Aromatics: In a large pot over medium heat, drizzle a splash of oil. Add your minced garlic and grated ginger, stirring for about 1–2 minutes until fragrant. This step is where your kitchen will start smelling wonderfully inviting. Aromatics are foundational and set the stage for flavor!
-
Cook the Chicken: Toss in the sliced chicken to the pot, stirring frequently. Cook for roughly 5–7 minutes or until the chicken is no longer pink. Remember, no one likes undercooked chicken! Keep an eye on the heat; you want it to cook through without catching.
-
Add the Mushrooms: Once the chicken is looking good, add your mushrooms, letting them sauté for another 3–4 minutes. They’ll soften and add an earthy richness to the soup.
-
Pour in Coconut Milk: It’s time for the star of the show! Add the coconut milk to the pot, giving it a good stir. Bring the mixture to a gentle simmer—it should bubble softly, not boil vigorously, to keep those lovely flavors intact.
-
Flavor the Soup: Now, it’s seasoning time! Add the fish sauce and squeeze in the juice of one lime. Adjust the fish sauce to taste; you can always add a bit more later if you fancy it. If you’re using chili peppers, toss those in as well.
-
Simmer It Up: Let the soup simmer gently for about 10–15 minutes. This step allows all those flavors to meld together beautifully. Grab your wooden spoon and occasionally stir so nothing sticks. This time is perfect for setting the table or preparing accompaniments!
-
Taste and Adjust: After simmering, taste your soup. You might want to add more lime juice, fish sauce, or even a dash of sugar if you prefer a sweeter finish. Don’t be shy—cooking is all about personalizing flavors!
-
Finish with Herbs: Once you’re satisfied with the taste, remove the pot from the heat. Stir in a handful of freshly chopped cilantro. This brings a bright freshness that balances the soup perfectly.
Serving Suggestions: A Bowl of Love
When it comes time to serve, ladle your fragrant soup into bowls, garnishing with additional cilantro and perhaps a lime wedge for an extra zesty kick. To make it a meal, serve with a side of jasmine rice or some crispy spring rolls. Don’t forget to pour a little extra coconut milk on top for visual appeal and added creaminess!
Recipe Variations: Get Creative!
This soup is wonderfully versatile! Try these variations to mix things up:
-
Vegetable Delight: Swap in extra veggies like bok choy, bell peppers, or zucchini for a vibrant vegetarian version. Just keep in mind that cooking times may vary slightly!
-
Spicy Coconut Curry: Add a tablespoon of red curry paste while sautéing the garlic and ginger for an extra layer of flavor and heat.
-
Protein Options: Replace chicken with tofu for a plant-based alternative or shrimp for a seafood twist. Adjust cooking time accordingly—you want your shrimp to be just cooked through!
-
Richer Soup: For a creamy indulgence, add a dollop of peanut butter or almond butter while simmering. It enriches the flavor and adds a delightful nuttiness.
-
Broth Variation: Swap half of the coconut milk with vegetable or chicken broth for a lighter soup that still maintains incredible flavor.
Chef’s Notes: My Kitchen Adventures
Trying new recipes always leads to incredible stories! One time, I was hosting a dinner party and realized I had forgotten to buy chicken. In a panic, I substituted leftover rotisserie chicken I found in the fridge. The soup turned out surprisingly delicious! That’s the beauty of cooking—flexibility can lead to delightful surprises.
Tom Kha Gai has evolved in my kitchen over the years. I’ve played with flavors, experimented with spices, and have learned to appreciate the elegance of simplicity. It’s always a joy to serve this dish to friends and family; their smiles as they take the first bite are the best kind of reward.
FAQs and Troubleshooting
Q: Can I make this soup ahead of time?
A: Absolutely! The flavors continue to develop, making it even more delicious the next day. Just reheat gently on the stove before serving.
Q: Is it too spicy for kids?
A: If you’re worried about the heat, reduce the number of chili peppers or omit them entirely. You can serve the chili flakes or sauce on the side for those who prefer a kick!
Q: What can I serve with Tom Kha Gai?
A: I love pairing this soup with jasmine rice, but you could also offer crispy spring rolls or a fresh salad for a balanced meal.
Q: Can I freeze the soup?
A: Yes, but keep in mind that coconut milk can change texture when frozen. It’s best to store the soup without mushrooms to prevent the texture from getting mushy upon thawing.
Nutritional Info
This Thai Coconut Chicken Soup is not only delicious but also boasts various nutrients! On average, a serving contains approximately:
- Calories: 400
- Protein: 25g
- Fat: 30g
- Carbohydrates: 10g
Whether you enjoy it with friends on a cozy night in or as a special treat for yourself, I hope this recipe brings you as much joy as it has brought to me. Remember, cooking is all about experimenting and enjoying the process. So tie on that apron, let your creativity flow, and enjoy every flavorful moment in the kitchen! Happy cooking!
PrintThai Coconut Chicken Soup

A cozy and flavorful Thai Coconut Chicken Soup, or Tom Kha Gai, combining fragrant herbs, tender chicken, and creamy coconut milk.
- Prep Time: 15 minutes
- Cook Time: 30 minutes
- Total Time: 45 minutes
- Yield: 4 servings 1x
- Category: Soup
- Method: Stovetop
- Cuisine: Thai
- Diet: Non-Vegetarian
Ingredients
- 1 lb Boneless Chicken Breast (or Thighs), thinly sliced
- 1 can Coconut Milk (full-fat preferred)
- 8 oz Fresh Mushrooms (Shiitake or button)
- 1 Lime, juiced
- 1 inch Fresh Ginger, grated
- 3 cloves Garlic, minced
- 2 tbsp Fish Sauce
- 2–3 Chili Peppers (to taste)
- Fresh Cilantro, for garnish
Instructions
- Prepare your ingredients: Slice chicken, mince garlic, grate ginger, and chop mushrooms.
- Sauté aromatics in a large pot with oil for 1-2 minutes until fragrant.
- Cook the chicken in the pot for about 5-7 minutes until it is no longer pink.
- Add the mushrooms and sauté for another 3-4 minutes.
- Pour in the coconut milk and bring to a gentle simmer, stirring.
- Flavor the soup with fish sauce and lime juice; adjust to taste.
- Simmer gently for 10-15 minutes to meld flavors.
- Taste and adjust seasonings, if needed.
- Finish with freshly chopped cilantro before serving.
Notes
Serve with jasmine rice or crispy spring rolls for a complete meal. Can be made ahead and reheats well.
Nutrition
- Serving Size: 1 serving
- Calories: 400
- Sugar: 5g
- Sodium: 800mg
- Fat: 30g
- Saturated Fat: 24g
- Unsaturated Fat: 6g
- Trans Fat: 0g
- Carbohydrates: 10g
- Fiber: 2g
- Protein: 25g
- Cholesterol: 90mg
Keywords: Thai soup, coconut chicken soup, Tom Kha Gai, comforting recipes

Beef Taco Soup
Hearty and Warm: Your Ultimate Beef Taco Soup Recipe
Welcome to the cozy, vibrant world of Beef Taco Soup! If you’re in the mood for a dish that wraps you in warmth and flavor, you’ve landed in the right place. Picture this: a steaming pot of savory soup, packed with ground beef, hearty beans, sweet corn, and juicy tomatoes, all mingling together in a dance of spices and comforting aromas. This is more than just a meal; it’s a celebration of home-cooked goodness, perfect for gatherings, a weeknight dinner, or just a little self-care on a chilly evening.
A Trip Down Memory Lane
This dish brings back fond memories of my childhood kitchen. I remember bustling around while my mom concocted her famous taco soup, the aroma wafting through our home, pulling everyone in like bees to honey. My siblings and I would fight for the last bit of the crunchy tortilla chips, diving into the table before it was even officially set. "Dinner’s ready!" echoed through the halls, and just like that, we’d gather around the table, laughter blending harmoniously with the clatter of pots and spoons.
Fast forward to my culinary adventures, and you’ll find me putting my spin on this classic dish that has the power to bring folks together. There’s something special about a soup that steams through the kitchen, fragrant and inviting, encouraging everyone to pull up a chair and share stories. It’s a dish that doesn’t just nourish the body; it feeds the soul.
Ingredients
Here’s what you’ll need to whip up this glorious Beef Taco Soup:
-
Ground Beef: The star of our show! I generally use lean ground beef for a healthier option. You can swap it for ground turkey or plant-based meat if you’re looking for a lighter version.
-
Beans: Canned black beans or kidney beans add texture and protein. If you’re short on time, rinsing canned beans works great. If canned goods aren’t your style, soak and cook dried beans for a fresh touch.
-
Corn: Sweet yellow corn brings a burst of sweetness to the soup. Frozen corn is an easy substitute if fresh isn’t available. Just toss it in straight from the bag without thawing.
-
Tomatoes: Diced tomatoes (canned or fresh) add depth. Think crushed tomatoes for a smoother texture, or fire-roasted for an extra flavor kick.
-
Onion: A must for that foundational flavor. Yellow onions give a sweet touch, but any onion will work. Leeks or shallots can be excellent alternatives if you’ve got them lying around.
-
Bell Pepper: Adds color and crunch! Any color works, but red or yellow peppers offer a sweeter flavor. Go for poblano for a smoky kick.
-
Garlic: Minced garlic is essential for that aromatic touch! Fresh is best, but you can use garlic powder in a pinch.
-
Taco Seasoning: This is where the magic happens! Homemade seasoning can be done with cumin, chili powder, paprika, and oregano, making it easy to adjust to your taste.
-
Broth: Beef or chicken broth adds layers of flavor; vegetable broth is perfect for a vegetarian twist!
-
Toppings: Sour cream, cheese, cilantro, avocado, and tortilla chips are always my favorites. Feel free to mix and match!
Step-by-Step Instructions
Now, let’s get cooking! Ready your apron and let’s dive into these effortless steps:
-
Brown the Beef: In a large pot or Dutch oven, heat a drizzle of olive oil over medium heat. Add your ground beef and cook, stirring to break it up, until it’s fully browned. This step builds flavor! Don’t forget to drain excess grease if you’re using fatty meat.
-
Add the Aromatics: Toss in a diced onion, chopped bell pepper, and minced garlic. Sauté for about 5-7 minutes until the vegetables soften and the kitchen smells heavenly. (Seriously, can you smell it yet?)
-
Mix in the Spices: Stir in that taco seasoning you prepared. This is where everything gets exciting! Coat the beef and veggies for about a minute to let those flavors bloom.
-
In with the Canned Goodies: Pour in the diced tomatoes (with juices), the canned beans (rinsed), and corn. Make sure to keep it all in the pot — nobody wants a kitchen disaster!
-
Add the Broth: Pour in the beef or chicken broth, give it a good stir, and turn the heat up until it reaches a gentle boil.
-
Simmer to Perfection: Reduce the heat to low, and let it simmer uncovered for about 20-25 minutes. This is the perfect time to relax, sip on some drink, or prep your toppings!
-
Taste and Adjust: As it simmers, taste your soup! Add salt, pepper, or extra spices as needed. Your kitchen, your rules!
-
Serve It Up: When you’re ready, ladle your Beef Taco Soup into bowls, and have fun adding your favorite toppings. A generous dollop of sour cream, a sprinkle of cheese, or a handful of crispy tortilla chips are all welcome here!
Serving Suggestions
To plate this delightful dish, use a wide bowl to showcase the vibrant colors of the soup. Arrange toppings beautifully on the side so that everyone can get creative with their garnishes. Pair your Beef Taco Soup with warm, crusty bread or a side salad for a complete meal.
Recipe Variations
- Spicy Twist: Add diced jalapeños or a splash of hot sauce for a kick!
- Chipotle Chicken: Swap in shredded rotisserie chicken and some chipotle in adobo sauce for a smoky flavor.
- Vegetarian Delight: Replace ground beef with lentils or quinoa for a hearty vegetarian option.
- Cheesy Goodness: Stir in some cream cheese or shredded cheddar directly into the soup to make it creamy and dreamy.
- Southwest Veggie: Toss in seasonal veggies like zucchini or bell peppers to amp up the nutrition.
Chef’s Notes
This Beef Taco Soup has evolved over the years. I’ve tried countless variations, and I cherish each one for different reasons. My friend once joked that I could make soup out of anything, and while it’s likely true, there’s something special about this particular recipe. It’s perfect for when the weather gets chilly and nostalgia strikes. Plus, it’s a crowd-pleaser, whether for a dinner party or a simple weeknight meal.
FAQs and Troubleshooting
Can I make this soup in advance?
Absolutely! This soup only gets better with time. You can make it a day or two ahead and store it in the fridge. Just reheat when ready to serve!
How can I thicken my soup?
If your soup is too thin, try simmering it uncovered for a bit longer to reduce the liquid. Alternatively, a cornstarch slurry (mix cornstarch with water, then stir it in) works wonders!
What if I don’t have taco seasoning?
No problem! You can mix up a quick spice blend with cumin, chili powder, garlic powder, onion powder, and paprika — all staples in any kitchen!
Can I freeze leftovers?
Definitely! This soup freezes beautifully. Let it cool completely before transferring it to an airtight container. When ready to eat, just thaw and heat on the stove.
Nutritional Info
While I won’t dive deep into the numbers, this comforting soup is high in protein thanks to the beef and beans, packed with fiber, and can be tailored to fit various dietary needs. Just load up on those veggies, and you’re golden!
So there you have it — your go-to Beef Taco Soup recipe that’s easy, comforting, and oh-so-delicious! I hope you enjoy making this dish as much as I do, and may it bring warmth and joy to your table. Remember to tie on your apron and savor every moment because, at the end of the day, good food is all about love and connection. Happy cooking!
PrintBeef Taco Soup

A hearty and warm Beef Taco Soup packed with ground beef, beans, corn, and tomatoes, perfect for gatherings or a cozy night in.
- Prep Time: 15 minutes
- Cook Time: 30 minutes
- Total Time: 45 minutes
- Yield: 6 servings 1x
- Category: Main Course
- Method: Simmering
- Cuisine: Mexican
- Diet: None
Ingredients
- 1 lb lean Ground Beef
- 1 can Black Beans, rinsed
- 1 can Kidney Beans, rinsed
- 1 cup Sweet Corn, frozen or fresh
- 1 can Diced Tomatoes
- 1 medium Onion, diced
- 1 Bell Pepper, chopped
- 3 cloves Garlic, minced
- 2 tbsp Taco Seasoning
- 4 cups Beef or Chicken Broth
- Toppings: Sour Cream, Cheese, Cilantro, Avocado, Tortilla Chips
Instructions
- Brown the Beef in a large pot or Dutch oven over medium heat with olive oil until fully cooked; drain excess grease.
- Add the diced onion, chopped bell pepper, and minced garlic; sauté for 5-7 minutes until softened.
- Mix in the taco seasoning and coat the beef and veggies, cooking for about a minute.
- In with the canned tomatoes, beans, and corn, keeping everything in the pot.
- Add the broth, stir, and bring to a gentle boil.
- Simmer uncovered for 20-25 minutes over low heat.
- Taste and adjust seasoning as necessary.
- Serve into bowls and add your favorite toppings.
Notes
This soup can be made in advance and frozen for later use. Adjust seasoning to your taste!
Nutrition
- Serving Size: 1 serving
- Calories: 400
- Sugar: 6g
- Sodium: 500mg
- Fat: 18g
- Saturated Fat: 7g
- Unsaturated Fat: 8g
- Trans Fat: 0g
- Carbohydrates: 36g
- Fiber: 10g
- Protein: 24g
- Cholesterol: 70mg
Keywords: Beef Taco Soup, Comfort Food, Soup Recipe, Easy Dinner, Hearty Recipe

One-Pot Chicken Fajita Soup: 25-Minute Weeknight Dinner
The Ultimate Guide to Chicken Fajita Soup: A Cozy Bowl of Flavor
Hello, fellow food enthusiasts! If you’re anything like me, your kitchen is your happy place—a sanctuary for creativity, comfort, and yes, a little bit of chaos. Today, I’m thrilled to share a recipe that hits the sweet spot between warmth and zest: Chicken Fajita Soup. This dish is a delightful fusion of classic fajita flavors, loaded into a cozy bowl of soup that’s perfect for any occasion. Whether it’s a chilly evening or you just want to bring some sunshine into your kitchen, this Chicken Fajita Soup will have you basking in good vibes and delicious aromas.
Introduction
Let’s dive into the heart of this vibrant recipe! Imagine walking into a cozy kitchen after a long day, greeted by the inviting smell of spices, sautéed peppers, and tender chicken bubbling away. That’s what this Chicken Fajita Soup offers—a hug in a bowl that’s bursting with flavors and colors. It’s not just your average soup; it’s a celebration of everything we love about cooking and sharing meals.
This recipe is all about simplicity without compromising on flavor. I designed it for both the beginner cook and the seasoned pro. With a few quality ingredients and some love, you can whip up a nourishing dish that brings your family or friends together. And let me tell you, this soup is a feast for the eyes as much as it is for your palate!
Gather around, and let’s turn your kitchen into our culinary playground! With this post, I’ll guide you through every step of the process, sharing my favorite tips along the way. So, whether you’re entertaining guests or just need a cozy night in, grab your apron, and let’s cook up some magic.
Personal Story
Every great recipe has a story, and Chicken Fajita Soup is no exception for me. I remember one Sunday afternoon when I was a kid, my family decided to have a “Mexican night.” We had all the fixings—tacos, nachos, and of course, my mom’s famous chicken fajitas. She made this deliciously tangy marinade and grilled the chicken to perfection, while the peppers danced around in a hot skillet. The flavors wafting through the house made everyone congregate around the kitchen, laughing and sharing stories.
As the years went by, I found myself recreating that vibe and those flavors in my own cooking. This Chicken Fajita Soup was born from that cherished memory, allowing me to capture all the comforting elements of my childhood favorite while giving it a cozy twist. Each slurp takes me back to those lively evenings, surrounded by family, sharing joy and laughter — and that’s the kind of warmth I hope to bring to your table!
Ingredients
Here’s what you’ll need to create this scrumptious Chicken Fajita Soup. I’ve also included some chef insights and substitution tips so you can make this recipe your own.
-
Chicken:
- Use boneless, skinless chicken breasts or thighs. They cook quickly and stay tender. If you’re short on time, rotisserie chicken works well too!
-
Peppers:
- A mix of bell peppers—red, yellow, and green—adds a beautiful array of colors and sweetness to the soup. Feel free to use whatever you have on hand, or even jalapeños for a spicy kick!
-
Fajita Seasoning:
- You can either use store-bought seasoning for convenience or make your own blend with chili powder, cumin, paprika, garlic powder, and a pinch of salt. This gives you control over the spice level!
-
Beans:
- Black beans or pinto beans add protein and creaminess to the soup. Canned beans are quick and easy, but feel free to use dried beans if you prefer—just soak them overnight and reduce the cooking time.
-
Chicken Broth:
- This forms the base of your soup. Use low-sodium broth for better flavor control, or vegetable broth for a vegetarian version.
-
Fresh Lime Juice:
- A squeeze of lime brightens up the flavors beautifully. You can substitute with lemon juice if needed.
-
Toppings:
- Avocado, fresh cilantro, shredded cheese, and tortilla strips make delightful garnishes — choose what you love most!
Step-by-Step Instructions
Ready to bring this flavorful soup to life? Grab your apron, and let’s get cooking!
-
Prep Your Ingredients:
- Start by chopping your chicken into bite-sized pieces and slicing your peppers. Don’t worry about perfection—rustic cuts are totally chic in home cooking!
-
Cook the Chicken:
- In a large pot over medium-high heat, add a splash of olive oil. Once hot, toss in the chicken pieces. Season with a pinch of salt and pepper. Cook for about 5–7 minutes, stirring occasionally until the chicken is browned and cooked through. Pro tip: Don’t overcrowd the pan; work in batches if necessary to ensure even cooking.
-
Sauté the Peppers:
- Add your sliced peppers into the pot with the chicken. Sauté for another 5 minutes until they start to soften. This is where the magic really happens—those wonderful scents will start wafting through your kitchen.
-
Season the Mixture:
- Sprinkle the fajita seasoning over the chicken and peppers (I usually go heavy-handed here!). Stir well to coat the chicken and peppers; cooking for an additional minute allows the spices to bloom and intensify in flavor.
-
Add Beans and Broth:
- To the pot, pour in the chicken broth and add in your rinsed beans. Bring the mixture to a gentle simmer, which should take just a few minutes. Let it cook for about 15–20 minutes, allowing the flavors to meld. Check for seasoning — adjust with salt, pepper, or more lime juice to suit your taste.
-
Finish with Lime Juice:
- Right before you serve, squeeze fresh lime juice into the pot and stir. The acid will brighten up the soup and make every bite sing!
Serving Suggestions
When it comes to plating, I like to keep it simple yet inviting. Serve the soup in deep bowls with a few colorful toppings—creamy avocado slices, fresh cilantro leaves, and a sprinkle of shredded cheese. If you’re feeling adventurous, toss in crunchy tortilla strips for that delightful contrast!
Recipe Variations
Every home cook deserves some room to play! Here are a few creative twists you can try:
-
Spicy Kick: Add diced jalapeños while cooking the peppers for an extra layer of spice.
-
Earthy Depth: Incorporate a tablespoon of smoked paprika or chipotle powder into the seasoning mix for a rich, smoky flavor.
-
Vegetarian Option: Use cubed tofu or chickpeas in place of chicken for a hearty plant-based version.
-
Creamy Dreamy: Stir in a dollop of sour cream or a splash of coconut milk at the end for a creamy texture.
-
More Veggies: Feel free to add corn or zucchini for additional color and nutrients—be creative!
Chef’s Notes
Ah, the joy of cooking! Over the years, I’ve tweaked this Chicken Fajita Soup countless times, but this version is my go-to. The recipe originally called for just chicken and spices, but I soon realized that the sweet crunch of peppers and the creaminess of beans elevate it to another level. This soup has become my lifesaver on busy weeknights while still impressing dinner guests. Who knew that nostalgia could turn into a culinary best friend?
FAQs and Troubleshooting
-
What can I do if my soup is too thick?
- Simply add a bit more chicken broth or water until you reach your desired consistency.
-
How do I store leftovers?
- Store your soup in airtight containers in the fridge for up to 4 days. It reheats beautifully on the stove or in the microwave.
-
Can I freeze this soup?
- Absolutely! Just allow it to cool completely before transferring to freezer-safe containers. It should keep well for about 3 months.
-
What can I substitute for canned beans?
- If you have dried beans on hand, soak them overnight and cook them separately per package instructions. Add them during the last few minutes of cooking time!
Nutritional Info
While I believe in enjoying food without guilt, I understand that many like to be mindful of their nutritional intake. This Chicken Fajita Soup is balanced, rich in protein, and packed with vitamins from the veggies! Each serving provides a perfect blend of nutrients while also satisfying those comfort food cravings.
In closing, I hope this Chicken Fajita Soup warms your soul and fills your kitchen with joy. Remember, cooking is all about love and connection, so gather your family or friends, share stories, and create beautiful moments around your table. Until next time, happy cooking! You’ve got this!
PrintChicken Fajita Soup

A delightful fusion of classic fajita flavors in a cozy, comforting soup.
- Prep Time: 15 minutes
- Cook Time: 30 minutes
- Total Time: 45 minutes
- Yield: 4 servings 1x
- Category: Soup
- Method: Stovetop
- Cuisine: Mexican
- Diet: Gluten-Free
Ingredients
- 1 pound boneless, skinless chicken breasts or thighs
- 2 bell peppers (red, yellow, or green)
- 2 tablespoons fajita seasoning
- 1 can black beans or pinto beans
- 4 cups low-sodium chicken broth
- 2 tablespoons fresh lime juice
- Optional toppings: avocado, fresh cilantro, shredded cheese, tortilla strips
Instructions
- Prep your ingredients by chopping chicken and slicing peppers.
- Cook the chicken in olive oil over medium-high heat for 5–7 minutes until browned.
- Sauté the sliced peppers with the chicken for another 5 minutes.
- Season the mixture with fajita seasoning and cook for an additional minute.
- Add chicken broth and beans; simmer for 15–20 minutes.
- Finish with lime juice just before serving.
Notes
Store in airtight containers in the fridge for up to 4 days. Freezing is also an option for up to 3 months.
Nutrition
- Serving Size: 1 bowl
- Calories: 350
- Sugar: 3g
- Sodium: 500mg
- Fat: 10g
- Saturated Fat: 2g
- Unsaturated Fat: 8g
- Trans Fat: 0g
- Carbohydrates: 30g
- Fiber: 8g
- Protein: 25g
- Cholesterol: 70mg
Keywords: Chicken Fajita Soup, Comfort Food, Easy Soup Recipe, Mexican Soup