
One-Pot Creamy Tomato Tortellini Soup for Weeknights
Creamy Tomato Tortellini Soup: A Cozy Bowl of Comfort
Hello, fellow foodies! Today, we’re diving into a dish that warms the heart and soul—Creamy Tomato Tortellini Soup. This soup is like a hug in a bowl, perfect for crisp autumn evenings or a lazy Sunday afternoon. Imagine settling into your favorite chair with a steaming bowl of soup, the aroma wafting through your kitchen, and friends (or family) gathered around the table. It’s pure comfort, and I can’t wait to show you how to make it!
A Heartfelt Memory
Let me take you back to a rainy day a few years ago—a day marked by dark skies and the soft sound of raindrops tapping against the window. I found myself cozied up in my kitchen, eager to create something that would counter the chill in the air. I remembered the first time I made tomato soup as a teenager—sitting beside my grandmother as she delicately stirred a pot, the smell of basil and garlic dancing around us. That memory flooded back and inspired me to whip up my version of it, adding the delightful element of tortellini.
As the soup simmered, I thought about how some flavors can transport us in time, evoking cherished moments—like sharing hearty soup with those we love. The transformation of simple ingredients into something enchanting is what I cherish most in cooking. So, let’s make that magic happen together!
Ingredients
Here’s what you’ll need to create this deliciously creamy, comforting bowl of goodness:
-
Tortellini:
- Fresh or frozen, they add delightful texture. If you can’t find tortellini, you can swap in any small pasta like ditalini or even gnocchi for something heartier.
-
Canned Tomatoes:
- I prefer whole peeled tomatoes for their robust flavor, but diced or crushed tomatoes work well too. Look for quality brands with a short ingredient list—trust me, fresh tomatoes are key.
-
Heavy Cream:
- This adds that luscious creaminess we’re after. For a lighter version, you can substitute half-and-half or even use a non-dairy alternative like coconut cream if you want a unique twist.
-
Fresh Basil:
- A handful of fresh basil elevates the flavor and adds a pop of color. If you’re out of fresh basil, dried will work in a pinch—just use less since dried herbs are more potent.
Step-by-Step Instructions
Let’s get cooking! Follow these steps, and soon you’ll have a pot of creamy, comforting soup:
-
Sauté Aromatics:
- In a large pot, heat a splash of olive oil over medium heat. Add 1 chopped onion and 2 minced garlic cloves. Cook until the onion becomes translucent and fragrant. Not only do these ingredients build a delicious base, but they also create that comforting aroma that makes your home feel welcoming.
-
Add Tomatoes:
- Pour in 2 cans of whole peeled tomatoes (28 ounces), including their juices. Use a spoon to break them up a bit. Let these simmer for about 10 minutes; this allows their flavors to develop intensely and marry beautifully with the aromatics.
-
Season it Up:
- Add salt, pepper, and a teaspoon of dried oregano for depth. A pinch of sugar can also balance the acidity from the tomatoes—a little chef hack I love. Stir well and let it cook for another 5 minutes.
-
Blend for Smoothness:
- If you prefer a silky-smooth soup, you can carefully blend it using an immersion blender until it reaches your desired consistency. If you like a chunkier texture, skip this step!
-
Incorporate Cream:
- Reduce the heat to low and stir in 1 cup of heavy cream. This step gives the soup its characteristic creamy texture—trust me, you won’t want to skip this!
-
Cook Tortellini:
- Add 2 cups of tortellini directly into the pot. Let them cook according to the package instructions—usually about 5-7 minutes. They will soak up the delicious flavors of the soup as they soften.
-
Final Touch with Basil:
- Stir in a handful of chopped fresh basil right before serving. This brightens the entire dish and adds a fresh note that balances the creaminess.
Serving Suggestions
Ladle your Creamy Tomato Tortellini Soup into warm bowls, and finish with a drizzle of olive oil and extra basil for garnish. Pair it with a crusty loaf of bread for dipping—trust me; it’s the perfect complement! If you want to elevate it even further, a sprinkle of freshly grated Parmesan cheese on top brings flavor and sophistication in one simple move.
Recipe Variations
- Vegetarian Delight: Use vegetable broth instead of chicken broth for a fully vegetarian option while still keeping the dish hearty and satisfying.
- Spicy Kick: Add crushed red pepper flakes to your sautéed onions for a bit of heat!
- Protein Boost: Throw in cooked chicken or turkey for added protein or incorporate beans for a vegetarian version that packs a punch.
- Change Up the Herbs: Swap basil for fresh parsley or thyme if you want to experiment with different aromatic flavors.
Chef’s Notes
This soup has come a long way since that rainy day I first whipped it up. Initially, it was just a simple concoction of tomatoes and cream, but over time, I’ve added tortellini and a medley of herbs to create the comforting dish I share with you now. I love how cooking evolves—not just with recipes, but also in the moments we share around the table. One particularly hilarious moment I recall was when my niece decided adding hot sauce made everything "better" during a family dinner. Let’s just say, not everyone agreed!
FAQs and Troubleshooting
1. Can I use fresh tomatoes?
Absolutely! If you have access to fresh, ripe tomatoes, use them. You’ll need about 2 pounds—blanch and peel them before adding to the soup.
2. My soup turned out too thick. What can I do?
Don’t sweat it! Simply add more broth or water until it reaches your desired consistency. Taste and adjust the seasoning afterward.
3. Can I freeze this soup?
Yes! This soup freezes beautifully. Just make sure to omit the tortellini before freezing. When you’re ready to serve it again, reheat and add fresh tortellini for the best texture.
4. What can I pair with this soup?
Besides crusty bread, consider a simple salad with vinaigrette for a fresh contrast or a classic grilled cheese for that nostalgic touch!
Nutritional Info
While I encourage you to savor every bite without counting calories—because enjoying food is paramount!—it’s still helpful to know that one serving (about 1 cup) of this Creamy Tomato Tortellini Soup has approximately 400 calories, with healthy doses of calcium and vitamin C.
So there you have it, my dear food lovers! The Creamy Tomato Tortellini Soup invites warmth, joy, and delicious memories into your kitchen. I hope you find the time to make this recipe your own and share it with the people you cherish most. Happy cooking, and let’s keep setting the table together!
PrintCreamy Tomato Tortellini Soup

A cozy and creamy soup with tortellini, perfect for chilly evenings.
- Prep Time: 10 minutes
- Cook Time: 30 minutes
- Total Time: 40 minutes
- Yield: 4 servings 1x
- Category: Soup
- Method: Stovetop
- Cuisine: Italian
- Diet: Vegetarian
Ingredients
- 2 cups tortellini (fresh or frozen)
- 2 cans whole peeled tomatoes (28 ounces)
- 1 cup heavy cream
- 1 chopped onion
- 2 minced garlic cloves
- Salt to taste
- Pepper to taste
- 1 teaspoon dried oregano
- A pinch of sugar
- A handful of fresh basil, chopped
- Olive oil for sautéing
Instructions
- Sauté the onion and garlic in olive oil until translucent.
- Add the whole peeled tomatoes and break them up, simmer for 10 minutes.
- Season with salt, pepper, oregano, and sugar, and cook for 5 more minutes.
- Blend the soup if a smoother texture is desired.
- Incorporate the heavy cream and stir.
- Cook the tortellini in the soup according to package instructions, about 5-7 minutes.
- Final touch with fresh basil right before serving.
Notes
Serve with a drizzle of olive oil and extra basil. Pair with crusty bread or a sprinkle of Parmesan cheese for added flavor.
Nutrition
- Serving Size: 1 cup
- Calories: 400
- Sugar: 6g
- Sodium: 800mg
- Fat: 21g
- Saturated Fat: 12g
- Unsaturated Fat: 8g
- Trans Fat: 0g
- Carbohydrates: 45g
- Fiber: 4g
- Protein: 15g
- Cholesterol: 60mg
Keywords: soup, tomato soup, tortellini soup, creamy soup, comfort food

Minute One-Pot Lemon Chicken Orzo Soup for Weeknights
Cozy Up with Lemon Chicken Orzo Soup: A Heartwarming Dish
Hello there, fellow food lovers! Today, we’re diving into a bowl of warmth with one of my all-time favorites: Lemon Chicken Orzo Soup. This isn’t just any soup; it’s a hug in a bowl that’s brimming with flavor, comfort, and a zing of zest that’s perfect for any day of the week. Whether you’re cozying up on a rainy day or looking for a quick weeknight dinner solution, this recipe is sure to light up your table and warm your heart!
A Flashback to Family Gatherings
Before we get into the recipe, let’s take a little stroll down memory lane. Picture this: It’s Sunday evening, and the kitchen is swathed in the warm glow of the setting sun. The garlicky aroma of something bubbling away on the stove fills the air, mingling with laughter and chatter from my family gathered around the table. My grandmother would often whip up her famous lemon chicken soup, a dish that was lovingly passed down through generations.
I remember how we would all gather, bustling about, talking over each other while sneaking tastes from the pot. The moment that bowl of soup was served, nothing else mattered. We savored each spoonful—the tender chicken, the zesty lemon, and the comforting orzo reminded us of home. That’s exactly the feeling I want to create with this Lemon Chicken Orzo Soup—a vibrant dish that brings everyone together while making your kitchen smell divine!
Ingredients
Let’s talk about what we need to create this deliciousness! Here’s a simple ingredient list, along with some chef insights to help you along the way:
-
Chicken (Boneless, Skinless): I prefer using thighs for their tenderness, but breasts work too! If you’re going for a quicker option, rotisserie chicken can save you loads of time.
-
Orzo Pasta: This tiny rice-shaped pasta is perfect for soup! If you’re looking for a gluten-free option, you can substitute it with quinoa or rice.
-
Lemon: Fresh lemon juice is a must for that zing! If you’re in a pinch, bottled lemon juice can work, but fresh is always best for flavor.
-
Spinach (or Kale): Fresh spinach wilts beautifully in the soup. If you’re using kale, make sure to chop it finely and cook a bit longer. Arugula is also a fun option for an extra peppery bite!
-
Carrots: These add a touch of sweetness and crunch. You can use frozen peas or zucchini if you prefer!
-
Celery: A classic soup base, celery brings in earthy notes. If you don’t have any, leeks or bell peppers can be a lovely substitute.
-
Garlic & Onion: Aromatics are key! I like using fresh garlic, but if you find yourself out, garlic powder can give you a hint of that flavor.
-
Chicken Broth: Homemade is king, but store-bought works just fine. Low-sodium options help control the saltiness.
-
Olive Oil, Salt, and Pepper: Basic but essential. Use a quality extra virgin olive oil for richer flavor.
Step-by-Step Instructions
Alright, let’s get cooking! Follow these easy steps for a spectacular one-pot Lemon Chicken Orzo Soup:
-
Sauté the Aromatics: In a large pot, heat 2 tablespoons of olive oil over medium heat. Add finely chopped onion, diced carrots, and celery. Sauté for about 5-7 minutes until they’re soft and the onion is translucent. Chef Hack: Add a pinch of salt to draw moisture out of the vegetables and enhance their flavors!
-
Add Garlic: Toss in 3 minced garlic cloves and stir for an additional minute until fragrant. Be careful not to burn the garlic; it should go from fragrant to charred in a heartbeat!
-
Cook the Chicken: Push the veggies to one side of the pot and add the chicken. Season with salt and pepper and sear until golden brown, about 5-8 minutes. If using rotisserie chicken, skip this step and add the shredded chicken in the next!
-
Pour in the Broth: Add 6 cups of chicken broth to the pot, scraping up any bits stuck on the bottom (that’s flavor, my friend!). Bring to a gentle simmer.
-
Add the Orzo: Once the soup is bubbling, add 1 cup of orzo and let it simmer for about 8-10 minutes until tender. Chef Tip: Stir occasionally to prevent the orzo from sticking!
-
Finish with Spinach and Lemon: Stir in 4 cups of fresh spinach and the juice of 1-2 lemons, adjusting to taste. You want that bright freshness to really sing! Let it simmer another 2-3 minutes until the spinach wilts.
-
Adjust Seasoning: Taste and adjust the seasoning with more salt, pepper, or lemon juice as desired. Remember, every palate is unique—make it yours!
-
Serve Immediately: Ladle the piping hot soup into bowls and garnish with fresh herbs like parsley or dill for an extra kick!
Serving Suggestions
Your Lemon Chicken Orzo Soup is all ready to make its grand debut! Serve it with a sprinkle of fresh herbs on top and maybe a squeeze of lemon for those who like it zesty. Pair it with some crusty bread, a green salad, or even a simple charcuterie board to complete your meal.
Recipe Variations
Feeling adventurous? Here are some quick twists you can try:
-
Creamy Delight: Add a splash of heavy cream at the end for a richer, creamier broth.
-
Herbaceous Flair: Try adding fresh basil or dill for an invigorating herbal hit.
-
Spicy Kick: Toss in some red pepper flakes for a spicy version that warms you from the inside out!
-
Vegetarian Version: Replace the chicken with chickpeas and use vegetable broth for a hearty plant-based option.
-
Extra Veggies: Throw in some diced zucchini or frozen peas for added nutrition and color!
Chef’s Notes
One of my favorite things about this soup is how well it holds up. I often make a big batch, knowing that the flavors deepen even more the next day. Leftovers can be stored in the fridge for up to 3 days, but they may thicken as the orzo absorbs the broth. Feel free to add a bit more broth the next day to revive it!
A little funny story: the first time I made this soup, I got a little too excited with the lemon. Instead of a few tablespoons, I accidentally added nearly a cup! Let’s just say my family was treated to “tangy soup” that night, and while I laughed it off, I learned quickly that balance is key in cooking!
FAQs and Troubleshooting
1. What if my soup is too salty?
If your soup ends up salty, add sliced potatoes to absorb some of the salt while it simmers for a bit. Just remove them before serving!
2. How do I prevent the orzo from getting mushy?
To keep orzo al dente, add it towards the end of cooking time and serve immediately after it’s cooked. If you’re making it ahead, you can cook the orzo separately and add it in just before serving.
3. Can I freeze Lemon Chicken Orzo Soup?
Absolutely! However, I recommend freezing the soup without the orzo. Cook the orzo fresh when you reheat it, as it tends to soak up too much liquid when frozen.
4. How can I ensure the chicken is tender?
If you want ultra-tender chicken, poaching the chicken breast in the broth for about 15-20 minutes can yield fantastic results!
Conclusion
There you have it! A delightful, comforting Lemon Chicken Orzo Soup that’s sure to become a staple in your kitchen. Remember, cooking is all about sharing love and creating memories, so gather your loved ones around the table and serve up a bowl (or two!) of this nourishing soup.
I can’t wait to hear how your version turns out! Happy cooking, and remember to always tie on that apron with a smile!
PrintLemon Chicken Orzo Soup

A heartwarming Lemon Chicken Orzo Soup that’s perfect for cozy gatherings, brimming with flavor, comfort, and a zing of zest.
- Prep Time: 15 minutes
- Cook Time: 30 minutes
- Total Time: 45 minutes
- Yield: 4 servings 1x
- Category: Main Course
- Method: Stovetop
- Cuisine: American
- Diet: Paleo
Ingredients
- 1 lb Chicken (Boneless, Skinless, thighs or breasts)
- 1 cup Orzo Pasta
- 2 Lemons (juiced)
- 4 cups Spinach (or Kale)
- 2 Carrots (diced)
- 2 stalks Celery (diced)
- 3 cloves Garlic (minced)
- 1 Onion (chopped)
- 6 cups Chicken Broth
- 2 tbsp Olive Oil
- Salt (to taste)
- Pepper (to taste)
Instructions
- Sauté the aromatics: In a large pot, heat 2 tablespoons of olive oil over medium heat. Add finely chopped onion, diced carrots, and celery. Sauté for about 5-7 minutes until they’re soft and the onion is translucent.
- Add garlic: Toss in 3 minced garlic cloves and stir for an additional minute until fragrant.
- Cook the chicken: Push the veggies to one side of the pot and add the chicken. Season with salt and pepper and sear until golden brown, about 5-8 minutes.
- Pour in the broth: Add 6 cups of chicken broth to the pot, scraping up any bits stuck on the bottom. Bring to a gentle simmer.
- Add the orzo: Once the soup is bubbling, add 1 cup of orzo and let it simmer for about 8-10 minutes until tender.
- Finish with spinach and lemon: Stir in 4 cups of fresh spinach and the juice of 1-2 lemons. Let it simmer another 2-3 minutes until the spinach wilts.
- Adjust seasoning: Taste and adjust the seasoning with more salt, pepper, or lemon juice as desired.
- Serve immediately: Ladle the soup into bowls and garnish with fresh herbs.
Notes
This soup holds up well and the flavors deepen when stored. Leftovers can be stored in the fridge for up to 3 days; add more broth if it thickens.
Nutrition
- Serving Size: 1 bowl
- Calories: 350
- Sugar: 5g
- Sodium: 600mg
- Fat: 10g
- Saturated Fat: 2g
- Unsaturated Fat: 6g
- Trans Fat: 0g
- Carbohydrates: 40g
- Fiber: 3g
- Protein: 20g
- Cholesterol: 55mg
Keywords: chicken soup, orzo soup, lemon soup, comfort food, cozy recipes
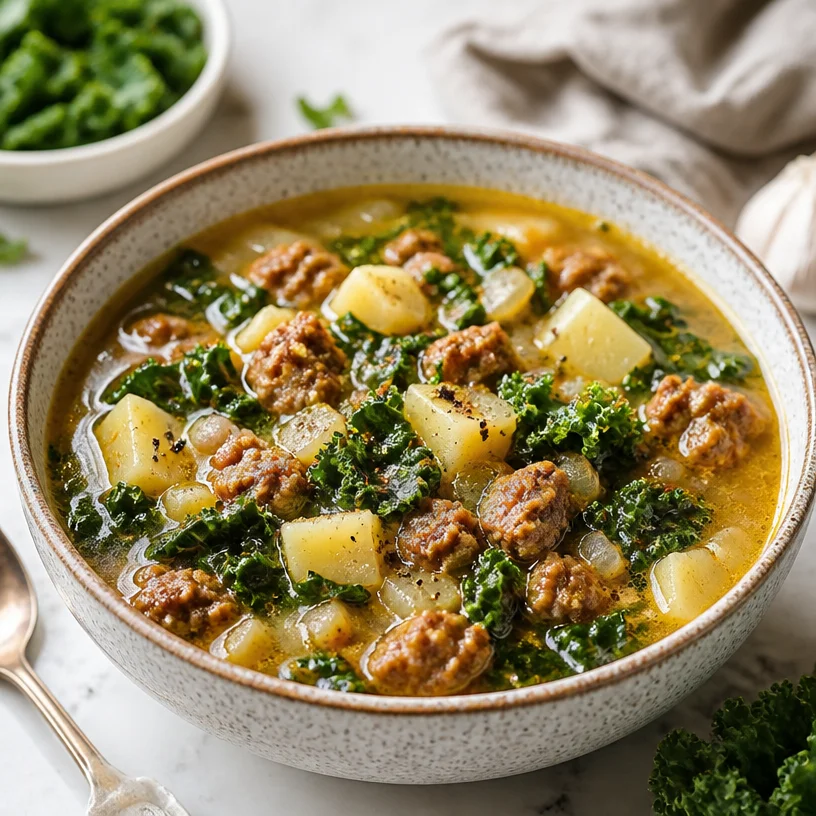
One-Pot Sausage Kale Soup: 30-Minute Weeknight Dinner
Cozy Up with a Hearty Sausage Kale Soup: A Warm Embrace in a Bowl
Hello, all you wonderful food lovers! Today, we’re diving into a bowl of pure comfort: sausage kale soup. It’s the kind of dish that wraps you up in a cozy embrace, just like a favorite sweater on a crisp autumn day. Picture this: a rich, savory broth swirling with tender potatoes, hearty Italian sausage, and healthy kale. It’s not only hearty and nourishing but also incredibly easy to whip up!
If you’ve never made a pot of soup before, don’t worry! This recipe is designed to guide you each step of the way, turning your kitchen into a warm haven of delicious aromas and delightful flavors. Let’s gather our ingredients and get started—this culinary journey is as much about the process as it is about the end result.
A Trip Down Memory Lane
Before we dive into our recipe, let me take you back to a chilly evening a few years ago. I was hosting a dinner party at my home, the kind where laughter echoed off the walls and the scent of garlic danced through the air. Everyone was bundled in their cozy sweaters, and I was on a mission to warm their hearts with my famous sausage kale soup.
As the soup simmered on the stove, I set the table with my favorite earthy-toned dishes, and the atmosphere was just right with soft music playing in the background. When I finally ladled out the first servings, I could practically see the smiles spread across my friends’ faces. After the first spoonful, one exclaimed, “This is like a warm hug in a bowl!” That moment encapsulated everything I love about cooking: bringing people together, sharing warmth, and creating memories.
From that night on, sausage kale soup became a household favorite, and I knew I had to share this delicious recipe with all of you.
Ingredients
To bring this dish to life, you’ll need the following ingredients:
-
Italian Sausage: I prefer mild or spicy Italian sausage for a flavor boost. If you want to make it lighter or vegetarian, swap it for plant-based sausage or omit it altogether for a completely vegetarian option.
-
Kale: This leafy green is not only packed with nutrients but also adds a lovely earthy flavor to the soup. You can substitute with Swiss chard or spinach if that’s what you have on hand.
-
Potatoes: I love using Yukon gold for their creamy texture, but you can also use Russets or red potatoes. Just remember to keep the peel on for that rustic touch!
-
Broth: Chicken or vegetable broth works well here, but homemade is always best if you have it! Consider low-sodium options for more control over seasoning.
-
Onion: A sweet onion or yellow onion is perfect for this recipe. Shallots can work too if you prefer a milder taste.
-
Garlic: Fresh garlic is a must for that aromatic punch. If you’re in a pinch, garlic powder can substitute, but fresh is always best.
-
Olive Oil: For sautéing the vegetables; however, feel free to use any cooking oil you prefer.
-
Herbs and Spices: Fresh thyme and bay leaves are my go-to, but dried versions work just as well. A pinch of red pepper flakes can add a delightful kick!
Chef Insight
When selecting your ingredients, freshness is key! Pay attention to the quality of your sausage and greens, as they will significantly elevate the flavor of the soup.
Step-by-Step Instructions
Now that we have our ingredients prepped, let’s get cooking!
-
Sauté the Aromatics: In a large pot, heat 2 tablespoons of olive oil over medium heat. Once the oil shimmers, toss in the diced onion. Sauté until it becomes translucent, about 5 minutes. Add minced garlic and stir for about a minute until fragrant. Keep an eye on it so it doesn’t burn!
-
Brown the Sausage: Increase the heat to medium-high. Add the Italian sausage, breaking it up with a spatula or wooden spoon. Cook until it’s browned, about 7-10 minutes. The bits of caramelization will add so much flavor to the soup, so resist the urge to stir too frequently.
-
Incorporate the Potatoes: Once the sausage is nicely browned, add the chopped potatoes to the pot. Stir them in for about 2-3 minutes to allow them to absorb some of that delicious flavor.
-
Pour in the Broth: It’s time to add 6 cups of broth! Bring the mixture to a boil. Once boiling, reduce to a simmer, cover the pot, and let it cook for about 15 minutes until the potatoes are tender.
-
Add the Kale: Here comes the magic! Stir in 4 cups of chopped kale and add in your herbs—a few sprigs of thyme and a bay leaf. Allow the soup to simmer for an additional 5-10 minutes until the kale has wilted and everything is combined beautifully.
-
Season to Perfection: Taste your soup and season with salt, pepper, and perhaps a pinch of red pepper flakes if you’re feeling spicy. It’s essential to taste and adjust; every palate is different!
-
Serve It Up!: Once everything is perfectly cooked and seasoned, remove from heat. Take out the bay leaf and thyme stems (if using fresh). Your soup is now ready to be served!
Chef Hacks
- If you have leftovers (which I highly doubt, it’s that good!), this soup freezes wonderfully! Just store it in an airtight container and pop it in the freezer for a chilly day.
- A splash of lemon juice right before serving can brighten the flavors beautifully!
Serving Suggestions
Serving this soup is as easy as pie (or should I say, soup?). Ladle it into warm bowls and top with a sprinkle of freshly grated Parmesan cheese and a drizzle of olive oil. Pair it with crusty bread or a simple green salad for a complete meal.
Consider setting the table with some beautiful napkins and perhaps a candle or two—because let’s be honest, everything feels better when you take the time to create a lovely setting.
Recipe Variations
- Creamy Sausage Kale Soup: Stir in a splash of heavy cream or coconut milk for a rich and creamy version!
- Spicy Kick: Add diced jalapeños or red chili flakes during the sauté stage for added heat.
- Added Protein: Toss in some beans—cannellini or kidney beans work beautifully for extra protein and texture.
- Roasted Garlic: Swap sautéed garlic for roasted garlic for a sweeter, caramelized flavor.
- Vegan Version: Use plant-based sausage, vegetable broth, and add lentils instead of potatoes for a healthy twist.
Chef’s Notes
Making this soup has turned into a cherished ritual in my kitchen. Over the years, I’ve adapted the recipe as my palate matured. My aim was always the same: comfort food that delights the senses and warms the soul. The beauty of cooking is that it can evolve with you—it’s a journey, not just a destination.
I still remember a time I got creative and tossed in some fresh corn at the end of summer—what a delightful surprise that was! So, don’t be afraid to challenge your creativity. Go ahead and make this recipe your own!
FAQs and Troubleshooting
1. What if my soup is too salty?
If your soup tastes overly salty, add a few slices of raw potato to absorb some of that saltiness. Let it simmer for about 10 minutes, then remove the potato slices.
2. What can I use instead of kale?
If kale isn’t your thing, feel free to substitute with spinach, Swiss chard, or even collard greens. Each greens has its unique flavor, but they’ll work wonderfully in this soup!
3. How long does sausage kale soup last in the fridge?
This dish will last about 3–4 days in an airtight container in the fridge. Just make sure to reheat it gently on the stove.
4. Can I make this soup in advance?
Absolutely! Soups often taste better the next day as the flavors meld. You can make a batch ahead of time and simply reheat before serving.
Nutritional Info
(For a serving size of 1 bowl; approximate values)
- Calories: 350
- Protein: 25g
- Fat: 18g
- Carbohydrates: 30g
- Fiber: 4g
Cooking should always be a joyful experience, filled with love and laughter. I hope this sausage kale soup recipe adds warmth to your kitchen and becomes a go-to for your gatherings and cozy nights in. Remember to tie on your apron, embrace the process, and most importantly—enjoy! Happy cooking, my friends!
PrintHearty Sausage Kale Soup

A comforting and nourishing sausage kale soup, perfect for chilly evenings.
- Prep Time: 10 minutes
- Cook Time: 30 minutes
- Total Time: 40 minutes
- Yield: 6 servings 1x
- Category: Soup
- Method: Stovetop
- Cuisine: Italian
- Diet: Paleo
Ingredients
- 1 lb Italian sausage (mild or spicy)
- 4 cups kale, chopped
- 3 medium Yukon gold potatoes, chopped
- 6 cups chicken or vegetable broth
- 1 onion, diced
- 4 cloves garlic, minced
- 2 tablespoons olive oil
- Fresh thyme and bay leaves
- Salt and pepper, to taste
- Red pepper flakes (optional)
Instructions
- Sauté the aromatics: In a large pot, heat olive oil over medium heat and sauté the onion until translucent. Add minced garlic and stir until fragrant.
- Brown the sausage: Increase to medium-high, add sausage, breaking it up, and cook until browned.
- Incorporate the potatoes: Add chopped potatoes and stir for a few minutes to absorb flavor.
- Pour in the broth: Add broth, bring to a boil, reduce to a simmer, and cook for 15 minutes until potatoes are tender.
- Add the kale: Stir in chopped kale along with herbs and simmer for another 5-10 minutes until kale wilts.
- Season to perfection: Taste the soup and adjust seasoning if necessary.
- Serve it up: Remove bay leaf and thyme stems before serving.
Notes
This soup freezes wonderfully for later enjoyment. A splash of lemon juice before serving brightens the flavors.
Nutrition
- Serving Size: 1 bowl
- Calories: 350
- Sugar: 4g
- Sodium: 600mg
- Fat: 18g
- Saturated Fat: 5g
- Unsaturated Fat: 10g
- Trans Fat: 0g
- Carbohydrates: 30g
- Fiber: 4g
- Protein: 25g
- Cholesterol: 45mg
Keywords: soup, sausage, kale, comfort food, cozy recipes, autumn, healthy

One-Pot Creamy Chicken Enchilada Soup for Weeknights
Cozy Up with This Chicken Enchilada Soup Recipe
Hello, my foodie friends! If there’s one dish that wraps itself around your heart and warms you to your core like a big, cozy hug, it’s Chicken Enchilada Soup. This rich, flavorful soup combines all the elements of your favorite enchiladas into a single, soul-soothing bowl. Packed with tender chicken, zesty enchilada sauce, hearty beans, and sweet corn, it’s comforting yet exciting and perfect for any occasion.
It’s autumn as I write this, and that sprinkle of chill in the air has me craving hearty, warming meals. Picture this: You arrive home after a long day, the air infused with the aroma of spices and simmering goodness. One spoonful transports you to an autumn fiesta, where laughter echoes through the air, and friends gather around the table. Have I got you salivating yet? Let’s dive into the deliciousness that is Chicken Enchilada Soup!
A Warm Memory of Chicken Enchilada Soup
Growing up, my family had a tradition of taco nights, and of course, enchiladas were a staple. I can still vividly remember the smell wafting through the kitchen as my mom stirred her rich enchilada sauce, while I dashed around the house with my siblings, playing and giggling between the dining and kitchen areas.
One chilly evening, as we were all nestled together on the couch, my mom brought out her version of Chicken Enchilada Soup. She had transformed our beloved enchiladas into a soup, and it was love at first spoonful. We piled on the toppings—crunchy tortilla strips, dollops of sour cream, and shimmering avocado slices. It was sheer bliss, perfect for a family gathering, and even more special because it sparked those warm-hearted conversations that flowed effortlessly around the table.
Let me share my own take on her recipe, blended with my cooking style and plenty of kitchen cheer to keep you smiling as you cook!
Ingredients
Here’s what you’ll need for your Chicken Enchilada Soup:
-
2 cups cooked shredded chicken
A rotisserie chicken works beautifully if you’re short on time. Just shred it up, and you’re golden! If you prefer, boneless, skinless chicken breasts can also be cooked and shredded right before adding them to the pot. -
1 can (15 oz) enchilada sauce
Feel free to choose your favorite brand or even try making your own from scratch! A mild, medium, or hot variety can adjust the spice to your liking. -
1 can (15 oz) black beans, drained and rinsed
Black beans are a classic choice, but you can swap in pinto or kidney beans for a different flavor. Don’t forget to rinse them for better taste and texture! -
1 cup corn (fresh, frozen, or canned)
Sweet, golden corn adds a delightful sweetness to balance out the savory flavors. If fresh corn is in season, grab it for the best taste! Otherwise, frozen or canned works perfectly too. -
4 cups chicken broth
Homemade broth is delightful, but a good store-bought version does wonders too. Opt for low-sodium if you want to control the overall saltiness of your soup! -
1 teaspoon cumin
This spice gives the soup its warm, earthy essence. Feel free to add a bit more if you love that deep flavor! -
1 teaspoon paprika
Paprika adds a lovely color and a hint of sweetness. Smoked paprika can give it a wonderful depth—just a little sprinkle enhances the flavor profile beautifully! -
Salt & pepper to taste
Always essential to elevate flavors and adjust according to how you like it! -
Toppings: avocado, cilantro, tortilla strips, shredded cheese, sour cream
Add a handful of your favorites for that finishing touch! A squeeze of lime can bring everything together and brighten the dish.
Step-by-Step Instructions
1. Start with the Base:
In a large pot, heat a drizzle of olive oil over medium heat. Toss in your cooked shredded chicken, followed by the enchilada sauce. Let the magic begin by mixing them together—watch how the chicken absorbs that vibrant, zesty sauce!
2. Stir in the Broth:
Next, pour in the chicken broth and stir it all together. A delightful aroma starts to fill your kitchen! It’s amazing how quickly this concoction turns into a comforting soup.
3. Add the Beans and Corn:
Now, toss in the black beans and corn. Stir everything, letting the flavors meld together. I often take a moment to enjoy the colorful appearance—it’s like a fiesta in the pot!
4. Season It Up:
Time to sprinkle in those spices! Add in the cumin and paprika, along with salt and pepper. Give it a good stir, and let it simmer for about 15-20 minutes. This step is crucial to allow all the flavors to dance together, so don’t rush it!
5. Serve It Up:
Once it’s bubbling away, taste it! Adjust seasonings if needed. If you like, you can add freshly chopped cilantro for a bright splash of flavor right at the end.
6. Time for Toppings:
Now for my favorite part—toppings! Ladle the soup into bowls and let your creativity flow! Add your choice of avocado slices, a handful of tortilla strips, a sprinkle of cheese, a dollop of sour cream, and a shower of fresh cilantro. The presentation brings it to life—ensure it looks inviting!
Serving Suggestions
While this Chicken Enchilada Soup is delightful on its own, you can elevate the experience even further! Serve it with warm corn tortillas or alongside a crisp green salad for a light yet satisfying meal. A side of guacamole and tortilla chips would also make this gathering feel even more festive!
Recipe Variations
-
Vegetarian Option: Swap the chicken for sautéed bell peppers and mushrooms for a scrumptiously hearty vegetarian version!
-
Vegan Delight: Use plant-based chicken and sour cream along with vegetable broth for an entirely vegan experience.
-
Spicy Kick: Add diced jalapeños or a pinch of cayenne pepper for an extra heat level if you adore spicy food!
-
Creamy Twist: Stir in a dollop of cream cheese while simmering for a creamy, dreamy adaptation.
-
Mexican Street Corn Style: Top with crumbled feta, fresh lime juice, and a sprinkle of chili powder for a street corn-inspired flavor explosion!
Chef’s Notes
Oh, how my Chicken Enchilada Soup has evolved over time! I remember my first attempts were disappointingly thin and bland. With countless tweaks and flavor experiments, I landed on this recipe that reflects my love for bold, diverse flavors without the fuss. Sometimes, I’ll sneak in extra veggies, like zucchini or diced tomatoes, whatever I have on hand! In my cooking journey, humor often finds its way in too—like the time I completely forgot the chicken and had to serve a "vegetable disaster soup." Let me tell you, we laughed harder than we worried about dinner!
FAQs and Troubleshooting
1. My soup tastes bland—what should I do?
Seasoning is key! Taste your soup and add more salt, pepper, or spices as you see fit. A squeeze of fresh lime juice can brighten the flavors!
2. Can I make this soup ahead of time?
Absolutely! This soup tastes even better the next day as the flavors develop further. Store it in the fridge for up to 3 days, and simply reheat it when you’re ready to enjoy.
3. How can I thicken my soup?
If you prefer a thicker consistency, you can blend a portion of the soup and return it to the pot. Adding a cornstarch slurry (1 tablespoon cornstarch mixed with 2 tablespoons cold water) can also work wonders!
4. What if I have leftover soup?
Leftover soup can be frozen! Just ensure you leave it to cool completely before transferring it to airtight containers. Thaw and reheat whenever those cozy cravings hit!
Nutritional Info
(For 1 cup of soup, estimated)
Calories: 320
Protein: 28g
Carbohydrates: 35g
Fat: 10g
Fiber: 8g
There you have it, my friends—a labor of love, ebullient stories, and a bowlful of warmth with this Chicken Enchilada Soup. I can’t wait for you to cook and enjoy it as much as we do! So grab your apron, your kitchen is calling, and let’s fill those bowls and hearts with goodness.
Happy cooking! 🌟
PrintChicken Enchilada Soup

A rich, flavorful soup combining all the elements of your favorite enchiladas into a cozy bowl, perfect for autumn.
- Prep Time: 15 minutes
- Cook Time: 30 minutes
- Total Time: 45 minutes
- Yield: 4 servings 1x
- Category: Main Course
- Method: Simmering
- Cuisine: Mexican
- Diet: Gluten-Free
Ingredients
- 2 cups cooked shredded chicken
- 1 can (15 oz) enchilada sauce
- 1 can (15 oz) black beans, drained and rinsed
- 1 cup corn (fresh, frozen, or canned)
- 4 cups chicken broth
- 1 teaspoon cumin
- 1 teaspoon paprika
- Salt & pepper to taste
- Toppings: avocado, cilantro, tortilla strips, shredded cheese, sour cream
Instructions
- Start with the Base: In a large pot, heat a drizzle of olive oil over medium heat. Toss in your cooked shredded chicken, followed by the enchilada sauce. Let the magic begin by mixing them together!
- Stir in the Broth: Next, pour in the chicken broth and stir it all together.
- Add the Beans and Corn: Toss in the black beans and corn. Stir everything, letting the flavors meld together.
- Season It Up: Sprinkle in those spices! Add in the cumin and paprika, along with salt and pepper. Let it simmer for about 15-20 minutes.
- Serve It Up: Once it’s bubbling away, taste it! Adjust seasonings if needed.
- Time for Toppings: Ladle the soup into bowls and add your choice of toppings!
Notes
This soup can be made ahead of time and tastes even better the next day. Feel free to customize toppings to your liking.
Nutrition
- Serving Size: 1 cup
- Calories: 320
- Sugar: 2g
- Sodium: 800mg
- Fat: 10g
- Saturated Fat: 3g
- Unsaturated Fat: 5g
- Trans Fat: 0g
- Carbohydrates: 35g
- Fiber: 8g
- Protein: 28g
- Cholesterol: 50mg
Keywords: Chicken Enchilada Soup, Cozy Soup, Autumn Recipes, Comfort Food

Minute Creamy Pumpkin Curry Soup for Weeknight Dinners
Whip Up Warmth: Savory Pumpkin Curry Soup
Hello, food lovers and fellow home chefs! Today, I’m excited to share a recipe that warms the heart and invigorates the senses: Pumpkin Curry Soup. It’s the kind of dish that brings together the creaminess of coconut milk, the earthy sweetness of pumpkin, and a hint of spice, creating a delightful symphony for your taste buds. So, let’s grab our aprons and dive in!
Introduction
When I think of autumn, I think of a cozy kitchen filled with the inviting aromas of pumpkin spice and comforting soups. As the weather cools, there’s nothing quite like curling up with a bowl of something delicious and soothing. This Pumpkin Curry Soup is not only a celebration of seasonal produce but also a showcase of how simple flavors can create truly magnificent dishes.
Incorporating pumpkin into your cooking can transform an ordinary day into something special. With its vibrant hue and nutritional bounty, pumpkin is a superstar in the kitchen. Plus, when you add coconut milk and curry paste, you get an irresistible blend that’s not just good for the soul — it’s great for those chilly evenings when you want something warming and satisfying.
This recipe is a perfect invitation for you to gather friends or family around the table, share stories, and enjoy a meal that feels both elegant and comforting. Let’s sprinkle the kitchen with love and make something beautiful together!
Personal Story
I have a special memory tied to pumpkin soup that always makes me smile. One chilly October evening, I threw a small gathering at my home, and I decided to try my hand at a new pumpkin curry soup recipe. My kitchen was bustling with laughter and chatter, and I vividly remember the moment when I was ready to taste-test. As I dipped the spoon into the steaming pot and took that first bite, a warmth spread through me like the cozy glow of candlelight. The soup was a hit!
Everyone chattered excitedly about the flavors, and that evening turned into an impromptu feast. It wasn’t just about the soup; it was about the connections and shared moments. Years later, I still cherish that night — every time I make this soup, it brings me back to that gathering, reminding me just how powerful a delicious meal can be in bringing people together.
Ingredients
Here’s what you’ll need to create this dreamy Pumpkin Curry Soup:
-
Pumpkin Puree:
- Why: The star of our show! You can use canned puree for convenience or roast fresh pumpkins for a more intense flavor.
- Substitution Tip: If you can’t find pumpkin, butternut squash works wonderfully as well!
-
Coconut Milk:
- Why: This adds a rich, creamy texture that balances the spices beautifully.
- Substitution Tip: For a lighter version, use light coconut milk or even unsweetened almond milk, but keep in mind it will alter the depth of flavor slightly.
-
Curry Paste:
- Why: The magic-maker! It brings warmth and spice to the soup.
- Chef Insight: Red curry paste gives a bolder flavor, while yellow curry paste offers a milder, more aromatic experience. Adjust according to your spice preference!
-
Vegetable Broth:
- Why: For cooking the soup and adding depth, use broth instead of water for richer flavors.
- Substitution Tip: Chicken broth works too, if you’re not concerned about keeping it vegetarian.
-
Onion and Garlic:
- Why: These aromatics lay the foundation for flavor. They add sweetness and depth.
- Chef Insight: Sauté them until they’re translucent for maximum flavor!
-
Ginger:
- Why: Fresh ginger adds a zesty bite that complements the sweetness of the pumpkin.
- Substitution Tip: Ground ginger can be used in a pinch, but fresh is always best!
-
Lime Juice:
- Why: A splash of lime adds brightness and balances the richness of the soup.
- Substitution Tip: Lemon juice can also work, but lime offers that authentic twist!
Step-by-Step Instructions
-
Sauté Aromatics:
- In a large pot, heat a drizzle of oil over medium heat. Add chopped onions, minced garlic, and freshly grated ginger. Sauté for about 5 minutes until the onions are translucent and fragrant. This is where the magic begins!
-
Add Curry Paste:
- Now, it’s time to stir in the curry paste. Let it cook with the aromatics for 1-2 minutes, allowing the spices to bloom. Trust me, your kitchen will smell divine at this point.
-
Incorporate Pumpkin Puree:
- Add in the pumpkin puree and vegetable broth. Stir everything together, ensuring the paste is well incorporated. What you have now is a vibrant orange mixture that’s begging to be tasted!
-
Simmer and Stir:
- Bring the mixture to a gentle simmer and let it cook for about 10-15 minutes. This allows the flavors to meld beautifully. Stir occasionally, so nothing sticks to the bottom!
-
Cream it Up:
- Pour in the coconut milk, stirring until it’s fully combined. Let the soup warm through for another 5 minutes. The coconut will add that luscious creaminess. At this point, you can opt to blend the soup for a smooth texture using an immersion blender or countertop blender — just be careful with hot liquids!
-
Finishing Touches:
- Remove the pot from heat and stir in a generous squeeze of lime juice. Taste and adjust seasoning as needed. If you like it spicy, consider adding a pinch of red pepper flakes or a dash of hot sauce!
-
Plate and Serve:
- Ladle the soup into bowls, and here comes the fun part — garnishing! Top with fresh herbs like cilantro or basil, a swirl of coconut milk, or even a sprinkle of roasted pumpkin seeds for extra texture.
Serving Suggestions
Serve this Pumpkin Curry Soup warm alongside crusty bread rolls or a simple green salad. Pop some warm naan bread on the side for dipping, and don’t forget to drizzle a little extra coconut milk or yogurt on top for that gourmet touch!
Recipe Variations
Feeling a touch adventurous? Here are some delicious twists to try:
- Add Greens: Stir in a handful of fresh spinach just before serving for a pop of color and nutrients.
- Swap Spices: Experiment with adding ground cumin or coriander for a different flavor profile.
- Protein Boost: Throw in some shredded chicken or chickpeas for added protein.
- Get Nutty: Top with toasted coconut flakes for a lovely crunch.
- Heat it Up: For a spicy version, include diced jalapeños or a dash of cayenne pepper.
Chef’s Notes
The beauty of this recipe is its adaptability! I originally stumbled upon a simple pumpkin soup, but over the years, I’ve made this version a staple. Once, during a dinner party, I accidentally grabbed the yellow curry paste instead of red, and it turned out to be a delightful mistake! It taught me that there’s beauty in experimentation in the kitchen. Don’t be afraid to make it your own!
FAQs and Troubleshooting
-
What if my soup is too thick?
- Simply add a bit more vegetable broth or coconut milk to reach your desired consistency.
-
How can I make it spicier?
- Add more curry paste or mix in red pepper flakes while sautéing the garlic and onions — it’s all about that kick!
-
Can I freeze this soup?
- Absolutely! The soup can be stored in an airtight container in the freezer for up to three months. Just thaw and reheat when you’re ready to enjoy.
-
What do I do if I don’t like coconut milk?
- You can substitute it with almond milk or heavy cream, though the flavor will shift slightly.
Nutritional Info
This creamy soup is not only delicious but also packed with nutrients! Using pumpkin gives you a healthy dose of vitamins A and C, while coconut milk offers healthy fats.
As we wrap up this savory adventure in the kitchen, I hope you feel inspired to create your own cherished memories around the table. This Pumpkin Curry Soup is perfect for sharing with loved ones or enjoying all by yourself — it’s just that good! So tie on your apron, gather your ingredients, and let’s celebrate the season with every comforting spoonful. Happy cooking!
PrintSavory Pumpkin Curry Soup

A cozy Pumpkin Curry Soup that blends creamy coconut milk, earthy pumpkin, and aromatic spices for a delightful warm dish.
- Prep Time: 10 minutes
- Cook Time: 30 minutes
- Total Time: 40 minutes
- Yield: 4 servings 1x
- Category: Soup
- Method: Stovetop
- Cuisine: Fusion
- Diet: Vegetarian
Ingredients
- 2 cups pumpkin puree
- 1 can coconut milk
- 2 tablespoons curry paste
- 4 cups vegetable broth
- 1 onion, chopped
- 3 cloves garlic, minced
- 1 tablespoon fresh ginger, grated
- 2 tablespoons lime juice
Instructions
- Sauté the onions, garlic, and ginger in oil until translucent.
- Add the curry paste and cook for 1-2 minutes.
- Incorporate the pumpkin puree and vegetable broth, mixing well.
- Simmer for 10-15 minutes, stirring occasionally.
- Cream the soup by adding coconut milk and heat through.
- Finish with lime juice, adjusting seasoning as needed.
- Plate and serve, garnished with fresh herbs and coconut milk.
Notes
Feel free to experiment with spices or add greens for extra nutrition.
Nutrition
- Serving Size: 1 bowl
- Calories: 320
- Sugar: 6g
- Sodium: 300mg
- Fat: 20g
- Saturated Fat: 10g
- Unsaturated Fat: 8g
- Trans Fat: 0g
- Carbohydrates: 35g
- Fiber: 4g
- Protein: 5g
- Cholesterol: 0mg
Keywords: pumpkin soup, curry soup, vegetarian soup, comfort food, fall recipes
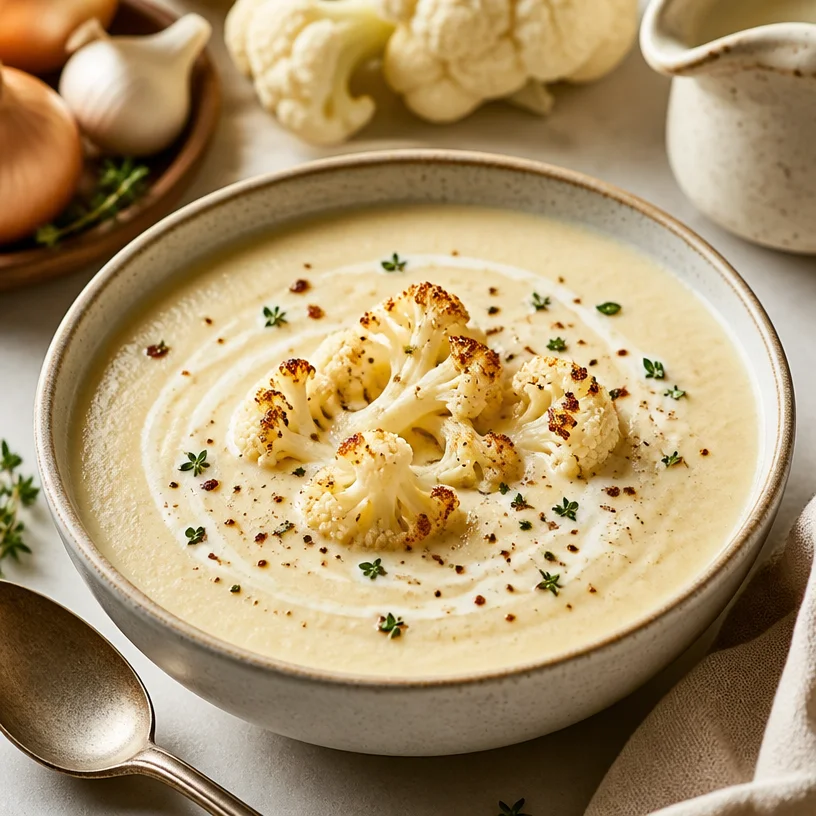
Creamy Cauliflower Soup: 25-Min One-Pot Weeknight Dinner
Creamy Cauliflower Soup: A Cozy Culinary Embrace
Hello, fellow food enthusiasts! I’m thrilled you’re here to whip up something delightful in the kitchen with me. Today, we’re diving into a bowl of warmth and comfort with my creamy cauliflower soup. This isn’t just any soup—it’s like a hug in a bowl, perfect for chilly evenings or whenever you crave a comforting dish that still feels gourmet. Let’s roll up our sleeves, put on our aprons, and create something special together!
A Nostalgic Bite: My Cauliflower Love Affair
I still remember the first time I encountered cauliflower soup at a quaint little bistro during my college days. It was a rainy afternoon, and the smell wafting from the kitchen enveloped the entire space. The moment I took a spoonful, I was hooked; it was rich and velvety, bursting with flavor, and instantly took me to my happy place. Little did I know that many years later, I’d be replicating that delightful experience in my kitchen and sharing it with friends and family.
As I stood there, spoon in hand, I made a silent promise to myself: I would learn how to make this creamy concoction from scratch. Fast forward to today, and I’ve created my own version that resonates with that first memory while adding a few personal touches. Trust me, this recipe is not only easy to make, but it’ll also warm your heart. Ready to start cooking? Let’s gather our ingredients.
Ingredients You’ll Need
Here’s a quick rundown of the ingredients that’ll turn your kitchen into a cozy haven:
-
Cauliflower (1 head, chopped): The star of the show! Fresh, tender cauliflower gives the soup its signature creamy texture. Look for heads that are firm and bright white with no brown spots.
-
Onion (1 medium, diced): This adds depth and richness to your soup. Feel free to swap it with shallots for a milder flavor or leeks for a sweeter touch.
-
Garlic (2-3 cloves, minced): Garlic brings a lovely aroma and a robust flavor that marries beautifully with cauliflower. If you’re not a garlic fan, you can reduce or omit it entirely.
-
Cream (1 cup): This is what makes your soup luxuriously creamy! You can use heavy cream for richness or substitute with coconut cream for a dairy-free version. For a lighter option, half-and-half works wonders, too!
-
Vegetable Stock (4 cups): This serves as the flavorful broth of our soup. Homemade stock is fantastic if you have time, but a good-quality store-bought version will work just fine.
-
Salt and Pepper to taste: They may be simple, but these two are crucial for elevating the flavors of the soup.
-
Fresh Herbs (optional, for garnish): A sprinkle of fresh chives or parsley adds a pop of color and freshness to your bowl. Don’t have fresh herbs on hand? Dried herbs can work as well!
Step-by-Step Instructions
Now, let’s get to the fun part! Here’s how to whip up this creamy cauliflower soup in a few simple steps:
-
Prep Your Ingredients
Start by chopping your cauliflower into florets, dicing the onion, and mincing the garlic. This makes the cooking process so much smoother! Pro tip: You can save the cauliflower leaves for a quick sauté or roast later. Nothing goes to waste! -
Sauté the Aromatics
In a large pot, heat about a tablespoon of olive oil over medium heat. Add the diced onion and a pinch of salt. Sauté for about 3-5 minutes until the onion is translucent—this will help soften the flavor. -
Add Garlic and Cauliflower
Once the onion is looking good, add in the minced garlic. Sauté for another minute until fragrant (you’ll want to inhale this heavenly smell!). Now, toss in your cauliflower florets and stir to combine. Let them cook for about 2-3 minutes, allowing them to slightly soften while absorbing those fragrant flavors. -
Pour in the Broth
Time to add the vegetable stock! Pour in your 4 cups and bring this delightful mix to a gentle simmer. Cover the pot and let it simmer for about 15-20 minutes, or until the cauliflower is fork-tender. This is when the magic happens! -
Blend It Up
Carefully transfer the mixture to a blender (or use an immersion blender if you have one!) to purée until smooth. Be cautious with the hot liquid! If you’re using a regular blender, you might want to let it cool slightly before blending (and remember to vent the lid to let steam escape). Blend until silky and smooth! -
Stir in the Cream
Return the blended soup to the pot over low heat. This is where your cream will make its grand entrance. Stir it in gently, allowing it to meld with the soup. Season with salt and pepper to taste, and let it warm up just enough to be cozy but not boiling. -
Taste and Adjust
Here’s where you can get creative! Give it a taste and see if you’d like to add more seasoning or perhaps a dash of nutmeg for warmth. (My mom swore by this secret! It adds a lovely depth).
Serving Suggestions
Now that your creamy cauliflower soup is ready, it’s time to serve! I love ladling it into warm bowls and topping it with a sprinkle of fresh herbs and a drizzle of olive oil for a touch of elegance. If you’re feeling fancy, add a dollop of crème fraîche or a sprinkle of roasted pepitas for a delightful crunch. Pair it with crusty bread or a light salad for a complete meal!
Recipe Variations
Here are a few creative twists to keep things exciting:
- Add Cheese: Stir in grated Parmesan or sharp cheddar right before serving for a cheesy kick!
- Spice It Up: Toss in a pinch of cayenne or smoked paprika while blending for an unexpected kick.
- Roast It: For an extra layer of flavor, roast the cauliflower and garlic in the oven before blending—trust me, it takes it to the next level!
- Herb-Infused: Blend in fresh herbs like basil or thyme to brighten the flavor profile.
- Creamy Vegan Version: Substitute cream with cashew cream or coconut milk for a rich, dairy-free alternative.
Chef’s Notes
As with any beloved recipe, this creamy cauliflower soup has evolved over time. In the beginning, I used to be a bit too heavy-handed with the cream—after many revisions, I found that just the right amount gives a rich taste without being overly indulgent. Remember, cooking is all about experimentation! Don’t be afraid to play around with flavors and make this recipe your own.
And oh, a quick kitchen story for you! One time, I was rushing to make this soup for a last-minute dinner party. I accidentally blended in some of the roasted garlic cloves I had prepared for a different dish, and it turned out to be a happy accident! The result was a garlic-infused creamy cauliflower masterpiece, and it’s now a regularly requested variation among my friends.
FAQs and Troubleshooting
1. My soup is too thick! What should I do?
If your soup turned out thicker than you’d like, simply whisk in more vegetable stock or water until you reach your desired consistency.
2. Can I freeze this soup?
Absolutely! This soup freezes well in an airtight container. Just make sure to leave some space for expansion as it freezes. Reheat on the stovetop, adding a touch more cream or stock to freshen it up!
3. How can I make this soup more filling?
Feel free to add cooked grains like rice or quinoa directly into the soup before serving, or serve it alongside a hearty sandwich or salad.
4. What if I don’t have vegetable stock?
No worries! You can use chicken broth if you’re not keeping it vegetarian, or simply use water. Just remember to adjust your seasoning as needed.
Nutritional Info (Optional)
While I love focusing on the comfort of cooking, I know many of you are curious about nutrition. This creamy cauliflower soup is packed with vitamins and minerals, particularly Vitamin C, and the cream adds a bit of indulgent richness. Each serving is wonderfully satisfying without being overly heavy, making it perfect for any occasion.
There you have it, my friends! This creamy cauliflower soup recipe comes straight from my heart to your kitchen. Whether you’re warming up on a cool evening or impressing guests with your culinary skills, this soup is destined to become a favorite. So, tie on your apron, let’s create some delicious memories together, and remember—you’ve got this! Happy cooking!
PrintCreamy Cauliflower Soup

A velvety and comforting creamy cauliflower soup, perfect for chilly evenings.
- Prep Time: 10 minutes
- Cook Time: 30 minutes
- Total Time: 40 minutes
- Yield: 4 servings 1x
- Category: Soup
- Method: Blending
- Cuisine: American
- Diet: Vegetarian
Ingredients
- 1 head Cauliflower, chopped
- 1 medium Onion, diced
- 2–3 cloves Garlic, minced
- 1 cup Cream (or coconut cream)
- 4 cups Vegetable Stock
- Salt and Pepper to taste
- Fresh Herbs, for garnish (optional)
Instructions
- Prep your ingredients by chopping cauliflower, dicing onion, and mincing garlic.
- Sauté the aromatics in a large pot with olive oil for about 3-5 minutes until onion is translucent.
- Add garlic and sauté for another minute; then add in cauliflower florets and stir to combine.
- Pour in the vegetable stock, bring to a simmer and cover for 15-20 minutes until cauliflower is tender.
- Blend the mixture until smooth using a blender or immersion blender.
- Stir in the cream over low heat, season to taste, and warm gently.
- Taste and adjust seasoning as desired.
Notes
For added richness, you can stir in cheese or spices for extra flavor. This soup freezes well for future meals.
Nutrition
- Serving Size: 1 bowl
- Calories: 250
- Sugar: 5g
- Sodium: 300mg
- Fat: 15g
- Saturated Fat: 8g
- Unsaturated Fat: 5g
- Trans Fat: 0g
- Carbohydrates: 24g
- Fiber: 3g
- Protein: 6g
- Cholesterol: 40mg
Keywords: cauliflower soup, creamy soup, comfort food, vegetarian, cozy soup

One-Pot Turkey Vegetable Soup: Easy Weeknight Meal Prep
Warm Your Soul with Homemade Turkey Vegetable Soup
Hello, lovely food friends! Today, I’m thrilled to share a recipe that’s close to my heart — a comforting bowl of Turkey Vegetable Soup. This dish is perfect for those chilly evenings or when you need a hug in a bowl. It’s not just about the ingredients; it’s about the memories, the warmth, and the love that goes into every pot we simmer. So grab your apron, and let’s dive into this delicious adventure together!
A Cozy Memory
One of my fondest memories involving turkey soup dates back to my childhood. Every Thanksgiving, once the feast was over and the last piece of pumpkin pie had been savored, my family would gather around in the kitchen. My mom, armed with her trusty stockpot, would gather the leftover turkey and a bounty of fresh vegetables. As I watched her chop carrots, celery, and onions with expert precision, I could already smell the comforting aroma of herbs wafting through the air.
In our home, making soup was more than a way to use leftovers; it was an event! We’d all gather around to share stories, sip on warm cider, and create a cozy ambiance with a flickering candle or two. The kitchen would transform into our gathering place, connecting us through laughter and delicious food. This tradition continued with my own family. Now, I love to carry on that spirit of hospitality and warmth, and there’s no better way to do that than with a pot of Turkey Vegetable Soup simmering away. Let’s recreate that warmth together in your kitchen!
The Ingredients You’ll Need
Here’s what you’ll need to whip up this delightful soup. Each ingredient has a role to play in creating something magical.
-
Turkey: The star of the show! You can use leftover roasted turkey or buy pre-cooked turkey breast. If you’re looking for an alternative, shredded chicken also works wonders here.
-
Mixed Vegetables: This can include carrots, celery, green beans, corn, and peas. Feel free to use fresh or frozen — I often have frozen veggies ready for a last-minute meal. They’re just as nutritious!
-
Broth: Use turkey broth for extra flavor, or vegetable/chicken broth if you’re in a pinch. Homemade is perfect, but store-bought can save time. Look for low-sodium varieties to control the saltiness.
-
Herbs: Fresh herbs like thyme, parsley, and bay leaves add depth to the soup. Dried herbs are a great substitute; just remember that their flavor is more concentrated, so use less.
-
Onions and Garlic: These are key for building a flavorful base. If you’re short on onions, leeks are a fantastic alternative.
-
Seasoning: Salt and pepper enhance all the flavors in the soup. Don’t skip this step, as seasoning is what brings your ingredients to life!
Step-by-Step Cooking Instructions
Alright, let’s get cooking! Follow these steps to create a delicious pot of turkey vegetable soup that warms you from the inside out.
-
Prep Your Ingredients: Start by giving your vegetables a good wash, peel, and chop. Aim for bite-sized pieces — they’ll cook evenly and be easy to enjoy in your soup!
-
Sauté the Aromatics: In a large pot, heat a tablespoon of olive oil over medium heat. Add diced onions and minced garlic, and sauté for about 3-4 minutes until they get soft and fragrant. This step is essential; it builds the flavor foundation for your soup, so don’t rush it!
-
Add Mixed Vegetables: Toss in your chopped mixed vegetables, stirring them into the aromatic mixture. Sauté for another 5-7 minutes, allowing them to soften a bit. The vibrant colors are not just pretty; they’ll enhance your soup’s flavor!
-
Pour in the Broth: Once your veggies are tender, it’s time to add the turkey broth. Pour in 6-8 cups (depending on how soupy you like it) and stir well. Bring this to a gentle simmer.
-
Turkey Time!: Add your turkey next. If you’re using leftover turkey, simply shred it into the pot. For pre-cooked turkey, chop or shred it before adding. Stir everything together and allow it to simmer for 20-30 minutes. This lets the flavors meld beautifully.
-
Herb Bliss: Add your herbs at this point. If using fresh herbs, toss in a handful of chopped parsley and a few sprigs of thyme. Toss in a bay leaf for that classic soup flavor! If you’re using dried, sprinkle in about 1 teaspoon of each — remember, dried herbs are more potent.
-
Final Touches: After 30 minutes of simmering, taste your soup and season with salt and pepper to your liking. You can also add a squeeze of lemon juice for brightness, which really elevates the dish.
-
Serve Hot: Ladle your hearty turkey vegetable soup into bowls, and don’t forget to sprinkle more fresh herbs on top for garnish, which adds a beautiful touch and extra flavor!
Serving Suggestions
For an elegant yet simple presentation, serve your Turkey Vegetable Soup in rustic bowls, perhaps alongside a slice of warm, crusty bread. A sprinkle of fresh herbs not only adds a pop of color but also enhances that fresh flavor. If you’re feeling extra, a dollop of Greek yogurt or sour cream adds creaminess that complements the flavors splendidly.
Recipe Variations
Here are a few fun twists you can explore to make this soup your own:
-
Spice it Up: Add a pinch of red pepper flakes or a dash of hot sauce for a kick. Perfect for those who love a little heat!
-
Add Grains: Throw in some cooked quinoa or pasta for added texture and heartiness. They make the soup even more filling!
-
Vegetarian Version: Skip the turkey and opt for extra beans or chickpeas along with the veggies, creating a protein-packed vegetarian delight.
-
Creamy Turkey Soup: Stir in a splash of cream or coconut milk in the last few minutes for a rich and creamy texture.
-
Herb Variations: Experiment with different herbs like basil, dill, or rosemary for a unique flavor profile.
Chef’s Notes
This Turkey Vegetable Soup recipe started as a way to use up those Thanksgiving leftovers but has evolved over time to become a staple in my kitchen all year round. I often find myself adapting it based on what’s in season or what leftovers I have on hand. One time, I added a handful of kale I had lingering in the fridge — talk about delicious! And let’s not tell anyone… I’ve been known to "accidentally" eat the whole pot in one sitting. Don’t worry—the soup is so good, it’s hard to resist!
FAQs and Troubleshooting
-
What if my soup is too salty?
If you find your soup is too salty, try adding a cubed potato to absorb some of the saltiness. Let it simmer for about 10 minutes, then remove the potato. -
Can I freeze the soup?
Absolutely! This soup freezes beautifully. Just make sure to cool it completely before transferring to an airtight container. It will keep for up to three months in the freezer. -
How can I thicken my soup?
If you prefer a thicker consistency, there are a few options: let it simmer without a lid to reduce it, blend a portion of the soup, or add a cornstarch slurry (1 tablespoon of cornstarch mixed with 2 tablespoons of cold water). -
Can I add other vegetables?
Yes! Feel free to get creative. You can add zucchini, spinach, or whatever vegetables you have on hand to customize your soup.
Nutritional Info (Optional)
For those who like to keep track, here’s a rough breakdown per serving (based on a recipe serving about 6):
- Calories: 200
- Protein: 20g
- Carbohydrates: 15g
- Fat: 8g
- Fiber: 4g
I hope you love making this Turkey Vegetable Soup as much as I do! It’s more than just a recipe; it’s about family, warmth, and sharing delightful moments with loved ones. Thank you for joining me in the kitchen today — here’s to many cozy meals and cherished memories to come! Happy cooking!
PrintHomemade Turkey Vegetable Soup

A comforting bowl of Turkey Vegetable Soup perfect for chilly evenings and family gatherings.
- Prep Time: 15 minutes
- Cook Time: 40 minutes
- Total Time: 55 minutes
- Yield: 6 servings 1x
- Category: Soup
- Method: Stovetop
- Cuisine: American
- Diet: Low Carb
Ingredients
- 2 cups leftover turkey, shredded
- 4 cups mixed vegetables (carrots, celery, green beans, corn, peas)
- 6–8 cups turkey broth (or vegetable/chicken broth)
- 1 tablespoon fresh thyme (or 1 teaspoon dried)
- 1/4 cup fresh parsley, chopped
- 1 bay leaf
- 1 medium onion, diced
- 3 cloves garlic, minced
- 1 tablespoon olive oil
- Salt and pepper to taste
Instructions
- Prep your ingredients: Wash, peel, and chop your vegetables into bite-sized pieces.
- Sauté the aromatics: Heat olive oil in a large pot and sauté onions and garlic for 3-4 minutes until soft.
- Add mixed vegetables: Stir them into the pot and sauté for another 5-7 minutes.
- Pour in the broth: Add the turkey broth and bring to a gentle simmer.
- Add your turkey: Shred leftover turkey and stir into the pot, simmering for 20-30 minutes.
- Add herbs: Mix in thyme, parsley, and bay leaf, adjusting as needed.
- Season to taste: After simmering, season with salt and pepper, and add lemon juice if desired.
- Serve hot: Ladle into bowls and garnish with fresh herbs.
Notes
For added flavor, try using homemade broth. Feel free to add other vegetables like zucchini or spinach.
Nutrition
- Serving Size: 1 serving
- Calories: 200
- Sugar: 4g
- Sodium: 600mg
- Fat: 8g
- Saturated Fat: 1g
- Unsaturated Fat: 7g
- Trans Fat: 0g
- Carbohydrates: 15g
- Fiber: 4g
- Protein: 20g
- Cholesterol: 75mg
Keywords: turkey soup, vegetable soup, comfort food, winter recipes, family recipes

Stuffed Pepper Soup
Cozy Up with Comfort: Stuffed Pepper Soup Recipe
Hello, fellow foodies! Today, I’m excited to share a dish that wraps you in warmth and nostalgia: Stuffed Pepper Soup. This is not just any soup; it’s a big hug in a bowl and has a way of making any day feel a bit more special.
Imagine a chilly evening—maybe it’s drizzling outside, or the leaves are starting to turn bright hues of orange and gold. You come home to a cozy kitchen, the kind of atmosphere that invites lingering. This soup fills the air with a mouthwatering aroma that dances between hearty spices, fresh herbs, and the vibrant colors of bell peppers.
A Personal Story
My love for stuffed peppers goes way back to my childhood. I remember standing on a stool next to my grandmother as she expertly filled hollowed-out bell peppers with a delicious mixture of ground beef and rice. The kitchen was filled with laughter, the sounds of sizzling and chopping, and the comforting knowledge that a family meal was about to unfold.
We would gather around the table, each of us with a steaming bowl of stuffed pepper soup topped with dollops of sour cream and freshly chopped parsley. Those meals were more than just a time to eat—they were moments of connection, of stories shared, and laughter echoing in a home filled with love.
Now, as an adult, I’ve put my spin on this nostalgic dish. Instead of the traditional stuffed peppers, I’ve created a comforting soup that brings all those familiar flavors together in one pot. It’s a go-to recipe when I want to invoke that sense of home and offer my loved ones a similarly warm experience.
Ingredients
Here’s what you’ll need to whip up this delightful stuffed pepper soup:
-
Ground Beef:
- A classic choice, ground beef adds protein and richness. For a leaner option, feel free to substitute ground turkey or chicken. If you’re looking for a vegetarian version, try using lentils or chickpeas for added texture.
-
Peppers:
- Bell peppers are the stars of this dish! Feel free to mix colors—red, yellow, and green bring a vibrant medley and different levels of sweetness. If you’re feeling adventurous, try poblano or jalapeño peppers for a spicy kick!
-
Rice:
- This helps thicken the soup and makes it satisfying. You can use white or brown rice—just remember that brown rice will take longer to cook, so adjust your timing accordingly! Quinoa or even cauliflower rice can be great substitutes for a little twist or to make it gluten-free.
-
Tomatoes:
- Canned diced tomatoes provide a flavorful base. Choose fire-roasted for a smoky flavor, or fresh tomatoes in season! You can also substitute with tomato sauce or crushed tomatoes for a smoother texture.
-
Onion and Garlic:
- These aromatics are key players in building flavor. They have the power to transform your soup! Yellow onions work best, and if you’re a garlic lover like me, don’t skimp on those cloves.
-
Broth:
- Use beef or vegetable broth for a rich base. Homemade is lovely if you have it—otherwise, store-bought is just fine. Adjust the salt levels based on your broth choice since some can be saltier than others.
-
Seasonings:
- Don’t forget the spices—Mexican chili powder, Italian seasoning, salt, and pepper will pull everything together. Feel free to get creative; a splash of Worcestershire sauce or some red pepper flakes can take it to another level!
Step-by-Step Instructions
Now that we have our ingredients, let’s jump right into making this spectacular Stuffed Pepper Soup!
-
Prep Your Ingredients:
Start by chopping your onion and garlic. Dice your bell peppers into bite-sized pieces. This not only saves cooking time but also ensures every spoonful has a perfect mix. Pro tip: if you want to save time, you can buy pre-chopped peppers from the grocery store. Just be sure to check for freshness! -
Brown the Meat:
In a large pot over medium heat, add about a tablespoon of olive oil. Once it’s heated, toss in your ground beef. Break it up and cook until it’s no longer pink, about 5 to 7 minutes. This step adds a lovely depth of flavor to your soup. If you’re using turkey or chicken, the cooking time may be a little shorter. -
Add Aromatics:
Once the meat is browned, add in the chopped onions and garlic. Sauté until the onions are soft and translucent, about 3–4 minutes. Make sure to scrape up any brown bits stuck to the bottom of the pot; they’re full of flavor! -
Incorporate Peppers and Rice:
Add your diced bell peppers to the pot along with 1 cup of rice. Stir everything together—this is where the magic begins! Let it cook for about 2–3 minutes just until the peppers start to soften. -
Tomato Time:
Pour in the canned tomatoes along with their juices. Give it a good stir and let those flavors mingle! Adding about 4 cups of broth now and season it with chili powder, Italian seasoning, salt, and pepper. Bring it to a gentle simmer. -
Simmer Away:
Reduce the heat to low and cover the pot. Allow the soup to simmer for about 20-30 minutes or until the rice is tender. If it gets too thick, just add more broth or water. Remember, you want a hearty soup but not a stew! -
Finishing Touches:
Once your rice is cooked through, taste and adjust seasoning if needed. This is your chance to add extra spices, or even a splash of hot sauce, if you’re feeling spicy!
Serving Suggestions
This stuffed pepper soup is best served piping hot! Ladle generous portions into bowls and garnish with a dollop of sour cream and a sprinkle of fresh parsley or chopped green onions. It’s a beautiful sight with the vibrant colors popping against the creamy white—perfect for impressing friends or just treating yourself after a long day.
Recipe Variations
-
Vegetarian Delight: Substitute ground beef for lentils or beans and use vegetable broth instead. You can also add in more veggies like zucchini or corn for added flavor.
-
Spicy Kick: If heat is your love language, consider adding diced jalapeños during cooking or a generous pinch of red pepper flakes.
-
Cheesy Goodness: Stir in some shredded cheese right before serving for a melty, delicious addition. Cheddar or Monterey Jack works wonderfully!
-
Herbaceous Twist: Fresh herbs like basil or cilantro stirred in just before serving can brighten up the whole dish. It’s all about balancing the flavors!
Chef’s Notes
In cooking, as in life, experimentation is key! Over the years, I’ve fine-tuned this recipe to suit my family’s tastes. One day, I added a splash of balsamic vinegar right before serving, and wow, it elevated the soup in ways I hadn’t expected! Cooking is about having fun and discovering what works best for you.
Also, if you’re ever in a chicken-and-rice recipe rut, remember this soup—it’s perfect for meal prep, leftovers are heavenly, and you can freeze individual portions in airtight containers for later.
FAQs and Troubleshooting
-
Can I use brown rice instead of white?
Yes! Just know that brown rice takes longer to cook, approximately 45 minutes. You may need to add more broth and adjust your simmering time. -
What can I use instead of ground beef?
Ground turkey, chicken, or even plant-based meat crumbles are great substitutes. For a vegetarian option, lentils are fantastic! -
Can I thicken my soup?
If your soup is too thin, try mixing a tablespoon of cornstarch with cold water to create a slurry and stir it into the soup while it simmers. -
How long will leftovers last?
Store leftovers in the fridge for up to 4 days or freeze for up to 3 months. Just be sure to cool it completely before freezing!
Nutritional Info
This hearty soup is packed with nutrients, offering protein from the beef, vitamins from the peppers, and fiber from the rice, making it a balanced meal option.
So there you have it! Stuffed Pepper Soup isn’t just a recipe; it’s a delicious way to bring friends and family around the table. I hope you give this a try and find it just as comforting and fulfilling as I do. Here’s to creating beautiful moments, one bowl at a time. Happy cooking!
PrintStuffed Pepper Soup

A comforting and flavorful soup combining all the beloved tastes of stuffed peppers in one bowl.
- Prep Time: 10 minutes
- Cook Time: 30 minutes
- Total Time: 40 minutes
- Yield: 6 servings 1x
- Category: Main Course
- Method: Stovetop
- Cuisine: American
- Diet: Gluten-Free
Ingredients
- 1 lb ground beef
- 3 bell peppers (any color, diced)
- 1 cup rice (white or brown)
- 1 can diced tomatoes
- 1 onion, chopped
- 4 cloves garlic, minced
- 4 cups beef or vegetable broth
- 1 tsp Mexican chili powder
- 1 tsp Italian seasoning
- Salt to taste
- Pepper to taste
- 1 tbsp olive oil
Instructions
- Prep your ingredients: chop onion and garlic, and dice the bell peppers.
- Brown the meat: In a large pot, heat olive oil and cook ground beef until no longer pink.
- Add aromatics: Stir in chopped onions and garlic, sautéing until soft.
- Incorporate peppers and rice, cooking for 2-3 minutes.
- Pour in diced tomatoes and broth; season with spices.
- Simmer on low heat for 20-30 minutes until rice is tender.
- Finishing touches: adjust seasoning as necessary and serve hot.
Notes
This soup is perfect for meal prep; leftovers can be frozen for up to 3 months.
Nutrition
- Serving Size: 1 serving
- Calories: 400
- Sugar: 6g
- Sodium: 800mg
- Fat: 15g
- Saturated Fat: 6g
- Unsaturated Fat: 8g
- Trans Fat: 0g
- Carbohydrates: 45g
- Fiber: 4g
- Protein: 20g
- Cholesterol: 70mg
Keywords: soup, stuffed peppers, comfort food, family recipe, meal prep

One-Pot Beef Vegetable Soup: 30-Minute Weeknight Dinner
Hearty Beef Vegetable Soup: A Soul-Warming Classic
Hello, fellow food lovers! Today, we’re diving into the warm, cozy world of Beef Vegetable Soup. There’s something incredibly delightful about a steaming bowl of this hearty dish, especially as the cool breeze begins to nip at our heels in the fall. It’s not just about the ingredients; it’s about the love and memories that go into each simmering pot. So, pull up a chair, grab your apron, and let’s sauté our way down memory lane.
A Journey to Grandma’s Kitchen
Growing up, my weekends were often filled with the savory scents wafting from my grandma’s kitchen. The minute you walked through her door, you were enveloped in the warmth of love and deliciousness. One particular memory stands out: a chilly Saturday afternoon when Grandma decided to whip up her classic Beef Vegetable Soup. While I was meant to be her sous chef, I was actually more focused on snagging a spoonful of that bubbling goodness straight from the pot.
Watching her effortlessly chop vegetables, the rhythmic sound of her knife hitting the cutting board became music to my ears. She taught me the secrets of seasoning, the importance of fresh herbs, and how simmering is an act of patience and love. Each bite of that soup was a hug in a bowl, infused with stories of laughter and warmth. That day, I realized food wasn’t just about nourishment—it was about creating memories. Today, I want to share that comforting experience with you and show you how simple it can be to create this classic dish in your own kitchen!
Ingredients
For this delicious Beef Vegetable Soup, you’ll need the following ingredients:
-
Beef: Use boneless chuck roast or stew meat; it becomes tender and flavorful as it simmers. If you’re looking for a leaner option, try sirloin or even ground beef, but keep in mind that you may need to adjust the cooking time.
-
Potatoes: Russet or Yukon gold potatoes work best for their creamy texture. If you want to make it lower in carbs, swap them out for turnips or cauliflower.
-
Carrots: Fresh, vibrant carrots add sweetness and color. You can substitute them with parsnips for a different flavor profile.
-
Peas: Frozen peas are a fantastic option—just toss them in at the end to retain their vibrant color and sweetness. If you have fresh peas, use them; they elevate the dish!
-
Tomatoes: Canned diced tomatoes are convenient and add acidity. For a fresh twist, try using chopped fresh tomatoes if they are in season; just add an extra pinch of salt to enhance their flavor.
Step-by-Step Instructions
Now, let’s get cooking! Follow these steps for a rich and satisfying Beef Vegetable Soup that will warm your heart and soul.
-
Prep Your Ingredients: Before you do anything, take a moment to wash, peel, and chop all your vegetables. This makes the cooking process smoother and more enjoyable. Pro tip: Chop the carrots and potatoes roughly the same size to ensure even cooking.
-
Brown the Beef: Heat a large pot or Dutch oven over medium-high heat. Add a glug of olive oil and let it get nice and hot. Toss in your beef, ensuring not to overcrowd the pan, or it will steam instead of sear. Brown the beef on all sides; it takes about 4-5 minutes. This step is essential for depth of flavor! Once browned, remove the beef and set it aside.
-
Sauté the Veggies: In the same pot, add another drizzle of olive oil (if needed) and add your onions first. Sauté until translucent, about 3-4 minutes. This is where flavor begins to develop. Then, toss in the garlic, carrots, and potatoes; sauté for another 5 minutes.
-
Deglaze with Broth: Pour in your beef broth (homemade or store-bought) and scrape the bottom of the pot with a wooden spoon to release all those browned bits—this is where the flavor truly lies. Return the beef to the pot.
-
Add the Tomatoes: Stir in the canned tomatoes, including their juices. This adds natural sweetness and acidity, balancing out the richness of the beef.
-
Season It Up: Season the mixture generously with salt, pepper, and your choice of herbs. I recommend a bay leaf, thyme, or even a sprinkle of Italian seasoning for a flavor lift.
-
Simmer, Simmer: Bring the soup to a gentle boil, then reduce to a simmer. Cover and let it bubble away for about 1.5 to 2 hours. Check occasionally and give it a stir. This is the time to sip on a glass of wine and think about how good life is—I also advise inviting a friend over to join!
-
Add the Peas: About 10 minutes before you’re ready to serve, add in the frozen peas and let them cook until they are heated through. They add a lovely pop of color and sweet flavor to your soup.
Serving Suggestions
To serve, ladle the piping hot Beef Vegetable Soup into bowls. I love to finish each bowl with a sprinkle of fresh parsley or chives for a touch of brightness. Serve it alongside a crusty loaf of bread or a simple green salad for a complete meal. You can also add a big dollop of sour cream or a sprinkle of Parmesan cheese for extra decadence!
Recipe Variations
Here are a few creative twists to make this Beef Vegetable Soup your own:
-
Herb Infusion: Swap out the thyme for fresh basil or oregano to give your soup an Italian twist.
-
Spicy Kick: Add a pinch of red pepper flakes or a splash of hot sauce during the simmering phase for warming heat.
-
Vegetarian Delight: Substitute the beef with lentils or chickpeas and use vegetable broth for a hearty vegetarian option.
-
Southwestern Flavor: Mix in black beans, corn, and diced green chilies for a Southwestern flair. A squeeze of lime before serving brightens the whole dish.
Chef’s Notes
As I reflect on the evolution of this recipe, it strikes me how adaptable it is. That’s what I love about cooking—there are no hard and fast rules. If you find a beautiful vegetable at the farmer’s market, toss it in! Perhaps you discover you’re out of a particular ingredient; improvise! I remember once running low on tomatoes and using a bit of tomato paste with roasted red peppers instead. It turned out wonderfully!
Here’s a fun kitchen story: one of my friends tried to impress his date with this soup but added way too much salt. In the end, they had to make a quick run to the store for more broth to balance it out. A lesson learned—taste as you go!
FAQs and Troubleshooting
1. My soup is too salty; how can I fix it?
- Adding a potato will help absorb some excess salt. Just let it simmer for about 15–20 minutes, then remove it.
2. Can I make this soup ahead of time?
- Absolutely! In fact, it often tastes better the next day as the flavors meld together wonderfully. Store it in the fridge for up to three days or freeze it for up to three months.
3. What if my beef isn’t tender after cooking?
- It might need more time to break down. Just continue simmering; low and slow is the key to tenderness!
4. How can I thicken my soup?
- If you prefer a thicker consistency, you can mash some of the potatoes in the soup or stir in a cornstarch slurry (1 tablespoon cornstarch mixed with 2 tablespoons cold water) and simmer until thickened.
Nutritional Info (Optional)
For those keeping an eye on nutritional values, one serving of this Beef Vegetable Soup contains approximately:
- Calories: 300
- Protein: 25g
- Carbohydrates: 30g
- Fat: 10g
- Fiber: 5g
Now you’re armed with all the tips and tales to transform humble ingredients into a bowl of comforting goodness. I hope you take this Beef Vegetable Soup and make it your own, filling your home with the warm aromas of nostalgia and love. So, grab your favorite apron, gather your loved ones around the table, and let’s celebrate food together! Happy cooking!
PrintHearty Beef Vegetable Soup

A comforting and hearty Beef Vegetable Soup, perfect for chilly days, filled with love and memories.
- Prep Time: 15 minutes
- Cook Time: 120 minutes
- Total Time: 135 minutes
- Yield: 4 servings 1x
- Category: Soup
- Method: Simmering
- Cuisine: American
- Diet: None
Ingredients
- 1 lb boneless chuck roast or stew meat
- 2 medium Russet or Yukon gold potatoes
- 2 large carrots
- 1 cup frozen peas
- 1 can diced tomatoes
- 4 cups beef broth
- 1 medium onion
- 2 cloves garlic
- Salt and pepper to taste
- Fresh herbs (bay leaf, thyme, Italian seasoning)
- Olive oil for cooking
Instructions
- Prep your ingredients: Wash, peel, and chop all vegetables.
- Brown the beef in a large pot over medium-high heat with olive oil.
- Sauté the vegetables starting with onions, then adding garlic, carrots, and potatoes.
- Deglaze with broth and scrape the pot to release browned bits.
- Add the canned tomatoes including juices.
- Season generously with salt, pepper, and herbs.
- Simmer for 90 minutes to 2 hours until beef is tender.
- Add the peas 10 minutes before serving.
Notes
Serve with a sprinkle of fresh parsley or chives and a crusty loaf of bread.
Nutrition
- Serving Size: 1 bowl
- Calories: 350
- Sugar: 6g
- Sodium: 800mg
- Fat: 15g
- Saturated Fat: 5g
- Unsaturated Fat: 8g
- Trans Fat: 0g
- Carbohydrates: 40g
- Fiber: 5g
- Protein: 25g
- Cholesterol: 70mg
Keywords: beef soup, vegetable soup, comfort food, hearty meals, fall recipes

Corn Chowder
Warm Up with Homemade Corn Chowder: A Comforting Classic
Welcome, my culinary companions! Today, we’re diving into the heartwarming world of corn chowder—a dish that perfectly encapsulates cozy gatherings and the joys of simple yet delightful cooking. As the leaves turn and the air gets a crisp bite, there’s perhaps nothing more comforting than a bowl of creamy corn chowder warming your hands and lifting your spirits. So, grab your apron and let’s cook something special!
Imagine it’s a Saturday afternoon. Sunlight spills into the kitchen while the faint crackle of bacon sizzles in the skillet. The air is filled with that intoxicating aroma—ah, the memories it stirs! A comforting childhood memory dances to mind: my grandmother’s kitchen where family gathered around as we patiently waited for her famous corn chowder to make its grand appearance. The laughter, the stories, and of course, the shared love of food made those moments unforgettable.
Corn chowder was a staple at our family gatherings, and every bowl narrates a different tale of togetherness. I remember trying to sneak tastes as she whisked ingredients, my curiosity piquing with every layer of flavor added. She taught me that cooking is not just about combining ingredients but sharing experiences, stories, and love. This recipe is my homage to those beautiful memories.
The best part? You don’t need a Michelin-starred kitchen or fancy tools. Just quality ingredients, a willingness to experiment, and, most importantly, the intent to gather friends or family around your own table. Let’s whip up a batch of corn chowder that’ll become a favorite at your next dinner party—or just a cozy night in.
Ingredients
Here’s what you’ll need for this creamy corn chowder:
-
Fresh Corn (or Frozen Corn):
- Sweet corn is the star of the dish. If you can get your hands on fresh corn, it’s divine! Frozen corn works just as well—just make sure it’s unsweetened and not overly processed. You might even consider canned corn in a pinch, but fresh or frozen will give you that sweet crunch we crave.
-
Potatoes:
- Use Yukon Gold or Russet potatoes for their creamy texture when cooked. They thicken the soup and provide a wonderful contrast to the sweet corn. If you’re looking for a lighter option, try cauliflower instead!
-
Bacon:
- Bacon adds a savory depth to the chowder. You could use turkey bacon or even plant-based bacon if you’re seeking a lower-fat alternative.
-
Heavy Cream:
- This is what gives the chowder its rich, velvety mouthfeel. You can substitute with half-and-half, or for a dairy-free option, try coconut milk. Just bear in mind that coconut milk will impart its flavor.
-
Onion and Garlic:
- These aromatics build the foundational flavors of the chowder. Yellow onions are great, but a bit of shallot can elevate the flavor. Garlic adds a punch, but feel free to adjust the quantity based on your preferences.
-
Vegetable or Chicken Broth:
- This ingredient adds depth! Homemade broth is ideal, but store-bought works perfectly. For a vegetarian version, vegetable broth is a great way to go.
-
Salt & Black Pepper:
- Essential for seasoning! Don’t forget to taste as you go. You can also add a pinch of smoked paprika for an extra layer of flavor.
-
Fresh Herbs (Chives or Parsley):
- Chopped fresh herbs add a beautiful touch at the end, both in color and flavor. Feel free to switch these up based on what you have on hand—thyme or basil can work well, too!
Step-by-Step Instructions
Now that we have our ingredients, let’s get cooking! Follow these steps for a delicious corn chowder:
-
Prep Your Ingredients:
- Start by shucking the corn if you’re using fresh. Stand the cob upright in a bowl and run a knife down the sides to release the kernels easily. Dice the potatoes into bite-sized chunks, chop the onion and garlic, and cut the bacon into small pieces. This initial prep makes cooking smoother—trust me!
-
Cook the Bacon:
- In a large pot over medium heat, toss in your bacon pieces. Let them sizzle until they’re golden and crispy, about 5-7 minutes. The rendered fat not only flavors the dish but will be the base for our aromatics. Once golden, transfer the bacon to a plate lined with paper towels, leaving the fat in the pot.
-
Sauté the Aromatics:
- Add the chopped onion to the pot, stirring gently in the bacon fat. Cook until the onion becomes translucent—about 3-4 minutes. The smell will begin to fill your kitchen! Toss in the garlic and sauté for an additional minute. You want to be careful not to let the garlic burn as it can become bitter.
-
Add Potatoes and Broth:
- Once the onions and garlic are softened, add the diced potatoes. Pour in your broth until it covers the potatoes, typically about 4 cups. Season with a pinch of salt and black pepper. Bring the mixture to a gentle boil, then reduce to a simmer. Cover the pot and let the potatoes cook until they are fork-tender, around 10-15 minutes.
-
Incorporate the Corn:
- Add the sweet corn to the pot, both fresh and/or frozen. Stir well and re-cover the pot, allowing everything to simmer for about 5 minutes. This will let the flavors mingle beautifully.
-
Blend the Chowder:
- Here comes the fun part! Using an immersion blender, carefully purée about half of the chowder directly in the pot. If you don’t have an immersion blender, you can transfer half to a regular blender—just be cautious with hot liquids. This step gives the chowder its creamy texture while still leaving some chunks of corn and potato for added interest.
-
Finish with Cream:
- Stir in the heavy cream (or alternative), and let it heat through—this will only take a minute or two. Taste and adjust seasoning as needed; perhaps a little more salt, pepper, or even a sprinkle of smoked paprika to elevate that flavor!
-
Reintroduce Bacon and Serve:
- Don’t forget to add back the crispy bacon bits into the chowder. This reintegration adds that delightful crunch!
Serving Suggestions
When it’s time to serve, ladle the chowder into warm bowls to keep it cozy. Top each bowl with crispy bacon, a drizzle of cream, and a sprinkle of chopped fresh herbs like chives or parsley. A slice of crusty bread or a warm baguette on the side makes for the perfect accompaniment. Grab a comfy seat and enjoy—this chowder is best enjoyed slowly.
Recipe Variations
Here are a few fun twists if you’re looking to get creative with your chowder:
- Spicy Corn Chowder: Add a diced jalapeño or a sprinkle of cayenne pepper for a kick of heat.
- Vegan Version: Substitute the cream with coconut milk and diced mushrooms in place of bacon for a smoky flavor using liquid smoke.
- Cheesy Corn Chowder: Stir in a cup of shredded cheddar cheese before serving, melting it right into the chowder for a rich, gooey texture.
- Herbed Variation: Experiment with fresh herbs like thyme, dill, or cilantro for different flavor profiles.
- Add Protein: For a heartier meal, consider adding cooked crab or shrimp for a seafood twist.
Chef’s Notes
Corn chowder is a versatile canvas! Over the years, I’ve experimented with various spices and ingredients. My favorite twist is adding a splash of lime juice before serving—it brightens everything up beautifully. And as for trying to keep it healthy, I remember one dinner where I accidently skipped the cream entirely. Instead, I pureed extra potatoes for creaminess—a hit with my health-conscious friends! They loved it so much; I still include it as an option today.
FAQs and Troubleshooting
-
What if my chowder is too thick?
- Don’t fret! Just add a bit more broth or water until you reach the desired consistency. Remember, you can always thin it down but can’t put the thickness back!
-
How long can I store leftovers?
- Corn chowder keeps well in the fridge for 3-4 days. Reheat gently on the stove, adding a splash of broth or water as needed.
-
Can I freeze corn chowder?
- Yes, you can! Just be aware that the cream may separate a bit upon thawing. To mitigate this, leave out the cream before freezing and stir it in after you reheat.
-
What if my chowder tastes bland?
- Always season as you go! If you find it a bit dull, consider adding a generous pinch of salt or a splash of vinegar or citrus juice to brighten it up.
Nutritional Info
Per serving (1 cup):
- Calories: 320
- Protein: 9g
- Fat: 19g
- Carbohydrates: 30g
- Fiber: 3g
So there you have it, my friends! A lovingly crafted corn chowder that’s perfect for cozy nights and gatherings alike. Whether you’re cooking it solo or sharing with loved ones, remember, it’s not just about the ingredients—it’s about the experiences and the joy of cooking together. Embrace the kitchen, tie on your apron, and let’s create something timeless together. Happy cooking!
PrintHomemade Corn Chowder

A heartwarming recipe for creamy corn chowder that encapsulates cozy gatherings and delightful cooking.
- Prep Time: 15 minutes
- Cook Time: 30 minutes
- Total Time: 45 minutes
- Yield: 4 servings 1x
- Category: Soup
- Method: Stovetop
- Cuisine: American
- Diet: Vegetarian (can be modified)
Ingredients
- 4 ears Fresh Corn (or 2 cups Frozen Corn)
- 2 medium Potatoes, diced
- 4 slices Bacon, chopped
- 1 cup Heavy Cream (or alternative)
- 1 Onion, chopped
- 2 cloves Garlic, minced
- 4 cups Vegetable or Chicken Broth
- Salt & Black Pepper, to taste
- Fresh Herbs (Chives or Parsley), for garnish
Instructions
- Prep your ingredients by shucking the corn and chopping the potatoes, onion, garlic, and bacon.
- Cook the bacon in a large pot over medium heat until crispy, about 5-7 minutes.
- Sauté the onion in the bacon fat until translucent, then add garlic and cook for another minute.
- Add the diced potatoes and pour in the broth to cover them; season and simmer until fork-tender, about 10-15 minutes.
- Incorporate the corn and allow to simmer for about 5 minutes.
- Blend half of the chowder using an immersion blender for creaminess.
- Finish with heavy cream and adjust seasoning as needed.
- Reintroduce the crispy bacon, stir well, and serve.
Notes
For variations, consider adding jalapeños for spice, coconut milk for a vegan version, or cheddar cheese for a cheesy twist.
Nutrition
- Serving Size: 1 cup
- Calories: 320
- Sugar: 5g
- Sodium: 400mg
- Fat: 19g
- Saturated Fat: 10g
- Unsaturated Fat: 8g
- Trans Fat: 0g
- Carbohydrates: 30g
- Fiber: 3g
- Protein: 9g
- Cholesterol: 30mg
Keywords: corn chowder, creamy soup, comfort food, vegetarian soup, family recipe