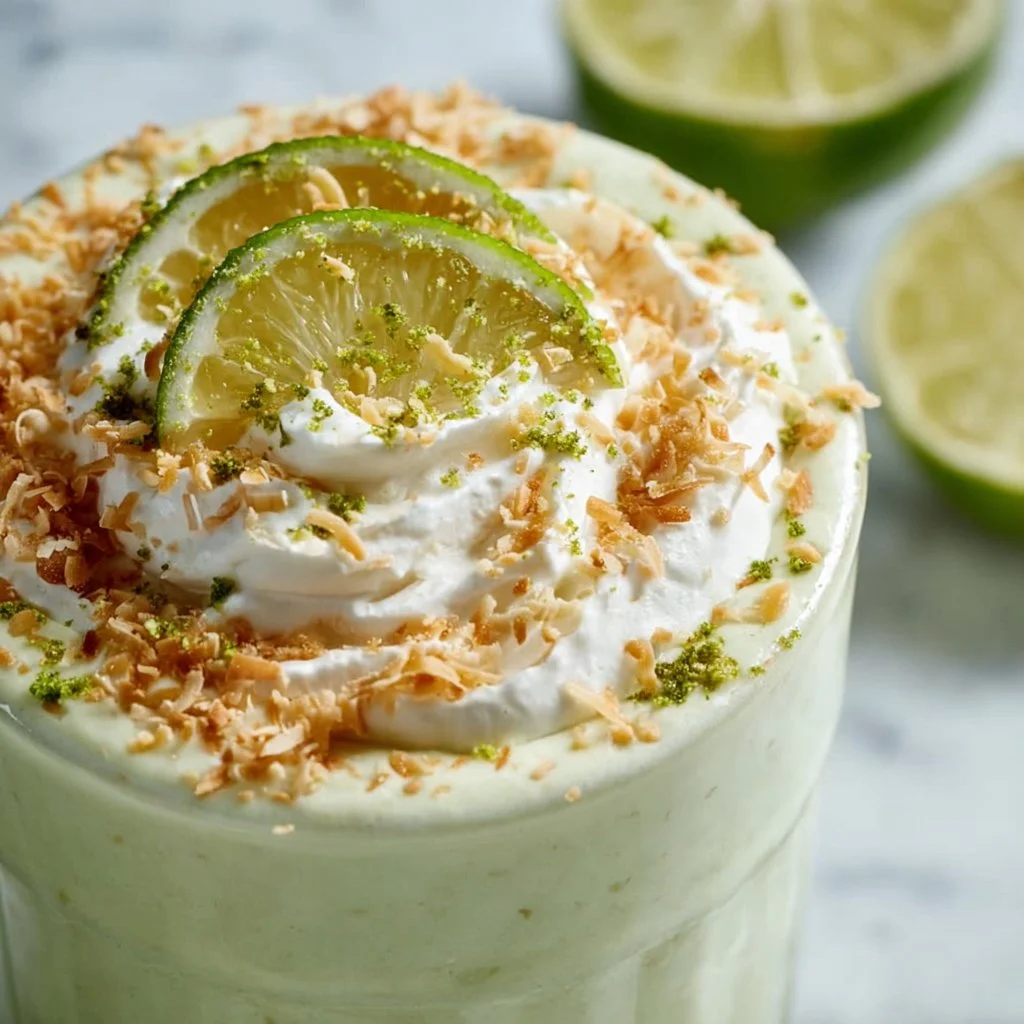
Creamy Coconut Key Lime Pie Smoothie
Creamy Coconut Key Lime Pie Smoothie: A Tropical Retreat in a Glass
Hello, sunshine! Are you ready to whisk your taste buds away to a tropical paradise? If you’ve been daydreaming about biting into a velvety slice of key lime pie on a sun-soaked beach, then today’s recipe is just for you. Join me as we whip up a Creamy Coconut Key Lime Pie Smoothie that combines all the flavors you love in that classic dessert, but with a nutritious twist!
Smoothies are one of my favorite breakfast options or afternoon pick-me-ups. They are so versatile and can be customized to fit any craving or dietary need. Plus, they’re an excellent way to sneak in a few extra servings of fruits and veggies, which is always a win in my book! And when it’s as dreamy as this creamy coconut key lime pie smoothie, you won’t want to miss it.
This recipe is a reflection of my love for all things tropical. Whenever I think of key lime pie, I’m transported back to family vacations in Florida, where we’d indulge in slice after slice while overlooking the sparkling ocean. I wanted to capture that same blissful feeling in a smoothie — light yet satisfying, tangy yet sweet, and oh-so-refreshing.
So grab your blender, summon the sunshine, and let’s create a deliciously inviting smoothie that will have you sipping your way to happiness.
Personal Story
One summer, my family embarked on a road trip down to the Florida Keys. The ocean was a brilliant turquoise, the sun was shining bright, and the air was filled with the scent of salty sea breeze. We stumbled upon a small seaside café and decided to stop for lunch. As soon as we sat down, I saw it — a slice of key lime pie larger than my face!
Naturally, I had to order it. As I took that first bite, the zesty creaminess exploded in my mouth, balancing perfectly between sweet and sour. It was pure bliss. Wrapped up in a buttery graham cracker crust, I was hooked. Not only did that pie become the highlight of my lunch, but it also inspired me to recreate its delicious flavors and make it a staple in my kitchen. Now, with this smoothie, I can enjoy that delightful taste anytime I want without the guilt of a heavy dessert.
Ingredients
Here’s what you’ll need to whip up this delicious smoothie:
- 1 cup coconut milk: Creamy and tropical, coconut milk makes this smoothie rich and smooth. You can also use almond milk or regular milk for a lighter option.
- 1/2 cup Greek yogurt: Adding Greek yogurt gives your smoothie a lovely thickness plus a boost of protein. If you’re dairy-free, try using a plant-based yogurt; coconut yogurt would enhance the flavor!
- 1 banana: Bananas add natural sweetness and help create a creamy texture. Don’t have a banana? Avocado is a fantastic substitute that will give you creaminess without overpowering the flavor.
- 1/4 cup key lime juice: This is where the magic happens! Key lime juice provides that soft tartness that sings in your smoothie. If you can’t find key limes, regular limes work just as well — just adjust to taste!
- 1 tablespoon honey or maple syrup (optional): A touch of sweetness helps balance the tanginess of the key lime. If you want to keep it sugar-free, you can skip this altogether or use a touch of agave syrup.
- 1/2 cup spinach or kale: Sneaky veggies are where it’s at! Adding greens boosts the nutrition profile without altering the taste much. If you want to skip this, feel free to leave out the greens for a truly dessert-like experience!
- Ice cubes (as desired): Ice helps thicken the smoothie and chills it down for a refreshing treat. You can blend in frozen fruit instead if you prefer a thicker texture.
Step-by-Step Instructions
Let’s get this tropical party started! Follow these simple steps for a perfect creamy coconut key lime pie smoothie:
-
Prepare your ingredients: Start by gathering all your ingredients on the countertop. Slice the banana into smaller pieces for easier blending. If you’re using fresh key limes, juice them now and zest them for an extra flavor boost.
-
Add the coconut milk: Pour 1 cup of coconut milk into your blender. Not only does this bring that delightful tropical flavor, but it also provides a creamy base. Be sure to use full-fat coconut milk for the creamiest result, but light coconut milk works too if you’re watching calories!
-
In goes the Greek yogurt: Add in 1/2 cup of Greek yogurt for that rich texture along with the protein punch. If it’s a bit thick, don’t worry! That’s what we want. A creamy smoothie means a satisfying one.
-
Next up, the banana: Toss in your banana. If you like a colder smoothie, use a frozen banana; it’ll make your drink extra refreshing. You can also throw in a few tablespoons of shredded coconut here for some chewy texture and additional flavor.
-
The key lime juice: Squeeze in 1/4 cup of that fresh key lime juice. This is where the magic happens! The tartness of the lime will rev up the flavors. If you find it too tangy after blending, you can always add more honey for sweetness.
-
Sweeten to taste: If you want, drizzle in your tablespoon of honey or maple syrup for that touch of sweetness. Remember, this step is optional — only add it if you like your smoothies on the sweeter side.
-
Add your greens: Toss in the 1/2 cup of spinach or kale, if using. This is a great way to sneak in some extra nutrients without sacrificing flavor.
-
Ice it up: Lastly, add some ice cubes. About a cup should do it, but adjust depending on how thick you want your smoothie. Blend everything on high until super smooth and creamy.
-
Taste and adjust: After blending, pause and taste your smoothie. This is your chance to customize it! If it’s too thick, add a bit more coconut milk. If it’s not sweet enough or too tangy, adjust the honey/maple syrup or lime juice as needed.
-
Serve and enjoy!: Pour your creamy coconut key lime pie smoothie into a chilled glass, and get ready to sip on your tropical paradise!
Serving Suggestions
Presentation is key! To serve this delightful smoothie, I recommend pouring it into a tall glass and topping it off with a dollop of whipped cream and a sprinkle of crushed graham crackers for that classic pie vibe. You could even add a citrus wedge or a slice of lime on the rim for that added splash of flair!
Recipe Variations
Feeling adventurous? Here are some fun variations to try in your creamy coconut key lime pie smoothie:
- Mango twist: Add in some frozen mango chunks for a tropical twist that complements the lime beautifully.
- Choco-lime: A tablespoon of cacao powder can transform this into a chocolate key lime pie smoothie! It’s a rich and indulgent treat.
- Minty fresh: Toss in a few fresh mint leaves for a refreshing spin on the classic flavors. Mint and lime are a match made in heaven!
- Nutty addition: Sprinkling in some almond or peanut butter can offer healthy fats and protein while giving a unique nutty twist.
Chef’s Notes
This recipe has evolved into one of my go-to smoothies because it perfectly captures the essence of summer, no matter the season. I love that it’s not just a drink; it’s a moment in a glass. The tangy key lime paired with creamy coconut makes my heart sing every time I sip it. And, honestly, it’s so versatile. You can use the same base but change the fruit or greens as your cravings evolve. One time, I accidentally added a handful of blueberries — and you know what? It worked beautifully!
Keep in mind, the taste may vary based on the ripeness of your banana and freshness of your key limes. Don’t hesitate to make adjustments as you go along; that’s part of the fun!
FAQs and Troubleshooting
Q1: My smoothie turned out too runny. What did I do wrong?
A: No worries! If your smoothie is too thin, you might have added too much liquid. Try adding more yogurt or ice to thicken it back up.
Q2: Can I prepare this smoothie ahead of time?
A: Absolutely! You can prep the ingredients and store them in the fridge. For best results, blend fresh to enjoy, but if you must make it ahead, drink it within 24 hours for optimal flavor and texture.
Q3: Is this smoothie kid-friendly?
A: Definitely! Kids love the creamy texture and sweet flavors. Plus, the spinach is a fun sneaky veggie that they won’t even notice!
Q4: How can I make this smoothie vegan?
A: Simply use a plant-based yogurt and swap honey for maple syrup to keep it fully vegan. Enjoy your delicious dairy-free treat!
And there you have it! A Creamy Coconut Key Lime Pie Smoothie that is as delightful to enjoy as it is to make. So gather your ingredients, summon a splash of tropical sunshine into your kitchen, and enjoy each and every sip. Here’s to creating delicious memories around your table! Keep cooking with love and intention — happy blending!
PrintCreamy Coconut Key Lime Pie Smoothie

A refreshing smoothie that captures the delightful flavors of key lime pie with a nutritious twist.
- Prep Time: 10 minutes
- Cook Time: 0 minutes
- Total Time: 10 minutes
- Yield: 2 servings 1x
- Category: Breakfast
- Method: Blending
- Cuisine: Tropical
- Diet: Vegetarian
Ingredients
- 1 cup coconut milk
- 1/2 cup Greek yogurt
- 1 banana
- 1/4 cup key lime juice
- 1 tablespoon honey or maple syrup (optional)
- 1/2 cup spinach or kale
- Ice cubes (as desired)
Instructions
- Prepare your ingredients: Start by gathering all your ingredients on the countertop.
- Add the coconut milk: Pour 1 cup of coconut milk into your blender.
- In goes the Greek yogurt: Add in 1/2 cup of Greek yogurt.
- Next up, the banana: Toss in your banana.
- The key lime juice: Squeeze in 1/4 cup of that fresh key lime juice.
- Sweeten to taste: If you want, drizzle in your tablespoon of honey or maple syrup.
- Add your greens: Toss in the 1/2 cup of spinach or kale, if using.
- Ice it up: Lastly, add some ice cubes.
- Blend everything on high until super smooth and creamy.
- Taste and adjust: Pause and taste your smoothie.
- Serve and enjoy!: Pour your smoothie into a chilled glass.
Notes
For best results, use full-fat coconut milk for creaminess. Customize sweetness and thickness to your liking.
Nutrition
- Serving Size: 1 serving
- Calories: 300
- Sugar: 20g
- Sodium: 50mg
- Fat: 10g
- Saturated Fat: 8g
- Unsaturated Fat: 2g
- Trans Fat: 0g
- Carbohydrates: 40g
- Fiber: 4g
- Protein: 8g
- Cholesterol: 5mg
Keywords: smoothie, coconut, key lime pie, tropical, breakfast
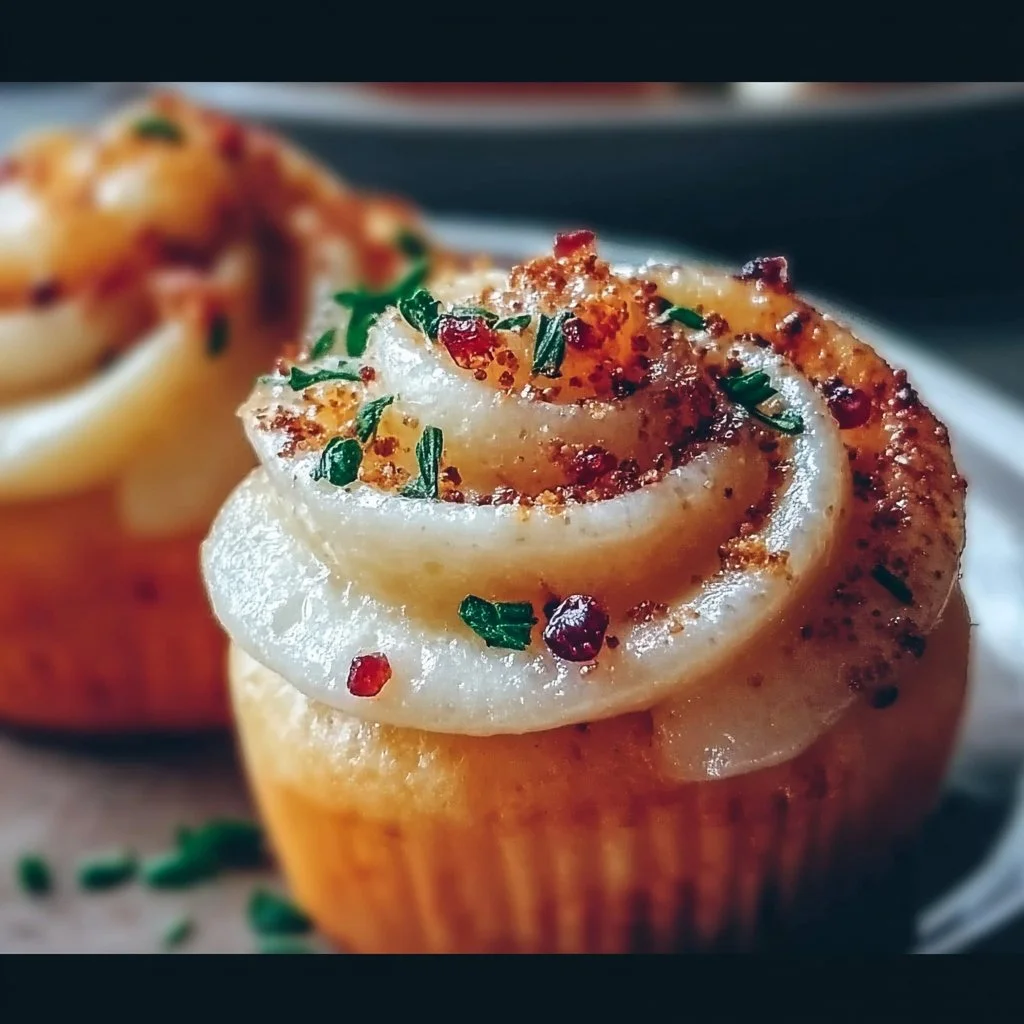
Pin by Vital Vibes on Cupcake Heaven 🧁 in 2026 | Recipes, Cooking, Cooking recipes
Cupcake Heaven: Your Ultimate Guide to Delectable Cupcake Recipes
Hello, fellow food lovers! Savannah Pierce here, and I’m absolutely thrilled to dive into one of my all-time favorite sweet treats—cupcakes! These delightful little cakes may be small, but they carry a world of flavor and creativity in each bite. Whether it’s a classic vanilla buttercream or a decadent chocolate ganache, cupcakes are the perfect canvas for your baking artistry.
Cupcakes have a special place in my heart, evoking memories of birthday parties, festive gatherings, and cozy evenings spent with family. Their versatility and charm make them ideal for any occasion. From sweet celebrations to casual bake-offs, every batch tells a story. Today, I want to take you on a journey into "Cupcake Heaven," where we’ll explore delightful recipes, tips, and tricks to elevate your cupcake game.
So, grab your mixing bowls and preheat that oven—we’re about to create something magical! With just a few quality ingredients and a sprinkle of love, you’ll be whipping up cupcakes that not only look stunning but also taste out of this world. Let’s get into the sweet details!
Personal Story
Ah, the nostalgia! I can still remember the first time I took a bite of my grandmother’s famous chocolate cupcakes. It was my birthday, and she had baked a dozen mini masterpieces, each with a swirl of rich frosting and a cherry on top—a simple yet divine affair. As I bit into that soft, moist cake, a burst of chocolate flavor danced on my palate. The joy I felt that day was amplified by the laughter of family, the whiff of vanilla wafting through the kitchen, and of course, the love that was poured into each cupcake.
Fast forward to now, when I host dinner parties and celebrations, and I find myself channeling those nostalgic moments. Cupcakes allow me to evoke that same warmth and joy for my friends and family. The best part? I’ve tweaked those recipes over the years, infusing them with fresh ingredients and modern flavors while keeping the tradition alive! Let’s make some cupcake magic, shall we?
Ingredients
Here’s a classic list of ingredients you’ll need for a delightful batch of cupcakes—these specific choices ensure a soft, delectable texture and irresistible flavors!
Base Ingredients:
- All-Purpose Flour: The backbone of our cupcakes! It provides structure. For a gluten-free option, swap with almond flour or a gluten-free flour blend.
- Granulated Sugar: Sweetness is key! You can use coconut sugar or honey, but keep in mind they may alter the final texture slightly.
- Baking Powder: This is what gives your cupcakes that lovely rise. Double-check the expiration date; old baking powder can lead to flat cakes!
- Salt: Just a pinch enhances sweetness and balances flavors—don’t skip it!
- Unsalted Butter: Adds richness and moisture. If you want a dairy-free cupcake, olive oil is a great substitute.
- Eggs: Vital for binding moisture. For a vegan twist, flax eggs work wonderfully (1 flaxseed meal + 2.5 tablespoons of water = 1 egg).
- Milk: Enhances flavor and moistness. You can use almond milk, oat milk, or any non-dairy alternative.
- Vanilla Extract: This elevates the flavor profile! Use pure vanilla extract for a more natural taste, or get creative and try almond extract for a hint of nuttiness.
Optional Frosting Ingredients:
- Powdered Sugar: This dreamy ingredient gives our frosting that fluffy texture. For a healthier option, powdered erythritol works well.
- Cream Cheese: Perfect for a tangy frosting! You could substitute with vegan cream cheese for a dairy-free version.
- Heavy Cream: Utilized to achieve that light, airy frosting; coconut cream works like a charm if you’re dairy-free.
Step-by-Step Instructions
Now, let’s get baking! Preheat that oven to 350°F (175°C) and prepare your cupcake pans with liners. With everything ready, here’s how to whip up delicious cupcakes:
-
Mix the Dry Ingredients: In a medium bowl, whisk together the all-purpose flour, baking powder, and salt. This ensures even distribution and helps aerate the flour for fluffier cupcakes.
-
Cream the Butter and Sugar: In a large mixing bowl, cream the softened unsalted butter and granulated sugar until light and fluffy—about 3–4 minutes. This step incorporates air, resulting in a soft texture!
-
Add the Eggs and Vanilla: Beat in the eggs one at a time, mixing well after each addition. Add the vanilla extract, and remember to scrape the sides of the bowl to incorporate all that buttery goodness.
-
Combine Dry & Wet Ingredients: Gradually add the dry mixture to the wet ingredients, alternating with milk. Start and finish with the flour. This helps maintain moisture while ensuring your batter isn’t over-mixed. Mix until just combined!
-
Fill the Cupcake Liners: Use a scoop or a measuring cup to fill each cupcake liner about two-thirds full—this allows room for rising but prevents overflow.
-
Bake: Pop them in the oven and bake for 18–20 minutes or until a toothpick inserted in the center comes out clean. Your kitchen will smell heavenly at this point—trust me!
-
Cool: Let the cupcakes cool in the pan for 5 minutes before transferring them to a wire rack. Allow them to cool completely before frosting.
-
Prepare Your Frosting: In a bowl, combine your cream cheese (or butter), powdered sugar, and a splash of heavy cream. Beat until creamy and easy to spread—adjust with more sugar or heavy cream for your desired consistency!
-
Frosting Fun: Once cooled, use a piping bag to frost your cupcakes. Start from the center and spiral outward for an elegant look—don’t worry about being perfect; it’s all about the love!
Serving Suggestions
To make your cupcakes shine, consider placing them on a decorative platter, perhaps adorned with fresh fruit or edible flowers for that wow-factor. Alternatively, you can display them in cute individual boxes for a delightful take-home treat at gatherings.
Recipe Variations
Feeling adventurous? Here are some fun twists on your classic cupcake recipe:
-
Red Velvet: Add cocoa powder and a splash of red food coloring for a gorgeous hue. Top with cream cheese frosting for the classic finish!
-
Lemon Zest: Incorporate fresh lemon zest into your batter for a bright, zesty flavor. Pair with a lemon buttercream for a refreshing lift.
-
Chocolate Chip: Fold in semi-sweet chocolate chips or chunks into the batter for an indulgent twist!
-
Spiced Maple: Substitute maple syrup for sugar and add cinnamon for a cozy autumn flavor. A maple buttercream will complement this beautifully.
-
Nutty Delight: Fold in crushed nuts or swap flour for almond flour for an interesting texture.
Chef’s Notes
Baking cupcakes has been a delightful journey for me. I remember the first time I tried to recreate my grandmother’s chocolate cupcakes; let’s just say it wasn’t pretty! The kitchen ended up looking like a flour bomb went off, but the laughter we shared that day overshadows any kitchen mishap. It’s in those moments I learned—baking is about joy, not just the end product. Over the years, I’ve perfected the recipes, but it’s always those messy, learning experiences that I treasure most.
FAQs and Troubleshooting
Q: Why are my cupcakes not rising?
A: Make sure your baking powder is fresh! Also, avoid over-mixing the batter once you’ve added the flour—this can lead to dense cupcakes.
Q: How do I store leftover cupcakes?
A: Store them in an airtight container at room temperature for 2–3 days. For longer storage, pop them in the fridge or freezer—just remember to let them come back to room temperature before enjoying!
Q: Can I use coconut flour instead of all-purpose flour?
A: Coconut flour is much more absorbent, so if you try to swap it, use only a 1/4 of what you’d normally use and add an extra egg or more liquid to balance.
Q: My frosting is too runny. What can I do?
A: If this happens, simply add more powdered sugar until you reach your desired consistency. If it’s too thick, add a drop of milk or cream.
Nutritional Info
(Nutritional info can vary based on ingredients and portion sizes.)
- Calories per cupcake (without frosting): Approximately 180
- Total Fat: 6g
- Saturated Fat: 3.5g
- Cholesterol: 43mg
- Carbohydrates: 28g
- Sugar: 14g
- Protein: 2g
And there you have it—a delightful journey into the realm of cupcakes! I hope you now feel inspired to grab that apron and whip up your very own batch of Cupcake Heaven. Every bite is a celebration, and I’m so glad to share this delicious experience with you. Remember, good food isn’t just about taste; it’s about connection, laughter, and the stories we share around the table. Happy baking!
PrintCupcake Heaven: Your Ultimate Guide to Delectable Cupcake Recipes

Explore the world of cupcakes with this delightful recipe guide, featuring classic and modern flavors that evoke nostalgia and joy.
- Prep Time: 15 minutes
- Cook Time: 20 minutes
- Total Time: 35 minutes
- Yield: 12 servings 1x
- Category: Dessert
- Method: Baking
- Cuisine: American
- Diet: Vegetarian
Ingredients
- 2 cups All-Purpose Flour
- 1 1/2 cups Granulated Sugar
- 1 tbsp Baking Powder
- 1/2 tsp Salt
- 1/2 cup Unsalted Butter, softened
- 3 Eggs
- 1 cup Milk
- 2 tsp Vanilla Extract
- Optional: 2 cups Powdered Sugar (for frosting)
- Optional: 8 oz Cream Cheese (for frosting)
- Optional: 1/4 cup Heavy Cream (for frosting)
Instructions
- Preheat the oven to 350°F (175°C) and prepare your cupcake pans with liners.
- Mix the dry ingredients: In a medium bowl, whisk together the flour, baking powder, and salt.
- Cream the butter and sugar: In a large mixing bowl, cream the softened butter and granulated sugar until light and fluffy.
- Add the eggs and vanilla: Beat in the eggs one at a time, mixing well after each addition, then add the vanilla extract.
- Combine dry and wet ingredients: Gradually add the dry mixture to the wet ingredients, alternating with milk.
- Fill the cupcake liners about two-thirds full.
- Bake for 18–20 minutes or until a toothpick comes out clean.
- Cool in the pan for 5 minutes, then transfer to a wire rack until cool.
- Prepare your frosting by beating together cream cheese, powdered sugar, and heavy cream.
- Frost with a piping bag, starting from the center and spiraling outward.
Notes
Consider using fresh fruit or edible flowers for decoration.
Nutrition
- Serving Size: 1 cupcake
- Calories: 180
- Sugar: 14g
- Sodium: 200mg
- Fat: 6g
- Saturated Fat: 3.5g
- Unsaturated Fat: 0.5g
- Trans Fat: 0g
- Carbohydrates: 28g
- Fiber: 0g
- Protein: 2g
- Cholesterol: 43mg
Keywords: cupcakes, baking, dessert, sweet treats, celebration

Easy Stromboli Dinner Recipe
Easy Stromboli Dinner Recipe: Your New Favorite Family Meal
Hello, my friends! Are you ready to roll up your sleeves and dive into a delightful dinner that’s not only easy to make but will also impress your family and friends? Today, I’m thrilled to share a scrumptious Easy Stromboli recipe that’s sure to become a staple in your kitchen. A delicious Italian favorite, Stromboli is a stuffed bread roll, perfect for any occasion—from cozy weeknight dinners to festive gatherings.
What I love most about Stromboli is its versatility. You can fill it with just about anything you have on hand, making it the perfect dish for using up leftovers or customizing to your taste. Imagine golden, flaky bread enfolding your favorite meats, cheeses, and veggies all melded together in a gooey, flavorful harmony. Plus, it’s a fun meal to make together with family or friends, turning cooking into a delightful experience rather than just a chore.
I remember the first time I made Stromboli—it was an impromptu dinner party for a few close friends. I had a houseful of giggles and stories, and I wanted to create something that felt festive yet easy. So, I rolled up some pizza dough with pepperoni, mozzarella, and a few hidden veggies, baked it until it was perfectly golden, and then allowed the delicious aromas to envelop us. The best part? Everyone got to enjoy tearing it apart and dipping it into marinara sauce as we shared stories around the table. Before I knew it, I was handed requests for the recipe and promises of Stromboli-themed dinner parties. And that, my friends, is how I knew I had struck gold.
Let’s bring that magic to your kitchen! Grab your apron, and let’s get ready to make your very own Easy Stromboli.
Personal Story
As a child, my family had a tradition of making homemade pizzas every Friday night. My mom would unwittingly become a kitchen magician, conjuring mouthwatering pies while dad handled the grill. I distinctly remember one Friday when we decided to mix things up and try making Stromboli instead. The kitchen was filled with laughter and the wafting smells of garlic and melting cheese. We set our toppings out like a mini buffet—pepperoni, green peppers, mushrooms, and yes, even some leftover meatball bits we couldn’t let go to waste!
As we rolled the dough, I marveled at how a simple mixture of ingredients could transform into something so delightful. Plus, I had the joy of creating my own masterpiece—one half with extra cheese, the other loaded with veggies. What I loved most was pulling it from the oven, the cheese bubbling with anticipation, and the satisfaction of breaking it apart for my siblings and friends. Those moments of warmth and connection around the dinner table stay with me to this day. Stromboli isn’t just food; it’s a way to bring people together—whatever the occasion may be!
Ingredients
Here’s what you’ll need to make your own Easy Stromboli:
-
Pizza Dough (1 pound)
The base of your Stromboli! You can use store-bought dough for convenience or make your own. If using pre-made dough, take it out of the fridge an hour before to come to room temperature. -
Mozzarella Cheese (1 cup, shredded)
The classic choice! Mozzarella melts beautifully, giving you that gooey texture we all crave. For a twist, you can substitute with provolone or a sharp cheddar. -
Pepperoni (1 cup, sliced)
A staple in many Stromboli recipes, but don’t feel limited! Swap it with some cooked Italian sausage, salami, or even turkey pepperoni if you’re aiming for a lighter option. -
Bell Peppers (1/2 cup, diced)
Sweet and colorful! Feel free to use any bell pepper variety—red, green, yellow, or orange. If you’re in the mood for something spicy, throw in some jalapeños! -
Onion (1/4 cup, diced)
For flavor depth, onions are fabulous. You could also caramelize them beforehand for an extra layer of sweetness or use scallions for a milder taste. -
Garlic (2 cloves, minced)
Because garlic makes everything better! If you’re feeling lazy, garlic powder can be a quick alternative. -
Olive Oil (1 tablespoon)
A splash of good-quality olive oil elevates the flavors. You might consider using infused oils like garlic or chili for a kick! -
Parmesan Cheese (1/4 cup, grated)
This isn’t crucial, but a sprinkle of Parmesan adds a lovely salty finish. If you’re out, any hard cheese can do! -
Italian Seasoning (1 teaspoon)
A mix of herbs like oregano, basil, and thyme. If you’re fresh out, feel free to use your favorite spice blend! -
Salt and Pepper (to taste)
Essential for balancing the flavors! Don’t skip adding them; flavor matters immensely.
Chef Insight:
Stromboli is remarkably forgiving! Feel free to experiment with your favorite ingredients or even change up the seasoning according to what you’re in the mood for. It’s all about making it delicious and your own!
Step-by-Step Instructions
Now, let’s dive into the fun part—making your Easy Stromboli! Follow these steps, and you’ll have a delicious dinner in no time:
Step 1: Preheat the Oven
First things first, preheat your oven to 400°F (200°C). This gives us a delightful, crispy crust, ensuring that all that gooey melted cheese is sealed beautifully inside.
Step 2: Prepare Your Dough
Roll out your pizza dough on a well-floured surface into a rectangle. Aim for about 12×15 inches or so, but don’t stress over this. You want it thin enough to hold the filling but thick enough to prevent it from tearing.
Step 3: Add Olive Oil and Seasoning
Brush your rolled-out dough with 1 tablespoon of olive oil. This isn’t just for flavor; it also helps in achieving that lovely golden color. Sprinkle your Italian seasoning, salt, and pepper evenly over the dough.
Step 4: Layer Your Ingredients
Now for the fun part! Start from one of the short ends of your rectangle. Layer on mozzarella cheese, followed by pepperoni, bell peppers, onions, and finally, sprinkle some minced garlic over the top. The key is to keep the fillings about an inch away from the edges to prevent any spillage when rolling!
Step 5: Roll it Up
Starting from the filled end, roll the dough tightly but gently. You want it snug, but don’t rush; being too forceful can cause the dough to tear. Once you reach the end, pinch the seams to seal it up. If you’ve got any edges hanging out, no worries—just fold those in like tucking a burrito.
Step 6: Bake the Stromboli
Place your Stromboli seam side down on a parchment-lined baking sheet. For extra flair (and flavor!), brush a little more olive oil on top and sprinkle with Parmesan cheese. Make a few small diagonal slashes on top with a sharp knife. This helps the steam escape and gives it those lovely golden stripes!
Step 7: Bake to Perfection
Pop your Stromboli into the oven and let it bake for 25-30 minutes, until golden brown and the cheese is gooey. Keep an eye on it in the last few minutes; ovens can vary!
Step 8: Cool and Slice
Once your Stromboli is golden, remove it from the oven and let it cool for about 5-10 minutes. This is crucial—cutting it too soon can unleash a cheesy eruption! Then, slice it into thick pieces and get ready for the feast.
Chef Tip:
To help the cheese stay within the Stromboli, you can add a thin layer of tomato sauce (cooled) before layering the cheese and toppings. Just be careful not to get too wild with the sauce to avoid soggy bread.
Serving Suggestions
When it comes to serving your Easy Stromboli, simplicity is key! Arrange the slices on a large platter, making them visually captivating. Pair it with a delightful marinara or a homemade garlic dipping sauce—both add a great touch. A fresh side salad or a simple arugula salad drizzled in olive oil and lemon juice balances the meal perfectly. Lay out some napkins and let everyone dive in!
Recipe Variations
Now, it’s time to get creative! Here are a few delicious twists you could explore with your Stromboli:
-
Veggie Lovers’ Delight: Load it up with all kinds of vegetables! Spinach, mushrooms, olives, and zucchini make for superb additions.
-
BBQ Chicken Stromboli: Start with shredded rotisserie chicken slathered in your favorite BBQ sauce, along with red onions and cheddar cheese.
-
Buffalo Chicken Style: Mix shredded chicken with buffalo sauce and top with blue cheese crumbles for a flavorful kick.
-
Caprese Style: Fill with fresh mozzarella, tomatoes, and basil, drizzling balsamic glaze before baking for an Italian classic twist.
-
Breakfast Stromboli: Swap traditional fillings with scrambled eggs, crumbled sausage, and cheddar cheese for a fun breakfast variant!
Chef’s Notes
I cherish how adaptable Stromboli is. Over the years, I’ve fueled my creativity here—from classic meats and cheeses to experimenting with global flavors. A notable story comes to mind: one evening, I tried a tropical island-inspired version, incorporating ham, pineapple, and a hint of teriyaki sauce! We laughed over our “Hawaiian Stromboli” and vowed to bring it back for a future dinner party.
Stromboli truly embodies the spirit of home cooking—always flexible, easily shared, and made with love. There’s something therapeutic about rolling dough, stuffing it full of ingredients, and watching it bake to golden perfection!
FAQs and Troubleshooting
Q1: Can I make Stromboli ahead of time?
A1: Absolutely! You can prepare the Stromboli and roll it up, cover it tightly with plastic wrap, and refrigerate for up to 24 hours before baking.
Q2: What should I do if my dough tears?
A2: Don’t panic! Simply patch it with a little extra dough or gently press it together. It won’t affect the flavor!
Q3: How do I freeze leftover Stromboli?
A3: Wrap it tightly in aluminum foil or plastic wrap after it’s cooled and freeze for up to three months. To reheat, unwrap, place in a preheated oven at 350°F (175°C), and heat until warmed through.
Q4: My Stromboli is soggy—what did I do wrong?
A4: This might be caused by too much filling or sauce. Make sure to adjust the amount of wet ingredients and let your fillings cool before assembling.
Nutritional Info
While the nutritional details may vary depending on the ingredients used, a serving of homemade Stromboli is typically around:
- Calories: 350-450 (varies based on fillings)
- Carbohydrates: 40g
- Protein: 15g
- Fat: 15-20g
- Fiber: 2g
Eating good food isn’t just about the calories; it’s about the experience and the joy it brings!
And there you have it! This Easy Stromboli recipe is your gateway to a world of culinary creativity and warm gatherings. Remember, it’s not just about feeding the stomach; it’s about filling hearts with love and laughter. Now, let’s get cooking!
PrintEasy Stromboli Dinner

A delicious Italian stuffed bread roll filled with pepperoni, mozzarella, and veggies, perfect for cozy dinners or festive gatherings.
- Prep Time: 15 minutes
- Cook Time: 30 minutes
- Total Time: 45 minutes
- Yield: 4 servings 1x
- Category: Main Course
- Method: Baking
- Cuisine: Italian
- Diet: Non-Vegetarian
Ingredients
- 1 pound Pizza Dough
- 1 cup Mozzarella Cheese, shredded
- 1 cup Pepperoni, sliced
- 1/2 cup Bell Peppers, diced
- 1/4 cup Onion, diced
- 2 cloves Garlic, minced
- 1 tablespoon Olive Oil
- 1/4 cup Parmesan Cheese, grated
- 1 teaspoon Italian Seasoning
- Salt and Pepper, to taste
Instructions
- Preheat the oven to 400°F (200°C).
- Roll out the pizza dough on a floured surface into a rectangle.
- Brush the dough with olive oil and sprinkle with Italian seasoning, salt, and pepper.
- Layer mozzarella cheese, pepperoni, bell peppers, onions, and garlic on the dough.
- Roll the dough tightly from the filled end and pinch the seams to seal.
- Place it seam side down on a parchment-lined baking sheet.
- Brush with olive oil, sprinkle with Parmesan, and make diagonal slashes on top.
- Bake for 25-30 minutes until golden brown and cheese is gooey.
- Cool for 5-10 minutes before slicing.
Notes
For a twist, mix up the fillings with your favorite ingredients or add a layer of cooled tomato sauce before the cheese.
Nutrition
- Serving Size: 1 serving
- Calories: 400
- Sugar: 2g
- Sodium: 800mg
- Fat: 20g
- Saturated Fat: 8g
- Unsaturated Fat: 10g
- Trans Fat: 0g
- Carbohydrates: 40g
- Fiber: 2g
- Protein: 20g
- Cholesterol: 50mg
Keywords: stromboli, easy dinner, Italian recipe, family meal, stuffed bread
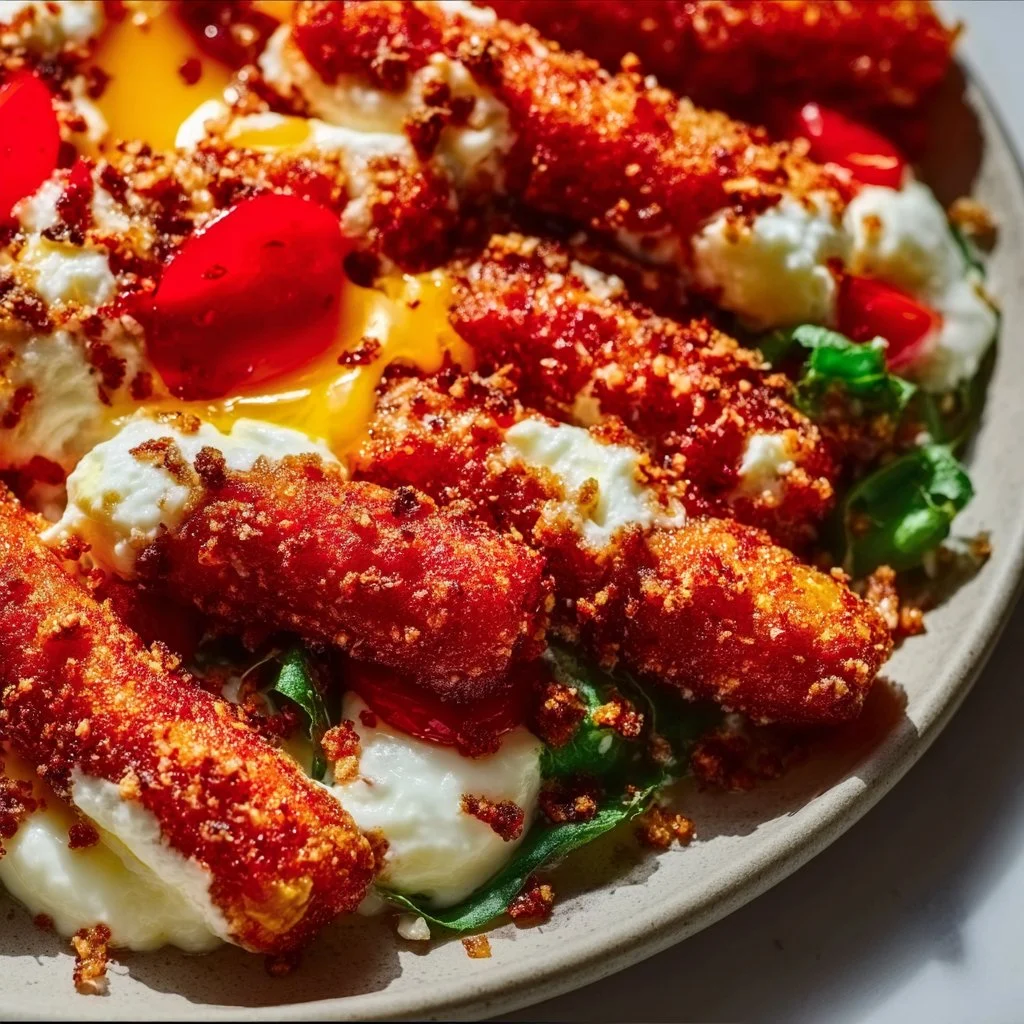
15 Weeknight Dinners for When You’re Done Negotiating With Toddlers in 2026 | Fun Easy Recipes, Picky Eater Recipes, Cooking Recipes for Dinner
15 Weeknight Dinners for When You’re Done Negotiating With Toddlers in 2026
Hey there, fellow food lovers! If you’re anything like me, weeknight dinners can sometimes feel like a negotiation process worthy of a political summit. I mean, getting toddlers to eat something other than the five main food groups (chicken nuggets, mac and cheese, cereal, fruit snacks, and ice cream) can be an Olympic event of its own.
When I first embarked on my journey as a recipe creator at Ivory Apron, I was inspired not just by elegant dinners and sophisticated cuisine, but also by the experience of cooking for my little ones. It turns out the art of simplifying deliciousness while keeping it fun and inviting is a skill that serves us all, especially the parents among us. In this post, I’m thrilled to share 15 delightful weeknight dinner recipes that are simple, nourishing, and sure to please even the pickiest of eaters. These dishes will transform your dinner table into a delightful space—one that sparks joy instead of debates!
So grab your apron, and let’s dive into these weeknight wonders that will leave you and your little ones smiling—and maybe even negotiating for seconds instead of declines!
Personal Story
Speaking of negotiations, I vividly remember a particular dinner I hosted years ago. My son, then just a toddler, was determined to eat only “fun food.” He pointedly rejected my perfectly seasoned roasted veggies and opted for the brightly colored, cartoon-shaped pasta instead. That was the night I learned that presenting food in a whimsical way can be a game-changer! I vividly recall the moment I decided to up my game. I sautéed up some simple veggies but arranged them into a smiley face on his plate. Suddenly, the same food that had been “icky” just moments before transformed into an edible smile! It was a lightbulb moment—a reminder of the joy of creativity in the kitchen, especially when it comes to feeding our little ones.
With that inspiring episode in mind, I’ve crafted these recipes to be not only delicious but also visually appealing, making dinner time a time to look forward to, rather than dread. After all, who wouldn’t want to eat a “smiley face” stir-fry?
Ingredients
Here’s your shopping list (with a few helpful notes on each ingredient) for these easy weeknight dinners:
1. Protein (Chicken, Beef, Tofu, etc.)
- Tips: Choose a protein that your family loves—chicken breast or tights are great for chicken; if opting for tofu, get extra-firm for the best results.
- Substitution: Swap with legumes like chickpeas or lentils for a vegetarian option.
2. Fresh Vegetables (Carrots, Bell Peppers, Broccoli)
- Chef Insight: Colorful veggies not only make the plate pop but also provide essential vitamins. Don’t hesitate to get creative based on what’s in season!
- Substitution: Frozen veggies work in a pinch and save prep time.
3. Aromatics (Onions, Garlic)
- Tips: Fresh garlic and onions build a flavor foundation. If you’re short on time, pre-chopped or even garlic powder will do!
4. Spices & Herbs (Oregano, Basil, Paprika)
- Options: Use dried spices for convenience. Fresh herbs (like basil) are wonderful if you have them—they add an extra layer of flavor!
5. Sauce or Liquid (Soy Sauce, Stock, Tomato Sauce)
- Chef Insight: Sauces can really elevate a dish. A good stir-fry sauce or homemade marinara can change the game!
- Substitution: Vegetable or chicken stock can substitute for sauces if your kiddos prefer milder flavors.
6. Grains (Rice, Pasta, Quinoa)
- Tips: Whole grains (like quinoa) are great for nutrition. If using pasta, consider fun shapes to engage little eaters!
7. Cheese (Optional for Certain Recipes)
- Options: Cheese can transform a dish! Opt for shredded cheeses that melt easily for a smoother texture.
8. Nuts or Seeds (Optional)
- Note: Add these for crunch and nutrition, keeping in mind any nut allergies.
Step-by-Step Instructions
Let’s kick things off with our first night’s recipe: One-Pan Chicken and Veggie Bake.
-
Preheat the Oven: Set your oven to 400°F (200°C). If you want your chicken crispy, a preheated oven is key!
-
Prepare the Chicken: In a bowl, season the chicken breasts with olive oil, salt, and pepper. Here’s a pro tip: adding a squeeze of lemon will elevate the flavor!
-
Chop Your Veggies: While the chicken marinates, chop your favorite veggies into bite-sized pieces. I love using bell peppers and broccoli for vibrant color—plus they cook wonderfully together.
-
Combine on a Sheet Pan: Spread the chicken and veggies on a parchment-lined baking sheet. Make sure there’s enough space so they roast rather than steam (crowding is a no-no!).
-
Add Flavor: Sprinkle your choice of spices (oregano and paprika are favorites of mine) over everything. If your toddler loves garlic, throw in a few minced cloves!
-
Bake: Roast in the preheated oven for about 25-30 minutes, or until the chicken reaches an internal temperature of 165°F (74°C). Take a quick peek halfway through; feel free to stir!
-
Serve: Once done, let it rest for a few minutes before serving. This resting period allows the juices to redistribute, making the chicken moist and tender.
-
Enjoy: Plate it up! Serve with a side of whole grain rice or pasta, and voilà—you’ve got a family-friendly feast!
Chef Hacks: Always double up your chicken so you have leftovers for salads or wraps the next day. Bonus points for meal prep!
Serving Suggestions
Plating is key to making the dish appealing. For the One-Pan Chicken and Veggie Bake, stack the chicken on a plate, then nestle the colorful roasted veggies around it. For a touch of flair, garnish with fresh herbs or a sprinkle of cheese. Let your little ones sprinkle some parmesan on their plate; it might just seal the deal!
Recipe Variations
-
Mexican Night: Swap out chicken for seasoned ground beef or turkey and add corn. Serve with tortillas for a fun and interactive dinner!
-
Pasta Party: Instead of baking, toss everything with cooked pasta and a creamy sauce for a comforting pasta bake.
-
Veggie Delight: Go plant-based by using tofu instead of chicken and adding in mushrooms and zucchini for extra flair.
-
Herbed Chicken: Switch herbs based on your mood—rosemary and thyme make for a lovely roasted flavor.
-
Sweet and Savory: Throw a handful of dried cranberries on top before serving for a sweet burst that pairs beautifully with savory chicken.
Chef’s Notes
As I’ve refined this recipe over time, I’ve found how versatile it really is! I once added pineapple during the last five minutes of roasting, which brought a delightful sweetness that my kids adored. Remember, cooking is all about experimenting—don’t be afraid to try new things and iterate as you go. Each cooking session can yield something uniquely delightful!
FAQs and Troubleshooting
Q: My chicken came out dry. What happened?
A: Overcooking is usually the culprit! Always use a meat thermometer to check for doneness. Aim for about 165°F (74°C) for juicy chicken.
Q: Can I prep this dish ahead of time?
A: Absolutely! You can marinate the chicken and chop the veggies a day in advance. This makes weeknight dinners even easier!
Q: How do I make this healthier?
A: Opt for whole grains and load up on veggies. You can also use less oil and any low-sodium sauces.
Q: My kids refused to eat the veggies. Any tips?
A: Try making them fun shapes with cookie cutters or presenting them in a playful manner. Personalize their plates with veggie “art”!
Nutritional Info
(Per Serving approx.)
- Calories: 350
- Protein: 30g
- Carbohydrates: 40g
- Fat: 10g
- Fiber: 5g
And there you have it—15 delightful weeknight dinners that will bring joy to your table and make cooking a shared adventure with your little ones. Cook confidently, use those chef hacks, and remember that the best meals are served with a side of love and laughter. Happy cooking, and keep shining in that kitchen! Tie on your apron, pour something sparkling, and let’s create something timeless together!
PrintOne-Pan Chicken and Veggie Bake

A simple, flavorful, and visually appealing chicken and vegetable dish that’s perfect for busy weeknight dinners.
- Prep Time: 15 minutes
- Cook Time: 30 minutes
- Total Time: 45 minutes
- Yield: 4 servings 1x
- Category: Main Course
- Method: Baking
- Cuisine: American
- Diet: Gluten-Free, Dairy-Free
Ingredients
- 1 lb Chicken Breasts
- 2 tbsp Olive Oil
- Salt to taste
- Pepper to taste
- 1 Lemon (squeeze for flavor)
- 2 cups Fresh Vegetables (Carrots, Bell Peppers, Broccoli)
- 2 cloves Garlic (minced)
- 1 tsp Oregano
- 1 tsp Paprika
- 2 cups Whole Grain Rice or Pasta (for serving)
Instructions
- Preheat the oven to 400°F (200°C).
- Prepare the chicken by seasoning it with olive oil, salt, and pepper. Add a squeeze of lemon for extra flavor.
- Chop your chosen veggies into bite-sized pieces.
- Combine the chicken and veggies on a parchment-lined baking sheet, ensuring there’s enough space.
- Add spices like oregano and paprika, and minced garlic if desired.
- Bake for 25-30 minutes until the chicken reaches 165°F (74°C).
- Serve the dish with whole grain rice or pasta and enjoy!
Notes
Consider making the meal prep easier by chopping veggies and marinating chicken a day in advance.
Nutrition
- Serving Size: 1 serving
- Calories: 350
- Sugar: 3g
- Sodium: 300mg
- Fat: 10g
- Saturated Fat: 1.5g
- Unsaturated Fat: 8g
- Trans Fat: 0g
- Carbohydrates: 40g
- Fiber: 5g
- Protein: 30g
- Cholesterol: 70mg
Keywords: chicken, weeknight dinners, family-friendly, easy recipes, healthy meals

Easy Strawberry Crunch Cookies
Easy Strawberry Crunch Cookies: A Sweet Journey to Nostalgia
Introduction
Hello, my fellow foodies! If there’s one thing I know for sure, it’s that cookies have a magical way of bringing people together. Whether it’s the comforting scent wafting through your kitchen or the crunch of a perfectly baked cookie, each bite tells a delicious story. Today, I’m excited to share a recipe that embodies the essence of joy, nostalgia, and creativity: Easy Strawberry Crunch Cookies.
Picture this: it’s a warm summer afternoon, and the sun is shining happily through your kitchen window. You’re whipping up something special for your friends (or maybe just for yourself—you deserve it!) when you remember that one childhood favorite snack—the sweet crunch of strawberry cereal. Now, imagine transforming that delightful memory into a gourmet cookie that not only impresses but also evokes smiles all around the table. With every bite of these cookies, you’ll transport yourself back to those carefree days of summer, when the biggest worry was how to tackle your next carton of strawberries.
This recipe is not just easy to make; it also packs a nutrition punch with real strawberries mixed into the dough for an irresistible aroma and freshness. Plus, the delightful crunch from the cereal ensures an exciting texture that’ll keep your taste buds dancing. So, let’s tie on our aprons, gather our ingredients, and embark on this sweet journey together!
Personal Story
The first time I baked cookies as a young girl, it was to impress my friends during a lazy summer afternoon. My little kitchen was filled with laughter, flour dust, and the intoxicating aroma of melting butter and sugar. I remember my mom handing me a box of strawberry cereal and encouraging me to mix it into the dough, giving the cookies a playful twist. We giggled as we shaped them into all sorts of creatures—hearts, stars, and even silly faces.
As we served our Strawberry Crunch Cookies, my friends’ eyes lit up. “These are the best cookies ever!” one exclaimed, and I felt like a superstar. That moment ignited my passion for baking, a passion I carry to this day. Today, I share this recipe not just as a collection of steps, but as a celebration of those sunny afternoons filled with friendship and creativity. And I hope that this delightful treat creates just as many sweet memories for you and your loved ones!
Ingredients
Before we dive into the how-to, let’s gather our ingredients. Here’s what you’ll need to whip up these scrumptious cookies:
-
1 cup unsalted butter, softened
- For a luscious flavor and texture. You can use margarine as a substitute, but the taste won’t be quite the same.
-
1 cup granulated sugar
- This adds sweetness and a slight crunch. If you want to cut down on sugar, use a sugar substitute like Stevia, but keep in mind it may change the flavor.
-
1 cup brown sugar, packed
- Provides moisture and a subtle flavor depth. Feel free to swap for coconut sugar for a healthier twist.
-
2 large eggs
- Binds the ingredients together! For a vegan option, you can use flax eggs (1 tablespoon of ground flaxseed mixed with 2.5 tablespoons of water).
-
1 teaspoon vanilla extract
- For a warm, fragrant backdrop. Use almond extract for a twist!
-
2 1/2 cups all-purpose flour
- The base of our cookies. Whole wheat flour works too if you prefer a heartier base.
-
1 teaspoon baking soda
- Helps the cookies rise and maintain the perfect texture.
-
1/2 teaspoon salt
- Enhances the overall flavors. Feel free to use sea salt for an added crunch and flavor.
-
1 cup crushed strawberry cereal
- This is the crunch factor! You can substitute with any fruity cereal you love for a different flavor profile.
-
1 cup chopped fresh strawberries
- Pure sweetness! If strawberries aren’t in season, you could use frozen strawberries, but remember to thaw and drain them first.
Step-by-Step Instructions
Now that we have all our lovely ingredients ready, let’s get baking!
Step 1: Preheat your oven to 350°F (175°C). Greasing or lining a baking sheet with parchment paper will prevent sticking, ensuring easy cookie removal!
Step 2: In a large mixing bowl, cream together the unsalted butter, granulated sugar, and packed brown sugar until the mixture becomes light and fluffy, about 2-3 minutes. Here’s a little chef hack: The softer your butter, the easier it beats in, making those cookies airy and delightful!
Step 3: Add the two eggs, one at a time, followed by the vanilla extract. Mix until well combined. Remember to scrape down the sides of your bowl to incorporate all that buttery goodness!
Step 4: In a separate bowl, whisk together the all-purpose flour, baking soda, and salt. Gradually add this dry mixture to the wet ingredients, mixing until just combined—don’t overmix; it can make your cookies tough!
Step 5: Now comes the fun part! Gently fold in the crushed strawberry cereal along with the chopped fresh strawberries. Unevenly mixing these in not only ensures a vibrant, fruity cookie but also keeps the strawberries intact for that delicious burst of flavor in every bite!
Step 6: Using a cookie scoop (or just a spoon!), drop dollops of dough about 2 inches apart onto your prepared baking sheet. A little tip here: try to make them uniform in size so they bake evenly—no one likes a half-baked cookie!
Step 7: Bake in the preheated oven for 10-12 minutes, or until the edges are lightly golden. Your kitchen will start to smell like a strawberry paradise. Resist the temptation to open the oven door too soon, or you might let the heat out!
Step 8: Once done, remove the cookies from the oven, allowing them to cool on the baking sheet for about 5 minutes before transferring them to a wire rack to cool completely. Seriously, they’ll be even better once cooled—trust me!
Serving Suggestions
To serve these lovely cookies, arrange them on a beautiful platter with a sprinkle of powdered sugar for an elegant touch. Consider pairing them with a dollop of whipped cream or a scoop of vanilla ice cream for an indulgent treat. You might even serve them alongside a fresh fruit salad to complement that strawberry flavor—perfect for hosting a summer brunch or a casual afternoon gathering!
Recipe Variations
Feeling adventurous? Here are some tasty variations to spice things up:
-
Chocolate Strawberry Crunch Cookies: Add 1/2 cup of mini chocolate chips to the dough for a delightful chocolatey twist.
-
Lemon Zest Variation: Add 1 tablespoon of freshly grated lemon zest for a refreshing citrus twist.
-
Nutty Crunch: Swap out the crushed strawberry cereal with chopped nuts for a crunchy texture.
-
Gluten-Free Delight: Use a gluten-free flour blend instead of all-purpose flour for a gluten-free option.
Chef’s Notes
Ah, the joys of experimenting in the kitchen! I can still remember the day I tossed in not just the strawberries, but also a handful of chocolate chips, thinking, “Why not?” It was a deliciously chaotic moment, teaching me that the kitchen is a space for creativity and joy. And let’s be real—who doesn’t love a good mishap that turns into a delightful surprise?
These cookies have evolved over the years from simply sweet to a fun canvas for whatever ingredients are in season—ripe peaches in the summer, maybe even crushed peppermint for the holidays. Each iteration has its own special charm, just like the memories they create.
FAQs and Troubleshooting
Q: My cookies spread too much. What did I do wrong?
A: Make sure your butter isn’t too soft—room temperature is great. If it’s melting, it’ll cause your cookies to spread. Also, chilling the dough for about 30 minutes can help keep them from spreading too much.
Q: Can I use frozen strawberries?
A: Absolutely! Just be sure to thaw and drain them first. Otherwise, the added moisture can make your cookie dough too wet.
Q: How do I store leftover cookies?
A: Keep cookies in an airtight container at room temperature for up to a week or freeze for longer storage. Just make sure you separate layers with parchment paper to prevent them from sticking together!
Q: Can I double the recipe?
A: Yes! Just remember to keep an eye on the baking time as cookies may require a few extra minutes.
Nutritional Info (optional)
While I’m all about enjoyment in cooking, a little nutritional insight never hurts. Each cookie has approximately:
- Calories: 150
- Total fat: 7g
- Saturated fat: 4g
- Carbohydrates: 22g
- Sugar: 10g
- Protein: 2g
Of course, these values will vary based on portion size and specific ingredients used, but they help you keep a good balance while enjoying these cookies!
So there you have it! Easy Strawberry Crunch Cookies that not only taste divine but also create unforgettable kitchen memories. I can’t wait to hear about your own experiences as you make this delightful treat! Happy baking, and remember: the kitchen is your canvas—make it sweet! 🍓
PrintEasy Strawberry Crunch Cookies

Delicious cookies that combine real strawberries and strawberry cereal for a sweet and crunchy treat that evokes nostalgic summer memories.
- Prep Time: 15 minutes
- Cook Time: 12 minutes
- Total Time: 27 minutes
- Yield: 24 servings 1x
- Category: Dessert
- Method: Baking
- Cuisine: American
- Diet: Vegetarian
Ingredients
- 1 cup unsalted butter, softened
- 1 cup granulated sugar
- 1 cup brown sugar, packed
- 2 large eggs
- 1 teaspoon vanilla extract
- 2 1/2 cups all-purpose flour
- 1 teaspoon baking soda
- 1/2 teaspoon salt
- 1 cup crushed strawberry cereal
- 1 cup chopped fresh strawberries
Instructions
- Preheat your oven to 350°F (175°C) and prepare a baking sheet.
- Cream together the unsalted butter, granulated sugar, and packed brown sugar until light and fluffy, about 2-3 minutes.
- Add the eggs, one at a time, followed by the vanilla extract, mixing until well combined.
- Whisk together the flour, baking soda, and salt in a separate bowl. Gradually add to the wet ingredients and mix until just combined.
- Fold in the crushed strawberry cereal and chopped strawberries gently.
- Scoop dollops of dough 2 inches apart onto the prepared baking sheet.
- Bake for 10-12 minutes, or until the edges are lightly golden.
- Cool on the baking sheet for about 5 minutes before transferring to a wire rack to cool completely.
Notes
For a sweeter treat, serve cookies with a sprinkle of powdered sugar or alongside whipped cream.
Nutrition
- Serving Size: 1 cookie
- Calories: 150
- Sugar: 10g
- Sodium: 200mg
- Fat: 7g
- Saturated Fat: 4g
- Unsaturated Fat: 2g
- Trans Fat: 0g
- Carbohydrates: 22g
- Fiber: 1g
- Protein: 2g
- Cholesterol: 30mg
Keywords: strawberry cookies, dessert recipe, easy baking
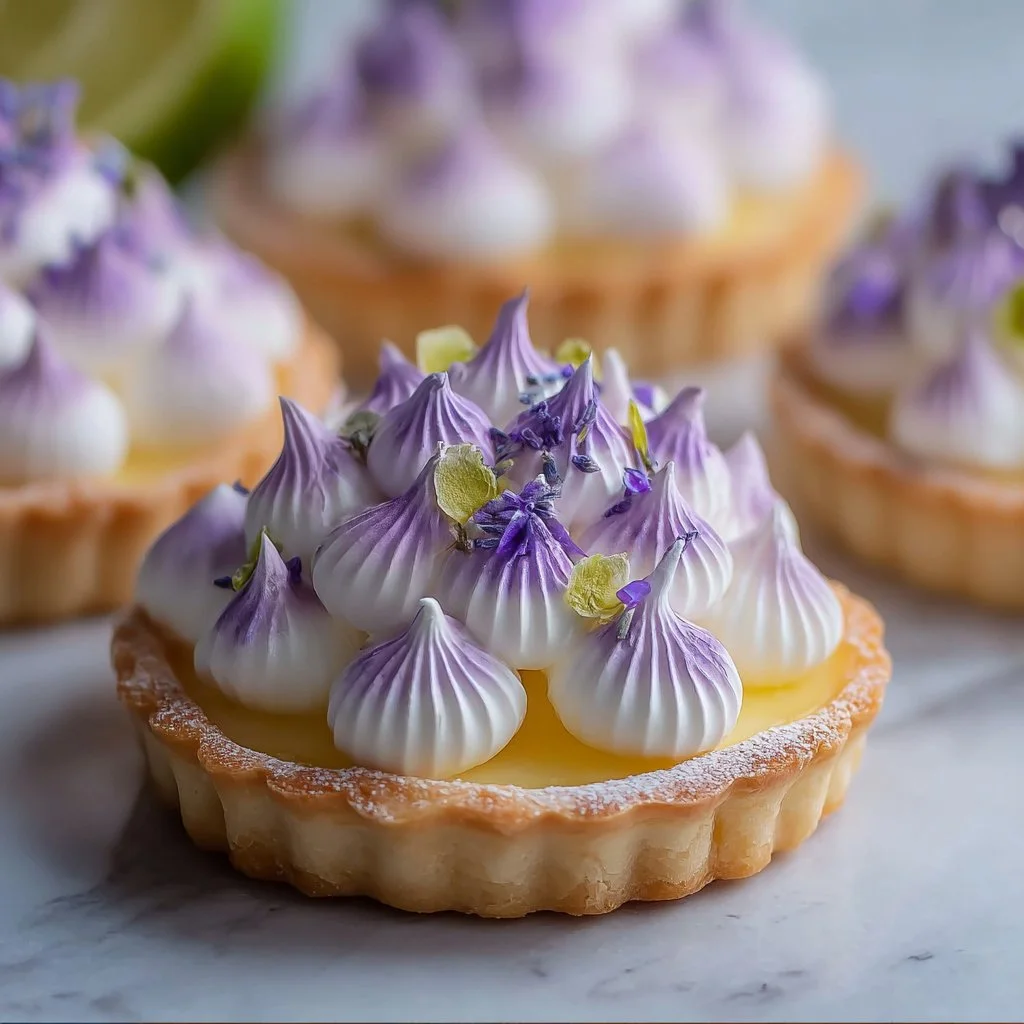
Mini Lemon Tart with Lilac Meringue: Spring Dessert
Mini Lemon Tart with Lilac Meringue: A Spring Dessert to Brighten Your Day
Hello there, fellow food lovers! As the days grow longer and the blossoms begin to dance in the gentle spring breeze, there’s nothing quite like the fresh, zesty goodness of lemon to awaken our taste buds. I can still remember the first time I tasted a bright, tangy lemon tart at a quaint little café. It was like sunshine on my plate—crisp, vibrant, and utterly delightful. And now, I want to share that same joy with you through my Mini Lemon Tart with Lilac Meringue!
This dessert is more than just a feast for the senses; it’s a celebration of the season. The buttery crumb crust is perfectly balanced by the creamy lemon filling, while the ethereal lilac meringue adds a whimsical pop of color and flavor. Trust me, friends, this recipe will have you dreaming of picnics in the park, backyard gatherings, and all the sweet moments spring brings.
Gather your favorite apron and let’s whip up this delightful treat together! This isn’t just about following a recipe; it’s about infusing a little love and sunshine into your kitchen. Whether you’re preparing a delightful dessert for a family gathering or simply treating yourself, these mini lemon tarts will surely impress!
Personal Story
Ah, springtime! A season that evokes nostalgia for me, especially when it comes to my love for baking and hosting. I vividly recall the first time I made lemon tarts. It was during an Easter brunch, the sun streaming through my kitchen window, casting a warm glow over everything. My family had gathered, laughter echoing as we set the table. I wanted to serve something special to celebrate the moment—a dish that encapsulated the essence of spring.
After hours of experimenting (and maybe a few kitchen mishaps), I finally settled on a fresh lemon tart with a delicate meringue. It was the first dessert that made my family swoon. They still talk about that very first taste of citrus bliss, and the vignettes of lilac meringue stealing the show! Now, I adore bringing this memory to life every spring, creating little bites of sunshine that capture the warmth of those cherished times.
So, whether this tart becomes a new family favorite or simply a sweet note of spring, I can’t wait for you to create your own delicious memories!
Ingredients
To create your Mini Lemon Tarts with Lilac Meringue, you’ll need the following ingredients:
For the Crust:
- 1 1/4 cups all-purpose flour: This forms the base of your delightful tart crust. If you’re feeling adventurous, substitute with whole wheat flour for a nuttier flavor or almond flour for a gluten-free option.
- 1/4 cup powdered sugar: This sweetens the dough without making it grainy. If you don’t have powdered sugar, you can blend granulated sugar in a spice grinder until fine.
- 1/2 cup unsalted butter, cold and cubed: Butter adds richness and flakiness. Remember, cold butter is key for that melt-in-your-mouth texture! You can replace it with coconut oil for a dairy-free version.
- 1 large egg yolk: This helps bind the dough together. If you’re vegan, consider a flax egg (1 tablespoon ground flaxseed mixed with 2.5 tablespoons water).
- 1–2 tbsp cold water: Just enough to bring the dough together. Use ice water to keep it cold!
For the Filling:
- 1/2 cup fresh lemon juice (about 2 lemons): Fresh is best here—nothing beats that zingy flavor! Bottled lemon juice can be used but may have a more subdued flavor.
- 1 tbsp lemon zest: Adds an extra punch of citrusy aroma. Feel free to use lime zest for a change of pace!
- 3/4 cup granulated sugar: Sweetness to balance out the tartness of the lemon. For a lower sugar option, feel free to use a sugar substitute like coconut sugar.
- 3 large eggs: These create the structure. You could experiment with aquafaba for a plant-based approach.
- 6 tbsp unsalted butter, cubed: Again, for richness and that creamy texture.
For the Lilac Meringue:
- 3 large egg whites: Make sure they’re at room temperature for the best volume! Egg white powder can be a great alternative if you’re avoiding eggs.
- 3/4 cup granulated sugar: This sugar will hold the meringue’s structure. Organic cane sugar can work if you’re looking for a cleaner alternative.
- 1/4 tsp cream of tartar: Helps stabilize the egg whites. If you don’t have it, you can use lemon juice as a substitute.
- 1/2 tsp vanilla extract: For flavor depth. Try almond extract for a unique twist!
- A few drops of violet food coloring or a mix of red and blue: This is purely optional, but who can resist beautiful color? Natural coloring from beet juice or blueberries can be an alternative.
- Optional: edible lilac flowers for garnish: Because we eat with our eyes first!
Step-by-Step Instructions
Let’s jump into the kitchen and get this delightful dish made step by step!
1. Prepare the Tart Crust
-
Mix Dry Ingredients: In a mixing bowl, whisk together the all-purpose flour and powdered sugar until well combined. This ensures an even sweetness throughout the crust.
-
Add Cold Butter: Using a pastry cutter or forks, cut in the cold, cubed butter until the mixture resembles coarse crumbs. If you don’t have a pastry cutter, your hands work well too—just be quick to avoid heating the butter.
-
Add Egg Yolk: Make a well in the center and add the egg yolk. Use a fork to blend it in lightly.
-
Bring Dough Together: Gradually add cold water, one tablespoon at a time, until the dough holds together but isn’t sticky. If it’s too crumbly, add a touch more water.
-
Chill the Dough: Shape the dough into a disc, wrap it in plastic wrap, and refrigerate for at least 30 minutes. Chilling helps prevent the crust from shrinking when we bake it.
2. Blind Bake the Crust
-
Preheat Oven: Set your oven to 350°F (175°C).
-
Roll Out the Dough: On a lightly floured surface, roll out the chilled dough to about 1/4 inch thick. It should feel supple but firm.
-
Cut and Fill: Cut the dough into circles to fit your mini tart pans. Press the dough into the pans gently, ensuring it’s even on the bottom and along the sides.
-
Prick and Chill: Using a fork, prick the bottom of each crust to prevent bubbling, then pop them back into the fridge for another 10 minutes.
-
Blind Bake: Place parchment paper over the crust and fill with pie weights (or dry beans) to keep it from puffing. Bake for 15 minutes, then remove the weights and parchment, and bake for another 10 minutes or until lightly golden. Allow to cool completely.
3. Prepare the Lemon Filling
-
Mix Lemon Ingredients: In a medium bowl, combine fresh lemon juice, lemon zest, granulated sugar, and eggs. Whisk until fully incorporated. The lemon zest adds a fragrant aroma that brings your filling to life!
-
Melt the Butter: In a saucepan, melt the cubed butter over low heat. Once melted, remove from heat, and slowly whisk in the lemon mixture until combined.
-
Cook until Thickened: Return the mixture to the saucepan over medium-low heat. Stir constantly for about 5-7 minutes until it thickens enough to coat the back of a spoon. Be patient; no one likes scrambled eggs in their lemon tart, so keep stirring gently!
-
Fill the Tart Shells: Pour the warm lemon filling evenly into your cooled tart shells. Leave a little room on top as it may puff during baking.
-
Bake Again: Bake at 350°F (175°C) for an additional 10-12 minutes until the filling is set but still slightly jiggly in the center. Let them cool completely on a wire rack.
4. Make the Lilac Meringue
-
Whip Egg Whites: In a clean mixing bowl, add the egg whites and cream of tartar. Using an electric mixer, beat on medium speed until soft peaks form.
-
Add Sugar Gradually: Gradually add the granulated sugar, continuing to beat on high speed until stiff, glossy peaks form. Test it by rubbing a little between your fingers—if it feels smooth without sugar granules, you’re good to go!
-
Flavor and Color: Beat in the vanilla extract and a few drops of violet food coloring. Remember, a little goes a long way! Feel free to play with the color until it’s just right.
-
Top Tarts: Spoon or pipe the meringue over the cooled lemon filling, creating swirls and peaks. This is your chance to get creative!
-
Toast the Meringue: Using a kitchen torch or the broiler, toast the meringue until golden brown. Keep an eye on it—I can’t tell you how many times I’ve gotten distracted and ended up with a blackened meringue!
Serving Suggestions
When it comes to serving your Mini Lemon Tarts with Lilac Meringue, presentation is key! Place each tart on a dessert plate, and consider garnishing them with a fresh lilac flower for that extra touch of elegance. Add a sprig of mint or some edible flowers around the plate for a vibrant and colorful display. A dusting of powdered sugar over the top adds an airy, whimsical finish!
Recipe Variations
- Berry Blast: Add a layer of fresh berries, like raspberries or blueberries, before topping with meringue for a fruity twist.
- Coconut Cream: Mix in some shredded coconut into the lemon filling for a tropical flair.
- Ginger Zest: Incorporate some finely grated fresh ginger into the lemon mixture for a spicy zing.
- Herb Infusion: Add two sprigs of fresh rosemary or thyme to the filling while it cooks for an herbal note—just remember to remove before filling the tarts!
- Chocolate Surprise: Drizzle melted chocolate over the meringue for a decadent chocolate contrast.
Chef’s Notes
As a cook who loves to experiment, this recipe has changed over the years, much like my own culinary journey! I once hosted a spring dinner party where my little cousin declared that nothing could beat the taste of a "rainbow of flavors." That inspired me to play with colors through meringue. I love how a tiny drop of color can transform a dish, just as seasons change how we feel about food.
Also, if you find yourself with leftover meringue, pipe little kisses onto a lined baking tray and bake at 200°F (90°C) until dry for delicious meringue cookies—no waste here!
FAQs and Troubleshooting
Q: My meringue collapsed! What happened?
A: Collapsing meringue can happen if the egg whites weren’t whipped long enough, or if they’ve been over-beaten. Make sure to whip until you have stiff peaks without drying out the meringue.
Q: How can I keep the tart crust from getting soggy?
A: A few tips! Always ensure the crust is cooked until golden before adding the lemon filling. Blind baking is crucial here, as is allowing the tart to cool completely once baked.
Q: Can I make the tarts ahead of time?
A: Absolutely! You can prepare the crust a day in advance and store it in the refrigerator. Fill it with lemon curd and meringue just before serving to keep everything fresh and vibrant.
Q: Is it normal for the filling to be a little jiggly after baking?
A: Yes! The filling will continue to set as it cools. Just make sure it’s not liquid in the center before you remove it from the oven.
Nutritional Info (Approx. per mini tart)
- Calories: 250
- Protein: 4g
- Carbohydrates: 30g
- Total Fat: 12g
- Saturated Fat: 7g
- Fiber: 1g
- Sugar: 18g
Now that we’ve created this beautiful mini lemon tart with lilac meringue, I can’t wait for you to experience that burst of flavor and joy. So, tie on your apron, gather your loved ones, and create your own food memories. Each slice is a little piece of spring, and I promise, they’re meant to be shared. Happy baking, friends! 🍋💜
PrintMini Lemon Tart with Lilac Meringue

A delightful spring dessert featuring a buttery crust, zesty lemon filling, and ethereal lilac meringue.
- Prep Time: 20 minutes
- Cook Time: 40 minutes
- Total Time: 1 hour
- Yield: 12 mini tarts 1x
- Category: Dessert
- Method: Baking
- Cuisine: American
- Diet: Vegetarian
Ingredients
- 1 1/4 cups all-purpose flour
- 1/4 cup powdered sugar
- 1/2 cup unsalted butter, cold and cubed
- 1 large egg yolk
- 1–2 tbsp cold water
- 1/2 cup fresh lemon juice (about 2 lemons)
- 1 tbsp lemon zest
- 3/4 cup granulated sugar
- 3 large eggs
- 6 tbsp unsalted butter, cubed
- 3 large egg whites
- 3/4 cup granulated sugar
- 1/4 tsp cream of tartar
- 1/2 tsp vanilla extract
- A few drops of violet food coloring
- Edible lilac flowers for garnish (optional)
Instructions
- Prepare the Tart Crust:
- Mix dry ingredients: In a mixing bowl, whisk together the all-purpose flour and powdered sugar until well combined.
- Add cold butter: Cut in the cold, cubed butter until the mixture resembles coarse crumbs.
- Add egg yolk: Make a well in the center and add the egg yolk, blending it in lightly.
- Bring dough together: Gradually add cold water until the dough holds together.
- Chill the dough: Shape into a disc, wrap in plastic, and refrigerate for at least 30 minutes.
- Blind Bake the Crust:
- Preheat oven to 350°F (175°C).
- Roll out the dough to about 1/4 inch thick.
- Cut into circles to fit mini tart pans, pressing gently.
- Prick the bottoms of each crust to prevent bubbling, then chill for 10 minutes.
- Blind bake with parchment and pie weights for 15 minutes, then remove weights and bake for another 10 minutes.
- Prepare the Lemon Filling:
- Mix lemon ingredients in a medium bowl until whisked.
- Melt the butter in a saucepan over low heat, remove from heat, and whisk into the lemon mixture.
- Cook until thickened over medium-low heat for about 5-7 minutes.
- Fill the tart shells with the warm lemon filling.
- Bake again at 350°F for 10-12 minutes until set.
- Make the Lilac Meringue:
- Whip the egg whites and cream of tartar until soft peaks form.
- Add sugar gradually, beating until stiff peaks form.
- Flavor with vanilla and color with food coloring.
- Top tarts with meringue and toast until golden brown.
Notes
Garnish with edible flowers for an elegant presentation. You can also experiment by adding fresh berries or coconut to the filling.
Nutrition
- Serving Size: 1 tart
- Calories: 250
- Sugar: 18g
- Sodium: 75mg
- Fat: 12g
- Saturated Fat: 7g
- Unsaturated Fat: 3g
- Trans Fat: 0g
- Carbohydrates: 30g
- Fiber: 1g
- Protein: 4g
- Cholesterol: 55mg
Keywords: lemon tart, spring dessert, mini tart, meringue, baking
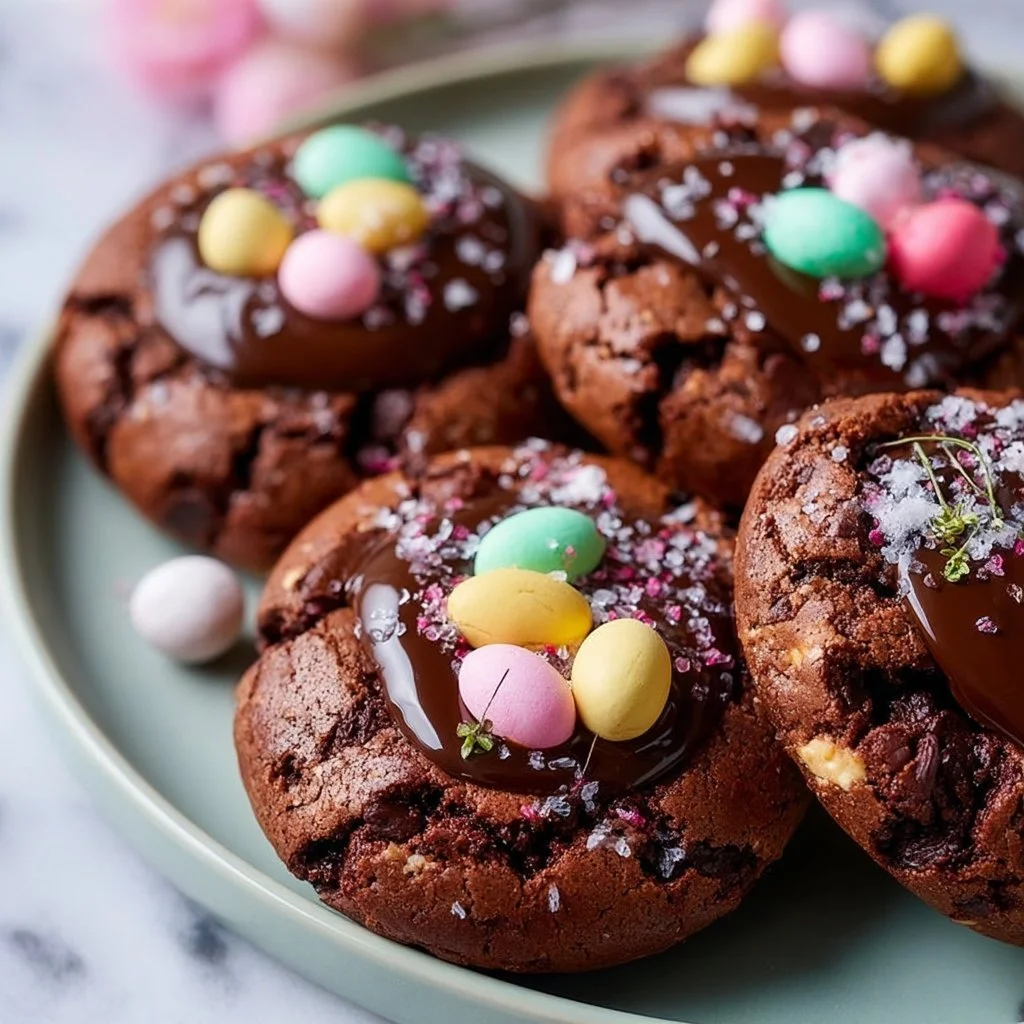
Double Chocolate Easter Egg Brownie Cookies
# Double Chocolate Easter Egg Brownie Cookies: A Sweet Celebration

## Introduction

Hey there, fellow foodies! Welcome back to my kitchen! Today, I’m bringing you a delightful treat that’s perfect for celebrating that special time of year when joy fills the air and chocolate is abundant—Easter! Picture this: soft, fudgy brownies turned into cookies, generously studded with mini chocolate eggs. Yes, you heard me right! I’m excited to share my **Double Chocolate Easter Egg Brownie Cookies** with you, a treat that balances indulgence with nostalgia.

Baking these brownies is like taking a trip down memory lane. I remember trailing behind my mom as she baked her famous brownies. She treated every holiday like a grand affair, and Easter was no exception—just like a magic show with eggs popping out of all corners. The kitchen was always warm and inviting, laughter sprinkled along with the flour, and chocolate chips were always mysteriously disappearing. It was in these moments that my love for creating in the kitchen was born. Now, as I share this recipe, I invite you into that sweet moment of joy, where scents waft through your home, and happiness is just a bite away.

These cookies are not only rich in flavor, but they also capture the fun spirit of the holiday! If you need a treat to take to your next gathering or simply want to indulge in something incredibly delicious, these cookies are the answer! So, roll up your sleeves, tie on your apron, and let’s get baking!

## Personal Story

One of my fondest Easter memories revolves around the yearly family gathering at my aunt's house. She had this amazing knack for turning ordinary days into extraordinary events. Every holiday was an occasion filled with delicious foods, laughter, and warmth—especially Easter. I vividly remember one Easter Sunday when my cousins and I decorated eggs, while the adults were knee-deep in brown sugar and chocolate, creating rich, fudgy brownies.

As we painted the eggs with bright colors, the scent of chocolate wafted through the open kitchen door, promising something special was on the horizon. After our egg decorating was complete, we all rushed to the kitchen, anticipating a taste of those heavenly brownies. But, my aunt decided to surprise everyone with something new—cookies!

These weren't just any cookies; they were thick, chewy brownie cookies that melted in your mouth, bursting with chocolate flavor at every turn. Inspired by this cherished memory, I took it upon myself to create my own version of these beloved treats, adding in festive mini chocolate eggs to make them Easter-ready! Every bite of these cookies transports me back to that vibrant Easter Sunday, reminding me of the joy of gathering around a table laden with delicious food and even better company.

## Ingredients

To create these **Double Chocolate Easter Egg Brownie Cookies**, gather the following ingredients:

- **1 cup unsalted butter**: This is your rich base! If you’d like a nuttier flavor, try using browned butter. You can substitute with coconut oil for a dairy-free option!

- **2 cups granulated sugar**: This adds sweetness and helps achieve that shiny top. You can use brown sugar for a richer flavor, or even coconut sugar for a healthier twist.

- **4 large eggs**: These provide structure and moisture. If you want an egg-free version, you can use flax eggs (1 tablespoon ground flaxseed mixed with 2.5 tablespoons water per egg, let sit for 5 minutes).

- **2 teaspoons vanilla extract**: Adds a warm depth to your cookies. Feel free to substitute with almond extract for an unexpected twist!

- **1 cup all-purpose flour**: Flour gives the cookies their structure. Gluten-free flour blends will work as a substitute for a gluten-free version.

- **1 cup cocoa powder**: This is where the chocolate magic happens! Opt for Dutch-processed cocoa for a deeper flavor or raw cacao powder for a healthier option.

- **1 teaspoon baking powder**: This helps the cookies rise just enough for that perfect chew. Don’t skip it—it’s essential for texture!

- **1/2 teaspoon salt**: A pinch of salt enhances the chocolate flavor. Sea salt or Himalayan salt both work wonderfully here.

- **1 cup chocolate chips**: Because there’s no such thing as too much chocolate! You can use dark, semi-sweet, or even white chocolate chips for a fun twist.

- **1 cup mini chocolate eggs (or Easter egg candies)**: The playful touch that makes these cookies festive and fun! You can substitute with regular chocolate candies for any occasion.

## Step-by-Step Instructions

Let’s get into the baking action! Follow these detailed steps to create your delightful cookies:

1. **Preheat Your Oven**: Start by preheating your oven to 350°F (175°C). This step is crucial as it ensures your cookies bake evenly and achieve that perfect fudgy texture.

2. **Melt the Butter**: In a medium saucepan over low heat, melt the unsalted butter. If you’re going for the browned butter option, swirl it in the pan until it turns golden brown and has a nutty aroma. Take it off the heat and let it cool slightly.

3. **Mix Sugar and Butter**: In a large bowl, combine the melted butter and granulated sugar. Use a whisk to mix until it’s smooth and glossy, about 1-2 minutes. The sugar should feel well-combined and slightly dissolved.

4. **Add Eggs and Vanilla**: Crack in the eggs one by one, followed by the vanilla extract. Whisk until everything is smoothly incorporated—this might take a couple of minutes, but it’s worth it for that lovely texture!

5. **Combine Dry Ingredients**: In a separate bowl, whisk together the flour, cocoa powder, baking powder, and salt. This helps distribute the dry ingredients evenly, ensuring no chocolate lumps later!

6. **Incorporate Dry into Wet**: Gradually add the dry mixture to the wet mixture, using a spatula or wooden spoon to fold it all together. Do this gently—overmixing can lead to dense cookies instead of the light, chewy ones we want!

7. **Add Chocolate Chips**: Once the dough has formed, fold in the chocolate chips, making sure they’re distributed evenly throughout.

8. **Mix in Mini Chocolate Eggs**: Now comes the fun part! Gently fold in the mini chocolate eggs. I love using these because they give that festive flair.

9. **Scoop the Dough**: Using a cookie scoop or two tablespoons, drop generous portions of dough onto a baking sheet lined with parchment paper. Leave enough space between each cookie, about 2 inches, as they will spread a little while baking.

10. **Bake to Perfection**: Place the baking sheet in the preheated oven and bake for 12-15 minutes. When they are finished, the edges should be set, and the centers may look slightly underbaked—that’s perfect! Let them cool on the baking sheet for about 5 minutes before transferring them to a wire rack.

11. **Enjoy the Wow Factor**: Once cooled, serve them warm with a glass of milk or coffee. You can even sprinkle a little sea salt on top of the cookies for a deliciously sophisticated touch!

## Serving Suggestions

When it comes to serving these delightful cookies, presentation is key! Stack a few on a beautiful platter, or arrange them in a basket lined with a pastel-colored napkin to evoke that lovely Easter vibe. You can also dust them lightly with powdered sugar for an elegant touch or even drizzle with a bit of melted chocolate for that extra indulgent flair.

## Recipe Variations

Feeling adventurous? Here are some fun twists you can try with this recipe:

1. **Nutty Delight**: Throw in some chopped nuts, such as walnuts or pecans, for added texture and flavor.

2. **Minty Fresh**: Add a teaspoon of peppermint extract for a festive minty chocolate surprise! Perfect for those mint chocolate lovers out there.

3. **Dried Fruit Fusion**: Incorporate dried cherries or cranberries for a sweet-tart contrast against the rich chocolate. It adds an unexpected burst of flavor.

4. **Spiced Sensation**: Add a dash of espresso powder and a sprinkle of cinnamon for a mocha-flavored cookie. It adds a lovely depth that’s irresistible!

5. **Gluten-Free Option**: Use a 1-to-1 gluten-free flour blend in place of all-purpose flour to make your cookies suitable for gluten-sensitive guests.

## Chef’s Notes

Baking is such a personal experience, and I love how recipes evolve over time. This double chocolate cookie recipe originally came about when I was seeking a way to make my aunt's brownie recipe a little more dynamic. The addition of mini chocolate eggs just made sense for Easter—my way of merging two favorite memories into a beautiful creation.

And trust me! These cookies have gone through a few iterations in my kitchen, and each time they come out even more delectable and nostalgic. One time, my niece and I switched the chocolate eggs for pastel M&M’s, and it created a beautiful color pop that we just adored!

## FAQs and Troubleshooting

**1. Why are my cookies not spreading?**
If your cookies are not spreading in the oven, it might be due to overmixing the dough. Make sure to mix just until ingredients are combined and keep an eye on the baking time—you may need to adjust based on your oven!

**2. Can I freeze these cookies?**
Absolutely! To freeze, arrange the uncooked cookie dough balls on a baking sheet and freeze until solid. Then transfer them to a zip-top bag. You can bake them directly from the freezer; just add a couple of minutes to the baking time.

**3. How can I tell when the cookies are done?**
Look for the edges to be set while the center appears slightly underbaked. They will continue to cook once removed from the oven.

**4. Why are my cookies too cakey?**
If your cookies ended up cakey, it may be a sign of overmixing or too much flour. For that ultimate fudgy texture, ensure you're measuring accurately and folding the ingredients gently.

## Nutritional Info (optional)

- **Serving Size**: 1 cookie
- **Calories**: Approximately 180
- **Total Fat**: 8g
- **Saturated Fat**: 5g
- **Cholesterol**: 42mg
- **Sodium**: 80mg
- **Total Carbohydrates**: 25g
- **Dietary Fiber**: 1g
- **Sugars**: 15g
- **Protein**: 2g

## Conclusion

There you have it, foodies! A delightful recipe for **Double Chocolate Easter Egg Brownie Cookies** that’s sure to ignite joy in your kitchen and on your table. As you whip these up this Easter (or any time of year, because why not?), remember that each cookie is a small piece of love shared with others. Let these cookies be a sweet reminder to gather, celebrate, and simply enjoy the moments that matter.

Now get out there and bake some magic! Tie on that apron, pour something delightful, and let’s celebrate with these delicious cookies that are sure to spark joy this season. Happy baking, friends!
Double Chocolate Easter Egg Brownie Cookies

Delightful brownie cookies packed with chocolate and festive mini chocolate eggs, perfect for Easter celebrations!
- Prep Time: 15 minutes
- Cook Time: 15 minutes
- Total Time: 30 minutes
- Yield: 24 cookies 1x
- Category: Dessert
- Method: Baking
- Cuisine: American
- Diet: Vegetarian
Ingredients
- 1 cup unsalted butter
- 2 cups granulated sugar
- 4 large eggs
- 2 teaspoons vanilla extract
- 1 cup all-purpose flour
- 1 cup cocoa powder
- 1 teaspoon baking powder
- 1/2 teaspoon salt
- 1 cup chocolate chips
- 1 cup mini chocolate eggs (or Easter egg candies)
Instructions
- Preheat your oven to 350°F (175°C).
- Melt the unsalted butter in a medium saucepan over low heat.
- Combine melted butter and granulated sugar in a large bowl, whisking until smooth and glossy.
- Add the eggs one by one, followed by the vanilla extract, whisking until fully incorporated.
- Whisk together the flour, cocoa powder, baking powder, and salt in a separate bowl.
- Gradually add the dry mixture to the wet mixture, folding gently to combine.
- Fold in the chocolate chips until evenly distributed.
- Gently mix in the mini chocolate eggs.
- Scoop generous portions of dough onto a baking sheet lined with parchment paper.
- Bake for 12-15 minutes, then cool on the baking sheet for 5 minutes before transferring to a wire rack.
- Serve warm with milk or coffee.
Notes
These cookies can be frozen; bake from frozen adding a couple of minutes to the baking time.
Nutrition
- Serving Size: 1 cookie
- Calories: 180
- Sugar: 15g
- Sodium: 80mg
- Fat: 8g
- Saturated Fat: 5g
- Unsaturated Fat: 3g
- Trans Fat: 0g
- Carbohydrates: 25g
- Fiber: 1g
- Protein: 2g
- Cholesterol: 42mg
Keywords: Easter, cookies, chocolate, brownie, dessert
Peach Cobbler Cheesecake Fruit Salad Recipe
# Peach Cobbler Cheesecake Fruit Salad Recipe: A Sweet Summer Delight

Welcome, fellow culinary enthusiasts! If you’ve ever found yourself in the kitchen, pondering how to celebrate summer’s bounty, you’re in for a treat today. It’s time to steal a moment, tie on that trusty apron, and whip up a Peach Cobbler Cheesecake Fruit Salad that will have your taste buds dancing with delight. This dessert is everything you love about summer—fresh peaches, creamy cheesecake goodness, and just a hint of nostalgia, all nestled together for an unparalleled flavor experience.

## A Sweet Memory of Summer Picnics

Like many of you, my journey into the world of food began with cherished moments around the table. I fondly remember summer picnics at my grandmother’s house, where a spread of vibrant dishes and desserts filled the backyard table. One particular memory stands out—Grandma’s peach cobbler. The aroma of sweet peaches mingled with cinnamon wafting through the air was pure magic. It was always the highlight of our gatherings, drawing everyone in for a slice.

Those sunny days made me realize that food isn’t just about taste—it’s about connection. Inspired by Grandma's cobbler, I thought, why not reinvent it in a way that accommodates busy lives while preserving that warm nostalgia? Enter the Peach Cobbler Cheesecake Fruit Salad, a delightful twist that merges creamy cheesecake with the freshness of juicy peaches. So, gather your loved ones and let’s create something beautiful together!

## Ingredients

Here's what you'll need to make this delightful dish:

- **4 fresh peaches, chopped**
  Fresh peaches are the star of the show! Use ripe, juicy peaches for the best flavor. If peaches aren’t in season, feel free to swap in nectarines or canned peaches (just make sure to drain them well).

- **8 oz cream cheese, softened**
  Cream cheese adds that rich, velvety texture reminiscent of cheesecake. Soften it for at least 30 minutes at room temperature for easy mixing. You can substitute with mascarpone cheese for a creamier finish.

- **1 cup sour cream**
  This ingredient helps lighten up the cream cheese and adds a lovely tang. Greek yogurt is a fantastic substitute if you’re looking for a lighter option.

- **1/2 cup granulated sugar**
  Just the right amount of sweetness to balance the flavors. If you prefer a healthier alternative, try using honey or maple syrup, keeping in mind to adjust the quantities since they are sweeter!

- **1 tsp vanilla extract**
  Vanilla adds depth to your cheesecake flavor. Always opt for pure vanilla extract; the difference in flavor is worth it!

- **1/2 tsp cinnamon**
  Cinnamon enhances that peach cobbler essence. Feel free to add a pinch more if you love that warm spice!

- **1 cup mini marshmallows**
  These fluffy bites add a playful texture and hint of sweetness. You can swap regular marshmallows if that’s what you have on hand, or even omit them if you’re looking to keep it simpler.

- **1/2 cup chopped nuts (optional)**
  A crunch factor! These add a wonderful contrast to the creamy salad. Pecans or walnuts work beautifully, but skip them if you have nut allergies.


## Step-by-Step Instructions

Time to roll up those sleeves and get cooking! Here’s how to bring this delightful dish to life:

1. **Prep Your Ingredients**
   Start by washing and chopping your peaches into bite-sized pieces. You can peel them if desired, but I love leaving the skin on for added color and nutrition! Set them aside while you prepare the creamy base.

2. **Mix the Creamy Mixture**
   In a large mixing bowl, combine the softened cream cheese and sour cream. Use an electric mixer or a good old whisk (if you’re feeling adventurous!) and beat them together until smooth and lump-free. The goal here is to achieve an airy, creamy texture that will encapsulate the flavors of summer.

3. **Add the Sweetness**
   Gradually mix in the granulated sugar, vanilla extract, and cinnamon. Keep mixing until everything is evenly blended and the sugar dissolves into the creamy mixture. Taste it (You can’t resist, right?) and adjust sweetness as you prefer!

4. **Fold in the Peach Magic**
   Gently fold in the chopped peaches, making sure they’re evenly coated in that dreamy cream. Be gentle here—nobody wants mushy peaches! This is where you can also fold in the mini marshmallows for an added sweet surprise.

5. **Add Nuts for Crunch (Optional)**
   If you're choosing to include nuts for that extra crunch, now's the time to fold them into the mixture. Take care to combine just enough to distribute them without breaking them apart.

6. **Chill it Out**
   Once everything is mixed, cover the bowl with plastic wrap or transfer it to an airtight container. Pop it in the fridge for at least an hour—this chilling time allows the flavors to mingle and lets the marshmallows soften ever so slightly.

7. **Serve with Flair**
   When you’re ready to serve, give it a gentle stir and transfer the salad into a beautiful serving bowl. Consider garnishing with extra peach slices, a sprinkle of cinnamon, or even a dollop of whipped cream for that wow factor!


## Serving Suggestions

Presentation is key, my friends! When serving the Peach Cobbler Cheesecake Fruit Salad, consider using a clear glass bowl to showcase its vibrant colors. You might even want to layer it in individual dessert cups for an elegant touch at your next gathering. A mint leaf or two makes for an inviting garnish, hinting at the freshness of the dish. This dessert is perfect for summer BBQs, potlucks, or simply as a refreshing treat on a warm afternoon.


## Recipe Variations

While this recipe is a classic, feel free to get creative! Here are some fun twists:

- **Berry Bliss**: Substitute half of the peaches with fresh strawberries or blueberries for a mixed berry fruit salad.
- **Coconut Cream**: Add 1/2 cup of toasted coconut flakes to bring in a tropical vibe.
- **Spiced Up**: Add more spices like nutmeg or allspice for a deeper, warm flavor profile.
- **Dairy-Free Delight**: Use cashew cream and coconut yogurt to make it dairy-free and just as creamy!
- **Chocolate Lovers**: Sprinkle some chocolate chips or shavings on top for extra indulgence!


## Chef’s Notes

This recipe has evolved over the years—it started as an attempt to recreate Grandma’s peach cobbler but soon morphed into something even more versatile. One particularly memorable summer, I was short on time before hosting a picnic and needed a cooler dessert. With just a few simple ingredients and a touch of creativity, this peach cobbler cheesecake salad came to fruition! Now, I can't host a gathering without it. Plus, it’s a total crowd-pleaser!

And let me tell you, watching everyone's faces light up as they take their first bite makes my job oh-so-rewarding. It's these small, flavorful moments that make cooking so special.


## FAQs and Troubleshooting

**Q: My peaches are too hard. What should I do?**
A: If your peaches are still a bit firm, try letting them sit at room temperature for a day or two. Alternatively, you can slice them thinly and let them marinate in a bit of sugar and lemon juice for about 30 minutes to help soften them up!

**Q: Can I use frozen peaches?**
A: Absolutely! Frozen peaches work well; just thaw them and drain excess liquid before mixing into the salad.

**Q: Can this be made ahead of time?**
A: Yes, indeed! This salad is perfect for make-ahead meals. Just be sure to cover it tightly as it will help maintain its freshness.

**Q: How long will leftovers last?**
A: Your Peach Cobbler Cheesecake Fruit Salad will last for about 3–4 days in the refrigerator in an airtight container.

## Nutritional Info (Optional)

If you’re keeping track of your nutrition, here’s a quick breakdown per serving (estimate based on 8 servings):

- Calories: Approximately 210
- Protein: 4g
- Carbohydrates: 32g
- Fat: 9g
- Fiber: 1g

---

And there you have it, my friends! A refreshing, creamy, wallop of flavor that encapsulates summer in a single bite. So, are you ready to bring this Peach Cobbler Cheesecake Fruit Salad to your table? Let me know how it turns out! Tie on your apron, pour a glass of something bubbly, and enjoy every moment spent creating beautiful memories around the table. Happy cooking!
Peach Cobbler Cheesecake Fruit Salad
A delightful twist on a summer classic, merging creamy cheesecake with fresh peaches for an unforgettable fruit salad.
- Prep Time: 15 minutes
- Cook Time: 0 minutes
- Total Time: 60 minutes
- Yield: 8 servings 1x
- Category: Dessert
- Method: No-Cook
- Cuisine: American
- Diet: Vegetarian
Ingredients
- 4 fresh peaches, chopped
- 8 oz cream cheese, softened
- 1 cup sour cream
- 1/2 cup granulated sugar
- 1 tsp vanilla extract
- 1/2 tsp cinnamon
- 1 cup mini marshmallows
- 1/2 cup chopped nuts (optional)
Instructions
- Prep your ingredients by washing and chopping peaches into bite-sized pieces.
- Mix the softened cream cheese and sour cream in a large mixing bowl until smooth.
- Add the sugar, vanilla extract, and cinnamon; mix until well blended.
- Fold in the chopped peaches and mini marshmallows gently.
- Add nuts if desired, folding them into the mixture.
- Chill in the fridge for at least an hour to let the flavors meld.
- Serve in a beautiful bowl and garnish if desired.
Notes
Best served chilled; great for summer gatherings and potlucks.
Nutrition
- Serving Size: 1 serving
- Calories: 210
- Sugar: 18g
- Sodium: 150mg
- Fat: 9g
- Saturated Fat: 5g
- Unsaturated Fat: 3g
- Trans Fat: 0g
- Carbohydrates: 32g
- Fiber: 1g
- Protein: 4g
- Cholesterol: 30mg
Keywords: summer salad, peach salad, dessert, fruit salad, cheesecake
Mini Lemon Cakes With Lavender Glaze
Delightful Mini Lemon Cakes with Lavender Glaze: A Journey of Flavors!
Hello, lovely foodies! Today, we’re stepping into the bright and cheerful world of desserts with a truly special treat: Mini Lemon Cakes with Lavender Glaze. If you’ve ever enjoyed the sun-drenched taste of fresh lemons while being enveloped in the delicate aroma of lavender, you know we’re in for a delightful culinary experience!
Picture this: it’s a warm afternoon, the sun is shining, and you’re enjoying a breezy gathering with friends or family. The air is filled with laughter, soft chatter, and the sweet scent of something delectable baking in the oven. These mini lemon cakes are not just a food item; they are the centerpiece of those beautiful moments when everyone gathers around the table, ready to share stories and enjoy each other’s company.
The joy of creating these cakes lies not only in how they taste but also in how simple they are to make! Using fresh ingredients that are easy to find, you can whip up these delightful treats that look polished yet are approachable for any home cook. So, tie on your apron and let’s embark on this tasty journey together!
Personal Story
Growing up, my grandmother had a garden filled with vibrant lavender and zesty lemons. Her backyard was our secret escape, where we spent countless afternoons picking herbs, smelling blossoms, and watching her prepare beautiful dishes. I distinctly remember one sunny day when she decided to teach me how to bake lemon cupcakes. The house filled with the zesty aroma of lemon zest mixed with buttery bliss, and soon, golden treats emerged from the oven.
As if that weren’t enough, we drizzled a sweet lavender frosting over the warm cakes. I can still hear the voice of my grandmother saying, “Baking is about making memories, Savannah. These cakes are sweet like life, so let’s share them and spread joy.” From that day on, a love affair with lemon cakes began! Now, I’m excited to share my own twist on the classic — mini lemon cakes with a super refreshing lavender glaze.
Ingredients
For the Mini Lemon Cakes:
-
1 1/3 cups all-purpose flour
Whether you’re using bleached or unbleached flour, both work well in this recipe. You could also use a gluten-free blend, keeping in mind that it might change the texture slightly. -
1/2 tsp kosher salt
A pinch of salt enhances the sweetness and flavor of the cake. Don’t skip it! -
1/8 tsp baking soda
This little pinch will help lift our cakes, making them fluffy and light. -
1/2 cup unsalted butter, softened
Softened butter is key to achieving creamy, light cakes. If you’re short on time, cube the butter and microwave it for 10 seconds. -
2/3 cup granulated sugar
Bringing sweetness and texture to our mini cakes, using granulated sugar allows for a perfect golden color. -
1/3 cup packed light brown sugar
This adds warmth and depth to the flavor—brown sugar has a hint of molasses that complements the lemon beautifully. -
1 tbsp grated lemon zest (from 2 lemons)
Make sure to zest the lemons lightly and avoid the bitter white pith. The zest is where the flavor magic lies! -
2 large eggs, at room temperature
Room temperature eggs blend better, ensuring that your batter is smooth and silky. -
1/4 cup sour cream, at room temperature
This adds moisture and a subtle tanginess; you can substitute with Greek yogurt if needed. -
1/4 cup whole milk, at room temperature
Milk helps to keep the cake moist; almond milk is a good non-dairy substitute here. -
1 tsp vanilla extract
A hint of vanilla compliments the lemon’s brightness wonderfully.
For the Lavender Glaze:
-
1/4 cup whole milk
As with the cake, room temperature milk makes for a smoother glaze. -
1/2 tsp culinary lavender
Make sure to use culinary-grade lavender for safe edible use. If you can’t find it, try substituting with dried chamomile! -
1 1/2 cups powdered sugar
Sweetening our glaze perfectly, powdered sugar dissolves smoothly and creates that heavenly glaze texture. -
1/4 tsp kosher salt
Just a pinch helps balance the sweetness of the glaze. -
1/8 tsp vanilla extract, as needed
Adjust as needed for flavor; I recommend a splash! -
Edible flowers and lemon zest (for garnish)
These are entirely optional but definitely add a sophisticated and beautiful touch to your presentation.
Step-by-Step Instructions
Step 1: Preheat Your Oven
Start by preheating your oven to 350°F (175°C). This is a crucial step to get those cakes baked evenly. While that’s warming up, it’s the perfect time to gather all your ingredients and prep your workspace.
Step 2: Prepare the Muffin Tin
Grease a mini muffin tin with a touch of butter or line it with cupcake liners. If you’re using a non-stick pan, just a light coating is enough to ensure they pop out easily once baked.
Step 3: Mix the Dry Ingredients
In a medium bowl, whisk together the flour, salt, and baking soda. This step ensures that all the baking soda gets evenly distributed throughout the cake batter. Set this aside while you mix the wet ingredients.
Step 4: Cream the Butter and Sugars
In a large mixing bowl, beat the softened unsalted butter with granulated and brown sugars until the mixture is fluffy and light—about 3-4 minutes. The color will change to a pale yellow, indicating that it’s well-mixed. Pro tip: Use a stand mixer if you have one—it saves your arm some workout!
Step 5: Add the Eggs and Zest
Next, crack in the room temperature eggs one at a time, blending well after each addition. Fold in the lemon zest, releasing that delightful citrus aroma.
Step 6: Incorporate Sour Cream and Milk
Pour in the sour cream, milk, and vanilla extract. Mix until just combined—over-mixing here can lead to dense cakes.
Step 7: Combine Dry and Wet Ingredients
Gradually add the dry ingredients to the wet mixture. Gently fold them in, stopping just before the flour is fully incorporated. It’s okay if a little bit of dry flour remains; we want to keep that cake light and airy!
Step 8: Fill the Muffin Tin
With a spoon or a small scoop, divide the batter evenly among the mini muffin cups. They should fill about 2/3 of the way full.
Step 9: Bake!
Bake the mini cakes in the preheated oven for 12-15 minutes or until they are golden brown and a toothpick comes out clean. Your kitchen will smell amazing during this time—trust me!
Step 10: Cool Down
Once baked, remove the mini cakes from the oven and allow them to cool in the pan for about 5 minutes before transferring them to a wire rack to cool completely.
Making the Lavender Glaze
Step 11: Prepare the Lavender Milk
In a small saucepan, heat the milk over medium heat until warm but not boiling. Add the culinary lavender and let it steep for about 5 minutes—this infuses the milk with a delicate floral flavor. Strain the milk into a bowl, discarding the lavender.
Step 12: Make the Glaze
In another bowl, mix the powdered sugar with the warm lavender-infused milk and kosher salt. Stir until you achieve a smooth glaze. If it’s too thick, add a little more milk; if it’s too thin, whisk in more powdered sugar.
Step 13: Glaze the Cakes
Once your mini lemon cakes are completely cool, dip each one into the glaze or drizzle it generously over the top. Allow the glaze to set for a few minutes before garnishing.
Serving Suggestions
To plate these mini lemon cakes, arrange them on a beautiful serving platter or cake stand. You can create an inviting display by garnishing with a sprinkle of lemon zest or placing edible flowers beside them. This simple touch transforms your dessert into a work of art, ready to impress your guests!
Recipe Variations
- Coconut Lemon Cakes: Swap out the milk for coconut cream in both the batter and the glaze for a tropical twist.
- Blueberry Lemon Cakes: Fold in fresh or frozen blueberries into the batter before baking for an extra burst of flavor.
- Lemon Almond Cakes: Add a teaspoon of almond extract and replace half the flour with almond flour for a nutty, delicious flavor.
- Vegan Version: Substitute eggs with flax eggs (1 tbsp flaxseed meal + 2.5 tbsp water for each egg) and replace dairy with plant-based milk and vegan butter.
Chef’s Notes
Over the years, I’ve played around with this recipe and have discovered that lemon is such a versatile flavor. Each variation brings a new layer of joy to the table. The lavender glaze, in particular, holds a special place in my heart, reminding me of those idyllic afternoons spent in my grandmother’s garden, surrounded by blooms and laughter.
One funny kitchen story comes to mind: I once tried to create lavender-infused sugar by tossing in fresh lavender with my sugar and leaving it in a cupboard. Instead of the delicate flavor I aimed for, I accidentally created a funky, floral mess. The lesson? Always use culinary-grade ingredients!
FAQs and Troubleshooting
-
Why are my mini cakes dense?
If your cakes are dense, it might be due to over-mixing the batter or using cold ingredients. Make sure all your ingredients, especially eggs and dairy, are at room temperature. -
How can I make the glaze less sweet?
To reduce the sweetness of the glaze, you can add a little more milk or lemon juice, which will add delicious tanginess and balance against the sugar. -
Can I store these cakes?
Absolutely! Store the mini cakes in an airtight container at room temperature for up to 3 days or in the refrigerator for up to a week. For best results, glaze them just before serving. -
What other flavors can I combine with lemon?
Lemon pairs beautifully with herbs like thyme or rosemary, or you can even create a shortcut by adding a splash of limoncello to the batter or glaze for an adult twist!
Nutritional Info (Optional)
Calories: 120 per mini cake
Fat: 4g
Carbohydrates: 19g
Protein: 2g
Final Thoughts
There you have it, my friends! Mini Lemon Cakes with Lavender Glaze are not just a dessert; they are a celebration of life’s little moments. Using fresh ingredients and simple techniques, you can create something that looks as good as it tastes. So, let’s gather around the table and enjoy the fruits of our labor together!
Happy baking, and remember: the joy of cooking lies in sharing delicious food with loved ones. Cheers! 🍋💛
PrintMini Lemon Cakes with Lavender Glaze

Delightful mini lemon cakes topped with a sweet lavender glaze, perfect for gatherings or a sweet treat.
- Prep Time: 15 minutes
- Cook Time: 15 minutes
- Total Time: 30 minutes
- Yield: 24 mini cakes 1x
- Category: Dessert
- Method: Baking
- Cuisine: American
- Diet: Vegetarian
Ingredients
- 1 1/3 cups all-purpose flour
- 1/2 tsp kosher salt
- 1/8 tsp baking soda
- 1/2 cup unsalted butter, softened
- 2/3 cup granulated sugar
- 1/3 cup packed light brown sugar
- 1 tbsp grated lemon zest (from 2 lemons)
- 2 large eggs, at room temperature
- 1/4 cup sour cream, at room temperature
- 1/4 cup whole milk, at room temperature
- 1 tsp vanilla extract
- 1/4 cup whole milk (for the glaze)
- 1/2 tsp culinary lavender
- 1 1/2 cups powdered sugar
- 1/4 tsp kosher salt (for the glaze)
- 1/8 tsp vanilla extract (for the glaze)
- Edible flowers and lemon zest (for garnish)
Instructions
- Preheat your oven to 350°F (175°C).
- Prepare a mini muffin tin by greasing it with butter or lining with cupcake liners.
- Mix the flour, salt, and baking soda in a medium bowl.
- Cream the softened butter with granulated and brown sugars until fluffy.
- Add the eggs one at a time, blending well after each.
- Incorporate sour cream, milk, and vanilla extract, mixing until just combined.
- Combine dry ingredients with wet mixture, folding gently until just combined.
- Fill the muffin tin with batter, filling each cup about 2/3 full.
- Bake for 12-15 minutes or until golden brown and a toothpick comes out clean.
- Cool in the pan for 5 minutes before transferring to a wire rack.
- Prepare the lavender milk by heating milk and steeping with culinary lavender.
- Make the glaze by mixing powdered sugar with the lavender-infused milk and salt.
- Glaze the cooled mini cakes by dipping or drizzling the glaze over them.
Notes
Store in an airtight container for up to 3 days at room temperature or up to a week in the refrigerator. Glaze just before serving for best results.
Nutrition
- Serving Size: 1 cake
- Calories: 120
- Sugar: 5g
- Sodium: 200mg
- Fat: 4g
- Saturated Fat: 2g
- Unsaturated Fat: 2g
- Trans Fat: 0g
- Carbohydrates: 19g
- Fiber: 0g
- Protein: 2g
- Cholesterol: 20mg
Keywords: mini cakes, lemon, lavender, dessert, baking
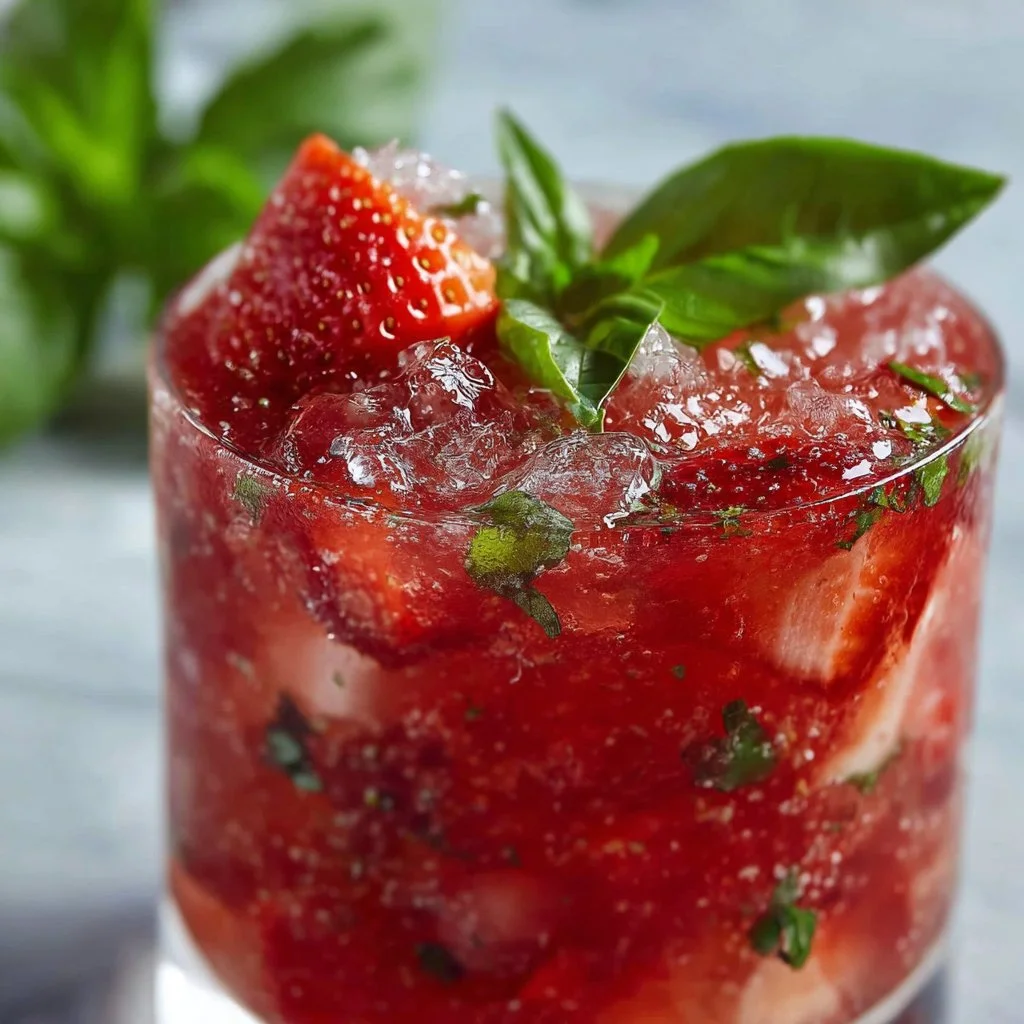
Refreshing Strawberry Basil Smash Cocktail
Refreshing Strawberry Basil Smash Cocktail: A Delightful Twist on Summer Sips
Hello, fellow food lovers! Today, I’m excited to bring you a cocktail that embodies the essence of summer—bright, fresh, and simply gorgeous. We’re talking about the Refreshing Strawberry Basil Smash Cocktail. Picture yourself lounging in the sun, a gentle breeze rustling the leaves, and the tantalizing aroma of fresh basil wafting through the air. This cocktail encapsulates all of that joy and warmth in a glass!
This cocktail has a special place in my heart. Each time I make it, I’m transported back to those carefree summer evenings filled with laughter, good friends, and vibrant conversations swirling around the patio. There’s something magical about muddling strawberries and basil together — the way the vibrant red of the fruit contrasts with the refreshing green of the herbs creates a visual feast that will make you eager to take a sip. This drink isn’t just about quenching your thirst; it’s a celebration of the beautiful simplicity of fresh ingredients and the art of hospitality.
When I first crafted this cocktail, I was hosting a casual dinner party for some dear friends. As we gathered around the table, I wanted a drink that would not only pair beautifully with the light fare but also serve as an icebreaker among guests. The Strawberry Basil Smash turned out to be the perfect solution! The flavors burst forth with every sip, and the lively conversation flowed just as freely. Now, I’m thrilled to share this recipe with you so we can bring those summer vibes directly into your home!
Ready to dive into making this delightful cocktail? Grab your apron (or don’t, really, it’s all about laid-back cooking and mixing here), and let’s create some magic in the kitchen!
Personal Story
One of my fondest memories tied to this cocktail happened a few years ago during a sweltering summer day. I had a group of friends visiting from out of town, and we all agreed that it was the perfect time for a little outdoor festivity! As the sun began to set, casting a golden hue over everything, I decided to whip up a batch of my Strawberry Basil Smash Cocktails.
Armed with a handful of fresh strawberries and basil from my garden, I began muddling the ingredients in my trusty mixing glass. The laughter and chatter echoed around me as I prepared the drinks, and I could feel the anticipation building. When I finally passed out those vibrant cocktails, everyone’s faces lit up as the first sip delighted their taste buds—refreshing, sweet, and herbal all at once!
We spent the evening recounting hilarious stories while clinking our glasses, the Strawberry Basil Smash becoming the symbol of our camaraderie. That episode taught me that great food and drinks are not just about flavors; they’re about the moments we create together. Since then, every time I make this cocktail, it reminds me of that joyful evening, and I can’t help but smile!
Ingredients
Here’s what you’ll need to make this refreshing cocktail:
-
6 medium fresh strawberries, hulled and quartered
These juicy red gems bring both sweetness and vibrant color to your cocktail. If strawberries are out of season, feel free to substitute with raspberries or blackberries for a similarly delightful twist. -
8-10 fresh basil leaves, gently bruised
Basil is the star here, adding a layer of aromatic goodness. To bruise the leaves, gently slap them between your fingers or use the back of a wooden spoon. If you can’t find fresh basil, mint can work as a refreshing substitute, too! -
2 tablespoons fresh lemon juice (about 1 lemon)
Lemon juice introduces a bright acidity that balances the sweetness of the strawberries. Freshly squeezed is the way to go for maximum flavor! You can swap it for lime juice if you’re in the mood for a more tropical taste. -
1 tablespoon honey syrup (equal parts honey and warm water)
A touch of sweetness goes a long way! To make honey syrup, simply warm equal parts honey and water until dissolved. Alternatively, agave syrup or simple syrup can also work beautifully here. -
2 ounces gin (or vodka/tequila)
The base spirit lends warmth and depth to the drink. Choose gin for floral notes, vodka for a neutral flavor, or tequila if you’re up for a more daring twist! -
Ice cubes or crushed ice
You’ll want your cocktail super cold, so ice is a must! Crushed ice can give a more slushy feel, while cubes provide a classic chill. -
2 ounces sparkling water
This adds a refreshing effervescence to the cocktail. If you’re feeling adventurous, a flavored sparkling water could add another layer of complexity! -
Strawberry slice and basil sprig for garnish
A beautiful garnish elevates your drink’s presentation and gives your guests a little preview of what’s inside!
Ready? Let’s get mixing!
Step-by-Step Instructions
Step 1: Muddle Your Ingredients
In a sturdy mixing glass or shaker, combine the quartered strawberries and bruised basil leaves. Using a muddler or the back of a spoon, gently mash and crush the ingredients together. This release of flavors is crucial. You want to break down the strawberries but be careful not to obliterate the basil completely; we want those lovely leafy notes to linger.
Chef Hack: If you’re not keen on muddling, you can toss everything into a blender for a quick blitz and strain the mixture for a smoother cocktail!
Step 2: Add Lemon Juice and Honey Syrup
Next, squeeze in two tablespoons of fresh lemon juice (use a juicer for ease!) and add the tablespoon of honey syrup. You’ll want to give it a gentle stir with a bar spoon or a regular spoon to mix the flavors together nicely.
Tip: If you prefer a less sweet cocktail, start with a little less honey syrup, and taste before adjusting!
Step 3: Pour in the Spirit
Now, it’s time to add your choice of spirit—2 ounces of gin, vodka, or tequila—depending on which flavor profile you’re going for. Pour it over the muddled mixture, and gently stir to combine.
Chef Insight: If you’re looking to reduce alcohol content, feel free to cut back on the spirit and slightly increase the sparkling water!
Step 4: Ice, Ice, Baby!
Add ice cubes or crushed ice to your mixing glass. The amount of ice you use depends on how chilled you want your cocktail, but more ice means a more refreshing drink. If you’re using crushed ice, fill the glass until the ice is heaping over the top.
Step 5: Shake or Stir It Up!
If you’re using a shaker, secure the lid and shake vigorously for about 15 seconds to chill everything and meld the flavors. If you’re using a mixing glass, gently stir the ingredients with the ice until well chilled but not too long—just enough to keep the fruit flavor intact.
Step 6: Top with Sparkling Water
Now, strain the mixture into a glass filled with ice (if you used a shaker) and top it off with 2 ounces of bubbly sparkling water. This step adds not only refreshment but also a beautiful fizz that elevates the cocktail experience!
Step 7: Garnish and Serve
Finally, take a lovely strawberry slice and a sprig of fresh basil and garnish your cocktail. This simple touch works wonders not only for aesthetics but also for aroma—after all, we eat (and drink) with our senses!
Serving Suggestions
Serve this delightful Strawberry Basil Smash Cocktail in a clear glass to showcase the beautiful red and green hues. A stemmed cocktail glass makes it feel more upscale, while a mason jar can give it that rustic charm. Pair it with light appetizers like bruschetta or a fresh summer salad to keep the party vibes flowing!
Recipe Variations
If you’re itching to get creative, here are a few fun twists you can try:
- Berry Medley Smash: Mix in a variety of berries—like blueberries or blackberries—for a different flavor profile.
- Spicy Strawberry Smash: Add a few slices of jalapeño or a dash of hot sauce for a spicy kick that pairs beautifully with the sweetness!
- Herbal Fusion: Swap out basil for mint or even rosemary for a new twist on this classic.
- Non-Alcoholic Delight: Skip the alcohol and replace it with extra sparkling water for a refreshing mocktail that everyone can enjoy!
- Citrus Burst: Incorporate a splash of orange juice or limoncello for a bright, zesty layer.
Chef’s Notes
This Strawberry Basil Smash Cocktail has traveled with me through many seasons and gatherings. Over time, I’ve added a personal spin here and there. For instance, I love playing with different herbs depending on what’s fresh and available at the farmer’s market.
There have been moments when I’ve invited guests into the kitchen to join in the cocktail-making process, and it’s turned into a memorable part of the gathering! Creating your cocktails together amplifies the experience, transforming an ordinary recipe into a lively bonding ritual.
And let’s be real—some of the tastiest cocktails have emerged from happy little accidents in the kitchen! One time, I had a bottle of elderflower liqueur sitting on the shelf, and I decided to throw a splash into the mix. The result was a floral wonder that became a summer favorite!
FAQs and Troubleshooting
1. What can I substitute for honey syrup?
If you prefer a different sweetener, you could use agave nectar, maple syrup, or simple syrup instead! Just remember to adjust the quantities to suit your taste.
2. Can I make this cocktail in advance?
Absolutely! You can mix the muddled fruit and spirit portion ahead of time and store it in the fridge (without ice) for about a day. When you’re ready to serve, add ice and top with sparkling water!
3. My cocktail is too sweet! What should I do?
If you find your drink is sweeter than you’d like, consider adding a tad more lemon juice to balance the flavors or even a splash more sparkling water to dilute it slightly.
4. What if I can’t find fresh strawberries?
If fresh strawberries aren’t available, feel free to use frozen ones! Just be sure to adjust the amount of honey to account for their sweetness, or consider using commercial strawberry puree.
Nutritional Info
While these details can vary based on specific ingredients and measurements, here’s a rough estimate:
- Calories: 180 calories per serving
- Fat: 0g
- Carbohydrates: 26g
- Sugar: 18g
- Protein: 0g
But let’s remember: the true value is in the taste, the shared moments, and the laughter around the table!
So, there you have it! A delightful, vibrant, and utterly refreshing Strawberry Basil Smash Cocktail to infuse your summer evenings with joy. I hope this recipe brings as much happiness to your gathering as it has to mine. Cheers to creating beautiful moments around the table—enjoy every sip!
PrintRefreshing Strawberry Basil Smash Cocktail
A delightful summer cocktail combining fresh strawberries and aromatic basil for a refreshing sip.
- Prep Time: 10 minutes
- Cook Time: 0 minutes
- Total Time: 10 minutes
- Yield: 1 serving 1x
- Category: Cocktail
- Method: Mixing
- Cuisine: American
- Diet: Vegetarian
Ingredients
- 6 medium fresh strawberries, hulled and quartered
- 8–10 fresh basil leaves, gently bruised
- 2 tablespoons fresh lemon juice
- 1 tablespoon honey syrup
- 2 ounces gin (or vodka/tequila)
- Ice cubes or crushed ice
- 2 ounces sparkling water
- Strawberry slice and basil sprig for garnish
Instructions
- Muddle your ingredients in a mixing glass: combine the quartered strawberries and bruised basil leaves, gently mash and crush them.
- Add in the lemon juice and honey syrup, and stir gently.
- Pour in your choice of spirit—gin, vodka, or tequila—over the muddled mixture and stir to combine.
- Ice the mixture with ice cubes or crushed ice, filling your glass based on preferred chill.
- Shake or stir the mixture to chill and meld the flavors.
- Top with sparkling water, adding effervescence to your cocktail.
- Garnish the drink with a strawberry slice and a basil sprig before serving.
Notes
For a non-alcoholic version, omit the spirits and increase the sparkling water.
Nutrition
- Serving Size: 1 cocktail
- Calories: 180
- Sugar: 18g
- Sodium: 0mg
- Fat: 0g
- Saturated Fat: 0g
- Unsaturated Fat: 0g
- Trans Fat: 0g
- Carbohydrates: 26g
- Fiber: 0g
- Protein: 0g
- Cholesterol: 0mg
Keywords: cocktail, summer drink, strawberry, basil, refreshing