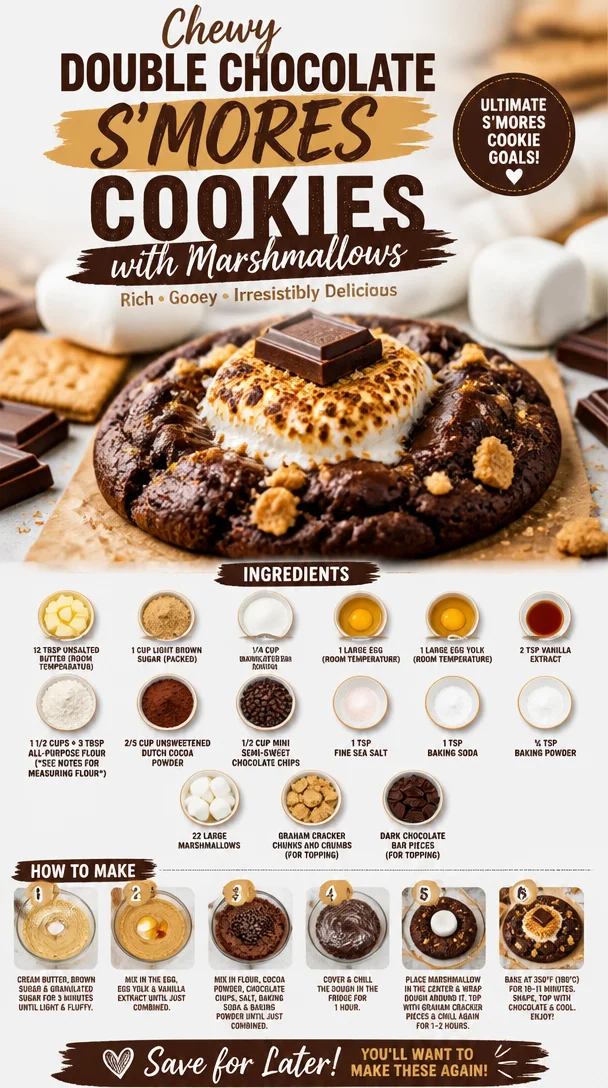
Chewy Double Chocolate S’mores Cookies with Marshmallows
Double Chocolate S’mores Cookies: A Delicious Twist on a Classic Treat
Welcome back, food lovers! Today, I’m excited to share with you a recipe that marries the classic campfire treat of s’mores with the irresistible chewiness of cookies. Introducing: Double Chocolate S’mores Cookies! These little delights are not just cookies; they’re a nostalgic journey to summer nights, laughter, and the joy of good food shared among friends.
These cookies encapsulate everything we love about s’mores—the gooey marshmallows, rich chocolatey goodness, and the satisfying crunch of graham crackers. Remember those evenings spent huddled around a fire, roasting marshmallows until they were gloriously golden? With this recipe, you can bring that same magic into your kitchen year-round.
Let’s get started on this scrumptious adventure that’s sure to impress friends and family alike. So, tie on that apron, chat with me as we dive into the sweet, indulgent world of double chocolate s’mores cookies!
A Culinary Memory
Growing up, our backyard was the hub of activity during the summer. My family would host the most fantastic bonfire nights, complete with blankets, flashlights, and of course, s’mores. I still recall the excitement of watching my dad expertly roast marshmallows—sometimes achieving that perfectly gooey texture, other times awkwardly setting one ablaze. My sister and I would giggle, eagerly waiting to sandwich those marshmallows between graham crackers and squares of chocolate, eagerly anticipating that first bite.
Fast forward years later when I began experimenting in the kitchen, yearning to recreate that sense of warmth and community using my own twist on those classic flavors. That’s how these Double Chocolate S’mores Cookies came to life—a tribute to those cherished memories with a rich, chocolatey flair. Each cookie I bake feels like I’m bringing a piece of that joyful energy into my kitchen, filling it with laughter and, of course, the mouthwatering aroma of melting chocolate and toasted marshmallows.
Ingredients
Here’s what you’ll need for these delightful treats:
-
12 tbsp unsalted butter (room temperature): This is the magic maker for any cookie, giving them that rich, tender texture. If you’re in a pinch, you can substitute with coconut oil, but the flavor will be a tad different.
-
1 cup light brown sugar (packed): The brown sugar adds that hint of caramel flavor and, combined with granulated sugar, keeps the cookies soft. If you need a substitute, you can use dark brown sugar for more depth or even coconut sugar for a healthier option.
-
1/4 cup granulated sugar: This helps to balance out the flavors and achieve the perfect sweetness. You could swap it with a sugar alternative like monk fruit sweetener, but the texture may be slightly different.
-
1 large egg (room temperature): Eggs provide structure and moisture. For a vegan alternative, you can use a flax egg (1 tablespoon ground flaxseed mixed with 2.5 tablespoons water).
-
1 large egg yolk (room temperature): Including an extra yolk ensures the cookies remain chewy. If you want to skip the egg, use an additional flax egg.
-
2 teaspoons vanilla extract: A splash of vanilla elevates the flavor! Feel free to use vanilla bean or a flavored extract for a unique twist.
-
1 1/2 cups + 3 tbsp all-purpose flour: This is your base. For a gluten-free option, substitute with a gluten-free flour blend, but check for specific measuring requirements.
-
2/3 cup unsweetened Dutch cocoa powder: This gives the cookies their chocolatey richness. You can swap it with carob powder for a different flavor profile, but it will alter the taste.
-
1/2 cup mini semi-sweet chocolate chips: Chocolate chips in the dough add those melty pockets of chocolate. Use dark chocolate chips or white chocolate if you crave a different flavor.
-
1 teaspoon fine sea salt: Salt enhances sweetness and balances flavor, so don’t skip it! If you have kosher salt, use slightly more as it’s less concentrated.
-
1 teaspoon baking soda & ½ teaspoon baking powder: These leavening agents create that perfect cookie lift. If unavailable, you can use baking powder alone, but the texture will change slightly.
-
22 large marshmallows: The star of the show! You can cube them for even distribution or use mini marshmallows if that’s what you have.
-
Graham cracker chunks and crumbs (for topping): This adds the quintessential crunch and flavor of s’mores to the cookies, reminiscences of summer fires. If you don’t have graham crackers, digestive biscuits can work too.
-
Dark chocolate bar pieces (for topping): Melty dark chocolate on top? Yes, please! You can substitute this with a milk chocolate bar or even a nut-based chocolate for a vegan option.
Step-by-Step Instructions
Now that we have our ingredients ready, let’s dive into the cookie-making process. These steps will lead you to deliciousness and a warm, inviting kitchen filled with mouthwatering scents!
-
Preheat Your Oven: Begin by preheating your oven to 350°F (175°C). This ensures your cookies bake evenly—always a good start!
-
Prepare Baking Sheets: Line your baking sheets with parchment paper. Not only does it prevent sticking, but it also makes clean-up a breeze.
-
Cream the Butter and Sugars: In a large mixing bowl, cream together the room-temperature butter, brown sugar, and granulated sugar until the mixture is fluffy and pale. This step is essential for airy cookies, so don’t rush it! You want to incorporate as much air as possible.
-
Add the Egg and Vanilla: Crack in your large egg and egg yolk, followed by the vanilla extract. Beat the mixture until combined—the batter should look glossy and creamy.
-
Incorporate the Dry Ingredients: In a separate bowl, whisk together the flour, cocoa powder, salt, baking soda, and baking powder. Gradually add this dry mix to the butter mixture, stirring until just combined. Avoid overmixing here; it’s perfectly okay if there are still some flour streaks.
-
Add in the Chocolate Chips: Fold in the mini chocolate chips—this is where you get those delightful, gooey bites in each cookie. Oh yes!
-
Chill the Dough: For a better texture, chill the dough in the fridge for about 30 minutes. This helps prevent the cookies from spreading too much while baking. Plus, it enhances the flavor!
-
Form the Cookies: Using a cookie scoop or your hands, form medium-sized balls of dough and place them on your prepared sheet, spacing them about 2 inches apart. Gently press down so they’re not too round, as this helps them spread out properly.
-
Add Marshmallows and Graham Crackers: Place 1-2 marshmallows on top of each cookie, followed by chunks of graham crackers. Press them gently into the dough to ensure they stick.
-
Bake the Cookies: Pop your cookies into the oven and bake for 10-12 minutes or until the edges are set but the centers are still gooey. They will continue to bake on the sheet, so don’t overdo it!
-
Top with Dark Chocolate: As soon as they come out, press a piece of dark chocolate on each warm cookie. Allow it to melt just a bit—heavenly!
-
Cool and Enjoy: Let your cookies cool on the baking sheet for about 5 minutes before transferring them to a wire rack. Enjoy them warm or store them in an airtight container for later. But let’s be honest—they might not last long!
Serving Suggestions
Presentation is key, so let’s make these cookies shine! Serve your Double Chocolate S’mores Cookies on a rustic wooden platter, draped with a cute checkered cloth for a homemade vibe. You can pair them with a glass of cold milk, rich coffee, or even a scoop of vanilla ice cream for a delightful dessert experience. And don’t forget to sprinkle a few graham cracker crumbs on top for extra flair!
Recipe Variations
Looking to shake things up? Here are a few variations you might enjoy:
-
Nutty Delight: Add chopped nuts such as walnuts or pecans into the dough for a crunch.
-
Spicy Kick: Stir in a dash of cayenne pepper or cinnamon for a warming spice that beautifully balances the chocolate.
-
Chocolate overload: Swap half of the cocoa powder for white chocolate chips for a fun twist on the classic.
-
Healthier Version: Use whole wheat flour and reduce the sugar by half, while adding a little applesauce for moisture.
-
Vegan S’mores Cookies: Follow the egg substitutes mentioned above, use coconut butter, and vegan chocolate for a completely plant-based treat!
Chef’s Notes
Every recipe has a story, and this one is no different! These Double Chocolate S’mores Cookies have evolved from my kitchen experiments. One evening, I melted a few marshmallows and added them to a basic chocolate cookie recipe—and it was a game-changer! Since then, I’ve fine-tuned this recipe to create the delightful blend of flavors you’ll experience today.
Every batch comes with delightful surprises: sometimes the graham crackers crumble just the right amount, sometimes they’re a little more crunchy. But that’s the beauty of baking—each time holds the potential for something unique. And honestly, who doesn’t love a surprise sweet moment?
FAQs and Troubleshooting
Q: My cookies turned out too flat—what happened?
A: This usually means that the butter was too warm when creamed, or you didn’t factor in chilling the dough. Make sure your butter is softened but not melted, and always chill your dough!
Q: Can I freeze the dough for later?
A: Absolutely! Once you scoop the dough into balls, place them on a baking sheet to freeze until solid, then transfer to a zip bag. You can bake them directly from frozen, just add a couple of extra minutes to the baking time.
Q: What if I don’t have Dutch cocoa powder?
A: If you only have regular cocoa powder, you can use that instead. The flavor will be slightly different, perhaps a bit more acidic, but it’ll still yield delicious cookies!
Q: My cookies are too cakey—what went wrong?
A: Overmixing can lead to cakey cookies. Once you add the flour mixture, mix until just combined. It’s okay if there are lumps!
Now you’re equipped with everything you need to whip up these delicious Double Chocolate S’mores Cookies. I hope this recipe brings as much joy to your home as it has to mine! Happy baking, and remember: good food isn’t just about the ingredients; it’s about the love and laughter shared around your table. Let’s make some memories!
PrintDouble Chocolate S’mores Cookies

A delicious twist on the classic campfire treat, these cookies combine gooey marshmallows, rich chocolate, and graham crackers for a nostalgic dessert experience.
- Prep Time: 30 minutes
- Cook Time: 12 minutes
- Total Time: 42 minutes
- Yield: 24 cookies 1x
- Category: Dessert
- Method: Baking
- Cuisine: American
- Diet: Vegetarian
Ingredients
- 12 tbsp unsalted butter (room temperature)
- 1 cup light brown sugar (packed)
- 1/4 cup granulated sugar
- 1 large egg (room temperature)
- 1 large egg yolk (room temperature)
- 2 teaspoons vanilla extract
- 1 1/2 cups + 3 tbsp all-purpose flour
- 2/3 cup unsweetened Dutch cocoa powder
- 1/2 cup mini semi-sweet chocolate chips
- 1 teaspoon fine sea salt
- 1 teaspoon baking soda
- 1/2 teaspoon baking powder
- 22 large marshmallows
- Graham cracker chunks and crumbs (for topping)
- Dark chocolate bar pieces (for topping)
Instructions
- Preheat your oven to 350°F (175°C).
- Prepare your baking sheets by lining them with parchment paper.
- Cream together the butter, brown sugar, and granulated sugar until fluffy.
- Add the egg, egg yolk, and vanilla extract, mixing until combined.
- Incorporate the dry ingredients in a separate bowl, then gradually mix them into the wet ingredients.
- Add the mini chocolate chips and fold them into the dough.
- Chill the dough in the fridge for about 30 minutes.
- Form medium-sized balls of dough and place them on the prepared baking sheet.
- Add 1-2 marshmallows and graham cracker chunks on top of each cookie.
- Bake for 10-12 minutes or until the edges are set.
- Top each cookie with a piece of dark chocolate right after baking.
- Cool for 5 minutes before transferring to a wire rack.
Notes
For best results, chill the dough to prevent spreading and achieve a chewy texture.
Nutrition
- Serving Size: 1 cookie
- Calories: 200
- Sugar: 15g
- Sodium: 150mg
- Fat: 10g
- Saturated Fat: 6g
- Unsaturated Fat: 4g
- Trans Fat: 0g
- Carbohydrates: 27g
- Fiber: 1g
- Protein: 2g
- Cholesterol: 30mg
Keywords: s'mores, cookies, chocolate, dessert, baking
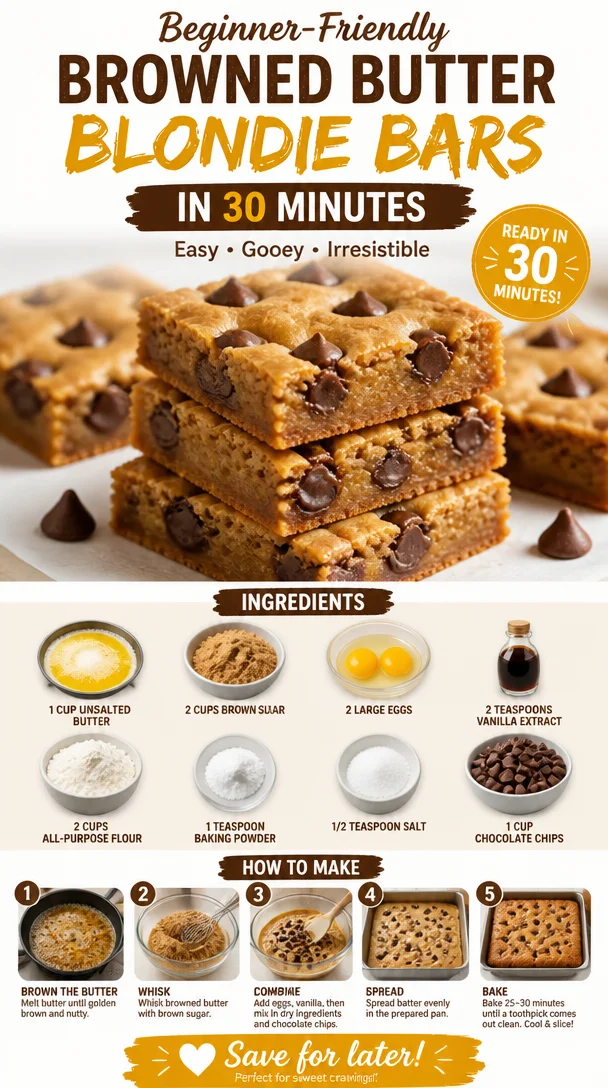
Beginner-Friendly Browned Butter Blondie Bars in 30 Minutes
The Ultimate Browned Butter Blondie Recipe: A Treat for Any Occasion
Hello, fellow food lovers! Today, I’m thrilled to share with you one of my all-time favorite indulgences—the Browned Butter Blondie. If you’ve never experienced the depths of flavor that comes from browning your butter, then buckle up, because we’re about to elevate a simple blondie recipe into something truly magical!
Personal Story
Growing up, my grandmother had a special stash of sweets that she kept hidden in her kitchen cupboard. She would always say, “If you can find the key, you can have a treat.” Well, you can imagine how many afternoons I spent searching for that elusive key! It didn’t matter how long it took; the reward was too tempting. One of my fondest memories is of the day I finally found it. There, nestled between tins of homemade fudge and crispy rice treats, were her heavenly blondies—golden, chewy bars infused with a rich, nutty flavor that made every bite feel like a warm hug. It was then that I realized how much joy food can bring, and my heart has been set on creating those moments for others ever since. So, let’s get started on crafting your own batch of browned butter blondies that will surely evoke similar memories!
Ingredients
Here’s what you’ll need to make these dreamy Browned Butter Blondies:
-
1 cup unsalted butter: The star of our show! Choose high-quality butter for the best flavor, and make sure it’s unsalted so you can control the seasoning. If you’re in a pinch, salted butter can work, but reduce the added salt by a pinch.
-
2 cups brown sugar: This rich, molasses-flavored sugar is what gives blondies their characteristic sweetness and depth. Light brown sugar will give you a milder flavor, while dark brown sugar will add a more pronounced caramel taste. You can use white sugar in a pinch, but you’ll lose that lovely flavor complexity.
-
2 large eggs: They provide moisture and richness to the batter. Make sure your eggs are at room temperature for better emulsification. You can substitute with flax eggs if you’re looking for a vegan option (1 tablespoon ground flaxseed mixed with 2.5 tablespoons water equals one egg).
-
2 teaspoons vanilla extract: Always opt for pure vanilla extract for authentic flavor. Homemade vanilla extract is a wonderful addition if you have it!
-
2 cups all-purpose flour: This gives structure to your blondies. You can substitute part of the all-purpose flour with whole wheat for added fiber, but the texture will change slightly.
-
1 teaspoon baking powder: This leavening agent helps the blondies rise a little, making them soft and tender. If you only have baking soda, you can experiment with that, but you’ll need to tweak the rest of your recipe for acidity.
-
1/2 teaspoon salt: A small amount of salt enhances all the other flavors. Don’t skip it! If you’re using salted butter, you can omit this ingredient entirely.
-
1 cup chocolate chips: Choose your favorite—dark, milk, or even white chocolate chips will work! You can replace them with chopped nuts or dried fruits for a different texture and taste.
Step-by-Step Instructions
Now let’s dive into making these delightful Browned Butter Blondies. Follow along, and I’ll sprinkle in some chef tips to ensure your baking adventure is a success!
-
Brown the Butter: In a medium saucepan, melt the butter over medium heat. Stir it continuously until it turns a beautiful golden brown, and you start to smell that nutty aroma—about 5-7 minutes. Keep an eye on it, as it can go from perfect to burnt quickly! Remove it from heat and let it cool slightly before using. Pro tip: This step is what takes your blondies from good to GREAT!
-
Mix Wet Ingredients: In a large mixing bowl, combine the browned butter (making sure it’s not too hot) with brown sugar. Use a whisk to mix them together until smooth. Then add in the eggs and vanilla extract, whisking until everything is well incorporated. This mix should look thick and shiny—just like liquid gold!
-
Combine Dry Ingredients: In another bowl, whisk together the flour, baking powder, and salt. This will help to evenly distribute the leavening agent and salt throughout the mixture.
-
Bring It All Together: Gradually add the dry ingredients to the wet mixture. Mix until just combined; don’t overmix! It’s okay if there are a few floury bits. This ensures your blondies will stay chewy rather than cake-like.
-
Fold in Chocolate Chips: Here’s where you can get creative! Gently fold in the chocolate chips, ensuring they’re evenly distributed throughout the batter.
-
Prepare the Baking Dish: Preheat your oven to 350°F (175°C). Line a 9×13-inch baking pan with parchment paper, leaving some overhang—this will make removing your blondies so much easier later.
-
Spread the Batter: Pour the batter into the prepared baking pan and use a spatula to spread it evenly. Remember, it doesn’t have to look perfect; rustic is always charming!
-
Bake: Pop it into the preheated oven and bake for 20-25 minutes. You want them to be slightly underbaked in the center for that gooey texture—look for a light golden color around the edges and a slightly set middle.
-
Cool and Serve: Once they’re done, let them cool in the pan for about 10 minutes before transferring to a wire rack to cool completely. Resist the urge to cut them while they’re hot, as this will help them firm up.
Serving Suggestions
When it comes to serving your Browned Butter Blondies, keep it simple and elegant. Cut them into squares and plate them up on a beautiful serving platter. A dusting of powdered sugar on top can add a touch of sophistication, or serve warm with a scoop of vanilla ice cream for an indulgent dessert experience. A drizzle of homemade caramel sauce on top wouldn’t hurt either!
Recipe Variations
Let’s shake things up a bit! Here are a few fun ideas to put your own twist on these Browned Butter Blondies:
-
Nutty Delight: Toss in 1 cup of chopped nuts like pecans or walnuts for that extra crunch.
-
Fruit Fusion: Swap the chocolate chips for dried fruits like cranberries or apricots for a chewy, tangy twist.
-
Spiced Up: Add 1 teaspoon of cinnamon or a pinch of nutmeg for a warm, cozy flavor, perfect for fall.
-
Peanut Butter Swirl: Incorporate a swirl of peanut butter into the batter before baking for a creamy surprise in every bite.
-
Coconut Bliss: Fold in 1 cup of shredded coconut for that tropical twist on your blondies!
Chef’s Notes
These Browned Butter Blondies have been a staple in my kitchen for years. Over time, I’ve experimented with different add-ins and flavor combinations, each time falling deeper in love with how versatile and forgiving this recipe is. I once decided to bake them for a surprise party and accidentally doubled the sugar—but you know what? The extra sweetness was an instant hit! So don’t be afraid to make it your own and embrace those happy accidents.
FAQs and Troubleshooting
-
Why are my blondies cakey?
If your blondies turn out cake-like, it’s likely due to overmixing the batter or baking them too long. Remember—the less you mix, the chewier they’ll be! -
Can I freeze blondies?
Absolutely! Allow them to cool completely, then wrap individually in plastic wrap and store in an airtight container. They’ll keep well in the freezer for up to three months! -
How do I know when they’re done baking?
Look for slight doming in the center and a golden edge. A toothpick inserted should come out with a few moist crumbs, not wet batter. -
What if I don’t have brown sugar?
You can substitute 1 cup of white sugar with 1 tablespoon of molasses mixed in. It might not be the same as the rich flavor from brown sugar, but it will still work!
Nutritional Info
(Include this section only if you want!)
- Serving Size: 1 Blondie
- Calories: Approx. 200
- Total Fat: 10g
- Saturated Fat: 6g
- Cholesterol: 35mg
- Sodium: 60mg
- Total Carbohydrates: 28g
- Dietary Fiber: 1g
- Sugars: 18g
- Protein: 2g
Final Thoughts
And there you have it! Your very own batch of Browned Butter Blondies, bursting with incredible flavor. Grab your apron, tie it on, and invite friends over to share in the creation—because good food is all about connection. Happy baking, and remember, the kitchen is a playground, so never stop experimenting!
Feel free to drop a line in the comments below if you try this recipe or share any tips of your own. Let’s keep this cooking community thriving!
PrintBrowned Butter Blondies
Indulge in these delightful Browned Butter Blondies, rich with nutty flavor and chocolate chips.
- Prep Time: 15
- Cook Time: 25
- Total Time: 40
- Yield: 12 servings 1x
- Category: Dessert
- Method: Baking
- Cuisine: American
- Diet: Vegetarian
Ingredients
- 1 cup unsalted butter
- 2 cups brown sugar
- 2 large eggs
- 2 teaspoons vanilla extract
- 2 cups all-purpose flour
- 1 teaspoon baking powder
- 1/2 teaspoon salt
- 1 cup chocolate chips
Instructions
- Brown the Butter: In a medium saucepan, melt the butter over medium heat. Stir it continuously until it turns a golden brown and you start to smell that nutty aroma—about 5-7 minutes. Remove from heat and let cool slightly before using.
- Mix Wet Ingredients: In a large mixing bowl, combine the browned butter with brown sugar. Whisk until smooth, then add in the eggs and vanilla extract, mixing until well incorporated.
- Combine Dry Ingredients: In another bowl, whisk together the flour, baking powder, and salt.
- Bring It All Together: Gradually add the dry ingredients to the wet mixture and mix until just combined, avoiding overmixing.
- Fold in Chocolate Chips: Gently fold in the chocolate chips until evenly distributed.
- Prepare the Baking Dish: Preheat your oven to 350°F (175°C). Line a 9×13-inch baking pan with parchment paper.
- Spread the Batter: Pour the batter into the prepared baking pan and spread it evenly.
- Bake: Bake for 20-25 minutes, until the edges are light golden and center is slightly underbaked.
- Cool and Serve: Let them cool in the pan for about 10 minutes before transferring to a wire rack to cool completely.
Notes
For an added twist, try mixing in chopped nuts, dried fruits, or even a swirl of peanut butter.
Nutrition
- Serving Size: 1 blondie
- Calories: 200
- Sugar: 18g
- Sodium: 60mg
- Fat: 10g
- Saturated Fat: 6g
- Unsaturated Fat: 4g
- Trans Fat: 0g
- Carbohydrates: 28g
- Fiber: 1g
- Protein: 2g
- Cholesterol: 35mg
Keywords: blondies, dessert, baking, sweet treat, browned butter
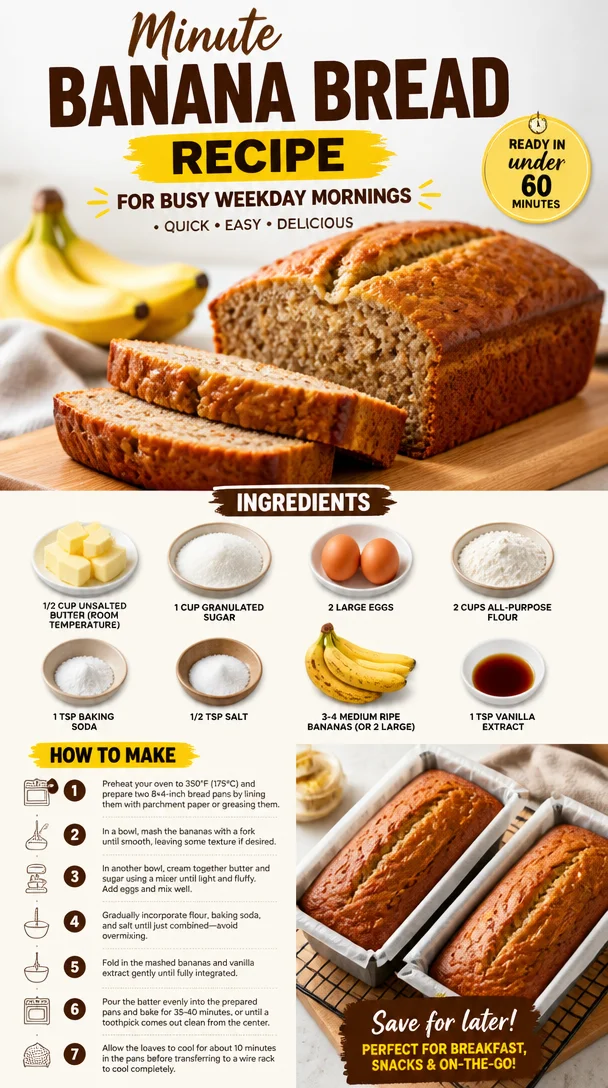
Minute Banana Bread Recipe for Busy Weekday Mornings
The Best Banana Bread Recipe: A Timeless Classic
Hello, lovely foodies! Today, I’m thrilled to share a recipe that holds a cherished spot in my heart—the best banana bread. It’s a classic that transforms those overripe bananas on your kitchen counter into a warm hug in loaf form. With every bite, you’ll experience the comforting flavors and aromas that evoke the essence of home. So grab your apron, and let’s get started!
A Slice of Nostalgia
Growing up, my grandmother’s kitchen was always filled with warm scents that beckoned everyone to linger. I can still picture her, a whirlwind of flour and laughter, whipping up her famous banana bread every time the kids visited. She had this incredible knack for turning simple ingredients into something magical. I remember the excitement of gathering around the table, bursting at the seams with family chatter, while the golden loaf cooled on the wire rack, tempting us with its sweetness.
One particular Saturday, we decided it would be fun to have a banana-bread bake-off. The smell of bananas and butter wafted through the house, and as the timer chimed, we discovered the delightful chaos of flour-covered countertops and giggles filling the air. While my attempt was slightly less than perfect—a bit too much baking soda and a touch too little sugar—my grandma’s banana bread was a masterpiece. That day remains a treasured memory, reminding me that cooking is not just about flavors; it’s about creating moments that we hold dear.
Ingredients
Let’s gather our ingredients to create that dream loaf of banana bread! Here’s what you’ll need:
-
1/2 cup unsalted butter (room temperature): Butter is essential for richness. If you don’t have unsalted on hand, you can use salted butter; just adjust the salt in the recipe accordingly.
-
1 cup granulated sugar: This adds sweetness and moisture. For a healthier twist, consider using coconut sugar or brown sugar for a more caramel-like flavor.
-
2 large eggs: Eggs provide structure and moisture. If you’re vegan, you can substitute with flax eggs (1 tablespoon of ground flaxseed mixed with 2.5 tablespoons of water for each egg).
-
2 cups all-purpose flour: This is the basis of your loaf. You can easily swap in whole wheat flour for a heartier flavor, or use gluten-free flour to cater to dietary needs.
-
1 tsp baking soda: This is crucial for leavening your bread. If you’re out, you can use baking powder instead—just double the amount!
-
1/2 tsp salt: A little salt enhances the sweetness and balances flavors.
-
3-4 medium ripe bananas (or 2 large): The star of the show! Choose bananas that are speckled and brown for the best sweetness and flavor. You can also substitute with applesauce (1/2 cup for every banana) if you want a unique twist.
-
1 tsp vanilla extract: This adds depth and warmth to the bread. Feel free to use almond extract for a more robust flavor!
Step-by-Step Instructions
Now onto the fun part—baking! Here’s how to transform these ingredients into a truly iconic banana bread.
-
Preheat your oven:
- Preheat your oven to 350°F (175°C). This ensures that the bread starts baking evenly right away!
-
Cream the butter and sugar:
- In a large mixing bowl, cream the room-temperature unsalted butter and granulated sugar together until light and fluffy. This usually takes about 3-5 minutes. Don’t rush this step; it’s essential for a light texture!
-
Add the eggs:
- Crack in the two large eggs one at a time, mixing well after each addition. You want to ensure they’re fully incorporated before adding more.
-
Mash the bananas:
- In a separate bowl, mash the ripe bananas with a fork until smooth. It’s okay to leave a few small lumps for texture. The riper the bananas, the sweeter your bread!
-
Combine banana and vanilla:
- Mix the mashed bananas and vanilla extract into the butter-sugar-egg mixture until well blended.
-
Dry ingredients time:
- In another bowl, whisk together the all-purpose flour, baking soda, and salt. This step ensures even distribution of the leavening agent.
-
Mix it all together:
- Gradually add the dry ingredients to the wet mixture, stirring until just combined. Try not to overmix! A few flour streaks are perfectly fine.
-
Pour into the pan:
- Pour the batter into a greased or parchment-lined 9×5-inch loaf pan. Use a spatula to smooth the top gently. This step is where you can sprinkle a bit of extra sugar or nuts on top for a delightful crunch!
-
Bake:
- Place your loaf in the preheated oven and bake for 60-70 minutes, or until a toothpick inserted in the center comes out clean. If the top begins to brown too quickly, you can tent it with aluminum foil during the last 15 minutes.
-
Cool it down:
- Once baked, remove from the oven and allow it to cool in the pan for about 10 minutes. Then transfer it to a wire rack and let it cool completely before slicing.
Serving Suggestions
Now that your banana bread is baked to perfection, how should you serve it? Here are a few ideas! Enjoy each slice fresh out of the oven for a cozy treat, or toast it lightly with a pat of butter for breakfast. A sprinkle of cinnamon or a drizzle of honey transforms this dish into a delightful morning treat. And if you’re feeling indulgent, consider serving it with a scoop of vanilla ice cream for a delightful dessert!
Recipe Variations
Want to bring a twist to your banana bread? Here are a few creative variations to explore:
-
Chocolate Chip Banana Bread: Add 1 cup of semi-sweet chocolate chips to the batter for a rich, decadent touch.
-
Nuts or Seeds: Incorporate 1/2 cup of walnuts, pecans, or sunflower seeds for added crunch and nutrition.
-
Spices: Sprinkle in a teaspoon of cinnamon or nutmeg for a warm, spiced flavor that’s perfect for autumn.
-
Coconut Banana Bread: Fold in 1/2 cup of unsweetened shredded coconut for a tropical twist.
-
Zucchini: Grate one small zucchini and add it for an extra boost of moisture and nutrients!
Chef’s Notes
Ah, banana bread—a true testament to the beauty of simplicity! This recipe has evolved over the years as I’ve experimented with different flavors and ingredients. I vividly recall a baking mishap when I mistakenly used too much baking soda, which transformed my loaf into a bouncy, almost rubbery disaster. Lesson learned! It was a (slightly embarrassing) reminder of the precision required in baking. Share your own kitchen flops in the comments; I know we all have them!
FAQs and Troubleshooting
-
Why is my banana bread too dense?
- Overmixing the batter can lead to dense bread. Mix just until combined for a lighter texture.
-
How can I store banana bread?
- Wrap your cooled banana bread in plastic wrap and store it at room temperature for up to three days. You can also freeze it for up to three months; just slice and freeze individual pieces for easy access!
-
My banana bread didn’t rise. What happened?
- Check the freshness of your baking soda. If it’s expired, your bread won’t rise properly.
-
Can I make mini banana breads?
- Absolutely! Divide the batter into mini loaf pans, reducing baking time to about 20-25 minutes.
Nutritional Info
(Serving size: 1 slice)
- Calories: 180
- Total Fat: 7g
- Saturated Fat: 4g
- Cholesterol: 30mg
- Sodium: 120mg
- Total Carbohydrates: 25g
- Dietary Fiber: 1g
- Sugars: 12g
- Protein: 2g
There you have it! The best banana bread recipe that’s not only delicious but also creates beautiful memories in the kitchen. I hope you enjoy baking this loaf as much as I enjoy sharing it with you. Tie on that apron, dive into those ripe bananas, and let’s make something wonderful together! Happy baking!
PrintThe Best Banana Bread Recipe: A Timeless Classic
A classic banana bread recipe that transforms overripe bananas into a comforting loaf, evoking nostalgia and home.
- Prep Time: 15 minutes
- Cook Time: 70 minutes
- Total Time: 85 minutes
- Yield: 1 loaf (about 12 slices) 1x
- Category: Dessert
- Method: Baking
- Cuisine: American
- Diet: Vegetarian
Ingredients
- 1/2 cup unsalted butter (room temperature)
- 1 cup granulated sugar
- 2 large eggs
- 2 cups all-purpose flour
- 1 tsp baking soda
- 1/2 tsp salt
- 3–4 medium ripe bananas (or 2 large)
- 1 tsp vanilla extract
Instructions
- Preheat your oven to 350°F (175°C).
- Cream the butter and sugar together until light and fluffy.
- Add the eggs one at a time, mixing well.
- Mash the ripe bananas until smooth.
- Combine the mashed bananas and vanilla into the batter.
- Whisk together the flour, baking soda, and salt.
- Mix the dry ingredients into the wet mixture until just combined.
- Pour the batter into a greased or parchment-lined loaf pan.
- Bake for 60-70 minutes, or until a toothpick comes out clean.
- Cool in the pan for 10 minutes, then transfer to a wire rack.
Notes
For variations, consider adding chocolate chips, nuts, spices, or even zucchini to the batter.
Nutrition
- Serving Size: 1 slice
- Calories: 180
- Sugar: 12g
- Sodium: 120mg
- Fat: 7g
- Saturated Fat: 4g
- Unsaturated Fat: 3g
- Trans Fat: 0g
- Carbohydrates: 25g
- Fiber: 1g
- Protein: 2g
- Cholesterol: 30mg
Keywords: banana bread, dessert, baking, comfort food, classic recipes
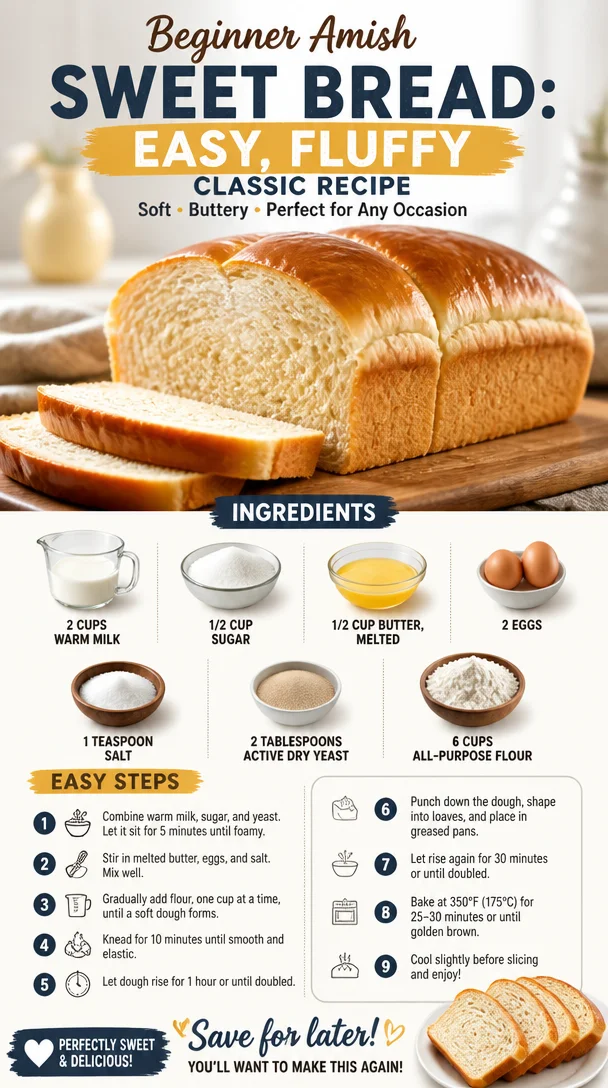
Beginner Amish Sweet Bread: Easy, Fluffy Classic Recipe
The Sweet Embrace of Amish Sweet Bread
Hello, fellow food lovers! Today, I can’t wait to share with you a recipe that’s very close to my heart: Amish Sweet Bread. The name itself conjures up warm, inviting images of rustic kitchens, the smell of freshly baked bread, and laughter shared over meals. Let’s dive into this beautiful recipe together!
A Slice of Nostalgia
Growing up, my family had a tradition where every Sunday was a day of gathering. My grandparents lived in a charming house that smelled of baked goods, and every week, my grandma would whip up a massive batch of her famous sweet bread. It wasn’t just about the bread; it was about the memories and the overwhelming sense of love that came with every loaf.
I remember lingering at the kitchen counter, eyes wide with anticipation while the dough was rising. Sometimes, I would sneak small bites of the raw dough—a no-no, I know, but oh, the thrill! Then, once the bread was out of the oven, the whole house would fill with a sweet, buttery aroma that made you want to hug the air itself. Each loaf was a little piece of heaven, perfect for sandwiches, toast, or just slathered with butter.
To me, Amish Sweet Bread symbolizes comfort, family, and tradition. So, gather your ingredients, tie that apron, and let’s make some magic!
Ingredients List
Here’s what you’ll need to create your very own Amish Sweet Bread:
-
2 cups warm milk
Warm milk activates the yeast, helping our dough rise beautifully. If you’re out of milk, you can substitute with almond milk or oat milk—just make sure it’s warmed up! -
1/2 cup sugar
This sweetener gives the bread its delightful flavor and helps activate the yeast. If you prefer, honey or maple syrup can be great substitutes. -
1/2 cup butter, melted
Buttery goodness makes everything better! If you want a lighter bread, you can substitute half the butter with applesauce. -
2 eggs
Eggs add richness and help bind the dough together. For a vegan option, use flaxseed meal mixed with water (1 tablespoon flaxseed meal + 2.5 tablespoons water = 1 egg). -
1 teaspoon salt
Salt enhances flavor and balances the sweetness in the bread. If you’re watching sodium intake, a little less will still do the trick—just remember, salt does play an important role in the fermentation process. -
2 tablespoons active dry yeast
This is our secret weapon for fluffy bread! If you only have instant yeast, you can use the same amount without needing to activate it beforehand. -
6 cups all-purpose flour
The backbone of our bread! You can use whole wheat flour for a heartier loaf, but you might need to adjust the liquid a bit since whole wheat absorbs more moisture.
Step-by-Step Instructions
-
Activate the Yeast: In a large mixing bowl, combine the warm milk and sugar. Stir until the sugar is dissolved, then sprinkle the yeast on top. Let it sit for about 5–10 minutes until it becomes bubbly and frothy. Think of this moment as the yeast waking up and getting ready to work its magic!
-
Mix the Ingredients: Once the yeast is active, stir in the melted butter and eggs, and mix well. But here’s a little chef secret: ensure the butter is not too hot; otherwise, it could cook the eggs! You want a gentle warmth, which is perfect for marrying the flavors.
-
Combine Flour and Salt: Gradually add the flour and salt to the wet mixture, stirring until a shaggy dough forms. I love using a wooden spoon for this—it gives a little bit of a workout too!
-
Knead the Dough: Turn the dough out onto a floured surface and knead for about 8–10 minutes. You’re aiming for a smooth, elastic texture. Don’t be afraid to get your hands in there; this is where the love happens! If it’s too sticky, sprinkle a little extra flour; too dry? Just a splash of warm water will help.
-
First Rise: Place the dough in a greased bowl, cover it with a damp cloth, and let it rise in a warm spot for about an hour, or until it doubles in size. I usually put mine near a warm oven or in a sunny spot.
-
Shape the Loaves: Once risen, punch down the dough (yes, it feels good!) to remove any air bubbles. Turn it out onto a floured surface and divide it into two equal pieces. Shape each piece into a loaf. Think about the love you’re putting into each loaf—imagine the smiles they’ll bring!
-
Second Rise: Place the shaped loaves into greased 9-inch loaf pans. Cover them again and let them rise for another 30–45 minutes. They should puff up nicely. During this time, preheat your oven to 350°F (175°C).
-
Bake Your Bread: After your second rise, pop those lovelies into the oven and bake for about 30–35 minutes or until golden brown. To check for doneness, gently tap the top of the loaf; it should sound hollow. Is there any better sound?
-
Cool and Serve: Once baked, let the bread cool in the pans for about 10 minutes, then turn them out onto wire racks. Let them cool completely—this is crucial to avoid a gummy interior when you slice into them.
Serving Suggestions
When it comes to serving Amish Sweet Bread, the possibilities are endless! For a cozy breakfast, toast a slice and slather it with butter and a sprinkle of cinnamon sugar. Or, elevate your brunch spread with a delightful French toast made from day-old bread. Slice it thin, drizzle with maple syrup, and garnish with fresh berries for a stunning presentation!
Recipe Variations
If you’re feeling adventurous, here are a few twists to try on this classic recipe:
-
Cinnamon Swirl: Before shaping your loaves, roll out the dough and sprinkle with a mixture of cinnamon and sugar for a delightful sweet surprise.
-
Fruit and Nut Mixture: Fold in raisins, chopped nuts, or dried fruit into the dough during kneading for added textures and flavors.
-
Herbed Bread: For a savory twist, incorporate fresh herbs like rosemary or thyme along with grated cheese into the dough.
-
Vegan Option: As mentioned, swap out eggs with flaxseed and substitute butter with coconut oil for a delicious vegan take!
Chef’s Notes
I must confess that I’ve burned a loaf or two in my baking adventures. Once, I was so caught up in a conversation over dinner that I forgot to check the oven. Let’s just say my loaf came out with a little too much "crust" and not enough "bread." Now, I always set a timer—kitchen catastrophes make great stories, but they don’t feed the tummy!
And remember, every time you make this bread, you’re not just baking; you’re creating memories—so don’t fret if it doesn’t look perfect; it will still taste divine!
FAQs and Troubleshooting
-
Why did my bread not rise?
- If your bread didn’t rise, it may be due to inactive yeast. Always check that your yeast is fresh, and don’t skip the activation step.
-
What can I do if my dough is too sticky?
- If the dough is sticky, gradually add more flour without overdoing it. Kneading the dough helps form gluten, which will create a better structure.
-
How should I store my Amish Sweet Bread?
- Let the bread cool completely, then wrap it airtight in plastic or foil. It’ll stay fresh at room temperature for a few days, but for longer storage, slice and freeze it in portions.
-
Can I make this recipe into rolls?
- Absolutely! Instead of shaping into loaves, divide the dough into smaller portions and shape them into rolls. Adjust the baking time to about 15–20 minutes.
Nutritional Info (Optional)
While bread is best enjoyed in moderation, a slice of Amish Sweet Bread offers:
- Calories: Approx. 180
- Fat: 7g
- Carbohydrates: 26g
- Protein: 4g
As always, values may vary based on additional ingredients and serving sizes.
And there you have it—a sensational homemade Amish Sweet Bread recipe to fill your home with warmth and deliciousness! I hope you enjoyed our little kitchen journey; let this recipe be a part of your family’s tradition just as it is with mine. Tie on that apron, enjoy the process, and savor every bite. Happy baking, my friends!
PrintAmish Sweet Bread
A warm and inviting recipe for Amish Sweet Bread, perfect for sandwiches, toast, or just slathered with butter.
- Prep Time: 15 minutes
- Cook Time: 35 minutes
- Total Time: 50 minutes
- Yield: 2 loaves 1x
- Category: Baking
- Method: Baking
- Cuisine: American
- Diet: Vegetarian
Ingredients
- 2 cups warm milk
- 1/2 cup sugar
- 1/2 cup butter, melted
- 2 eggs
- 1 teaspoon salt
- 2 tablespoons active dry yeast
- 6 cups all-purpose flour
Instructions
- Activate the yeast: In a large mixing bowl, combine the warm milk and sugar. Stir until the sugar is dissolved, then sprinkle the yeast on top. Let it sit for about 5–10 minutes until it becomes bubbly and frothy.
- Mix the ingredients: Once the yeast is active, stir in the melted butter and eggs, and mix well.
- Combine flour and salt: Gradually add the flour and salt to the wet mixture, stirring until a shaggy dough forms.
- Knead the dough: Turn the dough out onto a floured surface and knead for about 8–10 minutes until smooth and elastic.
- First rise: Place the dough in a greased bowl, cover it with a damp cloth, and let it rise in a warm spot for about an hour, or until it doubles in size.
- Shape the loaves: Once risen, punch down the dough and divide it into two equal pieces. Shape each piece into a loaf.
- Second rise: Place the shaped loaves into greased 9-inch loaf pans. Cover and let them rise for another 30–45 minutes.
- Bake your bread: Preheat the oven to 350°F (175°C) and bake for about 30–35 minutes or until golden brown.
- Cool and serve: Let the bread cool in the pans for about 10 minutes, then turn them out onto wire racks.
Notes
For a vegan option, use flaxseed meal for eggs and coconut oil for butter. Store in an airtight container.
Nutrition
- Serving Size: 1 slice
- Calories: 180
- Sugar: 5g
- Sodium: 350mg
- Fat: 7g
- Saturated Fat: 4g
- Unsaturated Fat: 2g
- Trans Fat: 0g
- Carbohydrates: 26g
- Fiber: 1g
- Protein: 4g
- Cholesterol: 30mg
Keywords: bread, sweet bread, Amish, baking, homemade
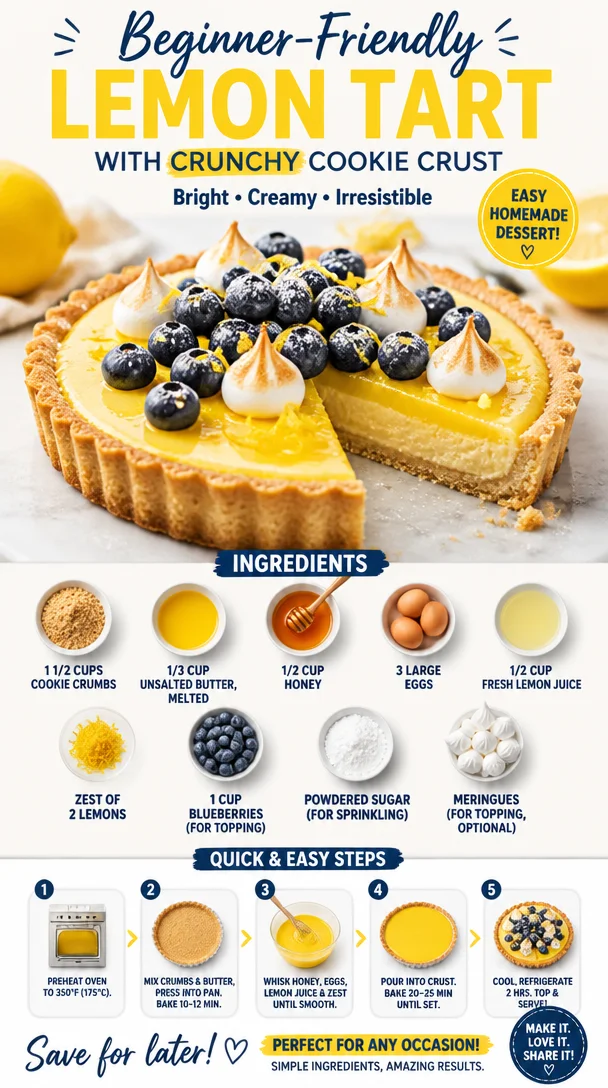
Beginner-Friendly Lemon Tart with Crunchy Cookie Crust
The Perfect Lemon Tart with Cookie Crust: An Easy Yet Elegant Dessert
Hello friends! If you’re in the mood for something refreshing, zesty, and utterly delightful, you’ve come to the right place. Today, we’re diving into the world of tangy goodness with a Lemon Tart that’s perfectly paired with a sweet cookie crust. This elegant dessert proves you don’t need fancy techniques or exhaustive ingredient lists to create something that feels gourmet. So, tie on that apron, and let’s get to it!
A Memory in Every Slice
Let me take you back to my childhood — a time when my sweet tooth had no limits. My grandmother, a petite woman with a heart as vast as her dessert repertoire, would spend hours in her cozy kitchen crafting one dessert after another. But one recipe that always brought the whole family together was her Lemon Tart. I can still picture her bustling around the kitchen, her floral apron slightly dusted with flour, as she mixed and stirred with an enthusiasm that filled the room with warmth.
One sunny afternoon, she and I decided to whip up a Lemon Tart together. The citrusy scent filled the air, and I was mesmerized as she expertly mixed the ingredients, her hands moving with a grace I admired deeply. As the tart baked in the oven, we sat on the porch, sipping lemonade and sharing stories. That Lemon Tart became not just a dessert but a symbol of love and togetherness.
Today, I’m thrilled to share my take on that cherished dessert with you — a Lemon Tart with a delightful cookie crust that’s sure to create just as many sweet memories!
Ingredients
Here’s what you’ll need to create your own slice of sunshine:
-
1 1/2 cups cookie crumbs
- Use your favorite cookies for the crust—think graham crackers, digestive biscuits, or even ginger snaps for a spicy twist! You can also crush them yourself for a more rustic texture.
-
1/3 cup unsalted butter, melted
- This is crucial for binding your cookie crust together. If you’re feeling adventurous, try substituting with coconut oil for a hint of tropical flavor.
-
1/2 cup honey
- Honey adds a lovely natural sweetness with a hint of floral notes. If you prefer, you can use agave nectar or maple syrup.
-
3 large eggs
- Fresh eggs give the tart a rich texture and help set the filling. If you’re vegan, a flax egg can be a great alternative (1 tablespoon flaxseed meal + 2.5 tablespoons water per egg).
-
1/2 cup fresh lemon juice
- Fresh is best! Store-bought lemon juice doesn’t have that same vibrant flavor. If lemons are out of season, you can try bottled, but do taste it first to ensure the tartness shines.
-
Zest of 2 lemons
- Zesting adds an incredible punch of lemon flavor. Make sure to zest before juicing to keep your hands clean and to utilize every bit of the lemon.
-
1 cup blueberries (for topping)
- Fresh blueberries add a splash of color and a burst of sweetness. Swap them with raspberries or strawberries if you prefer!
-
Powdered sugar (for sprinkling)
- It adds the final touch of sweetness and makes the tart visually appealing. A light dusting goes a long way!
-
Meringues (for topping, optional)
- Want to take it over the top? Add some meringue kisses for that café-style look! They’re surprisingly easy to make too.
Step-by-Step Instructions
Ready to embark on your lemony journey? Let’s get started!
-
Preheat the Oven
- Preheat your oven to 350°F (175°C). This is essential for getting that perfect crust and setting your filling.
-
Make the Cookie Crust
- In a mixing bowl, combine the cookie crumbs and melted butter. Stir until the crumbs are evenly moistened. You should end up with a sandy texture that holds together when pressed.
- Chef’s Tip: If you find your crust crumbling, simply add a bit more melted butter. You want it just wet enough to hold together!
-
Press the Crust into a Tart Pan
- Press the cookie mixture firmly into the bottom and up the sides of a 9-inch tart pan. Use the back of a measuring cup or your fingers to get it nice and even. Make sure to pack it tightly!
- Pro Tip: To avoid cracks in your crust, take your time and don’t rush this step. A well-pressed crust will ensure structural integrity later.
-
Bake the Crust
- Place the crust in the preheated oven and bake for about 10 minutes or until it’s golden brown. Remove from the oven and let it cool slightly.
-
Prepare the Lemon Filling
- In a mixing bowl, whisk together the honey and eggs until combined. Then, add in the fresh lemon juice and zest. Keep whisking until the filling is smooth and luscious.
- Kitchen Hack: To maximize the juice from your lemons, roll them on the countertop before cutting. It makes all the difference!
-
Pour the Filling into the Crust
- Carefully pour the lemon filling into your cooled cookie crust. Don’t be afraid to fill it up nice and full — it’ll puff up a bit while baking.
-
Bake the Tart
- Bake the tart for about 20-25 minutes, until the filling is just set and a bit wobbly in the center. It will firm up as it cools.
- Chef Insight: Avoid overbaking! You want that perfect silky texture, not a rubbery one.
-
Cool the Tart
- Allow your tart to cool at room temperature for a bit, then pop it in the fridge for at least an hour to chill and set completely.
-
Garnish and Serve
- Just before serving, sprinkle with powdered sugar, top with fresh blueberries, and add meringues if using. Cut into wedges and watch everyone’s faces light up with joy!
Serving Suggestions
Presentation is key when it comes to desserts, and this Lemon Tart is no exception! Serve slices on elegant dessert plates with a side of whipped cream, and garnish with extra fresh berries or sprigs of mint. This simple step not only enhances the visual appeal but also elevates the overall experience — because we eat with our eyes first!
Recipe Variations
This Lemon Tart is a great base for creative twists! Here are some fun ideas:
- Fruit Variations: Swap out blueberries for strawberries, raspberries, or even a mixed berry medley for a colorful topping!
- Herb Infusion: Add a teaspoon of finely chopped fresh basil or mint to the filling for a unique herbal twist.
- Chocolate Drizzle: Drizzle a bit of melted dark chocolate over the tart for an unexpected yet luxurious flavor combination.
- Gingersnap Crust: Instead of traditional cookies, use gingersnaps for a spiced cookie crust. It pairs beautifully with lemon!
- Vegan Option: Substitute eggs with a flax egg mixture and use maple syrup in place of honey to make a vegan-friendly tart.
Chef’s Notes
Making this Lemon Tart is a walk down memory lane for me. I love how desserts can evoke such strong connections to our past. Over the years, I’ve tweaked my grandmother’s original recipe, made it simpler, and added that crispy cookie crust to enhance the texture. The joy of sharing this dessert with loved ones brings me as much happiness as that sunny afternoon in my grandmother’s kitchen. And remember, it’s all about the experience — so have fun with it!
FAQs and Troubleshooting
Q: My filling turned out runny. What did I do wrong?
A: If your filling didn’t set, you might have undercooked it or not let it chill long enough. Make sure to follow baking times and allow it to cool completely in the fridge.
Q: Can I use bottled lemon juice?
A: While it’s possible, fresh lemon juice really enhances the flavor and gives you that bright tartness we all love. If you must use bottled, taste it first to ensure it has that refreshing kick.
Q: What do I do if my crust cracks?
A: Don’t fret! Cracks are common, especially if the crust is too dry. Next time, ensure you’re mixing the cookie crumbs and butter well, and pack it tightly into the pan.
Q: How long can I store leftovers?
A: Store your Lemon Tart in the refrigerator for up to 5 days. It’s a delightful treat to nibble on for dessert throughout the week!
Nutritional Info (Optional)
For those keeping track, here’s a rough breakdown for one slice (based on 8 slices):
- Calories: 230
- Total Fat: 10 g
- Saturated Fat: 5 g
- Cholesterol: 60 mg
- Sodium: 60 mg
- Total Carbohydrates: 33 g
- Dietary Fiber: 1 g
- Sugars: 15 g
- Protein: 3 g
So, there you have it! A Lemon Tart with Cookie Crust that’s not just a dessert, but a delightful way to create memories. I hope you enjoy making and sharing this recipe as much as I do. Happy cooking, dear friends—let’s create some magic in the kitchen!
PrintThe Perfect Lemon Tart with Cookie Crust

An easy yet elegant lemon tart with a delightful cookie crust, perfect for creating sweet memories.
- Prep Time: 15 minutes
- Cook Time: 30 minutes
- Total Time: 45 minutes
- Yield: 8 servings 1x
- Category: Dessert
- Method: Baking
- Cuisine: American
- Diet: Vegetarian
Ingredients
- 1 1/2 cups cookie crumbs
- 1/3 cup unsalted butter, melted
- 1/2 cup honey
- 3 large eggs
- 1/2 cup fresh lemon juice
- Zest of 2 lemons
- 1 cup blueberries (for topping)
- Powdered sugar (for sprinkling)
- Meringues (for topping, optional)
Instructions
- Preheat your oven to 350°F (175°C).
- In a mixing bowl, combine the cookie crumbs and melted butter. Stir until the crumbs are evenly moistened.
- Press the cookie mixture firmly into the bottom and sides of a 9-inch tart pan.
- Place the crust in the preheated oven and bake for about 10 minutes.
- In a mixing bowl, whisk together the honey and eggs until combined. Add in the fresh lemon juice and zest.
- Carefully pour the lemon filling into your cooled cookie crust.
- Bake the tart for about 20-25 minutes, until the filling is just set.
- Allow your tart to cool at room temperature, then chill in the fridge for at least an hour.
- Just before serving, sprinkle with powdered sugar and top with blueberries and meringues if using.
Notes
For fruit variations, try using strawberries, raspberries, or a mixed berry medley. Consider adding fresh herbs or a chocolate drizzle for a unique twist.
Nutrition
- Serving Size: 1 slice
- Calories: 230
- Sugar: 15g
- Sodium: 60mg
- Fat: 10g
- Saturated Fat: 5g
- Unsaturated Fat: 3g
- Trans Fat: 0g
- Carbohydrates: 33g
- Fiber: 1g
- Protein: 3g
- Cholesterol: 60mg
Keywords: lemon tart, dessert, cookie crust, easy dessert, citrus dessert
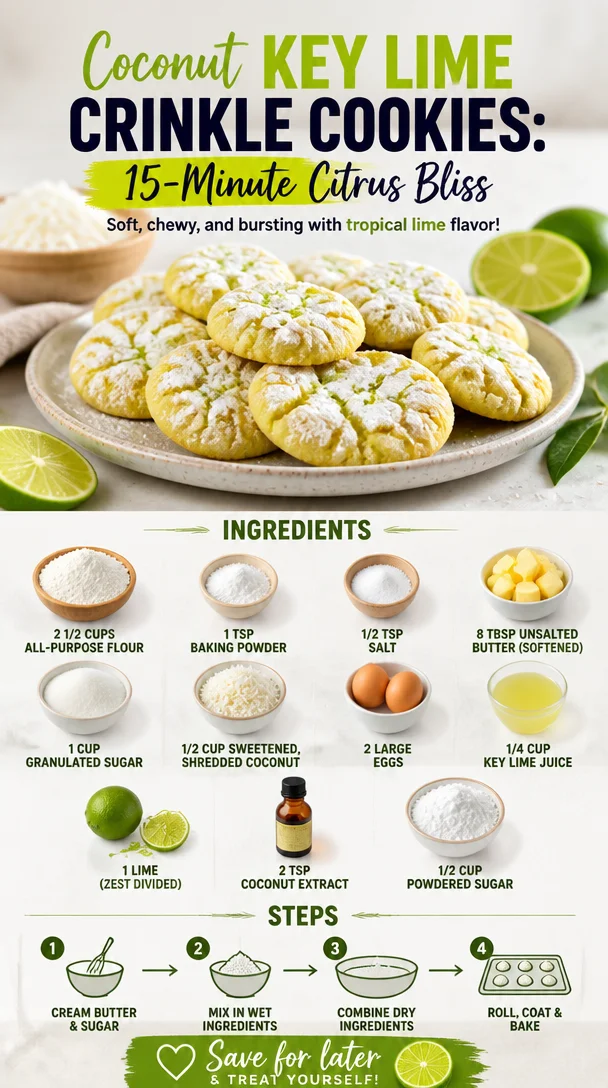
Coconut Key Lime Crinkle Cookies: 15-Minute Citrus Bliss
Coconut Key Lime Crinkle Cookies: A Tropical Delight
Hello, my fellow food lovers! Today, we are diving into a delightful recipe that brings a taste of the tropics right to your kitchen. We’re talking about Coconut Key Lime Crinkle Cookies—soft, chewy, and bursting with zesty lime goodness. Imagine biting into a cookie that melts in your mouth and the tropical flavors whisk you away to a sunny beach. Sounds heavenly, right? Let’s roll up our sleeves, tie on our aprons, and get started!
A Whisk of Nostalgia
I vividly remember the first time I tried my hand at baking cookies—specifically, these Coconut Key Lime Crinkle Cookies. It was a lazy summer afternoon, and my best friend and I decided to turn our small kitchen into a vibrant cookie factory. With flour dust dancing in the sunlight and laughter echoing off the walls, we whipped up a batch that would become a summer staple in our households.
As we mixed ingredients, we couldn’t stop dreaming up ways to elevate the classic cookie. Why not add a dash of coconut? Or make it bright with zesty key lime? The experimentation was half the fun! The cookies emerged from the oven—a little crinkle on top, golden on the edges, and soft in the middle. They were an instant hit! Each bite felt like a sunny escape, and before we knew it, we were sharing them with family and friends at every gathering.
Fast forward to today, and I’m thrilled to share this recipe with all of you, where every crumb carries a sprinkle of nostalgia and bliss.
Ingredients
Let’s gather our ingredients! Here’s what you’ll need to whip up these delightful Coconut Key Lime Crinkle Cookies:
-
2 1/2 cups all-purpose flour
This is the backbone of your cookies, providing structure. If you’re looking for a gluten-free option, try a 1:1 gluten-free flour blend! -
1 tsp baking powder
This little magic powder helps your cookies rise and become fluffy. Make sure it’s fresh for the best results! -
1/2 tsp salt
A pinch of salt enhances the sweetness and balances the flavors. Trust me; it’s essential. -
8 tbsp unsalted butter (softened)
Butter brings richness and flavor. If you’re in a pinch, you can use margarine or coconut oil for a dairy-free option! -
1 cup granulated sugar
This adds sweetness and helps with texture. Brown sugar can be subbed for a chewier cookie with a hint of caramel flavor. -
1/2 cup sweetened, shredded coconut
It gives the cookies that tropical flair! If you’d like less sweetness, try using unsweetened coconut. -
2 large eggs
Eggs bind the ingredients and provide moisture. You can replace each egg with 1/4 cup of applesauce for a vegan twist! -
1/4 cup key lime juice
The zingy star that brightens the cookies! Freshly squeezed is always best, but bottled works if that’s what you have. -
1 lime (zest divided)
The lime zest intensifies the lime flavor—don’t skip this step! Save half for decorating the cookies. -
2 tsp coconut extract
For a deeper coconut flavor, this extract is a game-changer. You can use vanilla extract if you’re out of coconut. -
1/2 cup powdered sugar
This is for rolling the cookies before baking, giving them their signature crinkle effect and a touch of sweetness!
Step-by-Step Instructions
Alright, my kitchen companions, let’s get baking!
-
Preheat Your Oven
Begin by preheating your oven to 350°F (175°C). This is the magic number for getting those cookies perfectly baked. -
Mix the Dry Ingredients
In a large bowl, whisk together the flour, baking powder, and salt. This ensures that your leavening and seasoning are evenly distributed. -
Cream the Butter and Sugar
In another bowl, beat the softened butter and granulated sugar until light and fluffy—about 3 minutes. This step is crucial; it helps incorporate air, leading to a lighter cookie! -
Add the Eggs and Flavorings
Next, beat in the eggs, key lime juice, coconut extract, and half of the lime zest. Mix until well combined, scraping down the sides of the bowl as needed. -
Combine Dry and Wet
Gradually add the dry ingredients to your wet mixture. Mix until just combined—don’t overmix! This will keep your cookies tender. -
Fold in the Coconut
Gently fold in the shredded coconut with a spatula until it’s evenly incorporated. This is where the fun begins—you can already smell the tropical goodness! -
Chill the Dough
Cover the bowl with plastic wrap and chill the dough for 30 minutes. This step helps prevent the cookies from spreading too much. -
Prepare for Baking
Line your baking sheets with parchment paper. Put the powdered sugar in a shallow bowl for rolling the cookies. -
Shape the Cookies
Once chilled, scoop out about two tablespoons of dough and roll them into balls. Next, roll each ball in powdered sugar until well coated. -
Bake the Cookies
Place the sugar-coated dough balls on your prepared baking sheet, leaving some space between them. Bake for 10-12 minutes or until the edges are lightly golden. -
Cool and Enjoy
Allow the cookies to cool on the baking sheet for a few minutes before transferring them to a wire rack. While they cool, sprinkle them with the remaining lime zest for a radiant touch.
Serving Suggestions
These Coconut Key Lime Crinkle Cookies are best served warm, with a refreshing glass of iced tea or a chilled coconut water. For a fun twist, serve them with a scoop of coconut ice cream on the side—talk about a tropical treat!
Recipe Variations
-
Chocolate Chip Twist: Add a cup of semi-sweet chocolate chips for a delightful contrast to the tartness of the lime.
-
Lemon Coconut Cookies: Substitute the key lime juice with freshly squeezed lemon juice for a zesty lemon version.
-
Nutty Coconut: Fold in 1/2 cup of chopped macadamia nuts for an extra crunch and a nutty flavor that complements the coconut!
-
Vegan Version: Use flax eggs (1 tablespoon of flaxseed meal mixed with 2.5 tablespoons of water for each egg) and coconut oil instead of butter.
-
Gluten-Free: Use almond flour or a gluten-free flour blend to make this cookie gluten-free without sacrificing taste.
Chef’s Notes
This recipe has evolved over the years, and I still remember the excitement when I decided to add shredded coconut and key lime into my cookie mix. Initially, my friends were skeptical—could a cookie be both tropical and comforting? But with the first bite of the warm, crinkly treat, they were converts!
Some days, I turn these cookies into an impromptu snack with a drizzle of white chocolate on top or even serve them as dessert for a dinner party, and they never fail to impress. Baking is all about experimentation; don’t be afraid to put your twist on it!
FAQs and Troubleshooting
-
Why are my cookies flat?
Check if your butter is too warm or if you skipped chilling the dough. Either can lead to flat cookies. Cooling helps them retain their shape. -
Can I use fresh key limes?
Absolutely! Fresh key limes provide a vibrant flavor. Just make sure you have enough on hand to get that 1/4 cup of juice. -
How do I store leftover cookies?
Store them in an airtight container at room temperature for up to a week, or freeze them for longer storage. Just ensure they’re completely cooled to keep that freshness! -
What if my dough is too sticky?
If the dough feels overly sticky, chill it a little longer or add a sprinkle of flour until you can easily handle it.
Nutritional Info
(If applicable—Feel free to modify based on data)
Per cookie (based on 24 cookies):
- Calories: 150
- Total Fat: 7g
- Saturated Fat: 4g
- Cholesterol: 20mg
- Sodium: 50mg
- Total Carbohydrates: 21g
- Dietary Fiber: 0.5g
- Sugars: 10g
- Protein: 2g
And there you have it, my lovely foodies—Coconut Key Lime Crinkle Cookies! I hope these cookies bring a sprinkle of sunshine into your day. Happy baking, and remember to gather around the table and share those delicious moments! 🍪🌴🍋
PrintCoconut Key Lime Crinkle Cookies

Soft, chewy cookies bursting with zesty lime and tropical coconut flavors, perfect for summer snacking.
- Prep Time: 15 minutes
- Cook Time: 12 minutes
- Total Time: 57 minutes
- Yield: 24 cookies 1x
- Category: Dessert
- Method: Baking
- Cuisine: American
- Diet: Vegetarian
Ingredients
- 2 1/2 cups all-purpose flour
- 1 tsp baking powder
- 1/2 tsp salt
- 8 tbsp unsalted butter (softened)
- 1 cup granulated sugar
- 1/2 cup sweetened, shredded coconut
- 2 large eggs
- 1/4 cup key lime juice
- 1 lime (zest divided)
- 2 tsp coconut extract
- 1/2 cup powdered sugar
Instructions
- Preheat your oven to 350°F (175°C).
- Mix the dry ingredients: whisk together the flour, baking powder, and salt.
- Cream the softened butter and granulated sugar until light and fluffy.
- Add in the eggs, key lime juice, coconut extract, and half of the lime zest.
- Combine the dry and wet ingredients, mixing until just combined.
- Fold in the shredded coconut.
- Chill the dough for 30 minutes covered with plastic wrap.
- Prepare your baking sheets with parchment paper and set aside powdered sugar in a shallow bowl.
- Shape the cookies by scooping two tablespoons of dough and rolling them in powdered sugar.
- Bake for 10-12 minutes or until the edges are lightly golden.
- Cool on the baking sheet for a few minutes before transferring to a wire rack and sprinkle with remaining lime zest.
Notes
Serve warm with iced tea or coconut water. For a fun twist, try them with coconut ice cream.
Nutrition
- Serving Size: 1 cookie
- Calories: 150
- Sugar: 10g
- Sodium: 50mg
- Fat: 7g
- Saturated Fat: 4g
- Unsaturated Fat: 3g
- Trans Fat: 0g
- Carbohydrates: 21g
- Fiber: 0.5g
- Protein: 2g
- Cholesterol: 20mg
Keywords: cookies, key lime, coconut
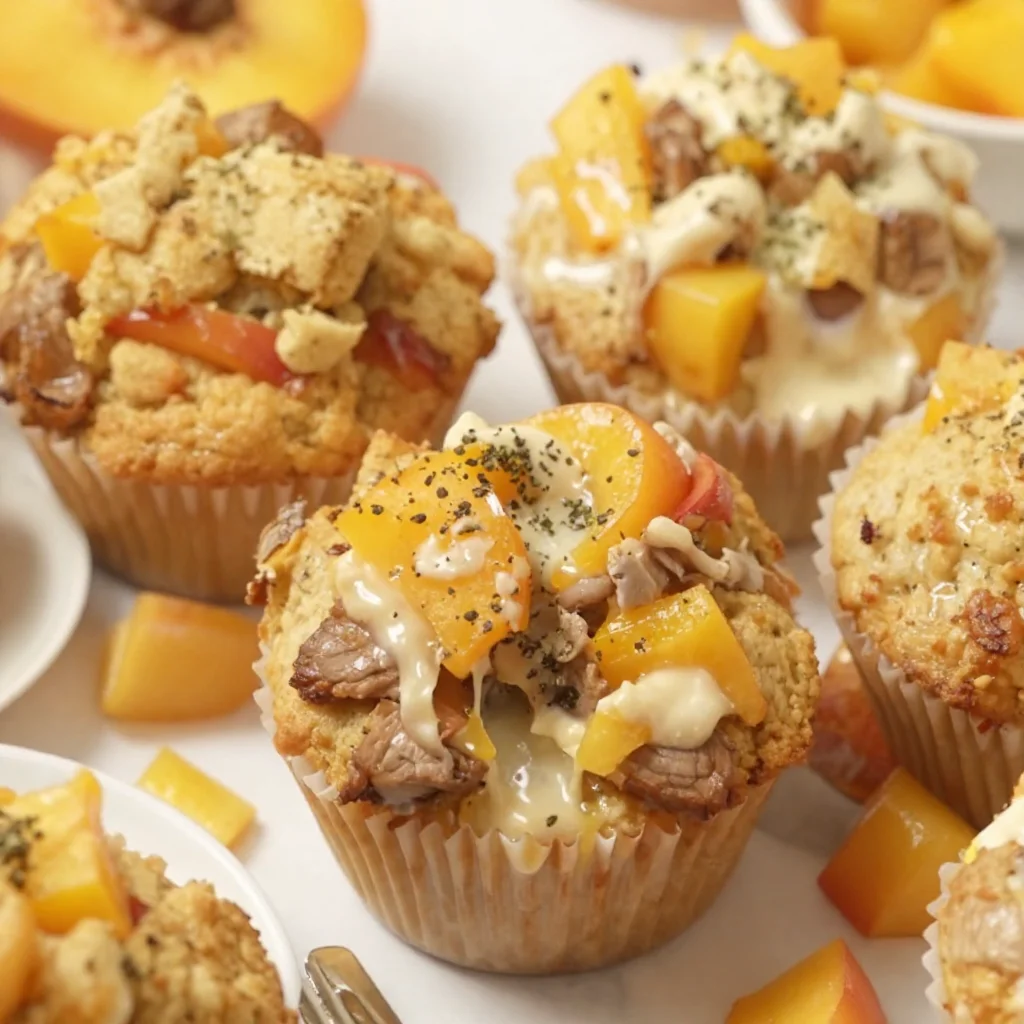
Summer Nectarine Muffins: Easy One-Bowl Recipe for Beginners
Heavenly Nectarine Muffins: A Bite of Summer in Every Bite
Hello, my lovely food enthusiasts! Today, we’re diving into the bubbly world of baking with a recipe that’s like a warm hug on a sunny day—Nectarine Muffins! These delectable treats are the perfect blend of sweet, juicy nectarines and fluffy, buttery goodness. Whether you enjoy them with your morning coffee or as a delightful afternoon snack, they bring a touch of summer to your kitchen all year round.
I’m so excited to share this recipe with you, especially since nectarines hold a special place in my heart. They remind me of those lazy summer afternoons spent picking ripe fruit straight from the orchard with family. The smell of sun-kissed fruit, laughter echoing in the air, and the sweet satisfaction of a juicy bite—it all comes flooding back every time I bake these muffins. It’s like encapsulating a sunny day into each fluffy morsel!
But let’s not just reminisce—let’s roll up our sleeves and create something magical! Whether you’re a baking aficionado or just starting out, I promise you’ll feel like a pro by the end of this one. So tie on your apron, grab your favorite mixing bowl, and let’s get started on these delightful nectarines muffins!
A Sweet Memory Worth Sharing
Growing up, I was surrounded by the vibrant colors and mouthwatering scents of fresh fruits in our family garden. But, there was something extra special about the nectarines. I vividly remember the summer when we decided to host a family gathering in our backyard. My grandmother had just baked a batch of her famous nectarines muffins, and the aroma wafted through the whole neighborhood.
Guests arrived, and you could see their faces light up as they sunk their teeth into those moist, fruity delights. Laughter and chatter filled the air, but it was the muffins that truly stole the show. I found myself whisking up that old recipe, adding a modern twist of my own—a drizzle of sweet glaze that made them even more irresistible. The joy I felt in sharing those muffins was a pivotal moment in my culinary journey, igniting my passion for creating and sharing delicious food with others.
Ingredients
Let’s gather the stars of our show! Here’s what you’ll need for your delightful nectarines muffins:
-
2 cups all-purpose flour: This is the backbone of the muffins, providing that fluffy texture we all love. You can substitute it with whole wheat flour for a nuttier flavor and healthier option.
-
1/2 cup sugar: This adds the right amount of sweetness to keep our muffins delightful. For a less refined option, feel free to use coconut sugar or a sugar substitute.
-
1 tablespoon baking powder: This is our leavening agent, making the muffins rise beautifully. Always check it’s fresh for optimal fluffiness!
-
1/2 teaspoon salt: Salt enhances the flavors and balances the sweetness. Don’t skip it!
-
1/2 cup unsalted butter, melted: Butter brings richness and moisture. You can substitute with coconut oil or even applesauce for a lighter version.
-
1 cup milk: Milk makes the batter smooth and helps create tender muffins. You can use almond milk for a dairy-free option.
-
2 large eggs: These bind the ingredients and add richness. For a vegan twist, try flax eggs or applesauce.
-
1 teaspoon vanilla extract: This adds a lovely depth of flavor. Homemade vanilla extract is a dream!
-
1 1/2 cups diced nectarines: The star ingredient! Choose ripe nectarines to pack in all the juicy goodness. You can substitute with peaches if nectarines are out of season.
-
1/2 teaspoon cinnamon: Cinnamon will give our muffins a warm, cozy flavor. Feel free to adjust based on your taste preference.
-
1/4 cup brown sugar: This will add a delightful caramel-like sweetness. If you’re looking for a lighter option, you could use maple syrup instead.
-
1/4 cup flour (for topping): Tossing a bit of flour with the brown sugar creates a lovely crunchy topping. Oats can make a great swap for a heartier texture.
-
1 cup powdered sugar (for glaze): The glaze adds a touch of sweetness and a glossy finish to our muffins. For a healthier option, you can drizzle with honey instead.
-
1-2 tablespoons milk (for glaze): This will help achieve that perfect glaze consistency. Non-dairy milk works well too!
Step-by-Step Instructions
Alright, let’s turn those beautiful ingredients into heavenly muffins:
-
Preheat and Prep: Preheat your oven to 350°F (175°C). Line a muffin tin with paper liners or grease it with a touch of cooking spray. This step is key to ensuring our muffins pop out effortlessly when they’re done!
-
Mix Dry Ingredients: In a large mixing bowl, whisk together the flour, sugar, baking powder, cinnamon, and salt. Make sure everything is well combined—this helps our muffins rise evenly.
-
Combine Wet Ingredients: In another bowl, melt the unsalted butter (let it cool slightly), then whisk in the milk, eggs, and vanilla extract. As you mix, you’ll notice that lovely aroma wafting through your kitchen—it’s pure bliss!
-
Merge the Mixtures: Gradually pour the wet ingredients into the dry mix. Stir gently until just combined; it’s okay if there are a few lumps. Over-mixing will result in tough muffins—nobody wants that!
-
Gently Fold in Nectarines: Now, fold in those diced nectarines with care. The vibrant colors and aroma of the fruit make you feel like a true kitchen artist!
-
Prepare the Topping: In a small bowl, combine the brown sugar, flour, and a dash of cinnamon. This mixture will create a lovely crumbly topping that adds texture and sweetness.
-
Fill the Muffin Tin: Divide the batter evenly among the muffin cups—fill them about two-thirds full. Sprinkle the brown sugar topping generously over each muffin.
-
Bake to Perfection: Pop the muffins into your preheated oven and bake for about 18-22 minutes, or until a toothpick inserted into the center comes out clean. Keep an eye on them; every oven can be a bit different!
-
Cool and Glaze: Once they’re perfectly golden brown, remove them from the oven and let them cool in the pan for about 5 minutes before transferring them to a wire rack. While they cool, whisk together your glaze ingredients until smooth. Drizzle that sweet glaze over the muffins for that extra touch of indulgence.
-
Serve and Savor: Let them cool a bit longer (if you can resist) and then enjoy them fresh from the oven, or store them in an airtight container to enjoy later. Trust me, they won’t last long!
Serving Suggestions
Presentation adds to the experience! When serving your nectarines muffins, you can stack them on a beautiful cake stand or arrange them on a large platter with fresh mint leaves for color. A dusting of powdered sugar on top, paired with a cup of freshly brewed coffee or tea, makes for a simple yet elegant display. Add a few extra diced nectarines alongside for that show-stopping summer vibe!
Recipe Variations
- Nutty Crunch: Add 1/2 cup of chopped nuts (like almonds or walnuts) into the batter for an added crunch and richness.
- Berry Blast: Swap half of the nectarines for fresh blueberries or raspberries for a fruity twist.
- Zesty Citrus: Add the zest of one lemon or orange to the batter for a refreshing citrus note.
- Cream Cheese Swirl: Swirl in a mixture of cream cheese with a hint of vanilla and sugar for a decadent surprise in every bite.
- Spiced Delights: Add a pinch of nutmeg and allspice for a deeper, warming flavor profile—perfect for those cozy days.
Chef’s Notes
Oh, how these nectarines muffins have evolved! Initially, I found myself overwhelmed with the process and the plethora of options available for mixing and matching flavors. Through trial and error, I learned to keep things simple and focused on one star ingredient—the nectarines. A funny story from my kitchen: One batch ended up with a handful of crushed cookies mixed in, which I didn’t realize until my friends were raving about the unexpected “cookie crunch.” Sometimes the mishaps lead to delightful surprises!
FAQs and Troubleshooting
Q: My muffins came out dense and heavy. What happened?
A: This could be due to over-mixing the batter. Gentle folds are key! Also, ensure your baking powder is fresh; its effectiveness declines over time.
Q: How can I keep my muffins moist?
A: Avoid overbaking and check for doneness around the 18-minute mark. Storing them in an airtight container once fully cooled will also help maintain moisture.
Q: Can I freeze the muffins?
A: Absolutely! Simply wrap each muffin individually in plastic wrap and store in a zip-top bag. They’ll last for about three months in the freezer. Thaw and enjoy whenever you want a taste of summer!
Q: Can I make these muffins without eggs?
A: Definitely! Substitute each egg with 1/4 cup of applesauce or a flax egg (1 tablespoon flaxseed meal + 2.5 tablespoons water). They’ll bake beautifully!
Nutritional Info
While I won’t nerd out too much on the numbers, here’s a rough idea per muffin, if you make 12:
- Calories: 200
- Fat: 8g
- Carbohydrates: 30g
- Protein: 3g
- Sugar: 12g
(Keep in mind, using alternative ingredients will change these numbers!)
And voila! Your kitchen is now filled with the heavenly aroma of freshly baked nectarines muffins. I hope this recipe brings a little extra joy to your day and inspires you to keep gathering around that table, creating meaningful memories together. Remember, it’s not just about the food; it’s about those beautiful moments of connection we create over delicious dishes. Happy baking, and don’t forget to enjoy every crumb!
PrintHeavenly Nectarine Muffins

Delightful nectarines muffins that capture the essence of summer in each fluffy bite.
- Prep Time: 15 minutes
- Cook Time: 20 minutes
- Total Time: 35 minutes
- Yield: 12 servings 1x
- Category: Dessert
- Method: Baking
- Cuisine: American
- Diet: Vegetarian
Ingredients
- 2 cups all-purpose flour
- 1/2 cup sugar
- 1 tablespoon baking powder
- 1/2 teaspoon salt
- 1/2 cup unsalted butter, melted
- 1 cup milk
- 2 large eggs
- 1 teaspoon vanilla extract
- 1 1/2 cups diced nectarines
- 1/2 teaspoon cinnamon
- 1/4 cup brown sugar
- 1/4 cup flour (for topping)
- 1 cup powdered sugar (for glaze)
- 1–2 tablespoons milk (for glaze)
Instructions
- Preheat your oven to 350°F (175°C). Line a muffin tin with paper liners or grease it with cooking spray.
- Mix the flour, sugar, baking powder, cinnamon, and salt in a large mixing bowl.
- Combine the melted unsalted butter, milk, eggs, and vanilla extract in another bowl.
- Merge the wet ingredients into the dry mix, stirring gently until just combined.
- Gently fold in the diced nectarines.
- Prepare the topping by combining brown sugar, flour, and a dash of cinnamon.
- Fill the muffin cups with batter and sprinkle the brown sugar topping over each muffin.
- Bake for about 18-22 minutes, or until a toothpick comes out clean.
- Cool the muffins for 5 minutes, then drizzle with glaze before serving.
Notes
For a twist, try adding nuts or swapping nectarines for other fruits.
Nutrition
- Serving Size: 1 muffin
- Calories: 200
- Sugar: 12g
- Sodium: 185mg
- Fat: 8g
- Saturated Fat: 5g
- Unsaturated Fat: 3g
- Trans Fat: 0g
- Carbohydrates: 30g
- Fiber: 1g
- Protein: 3g
- Cholesterol: 40mg
Keywords: nectarine, muffins, summer, baking, dessert
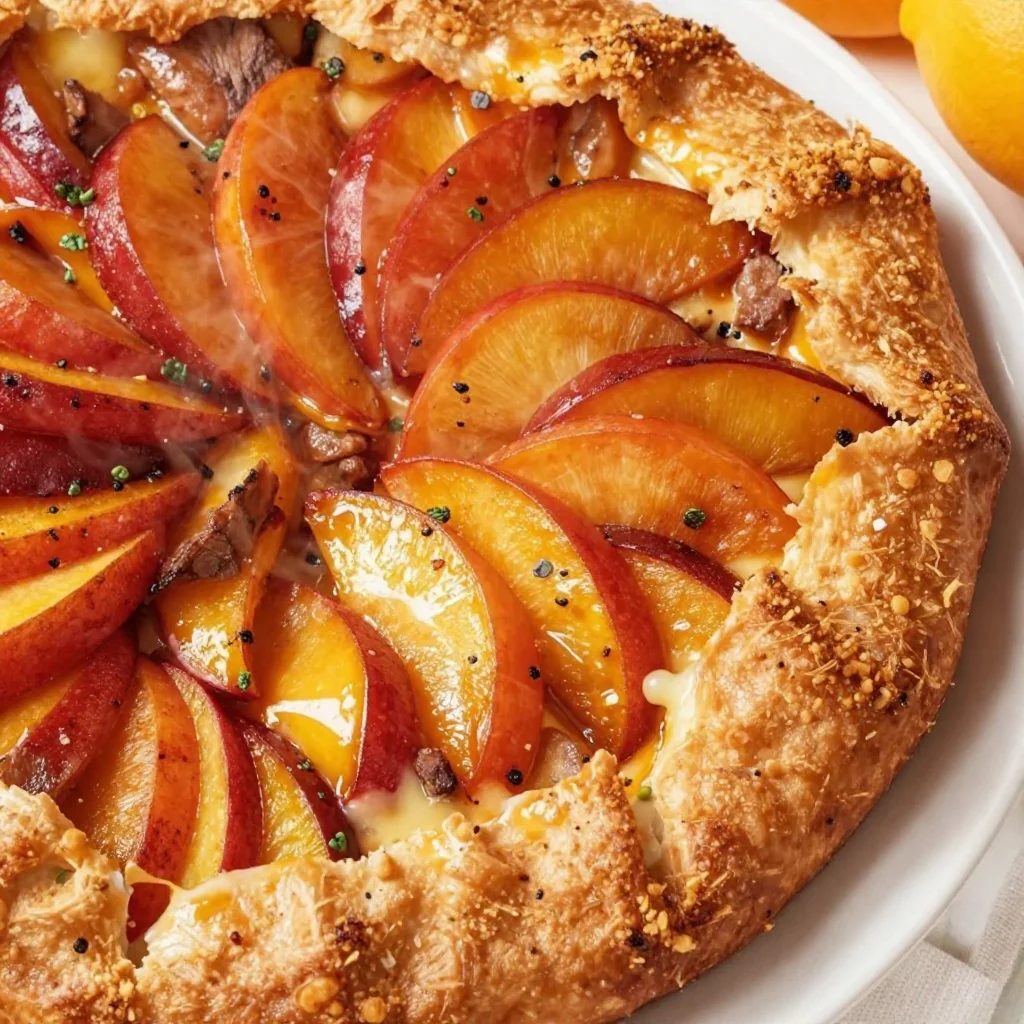
Seasonal Nectarine Galette: Quick Summer Dessert Recipe
Indulge in the Sweet Simplicity of a Nectarine Galette
Hello friends! Welcome back to the cozy corner of my kitchen. Today, we’re diving into a dish that embodies the essence of summer: the Nectarine Galette. This rustic dessert is not only a feast for the eyes but also an easygoing recipe that brings the charm of a fancy bakery right to your table. Imagine a flaky, buttery crust enveloping juicy, sweet nectarines, all beautifully rustic and just waiting for a scoop of vanilla ice cream on the side. Let’s roll our sleeves up and get to it!
The Story Behind the Galette
Growing up in a household where the kitchen was the heart of the home, many of my fondest memories are wrapped in the warmth of oven-baked goodies. One particular summer evening stands out in my mind—the sun setting, painting the sky in pastel hues, while my mother asked, “What do you want for dessert, Savannah?” Without hesitation, I yelled, “Peach galette!” Unfortunately, we had no peaches, but we had a bowl overflowing with nectarines from a recent trip to the farmer’s market.
So, we improvised! My mom and I dove into the kitchen, laughter echoing off the walls as we rolled out dough, sprinkled flour like confetti, and sliced nectarines, each one more glorious than the last. The smell of baking softened the summer night’s anticipation. The first bite was magical—sweet, tangy, and perfectly rustic! That evening, surrounded by family, sparked my love for this humble dessert, reminding me how simple ingredients can create something extraordinary. I’ve tweaked that original recipe over the years, but the spirit remains: uncomplicated, elegant, and utterly delicious.
Ingredients You’ll Need
Let’s gather our stars—these are the ingredients that’ll help us achieve a show-stopping Nectarine Galette:
-
2 cups all-purpose flour
The backbone of our galette, all-purpose flour gives the crust that perfect flaky texture. If you’re looking for a gluten-free option, try using a 1:1 gluten-free flour blend! -
1/2 cup unsalted butter, chilled and cubed
Butter is key to that flaky crust! I prefer unsalted to control the seasoning better. You can substitute it with coconut oil or vegan butter if you’re going dairy-free. -
1/4 cup sugar
This sweetens the dough slightly. For a more natural option, you might substitute it with coconut sugar or even honey in a pinch (just reduce the liquid in the dough slightly). -
1/4 teaspoon salt
A pinch of salt elevates the flavors. An essential ingredient, don’t skip this! -
6-8 nectarines, sliced
The star of the show! These nectarines bring a sweet and juicy punch. You can also mix in peaches, plums, or even apples if you want a flavor twist. -
1 teaspoon ground cinnamon
This warm spice enhances the sweetness of the nectarines beautifully. Feel free to swap it for nutmeg or allspice for a different kick! -
1 teaspoon vanilla extract
Vanilla adds a lovely depth. Don’t have any? A splash of almond extract will work wonders too! -
1-2 tablespoons sugar (for sprinkling)
A little extra sweetness on top to caramelize as it bakes. Try using brown sugar for a more caramelized finish! -
1 egg (for egg wash)
To create that golden, glossy finish on the crust. If you’re vegan, a plant-based milk would do the trick for brushing!
Let’s Get Cooking!
Are you ready to make some magic? Follow these steps and you’ll have a Nectarine Galette that you’ll want to make again and again.
-
Make the Dough
In a large bowl, combine the flour, 1/4 cup sugar, and salt. Add the cubed butter. Using your fingers, a pastry cutter, or two forks, gently work the butter into the flour mixture until it resembles coarse crumbs. This process is essential—don’t rush it! You want that lovely, crumbly texture. -
Chill the Dough
Once your mixture is ready, add about 4-5 tablespoons of cold water to the dough. Mix just until combined—it shouldn’t be sticky! Shape it into a disc, wrap in plastic, and pop it in the fridge for at least 30 minutes. Trust me, chilling allows the butter to firm up, resulting in the flakiest crust. -
Preheat the Oven
While the dough chills, preheat your oven to 400°F (200°C). A hot oven is vital for that perfect crust! -
Prepare the Nectarines
Slice your nectarines evenly and toss them in a bowl with the cinnamon, vanilla extract, and a tablespoon of sugar. Allow those juices to mix and mingle while the dough continues to chill. -
Roll Out the Dough
After chilling, on a lightly floured surface, roll out your dough into a rough circle, about 12 inches in diameter. Don’t stress about making it perfect—rustic is the name of the game! Transfer the rolled dough onto a parchment-lined baking sheet. -
Assemble the Galette
Arrange the sliced nectarines in the center of the dough, leaving about a 2-inch border. Fold the edges of the dough over the nectarines, creating a little enclosure—don’t worry if they peek out a bit! It adds to the charm. -
Brush and Sprinkle
Whisk the egg and brush it over the visible crust, then sprinkle with a coarse sugar. This step is what transforms your rustic galette into a showstopper with golden edges! -
Bake to Perfection
Pop your galette in the oven and bake for about 30-35 minutes, or until the crust is golden and the nectarines are bubbly. Your kitchen will smell divine, and you might have a hard time waiting! -
Cool Down
Once it’s out of the oven, let it cool for about 10 minutes before serving. This time allows it to set a bit more, making it easier to slice.
Serving Suggestions
Serving up this Nectarine Galette? Here’s a lovely idea: While it’s still warm, slice it into wedges and serve with a generous scoop of vanilla ice cream or a dollop of whipped cream. Garnish with a sprinkle of fresh mint for that extra pop of color and freshness. Trust me, a little texture from crushed nuts on top elevates it further while adding a delightful crunch!
Recipe Variations
Now, let’s get those creative juices flowing! Here are a few inspiring twists:
- Mixed Stone Fruits: Combine nectarines with peaches and plums for a vibrant fruit medley.
- Rustic Berry Galette: Swap nectarines for blueberries or raspberries. A little lemon zest in the filling can elevate the flavor!
- Spiced Autumn Variation: Add pumpkin spice seasoning with apples for a fab fall dessert!
- Nutty Addition: Sprinkle slivered almonds or chopped pistachios over your nectarines for a delightful crunch.
- Vegan Option: Substitute butter with coconut oil and use a plant-based milk for the egg wash.
Chef’s Notes
Over the years, this recipe has become a staple at gatherings and during the summer months when fruits shine their brightest. I recall an impromptu picnic at the park where I whipped up this galette. The reactions were priceless—spoonfuls of joy, smiles all around! One of my friends even asked if I had a pastry chef’s secret to share, and I chuckled; the truth is, my only secret is to love what you cook!
FAQs and Troubleshooting
Q1: My dough is too crumbly. What did I do wrong?
Don’t panic! You might need to add a tablespoon or two of cold water. Ensure not to overwork the dough; it should be slightly sticky but still hold together.
Q2: My nectarines are tough and not juicy. What gives?
It could be that the nectarines aren’t ripe enough. Make sure to choose ripe nectarines that yield slightly to pressure when you squeeze them for the best results.
Q3: Can I make this galette ahead of time?
Absolutely! You can make the dough a day in advance and store it in the refrigerator. Just don’t bake it until you’re ready to serve—it’s best when fresh!
Q4: How do I store leftovers?
Store any leftovers in an airtight container in the fridge for 2-3 days. Just pop it back in a warm oven for a few minutes to revive that crust!
Nutritional Info (Optional)
If you’re keeping track, a slice of this Nectarine Galette generally has around 250 calories, depending on the portion size and additional toppings. It’s a delightful treat worth every bite!
And there you have it! A delightful nectar-filled galette that’s perfect for summer days, family gatherings, or simply treating yourself. I hope you enjoy making it as much as I do. Remember, cooking should always feel like a joyful journey. So tie on that apron, gather your loved ones, and whip up this delightful recipe! Happy cooking!
PrintNectarine Galette

A rustic and easy-to-make dessert featuring a flaky crust and juicy nectarines, perfect for summer gatherings.
- Prep Time: 30 minutes
- Cook Time: 35 minutes
- Total Time: 65 minutes
- Yield: 8 servings 1x
- Category: Dessert
- Method: Baking
- Cuisine: American
- Diet: Vegetarian
Ingredients
- 2 cups all-purpose flour
- 1/2 cup unsalted butter, chilled and cubed
- 1/4 cup sugar
- 1/4 teaspoon salt
- 6–8 nectarines, sliced
- 1 teaspoon ground cinnamon
- 1 teaspoon vanilla extract
- 1–2 tablespoons sugar (for sprinkling)
- 1 egg (for egg wash)
Instructions
- Make the Dough: In a large bowl, combine flour, 1/4 cup sugar, and salt. Add cubed butter and work it into the flour mixture until it resembles coarse crumbs.
- Chill the Dough: Add 4-5 tablespoons of cold water until combined, shape into a disc, wrap in plastic, and refrigerate for at least 30 minutes.
- Preheat the Oven: While the dough chills, preheat oven to 400°F (200°C).
- Prepare the Nectarines: Toss sliced nectarines with cinnamon, vanilla extract, and a tablespoon of sugar.
- Roll Out the Dough: On a floured surface, roll out dough to a rough circle, about 12 inches in diameter.
- Assemble the Galette: Arrange nectarines in the center, folding the edges of the dough over, leaving some nectarines exposed.
- Brush and Sprinkle: Whisk the egg, brush the crust, and sprinkle with coarse sugar.
- Bake to Perfection: Bake for 30-35 minutes until the crust is golden and nectarines are bubbly.
- Cool Down: Let cool for about 10 minutes before serving.
Notes
Serve warm with vanilla ice cream or whipped cream, and garnish with fresh mint.
Nutrition
- Serving Size: 1 slice
- Calories: 250
- Sugar: 10g
- Sodium: 200mg
- Fat: 14g
- Saturated Fat: 8g
- Unsaturated Fat: 5g
- Trans Fat: 0g
- Carbohydrates: 30g
- Fiber: 2g
- Protein: 3g
- Cholesterol: 50mg
Keywords: nectarine galette, rustic dessert, summer dessert, easy recipe

Minute Cinnamon Sugar Blondies: Beginner-Friendly
The Sweetest Indulgence: Easy Cinnamon Sugar Blondies
Hello, fellow food lovers! Today, we’re diving into the world of easy baking with a treat that’s near and dear to my heart: Cinnamon Sugar Blondies. These delightfully chewy, sweet squares are perfect for satisfying your sweet tooth and make your kitchen smell like a cozy fall day—no matter the season.
You might ask, "Savannah, what makes blondies different from brownies?" Great question! Blondies have that rich, buttery goodness and a caramel-like flavor thanks to the brown sugar, while brownies are chocolaty and dense. The best part? Blondies offer a beautiful canvas for flavors like cinnamon, making them perfect for those moments when you want something a little extra special without the fuss. Trust me, once you bake these easy Cinnamon Sugar Blondies, they’ll become a go-to recipe in your collection!
A Sweet Memory
Let me take you back to my childhood for a moment—imagine a cozy kitchen filled with the aroma of warm cinnamon and brown sugar. I remember those rainy Saturdays when my mom would whip up a batch of her famous blondies. We’d eagerly await them cooling on the counter, each of us trying to sneak one before they were officially declared “ready.” Her secret was that extra sprinkle of cinnamon sugar on top that transformed these chewy delights into something magnificent.
Those moments were about more than just the food; they were about laughter, stories shared, and creating memories around our family table. It was during these times that I learned the power of cooking—a simple act that can fill the heart as much as it fills the belly.
Ingredients
Let’s gather our ingredients! You’ll need:
-
1 cup unsalted butter, melted
Butter is the heart of these blondies, giving them that rich flavor and chewy texture. If you’re in a pinch, you can substitute with coconut oil for a different twist! -
1 cup brown sugar
This gives the blondies their delightful caramel flavor. Dark brown sugar can lend a deeper molasses-like taste. -
1/2 cup granulated sugar
A touch of sweetness and balance to the brown sugar. You can replace it with coconut sugar for a more natural alternative. -
2 large eggs
They bind everything together and help create that chewy texture. If you need a vegan option, try flax eggs (1 tablespoon of ground flaxseed mixed with 2.5 tablespoons of water per egg). -
1 teaspoon vanilla extract
A must for flavor! Always opt for pure vanilla extract when possible; it genuinely makes a difference. -
2 cups all-purpose flour
Essential for structure. For a gluten-free option, you can substitute with a gluten-free flour blend. -
1 teaspoon baking powder
This helps the blondies rise a bit without making them cake-like. Be cautious with baking powder—too much can give a metallic taste. -
1 teaspoon ground cinnamon
The star of today’s dish! Cinnamon brings a warm, inviting flavor. You can swap it for pumpkin spice for a seasonal twist. -
1/2 teaspoon salt
A touch of salt enhances all the sweetness. You could also use sea salt for a more complex flavor. -
1/4 cup granulated sugar (for topping)
This gives the blondies a lovely crust and adds a bit of sweetness. -
1 tablespoon ground cinnamon (for topping)
More cinnamon? Yes, please! This is the finishing touch that elevates the dish.
Step-by-Step Instructions
Now, let’s get to the fun part! Here’s how to whip up these Cinnamon Sugar Blondies in simple, easy steps.
-
Preheat Your Oven:
Preheat your oven to 350°F (175°C). This is crucial for even baking. If you jump the gun, you might end up with unevenly cooked blondies! -
Prepare Your Pan:
Grease a 9×13-inch baking pan or line it with parchment paper. The parchment helps with easy lifting and cuts down on clean-up. Who doesn’t love that? -
Melt the Butter:
In a microwave-safe bowl or saucepan, melt the butter until it’s bubbly and just slightly cooled. Be cautious—burnt butter is not the flavor we’re after here! -
Mix the Sugars:
Add the brown and granulated sugar to the melted butter, and whisk until smooth. The mixture should appear glossy. This step is crucial for that chewy texture! -
Add the Eggs and Vanilla:
Next, whisk in the eggs until fully combined, and then add the vanilla extract. The mixture will look thick and creamy—this is a good sign! -
Combine Dry Ingredients:
In a separate bowl, whisk together the flour, baking powder, cinnamon, and salt. This ensures that the baking powder and cinnamon are evenly distributed for perfect bites of flavor. -
Blend Wet and Dry Ingredients:
Gradually add the dry mixture into the wet mixture, folding gently with a spatula until just combined. Avoid over-mixing—this will keep your blondies chewy. -
Spread in Pan:
Pour the blondie batter into your prepared pan. Use an offset spatula or the back of a spoon to spread it evenly. -
Make Cinnamon Sugar Topping:
In a small bowl, mix the 1/4 cup of granulated sugar with the tablespoon of cinnamon. Sprinkle this divine mixture generously over the top of the batter. This step is what makes these blondies stand out! -
Bake:
Bake in the preheated oven for 20-25 minutes. Start checking around 20 minutes—you’re looking for a light golden brown on the edges, with a toothpick inserted in the center coming out with a few moist crumbs. -
Cool and Serve:
Once baked, remove the pan from the oven and let it cool on a wire rack for at least 10 minutes. Then, cut into squares and enjoy!
Serving Suggestions
These Cinnamon Sugar Blondies are delightful on their own, but why not elevate the experience? Serve them warm with a scoop of vanilla ice cream and a drizzle of caramel sauce for an indulgent dessert. Alternatively, a dusting of powdered sugar on top adds an elegant touch. Arrange them on a charming platter, and don’t forget to sprinkle a little extra cinnamon for that artistic flair!
Recipe Variations
Feeling inspired? Here are a few creative twists to make these blondies uniquely yours:
- Add Nuts: Toss in some chopped pecans or walnuts for a delightful crunch.
- Chocolate Chips: Swirl in 1 cup of chocolate chips for a sweet addition.
- Fruity Twists: Fold in some dried cranberries or chocolate-covered raisins for extra flavor.
- Spiced Versions: Experiment by adding a pinch of nutmeg or ginger for a more aromatic profile.
- Gluten-Free: Use a gluten-free flour blend to make these blondies suitable for your gluten-sensitive friends!
Chef’s Notes
I can’t tell you how many batches of these blondies I’ve made over the years! They’ve become a staple for everything from birthday parties to cozy Sunday afternoons. I once tried adding a scoop of peanut butter to the batter, and let me tell you—absolutely divine! But you’ll have to be my taste tester to believe me!
My friends often tease me about my inability to keep my hands off the cinnamon sugar topping—the warm, sweet scent alone is worth the effort. As you’re baking, don’t be surprised if you find yourself sneaking a piece before they cool down.
FAQs and Troubleshooting
1. Why are my blondies too crumbly?
If your blondies turned out too crumbly, it might be due to over-baking or not enough moisture in the batter. Ensure you don’t bake longer than 25 minutes and check for that perfect toothpick test.
2. How do I store leftovers?
Store in an airtight container at room temperature for up to 3 days, or in the refrigerator for up to a week. These treats can also be frozen for up to three months—just wrap them tightly!
3. Can I use light brown sugar instead of dark?
Absolutely! Light brown sugar will yield delicious blondies, but keep in mind they may have a milder flavor.
4. What if I don’t have baking powder?
If you find yourself without baking powder, you can make a substitute with 1/4 teaspoon baking soda and 1/2 teaspoon of vinegar or lemon juice.
Nutritional Info (Optional)
While I believe in enjoying desserts in moderation, if you’re curious, here’s a quick nutritional breakdown per serving (based on 12 servings):
- Calories: 200
- Protein: 2g
- Fat: 9g
- Carbs: 30g
- Fiber: 1g
- Sugar: 15g
Baking these easy Cinnamon Sugar Blondies is about more than just the delicious end product—it’s about remembering those cherished moments spent in the kitchen, surrounded by loved ones. I can’t wait for you to try this recipe. Tie on that apron, and let’s create something truly special together. Happy baking!
PrintEasy Cinnamon Sugar Blondies

Delightfully chewy Cinnamon Sugar Blondies perfect for satisfying your sweet tooth, reminiscent of cozy fall days.
- Prep Time: 10 minutes
- Cook Time: 25 minutes
- Total Time: 35 minutes
- Yield: 12 servings 1x
- Category: Dessert
- Method: Baking
- Cuisine: American
- Diet: Vegetarian
Ingredients
- 1 cup unsalted butter, melted
- 1 cup brown sugar
- 1/2 cup granulated sugar
- 2 large eggs
- 1 teaspoon vanilla extract
- 2 cups all-purpose flour
- 1 teaspoon baking powder
- 1 teaspoon ground cinnamon
- 1/2 teaspoon salt
- 1/4 cup granulated sugar (for topping)
- 1 tablespoon ground cinnamon (for topping)
Instructions
- Preheat your oven to 350°F (175°C).
- Prepare a 9×13-inch baking pan by greasing or lining with parchment paper.
- Melt the butter in a microwave-safe bowl until bubbly and slightly cooled.
- Mix the brown and granulated sugar into the melted butter until smooth.
- Add the eggs and vanilla, whisking until fully combined.
- Combine the flour, baking powder, cinnamon, and salt in a separate bowl.
- Blend the dry ingredients into the wet mixture, folding gently.
- Spread the batter in the prepared pan.
- Make the cinnamon sugar topping by mixing the granulated sugar and cinnamon, and sprinkle over the batter.
- Bake for 20-25 minutes, checking for a toothpick to come out with a few moist crumbs.
- Cool on a wire rack for at least 10 minutes before cutting into squares.
Notes
Serve warm with a scoop of vanilla ice cream or a dusting of powdered sugar.
Nutrition
- Serving Size: 1 square
- Calories: 200
- Sugar: 15g
- Sodium: 200mg
- Fat: 9g
- Saturated Fat: 5g
- Unsaturated Fat: 4g
- Trans Fat: 0g
- Carbohydrates: 30g
- Fiber: 1g
- Protein: 2g
- Cholesterol: 30mg
Keywords: blondies, cinnamon, dessert, easy baking, sweet treats