
Healthy BLT Wraps with Secret Sauce
Healthy BLT Wraps with Secret Sauce: A Delicious Twist on a Classic
Hello, fellow food enthusiasts! Today, I’m excited to share a recipe that’s close to my heart — Healthy BLT Wraps with Secret Sauce. Trust me, these beauties are a game-changer! Imagine biting into crisp lettuce, savory bacon, juicy tomatoes, and creamy avocado all wrapped up in a fresh leaf. This dish not only satisfies your cravings but also brings a light, refreshing vibe to your meal. Plus, it’s an incredible way to switch things up while keeping your meals healthy!
Personal Story
I still remember the summer days of my childhood when I would help my mom whip up the classic BLT sandwiches in our sunny kitchen. The smell of crispy bacon sizzling in the pan would fill the house, and tempt me to sneak a piece (or two) before it even made it into the sandwich! My siblings and I would hover around the counter, gearing up for our favorite part — assembling the sandwiches. The crisp lettuce, ripe tomatoes, and smoky bacon topped with a generous smear of mayonnaise created a comforting sense of togetherness.
These BLTs became a staple for our family gatherings, often enjoyed outdoors in the glow of the sunset. As I grew older and started my culinary journey, I knew I wanted to reinvent this classic into something fresh, vibrant, and, dare I say, healthy! Hence, the Healthy BLT Wrap was born — an elevated twist that keeps all the flavors you love while packing in some serious nutritional benefits.
Ingredients
Here’s the lineup for our Healthy BLT Wraps with Secret Sauce. Let’s break it down:
-
4 large lettuce leaves: Opt for romaine or butter lettuce. They provide the perfect vessel for your wrap! For a crunchy alternative, use Swiss chard or collard greens.
-
4 slices of bacon: You can use turkey bacon for a lighter option, or even try crispy tempeh for a vegetarian twist. If you’re looking for a low-sodium option, go for nitrate-free bacon.
-
1 medium tomato, sliced: Choose ripe heirloom or vine-ripened tomatoes for maximum flavor. If tomatoes aren’t in season, slice up some roasted red peppers or sun-dried tomatoes for a smoky flavor.
-
1/2 avocado, sliced: Avocado adds a creamy texture. If you’re in a pinch, you can substitute it with a dollop of Greek yogurt for a lighter, tangy option.
-
1/4 cup mayonnaise: For a healthier take, use low-fat mayonnaise or a plant-based mayo. If you’re feeling adventurous, try a herbed aioli!
-
1 tablespoon Dijon mustard: This adds a wonderful tang. If you’re not a fan of mustard, a squeeze of lemon or lime can add a fresh zing without overpowering the other flavors.
-
Salt and pepper to taste: Essential for balancing flavors. Don’t skip these; they can elevate your dish from good to unforgettable!
Step-by-Step Instructions
Now that we’ve gathered our ingredients, let’s dive into making these wraps! Follow along closely, and don’t be afraid to channel your inner chef.
-
Cook the Bacon: Start by frying the bacon in a skillet over medium heat until it’s crispy. This usually takes about 6-8 minutes. For the healthiest option, you can bake the bacon in the oven at 400°F for 15-20 minutes. Just lay it on a baking sheet lined with parchment paper for easy cleanup! Trust me, you’ll love how the kitchen fills with that irresistible aroma.
-
Prepare the Lettuce Leaves: While the bacon is cooking, wash your lettuce leaves under cold water. Pat them dry with a kitchen towel or paper towels. The dryer they are, the better they’ll hold up against the delicious fillings.
-
Slice Your Vegetables: Now, grab that ripe tomato and your avocado. Slice them as evenly as possible — a serrated knife works wonders for tomatoes. Remember, presentation is key, even in a wrap! You want those vibrant colors visible when you assemble.
-
Make the Secret Sauce: In a small bowl, combine the mayonnaise with the Dijon mustard. Stir well until well mixed. If you’re feeling zesty, add a pinch of garlic powder or a slice of chopped green onion for an added kick. Taste and adjust the seasoning!
-
Assemble Your Wraps: Time to wrap it all up! Take one lettuce leaf and spread a spoonful of the secret sauce down the center. Lay down a slice of bacon, followed by a few slices of tomato and avocado. Sprinkle with salt and pepper to enhance the flavors. Finally, fold the sides over and roll it up from the bottom, tucking as you go. Don’t worry about perfection — remember, the messier it is, the more love it has!
-
Repeat and Serve: Repeat the process until you have all the wraps ready to go. Secure them with a toothpick if needed or simply serve them with the open ends facing up for that rustic flair.
Serving Suggestions
To serve these wraps, place them on a large platter or wooden board, fanned out for a beautiful presentation. Drizzle any leftover secret sauce around for dipping and garnish with extra cherry tomatoes or a sprig of fresh basil for a pop of color. These wraps are perfect for a casual lunch, a picnic in the park, or even as a light dinner option!
Recipe Variations
-
Spicy BLT Wrap: Add sliced jalapeños or a dash of hot sauce to the secret sauce for a spicy kick!
-
Veggie-Loaded Wrap: Toss in some sliced cucumbers, shredded carrots, or bell peppers for extra crunch and vitamins.
-
Caprese Twist: Swap out bacon for fresh basil and mozzarella slices. Top with a drizzle of balsamic glaze for an Italian flavor fiesta!
-
Low-Carb Option: Replace the lettuce with slices of grilled eggplant or zucchini for a fully veggie version.
-
Breakfast BLT: Add a poached or fried egg to the wrap for a delightful brunch option!
Chef’s Notes
As a self-professed bacon aficionado, I’ve experimented with various types of bacon over the years. There’s something about the sizzle and aroma that just oozes comfort and warmth! These Healthy BLT Wraps have evolved from a classic recipe into a versatile dish that I whip up on busy weeknights or leisurely weekends alike. They have seen many iterations, and I love how no matter how I twist it, they always evoke the warmth of home-cooked meals shared with loved ones.
FAQs and Troubleshooting
1. What type of lettuce is best for wraps?
Romaine and butter lettuce are fantastic choices because of their sturdiness and leaves that are easy to wrap. Avoid delicate leaves like iceberg as they may tear easily.
2. Can I make these in advance?
Absolutely! You can pre-cook the bacon and slice the veggies ahead of time. Just keep everything stored separately in the refrigerator. Assemble right before serving for the freshest flavors.
3. My wraps keep falling apart; what am I doing wrong?
Keep your lettuce leaves nice and dry, and don’t overstuff them. You can also secure the wraps with a toothpick to prevent any spills!
4. What can I serve alongside the wraps?
These wraps pair wonderfully with a side salad, sweet potato fries, or even a fresh fruit medley. Think light and refreshing for a lovely balance!
Nutritional Info
For those mindful of nutrition, here’s a quick breakdown per wrap (estimated):
- Calories: 230
- Protein: 10g
- Carbohydrates: 12g
- Fat: 18g
Eating well doesn’t have to be boring! With these Healthy BLT Wraps with Secret Sauce, you can enjoy a masterpiece that’s easy to prepare, beautifully presented, and oh-so-delicious.
So, what do you think? Ready to tie on your apron and whip these up? I hope these wraps inspire you to gather around the table, creating beautiful moments filled with flavor and laughter. Happy cooking!
PrintHealthy BLT Wraps with Secret Sauce

A delicious and healthy twist on the classic BLT sandwich, featuring crisp lettuce, savory bacon, juicy tomatoes, avocado, and a creamy secret sauce.
- Prep Time: 15 minutes
- Cook Time: 20 minutes
- Total Time: 35 minutes
- Yield: 4 servings 1x
- Category: Main Course
- Method: No-Cook/Baking
- Cuisine: American
- Diet: Low-Carb
Ingredients
- 4 large lettuce leaves (romaine or butter lettuce)
- 4 slices of bacon (or turkey bacon for a lighter option)
- 1 medium tomato, sliced
- 1/2 avocado, sliced
- 1/4 cup mayonnaise
- 1 tablespoon Dijon mustard
- Salt and pepper to taste
Instructions
- Cook the bacon in a skillet over medium heat until crispy, about 6-8 minutes.
- Prepare the lettuce leaves, washing and drying them thoroughly.
- Slice the tomato and avocado evenly.
- Make the secret sauce by mixing mayonnaise with Dijon mustard in a bowl.
- Assemble the wraps with lettuce, secret sauce, bacon, tomato, and avocado.
- Repeat for all wraps and serve with the open ends facing up.
Notes
For added flavor, consider using a pinch of garlic powder in the secret sauce. Secure wraps with a toothpick if needed.
Nutrition
- Serving Size: 1 wrap
- Calories: 230
- Sugar: 2g
- Sodium: 400mg
- Fat: 18g
- Saturated Fat: 4g
- Unsaturated Fat: 10g
- Trans Fat: 0g
- Carbohydrates: 12g
- Fiber: 3g
- Protein: 10g
- Cholesterol: 30mg
Keywords: BLT, wraps, healthy recipe, secret sauce, quick meal
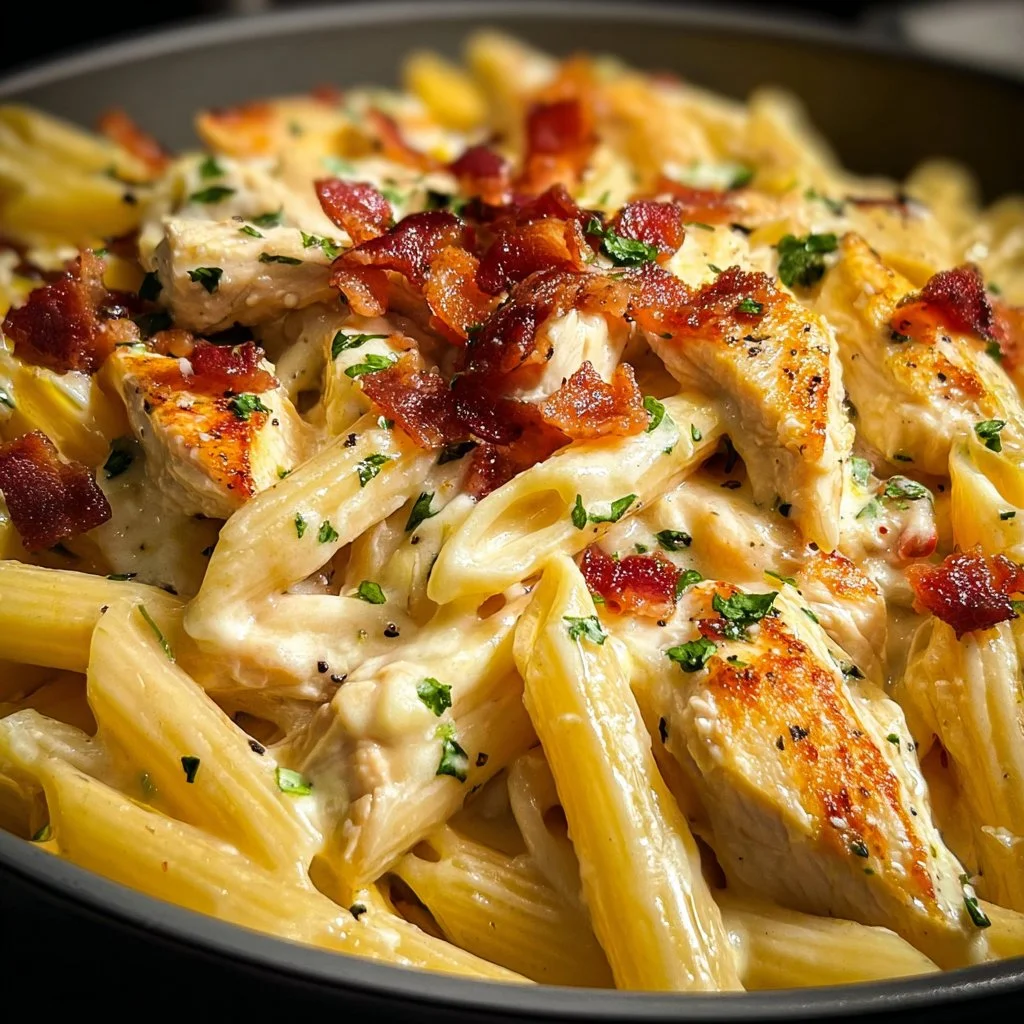
Discover the Creamy Delight of Crack Chicken Penne Tonight!
Discover the Creamy Delight of Crack Chicken Penne Tonight!
Hello, dear friends! I’m so excited to share with you a delightful recipe that will tickle your taste buds and warm your hearts—Creamy Crack Chicken Penne! This dish is not just a recipe; it’s an experience that brings comfort and joy to the table. Imagine the aroma of crisp bacon mingling with the creamy goodness of cheese and ranch seasoning wafting through your kitchen. It’s a dish that evokes not only flavor but also a sense of togetherness, perfect for those weeknight dinners or casual get-togethers.
Let me take you on a little journey. Picture this: It’s a chilly autumn evening, and the sun is setting earlier than usual. I’ve invited a few close friends over for dinner—nothing fancy, just a cozy gathering. The moment they walk in, they’re greeted by the savory smell of bacon sizzling away on the stovetop. I can’t help but smile as I watch them hang up their coats, their eyes lighting up at the delicious scents swirling around. The best part? As we gather around the table, we dive into bowls of creamy crack chicken penne, laughter filling the air with every bite.
What I love about this dish is its simplicity. It’s elegant yet approachable, just how I envision every meal at Ivory Apron. With just a handful of ingredients, you can whip up a dinner that impresses—without the stress. So, grab your apron and let’s get cooking!
My Personal Story
Ah, the memory of the first time I made crack chicken penne! It was during a bustling holiday season when I decided to host a small gathering for friends who felt like family. With a busy schedule, I wanted to cook something that felt special but didn’t require me to be in the kitchen all day. I stumbled upon a few recipes that included ranch seasoning and cream cheese—two ingredients that promised creamy goodness. My heart raced as I began to experiment. The rich, creamy concoction melded beautifully with the penne.
As we sat down to eat, I watched my friends relish each bite while recalling old stories—some hilarious, others touching. They couldn’t believe how flavorful the dish was, and it felt incredible to serve something that brought everyone joy. That evening, crack chicken penne became a staple in my recipe book, solidifying itself as the go-to dish for gatherings big and small.
Ingredients
Let’s gather our ingredients for this delightful meal! Here’s what you’ll need:
-
8 ounces penne pasta
This shape is perfect for catching that creamy sauce and ensuring every bite is rich and satisfying. If penne isn’t available, feel free to substitute it with rigatoni or fusilli for a similar texture. -
2 tablespoons olive oil
A must-have for cooking the chicken and ensuring it doesn’t stick to the pan. If you’re running low, melted butter works just as well and adds a nice flavor. -
6 slices thick-cut bacon
The smokiness of thick-cut bacon elevates the dish. Turkey bacon can be a lighter alternative, but it won’t provide the same richness. -
1 pound boneless, skinless chicken breasts
This is the base of our dish! For a twist, you could use cooked rotisserie chicken—just add it toward the end of the cooking process. -
1 packet ranch seasoning
The secret flavor booster! If you’d like to keep it homemade, a blend of dried dill, garlic powder, onion powder, and buttermilk powder can do the trick. -
3 cups low-sodium chicken broth
This adds depth and keeps the sauce creamy without being overly salty. You can swap it for vegetable broth if you prefer a meat-free version. -
8 ounces cream cheese
The magic ingredient that creates that luscious creaminess. Neufchâtel cheese can serve as a lighter alternative without compromising flavor. -
1 cup shredded cheddar cheese
Adding this at the end gives the dish a beautiful melty and cheesy finish. For a twist, use pepper jack cheese for a kick! -
1/4 cup fresh parsley
A sprinkle of fresh herbs at the end brightens up the dish, both in flavor and presentation. If parsley isn’t on hand, chives or basil can be a delightful alternative.
Step-by-Step Instructions
Now that we have all our ingredients prepped, it’s time to get cooking! Follow these simple steps, and you’ll have a crowd-pleasing meal in no time.
-
Cook the Pasta:
In a large pot, bring salted water to a rolling boil. Add the penne pasta and cook according to the package directions until al dente. This usually takes about 10-12 minutes. Remember, we want it to have a slight bite so it can absorb the sauce later. Drain and set aside, saving about 1 cup of pasta water to adjust the sauce later if needed. -
Cook the Bacon:
In a large skillet, heat the olive oil over medium heat. Add the thick-cut bacon slices and cook until crispy, about 5-7 minutes. Make sure to turn them occasionally for even crisping. Once cooked, transfer the bacon to a paper towel-lined plate to drain. You’ll love the smell here, trust me! Keep the bacon fat in the pan; it adds flavor to the dish. -
Sauté the Chicken:
In that same skillet with the bacon fat, add your boneless, skinless chicken breast, cooking it until it’s golden brown on both sides. This usually takes about 5-7 minutes per side, depending on thickness. Season with salt and pepper for extra flavor. Once done, remove the chicken and let it rest for a few minutes. -
Shred the Chicken:
Once the chicken is cool enough to handle, shred it using two forks (or chop it into bite-sized pieces). This adds a great texture to our creamy sauce! -
Make the Creamy Sauce:
In the same skillet, add your ranch seasoning to the remaining bacon fat, along with the chicken broth. Stir well and bring it to a simmer. Then, add in the cream cheese, whisking continuously until it’s fully melted and integrated into a smooth, creamy sauce. This step is where the magic happens! -
Combine Everything:
Now, toss in the shredded chicken, cooked penne, and half of your shredded cheddar cheese. Stir everything together until the pasta and chicken are well-coated with the creamy ranch sauce. If it’s too thick, gradually add a bit of the reserved pasta water until you reach your desired consistency. -
Add the Finishing Touches:
Fold in the crumbled bacon (saving some for garnish) and the remaining cheddar cheese, allowing it to melt into the pasta. Once everything is combined and heated through, taste and adjust the seasoning if necessary. -
Garnish and Serve:
Finally, sprinkle the fresh parsley on top of the dish, and voilà! It’s ready to be plated.
Serving Suggestions
When serving your creamy crack chicken penne, presentation is key! Serve it in wide, shallow bowls to showcase its creamy texture. Top each serving with additional crumbled bacon and a sprinkle of fresh parsley for that pop of color. A slice of crusty bread on the side wouldn’t hurt either! Pair it with a light salad for a refreshing crunch to balance the richness of the dish.
Recipe Variations
Feel free to get creative with your creamy crack chicken penne! Here are some variations to consider:
- Vegetarian Twist: Substitute the chicken for sautéed mushrooms and add some spinach for a hearty, veggie-loaded meal.
- Spicy Kick: Add diced jalapeños or a splash of hot sauce to the sauce for an added zing!
- One-Pot Wonder: Cook everything (including the uncooked pasta) in one pot with the chicken broth—just add extra liquid to account for the penne cooking.
- Different Cheeses: Swap out cheddar for Gouda or fontina for a different flavor profile.
- Zoodles or Whole Wheat: Use zucchini noodles or whole wheat penne for a healthier twist!
Chef’s Notes
As with any dish I create, this creamy crack chicken penne has come a long way over the years. I initially tried it with a more complex list of ingredients, only to find that keeping it simple was the key to its brilliance. My friends often joke that I could make it in my sleep, and with how easy it is, they might be onto something!
Through laughter and a few kitchen mishaps (like that time the cream cheese decided to clump), I’ve learned that cooking is more about the journey than the destination. So don’t stress if things aren’t perfect—it’s all part of the fun!
FAQs and Troubleshooting
1. What can I do if my sauce is too thick?
If your sauce turns out too thick for your liking, gradually add reserved pasta water, stirring until you achieve the desired consistency.
2. How do I store leftovers?
Store any leftovers in an airtight container in the fridge for up to 3 days. Reheat in the microwave or on the stovetop, adding a splash of chicken broth to loosen the sauce if needed.
3. Can I freeze this dish?
You can certainly freeze it! Make sure to cool it completely, then store in a freezer-safe container for up to three months. Thaw in the fridge before reheating.
4. My sauce is too salty; what can I do?
If you find your sauce too salty, add a splash of cream or whole milk to balance it out. Serving it with a side of unsalted rice or pasta can also help mitigate the saltiness.
Nutritional Info (Optional)
Keeping in mind how a dish like this may fit into your dietary needs, here’s a rough breakdown per serving (this is a loose estimate and can vary based on exact ingredients and portion sizes):
- Calories: 520
- Protein: 35g
- Fat: 28g
- Carbohydrates: 40g
- Fiber: 2g
There you have it—a recipe that guarantees a delightful meal and the perfect opportunity to gather loved ones around your table. Remember, cooking should always bring joy, so don’t hesitate to make it your own as you share this creamy crack chicken penne with friends and family. Here’s to creating beautiful moments and delicious memories—enjoy every bite!
PrintCreamy Crack Chicken Penne

A cozy, creamy pasta dish featuring tender chicken, crispy bacon, and a flavorful ranch seasoning that brings comfort to every gathering.
- Prep Time: 15
- Cook Time: 30
- Total Time: 45
- Yield: 4 servings 1x
- Category: Main Course
- Method: Stovetop
- Cuisine: American
- Diet: Paleo
Ingredients
- 8 ounces penne pasta
- 2 tablespoons olive oil
- 6 slices thick-cut bacon
- 1 pound boneless, skinless chicken breasts
- 1 packet ranch seasoning
- 3 cups low-sodium chicken broth
- 8 ounces cream cheese
- 1 cup shredded cheddar cheese
- 1/4 cup fresh parsley
Instructions
- Cook the pasta: In a large pot, bring salted water to a rolling boil. Add penne pasta and cook until al dente, about 10-12 minutes. Drain, reserving 1 cup of pasta water.
- Cook the bacon: In a skillet, heat olive oil and cook bacon until crispy, about 5-7 minutes. Transfer to a paper towel-lined plate.
- Sauté the chicken: In the same skillet, add chicken and cook until golden brown, about 5-7 minutes per side. Season with salt and pepper.
- Shred the chicken: Once cool, shred the chicken into bite-sized pieces.
- Make the creamy sauce: In the skillet, add ranch seasoning and chicken broth. Simmer, then whisk in cream cheese until smooth.
- Combine everything: Toss in shredded chicken, cooked penne, and half of the cheddar cheese until well-coated.
- Add the finishing touches: Fold in crumbled bacon and remaining cheddar cheese, adjusting with reserved pasta water if needed.
- Garnish and serve: Top with fresh parsley and serve in bowls.
Notes
Feel free to customize with different veggies or cheeses. Store leftovers in an airtight container for up to 3 days.
Nutrition
- Serving Size: 1 serving
- Calories: 520
- Sugar: 3g
- Sodium: 800mg
- Fat: 28g
- Saturated Fat: 12g
- Unsaturated Fat: 16g
- Trans Fat: 0g
- Carbohydrates: 40g
- Fiber: 2g
- Protein: 35g
- Cholesterol: 80mg
Keywords: creamy pasta, chicken penne, weeknight dinner, comfort food
High-Protein Honey Garlic Shrimp
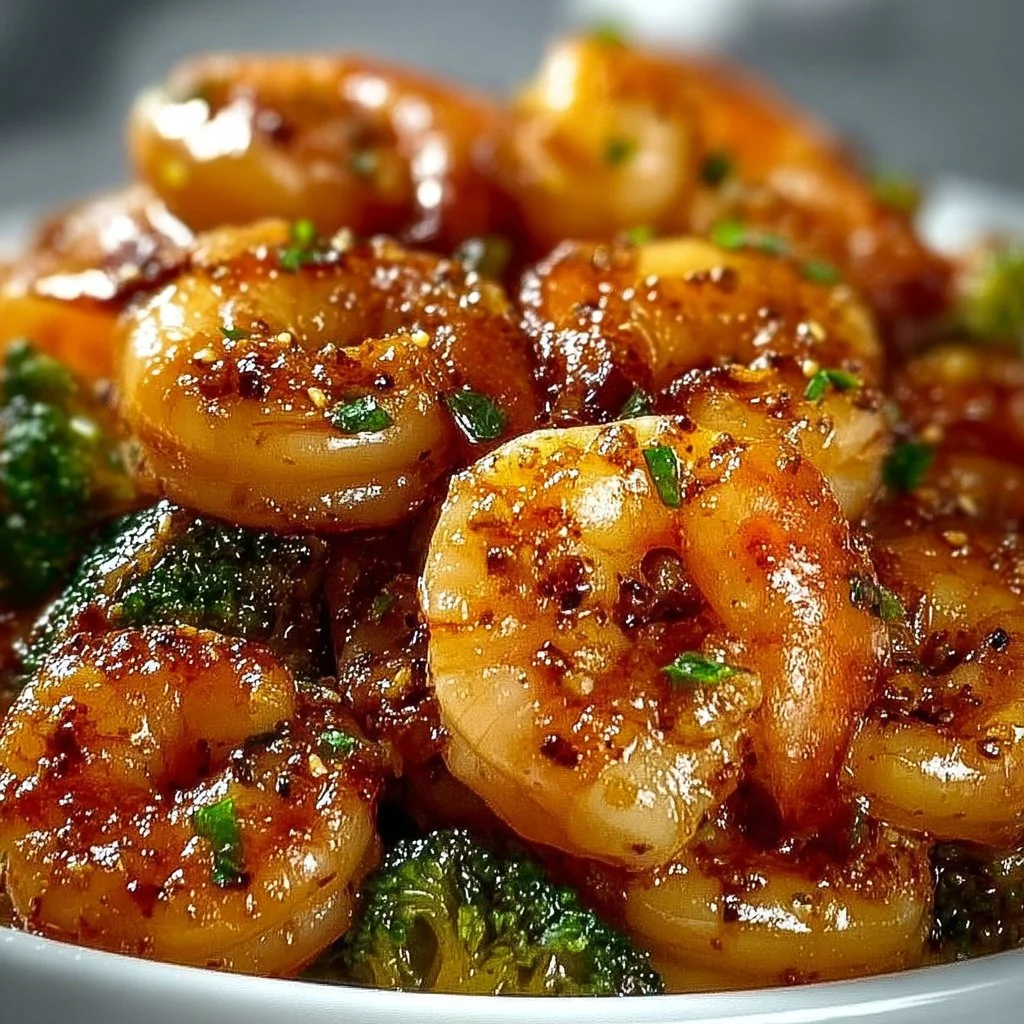
High-Protein Honey Garlic Shrimp: A Flavorful Delight
Hello, lovely foodies! Today, I’m thrilled to share with you a dish that’s close to my heart and packed with flavor: High-Protein Honey Garlic Shrimp. This recipe is not just a feast for the taste buds; it’s also a celebration of the joy of cooking and the beauty of gathering around the table with loved ones. Perfectly sweet, garlicky, and delightfully tender, this dish is sure to become a new favorite in your kitchen.
Let’s dive into the magic of these succulent shrimp. They’re not only high in protein—making them an excellent option for a healthy meal—but they’re also incredibly easy to whip up. Whether you’re looking to impress guests at a dinner party or simply trying to make weeknight dinners feel a bit more special, this recipe is a surefire hit. Ready to create something delicious? Let’s go!
A Taste of My Kitchen
Whenever I think of honey garlic shrimp, I’m instantly transported back to my childhood. I remember being in the kitchen with my grandma, who was such an inspiration in my early cooking adventures. One summer evening, we decided to whip up her famous garlic shrimp, a family staple that had everyone drooling. The aroma of sizzling garlic mingling with the sweet scent of honey was like a warm hug for the senses.
As we gathered around the table, my family eagerly awaited the moment where plates were filled with beautifully glazed shrimp, served atop a fluffy bed of jasmine rice. My grandpa would always say, "If you can make shrimp dance in a honey glaze, you can impress anyone!" It was this fun, whimsical spirit that fueled my passion for cooking and sharing food with others. Fast forward to today, and I’m excited to share this easy yet elegant dish that not only honors my grandma’s culinary flair but also showcases how simple it can be to create magic in the kitchen.
Ingredients You’ll Need
To make these lovely honey garlic shrimp, you’ll need the following ingredients:
-
1 pound shrimp, peeled and deveined: Look for large, fresh shrimp for the best texture and flavor. If you can’t find fresh, frozen shrimp will work beautifully—just make sure to thaw them properly before cooking.
-
1/4 cup honey: This sweet nectar is essential for our glaze! If you’re looking for a healthier alternative, you can use agave syrup or maple syrup for a unique flavor twist.
-
3 cloves garlic, minced: Fresh garlic is a must here; it adds depth and richness. If you’re in a pinch, pre-minced garlic can work, but be sure to adjust the amount, as it can be stronger in flavor.
-
2 tablespoons soy sauce: This adds a savory umami kick. For a gluten-free option, feel free to swap this with tamari or coconut aminos.
-
1 tablespoon olive oil: Use extra-virgin olive oil for the best flavor and health benefits. Canola or avocado oil are good substitutes if you’re looking for something lighter.
-
Salt and pepper to taste: Simple seasonings that elevate the flavors. Always taste your dish as you go to ensure it’s seasoned to your liking!
-
Steamed rice or vegetables for serving: Jasmine rice is fantastic with this dish, but feel free to serve it alongside broccoli, asparagus, or any of your favorite seasonal vegetables.
Step-by-Step Instructions
Let’s get cooking! Follow these simple steps to create your high-protein honey garlic shrimp masterpiece:
-
Prep your shrimp: If using frozen shrimp, make sure they’ve been thawed. Rinse them under cold water, pat dry with a paper towel, and set aside. This ensures that the shrimp will sear nicely and not steam in the pan.
-
Make the honey garlic sauce: In a medium bowl, whisk together the honey, minced garlic, and soy sauce until well combined. This will be the glaze that gives our shrimp their delightful flavor. Take a moment to inhale that sweet garlic goodness—it’s divine!
-
Heat your pan: In a large skillet, heat the olive oil over medium-high heat. Make sure it’s hot enough to sizzle when the shrimp hit the pan—that’s how we achieve a nice golden crust on our shrimp!
-
Cook the shrimp: Once the pan is hot, add the shrimp in a single layer. Let them cook undisturbed for about 2 minutes. You want them to develop a lovely golden color on one side before flipping. Flip the shrimp and cook for another 1-2 minutes until they’re opaque and cooked through.
-
Add the sauce: Reduce the heat to medium and pour the honey garlic sauce over the shrimp. Toss everything together to coat each shrimp evenly in that luscious glaze. Allow it to bubble for about a minute until slightly thickened. The smell will be irresistible!
-
Season to perfection: Taste the shrimp and add salt and pepper as needed. This is the moment where you can tailor the flavors to your liking—don’t be afraid to experiment!
-
Final touch: Once the sauce is shiny and the shrimp are well-coated, remove the pan from heat. You’re just a few moments from diving into this delightful dish!
Serving Suggestions
To plate this dish, spoon a generous serving of steamed rice onto a beautiful plate, then artfully arrange your honey garlic shrimp on top. Drizzle any extra sauce over the shrimp and garnish with freshly chopped herbs like green onions or parsley for a pop of color. Serve it with a side of vibrant, steamed vegetables for a complete, beautiful meal that’s sure to impress.
Recipe Variations
Looking to shake things up? Here are a few fun twists you can try with this high-protein shrimp dish:
-
Spicy kick: Add a pinch of red pepper flakes or a splash of Sriracha to the honey garlic sauce for a fiery twist.
-
Citrus burst: Squeeze in some fresh lime or lemon juice to the sauce for a zesty, bright flavor that complements the shrimp beautifully.
-
Tropical vibe: Stir in some diced pineapple or mango in the last minute of cooking for a sweet, fruity addition.
-
Herb-inspired: Swap out the garlic for fresh ginger and finish with a sprinkle of cilantro or basil for a fresh herby flair.
-
Cooking method: Grill the shrimp on skewers instead of pan-searing for a smoky charred flavor. Just adjust the cooking time for skewers on the grill!
Chef’s Notes
As a chef, I value the stories that recipes can tell. This honey garlic shrimp has evolved in my kitchen over the years. Initially, I would make it without much thought, but then I discovered the joy of adding layers of flavor—different herbs and spices, and even the knack for presentation! Every time I revisit this dish, it brings back not only the pleasure of cooking but also memories of loved ones gathered around the table, sharing stories and laughter.
A funny kitchen mishap I can’t forget is when I accidentally grabbed salt instead of sugar while preparing this recipe for a dinner party. Instead of panicking, I added a bit more honey and a splash of lemon juice to balance the flavors, and it turned out unexpectedly delicious! Cooking is all about improvisation and enjoying the process, so embrace those moments!
FAQs and Troubleshooting
Q: My shrimp turned out rubbery. What happened?
A: Overcooking shrimp is the main culprit for rubbery texture. Make sure to cook them just until they’re opaque and firm; they usually need only 2-3 minutes per side.
Q: Can I make this dish ahead of time?
A: While honey garlic shrimp taste best fresh, you can prepare the sauce ahead and store it in the fridge. Cook the shrimp just before serving for the best texture.
Q: What can I substitute for shrimp?
A: If you’re not fond of shrimp, this recipe works beautifully with chicken or tofu. Just adjust the cooking time until they are fully cooked.
Q: How do I store leftovers?
A: Store any leftovers in an airtight container in the refrigerator for up to 3 days. Reheat gently in a pan or microwave, but be careful not to overcook!
Nutritional Information
This honey garlic shrimp recipe serves approximately four people, making it an ideal meal for both family dinners and intimate gatherings. Each serving is not only delicious but a protein-packed option, making it great for a post-workout meal or a healthy dinner.
Approximate nutritional values per serving:
- Calories: 320
- Protein: 25g
- Carbohydrates: 30g
- Fat: 10g
Now that you have all the tools and knowledge to create this delightful high-protein honey garlic shrimp dish, it’s time to tie on your apron and gather your loved ones around the table. Cooking is about connection and joy, so I can’t wait for you to share this experience with friends and family. Happy cooking, and may your kitchen be filled with sweet aromas and laughter!
PrintHigh-Protein Honey Garlic Shrimp

A flavorful and easy dish featuring succulent shrimp coated in a sweet and garlicky honey glaze.
- Prep Time: 10 minutes
- Cook Time: 10 minutes
- Total Time: 20 minutes
- Yield: 4 servings 1x
- Category: Main Course
- Method: Sautéing
- Cuisine: Asian
- Diet: Gluten Free
Ingredients
- 1 pound shrimp, peeled and deveined
- 1/4 cup honey
- 3 cloves garlic, minced
- 2 tablespoons soy sauce
- 1 tablespoon olive oil
- Salt and pepper to taste
- Steamed rice or vegetables for serving
Instructions
- Prep your shrimp: If using frozen shrimp, make sure they’ve been thawed. Rinse them under cold water, pat dry with a paper towel, and set aside.
- Make the honey garlic sauce: In a medium bowl, whisk together the honey, minced garlic, and soy sauce until well combined.
- Heat your pan: In a large skillet, heat the olive oil over medium-high heat.
- Cook the shrimp: Add the shrimp in a single layer. Let them cook undisturbed for about 2 minutes. Flip the shrimp and cook for another 1-2 minutes until opaque.
- Add the sauce: Reduce the heat to medium and pour the honey garlic sauce over the shrimp. Toss to coat.
- Season to perfection: Taste the shrimp and add salt and pepper as needed.
- Final touch: Once the sauce is shiny and shrimp are well-coated, remove from heat.
Notes
Serve with steamed rice and garnish with fresh herbs. Experiment with flavors by adding spices or citrus.
Nutrition
- Serving Size: 1 serving
- Calories: 320
- Sugar: 28g
- Sodium: 500mg
- Fat: 10g
- Saturated Fat: 1g
- Unsaturated Fat: 9g
- Trans Fat: 0g
- Carbohydrates: 30g
- Fiber: 0g
- Protein: 25g
- Cholesterol: 200mg
Keywords: honey garlic shrimp, high protein shrimp, easy shrimp recipe
Crab Rangoon Bombs
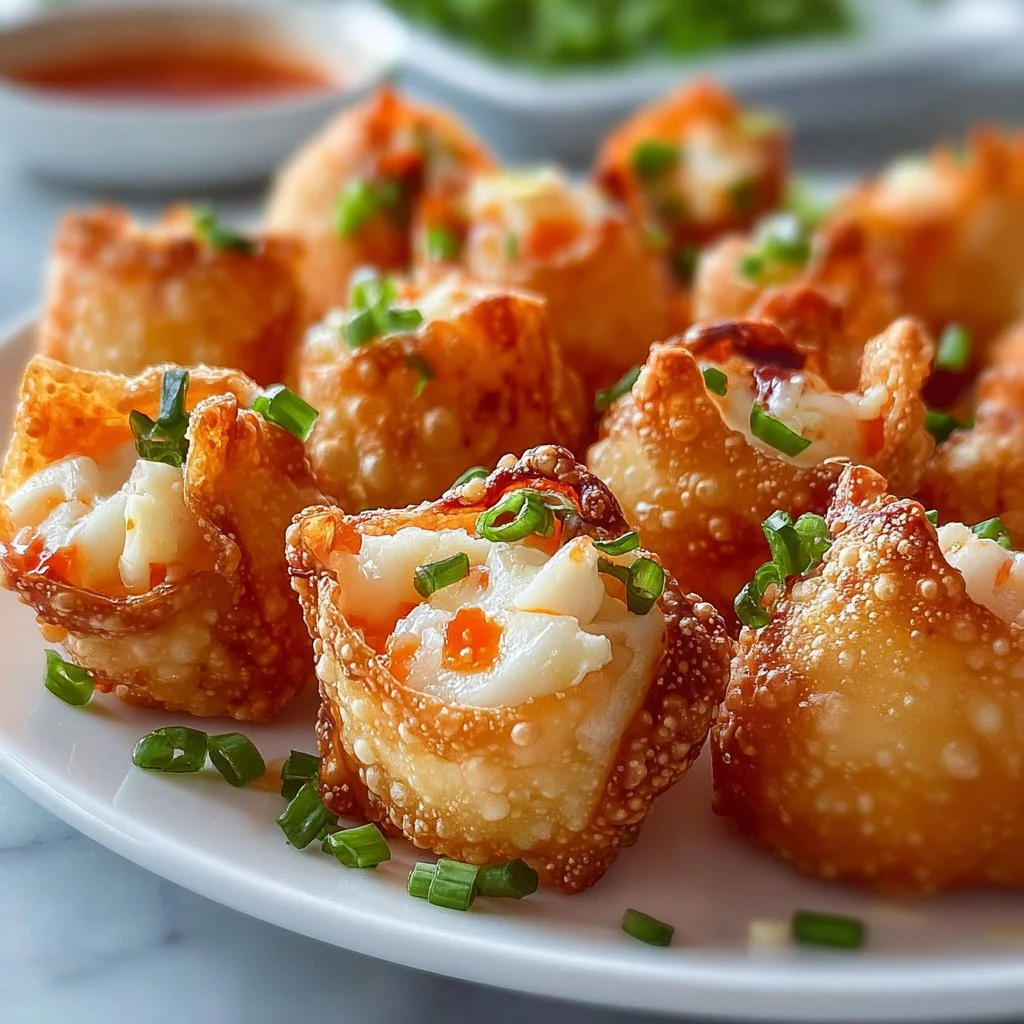
Crab Rangoon Bombs: A Delicious Twist on a Classic
Hello there, food lovers! Today, I’m shaking things up in the kitchen with a scrumptious recipe that you’re going to adore: Crab Rangoon Bombs. Imagine the delightful taste of traditional crab rangoon, but with a fun twist that makes them perfect for anything from lazy weeknight dinners to fabulous gatherings. These crispy little bombs are filled with a creamy crab filling and pack a punch of flavor, making them an instant hit at any table.
As you know, I believe cooking should be both elegant and approachable. So, whether you’re a seasoned chef or just starting your culinary journey, I hope this recipe inspires you to bring a little more joy into your kitchen. Let’s dive in and get those taste buds tingling!
A Taste of Nostalgia
Growing up, I was always fascinated by the magic of food. My family would gather around the table for special occasions, sharing stories over plates filled with our favorites. One dish that frequently made its appearance at parties was crab rangoon. I can still remember the tempting aroma of those golden-brown, crispy pockets filled with creamy goodness.
I often found myself lingering in the kitchen, watching my mom transform simple ingredients into mouthwatering bites. I loved how vibrant colors and enticing flavors came together, creating a dish that stirred up excitement before it even hit the table.
Fast forward to my adult life, and I wanted to pay homage to that beloved recipe with a twist! These Crab Rangoon Bombs embody the essence of the original but are ridiculously easy to whip up, making them the perfect choice for both formal gatherings and relaxed evenings spent at home. Let’s make some kitchen magic!
Ingredients
Here’s what you’ll need to create these delightful bombs:
-
12 wonton wrappers
These crispy little squares are the perfect vessel for your crab filling. You can usually find them in the refrigerated section of your grocery store. Can’t find wonton wrappers? Try egg roll wrappers cut into quarters for a similar effect! -
1 cup lump crab meat (fresh or canned)
The star of this dish! Fresh lump crab meat will give you the best flavor and texture, but canned crab meat will work in a pinch. Just be sure to check for shells! -
4 oz cream cheese (softened)
This adds a luscious creaminess that balances the sweet and briny flavor of the crab. For a lighter version, consider using Neufchâtel cheese. -
2 green onions (finely chopped)
These add a pop of freshness and flavor! If green onions aren’t available, finely chopped chives or shallots work well too. -
1 tsp garlic powder
A little bit of garlic powder enhances the flavor profile without overpowering the crab. If you’re a garlic lover, feel free to add a little crushed garlic! -
1 tsp soy sauce
This adds a savory umami note that ties everything together. Tamari works for a gluten-free option, or coconut aminos for a soy-free choice. -
Vegetable oil (for frying)
You’ll need this to achieve that perfect, crispy exterior. If you’re looking for alternatives, sunflower or canola oil are also great options!
Step-by-Step Instructions
Now that you’ve gathered all your ingredients, let’s get cooking! Follow these steps closely for perfectly crispy Crab Rangoon Bombs.
-
Prep the Filling
In a medium bowl, combine the softened cream cheese, lump crab meat, finely chopped green onions, garlic powder, and soy sauce. Mix gently until all ingredients are well incorporated. You want to maintain some chunkiness from the crab for that delightful texture, so don’t overmix! This is the moment to taste; feel free to adjust the seasoning to your preference. -
Assemble the Bombs
Take a wonton wrapper and place about a tablespoon of the crab filling in the center. Using your finger, wet the edges of the wonton wrapper with a little water to help it seal. Fold the wrapper over the filling to create a triangle or fold it into a pocket shape, pressing the edges firmly to seal. You can also twist the top for a fun bomb shape! Repeat this step until all the filling is used up. Lay them on a parchment-lined tray to keep them organized. -
Heat the Oil
Pour about 2 inches of vegetable oil into a large pot or deep skillet. Heat over medium heat until shimmering. To check if the oil is ready, drop a small piece of wonton wrapper into the oil; if it sizzles immediately, you’re good to go! -
Fry the Bombs
Carefully add a few of the assembled Crab Rangoon Bombs to the hot oil, ensuring not to overcrowd the pan. Fry them for about 2-3 minutes, or until they’re golden brown and crispy on all sides. Use a slotted spoon to remove them from the oil and transfer them to a paper towel-lined plate to drain excess oil. Repeat with the remaining bombs. -
Serve and Enjoy
These little beauties are best served immediately while they’re still warm and crispy. Gather your favorite dipping sauce, perhaps sweet chili sauce or soy sauce, and dig in!
Serving Suggestions
When it comes to presentation, a little thought goes a long way! Serve your Crab Rangoon Bombs on a beautiful platter garnished with sliced green onions or fresh herbs for a pop of color. Pair them with a simple dipping sauce for an extra kick and let everyone reach for their serving. It’s all about creating an inviting atmosphere—after all, food is best enjoyed shared!
Recipe Variations
Feeling adventurous? Here are some fun twists on the classic Crab Rangoon Bombs you can try:
-
Cheesy Spin: Add a handful of shredded cheese, like mozzarella or cheddar, to the crab filling for an ooey-gooey experience!
-
Spicy Kick: Mix in some sriracha or diced jalapeños for a spicy version that will wake up your taste buds.
-
Vegetarian Delight: Swap the crab with sautéed mushrooms or a mixture of chopped vegetables for a delicious vegetarian option.
-
Herb Infusion: Incorporate fresh herbs like cilantro or dill into your filling for an extra layer of flavor.
-
Baked Alternative: If you prefer a healthier option, brush the bombs with oil and bake them at 375°F (190°C) until crisp and golden.
Chef’s Notes
These Crab Rangoon Bombs have a special place in my heart. They remind me of cozy gatherings with friends where laughter and great food filled the air. Over the years, I’ve played around with the recipe, adding different flavors and fillings, but the base remains as delicious as ever. Trust me, you’ll get rave reviews whenever you serve these!
A funny little kitchen story: once, I created a batch while hosting a dinner party, and midway through frying, I got super distracted chatting with my guests. You can guess what happened next—I ended up overcooking a few, turning them into a crispy disaster! But hey, even kitchen mishaps can lead to laughs and great memories.
FAQs and Troubleshooting
-
Why are my Crab Rangoon Bombs breaking open when frying?
Ensure your wrappers are sealed tightly. If they’re not sealed, the filling can escape during frying. A dab of water goes a long way in sealing those edges! -
Can I make these ahead of time?
Absolutely! You can assemble the bombs and refrigerate them for up to 24 hours before frying. Just be sure to bring them to room temperature before frying for even cooking. -
How do I prevent the oil from splattering?
Be cautious when adding the bombs to the oil, and avoid overcrowding the pan to maintain a consistent temperature, which will help reduce splattering. -
What should I do if I have leftover filling?
Use any leftover filling as a creamy pasta sauce! Just toss it with some noodles and maybe a splash of cream. You’ll have a quick and delicious meal.
Nutritional Info
While I don’t typically provide nutritional breakdowns, I encourage you to consider the ingredients used and portion sizes. An indulgent treat, these Crab Rangoon Bombs can be made lighter by modifying the oil and introducing more veggies!
And there you have it, my darlings! An elegant, approachable recipe for Crab Rangoon Bombs that will surely impress at your next gathering. My hope is that you feel inspired to tie on your apron and get cooking. Remember, it’s all about enjoying the process and creating beautiful memories around your table. Happy cooking!
PrintCrab Rangoon Bombs

Crispy Crab Rangoon Bombs with a creamy crab filling, perfect for gatherings and weeknight dinners.
- Prep Time: 20 minutes
- Cook Time: 10 minutes
- Total Time: 30 minutes
- Yield: 4 servings 1x
- Category: Appetizer
- Method: Frying
- Cuisine: Asian
- Diet: Gluten-Free (if using gluten-free wrappers)
Ingredients
- 12 wonton wrappers
- 1 cup lump crab meat (fresh or canned)
- 4 oz cream cheese (softened)
- 2 green onions (finely chopped)
- 1 tsp garlic powder
- 1 tsp soy sauce
- Vegetable oil (for frying)
Instructions
- Prep the filling by mixing softened cream cheese, lump crab meat, green onions, garlic powder, and soy sauce in a medium bowl.
- Assemble the bombs by placing a tablespoon of crab filling in the center of each wonton wrapper, wetting edges to seal.
- Heat vegetable oil in a large pot over medium heat until shimmering.
- Fry the assembled Crab Rangoon Bombs for 2-3 minutes until golden brown, then transfer to a paper towel-lined plate.
- Serve immediately with your favorite dipping sauce.
Notes
Feel free to customize with different fillings or serve baked for a healthier option.
Nutrition
- Serving Size: 3 Bombs
- Calories: 300
- Sugar: 1g
- Sodium: 350mg
- Fat: 20g
- Saturated Fat: 6g
- Unsaturated Fat: 10g
- Trans Fat: 0g
- Carbohydrates: 30g
- Fiber: 1g
- Protein: 10g
- Cholesterol: 40mg
Keywords: Crab Rangoon, appetizer, Asian cuisine, fried snacks, party food

Garlic Butter Steak and Potatoes Skillet
Sizzle Into Flavor: Garlic Butter Steak and Potatoes Skillet
Hello, my delicious friends! Have you ever stumbled upon a recipe that feels like a warm hug, igniting sweet memories and making any evening feel special? Well, today, I’m pretty stoked to share one of my all-time favorites with you—Garlic Butter Steak and Potatoes Skillet. This dish isn’t just a meal; it’s a memory-maker, a table-gatherer, and a true comfort in the kitchen.
Picture this: it’s a cozy Friday night in, the kind where the week just slips away, and you can finally unwind. You’re in the kitchen with the scent of sizzling steak and fragrant garlic dancing through the air. This dish is all about simplicity and elegance, but trust me, it packs a punch in flavor! Cooking doesn’t need to be intimidating; it simply requires the right ingredients, a sprinkle of love, and a dash of intention.
So, grab your favorite apron, tie it on, and let’s dive into the savory world of Garlic Butter Steak and Potatoes! Whether you’re enjoying a mellow evening with family or whipping up a romantic dinner for two, this is the dish that sets the mood just right.
A Slice of Nostalgia
Growing up, our kitchen was the heart of our home, and I still remember those delicious Friday dinners my mom would whip up. One particular evening stands out—she made steak just like this one, and I can still recall the irresistible aroma that filled our home. I remember sneaking bites of the buttery, garlic-infused steak while it rested, hoping no one would notice. Pure bliss!
My mom had this magical way of infusing love into every dish, making even the simplest meals feel festive. As I took my first bite of that perfectly cooked steak, I felt a sense of belonging and warmth wash over me. That’s the beauty of food—it brings us together and creates cherished moments.
So now, whenever I prepare Garlic Butter Steak and Potatoes, I’m not just cooking; I’m recreating those beautiful memories. It’s a tradition that continues to echo through the years, reminding me that great food doesn’t just satisfy hunger; it nourishes the soul.
Ingredients
Ready to embark on a flavorful journey? Here’s what you’ll need to create this scrumptious dish:
-
2 ribeye steaks: A flavorful cut known for its marbling and tenderness. Look for steaks that are at least 1-inch thick for perfect cooking. If ribeye isn’t available, feel free to substitute with sirloin or filet mignon.
-
2 tablespoons garlic, minced: Garlic adds a punchy flavor profile and complements the richness of the steak beautifully. For a milder taste, consider using shallots or scallions instead.
-
4 tablespoons butter: Ah, the magic of butter! It adds richness and flavor to the dish. Opt for unsalted butter so you can control the saltiness. For a dairy-free option, use olive oil or vegan butter.
-
1 pound baby potatoes, halved: These little gems add a delightful texture and absorb all the wonderful flavors of the dish. If you can’t find baby potatoes, yellow or red potatoes work perfectly too.
-
Salt and pepper to taste: Seasoning is essential! Freshly cracked black pepper and kosher salt will elevate the entire dish.
-
Fresh parsley, chopped (for garnish): A sprinkle of parsley adds color and freshness. You can replace it with chives or thyme for a different flavor twist.
Step-by-Step Instructions
Now, let’s roll up our sleeves and get cooking! Here’s how to create this mouthwatering Garlic Butter Steak and Potatoes Skillet, step by step:
-
Prep Your Ingredients: Start by gathering all your ingredients. Wash and halve the baby potatoes, mince your garlic, and let your steaks come to room temperature. This helps them cook evenly.
-
Season the Steak: Generously season your ribeye steaks with salt and pepper on both sides. Don’t be shy—this is your chance to infuse flavor!
-
Cook the Potatoes: In a large skillet, heat 2 tablespoons of butter over medium heat. Add the halved baby potatoes, cut side down. Cook for about 10-12 minutes until they’re golden and crispy, shaking the pan occasionally to prevent sticking. If you need a little more flavor, toss in a pinch of garlic during this step!
-
Add Garlic: Once the potatoes are beautifully roasted, push them to the side of the skillet (or remove them momentarily). Add the minced garlic to the open space and let it sauté for about 30 seconds until fragrant. Be careful—garlic burns quickly!
-
Sear the Steak: Now, it’s time for the star of the show! Push the potatoes to the side again and add the remaining 2 tablespoons of butter to the skillet. Once it’s sizzling, add the steaks. Sear for about 4-5 minutes per side, depending on your desired doneness. Use a meat thermometer for accuracy: 130°F for medium-rare, 140°F for medium!
-
Baste the Steak: While the steaks are cooking, spoon the melted butter and garlic mixture over the top. This technique not only adds incredible flavor but also ensures your steak stays juicy.
-
Rest and Garnish: Once your steaks reach the desired temperature, remove them from the skillet and let them rest for about 5 minutes. This allows the juices to redistribute. During this time, don’t forget to sprinkle a generous amount of fresh parsley over your potatoes!
-
Plate Up: Slice the steak against the grain into thick slices, arrange it beautifully on a plate alongside those golden potatoes, and don’t forget to drizzle any remaining garlic butter over everything for that extra oomph!
Serving Suggestions
Presentation is key! To serve, take a large platter and lay your sliced steak in a fan shape next to the crispy potatoes. As a lovely finishing touch, drizzle some of that fragrant garlic butter over the top and garnish with freshly chopped parsley. Serve with a glass of red wine or a crisp salad for a complete meal!
Recipe Variations
Want to switch things up? Here are a few creative twists to try:
-
Herb Butter: Instead of plain butter, whip in chopped fresh herbs like rosemary or thyme for an aromatic kick.
-
Spicy Kick: Add a pinch of red pepper flakes to the garlic butter for an exciting spicy note!
-
Vegetable Boost: Toss in some seasonal vegetables like asparagus or green beans to make the dish even more colorful and nutritious.
-
Mustard Kiss: Brush the steaks with a thin layer of Dijon mustard before seasoning, for an extra layer of flavor that’s bold and tasty.
-
Vegan Variation: Swap the ribeye for a hearty portobello mushroom cap. Cook it similarly, and enjoy a delicious plant-based version!
Chef’s Notes
As every home cook knows, recipes evolve. Over the years, I’ve experimented with this dish, trying different cuts of meat and various potatoes. One of my funniest kitchen memories involves my best friend trying to impress her date with this recipe. She accidentally mixed up the measurements for salt and sugar. Let’s just say dessert wasn’t served after that dinner!
But in all seriousness, cooking is all about trial and error. Don’t be afraid to make this recipe your own! Embrace the beauty of imperfection in the kitchen, and remember that each meal is an opportunity to create new stories.
FAQs and Troubleshooting
1. My steak turned out tough; what did I do wrong?
- Tough steak usually results from overcooking. Use a meat thermometer to avoid this. Aim for medium-rare to medium for the best tenderness.
2. My potatoes didn’t crisp up; what happened?
- Make sure not to overcrowd the skillet when cooking the potatoes. Space is crucial for that coveted golden crisp!
3. Can I make this ahead of time?
- While the steak is best served fresh, you can pre-cook the potatoes. Just reheat them in the oven for a few minutes before serving.
4. What if I don’t have a skillet?
- You can use any oven-safe pan—cast iron works wonderfully, but even a regular baking tray can work if you finish the dish in the oven!
Nutritional Info
This recipe serves approximately 4 people. Here’s the estimated nutritional breakdown per serving:
- Calories: 600
- Protein: 40g
- Fat: 45g
- Carbohydrates: 30g
- Fiber: 5g
Now, my friends, you’re ready to dive into the culinary adventure of Garlic Butter Steak and Potatoes Skillet! Remember, the heart of every meal lies in the love and intention you bring to it. Happy cooking, and may your kitchen always be filled with the aroma of delicious meals and laughter! Let’s set the table!
PrintGarlic Butter Steak and Potatoes Skillet

A comforting dish of seared ribeye steaks complemented by crispy baby potatoes in a rich garlic butter sauce.
- Prep Time: 15 minutes
- Cook Time: 30 minutes
- Total Time: 45 minutes
- Yield: 4 servings 1x
- Category: Main Course
- Method: Skillet
- Cuisine: American
- Diet: None
Ingredients
- 2 ribeye steaks
- 2 tablespoons garlic, minced
- 4 tablespoons butter
- 1 pound baby potatoes, halved
- Salt and pepper to taste
- Fresh parsley, chopped (for garnish)
Instructions
- Prep your ingredients: Start by gathering all your ingredients. Wash and halve the baby potatoes, mince your garlic, and let your steaks come to room temperature.
- Season the steak: Generously season your ribeye steaks with salt and pepper on both sides.
- Cook the potatoes: In a large skillet, heat 2 tablespoons of butter over medium heat. Add the halved baby potatoes, cut side down, and cook for about 10-12 minutes.
- Add garlic: Once the potatoes are beautifully roasted, push them to the side and add the minced garlic to the skillet.
- Sear the steak: Add the remaining 2 tablespoons of butter to the skillet and sear the steaks for about 4-5 minutes per side.
- Baste the steak: While the steaks are cooking, spoon the melted butter and garlic over the top.
- Rest and garnish: Once cooked, let the steaks rest for about 5 minutes and sprinkle parsley over the potatoes.
- Plate up: Slice the steak and arrange it with the potatoes, drizzling any remaining garlic butter over everything.
Notes
For a vegan version, swap the ribeye for a portobello mushroom cap and use vegan butter.
Nutrition
- Serving Size: 1 serving
- Calories: 600
- Sugar: 2g
- Sodium: 800mg
- Fat: 45g
- Saturated Fat: 18g
- Unsaturated Fat: 24g
- Trans Fat: 1g
- Carbohydrates: 30g
- Fiber: 5g
- Protein: 40g
- Cholesterol: 100mg
Keywords: steak, garlic butter, skillet, potatoes, comfort food

Beef and Cheese Chimichangas
Dive into Deliciousness: Beef and Cheese Chimichangas
Welcome back to Ivory Apron, everyone! If there’s one thing I want to share with you today, it’s that cooking can be both elegant and approachable, especially when it comes to comfort food classics like Beef and Cheese Chimichangas. These delightful, crispy rolls are filled with seasoned ground beef, luscious cheese, and a chorus of flavors that sing throughout each bite. Whether you’re hosting a lively dinner party or just craving something hearty for weeknight dinner, chimichangas bring a burst of joy to the table.
Now, let’s talk about what makes chimichangas so special. These delicious pockets of goodness are the ultimate comfort food. Picture this: a warm tortilla filled to the brim with savory meat, gooey cheese, and a hint of spice, fried to golden perfection. Sounds tempting, right? But there’s more to this dish than just their mouthwatering taste. Chimichangas are best enjoyed with friends and family, making them a fantastic centerpiece for gatherings. So, grab your apron, and let’s get cooking!
A Bite of Nostalgia
Let me take you back to a cozy fall evening a few years ago. It was one of those rare occasions when all my friends from college managed to gather at my place. The air was crisp, and we were all bundled up, ready for a fun night filled with laughter and stories. I decided to whip up my version of chimichangas—a recipe I had been perfecting over the years.
With laughter echoing in my kitchen, we chatted about old times as I sautéed ground beef and added the spices that filled the room with a mouthwatering aroma. I can still picture my friends’ faces lighting up when they took that first bite. The crispy shell gave way to the savory, cheesy filling, and it was pure bliss. We paired them with homemade guacamole, fresh salsa, and a zingy lime crema that made everything taste even better. It was one of those unforgettable evenings! Now, every time I make chimichangas, I’m reminded of that warm gathering, filled with food, friends, and fantastic memories.
Ingredients
Here’s what you’ll need to make these scrumptious Beef and Cheese Chimichangas:
-
1 lb ground beef
(Use lean ground beef for a healthier option! You can also swap it out for ground chicken or turkey for a lighter twist.) -
1 small onion (finely diced)
(Onions add sweet and savory depth. If you’re not a fan, sauté some bell peppers or shallots instead for a different flavor.) -
2 cloves garlic (minced)
(Garlic packs a flavor punch! You can use garlic powder as a quick alternative—1/4 teaspoon per clove.) -
1 packet (1 oz) taco seasoning (or homemade)
(Feel free to use store-bought seasoning, but nothing beats a homemade blend of chili powder, cumin, and paprika!) -
½ cup salsa
(Choose your favorite salsa; the level of spice is up to you! For a fresh kick, try pico de gallo or even some zesty green salsa.) -
1 cup refried beans
(These add creaminess and an extra layer of flavor. For a vegetarian twist, use black beans or even lentils.) -
1 ½ cups shredded cheddar cheese (or Mexican blend)
(Cheddar is classic, but Monterey Jack or pepper jack cheese can add a delightful twist!) -
6 large flour tortillas (burrito-size)
(Larger tortillas wrap better, but corn tortillas work if you’re going gluten-free. Just soften them beforehand.) -
2 tbsp vegetable oil (for brushing/frying)
(I love avocado oil for a richer flavor; it’s also great for frying!)
Step-by-Step Instructions
Ready to create these golden wonders? Let’s break it down step by step!
-
Brown the Beef
In a large skillet over medium heat, add the ground beef. Cook until browned, breaking it up with a wooden spoon (about 6-8 minutes). A little kitchen hack: using a potato masher speeds up the crumbling process, ensuring an even texture. -
Add Onions and Garlic
Once the beef is browned, stir in the finely diced onion. Cook until it’s soft and translucent (about 3-4 minutes). Add the minced garlic and taco seasoning, mixing well for another minute to allow the flavors to bloom. -
Stir in Salsa and Beans
Pour in the salsa and refried beans, stirring to combine everything. Cook for about 2-3 minutes until heated through. Note: Taste your filling here! This is the moment to adjust seasonings if you’d like — a touch more cumin or even a sprinkle of cayenne for heat! -
Assemble the Chimichangas
Lay one tortilla on a flat surface. Spoon a generous amount of the beef mixture in the center (about 1/4 cup should do). Sprinkle some shredded cheese on top. To fold: bring the sides of the tortilla toward the center, then roll it up tightly like a burrito. Repeat with the remaining tortillas. -
Prep for Frying
Preheat your oven to 400°F (200°C). If you’re opting to bake instead of fry, a quick brush with oil will give you all the goodness—so don’t skip this step! For frying, heat vegetable oil in a deep skillet or Dutch oven over medium-high heat. -
Fry or Bake
If frying, carefully place the chimichangas in the hot oil, seam-side down. Fry for about 3-4 minutes per side or until golden brown. If baking, place them seam-side down on a baking sheet, brush with oil, and bake for 20 minutes, turning halfway through until crispy. -
Drain and Serve
If you fried them, transfer the chimichangas to a paper towel-lined plate to drain excess oil. Either way, let them cool for a minute, then get ready to serve!
Serving Suggestions
Now, for the fun part—serving! Arrange your chimichangas on a large platter, maybe sprinkle some chopped cilantro or green onions on top for a fresh pop of color. Pair them with side dishes like guacamole, sour cream, or a vibrant salad for a delightful contrast. Don’t forget a squeeze of lime; it cuts through the richness beautifully!
Recipe Variations
-
Spicy Vegetarian Option
Swap the beef for a mix of sautéed bell peppers, zucchini, and black beans. Use pepper jack cheese for an extra kick! -
Buffalo Chicken Style
Replace the beef with shredded cooked chicken and toss it in buffalo sauce. Add creamy blue cheese crumbles instead of cheddar! -
Breakfast Chimichangas
Fill with scrambled eggs, crumbled breakfast sausage, and cheese. Perfect for brunch or a cozy weekend meal! -
Sweet and Savory
For a fusion twist, incorporate caramelized apples or pears with brie cheese for a unique dessert chimichanga. -
BBQ Beef Delight
Substitute taco seasoning with BBQ sauce and pulled beef for a smoky flavor profile.
Chef’s Notes
I love how chimichangas can adapt to whatever I have lying around! This recipe has evolved for me over the years—from traditional beef fillings to experimenting with all sorts of flavors. A fun memory I have is of a friends’ potluck where I brought a batch of sweet and savory chimichangas, filled with smoky barbecue and topped with a chipotle crema. They were an instant hit!
One thing to remember—your chimichangas don’t need to be perfect. Embrace those little imperfections; they make your cooking unique. Just enjoy the process!
FAQs and Troubleshooting
-
What if I can’t find large tortillas?
No worries! You can use medium tortillas; just reduce the filling amount and adjust your cooking time since they’ll fry up faster. -
How do I prevent the filling from leaking?
Make sure to fold the tortillas tightly and seal the edges with a little water or a mix of flour and water if you’re feeling fancy! -
Can I make these ahead of time?
Absolutely! You can prepare the filling and assemble the chimichangas in advance. Store them covered in the fridge and fry/bake them just before serving. -
Why are my chimichangas not crispy?
Ensure the oil is hot enough (around 350°F). If it’s not hot, they will absorb too much oil and become soggy. Use a thermometer for accuracy!
Dive In!
Ready to create and share these delectable Beef and Cheese Chimichangas? I promise they’re as fun to make as they are to eat. Tie on that apron, gather your favorite people, and whip up something delicious that’ll have everyone asking for seconds. Bon appétit!
PrintBeef and Cheese Chimichangas

Crispy rolls filled with seasoned ground beef, cheese, and a hint of spice, perfect for gatherings or a hearty weeknight dinner.
- Prep Time: 20 minutes
- Cook Time: 30 minutes
- Total Time: 50 minutes
- Yield: 6 servings 1x
- Category: Main Course
- Method: Frying or Baking
- Cuisine: Mexican
- Diet: None
Ingredients
- 1 lb ground beef
- 1 small onion (finely diced)
- 2 cloves garlic (minced)
- 1 packet (1 oz) taco seasoning
- ½ cup salsa
- 1 cup refried beans
- 1 ½ cups shredded cheddar cheese
- 6 large flour tortillas (burrito-size)
- 2 tbsp vegetable oil (for brushing/frying)
Instructions
- Brown the beef in a skillet over medium heat until browned, about 6-8 minutes.
- Add the onions and cook until soft, about 3-4 minutes, then stir in garlic and taco seasoning.
- Stir in salsa and refried beans, and cook for about 2-3 minutes until heated through.
- Assemble each tortilla with beef mixture and cheese, folding and rolling tightly.
- Preheat the oven to 400°F (200°C) if baking, or heat oil if frying.
- Fry in hot oil for 3-4 minutes per side or Bake for 20 minutes, turning halfway through.
- Drain excess oil on paper towels (if frying) and let cool slightly before serving.
Notes
Serve with guacamole, sour cream, or a vibrant salad. Feel free to adapt fillings for different variations.
Nutrition
- Serving Size: 1 chimichanga
- Calories: 400
- Sugar: 3g
- Sodium: 600mg
- Fat: 18g
- Saturated Fat: 7g
- Unsaturated Fat: 8g
- Trans Fat: 0g
- Carbohydrates: 40g
- Fiber: 4g
- Protein: 25g
- Cholesterol: 60mg
Keywords: chimichangas, beef, cheese, Mexican, comfort food, party food

Cheesy Taco Sticks
Cheesy Taco Sticks: The Perfect Party Appetizer
Welcome to another delightful post from Ivory Apron! Today, we’re diving into the world of Cheesy Taco Sticks—a dish that perfectly combines bold flavors, gooey cheese, and a crispy texture that everyone will love. Whether it’s a casual weeknight dinner, a weekend gathering, or game day snacking, these cheesy delights will quickly become a family favorite. So, tie on your apron and let’s get started!
Personal Story
Picture this: a bustling kitchen filled with the sounds of laughter, sizzling pans, and the mouthwatering aroma of tacos. I remember one unforgettable taco night with my family when I was younger. My mom was busy whipping up her famous taco spread, and the excitement in the air was palpable. As she called us in, I spotted the melted cheese bubbling over the top of our ground beef tacos. This wasn’t just about the food; it was about the time spent together, the stories shared, and, of course, the fun of building our own taco creations.
Fast forward to today, and I’ve taken that nostalgic feeling and transformed it into something a little different—Cheesy Taco Sticks! They’re easy to make, fun to share, and bring back all those warm memories of family taco nights. So, whether you’re hosting a game night with friends or just looking for a cozy meal with loved ones, these cheesy treats will do the trick!
Ingredients
Let’s gather our ingredients! Here’s what you need for these Cheesy Taco Sticks:
-
1 package of flour tortillas
- These soft, chewy tortillas serve as the perfect vessel for all the delicious fillings. You can substitute with whole wheat or corn tortillas if you prefer a different flavor or texture!
-
1 cup shredded cheddar cheese
- Cheddar brings a tangy, bold flavor to our taco sticks. If you’re feeling adventurous, try a blend of cheeses like Monterey Jack or pepper jack for an extra kick!
-
1 cup cooked taco meat (beef or turkey)
- Ground beef is classic, but don’t shy away from ground turkey for a leaner option! Feel free to season your meat with your favorite spices to enhance the flavors.
-
1/2 cup salsa
- Salsa adds a vibrant kick! If you’re looking for a milder option, go with a chunky tomato salsa. For a spicy version, opt for a salsa verde or a roasted salsa to give it more depth and flavor.
-
1 tablespoon taco seasoning
- This is where the magic happens! You can use store-bought seasoning or mix your own with cumin, paprika, garlic powder, and a pinch of cayenne for some heat.
-
Cooking spray or olive oil for brushing
- A light brush of oil or spray helps the taco sticks become crispy and golden. You can use cooking spray for convenience or a drizzle of olive oil for a little extra flavor.
Step-by-Step Instructions
-
Preheat Your Oven:
Preheat your oven to 400°F (200°C). This ensures your Cheesy Taco Sticks will be perfectly crispy and golden brown when they come out of the oven. -
Prepare Your Taco Filling:
In a mixing bowl, combine the cooked taco meat, shredded cheddar cheese, salsa, and taco seasoning. Stir until well mixed. The cheese will act like a delicious glue that holds everything together, and the salsa will add moisture and flavor. Test it for seasoning—after all, a tasty filling is the heart of any good taco stick! -
Assemble the Taco Sticks:
Lay a flour tortilla on a clean surface. Spoon a generous amount of your taco filling onto one end of the tortilla. The key is not to overfill; less is often more here! Roll the tortilla tightly like a burrito, tucking in the ends as you go to secure the filling. Repeat this with the remaining tortillas. -
Brush and Bake:
Place the rolled taco sticks seam-side down on a baking sheet lined with parchment paper. Lightly spray or brush the tops with cooking spray or olive oil—this helps achieve that desirable golden crust. -
Bake Until Golden:
Bake them in your preheated oven for about 15-20 minutes until the tortillas are crisp and the cheese is melted and bubbly. Keep an eye on them to ensure they don’t brown too quickly! -
Slice and Serve:
Once out of the oven, allow them to cool for a few minutes before slicing them into bite-sized pieces. You can cut them diagonally for that trendy presentation or straight across for easy dipping.
Serving Suggestions
Serve your Cheesy Taco Sticks on a large platter with a selection of dipping sauces like sour cream, guacamole, or extra salsa. For flair, garnish with fresh cilantro or sliced green onions to make it visually stunning and appetizing. Whether it’s a party or a family dinner, these sticks are sure to be a hit!
Recipe Variations
Want to put a twist on these Cheesy Taco Sticks? Here are some fun ideas to experiment with:
-
Buffalo Chicken Taco Sticks: Use shredded buffalo chicken in place of taco meat and add a sprinkle of blue cheese for a spicy kick.
-
Vegetarian Delight: Substitute the meat with black beans or lentils. Throw in some corn and diced bell peppers for an added crunch.
-
Tex-Mex Twist: Mix in some chopped jalapeños or diced green chiles for a spicy touch.
-
Cheesy Veggie Option: Swap the beef for a melty cheese and spinach mixture for a delicious veggie option everyone can enjoy.
-
Breakfast Taco Sticks: Use scrambled eggs, breakfast sausage, and cheese wrapped in tortillas for a fun breakfast twist!
Chef’s Notes
Cooking is all about finding joy in the process, and these Cheesy Taco Sticks are no exception! I’ve had some hilarious mishaps while making these—like the time I accidentally added too much taco seasoning and turned our meal into a spicy adventure!
Over the years, this recipe has evolved from simple tacos to these trendy taco sticks that please both kids and adults alike. Remember, there are no hard and fast rules—keep experimenting and make it your own!
FAQs and Troubleshooting
1. What can I do if my taco sticks are soggy?
If you find your taco sticks are soggy, make sure to use a generous amount of cheese to bind the filling, and avoid adding too much liquid from the salsa. A sprinkle of additional cheese on top before baking can also help create a crispier texture.
2. Can I prepare these ahead of time?
Absolutely! You can assemble your taco sticks in advance and store them in the fridge. Just make sure to bake them fresh when you’re ready to serve so they maintain that delicious crunch.
3. How do I store leftovers?
If you have any leftovers (though they’re unlikely!), store them in an airtight container in the fridge. They can be reheated in the oven or air fryer for that crispy texture again.
4. Can I freeze these taco sticks?
Yes! These taco sticks freeze well. Just freeze them before baking, and when you’re ready to enjoy, bake from frozen—just add a few extra minutes to the cook time.
Nutritional Info
(If desired, please customize based on recipe specifics but here’s a general outline)
- Serving Size: 1 Stick
- Calories: Approx. 180
- Protein: 7g
- Fat: 8g
- Carbohydrates: 22g
There you have it! A delightful journey from the nostalgia of taco nights to creating your delicious Cheesy Taco Sticks. I hope you’re inspired to hop into your kitchen and make these for your next gathering. Remember, cooking is all about love and sharing, so gather your friends or family and enjoy the process. Happy cooking!
PrintCheesy Taco Sticks

Delicious Cheesy Taco Sticks combining bold flavors and gooey cheese, perfect for parties or family dinners.
- Prep Time: 15 minutes
- Cook Time: 20 minutes
- Total Time: 35 minutes
- Yield: 4 servings 1x
- Category: Appetizer
- Method: Baking
- Cuisine: Mexican
- Diet: Vegetarian option available
Ingredients
- 1 package of flour tortillas
- 1 cup shredded cheddar cheese
- 1 cup cooked taco meat (beef or turkey)
- 1/2 cup salsa
- 1 tablespoon taco seasoning
- Cooking spray or olive oil for brushing
Instructions
- Preheat your oven to 400°F (200°C).
- Combine the cooked taco meat, shredded cheddar cheese, salsa, and taco seasoning in a mixing bowl.
- Lay a flour tortilla on a clean surface and spoon a generous amount of filling onto one end.
- Roll the tortilla tightly like a burrito, tucking in the ends as you go.
- Place the rolled taco sticks seam-side down on a baking sheet lined with parchment paper.
- Brush the tops with cooking spray or olive oil.
- Bake for 15-20 minutes until the tortillas are crisp and the cheese is melted.
- Allow to cool for a few minutes before slicing into bite-sized pieces.
Notes
Serve with sour cream, guacamole, or extra salsa; garnish with fresh cilantro or sliced green onions.
Nutrition
- Serving Size: 1 stick
- Calories: 180
- Sugar: 2g
- Sodium: 500mg
- Fat: 8g
- Saturated Fat: 4g
- Unsaturated Fat: 3g
- Trans Fat: 0g
- Carbohydrates: 22g
- Fiber: 1g
- Protein: 7g
- Cholesterol: 30mg
Keywords: Cheesy Taco Sticks, Party Appetizer, Mexican Recipe

Heavenly Oreo Lemon Dessert
Heavenly Oreo Lemon Dessert: A Delightful Treat to Brighten Your Day
Hello, fellow food enthusiasts! If you’re ready to embark on a culinary journey that harmonizes the rich, chocolatey goodness of Oreos with the zesty, refreshing notes of lemons, then you’ve stumbled upon the perfect recipe! Today, I’m thrilled to share my Heavenly Oreo Lemon Dessert—a sweet indulgence that’s not only super easy to make but also sure to steal the spotlight at your next gathering.
Introduction
Let’s face it—life can sometimes feel a bit heavy, like that feeling when you have too many dishes in the sink or the laundry is piling up. So, what’s a great way to lift your spirits? A beautiful dessert, of course! This Heavenly Oreo Lemon Dessert combines the classic flavors of Oreos with a light, creamy lemon filling that dances on your taste buds. It’s the kind of dessert that brings joy with every bite—perfect for celebrations, picnics, or simply a treat for yourself after a long day.
You know, when I first made this delightful dish, I wasn’t sure how the creamy lemon would pair with the crunchy chocolate crumbs. But after the first taste, I was hooked! The flavors meld so perfectly that they create a blissful medley that’s both indulgent and refreshing. Plus, there’s something unique and playful about using Oreos in a dessert that’s meant to be light and airy. Whether you’re serving it at a dinner party or simply treating yourself on a Tuesday, this dessert will undoubtedly impress!
And here’s the best part: it requires minimal effort and just a few simple ingredients! So, roll up your sleeves and let’s create something extraordinary that’s guaranteed to create beautiful moments around your table.
Personal Story
I remember the first time I rolled out this dessert at a family get-together. My cousin was celebrating her birthday, and I was determined to try a refreshing twist on the traditional chocolate cake. As I whipped together the creamy filling and crushed Oreos, I could hear the cheerful chatter, laughter, and clinking of glasses in the background.
When I brought this dessert out, I was met with curious gazes followed by wide smiles. One bite and everyone was swept away by the refreshing lemon flavor—a perfect complement to the rich, chocolatey crust. That day, my dessert not only stole the show; it also became the highlight of our family gatherings. Now, I can’t make this dessert without thinking of that joyful day filled with love, laughter, and—of course—amazing food. It’s incredible how a simple recipe can create lasting memories!
Ingredients
Here’s what you need for this delightful treat:
-
1 package of Oreo cookies
The star of our crust! You can use regular Oreos or try other varieties like Golden Oreos for a fun twist. -
1/2 cup unsalted butter, melted
This helps bind the crushed Oreos together, creating a deliciously crisp crust. If you’re looking for a dairy-free option, coconut oil works well as a substitute! -
8 oz cream cheese, softened
Adds that rich, creamy texture. For a lighter alternative, consider using Neufchâtel cheese, which has less fat but still delivers on creaminess. -
1/2 cup powdered sugar
Sweetens the filling without adding graininess. If you’re looking for a healthier option, you can substitute it with agave syrup or honey—just adjust the quantity to taste! -
1 cup whipped topping
This gives the dessert a light, fluffy feel. Can’t find ready-made whipped topping? Feel free to whip some heavy cream until soft peaks form—it’ll add an extra luscious touch! -
1 cup lemon juice
The star flavor that brings the zing! Freshly squeezed lemon juice makes a noticeable difference, but you can use bottled juice in a pinch. -
1 tablespoon lemon zest
This enhances the lemon flavor and adds a delightful aroma. Zesting is easy—just make sure to use the outer yellow layer of the lemon without the bitter white pith.
Step-by-Step Instructions
Now that you’ve got your ingredients ready, let’s dive into the cooking process! This dessert is all about simplicity and flavor, so I’ll guide you through each step.
-
Prep the Crust
Start by crushing your Oreo cookies into fine crumbs. You can place them in a zip-top bag and smash them with a rolling pin, or use a food processor—my favorite method! These little beauties will be the foundation of our dessert. Once they’re crushed, transfer them to a mixing bowl. -
Combine with Butter
Pour the melted unsalted butter over the Oreo crumbs. Mix with a fork until the crumbs are evenly coated and resemble wet sand. It’s okay if there are a few larger bits; they’ll add a nice texture! -
Form the Crust
Press the mixture into the bottom of a 9×9-inch square baking pan (or any dish you have on hand). Make sure to pack it firmly; this will help it hold together nicely when you cut into it later. Once done, pop it into the fridge to set while you prepare the filling. -
Make the Filling
In a large mixing bowl, beat the softened cream cheese and powdered sugar together until smooth and creamy. This usually takes about 2-3 minutes. Remember to scrape the sides of the bowl to combine everything thoroughly! -
Add Whipped Topping and Lemon Juice
Gently fold in the whipped topping using a spatula. This helps keep the filling light and airy. Next, add in the lemon juice and zest. Mix until fully combined and oh-so-creamy—this will make your heart sing! -
Spread the Filling
Pour the luscious lemon cream filling over your chilled Oreo crust. Smooth the top with a spatula for a polished finish—you want it to look as good as it tastes! -
Chill to Set
Cover the dish with plastic wrap and chill in the refrigerator for at least 4 hours (or overnight if you can resist!). This allows the filling to firm up and the flavors to meld beautifully. Trust me, the wait will be worth it!
Serving Suggestions
When it’s time to serve, slice this dessert into squares for that perfect bite-sized treat! You can garnish each piece with a sprinkle of extra lemon zest or a dollop of whipped topping for that elegant touch. Pair it with a fresh mint leaf for a pop of color—presentation is key, even for a laid-back dessert!
Recipe Variations
Feeling adventurous? Here are a few delicious twists you can try:
-
Berry Delight: Add a layer of fresh berries (like strawberries or blueberries) on top of your lemon filling before chilling for a fruity burst.
-
Choco-Mint Magic: Mix in a drop of peppermint extract into the filling for a refreshing minty flavor that complements the chocolate crust beautifully.
-
Gluten-Free Option: Use gluten-free Oreo cookies if you want to make this dessert suitable for gluten-sensitive friends or family.
Chef’s Notes
Throughout my culinary journey, I’ve learned that cooking is all about experimentation and fun! The first time I made this dessert, it was just a spontaneous idea after I found a stash of Oreos in my pantry. Now, it’s become a staple in my dessert repertoire! It never fails to evoke fond memories while delighting everyone who takes a bite.
One of my favorite kitchen moments involved me not checking the consistency of the filling before serving it to guests. Let’s just say it turned into an impromptu “scoop your own” dessert night! My friends embraced the sheer chaos and hilarity, turning it into a fun story we still laugh about. Just remember, even if things don’t go as planned, embrace the experience—it’s all part of the journey!
FAQs and Troubleshooting
1. Can I prepare the dessert a day ahead?
Definitely! In fact, doing so allows the flavors to meld and the texture to set perfectly. It’s ideal for parties!
2. Why is my filling too runny?
If your cream cheese wasn’t softened enough, it might not mix well. Make sure to allow it to come to room temperature before starting. If the filling is still too runny, a touch more powdered sugar can help thicken it.
3. How can I store leftovers?
Cover any leftovers (if you’re lucky enough to have some!) tightly in the fridge. They should last for about 3-4 days. Just make sure to enjoy this treat soon—the flavors are best when fresh!
4. Can I freeze this dessert?
Absolutely! Just wrap it tightly in plastic wrap, then foil, and you can freeze it for up to a month. Thaw in the fridge before serving!
Nutritional Info
While focusing on enjoyment and satisfaction when creating this Heavenly Oreo Lemon Dessert, it’s important to acknowledge the nutrition too! Each serving (based on a typical 9×9 dessert) contains approximately:
- Calories: 320
- Total Fat: 18g
- Saturated Fat: 9g
- Carbohydrates: 39g
- Protein: 4g
(Note: These numbers may vary slightly based on specific ingredient brands and amounts used.)
There you have it—an approachable, delightful recipe that celebrates the perfect marriage of chocolate and lemon! I can’t wait for you to try this Heavenly Oreo Lemon Dessert! Each bite is an invitation to savor the moment, whether surrounded by friends or enjoying a quiet evening at home. So tie on your apron, gather your ingredients, and let’s create something beautiful together! Happy cooking! 🍋💕
PrintHeavenly Oreo Lemon Dessert

A delightful dessert that combines the rich chocolatey goodness of Oreos with a zesty lemon filling, perfect for any gathering.
- Prep Time: 15 minutes
- Cook Time: 0 minutes
- Total Time: 240 minutes
- Yield: 9 servings 1x
- Category: Dessert
- Method: Chilling
- Cuisine: American
- Diet: Vegetarian
Ingredients
- 1 package of Oreo cookies
- 1/2 cup unsalted butter, melted
- 8 oz cream cheese, softened
- 1/2 cup powdered sugar
- 1 cup whipped topping
- 1 cup lemon juice
- 1 tablespoon lemon zest
Instructions
- Prep the crust by crushing the Oreo cookies into fine crumbs. Transfer them to a mixing bowl.
- Combine the melted unsalted butter with the Oreo crumbs and mix until evenly coated.
- Form the crust by pressing the mixture into the bottom of a 9×9-inch square baking pan. Chill in the fridge.
- Make the filling by beating the softened cream cheese and powdered sugar until smooth and creamy.
- Add the whipped topping, lemon juice, and lemon zest to the cream cheese mixture and mix until combined.
- Spread the lemon cream filling over the chilled Oreo crust.
- Chill the dessert in the refrigerator for at least 4 hours.
Notes
For a fruity burst, add a layer of fresh berries on top of the lemon filling. Use gluten-free Oreos for a gluten-sensitive option.
Nutrition
- Serving Size: 1 square
- Calories: 320
- Sugar: 19g
- Sodium: 200mg
- Fat: 18g
- Saturated Fat: 9g
- Unsaturated Fat: 6g
- Trans Fat: 0g
- Carbohydrates: 39g
- Fiber: 1g
- Protein: 4g
- Cholesterol: 30mg
Keywords: Oreo dessert, lemon dessert, easy dessert, no-bake dessert, party dessert

Two Ingredient Summer Cocktail
Two-Ingredient Summer Cocktail: Effortless Sips for Warm Days
Hello, my fellow food lovers! As the sun shines brighter and the days stretch longer, there’s nothing I adore more than indulging in a refreshing drink that screams summer. And what’s more delightful than a Two-Ingredient Summer Cocktail? That’s right—the kind of sip that brings you taste without the fuss. If you’re dreaming of lazy afternoons on the patio or cozy evenings with friends, this cocktail will become your go-to.
Let’s Get Started!
Do you remember your first sip of a summer cocktail? Mine was on a bustling porch at a family barbecue, where laughter filled the air and the scent of grilled burgers danced with the breeze. The drink was simple—just fruit juice mixed with a fizzy splash of sparkling water—but it tasted like sunshine. I’ll never forget that moment; it felt like a magical escape from the ordinary.
Years later, I still find joy in that simplicity! Sharing a drink that evokes memories and puts a smile on faces is what hosting is all about. So let’s dive into crafting a two-ingredient cocktail that’s not only easy to make but also lets you personalize each sip just how you like it. Ready to raise your glass to summertime? Let’s go!
Ingredients
Gather these simple ingredients for your Two-Ingredient Summer Cocktail:
-
Sparkling Water
- A bubbly base for your cocktail! Use club soda, tonic water, or sparkling mineral water, depending on how you want your drink to sparkle. If you’re watching your sugar intake, make sure to grab unsweetened varieties. The fizz creates a lively vibe that’s perfect for soaking up those summer rays.
-
Fruit Juice of Choice
- The star of your cocktail! Whether you choose orange, cranberry, pineapple, or passion fruit juice, it’s all about your preference. Freshly squeezed juice is fantastic if you’re feeling fancy, but store-bought is totally acceptable too. Just be sure to select a juice without added sugars for a more refined flavor. Feel free to mix and match—think watermelon and mint, or mango and lime for a sunset-inspired sip!
Step-by-Step Instructions
Now that we have our ingredients ready, let’s whip up this cocktail. Follow these simple steps:
-
Select Your Glass:
- Choose a glass that’ll make you feel fancy! A tall glass for a classic look, or a mason jar for a more rustic vibe. The choice is yours, and it sets the tone for the drink.
-
Add Ice:
- Fill the glass with ice cubes to keep your cocktail refreshingly chilled. I love using ice made from fruit juice or herbal teas for a little bonus flavor! Just pour your juice into an ice cube tray and freeze until solid.
-
Pour in the Fruit Juice:
- Add about 1/3 to 1/2 of your glass with the fruit juice of your choice. This is your time to shine with flavors! If you’re using fresh juice, now’s the time to flaunt it—squeeze some citrus or muddle berries for a burst of natural sweetness.
-
Top with Sparkling Water:
- Gently pour the sparkling water over the juice until your glass is full. Be careful not to pour too quickly, or you’ll end up in a fizz explosion! You want those beautiful bubbles to dance together with your juice instead of fighting each other.
-
Give It a Gentle Stir:
- Using a cocktail stirrer or a spoon, give your drink a gentle stir to combine the flavors without losing all that lovely fizz.
-
Garnish to Impress:
- This is where you can elevate your drink effortlessly! Add fresh herbs like mint or basil for color and fragrance, or toss in some slices of fruit that match your juice. A cute cocktail straw or stirrer can make it feel festive!
Serving Suggestions
When it comes to serving this delightful cocktail, presentation makes all the difference. Opt for a bright, sun-drenched table setting—think colorful napkins and fun straws. You can even create a mini cocktail station if you’re hosting! Lay out various fruit juices and garnishes, and let your guests mix their favorite combinations. It’s a beautiful way to engage everyone and bring out their creativity.
Recipe Variations
The beauty of this recipe lies in its adaptability! Here are some fun variations for you to try:
- Herbal Infusion: Add fresh herbs like rosemary or thyme to your juice before mixing for a uniquely aromatic cocktail.
- Fruity Add-ins: Mash some berries or peaches into the juice for added texture and flavor.
- Frozen Slush: Throw the fruit juice and some ice into a blender and blend until slushy for a refreshing summer slush cocktail.
- Citrus Twist: Combine your fruit juice with a splash of coconut water for a refreshing and hydrating twist.
- Paw-sitively Good: For a non-alcoholic treat, swap the sparkling water for lemonade and serve it over ice; it’s a killer summer cooler!
Chef’s Notes
This cocktail has evolved alongside my summer adventures—each year bringing new flavors to the table. I fondly recall a backyard BBQ where this drink helped kick off our evening. The kids enjoyed their fruity versions while the adults added a shot of gin or vodka for a more spirited celebration.
Funny story: I once made a cocktail with an unusual juice—beet juice, to be exact—thinking it would create a dazzling crimson drink. Let’s just say the flavor was… interesting! But experimenting in the kitchen is what it’s all about—we learn as we go!
FAQs and Troubleshooting
1. My drink is too sweet; how can I adjust it?
- If your cocktail is overly sweet, simply add more sparkling water to dilute the sweetness without sacrificing flavor. Citrus juice like lemon or lime is another great way to balance the sweet notes.
2. How can I make this cocktail lower in calories?
- Use a diet or zero-calorie sparkling water and opt for fresh juices without added sugars. You can even cut the juice with sparkling water to reduce calories per serving.
3. Can I make this cocktail in advance?
- While it’s best enjoyed fresh for that bubbly fizz, you can prepare the juice ahead of time! Just combine your juice and water right before serving to keep the bubbles intact.
4. What if I don’t have fresh fruit juice?
- No problem! High-quality store-bought fruit juices work just fine. Look for organic or all-natural juices with no added sugars for the best flavor!
Conclusion
There you have it, a Two-Ingredient Summer Cocktail that’s not only refreshing but also invites creativity into your kitchen. Remember, cooking and hosting don’t have to be intimidating; they should feel welcoming and fun!
So, grab your favorite fruit juice, a bottle of sparkling water, and let’s toast to the warm days ahead. May your summer be filled with laughter, delicious conversations, and refreshing cocktails! Cheers to creating beautiful moments around your table, one sip at a time!
PrintTwo-Ingredient Summer Cocktail

A refreshing cocktail made with just two simple ingredients: fruit juice and sparkling water, perfect for warm summer days.
- Prep Time: 5 minutes
- Cook Time: 0 minutes
- Total Time: 5 minutes
- Yield: 1 serving
- Category: Beverage
- Method: Mixing
- Cuisine: American
- Diet: Vegan
Ingredients
- Sparkling Water
- Fruit Juice of Choice
Instructions
- Select Your Glass: Choose a glass that’ll make you feel fancy!
- Add Ice: Fill the glass with ice cubes to keep your cocktail refreshingly chilled.
- Pour in the Fruit Juice: Add about 1/3 to 1/2 of your glass with the fruit juice of your choice.
- Top with Sparkling Water: Gently pour the sparkling water over the juice until your glass is full.
- Give It a Gentle Stir: Using a cocktail stirrer or a spoon, give your drink a gentle stir.
- Garnish to Impress: Add fresh herbs or fruit slices to enhance your drink.
Notes
Feel free to customize your cocktail with different fruit juices and herbs for a personal touch. Experiment with flavors!
Nutrition
- Serving Size: 1 serving
- Calories: 100
- Sugar: 18g
- Sodium: 5mg
- Fat: 0g
- Saturated Fat: 0g
- Unsaturated Fat: 0g
- Trans Fat: 0g
- Carbohydrates: 24g
- Fiber: 0g
- Protein: 0g
- Cholesterol: 0mg
Keywords: cocktail, summer drink, refreshing drink, easy cocktail, two-ingredient cocktail
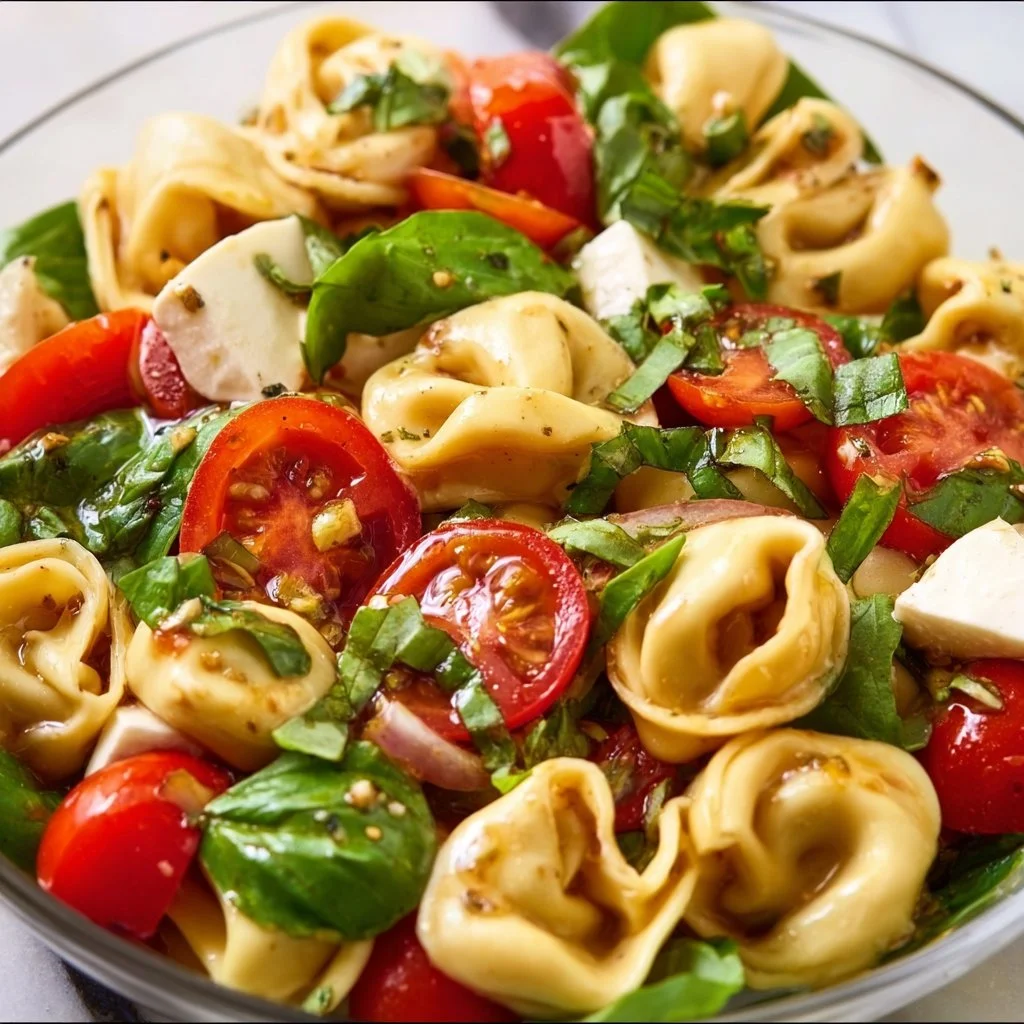
Caprese Salad with Tortellini
Discovering the Joy of Caprese Salad with Tortellini
Hello, fellow food enthusiasts! Today, I can’t wait to share with you a delightful dish that perfectly captures the essence of summer: Caprese Salad with Tortellini! This dish is not just a recipe; it’s a celebration of flavors and memories that make gathering around the kitchen table an absolute joy.
An Unexpected Delight
Picture this: It’s a sun-drenched afternoon, the scent of fresh tomatoes mingling with basil wafting gently in the air. I fondly remember a summer get-together a few years ago, where I decided to put a twist on the classic Caprese salad. My friends had just returned from a trip to Italy, and they were raving about the fresh, vibrant flavors they experienced. Inspired, I thought, “How about we bring a bit of that Italian magic right here, right now?”
I rushed to the farmer’s market, where I found the brightest cherry tomatoes and the freshest basil I could get my hands on. As I sautéed the tortellini, I imagined the laughter of my friends filling the room, and the table beautifully set, sparkling with summer light. That day, I created a Caprese-inspired dish that included cheese tortellini. It was a hit! The creamy tortellini paired perfectly with the juicy tomatoes, fragrant basil, and a drizzle of balsamic glaze. Each bite transported us back to those Italian streets, making the air buzz with stories and nostalgia.
Now, I get to share this delightful dish with you, so you too can create those cherished moments around your table!
Ingredients: What You’ll Need
Here’s a breakdown of the ingredients you’ll need to craft this beautiful dish:
-
12 oz cheese tortellini: The star of our dish! Use fresh or frozen tortellini. If you’re looking for a lighter option, opt for spinach or mushroom-flavored tortellini to add a little extra character.
-
2 cups cherry tomatoes, halved: These little gems burst with sweetness and add a gorgeous pop of color. If you can’t find cherry tomatoes, grape tomatoes will work too! Just quarter them instead of halving.
-
1 cup fresh basil leaves: Fresh basil is essential for that aromatic kick. If you’re in a pinch, you can use a teaspoon of dried basil, but fresh is always best!
-
1/2 cup balsamic glaze: This adds a lovely tangy sweetness that enhances every bite. You can substitute with a balsamic vinaigrette if that’s what you have on hand!
-
Salt and pepper to taste: These staples are your best friends in the kitchen! They enhance the natural flavors of your dish.
-
Olive oil (optional): A splash of extra virgin olive oil can lend a silky richness to the salad. Don’t shy away from quality here — it makes a difference!
Step-by-Step Instructions: Let’s Get Cooking!
-
Cook the Tortellini: Start by bringing a large pot of salted water to a boil. Carefully add the cheese tortellini and cook according to package instructions (usually about 3-5 minutes for fresh or 7-10 for frozen). Remember to taste test a few; you want them slightly al dente, giving you that perfect bite! Once done, drain and rinse them with cold water to stop further cooking, and set aside.
-
Prepare the Tomatoes: While the tortellini cooks, wash and halve your cherry tomatoes. Remember, the fresher the tomatoes, the better the flavor! I love to use a mix of colors for visual appeal. A little hint here: sprinkling them with a pinch of salt while you work can help enhance their natural sweetness.
-
Chop the Basil: Gently wash your fresh basil leaves, pat them dry, and then stack 3-4 leaves on top of each other. Roll them up tightly, and slice thinly to create a beautiful chiffonade. This method not only looks stunning but also releases aromatic oils from the basil, amplifying the dish’s flavor!
-
Combine Ingredients: In a large mixing bowl, combine the cooked tortellini, halved tomatoes, and basil. Here’s where we get to have some fun! Drizzle the balsamic glaze over the mixture and toss gently until everything is well coated. A little tip: Use a gentle hand here to keep your tortellini intact — they can be delicate!
-
Season to Taste: Now, it’s time for the salt and pepper! Give your salad a taste, and season as needed. If you’d like to add a bit more depth, drizzle some olive oil over the top. Toss gently once more and let it sit for about 10-15 minutes. This resting time allows the flavors to meld together beautifully!
Serving Suggestions: Presenting Your Masterpiece
To serve your Caprese Salad with Tortellini, scoop generous portions onto individual plates or serve it family-style in a large bowl. Drizzle a little extra balsamic glaze over the top for that aesthetic wow factor. If you want an Instagram-worthy touch, consider garnishing with whole basil leaves. Trust me, your guests will appreciate the effort, and it’s the simple touches that bring elegance without complexity!
Recipe Variations: Get Creative!
Now, let’s talk about how you can put your own spin on this dish:
-
Add Protein: Toss in grilled chicken or shrimp for a heartier option. The protein complements the cheese tortellini beautifully.
-
Go Vegan: Swap the cheese tortellini for a plant-based variety and omit the balsamic glaze or use a vegan alternative.
-
For a Kick: Add some sliced jalapeños or a sprinkle of red pepper flakes if you’re feeling adventurous! A little heat can enhance those fresh flavors.
-
Cheesy Twist: Incorporate freshly shaved Parmesan or burrata on top for an extra creamy texture!
-
Mediterranean Flair: Add olives or artichoke hearts for a Mediterranean twist. The brininess pairs wonderfully with the fresh ingredients.
Chef’s Notes: Kitchen Chronicles
I can’t emphasize enough how much I love a dish that brings people together. This Caprese Salad with Tortellini has evolved over many gatherings, becoming a staple on my table. It’s amazing how a simple recipe can gather friends and family, transforming an ordinary evening into something special. I remember one particular dinner where we all went around the table sharing our favorite food memories, and this dish sparked some of the best stories! It just goes to show that food is a wonderful bridge that connects us through laughter and shared experiences.
FAQs and Troubleshooting
1. What if my tortellini is falling apart?
- They can be delicate, especially if overcooked. Make sure to follow the package instructions closely, and rinse them immediately after draining to stop further cooking.
2. Can I prepare this salad in advance?
- While it’s best enjoyed fresh, you can prepare the components ahead. Just keep the tortellini, tomatoes, and basil separate until you’re ready to toss them together. Add the glaze right before serving to keep everything fresh.
3. How can I store leftovers?
- If you have any leftovers (which is rare!), store them in an airtight container in the fridge. They’ll keep for 2-3 days, but the tortellini may absorb some of the glaze. Just know that the flavors will still be delicious!
4. Can I make this dish gluten-free?
- Absolutely! Look for gluten-free tortellini or a similar pasta alternative to make this dish suitable for everyone.
Nutritional Info (Optional)
While I won’t detail specific nutritional values, this dish is generally balanced with carbohydrates, healthy fats, and plenty of vitamins from the tomatoes and basil, making it a nutritious addition to your meal rotation.
Conclusion: Let’s Keep Cooking!
Thank you for joining me on this culinary adventure! I’m thrilled to share my Caprese Salad with Tortellini recipe with you. Remember, cooking should be a joyful and creative experience. So, grab those ingredients, gather your loved ones, and let’s bring some Italian sunshine into your kitchen.
As always, I can’t wait to see what you create! Share your culinary masterpieces with me, and let’s inspire each other to keep the joy of cooking alive. Tie on that apron, keep it casual, and let’s make something beautiful!
PrintCaprese Salad with Tortellini

A delightful twist on a classic summer dish, combining cheese tortellini, fresh cherry tomatoes, and aromatic basil with a drizzle of balsamic glaze.
- Prep Time: 15 minutes
- Cook Time: 10 minutes
- Total Time: 25 minutes
- Yield: 4 servings 1x
- Category: Salad
- Method: Mixing
- Cuisine: Italian
- Diet: Vegetarian
Ingredients
- 12 oz cheese tortellini
- 2 cups cherry tomatoes, halved
- 1 cup fresh basil leaves
- 1/2 cup balsamic glaze
- Salt and pepper to taste
- Olive oil (optional)
Instructions
- Cook the tortellini: Start by bringing a large pot of salted water to a boil. Carefully add the cheese tortellini and cook according to package instructions (usually about 3-5 minutes for fresh or 7-10 for frozen). Once done, drain and rinse them with cold water to stop further cooking, and set aside.
- Prepare the tomatoes: While the tortellini cooks, wash and halve your cherry tomatoes. Sprinkle them with a pinch of salt to enhance their natural sweetness.
- Chop the basil: Gently wash your fresh basil leaves, pat them dry, and slice them thinly to create a chiffonade.
- Combine ingredients: In a large mixing bowl, combine the cooked tortellini, halved tomatoes, and basil. Drizzle the balsamic glaze over the mixture and toss gently.
- Season to taste: Give your salad a taste, and season with salt and pepper as needed. Let it sit for about 10-15 minutes to allow the flavors to meld together.
Notes
For added protein, toss in grilled chicken or shrimp. To make it vegan, swap the cheese tortellini for a plant-based variety.
Nutrition
- Serving Size: 1 serving
- Calories: 320
- Sugar: 4g
- Sodium: 250mg
- Fat: 10g
- Saturated Fat: 2g
- Unsaturated Fat: 8g
- Trans Fat: 0g
- Carbohydrates: 45g
- Fiber: 3g
- Protein: 12g
- Cholesterol: 20mg
Keywords: Caprese salad, tortellini, summer salad, Italian recipe, fresh ingredients