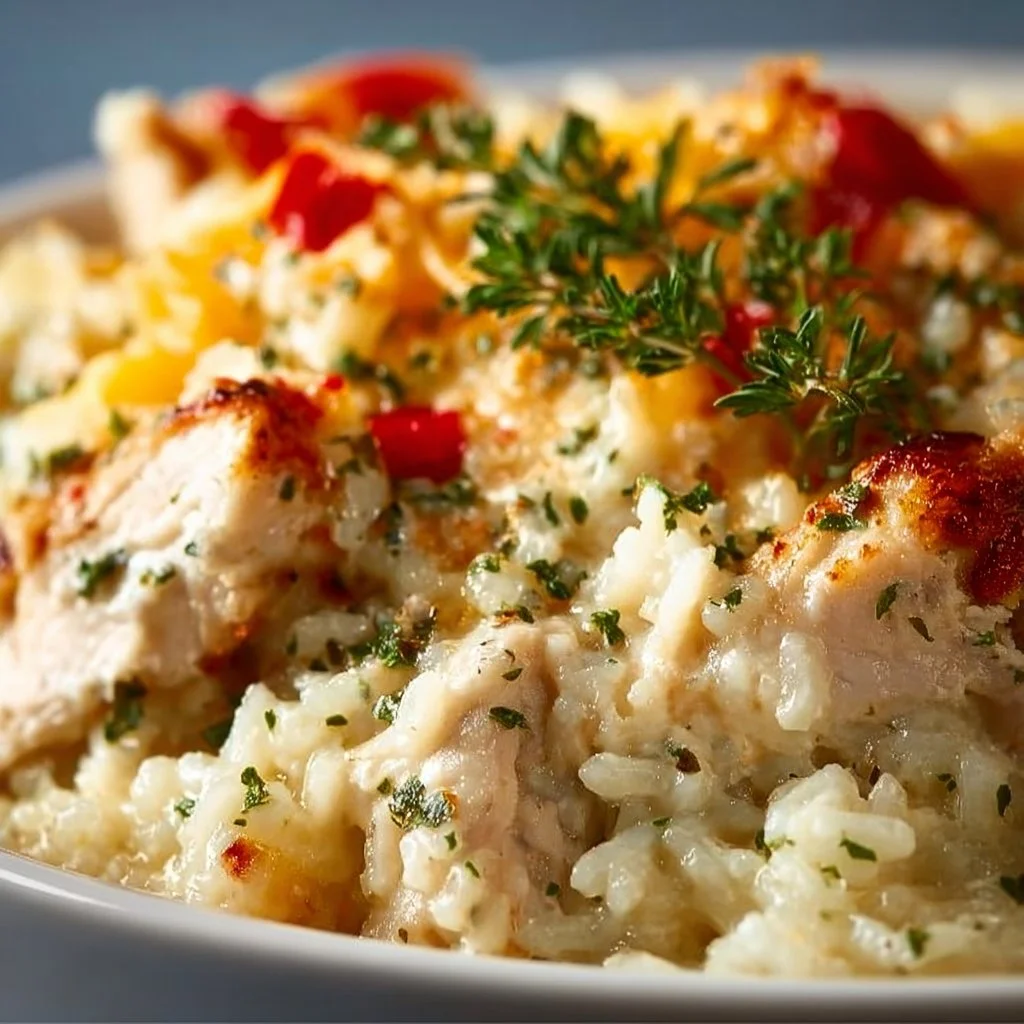
Angel Chicken and Rice Casserole
Angel Chicken and Rice Casserole: A Comforting Hug on a Plate
Hello, dear friends! Today, I am beyond excited to share a recipe that holds a special place in my heart and belly — Angel Chicken and Rice Casserole. This dish encapsulates everything I adore about cooking: it’s warm, comforting, and extremely easy to whip up. Whether you’re hosting a cozy dinner, preparing a meal for a busy weeknight, or simply looking to treat yourself, this casserole has got you covered.
Imagine this: it’s a chilly evening, and the aroma of something delicious wafts through the air as you pull this casserole from the oven, bubbling with flavor and love. It’s truly the culinary equivalent of a soft hug, enveloping you in its warmth and familiarity. So, let’s dive deeper into this magical dish and chat about my journey with it.
A Trip Down Memory Lane
One of my fondest memories of cooking this dish goes back to a rainy Saturday afternoon. I was in college, juggling a part-time job and schoolwork. My friends often dropped by, looking for comfort food after a long week. I wanted to make something quick but impressive, and that’s when I stumbled upon this Angel Chicken and Rice Casserole recipe in an old family cookbook.
I remember dashing to the grocery store, making sure to grab all the ingredients, and racing home. As I mixed everything together, my kitchen filled with laughter and chatter from my friends who, despite their busy lives, gathered around my small kitchen. By the time the casserole came out of the oven, our little apartment was filled with warmth, comfort, and gooey deliciousness. We dug in together, delighting in every cheesy bite while stories flowed and laughter echoed. This dish became our go-to comfort meal, and to this day, it’s one of my favorites.
Ingredients
Gathering the right ingredients is key to any fantastic dish. Let’s break down what you’ll need for this delightful casserole:
-
2 cups cooked chicken, shredded
- Feel free to use rotisserie chicken for convenience, or pull from your stash of leftovers!
-
1 cup uncooked rice
- While I love using long-grain white rice, brown rice or even jasmine rice can add an interesting twist. Just adjust the cooking time as needed!
-
1 can cream of chicken soup
- Creamy and comforting! If you’re feeling adventurous, homemade versions are fantastic too, or try swapping for cream of celery soup for a unique flair.
-
1 can cream of mushroom soup
- Another layer of creaminess! If you’re not a fan of mushrooms, opt for another cream soup like cream of onion or omit it altogether.
-
1 1/2 cups chicken broth
- Homemade broth is the best, but store-bought works perfectly in a pinch. Low-sodium options are a good choice for those watching their salt intake.
-
1 cup sour cream
- This ingredient adds richness! You can substitute with Greek yogurt for a healthier version, or even a dairy-free alternative if desired.
-
1/2 cup butter, melted
- Ah, butter — the key to flavor! If you’re watching your calories, try using olive oil for a healthier spin.
-
1 packet onion soup mix
- This is a flavor bomb! You can create a homemade mix by combining onion powder, garlic powder, and dried onion flakes if you’d like to avoid MSG.
-
Salt and pepper to taste
- Always essential, these simple seasonings can elevate your dish!
-
1 cup shredded cheese (optional)
- You can use any cheese you love — cheddar, mozzarella, or even a sprinkle of parmesan can take it to the next level.
Step-by-Step Instructions
Now that we’ve gathered our ingredients, it’s time to bring this dish to life! Follow along with these steps, sprinkled with a few chef tips to help you along.
-
Preheat the Oven:
- Preheat your oven to 350°F (175°C). This will set the stage for baking perfection, allowing the casserole to cook evenly.
-
Mix the Saucy Base:
- In a large mixing bowl, combine the cream of chicken soup, cream of mushroom soup, sour cream, melted butter, and onion soup mix.
- Chef Tip: Use a whisk for an even blend. It’ll help break up any lumps, creating a smooth, luscious sauce that hugs the chicken and rice beautifully.
-
Add the Chicken and Rice:
- Stir in the shredded chicken and uncooked rice until well coated. It’s all about layers of flavor!
- Chef Insight: The rice cooks while the casserole bakes, soaking up all those creamy, savory flavors.
-
Pour in the Broth:
- Gently mix in the chicken broth, ensuring everything is well incorporated.
- Pro Tip: If you’d like more flavor, try using broth instead of water when cooking your side dishes later — it’s a little chef secret!
-
Season to Taste:
- Don’t forget to add salt and pepper! This step is crucial, as seasoning can transform a good dish into a great one. Taste a small spoonful to see where you’re at.
-
Transfer to Baking Dish:
- Pour the mixture into a greased 9×13-inch baking dish. If you love a crispy top, get messy and sprinkle shredded cheese on top before it goes into the oven!
- Fun Fact: Using a glass baking dish can help you monitor the browning process without opening the oven.
-
Bake:
- Bake uncovered for about 45 to 50 minutes, or until bubbly and the rice has absorbed most of the broth. You want to see a nice golden crust on top!
- Chef’s Hint: If it’s browning too quickly, cover it loosely with foil to prevent burning while it finishes cooking.
-
Let it Rest:
- Once baked, let it sit for about 10-15 minutes before digging in. This helps the casserole set, making it easier to serve.
- Essential Tip: Use this wait time to whip up a simple salad or toast some crusty bread for a complete meal.
Serving Suggestions
To serve this delicious Angel Chicken and Rice Casserole, scoop hearty portions onto plates, allowing the creamy, cheesy goodness to cascade over the edges. A sprinkle of fresh parsley or chives on top adds a pop of color and freshness. Pair it with a zesty green salad or roasted vegetables to balance the richness of the dish. Don’t forget some crusty bread to soak up every last creamy bite!
Recipe Variations
Feeling adventurous? Here are a few ways to jazz up this classic casserole:
- Veggie Delight: Add in steamed broccoli or spinach for an extra layer of nutrition and flavor.
- Spicy Kick: A dash of red pepper flakes or diced jalapeños can bring some heat to the table.
- Herb Infusion: Fresh herbs such as thyme, rosemary, or basil can elevate the flavors. Add them during the mixing stage for a fragrant dish!
- Different Cheeses: Swap out the cheese for your favorite — pepper jack for a spicy touch, or feta for a Mediterranean vibe.
Chef’s Notes
This recipe is one I treasure, and it has evolved over the years. Initially, I made it exactly as written, but over time I’ve played with different herbs and spices, turning it into a versatile dish suitable for any palate. It’s a fantastic way to use leftover chicken, and I’ve even made it vegetarian by substituting beans or extra veggies. Whenever I whip it up, it always evokes memories of laughter and togetherness. It’s the kind of dish that fills the stomach and warms the heart!
FAQs and Troubleshooting
1. Can I use raw chicken in this recipe?
While the original recipe calls for cooked chicken, you can use raw chicken. Just ensure it’s chopped into small pieces and increase the baking time to about an hour to ensure it cooks thoroughly.
2. My rice is crunchy after baking. What went wrong?
This can happen if there isn’t enough liquid or if it doesn’t bake long enough. Make sure to measure your ingredients accurately, and if you need more time, cover it with foil and let it bake a bit longer.
3. Can I make this ahead of time?
Absolutely! You can prepare the casserole the night before and keep it in the fridge. Just be sure to add a few extra minutes to the baking time since it will be starting cold.
4. How do I store the leftovers?
Store any leftovers in an airtight container in the fridge for up to 3-4 days. You can reheat in the oven or microwave, but I recommend the oven for that crispy top!
Nutritional Info
While I won’t delve too deeply into nutritional info, it’s worth noting that this casserole is a hearty dish packed with protein from the chicken and sour cream, making it satisfying. For those keeping an eye on calories, consider using lower-fat substitutes for some of the creamy ingredients or adding in more vegetables to balance it out.
And there you have it — Angel Chicken and Rice Casserole in all its glory! I hope this dish brings you joy and warmth when you gather around your own table. Remember, my friends, cooking is about sharing love and creating memories. Grab your apron and let’s get cooking! 🍽️
PrintAngel Chicken and Rice Casserole

A warm and comforting casserole that combines shredded chicken, creamy soups, and rice for a delicious family meal.
- Prep Time: 15 minutes
- Cook Time: 50 minutes
- Total Time: 65 minutes
- Yield: 8 servings 1x
- Category: Main Course
- Method: Baking
- Cuisine: American
- Diet: Gluten-Free
Ingredients
- 2 cups cooked chicken, shredded
- 1 cup uncooked rice
- 1 can cream of chicken soup
- 1 can cream of mushroom soup
- 1 1/2 cups chicken broth
- 1 cup sour cream
- 1/2 cup butter, melted
- 1 packet onion soup mix
- Salt and pepper to taste
- 1 cup shredded cheese (optional)
Instructions
- Preheat the oven to 350°F (175°C).
- Mix together the cream of chicken soup, cream of mushroom soup, sour cream, melted butter, and onion soup mix in a large mixing bowl.
- Add the shredded chicken and uncooked rice, stirring until well coated.
- Pour in the chicken broth and mix until incorporated.
- Season with salt and pepper to taste.
- Transfer the mixture to a greased 9×13-inch baking dish and optionally sprinkle cheese on top.
- Bake uncovered for 45 to 50 minutes, or until bubbly and golden brown.
- Let the casserole rest for 10-15 minutes before serving.
Notes
Feel free to customize with your favorite veggies or spices for a unique twist!
Nutrition
- Serving Size: 1 serving
- Calories: 400
- Sugar: 4g
- Sodium: 600mg
- Fat: 22g
- Saturated Fat: 10g
- Unsaturated Fat: 8g
- Trans Fat: 0g
- Carbohydrates: 35g
- Fiber: 2g
- Protein: 19g
- Cholesterol: 70mg
Keywords: chicken casserole, comfort food, easy dinner, family meal

Hawaiian Poke Cake
Hawaiian Poke Cake: A Slice of Paradise
Hello, food friends! Today, I am thrilled to take you on a delightful journey to the tropical paradise of Hawaii with a cake that’s not just a treat for the taste buds but also a feast for the eyes—Hawaiian Poke Cake! If you’re looking for a dessert that’s effortlessly impressive and reminiscent of sun-kissed beaches, you’ve hit the jackpot!
Now, I know what you might be thinking: “Poke cake? What’s that?” Well, let me assure you that this dessert is a true game-changer! It’s a moist, fluffy cake soaked in a sweet, fruity goodness that’s perfect for gatherings, potlucks, or simply treating yourself on a sunny afternoon. Trust me; once you serve this gem, you’ll have friends and family coming back for seconds (or thirds!).
What I love most about Hawaiian Poke Cake is how it manages to feel both special and approachable. The best part? You don’t need to be a pastry chef to recreate this beauty in your kitchen! So, tie on that apron, and let’s dive into this tropical escape!
Personal Story
One of my fondest memories surrounding Hawaiian Poke Cake takes me back to a summer spent visiting relatives in Hawaii. Picture this: warm sun, gentle beach breezes, and afternoons spent lounging in hammocks while sipping on coconut water. One evening, we gathered for a family barbecue—a tradition that never stopped growing. My aunt pulled this cake out of the fridge, its topping glistening under the soft glow of tiki torches.
As we took our first bites, we were transported. Flavors of sweet pineapple combined with creamy coconut danced along our palates, each mouthful simply singing of Hawaii. In that moment, amidst laughter and sound of waves crashing nearby, I knew that this cake was going to weave its way into my own family traditions back home. Every time I whip up a Hawaiian Poke Cake now, I’m reminded of those warm evenings and the shared love that good food brings.
Ingredients
Before we get cooking, let’s gather our ingredients! Here’s what you’ll need:
-
1 box yellow cake mix (15.25 oz)
The base of our cake! For a gluten-free version, you can substitute this with a gluten-free cake mix. -
1 cup pineapple juice (100%)
This will add sweetness and moisture. You can use freshly squeezed pineapple juice if you’re feeling adventurous! -
1 cup full-fat coconut milk
This rich ingredient gives our cake its creamy texture. For a lighter option, feel free to swap it with coconut cream or a lighter coconut milk. -
1 cup sweetened shredded coconut
Adds texture and flavor. If you want to reduce sweetness, use unsweetened coconut flakes. -
1 cup pineapple chunks (drained)
Sweet, juicy bursts of pineapple! You can use canned or fresh pineapple, but make sure to drain it well to avoid excess moisture. -
1 cup whipped topping
This light and fluffy topping brings everything together. You can easily make your own whipped cream for a fresher taste. -
¼ cup maraschino cherries (for garnish)
The perfect pop of color! If you want a more natural garnish, try using fresh cherries or sliced strawberries instead.
Step-by-Step Instructions
Now that we have our ingredients ready, it’s time to get cooking! Follow these steps for a flawless Hawaiian Poke Cake experience:
-
Preheat Your Oven: Start by preheating your oven to 350°F (175°C). You want it nice and hot to ensure the cake bakes evenly.
-
Prepare Your Cake Pan: Grease a 9×13-inch baking dish with cooking spray or butter. This will prevent sticking, making your life a lot easier later on!
-
Mix the Cake Batter: In a large mixing bowl, combine your yellow cake mix, 1 cup of pineapple juice, and 1 cup of coconut milk. Use an electric mixer to blend them until the mixture is smooth and well combined—about 2-3 minutes.
-
Pour and Bake: Pour the batter into the prepared baking dish, spreading it evenly. Bake it in your preheated oven for about 25-30 minutes or until a toothpick inserted in the center comes out clean. Pro tip: Ovens can be sneaky! Keep an eye on your cake, as baking times can vary.
-
Poke the Cake: Once baked, remove the cake from the oven and let it cool in the pan for about 10-15 minutes. Using the handle of a wooden spoon or a fork, poke holes all over the top of the cake—make them deep but not all the way through! This is where our pineapple juice goodness will soak in.
-
Soak the Cake: Slowly pour the remaining ½ cup of pineapple juice over the poked cake, ensuring it seeps into those holes. This is crucial for keeping the cake moist and infusing it with that tropical flavor.
-
Add Coconut and Pineapple: While the cake is still warm, sprinkle the sweetened shredded coconut and the pineapple chunks over the top. Gently press them down into the cake so they stick.
-
Chill the Cake: This is where the magic happens! Allow the cake to cool completely at room temperature, then cover it with plastic wrap and refrigerate for at least 2-4 hours (overnight is even better!) to let those flavors meld beautifully.
-
Top It Off: Before serving, spread the whipped topping over the chilled cake and garnish with maraschino cherries for that classic touch.
-
Slice and Serve: Finally, cut yourself a generous slice of this tropical delight and enjoy every delicious bite!
Serving Suggestions
When it comes to serving, I like to keep things simple yet elegant. Serve your Hawaiian Poke Cake chilled, straight from the fridge. For presentation, you can plate it on a lovely dessert platter, and maybe even add a sprinkle of extra shredded coconut or a fresh mint sprig on top for a pop of color.
Pair it with a refreshing iced tea or a fizzy drink to enhance that tropical feel. Your guests won’t just taste dessert; they’ll indulge in a delightful experience!
Recipe Variations
-
Tropical Twist: Add diced mango or papaya to the topping for an extra burst of flavor.
-
Berry Bliss: Incorporate mixed berries (blueberries, raspberries, strawberries) into the coconut topping for a fruity explosion.
-
Chocolate Delight: Drizzle dark chocolate ganache over the whipped topping for a decadent upgrade.
-
Nutty Crunch: Sprinkle chopped macadamia nuts on top for a delicious crunch and an authentic Hawaiian touch.
-
Vegan Version: For a plant-based twist, use a vegan cake mix, coconut cream instead of whipped topping, and ensure your pineapple juice is fresh and additive-free.
Chef’s Notes
Over the years, my Hawaiian Poke Cake has morphed from a traditional dessert into a canvas for creativity! I’ve played with flavors and toppings, ensuring that each iteration feels personal. Did you know the first time I made this cake, my son mistook the maraschino cherries for candy? His enthusiastic approval confirmed that this cake was destined to be a family favorite!
This dessert has become a staple at our family gatherings, proving that simplicity can create lasting memories. If you haven’t tried Hawaiian Poke Cake yet, do yourself a favor and whip one up—you’ll find it’s not just a cake; it’s a sweet slice of nostalgia.
FAQs and Troubleshooting
1. Can I make Poke Cake in advance?
Absolutely! In fact, it tastes even better after sitting in the fridge for a day. This allows the flavors to intensify and the cake to absorb the juices.
2. My cake turned out dry; what happened?
The key to a moist poke cake is giving it enough time to soak up the juice! Make sure to poke enough holes and pour the juice evenly. Also, be cautious about overbaking; a toothpick should come out mostly clean, not dry.
3. Can I freeze leftover cake?
You sure can! Just slice it up, wrap individual pieces tightly in plastic wrap, and place them in an airtight container. When you’re ready to enjoy it, let it thaw in the fridge overnight.
4. What if I can’t find pineapple juice?
No problem! You can substitute with orange juice or even a mix of coconut milk and a splash of vanilla. While it won’t have that distinct tropical flavor, it will still be delicious!
Nutritional Info
While I believe that enjoying food is worth indulging in, here’s a quick glance at the nutritional info per slice (based on 12 servings):
- Calories: 300
- Total Fat: 12g
- Saturated Fat: 8g
- Total Carbohydrates: 45g
- Sugars: 30g
- Protein: 2g
As always, enjoy your food and savor the moments spent around the table!
So there you have it, my friends! Hawaiian Poke Cake is more than just a recipe; it’s a celebration of tastes and memories. I can’t wait for you to try it and make it your own. Until next time, happy cooking!
PrintHawaiian Poke Cake
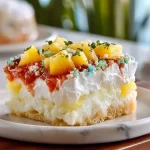
A moist and fluffy cake soaked in sweet pineapple juice and topped with coconut and whipped cream, perfect for any gathering.
- Prep Time: 20 minutes
- Cook Time: 30 minutes
- Total Time: 50 minutes
- Yield: 12 servings 1x
- Category: Dessert
- Method: Baking
- Cuisine: Hawaiian
- Diet: Vegetarian
Ingredients
- 1 box yellow cake mix (15.25 oz)
- 1 cup pineapple juice (100%)
- 1 cup full-fat coconut milk
- 1 cup sweetened shredded coconut
- 1 cup pineapple chunks (drained)
- 1 cup whipped topping
- ¼ cup maraschino cherries (for garnish)
Instructions
- Preheat your oven to 350°F (175°C).
- Prepare a 9×13-inch baking dish with cooking spray or butter.
- Mix the cake batter by combining yellow cake mix, 1 cup of pineapple juice, and 1 cup of coconut milk in a bowl.
- Pour the batter into the prepared baking dish and bake for 25-30 minutes.
- Poke holes all over the top of the cake once it is cool for about 10-15 minutes.
- Soak the cake with the remaining ½ cup of pineapple juice.
- Add sweetened shredded coconut and pineapple chunks on top of the warm cake.
- Chill the cake for at least 2-4 hours in the refrigerator.
- Top with whipped topping and garnish with maraschino cherries before serving.
- Slice and serve chilled.
Notes
This cake is best served chilled. It can be made in advance and tastes better after a day in the fridge.
Nutrition
- Serving Size: 1 slice
- Calories: 300
- Sugar: 30g
- Sodium: 200mg
- Fat: 12g
- Saturated Fat: 8g
- Unsaturated Fat: 4g
- Trans Fat: 0g
- Carbohydrates: 45g
- Fiber: 1g
- Protein: 2g
- Cholesterol: 10mg
Keywords: Hawaiian cake, poke cake, tropical dessert, easy cake recipe, summer dessert

Pepperoni Pizza Crescent Rolls
Pepperoni Pizza Crescent Rolls: The Perfect Crowd-Pleaser
Hello, fellow food lovers! Today, we’re diving into a recipe that’s close to my heart and even closer to my stomach — Pepperoni Pizza Crescent Rolls! Perfect for game night, family gatherings, or just a cozy movie marathon at home, these little treats meld the gooey goodness of pizza with the buttery flakiness of crescent rolls. It’s like a pizza pocket but with that delightful pop-and-flake that only crescent dough can provide. Let’s roll up our sleeves and get cooking!
A Slice of Nostalgia
Growing up, pizza was more than just a meal; it was a family affair. I remember those Friday nights when my siblings and I would gather around the kitchen table with flour-dusted aprons, ready to make our own mini pizzas. We’d lay out various toppings, from gooey mozzarella to spicy pepperoni, and let our imaginations run wild. Each creation was a masterpiece, and everything was fair game, even the odd leftover broccoli that somehow made it onto the pizza.
But the real magic happened when my mom introduced us to crescent rolls. Oh, the joy of popping that can open! The crescents turned out to be a perfect vessel for pizza ingredients, transforming our casual Friday night into the aerial display of modern culinary gymnastics. Fast forward to today, and I can still taste that nostalgia in each flaky bite of these Pepperoni Pizza Crescent Rolls.
Ingredients
Let’s gather our ingredients for this super fun dish! Here’s what you’ll need:
-
1 can (8 oz) refrigerated crescent roll dough
The star of our show! For a healthier option, you can use whole wheat dough or a gluten-free version if you’re avoiding gluten. -
24 slices pepperoni
Classic, spicy, and oh-so-savory! If you prefer, switch it up with turkey pepperoni or even sliced salami for a gourmet twist. -
4 mozzarella string cheese sticks (cut in half lengthwise)
The gooey, melty cheese is what makes these rolls special. For a vegan version, use plant-based cheese sticks or chunks. -
2 tablespoons pizza sauce (optional, for rolling)
Dip, roll, or fill! Use homemade or store-bought. You can also use marinara or a spicy arrabbiata sauce for a kick. -
1 tablespoon butter (melted)
This will give your rolls a beautiful golden finish when baked. Feel free to substitute with olive oil or a dairy-free version for a lighter touch. -
½ teaspoon Italian seasoning
A sprinkle of this enhances the pizza flavor. If you don’t have it, try mixing dried basil, oregano, and thyme instead. -
¼ teaspoon garlic powder
For that extra flavor punch. Fresh minced garlic works beautifully here, too! -
Grated Parmesan cheese (optional, for topping)
Because everything’s better with cheese! Nutritional yeast can replace this if you’re keeping it vegan. -
Extra pizza or marinara sauce (for dipping)
You can never have too much sauce. Grab your favorite for that final touch.
Step-by-Step Instructions
Now that we’re all prepped, let’s dive into the cooking process. Follow along as we create those drool-worthy Pepperoni Pizza Crescent Rolls!
-
Preheat Your Oven:
Start by preheating your oven to 375°F (190°C). This ensures that our rolls bake evenly and get that enticing golden hue. Best way to preheat? Turn on the oven while you prepare the rest. This saves time! -
Prepare Your Baking Sheet:
Line a baking sheet with parchment paper or a silicone baking mat. Not only does this make clean-up easier, but it also helps the rolls crisp up perfectly on the bottom. -
Unroll the Crescent Dough:
Open that can of crescent dough — the pop is half the fun! Carefully unroll it on a clean surface to prevent tearing. You should see a triangle shape for each piece. -
Add the Sauce:
Grab the pizza sauce and use a small spoon to spread about half a teaspoon onto the wider end of each crescent triangle. This step is optional but adds an extra flavor layer. -
Layer the Toppings:
Place 3 slices of pepperoni on top of the sauce, followed by a half-piece of string cheese. The beauty here is the way the cheese melts into the pepperoni and creates that pizza magic we all adore. -
Roll It Up:
Starting from the wider end, gently roll the dough towards the tip. Tuck in the sides as you go to avoid the cheese peeking out. Place the rolls on the prepared baking sheet with the point side down to prevent them from opening up while baking. -
Brush with Butter:
In a small bowl, mix the melted butter with Italian seasoning and garlic powder. Brush the mixture generously over each roll for an added, buttery flavor and crispy finish. -
Sprinkle with Cheese:
If you’re feeling extra fancy, sprinkle a little grated Parmesan cheese over the top of each roll. This will lend a delightful nuttiness and make your rolls even more irresistible. -
Bake It Up:
Slide the baking sheet into the preheated oven and let them bake for about 12-15 minutes, or until the rolls are golden brown and the cheese is bubbly. Keep an eye out; everyone’s oven behaves a bit differently! -
Cool and Serve:
Once removed from the oven, allow the rolls to cool for a few minutes. This helps the cheese set a little and keeps you from burning your mouth — we want to savor, not scald!
Serving Suggestions
For that perfect presentation, plate these Pepperoni Pizza Crescent Rolls on a large wooden board or a stylish serving platter. Serve them alongside the extra pizza or marinara sauce for dipping. Feel free to sprinkle some fresh basil or parsley over the top for a pop of color. These rolls also look fabulous surrounded by a simple salad, creating a beautiful, inviting table!
Recipe Variations
-
Veggie Delight: Add chopped bell peppers, mushrooms, or olives for a veggie-packed version. Just be sure not to overstuff the rolls!
-
BBQ Chicken: Swap in shredded cooked chicken mixed with BBQ sauce instead of pepperoni for a great twist.
-
Buffalo Style: Use buffalo chicken and blue cheese for a spicy take. Your taste buds will thank you for the explosion of flavors!
-
Sweet N’ Savory: Try adding a hint of honey drizzled over the baked rolls for a delightful sweet contrast to the salty pepperoni.
Chef’s Notes
This recipe is one of those wonderful “kitchen-sink” creations. I love to experiment with whatever I have handy — I’ve even thrown in spinach or some sautéed veggies when I’m feeling a bit health-conscious! Also, if you have leftovers (which is rare but can happen), they make for an excellent lunch the next day — just pop them back in the oven to reheat for that freshly-baked taste. Trust me; they’ll be just as delicious!
FAQs and Troubleshooting
Can I use homemade dough instead of store-bought?
Absolutely! Just roll it out to the same thickness as crescent roll dough, and follow the same rolling and filling instructions.
What if my rolls burst open during baking?
Don’t fret! Sometimes the cheese may ooze out a bit, and that’s totally fine. If you want to prevent this, try to roll them tighter or use the point of the dough to seal everything in snugly.
How do I store leftovers?
Store them in an airtight container in the refrigerator for up to 2 days. Reheat in the oven for a few minutes to restore their flaky texture.
Can I freeze these rolls?
Yes! Assemble the rolls, but do not bake them. Freeze them on a baking sheet, then transfer them to a freezer-safe container. When you’re ready to enjoy, bake directly from frozen, adding a few extra minutes to the cooking time.
And there you have it: your complete guide to making delicious Pepperoni Pizza Crescent Rolls! They’re simple to whip up, packed with flavor, and truly the ultimate comfort food. So, what are you waiting for? Tie on that apron, gather your loved ones, and let’s make some memories in the kitchen. Happy cooking!
PrintPepperoni Pizza Crescent Rolls

Delicious crescent rolls filled with pepperoni and cheese, perfect for gatherings or movie nights.
- Prep Time: 15 minutes
- Cook Time: 15 minutes
- Total Time: 30 minutes
- Yield: 8 servings 1x
- Category: Appetizer
- Method: Baking
- Cuisine: Italian
- Diet: Vegetarian
Ingredients
- 1 can (8 oz) refrigerated crescent roll dough
- 24 slices pepperoni
- 4 mozzarella string cheese sticks (cut in half lengthwise)
- 2 tablespoons pizza sauce (optional, for rolling)
- 1 tablespoon butter (melted)
- ½ teaspoon Italian seasoning
- ¼ teaspoon garlic powder
- Grated Parmesan cheese (optional, for topping)
- Extra pizza or marinara sauce (for dipping)
Instructions
- Preheat your oven to 375°F (190°C).
- Prepare a baking sheet lined with parchment paper.
- Unroll the crescent dough on a clean surface.
- Add pizza sauce to the wider end of each crescent triangle.
- Layer 3 slices of pepperoni and half a piece of cheese on top of the sauce.
- Roll the dough gently from the wider end to the tip, tucking in the sides.
- Brush melted butter mixed with Italian seasoning and garlic powder over each roll.
- Sprinkle grated Parmesan cheese on top if desired.
- Bake for 12-15 minutes, or until golden brown.
- Cool for a few minutes before serving.
Notes
Feel free to experiment with different toppings or sauces. Leftovers can be reheated in the oven for freshness.
Nutrition
- Serving Size: 1 roll
- Calories: 250
- Sugar: 1g
- Sodium: 450mg
- Fat: 15g
- Saturated Fat: 7g
- Unsaturated Fat: 6g
- Trans Fat: 0g
- Carbohydrates: 25g
- Fiber: 1g
- Protein: 9g
- Cholesterol: 25mg
Keywords: pepperoni pizza rolls, crescent rolls, easy appetizers, game night snacks, vegetarian recipes
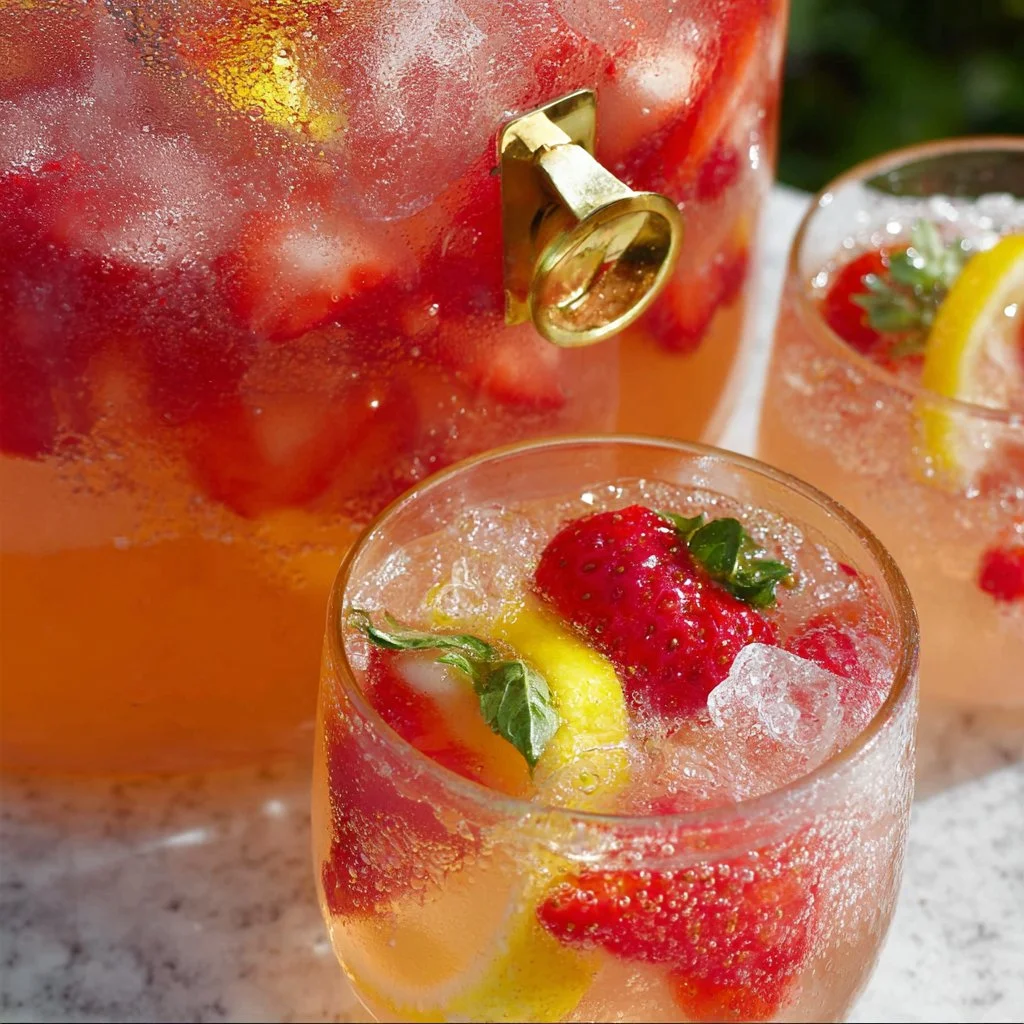
Sparkling Lemonade Punch Recipe
Sparkling Lemonade Punch Recipe: A Refreshing Treat for Every Occasion
Hello, delightful foodies! Savannah Pierce here, and today I’m excited to share a recipe that will not only quench your thirst but also elevate your next gathering with its vibrant colors and refreshing flavors. Sparrowing through the kitchen, I often find myself looking for something light, fizzy, and enjoyable (yes, please!). And that’s when my Sparkling Lemonade Punch came into play—a punch that is as dazzling as it is delicious!
This sparkling concoction is perfect for everything from sunny brunches to relaxed dinner parties, and it never fails to impress. Plus, there’s something whimsical about serving a punch that makes everyone feel like they’re partaking in a little celebration, no matter the occasion.
Personal Story
Let me take you back to a delightful summer evening when I was a little girl. My family hosted casual barbecues on the back porch, where laughter floated through the air as friends and family gathered. I remember my grandmother always whipping up the most refreshing lemonade, served in a big glass pitcher, adorned with freshly sliced fruits and sprigs of mint. The joy on everyone’s faces as they took those first sips is an image I cherish to this day.
Fast forward to today, I’ve taken that classic lemonade and added a sparkling twist! My Sparkling Lemonade Punch is inspired by those nostalgic moments—a vibrant tribute to sunny days and shared laughter. And trust me, it’s just as joyous to make as it is to sip!
Ingredients
Let’s gather our ingredients for a delightful batch of Sparkling Lemonade Punch! Here’s what you’ll need:
- 2 lemons: Fresh lemons provide a bright tartness. Use Meyer lemons if you want a sweeter twist!
- 2 sliced limes: Lime adds a zesty kick. If limes are out of season, grapefruit works beautifully too.
- 5 sliced strawberries: Fresh strawberries add a hint of sweetness and a pop of color. Frozen will work in a pinch, just remember they’ll be a bit mushy.
- 2 cans of Spindrift Lemon Limeade: This fizzy beverage offers a blast of lemon-lime flavor. You can substitute with homemade lemonade if you prefer!
- 2 cans of Spindrift Pink Lemonade: A sweet and vibrant addition! Feel free to swap it out for regular lemonade or a berry-flavored soda.
- 2 cans of Spindrift Strawberry Lemonade: This will add an enticing fruity twist! If you can’t find it, mix your own strawberry puree with lemonade.
- 2 full sprigs of mint: Fresh mint delivers a fragrant finish. If you don’t like mint, try basil for a unique twist!
Step-by-Step Instructions
Now that we have our ingredients assembled, let’s dive into making this sparkling sensation!
-
Prep the Fruits: Start by washing all your fruits thoroughly. Slice the lemons, limes, and strawberries to maximize the flavor infusion potential. Trust me, greater surface area means more zest!
-
Combine the Fruits: In a large pitcher (the bigger, the better!), toss in the sliced lemons, limes, and strawberries. If you want to elevate your punch with extra sophistication, muddle the fruits gently at the bottom of the pitcher. This releases even more flavors!
Chef Tip: When you muddle, don’t overly smash the fruit; you just want to release some juices while leaving chunks for that beautiful presentation!
-
Add the Mint: Next, gently slap the mint sprigs between your hands before adding them to the pitcher. This will activate the essential oils, filling your punch with lovely aromatic notes. Another way to do this? Simply run your fingers along the mint leaves to release their essence!
-
Pour in the Sparkling Beverages: Now, it’s time for the fizzy fun! Begin by pouring in the Spindrift Lemon Limeade, followed by the Pink Lemonade, and topping it all off with the Strawberry Lemonade.
Pro Tip: Pour these in slowly to maintain the fizz and avoid a frothy mess!
-
Give It a Gentle Stir: Using a long spoon or ladle, gently stir the mixture, ensuring not to lose that beautiful carbonation. You want to just combine the flavors without entirely deflating the bubbles.
-
Chill and Infuse: For the best results, let your punch sit in the fridge for about 30 minutes before serving. This allows the flavors to meld beautifully and gives your guests a refreshing drink that’s ready to go!
-
Prepare to Serve: Just before serving, give the punch one last gentle stir. You can even add a few extra fresh fruit slices or mint leaves for garnish!
Chef Hack: Serve the punch in wine glasses or mason jars for a rustic touch. Don’t forget to include a colorful straw for that extra flair!
Serving Suggestions
When it comes time to serve your Sparkling Lemonade Punch, I recommend using clear glasses so everyone can admire the beautiful blending of colors. You might even consider adding ice cubes for extra chill—bonus points if you freeze some sliced strawberries or lemons in the ice cubes for a pop of color as they melt!
Also, don’t shy away from experimenting with a garnishing touch. A sprig of mint on the rim or a slice of lemon on the glass draws the eye and elevates the entire presentation!
Recipe Variations
Stay adventurous! Here are a few creative twists you can incorporate to suit your taste or accommodate dietary needs:
- Berry Blast Punch: Add raspberries and blueberries for an all-berry recipe! This leaves you with an appealing colorful punch.
- Herbal Infusion: Try using basil instead of mint for a surprisingly delightful twist! The herbaceous flavor really complements the fruit.
- Citrus Delight: Incorporate orange slices or juices for a zesty punch that will brighten your drink.
- Alcoholic Option: For adult gatherings, consider mixing in some vodka or gin! Just keep it balanced so the flavors remain refreshing and not overpowering.
- Sparkling Alternative: Use a flavored sparkling water (like cucumber or peach) instead of the sweetened lemonade options for a lighter version!
Chef’s Notes
This Sparkling Lemonade Punch recipe has been a constant at my summer gatherings and even at cozy winter potlucks! What began as a simple endeavor to recreate my grandmother’s classic lemonade has elegantly evolved into this vibrant punch that beckons joy and laughter.
As a chef, I have always found that creating food and drinks is more than just the ingredients—it’s about the memories you share with those you love. In fact, I always keep extra fruits on hand to invite friends over spontaneously! A pitcher of this punch and some homemade snacks? Instant party!
FAQs and Troubleshooting
Here are some frequently asked questions and common issues you might encounter while making your Sparkling Lemonade Punch:
1. Can I use bottled lemon juice instead of fresh lemons?
While bottled juice is a convenient option, nothing beats the brightness and zest of fresh lemons. If you do use bottled juice, opt for a high-quality brand without added sugars.
2. My punch fizzled out too quickly; what went wrong?
The key is to stir gently, avoiding vigorous mixing. Additionally, serving the punch immediately after preparation helps maintain the fizz. If it’s been sitting for too long, consider just refreshing it with a top-off of sparkling water before serving!
3. Is this punch too sweet for my taste?
Absolutely! Feel free to control the sweetness by adjusting the ratio of lemonade to sparkling water. You can even add more fresh fruit to naturally balance the flavors without adding sugar.
4. Can I make this punch in advance?
You can prepare the fruit mixture ahead of time and store it in the fridge. However, add the sparkling beverages just before serving to ensure that it stays bubbly and fresh!
Nutritional Info
If you’re mindful of nutrition, this punch offers a light and refreshing option for social gatherings. Depending on the versions and brands of lemonade you choose, feel free to explore calorie counts on the beverage packaging. Remember, fresh fruits add not just flavor but also fiber and antioxidants!
So there you have it, my delightful friends—my Sparkling Lemonade Punch recipe! Simple yet elegant, it’s a drink that invites you to gather around the table with loved ones and celebrate the beautiful moments in life. Whether you’re sipping it on a sunny patio or serving it at your next gathering, this punch is sure to bring a sparkle to every occasion. Cheers to good food and good company! 🍋🥂
PrintSparkling Lemonade Punch

A refreshing and vibrant punch perfect for gatherings, combining fresh fruits and fizzy beverages.
- Prep Time: 15 minutes
- Cook Time: 0 minutes
- Total Time: 45 minutes
- Yield: 6 servings 1x
- Category: Beverage
- Method: Mixing
- Cuisine: American
- Diet: Vegan
Ingredients
- 2 lemons, sliced
- 2 sliced limes
- 5 sliced strawberries
- 2 cans of Spindrift Lemon Limeade
- 2 cans of Spindrift Pink Lemonade
- 2 cans of Spindrift Strawberry Lemonade
- 2 full sprigs of mint
Instructions
- Prep the fruits by washing and slicing the lemons, limes, and strawberries.
- Combine the sliced fruits in a large pitcher and muddle gently if desired.
- Add the mint sprigs to the pitcher.
- Pour in the Spindrift Lemon Limeade, then the Pink Lemonade, and finish with the Strawberry Lemonade.
- Give it a gentle stir to combine the flavors.
- Chill the punch in the fridge for 30 minutes before serving.
- Prepare to serve and garnish with extra fruit slices or mint leaves if desired.
Notes
Serve in clear glasses for a colorful presentation; consider adding ice cubes with frozen fruit for extra flair.
Nutrition
- Serving Size: 1 serving
- Calories: 150
- Sugar: 25g
- Sodium: 5mg
- Fat: 0g
- Saturated Fat: 0g
- Unsaturated Fat: 0g
- Trans Fat: 0g
- Carbohydrates: 36g
- Fiber: 1g
- Protein: 1g
- Cholesterol: 0mg
Keywords: punch, lemonade, beverage, refreshing, summer drink
Queso Chicken Enchiladas for a Quick and Cheesy Dinner Delight
Queso Chicken Enchiladas for a Quick and Cheesy Dinner Delight
Hello, fellow food lovers! If there’s one dish in my recipe arsenal that never fails to bring a smile to my face — and to the faces of my loved ones — it’s my Queso Chicken Enchiladas. With their creamy queso sauce, tender chicken, and cheesy goodness, these enchiladas are not just a meal; they’re a cozy hug in a tortilla. Whether you’re looking to whip up a weeknight dinner for the family or impress your friends at the next gathering, this recipe has you covered.
Cooking for me has always been about more than just feeding people; it’s about connecting, sharing stories, and creating memories around the table. I fondly remember the first time I made these enchiladas. It was a chilly autumn evening, and I wanted to make something comforting after what felt like a long week. I rifled through my pantry, found a few staple ingredients, and voila! My Queso Chicken Enchiladas were born. The aroma that filled my kitchen was intoxicating, and the laughter that followed at the dinner table was priceless.
Are you ready to dive into this cheesy delight? Let’s gather our ingredients and start cooking! You’ll be so glad you did.
Personal Story
Looking back, one of my fondest memories of making these enchiladas was the first time I prepared them for my close-knit group of friends during a cooking night. The atmosphere was relaxed; we sipped on sparkling water and reminisced about our college days, laughter and stories filling the air. As the enchiladas baked in the oven, the scent wafted through the house, coaxing everyone into the kitchen. When I finally pulled out that bubbling pan of cheesy goodness, the cheers were exhilarating!
The platter was nearly wiped clean in minutes, and every bite was accompanied by compliments and joyful exclamations. It was the perfect blend of nostalgia and new memories. This dish has since become a staple when I’m hosting, always reminding me that great food brings people together. And let me tell you, there’s nothing better than watching someone take a bite and smile with delight!
Ingredients
To make these tasty Queso Chicken Enchiladas, gather these simple yet delicious ingredients:
-
4 Burrito Size Flour Tortillas
Flour tortillas lend a pillowy texture to the enchiladas, but corn tortillas are a fabulous gluten-free alternative. Just remember to warm them up slightly on a skillet to keep them from cracking! -
2 Cups Shredded Chicken
Feel free to use rotisserie chicken for a quicker prep, or if you’re in the mood, poach or bake some chicken breasts. Leftover turkey also works brilliantly here! -
1 Packet Taco Seasoning
You can batch-make your own seasoning mix with spices like cumin, chili powder, and garlic for a personalized touch! Store-bought is convenient, but homemade can really amp up the flavor! -
1 Cup Sour Cream
Creamy, tangy, and rich, this plays well with the queso. Substitute with Greek yogurt for a healthier twist if desired! -
1 Cup Shredded Cheddar Cheese
Sharp Cheddar adds a delightful bite. For extra creaminess, mix in some Monterey Jack cheese — it melts like a dream! -
1 Can Chopped Green Chilies
These add a nice mild heat. Feel free to adjust the quantity based on your heat preference or even substitute with jalapeños for a kick! -
1 Can Diced Tomatoes with Green Chilies (Undrained)
The liquid helps keep the enchiladas moist. You can use regular diced tomatoes if you prefer! -
16 oz Queso Blanco Velveeta
This is the star of the dish! It melts beautifully, creating that indulgent creamy sauce. If you’re feeling adventurous, try using a block of cheese from the deli — just ensure it has good melting properties.
Step-by-Step Instructions
-
Preheat Your Oven
Preheat your oven to 350°F (175°C). This step is vital to ensure your enchiladas get that lovely golden finish while baking. -
Prepare the Filling
In a mixing bowl, combine the shredded chicken, taco seasoning, sour cream, chopped green chilies, and half of the shredded cheese. Mix well until everything is beautifully coated. This filling is so flavorful, you might find yourself sneaking bites before even wrapping it up! -
Assemble the Enchiladas
On a warm tortilla, spoon about ¼ cup of the chicken mixture into the center. Roll tightly from one end to the other and place seam-side down in a greased baking dish. Repeat with the remaining tortillas. There’s something therapeutic about rolling these babies up — just imagine the joy they’re going to bring! -
Make the Queso Sauce
In a saucepan over medium heat, melt the Velveeta queso. Add the diced tomatoes (with their juice) and stir until completely melted and combined. I like to add a touch of milk or chicken broth if I want a thinner sauce. Keep stirring to prevent it from sticking! -
Pour the Queso Sauce
Once your queso is smooth, pour it over the rolled enchiladas in the baking dish, making sure to cover them generously. You want every bite to be infused with that gooey goodness! -
Top with Cheese
Sprinkle the remaining shredded cheese on top of the enchiladas, allowing for that glorious cheesy crust we all crave. -
Bake
Place the baking dish in your preheated oven and bake for 20-25 minutes or until the cheese is bubbly and slightly golden on the edges. Your kitchen is going to smell divine — trust me! -
Serve
Once they’re done, let them sit for a few minutes before serving. This allows everything to set just a touch, making for easier cutting. Pair with a fresh salad or some tortilla chips for crunch!
Serving Suggestions
For plating these enchiladas, grab a large serving spoon and scoop them out onto a beautiful platter. Garnish with a sprinkle of fresh cilantro or a dollop of sour cream for a pop of color and flavor. Serve alongside a crisp green salad or some homemade salsa for added freshness. And don’t forget the margaritas — they pair oh-so-well!
Recipe Variations
- Spicy Kick: Add sliced jalapeños to the filling or substitute spicy taco seasoning to elevate the heat.
- Veggie Lovers: Replace the chicken with black beans, corn, or sautéed vegetables for a delicious vegetarian option.
- Creamy Avocado Sauce: Instead of queso, make a creamy avocado sauce to drizzle over the enchiladas before serving for a fresh twist.
- Herb Infusion: Add chopped fresh herbs like cilantro or chives to the filling for an aromatic upgrade.
- Different Cheeses: Swap out the cheddar and use pepper jack for a hint of spice or feta for a Mediterranean flair.
Chef’s Notes
These Queso Chicken Enchiladas are one of those recipes that have truly evolved in my kitchen. I started with a basic version many years ago, but over time, I’ve added little twists and turned it into something that feels uniquely mine. I also have to admit, there have been times where I tried using every cheese in my fridge, resulting in an accidental but delicious fusion of flavors!
One of my funniest kitchen stories related to this dish happened when I made them for a big family gathering. I mistakenly used a spicy bean dip instead of queso, and let’s just say they definitely left an impression! Lesson learned: always double-check your ingredients.
FAQs and Troubleshooting
Q: What if my enchiladas break when rolling?
A: Make sure to warm up your tortillas before filling them. This helps prevent breakage. If they do break, just layer the ingredients like a lasagna — it’ll still taste fantastic!
Q: Can I make these ahead of time?
A: Absolutely! You can assemble them and store them in the fridge covered for up to a day before baking. Just add a few extra minutes to the baking time since they’ll be cold from the fridge.
Q: What can I substitute for Velveeta?
A: If you want a more natural cheese option, try a block of cream cheese paired with a melting cheese like Monterey Jack or mozzarella. Just blend the cream cheese smooth before adding!
Q: How do I make them less greasy?
A: Opt for lower-fat cheese options or use Greek yogurt instead of sour cream to lighten them up a bit. You can also drain the diced tomatoes well to reduce moisture if necessary.
Nutritional Info
While everyone’s dietary needs can vary, here’s a rough estimate per serving (based on 4 servings):
- Calories: 450
- Protein: 28g
- Carbohydrates: 45g
- Fat: 20g
Remember to adjust based on your ingredient choices and serving sizes!
So there you have it, my beloved Queso Chicken Enchiladas — not just a meal, but a delightful experience in the kitchen and around the table! Whether you’re making these for a casual night or a special occasion, they’re sure to bring joy and warmth. Now, tie on your apron, turn up the music, and let’s make something delicious! Happy cooking!
PrintQueso Chicken Enchiladas

Creamy and cheesy Queso Chicken Enchiladas perfect for a cozy dinner, filled with tender chicken and topped with a luscious queso sauce.
- Prep Time: 15 minutes
- Cook Time: 25 minutes
- Total Time: 40 minutes
- Yield: 4 servings 1x
- Category: Main Course
- Method: Baking
- Cuisine: Mexican
- Diet: Gluten-Free Option Available
Ingredients
- 4 Burrito Size Flour Tortillas
- 2 Cups Shredded Chicken
- 1 Packet Taco Seasoning
- 1 Cup Sour Cream
- 1 Cup Shredded Cheddar Cheese
- 1 Can Chopped Green Chilies
- 1 Can Diced Tomatoes with Green Chilies (Undrained)
- 16 oz Queso Blanco Velveeta
Instructions
- Preheat your oven to 350°F (175°C).
- Combine the shredded chicken, taco seasoning, sour cream, chopped green chilies, and half of the shredded cheese in a mixing bowl.
- On a warm tortilla, spoon about ¼ cup of the chicken mixture into the center, roll tightly, and place seam-side down in a greased baking dish.
- Melt the Velveeta queso in a saucepan over medium heat, adding diced tomatoes and stirring until combined.
- Pour the queso sauce over the rolled enchiladas, covering them generously.
- Sprinkle the remaining shredded cheese on top of the enchiladas.
- Bake for 20-25 minutes until cheese is bubbly and golden.
- Let sit for a few minutes before serving.
Notes
Serve with fresh cilantro, sour cream, or a crisp salad. Feel free to modify the recipe to suit your taste, such as adding spicy elements or veggie substitutes.
Nutrition
- Serving Size: 1 serving
- Calories: 450
- Sugar: 4g
- Sodium: 800mg
- Fat: 20g
- Saturated Fat: 10g
- Unsaturated Fat: 6g
- Trans Fat: 0g
- Carbohydrates: 45g
- Fiber: 2g
- Protein: 28g
- Cholesterol: 80mg
Keywords: enchiladas, chicken, queso, cheesy, dinner, comfort food

Air Fryer Peaches
Air Fryer Peaches: The Delightful Summer Treat You Need
Hello, fellow food lovers! Today, I’m thrilled to share with you one of the simplest yet most delightful desserts that captures the essence of summer: Air Fryer Peaches. Think about juicy, sweet peaches enveloped in a slight caramelization, all topped off with a scoop of creamy vanilla ice cream. It’s simplicity meets heavenly flavor! Whether you’re hosting a casual get-together or just treating yourself after a long day, this recipe will have your friends and family asking for seconds—and maybe even thirds.
I have a soft spot for peaches. Growing up, my family would always visit this charming little orchard during the summer months. I can still picture the sun-drenched rows of trees, the vibrant yellow and orange hues of ripe peaches hanging just out of reach, and the fragrant sweet scent in the air that made my mouth water. My siblings and I would race to see who could collect the most peaches, and at the end of the day, we’d feast at a picnic table, savouring the fresh fruit as a sweet reward for our hard work.
In that essence of enjoying simple pleasures and flavors in their purity, this air fryer recipe perfectly encapsulates everything I adore about summer sweets. It’s approachable, elegant, and oh-so-satisfying. Plus, using an air fryer means these beauties are ready in a flash! So, let’s roll up our sleeves and dive into this delightful dish.
Personal Story
One particular summer stands out in my memory—a visit to the orchard that felt larger than life. The sun glistened off the peaches like jewels, waiting to be plucked. My family and I spent the day laughing, climbing trees, and, of course, tasting the fruits right off the branches. Once we had our bounty, we decided to host a peach-inspired dinner party at our home. I got to play chef, and we whipped up a peasant-style meal featuring fresh peach salsa, grilled chicken, and, of course, my mother’s famous peach cobbler for dessert. While I adored the cobbler, I wished I could elevate the fresh peaches even more, and that’s where my air fryer comes to the rescue years later!
Every time I prepare these air fryer peaches, I’m whisked back to those carefree summer days—gathering around the table, sharing food, and creating memories that last long after the last bite is gone.
Ingredients
Let’s dive into what you’ll need for our air fryer peaches:
-
4 ripe peaches: Look for peaches that are slightly soft to the touch. If they’re not quite ripe, a little extra time on the counter will make all the difference. You can substitute nectarines if you’re feeling adventurous!
-
2 tablespoons brown sugar: This adds a caramelized sweetness that enhances the natural flavor of the peaches. You can use coconut sugar or maple syrup if you prefer a healthier alternative.
-
1 teaspoon cinnamon: A warm spice that pairs perfectly with peaches. Feel free to experiment with nutmeg or allspice for a different aroma and taste.
-
Vanilla ice cream (for serving): It’s the crown jewel on this delightful dish, adding creaminess that beautifully contrasts with the peaches. Consider dairy-free ice cream if you’re looking for a vegan option!
Step-by-Step Instructions
Now onto the fun part—let’s cook! Follow these step-by-step instructions, and I promise you’ll have a delightful dessert in no time.
-
Prep the Peaches: Start by washing your peaches under cold running water to remove any natural pesticides. Pat them dry with a clean towel.
-
Halve and Pit: Carefully, using a sharp knife, cut each peach in half, twisting the two halves apart gently. Pop out the pit. You can scoop out a little more flesh with a spoon to create a small, sweet "bowl" if you like. This will hold the delicious brown sugar and cinnamon mix!
-
Season the Halves: In a small bowl, mix together the brown sugar and cinnamon. Generously sprinkle this mixture over the cut sides of the peach halves. Don’t hold back—the more, the merrier!
-
Preheat the Air Fryer: Preheat your air fryer to 350°F (175°C). This step is crucial as it ensures the peaches cook evenly and beautifully.
-
Air Fry: Place the peach halves in the air fryer basket, cut side up. Make sure they’re not overcrowded—give them a little space to breathe and get caramelized. Air fry them for about 8-10 minutes. You’ll know they’re done when they’re tender and slightly golden.
-
Serve: Remove the peaches carefully (they’ll be hot!), and let them cool for a minute. Then, plate them and add a scoop of vanilla ice cream on top while they’re still warm. A drizzle of honey or a sprinkle of crushed nuts on top can take this to the next level!
Serving Suggestions
Presentation can elevate any dish, so don’t forget about plating! Arrange the air-fried peach halves on a charming dessert plate, drizzled with a little extra honey or maple syrup for flair. The contrast of the warm peaches and the cold ice cream is not just delicious—it’s downright Instagrammable! Serve with a sprig of mint for that pop of color and surprise element.
Recipe Variations
Here are some delightful twists to consider for your air fryer peaches:
-
Spiced Peaches: Add a pinch of nutmeg or even a dash of cayenne for a sweet-spicy kick.
-
Grilled Peaches: For an even smokier flavor, try tossing your peaches in a bit of olive oil before air frying for that BBQ feel.
-
Nutty Crunch: Toss some crushed pistachios or almonds over the top with your vanilla ice cream for an added crunch.
-
Berry Bliss: Add fresh or frozen berries in the center of the peach halves before air frying for a fruity burst!
-
Vegan Version: Use almond or coconut milk ice cream as a delightful non-dairy alternative.
Chef’s Notes
Let me share a little funny story from my kitchen adventures. One summer, I was excited to showcase these air fryer peaches at a friend’s barbecue. However, I had accidentally purchased under-ripe peaches! Let’s just say I ended up with something resembling peach-flavored rocks instead. Luckily, I had a backup plan with some frozen peaches in the freezer, and all was saved! Always taste your fruit beforehand, my friends!
Over the years, my air fryer peach recipe has evolved into something beautifully simple yet packed with nostalgia. The recipe has become a staple in my kitchen, reminding me of those summer days filled with laughter, love, and delicious bites.
FAQs and Troubleshooting
1. What if my peaches are too firm?
If your peaches are not quite ripe and firm, you can either let them sit at room temperature for a few days or bake them in the air fryer for a few extra minutes to soften them.
2. Can I use frozen peaches?
Absolutely! While the texture may differ, frozen peaches can still work wonderfully. Just add an extra 2-3 minutes to the cooking time, and keep an eye on them.
3. What if I don’t have an air fryer?
No air fryer? No problem! You can grill or roast the peaches in the oven at 400°F (200°C) for about 15-20 minutes until tender. You won’t get that same degree of caramelization, but they’ll still be delicious!
4. How can I make these peaches sweeter?
If you have a sweet tooth, feel free to increase the amount of brown sugar or even add a drizzle of honey or maple syrup right before serving.
Nutritional Info
While I believe in enjoying food in moderation, here’s a rough nutritional breakdown per serving (two peach halves with a scoop of vanilla ice cream):
- Calories: Approximately 250-300, depending on the ice cream
- Fat: 10g
- Carbohydrates: 35g
- Protein: 3g
- Sugar: 20g
Cooking is about sharing joy and creating memories. And with these air fryer peaches, you can do just that. So tie on your apron, gather around the table, and let’s whip up something timeless together. Happy cooking, and enjoy those sweet summer moments!
PrintAir Fryer Peaches: The Delightful Summer Treat You Need

A simple and delightful dessert featuring juicy peaches, caramelized to perfection, and topped with creamy vanilla ice cream.
- Prep Time: 10 minutes
- Cook Time: 10 minutes
- Total Time: 20 minutes
- Yield: 4 servings 1x
- Category: Dessert
- Method: Air Frying
- Cuisine: American
- Diet: Vegetarian
Ingredients
- 4 ripe peaches
- 2 tablespoons brown sugar
- 1 teaspoon cinnamon
- Vanilla ice cream (for serving)
Instructions
- Prep the peaches: Wash the peaches under cold water and pat dry.
- Halve and pit: Cut each peach in half and remove the pit.
- Season the halves: Mix brown sugar and cinnamon, then sprinkle over the cut sides of the peaches.
- Preheat the air fryer: Set it to 350°F (175°C).
- Air fry: Place peaches in the air fryer and cook for 8-10 minutes until tender.
- Serve: Top with vanilla ice cream and enjoy.
Notes
For extra flavor, try adding honey or crushed nuts on top. Don’t forget you can use frozen peaches if fresh ones are unavailable.
Nutrition
- Serving Size: 2 peach halves with ice cream
- Calories: 275
- Sugar: 20g
- Sodium: 5mg
- Fat: 10g
- Saturated Fat: 5g
- Unsaturated Fat: 3g
- Trans Fat: 0g
- Carbohydrates: 35g
- Fiber: 2g
- Protein: 4g
- Cholesterol: 30mg
Keywords: Air Fryer, Peaches, Summer Dessert, Easy Recipe, Healthy Treat
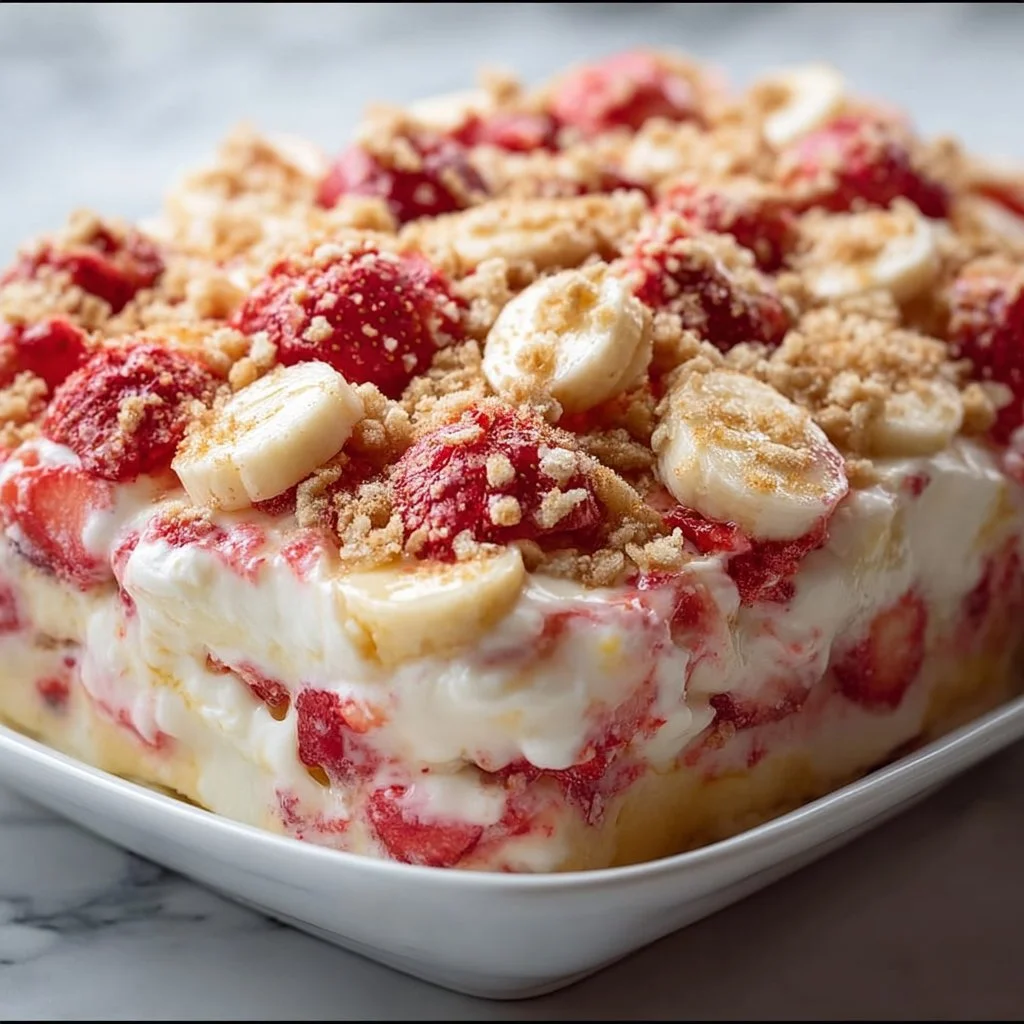
Strawberry Crunch Banana Pudding
The Delightful Harmony of Strawberry Crunch Banana Pudding
Hello, fellow food lovers! Today, let’s dive into a dish that’s near and dear to my sweet tooth—Strawberry Crunch Banana Pudding. This dessert isn’t just another pudding; it’s a delightful medley that combines the creaminess of vanilla pudding, the brightness of fresh bananas, and the unexpected crunch from strawberry cookie crumble. Whether you’re looking for a treat to impress your friends at a dinner party or simply want to indulge in something sweet after a long day, this recipe is here to save the day!
Growing up, I spent a lot of time in my grandmother’s kitchen while she worked her culinary magic. One of my fondest memories is when she would whip up her famous banana pudding during family gatherings. We’d all gather around the table, and the air would fill with laughter and that inviting aroma of pudding cooling in the refrigerator. She had a way of making the ordinary feel special—like a masterpiece crafted from everyday ingredients. Fast forward to today, and I’ve added my own twist: a strawberry crunch topping to elevate her classic recipe into something new and exciting.
This Strawberry Crunch Banana Pudding brings back all those warm memories while letting me share my passion for creating sophisticated yet simple desserts. Pairing the smooth vanilla pudding with the freshness of bananas and that buttery strawberry crunch is a joyous experience that will have your taste buds dancing. Let’s explore how to craft this delicious treat together!
Ingredients
To create this beautiful dessert, you’ll need the following ingredients:
-
1 package of vanilla pudding mix
The base of this dessert, vanilla pudding, provides a creamy and smooth texture. If you want an alternative, consider using a sugar-free version or a flavored pudding mix like banana or cheesecake. -
2 cups of milk
Whole milk creates a richer texture, but you can experiment with skim milk or plant-based alternatives like almond milk or oat milk for a different flavor. -
3 bananas, sliced
Ripe bananas are a must for this recipe; their natural sweetness adds to the dessert’s charm. If you’re not a banana fan, you could swap them out for thinly sliced peaches or berries for a fresh twist. -
1 container of whipped topping
This adds a light and airy texture to the pudding. You can use homemade whipped cream if you prefer a more natural option, or an alternative like coconut whipped cream for a dairy-free version. -
1 cup of strawberry cookie crumble
This is where the magic happens! You can make your crumble with buttery strawberry cookies, or if they’re not available, any buttery shortbread cookies mixed with some strawberry powder can work beautifully. -
Fresh strawberries for garnish (optional)
A pop of color and freshness, fresh strawberries make the dessert look inviting and add a burst of flavor. If you’re short on strawberries, blueberries or raspberries could work too!
Step-by-Step Instructions
Step 1: Prepare Your Pudding
- In a large mixing bowl, combine the vanilla pudding mix with 2 cups of milk.
Tip: Whisk vigorously for about 2 minutes until the mixture thickens—this is where the magic starts! Use a handheld mixer on low if you want to make it even fluffier.
Step 2: Fold in the Whipped Topping
- Once the pudding has set, gently fold in the container of whipped topping.
Chef Hack: Use a spatula and a gentle folding motion to keep the mixture light and airy. Remember, we want that creamy texture without losing all the fluffiness!
Step 3: Layer Your Ingredients
-
In a large glass serving dish or individual cups, start layering: begin with a layer of pudding, followed by a layer of sliced bananas.
Bonus Tip: Arrange the banana slices in a circle for a beautiful presentation—trust me, your guests will be impressed! -
Repeat the layering process until you’ve reached the top of your dish, finishing with a layer of pudding.
Step 4: Top with Crunch
- Sprinkle the strawberry cookie crumble generously over the top layer.
Chef Insight: Don’t hold back on the crumble—this is the highlight of the dish! If you’d like extra crunch, consider toasting the crumble slightly in a pan for 5-7 minutes.
Step 5: Chill and Garnish
- Place the finished pudding in the refrigerator for at least 2 hours (or ideally overnight) to allow the flavors to meld and the pudding to set perfectly.
Final Touch: When ready to serve, garnish with fresh strawberries for that extra charm.
Serving Suggestions
When it comes to serving your Strawberry Crunch Banana Pudding, the beauty is in the details! For a stunning presentation, consider using individual glass cups or jars. This not only showcases the delightful layers but also makes for an appealing dessert buffet. Drizzle a bit of homemade chocolate sauce or caramel on top just before serving for an extra special treat!
Recipe Variations
Let’s get playful! Here are some fun twists on this classic recipe:
- Chocolate-Chip Banana Pudding: Add mini chocolate chips to the pudding for that chocolate lover’s touch.
- Nutty Banana Crunch: Sprinkle in some chopped nuts like pecans or almonds for added texture.
- Berry Medley: Swap out the strawberries for a mix of your favorite berries—blueberries, raspberries, and blackberries for a fruity explosion!
- Savory Banana Pudding: A hint of cream cheese in the pudding could offer a delightful tang if you’re feeling adventurous.
- Lemon Zest: A little lemon zest in the pudding adds a refreshing punch—perfect for warm weather gatherings!
Chef’s Notes
As many recipes do, this Strawberry Crunch Banana Pudding has evolved over time. I even remember the first time I served it at a family gathering—a few skeptical looks turned to delight as forks dove in. The crunch was indeed a game-changer! My journey with this dish ignited my love for creating layers of flavor and texture. Plus, it’s an easy go-to when unexpected guests stop by; it takes less than 30 minutes to prep!
One thing I always keep in mind is to bring my personality into my cooking. There’s something magical about sharing food with loved ones that creates connection and warmth. This dish has become a staple—it’s a reminder of my grandmother’s kitchen where so much love began.
FAQs and Troubleshooting
1. Can I make this pudding ahead of time?
Absolutely! This pudding actually tastes better the next day, once it has chilled and all the flavors have melded together.
2. What if I can’t find strawberry cookies?
No worries! You can make your crumble with any buttery cookies. Just blend them with a touch of strawberry jam or freeze-dried strawberries for that strawberry flavor!
3. Why is my pudding not thickening?
Make sure you’re whisking the pudding mix and milk well for the recommended time. If it still doesn’t thicken, you may need to check the expiration date on your pudding mix.
4. How should I store leftovers?
Keep any leftovers covered in the refrigerator. It should stay fresh for about 3-4 days, though the crumble might lose some crunch.
Nutritional Info
If you’d like to know the nutritional breakdown, a serving of Strawberry Crunch Banana Pudding contains approximately:
- Calories: 250
- Total Fat: 10g
- Saturated Fat: 5g
- Carbohydrates: 38g
- Sugars: 20g
- Protein: 3g
Remember, these figures may vary depending on the specific brands of ingredients used.
So there you have it! Your very own guide to creating Strawberry Crunch Banana Pudding that marries nostalgia with elegance. I hope you find joy in making this dish as much as I do. Let’s gather around the table, dive into some layers of deliciousness, and create memories that last! I can’t wait to hear how yours turns out—happy cooking!
PrintStrawberry Crunch Banana Pudding

A delightful medley of creamy vanilla pudding, fresh bananas, and crunchy strawberry cookie crumble.
- Prep Time: 30 minutes
- Cook Time: 0 minutes
- Total Time: 120 minutes
- Yield: 4 servings 1x
- Category: Dessert
- Method: Chilling
- Cuisine: American
- Diet: Vegetarian
Ingredients
- 1 package of vanilla pudding mix
- 2 cups of milk
- 3 bananas, sliced
- 1 container of whipped topping
- 1 cup of strawberry cookie crumble
- Fresh strawberries for garnish (optional)
Instructions
- In a large mixing bowl, combine the vanilla pudding mix with 2 cups of milk. Whisk vigorously for about 2 minutes until the mixture thickens.
- Once the pudding has set, gently fold in the container of whipped topping.
- In a large glass serving dish or individual cups, start layering: begin with a layer of pudding, followed by a layer of sliced bananas.
- Repeat the layering process until you’ve reached the top, finishing with a layer of pudding.
- Sprinkle the strawberry cookie crumble generously over the top layer.
- Place the finished pudding in the refrigerator for at least 120 minutes (or ideally overnight) to allow the flavors to meld.
Notes
Consider using individual glass cups for serving. Drizzle homemade chocolate sauce or caramel on top before serving.
Nutrition
- Serving Size: 1 serving
- Calories: 250
- Sugar: 20g
- Sodium: 105mg
- Fat: 10g
- Saturated Fat: 5g
- Unsaturated Fat: 5g
- Trans Fat: 0g
- Carbohydrates: 38g
- Fiber: 1g
- Protein: 3g
- Cholesterol: 15mg
Keywords: banana pudding, strawberry dessert, summer dessert
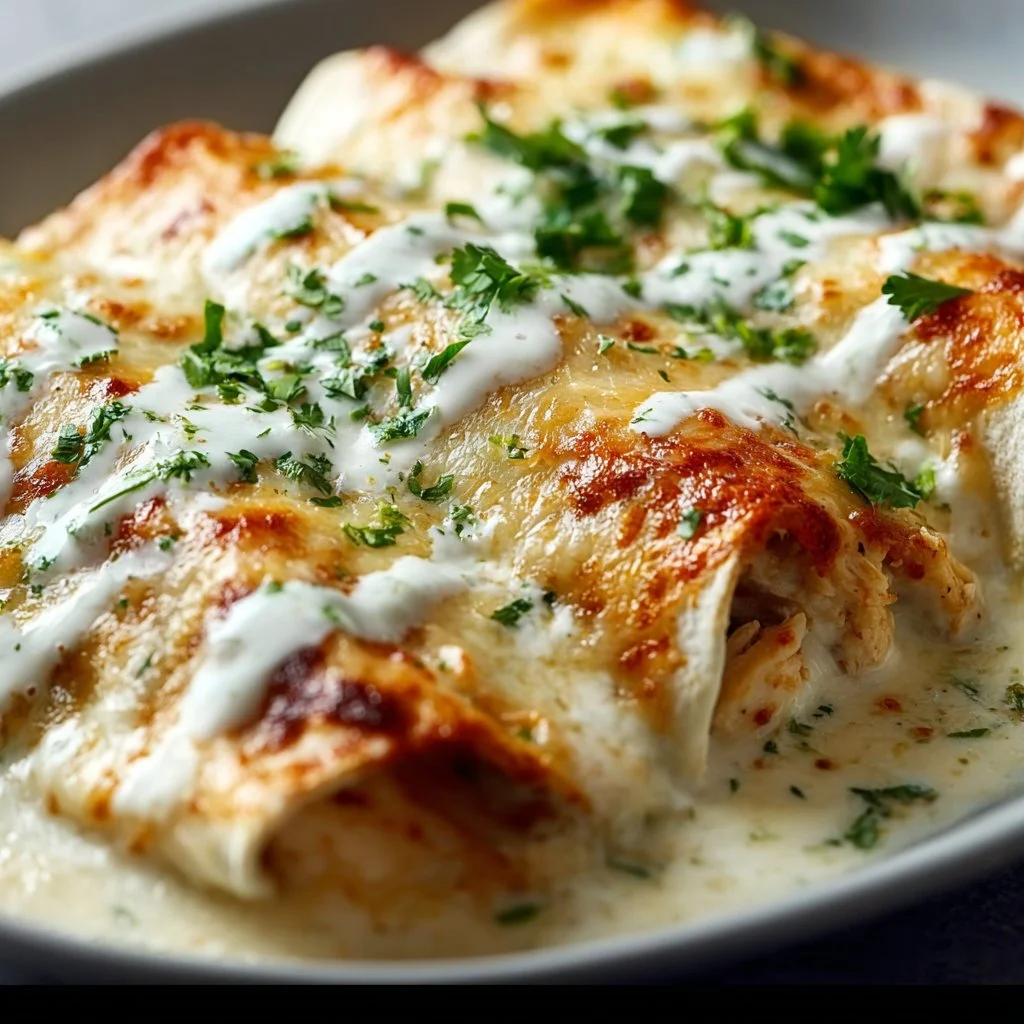
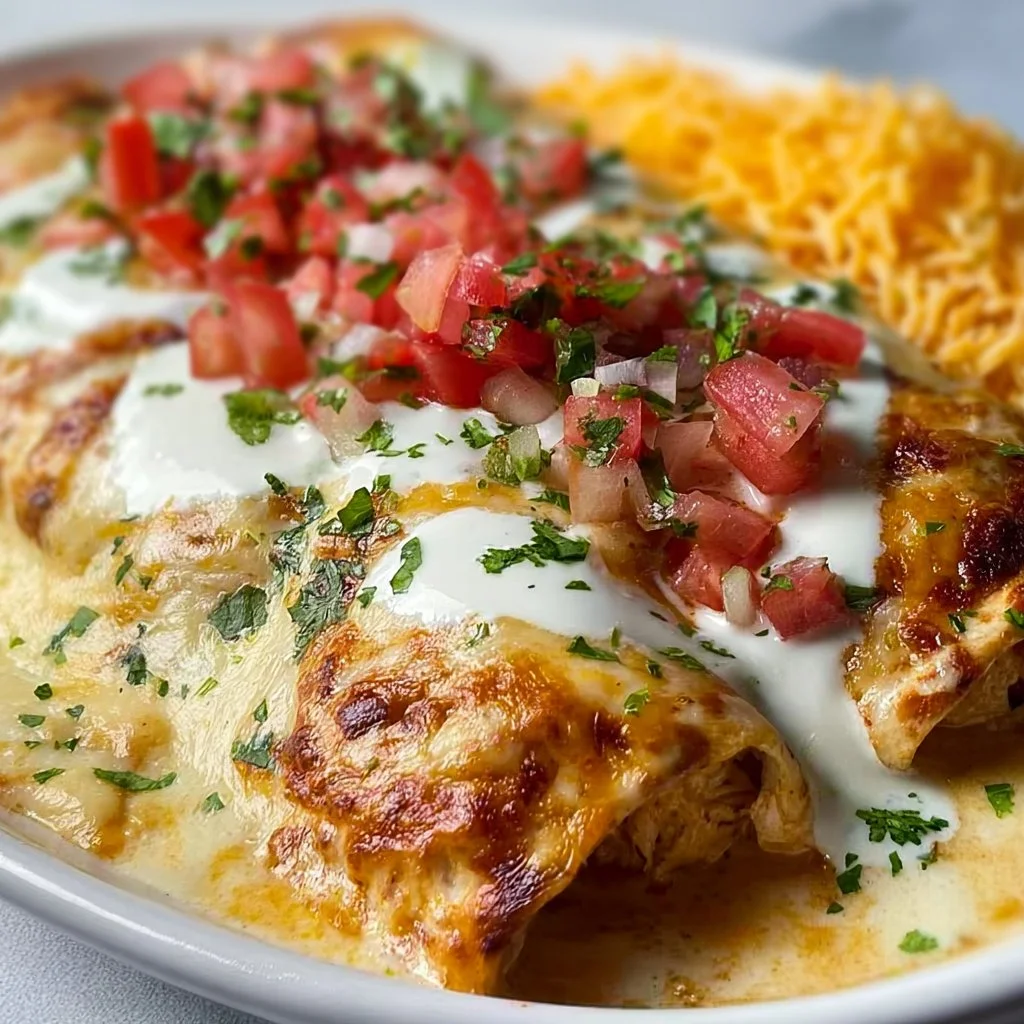
Creamy White Chicken Enchiladas
Creamy White Chicken Enchiladas: A Delicious Journey
Hello there, fellow food lovers! Today, I’m excited to share with you a dish that embodies comfort, warmth, and a whole lot of flavor: Creamy White Chicken Enchiladas. These delightful rolls are not only a feast for the eyes but also a warm hug for the taste buds. Picture melty cheese, tender chicken, and a luscious white sauce all wrapped in soft tortillas—what’s not to love?
When I think of my time in the kitchen crafting this recipe, it brings back fond memories of family gatherings, where laughter and delicious aromas filled the air. There’s something magical about sharing a cozy meal with the people you love, and I firmly believe these enchiladas deliver just that!
Whether you’re looking to impress friends at a dinner party or simply want to treat yourself to a comforting weeknight meal, this dish has got you covered. Let’s dive into this culinary adventure together!
My Culinary Memory
One of my favorite kitchen memories revolves around these delightful creamy white chicken enchiladas. I remember the first time I made them for my closest friends during a cozy winter gathering. The flurry of the season had everyone seeking warmth and comfort, and there I was, armed with my trusty apron, ready to create something special.
The moment those enchiladas came out of the oven—golden, bubbling, and simply irresistible—the entire room filled with the heavenly aroma of melted cheese and spices. As we gathered around the table, plates piled high with enchiladas, I couldn’t help but feel a deep sense of joy. We laughed, shared stories, and indulged in seconds (and maybe even thirds!). It was then that I realized how food has this incredible ability to bring people together and create cherished memories. So, grab your apron, and let’s recreate that magic in your kitchen!
Ingredients
Here’s what you’ll need to whip up these delectable Creamy White Chicken Enchiladas:
-
8-10 flour tortillas (medium size): Flour tortillas are soft and pliable—perfect for rolling. If you prefer a gluten-free option, corn tortillas work wonderfully too!
-
3 cups cooked shredded chicken: You can use rotisserie chicken for convenience or poach your own for freshness. Bonus points for flavor if you season the chicken while cooking!
-
2 cups shredded Monterey Jack cheese (divided): This cheese melts beautifully, adding a creamy texture to your dish. Feel free to substitute with white cheddar for a sharper taste.
-
1 cup shredded cheddar cheese (divided): Classic cheddar brings a delicious tanginess. Go for a sharp variety for more robust flavor!
-
1/2 cup diced green chiles (canned or fresh): These little guys add a delightful kick. If you prefer a milder flavor, opt for canned mild chiles or skip this ingredient altogether.
-
1/4 cup chopped fresh cilantro: Fresh cilantro brightens the dish! If you’re not a fan of cilantro, parsley can be used instead, although it offers a different flavor profile.
-
1 small onion (diced): Onions provide depth and sweetness. You can substitute with shallots for a more subtle flavor.
-
3 tablespoons butter: Butter adds that rich, velvety texture to our sauce. If you need a dairy-free option, use olive oil or vegan butter.
-
3 tablespoons all-purpose flour: This is essential for making the roux that thickens our white sauce. You can use gluten-free flour if necessary.
-
2 cups chicken broth: Homemade is best! But store-bought works perfectly in a pinch. Just be sure it’s low-sodium for better control over your seasonings.
-
1 cup sour cream (room temperature): Adds creaminess and tang! You can substitute with Greek yogurt for a healthier alternative.
-
1/2 teaspoon cumin (ground): Cumin brings warmth and earthiness to the dish. Feel free to adjust this based on your personal taste!
-
Salt and pepper (to taste): Essential seasonings that enhance the flavors!
Step-by-Step Instructions
Now that we’ve got our ingredients lined up, let’s get cooking! I promise it’ll be easier than you think!
-
Prepare Your Cooking Area: Start by preheating your oven to 350°F (175°C). Grab a 9×13-inch baking dish and lightly grease it with cooking spray or a drizzle of olive oil. This will help prevent sticking and make for easier cleanup.
-
Make the White Sauce: In a medium saucepan over medium heat, melt the butter. Once it’s bubbling, add the diced onions and cook for about 3-4 minutes until they’re translucent and fragrant. Here’s a little chef hack: stir occasionally to prevent burning and let them get that lovely caramelized color!
-
Create the Roux: Stir in the flour to create a roux. Combine it with the butter and onions, whirling it until it looks like a paste. Cook for another minute to cook out the raw flour flavor. You want it to be a light golden color.
-
Add Chicken Broth and Season: Gradually whisk in the chicken broth, ensuring there are no lumps. Increase the heat slightly and keep whisking until the mixture thickens, about 2-3 minutes. Once it’s nice and creamy, fold in the sour cream, cumin, salt, and pepper. Voila! Your white sauce is ready!
-
Combine Chicken and Sauce: In a large mixing bowl, combine your shredded chicken, half of the Monterey Jack cheese, green chiles, and half of the cilantro. Pour in a cup of the creamy white sauce and mix until everything is evenly coated.
-
Assemble the Enchiladas: Take one tortilla and spoon about 1/3 cup of the chicken mixture into the center. Roll it up tightly and place it seam-side down in your prepared baking dish. Repeat until all tortillas are filled. This might get a little messy, but isn’t that part of the fun?
-
Top it Off: Once all your enchiladas are snug in their dish, pour the remaining white sauce over them. Sprinkle the rest of your cheeses on top (the more cheese, the better!). Finish with a sprinkle of salt and pepper.
-
Bake to Perfection: Pop the baking dish in the preheated oven and bake for about 25-30 minutes, or until the top is golden and bubbly. You might want to crank the broiler for an extra minute or two at the end to get that perfect golden crust—just keep a close eye on it!
-
Garnish and Serve: Once removed from the oven, sprinkle the remaining cilantro over the top. Allow it to cool for a few minutes before serving.
Serving Suggestions
When it comes to plating, I like to keep it simple yet inviting. Serve your enchiladas directly from the baking dish for a homey vibe, letting your guests dive right in! Add a fresh side salad with a zesty vinaigrette to cut through the creaminess and maybe some avocado slices to add a hint of richness. Don’t forget to put out a bowl of sour cream and salsa for toppings—it’s all about personalization!
Recipe Variations
Feel like switching things up a bit? Here are a few creative spins on this classic:
- Spicy Salsa Verde Variety: Swap the white sauce for a zesty salsa verde for an unexpected twist that adds both flavor and spice!
- Vegetarian Option: Replace the chicken with black beans or roasted vegetables. This offers a hearty meatless meal while keeping all the creamy goodness.
- Extra Cheesy: For the cheese lovers, add another layer of cheese between the enchiladas and top with crushed tortilla chips before baking for a delightful crunch.
- Herb Infusion: Experiment with different herbs like oregano or thyme mixed into the filling for additional aromatic flavors!
- Breakfast Enchiladas: Substitute shredded chicken with scrambled eggs, black beans, and pepper jack cheese for a delicious breakfast twist!
Chef’s Notes
These Creamy White Chicken Enchiladas have a special place in my heart because of their versatility. They’ve evolved over time based on what I have on hand or what my friends are craving. I’ve thrown in everything from leftover grilled chicken to a variety of cheeses, and every time they’ve turned out divine. I once made a version with a little chipotle sauce for a smoky kick, and let me tell you, it was a hit!
In the kitchen, things don’t always go perfectly—once, I accidentally grabbed flour instead of cornstarch while trying to thicken a sauce. Long story short, we ended up with a delightful gravy that paired beautifully with some leftover steak! So remember, every cooking experience is an opportunity to learn and grow—embrace it!
FAQs and Troubleshooting
1. What if my sauce is too thick when I make it?
If your sauce gets too thick, don’t fret! Simply whisk in a bit more chicken broth until it reaches your desired consistency.
2. Can I freeze leftover enchiladas?
Yes! These enchiladas freeze beautifully. Just make sure to cover them well with plastic wrap and aluminum foil. They can be stored for up to 3 months. Thaw in the refrigerator and then bake as directed.
3. What’s the best way to reheat them?
Reheat your enchiladas in a preheated oven at 350°F (175°C) for about 15-20 minutes, until heated through. You can cover them with foil to prevent the cheese from browning too quickly.
4. Why are my enchiladas falling apart?
If your enchiladas are falling apart, it may be due to overfilling or undercooking the tortillas. Ensure they’re warmed slightly before filling to make them pliable, and don’t overload them with filling!
Nutritional Info (Optional)
Each serving of these Creamy White Chicken Enchiladas (based on a recipe serving 8) is approximately:
- Calories: 320
- Protein: 22g
- Carbohydrates: 28g
- Fat: 15g
Remember, nutrition can vary based on specific ingredients used, so adjust accordingly!
And there you have it! Beautiful, creamy white chicken enchiladas that are as enjoyable to make as they are to eat. I hope this recipe brings you as much joy as it has brought me over the years. Now, tie on that ivory apron of yours, tap into your culinary spirit, and let’s make some delicious memories together. Happy cooking!
PrintCreamy White Chicken Enchiladas

Comforting enchiladas filled with shredded chicken and smothered in a creamy white sauce.
- Prep Time: 15 minutes
- Cook Time: 30 minutes
- Total Time: 45 minutes
- Yield: 8 servings 1x
- Category: Main Course
- Method: Baking
- Cuisine: Mexican
- Diet: Gluten-Free Option
Ingredients
- 8–10 flour tortillas
- 3 cups cooked shredded chicken
- 2 cups shredded Monterey Jack cheese (divided)
- 1 cup shredded cheddar cheese (divided)
- 1/2 cup diced green chiles
- 1/4 cup chopped fresh cilantro
- 1 small onion (diced)
- 3 tablespoons butter
- 3 tablespoons all-purpose flour
- 2 cups chicken broth
- 1 cup sour cream
- 1/2 teaspoon cumin (ground)
- Salt and pepper (to taste)
Instructions
- Preheat your oven to 350°F (175°C) and grease a 9×13-inch baking dish.
- Melt the butter in a medium saucepan over medium heat. Add the diced onions and cook for 3-4 minutes until translucent.
- Stir in the flour to create a roux and cook for another minute.
- Whisk in the chicken broth gradually until thickened, about 2-3 minutes. Fold in the sour cream, cumin, salt, and pepper.
- Combine shredded chicken, half of the Monterey Jack cheese, green chiles, and half of the cilantro in a mixing bowl. Add a cup of the white sauce and mix well.
- Fill each tortilla with the chicken mixture, roll tightly, and place seam-side down in the dish.
- Pour the remaining white sauce over the top and sprinkle with the remaining cheese.
- Bake for 25-30 minutes until golden and bubbly.
- Garnish with remaining cilantro before serving.
Notes
These enchiladas can be frozen for up to 3 months. Reheat in a preheated oven at 350°F (175°C) for 15-20 minutes.
Nutrition
- Serving Size: 1 serving
- Calories: 320
- Sugar: 4g
- Sodium: 600mg
- Fat: 15g
- Saturated Fat: 8g
- Unsaturated Fat: 6g
- Trans Fat: 0g
- Carbohydrates: 28g
- Fiber: 2g
- Protein: 22g
- Cholesterol: 50mg
Keywords: enchiladas, creamy chicken, comfort food, Mexican cuisine

Creamy Beef Pasta
Creamy Beef Pasta: A Comforting Classic You’ll Adore
Hello, culinary friends! Today, we’re diving into a dish that promises to warm your heart and fill your home with delightful aromas: Creamy Beef Pasta. This recipe is perfect for cozy weeknights or when you just want something easy yet utterly satisfying. With luscious creaminess, savory beef, and comforting pasta, you’ll be ready to gather everyone around the table in no time. So, grab your apron and let’s get cooking!
A Taste of Nostalgia
Ah, pasta! It’s one of those magical foods that never fails to evoke memories. I remember the first time I tried a creamy beef pasta at a family gathering. It was one of those chilly autumn evenings, and my aunt had just taken it out of the oven, its cheesy top bubbling and golden brown. The moment I took a bite, I was transported to a warm embrace of flavors: the richness of the cream, the savory depth from the beef, and the satisfying chewiness of the pasta.
It became an instant classic in our family, making appearances at birthdays and casual Sunday dinners alike. Now, I’ve taken that nostalgic recipe and put my own spin on it, simplifying the steps while maximizing the flavor. Trust me, once you try this creamy beef pasta, it might just become a beloved dish in your household as well!
Ingredients
Here’s what you’ll need to whip up this delicious dish:
-
8 oz penne pasta
This pasta shape holds onto the sauce beautifully, making every bite a creamy delight! If you don’t have penne, feel free to swap it with fusilli or even spaghetti; just adjust the cooking times. -
1 lb lean ground beef
A fantastic protein that adds richness and flavor. If you’re looking for a leaner option, ground turkey or chicken works here too—just ensure it’s well-seasoned! -
1 cup heavy cream
This is the star of the show, lending that comforting creaminess we crave. If you’re looking for a lighter version, half-and-half can be a good substitute, but it won’t be quite as rich. -
3 cloves garlic, minced
Garlic infuses this dish with mouthwatering aroma and flavor. If you’re not a fan of garlic, shallots can be a milder alternative. -
1 medium onion, diced
Onions add natural sweetness and depth. Red onions can be used for a slightly different flavor profile, or you can omit them entirely if you prefer. -
1 cup grated Parmesan cheese
Absolutely essential for that cheesy goodness! Pecorino Romano is a great substitute for a bit of zing, or you can use a mix of your favorites like mozzarella for a different texture. -
2 tsp Italian seasoning
This blend of dried herbs rounds out the flavor perfectly. You can use fresh herbs if you have them—like basil or oregano—just chop them finely and sprinkle in as desired! -
Salt and pepper to taste
Essential for bringing all those flavors to life! Always taste as you go to ensure the perfect seasoning. -
2 tsp olive oil for sautéing
Olive oil is my go-to for sautéing because it adds flavor. If you want to mix it up, avocado oil is a great option!
Step-by-Step Instructions
Now that you have your ingredients ready, let’s get to the heart of the matter. Here’s how to make your creamy beef pasta come to life!
-
Cook the Pasta
Start by bringing a large pot of salted water to a boil. Add in the penne pasta and cook according to package instructions until al dente (about 8-10 minutes). Don’t forget to reserve about ½ cup of pasta water before draining! This starchy water can help adjust the sauce’s consistency later. -
Sauté the Aromatics
While your pasta is cooking, heat 2 tsp of olive oil in a large skillet over medium heat. Toss in the diced onion and sauté for about 3-4 minutes until it becomes translucent. Follow it up with the minced garlic, and cook for an additional minute until fragrant. (Ah, the smell of garlic! Who can resist?) -
Brown the Beef
Increase the heat to medium-high and add the ground beef to the skillet. Use a wooden spoon to break it up as it cooks. Season with salt, pepper, and 2 tsp of the Italian seasoning. Cook until the beef is browned and no longer pink, about 5-7 minutes. Make sure to drain any excess fat for a lighter dish. -
Stir in the Cream
Once your beef is perfectly browned, reduce the heat to medium and pour in 1 cup of heavy cream. Stir it all together, allowing the cream to meld with the beef and onions. This is the moment when things start to get dreamy! -
Add Cheese and Create the Sauce
Gradually sprinkle in the grated Parmesan cheese, stirring continuously to create a creamy sauce. If it seems too thick, this is where your reserved pasta water comes in. Add a splash or so until you like the consistency—creamy but not too heavy! -
Combine with Pasta
Add the drained pasta directly into the skillet. Toss it well with the sauce, ensuring every piece of pasta is coated in that luscious creaminess. Taste and adjust the seasoning if needed—maybe a touch more salt or pepper. -
Serve and Enjoy!
Once everything is well combined, it’s time to plate up. This dish is best enjoyed fresh, while the cream is still warm and inviting!
Serving Suggestions
When it comes to serving your creamy beef pasta, a little presentation never hurt anyone! You can dish out generous portions in shallow bowls or plates. A sprinkle of additional Parmesan cheese and a few fresh basil leaves on top can elevate the dish visually and flavor-wise. And if you want to add a pop of color, place a few cherry tomatoes or a side salad next to the bowl for that beautiful contrast. Trust me, your guests will be impressed!
Recipe Variations
-
Veggie-Loaded Version: Add sautéed mushrooms, bell peppers, or spinach for an extra dose of nutrients. Just toss them in with the onions!
-
Spicy Kick: Mix in some red pepper flakes while sautéing the garlic for a touch of heat.
-
Swap the Meat: Try using ground sausage for a richer flavor or lentils for a vegetarian twist.
-
Dairy-Free Option: Substitute the heavy cream with coconut milk and use nutritional yeast instead of cheese for a creamy yet dairy-free alternative.
-
Herb Infusion: Add fresh rosemary or thyme during the cooking process for a fragrant twist.
Chef’s Notes
Every recipe tells a story, and this creamy beef pasta is no different. Over the years, I’ve tried countless variations, from adding white wine to the cream to experimenting with different cheese combos. My kitchen has seen its fair share of “oops” moments—like the time I accidentally added too much cream, resulting in what I fondly dubbed my “Oopsie Creamy Pasta.” Once you get the hang of it, though, this dish becomes second nature. Just remember, if you ever find yourself unsure, trust your palate and feel free to adjust! Cooking is all about love and flavor, after all.
FAQs and Troubleshooting
1. My sauce is too thick. What should I do?
Add reserved pasta water gradually until you reach your desired consistency.
2. How do I prevent the cream from curdling?
Make sure to lower the heat after adding cream and stir continuously, ensuring it doesn’t boil.
3. Can I make this ahead of time?
Yes! You can prepare the beef and sauce ahead of time, but I’d recommend cooking the pasta fresh right before serving.
4. My pasta is sticky. What went wrong?
This can happen if the pasta is overcooked or if it wasn’t stirred during the first few minutes of cooking. Always keep an eye on it!
Nutritional Info
(Feel free to add your specific nutritional info based on estimated values!)
Now that you’re armed with this creamy beef pasta recipe, I can’t wait for you to try it! Let me know how it turns out, and share your own kitchen adventures. Remember, every meal is a chance to gather, connect, and create beautiful memories around the table. Happy cooking!
PrintCreamy Beef Pasta

A comforting and creamy beef pasta dish perfect for cozy weeknights.
- Prep Time: 10 minutes
- Cook Time: 20 minutes
- Total Time: 30 minutes
- Yield: 4 servings 1x
- Category: Main Course
- Method: Stovetop
- Cuisine: Italian
- Diet: None
Ingredients
- 8 oz penne pasta
- 1 lb lean ground beef
- 1 cup heavy cream
- 3 cloves garlic, minced
- 1 medium onion, diced
- 1 cup grated Parmesan cheese
- 2 tsp Italian seasoning
- Salt and pepper to taste
- 2 tsp olive oil for sautéing
Instructions
- Cook the pasta: Bring a large pot of salted water to a boil. Add in the penne pasta and cook according to package instructions until al dente (about 8-10 minutes). Don’t forget to reserve about ½ cup of pasta water before draining!
- Sauté the aromatics: Heat olive oil in a large skillet over medium heat. Toss in the diced onion and sauté for about 3-4 minutes until translucent. Add minced garlic and cook for an additional minute.
- Brown the beef: Increase heat to medium-high and add ground beef. Cook until browned and no longer pink, about 5-7 minutes. Drain excess fat.
- Stir in the cream: Reduce heat to medium and pour in heavy cream, stirring to combine.
- Add cheese and create the sauce: Gradually sprinkle in grated Parmesan cheese, stirring continuously. Adjust consistency with reserved pasta water if needed.
- Combine with pasta: Add drained pasta to the skillet and toss with the sauce until coated.
- Serve and enjoy: Plate generously and garnish with more cheese and fresh basil if desired.
Notes
For a veggie-loaded version, include mushrooms, bell peppers, or spinach. Adjust garlic and cheese depending on preference.
Nutrition
- Serving Size: 1 serving
- Calories: 500
- Sugar: 2g
- Sodium: 600mg
- Fat: 25g
- Saturated Fat: 12g
- Unsaturated Fat: 10g
- Trans Fat: 0g
- Carbohydrates: 45g
- Fiber: 3g
- Protein: 30g
- Cholesterol: 80mg
Keywords: creamy pasta, beef pasta, comfort food, Italian pasta, easy dinner

Grilled Salsa Verde Pepper Jack Chicken
Grilled Salsa Verde Pepper Jack Chicken: A Flavorful Delight for Your Table
Hello, fellow food enthusiasts! Today, I’m excited to share a recipe that has become a staple in my kitchen – Grilled Salsa Verde Pepper Jack Chicken. This dish beautifully marries the vibrant essence of salsa verde with the satisfying creaminess of pepper Jack cheese, all enveloping juicy chicken breasts that grill to perfection. It not only looks stunning on the plate but tastes even better, embodying that effortless elegance I adore.
Growing up, my summer evenings were often filled with the sound of the grill sizzling and the warm aroma of spices wafting through the air. My family knew it was a special occasion when the grill was lit. Those days inspired my love for outdoor cooking and delicious, flavor-packed meals. This recipe takes me back to those fond memories, where laughter mingled with the scent of charred chicken and zesty salsa.
So, whether you’re prepping for a casual weeknight dinner or hosting friends for a summer barbecue, this dish is the perfect way to impress your guests while keeping things easy and fun. Let’s dive into creating this delightful meal that’s sure to make your kitchen feel like the heart of the home!
Personal Story
As a child, summer meant family BBQs, where the grill would be fired up in our backyard on sunny afternoons. My dad was the undisputed king of the grill, flipping burgers and chicken like a pro. But my favorite part was always his secret ingredient: a vibrant green salsa he’d whip up using fresh herbs from our garden. The zing of that salsa transformed every dish into something magical.
One evening, as we sat around the table, I watched him pour the salsa over grilled chicken. The colors danced in the sunlight, and I was mesmerized by the joy it brought to everyone around. That dish became a family favorite, inspiring me to experiment with flavors and create my own grilled versions. This Grilled Salsa Verde Pepper Jack Chicken is my homage to those sun-soaked days, filled with good food and cherished memories.
Ingredients
Gather these delicious ingredients to create your own Grilled Salsa Verde Pepper Jack Chicken:
-
1 ½ pounds thin-sliced boneless skinless chicken breasts (about 4 breasts)
- Look for uniform thickness to ensure even cooking. If you can’t find thin-sliced, you can butterfly thick breasts or pound them down gently.
-
12 ounces salsa verde (Trader Joe’s recommended)
- Salsa verde offers a fresh, tangy flavor. Feel free to try making your own or use a jar from your favorite local brand.
-
3 tablespoons olive oil
- This adds richness while helping to keep the chicken moist on the grill. You could substitute with avocado oil for a similar flavor.
-
2 tablespoons lime juice
- Fresh lime juice brightens the dish! If you’re in a pinch, bottled lime juice works too, but fresh really makes a difference.
-
1 teaspoon cumin
- Cumin adds a warm, earthy spice. If you’re looking for a twist, smoked paprika could be a fun substitute.
-
1 teaspoon salt (or more, to taste)
- Always taste as you go! You might want more or less depending on your salt preference.
-
1 teaspoon freshly ground black pepper
- Freshly cracked pepper has a bold flavor that pre-ground just can’t match. Adjust to your taste.
-
4 slices pepper Jack cheese (or as desired)
- The creaminess and spice of pepper Jack cheese elevate the dish. Feel free to use Monterey Jack, cheddar, or even a vegan cheese alternative!
-
Fresh cilantro, finely minced (optional, for garnishing)
- Cilantro adds a fresh pop! If you’re not a fan, try finely chopped green onions or parsley instead.
-
Lime wedges (optional, for serving)
- A squeeze of lime just before eating brightens the flavors wonderfully.
Step-by-Step Instructions
Now that we have our ingredients ready, let’s get cooking! Follow these detailed steps to create your Grilled Salsa Verde Pepper Jack Chicken, and I promise you’ll be amazed how simple and enjoyable this process is.
Step 1: Marinate the Chicken
- In a large mixing bowl, combine your salsa verde, olive oil, lime juice, cumin, salt, and black pepper. Stir well until everything is mixed.
- Place your thin-sliced chicken breasts into the marinade, ensuring they’re coated evenly. This step infuses your chicken with incredible flavor!
- Cover the bowl with plastic wrap or transfer everything into a resealable bag. Refrigerate for at least 30 minutes – but if you can, let it marinate for a few hours or even overnight to deepen the flavor.
Step 2: Prepare the Grill
- Preheat your grill to medium-high heat, about 375°F to 450°F (190°C to 230°C). A hot grill will give you lovely grill marks while sealing in all the juices.
- Brush the grill grates with a little olive oil to help prevent sticking.
Step 3: Grill the Chicken
- Remove chicken from the marinade, shaking off any excess. Discard the leftover marinade (for safety reasons).
- Place the chicken breasts on the hot grill and close the lid. Grill for about 5-7 minutes on one side.
- After 5-7 minutes, check for grill marks and flip the chicken. Cook for another 5 minutes. You want the internal temperature to reach 165°F (75°C).
- During the last minute of grilling, place a slice of pepper Jack cheese on each breast. Close the lid and let the cheese melt – this is where the magic happens!
Step 4: Let It Rest
- Once your chicken is grilled to perfection, carefully remove it from the grill and let it rest for about 5 minutes. Resting is key; it allows the juices to redistribute, resulting in tender chicken.
Serving Suggestions
Now for the fun part: plating! To serve, lay the juicy grilled chicken on a vibrant plate. Drizzle a bit more salsa verde on top, allowing it to cascade onto the plate for that lovely, colorful presentation.
Garnish with freshly minced cilantro and serve with a wedge of lime on the side for an extra citrusy squeeze. This dish is perfect alongside a crisp green salad or grilled veggies to create a balanced and eye-catching meal!
Recipe Variations
Ready to mix things up? Here are a few delicious twists for your Grilled Salsa Verde Pepper Jack Chicken:
- Spicy Kick: Add a minced jalapeño or some hot sauce to the marinade for an extra level of heat.
- Herb Infusion: Mix in freshly chopped cilantro or basil with the marinade for an aromatic twist.
- Fruit Fusion: Top your chicken with fresh mango or peach salsa for a sweet and savory contrast.
- Cheesy Delight: Combine different cheeses for depth – try a mix of cheddar and pepper Jack for extra flavor.
- Vegan Version: Substitute chicken with thick slices of eggplant or zucchini. Marinate and grill them for a hearty vegetarian dish.
Chef’s Notes
This Grilled Salsa Verde Pepper Jack Chicken recipe started as a way to utilize leftover salsa. The first time I threw it together, I was simply attempting to clear out my fridge. To my surprise, the combination was so delectable that it quickly became a household favorite.
I’ve played around with various salsas since then, and each brought a unique twist to the dish! Salsa verde is my top choice due to its vibrant flavor, but don’t hesitate to experiment with whatever you have on hand. Who knew a pantry staple could evolve into such a memorable dish?
FAQs and Troubleshooting
Q: Can I use chicken thighs instead?
- Absolutely! Just ensure they’re boneless and skinless for even cooking. Thighs will offer a richer flavor and juiciness.
Q: My chicken came out dry; what did I do wrong?
- Overcooking can dry out chicken breasts quickly. Use a meat thermometer to accurately check for doneness.
Q: Can I make this in the oven?
- Yes, you can! Bake the marinated chicken at 375°F (190°C) for about 25-30 minutes, then add cheese in the last few minutes.
Q: What if I don’t have a grill?
- No worries! You can use a grill pan or even a skillet on the stovetop. Just make sure to preheat your pan and follow the same steps.
Nutritional Info
This Grilled Salsa Verde Pepper Jack Chicken is a delightful addition to a balanced diet, providing protein from the chicken and healthy fats from olive oil. Each serving (one 4-ounce grilled chicken breast) has approximately:
- Calories: 320
- Protein: 32g
- Fat: 18g
- Carbohydrates: 5g
- Fiber: 1g
And there you have it! A tantalizing recipe for Grilled Salsa Verde Pepper Jack Chicken that’s not only a treat for the taste buds but also embodies warmth, love, and delightful memories at the table. I hope you enjoy cooking this as much as I do! Remember, cooking is all about creating joyful experiences, so get in the kitchen, tie on your apron, and let’s make something delicious!
PrintGrilled Salsa Verde Pepper Jack Chicken

A delightful dish combining the vibrant essence of salsa verde with creamy pepper Jack cheese and juicy grilled chicken.
- Prep Time: 30 minutes
- Cook Time: 15 minutes
- Total Time: 45 minutes
- Yield: 4 servings 1x
- Category: Main Course
- Method: Grilling
- Cuisine: Mexican
- Diet: Gluten-Free
Ingredients
- 1 ½ pounds thin-sliced boneless skinless chicken breasts (about 4 breasts)
- 12 ounces salsa verde
- 3 tablespoons olive oil
- 2 tablespoons lime juice
- 1 teaspoon cumin
- 1 teaspoon salt (or more, to taste)
- 1 teaspoon freshly ground black pepper
- 4 slices pepper Jack cheese (or as desired)
- Fresh cilantro, finely minced (optional, for garnishing)
- Lime wedges (optional, for serving)
Instructions
- Marinate the chicken: In a large mixing bowl, combine salsa verde, olive oil, lime juice, cumin, salt, and black pepper. Stir well until mixed. Place chicken in marinade, ensuring it’s coated evenly. Cover and refrigerate for at least 30 minutes.
- Prepare the grill: Preheat your grill to medium-high heat (375°F to 450°F). Brush grill grates with olive oil.
- Grill the chicken: Remove chicken from marinade, discarding excess marinade. Place chicken breasts on the grill, cooking for 5-7 minutes. Flip and cook for another 5 minutes. Ensure internal temperature reaches 165°F (75°C). During the last minute, place cheese on each breast to melt.
- Let it rest: Remove chicken from the grill and let it rest for about 5 minutes.
Notes
This dish is perfect alongside a crisp green salad or grilled veggies. Options for variations include adding jalapeño for heat or using eggplant for a vegan version.
Nutrition
- Serving Size: 1 serving
- Calories: 320
- Sugar: 2g
- Sodium: 800mg
- Fat: 18g
- Saturated Fat: 6g
- Unsaturated Fat: 10g
- Trans Fat: 0g
- Carbohydrates: 5g
- Fiber: 1g
- Protein: 32g
- Cholesterol: 75mg
Keywords: grilled chicken, salsa verde, pepper jack cheese, summer BBQ, easy recipes