
Rose Cardamom Tea Latte
Rose Cardamom Tea Latte: A Sip of Elegance
Welcome back to Ivory Apron! Today, I’m thrilled to share a delightful recipe that’s not just a drink but an experience — the Rose Cardamom Tea Latte. Imagine sipping this fragrant concoction on a cozy afternoon, the enchanting aroma of rose petals mingling beautifully with the warm spices of cardamom. Doesn’t that sound heavenly? This latte is the perfect blend of elegance and comfort, a simple yet refined beverage that can elevate any day.
This tea latte is a nod to my love for international flavors and cozy gatherings. I’ve always been enchanted by the allure of floral notes in food and drink, and what better way to incorporate it than with rose? Combined with the exotic warmth of cardamom, this drink creates an inviting atmosphere that makes you feel like you’re sitting in a charming café, surrounded by friends and laughter.
When I first started experimenting with flavor infusions, I was inspired by a local café that served a similar drink. The way they artfully combined spices and florals fascinated me, and I knew I had to try my hand at creating my own version. The first time I served this Rose Cardamom Tea Latte during a small gathering, I watched as my friends savored each sip, their expressions turning from curiosity to delight. It was at that moment I knew I had something special — something worth sharing with all of you.
So, let’s step into my kitchen and bring the aromatic magic of a Rose Cardamom Tea Latte to life together!
Ingredients
To craft this mesmerizing latte, you’ll need the following ingredients:
-
Black Tea: The base of this latte, black tea offers a robust flavor that balances the subtle floral notes. Opt for your favorite loose leaf or tea bags. If you’re looking for a caffeine-free option, try using rooibos tea for a similar depth.
-
Dried Rose Petals: These beautiful petals add a delicate floral essence and a stunning visual element. Look for food-grade rose petals in specialty shops or online. If you can’t find them, consider using lavender or hibiscus as an alternative (though the flavor will differ slightly).
-
Cardamom Pods: These warm, aromatic spices provide an exotic kick to the latte. Crush the pods slightly before using them to release their essential oils. If you don’t have whole pods, ground cardamom is a suitable substitute — just use about 1/4 teaspoon for every pod.
-
Almond Milk: This creamy non-dairy option gives the latte a luxurious texture. Unsweetened almond milk is my go-to for this recipe. If you’re not a fan of almonds, feel free to swap it for oat milk, soy milk, or even traditional dairy milk for a creamy finish.
-
Honey: For a touch of natural sweetness, honey is the perfect finishing touch. I love using local honey for additional flavors, but maple syrup or agave nectar work great too if you’re looking for a vegan option.
Step-by-Step Instructions
Now, let’s roll up our sleeves and start brewing this aromatic latte!
-
Prepare the Black Tea: In a small saucepan, heat about 2 cups of water until it reaches a gentle boil. Once boiling, remove it from the heat and add 2-3 teaspoons of loose leaf black tea or 2 tea bags. Cover and let it steep for about 5 minutes. (Tip: The longer you steep, the stronger the flavor, but be careful not to oversteep — bitterness can sneak in!)
-
Add Rose Petals and Cardamom: After the tea has steeped, stir in 1 tablespoon of dried rose petals and 2 crushed cardamom pods (or 1/4 teaspoon ground cardamom). Cover the pot again and let it steep for an additional 3-5 minutes. This allows the flavors to infuse beautifully. (Chef hack: Gently crush the cardamom pods before adding them to release even more flavor!)
-
Strain the Tea: Once your tea has achieved its fragrant magic, strain it into a large mug or a heatproof pitcher using a fine-mesh sieve. Discard the rose petals and cardamom pods. (Pro tip: Don’t forget to taste it at this stage! Adjust the strength according to your preference or feel free to add a bit more honey if you like.)
-
Foam the Almond Milk: In a separate saucepan, heat 1 cup of almond milk until steaming (about 150°F). Whisk vigorously or use a handheld milk frother until it becomes frothy and light. (Little chef’s tip: You can also froth the milk using a French press by pumping the plunger up and down!)
-
Combine and Sweeten: Pour the hot strained tea into your favorite mug, and gradually stir in honey to taste. For a cozy twist, consider adding a sprinkle of cinnamon or a drop of vanilla extract if you’re feeling adventurous. (Little secret: If you’re seeking extra warmth, you can add a squeeze of fresh ginger juice for a spicy kick!)
-
Top with Frothy Milk: Carefully pour the frothed almond milk over the tea mixture. For a delicate touch, use a spoon to hold back the foam while you pour, then dollop it on top for that quintessential café look. (Final flourish: Feel free to garnish with a few dried rose petals or a sprinkle of cardamom powder for a charming finish!)
Serving Suggestions
For the ultimate latte experience, serve your Rose Cardamom Tea Latte in a clear glass mug to showcase its beautiful layers. Pair it with a small plate of buttery shortbread cookies or a slice of your favorite cake to transform your beverage into a sophisticated afternoon treat. And don’t forget to light a candle or play soft music to set the ambiance!
Recipe Variations
-
Iced Version: For a refreshing iced latte, simply brew the tea as directed, let it cool, and pour it over ice. Add cold almond milk and a dash of vanilla for a summertime treat!
-
Cashew Milk Swap: For a creamier texture, replace almond milk with cashew milk — it’s rich and has a subtle nutty flavor that pairs beautifully with the spices.
-
Sweetness Adjustment: Experiment with different sweeteners, such as brown sugar or coconut sugar, to give the latte a unique flavor profile.
-
Herbal Infusion: Mix in a touch of chamomile or peppermint for a soothing version that’s perfect for winding down in the evening.
-
Chai Twist: Use chai black tea instead of regular black tea to combine the floral and spicy notes even further, creating a super aromatic experience!
Chef’s Notes
Creating the Rose Cardamom Tea Latte has certainly been a journey of flavor and creativity for me. I remember one sunny afternoon when I was trying to perfect the froth on my almond milk. Let’s just say it ended with me chasing tiny froth bubbles across my counter! It’s those little kitchen adventures that remind me of why I love cooking — it’s about the process, the laughter, and the perfect concoction of flavors.
Over time, I’ve played with different spices and milks, but there’s something about the combination of rose and cardamom that still captures my heart. This latte has become my go-to for hosting — always impressing friends and family while inviting everyone to share in the joy of good food and meaningful moments.
FAQs and Troubleshooting
1. Why does my tea taste bitter?
If your tea has become bitter, it’s likely oversteeping. Make sure to steep black tea for no more than 5-7 minutes. If you’re using flavored or delicate tea, even less time is needed!
2. Can I use fresh rose petals instead of dried?
Though fresh rose petals add a lovely flavor, ensure they are pesticide-free and suitable for consumption. Fresh petals can be potent; start with a small amount and adjust to taste.
3. How can I make this vegan?
This recipe is already easily made vegan! Just replace honey with maple syrup or agave nectar. Both options will add the right amount of sweetness without compromising the flavors.
4. What if I don’t have cardamom pods?
No worries! Ground cardamom is a fine substitute. Just remember that a little goes a long way — 1/4 teaspoon of ground cardamom replaces about one pod.
Nutritional Info
Though I haven’t included specific nutritional breakdowns, this latte is a delightful choice for anyone looking to enjoy a comforting drink without excessive calories. Using almond milk keeps it light, while the addition of honey provides a natural sweetness without the guilt. Enjoy every sip!
So there you have it — a Rose Cardamom Tea Latte you can whip up with ease and grace! Whether you’re sharing it with friends or enjoying a quiet moment to yourself, I hope this recipe brings the same warmth and coziness to your table as it does to mine. Until next time, tie on your apron and keep creating beautiful memories in the kitchen!
PrintRose Cardamom Tea Latte

A delightful Rose Cardamom Tea Latte that combines floral and spicy notes for a comforting beverage experience.
- Prep Time: 5 minutes
- Cook Time: 10 minutes
- Total Time: 15 minutes
- Yield: 2 servings 1x
- Category: Beverage
- Method: Brewing
- Cuisine: International
- Diet: Vegan
Ingredients
- 2–3 teaspoons loose leaf black tea or 2 tea bags
- 1 tablespoon dried rose petals
- 2 crushed cardamom pods (or 1/4 teaspoon ground cardamom)
- 1 cup unsweetened almond milk
- Honey to taste (or maple syrup/agave nectar for vegan option)
- Optional: A sprinkle of cinnamon or vanilla extract
- Optional: Fresh ginger juice for added warmth
Instructions
- Prepare the Black Tea: In a small saucepan, heat about 2 cups of water until it reaches a gentle boil. Once boiling, remove it from the heat and add tea. Cover and let it steep for about 5 minutes.
- Add Rose Petals and Cardamom: After the tea has steeped, stir in rose petals and cardamom. Let it steep for an additional 3-5 minutes.
- Strain the Tea: Strain the tea into a mug or heatproof pitcher and discard the solids.
- Foam the Almond Milk: Heat almond milk until steaming, then whisk until frothy.
- Combine and Sweeten: Pour the hot strained tea into a mug and stir in honey.
- Top with Frothy Milk: Pour the frothed almond milk over the tea mixture, garnishing with dried rose petals or cardamom if desired.
Notes
For an iced version, brew as directed and pour over ice. Replace almond milk with cashew milk for a creamier texture. Adjust sweetness as desired.
Nutrition
- Serving Size: 1 serving
- Calories: 200
- Sugar: 15g
- Sodium: 50mg
- Fat: 8g
- Saturated Fat: 0.5g
- Unsaturated Fat: 7g
- Trans Fat: 0g
- Carbohydrates: 30g
- Fiber: 1g
- Protein: 3g
- Cholesterol: 0mg
Keywords: tea, latte, rose, cardamom, vegan, beverage, cozy drink, aromatic
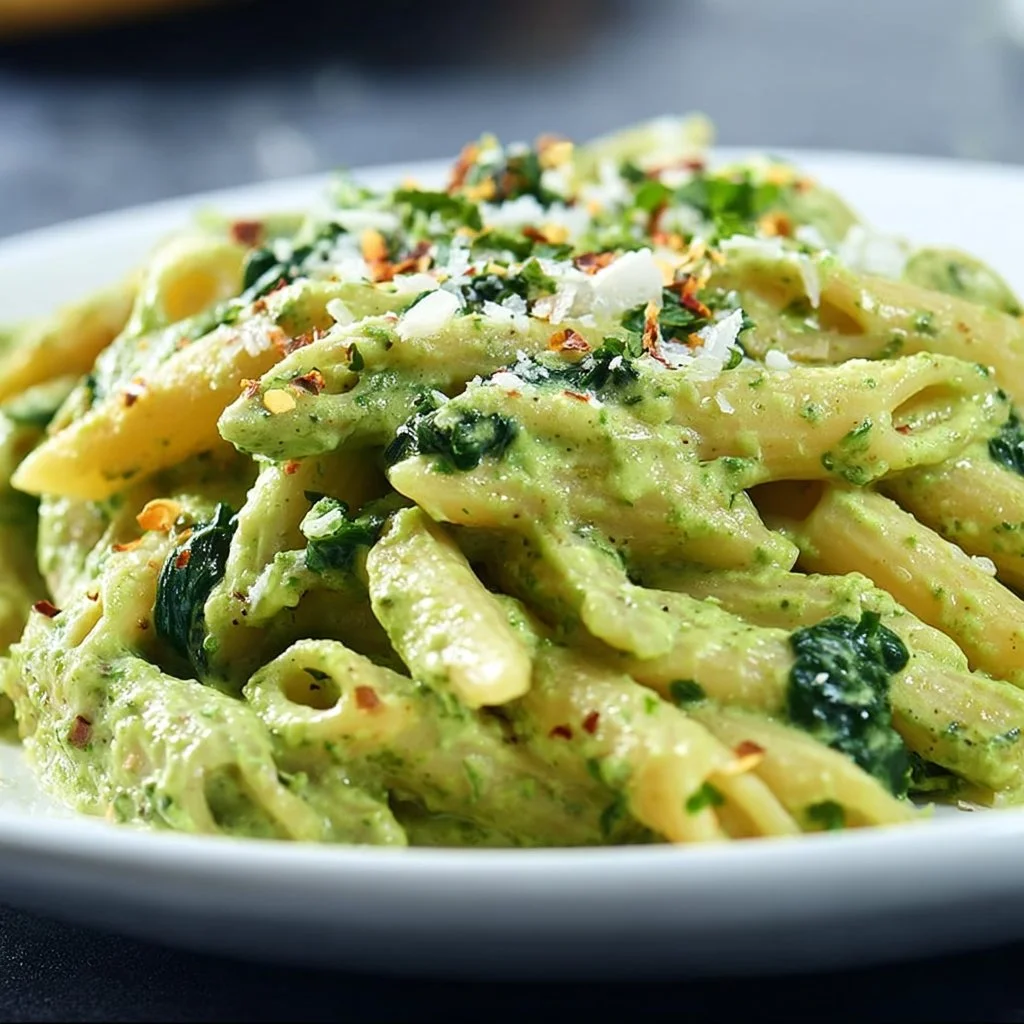
Creamy Spinach Pasta
Creamy Spinach Pasta: A Comforting Delight
Hello, fellow food enthusiasts! Today, I’m excited to share a recipe that embodies everything I adore about cooking — rich flavors, vibrant colors, and that cozy atmosphere we all crave when we gather around the table. Introducing my Creamy Spinach Pasta! This recipe is not only a feast for the eyes but also a delicious dish that’s perfect for a cozy weeknight dinner or a casual gathering with friends.
Now, let’s dive in and make some magic in the kitchen together!
A Personal Story with Spinach Pasta
Let me take you back to my childhood. I vividly remember those Sunday dinners at my grandma’s house, where the kitchen was filled with the tantalizing aromas of something wonderful just bubbling on the stove. My favorite was her creamy pasta! While she had her secrets (she was a master at hiding things from us eager little chefs), one day I caught a glimpse of her sneaking in a vibrant green spinach puree. I was puzzled but intrigued — how could something so green create such a heavenly dish?
Fast forward to the present, and that memory has fueled my passion for combining comfort food with healthy ingredients. Today, when I make Creamy Spinach Pasta, I can’t help but feel a connection to those lovely Sunday dinners. And the best part? It’s a dish that’s easy to recreate, ensuring that my friends and family can share in the joy, just like I did back then.
Ingredients
To create your own creamy masterpiece, you’ll need the following ingredients:
-
Fresh Palak (Spinach) Puree: This is the star of the dish! Use fresh spinach for vibrant color and flavor. You can substitute with frozen spinach, but be sure to thaw and drain it well.
-
Milk: Whole milk is ideal for a rich creaminess, but you can swap in almond milk or oat milk for a dairy-free option.
-
Wheat Flour: Essential for thickening the sauce. If you’re gluten-free, almond flour or cornstarch can be great alternatives.
-
Mozzarella Cheese: This adds a delightful stretch and creaminess. Feel free to use cheddar or a vegan cheese alternative if you prefer.
-
Salt: Essential for bringing out all the flavors. Always taste and adjust to your preference!
-
Pepper: Freshly cracked black pepper adds a subtle kick.
-
Olive Oil: A good quality olive oil not only adds flavor but also richness to the dish.
-
Garlic: Fresh garlic creates a depth of flavor that’s hard to beat. If you’re in a pinch, garlic powder will do, but fresh is best!
-
Onion: Finely diced onion adds sweetness and complexity. You can use shallots for a milder taste.
Step-by-Step Instructions
Let’s get cooking! Here’s how to whip up this Creamy Spinach Pasta in a few simple steps:
-
Prepare the Spinach Puree:
- Start by washing 2 cups of fresh spinach thoroughly. In a pot of boiling water, blanch the spinach for about 2-3 minutes until it turns vibrant green. Quickly transfer it to a bowl of ice water to stop the cooking process.
- Once cool, drain the spinach and squeeze out excess water. Blend it in a food processor until smooth. Voilà! You have your fresh palak puree.
-
Sauté the Aromatics:
- In a large skillet, heat 2 tablespoons of olive oil over medium heat. Add 1 finely chopped onion and 3 minced garlic cloves.
- Sauté until the onion becomes translucent and fragrant, about 3-4 minutes. This step is crucial, as it builds the base flavor for your sauce.
-
Make the Creamy Sauce:
- Sprinkle in 2 tablespoons of wheat flour and stir for about 1 minute to form a roux. This step will help thicken your sauce.
- Slowly whisk in 2 cups of milk, allowing the mixture to come to a gentle simmer. Stir continuously for about 5 minutes until it thickens. Chef tip: Don’t rush this process! Patience is key to a silky sauce.
-
Add Spinach Puree and Cheese:
- Stir in the spinach puree and mix well. Add 1 cup of shredded mozzarella cheese, stirring until melted and combined.
- Season with salt and pepper to taste. Remember to taste your sauce; this is your chance to adjust and personalize!
-
Cook the Pasta:
- While your sauce is bubbling away, cook your pasta of choice (about 8 oz) according to package instructions. I love using pappardelle or fettuccine for this dish but feel free to use whatever you have on hand!
- Reserve about 1 cup of pasta water before draining to adjust the consistency of the sauce later if needed.
-
Combine and Serve:
- Toss the drained pasta into the sauce, adding a splash of the reserved pasta water if it’s too thick. Mix until the pasta is well coated.
- Serve immediately, garnished with extra mozzarella or a sprinkle of fresh herbs for that extra touch!
Serving Suggestions
For an elegant presentation, plate your Creamy Spinach Pasta in shallow bowls. Add a generous amount of sauce on top, and finish with a light sprinkle of freshly grated Parmesan cheese or some crushed red pepper flakes for a kick. A drizzle of high-quality olive oil can elevate the dish even more, and don’t forget some freshly cracked black pepper for good measure. Additionally, pair it with a crisp green salad and a glass of white wine for a truly delightful dining experience!
Recipe Variations
Want to switch up this creamy delight? Here are a few creative twists you might consider:
- Add Protein: Toss in grilled chicken, sautéed shrimp, or roasted chickpeas for added protein.
- Change the Greens: Substitute spinach with other greens like kale or arugula for different flavors.
- Spice It Up: Add red pepper flakes for heat or mix in some sun-dried tomatoes for a burst of flavor.
- Vegan Version: Replace dairy with plant-based milk, nutritional yeast for cheesy flavor, and use a vegan cheese substitute.
- Pasta Alternatives: Experiment with whole grain or gluten-free pasta, or even spiralized veggies like zucchini!
Chef’s Notes
Cooking is one of those beautiful processes that evolves over time. This creamy spinach pasta has certainly transformed from my early attempts. Initially, I followed a more traditional Alfredo route, but over the years, I’ve gathered so many tips and tricks that brought this dish to life! One particularly funny moment involved a “tiny” explosion of flour while making the roux that left my kitchen looking like a snowy wonderland. Now, I’m extra cautious when whisking!
As this recipe continues to be a favorite in my home, I love being able to pass it on to others. It’s such a comforting delight and holds a special place in my heart!
FAQs and Troubleshooting
-
Why is my sauce too thick?
- If your sauce turns out thicker than expected, gradually add some of the reserved pasta water while mixing until you reach the desired consistency.
-
Can I make this ahead of time?
- Absolutely! You can prepare the sauce and pasta separately, storing them in the fridge. Just reheat and combine when you’re ready to serve.
-
Is it possible to freeze the dish?
- Yes! Freeze the pasta before adding the sauce. You can freeze the sauce separately as well. When you’re ready to enjoy, simply thaw and reheat.
-
My sauce isn’t creamy enough — what should I do?
- If you find your sauce lacking creaminess, you can stir in a splash of heavy cream or cream cheese for an ultra-rich texture.
Nutritional Info (Optional)
While I won’t dive deep into numbers here, I will say that this Creamy Spinach Pasta is rich in vitamins A and K from the spinach, calcium from the dairy, and provides a good amount of carbs for energy — a balanced dish that’s perfect for those cozy nights in.
There you have it, my friends! A delightful embrace of comfort and elegance with every bite of this Creamy Spinach Pasta. I hope you enjoy making it as much as I do, and that it becomes a cherished part of your gatherings just as it has in mine. Happy cooking, and let’s keep creating those beautiful moments around the table!
PrintCreamy Spinach Pasta

A comforting and delicious creamy spinach pasta perfect for cozy dinners or gatherings.
- Prep Time: 15 minutes
- Cook Time: 30 minutes
- Total Time: 45 minutes
- Yield: 4 servings 1x
- Category: Main Course
- Method: Cooking
- Cuisine: Italian
- Diet: Vegetarian
Ingredients
- 2 cups Fresh Spinach Puree
- 2 cups Whole Milk (or almond/oat milk)
- 2 tablespoons Wheat Flour (or almond flour/cornstarch)
- 1 cup Shredded Mozzarella Cheese (or cheddar/vegan cheese)
- Salt to taste
- Freshly cracked black Pepper to taste
- 2 tablespoons Olive Oil
- 3 minced Garlic Cloves
- 1 Finely chopped Onion
- 8 oz Pasta (pappardelle or fettuccine)
Instructions
- Prepare the Spinach Puree: Wash and blanch spinach for 2-3 minutes, then blend until smooth.
- Sauté the Aromatics: Heat olive oil in a skillet, add onion and garlic, and sauté until translucent.
- Make the Creamy Sauce: Add flour to the skillet, stir to form a roux, then whisk in milk and simmer until thickened.
- Add Spinach Puree and Cheese: Mix in spinach puree and cheese, and season with salt and pepper.
- Cook the Pasta: Prepare pasta according to package instructions and reserve pasta water before draining.
- Combine and Serve: Toss pasta with sauce, adjusting consistency with reserved pasta water as needed, and serve immediately.
Notes
For a creamier texture, you may stir in a splash of heavy cream or cream cheese. You can also add protein like grilled chicken or shrimp for variations.
Nutrition
- Serving Size: 1 serving
- Calories: 350
- Sugar: 8g
- Sodium: 400mg
- Fat: 18g
- Saturated Fat: 8g
- Unsaturated Fat: 6g
- Trans Fat: 0g
- Carbohydrates: 45g
- Fiber: 4g
- Protein: 14g
- Cholesterol: 30mg
Keywords: spinach pasta, creamy pasta, vegetarian pasta, easy dinner recipe
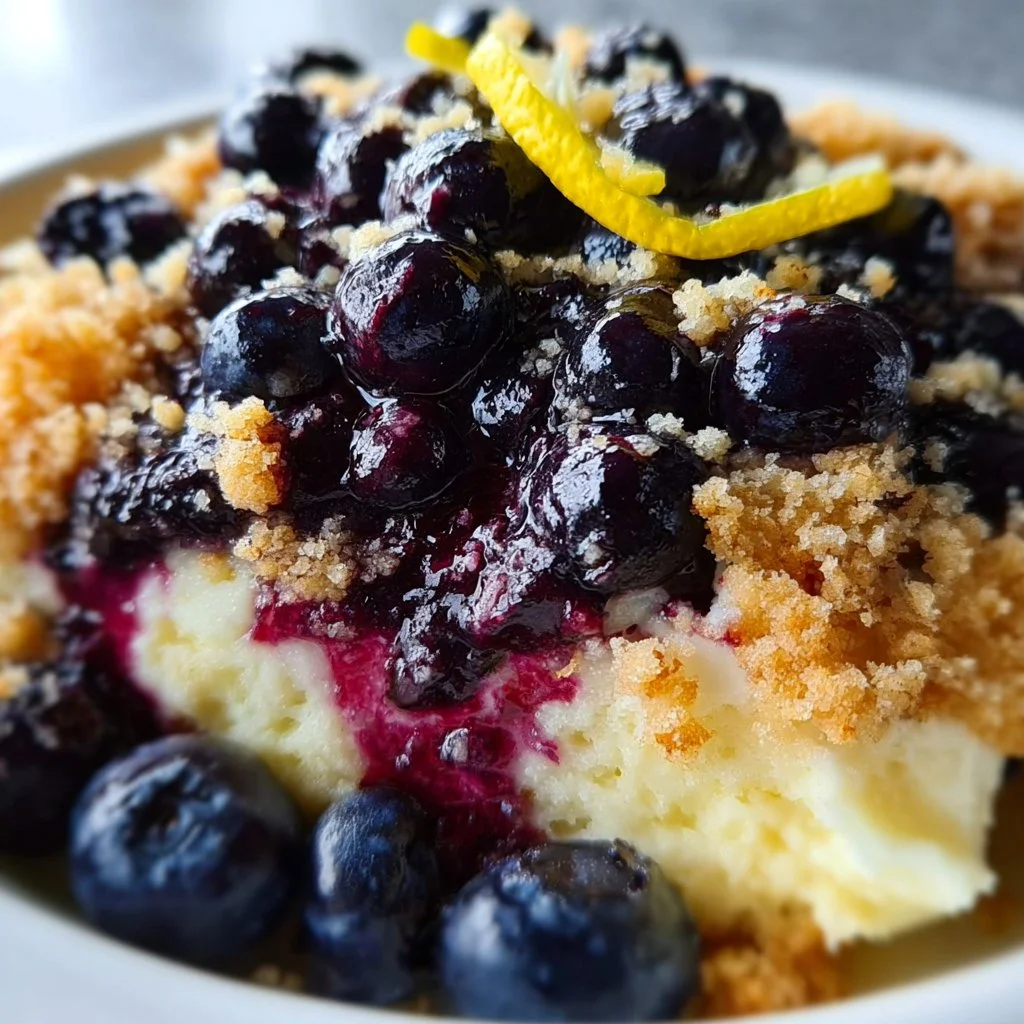
Lemon Blueberry Cheesecake Dump Cake
A Sweet Slice of Nostalgia: Lemon Blueberry Cheesecake Dump Cake
Hello, fellow foodies! Savannah Pierce here, and today we’re diving into a delightful dessert that brings together the bright, zesty flavors of lemon and the sweet-tart goodness of blueberries—introducing the Lemon Blueberry Cheesecake Dump Cake! This easy-to-make treat is sure to tickle your taste buds and warm your heart, reminding you of sunny days and cherished memories spent gathered around the table with loved ones.
A Slice of Childhood
Let me take you back to my childhood kitchen, where my love for baking blossomed. My grandmother, with her silver hair pulled back in a loose bun, was the queen of quick desserts. I remember watching her whip up cakes without fuss, and one day, she introduced me to her ‘throw-it-all-in’ cake method. “Savannah," she’d say, “the best cakes happen without too much thinking.”
I can still hear her laughter as she added a splash of this and a dash of that, her hands dusted with flour, her apron splattered with evidence of our culinary adventures. Her Lemon Blueberry Cheesecake Dump Cake was a favorite. It was the cake people would ask for at family gatherings, and I knew I wanted to create something equally special to honor her legacy.
So, today, as we flip through the pages of this recipe together, I invite you to create your own memories. Let’s bake with joy and share the fruits of our labor (and a sprinkle of love) with those we cherish!
Ingredients
Here’s what you’ll need to create this scrumptious Lemon Blueberry Cheesecake Dump Cake:
-
1 Box Yellow Cake Mix
A convenient base that brings a sweet, buttery flavor. You can substitute with gluten-free cake mix to suit dietary needs. -
1 Can of Lemon Pie Filling
This is where the magic happens! It adds rich lemon flavor. If you’re feeling adventurous, you can use homemade lemon curd instead. -
2 Cups Fresh Blueberries
Sweet and juicy, these little gems are the star of our show! If fresh blueberries aren’t available, frozen ones work just as well—just don’t worry about thawing them first. -
8 Ounces Cream Cheese, Softened
Creamy perfection! It adds richness to the cake. Feel free to use Neufchâtel cheese for a lower-fat option. -
1/2 Cup Sugar
A touch of sweetness to balance the tartness of the lemon. You can reduce it by a couple of tablespoons if you prefer less sweetness. -
1 Teaspoon Vanilla Extract
This adds warmth and depth to the flavor. Always use pure vanilla for the best taste, but artificial will work in a pinch. -
1/4 Cup Butter, Melted
Adds moisture and richness. If you’re going dairy-free, coconut oil could be a great substitute!
Step-by-Step Instructions
Now let’s get our hands a little messy and make this decadent dessert! Follow these steps closely, but don’t forget to have fun!
-
Preheat the Oven
Preheat your oven to 350°F (175°C). This is important as it ensures even baking. While that’s heating, take a moment to inhale the aroma of anticipation! -
Prepare the Baking Dish
Grab a 9×13 inch baking dish and grease it lightly. You want the cake to slide out easily. If you prefer, line it with parchment paper for an even smoother release. -
Mix the Cream Cheese Mixture
In a mixing bowl, beat the softened cream cheese with the sugar and vanilla extract until smooth and creamy. A hand mixer or a stand mixer works best here, but a whisk will also do the job if you’re feeling strong! -
Layer the Lemon Pie Filling
Spread the lemon pie filling on the bottom of the prepared baking dish. This tart layer will act as a base for your cake. Make sure to cover the entire surface evenly—the lemon flavor will seep into the cake. -
Add the Blueberries
Sprinkle your fresh blueberries over the lemon layer. You can add them neatly or scatter them for a more rustic look—no judgment here! -
Sprinkle the Cake Mix
Now for the dump part! Sprinkle the dry yellow cake mix evenly over the blueberries. No need to mix; just let the magic happen in the oven! -
Drizzle with Butter
Finally, drizzle the melted butter over the cake mix. This will create a golden, delicious crust as it bakes. Don’t worry about covering it completely; those little gaps will crisp up beautifully. -
Bake
Place the dish in the oven and bake for 35-40 minutes or until the top is golden and bubbling. Your kitchen will soon be filled with an intoxicating aroma that brings both comfort and excitement. -
Cool and Serve
Once baked, allow the cake to cool for about 15 minutes. This will make it easier to serve while still being warm and gooey!
Serving Suggestions
Plating this beauty is a breeze! Serve warm, either directly from the baking dish (because who has time for fancy dishes during a sweet craving?) or transfer it to a serving platter. A dollop of whipped cream or a scoop of vanilla ice cream on top makes for a stunning finish! Add a sprinkle of fresh blueberries or lemon zest for that aesthetic touch—it’ll feel like a slice of heaven on a plate!
Recipe Variations
- Berry Delight: Swap blueberries for a mix of berries! Raspberries and blackberries go splendidly well with lemon.
- Peachy Keen: Use canned or diced fresh peaches instead of lemon pie filling for a peach cheesecake dump cake.
- Coconut Cream: Replace the cream cheese with coconut cream for a tropical twist.
- Lemon Blueberry Muffin: Transform this into muffins by pouring the batter into muffin tins and adjusting bake time to about 20-25 minutes.
Chef’s Notes
My goodness, every time I whip up this Lemon Blueberry Cheesecake Dump Cake, I’m transported back to my grandmother’s kitchen! It’s been a hit at every family gathering, and the best part? It’s so easy that even the newest home cooks can impress their friends. Over the years, I’ve tweaked the recipe to enhance the lemon flavor or to add in whatever juicy fruit is in season. No matter how it’s made, I always encourage a big scoop of ice cream on top—it makes every forkful feel like a celebration!
FAQs and Troubleshooting
Q: Can I make this cake ahead of time?
A: Absolutely! You can prepare the components and layer them in the dish ahead of time, then store it in the fridge. Just pop it in the oven when you’re ready to bake!
Q: What if my cake mix clumps?
A: If you notice clumps, simply use a whisk to break them up before you sprinkle it over the fruit. It’ll bake up just fine!
Q: How do I know when the cake is done?
A: The top should be golden brown, and a toothpick inserted into the center should come out mostly clean with a few moist crumbs.
Q: Can I freeze leftovers?
A: You can! Just be sure to let the leftover cake cool completely, then cover tightly to prevent freezer burn. It’s best enjoyed within a few months.
Nutritional Info (Optional)
While every dessert should be enjoyed in moderation, here’s a rough breakdown per serving (based on 12 servings):
- Calories: 250
- Total Fat: 10g
- Saturated Fat: 5g
- Carbohydrates: 35g
- Sugars: 15g
- Protein: 3g
There you have it, my sweet friends—a Lemon Blueberry Cheesecake Dump Cake that’s sure to become a favorite in your home! As you tie on your apron and dive into this delightful recipe, remember that cooking is about sharing love and joy. I can’t wait to hear about the memories you create around your table! Happy baking!
PrintLemon Blueberry Cheesecake Dump Cake

A delightful dessert that combines zesty lemon and sweet blueberries in an easy-to-make dump cake.
- Prep Time: 15 minutes
- Cook Time: 40 minutes
- Total Time: 55 minutes
- Yield: 12 servings 1x
- Category: Dessert
- Method: Baking
- Cuisine: American
- Diet: Vegetarian
Ingredients
- 1 Box Yellow Cake Mix
- 1 Can of Lemon Pie Filling
- 2 Cups Fresh Blueberries
- 8 Ounces Cream Cheese, Softened
- 1/2 Cup Sugar
- 1 Teaspoon Vanilla Extract
- 1/4 Cup Butter, Melted
Instructions
- Preheat the oven to 350°F (175°C).
- Prepare a 9×13 inch baking dish by greasing it lightly.
- Mix the softened cream cheese with the sugar and vanilla extract until smooth and creamy.
- Layer the lemon pie filling on the bottom of the prepared baking dish.
- Add the fresh blueberries over the lemon layer.
- Sprinkle the dry yellow cake mix evenly over the blueberries.
- Drizzle the melted butter over the cake mix.
- Bake for 35-40 minutes until the top is golden and bubbling.
- Cool for about 15 minutes before serving.
Notes
Serve warm with whipped cream or ice cream for a stunning finish. Feel free to experiment with different fruits!
Nutrition
- Serving Size: 1 serving
- Calories: 250
- Sugar: 15g
- Sodium: 150mg
- Fat: 10g
- Saturated Fat: 5g
- Unsaturated Fat: 3g
- Trans Fat: 0g
- Carbohydrates: 35g
- Fiber: 1g
- Protein: 3g
- Cholesterol: 25mg
Keywords: dump cake, cheesecake, lemon blueberry, dessert, easy dessert
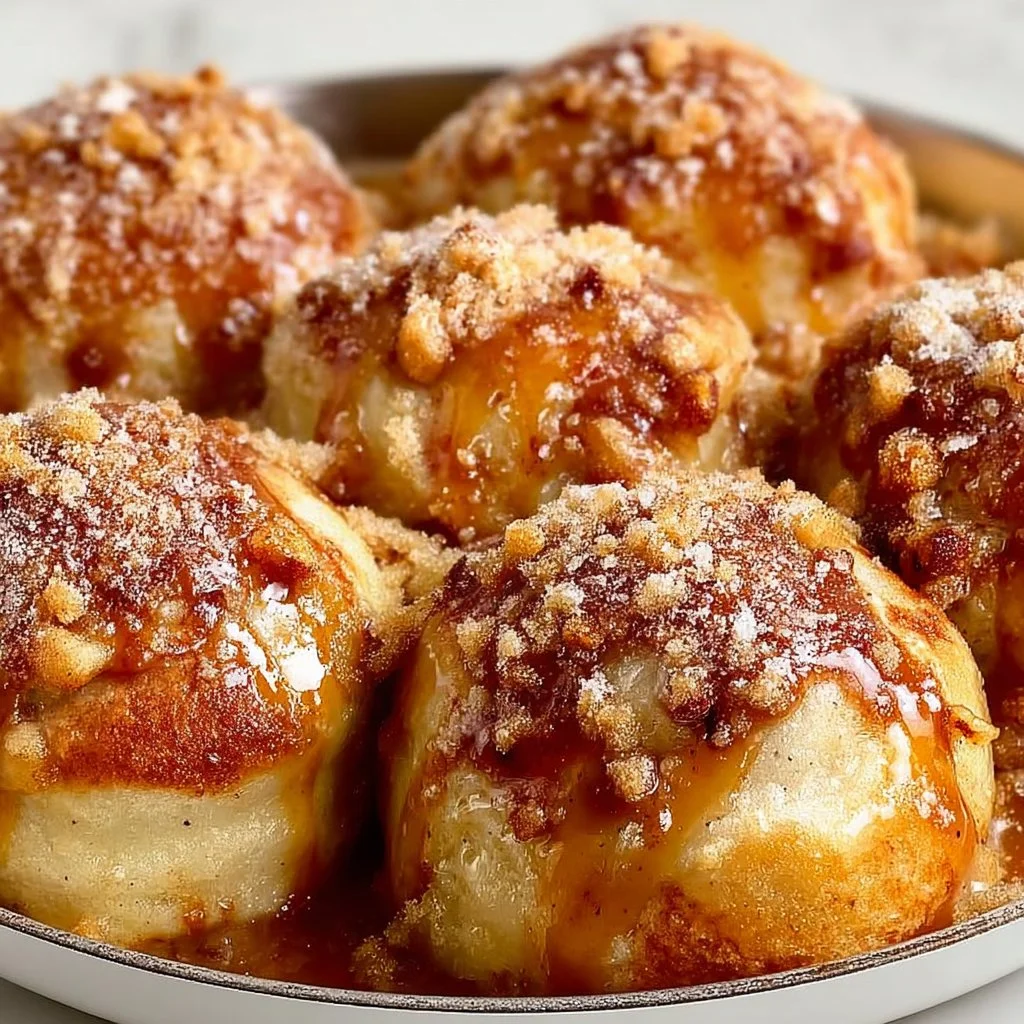
Simple Caramel Apple Pie Bombs
Simple Caramel Apple Pie Bombs: A Nostalgic Delight
Hello, and welcome back to my kitchen! Today, we’re diving into a dessert that merges nostalgia with absolute deliciousness — Simple Caramel Apple Pie Bombs. Picture this: sweet, tender apples enveloped in a buttery pie crust, drizzled with warm caramel, and baked to golden perfection. 🍏✨
Let’s face it; we all have those cherished memories of autumn gatherings filled with laughter, warm cider, and, of course, delicious treats. Caramel apple pie has always been a family favorite. It’s the kind of dessert that brings everyone together, a symbol of comfort and joy. And while we could whip up a traditional apple pie, sometimes, we crave something that’s bit-sized, portable, and oh-so-fun to eat! That’s where these delightful bombs come in!
As I was recalling my childhood, I remembered making caramel apples with my grandma during those cool fall afternoons. We’d dip crisp apples into rich, gooey caramel, relishing every sticky moment. Fast forward to today, and I’ve taken that classic idea and turned it into these irresistible pie bombs. They encapsulate that same joy, making them perfect for any occasion — from cozy nights at home to festive gatherings with friends.
So, grab your apron, and let’s create some sweetness that’s sure to put a smile on your face and warmth in your heart!
Personal Story
I vividly remember the yearly family tradition of baking pies with my grandma. Each fall, we’d gather in her sunny kitchen, surrounded by the sweet aroma of baking apples, cinnamon, and a hint of caramel wafting through the air. Those afternoons were filled with laughter as we would mix flour, sugar, and spice while sharing stories about our day.
One particular year, I can recall our experiment with caramel apples — we had so much fun dipping each apple in the warm, gooey caramel, and inevitably, we ended up with sticky fingers and lots of giggles. It was truly a cherished memory, and I believe that my love for baking was born in those moments spent with her.
When I came up with the idea for these Simple Caramel Apple Pie Bombs, I couldn’t help but smile at the nostalgia. They’re a fun and modern twist on our classic recipe, bringing back those sweet memories while allowing us to enjoy them in a delightful little package. Every bite sings of those warm afternoons shared over baked treats, reminding us that food is more than just sustenance — it’s about creating bonds and celebrating life’s small joys.
Ingredients
Here’s what you’ll need to create these delectable bites:
-
1 package refrigerated pie crusts: Convenient and time-saving, these crusts provide a flaky, buttery base. If you want to go homemade, a buttery flaky crust works beautifully as well!
-
2 cups peeled and diced apples: Choose your favorite apples! Tart varieties like Granny Smith bring a lovely contrast to the sweet caramel. Honeycrisp adds a delightful crunch. You can substitute them with pears for a different flavor profile.
-
1 cup caramel sauce: This is where the magic happens! You can use store-bought caramel for convenience, or if you’re feeling adventurous, I’ll share a quick recipe for a homemade caramel sauce later.
-
1 teaspoon cinnamon: A warm spice that complements apples wonderfully. If you’re a cinnamon lover, feel free to add a dash more. Alternatively, you could use apple pie spice!
-
1/4 cup sugar: This enhances the sweetness of the apples, balancing out the flavors. Consider swapping granulated sugar for brown sugar to add a touch of molasses flavor.
-
1 egg (for egg wash): This gives your pie bombs that beautiful golden finish when baked. If you’re avoiding eggs, a splash of milk or a vegan butter rub can work too!
-
Flour (for dusting): Just a little sprinkle to keep everything from sticking while you’re rolling out your crust.
With these ingredients, you’re well on your way to creating a delightful treat that’s sure to impress.
Step-by-Step Instructions
Now, let’s get cooking! Follow these detailed steps for creating your Simple Caramel Apple Pie Bombs:
-
Preheat the Oven: Start by preheating your oven to 375°F (190°C). This is the perfect temperature for crisping up your pastry. While the oven warms, lay your pie crusts on a lightly floured surface.
-
Roll Out the Crusts: If your refrigerated pie crusts are a bit thick, use a rolling pin to gently roll them out until they’re about 1/8 inch thick. This ensures every bite is flaky. Don’t have a rolling pin? A wine bottle works in a pinch!
-
Prepare the Filling: In a mixing bowl, combine the peeled and diced apples, sugar, cinnamon, and caramel sauce. Stir everything together until the apples are well-coated. Let it sit for about 10 minutes; this allows the flavors to mingle and the apples to release some juices.
-
Cut the Crusts: Using a round cookie cutter or a large glass, cut the pie crust into circles — about 4 to 5 inches in diameter. This will be the base of our bombs. Gather the scraps, reroll them, and cut out more circles!
-
Fill the Crusts: Place about a tablespoon of the apple filling in the center of each circle of pie crust. Be cautious not to overfill! You want these bombs to close up easily.
-
Seal It Up: Brush the edges of the pie crust circles with the beaten egg (this acts as glue!). Then, fold the crust over the filling, forming a half-moon shape. Use a fork to crimp the edges tightly, ensuring they are well-sealed. This is where you can get creative; use your fingers to pinch or twist the edges for a fun design!
-
Egg Wash and Bake: Place your sealed bombs on a parchment-lined baking sheet. Brush the tops with the egg wash to achieve a beautiful golden color when baked. Pop them in the oven and bake for about 20-25 minutes or until they are golden brown and bubbly.
-
Let Them Cool: Once baked, remove your pie bombs from the oven and let them cool for about 5-10 minutes. The caramel will be molten and can cause a little splatter!
-
Serve Warm: Drizzle some extra caramel sauce over the top for that little extra touch of sweetness!
And voila! You’ve created your very own Simple Caramel Apple Pie Bombs that are not only delicious but also a total crowd-pleaser!
Serving Suggestions
To serve, present your pie bombs on a rustic wooden board or a classic white platter – it’s all about that beautiful contrast! Drizzle some caramel sauce, and add a scoop of vanilla ice cream or a dollop of whipped cream on the side. Consider garnishing with a sprinkle of cinnamon or a sprinkle of chopped pecans for added texture and flavor. Trust me, your guests will be asking for seconds!
Recipe Variations
Feeling adventurous? Here are a few ways to change up your Caramel Apple Pie Bombs:
-
Add Nuts: Incorporate chopped walnuts or pecans into your filling for an extra crunch.
-
Spiced Up Flavor: Add a pinch of nutmeg or ginger to the apple filling for a spiced twist.
-
Chocolate Drizzle: Drizzle melted chocolate over the tops for a decadent finish. Chocolate and caramel are a match made in heaven!
-
Savory Edition: Swap out apples for cooked diced butternut squash and add sage or rosemary for a savory take.
-
Mini Versions: Use mini-muffin tins to create bite-sized bombs. Just adjust your baking time accordingly!
Chef’s Notes
One of my favorite adaptations of this recipe is swapping out traditional caramel sauce for salted caramel. Crisp, tart apples paired with the complexity of sea salt take these bombs to a whole new level. And speaking of adaptations, if you end up with extra filling, don’t throw it away! It’s perfect for topping yogurt, pancakes, or even just spooning straight from the bowl. Trust me, it’s that good!
Every time I make these pie bombs, I think back to those afternoons with my grandma. The excitement of pulling golden, bubbling bites from the oven — it never gets old! Kitchen messes may happen (I once spilled a full bowl of caramel on the counter), but it’s those little mishaps that make cooking memorable and fun.
FAQs and Troubleshooting
1. What if my pie bombs are leaking during baking?
This can happen if they’re overfilled or not sealed properly. Make sure to crimp the edges well and leave some space for expansion when filling.
2. How do I store leftovers?
Keep them in an airtight container in the fridge for up to 3 days. Reheat in the oven for a few minutes to regain that crispy texture.
3. Can I make these in advance?
Absolutely! You can prepare and seal them a day ahead, store them in the fridge, and bake them fresh right before serving!
4. What if I don’t have pie crust?
You can replace it with puff pastry, crescent roll dough, or even biscuit dough in a pinch. Each gives a unique texture and flavor!
Creating Simple Caramel Apple Pie Bombs is more than just a recipe; it’s an experience filled with laughter, warmth, and delicious memories. So, tie on your apron, gather your loved ones, and let’s bake something beautiful together! Happy cooking! 🍏❤️
PrintSimple Caramel Apple Pie Bombs

A fun and modern twist on the classic caramel apple pie, these bite-sized bombs are filled with tender apples and warm caramel, all encased in a flaky pie crust.
- Prep Time: 15 minutes
- Cook Time: 25 minutes
- Total Time: 40 minutes
- Yield: 4 servings 1x
- Category: Dessert
- Method: Baking
- Cuisine: American
- Diet: Vegetarian
Ingredients
- 1 package refrigerated pie crusts
- 2 cups peeled and diced apples
- 1 cup caramel sauce
- 1 teaspoon cinnamon
- 1/4 cup sugar
- 1 egg (for egg wash)
- Flour (for dusting)
Instructions
- Preheat the oven to 375°F (190°C).
- Roll out the refrigerated pie crusts on a lightly floured surface.
- Combine the diced apples, sugar, cinnamon, and caramel in a mixing bowl.
- Cut the pie crust into circles using a round cutter.
- Place about a tablespoon of filling in the center of each crust circle.
- Brush the edges with beaten egg and fold over to seal.
- Place on a baking sheet and brush tops with egg wash.
- Bake for 20-25 minutes until golden brown.
- Let cool for 5-10 minutes before serving.
Notes
For an extra touch, drizzle additional caramel sauce over the top before serving. Leftover filling works well as a topping for yogurt or pancakes.
Nutrition
- Serving Size: 1 serving
- Calories: 320
- Sugar: 20g
- Sodium: 150mg
- Fat: 14g
- Saturated Fat: 4g
- Unsaturated Fat: 9g
- Trans Fat: 0g
- Carbohydrates: 40g
- Fiber: 2g
- Protein: 3g
- Cholesterol: 37mg
Keywords: caramel, apple, pie, dessert, fall treats, nostalgic, baking
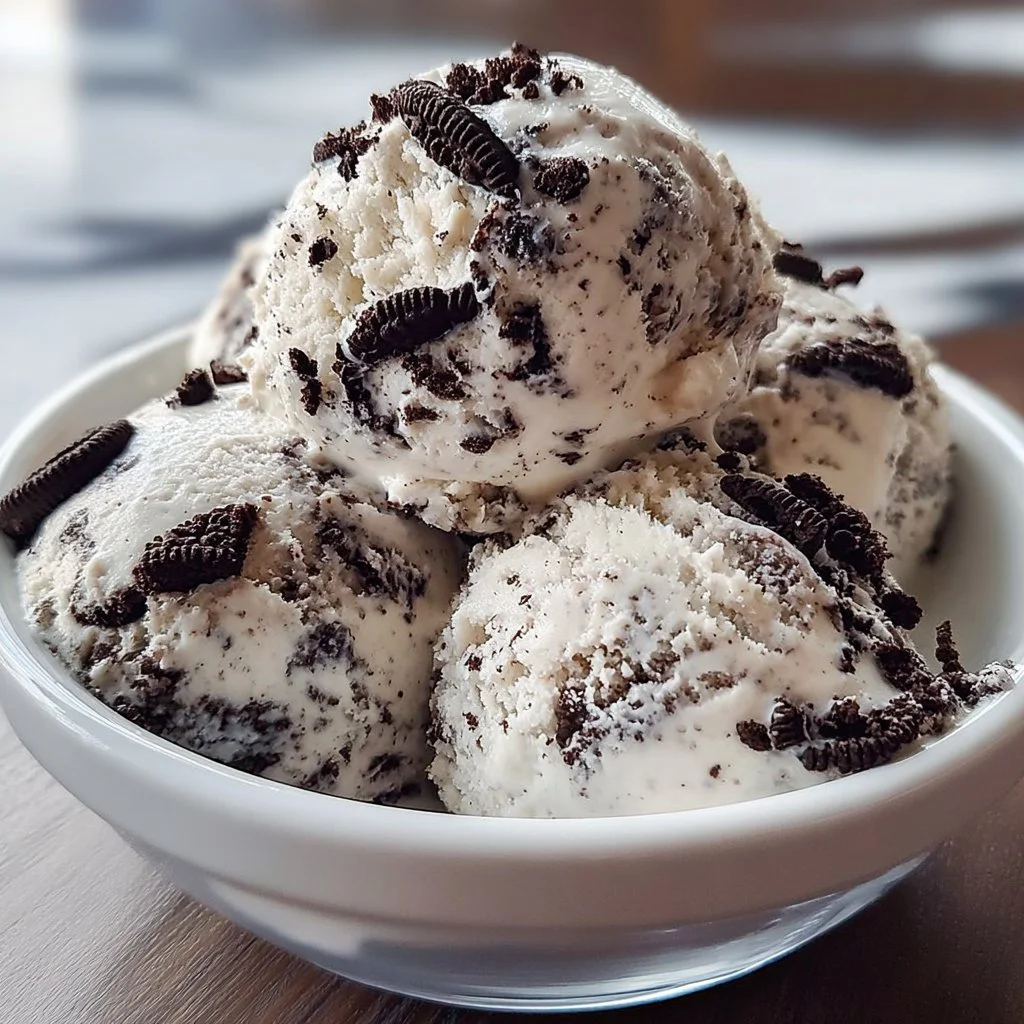
Cookies and Cream Ice Cream
The Joy of Homemade Cookies and Cream Ice Cream
Hello ice cream lovers! Let me take you on a delightful journey today as we explore one of my all-time favorite indulgences: Cookies and Cream Ice Cream. There’s something about the rich and creamy texture combined with the irresistible crunch of crushed Oreo cookies that just sings summer, childhood memories, and blissful adventures. What if I told you that you can create this beloved treat right in your own kitchen with just a handful of ingredients? Buckle up, because we’re diving into this dreamy creation together.
Personal Story: A Childhood Memory
Growing up, summer meant more than just long, sunny days and endless playtime; it was about daily trips to the local ice cream parlor. My friends and I would race down the street, our tiny legs moving at lightning speed, eager to pick out our favorite flavors. I was die-hard for Cookies and Cream. There was something magical about the way the crumbled Oreos blended with the sweet, velvety ice cream. I still remember sitting on the parlor’s rickety wooden benches, thick waffle cones dripping onto our hands as we giggled and debated which flavor was the best. Fast forward to today, and I still can’t resist that classic flavor, but now I make my own version—one that’s perfectly creamy, indulgent, and made with love.
Ingredients
Let’s gather our supplies for this ice cream dreamboat! Here’s what you’ll need:
-
2 cups heavy cream: This is the secret to getting that rich, smooth texture. You can substitute it with coconut cream for a dairy-free option, but the flavor won’t be as decadent.
-
1 cup sweetened condensed milk: This provides the necessary sweetness and creaminess. If you’re looking for a lower-sugar alternative, try using unsweetened condensed milk and adding a pinch of sugar to taste.
-
1 teaspoon vanilla extract: A must for adding depth to the flavors! You can use vanilla bean paste for an extra pop of flavor and those lovely little flecks.
-
1 cup crushed Oreo cookies: This is where the magic happens! Not a fan of Oreos? Any chocolate sandwich cookie will work, or you could even go wild with crushed chocolate wafers.
Step-by-Step Instructions
Now, let’s roll up those sleeves and get cooking! This is where the fun happens. Follow these steps to create your very own Cookies and Cream Ice Cream.
-
Prepare Your Mixing Bowl: Start by taking out a large mixing bowl. Ensure it’s chilled beforehand; this will help keep the cream from melting too quickly when whipped.
-
Whip the Heavy Cream: Pour the heavy cream into the bowl. Using an electric mixer, whip it on medium-high speed until soft peaks form. This usually takes about 2-3 minutes. What you’re looking for is fluffy, soft peaks that hold their shape but are still spoonable. Don’t overwhip; we want it light and airy, not butter!
-
Add Sweetened Condensed Milk and Vanilla: Once your cream is whipped to perfection, gently fold in the sweetened condensed milk and vanilla extract. Use a spatula to stir, taking care not to deflate all that beautiful whipped cream.
-
Incorporate the Crushed Oreos: Now for the fun part! Fold in the crushed Oreo cookies—reserve a few for topping, if you like. This step can get delightfully messy, and it’s absolutely worth it. The combination of textures makes every bite magical.
-
Chill the Mixture: Transfer your creamy cookie concoction to a suitable ice cream container or a loaf pan. Smooth the top with a spatula and cover it tightly with plastic wrap. This helps avoid ice crystals.
-
Freeze: Pop the container in the freezer for at least 4-6 hours, ideally overnight. This is the hardest part, but patience will pay off! The end result is a dreamy scoop of creamy goodness.
-
Enjoy Your Creation: Once frozen, take it out and let it sit for a few minutes to soften slightly. Scoop into your favorite bowl, top it with those reserved crumbled Oreos, and maybe a drizzle of chocolate sauce for the final touch.
Serving Suggestions
When serving your homemade Cookies and Cream Ice Cream, presentation is everything! Use a sturdy ice cream scoop for perfectly shaped scoops and serve in a chilled bowl to keep the ice cream from melting too quickly. For a fun twist, consider layering your ice cream with additional crushed Oreos or topping with whipped cream and a maraschino cherry for that classic sundae feel.
Recipe Variations
Feeling adventurous? Here are some creative twists you can try to elevate your ice cream experience:
-
Mint Cookies and Cream: Add a few drops of mint extract to the mixture for a refreshing twist.
-
Cookies and Cream Brownie Sundae: Serve your ice cream atop warm brownies and garnish with chocolate sauce and whipped cream.
-
Chocolate Chip Cookies and Cream: Swap out your Oreos for crumbled chocolate chip cookies for a delightful flavor combo.
-
Peanut Butter Swirl: Drizzle peanut butter into the mix before freezing for a rich and creamy peanut butter experience.
Chef’s Notes
Ah, this recipe has evolved beautifully over the years! It started with a simple desire to recreate that childhood parlor experience at home. I remember my first attempt—a delicious disaster! I forgot to whip the cream long enough, and the texture was all wrong. But that’s part of the fun! Every time I revisit this recipe, I tweak something because there’s always room for growth and personal flair. And let me tell you, making this with friends is a blast. There’s laughter in the air, and whether you’re spilling a scoop or adding a little too much cookie, it’s all part of the experience!
FAQs and Troubleshooting
1. Why is my ice cream icy?
If your ice cream has ice crystals, it likely hasn’t been mixed enough or needs to set longer. Make sure to whip your cream until soft peaks form for that creamy texture, and tightly cover the container before freezing.
2. Can I use low-fat cream instead?
While you can try low-fat cream, the richness and texture may not be the same. For a lighter version, consider a combination of low-fat whipped cream and Greek yogurt for creaminess.
3. How long will this ice cream last?
Homemade ice cream typically lasts about 1-2 weeks in the freezer, but it’s best enjoyed within a week for optimal texture and flavor.
4. What can I do if my ice cream won’t scoop easily?
Let it sit at room temperature for about 5-10 minutes to soften. This way, your scoop will glide right out!
Nutritional Info (if applicable)
While exact numbers may vary by brand and ingredient, a typical serving (about ½ cup) of this homemade Cookies and Cream Ice Cream will have approximately:
- Calories: 350
- Fat: 25g
- Carbohydrates: 32g
- Sugar: 24g
Indulging in a bowl of homemade Cookies and Cream Ice Cream is not just about the flavor; it’s about creating joyful memories that find their way back to the table. So grab that heavy cream and Oreos, roll up your sleeves, and dive into this delightful treat. You’ll find that making this ice cream brings as much happiness as enjoying it.
Happy cooking, and don’t forget to share those joyful moments with friends and family around the table! Enjoy every scoop!
PrintCookies and Cream Ice Cream

A creamy and indulgent homemade ice cream featuring crushed Oreo cookies for a delightful treat.
- Prep Time: 15 minutes
- Cook Time: 0 minutes
- Total Time: 360 minutes
- Yield: 4 servings 1x
- Category: Dessert
- Method: Freezing
- Cuisine: American
- Diet: Vegetarian
Ingredients
- 2 cups heavy cream
- 1 cup sweetened condensed milk
- 1 teaspoon vanilla extract
- 1 cup crushed Oreo cookies
Instructions
- Prepare Your Mixing Bowl: Start by taking out a large mixing bowl. Ensure it’s chilled beforehand to keep the cream from melting too quickly.
- Whip the Heavy Cream: Pour the heavy cream into the bowl and whip it on medium-high speed until soft peaks form (about 2-3 minutes).
- Add Sweetened Condensed Milk and Vanilla: Gently fold in the sweetened condensed milk and vanilla extract.
- Incorporate the Crushed Oreos: Fold in the crushed Oreo cookies, reserving a few for topping.
- Chill the Mixture: Transfer to an ice cream container, smooth the top, and cover with plastic wrap.
- Freeze: Pop the container in the freezer for at least 240-360 minutes, ideally overnight.
- Enjoy Your Creation: Once frozen, scoop into bowls, top with reserved crumbled Oreos, and enjoy!
Notes
For a dairy-free version, substitute heavy cream with coconut cream.
Nutrition
- Serving Size: 1/2 cup
- Calories: 350
- Sugar: 24g
- Sodium: 100mg
- Fat: 25g
- Saturated Fat: 15g
- Unsaturated Fat: 7g
- Trans Fat: 0g
- Carbohydrates: 32g
- Fiber: 1g
- Protein: 4g
- Cholesterol: 120mg
Keywords: ice cream, cookies and cream, homemade dessert
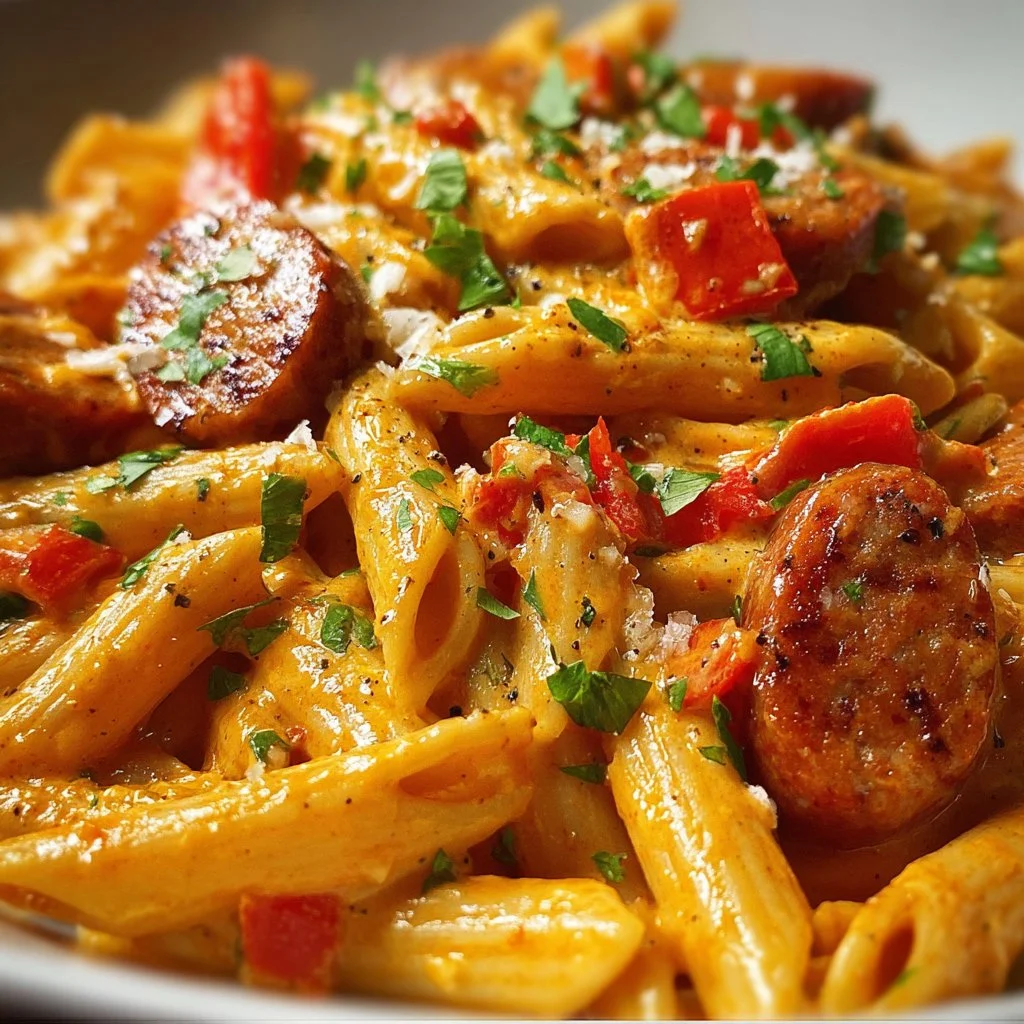
One-Pot Creamy Spicy Cajun Sausage Pasta
A Taste of Louisiana: One-Pot Creamy Spicy Cajun Sausage Pasta
Hey there, food lovers! Today, I’m thrilled to share with you one of my all-time favorite recipes – One-Pot Creamy Spicy Cajun Sausage Pasta! This dish combines the richness of creamy sauce with the bold flavors of Cajun spices, all while keeping things simple and stress-free. So, whether you’re entertaining friends or just whipping up a delicious dinner for yourself, this recipe is your ticket to flavor town!
Why One-Pot Cooking?
One-pot meals are my absolute jam! They’re perfect for busy weekdays when you want something hearty and divine without a mountain of dishes to wash afterward. Plus, this dish comes together in a bright, colorful array of ingredients that not only taste amazing but look stunning. Imagine a beautifully creamy pasta loaded with vibrant bell peppers and luscious sausage – it’s comfort food at its finest!
A Little Throwback to My Kitchen Adventures
This One-Pot Creamy Spicy Cajun Sausage Pasta brings back so many memories of my time cooking with my late grandmother. She was a true Cajun cook at heart, and her kitchen was always filled with warmth, laughter, and the enticing smell of spices. I can vividly remember her teaching me to perfect the holy trinity of Cajun cooking: onions, bell peppers, and celery. As we stirred a pot of something delicious (most likely jambalaya), she’d tell me tales of New Orleans and how food has a magical way of bringing people together.
When I first began experimenting with this dish in my own kitchen, I aimed to capture that community-oriented spirit while adding my own twist. Now, every time I make it, I can’t help but think about those cherished moments. So, let’s channel that love and warmth into your kitchen today!
Ingredients You’ll Need
Here’s a list of everything you’ll need to create this dreamy pasta dish:
-
1 lb smoked sausage
I love using andouille sausage for its spice, but any smoked sausage will do. You can also substitute turkey sausage for a lighter option! -
12 oz penne pasta
Penne holds the sauce beautifully! Feel free to swap in any short pasta you like, like rigatoni or ziti. -
2 cups chicken broth
Low sodium chicken broth helps control the saltiness. If you’re vegetarian or vegan, vegetable broth works great here! -
1 cup heavy cream
For that luscious creaminess! You can use half-and-half or even coconut milk for a dairy-free option. -
1 medium onion
Sweet onion adds depth. If you’re not a fan, shallots make a lovely substitute! -
1 bell pepper
I love red or yellow for sweetness, but green works beautifully for a sharper taste. -
3 cloves garlic
Because what’s pasta without a little garlic? Feel free to add more if you’re a garlic lover like me! -
1 can (14.5 oz) diced tomatoes
Adds moisture and acidity. You could use fresh tomatoes too—just increase the cooking time! -
1 tbsp Cajun seasoning
Honestly one of my secret weapons! You can adjust this up or down depending on your spice tolerance. -
1 tsp paprika
Pop of color and smoky flavor! Smoked paprika can give it an extra kick! -
Salt and pepper to taste
-
1 cup grated Parmesan cheese for garnish
A sprinkle of cheesy goodness brings it all together! -
2 tbsp olive oil
Essential for sautéing.
Step-by-Step Instructions
Now, let’s get cooking! Follow these steps, and you’ll have a delicious dish in no time:
-
Sauté the Sausage
In a large pot over medium heat, drizzle the olive oil. Once hot, add the sliced smoked sausage. Sauté for about 5 minutes until browned. This brings out all those delicious flavors. -
Add Onions and Peppers
Toss in the chopped onion and diced bell pepper. Sauté for another 3-4 minutes until the veggies are softened and the onion turns translucent. This not only enhances the flavor but also adds a lovely pop of color. -
Incorporate Garlic
Add minced garlic and cook for an additional minute until fragrant. This step is crucial as garlic loves to burn. Keep stirring! -
Mix in the Rest
Now, stir in the diced tomatoes (with their juice), chicken broth, penne pasta, Cajun seasoning, paprika, and a touch of salt and pepper to taste. Bring everything to a gentle boil. -
Cooking the Pasta
Once boiling, reduce the heat to a simmer. Cover the pot and let it cook for about 15 minutes or until the pasta is al dente, stirring occasionally. If your pasta seems to be soaking up too much liquid, feel free to add a bit more broth or water. -
Creamy Goodness
Once the pasta is cooked, stir in the heavy cream and let it cook for an additional 2-3 minutes. This is where the magic happens! It creates a creamy sauce that clings perfectly to the pasta. -
Cheesy Finish
Remove the pot from the heat and stir in half of the grated Parmesan cheese. This adds an extra layer of richness. Use the remainder for garnishing before serving.
Serving Suggestions
To serve this pasta dish, simply scoop a hearty portion onto a beautiful plate or in a rustic bowl. Sprinkle it with additional Parmesan and perhaps a dash of fresh parsley or crushed red pepper flakes for a pop of color. Grab some crusty bread on the side for the perfect meal that’s sure to make your guests swoon!
Recipe Variations
Looking to mix things up? Here are a few creative twists to get you started:
-
Protein Swap: Replace sausage with shrimp or chicken for different textures and flavors.
-
Vegetarian Delight: Skip the sausage altogether and add more veggies like zucchini, mushrooms, or spinach for a fresh take.
-
Gluten-Free Option: Use gluten-free pasta to keep this dish accessible for everyone.
-
Spicy Kick: Toss in some chopped jalapeños or a dash of hot sauce for added heat!
Chef’s Notes
This recipe has absolutely evolved over the years. I first started with a classic cream sauce and slowly began to incorporate those alluring Cajun flavors, which changed the game entirely! There’s always room for improvisation in the kitchen. On a particularly busy weeknight, I even tossed in some leftover vegetables — and guess what? They ended up enhancing the dish wonderfully! Don’t be afraid to make this recipe your own.
FAQs and Troubleshooting
1. My pasta turned out mushy. What went wrong?
Overcooking is usually the culprit! Keep an eye on your pasta, and remember it will continue to cook a little once you add the heavy cream.
2. Can I make this dish ahead of time?
Absolutely! You can prepare everything a day or two in advance. Just reheat slowly and consider adding a splash of broth if it seems too thick when reheating.
3. What can I serve alongside this dish?
A simple side salad or some garlic bread will perfectly complement the pasta. I also love a cold glass of white wine!
4. How can I store any leftovers?
Store in an airtight container in the fridge for up to 3 days. Just be aware that the pasta may soak up some sauce, so reheating with a splash of liquid might be necessary.
Nutritional Info
Per serving (about 1 cup):
- Calories: 550
- Fat: 30g
- Carbohydrates: 45g
- Protein: 25g
I hope you’re as excited to try this One-Pot Creamy Spicy Cajun Sausage Pasta as I am to share it! Cooking is about love, exploration, and bringing people together. So go ahead, tie on your apron, pour yourself a little something sparkling, and let’s create something delicious! Don’t forget to share your evening around the table — I’d love to hear your stories! Happy cooking!
PrintOne-Pot Creamy Spicy Cajun Sausage Pasta

A delicious one-pot pasta dish featuring creamy sauce and bold Cajun spices, perfect for busy weeknights or entertaining.
- Prep Time: 10 minutes
- Cook Time: 30 minutes
- Total Time: 40 minutes
- Yield: 4 servings 1x
- Category: Main Course
- Method: Stovetop
- Cuisine: Cajun
- Diet: Non-Vegetarian
Ingredients
- 1 lb smoked sausage
- 12 oz penne pasta
- 2 cups chicken broth
- 1 cup heavy cream
- 1 medium onion
- 1 bell pepper
- 3 cloves garlic
- 1 can (14.5 oz) diced tomatoes
- 1 tbsp Cajun seasoning
- 1 tsp paprika
- Salt and pepper to taste
- 1 cup grated Parmesan cheese for garnish
- 2 tbsp olive oil
Instructions
- Sauté the sausage in a large pot over medium heat with olive oil until browned.
- Add chopped onion and diced bell pepper; sauté until softened.
- Incorporate minced garlic and cook until fragrant.
- Mix in diced tomatoes, chicken broth, penne pasta, Cajun seasoning, paprika, and salt and pepper.
- Bring to a gentle boil, then reduce heat to simmer and cover, cooking for about 15 minutes until pasta is al dente.
- Add heavy cream and stir for an additional 2-3 minutes.
- Remove from heat and stir in half the Parmesan cheese; garnish with remainder before serving.
Notes
Feel free to substitute sausage with shrimp or chicken, or add extra veggies for a vegetarian option. This dish is also great with gluten-free pasta.
Nutrition
- Serving Size: 1 serving
- Calories: 550
- Sugar: 5g
- Sodium: 800mg
- Fat: 30g
- Saturated Fat: 10g
- Unsaturated Fat: 15g
- Trans Fat: 0g
- Carbohydrates: 45g
- Fiber: 3g
- Protein: 25g
- Cholesterol: 90mg
Keywords: One-Pot Pasta, Cajun Sausage, Creamy Pasta, Quick Dinner, Comfort Food

Ultimate Cheesy Ground Beef Melt
The Ultimate Cheesy Ground Beef Melt: A Comfort Food Classic
Introduction
Hello, culinary adventurers! I’m so excited you’re joining me today because we’re diving into one of my absolute favorite comfort food recipes: the Ultimate Cheesy Ground Beef Melt. It’s exactly what it sounds like—juicy, flavorful ground beef meeting a melty, gooey blanket of cheese all encapsulated in toasty bread. Yum, right?
There’s something so nostalgic about biting into a warm, cheesy melt that transports you back to those carefree days when dinner was simply about comfort, love, and the people gathered around the table. Whether you’re whipping this up for a weeknight meal, a cozy lunch, or a fun dinner party, this dish is sure to impress while still keeping things stress-free.
Now, let’s dive right in! I’ll share a personal story that showcases why this dish brings me joy, then take you through every step of the process, share chef tips, and sprinkle in a few fun variations that can personalize your melt. So, tie on your apron and let’s get cooking!
My Personal Story
When I think of the Ultimate Cheesy Ground Beef Melt, I’m transported back to my childhood kitchen, where my mom would host her “cheesy nights.” One evening, after a long day at school, I rushed home, my stomach growling in anticipation of the delightful aroma that filled our little home. My mom had whipped up this incredible ground beef dish, but the best part was watching her melt layers of gooey cheese over the top, transforming an everyday meal into something truly special.
We would sit around the kitchen table, my siblings and I, our plates piled high, laughter echoing against the walls as we shared stories from our day. Each bite was an explosion of flavor with the savory beef, the aromatic garlic and onions, and that melted cheese that stretched so beautifully—food that felt like a warm hug.
This simple yet fantastic recipe became a family staple, a tradition that I carry to this day. Whenever I prepare it now, I often find myself reminiscing, passing on the same warmth and joy to whoever joins me around the table. Trust me, my friends, once you taste this dish, it’ll weave its way into your own heart just like it did mine.
Ingredients
Before we get started, let’s round up our ingredients! Here’s what you’ll need for the Ultimate Cheesy Ground Beef Melt:
-
Ground Beef (1 lb): This is the star of the dish! I love using a higher fat content (80/20) for the juiciest results. For a healthier option, you can substitute it with ground turkey or chicken, but be careful not to dry it out.
-
Cheese (2 cups, shredded): Cheddar is my go-to for that sharpness, but mozzarella, Monterey Jack, or a melting blend can also do the trick. The creamier, the better!
-
Bread (4 slices or burger buns): Choose your favorite! Sandwich bread for a classic melt or burger buns for a heartier version. If you want a gluten-free alternative, look for gluten-free bread options or lettuce wraps.
-
Onion (1, diced, optional): Adds a lovely sweetness and complexity. If you’re not a fan, skip it, or swap in caramelized onions for a richer flavor.
-
Garlic (2 cloves, minced, optional): Fresh garlic brings that beautiful aromatic flavor. Feel free to substitute with garlic powder if you’re in a pinch!
-
Seasonings (Salt, pepper, paprika): Basic but essential! Salt enhances all the flavors, pepper adds a nice kick, and paprika tones it all down with a smokiness.
-
Butter or Oil (2 tbsp): For toasting the bread to perfection. You can choose olive oil for a lighter option or keep it classic with butter.
Step-by-Step Instructions
Now that we have everything ready, let’s get into the cooking! You won’t believe how simple this is to whip up. Follow these steps, and you’ll soon be savoring your cheesy creation.
-
Prep Your Ingredients: Begin by gathering all your ingredients. Chop that onion and mince your garlic, if you’re using them. Keeping everything within reach makes cooking much smoother and more enjoyable!
-
Cook the Ground Beef: In a large skillet, heat a tablespoon of butter or olive oil over medium-high heat. Once hot, add your ground beef, breaking it up with a spatula. Season it with salt, pepper, and paprika. Cook until browned, about 6-8 minutes, stirring occasionally. Don’t rush this step; you want all that flavor to develop! If you see excess fat, consider draining it off to avoid a greasy melt.
-
Add the Aromatics: If you’re using onions and garlic, now’s the time! Toss them in with the beef and let them sauté for about 3-4 minutes until the onions become translucent and the garlic smells heavenly. It’s like an instant flavor boost!
-
Melt the Cheese: Lower the heat to medium and sprinkle your cheese over the beef, covering it generously. Cover the skillet with a lid to let that cheese melt and become oozy, about 2-3 minutes. This is where the magic happens!
-
Toast the Bread: While your beef and cheese conjoin in cheesy harmony, heat another skillet or panini press with a little more butter or oil. If you’re using sandwich bread, take each slice or bun, and lightly brown them on both sides until golden and crispy—heavenly!
-
Assemble Your Melts: Now, take the toasted bread and pile on that flavorful beef and oozy cheese combo. Top it off with another slice of your crispy bread, creating a delicious sandwich that’s begging to be devoured.
-
Final Toasting: For extra melty goodness, consider grilling your assembled sandwiches in the same skillet over medium heat for a couple of minutes on each side until they’re golden brown and crisp. Nothing beats a perfectly toasted melt!
-
Slice and Serve: Once it’s all golden and cheesy, carefully slice those beauties in half. Feel free to get extra creative with your plating—maybe add a side of fresh greens or crispy fries for an indulgent touch!
Serving Suggestions
When serving your Ultimate Cheesy Ground Beef Melt, think of fun, hearty sides! A crisp salad with a tangy vinaigrette perfectly balances the richness of the melt, or consider some sweet potato fries for that added crunch. If you’re feeling adventurous, a touch of salsa or guacamole can elevate your melt to a whole new level!
Recipe Variations
Now for the fun part—personalizing your melt! Here are a few creative twists and flavor options to spice things up:
-
Spicy Kick: Add some diced jalapeños or a few dashes of hot sauce to bring on the heat.
-
Mushroom Delight: Sauté some mushrooms alongside the onions and garlic for an earthy component that pairs beautifully with beef and cheese.
-
Veggie Substitute: Incorporate lentils or black beans instead of beef for a vegetarian twist, maintaining that cheesy goodness.
-
Sourdough Bread: For a tangy, chewy texture, try sourdough bread instead of classic sandwich bread. The flavor combination is simply divine!
-
Herb Infusion: Fresh herbs like thyme or rosemary can give your melt a lovely aromatic flair. Just chop some finely and mix them in when cooking the beef.
Chef’s Notes
Oh, the stories I could tell about my cheesy nights gone awry! I once invited friends over for a “cheesy melt night,” only to realize I had burnt the first batch so badly it resembled charcoal. The laughter that erupted made it all worth it, but I learned the hard way to keep an eye on those toasting sandwiches! Since then, I’ve become a pro at keeping my kitchen timer handy.
I’ve also evolved the recipe over time, playing with the kind of cheese and seasonings until I landed on this dreamy combination. I genuinely believe that cooking should be fun and that experimenting in the kitchen can lead to delightful surprises!
FAQs and Troubleshooting
-
Why is my cheese not melting?
It can happen! Make sure you’re using a cheese known for melting, like cheddar or mozzarella. Covering the pan can also help trap in the heat for that gooey texture. -
Can I use a different type of meat?
Absolutely! Ground turkey or chicken work well too. Just remember to adjust seasoning and moisture, as lean meats can sometimes become dry. -
What if my bread is getting too brown before the cheese melts?
If you notice the bread browning too quickly, simply lower the heat. Alternatively, you can cover the skillet briefly to help the cheese melt while preventing the bread from getting overly crispy. -
Can I make this dish in advance?
Sure! You can prepare the ground beef mixture ahead and store it in the fridge. When you’re ready to eat, just reheat it, add cheese, and assemble the melts.
Nutritional Info
You might be curious about the nutritional breakdown. While this recipe is rich and indulgent, each melt can provide around 400-500 calories, depending on the ingredients used. If you’re counting calories, you can go light on bread and cheese or add more veggies to keep it balanced.
Now that you’re equipped with this Ultimate Cheesy Ground Beef Melt recipe, I hope you feel inspired to gather your loved ones, share some laughs, and create memorable meals. Remember, cooking should be joyful—just as much about the experience as the outcome. Happy cooking, friends!
PrintUltimate Cheesy Ground Beef Melt

A comforting and indulgent ground beef melt topped with gooey cheese and toasted bread, perfect for any meal.
- Prep Time: 15 minutes
- Cook Time: 20 minutes
- Total Time: 35 minutes
- Yield: 4 servings 1x
- Category: Main Course
- Method: Grilling
- Cuisine: American
- Diet: None
Ingredients
- 1 lb Ground Beef
- 2 cups Cheese (shredded)
- 4 slices Bread or burger buns
- 1 Onion (diced, optional)
- 2 cloves Garlic (minced, optional)
- Salt (to taste)
- Pepper (to taste)
- Paprika (to taste)
- 2 tbsp Butter or Oil
Instructions
- Prep your ingredients by gathering everything and chopping onion and mincing garlic if using.
- Cook the ground beef in a skillet over medium-high heat for 6-8 minutes until browned, seasoning with salt, pepper, and paprika.
- Add the onions and garlic to the beef and sauté for about 3-4 minutes until onions become translucent.
- Melt the cheese over the beef, covering the skillet with a lid for 2-3 minutes until oozy.
- Toast the bread in another skillet or panini press until golden and crispy.
- Assemble the melts by piling the beef and cheese on the toasted bread and topping with another slice.
- Final toasting of the sandwiches for an additional few minutes on each side until golden brown.
- Slice and serve your melts with preferred sides.
Notes
For a healthier option, substitute ground beef with turkey or chicken. Consider adding mushrooms, jalapeños, or herbs for a twist!
Nutrition
- Serving Size: 1 sandwich
- Calories: 450
- Sugar: 2g
- Sodium: 600mg
- Fat: 25g
- Saturated Fat: 12g
- Unsaturated Fat: 10g
- Trans Fat: 0g
- Carbohydrates: 30g
- Fiber: 2g
- Protein: 25g
- Cholesterol: 80mg
Keywords: ground beef, cheesy melt, comfort food, sandwiches, easy recipes
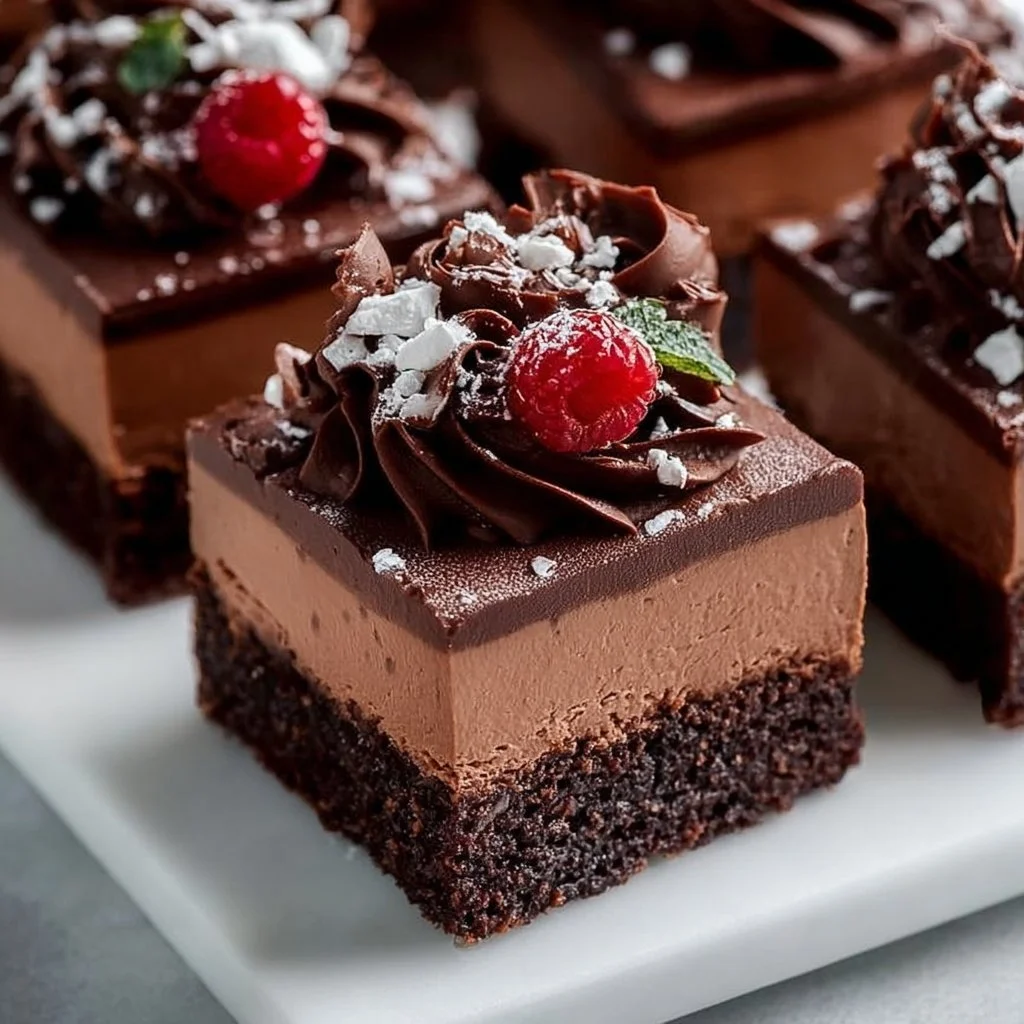
Chocolate Mousse Brownies
Indulge in Decadence: Chocolate Mousse Brownies Recipe
Welcome, fellow food lovers! Today, we’re diving into one of life’s simplest pleasures: chocolate. More specifically, we’re bringing together two crowd-pleasers in a luscious combination that will leave you weak in the knees—because nothing makes a bad day better than a rich, fudgy chocolate mousse brownie. Trust me; the only thing more tempting than the idea of these brownies is the act of making them.
When we think chocolate, we often imagine the sweet, silky taste melting in our mouths. But have you ever considered the magic of pairing rich brownies with an airy chocolate mousse? It’s pure alchemy in the kitchen, one that I fell in love with at a young age.
Let me take you on a little journey through my life: picture me as a young girl, smeared in flour and cocoa powder, bouncing around the kitchen as I tried to recreate my grandmother’s brownie recipe. As I stirred and combined, I’d sneak in bites of the mousse I had whipped up, only to find that blending the two could create something extraordinary! I remember the joy of serving my family these decadent treats and their wide-eyed amazement as they took their first bite. The laughter and smiles that surrounded the table are memories I cherish deeply, and are the essence behind why I share my recipes with you today.
Ingredients
Let’s gather our ingredients to create this chocolatey delight! Each one plays an essential role in crafting your perfect brownies:
-
1 cup unsweetened cocoa powder: This will be the base of our chocolate flavor. Opt for Dutch-processed cocoa for a richer taste, or substitute with an equal amount of carob powder for a caffeine-free version.
-
1 cup all-purpose flour: This provides structure. You can replace it with gluten-free flour to keep things friendly for those with dietary needs.
-
1 cup granulated sugar: For sweetness! Brown sugar can be used for a deeper flavor, but note that it may change the texture slightly.
-
1/2 cup unsalted butter, melted: This adds richness and moisture; coconut oil is a great dairy-free substitute.
-
3 large eggs: They bind everything together and contribute to the chewy texture. For a vegan option, use flax eggs (1 tablespoon ground flaxseed + 2.5 tablespoons water = 1 egg).
-
1 teaspoon vanilla extract: A must for elevating the overall flavor. If you’re out, almond extract makes a wonderful substitute.
-
1/2 cup heavy cream: This is for the mousse layer. If you need dairy-free, coconut cream works beautifully.
-
4 ounces semisweet chocolate, chopped: The star of the mousse! You can use dark chocolate if you prefer a more intense flavor, or swap with a flavored chocolate for a fun twist.
-
1/2 cup powdered sugar: To sweeten the mousse. For a lower sugar option, consider using stevia or another sugar substitute.
-
1/2 teaspoon salt: Salt enhances the sweetness of chocolate — trust me on this one! If you’re watching your sodium intake, a pinch of sea salt will do nicely.
Step-by-Step Instructions
Now, let’s get to the fun part: making our chocolate mousse brownies! Follow these steps for brownie bliss:
-
Preheat Your Oven: Preheat your oven to 350°F (175°C). This is the best way to ensure your brownies bake evenly and come out perfectly chewy. Don’t forget to line an 8×8-inch baking pan with parchment paper for easy removal!
-
Mix the Wet Ingredients: In a mixing bowl, whisk together the melted butter, granulated sugar, and vanilla extract until well combined. The mixture should look smooth and glossy. Make sure your butter isn’t too hot; warm is perfect but avoid cooking the eggs when you add them next.
-
Add the Eggs: Crack in the three large eggs and whisk until fully incorporated. You want the mixture to become a light, shiny batter. I have a little trick: after adding the eggs, whisk until the batter lightens a couple of shades to bring air into the mixture—this will result in a fluffier brownie.
-
Combine the Dry Ingredients: In another bowl, sift together the cocoa powder, flour, and salt. Sifting helps aerate the cocoa and flour, taking away any lumps for a smooth brownie. Gradually fold the dry ingredients into the wet mixture using a rubber spatula. Be gentle! Overmixing can create tough brownies. Stop when you no longer see dry flour.
-
Bake the Brownies: Pour your brownie batter into the prepared pan, smoothing it out with your spatula. Bake for 25-30 minutes, or until a toothpick inserted into the center comes out with moist crumbs (not wet batter). Ovens can vary, so keep an eye on them past the 25-minute mark.
-
Prepare the Chocolate Mousse: While the brownies are baking, it’s mousse time! Heat the heavy cream in a small saucepan over medium heat until just simmering. Pour it over the chopped semisweet chocolate in a mixing bowl and let stand for 5 minutes. This allows the chocolate to melt evenly.
-
Whisk Together: After 5 minutes, whisk the chocolate and cream together until smooth. Then beat in the powdered sugar until it’s creamy and luscious. This is where you can taste-test — quality control is crucial, my friends!
-
Chill the Mousse: Once mixed, refrigerate the mousse for about 30 minutes. It helps to thicken and sets up beautifully.
-
Assemble the Treat: Once the brownies are cool, spread the chocolate mousse evenly on top. You can get creative here; consider using a piping bag for a beautiful presentation!
-
Chill Again: This sweet delight benefits from a little more chilling. Place the brownies back in the fridge for at least an hour to set the mousse nicely before slicing.
Serving Suggestions
Now that you’ve created these divine chocolate mousse brownies, it’s time to serve them up right! Slice them into generous squares and serve them on a beautiful platter. For an elegant touch, dust with a bit of powdered sugar and a sprig of fresh mint. I also love pairing them with a scoop of vanilla ice cream or whipped cream—because, let’s be honest, chocolate deserves a companion!
Recipe Variations
Get creative with these brownies! Here’s how to put your spin on them:
-
Nutty Brownies: Fold in chopped nuts like walnuts or pecans into the brownie batter for added crunch.
-
Mint Chocolate Mousse: Add a few drops of peppermint extract to the mousse for a refreshing mint flavor that pairs perfectly with chocolate.
-
Fruit Topper: Fresh raspberries or strawberries on top of the mousse add a gorgeous pop of color and a little acidity to balance the richness.
-
Spicy Chocolate: Add a pinch of cayenne or chili powder to the brownie mix for a surprising kick that married beautifully with chocolate.
-
Vegan Delight: Follow earlier substitutions for a fully vegan recipe while adding silken tofu blended into the mousse for a creamy texture.
Chef’s Notes
This recipe has followed me through the years and has definitely evolved. I started with instant chocolate pudding mixed into the brownie batter (hey, we all have to learn somewhere!). But over time, I honed my skills and discovered that from-scratch mousse makes all the difference in flavor and texture!
If you ever find you’ve made a mess of the kitchen while creating (and believe me, I have!), just remember this: the messy ones often produce the most delicious results. And when all else fails, know that you can throw on a bit of powdered sugar for "decoration."
FAQs and Troubleshooting
1. My brownies came out cakey! What did I do wrong?
Overmixing can introduce too much air into the batter, leading to a cakey texture. Or, you may have baked them too long. Keep an eye on them after 25 minutes!
2. My mousse is too runny; how can I fix this?
This could be due to not letting the chocolate cool enough before mixing in the cream. Chill the mousse for a bit longer, and it’ll firm up beautifully.
3. The brownies stuck to the pan! Help!
Make sure you’ve lined your pan with parchment paper, and don’t skip the butter or oil to help them release easily.
4. Can I make the mousse ahead of time?
Absolutely! You can prepare the mousse a day in advance and store it in the fridge. Just give it a quick stir before spreading it on the brownies.
Nutritional Info
If you’re wondering about the nutritional value of these luscious brownies, here’s a quick breakdown (per serving, based on 16 servings):
- Calories: 300
- Total Fat: 18g
- Saturated Fat: 10g
- Cholesterol: 75mg
- Total Carbohydrates: 35g
- Dietary Fiber: 2g
- Sugars: 24g
- Protein: 4g
And there you have it! Chocolate mousse brownies that hit the sweet spot in every way. Whether you’re enjoying them at a dinner party, date night, or just a cozy evening at home, these brownies will surely impress. So, tie on your apron, friends, and dive into this sweet adventure — because life is too short for anything less than phenomenal desserts. Happy baking!
PrintChocolate Mousse Brownies

Indulge in the decadent combination of rich brownies topped with airy chocolate mousse for a delicious dessert.
- Prep Time: 15 minutes
- Cook Time: 30 minutes
- Total Time: 45 minutes
- Yield: 16 servings 1x
- Category: Dessert
- Method: Baking
- Cuisine: American
- Diet: Vegetarian
Ingredients
- 1 cup unsweetened cocoa powder
- 1 cup all-purpose flour
- 1 cup granulated sugar
- 1/2 cup unsalted butter, melted
- 3 large eggs
- 1 teaspoon vanilla extract
- 1/2 cup heavy cream
- 4 ounces semisweet chocolate, chopped
- 1/2 cup powdered sugar
- 1/2 teaspoon salt
Instructions
- Preheat your oven to 350°F (175°C).
- Mix the melted butter, granulated sugar, and vanilla extract until smooth.
- Add the eggs and whisk until fully incorporated.
- Combine the cocoa powder, flour, and salt in another bowl.
- Fold the dry ingredients into the wet mixture using a rubber spatula.
- Bake the brownie batter in the prepared pan for 25-30 minutes.
- Prepare the mousse by heating heavy cream until simmering, then pour over chopped chocolate.
- Whisk the chocolate and cream until smooth, then stir in powdered sugar.
- Chill the mousse for about 30 minutes.
- Assemble the mousse layer on top of the cooled brownies and chill again for at least an hour.
Notes
For variations, consider adding nuts, mint extract, or fruit on top.
Nutrition
- Serving Size: 1 brownie
- Calories: 300
- Sugar: 24g
- Sodium: 200mg
- Fat: 18g
- Saturated Fat: 10g
- Unsaturated Fat: 8g
- Trans Fat: 0g
- Carbohydrates: 35g
- Fiber: 2g
- Protein: 4g
- Cholesterol: 75mg
Keywords: brownies, chocolate mousse, dessert, baking, sweets
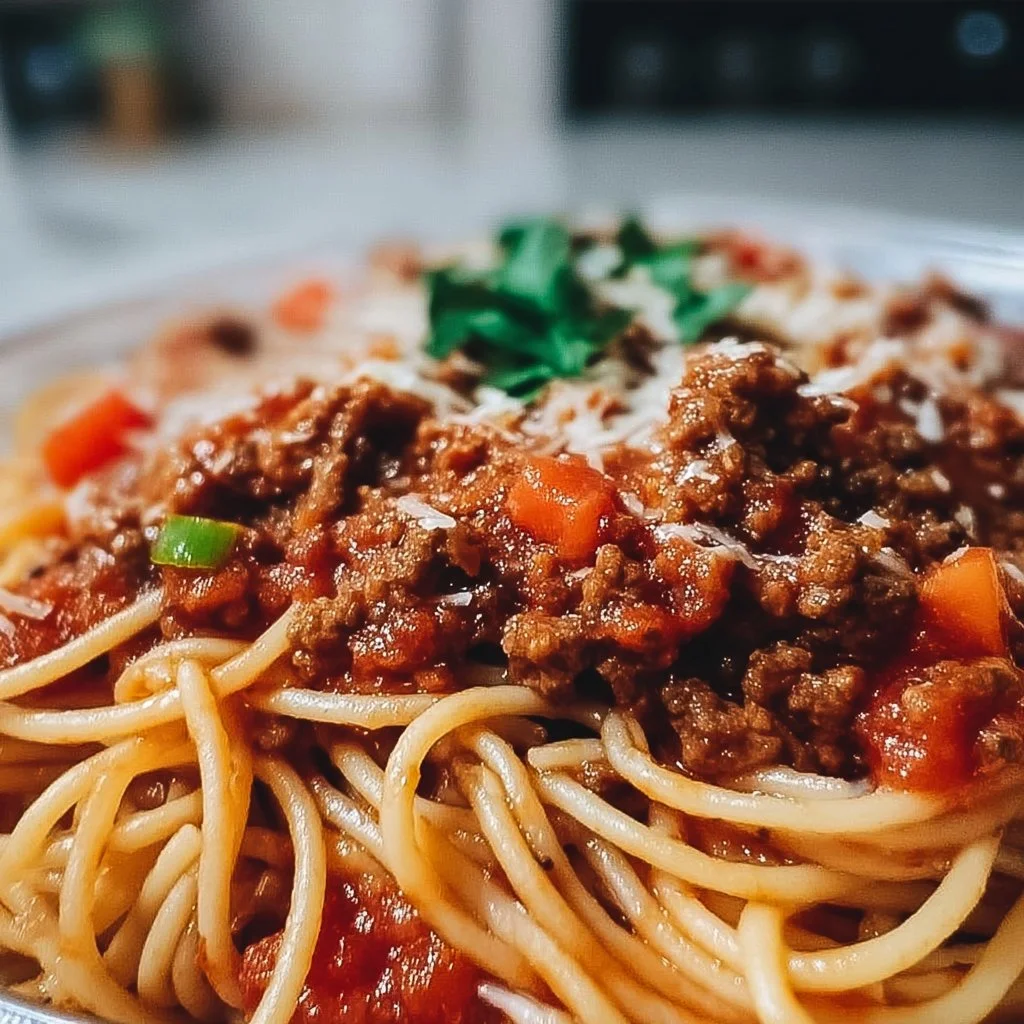
Spaghetti with Meat Sauce
The Perfect Spaghetti with Meat Sauce: A Home Cook’s Delight
Cooking is one of life’s great pleasures, and there’s nothing quite like the comforting embrace of a bowl of spaghetti with meat sauce. It’s simple, satisfying, and a dish I believe everyone should know how to make. Today, I’m excited to share my favorite recipe with you, dripping with nostalgia and flavor—it’s sure to make your kitchen glow with warmth and laughter!
A Personal Memory with Spaghetti
When I think of spaghetti and meat sauce, my mind drifts back to my childhood kitchen, a bustling hub of activity every Sunday evening. My parents, determined to keep our family traditions alive, would host what we called "Sunday Funday." The aroma of simmering sauce would fill the house, mingling with laughter and chatter as my siblings and I set the table, eager for what was about to unfold.
My dad spent the afternoon preparing the sauce, a secret family recipe, which had been passed down through generations. The whole kitchen transformed into an aromatic wonderland of browning meat, caramelizing onions, and garlic that had us all salivating before the first forkful. I remember sneaking bits of the sauce when he wasn’t looking, my taste buds rejoicing with every savory bite. When it finally came time to sit around the table, we served up plates heaped high, ready to enjoy a meal crafted with love. It was more than just food; it was a bond that brought us together.
So, let’s dive into making this classic deliciousness! Follow along, and soon your kitchen will be filled with the same rich scents that have graced my family dinners.
Ingredients: Gather Your Essentials
Before we start, let’s get all your ingredients lined up:
-
Spaghetti: The star of the show! You can opt for traditional wheat pasta or switch it up with whole wheat or gluten-free options. Just cook it according to package instructions for that perfect al dente texture.
-
Ground Beef or Sausage: Either will do! Ground beef gives a classic taste, while sausage adds a delightful zing. Feel free to mix it up for a unique kick!
-
Onion, Chopped: This ingredient adds sweetness and depth. If you’re sensitive to onions, shallots are a lovely substitute or you can even use leeks!
-
Garlic, Minced: Because garlic makes everything better! Fresh garlic is ideal, but if you’re in a pinch, garlic powder works too—just adjust the amount so you don’t overpower the dish.
-
Canned Tomatoes (Crushed or Diced): For that luscious sauce base, choose high-quality canned tomatoes. If fresh tomatoes are in season, feel free to use them; just remember to peel and deseed for a smoother sauce.
-
Tomato Paste: This intensifies the tomato flavor and thickens the sauce. If you’re out, a bit of tomato sauce can work, but the richness might not be as pronounced.
-
Italian Seasoning: Essential for that comforting Italian flavor profile. You can DIY this mix with dried basil, oregano, thyme, and rosemary.
-
Salt: A little goes a long way in enhancing flavors. Keep it handy!
-
Pepper: Freshly ground is always best for that extra kick.
-
Parmesan Cheese (Optional): For a deliciously nutty finish! Other hard cheeses like Pecorino Romano work great too.
Step-by-Step Instructions: Let’s Cook!
Now comes the fun part! Here’s how you bring this dish together:
-
Start by boiling the spaghetti:
- Fill a large pot with salted water and bring it to a rolling boil. When it’s bubbling like mad, toss in your spaghetti. Set a timer based on the package directions—typically 8-10 minutes—for perfectly cooked pasta. Don’t forget to stir occasionally to prevent sticking!
-
Sauté your aromatics:
- While the pasta cooks, grab a large skillet (preferably non-stick) and heat over medium heat. Add a drizzle of olive oil—about a tablespoon should do. Once hot, throw in your chopped onion and sauté until it’s translucent and fragrant, around 3-5 minutes. Then, add the minced garlic and cook for another minute until it gets that lovely golden color and fragrance.
-
Cook the meat:
- Increase the heat to medium-high. Time to add in your ground beef or sausage! Break it apart with a spatula and let it brown evenly, about 5 minutes. Make sure to stir often to avoid clumps and ensure everything caramelizes beautifully.
-
Add the tomatoes and seasonings:
- Once your meat is browned, it’s time to add the canned tomatoes and tomato paste. Stir them in well, then sprinkle in your Italian seasoning, salt, and pepper. Bring the mixture to a gently simmer. This is where the magic happens! Allow the sauce to cook for at least 15 minutes on low heat. If you have the time, let it simmer longer—this is where those flavors deepen and develop!
-
Combine pasta and sauce:
- When your spaghetti is perfectly cooked, reserve about a cup of pasta water, then drain it. Add the drained spaghetti directly into your sauce. Toss to coat the noodles evenly. If the sauce is too thick, add a splash of that reserved pasta water until you reach your desired consistency.
Serving Suggestions: Plating It Up
Presentation does wonders, so let’s make those plates pop! Serve your spaghetti in shallow bowls, twirling the noodles into a nest-like shape for that elegant touch. Top each serving with a generous scoop of meat sauce and finish it off with a sprinkle of freshly grated Parmesan cheese. Add a sprinkle of fresh basil or parsley for a burst of color and flavor—trust me, your guests will be delighted!
Recipe Variations: Get Creative!
This recipe is incredibly versatile! Here are some fun twists to try:
-
Vegetarian Delight: Swap the meat for lentils or a mix of sautéed mushrooms, spinach, and zucchini for a hearty plant-based option.
-
Spicy Kick: Add crushed red pepper flakes to the sauce for heat—just adjust to your spice preference!
-
Creamy Dream: Stir in a splash of heavy cream or a dollop of ricotta just before serving for a rich, creamy sauce.
-
Extra Veggies: Toss in bell peppers, spinach, or other veggies into the sauce—great for sneaking in some extra nutrition!
-
Zoodles: For a low-carb version, use spiralized zucchini instead of spaghetti!
Chef’s Notes: Personal Reflections
Growing up, my dad often insisted that the secret to a great sauce was patience. I’ve learned through the years that allowing the flavors to meld together makes all the difference. As I began experimenting, I incorporated more herbs for freshness and ended up creating a version of the sauce that I can proudly serve to friends and family alike.
And don’t worry about everything being perfect! One time, I mistakenly grabbed chili powder instead of olive oil while cooking. Surprisingly, it made for a deliciously smoky twist that I still replicate today. Cooking is about exploration, so don’t shy away from mistakes—they often lead to remarkable discoveries!
FAQs and Troubleshooting
1. Why did my sauce turn out too watery?
This can happen if there’s excess liquid in the canned tomatoes. To fix it, simmer the sauce uncovered to help it thicken or incorporate a bit of tomato paste.
2. My meat is tough; what did I do wrong?
It’s likely that the meat was cooked at too high a temperature or for too long. Aim for a medium heat and keep stirring to avoid overcooking.
3. How do I store leftovers?
Let the leftovers cool completely, then transfer them to an airtight container. They last in the fridge for 3-4 days or can be frozen for up to 3 months.
4. Can I make this sauce ahead of time?
Absolutely! The sauce actually tastes better the next day as the flavors develop. Just reheat it gently on the stovetop before serving.
Nutritional Info
While I believe the love you put into your food is just as important as the calories, here’s a rough estimate for one serving:
- Calories: 550
- Protein: 25g
- Carbohydrates: 75g
- Fat: 15g
Cooking spaghetti with meat sauce is not just about the ingredients; it’s about the stories, the memories, and the lovely moments shared at the table. I hope this recipe brings you as much joy as it has brought me, so grab that apron, pour yourself a glass of something bubbly, and enjoy every step of the process. Happy cooking!
PrintPerfect Spaghetti with Meat Sauce
A comforting and classic spaghetti with meat sauce recipe that brings warmth and nostalgia to your kitchen.
- Prep Time: 15 minutes
- Cook Time: 30 minutes
- Total Time: 45 minutes
- Yield: 4 servings
- Category: Main Course
- Method: Cooking
- Cuisine: Italian
- Diet: Non-Vegetarian
Ingredients
- Spaghetti
- Ground Beef or Sausage
- Onion, Chopped
- Garlic, Minced
- Canned Tomatoes (Crushed or Diced)
- Tomato Paste
- Italian Seasoning
- Salt
- Pepper
- Parmesan Cheese (Optional)
Instructions
- Start by boiling the spaghetti: Fill a large pot with salted water and bring it to a rolling boil. Toss in your spaghetti and set a timer based on package directions, typically 8-10 minutes. Stir occasionally.
- Sauté your aromatics: Heat a large skillet over medium heat and add olive oil. Once hot, add chopped onion and sauté for 3-5 minutes. Add minced garlic and cook for another minute.
- Cook the meat: Increase heat to medium-high and add ground beef or sausage. Brown evenly for about 5 minutes, stirring often.
- Add the tomatoes and seasonings: Once the meat is browned, add canned tomatoes and tomato paste, then sprinkle in Italian seasoning, salt, and pepper. Simmer for at least 15 minutes on low heat.
- Combine pasta and sauce: Reserve a cup of pasta water, then drain spaghetti. Add drained spaghetti to the sauce and toss to coat.
Notes
For extra flavor, let the sauce simmer longer than 15 minutes. Consider adding vegetables or trying variations like vegetarian options.
Nutrition
- Serving Size: 1 serving
- Calories: 550
- Sugar: 7g
- Sodium: 600mg
- Fat: 15g
- Saturated Fat: 5g
- Unsaturated Fat: 7g
- Trans Fat: 0g
- Carbohydrates: 75g
- Fiber: 5g
- Protein: 25g
- Cholesterol: 70mg
Keywords: spaghetti, meat sauce, Italian recipe, comfort food, family meal
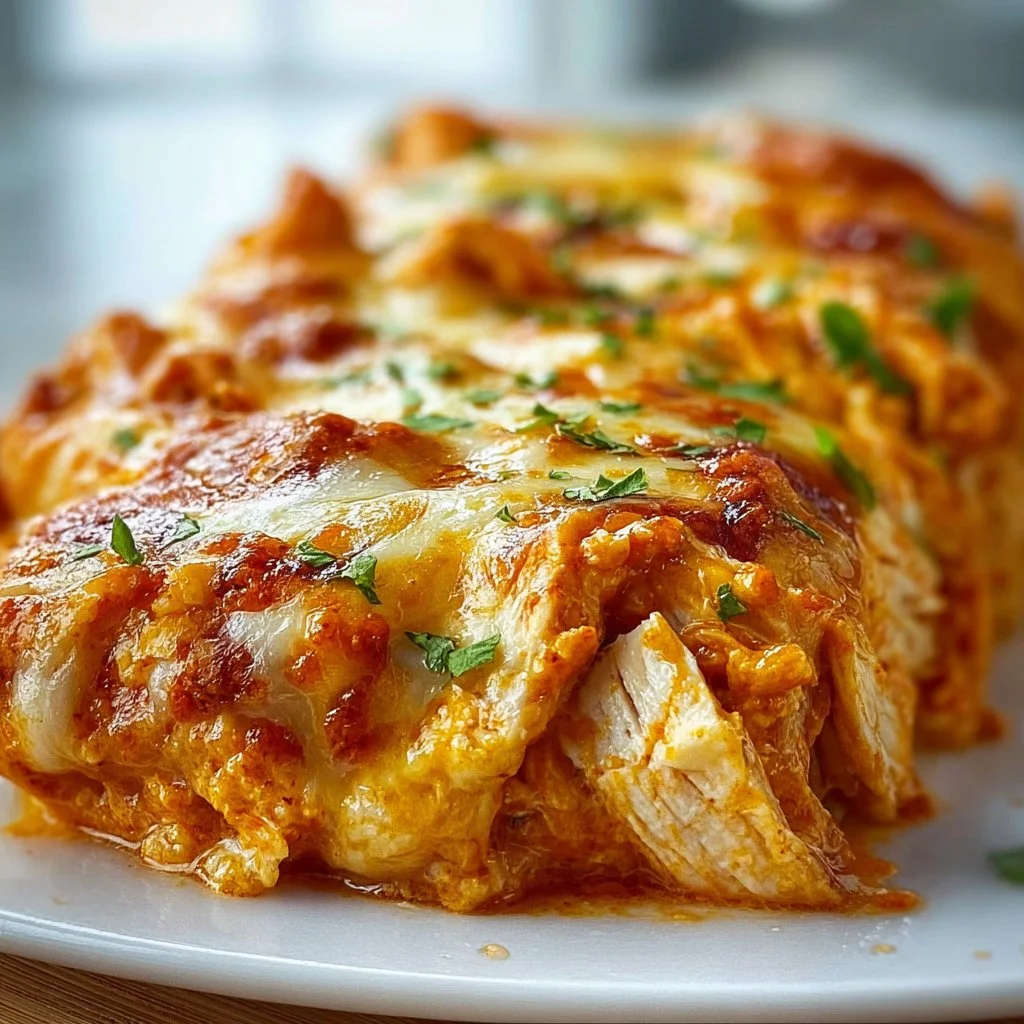
Buffalo Chicken Cheese Bake
Buffalo Chicken Cheese Bake: A Crowd-Pleasing Delight
Hello, food lovers! Today, we’re diving into a dish that’s near and dear to my heart—the Buffalo Chicken Cheese Bake. Imagine creamy, cheesy, spicy goodness all baked into one dish that’s perfect for any gathering. Picture this: you’re hosting a few friends for the big game or maybe a spontaneous movie night. You open your oven to unveil a bubbling, golden masterpiece that features the perfect blend of buffalo chicken and cheese. It’s comforting, it’s delicious, and it’s bound to impress!
The beauty of this dish lies not just in its flavor but also in its simplicity. It’s a recipe that encourages connection and sharing, making it perfect for any occasion—whether you’re celebrating a birthday, hosting a casual get-together, or just enjoying a relaxed evening at home. So, grab your apron, and let’s get cooking!
A Blast from the Past
I remember the first time I tried buffalo chicken dip at a friend’s gathering. It was love at first bite! The way the creamy cheese melded with the zesty buffalo sauce while the warmth enveloped me—it was the ultimate comfort food. My friend’s easy-going hosting style inspired me to experiment with this classic dish, transforming it from a dip into a hearty bake that brings a cozy vibe to any table.
Each time I prepare this Buffalo Chicken Cheese Bake, I conjure up memories of laughter filling the space, good-natured teasing over who will finish the last bite, and, of course, the inevitable debate about whether blue cheese or ranch dressing reigns supreme. This recipe captures all that nostalgia and delivers it in a comfort-filled casserole.
Ingredients
Here’s what you’ll need for this mouthwatering dish:
-
2 cups cooked chicken, shredded
Rotisserie chickens work like a charm here or simply boil or roast chicken breasts until cooked through. It can also be swapped with shredded turkey for a post-holiday twist! -
1 cup buffalo sauce
You can use your favorite brand or homemade buffalo sauce. If you prefer a milder flavor, whisk in a bit of sour cream to tone it down. -
2 cups cream cheese, softened
This is the secret to the dish’s creaminess! If you want a healthier option, you can substitute with Greek yogurt, though the texture will be a tad different. -
1 cup shredded cheddar cheese
Sharp cheddar provides a deeper flavor. If you’re feeling adventurous, try a pepper jack cheese for an extra kick! -
1 cup shredded mozzarella cheese
This cheese adds that gooey stretch we all love. Feel free to swap in provolone for a different flavor profile. -
1/2 cup ranch dressing
The coolness of ranch balances the heat perfectly. If you like blue cheese, go ahead and use that instead for a more traditional buffalo flavor. -
1/2 cup green onions, chopped
These add color and a fresh crunch. If green onions aren’t your favorite, finely chopped celery can make a great substitute. -
Salt and pepper to taste
Always taste your dish as you go! Feel free to adjust the seasoning to your liking. -
Tortilla chips or celery sticks for serving
Classic choices for dipping! You could also serve it with pita chips or sliced veggies for a crunchy bite.
Step-by-Step Instructions
Now that we have our ingredients ready, let’s get started on creating this fantastic dish!
-
Preheat Your Oven:
Preheat your oven to 350°F (175°C). This ensures that your dish gets all warm and bubbly, just like you want it. -
Mix the Creamy Base:
In a large mixing bowl, combine the softened cream cheese and ranch dressing. Use a hand mixer or a spatula to blend them together until they’re smooth and creamy. Probably one of the easiest steps, and you can already start smelling the creamy goodness. -
Add the Chicken and Sauce:
Toss in your shredded chicken and buffalo sauce. Stir until everything is well-combined. The chicken should be coated in the beautiful orange sauce. Oh, and don’t be afraid to taste it; you need to make sure it’s up to par! -
Cheesy Goodness:
Now fold in half of the shredded cheddar and half of the mozzarella cheese. This will make the filling incredibly cheesy and delicious. I like to save the other half for the top because who doesn’t love a golden, bubbly cheese layer? -
Transfer to Baking Dish:
Grease a 9×13 inch (or similar-sized) baking dish. Spread your cheesy, buffalo chicken mixture evenly across the dish. Smooth the top with a spatula for an even bake—this is your canvas! -
Top It Off:
Sprinkle the remaining cheddar and mozzarella cheese over the top. You want it to look cheesy, bubbly, and irresistible. If you’re feeling adventurous, throw in some extra green onions for garnish at this point too! -
Bake Time:
Pop it in the preheated oven and bake for about 25-30 minutes or until the cheese is melted and bubbly. Keep an eye on it; your kitchen will smell amazing, and you’ll want to dive in right away—it’s a tease! -
Cool and Serve:
Once baked, let it cool for a few minutes. This will allow the cheese to set slightly, making it easier to serve. Grab your tortilla chips or celery sticks and get ready to enjoy!
Serving Suggestions
When serving your Buffalo Chicken Cheese Bake, consider a rustic presentation. You could place it right in the center of your dining table as a communal dish, encouraging everyone to dig in. Pair it with a side of extra buffalo sauce or ranch dressing for dipping—because who doesn’t love extra sauce? Just sprinkle some extra chopped green onions on top to add a pop of color and freshness!
Recipe Variations
Here are a few creative twists and alternatives you can try:
-
Vegetarian Option: Swap shredded chicken with chickpeas or cauliflower. Add in some extra spices to replicate that buffalo flavor without the meat.
-
Spicy Twist: If you love heat, add chopped jalapeños or a dash of cayenne pepper to the mix.
-
BBQ Chicken Bake: Substitute buffalo sauce with your favorite BBQ sauce for a smoky flavor.
-
Add Veggies: Throw in some diced bell peppers or spinach for a bit of green, adding both nutrition and color to your dish.
-
Cheesy Mix: Use different types of cheese—try gouda or smoked cheddar for a unique flavor profile.
Chef’s Notes
I absolutely love how versatile this recipe can be! Over the years, I’ve adapted it based on whatever ingredients I have on hand. The best part is, no matter the variation, it’s always a hit! I remember one night making this for a last-minute get-together, and I only had cream cheese and cheddar left in my fridge. I swapped out ranch for a bit of sour cream and winged it. It turned out fantastic! That little adventure turned into one of my go-to quick recipes.
FAQs and Troubleshooting
1. My cheese isn’t melting properly; what did I do wrong?
This can happen if your cheese is too cold when you put it in the oven. Make sure to let your cream cheese come to room temperature and consider mixing in your cheese while the chicken mixture is warm.
2. Can I make this ahead of time?
Absolutely! You can prepare the dish up to the baking step, cover it tightly with plastic wrap, and store it in the fridge for up to 24 hours. Just add a few minutes to the baking time if it’s coming directly from the refrigerator.
3. What if it’s too spicy?
If you find that the buffalo sauce is too hot, mix in a touch of sour cream or an additional layer of cream cheese to tone it down. It won’t lose the flavor, just become milder.
4. How do I store leftovers?
Store any leftovers in an airtight container in the fridge for up to three days. To reheat, pop it back in the oven or microwave until warmed through, adding a splash of milk or cream to bring back the creamy texture.
Nutritional Info
Note: Nutritional values will vary based on specific ingredients used. This dish serves about 6-8 people, and each serving provides approximately:
- Calories: 450
- Protein: 28g
- Carbohydrates: 14g
- Fat: 32g
So there you have it—my Buffalo Chicken Cheese Bake recipe, packed with nostalgia and lots of melting cheese! I hope this brings as much joy to your table as it has to mine. Remember, good food isn’t just about the ingredients; it’s about the moments you create while enjoying it. So gather your friends, tie on your apron, and let’s make some delicious memories together! Enjoy, and happy cooking!
PrintBuffalo Chicken Cheese Bake

A creamy and cheesy buffalo chicken bake that’s perfect for gatherings, combining shredded chicken, spicy buffalo sauce, and melted cheese.
- Prep Time: 10 minutes
- Cook Time: 30 minutes
- Total Time: 40 minutes
- Yield: 6-8 servings 1x
- Category: Appetizer
- Method: Baking
- Cuisine: American
- Diet: None
Ingredients
- 2 cups cooked chicken, shredded
- 1 cup buffalo sauce
- 2 cups cream cheese, softened
- 1 cup shredded cheddar cheese
- 1 cup shredded mozzarella cheese
- 1/2 cup ranch dressing
- 1/2 cup green onions, chopped
- Salt and pepper to taste
- Tortilla chips or celery sticks for serving
Instructions
- Preheat your oven to 350°F (175°C).
- Mix the softened cream cheese and ranch dressing in a large mixing bowl until smooth and creamy.
- Add your shredded chicken and buffalo sauce, and stir until well combined.
- Fold in half of the shredded cheddar and half of the mozzarella cheese.
- Transfer the mixture to a greased 9×13 inch baking dish.
- Top with the remaining cheddar and mozzarella cheese.
- Bake for about 25-30 minutes or until the cheese is melted and bubbly.
- Cool for a few minutes before serving with tortilla chips or celery sticks.
Notes
For a vegetarian option, swap shredded chicken with chickpeas or cauliflower. For a spicy twist, add chopped jalapeños or cayenne pepper.
Nutrition
- Serving Size: 1 serving
- Calories: 450
- Sugar: 3g
- Sodium: 820mg
- Fat: 32g
- Saturated Fat: 18g
- Unsaturated Fat: 8g
- Trans Fat: 0g
- Carbohydrates: 14g
- Fiber: 1g
- Protein: 28g
- Cholesterol: 90mg
Keywords: buffalo chicken, cheese bake, comfort food, party recipe, appetizer