Candied Beets
Indulge in the Sweetness of Candied Beets
Hello, fellow food enthusiast! Today, I’m excited to share a delightful recipe that has graced my table time and again: candied beets. These vibrant, sweet jewels of the root vegetable world are not only a feast for the eyes but also a treat for the taste buds. With their earthy undertones paired with a caramelized sweetness, candied beets can elevate any meal into something special. Let’s dive into the creation of this visually stunning and delicious dish, and I promise you’ll leave the kitchen with both a full heart and a satisfied belly!
Now, let’s face it: beets can be a polarizing vegetable. Some people love their unique flavor, while others shy away from them. But I believe that when cooked and prepared with love—or, dare I say, a little sugar—they can transform into a dish that even the most skeptical eaters will adore. The day I first introduced candied beets to my friends was a moment etched in memory. I had just moved into my first place and decided to throw an impromptu dinner party. With a few close friends gathered around, I whipped up a simple meal and, for a touch of sophistication, decided to add candied beets as my side dish.
As I plated the beets, glowing a deep ruby red, one of my friends—a self-proclaimed beet-hater—eyed them suspiciously. But after the first bite, I was met with wide eyes and smiles all around. “These don’t even taste like beets!” she exclaimed. It was a culinary triumph, and from that moment on, candied beets became a staple in my cooking repertoire.
So, are you ready to create your own beet bliss? Let’s roll up our sleeves and get cooking!
Ingredients
Here’s what you’ll need to create these scrumptious candied beets:
-
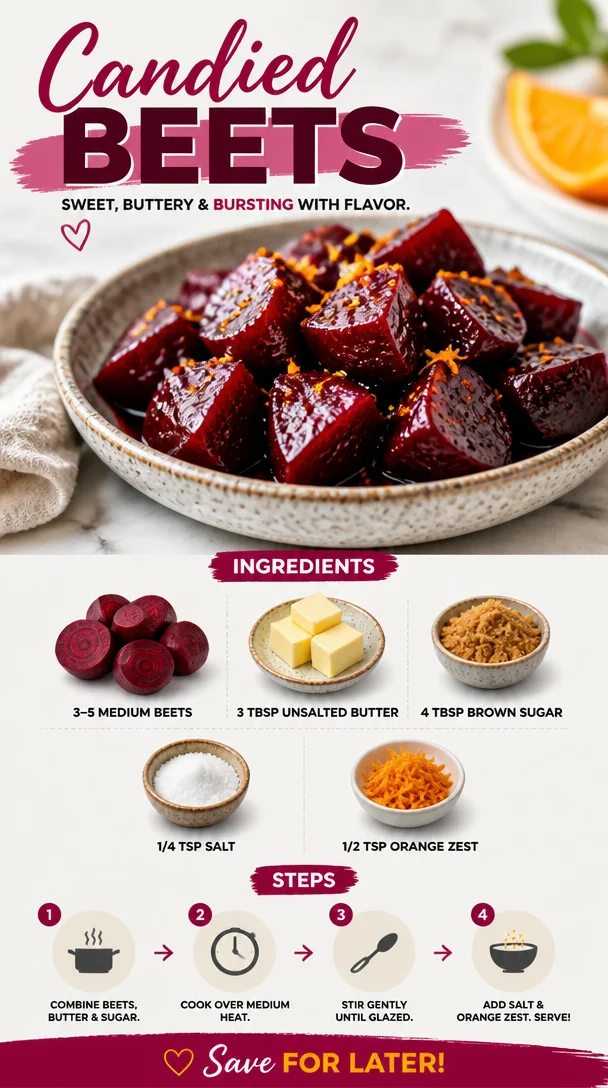
3–5 medium beets (cooked, peeled, and cut into 2" pieces)
Fresh beets are wonderful, but if you’re short on time, feel free to substitute with whole canned beets. Just be sure to drain and rinse them thoroughly. Fresh beets will bring a deeper flavor and firmer texture. -
3 tablespoons unsalted butter
Unsalted butter allows you to control the saltiness of your dish. If you prefer a dairy-free option, you can use coconut oil, which will impart a subtle sweetness. -
4 tablespoons brown sugar
Brown sugar adds a rich molasses flavor that complements the earthy taste of beets. If you want a lower-sugar option, consider using maple syrup or agave, but note that the cooking times may vary slightly. -
1/4 teaspoon salt
Just a pinch of salt here enhances the sweetness of the beets; however, you can omit it if you’re watching your sodium intake. -
1/2 teaspoon orange zest
The vibrant zest of an orange brightens up the dish and adds a lovely citrus note. If you don’t have oranges, lemon zest could be a delightful substitute, offering an elegant twist.
Step-by-Step Instructions
Step 1: Prepare the Beets
If you’re using fresh beets, start by giving them a good scrub under running water to remove any dirt. Place the beets in a pot, cover them with water, and boil them until fork-tender—this usually takes about 30-45 minutes. Once cool enough to handle, peel the skin off (it should slide right off) and cut them into 2-inch pieces. If you’re using canned beets, skip this step—just cut them up and set aside!
Chef Tip: Save some of the beet greens if they’re attached; they’re delicious sautéed with a little garlic and olive oil.
Step 2: Melt the Butter
In a large skillet, melt the unsalted butter over medium heat. As it melts, enjoy that comforting aroma—it’s the start of something heavenly!
Little Hack: Allow your butter to brown slightly for a nutty flavor twist. Just be careful not to let it burn!
Step 3: Add the Sugar
Once the butter is melted and sizzling, sprinkle the brown sugar into the skillet and stir until it’s fully dissolved. You’ll see a glossy, bubbling mixture form.
Tip: This is the magic moment! Stir continuously to prevent the sugar from sticking or burning.
Step 4: Toss in the Beets
Gently add the beet pieces into the caramelized butter and sugar mixture. Give them a robust toss to ensure every piece is coated in that sticky goodness.
Step 5: Season the Beets
Sprinkle the salt and orange zest over the beets, and stir again to combine. Cook for another 5-8 minutes, turning the beets regularly, letting them absorb all that rich flavor and caramelize beautifully.
Chef’s Insight: You’ll know they’re done when they’re heated through (not mushy!), and their vivid color shines even brighter.
Step 6: Serve and Enjoy
Once the beets are beautifully glazed and gleaming, remove them from the heat. Transfer them to a serving dish—don’t forget to scrape all that delicious sauce on top!
Serving Suggestions
Presentation is everything! Serve your candied beets on a lovely platter, garnished with fresh herbs like parsley or mint for a burst of color and freshness. They make a vibrant side dish for roasted meats or as part of a vegetarian feast. If you’re feeling fancy, add goat cheese crumbles or toasted walnuts for some added texture and flavor. Oh, the options are endless!
Recipe Variations
Get creative with these simple twists on candied beets:
- Spiced Candied Beets: Add a pinch of cinnamon or nutmeg for a warm flavor profile, perfect for cozy meals.
- Balsamic Reduction: Drizzle a balsamic reduction over the finished beets for a tangy contrast.
- Maple-Glazed Beets: Substitute brown sugar with pure maple syrup for a delightful twist.
- Herbed Beets: Mix in fresh herbs like thyme or dill during the last minute of cooking for an herby infusion.
- Vegan Option: Use coconut oil instead of butter and maple syrup instead of brown sugar for a vegan twist.
Chef’s Notes
As a love letter to beets, this recipe has truly evolved over the years. I’ve tried everything from adding cream to experimenting with different sweeteners. What always brings me back is the simplicity and elegance of the core ingredients. It reminds me of the first dinner party I hosted that night when my friends and I laughed over sweet, sticky beets in an utterly cozy setting. Food isn’t just about taste; it’s about the stories we create around it.
If you ever find yourself in the kitchen and the beets aren’t cooperating, don’t stress! Cooking is a journey, not a race. Laugh at the hiccups and keep tasting along the way.
FAQs and Troubleshooting
Q1: My beets are mushy. What went wrong?
Overcooking is the usual culprit! Be sure to check for tenderness with a fork; you want them tender but still holding their shape.
Q2: Can I make candied beets ahead of time?
Absolutely! You can cook and candy the beets in advance. Store them in an airtight container in the fridge for up to 3 days. Reheat gently on the stovetop when ready to serve.
Q3: What should I serve with candied beets?
They pair beautifully with roasted meats like chicken or pork, or as an elegant side dish for a vegetarian meal. They can also be added to salads for a pop of sweetness.
Q4: Is there a way to make this recipe healthier?
You can reduce the amount of sugar or use natural sweeteners like honey or maple syrup. You could also add some sautéed greens for a nutritional boost.
Cooking is all about exploration and adapting to what you have on hand. I hope this recipe sparks joy in your kitchen as it has in mine. Now, go ahead, tie on that apron, and let those beets shine bright on your dining table!
Enjoy the sweetness, and until next time, happy cooking!
PrintCandied Beets

A delightful recipe for candied beets that transforms this polarizing vegetable into a sweet and savory side dish.
- Prep Time: 15 minutes
- Cook Time: 30 minutes
- Total Time: 45 minutes
- Yield: 4 servings 1x
- Category: Side Dish
- Method: Stovetop
- Cuisine: Vegetarian
- Diet: Vegetarian
Ingredients
- 3–5 medium beets (cooked, peeled, and cut into 2″ pieces)
- 3 tablespoons unsalted butter
- 4 tablespoons brown sugar
- 1/4 teaspoon salt
- 1/2 teaspoon orange zest
Instructions
- Prepare the beets by scrubbing them, boiling until fork-tender, and cutting into 2-inch pieces.
- Melt the butter in a large skillet over medium heat.
- Add the brown sugar to the melted butter and stir until dissolved.
- Toss in the beet pieces and coat them in the mixture.
- Season with salt and orange zest, stirring and cooking for another 5-8 minutes.
- Serve the candied beets on a platter, garnished with fresh herbs if desired.
Notes
These candied beets can be made ahead of time and are perfect alongside roasted meats or in salads.
Nutrition
- Serving Size: 1 serving
- Calories: 150
- Sugar: 25g
- Sodium: 100mg
- Fat: 7g
- Saturated Fat: 4g
- Unsaturated Fat: 3g
- Trans Fat: 0g
- Carbohydrates: 20g
- Fiber: 3g
- Protein: 2g
- Cholesterol: 15mg
Keywords: candied beets, side dish, vegetarian, sweet beets, easy recipe
Oat Flour Beet Brownies (egg-free)
Oat Flour Beet Brownies: A Delicious Egg-Free Delight
Welcome to another delightful culinary adventure! Today, we’re diving into a recipe that combines the rich, fudgy goodness of brownies with the vibrant earthiness of beets. If you’ve ever wondered how to create a dessert that’s both indulgent and nutritious, look no further. These Oat Flour Beet Brownies are not only egg-free but also gluten-free, making them a fantastic option for friends and family with dietary restrictions or for anyone looking to enjoy a healthier treat. So, let’s roll up our sleeves, tie on our aprons, and bring some sweetness to our day!
A Taste of Nostalgia
Let me take you back to one of my fondest kitchen memories—baking brownies with my grandmother on rainy afternoons. The kitchen would fill with the rich aroma of chocolate, and we’d swap secrets about the best chocolate chips. But here’s the kicker—she had a quirky habit of sneaking in “mystery” ingredients that sent me on a detective quest to uncover hidden flavors. I remember finding out she added beet puree to her brownies for a subtle sweetness and a more decadent texture. At first, I wasn’t convinced. I thought, “Beets in brownies? No way!” But as soon as I had that first bite, I was hooked!
That’s the beauty of cooking—finding surprises that not only taste amazing but also nourish us. Finding creative, nutritious ways to enjoy sweets led me to perfect this Oat Flour Beet Brownies recipe. Don’t worry, I promise no one will guess that these decadently rich delights contain veggies! Grab your beets, and let’s get started!
Ingredients
Here’s what you’ll need to create these fabulous brownies—simple ingredients that you can easily find at your local grocery store. Each element plays a crucial role, so let’s break it down:
-
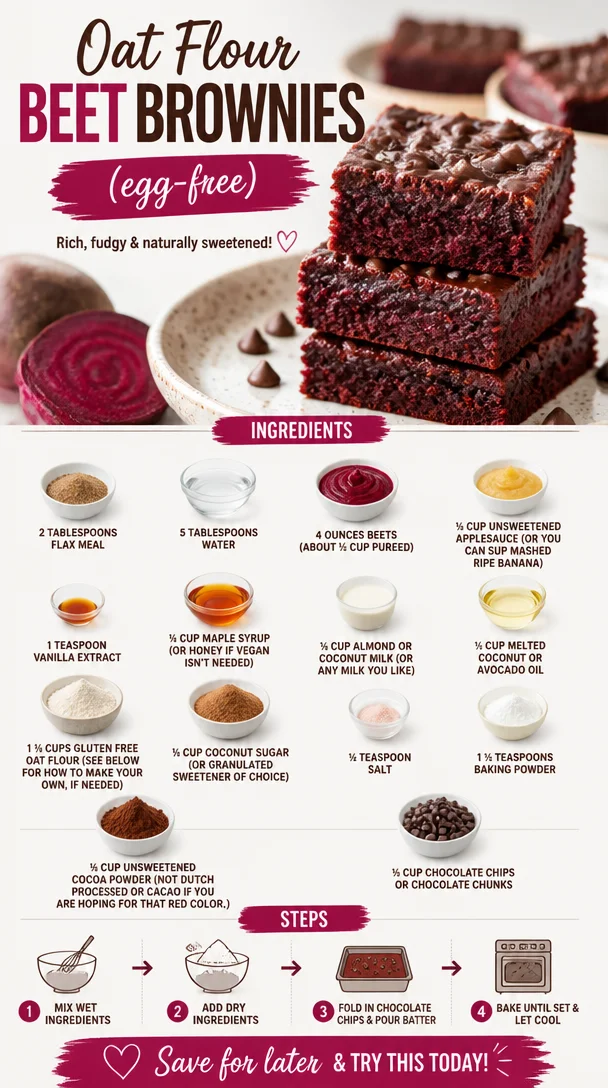
2 tablespoons flax meal: This is our egg replacer! When mixed with water, flax meal forms a gel that binds the brownies beautifully. For a bit of crunch, try using ground chia seeds as an alternative.
-
5 tablespoons water: This hydrates our flax meal, allowing it to work its binding magic. Simple, right?
-
4 ounces beets (about ½ cup pureed): Beets add natural sweetness and moisture, giving us that gorgeous fudgy texture. Canned beets work well here; just be sure they’re unsweetened!
-
½ cup unsweetened applesauce: This not only sweetens the batter but keeps the brownies moist. You can substitute it with mashed ripe banana for a different flavor.
-
1 teaspoon vanilla extract: A splash of vanilla enhances the chocolate flavor. You might even experiment with almond extract for a nutty twist!
-
¼ cup maple syrup: This natural sweetener adds depth to our brownie batter. If you’re not concerned about keeping it vegan, honey is a fine substitute.
-
¼ cup almond or coconut milk: Either works just fine; choose your favorite dairy or non-dairy milk!
-
¼ cup melted coconut or avocado oil: This adds a luscious quality and keeps the brownies moist. If that’s not your style, you can replace it with melted butter (non-vegan option).
-
1 ¼ cups gluten-free oat flour: You can easily make your own by blending rolled oats until fine! This is the base of our brownies.
-
¼ cup coconut sugar: This adds caramel notes to the sweetness. Granulated sugar will work too if that’s what you have on hand.
-
¼ teaspoon salt: Just a pinch enhances all flavors—even sweet ones!
-
1 ½ teaspoons baking powder: This helps our brownies rise a bit, making them fluffy yet fudgy.
-
¼ cup unsweetened cocoa powder: Key for that deep chocolate flavor. Make sure it’s not Dutch processed—we want to maintain that beautiful reddish color from the beets.
-
⅓ cup chocolate chips or chocolate chunks: Because you can never have too much chocolate! Feel free to use dairy-free options if you want to keep these vegan.
Step-by-Step Instructions
Ready to get your hands dirty? Here’s a simple guide to whip up your Oat Flour Beet Brownies. Each step includes some pro tips to make sure you’re on the right path!
-
Preheat Your Oven:
- Start by preheating your oven to 350°F (175°C). This ensures even baking, giving you perfectly fudgy brownies.
-
Prepare the Flax Egg:
- In a small bowl, combine the flax meal and water. Stir it well and let it sit for about 10 minutes. This is your egg substitute, and it’ll set nicely while we prep the other ingredients.
-
Combine the Wet Ingredients:
- In a large mixing bowl, add your pureed beets, applesauce, vanilla extract, maple syrup, almond or coconut milk, and melted coconut or avocado oil. Use a whisk to blend everything until it’s well combined and smooth. Feel free to get creative with flavors here—perhaps add a splash of coffee if you dare!
-
Mix in the Flax Egg:
- Once the flax mixture has thickened, fold it into the wet mixture. Give it a gentle stir, incorporating all those fabulous ingredients.
-
The Dry Ingredients Come Next:
- In another bowl, mix the oat flour, coconut sugar, salt, baking powder, and cocoa powder. Stir these together to ensure even distribution of the cocoa. This step is crucial!
-
Combine Wet and Dry:
- Gradually add the dry mixture to the wet ingredients, stirring until everything is just combined. Overmixing can lead to dense brownies, which isn’t the goal. The batter should be thick yet pourable.
-
Fold in the Chocolate Chips:
- Gently fold in your chocolate chips or chunks. This adds welcome pockets of melty goodness throughout your brownies.
-
Prepare Your Baking Dish:
- Line an 8×8 square baking pan with parchment paper or lightly grease it. This will help you lift the brownies out later, making for easy slicing!
-
Bake Those Brownies:
- Pour the batter into your prepared pan, spreading it evenly. Pop that masterpiece in the oven and bake for about 25–30 minutes. To test for doneness, insert a toothpick in the center—the brownies should seem set but moist without wet batter clinging to the toothpick.
-
Cool and Cut:
- Let the brownies cool in the pan for about 10–15 minutes before transferring them to a wire rack to cool completely. This final step is important—cooling enhances the flavor and texture!
Serving Suggestions
To serve these beauties, slice them into squares or rectangles—personal preference here! Dust them lightly with powdered sugar for a classic touch, or drizzle with melted chocolate for added flair. A scoop of vanilla ice cream on the side can elevate the experience! For a personal touch, consider garnishing with fresh mint or a sprinkle of sea salt for that extra wow factor. Whatever you choose, these brownies are bound to impress!
Recipe Variations
Want to mix things up? Here are a few variations to keep your brownies exciting:
-
Nutty Chocolate Brownies: Add ½ cup of chopped nuts (like walnuts or pecans) for extra texture and a wholesome crunch.
-
Spicy Choco-Brownies: Add a pinch of cayenne pepper or chili powder to the batter for a surprising kick.
-
Minty Delight: Stir in a few drops of peppermint extract for a refreshing mint chocolate flavor.
-
Choco-Coconut Swirl: Add shredded coconut to the batter or top the brownies with toasted coconut flakes.
-
Fruit Fusion: Toss in some chopped hazelnuts and dried cherries for a pop of flavor.
Chef’s Notes
These brownies have a special place in my heart because they embody the spirit of creativity in the kitchen! I started experimenting with veggie-based desserts to make treats healthier without compromising on taste. Each batch explores the balance between sweet and earthy, transforming ingredients like beets from the garden into something incredible. The first time I served these at a dinner party, guests were astounded when they discovered they were made with beets! If that’s not a kitchen success story, I don’t know what is!
FAQs and Troubleshooting
-
Can I replace the oat flour with all-purpose flour?
- Technically you can, but it might change the texture. Oat flour gives a lovely chewiness and is gluten-free, which suits many diets. If you use all-purpose flour, you may need to adjust the liquid.
-
My brownies came out too dense. What did I do wrong?
- Overmixing after adding the flour can lead to dense brownies. Just mix until everything is combined, and remember to bake right until your toothpick comes out clean or with a few moist crumbs.
-
How do I store leftovers?
- These brownies keep well in an airtight container in the fridge for about a week. You can also freeze them for longer storage—just make sure to wrap them tightly!
-
What if I don’t have flax meal?
- No worries! You can use chia seeds ground in a blender or food processor to make a "chia egg" as an alternative binder in the recipe.
Nutritional Info
While I don’t typically include nutritional info because it varies based on major brands and products used, I can confidently say these brownies provide a wholesome treat rich in fiber, antioxidants from the beets, and healthy fats from the coconut oil.
Ready to bake? Embrace your inner chef, gather those ingredients, and whip up a batch of these divine Oat Flour Beet Brownies. Dough may stick to your fingers and chocolate might smear across your palm, but once you take that first, glorious bite, you’ll agree—it’s all worth it! Happy baking!
PrintOat Flour Beet Brownies

Indulge in these light and fudgy Oat Flour Beet Brownies that are egg-free and gluten-free, perfect for a nutritious dessert.
- Prep Time: 15 minutes
- Cook Time: 30 minutes
- Total Time: 45 minutes
- Yield: 12 servings 1x
- Category: Dessert
- Method: Baking
- Cuisine: American
- Diet: Vegan, Gluten-Free
Ingredients
- 2 tablespoons flax meal
- 5 tablespoons water
- 4 ounces beets (about ½ cup pureed)
- ½ cup unsweetened applesauce
- 1 teaspoon vanilla extract
- ¼ cup maple syrup
- ¼ cup almond or coconut milk
- ¼ cup melted coconut or avocado oil
- 1 ¼ cups gluten-free oat flour
- ¼ cup coconut sugar
- ¼ teaspoon salt
- 1 ½ teaspoons baking powder
- ¼ cup unsweetened cocoa powder
- ⅓ cup chocolate chips or chocolate chunks
Instructions
- Preheat your oven to 350°F (175°C).
- Combine the flax meal and water in a small bowl; let it sit for about 10 minutes.
- Add the pureed beets, applesauce, vanilla extract, maple syrup, almond or coconut milk, and melted oil into a mixing bowl and whisk until smooth.
- Mix in the flax egg once it has thickened.
- Stir together the oat flour, coconut sugar, salt, baking powder, and cocoa powder in another bowl.
- Combine the dry ingredients with the wet mixture until just mixed.
- Fold in the chocolate chips or chunks.
- Prepare an 8×8 square baking pan by lining it with parchment paper.
- Bake for about 25-30 minutes or until a toothpick comes out mostly clean.
- Cool the brownies in the pan before transferring them to a wire rack to cool completely.
Notes
For a classic touch, dust with powdered sugar or drizzle with melted chocolate before serving.
Nutrition
- Serving Size: 1 brownie
- Calories: 200
- Sugar: 12g
- Sodium: 150mg
- Fat: 8g
- Saturated Fat: 6g
- Unsaturated Fat: 2g
- Trans Fat: 0g
- Carbohydrates: 30g
- Fiber: 3g
- Protein: 4g
- Cholesterol: 0mg
Keywords: vegan brownies, healthy dessert, gluten-free sweets, chocolate beets

Minute Zesty Lemon Parmesan Couscous for Weeknight Meals
Zesty Lemon Parmesan Couscous: A Bright and Elegant Side Dish
Hello, food lovers! Today, we’re diving into a vibrant and simple side dish that brings a little sunshine to your table — Zesty Lemon Parmesan Couscous. This dish is not just easy to make; it’s a crowd-pleaser that pairs beautifully with just about everything. Whether you’re hosting an elegant dinner party or simply elevating a weeknight meal, this couscous is your new best friend in the kitchen.
A Taste of Nostalgia
Let me take you back to my childhood kitchen filled with the enticing aroma of fresh herbs and citrus. I can still picture my mom in her apron, zesting lemons with a cheerful determination. She’d often call us all to gather around as she prepared dinner — and one of my favorite memories is the day she introduced us to couscous for the first time. It was fluffy, bright, and packed with flavor, and I was smitten!
That evening, as we dug into our plates, she taught us the magic of cooking with intention — the importance of fresh ingredients, careful preparation, and making every meal a celebration. Now, when I make Zesty Lemon Parmesan Couscous, I’m instantly transported back to that vibrant kitchen. It’s a dish that’s all about sharing joy with loved ones, just like my mom did.
Ingredients
For our Zesty Lemon Parmesan Couscous, you’ll need the following delightful ingredients. Let’s break them down so you know exactly what you’re working with!
-
1 cup couscous: The star of our dish! Couscous is versatile and cooks quickly. If you’re in the mood for a different grain, try quinoa or orzo as a substitute.
-
1 cup chicken or vegetable broth: This adds depth and flavor. Homemade broth is ideal, but store-bought works just as well. For a vegetarian option, stick with vegetable broth.
-
1/2 cup grated Parmesan cheese: This brings a savory richness to the dish. If you’re looking for a dairy-free alternative, nutritional yeast can add a similar flavor profile.
-
1 lemon (juice and zest): This is where the zestiness comes from! The zest adds intense citrus flavor without the acidity. If you don’t have a lemon on hand, lime is a wonderful substitute that will add a different twist.
-
2 tablespoons olive oil: A good quality extra virgin olive oil enhances the flavor and adds healthy fats. You can replace it with melted butter for a richer taste.
-
Salt and pepper to taste: Essential for rounding out flavors. Always taste as you go!
-
Fresh parsley (optional, for garnish): Adds a pop of color and freshness. If parsley isn’t your thing, try fresh basil or chives.
Step-by-Step Instructions
Now that we’ve gathered our ingredients and are feeling excited, let’s dive into making this delicious dish!
-
Prepare the Broth: In a medium saucepan, bring 1 cup of chicken or vegetable broth to a boil over medium-high heat. If you’re feeling adventurous, you can throw in a garlic clove or some bay leaves for added flavor.
-
Add the Couscous: Once the broth is boiling, stir in 1 cup of couscous. Cover the pot with a lid and remove it from heat. Let it sit for about 5 minutes. This is when the couscous puffs up and absorbs all that flavorful broth. Trust me; it’s magical.
-
Fluff the Couscous: After 5 minutes, it’s time to unveil the couscous! Use a fork to fluff it up gently. This step is crucial to avoid clumping and to make every grain stand out. Imagine the fluffy clouds of couscous basking in the warm sun!
-
Zest and Juice Your Lemon: As your couscous cools, zest your lemon and then squeeze out its juice. Remember, we want the zest to be bright and colorful, so use a microplane or a fine grater to get the fine bits. You want about 2 tablespoons of juice.
-
Add the Good Stuff: Drizzle 2 tablespoons of olive oil over the fluffed couscous, followed by the grated Parmesan, lemon juice, and lemon zest. Use a spatula to gently fold everything together. This is the stage where flavor melds together into something beautiful. Don’t be afraid to add a pinch of salt and pepper here!
-
Adjust the Seasoning: Taste your creation and adjust the seasoning as needed. Maybe it needs a touch more salt or a bit of extra lemon juice to amp up the zesty flavor. Cooking is all about balance!
-
Garnish: If you’re using fresh parsley, chop it roughly and sprinkle it over your couscous before serving. It brightens the dish visually as well as in flavor.
Serving Suggestions
When it comes to serving Zesty Lemon Parmesan Couscous, presentation is key! Arrange the couscous in a beautiful bowl or platter. You can even sprinkle a little extra Parmesan on top for that lovely finishing touch. For an upscale feel, you could even squeeze a few lemon slices on the side — they look gorgeous and add a bright pop of color against the pale couscous.
Serve this stunning side with grilled chicken, roasted veggies, or a fresh salad. The zesty notes complement proteins beautifully while adding a refreshing element to your overall meal.
Recipe Variations
Here are a few fun twists on this basic recipe that can elevate your couscous experience:
-
Herbed Couscous: Stir in fresh herbs like dill, basil, or thyme for a fragrant twist. Each herb brings a unique flavor that can change the entire vibe of your dish!
-
Mediterranean Style: Add chopped tomatoes, cucumbers, olives, and feta cheese for a vibrant Mediterranean salad. It’s a great way to bring a taste of the Greek Isles to your table!
-
Nutty and Sweet: Toss in some toasted almonds or pine nuts, and add a spoonful of dried cranberries or raisins. It brings a delightful crunch and a touch of sweetness to your plate.
-
Spicy Couscous: For those who like a little kick, add red pepper flakes or toss in some sautéed bell peppers. This will wake up your palate and breathe a little heat into your dish!
-
Coconut Couscous: Swap chicken broth for coconut milk for a tropical twist. Add in a sprinkle of toasted coconut for extra flavor. This option brings a rich and creamy touch to your meal.
Chef’s Notes
This Zesty Lemon Parmesan Couscous recipe has been a staple in my kitchen for years. It’s versatile, quick, and impressively sophisticated without requiring hours in the kitchen. One time, I decided to make it for last-minute guests, and they couldn’t believe how simple it was! It’s those delightful surprises that make cooking so rewarding.
Here’s a little tip: always keep couscous and broth handy. You’ll find a million ways to dress it up and make it shine! Plus, cooking should be about more than just the end dish. It’s about the memories, the laughter, and those beautiful moments around the table.
FAQs and Troubleshooting
1. What if my couscous is clumpy?
If your couscous comes out clumpy, it might be because it didn’t fluff properly. Make sure to use a fork to gently separate the grains; sometimes a bit of olive oil will help.
2. Can I make this ahead of time?
Absolutely! Couscous can be made a day in advance. Just store it in an airtight container in the fridge. When you’re ready to serve, simply fluff and add a touch more lemon juice if needed.
3. What can I do if I don’t have any broth?
No broth? No problem! You can use boiling water, but the flavor will be less intense. If you have any herbs or spices, throw those in to enhance the taste.
4. How can I store leftovers?
Store any leftover couscous in an airtight container in the fridge for up to 3 days. It makes for a quick lunch option the next day — just toss it into a salad!
Nutritional Info
While I didn’t include specific nutritional info for this recipe, couscous is generally a low-calorie option that provides a good source of carbohydrates. The addition of lemon and cheese brings in vitamins and calcium, making it a balanced side.
So there you have it, my friends! Zesty Lemon Parmesan Couscous is not just a recipe; it’s a warm invitation to gather around the table, share stories, and create memories. Get that apron on, and let’s get cooking! I can’t wait for you to try this dish and share it with the people you love. Happy cooking!
PrintZesty Lemon Parmesan Couscous

A vibrant and simple side dish that brings sunshine to your table, perfect for any occasion.
- Prep Time: 5 minutes
- Cook Time: 10 minutes
- Total Time: 15 minutes
- Yield: 4 servings 1x
- Category: Side Dish
- Method: Stovetop
- Cuisine: Mediterranean
- Diet: Vegetarian
Ingredients
- 1 cup couscous
- 1 cup chicken or vegetable broth
- 1/2 cup grated Parmesan cheese
- 1 lemon (juice and zest)
- 2 tablespoons olive oil
- Salt and pepper to taste
- Fresh parsley (optional, for garnish)
Instructions
- Prepare the broth: In a medium saucepan, bring 1 cup of chicken or vegetable broth to a boil over medium-high heat.
- Add the couscous: Once the broth is boiling, stir in 1 cup of couscous, cover the pot, and remove it from heat. Let it sit for about 5 minutes.
- Fluff the couscous: Use a fork to fluff it up gently after sitting.
- Zest and juice your lemon: Zest your lemon and squeeze out its juice.
- Add the good stuff: Drizzle 2 tablespoons of olive oil over the fluffed couscous, followed by the grated Parmesan, lemon juice, and zest. Fold everything together.
- Adjust the seasoning: Taste and adjust with salt or lemon juice as needed.
- Garnish: If using, chop fresh parsley and sprinkle over the couscous before serving.
Notes
Couscous can be made a day in advance and stored in an airtight container. Fluff and add lemon juice when ready to serve.
Nutrition
- Serving Size: 1 serving
- Calories: 250
- Sugar: 1g
- Sodium: 600mg
- Fat: 10g
- Saturated Fat: 2g
- Unsaturated Fat: 7g
- Trans Fat: 0g
- Carbohydrates: 30g
- Fiber: 2g
- Protein: 8g
- Cholesterol: 5mg
Keywords: couscous, lemon, parmesan, side dish, vegetarian
Ingredient BBQ Chicken Coleslaw Wraps: Weeknight Meal Prep
BBQ Chicken Coleslaw Wraps: Your New Go-To for Flavor!
Hello, fellow food lovers! Today, we’re diving into a delightful dish that’s perfect for any gathering or cozy night in—BBQ Chicken Coleslaw Wraps. These wraps are not only delicious but also a breeze to prepare, making them an ideal choice for both seasoned cooks and those still getting comfortable in the kitchen. So, pull up a chair, grab your apron, and let’s get cooking!
A Taste of Nostalgia
One of my fondest memories stems from summer evenings spent with my family in our backyard. The grill was always fired up, and the air was thick with the smell of barbecue sauce mingling with fresh herbs. My mom would whip up her famous BBQ chicken, which had this wonderfully smoky flavor. As the sun began to set, we’d gather around the picnic table piled high with platters of food, laughter echoing as we shared stories of our day.
It was during one particularly unforgettable family gathering that we decided to mix things up. Instead of our usual routine of serving the BBQ chicken with sides, someone suggested we take the tender, juicy chicken and wrap it up with creamy coleslaw in a tortilla. The first bite was magical! The crispy crunch of the coleslaw combined with the sweet and tangy BBQ chicken was an explosion of flavor that brought smiles all around.
And just like that, BBQ Chicken Coleslaw Wraps became a staple in our family, marking special occasions and adding a delicious twist to our summer memories. Let me show you how to recreate this dish so you can make your own memorable summer nights!
Ingredients
Here’s what you’ll need to create these mouthwatering wraps:
-
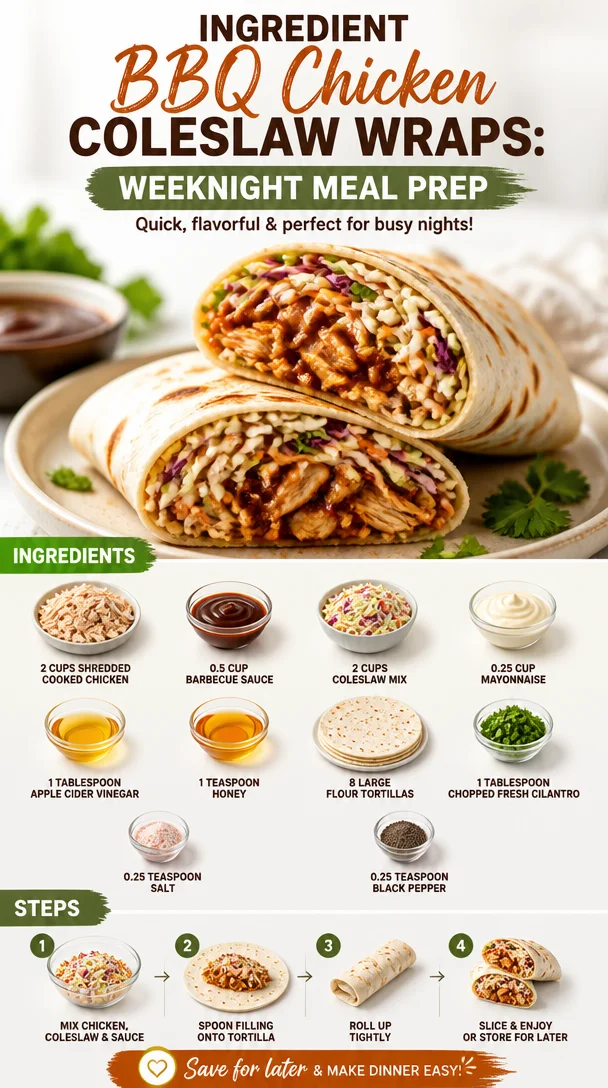
2 cups shredded cooked chicken
This can be rotisserie chicken or leftovers from a previous meal! If you’re in a pinch, you can replace it with shredded turkey or even tofu for a vegetarian twist. -
0.5 cup barbecue sauce
Use your favorite brand or homemade sauce. Sweet, spicy, or smoky—choose what you love best! If you prefer a healthier version, opt for a low-sugar BBQ sauce for a guilt-free treat. -
2 cups coleslaw mix
This mix usually contains cabbage and carrots. If you want to go fresh, slice up some cabbage and carrots yourself! You can also substitute in kale for a different flavor and texture. -
0.25 cup mayonnaise
This adds creaminess to the coleslaw. If you want a lighter option, consider Greek yogurt or a vegan mayo alternative. -
1 tablespoon apple cider vinegar
This adds a nice tang that balances the sweetness of the BBQ sauce. White wine vinegar can be a suitable substitute if you’re out of apple cider. -
1 teaspoon honey
Just a touch of sweetness helps to round out all the flavors. Maple syrup can replace honey if you’re looking for a vegan option. -
8 large flour tortillas
Choose whole wheat or even corn tortillas for a gluten-free option. You can also use lettuce wraps for a lower-carb meal. -
1 tablespoon chopped fresh cilantro
This brightens the dish and adds a pop of flavor. If cilantro isn’t your vibe, fresh parsley or green onions are perfect substitutes. -
0.25 teaspoon salt
Just a pinch enhances all the flavors. -
0.25 teaspoon black pepper
A little spice brings the whole dish together.
Step-by-Step Instructions
-
Shred the Chicken
If you’re using rotisserie chicken, simply pull it apart with your hands or a fork until it’s shredded. For a quick hack, if you have an electric mixer, toss the cooked chicken in there and mix on low for a few seconds until shredded! -
Mix the BBQ Sauce
In a medium bowl, combine the shredded chicken and barbecue sauce. Make sure every piece of chicken is well coated. This is where the magic begins! Feel free to taste and adjust the sauce according to your preference—add more for a stronger BBQ flavor. -
Prepare the Coleslaw
In another bowl, mix the coleslaw with mayonnaise, apple cider vinegar, honey, salt, and pepper. Stir until everything is well combined. This is a great moment to taste and tweak the dressing. Don’t hesitate to add a bit more vinegar or honey based on your taste! -
Warm the Tortillas
To make your wraps extra pliable, warm the tortillas in a dry skillet over medium heat for about 30 seconds on each side. This step keeps them from cracking when you roll them up and makes for a delightful texture. If you’re in a rush, a damp paper towel wrapped around the tortillas in the microwave for 15-20 seconds works wonders too! -
Assemble the Wraps
Lay a tortilla flat on a plate. Spoon about 1/4 cup of the BBQ chicken onto the center of the tortilla. Top it with a generous scoop of the coleslaw mix, and sprinkle some chopped cilantro over the top. -
Roll It Up
Fold in the sides of the tortilla, then pull the bottom up over the filling and roll tightly. Voila! Your wrap is assembled. You can cut it in half for easier handling or enjoy it whole if you’re feeling adventurous! -
Serve
Arrange the wraps on a platter, perhaps with some extra BBQ sauce or a side of chips and pickles. This casual presentation is all about fun and flavor!
Serving Suggestions
When serving BBQ Chicken Coleslaw Wraps, think about adding complementary sides. A simple fresh fruit salad can brighten the plate, while sweet potato fries or corn on the cob bring a rustic feel to your meal. Don’t forget to drizzle a bit more BBQ sauce on the side for dipping—it takes it to the next level!
Recipe Variations
Here are some creative twists to keep things exciting:
- Spicy BBQ Chicken: Add chopped jalapeños to the chicken mixture for a kick!
- Asian-inspired Wraps: Replace BBQ sauce with teriyaki sauce and use an Asian slaw mix instead of traditional coleslaw.
- Pulled Pork: Switch shredded chicken with pulled pork for a hearty variation.
- Vegetarian Delight: Use chickpeas or jackfruit instead of chicken for a plant-based option.
- Cheesy Twist: Sprinkle shredded cheese on the wraps before rolling them up for an even gooier experience!
Chef’s Notes
As I think back on the many times I’ve prepared these wraps, I recall one particularly chaotic evening—my kitchen took on a life of its own! I had friends over, and we were all busy chopping, whisking, and laughing. At one point, I accidentally mixed coleslaw into the BBQ chicken, thinking they belonged together. To my surprise, it turned out to be a delicious mash-up! Now, it’s how I make them every time!
These wraps are a fantastic way to feed a crowd, and the simple, wholesome ingredients almost guarantee they will be a hit.
FAQs and Troubleshooting
Q: Can I make the slaw in advance?
Absolutely! You can prepare the coleslaw a day ahead of time. Just keep it covered in the fridge until you’re ready to assemble.
Q: What if I have leftover wraps?
You can store any leftovers wrapped in foil or in an airtight container in the fridge for up to 2 days. Just be sure to keep the coleslaw separate if you want to maintain the crunch!
Q: Can I freeze the chicken?
Yes! Shredded BBQ chicken freezes wonderfully. Just thaw, reheat, and then mix with coleslaw when you’re ready to enjoy.
Q: Can I use different wraps?
Indeed! Feel free to use whole wheat, spinach, or gluten-free tortillas. Lettuce leaves also work beautifully for a lighter option.
Nutritional Info
For a standard serving of a BBQ Chicken Coleslaw Wrap (1 wrap):
- Calories: Approximately 350
- Protein: 25g
- Fat: 12g
- Carbohydrates: 40g
- Fiber: 2g
- Sugar: 4g
Wrapping It Up
BBQ Chicken Coleslaw Wraps are more than just a meal; they’re an experience! Each bite is a reminder of sunny days, laughter, and the joy of sharing food with friends and family. I hope you’ve enjoyed this little journey into my kitchen, and I can’t wait to hear how your wraps turn out. So go ahead—tie on your apron, grab those ingredients, and let’s make something unforgettable together! Happy cooking!
PrintBBQ Chicken Coleslaw Wraps

Delicious BBQ Chicken Coleslaw Wraps, perfect for gatherings or cozy nights, filled with smoky BBQ chicken and crunchy coleslaw.
- Prep Time: 15 minutes
- Cook Time: 15 minutes
- Total Time: 30 minutes
- Yield: 4 servings 1x
- Category: Main Course
- Method: Wrap
- Cuisine: American
- Diet: Non-Vegetarian
Ingredients
- 2 cups shredded cooked chicken
- 0.5 cup barbecue sauce
- 2 cups coleslaw mix
- 0.25 cup mayonnaise
- 1 tablespoon apple cider vinegar
- 1 teaspoon honey
- 8 large flour tortillas
- 1 tablespoon chopped fresh cilantro
- 0.25 teaspoon salt
- 0.25 teaspoon black pepper
Instructions
- Shred the chicken.
- Mix the BBQ sauce with the shredded chicken.
- Prepare the coleslaw with mayonnaise, apple cider vinegar, honey, salt, and pepper.
- Warm the tortillas in a skillet or microwave.
- Assemble the wraps with BBQ chicken and coleslaw.
- Roll it up tightly.
- Serve with extra BBQ sauce if desired.
Notes
These wraps can be made with various substitutes for dietary preferences.
Nutrition
- Serving Size: 1 wrap
- Calories: 350
- Sugar: 4g
- Sodium: 500mg
- Fat: 12g
- Saturated Fat: 2g
- Unsaturated Fat: 8g
- Trans Fat: 0g
- Carbohydrates: 40g
- Fiber: 2g
- Protein: 25g
- Cholesterol: 60mg
Keywords: BBQ Chicken, Coleslaw, Wraps, Summer Recipes, Easy Dinner
Minute Balsamic Garlic Grilled Mushroom Skewers
Balsamic Garlic Grilled Mushroom Skewers: A Friendly Guide to Flavorful Cooking
Introduction
Hello, fellow foodies! If you’re anything like me, when it comes to grilling, you might be inclined to think that it’s all about the meats. But let me tell you, there’s a whole world of flavor to be discovered with vegetables, especially when you bring mushrooms into the mix. Today, I’m so excited to share with you my favorite recipe for Balsamic Garlic Grilled Mushroom Skewers—a dish that’s earthy, savory, and absolutely perfect for the grill!
I remember the first time I decided to swap out the usual burgers for something that truly celebrates plant-based flavors. It was an impromptu barbecue at a friend’s place. I had a craving for something hearty but not meat-centric. As I stood there, gazing at a basket of fresh mushrooms, the idea struck! I whisked together balsamic vinegar, garlic, and a touch of soy sauce, and before I knew it, these grilled skewers became the star of the show. The way the mushrooms soaked up that marinade and developed a smoky, rich flavor left everyone raving about them.
These bad boys aren’t just delicious; they’re also super easy to whip up, making them perfect for any occasion—whether you’re hosting a dinner party, enjoying a light meal, or just grilling out with friends. Plus, they’re versatile enough to complement any main dish or serve as a fantastic appetizer. So grab your skewers, and let’s get cooking!
Personal Story
Growing up, my family had a tradition of prepped meals on the weekends, where we would gather together in the kitchen, chopping, stirring, and, of course, taste-testing. One weekend, it was all about the grill. Everyone had a hand in preparing our favorites. My dad was in charge of the steaks, while my mom tossed together her famous grilled veggies. That weekend was so special; we laughed, shared stories, and just savored the time together.
As we lined our plates with various grilled items, I suddenly had an idea: "Why not try throwing some mushrooms on the grill?" The skeptical looks turned into excitement as I quickly marinated them in a balsamic garlic mixture. The result was a hit! They were so flavorful and juicy that they became a must-have at every barbecue thereafter. Even today, anytime I fire up the grill, I think back to those warm, sunny afternoons filled with laughter and the smoky aroma of grilled goodness wafting through the air.
Ingredients
For these delicious Balsamic Garlic Grilled Mushroom Skewers, you will need the following:
-
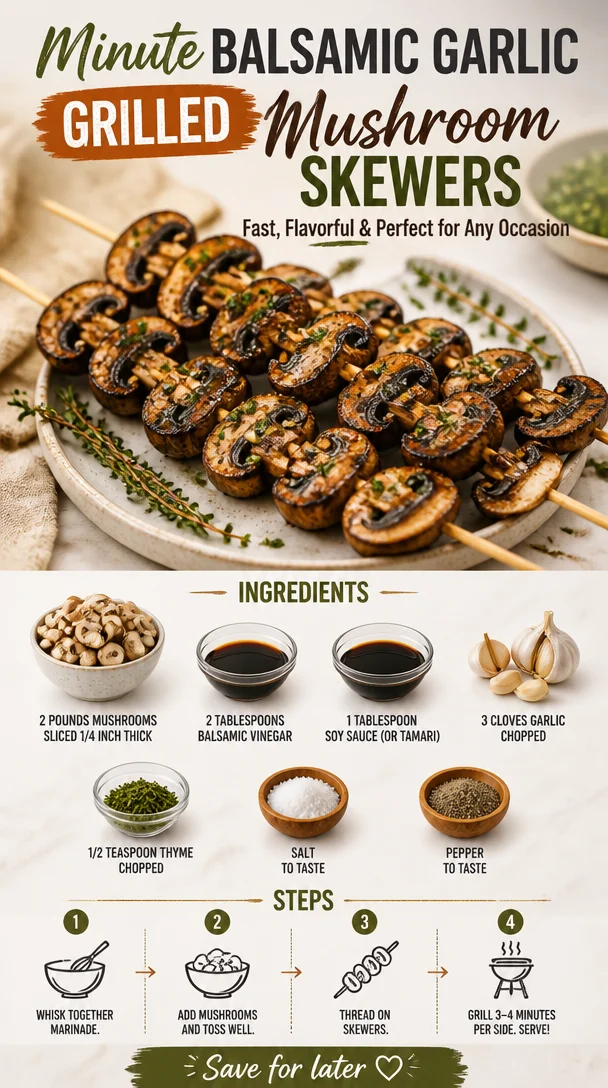
2 pounds mushrooms, sliced 1/4 inch thick
These can be button, portobello, or cremini mushrooms. Each type brings its unique texture and flavor! For a gluten-free option, ensure your soy sauce or tamari is certified gluten-free. -
2 tablespoons balsamic vinegar
This is the star of the dish! It adds a beautiful tang and depth of flavor. If you want to switch things up, try a flavored balsamic, like fig or raspberry. -
1 tablespoon soy sauce (or tamari)
This adds umami to the mushrooms. Tamari is a great gluten-free alternative. -
3 cloves garlic, chopped
Fresh garlic gives a lovely aroma and spice. If you’re feeling adventurous, roasted garlic can add a sweeter, mellower flavor! -
1/2 teaspoon thyme, chopped
Thyme complements the earthiness of the mushrooms beautifully. Fresh is best, but if you only have dried thyme, use about a third of the amount. -
Salt and pepper to taste
Always season with salt and pepper; they enhance the flavors of the other ingredients.
Step-by-Step Instructions
-
Prepping the Marinade
In a medium bowl, whisk together the balsamic vinegar, soy sauce, chopped garlic, thyme, and a pinch of salt and pepper. You want to create a harmonious blend of flavors that will soak into the mushrooms beautifully. Don’t be shy—give it a good whisking to fully incorporate those garlicky goodness and tangy notes. -
Marinating the Mushrooms
Add in the sliced mushrooms, tossing them gently but thoroughly in the marinade. The goal here is to coat each piece evenly—think of them having a lovely balsamic hug! Let them marinate for at least 30 minutes at room temperature. If you’re prepping ahead, you can throw them in the fridge for up to 2 hours. Just remember to bring them back to room temperature before grilling. -
Skewering the Shrooms
Preheat your grill (or a grill pan) to medium-high heat. While the grill heats up, start threading the marinated mushrooms onto skewers. You can use metal or soaked wooden skewers—just make sure to leave a little space between the mushrooms for those beautiful grill marks and even cooking! If you’re using wooden skewers, remember to soak them in water for about 30 minutes so they won’t burn on the grill. -
Grilling Perfection
Place the skewers on the grill. Grill them for about 5–7 minutes per side, turning them halfway through. Keep an eye out for those gorgeous grill marks that bring some serious flavor! The mushrooms should be tender and slightly charred. You’ll know they are done when they become juicy and soften but still hold their shape. -
Serve and Enjoy
Once off the grill, let the skewers rest for a couple of minutes. This helps retain the lovely juices! Drizzle any leftover marinade over the skewers for an extra burst of flavor. You can serve them directly on the skewers for a rustic touch or plate them up with a sprinkle of fresh herbs or a dash of extra balsamic for an elevated presentation.
Serving Suggestions
These mushroom skewers are fantastic on their own, but they also play well with others! Serve them alongside grilled vegetables for a colorful platter, or pair them with a light salad and crusty bread for a full meal. If you’re feeling a little fancy, sprinkle some shaved parmesan or crumbled feta on top, or pair them with rosemary-infused olive oil for dipping.
Recipe Variations
- Herb Adventure: Swap out the thyme for rosemary or oregano for a different herb profile that brings out new flavors.
- Spice It Up: Add a sprinkle of red pepper flakes to the marinade for a spicy kick!
- Umami Boost: Add a teaspoon of miso paste for a deeper umami flavor.
- Sweet and Savory: Drizzle some honey or maple syrup in the marinade for a sweet twist on this savory dish.
- Cheesy Delight: Toss some feta crumbles on top before serving for that creamy, tangy goodness.
Chef’s Notes
One of my favorite things about this recipe is how it has evolved over time. Initially, I kept it super simple, but then I started experimenting with different marinades and flavors. I’ve had friends ask to swap out mushrooms for other veggies like zucchini or bell peppers, and let me tell you, the results are fantastic. The key is finding the right marinade balance to complement whatever veggie you choose! It’s all about embracing creativity in the kitchen.
Oh, and let me share a funny memory revolving around this dish. During one of my first attempts at grilling with friends, I decided to multitask and ended up with charred mushrooms and laughing friends. Their comments, “Well, at least they’re crispy!” has stuck with me. Now, I’m always adamant about keeping an eye on the grill!
FAQs and Troubleshooting
-
Why did my mushrooms turn out tough?
If you grill mushrooms too long or at too high a heat, they can become rubbery. Aim for medium heat and a good 5–7 minutes per side. -
Can I use other vegetables?
Absolutely! Bell peppers, zucchini, and cherry tomatoes also grill beautifully. Just be mindful of timing since different vegetables have different grilling durations. -
How do I store leftover skewers?
Store any leftovers in an airtight container in the fridge for up to three days. They’re delightful in salads or as a topping for grain bowls. -
What can I do with the leftover marinade?
If you’ve grilled the mushrooms, it’s best to discard the leftover marinade for safety. However, if you’re marinating fresh veggies, it makes a great salad dressing after a quick whisking!
Nutritional Info (Optional)
While I don’t usually dive deep into the nitty-gritty of nutritional info, these skewers are a powerhouse of flavor and health! They offer a good source of fiber, vitamins, and minerals without compromising on taste.
Now that you have the complete rundown, it’s time to grab those mushrooms, fire up the grill, and bring some stunning flavors to your table. I hope you enjoy making these Balsamic Garlic Grilled Mushroom Skewers as much as I do. Let me know how yours turn out—I can’t wait to hear your kitchen stories! Happy cooking!
PrintBalsamic Garlic Grilled Mushroom Skewers

Delicious and earthy Balsamic Garlic Grilled Mushroom Skewers, perfect for grilling occasions.
- Prep Time: 15 minutes
- Cook Time: 15 minutes
- Total Time: 30 minutes
- Yield: 4 servings 1x
- Category: Appetizer
- Method: Grilling
- Cuisine: Vegetarian
- Diet: Vegetarian
Ingredients
- 2 pounds mushrooms, sliced 1/4 inch thick
- 2 tablespoons balsamic vinegar
- 1 tablespoon soy sauce (or tamari)
- 3 cloves garlic, chopped
- 1/2 teaspoon thyme, chopped
- Salt and pepper to taste
Instructions
- Whisk together the balsamic vinegar, soy sauce, chopped garlic, thyme, and a pinch of salt and pepper in a medium bowl.
- Add the sliced mushrooms and toss them gently in the marinade, letting them marinate for at least 30 minutes.
- Preheat your grill to medium-high heat and thread the marinated mushrooms onto skewers.
- Grill the skewers for about 5–7 minutes per side, until tender and slightly charred.
- Let the skewers rest for a couple of minutes before serving, drizzling any leftover marinade over them.
Notes
Store leftovers in an airtight container for up to three days. This recipe can also be adapted with other vegetables.
Nutrition
- Serving Size: 1 serving
- Calories: 250
- Sugar: 5g
- Sodium: 300mg
- Fat: 7g
- Saturated Fat: 1g
- Unsaturated Fat: 6g
- Trans Fat: 0g
- Carbohydrates: 26g
- Fiber: 4g
- Protein: 8g
- Cholesterol: 0mg
Keywords: mushroom skewers, grilled vegetables, balsamic garlic
Healthy Peach BBQ Pulled Chicken
Healthy Peach BBQ Pulled Chicken: A Delight for Your Table
Hey there, foodie friends! I’m so excited to share one of my favorite recipes with you today: Healthy Peach BBQ Pulled Chicken. I don’t know about you, but I believe that cooking should be both delicious and healthy, without sacrificing that delightful taste we all crave. Whether you’re having a family dinner, hosting a casual get-together, or simply looking for a weeknight meal that’ll impress even the pickiest eaters, this dish is here to save the day!
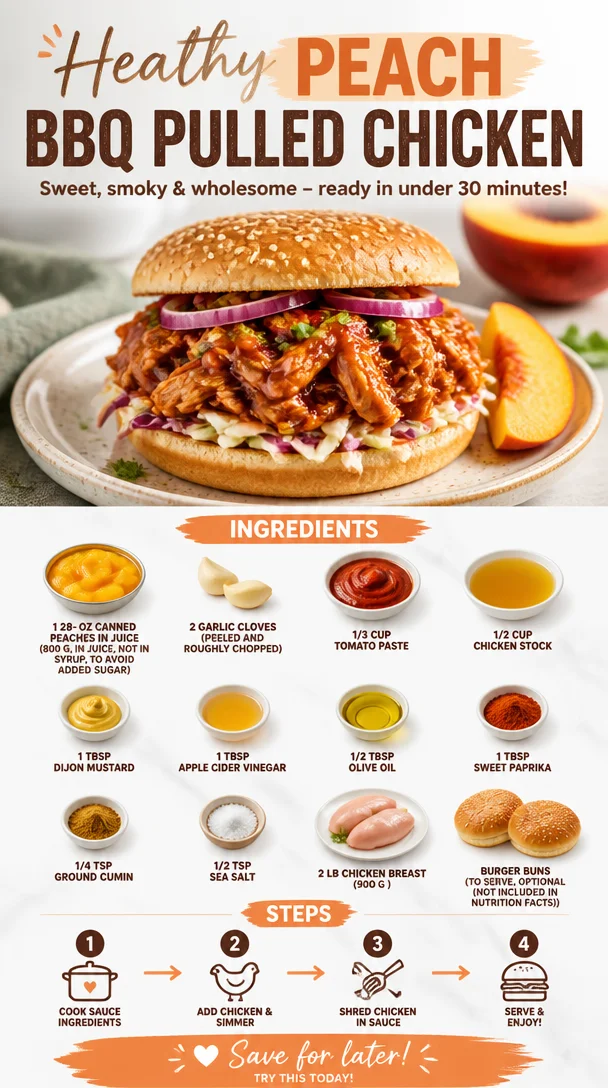
Picture this: tender, juicy chicken coated in a luscious, peach-infused barbecue sauce that’s both tangy and sweet. Serve it on warm burger buns or pile it onto a bed of greens for a refreshing salad option—the choice is yours! This recipe takes the essence of summer and captures it right in your kitchen, making your dining table a place of joy and nostalgia.
As a passionate home cook with a love for hosting, I find that great meals are about sharing delightful flavors and making memories. And what better way to do that than with a hearty dish that brings everyone together? Today, we’re diving into the world of healthy barbecue pulled chicken, and I can’t wait for you to create this masterpiece in your home. So, tie on that apron, and let’s get started!
Personal Story
I remember the first time I made pulled chicken for a backyard barbecue with friends. It was warm at dusk, and the smell of grilling chicken wafted through the air, teasing everyone’s taste buds. But here’s the twist: instead of the traditional barbecue sauce, I decided to get creative with peaches. Growing up, we had a peach tree in our backyard, and those sweet, juicy peaches were the highlight of summer. So, it felt only fitting to incorporate that nostalgia into my cooking.
As the chicken cooked low and slow, the aroma filled our outdoor space, mingling with laughter and the sound of clinking glasses. The reaction when I revealed the peach BBQ pulled chicken was priceless! People were amazed not only by the unique flavor but also how it brought a touch of nostalgia to the table. Since then, this recipe has become a family favorite and a staple at gatherings. It reminds me that cooking is not just about the food, but creating beautiful memories with the people we care about.
Ingredients
To create this tantalizing dish, you’ll need the following ingredients:
-
28 oz canned peaches in juice (800 g): Choose peaches packed in juice, not syrup! This keeps our dish naturally fruity without added sugars. If canned peaches aren’t available, you can use fresh or frozen peaches; just cook them down until they’re soft and juicy.
-
2 garlic cloves (peeled and roughly chopped): Garlic is the heart of flavor! Not only gives it that aromatic punch, but it also adds a bit of a health boost. If you love garlic (who doesn’t?), feel free to add more, or substitute with garlic powder if you’re in a pinch.
-
1/3 cup tomato paste: This ingredient adds richness and depth to our sauce. It’s a great base that marries beautifully with the peaches. If you don’t have tomato paste, consider using ketchup, though it may add some extra sweetness.
-
1/2 cup chicken stock: A great broth can elevate any dish! If you’re looking for a vegetarian option, feel free to substitute vegetable stock instead.
-
1 tbsp Dijon mustard: This tangy delight kicks up the flavor profile and offers a bit of zest. You can swap it with yellow mustard if that’s what you have on hand.
-
1 tbsp apple cider vinegar: Adds a refreshing tang and cuts through the sweetness of the peaches. If you don’t have this, white wine vinegar can work just as well.
-
1/2 tbsp olive oil: For sautéing those garlic cloves and locking in flavor. If you’re looking for something different, avocado oil or coconut oil can be nice swaps.
-
1 tbsp sweet paprika: This adds a warm, rich depth of flavor with a hint of sweetness. Smoked paprika is fantastic if you want a smoky element.
-
1/4 tsp ground cumin: Cumin adds an earthy, aromatic quality that pairs wonderfully with the sweetness of the peaches. Feel free to adjust this based on your preference; a little can go a long way!
-
1/2 tsp sea salt: A pinch of salt to enhance all the flavors at play! You can adjust to taste, especially if you’re watching your sodium intake.
-
2 lb chicken breast (900 g): The star of our dish! Chicken breast is lean and healthy, but thighs can add more flavor if you’re feeling indulgent.
-
Burger buns (optional): If you want to serve it the classic way! Whole wheat or gluten-free buns are excellent alternatives.
Step-by-Step Instructions
Now that we’ve gathered our delightful ingredients, let’s dive into the cooking process!
Step 1: Prepare Your Ingredients
To get things moving, start by chopping your garlic and setting it aside. If you’re using fresh peaches, peel and slice them now—no need to worry about dicing them perfectly as they will break down during cooking. If you’re using canned peaches, simply drain the juices (but hang onto them for later).
Step 2: Sauté the Garlic
In a large skillet or pot, heat up your olive oil over medium heat. Once it’s shimmering, toss in your chopped garlic. Sauté it for about 1-2 minutes until it’s fragrant and glowing but not burnt—trust me, burnt garlic can ruin the dish.
Step 3: Make the Sauce
Next, add the tomato paste to the garlic and stir it in well. Let it cook for another minute to caramelize slightly before adding the canned peaches (or fresh), chicken stock, Dijon mustard, apple cider vinegar, sweet paprika, ground cumin, and sea salt.
Stir everything together, and allow it to simmer for about 5-10 minutes until the peaches break down and the sauce thickens slightly. This is where that divine aroma fills your kitchen!
Step 4: Introduce the Chicken
Now, it’s time for our chicken! Nestle the chicken breasts into the sauce, ensuring they are fully submerged. Cover your skillet and let it simmer on low heat for about 30-40 minutes. The goal is to gently poach the chicken until it’s cooked through and juicy—this will help it shred easily!
Step 5: Shred the Chicken
Once the chicken reaches an internal temperature of 165°F (75°C), remove it from the skillet and set it aside on a cutting board. Allow it to cool slightly before pulling out two forks to shred the meat. This should feel cathartic and easy!
Step 6: Combine and Serve
Place the shredded chicken back in the skillet and stir it into the peach sauce. Let it cook together for an additional 5-10 minutes to absorb those flavors. Serve it warm atop burger buns or as a served warm over a fresh salad, and don’t forget a drizzle of that irresistible sauce!
Serving Suggestions
Presentation is everything! Serve your Peach BBQ Pulled Chicken generously piled onto toasted burger buns for that classic look, topped with fresh arugula or crispy cabbage for a satisfying crunch. If you’re opting for a lighter meal, serve the chicken over a bed of mixed greens, drizzled with a splash of lemon juice for added zing. Arrange colorful sides like roasted veggies or cornbread to make your meal visually stunning!
Recipe Variations
Feeling adventurous? Here are a few creative twists to make this recipe your own:
-
Spicy Kick: Add chopped jalapeños or a pinch of cayenne pepper to the sauce for a bit of heat.
-
Tropical Twist: Substitute the peaches with diced pineapple or mango for a refreshing tropical flavor.
-
Sweet & Savory: Mix in some hoisin sauce or a splash of soy sauce for an Asian-inspired fusion.
-
Herb Infusion: Blend in fresh basil or cilantro before serving for an unexpected herbal freshness.
-
Vegan Option: Swap chicken for jackfruit to make this dish vegan-friendly. The jackfruit mimics the texture perfectly when cooked down.
Chef’s Notes
This recipe has definitely evolved for me over time. It originally started as a way to use up extra chicken from a weekend roast, but it quickly became a family favorite. I often find myself adjusting the ingredients based on whatever is in my pantry. Plus, the beauty of this dish is how adaptable it is—you can have it with rice, in tacos, or even as part of a meal prep bowl!
Funny story: the first time I made this for a large group, I accidentally left out the mustard! No one noticed, but I definitely learned to always double-check my ingredients list beforehand (oops!). It taught me to be organized in the kitchen, and now I always measure and prep in advance.
FAQs and Troubleshooting
-
What if my chicken isn’t shredding easily?
- If it’s tough, it might need more time cooking. Ensure it’s cooked through and tender before shredding!
-
Can I make this ahead of time?
- Absolutely! The flavors deepen as it sits, making it even more delicious. Store it in an airtight container in the fridge for up to 3 days.
-
How do I store leftovers?
- Keep any leftover pulled chicken in an airtight container in the fridge for up to 5 days, or freeze it in portions for up to 3 months.
-
Can I make this recipe in a slow cooker?
- Yes! Just combine all ingredients into your slow cooker and cook on low for 6-8 hours or high for 3-4 hours until the chicken is tender.
Nutritional Info (optional)
While I won’t delve too deeply into the numbers, this recipe is a fantastic source of protein and rich in vitamins from the peaches and herbs. It fits well within a balanced diet, particularly if you focus on whole grains and fresh veggies in your meal combinations!
So there you have it, my lovely foodies! Healthy Peach BBQ Pulled Chicken is not just a dish; it’s an experience waiting to unfold at your table. I can’t wait for you to try it and make it your own. Remember, cooking is about joy, creativity, and sharing beautiful moments. Keep gathering around your table, and let’s keep spreading that love one recipe at a time! Happy cooking!
PrintHealthy Peach BBQ Pulled Chicken

A deliciously healthy dish featuring tender pulled chicken in a sweet and tangy peach-infused barbecue sauce, perfect for any meal.
- Prep Time: 15 minutes
- Cook Time: 40 minutes
- Total Time: 55 minutes
- Yield: 4 servings 1x
- Category: Main Course
- Method: Stovetop
- Cuisine: American
- Diet: Gluten Free
Ingredients
- 28 oz canned peaches in juice (800 g)
- 2 garlic cloves, peeled and roughly chopped
- 1/3 cup tomato paste
- 1/2 cup chicken stock
- 1 tbsp Dijon mustard
- 1 tbsp apple cider vinegar
- 1/2 tbsp olive oil
- 1 tbsp sweet paprika
- 1/4 tsp ground cumin
- 1/2 tsp sea salt
- 2 lb chicken breast (900 g)
- Burger buns (optional)
Instructions
- Prepare your ingredients: chop garlic and slice fresh peaches if using.
- Sauté the garlic in olive oil over medium heat for 1-2 minutes until fragrant.
- Add the tomato paste and cook for 1 minute before stirring in peaches, chicken stock, Dijon mustard, apple cider vinegar, sweet paprika, cumin, and salt.
- Simmer the sauce for 5-10 minutes until peaches break down and thicken.
- Introduce the chicken breasts into the sauce, cover, and simmer on low for 30-40 minutes until cooked through.
- Shred the chicken once cooled slightly and return it to the skillet, stirring into the sauce.
- Serve warm on burger buns or over greens with extra sauce on top.
Notes
This dish can be made ahead of time and tastes even better when reheated. It can also be adapted with different fruits or spices to suit your taste.
Nutrition
- Serving Size: 1 serving
- Calories: 400
- Sugar: 12g
- Sodium: 500mg
- Fat: 10g
- Saturated Fat: 2g
- Unsaturated Fat: 8g
- Trans Fat: 0g
- Carbohydrates: 30g
- Fiber: 3g
- Protein: 35g
- Cholesterol: 80mg
Keywords: peach, BBQ, pulled chicken, healthy, summer, family meal, easy recipe
Ingredient Strawberry Mango Popsicles: Quick No-Bake Treat
Cool Off This Summer with Homemade Strawberry Mango Popsicles
Are you looking for a fabulous way to beat the heat? These strawberry mango popsicles are just what you need! This recipe not only delivers a burst of tropical flavor but also fills your kitchen with nostalgia, fun, and vibrant colors. Trust me, nothing screams summer quite like fresh fruit popsicles, and once you whip up a batch, you’ll be wishing you’d done it sooner!
Popsicles have been a part of my summer since childhood. I fondly remember those hot afternoons when my siblings and I would race to the freezer, anticipating the moment we could sink our teeth into something cool and sweet. These strawberry mango popsicles are my adult twist on those cherished memories. They’re simple enough to whip up in a jiffy but elegant enough to impress your guests at a garden party. Plus, you can feel good about the ingredients you’re using!
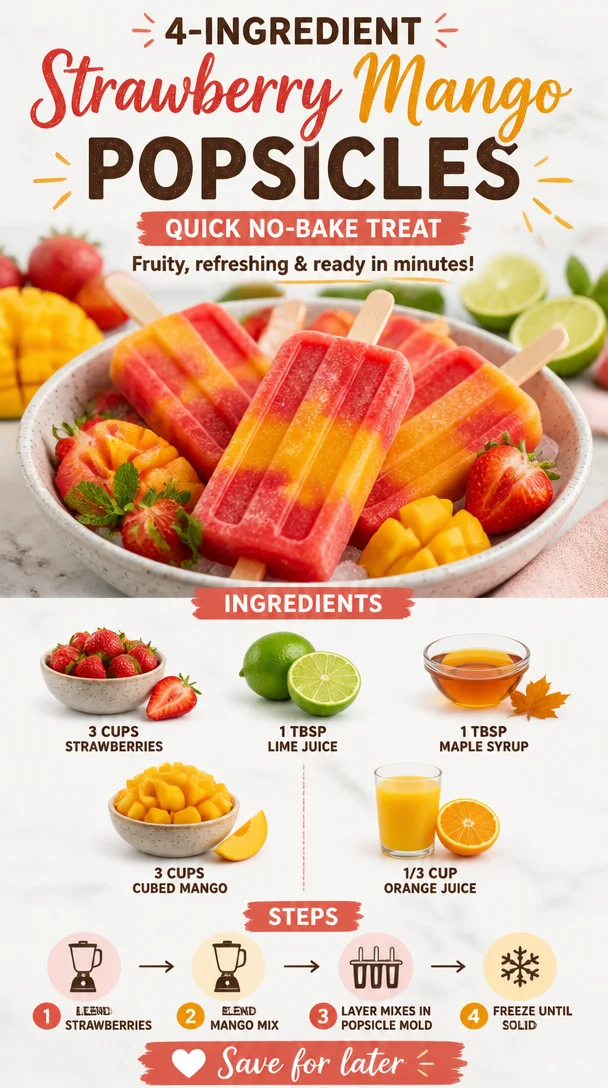
Now, gather your trusty apron, because we’re about to embark on a fruity adventure that’ll have everyone chewing their way to the bone—er, popsicle stick! The combination of strawberries and mango is a tropical paradise on a stick, balanced perfectly with a splash of lime and a touch of maple syrup. Believe me, you’ll want to keep these in your freezer year-round!
A Sweet Taste of Nostalgia
Every summer, my family took a road trip to the beach, and one of the highlights was always stopping at a little roadside stand selling fresh fruit and homemade popsicles. I can still hear the distant laughter of children and the sizzle of snacks being fried in the background. The sweet, tart flavor of strawberries, alongside the lush pulp of sun-ripened mango, became my go-to treat. Back then, nothing was more refreshing than biting into a colorful popsicle while feeling the ocean breeze tousle my hair.
Fast forward to today, and I find that blending those childhood memories with my love for cooking yields a tasty, magical treat. When I make these strawberry mango popsicles, it’s like I’m instantly transported back to those carefree summers, the warm sun on my skin, and the excitement of sharing popsicles with friends and family. Now, let’s pack those sweet memories into a mold and make some magic!
Ingredients
To create these delightful strawberry mango popsicles, here’s what you will need:
-
3 cups strawberries: Use fresh, ripe strawberries for the best flavor! If you can’t find them, you can substitute with frozen strawberries, but be sure to thaw and drain them before blending.
-
1 tbsp lime juice: A splash of lime juice brightens up the flavors and balances sweetness. If you don’t have lime, lemon juice works great too for a zesty kick!
-
1 tbsp maple syrup: This natural sweetener adds depth and a hint of earthiness. Honey or agave syrup can be a perfect alternative—just tweak the quantity to your taste.
-
3 cups cubed mango: Fresh mango adds a tropical twist, but feel free to use frozen mango if that’s more accessible. Make sure to allow it to thaw a bit for easier blending!
-
1/3 cup orange juice: It’s the perfect refresher! If you’re not fond of orange juice, pineapple juice can also elevate those tropical notes.
Get ready to experience the essence of summer in every bite. If you’ve got everything prepped, let’s dive into making our popsicles!
Step-by-Step Instructions
-
Preparation: Begin by washing your strawberries thoroughly and hulling them. This means removing the green tops and any white parts underneath. Surprisingly, having super ripe strawberries makes a world of difference in flavor!
-
Blend the Strawberries: Toss the strawberries into your blender. Add the lime juice and maple syrup. Blend until smooth. Don’t be afraid to pause and taste! The sweetness of the strawberries should shine through. If they aren’t sweet enough, a little more maple syrup won’t hurt!
-
Set Aside: Once blended, pour the strawberry mixture into a bowl and set it aside. You’ll want to keep the strawberry mix separate for layering that beautiful popsicle effect.
-
Blend the Mango: Rinse the blender (no one wants a strawberry-mango mix just yet!). Add the cubed mango and orange juice. Blend until creamy and smooth. You’re going to love how vibrant and silky this mixture is!
-
Layer the Molds: Now for the fun part! Grab your popsicle molds. Start by adding a layer of the strawberry mixture to each mold, about a third of the way full. Use a spoon to tap the bottom gently, which helps eliminate air bubbles.
-
Add the Mango Mixture: Follow up with a layer of mango blend on top of the strawberry. You can alternate the layers until the molds are full. I usually end with the mango for that stunning golden top!
-
Insert Sticks and Freeze: If your molds come with stick holders, insert them now. Place the molds in the freezer and allow them to chill for at least 4-6 hours. Overnight is even better if you can wait!
-
Pop and Enjoy: Once frozen solid, remove the popsicles. If they’re hard to get out, run some warm water over the outside of the molds for a few seconds. Enjoy your homemade popsicles as a sweet afternoon treat!
Serving Suggestions
There’s something visually stunning about a beautiful popsicle! For serving, you could plate these popsicles on a vibrant plate and surround them with fresh strawberries and mango slices for that wow factor. Drizzle over a bit of melted dark chocolate for a gourmet touch, or serve with a dollop of coconut whipped cream on the side for those who appreciate fluffy indulgence.
Recipe Variations
-
Berry Blast: Combine strawberries with other berries like blueberries or raspberries for a mixed-berry treat. Toss in a few basil leaves for an unexpected twist!
-
Creamy Delight: Add a layer of Greek yogurt or coconut cream between the fruit layers for a creamy variation. It adds a lovely texture that contrasts beautifully with the fruit.
-
Chili-Lime Popsicle: Spice things up! Blend a pinch of chili powder into the lime juice mix. It adds a tangy, spicy surprise that kicks every bite up a notch.
-
Chocolate-Dipped: After freezing, dip your pops in melted dark chocolate and immediately roll in crushed nuts or sprinkles for a delightful crunch.
-
Herbal Infusion: Try blending some mint or basil with the mango for a refreshingly herbaceous flavor that delights the palate!
Chef’s Notes
Ah, the popsicle journey! When I first developed this recipe, I made so many fruity concoctions that my kitchen looked like a fruit explosion—everywhere you looked, it was a cascade of colors! The first batch turned out too icy because I didn’t use enough sweetener. Lesson learned!
Now, I like to experiment with the layering, making sure each color stands out while still blending harmoniously once bitten into. It’s all about finding that balance between the textures and flavors. And honestly, the best part? Watching my nieces and nephews devour them with smiles on their little faces. There’s no better joy than creating something that brings people together, don’t you think?
FAQs and Troubleshooting
1. My popsicles are too hard! What did I do wrong?
If your popsicles come out rock-solid, this usually means they might have been in the freezer for too long or didn’t have enough sweetener. If they’re too hard, just let them sit at room temperature for a minute or run some warm water over the mold to help release them.
2. Can I use other fruits?
Absolutely! You can blend any fruit of your choice. Just ensure they are ripe for optimal flavor. Fruits like kiwi, bananas, and peaches work wonderfully too.
3. Are these popsicles healthy?
Yes! They’re made with whole fruits and natural sugars, making them a healthier choice compared to store-bought popsicles. You can modify the sweetener to your taste and use all organic ingredients if you prefer!
4. How long do these popsicles last in the freezer?
Homemade popsicles typically last about 2-3 months in the freezer. Just be sure to keep them stored in a sealed container or bag to avoid freezer burn!
These strawberry mango popsicles are sure to be a summer staple at your home. Simple, refreshing, and vibrant—they capture that warm weather vibe perfectly! I hope you’ll enjoy making these as much as I do. Now, let’s share some popsicle love with family and friends, shall we? Cheers to sweet and sunny days ahead!
PrintStrawberry Mango Popsicles

Delightful strawberry mango popsicles that capture the essence of summer with fresh fruits and a dash of lime.
- Prep Time: 15 minutes
- Cook Time: 0 minutes
- Total Time: 15 minutes
- Yield: 8 servings 1x
- Category: Dessert
- Method: Freezing
- Cuisine: American
- Diet: Vegetarian
Ingredients
- 3 cups strawberries, hulled
- 1 tbsp lime juice
- 1 tbsp maple syrup
- 3 cups cubed mango
- 1/3 cup orange juice
Instructions
- Wash your strawberries thoroughly and hull them.
- Toss the strawberries into your blender. Add the lime juice and maple syrup.
- Pour the strawberry mixture into a bowl and set it aside.
- Rinse the blender and add the cubed mango and orange juice.
- Grab your popsicle molds and add a layer of the strawberry mixture.
- Follow up with a layer of mango blend on top of the strawberry.
- Insert sticks if your molds come with holders and freeze for at least 4-6 hours.
- Once frozen solid, remove the popsicles and enjoy!
Notes
For serving, plate popsicles with fresh fruit and drizzle with chocolate or coconut whipped cream.
Nutrition
- Serving Size: 1 popsicle
- Calories: 80
- Sugar: 10g
- Sodium: 5mg
- Fat: 0g
- Saturated Fat: 0g
- Unsaturated Fat: 0g
- Trans Fat: 0g
- Carbohydrates: 22g
- Fiber: 2g
- Protein: 1g
- Cholesterol: 0mg
Keywords: popsicles, summer dessert, strawberry mango, homemade ice pops, healthy treats
Seasonal Nectarine Bread: Quick 60-Minute Homemade Recipe
The Sweet Symphony of Homemade Nectarine Bread
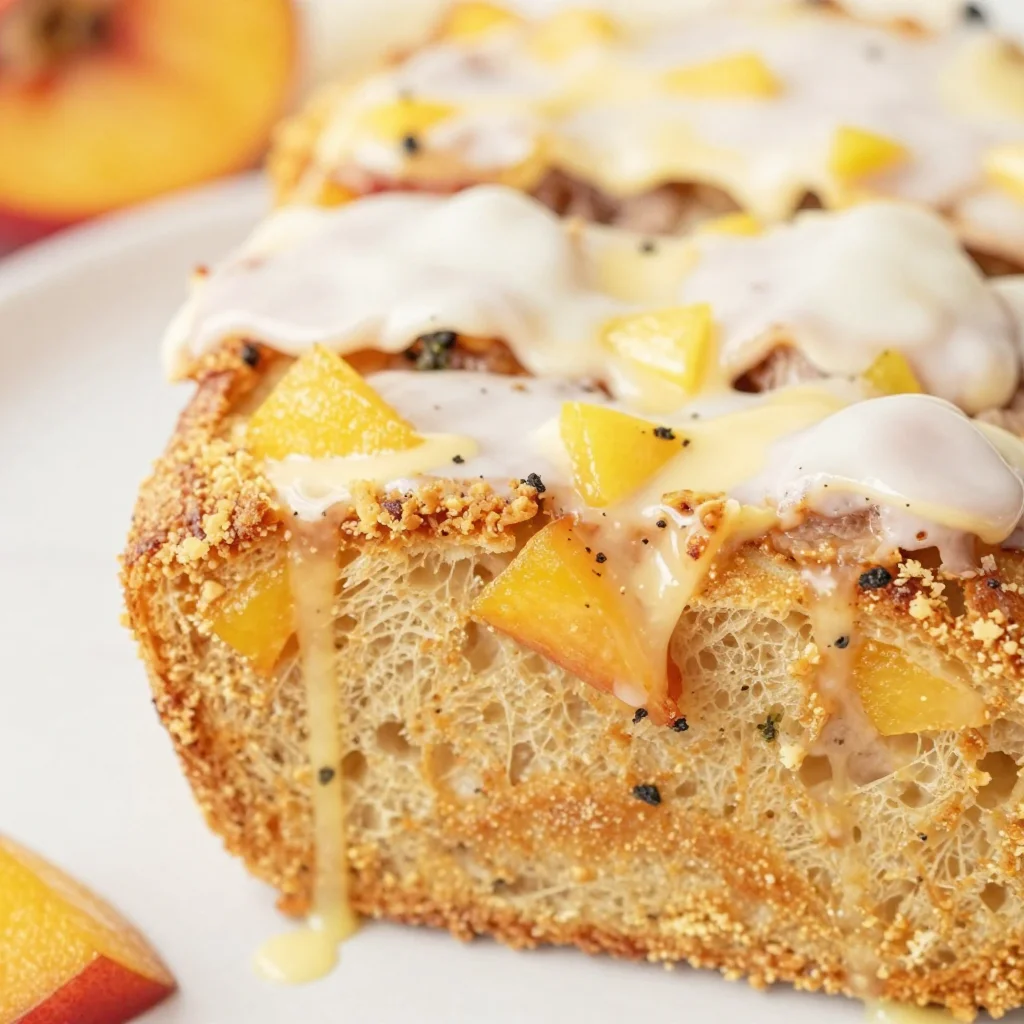
Hello, dear foodie friends! Today, we’re diving into the delightful world of homemade nectarines with a recipe that’s near and dear to my heart: Nectarine Bread! This isn’t just any bread; it’s a sunlit slice of summer, ready to brighten your kitchen and your table. Picture yourself biting into a warm slice, its tender crumb bursting with juicy pieces of sweet nectarines, while the warm aroma of cinnamon wafts through your home. Can you smell it already?
Why Nectarine Bread?
Nectarine bread encapsulates the essence of sweet, juicy nectarines wrapped in a soft, comforting loaf that feels both special and approachable. Whether it’s breakfast, a midday snack, or a cozy dessert, this bread adapts perfectly to any occasion. Plus, the vibrant fruit inside gives each bite a fresh burst of flavor, making even the simplest kitchen feel like a gourmet experience.
Before we head to the kitchen, let me take you on a little journey down memory lane that inspired this recipe.
A Memory to Savor
I remember my first foray into baking from scratch, inspired by a bountiful haul of fruits from our local farmer’s market. My grandmother used to make the most phenomenal fruit breads, and I recall standing beside her, mesmerized as she demonstrated the tender art of blending flavors. I was enchanted by the way she could transform ordinary ingredients into something extraordinary.
That summer afternoon, the kitchen was filled with laughter, the warmth of the oven, and the sweet scent of nectarines being sliced. We blended the nectarines into a batter, chatting about life while dancing to a tune on the radio. It was pure magic! When that first loaf came out of the oven, we could hardly contain our excitement as we slathered it with butter, and as the first slice was cut, it felt like a hug for our taste buds. Baking has since evolved into my language of love, and every time I make this Nectarine Bread, it’s a tribute to those moments shared in my grandmother’s kitchen.
Let’s recreate that magic together!
Ingredients
For our delightful homemade Nectarine Bread, you will need:
-
2 cups all-purpose flour
- You can substitute with whole wheat flour for added nutrition or gluten-free flour if you need a gluten-free option. Just be sure to adjust the liquid slightly for gluten-free blends!
-
1 cup brown sugar
- Brown sugar adds a lovely depth of flavor. Feel free to use coconut sugar for a more natural sweetness, or granulated sugar if that’s all you have on hand.
-
1 teaspoon baking soda
- This is your leavening agent! If you’re out of baking soda, you can substitute with baking powder (just double the amount), but your bread may be a bit denser.
-
1/2 teaspoon salt
- A crucial component that enhances flavors. Kosher or sea salt works just as well!
-
1 teaspoon ground cinnamon
- This spice brings warmth and a hint of cozy to your bread! Feel free to experiment with nutmeg or even ginger for a spicy twist.
-
1/2 cup unsalted butter, melted
- Use coconut oil for a dairy-free version, or leftover fruit puree for a lighter loaf if you’re feeling adventurous.
-
1 cup buttermilk
- Don’t have buttermilk? Mix 1 tablespoon of lemon juice or vinegar with enough milk to make 1 cup, and let it sit for 5 minutes to sour.
-
2 large eggs
- Eggs help bind the bread together. For a vegan version, substitute with flax eggs (1 tablespoon flaxseed meal + 2.5 tablespoons water per egg, let sit to gel).
-
1 cup diced nectarines
- Fresh nectarines are ideal, but you can use peaches or any other juicy fruit you love. Just adjust the sweetness accordingly!
-
1/2 cup powdered sugar (for glaze)
- Optional but recommended for a touch of sweetness on top! You can omit this or use a sugar substitute for a healthier choice.
-
1–2 tablespoons milk (for glaze)
- This can be almond milk, oat milk, or any milk of your choice!
Step-by-Step Instructions
Now, let’s house these beautiful flavors into your kitchen! Follow along step-by-step for delicious homemade Nectarine Bread.
-
Preheat Your Oven:
Preheat your oven to 350°F (175°C) and grease a 9×5-inch loaf pan with butter or cooking spray. This helps prevent any sticky situations later on. -
Combine Dry Ingredients:
In a large mixing bowl, whisk together the all-purpose flour, brown sugar, baking soda, salt, and ground cinnamon. This is your dry mix, and whisking helps to integrate everything evenly.Chef Tip: Sifting the flour first can add aeration and help create a lighter texture.
-
Mix Wet Ingredients:
In a separate bowl, whisk together the melted butter, buttermilk, and eggs until you have a smooth mixture. The melted butter will add richness to the bread, while the buttermilk gives it a slight tang. -
Combine Wet and Dry Mixes:
Pour the wet mixture into the dry ingredients, and gently fold them together. Remember, no need to overmix! A few lumps are totally fine. Overmixing can lead to a dense loaf, and we want soft and fluffy!Little Chef Hack: Use a spatula to fold instead of an electric mixer; it prevents a tough texture.
-
Add Nectarines:
Gently fold in the diced nectarines, making sure they are evenly distributed throughout the batter. -
Pour and Bake:
Pour the batter into your prepared loaf pan, smoothing the top. Pop it in the oven and bake for about 55-65 minutes. You’ll know it’s done when a toothpick inserted into the center comes out clean!Pro Tip: If the top starts browning too quickly, cover it loosely with aluminum foil halfway through baking to prevent over-browning.
-
Cool and Glaze:
Once baked, remove from the oven and let it cool in the pan for 10 minutes before transferring to a wire rack. While it cools, mix your powdered sugar with milk until you achieve a drizzling consistency. -
Drizzle Glaze:
Once the loaf is fully cooled, drizzle that sweet glaze over the top, and let it set for a few moments before slicing.
Serving Suggestions
When it comes to serving your Nectarine Bread, think of how you want to create that inviting atmosphere! Slice the loaf thick or thin, depending on your preference, and serve it warm with a pat of butter on the side. You can also pair it with tea or coffee for a lovely breakfast or afternoon treat. Sprinkle a few diced nectarines on the side for added flair!
Recipe Variations
Here are a few fun twists and swaps to make this recipe your own!
- Spiced Banana Nectarine Bread: Mash one ripe banana into the batter for added sweetness and moisture.
- Nutty Delight: Toss in 1/2 cup of chopped walnuts or pecans for a crunchy texture.
- Citrus Zing: Zest a lemon or orange into the batter to infuse a bright flavor.
- Gluten-Free Version: Use a gluten-free flour blend to accommodate your dietary needs—just be sure to follow the manufacturer’s instructions regarding liquid adjustments.
- Berry Infusion: Swap out some nectarines for blueberries or raspberries for a fruity explosion.
Chef’s Notes
This recipe has evolved over time, drawing inspiration from those cherished baking days with my grandmother. It’s easy to make and share, whether you’re hosting friends or just indulging with family. One of my funniest kitchen memories involved a bowl of flour spilling everywhere right before a holiday—I guess you could say I’ve had my share of “flour power!”
Remember, cooking is about joy and connection. This Nectarine Bread is not just a recipe; it’s a way to bring people together and create memories.
FAQs and Troubleshooting
Q: My bread didn’t rise! What went wrong?
A: Check your baking soda! If it’s old or expired, it might lose its potency. Always use fresh ingredients for the best results.
Q: Can I freeze Nectarine Bread?
A: Absolutely! Wrap the cooled loaf tightly in plastic wrap and aluminum foil. It will keep well for up to three months. Thaw in the fridge overnight, and enjoy the next day!
Q: Why is my bread dense?
A: Overmixing can lead to dense bread, as can insufficient leavening. Make sure to mix just until combined and double-check your baking soda’s freshness.
Q: Can I replace nectarines with other fruit?
A: Definitely! Peaches, apples, or even berries work wonderfully—just adjust the sweetness if needed.
Nutritional Info
(Optional, depending on your audience) A single slice of Nectarine Bread (approximately 1/12 of the loaf) has about 175 calories. This may vary depending on exact ingredients and portion size.
So there you have it, beloved foodies: a beautifully designed recipe for Nectarine Bread that’s as comforting as it is delicious. I can’t wait for you all to recreate this in your kitchens! If you do, drop a comment below or tag me on social media; I’d love to see your creations. Until next time, happy baking, and remember: good food isn’t about showing off; it’s about showing up and sharing love.
PrintNectarine Bread
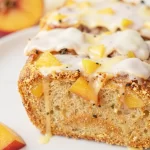
A delightful homemade Nectarine Bread bursting with juicy pieces of nectarines and warm aromas of cinnamon.
- Prep Time: 15 minutes
- Cook Time: 65 minutes
- Total Time: 80 minutes
- Yield: 12 servings 1x
- Category: Dessert
- Method: Baking
- Cuisine: American
- Diet: Vegetarian
Ingredients
- 2 cups all-purpose flour
- 1 cup brown sugar
- 1 teaspoon baking soda
- 1/2 teaspoon salt
- 1 teaspoon ground cinnamon
- 1/2 cup unsalted butter, melted
- 1 cup buttermilk
- 2 large eggs
- 1 cup diced nectarines
- 1/2 cup powdered sugar (for glaze)
- 1–2 tablespoons milk (for glaze)
Instructions
- Preheat your oven to 350°F (175°C) and grease a 9×5-inch loaf pan with butter or cooking spray.
- Combine dry ingredients: In a large mixing bowl, whisk together the all-purpose flour, brown sugar, baking soda, salt, and ground cinnamon.
- Mix wet ingredients: In a separate bowl, whisk together the melted butter, buttermilk, and eggs until smooth.
- Combine wet and dry mixes, folding gently to combine without overmixing.
- Add diced nectarines and gently fold until evenly distributed.
- Pour the batter into the prepared loaf pan and bake for about 55-65 minutes, checking doneness with a toothpick.
- Cool in the pan for 10 minutes before transferring to a wire rack.
- Drizzle glaze: Mix powdered sugar with milk to a drizzling consistency, then glaze the cooled loaf.
Notes
Can be served warm with butter or paired with tea or coffee.
Nutrition
- Serving Size: 1 slice
- Calories: 175
- Sugar: 12g
- Sodium: 200mg
- Fat: 6g
- Saturated Fat: 4g
- Unsaturated Fat: 2g
- Trans Fat: 0g
- Carbohydrates: 26g
- Fiber: 1g
- Protein: 3g
- Cholesterol: 30mg
Keywords: nectarine bread, summer dessert, fruit bread, baking

30g Protein Breakfast Sandwich: Low-Cal, Fast & Fresh
Start Your Day Right with a High-Protein Low-Calorie Breakfast Sandwich
Hello, food lovers! Today, we’re diving into a breakfast wonder that’s not only delicious but incredibly wholesome — the High Protein Low Calorie Breakfast Sandwich. Imagine sinking your teeth into a warm, fluffy sandwich that gives you 30 grams of protein while keeping those calories in check. Sounds dreamy, right? Well, it’s not just a dream; it’s a breakfast reality that I’ll help you create step by step.
Why Breakfast?
Breakfast is often touted as the most important meal of the day, and for good reason! It’s a chance to fuel your body after a long night’s rest. When it comes to breakfast sandwiches, I’ve always believed that you don’t have to compromise on flavor or nutrition. This sandwich keeps it simple with high-quality ingredients while packing a punch of protein — ideal for anyone looking to kickstart their day with energy and satisfaction!
A Fond Memory of Breakfast
Let me take you back to one of my favorite mornings. I was home for the holidays, and the kitchen was a flurry of activity as the smell of coffee wafted through the air. My mom would make her signature breakfast sandwiches — layers of egg, bacon, and gooey cheese. We’d gather around the table, battling for the first sandwich before heading out for a long day of festivities. Those mornings were all about connection, laughter, and great food. This High Protein Low Calorie Breakfast Sandwich is a modern take on that nostalgia, allowing us to pack in the protein while reminiscing about those heartwarming moments.
Ingredients
Here’s what you need to whip up this protein-packed delight:
-
1 Whole Wheat English Muffin
- A nutritious base that is higher in fiber than white bread. You can also use a low-carb English muffin if you’re looking to cut down further on calories!
-
½ Cup Liquid Egg Whites
- Churned from egg whites, these are low in calories while providing a significant protein boost. You can substitute with whole eggs if you prefer the richer taste, but keep in mind that this will increase the calorie count.
-
1 Slice Reduced-Fat Cheddar Cheese
- Who doesn’t love melted cheese? This reduced-fat option keeps flavor intact while saving you some calories. If you’re dairy-free, feel free to swap in your favorite plant-based cheese!
-
2 Slices Turkey Bacon
- A leaner bacon alternative that’s savory and satisfying. If you love traditional bacon, you can use turkey bacon for a lower-calorie option, but it won’t have quite the same crispiness.
-
Cooking Spray
- A light spray for the skillet to prevent sticking. You could also use olive oil for cooking, just a teaspoon or so will do.
-
Ketchup or Sauce of Choice
- Adds that essential touch of flavor! You can also take this in a healthier direction by using salsa or avocado for a fresh twist.
Step-by-Step Instructions
Now, let’s get cooking! Follow these simple steps to create your breakfast masterpiece:
-
Prep Your Ingredients:
- Gather all your ingredients before you start cooking. This ensures everything goes smoothly and keeps your kitchen nice and tidy. Set your cooking spray, English muffin, egg whites, cheese, and turkey bacon at arm’s reach.
-
Cook the Turkey Bacon:
- Heat a non-stick skillet over medium heat and spray it lightly with cooking spray. Add the turkey bacon slices and cook for about 4-5 minutes. Flip them halfway through until they’re golden and crispy. This is your savory flavor punch for the sandwich!
-
Prepare the Egg Whites:
- In the same skillet, remove the cooked bacon, but don’t clean it just yet! The residual flavor will infuse into the egg whites. Pour in your ½ cup of liquid egg whites and let them cook undisturbed for about 2-3 minutes.
- Stir occasionally until the eggs are set but still soft. You can sprinkle some salt and pepper for seasoning — a little goes a long way!
-
Melt the Cheddar Cheese:
- Right before you take the eggs off the heat, lay the slice of reduced-fat cheddar cheese on top of the scrambled egg whites. Cover the skillet for a minute to allow the cheese to melt beautifully.
-
Toast the English Muffin:
- While the cheese is melting, slice your whole wheat English muffin in half and pop it in a toaster until golden brown. If you’re feeling indulgent, you could also throw it in the skillet for a minute or two!
-
Assemble Your Sandwich:
- Now for the fun part: assembling your sandwich! Start with the bottom half of the toasted muffin, place the cheesy egg whites on top, add your crispy turkey bacon, and drizzle with your sauce of choice. Finish with the muffin’s top half and voilà, beautiful breakfast bliss!
Serving Suggestions
For the perfect presentation, I recommend serving your breakfast sandwich on a fresh plate. You can add a side of fresh fruit or a small salad to brighten up your plate. If you’re feeling fancy, a sprig of fresh parsley or a dash of hot sauce on top adds a delightful pop of color and flavor!
Recipe Variations
Here are a few creative twists on this breakfast classic:
- Mediterranean Twist: Add spinach and diced tomatoes to the egg whites for a refreshing flavor combo.
- Southwest Style: Mix in some black beans and avocado, and swap the turkey bacon for a spicy chorizo.
- Veggie Lovers: Load up with roasted bell peppers and mushrooms for a hearty vegetarian option.
- Cheesy Italian: Replace cheddar with mozzarella and add a spoonful of marinara sauce for an Italian flair!
- Sweeten the Deal: For a sweeter touch, try adding a dollop of honey or a smear of almond butter on your muffin.
Chef’s Notes
This recipe has evolved over the years to meet my busy lifestyle without losing that breakfast comfort we all love. I started with standard bacon and scrambled eggs but quickly realized there’s beauty in lightening things up. One of my favorite kitchen stories involves a particularly chaotic morning when I accidentally grabbed the maple syrup instead of the ketchup. The unexpected sweetness paired with the savory dish opened my eyes to endless flavor possibilities! That’s the magic of cooking; it’s always an adventure.
FAQs and Troubleshooting
-
Can I make this sandwich ahead of time?
- Absolutely! You can prepare the ingredients and assemble the sandwich, then just heat it briefly in the microwave when you’re ready to eat. It might lose a little crispiness, but you’ll still enjoy the flavors!
-
What if I’ve never cooked egg whites before?
- No worries! Cooking egg whites is similar to cooking whole eggs. Just make sure they’re cooked until they’re no longer runny, and play with the seasoning to suit your taste.
-
Can I freeze this sandwich?
- Yes, you can! Wrap it tightly in foil and store it in the freezer. When you’re ready to eat, just heat it directly in the oven or microwave from frozen until heated through.
-
What is the calorie count for this sandwich?
- On average, this sandwich clocks in around 300 calories, and with the 30g of protein, it’s a fantastic option to fuel your day!
Eating doesn’t have to be complicated; it can be quick, easy, and still packed with flavor and nutrition. Grab your apron, gather your ingredients, and let this High Protein Low Calorie Breakfast Sandwich be a staple in your morning routine. Here’s to delicious mornings and beautiful moments shared around the table! Happy cooking!
PrintHigh Protein Low Calorie Breakfast Sandwich

A delicious and nutritious breakfast sandwich packed with 30 grams of protein while keeping the calories low.
- Prep Time: 10 minutes
- Cook Time: 10 minutes
- Total Time: 20 minutes
- Yield: 1 serving 1x
- Category: Breakfast
- Method: Cooking
- Cuisine: American
- Diet: Low-Calorie, High-Protein
Ingredients
- 1 Whole Wheat English Muffin
- ½ Cup Liquid Egg Whites
- 1 Slice Reduced-Fat Cheddar Cheese
- 2 Slices Turkey Bacon
- Cooking Spray
- Ketchup or Sauce of Choice
Instructions
- Prep your ingredients: Gather all your ingredients before you start cooking.
- Cook the turkey bacon: Heat a non-stick skillet over medium heat and spray it lightly with cooking spray. Add the turkey bacon slices and cook for about 4-5 minutes, flipping halfway.
- Prepare the egg whites: In the same skillet, remove the cooked bacon. Pour in your ½ cup of liquid egg whites and cook undisturbed for about 2-3 minutes. Stir occasionally until the eggs are set but still soft.
- Melt the cheddar cheese: Lay the slice of reduced-fat cheddar cheese on top of the scrambled egg whites and cover the skillet for a minute to melt the cheese.
- Toast the English muffin: Slice your muffin in half and toast until golden brown.
- Assemble your sandwich: Start with the bottom of the toasted muffin, add the cheesy egg whites, turkey bacon, drizzle with your sauce, and top with the muffin’s top half.
Notes
You can make this sandwich ahead of time and heat it briefly in the microwave. It can also be frozen.
Nutrition
- Serving Size: 1 sandwich
- Calories: 300
- Sugar: 2g
- Sodium: 600mg
- Fat: 10g
- Saturated Fat: 3g
- Unsaturated Fat: 5g
- Trans Fat: 0g
- Carbohydrates: 30g
- Fiber: 5g
- Protein: 30g
- Cholesterol: 0mg
Keywords: breakfast, sandwich, high-protein, low-calorie, healthy
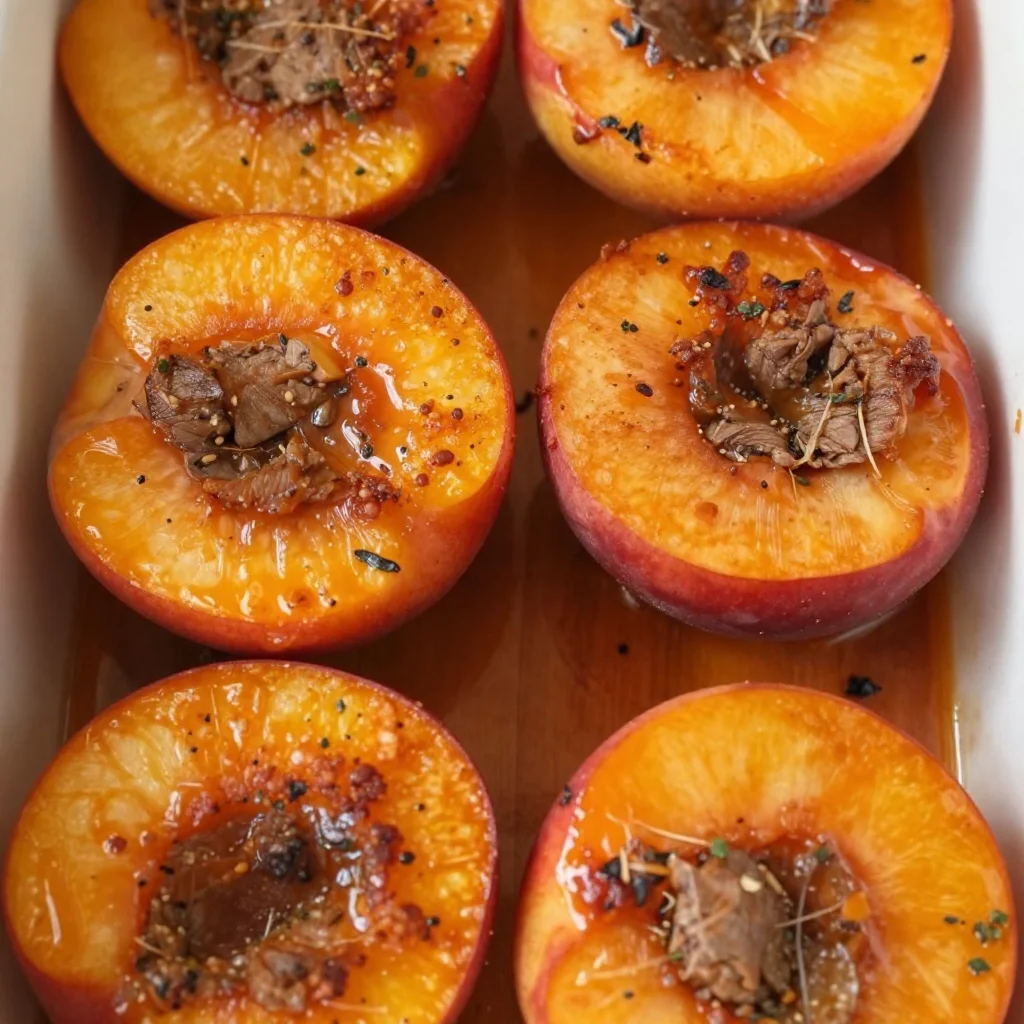
Summer-Ready Baked Nectarines with Vanilla Ice Cream
Baked Nectarines with Vanilla Ice Cream: A Summer Delight
Summer is the season that brings a wonderful cascade of vibrant fruits bursting with flavor—hydration, sweetness, and sunshine in every bite. Among those refreshing gifts of nature, nectarines hold a special place in my heart. Their delicate skin hides juicy, fragrant flesh that can transform effortlessly from a simple snack into an elegant dessert. Today, I’m thrilled to share my favorite recipe for Baked Nectarines with Vanilla Ice Cream that is sure to impress and delight your family and friends or serve as a special treat for yourself!
A Sweet Memory
I remember summer evenings at my grandmother’s house, where the air would be filled with the scent of freshly baked goods. Every Saturday, we’d gather in her kitchen, where we rolled up our sleeves and dug into batches of fruit crisps, pies, and all kinds of goodies. One summer, she introduced us to her baked nectarines, which she’d drizzle with honey and sprinkle with cinnamon—a combination that ignited my taste buds with joy.
Watching the nectarines caramelize in the oven made the anticipation even sweeter. And when she served them warm with a scoop of creamy vanilla ice cream, it was like magic on a spoon! Those cherished memories of laughter, learning, and indulging in summer’s bounty are why I adore this dessert. Today, I continue that tradition, making it for my family and friends, inviting them to create their own sweet memories around the table.
Ingredients
Here’s everything you’ll need for this delightful dish:
-
Nectarines: The stars of this dessert! Choose ripe, firm nectarines for the best flavor. If nectarines are hard to find, peaches make an excellent substitute.
-
Cinnamon: This warm spice adds a cozy, aromatic depth. If you’re not a fan, nutmeg or allspice are great alternatives.
-
Honey: A natural sweetener that enhances the nectarines’ flavor profile. You can swap it with maple syrup or agave nectar for a vegan option.
-
Vanilla Ice Cream: The rich creaminess balances out the warm, baked nectarines. For a dairy-free option, consider coconut or almond milk ice cream.
Step-by-Step Instructions
Now let’s get cooking! Follow these steps, and we’ll have those baked nectarines ready in no time!
-
Preheat Your Oven: Start by preheating your oven to 375°F (190°C). This will provide the perfect climate for our nectarines to become tender and caramelized.
-
Prepare the Nectarines: Wash your nectarines thoroughly and cut them in half. Remove the pit and place the halves cut side up in a baking dish. As you cut, let your knife glide through the flesh with ease, enjoying the vibrant juice that drips from each slice.
-
Sprinkle with Cinnamon: Generously sprinkle ground cinnamon over the nectarines. This spice not only enhances flavor but also creates a lovely aroma that will fill your kitchen. If you’re feeling adventurous, consider adding a tiny pinch of cayenne pepper for a surprising twist!
-
Drizzle with Honey: Now, take your honey and drizzle it all over the nectarines. Make sure to coat them generously, as it will create a delicious caramelization during baking. Remember, a little honey goes a long way in sweetening the dish, but feel free to adjust to taste.
-
Bake: Slide the baking dish into your preheated oven and bake for 20 to 25 minutes. Keep an eye on them; you want them to become soft and bubbly, with caramelizing edges—but not mushy! The nectarines are ready when they yield easily to a fork.
-
Serve: Remove the baking dish from the oven and let it cool for a few minutes. For the final touch, scoop a generous serving of vanilla ice cream on top of each warm nectarine half. The ice cream will melt into the warm fruit—pure bliss!
Serving Suggestions
To make this dish visually stunning, serve the baked nectarines on individual dessert plates. Don’t forget to drizzle some of the delicious syrup from the baking dish over the top and finish with a fresh mint leaf for a pop of color. It’s an elegant touch that elevates even the simplest dessert!
Recipe Variations
- Nutty Crumble: Add a sprinkle of granola or chopped nuts like almonds or pecans over the nectarines before baking for added crunch.
- Alcoholic Twist: Drizzle some bourbon over the nectarines before baking for an adult version that adds sophistication.
- Different Fruits: Feel free to mix it up! Try using plums, peaches, or even apples or pears for a delightful twist on this recipe.
- Herbal Infusion: Infuse your honey with fresh lavender or rosemary to add a unique herbal note!
- Vegan Delight: Swap the vanilla ice cream with a coconut or almond-based ice cream for a completely dairy-free treat.
Chef’s Notes
This isn’t just any ordinary dessert—it’s a canvas for creativity! Each time I make this recipe, I find myself experimenting with new combinations of spices and toppings. I’ve even served it with a splash of dessert wine for a fun weekend gathering. Plus, it’s super adaptable to whatever fruit is in season! So don’t hesitate to play and make this dessert your own.
FAQs and Troubleshooting
1. How ripe should my nectarines be?
You want them slightly firm but not hard—like with peaches, go for a little give when you gently squeeze them. Avoid completely squishy ones, as they’ll turn to mush in the oven.
2. Can I make this dish in advance?
While baked nectarines are best served fresh, you can prepare them up to the baking step and store them in the fridge. When you’re ready, just pop them in the oven!
3. My nectarines turned out mushy. What did I do wrong?
Overbaking can cause your nectarines to become mushy. Keep a close eye on them during the cooking process; once fork-tender and bubbly, it’s time to take them out!
4. Can I use frozen nectarines?
While fresh is ideal, you can indeed use frozen ones! Just be sure to thaw them and drain off excess liquid before proceeding with the recipe to avoid a soggy result.
Nutritional Info
This dessert is all about balance. Each serving offers a delightful combination of fresh fruit, natural sugars, and creamy goodness. While I won’t dive into specific nutritional values today, it’s safe to say that this sweet treat is a lovely way to indulge while enjoying the health benefits of fruit!
Conclusion
As summer reaches its peak, delight in the pleasures of simple, beautiful desserts that bring joy to your table. Baked Nectarines with Vanilla Ice Cream showcase the best of summer flavors while being easy enough for any culinary enthusiast! Remember, this recipe is all about the experience—so gather your loved ones, tie on your apron, and let the good times roll!
I can’t wait to hear your stories as you bring this recipe to life. Remember, cooking is about connection, sharing, and those beautiful moments that make life richer. Happy cooking!
PrintBaked Nectarines with Vanilla Ice Cream
A delicious dessert featuring juicy nectarines baked to perfection and served warm with creamy vanilla ice cream.
- Prep Time: 15 minutes
- Cook Time: 25 minutes
- Total Time: 40 minutes
- Yield: 4 servings 1x
- Category: Dessert
- Method: Baking
- Cuisine: American
- Diet: Vegetarian
Ingredients
- 4 ripe nectarines
- 1 tsp ground cinnamon
- 2 tbsp honey
- Vanilla ice cream for serving
Instructions
- Preheat your oven to 375°F (190°C).
- Prepare the nectarines by washing them and cutting them in half; remove the pit.
- Sprinkle ground cinnamon over the nectarines.
- Drizzle honey all over the nectarines.
- Bake for 20 to 25 minutes until soft and bubbly.
- Serve with a generous scoop of vanilla ice cream on top.
Notes
For a vegan option, substitute honey with maple syrup or agave nectar, and use dairy-free ice cream.
Nutrition
- Serving Size: 1 serving
- Calories: 280
- Sugar: 22g
- Sodium: 25mg
- Fat: 8g
- Saturated Fat: 4g
- Unsaturated Fat: 3g
- Trans Fat: 0g
- Carbohydrates: 49g
- Fiber: 3g
- Protein: 3g
- Cholesterol: 30mg
Keywords: baked nectarines, dessert, summer recipe, vanilla ice cream, easy dessert