
One-Pan Million-Dollar Italian Lasagna for Weeknights
Million Dollar Italian Lasagna: A Heartwarming Feast
Hello, fellow foodies! Today, I’m excited to take you on a delicious journey through the world of comfort food — specifically, my Million Dollar Italian Lasagna. This dish holds a special place in my heart and kitchen. It’s one of those recipes that brings family and friends together, spilling stories and laughter over layers of cheesy goodness. So, grab your apron and let’s dive into this ultimate Italian classic that’s worthy of a celebratory feast but simple enough for a cozy weeknight dinner.
A Slice of My Past
Growing up, Sunday dinners were a big deal in my family. My mom would spend the afternoon in the kitchen, and you could smell the heavenly aroma of marinara sauce wafting through the house. One particular Sunday, my mom decided to host a family gathering, and lasagna was on the menu. I remember peeking over the counter, my little fingers reaching for the cheese, and her playfully swatting me away.
As the layers of noodles, meat, and sauce came together, I was in awe of my mom’s culinary skills. “This isn’t just a dish; it’s a celebration,” she said, and she was right! That lasagna became our family tradition, and every bite reminded us of the love and joy we shared. Now, I’m so thrilled to continue that tradition and put my spin on it with this Million Dollar Italian Lasagna. It’s rich, flavorful, and something I hope you’ll come to cherish just as much as I do!
Ingredients You’ll Need
Here’s what you’ll need to create a show-stopping Million Dollar Italian Lasagna:
- Lasagna noodles: These are the backbone of your dish! You can use traditional, no-boil, or whole wheat noodles depending on your preference.
- Ground beef: A classic choice for a robust flavor. You can substitute with ground turkey, chicken, or even plant-based meat if you’re looking for a lighter option.
- Ricotta cheese: This creamy cheese provides richness and a lovely texture. If you need a substitute, cottage cheese or a vegan ricotta made from blended tofu can work wonders.
- Mozzarella cheese: Nothing beats the gooey goodness of melty mozzarella. For a twist, try using smoked mozzarella for added flavor!
- Marinara sauce: Opt for a high-quality jar or make your own from scratch. I like to add a splash of red wine for depth of flavor; feel free to skip this if you prefer.
- Parmesan cheese: This parmesan will elevate your dish with its salty, nutty flavor. Pecorino Romano is a great alternative if you want something with a bit more kick.
- Eggs: A binding agent for the ricotta mixture; they help keep the layers intact. If you’re vegan, you can use a flax egg instead.
- Garlic: For that aromatic flair! Fresh garlic is ideal, but minced garlic or garlic powder works in a pinch.
- Onion: A sweet and savory addition that builds on the flavor. Shallots could also be a lovely substitute if you have them on hand.
- Italian herbs: A blend of oregano, basil, and thyme adds a fragrant punch. You can use fresh herbs for a brighter taste, or dried if that’s what you have.
- Salt and pepper: Essential seasonings for rounding out the flavors. Always be generous with seasoning but taste as you go!
Step-by-Step Instructions
Now, let’s get down to the nitty-gritty of making this Million Dollar Lasagna! Follow these simple steps to create a dish that’ll dazzle your guests.
-
Preheat your oven: Start by preheating your oven to 375°F (190°C). This ensures even baking and that your lasagna is bubbling and golden at the end.
-
Cook the noodles: If you’re using regular lasagna noodles, bring a large pot of salted water to a boil and cook them according to the package instructions until al dente. No-boil noodles can be used directly; just ensure you have enough sauce to moisten them.
-
Sauté the aromatics: In a large skillet, add a splash of olive oil over medium heat. Toss in chopped onions and minced garlic, sautéing until they’re translucent and fragrant. This step brings out the natural sweetness of the onion and the aroma of garlic — trust me, it’s a must!
-
Brown the meat: Add in your ground beef, breaking it up with a spoon as it cooks. Season with salt, pepper, and Italian herbs. Cook until browned, about 5-7 minutes. Drain excess fat if needed, and add in your marinara sauce. Simmer for a few minutes while you prepare the ricotta mixture.
-
Make the ricotta mixture: In a bowl, combine the ricotta cheese, eggs, and a pinch of salt and pepper. Stir until smooth. This cheesy blend will be your layer of luxury!
-
Assemble your lasagna: In a 9×13 inch baking dish, spread a thin layer of the meat sauce on the bottom. Then, place a layer of lasagna noodles on top. Spread half of the ricotta mixture over the noodles and sprinkle half of the mozzarella cheese. Repeat layers, ending with a final layer of meat sauce and a generous sprinkle of mozzarella and parmesan on top.
-
Bake it beautiful: Cover your lasagna with aluminum foil (avoid touching the cheese!). Bake for 25 minutes, then remove the foil and bake for an additional 15 minutes, or until bubbly and golden. Let it rest for 10-15 minutes before slicing; this helps the layers set, ensuring a beautiful slice every time!
Serving Suggestions
When it comes to serving my Million Dollar Italian Lasagna, I love to keep it simple yet elegant. Serve it with a fresh side salad drizzled with vinaigrette and some crusty garlic bread for a complete meal. You can also offer grated parmesan on the side for that extra cheesy finish. And don’t forget to pour a glass of red wine; it’s the perfect pairing to elevate the experience!
Recipe Variations
Here are some fun variations to mix things up in your lasagna game:
- Spinach and Mushroom Lasagna: Add layers of sautéed spinach and mushrooms for a delicious veggie-packed twist.
- Pesto Lasagna: Swap in some basil pesto in place of some of the marinara for a vibrant flavor boost.
- Gluten-Free Lasagna: Use gluten-free noodles or sliced zucchini for a lighter, veggie-forward version.
- Spicy Sausage Lasagna: Replace the ground beef with spicy Italian sausage for a bold kick.
- Vegan Lasagna: Use a plant-based ground meat alternative, vegan ricotta (like blended cashews or tofu), and dairy-free mozzarella.
Chef’s Notes
Over time, I’ve learned that lasagna loves a little personalization. Sometimes I toss in whatever leftover veggies I have in the fridge. It’s all about making it your own, and honestly, that’s where the magic happens! Plus, when I make extra, it never goes to waste. Leftover lasagna makes for the best Sunday brunch treat—just reheat and enjoy!
FAQs and Troubleshooting
1. My lasagna noodles are sticking together! How do I prevent this?
- Make sure to stir the noodles while they cook to prevent sticking. After draining, toss them with a splash of olive oil.
2. Why is my lasagna watery?
- This can happen if there’s not enough sauce to absorb or if it has too many watery ingredients (like fresh veggies). Try adding less sauce or using no-boil noodles that absorb moisture better.
3. How can I make my lasagna ahead of time?
- You can assemble your lasagna a day in advance and refrigerate it. Just make sure to add a little extra baking time if baking straight from the fridge.
4. What if I didn’t let my lasagna rest?
- It might be a little messy, but there’s nothing wrong with a “rustic” lasagna! It still tastes amazing, so don’t worry too much if it’s not perfect.
Nutritional Info
Note: This recipe serves 8 and is made rich with the classic comforting flavors of Italian cuisine. For nutritional information, you might need to calculate based on specific brands and adjustments. Remember, it’s all in moderation!
There you have it, my friend — the perfect Million Dollar Italian Lasagna that’s sure to warm hearts and fill bellies! Cooking should be fun and filled with love, so get your apron on, and remember, it’s always about the experience and the memories you create around the table. Happy cooking!
PrintMillion Dollar Italian Lasagna

A heartwarming Italian lasagna recipe that brings family and friends together with layers of cheesy goodness.
- Prep Time: 30 minutes
- Cook Time: 40 minutes
- Total Time: 70 minutes
- Yield: 8 servings
- Category: Main Course
- Method: Baking
- Cuisine: Italian
- Diet: Meat-based
Ingredients
- Lasagna noodles
- Ground beef
- Ricotta cheese
- Mozzarella cheese
- Marinara sauce
- Parmesan cheese
- Eggs
- Garlic
- Onion
- Italian herbs
- Salt
- Pepper
Instructions
- Preheat your oven to 375°F (190°C).
- Cook the noodles in a large pot of salted water until al dente.
- Sauté chopped onions and minced garlic in olive oil until translucent.
- Brown the ground beef, seasoning with salt, pepper, and Italian herbs, then stir in marinara sauce.
- Make the ricotta mixture by combining ricotta cheese, eggs, and seasoning.
- Assemble the lasagna in a 9×13 inch baking dish, layering meat sauce, noodles, ricotta mixture, and mozzarella.
- Bake covered with foil for 25 minutes, then remove foil and bake for an additional 15 minutes.
- Let it rest for 10-15 minutes before slicing.
Notes
Serve with a fresh side salad and crusty garlic bread. Grated parmesan on the side enhances the experience.
Nutrition
- Serving Size: 1 serving
- Calories: 450
- Sugar: 6g
- Sodium: 600mg
- Fat: 22g
- Saturated Fat: 10g
- Unsaturated Fat: 8g
- Trans Fat: 0g
- Carbohydrates: 36g
- Fiber: 2g
- Protein: 28g
- Cholesterol: 90mg
Keywords: lasagna, Italian, comfort food, family recipe, cheesy

One-Pan Creamy Chorizo Pasta in 20-Minute Weeknight Dinner
Creamy Chorizo Pasta: A Dish That Dances on Your Taste Buds
Hello, lovely foodies! Today, we’re diving into a recipe that’s not just delicious but also embodies everything I love about cooking: simplicity, flavor, and a touch of warmth. This Creamy Chorizo Pasta is one of those dishes that makes the kitchen smell simply irresistible, bringing everyone to the table with anticipation. Ready to impress your loved ones? Let’s get cooking!
A Flavorful Flashback
Let me take you back to one of my favorite kitchen memories: the first time I discovered chorizo. It wasn’t just a revelation; it was a culinary awakening! I was at a friend’s house, and she was whipping up this vibrant dish that had the whole family gathered around the stove, chatting, laughing, and eagerly awaiting the meal.
As she sautéed the chorizo, the spicy aroma filled the air, wrapping around us like a cozy blanket. I couldn’t help but ask for the recipe, and she smiled, saying, “It’s just pasta, but with a little love and some spicy sausage!”
That night, we dined with bowls heaped high and served family-style. Each bite was a burst of flavor, creamy yet rich with that intoxicating chorizo kick. That moment ignited my passion for creating dishes that bring people together, and I’ve adapted and perfected this Creamy Chorizo Pasta ever since.
Ingredients
Here’s what you’ll need to recreate that magical moment:
-
14 ounces rigatoni: This pasta shape holds sauce beautifully, making every bite delicious. If you’re in a pinch, penne or fusilli works just as well!
-
1 tbsp unsalted butter: Butter adds richness and helps to develop a deep flavor. You can use olive oil for a lighter option or if you prefer a vegan alternative, try coconut oil.
-
11 ounces spicy chorizo sausage: This is the hero of the dish! You can use fresh chorizo for a more intense flavor. For a lighter option, turkey chorizo works like a charm.
-
6 garlic cloves (minced): Garlic is the backbone of flavor. For those who want a milder taste, roasted garlic can substitute great here.
-
4 tbsp tomato paste: This adds depth and sweetness. If you don’t have paste, crushed tomatoes can work, but you’ll need to adjust the liquid in the sauce.
-
1 tsp dried oregano: A classic herb that complements the chorizo beautifully. Use Italian seasoning as a substitute for a more herby profile.
-
½ tsp salt: Season to taste. Always remember: it’s easier to add than to take away.
-
½ tsp black pepper: Freshly cracked is the best! If you’re feeling adventurous, a pinch of red pepper flakes adds a delightful kick.
-
¾ cup heavy cream: This gives the dish its creamy texture. For a lighter version, half-and-half or even coconut milk works well.
-
½ cup grated Parmesan: Cheese makes everything better! You can substitute with Pecorino Romano for a sharper flavor.
-
2 tbsp chopped parsley (optional): A pop of color and freshness! If you don’t have parsley, fresh basil or arugula are excellent substitutes.
Step-by-Step Instructions
Alright, let’s roll up those sleeves and get cooking:
-
Cook the Pasta:
- Start by boiling a large pot of salted water. Add your rigatoni, cooking until al dente (about 10-12 minutes). Make sure to stir occasionally. You want it to be firm enough to hold up against the creamy sauce but not so hard that it’s unpleasant. Save a cup of pasta water for later!
-
Sauté the Chorizo:
- While the pasta cooks, grab a large skillet and melt the butter over medium heat. Once it’s foamy, add the spicy chorizo. Sauté for about 5-7 minutes, breaking it up with your spatula. You want it browned and slightly crispy. Oh, the smell wafting from the pan is going to make you (and anyone nearby) hungry!
-
Add Garlic and Tomato Paste:
- Toss in the minced garlic, stirring for about 30 seconds until fragrant. Be careful not to let it brown too much—it can turn bitter. Next, add in the tomato paste and oregano. Stir everything together to coat the chorizo. This combo will form the base of our sauce and pack in so much flavor.
-
Incorporate Heavy Cream:
- Pour in the heavy cream slowly, stirring to combine. Allow it to simmer for about 3-5 minutes, thickening beautifully. If it gets too thick for your liking, add that reserved pasta water until it reaches your desired consistency.
-
Mix in the Pasta:
- Drain your rigatoni (remember, save that pasta water) and add it directly into the chorizo sauce. Toss to coat every piece of pasta, getting all that creamy goodness in every nook and cranny.
-
Finishing Touches:
- Stir in the grated Parmesan cheese, mixing until it’s gooey and melty. If the sauce seems a bit too thick, now’s the time to add a splash more of that reserved pasta water. Season with salt and pepper to taste.
-
Garnish and Serve:
- Before you dish up, sprinkle with chopped parsley and any additional cheese you fancy. A light sprinkle of extra Parmesan adds that restaurant-quality touch!
Serving Suggestions
For plating, I love serving this Creamy Chorizo Pasta family-style in a large bowl. Tossing the pasta and sauce together creates a gorgeous marbling effect that’s visually appealing. You can also serve it in individual bowls topped with a drizzle of olive oil and a sprinkle of parsley for that extra wow factor. Pair it with a side of garlic bread or a fresh green salad to elevate your meal.
Recipe Variations
Feel like switching things up? Try one of these fun variations!
-
Add Vegetables: Toss in some sautéed spinach, peas, or roasted red peppers for added nutrients and color.
-
Spicy Twist: Spice it up even more with jalapeños or add a dash of hot sauce while cooking the sauce for that extra kick.
-
Cheesy Delight: Mix in a blend of cheeses, like mozzarella or goat cheese, for a creamy, gooey texture.
-
One-Pot Wonder: For fewer dishes, add uncooked pasta directly into your chorizo sauce, adding enough broth to cook the pasta right in the sauce!
-
Gluten-Free Option: Use gluten-free pasta for the same deliciousness without the gluten!
Chef’s Notes
This Creamy Chorizo Pasta has evolved quite a bit over time! Initially, it was a simple concoction thrown together during a last-minute dinner party. However, after several experiments (and some delightful mishaps), I’ve found the balance of flavors that truly reflects my cooking philosophy: inviting, warm, and a touch fancy—but never overcomplicated.
I remember one time, I accidentally grabbed the cayenne instead of the black pepper. Let’s just say, it became a rather fiery experience that everyone laughs about now! Cooking is all about making memories, right?
FAQs and Troubleshooting
-
My sauce turned out too thick; what can I do?
- No worries! If your sauce is too thick, gradually add some reserved pasta water or additional cream to reach your desired consistency.
-
I’m sensitive to spice; what can I use instead of chorizo?
- Try using mild Italian sausage or turkey sausage that’s free of any added spice. You’ll miss the kick chorizo provides, but it’ll still be a hearty dish!
-
Can I prepare this ahead of time?
- Absolutely! You can make the sauce ahead of time and reheat when you’re ready to serve. Just undercook the pasta slightly so that it doesn’t become mushy when mixing everything together.
-
What if I don’t have tomato paste?
- Not to fret! If you’re out of tomato paste, crushed tomatoes will do, but reduce the amount of liquid in your sauce to prevent it from getting too watery.
Nutritional Info
If you’re counting calories or following dietary restrictions, here’s a rough breakdown of nutrition per serving of this delightful dish (based on 6 servings):
- Calories: 520
- Fat: 29g
- Carbohydrates: 47g
- Protein: 20g
Enjoy this meal and gather those you love around your table. Remember, good food is all about showing up—it’s the time spent together that makes it truly special. Let’s get that apron tied and food on the table! Until next time, happy cooking from my kitchen to yours!
PrintCreamy Chorizo Pasta

A creamy and flavorful pasta dish featuring spicy chorizo, perfect for gathering loved ones around the table.
- Prep Time: 10 minutes
- Cook Time: 20 minutes
- Total Time: 30 minutes
- Yield: 4 servings 1x
- Category: Main Course
- Method: Stovetop
- Cuisine: Italian
- Diet: Meat
Ingredients
- 14 ounces rigatoni
- 1 tbsp unsalted butter
- 11 ounces spicy chorizo sausage
- 6 garlic cloves (minced)
- 4 tbsp tomato paste
- 1 tsp dried oregano
- ½ tsp salt
- ½ tsp black pepper
- ¾ cup heavy cream
- ½ cup grated Parmesan
- 2 tbsp chopped parsley (optional)
Instructions
- Cook the Pasta: Start by boiling a large pot of salted water. Add your rigatoni, cooking until al dente (about 10-12 minutes). Save a cup of pasta water for later!
- Sauté the Chorizo: While the pasta cooks, grab a large skillet and melt the butter over medium heat. Add the spicy chorizo and sauté for about 5-7 minutes.
- Add Garlic and Tomato Paste: Toss in the minced garlic, stirring for about 30 seconds until fragrant. Next, add in the tomato paste and oregano.
- Incorporate Heavy Cream: Pour in the heavy cream slowly, stirring to combine. Allow it to simmer for about 3-5 minutes.
- Mix in the Pasta: Drain your rigatoni and add it directly into the chorizo sauce. Toss to coat every piece of pasta.
- Finishing Touches: Stir in the grated Parmesan cheese, mixing until it’s gooey and melty. Season with salt and pepper to taste.
- Garnish and Serve: Sprinkle with chopped parsley and any additional cheese you fancy.
Notes
Feel free to add sautéed vegetables for extra nutrition or switch to turkey chorizo for a lighter option.
Nutrition
- Serving Size: 1 serving
- Calories: 520
- Sugar: 3g
- Sodium: 800mg
- Fat: 29g
- Saturated Fat: 12g
- Unsaturated Fat: 10g
- Trans Fat: 0g
- Carbohydrates: 47g
- Fiber: 3g
- Protein: 20g
- Cholesterol: 80mg
Keywords: Creamy pasta, Chorizo pasta, Comfort food, Pasta dish, Quick meal
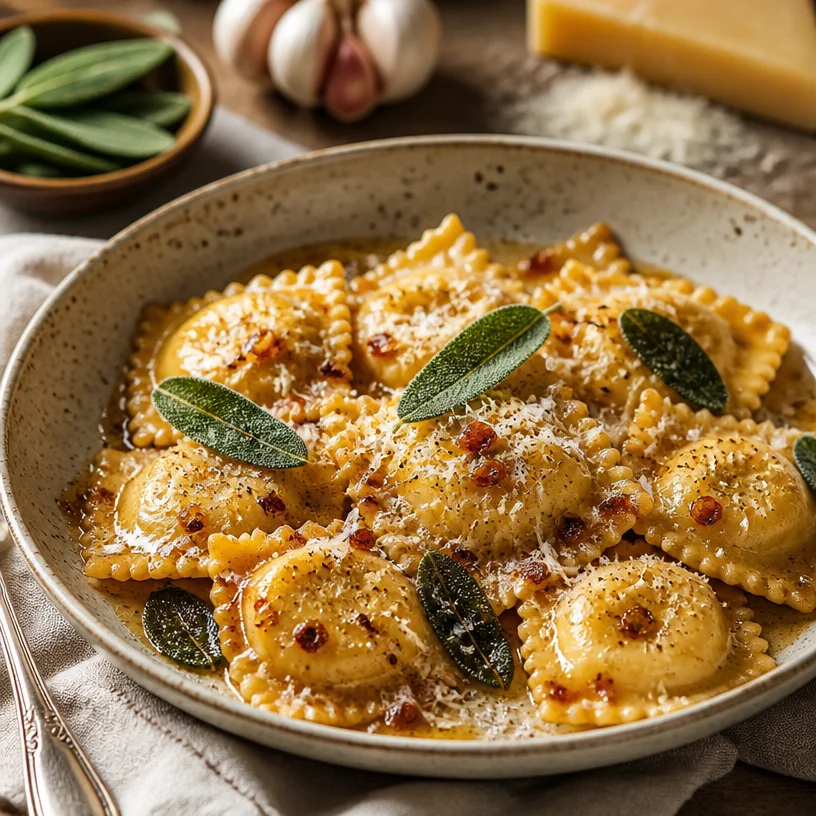
Weeknight Pumpkin Ravioli with Garlic Brown Butter Sauce
Homemade Pumpkin Ravioli with Garlic Brown Butter
Introduction
Hello, fellow food lovers! Today, I’m thrilled to take you on a delightful culinary journey as we whip up a dish that’s perfect for those cozy fall evenings — Homemade Pumpkin Ravioli with Garlic Brown Butter. Imagine the aroma of nutmeg and garlic wafting through your kitchen, the golden filling of pumpkin mingling with creamy ricotta, all lovingly enveloped in tender pasta. This dish is not just a meal; it’s a celebration of warmth, togetherness, and the simple pleasure of creating something special from scratch.
In my kitchen at Ivory Apron, I’ve come to love experimenting with seasonal ingredients, and pumpkin is a true star of the fall harvest. Its creamy texture and naturally sweet flavor make it the perfect filling for ravioli. Not to mention, pairing it with a luscious garlic brown butter sauce elevates the dish to new heights! Trust me, this recipe is as much about the joy of cooking as it is about the end result.
Whether you’re looking to impress at your next dinner party or just delighting in a quiet evening at home, making your own ravioli can feel elegant and satisfying. Don’t worry if you’ve never made pasta before — I’m here to guide you every step of the way. So, roll up your sleeves, tie on that ivory apron, and let’s dive into this delightful dish together!
Personal Story
Ah, the nostalgia of homemade ravioli! I still remember the first time I tried my hand at making pasta. I was a young chef-in-training, deeply inspired by my grandmother’s kitchen. One autumn afternoon, she invited me to join her in crafting ravioli filled with her famous ricotta and spinach. Watching her hands deftly work the dough was mesmerizing — it was like she was dancing with the pasta.
We filled those little pillows of joy with love and laughter, and when they hit the boiling water, I was mesmerized watching them float to the surface! The meal that followed was filled with delightful stories and cozy warmth. As I took my first bite of that homemade ravioli, I knew in that moment that the kitchen would always be my happy place.
Years later, I’ve taken that memory, along with my love for pumpkin, to create this uniquely seasonal twist. This pumpkin ravioli pays homage to those cherished moments while introducing the delightful flavors of fall. Ready to make your own memories? Let’s begin!
Ingredients
Here’s what you’ll need to make your homemade pumpkin ravioli:
-
2 cups all-purpose flour: This serves as your pasta base. Use “00” flour for an even silkier texture if you have it but good old all-purpose works just as well.
-
3 large eggs: These are essential for creating a rich and elastic pasta dough. If you’re short on eggs, you can substitute one egg with two egg yolks for a more indulgent dough.
-
1 cup pumpkin puree: Make sure to use pure pumpkin puree, not the sweetened pie filling. You can roast your own pumpkin or use store-bought — either works beautifully.
-
1/2 cup ricotta cheese: This adds creaminess and balances the pumpkin’s sweetness. If you want a lighter option, try using cottage cheese, blended until smooth.
-
1/4 cup grated Parmesan cheese: A sprinkle of nutty, salty Parmesan elevates the filling. For a dairy-free version, try nutritional yeast for a cheesy flavor.
-
1/2 teaspoon salt: A good pinch of salt enhances all the flavors. Adjustable to your preference, of course!
-
1/2 teaspoon nutmeg: This spice adds warmth and depth to the filling; fresh grated nutmeg can really take it to another level.
-
1/4 teaspoon black pepper: A touch of heat that complements the pumpkin perfectly.
-
1/2 cup unsalted butter: Essential for the brown butter sauce which brings everything together. If you need a substitute, olive oil can work, but you’ll lose that distinct nutty flavor.
-
3 cloves garlic, minced: Garlic adds a fragrant kick to the sauce. Feel free to add more if you’re a garlic lover like me!
-
Fresh sage leaves (for garnish): The earthy flavor of sage pairs beautifully with the pumpkin. You can also use other herbs like thyme or rosemary if you prefer.
Step-by-Step Instructions
Step 1: Make the Pasta Dough
-
Flour Mountain:
Create a mound with the flour on a clean surface or in a bowl, forming a well in the center. This is where your eggs will go! -
Add Eggs:
Crack the eggs into the well and sprinkle in that half teaspoon of salt. Using a fork, gently beat the eggs, gradually incorporating the flour from the edges of the well. -
Knead it Good:
Once the mixture is too stiff to mix with a fork, use your hands! Knead the dough for about 8-10 minutes until it’s smooth and elastic. Don’t hesitate to sprinkle a bit of flour if it gets too sticky. -
Rest Time:
Wrap your dough in plastic wrap and let it rest for at least 30 minutes at room temperature. Trust me, this step helps to relax the gluten and makes rolling out the dough a breeze!
Step 2: Prepare the Filling
-
Combine Ingredients:
In a mixing bowl, combine the pumpkin puree, ricotta cheese, Parmesan cheese, nutmeg, and black pepper. Adjust seasoning to your taste and make sure it’s well mixed. -
Taste Test:
This is the fun part! Sneak a spoonful to ensure the flavors are just right — and make sure to save some for your ravioli!
Step 3: Roll Out the Pasta
-
Divide and Conquer:
Cut the rested dough into four pieces. Work with one piece at a time while keeping the others covered to prevent them from drying out. -
Flatten and Roll:
Lightly flour your surface and use a rolling pin or pasta machine to roll your dough to about 1/16-inch thickness. Aim for transparency but take your time — it’s okay if it’s a touch thicker! -
Trim and Cut:
Cut the pasta into long strips, about 3 inches wide. (If you’re feeling lazy, you can also use store-bought pasta sheets for an even quicker dish!)
Step 4: Fill and Shape the Ravioli
-
Egg Wash:
Beat one egg and brush a thin layer around the edges of the pasta strips. This will help seal the ravioli closed. -
Fill ‘Em Up:
Place about a tablespoon of filling spaced about 2 inches apart on one of the pasta strips. Feel free to use a piping bag for easier filling! -
Seal the Deal:
Fold the pasta over the filling to create a pocket, gently pressing to eliminate air bubbles. Press around the edges to seal and use a fork to crimp the edges for a pretty design. -
Repeat:
Continue with the rest of the dough and filling until all are made. Flour them lightly to prevent sticking!
Step 5: Cook the Ravioli
-
Boil, Baby, Boil:
Bring a large pot of salted water to a boil. Once boiling, add the ravioli gently and cook for about 4-5 minutes or until they float to the surface. -
Drain Carefully:
Use a slotted spoon to carefully remove the ravioli, and let them rest on a kitchen towel while you make the sauce.
Step 6: Make the Garlic Brown Butter Sauce
-
Brown the Butter:
In a skillet, melt the unsalted butter over medium heat. Add the minced garlic as the butter begins to foam. -
Watch it Carefully:
Stir frequently to ensure the butter doesn’t burn. Keep cooking until it turns a lovely golden brown and has a nutty aroma — about 4-5 minutes. -
Add Some Sage:
Toss in fresh sage leaves and let them fry briefly in the browned butter for flavor. Your kitchen will smell divine!
Step 7: Combine and Serve
-
Toss the Ravioli:
Gently add the cooked ravioli to the skillet with the garlic brown butter sauce. Toss carefully to coat them without breaking them. -
Plating Perfection:
Serve in a warm bowl, drizzling extra brown butter over the top. Garnish with crispy sage leaves and a sprinkle of Parmesan for an elegant finish.
Serving Suggestions
To serve, place your pumpkin ravioli in shallow bowls, ensuring they have a good layer of the garlic brown butter sauce. Add a sprinkle of fresh Parmesan, and if you’re feeling fancy, try a touch of freshly cracked black pepper or a drizzle of balsamic glaze for added flair. This dish is visually stunning and will have your guests raving before they even take a bite!
Recipe Variations
-
Add Protein: Mix in some cooked pancetta or browned sausage with the filling for a hearty option.
-
Go Vegan: Swap the egg in the pasta for aquafaba (chickpea water) and use a dairy-free ricotta paired with nutritional yeast.
-
Herb-Infused: Try adding chopped spinach or fresh herbs like basil or thyme to the filling for extra flavor and nutrition.
-
Cheesy Twist: Add a bit of goat cheese or feta for an added tangy element to the filling.
-
Sauce Variations: Experiment with other sauces like a sage cream sauce or a light marinara for a different flavor profile.
Chef’s Notes
As I’ve developed this recipe over the years, I’ve found joy in experimenting with flavors and techniques. One funny story? The first time I made these wasn’t as pretty as I envisioned — my ravioli burst open in the pot, filling the water with pumpkin goodness! But even during those moments, laughter ensued, and I learned that cooking is all about the process, not just the perfect end result.
This recipe has evolved from traditional family favorites to something uniquely my own. I love sharing it with friends, and I hope it inspires you to create your own kitchen memories!
FAQs and Troubleshooting
1. My pasta dough is too sticky. What should I do?
If your dough is sticky, sprinkle in a bit more flour as you knead until it reaches a soft, manageable consistency. But remember, don’t overdo it — you want that nice elasticity!
2. How can I ensure my ravioli don’t burst while cooking?
Make sure to press out all the air when sealing the ravioli. A good egg wash around the edges will also create a stronger seal.
3. Can I freeze the ravioli?
Absolutely! Place them in a single layer on a baking sheet until frozen, then transfer to a freezer bag. Cook them straight from frozen for about 6-8 minutes.
4. What’s the best way to reheat leftover ravioli?
Gently reheat in a skillet with a splash of water or some melted butter over low heat to retain the texture without overcooking.
Nutritional Info
While I won’t focus too much on the numbers because cooking should be about enjoyment, it’s good to know that an average serving of these delightful pumpkin raviolis (without excessive butter) can offer a decent balance of protein, healthy fats, and carbs, packed with vitamins and minerals from the pumpkin.
Now that you have your recipe, gathering your loved ones around the table to enjoy the fruits of your labor will make all that effort worthwhile. I can’t wait to hear how it goes! Enjoy this process—it’s all about creating beautiful meals and memories. Happy cooking!
PrintHomemade Pumpkin Ravioli with Garlic Brown Butter

Delight in the warmth of homemade pumpkin ravioli enveloped in a creamy ricotta filling and topped with a luscious garlic brown butter sauce.
- Prep Time: 15 minutes
- Cook Time: 30 minutes
- Total Time: 45 minutes
- Yield: 4 servings 1x
- Category: Main Course
- Method: Baking
- Cuisine: Italian
- Diet: Vegetarian
Ingredients
- 2 cups all-purpose flour
- 3 large eggs
- 1 cup pumpkin puree
- 1/2 cup ricotta cheese
- 1/4 cup grated Parmesan cheese
- 1/2 teaspoon salt
- 1/2 teaspoon nutmeg
- 1/4 teaspoon black pepper
- 1/2 cup unsalted butter
- 3 cloves garlic, minced
- Fresh sage leaves (for garnish)
Instructions
- Create a mound with the flour on a clean surface and form a well in the center for the eggs.
- Crack the eggs into the well and sprinkle in salt. Beat the eggs, gradually incorporating the flour.
- Knead the dough for about 8-10 minutes until it’s smooth and elastic.
- Wrap the dough in plastic wrap and let it rest for at least 30 minutes.
- In a mixing bowl, combine the pumpkin puree, ricotta cheese, Parmesan cheese, nutmeg, and black pepper for the filling.
- Cut the rested dough into four pieces, working with one piece at a time while keeping the others covered.
- Roll the dough to about 1/16-inch thickness, and cut into strips about 3 inches wide.
- Beat one egg and brush a thin layer around the edges of the pasta strips.
- Place about a tablespoon of filling spaced about 2 inches apart on one of the pasta strips.
- Fold the pasta over the filling, gently pressing to eliminate air bubbles. Seal and crimp the edges with a fork.
- Bring a large pot of salted water to a boil and cook the ravioli for about 4-5 minutes or until they float.
- Melt the unsalted butter in a skillet over medium heat and add the minced garlic.
- Stir frequently until the butter turns golden brown, about 4-5 minutes, then add sage leaves.
- Add the cooked ravioli to the skillet and gently toss to coat.
- Serve in warm bowls, drizzling extra brown butter and garnishing with sage and Parmesan.
Notes
For vegan options, substitute egg in the pasta with aquafaba and use dairy-free cheese. Freezing ravioli is possible; just ensure they are well sealed before cooking.
Nutrition
- Serving Size: 1 serving
- Calories: 350
- Sugar: 5g
- Sodium: 400mg
- Fat: 12g
- Saturated Fat: 4g
- Unsaturated Fat: 6g
- Trans Fat: 0g
- Carbohydrates: 45g
- Fiber: 3g
- Protein: 15g
- Cholesterol: 30mg
Keywords: pumpkin ravioli, homemade pasta, fall recipe, garlic brown butter
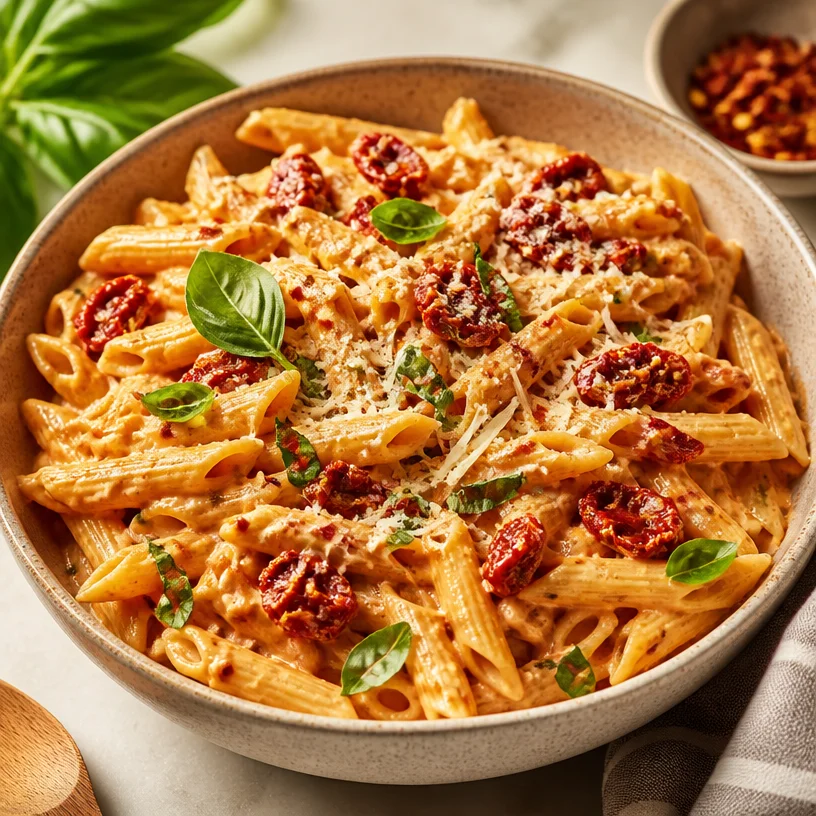
Minute Creamy Vegan Sun-Dried Tomato Pasta Weeknight
Creamy Vegan Sun-Dried Tomato Pasta: A Deliciously Simple Dish
Introduction
Hey there, fellow food lovers! I’m thrilled to welcome you back to my little corner of the culinary world. If there’s one dish that can whisk you away to the sun-drenched coasts of Italy with just a single bite, it’s got to be pasta. Today, we’re diving into a delightful recipe that’s not only creamy and dreamy but also completely vegan: Creamy Vegan Sun-Dried Tomato Pasta!
Now, I know what you might be thinking: “Vegan pasta? Can it really be creamy without all the dairy?” Oh yes, my friend! This dish combines the inherent richness of cashews and the tangy flavor of sun-dried tomatoes to create a sauce that’ll have you swooning. Whether you’re hosting a dinner party, having a cozy night in, or seeking a quick weeknight meal that delights, this pasta is going to be a standout on your table.
This recipe is straightforward and packed full of flavor—but best of all, it’s perfect for any occasion. You know what they say: cooking is about connection, and I truly believe every plate can create a little magic if we allow it. So let’s roll up our sleeves, grab our aprons, and create something beautiful together!
Personal Story
I still remember the first time I had sun-dried tomatoes. It was during one of my early culinary explorations—one summer evening at a quaint little bistro that dotted the outskirts of my hometown. As the sun set, bathing everything in golden light, a plate of sun-dried tomato pasta made its way across the table. The vibrant red of the tomatoes against golden pasta was a feast for the eyes, and each bite tasted like a warm embrace.
From that moment on, I was hooked! I made it my mission to recreate that magic at home. However, life had other plans, and I eventually transitioned to a plant-based diet. This twist inspired me to adapt that beloved dish into today’s creamy vegan version. After many trials and a few missteps (sorry, kitchen!), I am excited to share this delightful vegan pasta recipe with you.
Ingredients
Let’s gather our ingredients and get acquainted with these stars of the show. Each element plays a crucial role, not only in taste but also in creating that dreamy texture you crave.
-
8 oz pasta of choice: Use any shape you love! Whole wheat, gluten-free, or even chickpea pasta are fantastic options. Each adds its own flair and nutrients to the dish.
-
1 cup raw cashews (soaked for 2-4 hours): Cashews bring creaminess without dairy. Soaking them softens their texture, making them easy to blend into a silky sauce. If you’re short on time, feel free to use boiled cashews instead.
-
1 cup sun-dried tomatoes (packed in oil, drained): These little flavor bombs infuse our pasta with tangy sweetness. If you can’t find the oil-packed variety, you can use dry sun-dried tomatoes—just soak them in hot water for about 30 minutes before using.
-
1 cup vegetable broth: This is the flavor base of our creamy sauce. Homemade or store-bought broth works fine. If you’re looking for a lighter version, you can use water, but the broth will enhance the flavors.
-
2 cloves garlic: Fresh garlic brings a punch to our pasta. Feel free to use more if you adore that savory aroma!
-
1 tablespoon nutritional yeast: This ingredient lends a cheesy, umami flavor that really ties the creamy sauce together. If you’re not a fan or can’t find it, you can skip it, but you’ll miss that depth!
-
Salt and pepper to taste: These are essential for seasoning. I suggest starting with a pinch, and then tasting as you go for that perfect balance.
-
Fresh basil for garnish: A sprinkle of fresh basil adds vivid color and fragrant notes. Don’t skip this step—it elevates the entire dish!
-
Vegan parmesan for garnish (optional): For those craving that cheesy touch, a sprinkle of vegan parmesan will do the trick.
-
Red pepper flakes for garnish (optional): If you like a hint of heat, these little flakes provide just the right kick!
Step-by-Step Instructions
Alright, my fellow chefs, let’s roll up those sleeves and get to cooking. Grab your favorite pot and blender, and we’ll transform these simple ingredients into a masterpiece.
-
Cook the Pasta: Bring a large pot of salted water to a boil. Add your pasta and cook according to the package instructions until al dente. Remember to reserve about ½ cup of the pasta cooking water before draining it. This starchy water can help your sauce adhere beautifully to the pasta later on! Once cooked, drain and set aside.
-
Prepare the Creamy Sauce: While the pasta is cooking, let’s whip up our creaminess! Drain the soaked cashews and toss them into your blender. Add the drained sun-dried tomatoes, vegetable broth, garlic cloves, and nutritional yeast. Blend until the mixture reaches a rich and creamy consistency. Scrape down the sides as needed—it’s all about that silky finish!
-
Adjust the Sauce: If the sauce seems too thick, don’t stress! Just add a splash of that reserved pasta water until it reaches your desired creaminess. Want a thicker sauce? Blend in a few more cashews or a splash more broth. Taste the sauce and season with salt and pepper. Here’s a tip: flavor while blending can morph as it cooks, so don’t be shy—adjust as needed!
-
Heat the Sauce: In a large skillet over medium heat, pour in your creamy mixture. Cook for about 2-3 minutes, stirring occasionally, until heated through. This helps enhance the flavors.
-
Combine and Toss: Add the drained pasta to the skillet. Gently toss the pasta in the creamy sauce, ensuring every noodle is coated in that luscious goodness. If it seems too thick, drizzle a bit more reserved pasta water into the skillet and stir until you find that perfect creamy texture.
-
Finishing Touches: Once everything’s combined, remove from heat. Toss in some fresh basil and, if you like it spicy, sprinkle red pepper flakes for that little bit of zing!
Serving Suggestions
To plate, serve generous portions of the creamy vegan sun-dried tomato pasta in shallow bowls. Add a sprinkle of vegan parmesan and more fresh basil on top for a pop of color. Feeling fancy? Use a twirled fork to create a beautiful nest of pasta in the center of the plate. It’s all about that presentation, darling!
Recipe Variations
-
Pasta Primavera: Toss in some sautéed seasonal vegetables like zucchini, bell peppers, or spinach for a delicious veggie boost.
-
Lemon Zest: Add a zing of brightness by incorporating the zest of half a lemon before serving. It pairs beautifully with the sun-dried tomatoes!
-
Nut-Free Option: Replace cashews with silken tofu or one can of chickpeas for a creamy yet nut-free sauce.
-
Make it Pesto: Stir in a couple spoonfuls of your favorite vegan pesto instead of the sun-dried tomatoes for a herby twist.
-
Spicy Arrabbiata Style: Add crushed red pepper to the creamy blend for a spicy variant that keeps the flavor punchy!
Chef’s Notes
Over the years, this creamy vegan sun-dried tomato pasta has journeyed with me, adapting and changing over countless dinners and gatherings. I remember one dinner party where a friend brought over her non-vegan sister. She took one bite, paused, and said, "Are you sure this is vegan?"
It’s moments like this that make cooking so delightful—the little surprises that happen when you pour love into your food. This dish has become my go-to for impressing guests without spending hours in the kitchen. So, whether it’s a casual weeknight dinner or a fancy affair, this pasta is sure to steal the spotlight!
FAQs and Troubleshooting
1. My pasta sauce turned out too thick; what can I do?
No worries! If your sauce ends up thicker than desired, simply stir in a splash of the reserved pasta cooking water bit by bit until you reach the desired consistency.
2. Can I make the sauce ahead of time?
Absolutely! The cream sauce can be refrigerated for up to three days. Just give it a quick re-blend with a splash of water or broth to regain that smooth texture before mixing it with your freshly cooked pasta.
3. What if I don’t have nutritional yeast?
While nutritional yeast enhances the cheesy flavor, feel free to substitute with garlic powder or omit it altogether. You won’t have the exact same flavor, but it’ll still taste amazing!
4. I have leftovers. How do I store them?
Store any leftovers in an airtight container in the fridge for up to 3 days. When reheating, add a splash of water or vegetable broth to keep the creaminess intact.
Nutritional Info
(per serving; makes 4 servings)
- Calories: 370
- Protein: 12g
- Carbohydrates: 44g
- Dietary Fiber: 5g
- Sugars: 3g
- Fats: 18g
There you have it: a creamy and satisfying dish that’s perfect for any occasion. I hope you enjoy making this vegan sun-dried tomato pasta as much as I’ve enjoyed sharing it with you. Remember, cooking is all about joy, creativity, and bringing people together. So grab your apron, invite a friend, and enjoy the deliciousness you create together. Happy cooking!
PrintCreamy Vegan Sun-Dried Tomato Pasta

A deliciously simple vegan pasta dish featuring creamy cashew sauce and tangy sun-dried tomatoes, perfect for any occasion.
- Prep Time: 15 minutes
- Cook Time: 20 minutes
- Total Time: 35 minutes
- Yield: 4 servings 1x
- Category: Main Course
- Method: Blending
- Cuisine: Italian
- Diet: Vegan
Ingredients
- 8 oz pasta of choice
- 1 cup raw cashews (soaked for 2–4 hours)
- 1 cup sun-dried tomatoes (packed in oil, drained)
- 1 cup vegetable broth
- 2 cloves garlic
- 1 tablespoon nutritional yeast
- Salt and pepper to taste
- Fresh basil for garnish
- Vegan parmesan for garnish (optional)
- Red pepper flakes for garnish (optional)
Instructions
- Cook the Pasta: Bring a large pot of salted water to a boil. Add your pasta and cook according to the package instructions until al dente. Reserve about ½ cup of pasta cooking water before draining. Drain and set aside.
- Prepare the Creamy Sauce: While the pasta is cooking, drain the soaked cashews and toss them into your blender. Add the drained sun-dried tomatoes, vegetable broth, garlic cloves, and nutritional yeast. Blend until creamy.
- Adjust the Sauce: If the sauce is too thick, add a splash of reserved pasta water until desired creaminess is reached. Taste and season with salt and pepper.
- Heat the Sauce: In a large skillet over medium heat, pour in your creamy mixture. Cook for 2-3 minutes until heated through.
- Combine and Toss: Add the drained pasta to the skillet. Toss until the pasta is coated in the sauce. Adjust with more reserved water if too thick.
- Finishing Touches: Remove from heat. Toss in fresh basil and sprinkle red pepper flakes for extra zing.
Notes
This dish can be made ahead; refrigerate the sauce for up to 3 days. Re-blend with a splash of water before mixing with pasta.
Nutrition
- Serving Size: 1 serving
- Calories: 370
- Sugar: 3g
- Sodium: 350mg
- Fat: 18g
- Saturated Fat: 2g
- Unsaturated Fat: 16g
- Trans Fat: 0g
- Carbohydrates: 44g
- Fiber: 5g
- Protein: 12g
- Cholesterol: 0mg
Keywords: vegan pasta, sun-dried tomatoes, creamy sauce, plant-based meals

Creamy Ham, Potato & Corn Chowder (One-Pot Weeknight Dinner)
Cozy Comfort: Ham and Potato Corn Chowder
Welcome to the heart of my kitchen, where the aroma of sizzling bacon mingles with the sweet scent of corn, and cozy moments come alive with each spoonful. Today, we’re diving into a dish that wraps you in warmth and flavor: Ham and Potato Corn Chowder. This hearty soup is like a hug in a bowl, perfect for sharing on chilly evenings or when you just need a little comfort food magic in your life.
Introduction
If you’ve ever huddled under a blanket on a brisk evening, sipping something warm while the world bustled outside, you’ll appreciate the cozy embrace of a good chowder. I can still remember the first time I savored a bowl of ham and potato corn chowder at my grandma’s house. It was a rainy afternoon, and her kitchen was bustling with love: the kind you can almost taste. The bubbles of the simmering soup melded with laughter and stories, creating an atmosphere I longed to replicate in my own home.
Chowders hold a special place in my heart—not just as a satisfying meal, but as a timeless tradition that brings family and friends together. Cooking this ham and potato corn chowder isn’t just about following a recipe; it’s about creating memories, sharing stories, and relishing the small joys of life. And guess what? You can do it too! With a few simple ingredients and my expert guidance, you’ll whip up a delightful pot of chowder that warms both the body and soul.
So grab your apron and let’s get started! You’ll soon be cooking up a storm in your kitchen, channeling the comforting vibes of home-cooked goodness with every spoonful of this rich and flavorful chowder.
Personal Story
Let me take you back to a family gathering one rainy fall evening, where every droplet outside seemed to dance to the rhythm of our chatter. As kids rushed about in the background, my grandma stood proudly by her old stove, stirring a bubbling pot of ham and potato corn chowder. The savory scent wafted through the air, pulling everyone to the kitchen like a magnet.
I remember that vibrant moment when she ladled out the chowder. The steam rising from the bowl mirrored the warmth of our laughter. As I took my first spoonful, the amalgamation of smoky ham, creamy potatoes, and sweet corn created a symphony of flavors that was pure bliss. It was then I realized food wasn’t just something we ate; it was an experience—a way to bond, reminisce, and nourish love. That chowder wasn’t just a dish; it was a memory I carried with me, and today, I’m excited to share it with you!
Ingredients
Here’s what you’ll need to create this delightful chowder:
-
4 strips bacon: This crispy delight adds a wonderful smoky flavor. For a healthier option, you could opt for turkey bacon or skip it altogether and use a bit of olive oil instead for richness.
-
1/2 medium onion, chopped: Onions add depth to any dish. If you’re not a fan, try using leeks for a mellower taste or shallots for a sweeter option.
-
2 sticks celery, chopped: Celery contributes crunch and flavor. If you need to avoid it, diced zucchini works well as a replacement.
-
1/4 cup all-purpose flour: This acts as a thickening agent. For a gluten-free option, feel free to use cornstarch or a gluten-free flour blend.
-
2 cloves garlic, minced: Garlic packs a flavor punch. You can substitute with garlic powder (1/8 teaspoon per clove) if you’re in a pinch.
-
4 cups chicken broth or stock: Chicken broth provides a robust base. Vegetable broth or homemade stock can easily replace it for a vegetarian version.
-
1 cup heavy (or whipping) cream: Cream gives that luscious texture. To lighten it up, you can use half-and-half or a non-dairy milk, though results may vary.
-
2 cups frozen corn: Sweet corn brightens the dish. Fresh corn can work wonderfully too, especially in summer!
-
1 pound smoked ham, chopped: This is the star of the show, adding savory goodness. You can substitute with diced turkey or even chickpeas for a vegetarian variant.
-
2 large Russet potatoes, peeled and diced: Potatoes lend creaminess to the chowder. Yukon gold potatoes also work well for a buttery flavor.
-
1/4 teaspoon Italian seasoning: This adds an herby note. Feel free to use fresh herbs such as thyme or rosemary for a more vibrant flavor.
-
1 pinch cayenne pepper (optional): A touch of heat keeps things interesting. If you prefer it milder, leave it out!
-
Salt and pepper, to taste: Essential for rounding out flavors.
Step-by-Step Instructions
Ready to get cooking? Let’s turn that list of ingredients into a warm bowl of happiness!
-
Cook the Bacon:
Start by placing the bacon strips in a large pot over medium heat. Cook until they’re crispy, about 5-7 minutes. This not only renders the fat but leaves you with beautiful, crispy bacon bits as a topping—the perfect garnish! Once cooked, transfer the bacon to a paper towel-lined plate and set aside. Remember to leave the bacon drippings in the pot; this flavor is GOLD! -
Sauté the Vegetables:
In the same pot, add the chopped onion and celery to the drippings. Sauté for about 4-5 minutes, stirring occasionally, until they soften. The onions will turn translucent and start to smell divine. You’ve just created a flavor base, so keep an eye on that deliciousness! -
Add Garlic and Flour:
Toss in the minced garlic and stir for an additional minute. This is the point where your kitchen starts to feel like a cozy restaurant! Next, sprinkle in the flour and stir it into the veggies, cooking for about a minute to eliminate that raw flour taste. You want it to coat the vegetables evenly—this will help thicken your chowder later. -
Incorporate the Broth:
Gradually pour in the chicken broth while stirring constantly, ensuring there are no lumps. This might seem tedious, but trust me, it’s worth it! Bring the mixture to a gentle boil, then reduce the heat to a simmer. -
Add the Potatoes and Corn:
Once the broth is bubbling, toss in the diced potatoes and frozen corn. Let this simmer for about 15-20 minutes, or until the potatoes are fork-tender. Stir occasionally, and don’t forget to taste along the way! Adjust seasoning as you go. -
Stir in Ham and Cream:
Once the potatoes are tender, stir in the chopped smoked ham and heavy cream. The cream takes it from good to phenomenal! Let it simmer for another 5 minutes until everything is heated through. -
Season and Serve:
Now it’s final seasoning time! Add your Italian seasoning, optional cayenne pepper, and salt and pepper to taste. If you like your chowder a bit thicker, let it cook a minute longer. Otherwise, you’re ready to serve!
Serving Suggestions
When it’s time to plate up, ladle the chowder into bowls, allowing the steam to rise up invitingly. Garnish each serving with a crumbled bacon strip on top (remember, we saved that gorgeous bacon!), a sprinkle of fresh herbs, and perhaps a light drizzle of olive oil for that extra touch. Pair it with some crusty bread or fluffy biscuits for a truly indulgent experience!
Recipe Variations
Now, let’s shake things up a bit! Here are some fun twists you can try:
-
Vegetable Chowder: Want to skip the meat? Substitute the ham with mushrooms, or add a variety of veggies like spinach and bell peppers for a hearty vegetarian version.
-
Spicy Twist: If you enjoy a bit of kick, add jalapeños or a splash of hot sauce during cooking for a spicier chowder.
-
Cheesy Delights: Stir in some shredded cheddar cheese just before serving for a cheesy twist that’ll melt right into the chowder.
-
Herbed Comfort: Try using fresh herbs like dill or cilantro instead of Italian seasoning for a completely different flavor profile.
Chef’s Notes
Throughout my cooking journey, this ham and potato corn chowder has evolved. I remember when I first started making it; it was a hodgepodge of whatever I could find in the fridge. But each iteration brought a deeper understanding of flavors, textures, and how a little tweaking can transform a dish.
One of my favorite memories is when I attempted to make it from scratch during a summertime picnic with friends. I left the pot simmering too long, and we emerged to find the most incredible aroma coming from the kitchen! The chowder had slightly thickened and developed an even richer flavor. Sometimes, happy accidents create the best memories, right?
FAQs and Troubleshooting
1. My chowder turned out too thick, what can I do?
No worries! If your chowder is thicker than desired, just add a bit more chicken broth or cream and stir until you reach the desired consistency. Heat it gently on the stove to incorporate.
2. Can I use fresh corn instead of frozen?
Absolutely! If you have fresh corn available, go for it! Just make sure to cut it off the cob and add it at the same time as the potatoes for even cooking.
3. How long can I store leftover chowder?
This chowder stores well in the fridge for up to 3 days. To reheat, do so gently on the stove while adding a splash of broth to help bring it back to life.
4. I don’t eat pork; can I use chicken instead?
Definitely! Diced, cooked chicken can be a delightful alternative to the smoked ham. Just cook it to your liking before adding it to the pot.
Nutritional Info (Optional)
While I always advocate for indulging in good food, here’s a rough estimate per serving of this chowder (based on 6 servings):
- Calories: 400
- Protein: 15g
- Fat: 25g
- Carbohydrates: 35g
- Fiber: 4g
Remember, these numbers can vary based on your specific ingredient choices, but who’s counting calories when you’ve got comfort food on the table?
Conclusion
And there you have it—your very own ham and potato corn chowder ready to warm your heart and soul! This delicious meal isn’t just about nourishment; it’s about connection and sharing beautiful moments with loved ones. Whether enjoyed on a rainy day or as a comforting treat during the hustle and bustle of life, remember that good food is all about showing up and savoring each delicious bite.
Thank you for joining me in the kitchen today! I hope you feel inspired to recreate this chowder in your own home and bring a bit of comfort to your table. Happy cooking, my friend!
PrintHam and Potato Corn Chowder

A warm and hearty chowder featuring smoky ham, creamy potatoes, and sweet corn, perfect for cozy evenings.
- Prep Time: 15 minutes
- Cook Time: 30 minutes
- Total Time: 45 minutes
- Yield: 6 servings 1x
- Category: Soup
- Method: Stovetop
- Cuisine: American
- Diet: Meat
Ingredients
- 4 strips bacon
- 1/2 medium onion, chopped
- 2 sticks celery, chopped
- 1/4 cup all-purpose flour
- 2 cloves garlic, minced
- 4 cups chicken broth or stock
- 1 cup heavy (or whipping) cream
- 2 cups frozen corn
- 1 pound smoked ham, chopped
- 2 large Russet potatoes, peeled and diced
- 1/4 teaspoon Italian seasoning
- 1 pinch cayenne pepper (optional)
- Salt and pepper, to taste
Instructions
- Cook the bacon: Start by placing the bacon strips in a large pot over medium heat. Cook until they’re crispy, about 5-7 minutes. Transfer to a paper towel-lined plate and set aside, leaving the drippings in the pot.
- Sauté the vegetables: Add the chopped onion and celery to the drippings. Sauté for 4-5 minutes until softened.
- Add garlic and flour: Toss in the minced garlic and stir for another minute. Sprinkle in the flour and cook for 1 minute.
- Incorporate the broth: Gradually pour in the chicken broth while stirring to avoid lumps. Bring to a gentle boil, then reduce to a simmer.
- Add the potatoes and corn: Toss in the diced potatoes and frozen corn. Simmer for 15-20 minutes or until potatoes are fork-tender.
- Stir in ham and cream: Once the potatoes are tender, stir in the chopped smoked ham and heavy cream. Let simmer for another 5 minutes.
- Season and serve: Add Italian seasoning, cayenne pepper, and salt and pepper to taste. Serve hot, garnished with crumbled bacon.
Notes
Feel free to substitute ingredients for health preferences, such as using turkey bacon or a gluten-free flour blend.
Nutrition
- Serving Size: 1 bowl
- Calories: 400
- Sugar: 5g
- Sodium: 800mg
- Fat: 25g
- Saturated Fat: 10g
- Unsaturated Fat: 5g
- Trans Fat: 0g
- Carbohydrates: 35g
- Fiber: 4g
- Protein: 15g
- Cholesterol: 70mg
Keywords: chowder, soup, comfort food, ham, potato, corn

Cowboy Soup
Whip Up a Hearty Cowboy Soup: A Taste of Western Charm
Hello, fellow food lovers! Today, we’re saddling up for a delicious journey into the heart of comfort food with a recipe for Cowboy Soup. Imagine a bubbling pot filled with savory ground beef, fragrant veggies, and a medley of spices—it’s the epitome of cozy cooking, perfect for any day of the week. As someone who believes in the joy of gathering around the table, I’m excited to share not just a recipe, but a little slice of my culinary history that fuels my passion for hearty dishes like this one.
A Kitchen Memory: The Ranch House Gathering
Growing up, my family often retreated to a rustic ranch during long weekends, where our gatherings were never complete without a big pot of soup simmering away on the stove. One chilly afternoon, just as the snow began to fall outside, my mom decided to whip up what we fondly called “Cowboy Soup.” The smell of onions sautéing and garlic popping in the pan filled the farmhouse, creating a warm ambiance that somehow made us forget about the frost outside. We gathered around the kitchen table, sharing laughter and stories, spooning soup into bowls that never seemed to empty. This soup isn’t just food; it’s a memory steeped in comfort, love, and the soothing rhythm of a family kitchen full of chatter.
With every bite, I was reminded that food has the power to evoke feelings and create lasting memories. So, tie on your apron, and let’s get cooking!
Ingredients
Here’s what you’ll need to create this fantastic Cowboy Soup:
-
1 lb ground beef
The centerpiece of this dish, adding rich flavor and protein. If you prefer a lighter option, try ground turkey or a plant-based substitute like lentils. -
1 onion, chopped
This aromatic builds a flavorful base. Yellow onion works well, but feel free to use red onion for a slightly sweeter taste. -
2 cloves garlic, minced
A must-have for that punch of flavor! If fresh garlic isn’t on hand, 1/2 teaspoon of garlic powder is a great substitute. -
2 carrots, diced
These add sweetness and texture. If you like a bit of heat, try using diced bell peppers instead! -
2 celery stalks, diced
Celery brings a lovely crunch and depth. If you’re not a fan, you can skip it or add bell peppers for more color. -
1 can (15 oz) diced tomatoes
Adds acidity and brightness. You can use fresh tomatoes (about 2 cups) if you have them! -
1 can (15 oz) kidney beans, rinsed and drained
For heartiness and fiber. If you want, black beans or chickpeas can provide similar benefits. -
4 cups beef broth
This is essential for creating a rich and comforting base. You can opt for low-sodium broth to take control of salt levels. -
1 teaspoon chili powder
Adds warmth without overwhelming heat. Adjust the amount to match your spice tolerance, or swap it for smoked paprika for a different flavor profile. -
Salt and pepper to taste
Essential for enhancing all the elements. Remember, taste as you go! -
1 cup corn (frozen or canned)
Sweet corn is the perfect finishing touch! If corn’s not your thing, feel free to add peas for a pop of color and sweetness.
Step-by-Step Instructions
Let’s get this Cowboy Soup cooking! Follow these steps, and don’t forget to sprinkle in your personal flair as you go.
-
Brown the Beef
In a large pot or Dutch oven over medium heat, add your ground beef and stir occasionally. Allow it to brown evenly, about 5-7 minutes, then drain any excess fat. Browning the meat adds depth, so don’t rush this step! -
Sauté the Aromatics
With the beef in the pot, add the chopped onion and minced garlic. Sauté for about 3-4 minutes until the onion becomes translucent and aromatic. This step is all about building flavor—let those scents fill your kitchen! -
Add the Veggies
Toss in the diced carrots and celery. Stir everything together and let it cook for another 5 minutes. You want the veggies to soften up a bit, releasing their natural sweetness. -
Pour in the Tomatoes and Broth
Add the can of diced tomatoes (with their juice) and the beef broth. Give it a good stir! The tomatoes add a bit of acidity, balancing the richness of the beef beautifully. -
Mix in the Beans and Corn
Gently fold in the kidney beans and corn, ensuring they’re well incorporated. These babies are what make this soup hearty and satisfying! -
Season and Simmer
Sprinkle in the chili powder, salt, and pepper to taste. Bring the soup to a boil, then reduce the heat and let it simmer for about 20-30 minutes. This is where the magic happens—flavors meld and deepen! -
Taste Test!
About 10 minutes before serving, taste the soup. Adjust any seasoning as needed. More heat? A sprinkle of cayenne! Want more acidity? A dash of vinegar makes a world of difference! -
Serve it Up
Once the flavors are harmonious and the soup is steaming, you’re ready to serve!
Serving Suggestions
When it comes to plating, think rustic elegance. Serve the Cowboy Soup in hearty bowls topped with a sprinkle of fresh parsley or cilantro for a pop of color. A dollop of sour cream or Greek yogurt can add creaminess and a tangy note! Crusty bread on the side completes the experience beautifully—perfect for dipping!
Recipe Variations
Let’s get creative! Here are a few variations to give your Cowboy Soup a twist:
- Spicy Cowboy Soup: Add diced jalapeños or crushed chili flakes for an extra kick.
- Vegetarian-Friendly: Skip the beef and substitute with a quinoa or textured vegetable protein for a satisfying meal.
- Creamy Version: Stir in a splash of heavy cream or coconut milk at the end for a richer texture.
- Taco Twist: Add taco seasoning in place of chili powder, and serve with tortilla chips on top!
- Southwestern Style: Incorporate black beans and corn, and top with avocado slices for a fresh touch.
Chef’s Notes
When I first started making this Cowboy Soup years ago, I was simply trying to use up ingredients in the fridge after a big shopping trip. What began as a simple dish quickly evolved into a family favorite! I’ve played around with countless variations, swapping out ingredients based on what I had available or experimenting with different spices. The beauty of this soup is how forgiving it is—perfect for those busy weeknights when you want something hearty and delicious without spending hours in the kitchen.
And I learned an important kitchen lesson preparing this over the years: sometimes, it’s the unexpected ingredients that lead to the tastiest adventures—so don’t be afraid to make it your own!
FAQs and Troubleshooting
1. Why is my soup too salty?
If you find your soup on the salty side, adding a splash of vinegar or a few extra diced tomatoes can help balance the flavors. Plus, the addition of some fresh herbs can dilute the saltiness a bit.
2. Can I freeze Cowboy Soup?
Absolutely! It freezes quite well. Just cool it completely before transferring it to airtight containers. It will keep for up to 3 months in the freezer. When reheating, add a splash of broth to bring it back to life!
3. My soup is too thick; how do I fix it?
If your soup becomes too thick, stir in additional beef broth or water a little at a time until you reach your desired consistency.
4. How can I make it gluten-free?
Make sure to use gluten-free beef broth and check your canned goods to confirm they’re gluten-free. Most of the ingredients here naturally are!
Nutritional Info
This Cowboy Soup is packed with protein, fiber, and various vitamins from the vegetables. Each serving provides about:
- Calories: 300
- Protein: 22g
- Carbohydrates: 30g
- Dietary Fiber: 8g
- Total Fat: 10g
Feel free to adjust with varying toppings or side dishes to suit your dietary needs!
So there you have it! With this Cowboy Soup, you’re not just making a meal; you’re creating an experience to share with loved ones around the table. Each spoonful tells a story—filled with warmth, nostalgia, and the joy of cooking. I hope you enjoy making this recipe as much as I do. Until next time, keep your apron on and happy cooking!
PrintHearty Cowboy Soup

A delicious Cowboy Soup filled with savory ground beef, fragrant veggies, and a medley of spices, perfect for cozy gatherings.
- Prep Time: 15 minutes
- Cook Time: 30 minutes
- Total Time: 45 minutes
- Yield: 4 servings 1x
- Category: Main Course
- Method: Stovetop
- Cuisine: American
- Diet: None
Ingredients
- 1 lb ground beef
- 1 onion, chopped
- 2 cloves garlic, minced
- 2 carrots, diced
- 2 celery stalks, diced
- 1 can (15 oz) diced tomatoes
- 1 can (15 oz) kidney beans, rinsed and drained
- 4 cups beef broth
- 1 teaspoon chili powder
- Salt and pepper to taste
- 1 cup corn (frozen or canned)
Instructions
- Brown the Beef: In a large pot or Dutch oven over medium heat, add your ground beef and stir occasionally. Allow it to brown evenly, about 5-7 minutes, then drain any excess fat.
- Sauté the Aromatics: With the beef in the pot, add the chopped onion and minced garlic. Sauté for about 3-4 minutes until the onion becomes translucent and aromatic.
- Add the Veggies: Toss in the diced carrots and celery. Stir everything together and let it cook for another 5 minutes.
- Pour in the Tomatoes and Broth: Add the can of diced tomatoes (with their juice) and the beef broth. Give it a good stir!
- Mix in the Beans and Corn: Gently fold in the kidney beans and corn, ensuring they’re well incorporated.
- Season and Simmer: Sprinkle in the chili powder, salt, and pepper to taste. Bring the soup to a boil, then reduce the heat and let it simmer for about 20-30 minutes.
- Taste Test: About 10 minutes before serving, taste the soup. Adjust any seasoning as needed.
- Serve it Up: Once the flavors are harmonious and the soup is steaming, you’re ready to serve!
Notes
Feel free to add your personal flair as you go. This soup also freezes well and can be adjusted for thickness and spice levels.
Nutrition
- Serving Size: 1 serving
- Calories: 300
- Sugar: 4g
- Sodium: 600mg
- Fat: 10g
- Saturated Fat: 4g
- Unsaturated Fat: 6g
- Trans Fat: 0g
- Carbohydrates: 30g
- Fiber: 8g
- Protein: 22g
- Cholesterol: 70mg
Keywords: Cowboy Soup, comfort food, hearty soup, beef soup, family recipe

Creamy Loaded Baked Potato Soup: 30-Minute Weeknight Dinner
A Cozy Bowl of Loaded Baked Potato Soup
Is there anything more comforting than a warm bowl of Loaded Baked Potato Soup on a chilly evening? The velvety texture, the golden touch of cheese, and the crunch of bacon all come together harmoniously, making this dish feel like a warm hug from a friend. As the days grow shorter and the nights colder, there’s something magical about simmering a pot of soup on the stove, filling your kitchen with irresistible aromas. Today, I want to share my beloved recipe for Loaded Baked Potato Soup, a dish that effortlessly combines comfort and elegance. Whether you’re hosting a gathering or simply indulging in self-care at home, this recipe will elevate your dining experience.
This soup is more than just a delicious meal; it’s a time-honored tradition in my kitchen. I can still remember huddling up with my family around the dinner table after a long day. The warmth of the soup seeped into our bones as we shared stories and laughter, nourishing not only our bodies but our spirits too. The best part? There was always room for a second helping!
So, grab your apron, and let’s get to cooking! I promise by the end of this, you’ll have a bowl of creamy potato goodness that will warm your heart and bring a smile to your face.
Personal Story
When I think of Loaded Baked Potato Soup, it takes me back to the winter nights of my childhood. My mom would whip up a big pot on particularly chilly evenings, and the entire house would embrace the blissful aroma of sautéed onions and garlic mingling with potatoes. After a day filled with outdoor adventures and snowball fights, nothing felt better than gathering around the kitchen island with a spoon in hand, chatting about our day as the soup bubbled away.
One specific memory stands out in my mind: I’m sitting at the kitchen counter, my feet dangling off the stool, while my mom stirs the pot. The anticipation felt electric as she ladled warm soup into our bowls, topping each one with a sprinkle of cheese and a dollop of sour cream. It was always a celebration of flavors and family, and that’s the spirit I strive to capture every time I make this recipe. Let’s carry this legacy forward together!
Ingredients
To make this delightful Loaded Baked Potato Soup, you’ll need the following ingredients:
-
4 large russet potatoes, peeled and diced
Russet potatoes are the stars of this soup; their starchiness gives the soup a luxurious thickness. If you can’t find russets, Yukon Golds are a fantastic alternative—they’ll add a slightly buttery flavor. -
1/2 cup of chopped onion
Onions create a lovely base for your soup. If you’re not a fan of onions, you can skip them or swap them for leeks, which offer a milder taste. -
3 cloves of garlic, minced
Garlic brings a fragrant punch to the dish! If you prefer a subtler flavor, feel free to reduce the amount to one or two cloves. -
4 cups of chicken or vegetable broth
Broth provides depth, so choose high-quality, low-sodium options to keep the flavors balanced. Homemade broth will take this dish to the next level! -
1 cup of heavy cream
For that creamy richness! If you’re aiming for a lighter version, you can use whole milk or a plant-based milk, but the texture will differ slightly. -
1 cup of shredded cheddar cheese
Sharp cheddar is wonderful in this recipe, but feel free to mix it up with some Gruyere or pepper jack for a spicy kick! -
1/2 cup of sour cream
Sour cream adds a tangy touch to balance the soup. For a lighter option, Greek yogurt is a great substitute. -
Salt and pepper to taste
A must-have for seasoning! Always remember to taste and adjust your seasoning as you go; every palate is different! -
Chopped green onions for garnish
Green onions provide a fresh crunch. If you don’t have them on hand, chives also work beautifully! -
Cooked bacon bits for garnish
The crunch and smokiness of bacon take this soup to another level! If you’re vegetarian, feel free to leave this out or use crispy chickpeas as an alternative.
Step-by-Step Instructions
Step 1: Prep Your Ingredients
Start by preparing your ingredients. Wash and peel the russet potatoes, then dice them into roughly 1-inch cubes. Chop your onion, mince the garlic, and set everything aside in separate bowls so you’re ready to go.
Step 2: Sauté the Aromatics
In a large pot or Dutch oven, heat a drizzle of olive oil over medium heat. Once hot, add the chopped onion and sauté until translucent, about 5 minutes. Add the minced garlic and sauté for another minute, until fragrant. This combination serves as the flavor foundation for your soup, and trust me, it’s going to make your kitchen smell heavenly.
Step 3: Cook the Potatoes
Add the diced potatoes to the pot, followed by the chicken or vegetable broth. Bring everything to a boil, then reduce the heat to a simmer. Cover the pot and cook for about 15-20 minutes, or until the potatoes are fork-tender. The goal is to achieve a softness that will make them easy to mash later on!
Step 4: Blend it Up
Once the potatoes are cooked, it’s time to make this soup creamy. Use an immersion blender directly in the pot for a smooth consistency. If you don’t have one, you can carefully transfer the mixture to a blender in batches. Just be cautious of hot splashes! Blend until the soup is creamy but still retains some rustic potato chunks for texture.
Step 5: Add the Cream and Cheese
Now comes the fun part—adding the heavy cream and cheese! Stir in the cream until fully incorporated, then gradually add in the shredded cheddar. Continue stirring until the cheese melts beautifully into the soup. If it’s too thick for your liking, feel free to thin it out with a little more broth or water.
Step 6: Season to Perfection
Taste your soup and season it with salt and pepper to suit your flavor preferences. This is where you can make it your own—don’t be shy!
Step 7: Serve and Garnish
Ladle the delicious soup into bowls and finish it off with a generous dollop of sour cream, a sprinkle of green onions, and crispy bacon bits. If you’re feeling fancy, a drizzle of olive oil can elevate the presentation significantly!
Serving Suggestions
To really set the mood, serve your Loaded Baked Potato Soup alongside some crusty bread or a fresh garden salad. You can also add a side of grilled cheese sandwiches for a perfect comfort food combo. Don’t forget to set the table beautifully—maybe with some soft candlelight to create a warm, inviting atmosphere.
Recipe Variations
- Spicy Loaded Baked Potato Soup: Add diced jalapeños or a pinch of cayenne pepper for a warming kick.
- Vegan Version: Substitute heavy cream with coconut milk, use vegetable broth, and replace cheddar cheese and sour cream with cashew cream or nutritional yeast.
- Loaded with Greens: Stir in some kale or spinach for an added nutrient boost and vibrant color.
- Smoky Flavor: Use smoked paprika instead of regular paprika to give the soup a wonderful depth and complexity.
- Herb Infusion: Add fresh thyme or rosemary while simmering the potatoes for a fragrant note.
Chef’s Notes
Every time I make this Loaded Baked Potato Soup, I reminisce about the countless variations I created over the years, each a reflection of the ingredients I had on hand. I remember one holiday season when I wanted to impress my family, I added a splash of white wine to the broth, which created an unexpectedly delightful flavor!
It’s incredible how a simple recipe can be adapted and transformed. Challenge yourself to enjoy it in different ways, and always keep a few “secret ingredients” up your sleeve to surprise your diners!
FAQs and Troubleshooting
Q: My soup is too thick; what can I do?
A: If your soup is thicker than you’d like, simply add more broth or water a little at a time until you reach your desired consistency.
Q: Can I freeze Loaded Baked Potato Soup?
A: Yes! Allow it to cool completely before transferring it to an airtight container. It should last for about 3 months in the freezer. To reheat, thaw it overnight in the fridge and warm it on the stove, adding a splash of broth if needed.
Q: What if my potatoes aren’t cooking evenly?
A: Make sure you have evenly sized potato pieces to ensure they cook at the same rate. If some seem undercooked, give them a bit more time simmering and check occasionally.
Q: Can I make this soup ahead of time?
A: Absolutely! This soup tastes even better the next day after the flavors have had a chance to meld together. Just reheat gently on the stove without boiling.
Nutritional Info
While it varies based on specific ingredients and serving sizes, a standard bowl of Loaded Baked Potato Soup generally contains approximately:
- Calories: 450
- Protein: 13g
- Fat: 25g
- Carbohydrates: 52g
(Always check to adjust based on specific ingredient swaps you may have used!)
So there you have it—my favorite Loaded Baked Potato Soup recipe that merges nostalgia with comfort. I hope it warms your kitchen and heart as it has for me over the years. With each spoonful, may you gather around your table and create beautiful moments, one delicious bite at a time! Happy cooking!
PrintLoaded Baked Potato Soup

A comforting and creamy loaded baked potato soup with the perfect blend of potatoes, cheese, and garnishes, perfect for chilly evenings.
- Prep Time: 15 minutes
- Cook Time: 30 minutes
- Total Time: 45 minutes
- Yield: 4 servings 1x
- Category: Soup
- Method: Simmering and Blending
- Cuisine: American
- Diet: Vegetarian (optional bacon garnish)
Ingredients
- 4 large russet potatoes, peeled and diced
- 1/2 cup of chopped onion
- 3 cloves of garlic, minced
- 4 cups of chicken or vegetable broth
- 1 cup of heavy cream
- 1 cup of shredded cheddar cheese
- 1/2 cup of sour cream
- Salt and pepper to taste
- Chopped green onions for garnish
- Cooked bacon bits for garnish
Instructions
- Prep your ingredients by washing and dicing the potatoes, chopping the onion, and mincing the garlic.
- Sauté the chopped onion in a pot with olive oil until translucent, then add garlic and sauté until fragrant.
- Cook the diced potatoes with broth, bring to a boil, then simmer until fork-tender.
- Blend the soup with an immersion blender until creamy, leaving some chunks for texture.
- Add the heavy cream and shredded cheddar cheese, stirring until the cheese melts.
- Season with salt and pepper to taste.
- Serve in bowls, garnishing with sour cream, green onions, and bacon bits.
Notes
This soup can be made ahead of time and tastes even better the next day. It can also be frozen for about 3 months.
Nutrition
- Serving Size: 1 bowl
- Calories: 450
- Sugar: 5g
- Sodium: 800mg
- Fat: 25g
- Saturated Fat: 14g
- Unsaturated Fat: 6g
- Trans Fat: 0g
- Carbohydrates: 52g
- Fiber: 4g
- Protein: 13g
- Cholesterol: 70mg
Keywords: soup, comfort food, baked potato soup, creamy soup, cozy recipes

One-Pot Creamy Cheesy Beef and Potato Soup for Weeknights
Comfort in a Bowl: Cheesy Beef and Potato Soup
Introduction
Hey there, fellow foodies! I’m so excited to take you on this flavorful journey today as we whip up a warm and hearty Cheesy Beef and Potato Soup. Picture this: a chilly evening where the air is crisp, and all you want to do is curl up with a comforting bowl of something delicious. This soup is exactly that—a cozy, creamy masterpiece layered with savory beef, tender potatoes, and, of course, a velvety cheddar cheese finish. It’s perfect for those weeknights when you need a little extra warmth or a casual get-together with friends and family.
There’s something inherently soothing about a steaming bowl of soup, right? It’s like a big hug in a bowl. This particular recipe has roots that run deep in my cooking journey; it embodies warmth, nostalgia, and a sprinkle of home-cooked happiness. The best part? It’s not only easy to make but also delightful to share. Whether you’re sitting around the dinner table or catching up with friends over bowls of soup, this dish encourages gathering, sharing, and making memories—the true essence of home cooking.
So, grab your apron, and let’s dive into creating this creamy, cheesy delight that will become a staple in your kitchen!
Personal Story
Let me take you back to a winter’s evening when I first mastered this Cheesy Beef and Potato Soup. I was curled up at home, glancing outside at the snow that blanketed the ground. My friends were planning a movie night, but honestly, I wasn’t feeling like heading out into the cold. I wanted something cozy but also tasty to impress my friends. That’s when I recalled a comforting recipe my grandmother used to make—though her version involved a significant amount of trial and error!
I grabbed some ground beef from my fridge and a few potatoes that were longing to be used, and I let my culinary instincts take over. As I sautéed the beef and onions, the aroma wafted through my home, transforming it into a comforting haven. By the time I folded in the cheese and cream, I was filled with an overwhelming sense of satisfaction. When my friends arrived and tasted the soup, there were smiles all around and compliments galore—proof that food truly does bring us together. That brisk night led to a cherished recipe that warmed bellies and hearts alike.
Ingredients
Let’s gather everything we need to create this delicious soup! Here’s what you’ll need:
-
1 lb ground beef: This is the hearty backbone of our soup. Feel free to use lean ground beef if you prefer. Ground turkey or chicken can also be swapped for a lighter option!
-
4 medium potatoes, diced: I love using Yukon Gold for their buttery flavor, but Russets or red potatoes work just as well! Make sure to dice them evenly for consistent cooking.
-
1 onion, chopped: The more aromatic, the better! You can substitute with shallots for a slightly sweeter taste.
-
3 cups beef broth: Store-bought works fine, but homemade broth elevates the flavor! You can use vegetable broth for a lighter version or even chicken broth for a different twist.
-
2 cups shredded cheddar cheese: You can’t go wrong with sharp cheddar, but feel free to experiment with smoked gouda or pepper jack for a unique flavor!
-
1 cup heavy cream: This adds richness, but half-and-half or whole milk can be used if you want a lighter option. Just keep in mind that the creaminess will lessen.
-
Salt and pepper to taste: Essential for enhancing flavors—don’t be shy with your seasonings!
-
Fresh parsley for garnish: Adds a pop of color and freshness to the rich soup. Basil or chives work beautifully as well!
Step-by-Step Instructions
Now that we have our ingredients ready, it’s time to roll up our sleeves and get cooking! Follow these steps for a bubbling pot of goodness:
-
Brown the Beef: In a large pot over medium heat, add the ground beef, breaking it apart with a wooden spoon. Cook for about 5-7 minutes until it’s browned and all the pink is gone. Don’t forget to season it with salt and pepper as it cooks! Tip: If there’s excess grease, feel free to drain it—no one wants a greasy soup!
-
Sauté the Aromatics: Add your chopped onion to the pot and sauté together with the beef for about 3-4 minutes. You want the onion to become translucent and fragrant. This step is crucial for building layers of flavor in your soup.
-
Incorporate the Potatoes: Stir in the diced potatoes, allowing them to soak up all those delicious flavors. Mix well and let them cook with the beef and onion for a couple of minutes before moving on.
-
Add the Broth: Pour in the beef broth and bring the mixture to a gentle simmer. Don’t forget to scrape the bottom of the pot to release any flavorful browned bits! This step adds a depth of flavor that truly makes your soup shine.
-
Simmer Away: Cover the pot and allow the soup to simmer for about 15-20 minutes, until the potatoes are tender. You can check them by piercing with a fork—if they slide off easily, they’re ready!
-
Creamy Goodness: Once the potatoes are tender, stir in the heavy cream and shredded cheddar cheese. Allow the cheese to melt completely into the soup, creating a luscious, creamy texture. Don’t rush this step; let the flavors meld together beautifully.
-
Final Seasoning: Taste and adjust the seasoning as necessary. A little extra salt or pepper can elevate your soup even further! If you like a little bit of heat, a dash of cayenne pepper goes a long way.
-
Garnish and Serve: Ladle the soup into bowls and garnish with freshly chopped parsley. This little touch goes a long way in creating a beautiful presentation.
Serving Suggestions
When it comes to plating this Cheesy Beef and Potato Soup, the simpler, the better! Use rustic bowls to serve and don’t skimp on the cheese—people love a cheesy topping. Pair it with a crusty loaf of bread or some crunchy crackers. Trust me, your guests (and you!) will be diving in with big smiles and happy hearts.
Recipe Variations
Feel free to get creative with your Cheesy Beef and Potato Soup. Here are some fun variations:
-
Spicy Kick: Add diced jalapeños or a splash of hot sauce for a spicy twist—perfect for heat lovers!
-
Vegetarian Delight: Swap the ground beef with chopped mushrooms or lentils for a hearty vegetarian version.
-
Add Greens: Toss in some hearty greens like spinach or kale during the last few minutes of cooking for added nutrition and color.
-
Bacon Infusion: Sauté some bacon before the ground beef for an added smoky flavor that will elevate your soup experience!
-
Herbaceous Flavor: Add a sprig of thyme or rosemary while the soup simmers for a refreshing layer of herbaceous goodness.
Chef’s Notes
If you’re anything like me, the kitchen is a place where magical things happen! The beauty of this recipe is that it evolves with you. I’ve experimented with different cheeses and broths over time, and I can tell you that it’s brilliant no matter how you adapt it. One funny moment I remember was a time I mistook powdered sugar for flour while preparing this dish! Let’s just say we enjoyed a very sweet dinner that evening—but it taught me to always check the pantry labels!
So take this recipe and make it your own; every little change adds a story to the dish. Each bowl of soup won’t just be a meal but a memory filled with joy and laughter.
FAQs and Troubleshooting
1. Why is my soup too thick?
If you find that your soup has thickened too much, simply add a bit more beef broth or water until it reaches your desired consistency.
2. Can I use frozen potatoes?
While fresh is best, you can use frozen diced potatoes. Just remember they may add extra water to your soup, so adjust your broth accordingly.
3. My cheese clumped up! What went wrong?
This usually happens if the cheese is added too quickly or at too high of a temperature. To avoid this, ensure the soup is at a lower simmer when you stir in the cheese gradually.
4. Can I make this ahead of time?
Absolutely! Like most soups, the flavors deepen over time. Just be sure to store it in an airtight container. You can reheat on the stove with a splash of water or broth to revive the creamy texture.
Nutritional Info
(Nutrition info is optional; here’s a quick guide to average stats for this recipe)
- Calories: Approximately 400-450 per serving (based on 6 servings).
- Protein: 24g
- Carbs: 30g
- Fat: 25g
Let’s wrap this up, shall we? This Cheesy Beef and Potato Soup is not just a meal; it’s an experience—one that brings warmth, comfort, and delicious flavors into your home. So let’s head to the kitchen, create some culinary magic, and enjoy every cozy bite together. Cheers to delightful cooking!
PrintCheesy Beef and Potato Soup

A warm, hearty soup made with ground beef, tender potatoes, and creamy cheddar cheese, perfect for chilly evenings.
- Prep Time: 15 minutes
- Cook Time: 30 minutes
- Total Time: 45 minutes
- Yield: 6 servings 1x
- Category: Soup
- Method: Stovetop
- Cuisine: American
- Diet: Carnivore
Ingredients
- 1 lb ground beef
- 4 medium potatoes, diced
- 1 onion, chopped
- 3 cups beef broth
- 2 cups shredded cheddar cheese
- 1 cup heavy cream
- Salt and pepper to taste
- Fresh parsley for garnish
Instructions
- Brown the beef in a large pot over medium heat, breaking it apart with a wooden spoon for about 5-7 minutes until browned.
- Sauté the onion with the beef for 3-4 minutes until translucent.
- Incorporate the diced potatoes, mixing well.
- Add the beef broth and bring to a gentle simmer, scraping the bottom of the pot.
- Simmer for 15-20 minutes until potatoes are tender.
- Stir in the heavy cream and cheddar cheese until melted.
- Adjust seasoning as necessary.
- Garnish with parsley and serve.
Notes
Feel free to experiment with different cheeses and add-ins like greens or spices for a unique twist.
Nutrition
- Serving Size: 1 bowl
- Calories: 400
- Sugar: 3g
- Sodium: 800mg
- Fat: 25g
- Saturated Fat: 12g
- Unsaturated Fat: 10g
- Trans Fat: 1g
- Carbohydrates: 30g
- Fiber: 3g
- Protein: 24g
- Cholesterol: 80mg
Keywords: soup, beef, potatoes, cheesy soup, comfort food
Orzo Soup
Cozy Up with Orzo Soup: Your New Favorite Comfort Dish
Welcome back to the kitchen, food lovers! Today, we’re diving into the wonderful world of Orzo Soup, a dish that’s all about comfort, coziness, and flavor. If you’re like me, the colder months have a way of bringing out the comfort food cravings, and what could be more inviting than a warm bowl of homemade soup? This isn’t just any soup; it’s a delightful mélange of fresh ingredients, hearty orzo pasta, and a dash of love. So, tie on your apron, grab your favorite stirring spoon, and let’s get cooking!
A Toast to Warm Memories
Before we get into the nitty-gritty of the recipe, let me share a little kitchen story with you. I still remember the first time I had orzo soup. I was visiting my grandmother’s house for the holidays, and you know what that means: the aroma of something delicious wafting through the air. Grandma had her signature cooking apron on, her hair pulled back in a messy bun — classic grandma vibe.
That day, she decided to whip up a big pot of orzo soup for the family, and I was her eager sous-chef. I can still hear her saying, “Savannah, cooking is about love, and every ingredient should have a purpose.” As we tossed in diced vegetables, fragrant herbs, and the pearl-like pasta, I felt an overwhelming sense of warmth and belonging.
When we finally sat at the table, soup steaming in our bowls, it was not just the food that made it special; it was the laughter and stories shared. That first spoonful sent me right to comfort heaven — rich broth, tender veggies, and those little orzo gems providing just the right chew. This soup quickly became a staple in my own household. Every time I make orzo soup, I’m transported back to Grandma’s kitchen, surrounded by love and warmth.
Ingredients
Here’s what you’ll need for this heartwarming dish:
-
1 tablespoon extra virgin olive oil
A staple in any kitchen! This oil adds a rich flavor and helps to sauté the vegetables. If you’re looking for a healthier fat option, try avocado oil! -
1 medium-sized onion, diced
Onions are the base of many flavorful dishes. They add sweetness and depth to the soup. For a milder flavor, you could substitute with shallots. -
1 large carrot, diced
Carrots bring a slight sweetness and vibrant color to the mix. If you’re out of carrots, try parsnips for a different twist! -
1 large celery rib, diced
Celery adds a crisp texture and is a classic mirepoix ingredient. In a pinch, you could use fennel for a more aromatic touch. -
1 garlic clove, minced
A little garlic goes a long way! It infuses the broth with wonderful flavor. Feel free to add more if you’re a fan — it’s hard to overdo garlic! -
½ teaspoon dried basil or dried thyme
Herbs elevate the dish with their fragrance. Opt for Italian seasoning if you have it, or fresh herbs for an extra burst of flavor. -
2 teaspoon flour
This helps thicken the soup slightly. If you’re gluten-free, cornstarch or arrowroot powder can be great substitutions. -
4 cups (960 ml) low-sodium vegetable broth
A tasty, quality broth is crucial! Low-sodium broth allows you to control the saltiness. Chicken broth can be used if you’re not vegetarian. -
1 ¼ teaspoon salt, or to taste
Salt is essential for bringing out flavors! Remember, if your broth is salty, lessen the added salt. -
1 cup (165 grams) orzo pasta
These tiny pasta pieces are the heart of our soup. If you want a gluten-free option, rice or quinoa would work beautifully. -
2 tablespoons fresh parsley, chopped
Fresh herbs brighten up the dish and add color. You can also substitute with fresh basil or dill if you prefer!
Step-by-Step Instructions
Now that you’ve gathered all your ingredients, let’s get cooking! Follow these steps to make the most delicious orzo soup.
-
Sauté the Vegetables
In a heavy-bottom pot, heat the olive oil over medium heat. Add the diced onion, carrot, and celery. Sauté for about 5-7 minutes, stirring occasionally until the vegetables are tender and slightly caramelized. This process develops flavors, so make sure to keep stirring. Pro tip: if you’re short on time, a bit of pre-diced frozen onion mix works wonders too! -
Add the Garlic & Herbs
Once your vegetables are gorgeous and golden, add the minced garlic and your choice of dried herbs (basil or thyme). Sauté for an additional minute. The goal is to bring out that aromatic goodness without burning the garlic — no one wants bitter soup! -
Incorporate the Flour
Sprinkle the flour over the sautéed vegetables, stirring continuously for about a minute. This will help create a thick base for your soup. If the mixture starts sticking to the pot, don’t panic; just keep stirring, and it will all meld together! -
Add the Broth
Gradually pour in the vegetable broth while continuing to stir, making sure no lumps of flour remain. This will create a smooth, silky broth. Increase the heat and bring it to a gentle simmer. -
Stir in the Orzo
Once simmering, toss in the orzo pasta and salt. Give it a stir and let it cook for about 8-10 minutes, or until the orzo is al dente. Keep an eye on it; if you prefer a thinner soup, add a splash more broth or water as needed. Chef hack: If you’re cooking the soup in advance, consider undercooking the orzo slightly so it’s perfectly tender at serving time. -
Season to Taste
After the cooking time, taste your soup! Adjust the seasoning with more salt if needed. If you’re feeling adventurous, squeeze in a touch of lemon juice for brightness or a dash of hot sauce for a kick! -
Finish with Fresh Parsley
Stir in the fresh chopped parsley just before serving. It adds a lovely freshness! I always find this final touch takes the soup to the next level.
Serving Suggestions
When it comes to serving your orzo soup, presentation can really elevate the experience. Serve it in deep bowls, and don’t be shy with the parsley garnish — it adds a pop of color! A drizzle of high-quality olive oil on top adds elegance and richness. You can also serve it alongside crusty bread or a fresh salad for a complete meal.
Recipe Variations
Now, let’s talk about some fun twists you can make to personalize your orzo soup:
- Add Protein: Toss in shredded rotisserie chicken or cooked chickpeas for a heartier dish.
- Spice it Up: Add crushed red pepper flakes or diced green chilies to kick it up a notch!
- Creamy Version: For a creamier soup, stir in a splash of heavy cream or coconut milk right before serving.
- Vegetable Medley: Feel free to add in other veggies, like kale, spinach, or zucchini for extra nourishment and color.
- Pesto Power: Stir in a spoonful of your favorite pesto just before serving for a burst of fresh flavor.
Chef’s Notes
Ah, orzo soup — my steadfast companion in the chilly months. Over the years, I’ve experimented with this recipe. Some days, I feel nostalgic and add a sprinkle of Parmesan; other days, I play with the herbs and go for something a little more exotic. The beauty of this soup is that it constantly evolves with my emotions in the kitchen. There’s something inherently beautiful about cooking: you can take a classic dish and make it your own, one twist at a time!
FAQs and Troubleshooting
-
Can I store leftovers?
Absolutely! This soup stores well in the fridge for up to 3 days. Just keep in mind that the orzo will continue to absorb the broth, so you might want to add a bit more when reheating. -
What if the soup is too thick?
If your soup thickens too much, simply add more broth or water until it reaches your desired consistency. Stir well and let it simmer briefly. -
Can I freeze it?
Yes, but I recommend freezing it without the orzo. Cook the orzo separately when you’re ready to enjoy your soup! -
What if I don’t have fresh herbs?
Dried herbs work great too! Just use about a third of the amount stated for fresh herbs, as dried herbs are more concentrated in flavor.
Nutritional Info
While I’m not a nutritionist, I like to think this soup packs a healthy punch! With its vibrant vegetables and wholesome ingredients, it’s a great source of vitamins, fiber, and plant-based goodness. Enjoy it guilt-free!
So there you have it, friends — a recipe for Orzo Soup that’s as much about gathering around the table as it is about the ingredients. May each bowl bring you warmth and connection just as it did for me and my family. I can’t wait to hear your stories and how you make it your own! Let’s keep cooking and sharing delicious moments, one meal at a time.
PrintOrzo Soup

A cozy and heartwarming orzo soup filled with fresh vegetables and flavors, perfect for chilly days.
- Prep Time: 10 minutes
- Cook Time: 20 minutes
- Total Time: 30 minutes
- Yield: 4 servings 1x
- Category: Soup
- Method: Stovetop
- Cuisine: Italian
- Diet: Vegetarian
Ingredients
- 1 tablespoon extra virgin olive oil
- 1 medium-sized onion, diced
- 1 large carrot, diced
- 1 large celery rib, diced
- 1 garlic clove, minced
- ½ teaspoon dried basil or dried thyme
- 2 teaspoon flour
- 4 cups (960 ml) low-sodium vegetable broth
- 1 ¼ teaspoon salt, or to taste
- 1 cup (165 grams) orzo pasta
- 2 tablespoons fresh parsley, chopped
Instructions
- Sauté the vegetables: In a heavy-bottom pot, heat the olive oil over medium heat. Add the diced onion, carrot, and celery. Sauté for about 5-7 minutes, stirring occasionally until the vegetables are tender and slightly caramelized.
- Add the garlic & herbs: Once your vegetables are golden, add the minced garlic and your choice of dried herbs. Sauté for an additional minute.
- Incorporate the flour: Sprinkle the flour over the sautéed vegetables, stirring continuously for about a minute.
- Add the broth: Gradually pour in the vegetable broth while continuing to stir. Increase the heat and bring it to a gentle simmer.
- Stir in the orzo: Once simmering, toss in the orzo pasta and salt. Let it cook for about 8-10 minutes, or until the orzo is al dente.
- Season to taste: After cooking, taste your soup and adjust the seasoning with more salt if needed.
- Finish with fresh parsley: Stir in the fresh chopped parsley just before serving.
Notes
You can add shredded rotisserie chicken, crushed red pepper, or even a splash of heavy cream for variations.
Nutrition
- Serving Size: 1 bowl
- Calories: 320
- Sugar: 4g
- Sodium: 600mg
- Fat: 7g
- Saturated Fat: 1g
- Unsaturated Fat: 3g
- Trans Fat: 0g
- Carbohydrates: 54g
- Fiber: 4g
- Protein: 9g
- Cholesterol: 0mg
Keywords: orzo soup, comfort food, vegetarian soup
Minute Creamy Chicken Gnocchi Soup for Weeknights
Warm Up with Chicken and Gnocchi Soup: A Cozy Classic
There’s something incredibly comforting about a warm bowl of soup on a chilly day. The aromas wafting through the house, the anticipation of gathering around the table, and that first rich sip—nothing compares. Today, we’re diving into one of my all-time favorite dishes: Chicken and Gnocchi Soup. This delightful recipe is perfect for weeknight dinners, but it’s also fancy enough to impress guests at your next gathering. Plus, once you master it, feel free to share with friends—you might end up with some new admirers!
I first stumbled upon this recipe during a particularly rainy autumn while visiting my grandmother. I remember helping her in the kitchen, her warm laughter mixing with the clinking of spoons against bowls. She always had a knack for turning simple ingredients into something extraordinary, and that day, it was all about chicken and dumplings. After a few hours of cooking, we had a deliciously rich soup that warmed our souls. The moment felt timeless, etched in my memory like the deep aromas that enveloped us. I now use that experience as inspiration for my own version, adding gnocchi—a bit of a twist that elevates this dish to an entirely new level!
Ingredients
Here’s what you’ll need:
-
2 cups cooked shredded chicken
This is your protein powerhouse! You can use leftover roast chicken, a store-bought rotisserie chicken, or boil and shred your own. The beauty of this recipe is its adaptability—use what you have on hand! -
1 package gnocchi
These little pillows of perfection are typically found in the pasta aisle of your grocery store. If you can’t find them, you can use dumplings or even small pasta like orzo or ditalini as a substitute. -
1 cup carrots, diced
Fresh carrots add sweetness and a burst of color. If you have other veggies on hand—like parsnips or bell peppers—feel free to mix them in for added flavor! -
1 cup celery, diced
Celery brings a crunchy texture and aromatic foundation. No celery? Feel free to leave it out or swap it with fennel for a unique twist. -
1 onion, chopped
A must-have for flavor depth! I love using yellow onions, but white or shallots work nicely too. -
3 cloves garlic, minced
Because everything is better with garlic, am I right? For an even faster approach, jarred minced garlic can be used, but fresh is always best for flavor. -
4 cups chicken broth
I recommend low-sodium so you can control the saltiness. Homemade broth adds incredible depth if you have it—just make sure it’s good quality! -
1 cup heavy cream
This is the creaminess factor—which brings everything together into a luxurious finish. For a lighter version, you could swap it with half-and-half or even coconut milk for a dairy-free option. -
1 teaspoon dried thyme
This herb gives an earthy touch that complements the other flavors. Fresh thyme works too—just double the amount! -
1 teaspoon dried basil
Another aromatic touch! Basil adds warmth and richness, but you can also use Italian seasoning if that’s what you have on hand. -
Salt and pepper to taste
Always adjust to your preference! Freshly cracked pepper adds a lovely kick. -
Olive oil
We use this to sauté our veggies. A good quality extra virgin olive oil brightens the flavors beautifully.
Step-by-Step Instructions
Now, let’s get cooking! Follow these detailed instructions, and I promise you’ll have a pot of comforting soup in no time.
-
Prep Your Ingredients
Start by gathering all your ingredients. Prepping ahead saves time and helps maintain the flow of your cooking process. Chop your veggies, shred the chicken, and measure out your broth and cream. A tidy kitchen is a happy kitchen! -
Sauté the Aromatics
In a large pot or Dutch oven, drizzle about a tablespoon of olive oil and heat it over medium heat. Add your chopped onion, diced carrots, and celery. Sauté these aromatic heroes for about 5-7 minutes until they soften slightly. The goal here is to develop a flavor base for your soup while the kitchen fills with their lovely scent. -
Add Garlic
Toss in the minced garlic and sun throughout the kitchen. Sauté everything together for another minute—this step enhances the flavors while preventing any overcooking of the garlic. Nobody wants that bitter bite! -
Pour in the Broth
Time to add in the chicken broth! Carefully pour it into the pot, stirring gently to combine everything. Bring it to a simmer and let it bubble away for about 10 minutes. During this time, you’ll want to collect the thoughts of home—enjoy the aromas and the anticipation of the deliciousness ahead. -
Incorporate the Gnocchi
Add your gnocchi into the bubbling broth. They’ll cook quickly—about 2-3 minutes or until they float to the top. This is where the magic happens! The gnocchi absorbing the flavors is what makes this dish so special. -
Add the Chicken and Cream
Once the gnocchi are floating, stir in your shredded chicken and pour in the heavy cream. This will make your soup luxuriously creamy. Allow everything to heat through for an additional 3-5 minutes, stirring gently. Sprinkle in your dried thyme and basil, followed by a generous sprinkle of salt and pepper. Taste and adjust seasoning as necessary. -
Final Touches
Give your beautiful creation a final stir. Turn off the heat and let it breathe for a couple of minutes. I like to let the flavors mingle! Ladle the soup into bowls and prepare for the compliments that are bound to follow.
Serving Suggestions
Presentation is key! Serve your Chicken and Gnocchi Soup in deep, stylish bowls (the kind that makes you want to curl up on the couch and watch your favorite show). A sprinkle of fresh herbs on top or a drizzle of olive oil can elevate the look even more. Pair this warm bowl with some crusty bread or a light green salad for a complete meal.
Recipe Variations
This recipe is all about creativity! Here are some fun twists you can try:
- Vegetarian Twist: Use vegetable broth, swap the chicken for mushrooms or chickpeas, and add in some leafy greens (spinach or kale) for a nutritious boost.
- Spicy Kick: Add a pinch of red pepper flakes or a splash of hot sauce for a spicy version that warms you up even more!
- Herbaceous Delight: Substituting fresh herbs like dill or parsley can bring a new and fresh flavor profile; experiment to find your favorite combo.
- Comforting Cheesy: Stir in some grated Parmesan or a dollop of cream cheese for an extra creamy finish.
Chef’s Notes
As I’ve refined this recipe over the years, it has become a staple in my home; it dances between comfort food and gourmet elegance. I often find myself reminiscing about that rainy day in my grandmother’s kitchen, laughing at how I used to shy away from cooking. Now, it’s a joy to share these flavors with those I love. And yes, if you’re wondering—this soup is also delightful as leftovers. The flavors deepen even more deliciously the next day!
FAQs and Troubleshooting
-
What if my soup is too thick?
No worries! You can thin it out by adding a splash of chicken broth or water until it reaches your desired consistency. -
Can I freeze Chicken and Gnocchi Soup?
Yes, but gnocchi may alter in texture once frozen. For the best results, store the soup without gnocchi and add them fresh when reheating. -
How can I make this soup healthier?
Try substituting heavy cream with evaporated milk or plain Greek yogurt for a lighter version. You can also switch to whole grain or zucchini gnocchi! -
Can I use canned chicken?
Absolutely! Canned chicken saves time. Just make sure to drain it well before adding it to the soup.
Nutritional Info
While I generally don’t get too caught up in counting calories, here’s a rough breakdown of the nutrients you can expect in one serving (about 1.5 cups), excluding optional add-ins:
- Calories: 450
- Protein: 27g
- Carbohydrates: 35g
- Fat: 25g
Conclusion
Cooking is about crafting experiences—bringing people together, creating memories, and enjoying the simple pleasures in life. This Chicken and Gnocchi Soup is not just food; it’s a warm embrace in a bowl! I sincerely hope that you find joy and comfort in making this recipe and sharing it with loved ones. So put on your apron, pour yourself something warm, and let’s stir up some love in the kitchen! Happy cooking, and remember: every meal tells a story, I can’t wait to hear yours!
PrintChicken and Gnocchi Soup

A comforting bowl of Chicken and Gnocchi Soup that warms you up on chilly days with its rich flavors and creamy texture.
- Prep Time: 15 minutes
- Cook Time: 30 minutes
- Total Time: 45 minutes
- Yield: 4 servings 1x
- Category: Soup
- Method: Stovetop
- Cuisine: Italian
- Diet: Non-Vegetarian
Ingredients
- 2 cups cooked shredded chicken
- 1 package gnocchi
- 1 cup carrots, diced
- 1 cup celery, diced
- 1 onion, chopped
- 3 cloves garlic, minced
- 4 cups chicken broth
- 1 cup heavy cream
- 1 teaspoon dried thyme
- 1 teaspoon dried basil
- Salt and pepper to taste
- Olive oil
Instructions
- Prep your ingredients by chopping veggies, shredding chicken, and measuring broth and cream.
- Sauté the onion, carrots, and celery in olive oil over medium heat for 5-7 minutes.
- Add the minced garlic and sauté for another minute.
- Pour in the chicken broth and bring to a simmer for 10 minutes.
- Incorporate the gnocchi and cook for 2-3 minutes until they float.
- Add the shredded chicken and heavy cream, heating through for 3-5 minutes.
- Final touches: Stir, let it breathe, and serve in bowls.
Notes
This soup is even better as leftovers, and flavors deepen beautifully overnight.
Nutrition
- Serving Size: 1 serving
- Calories: 450
- Sugar: 5g
- Sodium: 800mg
- Fat: 25g
- Saturated Fat: 15g
- Unsaturated Fat: 8g
- Trans Fat: 0g
- Carbohydrates: 35g
- Fiber: 2g
- Protein: 27g
- Cholesterol: 100mg
Keywords: Chicken Soup, Gnocchi, Comfort Food, Easy Recipe, Hearty Soup