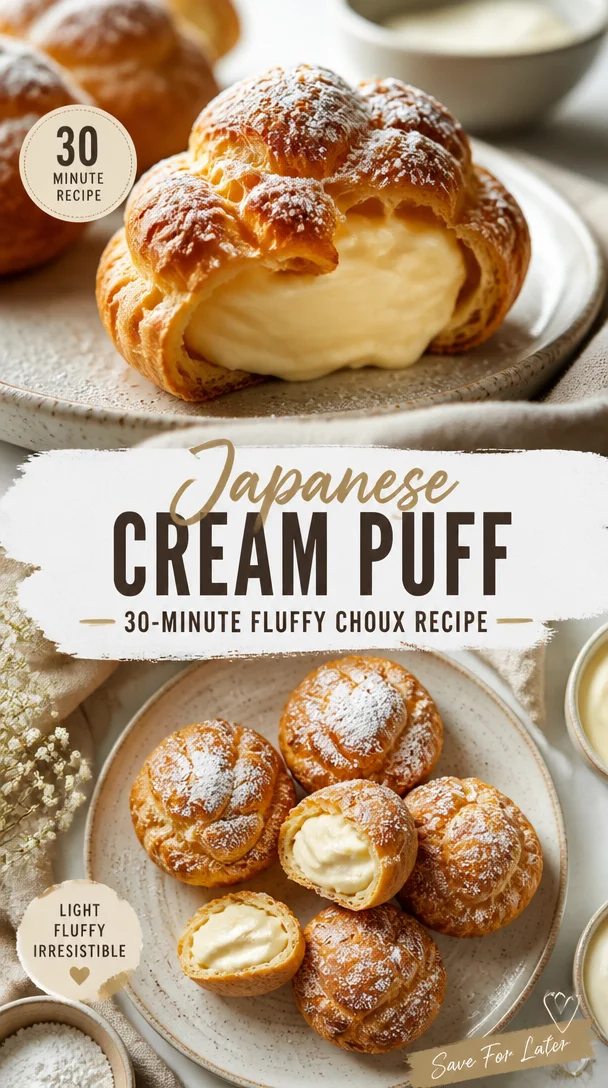
Japanese Cream Puff: 30-Minute Fluffy Choux Recipe
Indulge in Deliciousness: Japanese Cream Puffs You Can Master at Home
Hello, friends! Today, we’re diving into the delightful world of Japanese cream puffs. These airy confections, known as “choux” pastry in French, are just as breathtaking to the eye as they are to the taste buds. Soft, delicate, and filled with luscious cream, they are the perfect treat to elevate any gathering or simply brighten your day. From the first puff to the last, I can promise you a mini culinary adventure in your kitchen!
There’s something inherently sophisticated about a cream puff that feels both celebratory and cozy. Perhaps it’s the elegant shape, or the delightful cream filling that surprises with every bite. But don’t let the fancy name fool you—making these beauties at home is easier than you might think! Get ready for an excellent opportunity to tie on that ivory apron and impress your friends and family.
My Cream Puff Journey
Let me take you back to my very first encounter with Japanese cream puffs. Picture this: a quaint little café tucked away in the bustling streets of Kyoto. I vividly remember the afternoon sun filtering through the café windows, casting a warm glow over a display of pastries that seemed to defy gravity. It was there that I tasted my first cream puff, its delicate shell crumbling against my fingers, revealing a luscious filling that burst with flavor. I remember closing my eyes, savoring every bite—it was pure bliss!
From that moment on, my heart was set on mastering the art of making cream puffs. I experimented tirelessly in my kitchen—encouraged by my friends and family, who became my taste-test champions. Each time I perfected the recipe, I felt as if I were capturing a tiny piece of that magical café moment to share with everyone. Now, I want to share that joy with you!
Ingredients
Here’s what you’ll need to create these fluffy clouds of goodness:
- 3 tablespoons (40g) butter: Adds flavor and richness to the choux. For a dairy-free option, you can use coconut oil.
- 2 teaspoons (10g) sugar: Just the right amount to bring a hint of sweetness to the pastry. You can substitute with honey or maple syrup if desired.
- 1/2 cup (100 ml) water: This provides steam to help your choux puff up beautifully. If you want an extra hint of flavor, use brewed tea instead!
- 1/2 cup (60g) all-purpose flour: The foundation of your pastry. For a gluten-free alternative, try a gluten-free flour blend.
- 2 small eggs: These help bind the mixture and create that fluffy texture. If you’re avoiding eggs, you can experiment with flaxseed eggs (1 tablespoon ground flaxseed + 3 tablespoons water = 1 egg).
- 2 egg yolks: They add richness and contribute to a more vibrant color. You can omit them if you choose to keep it lighter.
- 1/4 cup (60g) caster sugar: This finely ground sugar dissolves quickly, creating a smooth texture for your pastry cream. Regular granulated sugar works too, but caster sugar is preferred for its fine texture.
- 2 tablespoons (20g) all-purpose flour (for the pastry cream): This thickens your filling, ensuring it’s both creamy and stable.
- 1 cup (200ml) milk: The base for your pastry cream. Feel free to use almond milk or soy milk for a vegan option.
- 1 tablespoon (14g) butter (for shine and firmness): This makes your cream filling luxurious. You can substitute with coconut cream if you’d like to keep it dairy-free.
Step-by-Step Instructions
Step 1: Making the Choux Pastry
-
Preheat your oven to 375°F (190°C). A hot start is key to getting those puffs to rise perfectly!
-
In a medium saucepan, combine butter, sugar, and water. Heat over medium until the butter melts and the mixture begins to boil.
-
Add the flour all at once and stir vigorously with a wooden spoon or spatula. Keep mixing until the dough forms a ball and pulls away from the sides of the pan—this should take about 2–3 minutes. Pro tip: The goal is to cook off some of the moisture; a slightly dry dough leads to fluffier choux!
-
Remove from heat and let it cool for about 5 minutes. You don’t want it too hot when adding the eggs, or you’ll end up scrambling them!
-
Incorporate the eggs one at a time. After each addition, stir until the dough is smooth and glossy. The mixture should be thick but falls easily from the spoon—this is when you know you’ve hit the sweet spot!
-
Transfer the dough to a piping bag fitted with a large round tip, or you can use a Ziploc bag with the corner snipped off. Pipe the dough onto a parchment-lined baking sheet, creating small mounds about 1.5 inches apart, leaving room for them to puff up.
-
To give your puffs a glossy finish, lightly brush them with an egg wash (made from beaten eggs). This step is optional, but it adds such a beautiful sheen!
-
Bake for about 20-25 minutes, or until they’re golden brown and puffed up. The best part? Don’t open the oven door too soon; we want these babies to rise and hold their shape!
Step 2: Preparing the Pastry Cream
-
In a medium saucepan over medium heat, combine the milk and half of the caster sugar. Stir to dissolve the sugar and let the mixture come to a gentle simmer.
-
While that’s heating, whisk together the egg yolks, the rest of the caster sugar, and the 2 tablespoons of flour in a bowl. You want a smooth and pale mixture—this is where the magic happens!
-
Slowly pour the hot milk into your egg mixture, whisking continuously to temper the eggs. This step is crucial! If you add the hot milk too quickly, you’ll end up with scrambled eggs.
-
Now, pour everything back into the saucepan. Cook over medium heat, whisking constantly until it thickens (about 3-5 minutes). The mixture should be thick enough to coat the back of a spoon.
-
Once thickened, remove from heat and whisk in the 1 tablespoon of butter. This not only adds shine but also gives the cream a rich flavor.
-
Strain the pastry cream through a fine sieve into a clean bowl to ensure it’s super smooth. Wish away any lumps!
-
Cool the pastry cream by covering the surface with plastic wrap to prevent a skin from forming. Let it chill in the refrigerator while your puffs cool too!
Step 3: Filling the Puffs
-
Once your cream puffs are completely cooled, use a small knife to make a slit in the side of each puff. This helps release some steam and makes filling easier.
-
Grab your chilled pastry cream and transfer it to a piping bag. Pipe it into each puff until they feel satisfyingly full. You want them to be plump and indulgent!
-
Once filled, you can dust the tops with powdered sugar or even dip them in chocolate for a decadent touch.
Serving Suggestions
Arrange your elegant cream puffs on a beautiful platter or cake stand to display their charming shape. Drizzle some chocolate ganache or raspberry sauce over the top for a pop of color and added flavor. Alternatively, serve them with fresh seasonal fruit on the side—think strawberries or blueberries for a delightful contrast!
Recipe Variations
- Matcha Cream Puffs: Add 1-2 teaspoons of matcha powder to your pastry cream for a delightful green tea flavor.
- Chocolate Ganache: Melt some chocolate and mix it with cream for a rich chocolate filling. Swirl it with the pastry cream for a marbled effect.
- Lemon Zest: Fold in some lemon zest to the pastry cream for a bright citrus twist that’s refreshing!
- Mocha Madness: Add a shot of espresso to your pastry cream for a coffee-flavored delight.
- Fruit-Filled Cream Puffs: Fold fresh fruit or fruit puree into the pastry cream for a refreshing twist! Think strawberries, mangoes, or even a hint of passion fruit.
Chef’s Notes
Ah, the beauty of choux pastry! I’ve had my fair share of trials and errors—believe me; I’ve watched puffs collapse and come out flat as pancakes more times than I can count. That’s when I learned the power of patience and a good preheated oven! One time, I forgot to add the eggs, thinking I was being “strategic” to avoid scrambling. Spoiler alert: the dough didn’t rise. So many lessons learned, but every misstep only made those successful puffs more rewarding!
FAQs and Troubleshooting
Q: Why didn’t my cream puffs rise?
A: Ensure that your dough is properly cooked and that you didn’t open the oven door too early. Both factors can cause deflation.
Q: Can I make the dough in advance?
A: Yes! You can prepare choux dough ahead of time and store it in the fridge. Just be sure to bake them fresh to keep that puff intact.
Q: How do I store leftover cream puffs?
A: Store unfilled puffs in an airtight container at room temperature for up to two days. Filled puffs are best eaten the same day, but you can refrigerate them for a day. Just know, they might get a little soggy!
Q: Can I freeze cream puffs?
A: Absolutely! Freeze the unfilled choux puffs and fill them soon after defrosting. Just make sure they are airtight to prevent freezer burn.
Nutritional Info (Optional)
Per cream puff (filled):
- Calories: ~120
- Fat: 6g
- Carbohydrates: 15g
- Protein: 3g
- Sugar: 5g
Now that you have everything you need, I hope you’re excited to whip up these delicious Japanese cream puffs! Cooking should feel like a joyous adventure, and I can’t wait for you to experience the delight as these puffs come together in your kitchen. Remember, good food is about gathering and sharing, and I’m so thrilled to be on this journey with you.
So tie on that apron, pour yourself a glass of something sparkling, and let’s create some culinary magic together! Happy baking!
PrintJapanese Cream Puffs

Light and airy Japanese cream puffs filled with luscious pastry cream, perfect for any occasion.
- Prep Time: 15 minutes
- Cook Time: 30 minutes
- Total Time: 45 minutes
- Yield: 12 servings 1x
- Category: Dessert
- Method: Baking
- Cuisine: Japanese
- Diet: Vegetarian
Ingredients
- 3 tablespoons (40g) butter
- 2 teaspoons (10g) sugar
- 1/2 cup (100ml) water
- 1/2 cup (60g) all-purpose flour
- 2 small eggs
- 2 egg yolks
- 1/4 cup (60g) caster sugar
- 2 tablespoons (20g) all-purpose flour (for pastry cream)
- 1 cup (200ml) milk
- 1 tablespoon (14g) butter (for filling)
Instructions
- Preheat your oven to 375°F (190°C).
- Combine butter, sugar, and water in a saucepan over medium heat until boiling.
- Add the flour all at once and stir until a ball forms, about 2–3 minutes.
- Remove from heat and cool for 5 minutes.
- Incorporate eggs one at a time, stirring until smooth and glossy.
- Transfer to a piping bag and pipe onto a lined baking sheet.
- Brush with egg wash for gloss, if desired.
- Bake for 20-25 minutes until golden brown.
- Combine milk and half the caster sugar in a saucepan over medium heat to simmer.
- Whisk egg yolks, remaining sugar, and 2 tablespoons flour in a bowl.
- Slowly pour hot milk into the egg mixture, whisking continuously.
- Cook the mixture back in the saucepan until thick, about 3-5 minutes.
- Whisk in 1 tablespoon of butter and strain through a sieve.
- Cool the pastry cream covered with plastic wrap.
- Make a slit in each cooled puff and fill with pastry cream using a piping bag.
- Dust with powdered sugar or dip in chocolate if desired.
Notes
Make sure not to open the oven door early for the best puff rise.
Nutrition
- Serving Size: 1 cream puff
- Calories: 120
- Sugar: 5g
- Sodium: 50mg
- Fat: 6g
- Saturated Fat: 3g
- Unsaturated Fat: 2g
- Trans Fat: 0g
- Carbohydrates: 15g
- Fiber: 0g
- Protein: 3g
- Cholesterol: 50mg
Keywords: cream puffs, Japanese dessert, choux pastry, pastry cream, baking
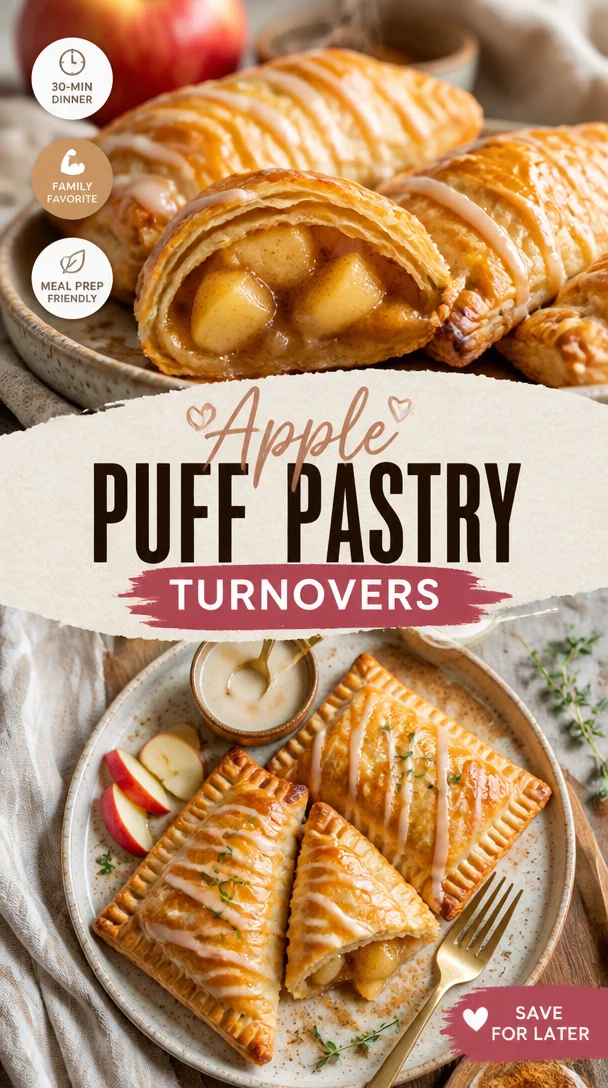
Apple Puff Pastry Turnovers
Apple Puff Pastry Turnovers: A Delightful Journey in Every Bite
Hello, dear friends! Today, we’re diving into the world of flaky, buttery goodness with a recipe that will have your kitchen smelling divine: Apple Puff Pastry Turnovers. These luscious little pockets of joy are not just a treat for the taste buds; they’re a celebration of warm, comforting flavors wrapped in crispy pastry. Think of them as tiny masterpieces, ready to impress your friends and family—or even just yourself—after a long day.
When I think back to my childhood, there’s a vivid memory that springs to mind: my grandmother’s kitchen, where warmth radiated from the oven as she prepared her famous apple turnovers. The smell of cinnamon and baked apples got me every time, making it impossible to resist sneaking one before they were even cool! Those delicious moments spent watching her craft these treats are woven into my earliest culinary experiences.
And that, my friends, is why I’m here to share this delightful recipe with you. Because cooking is not just about the food; it’s about the stories, memories, and love you put into every dish. Join me as we recreate a nostalgic favorite that’s easy enough for a weeknight treat yet impressive enough for any gathering.
A Taste of Nostalgia
It was a chilly autumn afternoon, one of those perfect days when the leaves turned a brilliant amber and the air was crisp. I remember standing on a stool in my grandmother’s cozy kitchen, peering over the counter as she peeled and diced the Granny Smith apples. With every slice, she would share a story about her own childhood and how her mother taught her to bake. Those apples, mixed with butter, sugar, and a sprinkle of cinnamon, were transformed into a filling that was so magical I could hardly contain my excitement.
As we rolled out the puff pastry, I marveled at how something so simple could become an extraordinary treat with just a little love and creativity. By the time those turnovers came out of the oven, golden and flaky, the entire house was fragrant with the smell of baked apples and cinnamon. Each bite was a warm hug—sweet, tart, and comforting. That experience shaped my love for cooking and my belief that everyone deserves to savor the beauty of homemade treats, no matter their skill level. So, let’s channel that nostalgia and recreate this delightful dish together!
Ingredients
Gather your ingredients, and let’s jump into the apple turnover magic! Here’s what you’ll need:
-
1 pound (2 sheets) puff pastry (thawed if frozen)
- Tip: Puff pastry is a game changer! Keep some on hand for quick desserts and savory delights. If you’re in a pinch, you can use phyllo dough, but keep in mind the texture will be different!
-
2 large (or 4 small) Granny Smith apples (peeled, cored, and diced into small uniform pieces)
- Substitution: If Granny Smith apples aren’t available, feel free to use Honeycrisp or Fuji for a sweeter flavor. Just be sure they are tart enough to balance the sugar!
-
1 tablespoon unsalted butter
- Chef Insight: Using unsalted butter lets you control the saltiness in your dish. If you only have salted butter on hand, just reduce the added salt from the recipe.
-
1/8 cup brown sugar
- Tip: Not only does brown sugar add sweetness, but it also brings a lovely moisture and depth of flavor. Dark brown sugar can give an even richer taste.
-
1/8 cup granulated sugar
- Substitution: You can adjust the sugar amounts according to your sweetness preference, or even swap in coconut sugar for a more wholesome twist.
-
1 teaspoon cornstarch
- Chef Insight: This helps thicken the apple mixture and prevents it from becoming too runny. If you don’t have cornstarch, you can use flour, but it might not absorb as well as cornstarch does.
-
1/2 teaspoon cinnamon
- Tip: For an extra kick, you can also add a dash of nutmeg or allspice to enhance the flavor profile.
-
1 pinch salt
- Chef Insight: Balancing flavors is key in cooking. A pinch of salt elevates the sweetness and brings out the apples’ natural flavor.
-
1 large egg
- Tip: This will be used to create an egg wash that gives your pastries that beautiful golden color when baked. You can substitute it with a teaspoon of yogurt or a plant-based egg if you’re vegan.
-
1 tablespoon milk
- Substitution: Any type of milk works here—dairy or non-dairy! Almond milk or oat milk can add a slight flavor twist too.
-
2/3 cup powdered sugar
- Chef Insight: Whisked together with milk, this creates a simple glaze to elevate our turnovers to pastry perfection!
-
1 tablespoon milk (for glaze)
- Tip: You can add a splash of vanilla extract for an aromatic twist to the glaze.
Step-by-Step Instructions
Ready to make some kitchen magic? Follow these steps carefully, and you’ll have a batch of gorgeous apple turnovers in no time!
-
Preparing the Apples: Begin by peeling, coring, and dicing your Granny Smith apples into small, even pieces (about half an inch). This ensures they cook evenly. In a medium saucepan over medium heat, melt the unsalted butter. Once melted, add the diced apples, brown sugar, granulated sugar, cornstarch, cinnamon, and a pinch of salt. Stir gently to combine, and let it cook for about 5–7 minutes until the apples are tender but not mushy. Remove from heat and set aside to cool.
-
Rolling Out the Puff Pastry: Preheat your oven to 400°F (200°C). Roll out the thawed puff pastry sheets on a lightly floured surface until they are about 1/8 inch thick. Cut each sheet into 4 squares—this will yield 8 turnovers. Don’t stress if they don’t look perfect; rustic is the name of the game!
-
Filling the Pastry: Spoon about 2 tablespoons of the apple filling onto the center of each pastry square. Be careful not to overfill, or your delicious filling might escape during baking!
-
Assembling the Turnovers: Fold the pastry over the filling to create a triangle. Press down the edges firmly with your fingers to seal, then use a fork to crimp the edges for an extra secure seal. This also gives a lovely decorative touch.
-
Egg Wash and Baking: Whisk together the egg and milk in a small bowl. Brush this egg wash over the tops of the turnovers—this will give them that golden, inviting look. Place the turnovers on a parchment-lined baking sheet, leaving space for them to puff up. Bake in your preheated oven for 20-25 minutes or until they are golden brown and flaky. You might want to rotate the baking sheet halfway through for even cooking.
-
Making the Glaze: While the turnovers bake, whisk together the powdered sugar and the remaining tablespoon of milk in a small bowl. You want a syrupy consistency—you can add more powdered sugar or milk as needed to achieve this.
-
Gilding the Lily: Once the turnovers are out of the oven (be sure to let them cool for a few minutes), drizzle the glaze over the top. This adds the finishing touch and makes them look truly tantalizing!
Serving Suggestions
These apple puff pastry turnovers are best served warm, right out of the oven. To plate them, arrange them on a charming platter and dust lightly with a sprinkle of powdered sugar. You can serve them alongside a scoop of vanilla ice cream or a dollop of whipped cream for an extra indulgent treat. An aromatic cup of spiced chai or hot cider pairs beautifully as well, creating a complete cozy experience.
Recipe Variations
- Berry Bliss: Substitute some of the apples with mixed berries (e.g., blueberries, raspberries) for a delightful fruity twist.
- Nutty Addition: Add 1/4 cup of chopped walnuts or pecans to the apple filling for a crunchy texture.
- Caramel Drizzle: Drizzle salted caramel sauce over the baked turnovers for an indulgent dessert.
- Savory Twist: For a savory version, fill the pastries with spiced sautéed mushrooms and cheese instead of apples.
- Gluten-Free Option: Use gluten-free puff pastry so everyone can enjoy these treats regardless of dietary restrictions.
Chef’s Notes
As I’ve made these turnovers over the years, they’ve evolved into a cherished family favorite. Sometimes I experiment with different fruits depending on what’s in season—pears, peaches, and even berries have made their way into these pockets of love!
The best part about this recipe is that it’s incredibly forgiving. If your apples are a bit too sweet, a squeeze of lemon juice can add a bright touch and balance the flavors. And if you happen to overdo it with the filling, just know that a little overflow never hurt anyone—it’s a sign of love, right?
FAQs and Troubleshooting
-
Why did my puff pastry not puff?
Unfortunately, if the pastry wasn’t thawed properly (make sure it’s fully thawed!), or if the oven wasn’t hot enough, it might not puff up as expected. Always preheat your oven! -
My turnovers leaked during baking. What went wrong?
This usually happens if the filling was too wet. Ensure you’re not overloading the pastry with filling, and give the filling time to cool and thicken before using it. -
Can I freeze the turnovers before baking?
Absolutely! Just assemble them, place them on a baking sheet lined with parchment, and freeze them until solid. Then transfer them to a freezer bag. You can bake them straight from the freezer; just add a few extra minutes to the baking time. -
What should I do if the glaze is too thick?
If your glaze is too thick, gradually add more milk until you reach your desired consistency. It should be thick enough to drizzle but thin enough to spread a bit!
Nutritional Info
While I won’t dive too deep into the numbers, it’s worth noting that each delightful turnover is best enjoyed in moderation as a sweet treat. Made with fresh apples and a few simple ingredients, these beauties are perfect for sharing and savoring. Remember, it’s the joy of cooking and gathering together that truly nourishes us!
So there you have it—Apple Puff Pastry Turnovers that are sure to warm your heart and delight your guests (or yourself!). Cooking is a journey, and I’m so glad you’re on this one with me. Let’s keep creating those lovely kitchen memories, one recipe at a time! Happy cooking, my friends! 🍏❤️
PrintApple Puff Pastry Turnovers

Delightful apple turnovers wrapped in flaky puff pastry, perfect for any occasion.
- Prep Time: 15 minutes
- Cook Time: 25 minutes
- Total Time: 40 minutes
- Yield: 8 servings 1x
- Category: Dessert
- Method: Baking
- Cuisine: American
- Diet: Vegetarian
Ingredients
- 1 pound (2 sheets) puff pastry (thawed if frozen)
- 2 large (or 4 small) Granny Smith apples (peeled, cored, and diced)
- 1 tablespoon unsalted butter
- 1/8 cup brown sugar
- 1/8 cup granulated sugar
- 1 teaspoon cornstarch
- 1/2 teaspoon cinnamon
- 1 pinch salt
- 1 large egg
- 1 tablespoon milk
- 2/3 cup powdered sugar
- 1 tablespoon milk (for glaze)
Instructions
- Prepare the Apples: Begin by peeling, coring, and dicing your Granny Smith apples into small, even pieces. In a medium saucepan over medium heat, melt the unsalted butter. Add the diced apples, brown sugar, granulated sugar, cornstarch, cinnamon, and a pinch of salt. Stir gently and let it cook for about 5–7 minutes until the apples are tender. Remove from heat and set aside to cool.
- Preheat your oven to 400°F (200°C). Roll out the thawed puff pastry sheets on a lightly floured surface until about 1/8 inch thick. Cut each sheet into 4 squares—yielding 8 turnovers.
- Spoon about 2 tablespoons of the apple filling onto the center of each pastry square. Be careful not to overfill.
- Fold the pastry over the filling to create a triangle. Press down the edges firmly and use a fork to crimp the edges.
- Whisk together the egg and milk in a small bowl. Brush this egg wash over the tops of the turnovers. Place on a parchment-lined baking sheet, leaving space for puffing up. Bake for 20-25 minutes until golden brown.
- Whisk together the powdered sugar and remaining milk in a small bowl for the glaze, achieving a syrupy consistency.
- Drizzle the glaze over cooled turnovers before serving.
Notes
Serve warm with whipped cream or vanilla ice cream for an extra treat.
Nutrition
- Serving Size: 1 turnover
- Calories: 250
- Sugar: 10g
- Sodium: 150mg
- Fat: 10g
- Saturated Fat: 4g
- Unsaturated Fat: 6g
- Trans Fat: 0g
- Carbohydrates: 36g
- Fiber: 1g
- Protein: 3g
- Cholesterol: 30mg
Keywords: apple, pastry, dessert, turnovers, baked goods

Minute Crispy Ham & Cheese Puff Pastry Bites
Perfectly Flaky Ham and Cheese Puff Pastry
Hello, fellow foodies! Today, we’re diving into one of my absolute favorite savory treats: Ham and Cheese Puff Pastry. There’s something undeniably delightful about biting into that flaky, buttery exterior to reveal a warm, cheesy, and savory filling within. This dish is perfect for a cozy evening at home or as a sophisticated appetizer at your next gathering. Let’s roll up our sleeves and embark on this delicious culinary adventure together!
A little taste of nostalgia
I still remember the first time I encountered a delightful ham and cheese pastry. Picture this: I was a wide-eyed kid at a friend’s birthday party, and the spread was loaded with colorful balloons, kids sprinting around, and a buffet table brimming with treats. But the stars of the show were the warm ham and cheese pastries, glistening under the soft glow of fairy lights. One bite transported me to a world of flaky perfection—golden layers giving way to melty cheese and savory ham.
Fast forward a few years, and you can bet that I’ve tweaked this beloved dish to make it my own. I’ve since experimented with different cheeses and herbs, but the heart of the dish remains the same—a crafted blend of comfort and simplicity. Every time I whip these up, I’m reminded of that carefree childhood party, and I can’t help but smile. So, let’s capture that feeling in our kitchens today!
Ingredients
Here’s what you’ll need to create these beautiful ham and cheese puff pastries:
-
1 sheet of puff pastry
- This flaky dough is available in the frozen aisle of most grocery stores. Be sure to let it thaw in the fridge for a few hours before using. If you’re feeling adventurous, you could even make homemade puff pastry—just remember it takes a bit of time and patience!
-
100g sliced ham
- Go for your favorite! Honey-glazed, smoked, or even a classic deli ham will work beautifully. For a vegetarian option, substitute with sautéed mushrooms or spinach, or try a delicious combination of roasted red peppers and feta cheese.
-
100g shredded cheddar cheese
- Sharp cheddar adds a lovely flavor and pairs perfectly with ham. Feel free to mix it up with Gruyère or mozzarella for a gooey goodness, or even try a spicy pepper jack for an extra kick!
-
1 egg (beaten for egg wash)
- This will give your pastries that beautiful golden-brown finish. If you’re vegetarian, you can use a splash of milk or water for a lighter glaze.
-
Salt and pepper to taste
- A pinch of seasoning makes all the difference! Taste as you go—don’t be shy about enhancing those flavors.
-
Optional: fresh herbs (like thyme or parsley)
- Fresh herbs brighten up the flavors. If you have any on hand, chop them finely and toss them into the mix!
Step-by-Step Instructions
Now, let’s get cooking! Follow these steps closely for perfectly flaky and delicious puff pastries:
-
Preheat Your Oven: Start by preheating your oven to 200°C (400°F). This ensures that your pastries will puff and become beautifully golden as they bake.
-
Roll Out the Puff Pastry: Unroll the thawed puff pastry sheet onto a lightly floured surface. If it’s too cold, it may crack—let it sit at room temperature for a few minutes. Gently roll it out using a rolling pin to smoothen it and increase the surface area just slightly.
-
Cut the Pastry: Using a sharp knife or pizza cutter, divide the pastry into squares or rectangles. Aim for about 10cm (4 inches) in size. Don’t worry if they aren’t perfectly shaped; rustic is charming!
-
Add the Filling: On the center of each square, layer a slice of ham followed by a generous sprinkle of shredded cheddar cheese. If you’re using herbs, sprinkle some finely chopped parsley or thyme over the filling. Remember, a little extra cheese on top never hurt anyone!
-
Fold and Seal: Carefully fold each pastry over, enclosing the filling. Press the edges together to seal them securely. You can use a fork to crimp the edges and create a beautiful design, or simply pinch them together with your fingers for a casual look.
-
Egg Wash Time: Place the filled pastries on a parchment-lined baking sheet. Brush the tops with the beaten egg using a pastry brush. This step ensures a gloriously shiny and golden crust. If you’re using milk or water, give them a good brush to help the dough brown!
-
Season and Bake: Sprinkle a pinch of salt and pepper across the top of each pastry, and pop them into the preheated oven. Bake for about 15-20 minutes or until they puff up and turn a gorgeous golden brown. Keep an eye on them; ovens can vary in temperature!
-
Cool and Serve: Once they’re out of the oven, let the pastries cool for a few minutes. This can be the hardest part; trust me, the aroma is mouthwatering! Let them cool slightly, and then serve warm.
Serving Suggestions
To plate these little wonders, arrange them on a beautiful serving platter, perhaps garnishing with some fresh herbs for a splash of color. Pair them with a light salad or some dipping sauces like spicy mustard, aioli, or even a sweet chutney for a delightful flavor contrast. Whether you’re entertaining or enjoying them on a cozy night in, they’ll surely impress!
Recipe Variations
Looking to switch things up? Here are some tasty variations to consider:
- Spinach and Feta: Swap the ham for sautéed spinach and crumbled feta for a vegetarian option full of flavor.
- Sun-Dried Tomato and Goat Cheese: Mix sun-dried tomatoes into the cheese filling for a Mediterranean twist.
- Buffalo Chicken: Add cooked shredded chicken tossed in buffalo sauce for a spicy kick.
- Herbed Cream Cheese: Use a spreadable herbed cream cheese in place of the cheese for a creamy, savory bite.
- Savory Breakfast Puff: Add scrambled eggs and cooked bacon or breakfast sausage to create mini breakfast pastries.
Chef’s Notes
Ham and cheese puff pastries have such a fun history in my kitchen. They’ve evolved over time from quick snacks in film nights to versatile treats for seasonally themed gatherings. I once made these in a rush for a last-minute brunch, and I used leftover Thanksgiving ham and cranberry sauce as a filling. Did it ever surprise me how delightful that unexpected combination turned out!
Remember, the beauty of cooking is experimentation. Don’t stress over exact measurements—mold this recipe to your taste, personality, and cravings!
FAQs and Troubleshooting
1. What do I do if my puff pastry doesn’t puff up?
If your pastries don’t puff, double-check that your oven was preheated and that the pastry remained cold until it went in. Warm pastry won’t rise as beautifully!
2. Can I make these ahead of time?
Absolutely! You can prepare and fill the pastries ahead, then freeze them before baking. When you’re ready, just pop them in the oven from frozen—adjust baking time a bit longer.
3. What can I pair with these pastries?
They pair wonderfully with a light green salad, dipping sauces, or even a cup of soup for a comforting meal.
4. How do I store leftovers?
If you have any pastries left, store them in an airtight container in the fridge for up to 3 days. To reheat, pop them in the oven for a few minutes to restore the crispiness!
Nutritional Info
While I typically focus on flavor and enjoyment, you might wonder about the nutritional value. Here’s a rough estimate per serving:
- Calories: ~250
- Protein: 10g
- Carbohydrates: 20g
- Fat: 15g (depends on cheese and pastry type)
- Fiber: 1g
There you have it! A lovely continuation of my love for creating delicious food and bringing people together. I hope you enjoy making and sharing these ham and cheese puff pastries as much as I do. Remember, cooking is as much about the memories you create as it is about the food. So roll up your sleeves, have fun, and most importantly, savor every delightful bite. Happy cooking!
PrintPerfectly Flaky Ham and Cheese Puff Pastry

A delightful savory treat with a flaky, buttery exterior and a warm, cheesy, savory filling. Perfect for cozy evenings or elegant appetizers.
- Prep Time: 15 minutes
- Cook Time: 20 minutes
- Total Time: 35 minutes
- Yield: 4 servings 1x
- Category: Appetizer
- Method: Baking
- Cuisine: French
- Diet: Omnivore
Ingredients
- 1 sheet of puff pastry
- 100g sliced ham
- 100g shredded cheddar cheese
- 1 egg (beaten for egg wash)
- Salt and pepper to taste
- Optional: fresh herbs (like thyme or parsley)
Instructions
- Preheat your oven to 200°C (400°F).
- Roll out the puff pastry on a lightly floured surface.
- Cut the pastry into squares or rectangles, approximately 10cm (4 inches) in size.
- Add a slice of ham and a sprinkle of cheddar cheese onto each square.
- Fold the pastry over to enclose the filling and seal the edges.
- Brush the tops with the beaten egg.
- Season with salt and pepper, then bake for 15-20 minutes until golden brown.
- Cool slightly before serving warm.
Notes
These pastries can be made ahead of time and frozen before baking. Bake from frozen, adjusting the time as needed.
Nutrition
- Serving Size: 1 pastry
- Calories: 250
- Sugar: 1g
- Sodium: 500mg
- Fat: 15g
- Saturated Fat: 7g
- Unsaturated Fat: 5g
- Trans Fat: 0g
- Carbohydrates: 20g
- Fiber: 1g
- Protein: 10g
- Cholesterol: 70mg
Keywords: puff pastry, ham and cheese, appetizer, savory snack, easy recipe
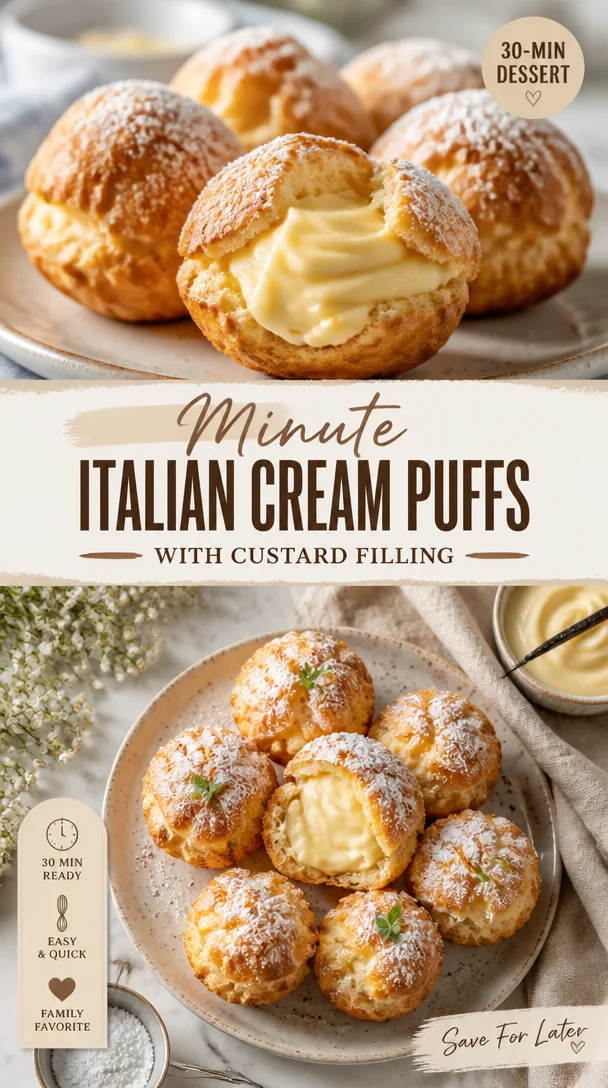
Minute Italian Cream Puffs with Custard Filling
The Sweetness of Italian Cream Puffs: A Culinary Adventure
Hello, foodies! Today, I’m so excited to whisk you away on a journey to Italy through one of my all-time favorite treats—Italian Cream Puffs with Custard Filling! Imagine airy, golden pastry puffs filled with luscious, creamy custard, and topped with a light whipped cream. If you haven’t had the pleasure of experiencing these delightful little bites yet, you’re in for a treat!
The beauty of these cream puffs is not just in their deliciousness but also in the memories they evoke. I can still picture the first time I had a cream puff. Picture this: bright summer day, a lively kitchen buzzing with laughter, and the aroma of freshly baked pastry dough wafting through the air. I must have been around eight years old—excitedly helping my grandmother in her quaint kitchen. She expertly piped the dough onto a baking sheet while I eagerly waited with a spatula in hand. Those were such precious moments of bonding, the best kind of culinary magic. As we sunk our teeth into those golden puffs, the world around us melted away.
Today, I want to share that memory and recipe with you, blending nostalgia and flavors to create an irresistible dessert that’s sure to make your gatherings even sweeter. Let’s don our aprons and dive right into making these beauties!
Ingredients
Here’s what you’ll need to create your Italian Cream Puffs:
-
1 cup water
The base for your dough. You can replace this with equal parts milk for a richer flavor or use chicken stock for a savory twist! -
1/2 cup unsalted butter
Adds richness to your dough. If you’re watching your salt intake, use a salted butter instead and reduce the added salt in the recipe. -
1 cup all-purpose flour
Essential for structure! Gluten-free flour blends work well as substitutes if you’re catering to gluten sensitivities. -
1/4 teaspoon salt
Enhances flavor and balances sweetness. Feel free to skip it if you’re going for a sugar-heavy version, but just a pinch can elevate the taste. -
4 large eggs
These are the binders that give your puffs their structure. You can substitute with 1/4 cup of aquafaba for a vegan version. -
2 cups milk
The base for your custard filling! Whole milk creates a creamier texture, but you can use a non-dairy alternative like almond or oat milk. -
1/2 cup granulated sugar
Sweetens your custard. Coconut sugar makes a great substitute if you want a less refined option. -
1/4 cup cornstarch
Essential for thickening your custard. Arrowroot powder works wonderfully in its place if you’re looking for a corn-free alternative. -
1 teaspoon vanilla extract
A must for flavoring your custard; homemade vanilla extract takes it to a whole new level. You can also experiment with almond extract for a unique twist! -
1/2 cup heavy cream (optional)
Whipped into a fluffy topping. For a lighter option, consider using coconut cream!
Step-by-Step Instructions
Step 1: Make the Pâte à Choux (Pastry Dough)
In a medium saucepan, combine your water and unsalted butter over medium heat. Bring it to a boil, allowing the butter to melt completely. This step is crucial because it creates the perfect texture for your dough.
Chef Tip: Keep the heat steady to prevent the butter from burning. Trust me; you don’t want that!
Step 2: Add the Flour
As soon as your mixture is boiling, quickly add the all-purpose flour and salt. Mix vigorously with a wooden spoon until the dough forms and pulls away from the sides of the pan, about 1-2 minutes. It should feel smooth and slightly sticky.
Chef Hack: If you find your dough is too stiff, add a bit more water—just a tablespoon at a time—until you achieve the right consistency.
Step 3: Cool It Down
Transfer your dough to a mixing bowl and let it cool for about 10 minutes. Then, start adding your eggs one at a time, mixing well after each addition. This step helps create those lofty, airy puffs!
Tip: The key here is to add the eggs gradually; if your dough is too hot, you risk scrambling the eggs. Be patient!
Step 4: Pipe the Puffs
Preheat your oven to 425°F (220°C) and line a baking sheet with parchment paper. Transfer your dough to a piping bag fitted with a round tip. Pipe mounds about 2 inches apart on the prepared baking sheet, aiming for a nice dome shape.
Pro Tip: Wet your fingers and smooth down any pointy tops to ensure your puffs rise evenly!
Step 5: Bake the Puffs
Bake for about 20-25 minutes until golden brown and puffed up. Avoid opening the oven door during the first 20 minutes of baking—it can cause your puffs to collapse!
Step 6: Prepare the Custard
While your puffs are baking, it’s time to make the custard. In a saucepan, combine the milk, granulated sugar, and cornstarch. Cook over medium heat while whisking constantly until it thickens and starts bubbling.
Chef Insight: The whisking is essential, as it ensures a silky-smooth custard with no lumps!
Step 7: Flavor It Up
Once your custard has thickened, remove it from heat and stir in the vanilla extract. Transfer to a bowl and cover the surface with plastic wrap to prevent a skin from forming.
Step 8: Assemble the Cream Puffs
Once your puffs are fully cooled, carefully slice them in half. Use a piping bag to fill them with custard, then replace the tops. You can add whipped cream on top for an extra touch of decadence.
Serving Suggestions
Plate your Italian cream puffs on a beautiful serving platter, dusted with powdered sugar for that extra touch of elegance. Pair them with fresh berries or a drizzle of chocolate sauce for a stunning presentation. Your guests will be swooning!
Recipe Variations
Let’s get creative! Here are a few fun twists to try with your cream puffs:
-
Lemon Zest Custard: Add the zest of one lemon to your custard for a refreshing citrus burst!
-
Chocolate Cream Filling: Stir in some melted chocolate into your custard for a rich chocolate experience.
-
Espresso Cream: Mix espresso powder into the whipped cream for a delightful coffee-flavored topping.
-
Fruit-Infused Cream: Incorporate mashed strawberries or blueberries into the whipped cream for a fruity twist!
-
Savory Spin: Swap the custard for a savory filling like garlic and herb cream cheese for an appetizer version!
Chef’s Notes
Italian cream puffs have a special place in my heart. They’ve evolved through the years in my kitchen; I remember my first batches came out flat and soggy because I was too eager to check on them. Now, I’ve perfected my technique, and every bite feels like a warm hug! These cream puffs are perfect for any occasion, from birthdays to casual family dinners. Don’t worry about perfection—focus on the joy of the process.
FAQs and Troubleshooting
Q: Why did my cream puffs not rise?
A: Only open the oven door after the initial baking to ensure they don’t collapse. Also, make sure the oven is fully preheated before baking!
Q: My custard is lumpy. What did I do wrong?
A: This might happen if the heat is too high or if the mixture wasn’t whisked enough. If you face this, consider straining it through a fine-mesh sieve to fix the lumps!
Q: Can I make these ahead of time?
A: Yes! The puffs can be baked in advance and stored in an airtight container at room temperature. The custard can be prepared a day ahead and kept in the fridge until ready to assemble.
Q: How do I know when my custard is ready?
A: It should be thick enough to coat the back of a spoon. When you run your finger through the custard, it should leave a line!
Nutritional Info
While I believe in indulgence, here’s a rough estimate for one cream puff filled with custard:
- Calories: 120
- Total Fat: 7g
- Carbohydrates: 12g
- Protein: 2g
Feel free to adjust portion sizes and toppings for your dietary needs, and remember—enjoying these sweet puffs is about balance and savoring each delicious bite!
So there you have it, my dear culinary companions—everything you need to master Italian Cream Puffs with Custard Filling! Gather your loved ones, make some memories, and savor every sweet moment around your table. Happy baking!
PrintItalian Cream Puffs with Custard Filling

Delightful Italian cream puffs filled with luscious custard and topped with whipped cream, perfect for any occasion.
- Prep Time: 15 minutes
- Cook Time: 30 minutes
- Total Time: 45 minutes
- Yield: 4 servings 1x
- Category: Dessert
- Method: Baking
- Cuisine: Italian
- Diet: Vegetarian
Ingredients
- 1 cup water
- 1/2 cup unsalted butter
- 1 cup all-purpose flour
- 1/4 teaspoon salt
- 4 large eggs
- 2 cups milk
- 1/2 cup granulated sugar
- 1/4 cup cornstarch
- 1 teaspoon vanilla extract
- 1/2 cup heavy cream (optional)
Instructions
- Combine water and unsalted butter in a saucepan over medium heat.
- Add the all-purpose flour and salt when the mixture boils.
- Transfer the dough to a bowl and let it cool for about 10 minutes.
- Preheat your oven to 425°F (220°C) and pipe mounds of dough onto a baking sheet.
- Bake for about 20-25 minutes until golden brown.
- Prepare custard by cooking milk, sugar, and cornstarch over medium heat.
- Stir in vanilla extract once custard thickens.
- Slice cooled puffs in half and fill with custard.
Notes
These cream puffs can be filled with various flavors and make excellent dessert options for gatherings.
Nutrition
- Serving Size: 1 serving
- Calories: 120
- Sugar: 5g
- Sodium: 100mg
- Fat: 7g
- Saturated Fat: 4g
- Unsaturated Fat: 3g
- Trans Fat: 0g
- Carbohydrates: 12g
- Fiber: 1g
- Protein: 2g
- Cholesterol: 50mg
Keywords: cream puffs, Italian dessert, custard filling, pastries, baking
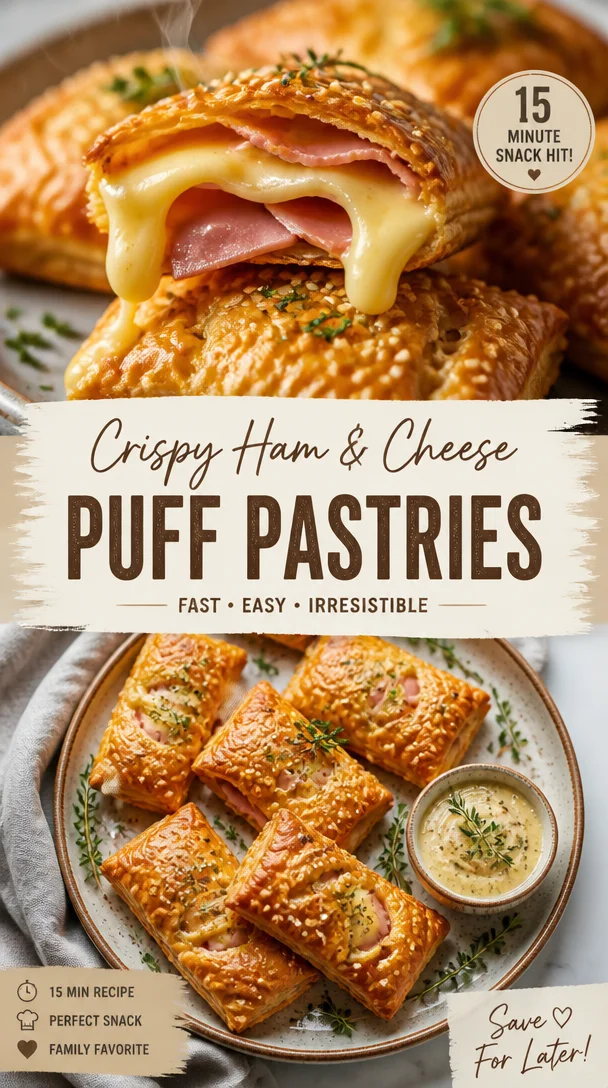
Crispy Ham & Cheese Puff Pastries: 15-Minute Snack Hit
The Ultimate Ham and Cheese Puff Pastries: An Easy Delight for Any Occasion
Hello, friends! Today, I’m thrilled to share a recipe that’s one of my absolute favorites: Ham and Cheese Puff Pastries. These little pockets of deliciousness are not just a hit at dinner parties but also perfect for a quiet evening in. Imagine flaking into soft, buttery pastry followed by savory ham and melted cheese—a bite that says “comfort” with every morsel! So let’s roll up our sleeves, tie on our aprons, and dive into this delightful culinary adventure.
Personal Story
This recipe takes me back to my childhood kitchen, where the aroma of golden pastries filled the air. My mom would whip them up on weekends for a special brunch. I can still picture her skillfully rolling out the puff pastry, her laughter echoing in the air as we chased each other around the kitchen. Those moments taught me that cooking is more than just preparing food—it’s about creating memories and cherishing time spent with loved ones. When I make Ham and Cheese Puff Pastries, I feel like I’m channeling my mom’s spirit, mixing nostalgia with creativity. I love serving these pastries at gatherings, knowing each bite can brighten someone’s day just like they did for me all those years ago.
Ingredients
-
1 sheet of puff pastry
Puff pastry is the star of this dish! It’s flaky, buttery, and creates a wonderful texture. Feel free to use store-bought for convenience. If you’re feeling adventurous, you might even try making your own, but that’s a recipe for another day! -
4 oz ham, diced
Choose your favorite type of ham—smoked, honey, or even leftover holiday ham works beautifully here. Don’t have ham? Cooked chicken or turkey make great substitutes, too! -
4 oz cheese (like cheddar or Swiss), shredded
The creaminess of the cheese complements the savory ham perfectly. You can swap cheddar for mozzarella or pepper jack for an extra kick—just keep it shredded for even melting. -
1 egg, beaten (for egg wash)
This golden egg wash will give your pastries that gorgeous, shiny finish. You can use an egg substitute if needed, like a mixture of grounded flaxseed and water. -
Salt and pepper to taste
Just a pinch is all you need for seasoning! Remember to taste as you go—cooking should be an adventure of flavor.
Step-by-Step Instructions
-
Preheat the Oven
Preheat your oven to 400°F (200°C). This step is vital, as a hot oven helps the puff pastry rise beautifully and become gloriously flaky. -
Prepare the Puff Pastry
If your puff pastry is frozen, let it thaw in the refrigerator or on the counter for about 30 minutes until it’s pliable but still cold. Once thawed, roll it out gently on a floured surface to prevent sticking. If it’s too soft, pop it in the freezer for a few minutes. Trust me, it’ll be easier to handle! -
Cut the Pastry
Using a sharp knife or a pizza cutter, slice the pastry into squares—roughly 4×4 inches. This doesn’t have to be exact; we’re going for rustic charm, not perfection! -
Mix Ham and Cheese
In a mixing bowl, combine the diced ham with the shredded cheese. Season with salt and pepper. Remember, the ham might already be salty, so taste your mixture before adding any extra salt. -
Fill the Pastry
Place a heaping tablespoon of the ham and cheese mixture in the center of each pastry square. Make sure not to overfill them—you don’t want the delicious filling spilling out while baking! -
Fold and Seal
Fold the corners of the pastry into the center to form a little pocket. You can press down around the edges with a fork to seal them securely. This is also a fun step—get creative with the design! -
Egg Wash Time
Brush the tops of the pastries with the beaten egg. This is where the magic happens; it gives them a beautiful golden color that will make them irresistible. -
Bake
Place the pastries on a parchment-lined baking sheet, ensuring they are spaced well apart. Bake for about 15-20 minutes or until they are puffed up and perfectly golden-brown. You might want to take a peek at them after 15 minutes—you’ll want them just right!
Serving Suggestions
Serve these lovely ham and cheese puff pastries warm, straight out of the oven! For an elegant touch, plate them on a beautiful serving platter alongside a small bowl of mustard for dipping. Fresh herbs, like parsley or chives, sprinkled on top will elevate the presentation even further. Trust me, they’ll disappear in no time!
Recipe Variations
-
Spinach and Feta: Swap the ham for sautéed spinach and crumbled feta cheese for a delicious vegetarian twist.
-
Apple and Cheddar: Add diced apples to the ham-and-cheese filling for a sweet and savory contrast.
-
Spicy Kick: Add jalapeños or red pepper flakes to the cheese mixture if you crave some heat.
-
Herbed Cream Cheese: Use herbed cream cheese for an extra creamy filling that adds a burst of flavor.
-
Whole Wheat Puff Pastry: For a more wholesome option, use whole wheat puff pastry for an added nutrient boost.
Chef’s Notes
This recipe has evolved so much over the years. I started with plain ham and cheese, and with time, I’ve experimented with different fillings and spices. I once hosted a gathering where I made a variety of pastries, and guests were encouraged to mix and match the fillings. It turned into a delightful culinary exploration! And here’s a funny tidbit: during that gathering, my dough didn’t fully seal on a few pastries. They oozed cheese, causing quite the mess—but they tasted amazing, and everyone loved the ‘lava’ effect!
FAQs and Troubleshooting
1. My puff pastry didn’t rise properly; what happened?
Ensure your oven was preheated and not overcrowded. Airflow is essential for perfect puffing! Also, check that your pastry was chilled before baking—warm dough doesn’t puff as well.
2. Can I make the filling ahead of time?
Absolutely! You can prepare the ham and cheese filling a day in advance. Just store it in an airtight container in the refrigerator and assemble the pastries just before baking.
3. How do I store leftovers?
Keep any uneaten pastries in an airtight container in the fridge for up to 2 days. Reheat them in the oven to regain their crispiness.
4. Can I freeze the pastries?
Yes! Assemble the pastries but don’t bake them. Place them on a baking sheet, freeze until solid, and then transfer to a freezer bag. Whenever you’re ready, pop them in the oven straight from the freezer—just add a few extra minutes to the baking time.
Nutritional Info
While I believe in enjoying food without stress, it’s always helpful to have a look at nutrition! Each Ham and Cheese Puff Pastry (based on this recipe) contains approximately:
- Calories: 223
- Total Fat: 15g
- Saturated Fat: 7g
- Cholesterol: 55mg
- Sodium: 360mg
- Total Carbohydrate: 15g
- Dietary Fiber: 1g
- Protein: 7g
So there you have it—a double delight of nostalgia and newfound kitchen magic! I hope you feel encouraged to try your hand at these Ham and Cheese Puff Pastries. They’re simple, straightforward, and oh-so-delicious. Gather your loved ones around, serve warm, and create your own wonderful memories in the kitchen—in the spirit of love, laughter, and great food. Happy cooking!
PrintHam and Cheese Puff Pastries

These flaky pastries filled with savory ham and melted cheese are perfect for any occasion, bringing comfort and nostalgia to your table.
- Prep Time: 15 minutes
- Cook Time: 20 minutes
- Total Time: 35 minutes
- Yield: 4 servings 1x
- Category: Appetizer
- Method: Baking
- Cuisine: French
- Diet: Omnivore
Ingredients
- 1 sheet of puff pastry
- 4 oz ham, diced
- 4 oz cheese (like cheddar or Swiss), shredded
- 1 egg, beaten (for egg wash)
- Salt and pepper to taste
Instructions
- Preheat your oven to 400°F (200°C).
- Prepare the puff pastry by thawing it if frozen and rolling it out.
- Cut the pastry into squares, roughly 4×4 inches.
- Mix the diced ham with shredded cheese, adding salt and pepper to taste.
- Fill each pastry square with a heaping tablespoon of the ham and cheese mixture.
- Fold the corners of the pastry into the center and seal with a fork.
- Brush the tops with the beaten egg.
- Bake for 15-20 minutes until golden brown.
Notes
Serve warm and optionally with mustard for dipping. Fresh herbs can elevate the presentation.
Nutrition
- Serving Size: 1 pastry
- Calories: 223
- Sugar: 1g
- Sodium: 360mg
- Fat: 15g
- Saturated Fat: 7g
- Unsaturated Fat: 5g
- Trans Fat: 0g
- Carbohydrates: 15g
- Fiber: 1g
- Protein: 7g
- Cholesterol: 55mg
Keywords: ham, cheese, puff pastry, appetizer, easy recipe

Minute Puff Pastry Donuts: Easy Cronuts for Busy Nights
Easy Puff Pastry Donuts: The Best Homemade Cronuts!
There’s something magical about a freshly made donut. The airy dough, the sweet glaze, and that first bite that takes you straight to pastry heaven! Today, I want to share a recipe that not only satisfies your sweet tooth but also brings a touch of elegance to your baking. Welcome to my kitchen, where we’re going to whip up the most delightful puff pastry donuts—aka cronuts! Perfect for breakfast, brunch, or any time you need a little indulgence.
Puff pastry donuts are the ultimate fusion of a croissant’s flaky goodness and a donut’s sweet charm. Imagine biting into a warm cronut, the outside crisp and golden, the inside soft and airy, and a luscious glaze that drips tantalizingly as you take another bite. Sounds divine, right? Trust me; once you make these beauties, they’ll become a staple in your treat rotation.
Now, don’t be intimidated by the idea of making donuts at home. With a little guidance and the magic of store-bought puff pastry, you can create these delightful treats with ease. Invite your friends over or treat yourself; either way, it’s time to roll up our sleeves and get cooking together!
My Puff Pastry Journey
Ah, puff pastry. The first time I tackled it was during a bustling holiday season when my ambition outpaced my experience. I decided I would make everything from scratch for a family gathering. I vividly remember the chaos in my kitchen: flour clouded the air, dough scattered on the countertops, and my loyal pup, Bella, hoping for a crumb. It was a mess, but my puff pastry turned out surprisingly well, and my family was impressed!
Fast forward to today, and I take the trusty shortcut of using pre-made puff pastry. The aroma of frying donuts always brings me back to that holiday gathering. It reminds me of the joy food brings us and how even amidst the hustle and bustle, we can create memories that linger just like the sweetness of warm donuts.
Now, let’s recreate that magic together in a much simpler way!
Ingredients
-
2 Sheets Puff Pastry, thawed
Puff pastry is the star of our show! Choose a high-quality brand for the best results. If you want a healthier option, look for whole wheat puff pastry. -
1 Egg, whisked
This is our egg wash; it gives our donuts that beautiful golden color. If you’re looking for an egg-free option, try using a bit of milk or plant-based milk blended with water instead. -
Vegetable Oil for Frying
Any neutral oil will do, like canola or sunflower. If you’re feeling adventurous, peanut oil adds a lovely flavor! -
Flour for Dusting
A little flour helps prevent sticking. Use all-purpose flour for the best results!
For the Glaze
-
2 cups Powdered Sugar
The base of a luscious glaze! If you’re watching your sugar intake, consider using monk fruit sweetener or a sugar-free powdered sugar alternative. -
1 1/2 tbsp. Milk
This helps loosen the glaze to the perfect drizzling consistency. You can also use almond or oat milk for a dairy-free version. -
1/2 tsp. Salt
A pinch of salt balances the sweetness beautifully. -
1 tsp. Vanilla Extract
This adds a warm, cozy flavor. Substitute with almond extract for a fun twist!
Step-by-Step Instructions
-
Roll Out the Puff Pastry
Begin by lightly dusting your work surface with flour. To ensure an even thickness, roll out each sheet of puff pastry gently. We’re aiming for about 1/8 inch thick. This step ensures that your donuts will rise beautifully! -
Cut into Shapes
Using a donut cutter or two different sizes of round cutters, cut out the donut shapes. The inner hole can be as large or small as you like; a smaller center hole will create a crisper donut. Gather the scraps and re-roll to cut more donuts—no waste here! -
Prepare the Frying Oil
In a deep skillet or a Dutch oven, pour enough vegetable oil to submerge the donuts—about 2 inches deep. Heat the oil over medium heat until it reaches 350°F (175°C). Tip: You can drop a small piece of dough into the oil to check if it’s ready. If it sizzles and rises, you’re good to go! -
Fry the Donuts
Carefully add the donuts to the hot oil in batches to avoid overcrowding. Fry for about 2-3 minutes on each side or until golden brown. Use a slotted spoon to flip them gently. Chef’s hack: If you notice any bubbles forming on the surface, it means the oil is hot enough for frying! -
Drain and Cool
Remove the donuts from the oil and place them on a paper towel-lined plate to drain excess oil. Let them cool for a few minutes; the glaze will stick better to warm donuts! -
Whip Up the Glaze
In a medium bowl, combine the powdered sugar, milk, salt, and vanilla extract. Whisk until smooth and glossy. If it’s too thick, add a splash more milk until you achieve the desired consistency. -
Glaze the Donuts
Dunk each warm donut into the glaze, rotating it gently to coat completely. Allow any excess glaze to drip off before placing it on a wire rack to set.
Serving Suggestions
Plate your puff pastry donuts on a beautiful cake stand or a simple plate to really elevate the presentation. Dust with a bit of extra powdered sugar for that picture-perfect touch, or garnishthem with fresh berries for a pop of color. Pairing them with a lovely cup of coffee or tea makes for an indulgent afternoon treat.
Recipe Variations
- Chocolate Glazed Cronuts: Mix melted chocolate with butter and dip your cooled donuts into this rich glaze for a decadent chocolate treat.
- Filled Cronuts: Before frying, use a piping bag to fill your pastry rings with pastry cream, whipped cream, or even jam for a surprise inside.
- Cinnamon Sugar Cronuts: After frying, roll the warm donuts in a mixture of cinnamon and sugar for a sweet, cozy flavor.
- Savory Cronuts: Add herbs and spices to your dough and fill them with creamy ricotta and spinach before frying for a savory twist!
- Vegan Cronuts: Substitute the egg wash with a plant-based egg replacement and use dairy-free milk and oil for frying.
Chef’s Notes
These easy puff pastry donuts are my go-to whenever I want to impress friends or just need a sweet escape. I’ve watched countless faces light up after one bite, and there’s nothing like it! Over the years, I’ve experimented with different fillings and glazes, and even though this basic recipe is perfection, I love how it allows for creativity.
Just the other day, I had an unexpected guest, and with nothing but a few pantry staples and these simple puff pastry donuts, we created an impromptu little dessert party! Laughter echoed in the kitchen as we shared stories and tried all the different glazes—those moments are what cooking is all about.
FAQs and Troubleshooting
1. Why did my donuts turn out greasy?
If your donuts feel greasy, your oil may not have been hot enough. Make sure to monitor the temperature closely and let the oil reach 350°F before frying.
2. Can I bake these instead of frying?
While frying gives cronuts their signature texture, you can bake them at 400°F for 12-15 minutes. Just remember they’ll have a different texture than their fried counterparts but will still be delicious!
3. How do I store leftovers?
Store your donuts in an airtight container at room temperature for up to two days. If they last longer than that (good luck!), keep them in the fridge. Just reheat them a bit to bring back the texture!
4. What can I do about the sogginess?
If your donuts seem soggy from the glaze, let them sit on a wire rack for a few minutes after glazing. This will help the glaze set and reduce the moisture.
Nutritional Info
Calories per donut (approx.): 200-250
Total Fat: 14g
Carbohydrates: 25g
Protein: 2g
Cooking is about experimenting and enjoying the process—so go ahead and personalize these lovely puff pastry donuts in your own style. So grab your apron, gather your ingredients, and let’s create sweet moments in the kitchen together. Happy cooking!
PrintEasy Puff Pastry Donuts: The Best Homemade Cronuts!

Indulge in these delightful puff pastry donuts, also known as cronuts, that fuse the flakiness of croissants with the sweetness of donuts, perfect for any occasion.
- Prep Time: 15 minutes
- Cook Time: 30 minutes
- Total Time: 45 minutes
- Yield: 12 servings 1x
- Category: Dessert
- Method: Frying
- Cuisine: American
- Diet: Vegetarian
Ingredients
- 2 Sheets Puff Pastry, thawed
- 1 Egg, whisked
- Vegetable Oil for Frying
- Flour for Dusting
- 2 cups Powdered Sugar
- 1 1/2 tbsp. Milk
- 1/2 tsp. Salt
- 1 tsp. Vanilla Extract
Instructions
- Roll Out the Puff Pastry: Lightly dust your work surface with flour and roll out each sheet of puff pastry to about 1/8 inch thickness.
- Cut into Shapes: Use a donut cutter to cut out donut shapes and gather scraps to re-roll.
- Prepare the Frying Oil: Heat vegetable oil in a deep skillet to 350°F (175°C).
- Fry the Donuts: Carefully add the donuts to the hot oil and fry for 2-3 minutes on each side until golden brown.
- Drain and Cool: Remove the donuts and place them on a paper towel-lined plate to drain excess oil.
- Whip Up the Glaze: Combine powdered sugar, milk, salt, and vanilla extract in a bowl and whisk until smooth.
- Glaze the Donuts: Dunk each warm donut in the glaze and let excess drip off before placing on a wire rack.
Notes
These cronuts can be customized with various fillings and glazes. Serve with coffee or tea for a delightful treat.
Nutrition
- Serving Size: 1 donut
- Calories: 225
- Sugar: 12g
- Sodium: 150mg
- Fat: 14g
- Saturated Fat: 4g
- Unsaturated Fat: 8g
- Trans Fat: 0g
- Carbohydrates: 25g
- Fiber: 1g
- Protein: 2g
- Cholesterol: 30mg
Keywords: puff pastry, cronuts, donuts, homemade, dessert

Copycat Little Caesars Crazy Puffs: 30-Minute Cheesy Bites
Little Caesars Crazy Puffs Recipe: A Flavorful Twist on a Classic Favorite
Hello, fellow foodies! Today, we’re diving into a fun and delightful recipe that I’m sure will become a family favorite in your household—Little Caesars Crazy Puffs. Imagine this: light, airy pillows of pizza dough stuffed with gooey cheese, zesty pepperoni, and your favorite pizza fixings, all baked to perfection and brushed with a buttery garlic blend. Sounds dreamy, right? Let’s roll up our sleeves and bring a little piece of pizza heaven into our kitchens!
When I first stumbled upon the idea of Crazy Puffs during a late-night snack session, I had one of those “aha!” moments. I was craving pizza, yet I wanted something easy to grab and pop in my mouth while I binge-watched my favorite show. You know how that goes! One bite became two, and before I knew it, I was contemplating how to recreate this snack at home. Spoiler alert: they turned out deliciously addictive, and I haven’t looked back since!
Let’s talk about the best part—this recipe is incredibly simple! With just a handful of ingredients that you might already have in your kitchen, you can transform your everyday pizza dough into these heavenly Crazy Puffs. I can’t wait to share my tips and tricks with you, so let’s get started!
A Fun Kitchen Memory
As I reflected on my Crazy Puffs adventure, a nostalgic memory came rushing back. I remember a rainy Saturday afternoon with my little cousin, Emily, who was just starting to show interest in cooking. We decided to knead some pizza dough from scratch—let me tell you, it wasn’t pretty! We ended up with more flour on our faces than in the mixing bowl, giggling uncontrollably as we worked through our culinary chaos.
We eventually crafted our dough into something resembling pizza and topped it with everything we could find in the fridge. As the smell of baking bread and melted cheese filled the kitchen, we jumped up and down in anticipation. It was one of those moments where cooking became more than just a task; it transformed into a cherished memory. That spirit of fun and exploration is what I want to channel today with these Crazy Puffs. So, let’s roll up our sleeves and get to it!
Ingredients
Here’s what you’ll need to create these scrumptious Crazy Puffs:
-
1 pound of your favorite pizza dough
You can use store-bought or homemade! Just make sure it’s at room temperature for easier handling. If you want a healthier option, try whole wheat dough. -
1 cup zesty pizza sauce
Zesty sauce adds a kick! Feel free to substitute with marinara or your favorite dipping sauce if you prefer something milder. -
2 cups shredded mozzarella cheese
Mozzarella is classic for that gooey, stretchy cheese effect. You can mix in provolone or even a dairy-free option if you want a different flavor profile! -
8 ounces pepperoni or turkey pepperoni slices
Pepperoni is a staple, but turkey pepperoni offers a leaner alternative. You can also swap it out for veggies or cooked sausage if you’re feeling adventurous! -
4 tablespoons unsalted butter (melted to perfection)
Butter gives a rich flavor and a beautiful sheen to your puffs. If you need a dairy-free version, try olive oil instead! -
1 tablespoon minced garlic for strong flavor
Garlic amps up the flavor. If you love it, feel free to add more! If you’re not a fan, you can skip this. -
¼ cup freshly grated Parmesan cheese
Parmesan adds a delightful nutty flavor. If you’re looking to keep it dairy-free, nutritional yeast is a great substitute! -
1 teaspoon fine sea salt
Always use salt to enhance flavors, but adjust to your preference based on the saltiness of your dough and sauces. -
1 teaspoon Italian herb blend
A versatile blend! Customize it with your preferred dried herbs like thyme or basil for a unique flavor twist. -
1 teaspoon freshly cracked black pepper
Black pepper provides a little heat! If you like it spicier, add some cayenne or red pepper flakes. -
1 teaspoon dried oregano leaves
Oregano is a classic pizza herb. If fresh is available, you can use it for an upgraded flavor! -
2 tablespoons finely chopped fresh parsley (optional)
Parsley adds a refreshing note and a pop of color. Feel free to skip this if you want to keep it simple! -
1 teaspoon red pepper flakes
If you like some heat, toss in the red pepper flakes. They can easily be adjusted according to your spice preference. -
½ teaspoon smoked paprika
Smoked paprika brings a lovely depth and smokiness to the Crazy Puffs.
Step-by-Step Instructions
Let’s prepare these Crazy Puffs step by step. Roll up your sleeves, tie on that apron, and let’s get cooking!
-
Preheat Your Oven
First things first, preheat your oven to 400°F (200°C). A hot oven is crucial for that perfect golden-brown crust. -
Prep Your Dough
Lightly flour your work surface and roll out the pizza dough into a rectangle about 1/4 inch thick. You want it to have a nice thickness to hold in all those delicious fillings. -
Cut the Dough
Using a sharp knife or pizza cutter, slice your rolled-out dough into squares—about 3 inches by 3 inches is ideal. Don’t worry about making them perfect; a little rustic charm is welcomed! -
Fill with Goodness
On each square, place a spoonful of zesty pizza sauce, a sprinkle of mozzarella cheese, and a couple of slices of pepperoni. Don’t overfill—trust me! You want them to seal well, keeping all the cheesy goodness inside. -
Seal Those Puffs
Fold the square over to create a triangle or a pocket. Use your fingers to pinch the edges together. To ensure a good seal, you can press down with a fork or your fingers. Be gentle though; you want them to maintain their fluffy shape! -
Brush with Butter
In a small bowl, mix the melted butter with minced garlic. Brush this mixture generously over the top of each puff. This adds incredible flavor and gives them a beautiful, golden color while they bake. -
Sprinkle with Delights
Now, sprinkle the tops of your Crazy Puffs with a mix of the grated Parmesan cheese, Italian herb blend, sea salt, oregano, black pepper, and smoked paprika. This adds an extra layer of flavor that elevates these puffs from good to absolutely irresistible! -
Bake Away
Place your puffs on a lined baking sheet, making sure they have enough space to expand as they bake. Pop them into the oven and bake for 15-20 minutes, or until they’re puffed up and golden brown. -
Finish with Freshness
Once baked, take them out and if you chose to, sprinkle the parsley over the top while they’re still warm. This adds a lovely freshness to the dish! -
Let Cool and Enjoy
Allow your Crazy Puffs to cool for a few minutes (if you can resist!). Serve them warm with extra pizza sauce on the side for dipping. Trust me; they’re best enjoyed fresh from the oven.
Serving Suggestions
For a beautiful presentation, arrange your Crazy Puffs on a colorful platter. Serve them alongside a small bowl of zesty pizza sauce for dipping that beautifully contrasts against the cheesy, golden puffs. You can also sprinkle some fresh parsley over the top for a pop of color!
Recipe Variations
- Veggie Crazy Puffs: Swap the pepperoni for a mix of sautéed bell peppers, mushrooms, and olives for a vegetarian option.
- Cheesy Garlic Puffs: Omit the pepperoni and sprinkle a blend of mozzarella and cheddar cheese with garlic for that ultimate cheesy experience.
- Spicy Buffalo Puffs: Mix in some shredded cooked chicken and buffalo sauce for a spicy twist on the original.
- Caprese Puffs: Stuff your Crazy Puffs with tomatoes, fresh mozzarella, and basil for a fresh Italian flavor.
- Chili Cheese Puffs: Add a spoonful of chili and shredded cheese inside for a hearty snack with a kick!
Chef’s Notes
Oh, the joy of experimenting in the kitchen! I remember when I first made these Crazy Puffs; I tried adding different fillings from what I had on hand. I once added a little bit of spinach and artichokes, and oh boy, it was a game changer! Not every experiment turned out as planned, though. I once tried to get fancy and stuffed them with too much sauce; needless to say, it turned into a gooey mess. Lesson learned: less is often more!
Over time, this recipe has evolved to reflect what I love about casual cooking—keeping it fun, easy, and delicious. Cooking is all about joy and creativity, so don’t hesitate to make it your own!
FAQs and Troubleshooting
1. Why are my Crazy Puffs not puffy?
If your puffs do not rise or appear too flat, it’s likely a result of overworking the dough or not letting it rise properly. Ensure you allow the dough to rest at room temperature for easier handling.
2. Can I freeze the puffs?
Absolutely! You can freeze them before baking. Just freeze them on a baking sheet until solid, then transfer them to a zip-top bag. When you’re ready, bake them from frozen, adding a few minutes to the bake time.
3. How do I make them crispy?
To achieve a crispier exterior, bake until golden brown, and consider brushing them with a little olive oil before baking instead of butter.
4. What if my dough rips during filling?
Don’t worry! Just patch it up with a little extra dough or dough scraps. It’s all part of the kitchen fun; embrace those imperfections!
Nutritional Info
While precise nutritional values can vary based on specific ingredients and substitutions, one serving of Crazy Puffs (approximately two puffs) typically contains around 250-300 calories. However, they’re meant to be enjoyed as a treat, so savor every bite without guilt!
There you have it, my friends! Little Caesars Crazy Puffs—a delightful snack that’s not only easy to whip up but also filled with flavors that will have everyone licking their fingers. I hope you enjoy making these as much as I did. Remember to gather your loved ones around the table, share some laughs, and create those little beautiful moments that good food is all about. Happy cooking, and let’s keep exploring delicious dishes together!
PrintLittle Caesars Crazy Puffs

A flavorful twist on a classic favorite—light, airy pillows of pizza dough stuffed with gooey cheese and zesty pepperoni.
- Prep Time: 15 minutes
- Cook Time: 20 minutes
- Total Time: 35 minutes
- Yield: 4 servings 1x
- Category: Snack
- Method: Baking
- Cuisine: American
- Diet: Vegetarian
Ingredients
- 1 pound pizza dough
- 1 cup zesty pizza sauce
- 2 cups shredded mozzarella cheese
- 8 ounces pepperoni or turkey pepperoni slices
- 4 tablespoons unsalted butter (melted)
- 1 tablespoon minced garlic
- ¼ cup freshly grated Parmesan cheese
- 1 teaspoon fine sea salt
- 1 teaspoon Italian herb blend
- 1 teaspoon freshly cracked black pepper
- 1 teaspoon dried oregano leaves
- 2 tablespoons finely chopped fresh parsley (optional)
- 1 teaspoon red pepper flakes
- ½ teaspoon smoked paprika
Instructions
- Preheat your oven to 400°F (200°C).
- Lightly flour your work surface and roll out the pizza dough into a rectangle about 1/4 inch thick.
- Using a sharp knife, slice the rolled-out dough into squares, about 3 inches by 3 inches.
- On each square, place a spoonful of pizza sauce, a sprinkle of mozzarella cheese, and a couple of slices of pepperoni.
- Fold the square over to create a triangle or pocket and pinch the edges together.
- In a small bowl, mix the melted butter with minced garlic and brush over the top of each puff.
- Sprinkle the tops with Parmesan cheese, Italian herb blend, sea salt, oregano, black pepper, and smoked paprika.
- Place the puffs on a lined baking sheet and bake for 15-20 minutes until golden brown.
- Once baked, optionally sprinkle parsley over the top while warm.
- Allow to cool for a few minutes, then serve warm with extra pizza sauce for dipping.
Notes
Experiment with different fillings like sautéed vegetables or chicken for variations.
Nutrition
- Serving Size: 2 puffs
- Calories: 300
- Sugar: 2g
- Sodium: 600mg
- Fat: 14g
- Saturated Fat: 7g
- Unsaturated Fat: 5g
- Trans Fat: 0g
- Carbohydrates: 32g
- Fiber: 2g
- Protein: 12g
- Cholesterol: 30mg
Keywords: Crazy Puffs, Little Caesars, Snack, Pizza, Appetizer

Crispy Flaky Puff Pastry Donuts in 20 Minutes (Brunch-Ready)
The Irresistible Charm of Puff Pastry Donuts
Hello, dear friends! Let’s talk about a delightful little treat that will elevate your breakfast game to an entirely new level. Imagine fluffy, airy, and perfectly flaky donuts that practically melt in your mouth — I’m talking about Puff Pastry Donuts! Oh, I can already feel the sweet aroma wafting through the kitchen as we dive into this incredible recipe together.
You’ve probably experienced the satisfaction of biting into a fresh donut, and puff pastry donuts are no exception. They are the perfect blend of the classic donut’s charm with the elegant touch of flaky pastry. What’s even better? These gems take only a handful of ingredients and will have your friends and family swooning.
We all love a good donut, right? But, have you ever dabbled in making them from scratch? If not, allow me to rekindle those fond memories and inspire you with my homemade puff pastry brothers and sisters of the classic donut. Whether you’re whipping them up for a special brunch with friends or indulging in a cozy afternoon treat, this recipe is bound to impress. So, grab your apron, and let’s get started on making these delectable delights!
A Nostalgic Kitchen Memory
Let me take you back to my childhood, where the kitchen was always filled with laughter, chatter, and the sweet smell of baking. One of my fondest memories is from a warm Sunday morning when my mom decided we were going to make donuts together. The air was thick with the scent of cinnamon and sugar as we flourished our hands in the mix.
I remember sneaking bites of the donut dough while my mom wasn’t looking — it was the best kind of rebellion! She had this funny way of shaping the donuts with a jar lid and a smaller bottle cap for the perfect hole, and we giggled every time one of them ended up looking like a lopsided masterpiece. Those hot, fluffy donuts covered in a glaze of sugary goodness are imprinted in my mind as a cherished memory.
Fast forward to today, and I still relish in the joy of creating donuts — but I’ve found a way to elevate that nostalgic treat by using puff pastry. We’re talking about the joy of whipping up a delicious batch of Puff Pastry Donuts that are quick to prepare and utterly delightful to devour. Let’s make some delicious memories in the kitchen!
Ingredients
To create these golden, flaky delights, you’ll need the following ingredients:
-
2 sheets puff pastry (thawed): The star ingredient! Puff pastry creates those irresistible layers. You can find pre-made sheets at your local grocery store. If you’re feeling adventurous, you can try making your own, but store-bought is a total time-saver!
-
Vegetable oil (for frying): This is what will give your donuts that beautifully crispy exterior. Canola oil or peanut oil can also work well here.
-
2 cups powdered sugar: The sweet coating! It gives that classic powdered donut look. If you’re looking to cut down on sugar, feel free to adjust the amount based on your taste preferences.
-
4 tablespoons milk: This will help to create a smooth glaze for the donuts. If you want to keep it dairy-free, unsweetened almond milk or coconut milk will do the trick!
-
2 teaspoons vanilla extract: A splash of flavor! This adds warmth and depth. If you’re in the mood for something different, consider using almond extract for a nutty twist.
Step-by-Step Instructions
Now that we’ve gathered our ingredients, let’s break down the process for making these delicious Puff Pastry Donuts!
Step 1: Roll out the pastry
Begin by unfolding the thawed puff pastry sheets on a lightly floured surface. Roll them out gently with a rolling pin to about 1/4 inch thickness. This will ensure that your donuts are nice and flaky, with ample room for rising.
Tip: Try not to overwork the dough; remember, the magic of puff pastry is in the layers!
Step 2: Cut out the donuts
Using a round cookie cutter or even a drinking glass, cut out circles from the pastry. For the donut holes, take a small bottle cap or a smaller cookie cutter to remove the centers. It’ll look like a mini donut!
Tip: If you’re feeling whimsical, cut out shapes using other cookie cutters! Stars, hearts—nothing is off-limits when it comes to celebration!
Step 3: Heat the oil
In a deep frying pan or pot, pour in enough vegetable oil to submerge the donuts at least halfway. Heat it over medium-high heat until it reaches about 350°F (175°C). Use a kitchen thermometer if you have one; this ensures even frying.
Tip: If you don’t have a thermometer, sprinkle a small bit of flour into the oil—if it sizzles, you’re ready to fry!
Step 4: Fry the donuts
Carefully lower the donut rounds into the hot oil, ensuring you don’t overcrowd the pan. Fry them for 2-3 minutes on each side until they’re golden brown and fragrant.
Tip: Keep an eye on the temperature of the oil. If it’s too hot, the donuts will burn. If it’s too cool, they’ll soak up too much oil and become greasy.
Step 5: Drain and cool
Once they’re beautifully golden, remove the donuts from the oil and place them on paper towels to absorb any excess oil. Let them cool slightly before moving onto glazing.
Step 6: Whisk the glaze
In a separate bowl, combine the powdered sugar, milk, and vanilla extract for the glaze. Whisk until smooth. If the glaze is too thick, add a splash of milk; if it’s too thin, sprinkle in a little more powdered sugar until you achieve a a smooth, drizzling consistency.
Tip: Feel free to get creative with flavor additions—cocoa powder for chocolate glaze or citrus zest for a refreshing touch!
Step 7: Glaze your donuts
Dip the cooled donuts in the glaze, turning to coat quickly. Place them on a cooling rack to let the glaze set.
Tip: For a little extra flair, add toppings like sprinkles, shredded coconut, or crushed nuts immediately after glazing!
Serving Suggestions
Presentation is key! To serve your delightful puff pastry donuts, place them on a beautiful platter or cake stand. Arrange them in a playful cloche or tower for a charming display. If you want, dust with a little more powdered sugar before serving — it adds that extra touch of elegance. Enjoy alongside a steaming cup of coffee or tea for the perfect cozy afternoon treat!
Recipe Variations
Here are a few fun twists to give your Puff Pastry Donuts an upgrade:
-
Cinnamon Sugar Donuts: After frying, roll the donuts in a mix of cinnamon and granulated sugar for that classic cinnamon sugar vibe.
-
Filled Donuts: Before cutting out for frying, place a small dollop of jam, custard, or chocolate ganache in the center of the circles and seal them up before frying for delicious filled donuts!
-
Glazed with Lemon Icing: Swap vanilla extract for lemon zest in your glaze for a zesty kick!
-
Savory Version: Consider adding herbs to the puff pastry or topping with a sprinkle of sea salt for a savory rendition.
-
Vegan Option: Use dairy-free butter and almond milk to replace regular milk to make this recipe vegan-friendly!
Chef’s Notes
Creating these puff pastry donuts has been a delightful journey for me. They originally started as a simple experiment in my kitchen — I was attempting to make traditional donuts and found a leftover sheet of puff pastry in the fridge. The aroma that filled my home was incredible, and it’s been a favorite recipe ever since!
One day, my friend Grace popped over unannounced, and I whipped these up on a whim. Watching her eyes light up with that first bite was priceless! Now, she calls them my ‘party donuts’ because they’ve become a staple at every gathering.
And remember, don’t be too hard on yourself if they don’t turn out perfect. It’s all about the love you put into them!
FAQs and Troubleshooting
1. Why did my donuts come out greasy?
If your donuts are greasy, it’s likely because the oil temperature was too low. Ensure the oil is hot enough for frying — you want nice sizzles when you drop your donuts in.
2. Can I bake these instead of frying?
While frying gives that classic donut texture, you can bake them! Preheat your oven to 400°F (200°C) and bake for about 15-20 minutes until golden. Just be prepared for a different texture.
3. How do I store the leftovers?
These donuts are best enjoyed fresh, but you can store them in an airtight container at room temperature for up to 2 days. Beyond that, consider freezing them for future indulgence!
4. What if my glaze is too runny?
If your glaze is too runny, you can thicken it with more powdered sugar until it reaches the desired consistency!
Nutritional Info
While I usually focus on the pleasure of cooking rather than calorie counting, it’s good to know approximately what you’re indulging in. Each puff pastry donut is approximately 120-150 calories, depending on the glaze and toppings you choose.
And there you have it, my dear foodies! Puff Pastry Donuts that are not only a joy to make but are sure to be a hit every time. Remember, cooking is all about creativity, so feel free to experiment and make this recipe your own. Happy cooking, and may your kitchen always be filled with good vibes and even better treats!
PrintPuff Pastry Donuts

Delicious and fluffy puff pastry donuts that are easy to make and perfect for any occasion.
- Prep Time: 15 minutes
- Cook Time: 20 minutes
- Total Time: 35 minutes
- Yield: 12 servings 1x
- Category: Dessert
- Method: Frying
- Cuisine: American
- Diet: Vegetarian
Ingredients
- 2 sheets puff pastry (thawed)
- Vegetable oil (for frying)
- 2 cups powdered sugar
- 4 tablespoons milk
- 2 teaspoons vanilla extract
Instructions
- Roll out the pastry on a lightly floured surface to about 1/4 inch thickness.
- Cut out circles from the pastry using a round cookie cutter.
- Heat the oil in a deep frying pan until it reaches about 350°F (175°C).
- Fry the donuts for 2-3 minutes on each side until golden brown.
- Drain on paper towels and let cool slightly.
- Whisk the powdered sugar, milk, and vanilla extract in a bowl until smooth.
- Glaze the cooled donuts and let the glaze set.
Notes
For variation, try rolling the donuts in cinnamon sugar or adding jam before frying.
Nutrition
- Serving Size: 1 donut
- Calories: 150
- Sugar: 10g
- Sodium: 50mg
- Fat: 8g
- Saturated Fat: 1g
- Unsaturated Fat: 7g
- Trans Fat: 0g
- Carbohydrates: 19g
- Fiber: 1g
- Protein: 2g
- Cholesterol: 0mg
Keywords: donuts, puff pastry, dessert, sweet treats, breakfast

Indulgent Reese’s Chocolate Peanut Butter Cup Earthquake Cake
Indulgent Reese’s Chocolate Peanut Butter Cup Earthquake Cake
Welcome back to the delightful world of indulgent baking! Today, we’re diving into a true celebration of flavor and texture with a show-stopping dessert: the Reese’s Chocolate Peanut Butter Cup Earthquake Cake. If you’ve ever dreamed of sinking your teeth into a chocolate cake that’s bursting with peanut butter goodness, then you’re in for a treat!
Introduction
There’s something magical about the combination of chocolate and peanut butter. It’s a flavor pairing that leaves taste buds dancing and hearts swooning. And trust me, there’s no better way to experience this delightful duo than with an Earthquake Cake! This cake isn’t just a typical chocolate dessert; it’s an awe-inspiring masterpiece that comes with the promise of gooey, fudgy goodness balanced by the creamy richness of peanut butter cups.
Imagine this: a moist chocolate cake, a layer of rich chocolate pudding adding decadence, and chunks of Reese’s Peanut Butter Cups melted throughout, creating a satisfyingly messy ‘earthquake’ effect as it bakes. Sounds dreamy, right? And the best part? It’s surprisingly easy to whip up! Whether you’re planning a major celebration, a cozy dinner party, or just a casual family night in, this cake will steal the show and have everyone reaching for seconds (and thirds!).
So, tie on your apron and let’s walk through this joyous journey of flavors. Together, we’ll create a dessert that feels special yet approachable—just like the spirit of Ivory Apron!
Personal Story
Let me take you back to one of my earliest baking adventures in the kitchen. I was about ten years old, and I remember being captivated by the powerful aromas swirling around our home as my mom baked. One day, she decided to get creative with chocolate and peanut butter—a combination I loved but mostly found in simple sandwiches at lunch. She pulled out her recipe book and introduced me to the world of cakes, and we baked a chocolate-peanut butter cake together.
My little kid heart was filled with anticipation as I carefully measured out the cocoa powder and stirred the ingredients. The best moment was when we added chunks of peanut butter cups right into the batter! That first bite of gooey cake mingling with creamy peanut butter was pure bliss. That experience ignited my passion for baking, and I can still feel the warmth that enveloped me then. To this day, the combination of chocolate and peanut butter speaks to me, and it’s the foundation of this Earthquake Cake recipe. It’s not just food; it’s a nostalgic reminder of joyful moments spent in the kitchen.
Ingredients
Here’s what you’ll need for our delightful cake:
-
1 standard chocolate cake mix
Use your favorite brand; this is the base of our cake. If you’re feeling adventurous, you can opt for a dark chocolate cake mix for a richer flavor. -
3 large eggs
Eggs help bind everything together and add moisture. If you’re by chance out of eggs, you can substitute each egg with 1/4 cup of unsweetened applesauce or a mashed banana for a subtle twist. -
Water (or brewed coffee for richer flavor)
Using brewed coffee enhances the chocolate flavor beautifully. But if coffee isn’t your thing, plain old water works just fine! -
1 package instant chocolate pudding mix
This is where we elevate our cake’s creaminess. It adds a rich texture and indulgent taste! You can switch it up with vanilla pudding for a different flavor profile. -
6-8 Reese’s Peanut Butter Cups, chopped
The star of the show! These candy pieces add bursts of peanut butter bliss throughout the cake. You can substitute with any other peanut butter cup brand, or use a mix of chocolate and peanut butter candies. -
Creamy peanut butter (or crunchy for texture)
This will be swirled into the batter and gives it that signature peanut buttery flavor. If you prefer a little crunch, go for crunchy peanut butter; it brings delightful texture! -
Powdered sugar
For a light, sweet finishing touch! This isn’t strictly necessary, but it adds a lovely touch if you plan to dust the cake for presentation.
Step-by-Step Instructions
Ready to create some mouthwatering magic? Here’s how to make your Earthquake Cake!
-
Preheat and Prepare Your Pan
Preheat your oven to 350°F (175°C). Grease a 9×13-inch baking dish with cooking spray or butter. This will help our cake slide right out when it’s baked—nobody wants to face the cake catastrophe of a stuck dessert! -
Mix the Cake Batter
In a large mixing bowl, combine the chocolate cake mix, eggs, and water (or brewed coffee). Now, grab a whisk or electric mixer and beat the mixture on low for about 30 seconds. Then, bump it up to medium speed and mix for an additional 2 minutes. This helps aerate the cake, creating a lovely, fluffy texture. -
Add the Pudding Mix
Gently fold the chocolate pudding mix into your batter. Yes, it’s going to get ridiculously rich and delicious! Just make sure it’s well incorporated. -
Prepare the Peanut Butter Swirl
Before we dive in with the candy, let’s create that yum-factor! In a small bowl, mix together creamy peanut butter and a couple tablespoons of water (or milk) until it’s spreadable. This helps create the beautiful and creamy ripple effect throughout the cake. -
Combine Ingredients
Fold in the chopped Reese’s Peanut Butter Cups into the cake batter. This is where the magic starts to happen—those glistening chocolate and peanut butter pieces begin to dance throughout the batter! -
Transfer to the Baking Pan
Pour the cake batter into your prepared baking dish, spreading it into an even layer with a spatula. Now it’s time for that dreamy peanut butter swirl! Using a spoon, drop dollops of the prepared peanut butter mix on top and gently swirl it through the batter. Don’t worry about making it perfect; the chaos is what makes it an Earthquake Cake! -
Bake the Cake
Place the baking dish into the preheated oven and let it bake for about 30-35 minutes. Check doneness by inserting a toothpick in the center; it should come out clean, with a few moist crumbs attached. Don’t bake it too long or it can dry out—the last thing we want is a dry cake! -
Cool and Serve
Once baked, take it out of the oven and let it cool in the pan for about 10-15 minutes. After that, carefully flip it onto a wire rack or a serving platter. It’s hard to resist cutting into it straight away, but letting it cool slightly allows the flavors to deepen. -
Dust with Powdered Sugar
If you’re feeling fancy, dust some powdered sugar on top of the cake right before serving. It adds an elegant touch—perfect for impressing your guests!
Serving Suggestions
When it’s time to serve, cut yourself a generous slice—you’ll want to showcase the gooey layers and pockets of peanut butter cups in every piece! Pair it with a scoop of vanilla ice cream to create a heavenly contrast that chills the warm cake. Serving it with an extra drizzle of melted chocolate or a dollop of whipped cream would also be a delightful touch. Trust me, everyone will be requesting the recipe!
Recipe Variations
-
Minty Twist: Add a handful of crushed mint candies or peppermint extract into the cake batter for a refreshing surprise.
-
Nutty Surprise: Add a sprinkle of chopped nuts (like pecans or walnuts) to give your cake an irresistible crunch.
-
Swapping Flour: If you want a gluten-free option, use a gluten-free chocolate cake mix in place of the standard one.
-
Different Candies: Experiment with various types of chocolate candies, such as Milky Way or Snickers, for your own unique flavor experience.
-
Healthier Option: Use a reduced-fat cake mix and replace the peanut butter with a natural nut butter. You could also serve it with a fresh fruit salad on the side for a lighter touch.
Chef’s Notes
Baking this cake is always a delightful experience, but it also comes with its fair share of baking mishaps! I remember one time, in my excitement, I mistakenly grabbed the salt instead of the sugar. The resulting cake was a hilarious lesson in “don’t bake when tired.” As I shared bites of this “salty surprise” with friends, laughter filled the kitchen. This cake has truly evolved over time, from a simple chocolate cake to the rich and indulgent Earthquake Cake we’re whipping up today. It’s these little kitchen moments, both hilarious and heartwarming, that make baking such a joy.
FAQs and Troubleshooting
1. My cake didn’t rise. What happened?
Ensure your baking powder or cake mix isn’t expired, and double-check that you followed the recipe correctly. Sometimes, if the batter is over-mixed, it can also affect rising.
2. Why did my cake get hard?
This might happen if the cake is overbaked. Keep an eye on the time and always test with a toothpick.
3. Can I freeze the cake?
Yes! If you have leftovers (which is rare!), you can wrap individual slices in plastic wrap and store them in an airtight container in the freezer for up to 2 months.
4. How do I store leftovers?
Keep any leftover cake in an airtight container at room temperature for a day or two or in the fridge for up to a week. Just know that the sooner you eat it, the better!
Nutritional Info
(Note: Nutritional information can vary based on specific ingredients and portion sizes. It’s always a good idea to check labels for the most accurate details.)
- Serving size: 1 slice
- Calories: Approximately 400
- Carbohydrates: 60g
- Fat: 20g
- Protein: 6g
- Sugar: 30g
There you have it—a luscious, indulgent Reese’s Chocolate Peanut Butter Cup Earthquake Cake that’s bound to be the star of any event! Remember, it’s all about the joy of cooking together, creating beautiful moments around the table, and celebrating life’s sweetest moments (and desserts!). So gather your loved ones, pour a little something sparkling, and enjoy this deliciously rich creation! Happy baking!
PrintReese’s Chocolate Peanut Butter Cup Earthquake Cake

A rich and indulgent chocolate cake bursting with peanut butter goodness and chunks of Reese’s Peanut Butter Cups.
- Prep Time: 15 minutes
- Cook Time: 35 minutes
- Total Time: 50 minutes
- Yield: 12 servings 1x
- Category: Dessert
- Method: Baking
- Cuisine: American
- Diet: Vegetarian
Ingredients
- 1 standard chocolate cake mix
- 3 large eggs
- 1 cup water or brewed coffee
- 1 package instant chocolate pudding mix
- 6–8 Reese’s Peanut Butter Cups, chopped
- Creamy or crunchy peanut butter
- Powdered sugar (optional, for dusting)
Instructions
- Preheat your oven to 350°F (175°C) and grease a 9×13-inch baking dish.
- Mix the chocolate cake mix, eggs, and water (or brewed coffee) in a large bowl until well combined.
- Add the chocolate pudding mix and fold it into the batter.
- Prepare the peanut butter by mixing it with a few tablespoons of water or milk until spreadable.
- Combine the chopped Reese’s Peanut Butter Cups into the cake batter.
- Transfer the batter into the prepared baking dish and swirl in the peanut butter mix.
- Bake for about 30-35 minutes, or until a toothpick comes out clean.
- Cool for 10-15 minutes in the pan before transferring to a wire rack.
- Dust with powdered sugar before serving, if desired.
Notes
Pair with a scoop of vanilla ice cream or a drizzle of hot chocolate for an extra indulgent experience.
Nutrition
- Serving Size: 1 slice
- Calories: 400
- Sugar: 30g
- Sodium: 400mg
- Fat: 20g
- Saturated Fat: 8g
- Unsaturated Fat: 10g
- Trans Fat: 0g
- Carbohydrates: 60g
- Fiber: 2g
- Protein: 6g
- Cholesterol: 50mg
Keywords: chocolate cake, peanut butter, dessert, Reese's, indulgent

One-Bowl Double-Chocolate Muffins in 15 Minutes (No-Mixer)
Double Chocolate Muffins: A Luxurious Treat for Any Occasion
Introduction
Hello, lovely food lovers! Today, we’re diving into a decadent delight that’s sure to satisfy even the most serious chocolate cravings — double chocolate muffins. Picture this: a warm, gooey muffin oozing with melted chocolate chips, paired perfectly with a cup of coffee or tea. Whether for breakfast, an afternoon snack, or dessert, these irresistible muffins truly shine.
But what makes these muffins extra special? It’s not just about the rich, chocolatey flavor; it’s the memories and love baked into every bite! I still remember the first time I made these muffins. I was hosting a casual breakfast for a group of friends, and feels were running high as we all gathered around the table with steaming hot mugs in hand. The aroma of chocolate wafted through the kitchen, drawing everyone closer. They barely had time to cool before we dove in, gooey centers and all! Trust me; you’ll want to recreate that experience in your home too.
So, tie on your apron and let’s get started on making these luscious double chocolate muffins. I promise they’ll be a crowd-pleaser and add an elegant twist to your everyday baking! Plus, you’ll learn some handy tips along the way that will leave you feeling like a pro in the kitchen!
Personal Story
Back in my college days, Sundays were sacred. It was the one day of the week that was all about cozy get-togethers, brunches, and a bit of relaxation before the chaos of the week resumed. One particular Sunday stands out in my mind when I decided to whip up my double chocolate muffins for a small gathering. I remember standing in my tiny kitchen, chocolate speckles everywhere, and feeling a little nervous about whether my friends would love them.
As the timer buzzed, I pulled out the muffins from the oven, and the aroma filled my home with warmth. My friends couldn’t wait to dig in, and as soon as they took their first bites, the room filled with smiles and satisfied sighs. One of my pals even declared, “These are better than any café muffin I’ve ever had!” That moment solidified my belief that nurturing people through food is truly a gift. Ever since then, these double chocolate muffins have held a special place in my heart and my recipe collection.
Ingredients
Let’s gather our ingredients! Here’s what you’ll need to create these scrumptious double chocolate muffins:
-
1 3/4 cups all-purpose flour
The backbone of our muffins, flour helps to create structure. You can substitute whole wheat flour for a healthier twist, but keep in mind it may change the texture slightly. -
1/2 cup unsweetened cocoa powder
This is where the chocolate magic begins! Choose a high-quality cocoa powder for a richer flavor. You can use Dutch-processed cocoa if you prefer a smoother taste. -
1 cup granulated sugar
Sweetness is essential! You can swap it for brown sugar for a hint of caramel flavor, or use coconut sugar for a more earthy sweetness. -
1 teaspoon baking soda
A key leavening agent that helps our muffins rise beautifully. Make sure it’s fresh! Replace with baking powder if needed, but the texture might change a bit. -
1/2 teaspoon salt
Salt enhances the chocolate flavor — don’t skip it! You can use sea salt for a gourmet touch. -
2 large eggs
Eggs provide moisture and bind the ingredients together. For a vegan option, you can substitute them with flax eggs (1 tablespoon ground flaxseed mixed with 2.5 tablespoons water per egg). -
1 cup buttermilk
Buttermilk adds richness and tenderness. No buttermilk? Don’t worry! You can make a quick substitute by adding a tablespoon of vinegar or lemon juice to regular milk. Let it sit for about 5 minutes! -
1/2 cup vegetable oil
This keeps the muffins moist. You can use melted coconut oil or even applesauce for a lighter option. -
1 teaspoon vanilla extract
A splash of vanilla brightens the whole muffin experience. Feel free to experiment with almond extract or even coffee for a twist! -
1 cup chocolate chips
Because we want double the chocolate, right? Use semi-sweet, dark, or even white chocolate chips. You can also use chopped chocolate bars for a gourmet touch!
Step-by-Step Instructions
Now that we have all our delightful ingredients ready, it’s time to get cooking! Follow these detailed steps for making your double chocolate muffins:
-
Preheat the Oven
Preheat your oven to 350°F (175°C). This ensures that your muffins bake evenly from the moment they hit the oven. -
Prepare the Muffin Tin
Grab a muffin tin and line it with paper liners or grease it lightly. This helps with easy removal later. If you have a non-stick muffin pan, you may not need liners — just make sure to grease it well to prevent sticking! -
Mix Dry Ingredients
In a large mixing bowl, whisk together the flour, cocoa powder, baking soda, and salt until well combined. This step is crucial as it helps to evenly distribute the leavening agent. Make sure there are no cocoa clumps! -
Combine Wet Ingredients
In another bowl, whisk the eggs and sugar together until fluffy. Next, add the buttermilk, vegetable oil, and vanilla extract, mixing until everything is well blended. Tip: If you’re prone to lumps, beat the wet ingredients with a whisk for a bit longer to ensure a smooth mixture. -
Combine Both Mixtures
Pour the wet mixture into the dry ingredients. Gently fold the two mixtures together using a spatula — be careful not to overmix! It’s okay if there are a few flour streaks; we want to keep our muffins light and tender. -
Add Chocolate Chips
Carefully fold in the chocolate chips, making sure they’re evenly distributed throughout the batter. Oh, and save a few for sprinkling on top for that “wow” factor! -
Fill the Muffin Tin
Evenly portion the batter into the prepared muffin tin, filling each cup about two-thirds full. This allows space for the muffins to rise without overflowing. If desired, sprinkle the remaining chocolate chips on top. -
Bake
Place the muffin tin in the preheated oven and bake for 18-20 minutes. Check for doneness using a toothpick; it should come out with a few moist crumbs — not completely clean! -
Cool
Once baked, let the muffins cool in the tin for about 5 minutes, then transfer them to a wire rack to cool completely. This helps maintain their moist texture.
And voilà! You’ve just created a batch of perfectly fluffy double chocolate muffins!
Serving Suggestions
Now, let’s talk about serving these beauties. They’re delightful on their own, but why not elevate the experience a little? I love serving them warm, dusted with powdered sugar for elegant flair. Pair them with a scoop of vanilla ice cream or a dollop of whipped cream for an indulgent dessert. Or simply enjoy one with your morning coffee — it’s the perfect pairing!
Recipe Variations
Ready to get creative? Here are some fun variations you can try with your double chocolate muffins:
- Mint Chocolate Muffins: Add a few drops of peppermint extract for a refreshing twist.
- Nutty Delight: Fold in a half-cup of chopped nuts like walnuts or pecans for added crunch and flavor.
- Spicy Chocolate: Mix in a pinch of cayenne or cinnamon for a subtly spicy kick.
- Fruit-Infused: Add chopped raspberries or strawberries for a fruity surprise!
- Gluten-Free: Swap the all-purpose flour for a gluten-free blend, making sure your baking powder is certified gluten-free as well.
Chef’s Notes
As with all recipes, practice makes perfect! The beauty of these muffins is how flexible they can be — you can use this base recipe and change it up to suit your taste buds or what you have on hand. I’ve made these muffins countless times and often add a little more cocoa or chocolate depending on my cravings. Sometimes, I even experiment with flavor extracts, and guess what? They’ve always turned out deliciously! Remember, it’s all about having fun in the kitchen!
FAQs and Troubleshooting
Here are some common questions you may have while making your double chocolate muffins:
-
Why are my muffins dense?
Overmixing the batter can lead to dense muffins. Fold the wet and dry ingredients just until combined! -
How do I store leftover muffins?
Keep them in an airtight container at room temperature for up to three days. You can also freeze them for up to three months; just thaw at room temperature when ready to eat. -
Can I make these muffins ahead of time?
Absolutely! You can prepare the batter the night before and refrigerate it, then bake fresh muffins in the morning. Just allow them to sit at room temperature for about 10 minutes before baking. -
How do I fix dry muffins?
If you find your muffins turned out dry, try reducing the baking time slightly next time or make sure the measuring of your flour is accurate and not over-packed.
Nutritional Info
While indulging in these double chocolate muffins is an absolute delight, it’s always great to be mindful of the ingredients you’re consuming. Each muffin (based on 12 servings) typically contains approximately:
- Calories: 240
- Total Fat: 12g
- Saturated Fat: 3g
- Carbohydrates: 31g
- Sugars: 15g
- Protein: 4g
Of course, these values can vary based on your ingredients and any substitutions you may choose to make.
And there you have it! Your guide to crafting the most delightful double chocolate muffins that bring joy to every gathering. I hope you enjoy making them as much as I do. Happy baking, and don’t forget to share your muffin moments around the table! 🍫✨
PrintDouble Chocolate Muffins

Decadent double chocolate muffins with melted chocolate chips, perfect for any occasion.
- Prep Time: 15 minutes
- Cook Time: 20 minutes
- Total Time: 35 minutes
- Yield: 12 servings 1x
- Category: Dessert
- Method: Baking
- Cuisine: American
- Diet: Vegetarian
Ingredients
- 1 3/4 cups all-purpose flour
- 1/2 cup unsweetened cocoa powder
- 1 cup granulated sugar
- 1 teaspoon baking soda
- 1/2 teaspoon salt
- 2 large eggs
- 1 cup buttermilk
- 1/2 cup vegetable oil
- 1 teaspoon vanilla extract
- 1 cup chocolate chips
Instructions
- Preheat your oven to 350°F (175°C).
- Prepare a muffin tin by lining it with paper liners or greasing it lightly.
- Mix dry ingredients: in a large mixing bowl, whisk together flour, cocoa powder, baking soda, and salt.
- Combine wet ingredients in another bowl: whisk eggs and sugar until fluffy, then add buttermilk, vegetable oil, and vanilla extract.
- Combine both mixtures by pouring the wet mixture into the dry ingredients and gently folding.
- Add chocolate chips and fold them in with care.
- Fill the muffin tins about two-thirds full with batter.
- Bake in the preheated oven for 18-20 minutes or until a toothpick comes out with a few moist crumbs.
- Cool the muffins in the tin for 5 minutes then transfer to a wire rack.
Notes
For variations, consider adding mint extract, nuts, or fruits to customize your muffins!
Nutrition
- Serving Size: 1 muffin
- Calories: 240
- Sugar: 15g
- Sodium: 200mg
- Fat: 12g
- Saturated Fat: 3g
- Unsaturated Fat: 7g
- Trans Fat: 0g
- Carbohydrates: 31g
- Fiber: 2g
- Protein: 4g
- Cholesterol: 70mg
Keywords: muffins, double chocolate, dessert, baking, chocolate