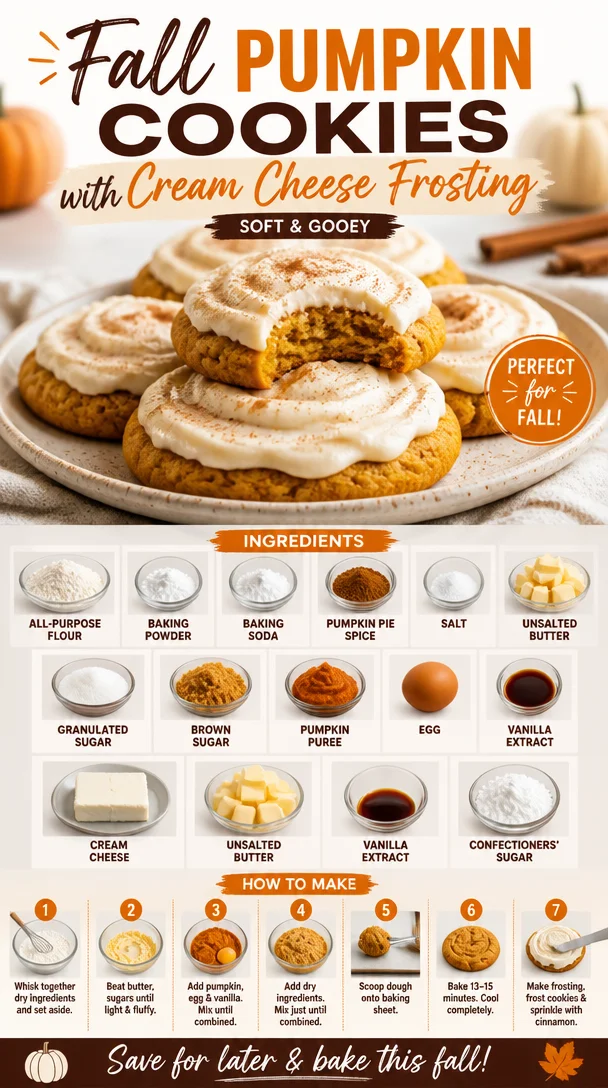
Fall Pumpkin Cookies with Cream Cheese Frosting (Soft Gooey)
Pumpkin Cookies with Cream Cheese Frosting: An Autumn Delight
Hello, fellow food enthusiasts! As the leaves turn golden and the air grows crisp, there’s something truly magical about the warm, inviting scent of freshly baked pumpkin cookies wafting through the kitchen. Today, I’m thrilled to share with you one of my all-time favorite recipes: Pumpkin Cookies with Cream Cheese Frosting. These cookies are the perfect blend of soft, spicy sweetness topped with the tangy richness of cream cheese frosting — a delightful treat for all fall gatherings!
A Cozy Memory
Growing up, fall was a season filled with warmth and aroma as my family embraced the harvest time. I fondly remember the first batch of pumpkin cookies I made all on my own. I was around ten, standing on a small stool just to reach the countertop. My mom had just handed me the mixing bowl, and as I sunk my hands into the buttery dough mixed with fragrant pumpkin and spices, I felt like a true chef! My little kitchen turned into a bakery, and the anticipation of sharing those cookies with my family was priceless. As the cookies baked, we curled up on the couch, sipping apple cider and enjoying the cozy autumn vibes. Those sweet moments spent in the kitchen ignited my love for baking, and now, years later, I can’t wait to recreate those joyful feelings with you through this recipe!
Ingredients
Let’s gather our ingredients! Here’s everything you’ll need for these lovely pumpkin cookies:
-
2 1/2 cups (312 g) all-purpose flour
This is the base of our cookies! For a wholesome twist, you can substitute half with whole wheat flour for added nutrition. -
1 teaspoon baking powder
This will provide the lift we need for soft and fluffy cookies. -
1 teaspoon baking soda
Works in tandem with the baking powder for an extra rise. -
1 tablespoon pumpkin pie spice
A fragrant mix of cinnamon, nutmeg, and ginger that captures the essence of fall. You can make your own blend or simply use more cinnamon if you’re out of pumpkin spice. -
1/2 teaspoon salt
A pinch of salt enhances the sweetness of the cookies. -
3/4 cup (170 g) unsalted butter (room temperature)
Buttery goodness brings richness to our cookie dough. Make sure it’s soft to the touch to cream perfectly. -
3/4 cup (150 g) granulated sugar
This adds sweetness and creates that satisfying crisp when baked. -
1/2 cup (100 g) packed light brown sugar
Brown sugar brings moisture and a hint of caramel flavor to the cookies. -
1 1/4 cups (305 g) canned pumpkin puree
The star of our show! Make sure to use pure pumpkin puree and not pumpkin pie filling for the best flavor. -
1 large egg (room temperature)
Eggs add moisture and help bind our ingredients together. -
1 teaspoon pure vanilla extract
A touch of vanilla enhances all the flavors beautifully. -
8 ounces (1 brick or 226 g) block-style cream cheese (softened but still cool)
Cream cheese creates a velvety frosting to top our cookies. -
¼ cup (56 g) unsalted butter (softened but still cool)
Just like before, this will help achieve the luscious texture of the frosting. -
1 teaspoon pure vanilla extract
Yes, we’re using it again! It really uplifts that cream cheese flavor. -
1 3/4 cups (210 g) confectioners’ sugar (sifted)
This will sweeten our frosting to perfection while ensuring a smooth texture.
Step-by-Step Instructions
Ready to bake? Let’s dive into the delicious process of making these pumpkin cookies:
-
Preheat your oven: Set your oven to 350°F (175°C) and line your baking sheets with parchment paper. This will prevent sticking and make cleanup a breeze!
-
Mix the dry ingredients: In a medium bowl, whisk together the all-purpose flour, baking powder, baking soda, pumpkin pie spice, and salt. This step is essential to evenly distribute the leaveners and spices; it will prevent clumps in your dough.
-
Cream the butter and sugars: In a large mixing bowl, beat the softened unsalted butter, granulated sugar, and brown sugar together using an electric mixer on medium speed until light and fluffy — about 2-3 minutes. This will incorporate air into the mixture, which helps to create a lighter cookie.
-
Incorporate the wet ingredients: Add in the pumpkin puree, egg, and vanilla extract to the buttery mixture. Beat until well combined. It’s okay if the mixture appears slightly chunky; the pumpkin makes it wonderfully moist!
-
Add the dry mix: Gradually add the dry ingredients, mixing on low speed until just combined. Do not overmix! We want our cookies to remain soft and chewy.
-
Scoop the dough: Using a cookie scoop or a spoon, drop rounded tablespoons of dough onto the prepared baking sheets, spaced about 2 inches apart (these cookies will spread a little).
-
Sprinkle with extra pumpkin spice: For that extra flair, sprinkle a bit of pumpkin pie spice atop each dough ball before baking.
-
Bake: Pop them in the preheated oven and bake for about 12-15 minutes, or until the edges are lightly golden. The centers will look slightly underbaked — trust me! They’ll firm up as they cool.
-
Cool completely: Allow the cookies to cool on the baking sheets for about 5 minutes before transferring them to a wire rack to cool completely. This keeps them soft and prevents any sticking!
-
Make the cream cheese frosting: In a mixing bowl, beat the softened cream cheese and butter together until smooth. Gradually add the sifted confectioners’ sugar while continuing to mix, then finish it off with vanilla extract. Mix until creamy and heavenly!
-
Frost the cookies: Once the cookies are completely cool, frost each cookie generously with the cream cheese frosting.
Serving Suggestions
To serve these delightful cookies, plate them on a beautiful serving tray, dust with a pinch of pumpkin pie spice, or drizzle a little extra cream cheese frosting on top for added flair. These cookies are perfect for cozy gatherings, festive celebrations, or just indulging during a quiet evening at home with a warm cup of tea or coffee!
Recipe Variations
Feeling adventurous? Here are a few creative twists you can try:
-
Chocolate Chip Pumpkin Cookies: Mix in a cup of semi-sweet or dark chocolate chips for a delightful sweet-and-spicy combo.
-
Nuts and Seeds: Add chopped pecans or walnuts for a crunchy texture that contrasts beautifully with the soft cookie.
-
Gluten-Free Option: Substitute the all-purpose flour with a 1:1 gluten-free baking blend. Just make sure it contains xanthan gum!
-
Add Citrus: A teaspoon of orange or lemon zest in the cookie dough brightens up the flavor profile wonderfully.
-
Frosting Flavor Variations: Swap traditional vanilla extract for maple syrup in your frosting to enhance the fall flavors even more!
Chef’s Notes
These pumpkin cookies have become a staple in my home! Over the years, I’ve tweaked the recipe to include my favorite add-ins and flavors while keeping the essence of the original dish intact. Each bite takes me back to that cozy fall memory with my family. Cooking is all about those warm moments, isn’t it? And trust me, if you can resist the temptation of snacking on the cookie dough, you’re a stronger soul than I! But hey, if you do sneak a bite, no judgment here — doughy goodness is part of the experience!
FAQs and Troubleshooting
Q: Why are my cookies spreading too much?
A: This can happen if your butter is too warm, or if you didn’t chill the dough long enough before baking.
Q: How can I make sure my cookies are soft and chewy?
A: Be careful not to overbake! They should look slightly underdone when you take them out of the oven. They’ll continue to cook while cooling.
Q: Can I freeze the cookies?
A: Absolutely! Allow them to cool completely and freeze them in an airtight container. For the best texture, frost them after thawing!
Q: My frosting turned out too runny; what did I do wrong?
A: If the frosting is too runny, it may be because the cream cheese and butter were too warm. Pop the frosting in the fridge for a few minutes to firm it up, then mix it again.
Nutritional Info (Optional)
While I typically don’t focus on nutrition too much as I believe in enjoying every bite, here’s a quick breakdown per cookie to keep you informed:
- Calories: Approximately 180
- Total Fat: 8g
- Saturated Fat: 5g
- Carbohydrates: 24g
- Sugar: 10g
- Protein: 2g
There you have it, my dear friends! These Pumpkin Cookies with Cream Cheese Frosting are not just a treat; they’re a celebration of the season, a means of connection, and a delicious way to remind us of the warmth that comes from sharing food. I hope you enjoy creating beautiful moments around your table with this simple yet elegant recipe. So tie on that ivory apron, grab your favorite whisk, and let’s get baking! 🍂
PrintPumpkin Cookies with Cream Cheese Frosting

Delightful pumpkin cookies topped with cream cheese frosting, perfect for fall gatherings.
- Prep Time: 20 minutes
- Cook Time: 15 minutes
- Total Time: 35 minutes
- Yield: 24 servings 1x
- Category: Dessert
- Method: Baking
- Cuisine: American
- Diet: Vegetarian
Ingredients
- 2 1/2 cups (312 g) all-purpose flour
- 1 teaspoon baking powder
- 1 teaspoon baking soda
- 1 tablespoon pumpkin pie spice
- 1/2 teaspoon salt
- 3/4 cup (170 g) unsalted butter (room temperature)
- 3/4 cup (150 g) granulated sugar
- 1/2 cup (100 g) packed light brown sugar
- 1 1/4 cups (305 g) canned pumpkin puree
- 1 large egg (room temperature)
- 1 teaspoon pure vanilla extract
- 8 ounces (226 g) cream cheese (softened but still cool)
- ¼ cup (56 g) unsalted butter (softened but still cool)
- 1 teaspoon pure vanilla extract
- 1 3/4 cups (210 g) confectioners’ sugar (sifted)
Instructions
- Preheat your oven: Set your oven to 350°F (175°C) and line your baking sheets with parchment paper.
- Mix the dry ingredients: In a medium bowl, whisk together the all-purpose flour, baking powder, baking soda, pumpkin pie spice, and salt.
- Cream the butter and sugars: In a large mixing bowl, beat the softened unsalted butter, granulated sugar, and brown sugar together using an electric mixer on medium speed until light and fluffy.
- Incorporate the wet ingredients: Add in the pumpkin puree, egg, and vanilla extract to the buttery mixture. Beat until well combined.
- Add the dry mix: Gradually add the dry ingredients, mixing on low speed until just combined.
- Scoop the dough: Using a cookie scoop or a spoon, drop rounded tablespoons of dough onto the prepared baking sheets, spaced about 2 inches apart.
- Sprinkle with extra pumpkin spice: For that extra flair, sprinkle a bit of pumpkin pie spice atop each dough ball before baking.
- Bake: Pop them in the preheated oven and bake for about 12-15 minutes, or until the edges are lightly golden.
- Cool completely: Allow the cookies to cool on the baking sheets for about 5 minutes before transferring them to a wire rack to cool completely.
- Make the cream cheese frosting: In a mixing bowl, beat the softened cream cheese and butter together until smooth. Gradually add the sifted confectioners’ sugar and vanilla extract, mixing until creamy.
- Frost the cookies: Once the cookies are completely cool, frost each cookie generously with the cream cheese frosting.
Notes
For variations, consider adding chocolate chips or nuts for a twist! You can freeze the cookies for later enjoyment.
Nutrition
- Serving Size: 1 cookie
- Calories: 180
- Sugar: 10g
- Sodium: 150mg
- Fat: 8g
- Saturated Fat: 5g
- Unsaturated Fat: 3g
- Trans Fat: 0g
- Carbohydrates: 24g
- Fiber: 1g
- Protein: 2g
- Cholesterol: 30mg
Keywords: pumpkin cookies, fall recipes, cream cheese frosting, autumn desserts
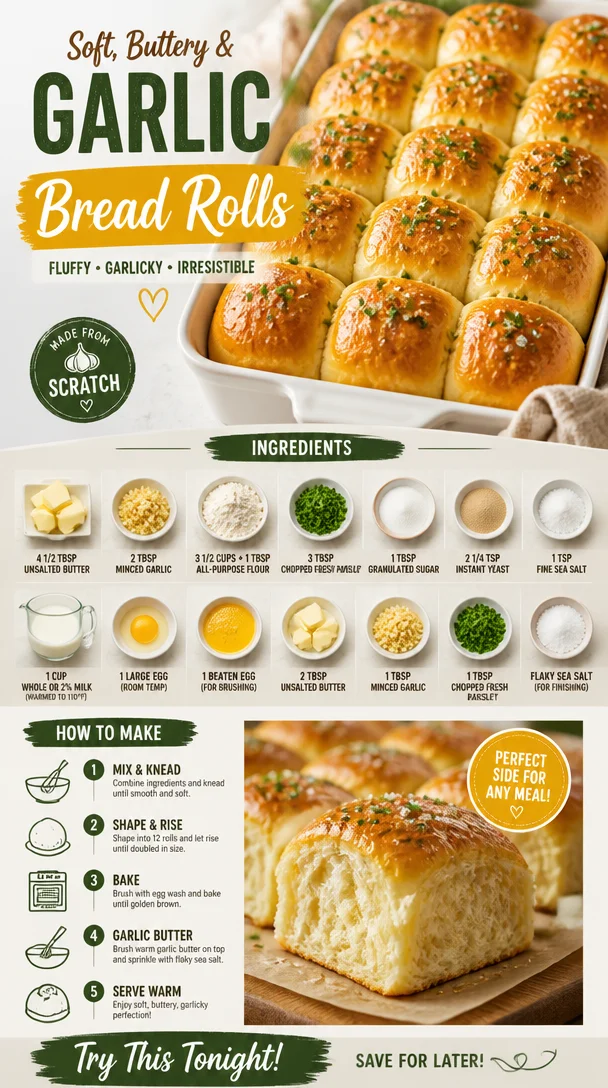
Garlic Bread Rolls
Embrace the Comfort: Homemade Garlic Bread Rolls
Hello, fellow food lovers! Today, we’re diving into the world of homemade Garlic Bread Rolls—a recipe that’ll elevate your meals and warm your heart. Imagine biting into a soft, pillowy roll, bursting with the rich flavors of garlic and parsley, paired with a golden, buttery crust. If that doesn’t make you swoon, I don’t know what will!
There’s something so enchanting about the aroma of freshly baked bread wafting through the kitchen. It’s like a warm hug for your senses, inviting everyone to gather around and share in the love. I can’t wait to share this scrumptious recipe with you! Whether it’s a cozy weeknight dinner or a festive gathering, these Garlic Bread Rolls will have your guests feeling right at home.
The Heart of the Kitchen: A Personal Story
Let me take you back to my childhood kitchen, where I first discovered the magic of bread-making. I can still picture the flour-covered countertop and my mother, donned in her trusty ivory apron, guiding me with a patient smile. One rainy afternoon, we decided to whip up her famous garlic rolls for dinner. The sound of the dough rising and the delightful aroma of roasting garlic was intoxicating.
While we baked, we laughed and shared stories—I even remember my little brother sneaking bites of the dough when he thought no one was looking (sneaky little hands!). When those rolls finally came out of the oven, they were golden brown and shimmering with butter. The whole family gathered at the table, and with each bite, we created memories that I cherish to this day.
That experience ignited my passion for cooking and hosting. And now, I’m so thrilled to share that magic with you through these Garlic Bread Rolls. Let’s roll up our sleeves and make some kitchen magic together!
Ingredients: The Building Blocks of Flavor
Here’s what you’ll need for your utterly delightful Garlic Bread Rolls:
- 4 1/2 tablespoons unsalted butter: This adds richness and moisture. You can substitute with olive oil for a lighter flavor.
- 2 tablespoons minced garlic: Fresh is best! You can use garlic powder if you’re in a pinch—1 teaspoon should do.
- 3 1/2 cups + 1 tablespoon all-purpose flour: Flour is the backbone of your rolls! Make sure to measure accurately; spoon the flour into the measuring cup and level it off. For a gluten-free option, try a 1:1 baking blend.
- 3 tablespoons chopped fresh parsley: This brightens the flavor and adds a pop of color. Dried parsley works too, but use less since it’s more concentrated.
- 1 tablespoon granulated sugar: This helps with browning and yeast activation. Honey or maple syrup can be a natural substitute.
- 2 1/4 teaspoons instant yeast: Instant yeast is a game-changer because you can mix it directly with the dry ingredients. If you only have active dry yeast, let it bloom in warm milk for about 5-10 minutes first.
- 1 teaspoon fine sea salt: Essential for flavor balance. Don’t skip this!
- 1 cup whole or 2% milk (warmed to 110°F): This hydrates the dough. If you need a dairy-free alternative, unsweetened almond or oat milk will work well.
- 1 large egg (room temperature): This enriches the dough, giving it a lovely texture.
- 1 beaten egg, for brushing the tops: This creates that beautiful golden finish on your rolls.
- 2 tablespoons unsalted butter: More butter to brush on the rolls post-bake for that extra deliciousness!
- 1 tablespoon minced garlic: Yes, more garlic! This adds a buttery, garlicky glaze on top.
- 1 tablespoon chopped fresh parsley: Because we fancy! This adds freshness to the finishing touch.
- Flaky sea salt (for finishing): A sprinkle of flaky salt elevates the flavor and makes those rolls extra special.
Step-by-Step Instructions: Roll with Me
-
Prepare Your Dough:
In a large mixing bowl, combine 3 1/2 cups of all-purpose flour, granulated sugar, instant yeast, and sea salt. Give it a good mix with a whisk to make sure everything is evenly incorporated. -
Add the Wet Ingredients:
Now, let’s bring our dough to life! Add the warmed milk, room temperature egg, and 4 1/2 tablespoons of softened unsalted butter to the flour mixture. Using a spatula or your hands, mix until a shaggy dough forms. -
Kneading:
Lightly flour your countertop and dump the dough onto it. Knead for about 6-8 minutes, or until the dough is smooth and elastic. If it’s sticky, sprinkle a little more flour as needed. Don’t worry; kneading is a great way to channel any stress. -
First Rise:
Place the kneaded dough in a greased bowl and cover it with a clean kitchen towel. Let it rise in a warm place for about 1 hour, or until it has doubled in size. Pro tip: try turning your oven on for 1 minute, then turning it off before placing the dough inside—proven cozy spot for rising! -
Shape Your Rolls:
Once the dough has risen, punch it down to release the air, and sprinkle in the minced garlic and chopped parsley. Mix gently until incorporated. Then, divide the dough into 12 equal pieces and shape each piece into a roll. -
Second Rise:
Place the shaped rolls close together in a greased 9×13-inch baking dish. Cover them again with the kitchen towel and let them rise for another 30-45 minutes. You want them to be puffy and almost touching. -
Preheat Your Oven:
While the rolls are rising, preheat your oven to 375°F (190°C). A hot oven is critical for that golden crust! -
Egg Wash:
Once they’ve risen beautifully, brush the tops with the beaten egg to enhance browning. -
Bake:
Pop those rolls in the oven and let them bake for about 20-25 minutes or until they’re golden brown and sound hollow when tapped on the bottom. -
Garlic Butter Glaze:
In a small saucepan, melt 2 tablespoons of butter over low heat and stir in the additional minced garlic and parsley. Once the rolls are out of the oven, brush this glorious mixture over the top and sprinkle with flaky sea salt.
Serving Suggestions: Plating with Love
These Garlic Bread Rolls are best served warm and fresh out of the oven. To plate, arrange them in a lovely basket lined with a clean kitchen towel for rustic charm. Serve them alongside your favorite pasta, soups, or simply enjoy them on their own with a drizzle of olive oil or balsamic vinegar. Trust me, they’ll be the star of the show!
Recipe Variations: Get Creative!
- Cheesy Garlic Rolls: Add shredded mozzarella or parmesan to the dough or on top before baking for a melty surprise!
- Herb-Infused Rolls: Mix in chopped fresh rosemary or thyme instead of parsley for an aromatic twist.
- Whole Wheat Option: Swap half of the all-purpose flour with whole wheat flour to introduce a nuttier flavor and more fiber.
- Garlic-Herb Butter: Mix in dried Italian herbs for an extra burst of flavor in your garlic butter glaze.
- Sweet Garlic Rolls: Add a hint of cinnamon and sugar to your dough for a sweet take on these rolls, perfect for breakfast!
Chef’s Notes: A Slice of Kitchen Life
Oh, where do I begin? These rolls have a special place in my heart because they remind me of family and the simple joy of cooking together. Over the years, I’ve played around with different garlic and herb combinations, and sometimes I add a splash of white wine to the dough for depth.
Funny story—one Christmas, I decided to showcase these at our dinner. I was so excited that I accidentally doubled the garlic in the glaze! Let’s just say it turned into a garlic fest that still gets talked about during family gatherings. Lesson learned—sometimes, less is more, but it sure made for a memorable holiday!
FAQs and Troubleshooting
-
Why are my rolls dense?
If your rolls turned out dense, it could be due to insufficient kneading or not allowing enough rise time. Be sure to knead until smooth and give them adequate time to rise; patience is key! -
Can I prepare the dough in advance?
Absolutely! You can prepare the dough up to the first rise, punch it down, store it in the fridge overnight, and shape the rolls the next day. Just allow them to come to room temperature before the second rise. -
What if my rolls don’t brown properly?
If your rolls aren’t browning as they should, ensure your oven is properly preheated. An egg wash not only adds golden color but also a crispy crust, so don’t skip it! -
Can I freeze these rolls?
Yes! After baking and cooling, freeze them in an airtight bag. When you’re ready to eat, pop the frozen rolls in a preheated oven at 350°F (175°C) for about 10-15 minutes.
Nutritional Info
For those who are health-conscious, a single roll packs roughly 180 calories, with a balance of carbohydrates, fats, and proteins, thanks to the butter and egg. Remember, it’s all about balance—indulging in these rolls once in a while will bring happiness into your kitchen!
There you have it—your go-to recipe for Garlic Bread Rolls that are destined to impress! Cooking should be a joyous adventure, and I hope this recipe inspires you to gather your loved ones around the table. So, tie on that apron, sprinkle in some love, and enjoy each delicious bite. Happy baking!
PrintHomemade Garlic Bread Rolls

Delight in these soft, pillowy garlic bread rolls, bursting with flavor and perfect for any meal.
- Prep Time: 15 minutes
- Cook Time: 25 minutes
- Total Time: 90 minutes
- Yield: 12 servings 1x
- Category: Side Dish
- Method: Baking
- Cuisine: Italian
- Diet: Vegetarian
Ingredients
- 4 1/2 tablespoons unsalted butter
- 2 tablespoons minced garlic
- 3 1/2 cups + 1 tablespoon all-purpose flour
- 3 tablespoons chopped fresh parsley
- 1 tablespoon granulated sugar
- 2 1/4 teaspoons instant yeast
- 1 teaspoon fine sea salt
- 1 cup whole or 2% milk, warmed to 110°F
- 1 large egg, room temperature
- 1 beaten egg, for brushing the tops
- 2 tablespoons unsalted butter, melted, for brushing
- 1 tablespoon minced garlic, for glaze
- 1 tablespoon chopped fresh parsley, for glaze
- Flaky sea salt, for finishing
Instructions
- Prepare your dough: In a large mixing bowl, combine flour, sugar, instant yeast, and salt. Mix well.
- Add the warmed milk, egg, and unsalted butter to the flour mixture. Mix until shaggy dough forms.
- Knead the dough on a floured countertop for about 6-8 minutes until smooth and elastic.
- Place the kneaded dough in a greased bowl and cover it. Let it rise in a warm place for about 60 minutes.
- Shape your rolls: Punch down the risen dough, add minced garlic and parsley, mix gently, and divide into 12 pieces, shaping each into a roll.
- Place the rolls in a greased baking dish, cover, and let them rise for another 30-45 minutes.
- Preheat your oven to 375°F (190°C).
- Brush the tops of the rolls with beaten egg.
- Bake for 20-25 minutes until golden brown.
- Melt butter in a saucepan, stir in garlic and parsley, then brush over rolls and sprinkle with flaky sea salt.
Notes
These rolls are best served warm and can be frozen after baking for later enjoyment. For a twist, try adding cheese or different herbs.
Nutrition
- Serving Size: 1 roll
- Calories: 180
- Sugar: 1g
- Sodium: 300mg
- Fat: 7g
- Saturated Fat: 4g
- Unsaturated Fat: 3g
- Trans Fat: 0g
- Carbohydrates: 23g
- Fiber: 1g
- Protein: 4g
- Cholesterol: 15mg
Keywords: garlic bread, rolls, homemade bread, vegetarian, side dish
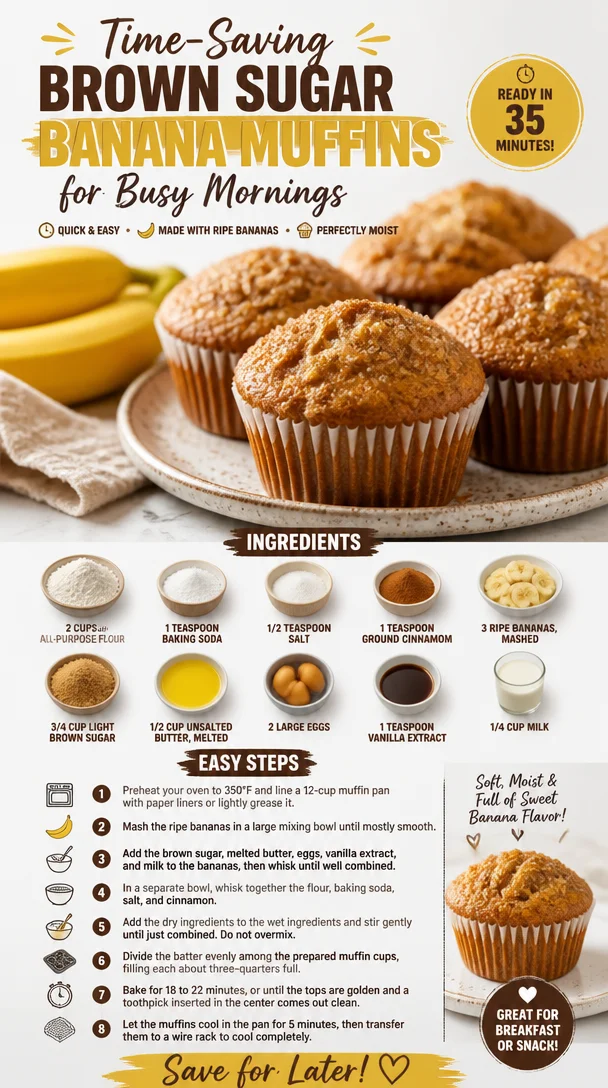
Time-Saving Brown Sugar Banana Muffins for Busy Mornings
Irresistible Brown Sugar Banana Muffins: A Cozy Delight for Any Occasion
Introduction
Hey there, fellow food lovers! Today, we’re diving into the delightful world of Brown Sugar Banana Muffins—a cozy treat that whispers comfort and nostalgia. You know those moments when you’re craving something sweet, warm, and inviting? Brown Sugar Banana Muffins are the ultimate solution! They’re perfect for breakfast, a lovely afternoon snack, or even a late-night indulgence while curling up with your favorite book.
Let’s be real: there’s something magical about the aroma of bananas and brown sugar baking in the oven. It’s like a warm hug that says, “Everything is going to be okay.” And the best part? They’re incredibly easy to whip up, even if you’re a kitchen novice! So, grab your apron, tie it on, and let’s create some scrumptiously soft muffins that will have everyone begging for the recipe—because trust me, it’s a keeper!
You don’t need a culinary degree, fancy equipment, or a Pinterest-perfect kitchen to bring these muffins to life. All you need are a few simple ingredients and a dash of love. And guess what? I’m here to guide you every step of the way! So, let’s get started on this delicious journey together.
Personal Story
Let me take you back to a sunny Saturday morning, where the gentle rays of the sun filtered through the kitchen window. My mom and I were in the kitchen, surrounded by the tantalizing aroma of baked goods. As we peeled and mashed bananas, laughter filled the air. We were making her famous banana muffins, a recipe passed down through generations.
I remember how I would sneak spoonfuls of the batter when no one was looking (don’t tell anyone!). The mix of creamy bananas and sugary goodness was irresistible. I was hooked! Fast forward to now, and whenever I bake these muffins, I’m transported back to those carefree days, awash with the scent of nostalgia. Each muffin I make carries a piece of that memory, and I’m excited to share this magic with you. Let’s recreate that sweet moment together!
Ingredients
Here’s what you’ll need for these sweet delights:
-
2 cups all-purpose flour
This is the backbone of your muffins. You can swap it out for whole wheat flour for a heartier muffin, but keep in mind the texture may vary slightly. -
1 teaspoon baking soda
This helps your muffins rise perfectly. If you don’t have baking soda on hand, a triple combination of baking powder (3 teaspoons) can serve as a substitute. -
1/2 teaspoon salt
Balances out the sweetness. If you’re cutting down on salt, you can leave it out, but it does enhance the flavors. -
1 teaspoon ground cinnamon
For that aromatic, warm flavor! If you’re a cinnamon lover—or have a big love for fall spices—feel free to add a pinch of nutmeg or ginger for a little kick. -
3 ripe bananas, mashed
Opt for bananas that have brown spots. These are the sweetest! If you don’t have bananas, apple sauce can work in a pinch (about 3/4 cup). -
3/4 cup light brown sugar
This adds a rich, caramel notes to the muffins. You can substitute with coconut sugar if you’re looking for a healthier option. -
1/2 cup unsalted butter, melted
Butter makes everything better! If you’re dairy-free, try using coconut oil or a vegan butter alternative. -
2 large eggs
Eggs hold everything together, providing moisture and depth. For a vegan swap, try flax eggs (1 tablespoon ground flaxseed mixed with 3 tablespoons water for each egg). -
1 teaspoon vanilla extract
This elevates the overall flavor! You can use almond extract for a twist if you’re feeling adventurous. -
1/4 cup milk
This adds moisture and richness to our batter. You can substitute almond or oat milk for a non-dairy version.
Step-by-Step Instructions
Let’s get baking! Follow these easy steps to create your Brown Sugar Banana Muffins:
-
Preheat Your Oven: Start by preheating your oven to 350°F (175°C). This ensures the muffins begin baking at the perfect temperature.
-
Prep Your Muffin Tin: Grease your muffin tin or line it with muffin liners for easy clean-up. A little non-stick spray does wonders!
-
Mix Dry Ingredients: In a large bowl, whisk together the flour, baking soda, salt, and cinnamon until well combined. This step helps avoid clumps and ensures the baking soda is evenly distributed.
-
Mash the Bananas: In a separate bowl, mash your bananas until smooth. If you have some chunky bits, that’s fine—they’ll add delightful texture to your muffins!
-
Blend Wet Ingredients: Add the melted butter, brown sugar, eggs, vanilla extract, and milk to the mashed bananas. Mix until everything is smoothly combined. You can use an electric mixer or whisk by hand—choose whichever you prefer!
-
Combine Wet and Dry Mixtures: Gently fold the dry ingredients into the wet mixture using a spatula. Here’s a chef hack: Do not overmix! A few lumps are perfectly fine. Overmixing can lead to tough muffins, and we want a light and tender texture.
-
Fill the Muffin Tins: Using a scoop or a spoon, fill each muffin cup about 2/3 full—this gives them room to rise without overflowing.
-
Bake Away: Pop the muffin tin into your preheated oven and bake for 20-25 minutes. Keep an eye on them! You’ll know they’re done when a toothpick inserted into the center comes out clean or with just a few crumbs.
-
Cool Down: Once baked, remove the muffins from the oven and let them cool in the pan for about 5 minutes. Then, transfer them to a wire rack to cool completely, if you have the patience. (I rarely do!)
Serving Suggestions
Time to serve up those delicious creations! For a touch of elegance, place the muffins on a pretty plate and dust them with a light sprinkle of powdered sugar or cinnamon. Pair them with a dollop of whipped cream or a pat of butter for extra richness. And let’s not forget—these muffins are fantastic with a hot cup of coffee or tea!
Recipe Variations
Want to switch things up? Here are some fun variations to try:
- Chocolate Chip Banana Muffins: Stir in 1 cup of chocolate chips for a decadent twist.
- Nutty Banana Muffins: Add 1/2 cup of chopped walnuts or pecans for added crunch and flavor.
- Berry Banana Muffins: Toss in 1/2 cup of blueberries or raspberries for a fruity burst.
- Cocoa Banana Muffins: Mix in 1/4 cup of cocoa powder for a chocolatey delight.
- Overnight Banana Muffins: Let the batter sit in the fridge overnight for an even richer flavor!
Chef’s Notes
Now, here’s a little secret from my kitchen: these muffins are incredibly versatile! Over time, I’ve experimented with different add-ins and flavors. One of my all-time favorites is adding a drizzle of peanut butter on top. It elevates the muffin to a whole new level! And don’t be afraid to embrace your creative side. If you have an idea in mind, go with it! Each batch has its own personality, and that’s what makes baking so much fun.
FAQs and Troubleshooting
1. My muffins turned out dense! What happened?
Dense muffins are often the result of overmixing the batter. Mix just until the dry ingredients are incorporated, and no more.
2. Can I freeze these muffins?
Absolutely! These muffins freeze wonderfully. Just place them in an airtight container or zip-top bag and they’ll stay fresh for up to 3 months.
3. How long do they last?
Stored in an airtight container at room temperature, these muffins can last about 3-4 days—but they never last that long in my house!
4. What if I don’t have ripe bananas?
No worries! You can speed up the ripening process by placing your bananas in a paper bag for a day or two. Alternatively, you can bake the bananas in their peel at 300°F for 15-20 minutes until they’re soft.
Nutritional Info
Each muffin is approximately 180 calories, but this can vary depending on ingredients used. Just remember, balance is key! Enjoy them in moderation as part of a delicious day.
And there you have it—your guide to making Irresistible Brown Sugar Banana Muffins! With every bite, you’re not just treating your taste buds; you’re creating memories and sharing love through food. So, the next time you’re in the kitchen, remember: good food isn’t about showing off; it’s about showing up. Happy baking!
PrintIrresistible Brown Sugar Banana Muffins
Delightful Brown Sugar Banana Muffins, perfect for breakfast or any time, with an irresistible aroma of bananas and brown sugar.
- Prep Time: 10 minutes
- Cook Time: 25 minutes
- Total Time: 35 minutes
- Yield: 12 servings 1x
- Category: Dessert
- Method: Baking
- Cuisine: American
- Diet: Vegetarian
Ingredients
- 2 cups all-purpose flour
- 1 teaspoon baking soda
- 1/2 teaspoon salt
- 1 teaspoon ground cinnamon
- 3 ripe bananas, mashed
- 3/4 cup light brown sugar
- 1/2 cup unsalted butter, melted
- 2 large eggs
- 1 teaspoon vanilla extract
- 1/4 cup milk
Instructions
- Preheat your oven to 350°F (175°C).
- Prep your muffin tin by greasing it or lining it with muffin liners.
- Mix the flour, baking soda, salt, and cinnamon together in a large bowl.
- Mash the bananas in a separate bowl until smooth.
- Blend the melted butter, brown sugar, eggs, vanilla extract, and milk into the mashed bananas.
- Combine the wet and dry mixtures using a spatula, folding gently.
- Fill each muffin cup about 2/3 full.
- Bake in the preheated oven for 20-25 minutes.
- Cool in the pan for 5 minutes before transferring to a wire rack.
Notes
These muffins are versatile; try adding chocolate chips, nuts, or different fruits for variations!
Nutrition
- Serving Size: 1 muffin
- Calories: 180
- Sugar: 9g
- Sodium: 150mg
- Fat: 7g
- Saturated Fat: 4g
- Unsaturated Fat: 3g
- Trans Fat: 0g
- Carbohydrates: 25g
- Fiber: 1g
- Protein: 2g
- Cholesterol: 40mg
Keywords: banana muffins, brown sugar muffins, easy muffin recipe

Orange Muffins
The Bright and Zesty Delight: Orange Muffins
Welcome, fellow food lovers! Today, I’m thrilled to share a recipe that brings a sunny burst to any breakfast table: Orange Muffins. The sight of these golden treats lining a plate is enough to make anyone smile, and their sweet citrus aroma has a way of brightening even the gloomiest mornings. Whether you’re whipping them up for a cozy Sunday brunch, an afternoon tea, or just because you love a slice of zest in your baked goods, these muffins are sure to please. Let’s dive into this delightful journey!
A Slice of Nostalgia
I can still vividly recall the first time my grandmother introduced me to the world of citrus baking. We were in her warm, inviting kitchen, the smell of fresh oranges permeating the air as she demonstrated her recipe for orange muffins. The way she expertly zested the orange, letting the colorful shavings fall into the bowl, was nothing short of magic. I watched in awe as she mixed the ingredients, each stir as gentle as the sunlight streaming through the window.
Those muffins became a staple in our family, appearing at gatherings and celebrations. My grandmother always knew how to warm hearts through her cooking, and those orange muffins were a delicious vehicle for her love. Each bite took me back to that sunlit kitchen, a moment frozen in time where the rhythm of baking and laughter melted together. Today, I’ve adapted that cherished recipe just for you, adding my own twists while keeping the essence alive. So, grab your apron—let’s embark on this flavorful adventure!
Ingredients
Here’s what you’ll need for these delightful Orange Muffins:
-
2 cups all-purpose flour: The foundation of your muffins. You can swap it with whole-wheat flour for a heartier muffin or a gluten-free blend if you prefer.
-
1 cup granulated sugar: This is what helps the muffins rise and creates that perfectly sweet flavor! Coconut sugar is a great alternative for a deeper flavor profile.
-
1 tablespoon baking powder: The key to those fluffy muffins that lift beautifully in the oven. Make sure it’s fresh; old baking powder can lead to dense muffins.
-
1/2 teaspoon baking soda: Adds extra lift and balances the acidity of the orange juice, ensuring your muffins are light and airy.
-
1/2 teaspoon salt: A little pinch to enhance all the flavors—don’t skip it!
-
1/2 cup unsalted butter, melted: This brings richness and moisture to the muffins. You can use coconut oil or a dairy-free butter for a vegan version.
-
1 cup fresh orange juice: Fresh is best! It brightens the flavor and aroma. Bottled juice works in a pinch, but the taste won’t be as vibrant.
-
Zest of 1 orange: The zest adds an extra layer of citrus flavor and aroma that you simply can’t replicate with juice alone. Feel free to toss in zest from lemons or limes for a fun twist!
-
2 large eggs: These bind the ingredients together and add moisture. For an egg-free version, use flaxseed meal mixed with water (1 tablespoon ground flaxseed + 3 tablespoons water = 1 egg).
-
1 teaspoon vanilla extract: A classic flavor enhancement that rounds out the sweetness and complements the citrus oh-so-well. You could also use almond extract for a unique twist!
Step-by-Step Instructions
Now that we have our ingredients lined up, let’s get to the fun part—baking! Here’s how to whip up these Orange Muffins step by step:
-
Preheat your oven: Let’s get that oven warmed up to 350°F (175°C). This ensures even baking and beautifully golden muffins. While it’s warming, you can prep the muffin tin.
-
Prepare the muffin tin: Grease your muffin tin with some non-stick spray or line it with paper liners—it makes for easier cleanup later and adds a lovely touch to presentation.
-
Mix dry ingredients: In a large mixing bowl, whisk together the flour, sugar, baking powder, baking soda, and salt. This mixing ensures even distribution of the leavening agents, which is key for consistent muffin texture.
-
Combine wet ingredients: In another bowl, mix the melted butter, fresh orange juice, orange zest, eggs, and vanilla extract. I love taking a moment here to breathe in that vibrant scent before whisking it all together until smooth.
-
Combine wet and dry: Now, add the wet ingredients to the dry ingredients. Gently fold them together with a spatula or wooden spoon. Don’t overmix—this is a common mistake that results in dense muffins. Just bring it together until you see no dry flour.
-
Fill the muffin cups: Using a cookie scoop or a ladle, evenly distribute the batter into the prepared muffin tin, filling each cup about 2/3 full. This allows room for the muffins to rise perfectly without spilling over.
-
Bake: Pop the muffin tin into the preheated oven and bake for about 18-20 minutes. You’ll know they’re done when a toothpick inserted in the center comes out clean—and trust me, the smell will be irresistible!
-
Cool and enjoy: Let the muffins cool in the tin for 5 minutes before transferring them to a wire rack. This step allows the muffins to firm up a bit. Enjoy these warm with a pat of butter or let them cool completely for later.
Serving Suggestions
Serving these Orange Muffins is all about presentation! For a whimsical touch, dust them lightly with confectioners’ sugar or drizzle with a simple orange glaze made from powdered sugar and a splash of orange juice. Arrange them on a bright platter or wooden board, garnished with fresh orange slices or sprigs of mint. Feel free to pair them with a light yogurt and some berries for a delightful brunch spread!
Recipe Variations
Why stop at classic when you can get creative? Here are a few variations you can try with your Orange Muffins:
-
Chocolate Chip Orange Muffins: Fold in a handful of semi-sweet chocolate chips into the batter for a delightful contrast between citrus and chocolate.
-
Cranberry Orange Muffins: Add fresh or dried cranberries for a tart kick that complements the sweetness of the muffins beautifully.
-
Orange Poppy Seed Muffins: Toss in a tablespoon of poppy seeds for added texture and a hint of nutty flavor.
-
Spiced Orange Muffins: Cinnamon or nutmeg can add a warm, comforting spice to every bite. Just a pinch goes a long way!
-
Vegan Orange Muffins: Swap out the eggs for flax eggs or applesauce and use a plant-based butter substitute to enjoy a vegan version of this delicious treat.
Chef’s Notes
When I first made these muffins, I was attempting to recreate my grandmother’s recipe, but as every good chef knows, experimentation is the heart of culinary creation! I added my own flair, adjusting sugar levels and experimenting with different fats (butter vs. oil). Each batch brought joyful memories of baking with her. If a muffin tops a little lopsided? Embrace it! It’s a sign of a home-cooked treat—a friendly reminder that perfection is overrated.
FAQs and Troubleshooting
-
My muffins didn’t rise. What went wrong?
- Ensure your baking powder and baking soda are fresh! Also, don’t overmix the batter; mixing too much can create dense muffins.
-
Why are my muffins dry?
- Overbaking can lead to dryness. Keep an eye on your oven and begin checking for doneness a few minutes before the timer goes off.
-
Can I freeze these muffins?
- Absolutely! Once cooled, you can freeze them in an airtight container for up to 3 months. Just reheat in the microwave or oven when you’re ready to enjoy!
-
Can I add different fruits?
- Yes! Try swapping out the orange juice and zest for lemon, lime, or even grapefruit for a unique twist.
Nutritional Info
(Per muffin, serves approximately 12 muffins)
- Calories: 220
- Total Fat: 8g
- Saturated Fat: 4.5g
- Cholesterol: 40mg
- Sodium: 150mg
- Total Carbohydrates: 34g
- Dietary Fiber: 0.5g
- Sugars: 12g
- Protein: 3g
With each bite, these Orange Muffins deliver familiar warmth and a spark of joy. They are more than just a treat—they carry with them a legacy of love, laughter, and community. So, gather your loved ones around the table, take out those muffins, and create your own delicious memories. Happy baking!
PrintOrange Muffins

Delightful orange muffins that bring a burst of citrus flavor to breakfast or brunch.
- Prep Time: 15 minutes
- Cook Time: 20 minutes
- Total Time: 35 minutes
- Yield: 12 muffins 1x
- Category: Breakfast
- Method: Baking
- Cuisine: American
- Diet: Vegetarian
Ingredients
- 2 cups all-purpose flour
- 1 cup granulated sugar
- 1 tablespoon baking powder
- 1/2 teaspoon baking soda
- 1/2 teaspoon salt
- 1/2 cup unsalted butter, melted
- 1 cup fresh orange juice
- Zest of 1 orange
- 2 large eggs
- 1 teaspoon vanilla extract
Instructions
- Preheat your oven to 350°F (175°C).
- Prepare the muffin tin by greasing it or lining it with paper liners.
- Mix the dry ingredients in a bowl: flour, sugar, baking powder, baking soda, and salt.
- Combine the wet ingredients in another bowl: melted butter, orange juice, zest, eggs, and vanilla extract.
- Combine the wet and dry ingredients, folding them gently together until no dry flour remains.
- Fill the muffin cups about 2/3 full with batter.
- Bake for 18-20 minutes or until a toothpick comes out clean.
- Cool in the tin for 5 minutes before transferring to a wire rack.
Notes
For a fun twist, try adding chocolate chips, cranberries, or poppy seeds.
Nutrition
- Serving Size: 1 muffin
- Calories: 220
- Sugar: 12g
- Sodium: 150mg
- Fat: 8g
- Saturated Fat: 4.5g
- Unsaturated Fat: 2g
- Trans Fat: 0g
- Carbohydrates: 34g
- Fiber: 0.5g
- Protein: 3g
- Cholesterol: 40mg
Keywords: orange muffins, breakfast muffins, citrus baking, homemade muffins
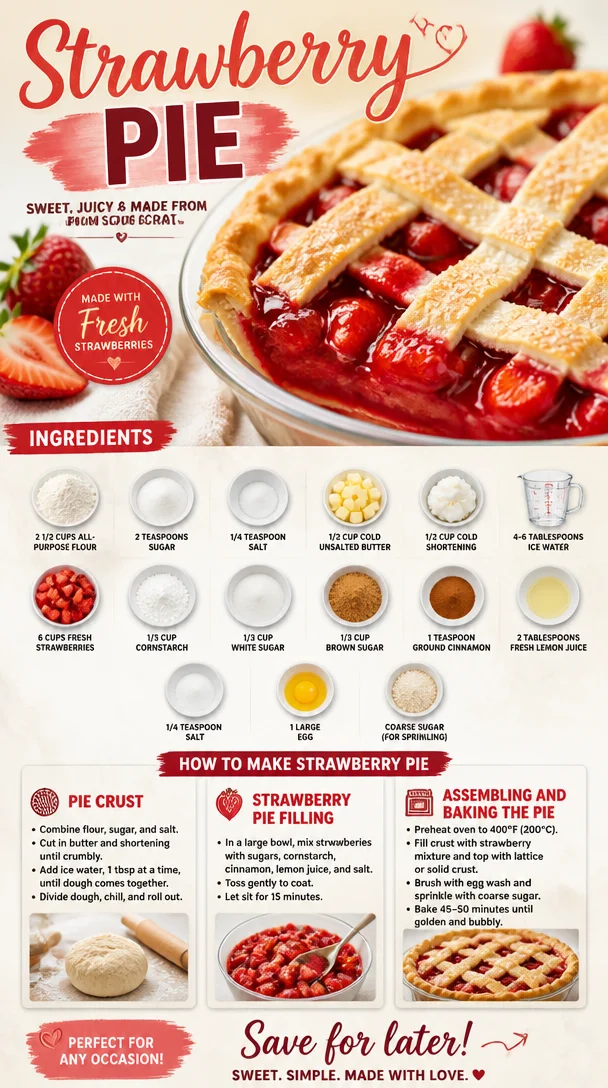
Strawberry Pie
Delightful Strawberry Pie: A Sweet Slice of Summer
Welcome to the world of vibrant flavors and joyous gatherings! If you’re anything like me, there’s something magical about biting into a slice of homemade strawberry pie—especially when the berries are at their juicy peak. This delightful dessert is not just a treat but a joyful experience that brings back memories of sun-soaked days spent under the warm sun, surrounded by friends and family.
Strawberry pie is one of those desserts that feels like a hug in a slice. It’s light yet rich with natural sweetness, a perfect expression of summer that servers can appreciate whether they are at a cozy picnic or a festive dinner gathering. Plus, its brilliant red hue makes it a showstopper on any dessert table!
Join me as we embark on a journey to create a luscious strawberry pie that captivates your tastebuds and warms your heart. So, dust off your apron, gather the ingredients, and let’s make some memories together in the kitchen!
A Nostalgic Slice of Life
Let me take you back to a summer afternoon at my grandmother’s house, when the air was fragrant with blooming flowers and ripe strawberries. She had this incredible garden, brimming with juicy berries that glistened in the sun. Each year, when it was time to harvest, I’d be her little helper, gathering baskets filled with the freshest strawberries.
One day, after a particularly bountiful harvest, we rolled up our sleeves and made our famous strawberry pie. The kitchen filled with laughter as we mixed the juicy strawberries with sugar and cinnamon, and I remember my grandma’s secret ingredient—love, of course! Little did I know that those moments would shape my love for cooking and for bringing people together around the table.
As the pie baked, the sweet aroma wafted through the house, making the anticipation all the more delightful. I could hardly wait for it to cool, but my grandma taught me the importance of patience. Finally, we enjoyed our treat—each bite bursting with goodness and nostalgia. That, my friends, is the magic of a homemade strawberry pie. Let’s recreate that same magic in your kitchen today!
Ingredients
Here’s what you’ll need to whip up your own stunning strawberry pie:
-
2 1/2 cups all-purpose flour: This will be the base for your pie crust. For a healthier option, you can substitute with whole wheat flour, but the texture will change a bit.
-
2 teaspoons sugar: This adds a little sweetness to the crust itself. You can use coconut sugar for a slightly deeper flavor.
-
1/4 teaspoon salt: A must-have for enhancing flavors and balancing the sweetness.
-
1/2 cup cold unsalted butter: Butter gives the crust its flaky texture. If you want a dairy-free option, use 1/2 cup of cold coconut oil instead.
-
1/2 cup cold shortening: Helps achieve that wonderful flaky quality. You can use lard for a more traditional flavor or stick to butter for a completely butter-based crust.
-
4–6 tablespoons ice water: Essential to bring the dough together without melting the butter.
-
6 cups fresh strawberries: Haul ’em and slice ’em! The star of the show. Frozen strawberries can work too, but fresh is always better for this pie.
-
1/3 cup cornstarch: This will help thicken your filling. You may substitute it with arrowroot for a gluten-free version.
-
1/3 cup white sugar: This gives sweetness to your filling without altering the color. Feel free to reduce this if your berries are super sweet.
-
1/3 cup brown sugar: Adds a rich, caramel-like flavor. If you don’t have brown sugar, a light drizzle of honey can work too!
-
1 teaspoon ground cinnamon: Just a hint of spice to complement the strawberries. You can also experiment with nutmeg for a different flavor.
-
2 tablespoons fresh lemon juice: Brightens up the flavors of the filling and keeps those strawberries fresh. Lime juice works in a pinch!
-
1/4 teaspoon salt: Enhances the overall flavor of the filling, balancing the sweetness.
-
1 large egg: This will help bind the crust together. For a vegan version, substitute it with a flaxseed egg (1 tablespoon ground flaxseed mixed with 2.5 tablespoons water).
-
Coarse sugar: For sprinkling on top of the pie, giving it a delightful crunch! You can use sparkling sugar for extra flair.
Step-by-Step Instructions
Now that we have our ingredients, let’s dive into the magic of making this pie!
Step 1: Making the Crust
-
Prep your workspace: Start by cleaning the countertop (or your kitchen table). You want a clean, organized area to create your pie magic!
-
Mix the dry ingredients: In a large bowl, whisk together the flour, sugar, and salt until fully blended.
-
Cut in the butter and shortening: Add the cold butter and shortening to the bowl, and using a pastry cutter or your fingers, work the fats into the flour mixture. You want a crumbly texture with some pea-sized pieces remaining. This is the secret to a flaky crust!
-
Add ice water: Slowly drizzle in the ice water, one tablespoon at a time, mixing until the dough just comes together. Be careful not to overwork it—want that tenderness!
-
Chill the dough: Form the dough into a disc, wrap it in plastic wrap, and refrigerate for at least 30 minutes. This is crucial for those flavors to meld and for the butter to firm up again.
Step 2: Prepare the Filling
-
Slice the strawberries: While the dough chills, haul and slice your strawberries. Place them in a large mixing bowl.
-
Mix the filling ingredients: In another bowl, combine the cornstarch, white sugar, brown sugar, cinnamon, lemon juice, and salt. Pour this over the strawberries and gently toss to coat. Let this mixture sit for about 15-20 minutes to allow the juices to start mixing with the sugars.
Step 3: Roll Out the Crust
-
Preheat your oven: Turn on your oven to 425°F (220°C) so it’s hot and ready when your pie is prepared.
-
Roll out the dough: After the dough has chilled, lightly flour your surface. Roll out your dough to about 1/8 inch thickness with a rolling pin, ensuring it’s big enough to fit your pie dish.
-
Transfer to the pie dish: Gently place the rolled-out dough into your pie dish. Trim the excess dough hanging over the edges and press it down gently into place. Poking holes in the crust helps prevent bubbling.
Step 4: Assemble the Pie
-
Add the filling: Pour the strawberry mixture into the prepared crust, spreading it out evenly. Make sure every bit of that sweet goodness is distributed!
-
Top the pie: Roll out any remaining dough for a lattice top or simply use additional dough to cover the pie. Create slits in the top crust if you’re making it solid to allow the steam to escape. Brush the top with a beaten egg for that beautiful golden sheen.
Step 5: Bake
-
Sprinkle with coarse sugar: Before placing it in the oven, sprinkle some coarse sugar over the top for that enticing crunch.
-
Bake: Pop the pie into your preheated oven and bake for about 40-45 minutes or until the crust is golden brown and the filling is bubbly. Keep an eye on it; if the edges brown too quickly, cover them with foil!
Step 6: Cool and Serve
- Cool: Once out of the oven, let the pie cool for at least 2 hours before slicing. This allows the filling to set up so that first slice is picture-perfect!
Serving Suggestions
When it’s finally time to serve, slice your strawberry pie and plate it with a scoop of vanilla ice cream or a dollop of whipped cream on the side. Drizzle with a bit of strawberry sauce for extra flair, and don’t forget a sprig of mint for color!
Recipe Variations
Here are some fun twists you can try with the classic strawberry pie:
-
Mixed Berry Pie: Instead of just strawberries, try combining raspberries, blueberries, and blackberries for a delightful mixed berry pie!
-
Chocolate Drizzle: Add a rich chocolate drizzle over the top of each slice for a decadent addition.
-
Lemon Basil Pie: Incorporate fresh basil with the strawberries for a surprising twist of flavor. It gives the pie an herby freshness that’s out of this world!
-
Portable Strawberry Hand Pies: Use the same filling, but make small hand-held pies by folding the dough over the filling and sealing the edges.
-
Gluten-Free Version: Use a gluten-free flour blend to make the crust. It works beautifully!
Chef’s Notes
As I look back on my love for strawberry pie, it’s evolved over the years. There are so many moments tied to this simple dish—family gatherings, summer barbecues, or cozy evenings under the stars. Each iteration teaches me something new in the kitchen, like mastering the balance between sweetness and tartness or the art of the perfect crust.
I’ll let you in on a little secret: I always keep a stash of frozen berries in my freezer. Life gets busy, and sometimes you just want that pie-decadence without a long prep time. No one has to know, right?
FAQs and Troubleshooting
Q: Why is my pie crust soggy?
A: This can occur if your filling is too watery or if the crust isn’t pre-baked. Make sure to bake the crust until it’s firm before adding the filling, and consider draining some of those strawberry juices before pouring them in!
Q: How can I prevent my pie from burning?
A: If the crust edges start to brown too fast, cover them with strips of aluminum foil for the remainder of baking.
Q: Can I make this pie ahead of time?
A: Absolutely! You can prep the filling a day ahead and store it in the fridge. Just assemble and bake the pie when you’re ready!
Q: What if I don’t have fresh strawberries?
A: Frozen strawberries can be used, but you may need to adjust the sugar and cook the filling for a few minutes on the stovetop to thicken it properly.
Nutritional Info
While I believe in enjoying dessert in moderation, here’s a basic breakdown of nutritional values per slice of strawberry pie (assuming 8 slices):
- Calories: 250
- Total Fat: 12g
- Saturated Fat: 5g
- Carbohydrates: 34g
- Fiber: 2g
- Sugar: 15g
- Protein: 3g
Enjoy this delightful strawberry pie, and remember, it’s not just about the food; it’s about gathering together, sharing stories, and creating moments that matter. So, let’s celebrate the sweetness of life, one slice at a time—happy baking!
PrintDelightful Strawberry Pie

A sweet and nostalgic homemade strawberry pie that celebrates summer with its burst of flavors and vibrant colors.
- Prep Time: 30 minutes
- Cook Time: 45 minutes
- Total Time: 75 minutes
- Yield: 8 servings 1x
- Category: Dessert
- Method: Baking
- Cuisine: American
- Diet: Vegetarian
Ingredients
- 2 1/2 cups all-purpose flour
- 2 teaspoons sugar
- 1/4 teaspoon salt
- 1/2 cup cold unsalted butter
- 1/2 cup cold shortening
- 4–6 tablespoons ice water
- 6 cups fresh strawberries
- 1/3 cup cornstarch
- 1/3 cup white sugar
- 1/3 cup brown sugar
- 1 teaspoon ground cinnamon
- 2 tablespoons fresh lemon juice
- 1/4 teaspoon salt
- 1 large egg
- Coarse sugar for sprinkling
Instructions
- Prep your workspace: Start by cleaning the countertop.
- Mix the dry ingredients: In a large bowl, whisk together the flour, sugar, and salt until blended.
- Cut in the butter and shortening: Work the fats into the flour mixture until crumbly.
- Add ice water: Slowly drizzle in the ice water, mixing until the dough just comes together.
- Chill the dough: Form into a disc, wrap, and refrigerate for at least 30 minutes.
- Slice the strawberries: After the dough chills, slice your strawberries and place in a large bowl.
- Mix the filling ingredients: Combine cornstarch, white sugar, brown sugar, cinnamon, lemon juice, and salt; pour over strawberries and toss.
- Preheat your oven: Turn on to 425°F (220°C).
- Roll out the dough: On a floured surface, roll out the dough to about 1/8 inch thickness.
- Transfer to the pie dish: Place the rolled-out dough into the pie dish, trimming edges.
- Add the filling: Pour the strawberry mixture into the prepared crust.
- Top the pie: Create a lattice top or cover the pie, making slits in the top crust.
- Sprinkle with coarse sugar: Before baking, sprinkle sugar on top.
- Bake: Bake for about 40-45 minutes until the crust is golden and filling is bubbly.
- Cool and serve: Let cool for at least 2 hours before slicing.
Notes
Serve with vanilla ice cream or whipped cream. You can create variations by adding different berries or flavors.
Nutrition
- Serving Size: 1 slice
- Calories: 250
- Sugar: 15g
- Sodium: 200mg
- Fat: 12g
- Saturated Fat: 5g
- Unsaturated Fat: 5g
- Trans Fat: 0g
- Carbohydrates: 34g
- Fiber: 2g
- Protein: 3g
- Cholesterol: 30mg
Keywords: strawberry pie, summer dessert, homemade pie
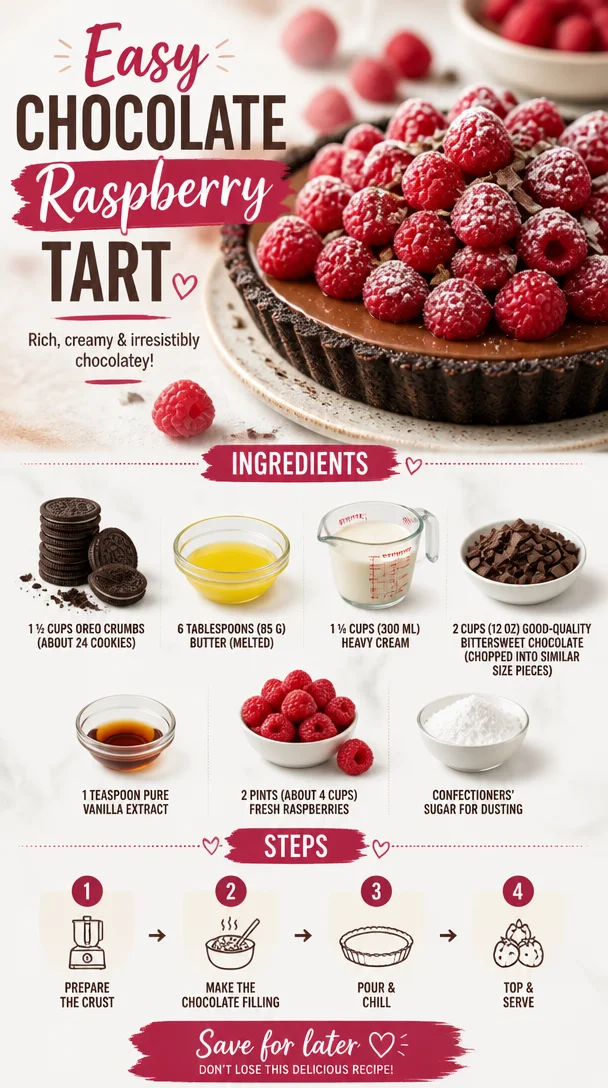
Easy Chocolate Raspberry Tart
Decadent Delight: Easy Chocolate Raspberry Tart
Hello and welcome, fellow foodies! If you’re in the mood for something indulgent, delicious, and oh-so-chic, then let’s talk about one of my all-time favorite desserts — the Easy Chocolate Raspberry Tart. Simple to whip up yet impressively elegant, this tart is a showstopper for any gathering, whether you’re hosting a chic soirée or a cozy dinner with loved ones. So grab your apron, and let’s dive into this delightful chocolatey creation!
Introduction
There’s something magical about dessert, isn’t there? It’s the sweet ending to a beautiful meal, the special treat that brings a smile to our faces, and let’s be honest, the perfect excuse to indulge a little bit. When it comes to desserts that capture elegance without the fuss, this Easy Chocolate Raspberry Tart reigns supreme.
Imagine a velvety chocolate filling cradled in a buttery Oreo crust, topped with vibrant, fresh raspberries that pop in both flavor and color. Together, they create a beautiful harmony of taste — rich yet refreshing, decadent yet light. Each slice tells a story of indulgence that feels just right, no matter the occasion.
What I adore about this tart is how effortlessly it comes together. You don’t need any advanced culinary skills to pull it off; just a bit of love, attention to detail, and maybe a glass of wine to sip on as you create this edible masterpiece. It’s the perfect balance of sophistication and simplicity, making it a must-have recipe in your collection.
Now, let’s talk about the heartwarming personal memory I have with this dish that adds a sprinkle of nostalgia to every bite.
Personal Story
I vividly remember the first time I made this Easy Chocolate Raspberry Tart for my best friend’s birthday. We were both in college, broke but brimming with enthusiasm and dreams of becoming gourmet chefs. On that warm summer afternoon, I laid out the ingredients on our tiny kitchen counter, excitedly chatting with her about our plans while the sun streamed through the windows. As I crushed the Oreos into crumbs, we shared laughter and memories. It felt like a scene from a movie — two aspiring chefs concocting a delicious creation that would bring smiles and joy.
When the tart was finally ready, and we saw the rich chocolate filling juxtaposed with the vibrant raspberries, we couldn’t contain our excitement. We plated it up, dusting it with confectioners’ sugar like true chefs, and sat down to enjoy it together. The combination of smooth chocolate and tart raspberries was heavenly! It was a special moment filled with friendship and the joys of cooking that shaped my passion for sharing food with loved ones.
Now, let’s get into the details of creating this unforgettable dessert so you can make your own delicious memories!
Ingredients
Here’s what you’ll need for this heavenly Easy Chocolate Raspberry Tart. I’ve added some chef insights and substitution tips to guide you along the way.
-
1 ½ cups Oreo crumbs (about 24 cookies)
These provide a rich, chocolatey crust that’s super easy to make. If you’re not a fan of Oreos, feel free to use a homemade chocolate cookie or even graham cracker crumbs mixed with cocoa powder for an alternate twist. -
6 Tablespoons (85 g) butter (melted)
The melted butter brings everything together, adding richness and moisture. You can substitute it with coconut oil for a dairy-free option, but be mindful of the flavor it might impart. -
1 ¼ cups (300 ml) heavy cream
The heavy cream is the backbone of the chocolate filling, making it smooth and rich. If you’re looking for a lighter option, you can use full-fat coconut milk, but the texture will be slightly different. -
2 cups (12 oz) good-quality bittersweet chocolate (chopped into similar size pieces)
I recommend a chocolate with at least 60% cacao for a well-balanced flavor. If you prefer milk chocolate, feel free to use that, but reduce the sugar in the recipe slightly since it’ll be sweeter. -
1 teaspoon pure vanilla extract
This enhances the chocolate flavor and adds warmth. Don’t skip it! However, if you’re out, almond extract can work in a pinch for an intriguing twist. -
2 pints (about 4 cups) fresh raspberries
The fresh raspberries not only add a beautiful pop of color but also a fabulous tartness that cuts through the richness of the chocolate. If fresh berries are out of season, frozen raspberries can work; just thaw and drain any excess moisture. -
Confectioners’ sugar for dusting
This is optional but adds a lovely final touch. You can also use cocoa powder for a deeper chocolate flavor.
Step-by-Step Instructions
Ready to get baking? Here’s a detailed walkthrough for making your Easy Chocolate Raspberry Tart!
-
Prepare the Oreo Crust
Start by preheating your oven to 350°F (175°C). While it heats, combine the Oreo crumbs and melted butter in a mixing bowl. Use a fork or your hands to mix until the crumbs are evenly moistened.Chef Insight: Make sure that the consistency resembles wet sand. You want it to hold together when pressed. Once mixed, firmly press the crumb mixture into the bottom and up the sides of a 9-inch tart pan to create an even layer. Bake for about 10 minutes until set, then let it cool completely while you prepare the filling.
-
Make the Chocolate Ganache
In a medium saucepan, heat the heavy cream over medium heat until it just begins to simmer — you’ll see bubbles forming around the edges. Remove it from the heat and pour it over the chopped bittersweet chocolate in a heatproof bowl. Let it sit for a minute to soften the chocolate.Tip: This is the perfect time to check the texture of your chocolate. If you’re using chocolate chips, they will melt easily, but chopped chocolate bars create a smoother ganache.
-
Stir in Vanilla
After a minute, stir gently until the chocolate is completely melted and the mixture is smooth. Add the vanilla extract and stir to incorporate.Hack: If your ganache has lumps, you can give it a quick blitz with an immersion blender to smooth it out!
-
Pour the Mixture into the Cool Crust
Pour the luscious chocolate ganache into the cooled Oreo crust, spreading it into an even layer. Allow it to set at room temperature for a bit before transferring it to the refrigerator to chill for at least 2 hours, or until firm to the touch.Chef Tip: For an easier release from the tart pan, gently run a knife around the edges before slicing. It makes for a clean cut!
-
Add the Fresh Raspberries
Just before serving, take the tart out of the refrigerator and decorate the top with fresh raspberries. Dust with confectioners’ sugar for that extra wow factor. -
Slice and Serve
Use a sharp knife to slice the tart into wedges, serving it alongside extra raspberries if desired.Pro Tip: If the chocolate gets too solid in the fridge, let it sit at room temperature for a few minutes before slicing for cleaner cuts.
Serving Suggestions
When you serve this tart, think of the presentation! Place a slice on a dessert plate and garnish it with a few fresh raspberries on the side for a pop of color. A dollop of whipped cream or a scoop of vanilla ice cream also pairs splendidly with the tart — the creamy elements balance the rich chocolate beautifully.
Recipe Variations
-
Nutty Crust Variation
Swap out half the Oreo crumbs for finely ground almonds or walnuts for a nutty twist! -
Mint Chocolate Version
Add a drop or two of peppermint extract to the ganache mixture for a refreshing mint chocolate experience. -
Dairy-Free Delight
Use dairy-free chocolate and coconut cream instead of heavy cream to create a vegan-friendly version that doesn’t skimp on flavor. -
Fruit Medley Topping
Mix it up with different fruits! Strawberries or blueberries can provide a delightful change and add a fresh twist to the tart. -
Espresso Infusion
Add a teaspoon of instant espresso powder to the ganache to enhance the chocolate flavor for coffee lovers.
Chef’s Notes
This Easy Chocolate Raspberry Tart has a special place in my heart, and it’s evolved over time. Initially, I used to struggle with cooling the chocolate too quickly, which led to a lumpy ganache. But as I learned to gently heat the cream and give the ganache time to meld, I found that patience truly makes for a richer and smoother filling. Plus, this recipe has become a beloved favorite among friends and family, often making an appearance at birthdays and holiday gatherings. That’s what I cherish about cooking — sharing food that carries love and intention.
FAQs and Troubleshooting
-
Why did my ganache turn out grainy?
This can happen if the chocolate gets too hot or if it’s not stirred enough. Always heat the cream gently and let the chocolate sit to soften before stirring. -
Can I make this tart ahead of time?
Absolutely! You can prepare the tart a day in advance. Just keep it covered in the refrigerator until you’re ready to serve. -
What if my crust crumbled when I tried to slice it?
If the crust crumbles, it may be due to not enough butter binding it together. Next time, consider adding an extra tablespoon of melted butter to the crust mixture. -
How do I store leftovers?
Store any leftovers in the refrigerator in an airtight container for up to four days. However, I doubt it’ll last that long — it’s hard to resist!
Nutritional Info
While this tart is undoubtedly rich and indulgent, it’s all about balance in the kitchen. Each slice contains a delightful mix of flavors with quality ingredients that elevate your sweet indulgence.
So there you have it, my sweet friends! The Easy Chocolate Raspberry Tart is more than just a dessert; it’s a memory maker, a show-stopper, and an absolute treat that you’ll confidently serve time and again. Whether it’s a special occasion or just a Tuesday, let’s gather around the table and enjoy the beautiful moments that good food can create. Happy baking!
PrintEasy Chocolate Raspberry Tart
A simple yet elegant dessert featuring a rich chocolate filling in a buttery Oreo crust, topped with fresh raspberries.
- Prep Time: 20 minutes
- Cook Time: 10 minutes
- Total Time: 130 minutes
- Yield: 8 servings 1x
- Category: Dessert
- Method: Baking
- Cuisine: American
- Diet: Vegetarian
Ingredients
- 1 ½ cups Oreo crumbs (about 24 cookies)
- 6 Tablespoons (85 g) butter (melted)
- 1 ¼ cups (300 ml) heavy cream
- 2 cups (12 oz) good-quality bittersweet chocolate (chopped into similar size pieces)
- 1 teaspoon pure vanilla extract
- 2 pints (about 4 cups) fresh raspberries
- Confectioners’ sugar for dusting (optional)
Instructions
- Preheat your oven to 350°F (175°C). Combine the Oreo crumbs and melted butter in a mixing bowl. Mix until evenly moistened.
- Press the crumb mixture into the bottom and sides of a 9-inch tart pan. Bake for about 10 minutes until set, then let it cool.
- Heat the heavy cream over medium heat until it simmers, then pour it over the chopped bittersweet chocolate. Let it sit for a minute.
- Stir gently until the chocolate is completely melted and smooth. Add the vanilla extract and stir to incorporate.
- Pour the ganache into the cooled Oreo crust. Let it set at room temperature, then refrigerate for at least 2 hours.
- Decorate the tart with fresh raspberries just before serving. Dust with confectioners’ sugar if desired.
- Slice the tart into wedges and serve alongside extra raspberries or whipped cream.
Notes
This tart can be made a day ahead of time. Store in the refrigerator and cover to keep it fresh.
Nutrition
- Serving Size: 1 slice
- Calories: 350
- Sugar: 20g
- Sodium: 250mg
- Fat: 18g
- Saturated Fat: 10g
- Unsaturated Fat: 6g
- Trans Fat: 0g
- Carbohydrates: 45g
- Fiber: 2g
- Protein: 4g
- Cholesterol: 30mg
Keywords: chocolate tart, raspberry dessert, easy dessert, chocolate raspberry tart
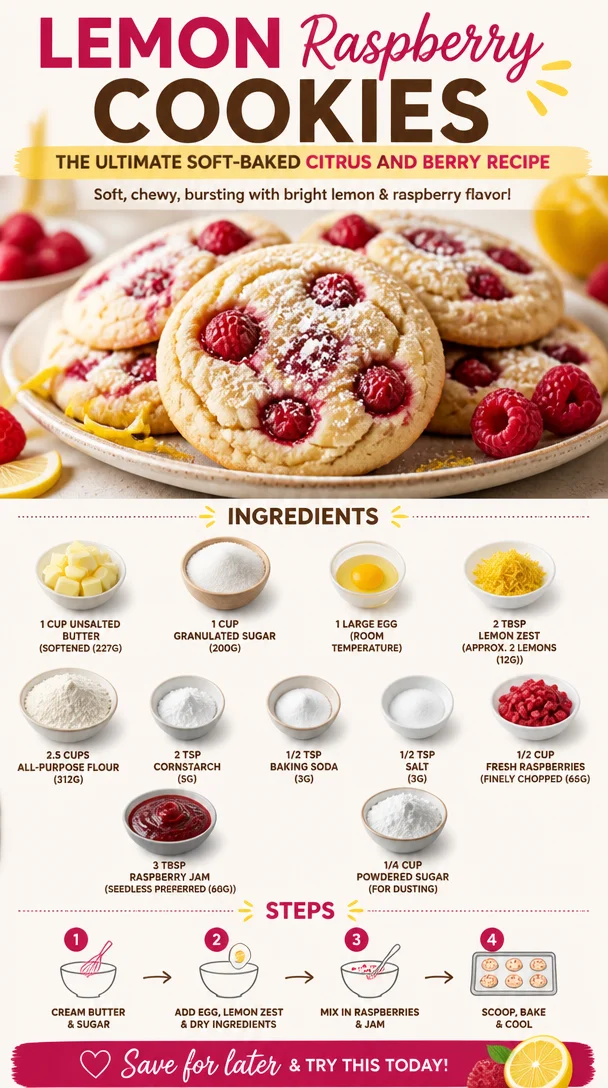
Lemon Raspberry Cookies: The Ultimate Soft-Baked Citrus and Berry Recipe
Lemon Raspberry Cookies: The Ultimate Soft-Baked Citrus and Berry Recipe
Hello, fellow foodies! If you’re ready to elevate your baking game and create a treat that’s bursting with flavor, then you’ve landed in the right spot. Today, we’re diving into the delightful world of Lemon Raspberry Cookies—a soft-baked cookie recipe that combines zingy lemon with sweet, juicy raspberries for a perfect balance that’s undeniably irresistible. Picture this: a cookie that melts in your mouth, leaving you with the bright notes of citrus and the luscious burst of berries. Mmm, can you smell it already? Let’s make it happen!
The Joy of Nostalgia
I can’t help but reminisce about sunlit afternoons in my childhood kitchen, the air filled with the tantalizing scents of fresh citrus. My grandmother, with her warm smile and flour-dusted apron, would gather me into her kitchen to bake treats for our family gatherings. Her lemon bars were legendary, but what I loved most were those moments spent whisking away in laughter, surrounded by the warmth of my family. Years later, I decided to take that nostalgia and infuse it with a touch of modern flair. Enter, the Lemon Raspberry Cookie! Each bite of these cookies transports me back to those sunny afternoons, with a superb burst of flavor. It’s not just about baking; it’s about creating memories, and I can’t wait for you to experience that joy.
Ingredients
Let’s get all our goodies together! Here’s what you’ll need to whip up these citrusy, berry delights:
-
1 cup Unsalted Butter (Softened – 227g)
Softened butter creates a rich, tender texture. If you’re in a pinch, substitute with margarine or coconut oil for a dairy-free option! -
1 cup Granulated Sugar (200g)
Sweetness is key! You can use coconut sugar for a slight caramel flavor, but keep in mind it will darken the cookies. -
1 Large Egg (Room temperature)
This ingredient brings moisture and binds everything together. For a vegan alternative, use a flax egg (1 tbsp ground flaxseed mixed with 2.5 tbsp water). -
2 tbsp Lemon Zest (Approx. 2 lemons – 12g)
Zest adds a bright flavor punch! Don’t skip this; it transforms the cookie into a full citrus experience. -
2.5 cups All-Purpose Flour (312g)
The foundation of any cookie. If you want gluten-free cookies, swap this with a 1:1 gluten-free all-purpose blend. -
2 tsp Cornstarch (5g)
This ingredient gives our cookies that soft-baked quality. If you’re in a bind, you can substitute with an equal amount of arrowroot powder. -
1/2 tsp Baking Soda (3g)
A leavening agent that helps the cookies rise. Make sure it’s fresh for the best results! -
1/2 tsp Salt (3g)
Balances the sweetness and enhances flavors. It can be omitted if you’re watching your sodium intake. -
1/2 cup Fresh Raspberries (Finely chopped – 65g)
Fresh berries bring a juicy burst! You can use frozen but make sure to thaw and pat them dry first. -
3 tbsp Raspberry Jam (Seedless preferred – 60g)
This adds an extra layer of raspberry flavor and moisture. Swap with any other jam if you’re feeling adventurous! -
1/4 cup Powdered Sugar (For dusting)
A simple finishing touch that looks oh-so-elegant on top of your cookies.
Step-by-Step Instructions
Alright, cue the apron and let’s get cooking! Here’s how you make these beautiful cookies:
-
Preheat Your Oven:
Start by preheating your oven to 350°F (175°C). This will ensure that your cookies bake evenly and perfectly. -
Cream Butter and Sugar:
In a large mixing bowl, cream together the softened butter and granulated sugar until light and fluffy—about 2-3 minutes. This step is crucial, as it helps incorporate air into your cookie dough for that lovely fluffy texture! -
Add the Egg and Lemon Zest:
Beat in the egg and lemon zest until well combined. You want that lemon aroma to permeate the batter. Pro tip: Use the microplane grater for fine zesting that packs in the most flavor without the bitter pith. -
Whisk Dry Ingredients:
In a separate bowl, whisk together the flour, cornstarch, baking soda, and salt. This helps to distribute the leavening agent evenly, so no surprise spots of baking soda in your cookies! -
Combine Wet and Dry Mixtures:
Gradually add the dry mixture to the wet mixture, mixing until just combined. Be careful not to overmix! Overworking the dough can lead to tough cookies. Chef hack: You want clumps of flour to still be visible; they will incorporate with the next step. -
Fold in the Raspberries and Jam:
Gently fold in the finely chopped raspberries and raspberry jam, ensuring they’re evenly distributed throughout the dough. The jam will add extra sweetness and moisture, so don’t be shy about it! -
Scoop the Dough:
Using a cookie scoop or tablespoon, drop dough onto a baking sheet lined with parchment paper, spacing them a few inches apart. They will spread a bit, so give them room! -
Bake:
Pop the cookies in the oven for 12-15 minutes, or until the edges are lightly golden. Keep an eye on them—the aroma of lemon and raspberry will have your head spinning! -
Cool Down:
Allow the cookies to cool on the baking sheet for 5 minutes before transferring them to a wire rack to cool completely. This cool-down allows the cookies to set up perfectly! -
Dust with Powdered Sugar:
Once cooled, finish them off with a light dusting of powdered sugar for that elegant touch that makes them look as special as they taste.
Serving Suggestions
To serve these Lemon Raspberry Cookies, arrange them on a beautiful platter or tiered stand, dusting with a bit of powdered sugar just before serving. Pair them with a lovely cup of tea or a refreshing lemon-infused sparkling water for a delightful afternoon treat.
Recipe Variations
- Add White Chocolate Chips: Incorporate white chocolate chips for a creamy contrast to the tart raspberries.
- Swap Berries: Try using blueberries or blackberries instead for a different berry experience.
- Lemon Icing Drizzle: Drizzle a simple icing made of powdered sugar and lemon juice over the cooled cookies for a little extra sweetness and another layer of lemon.
- Make it a Sandwich Cookie: Spread some raspberry jam between two cookies for a tasty twist!
- Add Nuts: Chopped pistachios or walnuts can add crunch and a whole new flavor profile.
Chef’s Notes
I’ve played around with this recipe over the years, trying different combinations and swaps. I once tried adding a touch of rosemary for a fragrant herbal note, which turned out surprisingly delightful! It’s amazing what a little experimentation can yield. Also, remember—these cookies can be a little soft when they come out of the oven, but they firm up as they cool. So when in doubt, wait a few minutes before you start munching!
FAQs and Troubleshooting
-
Why are my cookies flat?
If your cookies spread too much, consider using cold butter instead of softened, or double-check your baking soda to ensure it’s fresh. -
Can I freeze my dough?
Absolutely! Just scoop the dough onto a baking sheet, freeze until firm, and then transfer to a freezer-safe bag. Bake straight from the freezer with an added minute or two to the bake time. -
Can I use frozen raspberries?
Yes, but be sure to thaw and pat them dry to prevent excess moisture that can be released during baking. -
How do I know when they’re done baking?
Look for a light golden edge; they will continue to cook slightly after coming out of the oven, creating that perfect soft-baked texture.
Conclusion
There you have it—Lemon Raspberry Cookies that are not only delicious but wrapped in a story that connects deliciousness to cherished memories. So, tie on that apron, gather your ingredients, and let’s bake something that will bring joy not just to your palate but to your entire kitchen! Happy baking, friends! 🍋🍪❤️
PrintLemon Raspberry Cookies

Delightful soft-baked cookies combining zingy lemon and sweet raspberries for an irresistible treat.
- Prep Time: 15 minutes
- Cook Time: 15 minutes
- Total Time: 30 minutes
- Yield: 24 cookies 1x
- Category: Dessert
- Method: Baking
- Cuisine: American
- Diet: Vegetarian
Ingredients
- 1 cup Unsalted Butter (Softened – 227g)
- 1 cup Granulated Sugar (200g)
- 1 Large Egg (Room temperature)
- 2 tbsp Lemon Zest (Approx. 2 lemons – 12g)
- 2.5 cups All-Purpose Flour (312g)
- 2 tsp Cornstarch (5g)
- 1/2 tsp Baking Soda (3g)
- 1/2 tsp Salt (3g)
- 1/2 cup Fresh Raspberries (Finely chopped – 65g)
- 3 tbsp Raspberry Jam (Seedless preferred – 60g)
- 1/4 cup Powdered Sugar (For dusting)
Instructions
- Preheat your oven to 350°F (175°C).
- Cream together the softened butter and granulated sugar until light and fluffy—about 2-3 minutes.
- Add the egg and lemon zest until well combined.
- Whisk together the flour, cornstarch, baking soda, and salt in a separate bowl.
- Combine the dry mixture with the wet mixture, mixing until just combined.
- Fold in the chopped raspberries and raspberry jam.
- Scoop dough onto a baking sheet lined with parchment paper.
- Bake for 12-15 minutes, until edges are lightly golden.
- Cool on the baking sheet for 5 minutes before transferring to a wire rack.
- Dust with powdered sugar before serving.
Notes
These cookies can be soft when they come out of the oven; they firm up as they cool.
Nutrition
- Serving Size: 1 cookie
- Calories: 200
- Sugar: 12g
- Sodium: 100mg
- Fat: 10g
- Saturated Fat: 6g
- Unsaturated Fat: 2g
- Trans Fat: 0g
- Carbohydrates: 23g
- Fiber: 1g
- Protein: 2g
- Cholesterol: 30mg
Keywords: lemon cookies, raspberry cookies, soft-baked cookies, dessert
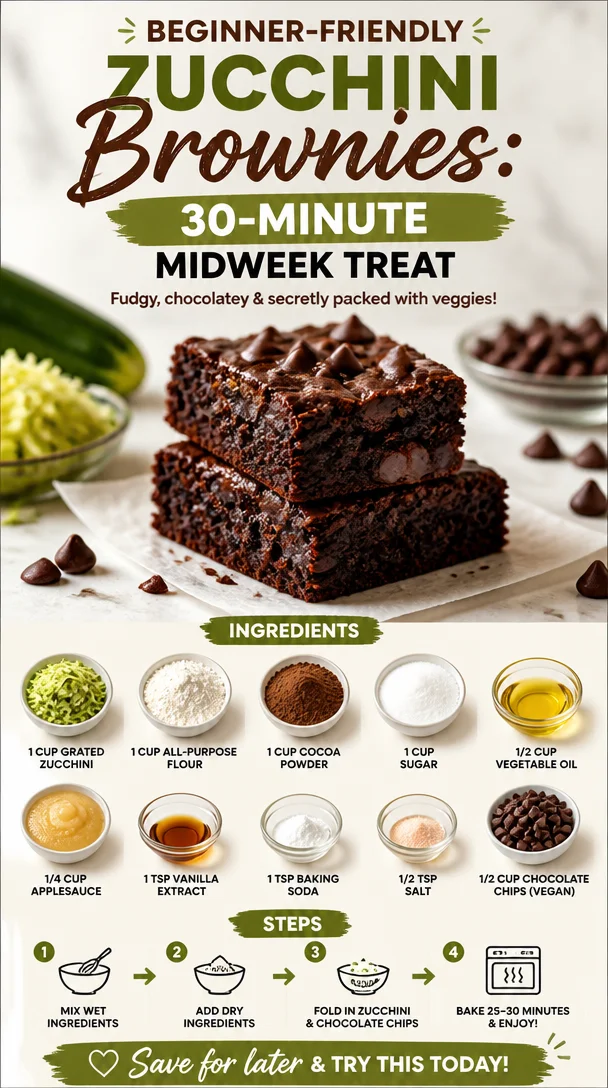
Beginner-friendly Zucchini Brownies: 30-Minute Midweek Treat
Zucchini Brownies: A Deliciously Surprising Treat
Hey there, foodie friends! Are you ready to dive into a dessert that will change the way you think about vegetables? Today, we’re whipping up Zucchini Brownies — a delightful twist on a classic favorite that’s not just indulgent but also surprisingly good for you! Whenever I think of brownies, I can’t help but reminisce about those blissful afternoons spent in my grandmother’s kitchen, sneaking spoonfuls of warm batter from the bowl. It was a sacred ritual that filled the air with sweet, chocolatey goodness.
Brownies have a special place in my heart, and I believe every kitchen should have a go-to brownie recipe. But wait! What if I told you that we could sneak some greens in without compromising that rich chocolaty flavor? That’s right! Zucchini is our secret weapon here, adding moisture and a subtle sweetness while remaining completely undetectable. You might even find yourself in a happy debate over whether zucchini deserves its spot in dessert land.
As we journey through this recipe, I invite you to embrace the unexpected and delight in the whimsical nature of cooking. Grab your apron, gather your ingredients, and let’s create something magical together!
A Little Kitchen Story
Let me take you back to a sunny afternoon in my childhood. Picture this: my grandmother, donned in her favorite apron, exuded warmth as she reigned over her domain — the kitchen. The comforting aroma of chocolate was intoxicating. I stood on a stool beside her, eager to learn her secret brownie techniques. I watched as she combined rich cocoa powder, sugar, and butter, the mixture bubbling joyously in the bowl.
One day, while rummaging through the fridge, she pulled out a surprising addition: zucchini! I was skeptical, to say the least. “Zucchini in brownies? No way!” But her reassuring smile melted my doubts. “Trust me, dear.” And trust her I did! The result was a batch of gooey, fudgy brownies that were every bit as indulgent as they were mysterious.
Now, every time I whip up a batch of Zucchini Brownies, I fondly think of Grandma and her surprising little twist. They’ve become a beloved family recipe, proving that you can sneak in the good stuff while keeping the rich and decadent flavor we all crave. This recipe is about more than just baking; it’s about creating memories and inviting loved ones to partake in your culinary adventures.
Ingredients
Let’s talk about the stars of the show! Here’s what you’ll need to recreate these delightful Zucchini Brownies:
-
1 cup grated zucchini
Zucchini adds moisture and a hint of sweetness without being detectable. You can substitute it with shredded carrots for a different flavor, though the texture may vary slightly. -
1 cup all-purpose flour
A basic but essential ingredient, providing structure. For a gluten-free version, you can use a 1:1 gluten-free flour blend, and the result should still be delightful. -
1 cup cocoa powder
This rich cocoa powder is what gives our brownies that signature chocolate flavor. Use Dutch-processed cocoa for a deeper flavor, or if you’re feeling adventurous, try a blend of dark and regular cocoa! -
1 cup sugar
Sweetness is key in brownies! You can use organic cane sugar, brown sugar for a hint of caramel, or even coconut sugar for a healthier option if you prefer. -
1/2 cup vegetable oil
This keeps the brownies moist and fudgy. You can use melted coconut oil for a wonderful flavor twist, or swap it for unsweetened applesauce for a lighter version, but keep that in mind since it will change the texture slightly. -
1/4 cup applesauce
This adds additional moisture and helps cut down on oil. Feel free to use homemade or store-bought. If you want to keep things simple, just double the vegetable oil. -
1 tsp vanilla extract
Vanilla brings all the flavors together in harmony. Make sure to use real vanilla extract for the best flavor — it makes a big difference! -
1 tsp baking soda
Our leavening agent that will help the brownies rise to the occasion. Don’t substitute with baking powder; they have different leavening properties. -
1/2 tsp salt
A crucial element that enhances all the flavors. It may sound small, but a pinch of salt balances the sweetness beautifully. -
1/2 cup chocolate chips (vegan)
These are the cherry on top! Choose vegan chocolate chips if you’re keeping it dairy-free. You can also use white chocolate chips or nuts for a different flavor profile.
Step-by-Step Instructions
Now that we have our ingredients lined up, let’s dive into the baking process! Trust me, this is going to be a breeze.
-
Preheat Your Oven
Start by preheating your oven to 350°F (175°C). This step is crucial for achieving that perfect fudgy texture in your brownies. While the oven heats up, line an 8-inch square baking pan with parchment paper for easy removal later. -
Prepare the Zucchini
Wash and grate your zucchini; a box grater works wonders here! Don’t worry about peeling it; the skin packs a ton of nutrients. After grating, squeeze out any excess moisture using a clean kitchen towel. This prevents the brownies from getting too soggy. -
Mix the Wet Ingredients
In a large mixing bowl, combine the vegetable oil, applesauce, sugar, and vanilla extract. Whisk them together until it’s smooth and all the ingredients are well combined. Feel free to let loose here — mix with joy! -
Add the Dry Ingredients
Next up, sift in the flour, cocoa powder, baking soda, and salt. Sifting helps prevent clumps and ensures even distribution of the dry ingredients. Gently fold the mixture using a spatula until just combined. Avoid over mixing; we’re aiming for tender brownies here! -
Incorporate the Zucchini and Chocolate Chips
Gently fold in the grated zucchini and 1/2 cup of chocolate chips until evenly distributed. You can reserve a few chips to sprinkle on top for that irresistible melty finish! -
Pour the Mixture into the Baking Pan
Spread the brownie batter evenly in the greased baking pan, using a spatula to smooth out the top. Don’t worry about perfection; those little imperfections add character! -
Bake to Perfection
Slide the pan into the preheated oven and bake for 25-30 minutes or until a toothpick inserted in the center comes out with a few moist crumbs. Remember, it’s better to underbake slightly for a fudgy texture! -
Cool and Serve
Once baked, remove the brownies from the oven and let them cool in the pan for about 10 minutes. Then, carefully lift them out using the parchment paper and let them cool completely on a wire rack. This helps set the fudgy texture; patience is key! -
Slice and Enjoy
Once cooled, slice into squares (or rectangles, if you’re feeling fancy) and serve. Optional but recommended: dust with powdered sugar for some extra flair!
Serving Suggestions
When it comes to serving these Zucchini Brownies, a little creativity goes a long way! Consider presenting them warm with a scoop of vanilla ice cream or a dollop of whipped cream on top. If you want to impress, drizzle some melted dark chocolate over the brownies for that “wow” factor. You could even sprinkle some crushed nuts or sea salt on top for added texture and flavor. These brownies can be enjoyed on their own or with a freshly brewed cup of coffee for that cozy afternoon treat!
Recipe Variations
Ready to mix things up? Here are a few fun ideas to personalize your Zucchini Brownies:
- Nutty Bliss: Fold in 1/2 cup of chopped walnuts or pecans for a crunchy texture that complements the brownies beautifully.
- Minty Fresh: Add 1 tsp of peppermint extract for a refreshing mint chocolate brownie twist!
- Fruity Addition: Throw in a handful of dried cherries or cranberries to add a sweet and tangy fruit element.
- Spicy Kick: For a fall-inspired treat, add a pinch of cinnamon or pumpkin spice for warmth and depth.
- Swaps for the Health-Conscious: Substitute half the sugar with a natural sweetener like maple syrup or agave nectar for a healthier version.
Chef’s Notes
Ah, the beauty of Zucchini Brownies! They bring all sorts of delicious memories and a few funny kitchen stories along. I once attempted to bake these brownies for a friend’s birthday party and realized I had run out of cocoa powder! In a moment of creativity, I used dark chocolate bars melted down instead, and guess what? They turned out even better than the original recipe! This little mishap reminded me that sometimes the best recipes evolve through experimentation.
Every time I bake these brownies, I think about how far they’ve come from my grandmother’s original recipe — add a little zucchini here, a dash of this there — and it has become a sweet tradition in my family. I love seeing how each batch brings joy to others as they indulge in the rich flavors.
FAQs and Troubleshooting
Why are my brownies dry?
Dry brownies can result from overbaking. Always keep an eye on them and test with a toothpick for gooeyness. Slightly underbaking can give you a more fudgy brownie.
Can I make these brownies ahead of time?
Absolutely! Zucchini Brownies store well in an airtight container for up to 3 days at room temperature. For longer storage, try freezing them for up to a month.
What can I substitute for eggs?
Although this recipe does not contain eggs, if you ever have a version that does, you could replace each egg with 1/4 cup of unsweetened applesauce or 1/4 cup of mashed banana for moisture.
What if I can’t find vegan chocolate chips?
If you can’t find vegan chocolate chips, feel free to finely chop up your favorite chocolate bar. Just ensure it’s dairy-free!
Nutritional Info
While I love focusing on taste and experience rather than strict nutrition, it’s worth noting that these Zucchini Brownies carry health benefits thanks to the zucchini! They’re a great source of vitamins while still satisfying that sweet tooth. Each brownie (based on 16 servings) contains approximately:
- Calories: 130
- Carbohydrates: 22g
- Protein: 2g
- Fat: 5g
- Fiber: 1g
Keep in mind these values can vary based on ingredient choices.
So there you have it, my dear kitchen companions! Zucchini Brownies are not just a delicious dessert; they’re a canvas for creativity and a testament to how we can embrace the unexpected in our kitchens. The next time you’re tempted to sneak a veggie into a dessert, I say go for it — you may just create a new favorite recipe that your family will cherish for years to come. Happy baking! 🍫✨
PrintZucchini Brownies

A delightful twist on classic brownies, incorporating zucchini for added moisture and sweetness.
- Prep Time: 15 minutes
- Cook Time: 30 minutes
- Total Time: 45 minutes
- Yield: 16 servings 1x
- Category: Dessert
- Method: Baking
- Cuisine: American
- Diet: Vegetarian; Vegan
Ingredients
- 1 cup grated zucchini
- 1 cup all-purpose flour
- 1 cup cocoa powder
- 1 cup sugar
- 1/2 cup vegetable oil
- 1/4 cup applesauce
- 1 tsp vanilla extract
- 1 tsp baking soda
- 1/2 tsp salt
- 1/2 cup chocolate chips (vegan)
Instructions
- Preheat your oven to 350°F (175°C) and line an 8-inch square baking pan with parchment paper.
- Prepare and grate your zucchini, then squeeze out excess moisture using a clean towel.
- Mix the vegetable oil, applesauce, sugar, and vanilla in a large bowl until smooth.
- Add the flour, cocoa powder, baking soda, and salt, sifting them into the bowl and folding gently until just combined.
- Incorporate the grated zucchini and chocolate chips until evenly distributed.
- Pour the batter into the prepared baking pan and spread evenly.
- Bake for 25-30 minutes, testing with a toothpick for doneness.
- Cool for about 10 minutes in the pan before transferring to a wire rack to cool completely.
- Slice into squares and serve, optionally dusted with powdered sugar.
Notes
For added creativity, try mixing in nuts, mint extract, or dried fruits. Store in an airtight container for up to 3 days.
Nutrition
- Serving Size: 1 brownie
- Calories: 130
- Sugar: 12g
- Sodium: 200mg
- Fat: 5g
- Saturated Fat: 1g
- Unsaturated Fat: 4g
- Trans Fat: 0g
- Carbohydrates: 22g
- Fiber: 1g
- Protein: 2g
- Cholesterol: 0mg
Keywords: Zucchini Brownies, Dessert, Vegan Brownies, Healthy Brownies, Chocolate Dessert
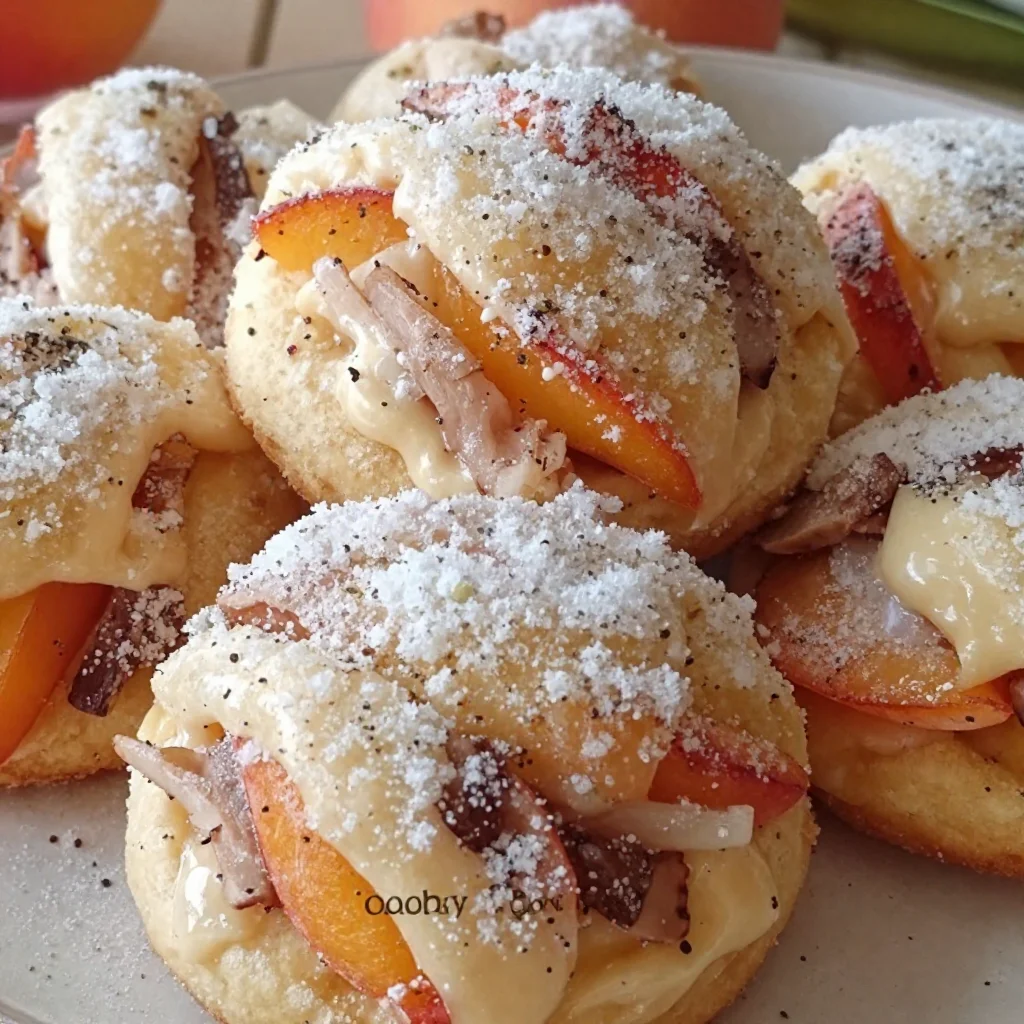
Ingredient Italian Peach Cookies (Pesche Dolci) for Summer
Sweet Summer Bites: Italian Peach Summer Cookies (Pesche Dolci)
Hello, lovely foodies! Today, we’re diving into a treat that’s as delightful as a summer afternoon — Italian Peach Summer Cookies, or Pesche Dolci. These cookies bring the essence of summer right to your kitchen, with their soft, pillowy texture and fruity filling. They’re like a warm embrace from the sun, and let me tell you, they are perfect for sharing with family and friends at any gathering.
Imagine this: the sun is shining, a gentle breeze is blowing, and you’re sitting on your porch with a plate of these delicious cookies accompanied by a refreshing drink. That’s the vibe I want to create for you with today’s recipe. So, let’s roll up our sleeves, tie on those aprons, and make something truly special together!
A Nostalgic Taste of Home
Growing up, my family had a little tradition during the summer. Each year, we’d pack our bags and head off to my grandparents’ home for a week filled with sunshine, laughter, and, of course, incredible food. My grandmother was a master pastry chef — she could whip up desserts that would make your heart sing. One of my fondest memories is standing beside her in the kitchen, flour dusting our noses as we crafted Pesche Dolci together. She’d always say, “Cooking is love made visible,” and as we baked, I could feel that love with each scoop of peach preserves and sprinkle of sugar.
I remember the joy of forming those little dough balls and filling them with sweet peach goodness! Each bite was a delicious reminder of those sun-kissed afternoons spent together. Now, I want to bring that joy to your kitchen, so you can create your own cherished memories around these delectable Italian cookies!
Ingredients
Here’s what you’ll need to make these delightful Pesche Dolci:
-
2 cups all-purpose flour
A staple in many kitchens! If you need a gluten-free option, try using a gluten-free flour blend, but keep in mind that the texture might differ slightly. -
1 cup sugar
Simple granulated sugar is all you need here. For a lower-calorie option, you can substitute with coconut sugar or a sugar substitute like erythritol. -
1/2 cup unsalted butter, softened
Butter brings richness to the cookies. If you’re dairy-free, use a non-dairy butter or coconut oil for a twist on the flavor. -
2 large eggs
Eggs add moisture and fat, helping the cookies rise. For vegan alternatives, you can use flax eggs (1 tablespoon ground flaxseed mixed with 2.5 tablespoons water per egg, let it sit for 5 minutes). -
1/2 cup milk
Whole milk is the go-to, but feel free to use almond milk or oat milk for a dairy-free version. -
2 teaspoons baking powder
This is our leavening agent, helping the cookies puff up beautifully! Make sure it’s fresh for the best results. -
1 teaspoon vanilla extract
Vanilla adds a lovely warmth to the cookies. You can also try almond extract for a nutty twist! -
1/4 teaspoon salt
Don’t skip the salt! It enhances sweetness and balances the flavors. -
1 cup peach preserves or filling
The star of our recipe! If you’re feeling adventurous, homemade peach preserves can elevate this dish even more. You can also use any other stone fruit preserves. -
Peach syrup (made from peach juice or brandy and sugar)
This sweet syrup adds a lovely drizzle for serving. You can make your own by simmering peach juice with a bit of sugar until thickened. -
Granulated sugar for rolling
For that signature sweet finish, this rolling sugar gives the cookies a delightful crunch.
Step-by-Step Instructions
Ready to make magic in the kitchen? Let’s get started!
Step 1: Preheat the Oven
Preheat your oven to 350°F (175°C). This is a crucial step — a well-heated oven ensures even baking. While it heats, line two baking sheets with parchment paper. This will help prevent sticking and make cleanup a breeze!
Step 2: Mix the Dry Ingredients
In a medium mixing bowl, whisk together the flour, baking powder, and salt. This helps aerate the flour, providing a lighter texture. Make sure there are no lumps in your flour for perfectly soft cookies!
Step 3: Cream the Butter and Sugar
In a large mixing bowl, beat the softened unsalted butter with sugar until it’s light and fluffy — about 3-5 minutes. This step is where the magic happens! Creaming the butter and sugar incorporates air, giving your cookies that delightful softness.
Step 4: Add the Eggs and Vanilla
Next, add the eggs one at a time, mixing well after each addition, followed by the vanilla extract. You want a smooth, creamy blend here. If you’re feeling a little adventurous, give the mixture a quick taste—just a tiny dab to make sure you’re on the right track!
Step 5: Combine Wet and Dry Ingredients
Gradually add the dry mixture to the buttery goodness, alternating with the milk. Start and end with the dry ingredients, mixing until just combined. Overmixing can lead to dense cookies, and we want them to be light and airy, so be gentle!
Step 6: Fill with Peach Preserves
Now comes the fun part! Using your hands (don’t be afraid to get a little messy!), scoop out a tablespoon of dough and flatten it slightly in your palm. Add a small spoonful of peach preserves in the center. Pinch the dough closed around the filling, rolling it into a ball. Place the dough balls onto the lined baking sheets, spacing them a few inches apart.
Step 7: Roll in Sugar
In a shallow dish, add some granulated sugar. Gently roll each cookie ball in the sugar, coating them evenly. This will create that beautiful crunchy exterior, perfectly contrasting with the soft interior.
Step 8: Bake to Perfection
Pop those trays into your preheated oven and bake for 15-18 minutes, or until the bottoms are lightly golden. The aroma of sweet peaches and vanilla will fill your kitchen during this time—get ready for the compliments!
Step 9: Drizzle with Peach Syrup
Once baked, remove the cookies from the oven and let them cool on a wire rack. Before serving, drizzle them with the peach syrup for that extra burst of flavor. It’s like a little summer in each bite!
Serving Suggestions
Plate your Pesche Dolci with a light dusting of powdered sugar on top for a charming finish. These cookies are perfect alongside a steaming cup of coffee or a refreshing iced tea. I also love to pair them with fresh summer fruits or a scoop of vanilla ice cream for an indulgent dessert!
Recipe Variations
- Peach Melba Twist: Add a swirl of raspberry preserves in with the peach filling for a gorgeous, colorful surprise!
- Nutty Delight: Incorporate finely chopped almonds or pistachios into the dough for an added crunch.
- Spiced Cookies: Add a pinch of cinnamon or nutmeg to the dough for a warm, comforting flavor.
- Lemon Zest: Stir in zest from a lemon into the cookie dough for a refreshing citrus twist.
- Vegan Swap: Use flax eggs and coconut oil for a delicious vegan version that still packs a flavorful punch!
Chef’s Notes
As with any recipe passed down through generations, I’ve made a few adjustments over time. My grandmother used to roll her cookies in almond flour instead of sugar, giving them a nutty flavor that I still adore! Whenever I make these cookies, I think of her, and how cooking brings us closer — even when we’re miles apart. So have fun with this recipe, and don’t be afraid to make it your own!
FAQs and Troubleshooting
Q: My cookies flattened out instead of puffing up! What went wrong?
A: This usually happens if the butter is too soft or if the dough was overmixed. Make sure your butter is softened but not melted, and mix just until combined.
Q: Can I store these cookies? How should I do it?
A: Absolutely! These cookies store well in an airtight container at room temperature for up to a week. You can also freeze them for later enjoyment. Just be sure to thaw them completely before serving.
Q: I can’t find peach preserves. Can I use fresh peaches instead?
A: Fresh peaches can be used, but they will require cooking down with sugar to create a preserves-like consistency. Simply simmer diced peaches with a little sugar until they break down into a chunky sauce.
Q: What’s the best way to ensure even baking?
A: Rotating your baking sheets halfway through baking helps, as does placing the sheets on the middle rack of your oven. Avoid overcrowding the baking sheets to allow proper air circulation.
Nutritional Info
Calories per cookie (approximate): 150
Total carbohydrates: 22g
Total fat: 6g
Protein: 2g
Note: Nutritional values may vary based on ingredients and portion sizes.
Now that you’re armed with this delightful Pesche Dolci recipe, it’s time to hit the kitchen and create something wonderful! Remember to embrace the mess, enjoy the process, and most importantly, savor every sweet bite. Happy baking, friends! 🍑✨
PrintItalian Peach Summer Cookies (Pesche Dolci)

Delightful Italian cookies filled with sweet peach preserves, perfect for summer gatherings.
- Prep Time: 20 minutes
- Cook Time: 18 minutes
- Total Time: 38 minutes
- Yield: 24 cookies 1x
- Category: Dessert
- Method: Baking
- Cuisine: Italian
- Diet: Vegetarian
Ingredients
- 2 cups all-purpose flour
- 1 cup sugar
- 1/2 cup unsalted butter, softened
- 2 large eggs
- 1/2 cup milk
- 2 teaspoons baking powder
- 1 teaspoon vanilla extract
- 1/4 teaspoon salt
- 1 cup peach preserves or filling
- Peach syrup (for drizzling)
- Granulated sugar for rolling
Instructions
- Preheat the oven to 350°F (175°C) and line two baking sheets with parchment paper.
- Mix the flour, baking powder, and salt in a medium mixing bowl.
- Cream the butter and sugar in a large mixing bowl until light and fluffy.
- Add the eggs one at a time, mixing well after each addition, followed by the vanilla extract.
- Combine the dry ingredients with the wet ingredients, alternating with the milk.
- Fill cookie dough balls with peach preserves by scooping a tablespoon of dough, flattening it, adding preserves, and rolling it into a ball.
- Roll each ball in sugar to coat.
- Bake for 15-18 minutes, or until the bottoms are lightly golden.
- Drizzle with peach syrup before serving.
Notes
These cookies can be stored in an airtight container for up to a week.
Nutrition
- Serving Size: 1 cookie
- Calories: 150
- Sugar: 9g
- Sodium: 120mg
- Fat: 6g
- Saturated Fat: 4g
- Unsaturated Fat: 2g
- Trans Fat: 0g
- Carbohydrates: 22g
- Fiber: 0g
- Protein: 2g
- Cholesterol: 30mg
Keywords: cookies, peach, summer dessert, Italian cookies, Pesche Dolci
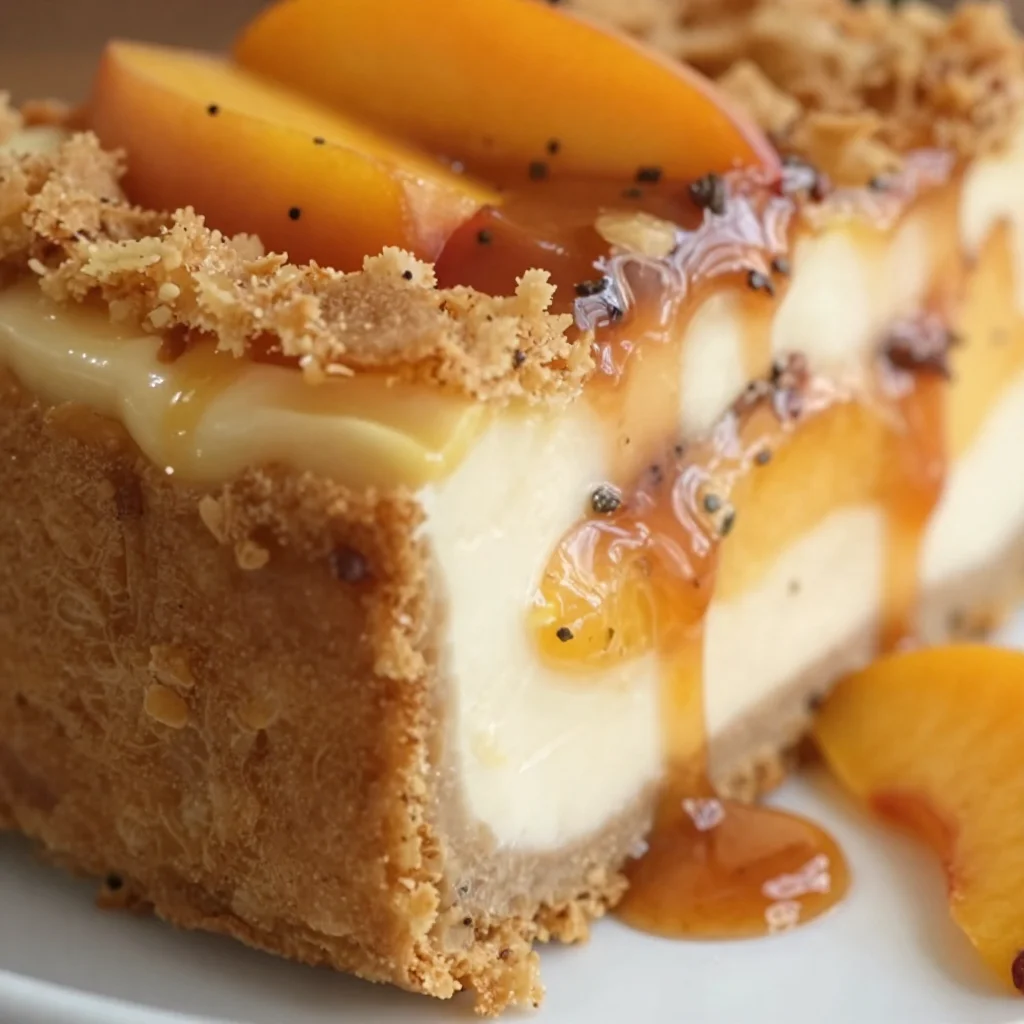
Ingredient Peach Cobbler Cheesecake
Sweet Harmony: Peach Cobbler Cheesecake Recipe
Hello, dear friends! Today, I’m excited to bring you a delightful fusion of two classic desserts: Peach Cobbler and Cheesecake. Yes, you heard that right! This Peach Cobbler Cheesecake combines the creamy decadence of cheesecake with the warm, comforting essence of summer peaches and that buttery, crumbly topping we all love. It’s like a dreamy hug on a plate, and let me tell you, it’s a showstopper that’ll impress your guests or make a quiet evening at home feel extra special.
A Slice of Nostalgia
Before we jump into this enticing recipe, I want to share a little story with you. Growing up, my family would gather every summer for a big peach-picking weekend. The smell of ripe peaches filled the air, and the sun-kissed fruits glistened like jewels on the trees. We would spend the day plucking peaches and brainstorming all the delicious things we could make with them.
One summer, my grandmother introduced me to her famous peach cobbler. I can still picture her in the kitchen, humming to her favorite tunes as she mixed and poured. She taught me that cooking is about love, creativity, and, most importantly, sharing. Her cobbler was always a hit, and the leftovers (if there were any!) would mysteriously vanish by morning. This recipe is a tribute to those cherished memories and the joy of sharing good food with loved ones.
Ingredients
Here’s what you’ll need to create this Peach Cobbler Cheesecake masterpiece:
-
1 ½ cups graham cracker crumbs
These provide the perfect buttery base and a subtle crunch. If you’re feeling adventurous, try using crushed vanilla wafers for a twist! -
½ cup unsalted butter, melted
This binds the crumbs together and gives the crust its delicious richness. Make sure it’s unsalted to control the overall saltiness of the dessert. -
2 cups cream cheese, softened
The star of our cheesecake! It creates that rich, creamy texture. If you’re looking for a lighter option, you can use Neufchâtel cheese (it’s lower in fat!). -
1 cup granulated sugar
This sweetens our cheesecake filling. If you’re trying to cut back on sugar, consider using a sweetener like monk fruit or a reduced-sugar alternative. -
1 teaspoon vanilla extract
For that warm, aromatic flavor that makes everything better! A splash of almond extract can also elevate the taste. -
3 large eggs
They add structure and help set the cheesecake. Want an egg-free version? You can substitute each egg with ¼ cup unsweetened applesauce. -
2 cups fresh peaches, sliced
Use ripe, juicy peaches for the best flavor. If peaches are out of season, frozen peaches work too—just make sure to thaw and drain them well first! -
½ cup brown sugar
This gives an extra caramel-like flavor to the peaches and enhances their sweetness. Don’t have brown sugar? A mix of white sugar and a bit of molasses can do the trick! -
1 teaspoon cinnamon
A warm spice that complements the peaches perfectly. Feel free to experiment with nutmeg or even pumpkin pie spice! -
1 tablespoon cornstarch
This helps thicken the peach mixture and gives it that delectable saucy quality. Arrowroot powder can be substituted if preferred. -
1 tablespoon lemon juice
A splash of acidity to balance the sweetness. Lime juice can be a nice alternative and adds a fun twist!
Step-by-Step Instructions
Alright, let’s get cooking! Follow these steps to create your Peach Cobbler Cheesecake.
-
Preheat Your Oven:
Begin by preheating your oven to 325°F (163°C). This allows the cheesecake to bake evenly, creating that perfectly creamy texture we all love. -
Prepare the Crust:
In a mixing bowl, combine the graham cracker crumbs and melted butter until the mixture resembles wet sand. Press this mixture firmly into the bottom of a 9-inch springform pan. Make sure it’s compact, as this will hold everything together. Plus, a little tip: you can use the bottom of a measuring cup to smooth it out perfectly! -
Bake the Crust:
Pop the crust into your preheated oven for about 8-10 minutes or until it’s lightly golden. This helps set the crust, ensuring it holds up against the creamy cheesecake filling. Let it cool while we work on the filling. -
Make the Filling:
In a mixing bowl, beat the softened cream cheese until smooth (about 2 minutes). Gradually add the granulated sugar and beat until combined. We want that mixture creamy and dreamy! Scrape down the sides of the bowl to catch any lumps—no one likes unexpected lumps in their cheesecake! -
Add Vanilla and Eggs:
Stir in the vanilla extract. Then, add the eggs, one at a time, beating on low speed after each addition until just combined. Be careful not to over-mix here; we want a light and fluffy texture, not an airy one. -
Prepare the Peach Layer:
In a small bowl, toss the sliced peaches with brown sugar, cinnamon, cornstarch, and lemon juice. Let them sit for about 10 minutes until they’re nice and juicy. The natural flavors will meld beautifully, creating an incredible topping for our cheesecake. -
Layer It Up:
Pour half of the cheesecake mixture over the cooled crust, then carefully layer half of the peach mixture on top. Follow with the remaining cheesecake filling and sprinkle the rest of the peaches on top. Don’t worry about perfection; this is all part of the charm! -
Bake the Cheesecake:
Bake in the oven for about 60-70 minutes until the edges are set, but the center still slightly jiggles (it will set more as it cools). Here’s a little chef hack: to prevent cracking, you can place a shallow pan of water in the oven alongside the cheesecake. It creates steam and keeps your cheesecake from drying out. -
Cool and Chill:
Once it’s done, turn off the oven and leave the cheesecake inside for an additional hour, cracking the door slightly. This allows it to cool gradually, reducing the chances of cracks. After an hour, let it cool fully before transferring it to the refrigerator to chill for at least 4 hours (or overnight if you can handle the wait!).
Serving Suggestions
When it’s finally time to serve your Peach Cobbler Cheesecake, carefully run a knife around the edge of the springform pan before releasing the sides. You can serve it plain, or dress it up with a dollop of whipped cream or a scoop of vanilla ice cream on the side—you can never go wrong with that classic combination!
Recipe Variations
- Add Crunch: Mix in some chopped pecans or walnuts to the peach layer for added texture.
- Flavor Substitutions: Try using blueberries or raspberries instead of peaches for a berry cobbler cheesecake surprise.
- Healthy Twist: Swap out the graham crackers for almond flour or oat flour to make a gluten-free crust without sacrificing flavor.
- Celebrate Fall: Feel free to mix in some pumpkin puree into the cheesecake batter for a seasonal variation!
- Dairy-Free Delight: Use cashew cream and a dairy-free butter substitute to make a vegan version without sacrificing creaminess.
Chef’s Notes
This recipe has evolved from my traditional peach cobbler. Initially, I had a simple, straightforward way of making it, but over the years it morphed into a creamy cheesecake that carries that nostalgic flavor of my grandma’s cobbler. I’m constantly amazed at how the simplest of ingredients can turn into something so exquisite. I still remember one time making it for a picnic—by the time we reached our destination, the cheesecake was gone! Everyone raved about it, wanting the recipe immediately. I couldn’t help but smile, knowing it brought a little joy to their day!
FAQs and Troubleshooting
Q: Why does my cheesecake have cracks on the surface?
A: Cracking can happen due to overmixing the batter or baking it at too high of a temperature. Always mix on low speed and try to bake it in a water bath for extra moisture.
Q: How do I know my cheesecake is done?
A: The edges should be set, but the center will still have a slight jiggle when you gently shake the pan. It will firm up more as it cools.
Q: Can I freeze my Peach Cobbler Cheesecake?
A: Absolutely! To freeze, cover the cooled cheesecake tightly with plastic wrap and then again with aluminum foil. It can be frozen for up to 2 months. Just thaw in the fridge overnight before serving.
Q: What if I don’t have fresh peaches?
A: No worries! Frozen peaches work perfectly. Just be sure to thaw and drain any excess liquid to avoid a soggy cheesecake.
Conclusion
And there you have it, my dear friends! A beautiful Peach Cobbler Cheesecake that’s sure to become a treasured recipe in your collection. Not only does it blend two beloved desserts into one, but it also carries with it a personal story—a reminder of the joy that comes from gathering around the table and sharing moments with those we love.
So, gather your favorite people, tie on your apron, and get ready to create something incredible. And remember, as you whip up this delightful dessert, it’s not just about the ingredients; it’s about the love and intention you put into it. Enjoy every bite, and happy cooking!
PrintPeach Cobbler Cheesecake

A delightful fusion of creamy cheesecake and warm, comforting peach cobbler, perfect for impressing guests or enjoying at home.
- Prep Time: 20 minutes
- Cook Time: 70 minutes
- Total Time: 90 minutes
- Yield: 8 servings 1x
- Category: Dessert
- Method: Baking
- Cuisine: American
- Diet: Vegetarian
Ingredients
- 1 ½ cups graham cracker crumbs
- ½ cup unsalted butter, melted
- 2 cups cream cheese, softened
- 1 cup granulated sugar
- 1 teaspoon vanilla extract
- 3 large eggs
- 2 cups fresh peaches, sliced
- ½ cup brown sugar
- 1 teaspoon cinnamon
- 1 tablespoon cornstarch
- 1 tablespoon lemon juice
Instructions
- Preheat your oven to 325°F (163°C).
- Combine the graham cracker crumbs and melted butter until the mixture resembles wet sand. Press into the bottom of a 9-inch springform pan.
- Bake the crust for about 8-10 minutes until lightly golden. Let it cool.
- Beat the softened cream cheese until smooth, then gradually add the granulated sugar and mix.
- Stir in the vanilla extract and add the eggs one at a time, mixing on low speed until just combined.
- Toss the sliced peaches with brown sugar, cinnamon, cornstarch, and lemon juice, then let sit for about 10 minutes.
- Pour half of the cheesecake mixture over the cooled crust, layer half of the peach mixture on top, then add the remaining cheesecake filling and the rest of the peaches.
- Bake in the oven for about 60-70 minutes until the edges are set but the center still jiggles.
- Cool the cheesecake inside the oven for an hour with the door slightly cracked, then refrigerate for at least 4 hours.
Notes
Serve plain or with whipped cream or vanilla ice cream. You can also mix in nuts for added texture or swap fruits for variations.
Nutrition
- Serving Size: 1 slice
- Calories: 400
- Sugar: 25g
- Sodium: 300mg
- Fat: 25g
- Saturated Fat: 15g
- Unsaturated Fat: 5g
- Trans Fat: 0g
- Carbohydrates: 45g
- Fiber: 2g
- Protein: 6g
- Cholesterol: 90mg
Keywords: peach cobbler, cheesecake, dessert, summer dessert, fruity cheesecake