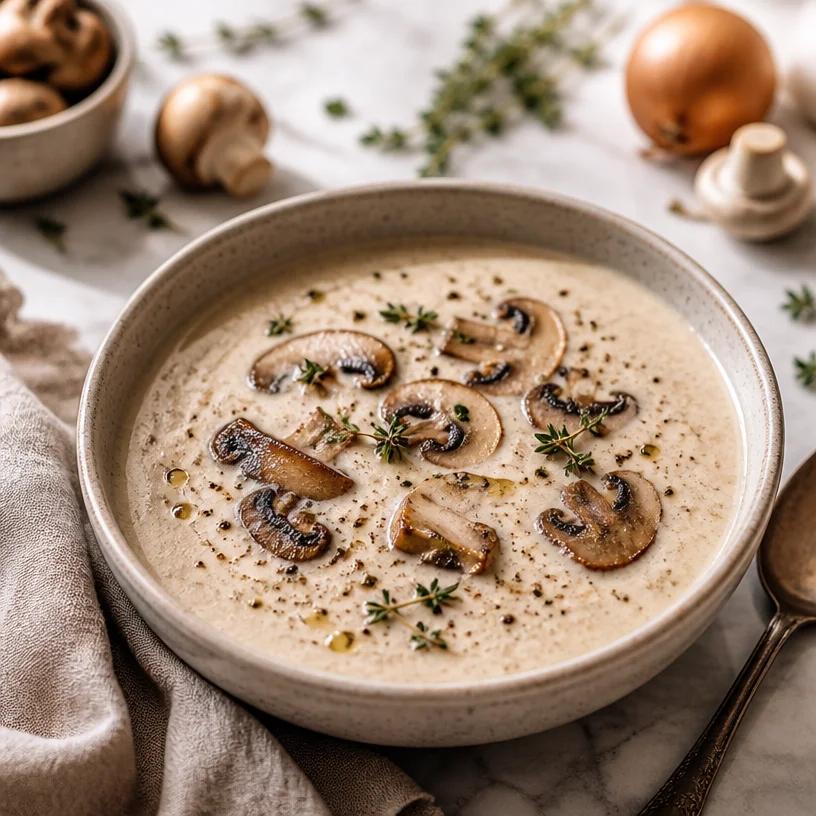
Creamy Mushroom Soup: 20-Minute Weeknight Comfort Recipe
The Comfort of Creamy Mushroom Soup: A Cozy Journey in Every Spoonful
Hello, dear food lovers! If there’s one dish that embodies warmth, comfort, and the kind of loving hug that your grandma might give you, it’s creamy mushroom soup. This delightful concoction isn’t just good for the soul; it’s quite versatile and remarkably easy to whip up in your cozy kitchen. My love for this fragrant, creamy dish runs deep, and I can’t wait to share why it holds a special place in my heart.
A Simple Yet Heartfelt Memory
Many moons ago, I remember standing in my childhood kitchen, the aroma of sautéing mushrooms and onions mingling with the rich scent of thyme wafting through the air. My mom would often make her famous mushroom soup on chilly Sunday afternoons, capturing the essence of comfort food in a single bowl. I can still picture the large wooden spoon my mom used to stir the pot, her laughter ringing out as my siblings and I snuck in bites before it was even ready. That’s the magic of cooking — it creates these beautiful, nostalgic moments that we carry with us forever.
As she served us each a bowl topped with a sprinkle of fresh parsley, my heart filled with happiness not only from the delicious flavor but from the lovely family time we shared. It taught me that food isn’t just sustenance; it’s about connection. This beloved creamy mushroom soup carries those cherished memories, making it an essential part of my culinary repertoire.
The Essential Ingredients
Now, let’s dive into the star players of our creamy mushroom soup! Each ingredient contributes its own unique magic, so let’s take a closer look.
-
Mushrooms:
- Why: These earthy wonders form the foundation of our soup. You can use cremini, shiitake, or even the classic button mushrooms for varied flavor and texture.
- Substitution Tip: If you need a change, try using canned mushrooms in a pinch, but fresh is always best!
-
Onion:
- Why: The onion adds depth and sweetness to the soup, balancing the earthiness of the mushrooms.
- Substitution Tip: Shallots or leeks work excellently if you want a milder flavor.
-
Thyme:
- Why: Fresh thyme imparts a lovely herby fragrance that ties everything together.
- Substitution Tip: If fresh thyme isn’t available, you can use dried thyme; just remember that dried herbs are more concentrated, so you’ll want about a third of the amount.
-
Cream:
- Why: Cream adds luxurious velvety richness that makes the soup so comforting.
- Substitution Tip: For a healthier option, you can use half-and-half, coconut milk, or a cashew cream for a dairy-free alternative.
Step-by-Step Instructions
Ready to get cooking? Let’s take this journey together, step by step!
-
Prepare Your Ingredients:
- Start by cleaning and slicing your mushrooms. Always use a damp cloth to wipe them clean instead of rinsing them under water; mushrooms absorb water, which can change their texture.
- Chop the onion finely and strip the thyme leaves from the stems. Feel free to inhale those beautiful aromas!
-
Sauté the Onions:
- In a large pot, heat a splash of olive oil over medium heat. Add the chopped onion and a pinch of salt. Cooking the onion for about 5-7 minutes until it softens and turns translucent will really enhance its sweetness. This step adds a beautiful base flavor, setting the stage for the mushrooms.
-
Add the Mushrooms:
- Toss in the sliced mushrooms and increase the heat to medium-high. We want to sauté these until they’re golden brown and have released their moisture, which should take about 10 minutes. This step is crucial; browning the mushrooms boosts that umami factor that elevates the dish to another level!
-
Incorporate the Thyme:
- Stir in the fresh thyme and continue to cook for another minute until the aroma hits you. It’s like a cozy blanket wrapping around your senses.
-
Pour in the Stock:
- Now it’s time to add 4 cups of vegetable or chicken stock. Bring it to a boil, then reduce the heat and let it simmer for about 15 minutes, allowing the flavors to marry beautifully.
-
Blend the Soup:
- Here’s a fun part! Either use an immersion blender or carefully transfer the soup into a blender. Blend until smooth (if you enjoy a chunkier soup, you can reserve some sautéed mushrooms to stir back in later). This step creates that luxurious texture we all crave!
-
Stir in the Cream:
- Return the soup to the pot and stir in one cup of heavy cream (or your chosen alternative). Allow it to gently heat through. Taste and season with salt and pepper as needed. This is the moment you can revise it to your taste.
-
Final Touches:
- Garnish with a sprinkle of fresh parsley or thyme for a pop of color and flavor. Serve hot with crusty bread or a crunchy baguette.
Serving Suggestions
When it comes to plating your creamy mushroom soup, simplicity is key. Ladle the soup into warm bowls and top with a spoonful of sautéed mushrooms, a drizzle of olive oil, and a few sprigs of fresh thyme for that picture-perfect finishing touch. Pair it with crusty bread for dipping — trust me; the combination is divine!
Recipe Variations
Want to shake things up? Here are a few creative variations to play with:
- Truffle Mushroom Soup: Add a dash of truffle oil just before serving for an elegant touch.
- Mushroom-Spinach Soup: Toss in a handful of fresh spinach at the end for a pop of color and added nutrients.
- Asian-Inspired Twist: Drizzle with soy sauce, sesame oil, and a sprinkle of toasted sesame seeds for a completely different flavor profile.
- Mushroom & Leek: Swap out half the mushrooms for leeks for a sweeter, more robust flavor.
- Peppery Variation: Add a hint of crushed red pepper for a warm kick!
Chef’s Notes
This creamy mushroom soup has been my go-to for cozy gatherings or even solo dinners when I want to treat myself. I hold dear the memories of friends who have gathered around my table to enjoy it. Over time, I’ve learned that the best recipes often evolve through experimentation. For instance, I’ve swapped out the cream for coconut milk during my vegan phase, and it still turned out incredibly delicious! Each bowl is a bit of love from my kitchen to yours.
FAQs and Troubleshooting
-
Why is my soup too thin?
- This may happen if the mushrooms released too much moisture. If this happens, you can thicken the soup by blending in a bit more cooked potato, or simmering it longer to reduce it.
-
How can I enhance the flavor?
- If you’re looking for more depth, consider adding a splash of white wine when you cook the mushrooms! It’ll elevate that flavor profile immensely.
-
My soup is too rich; how can I lighten it?
- Simply add more vegetable or chicken stock to dilute it. A squeeze of lemon juice can also balance out the richness beautifully.
-
Can I make this soup ahead of time?
- Absolutely! Make it ahead and store it in the fridge for up to 3 days. Just remember to wait until reheating to add the cream, which will keep it from curdling.
Nutritional Info
While I’m not a nutritionist, I can tell you that this creamy mushroom soup is packed with umami flavor while being relatively low in calories. It’s a great source of vitamins and minerals thanks to the mushrooms, especially Vitamin D, when exposed to sunlight!
Cooking is all about enjoying the process and forging connections with those around us. So tie on that apron, grab your favorite spoon, and let’s create a cozy bowl of creamy mushroom goodness that warms the heart! Welcome to the delightful world of Ivory Apron — where elevated cooking meets everyday moments. Bon appétit!
PrintCreamy Mushroom Soup

A comforting and versatile creamy mushroom soup that warms the soul.
- Prep Time: 15 minutes
- Cook Time: 30 minutes
- Total Time: 45 minutes
- Yield: 4 servings 1x
- Category: Soup
- Method: Sautéing, Blending
- Cuisine: French
- Diet: Vegetarian
Ingredients
- 8 cups mushrooms (cremini, shiitake, or button), sliced
- 1 onion, chopped finely
- 4 cups vegetable or chicken stock
- 1 cup heavy cream (or alternative)
- 2 tablespoons olive oil
- 1 tablespoon fresh thyme, stripped from stems
- Salt, to taste
- Pepper, to taste
- Fresh parsley or thyme, for garnish
Instructions
- Prepare your ingredients: Clean and slice mushrooms. Chop onion and strip thyme leaves.
- Sauté the onions: Heat olive oil, add onion, and salt. Cook for about 5-7 minutes until softened.
- Add the mushrooms: Increase heat and sauté mushrooms until golden brown for about 10 minutes.
- Incorporate the thyme: Stir in thyme and cook until aromatic.
- Pour in the stock: Add stock, bring to boil, then simmer for 15 minutes.
- Blend the soup: Use an immersion blender or transfer to a blender until smooth.
- Stir in the cream: Return soup to pot, add cream and heat through while seasoning as needed.
- Garnish: Serve with fresh parsley or thyme and enjoy with crusty bread.
Notes
This soup can be made ahead of time and stored in the fridge for up to 3 days. Add cream just before reheating.
Nutrition
- Serving Size: 1 serving
- Calories: 350
- Sugar: 5g
- Sodium: 400mg
- Fat: 24g
- Saturated Fat: 12g
- Unsaturated Fat: 10g
- Trans Fat: 0g
- Carbohydrates: 25g
- Fiber: 3g
- Protein: 8g
- Cholesterol: 60mg
Keywords: creamy mushroom soup, comfort food, vegetarian soup, cozy recipes

Minute One-Pot Chicken Noodle Soup for Busy Weeknights
The Comfort of Chicken Noodle Soup: A Timeless Classic
Hello, dear food friends! Today, we’re diving into one of my all-time favorite dishes: Chicken Noodle Soup. It’s a nostalgic recipe that warms the heart, brings family together, and serves as a culinary remedy on chilly days. Whether it’s the first snowfall of the year or just an ordinary Tuesday evening, there’s something wonderfully comforting about a steaming bowl of chicken noodle soup. Join me as we explore the magic behind this classic dish, share a personal cooking story, and whip up a batch that will make your kitchen feel like home.
A Spoonful of Nostalgia
Let me take you back to my childhood kitchen. I can still picture my mom stirring a large pot of chicken noodle soup on a rainy afternoon, the delicious aroma wafting through the house. I’d drift into the kitchen, drawn in by the scent of savory broth and tender chicken. She would always let me sneak slivers of carrots and noodles as we prepped the ingredients together. Those moments were filled with laughter, stories, and a sprinkle of love that only home-cooked meals can provide.
One of my favorite memories was when I got to help her make the soup for my grandparents’ visit. It was a simple affair, but the joy on their faces as they savored each bite made me realize that food isn’t just about nourishment; it’s about connection. Now, I find myself recreating that soup, adding my own little spins, yet maintaining the essence of that cherished recipe. Let’s whip up a pot of this classic together; I promise it will bring just as much warmth to your table as it did to mine!
Ingredients You’ll Need
Here’s a list of what you will need to create your very own delicious chicken noodle soup:
-
Chicken: I recommend using bone-in, skin-on chicken thighs for added flavor and richness. If you’re short on time, rotisserie chicken works wonders, too! Just shred it up and throw it in at the end.
-
Egg Noodles: These tender noodles soak up the broth beautifully. If you need a gluten-free option, try using rice noodles or spiralized zucchini for a fresh twist.
-
Carrots: Sweet and colorful, carrots add a lovely crunch. You can switch them out for parsnips for a slightly sweeter flavor.
-
Celery: Celery is essential for that classic flavor profile, contributing a subtle crispness. It can be substituted with fennel if you like a slightly anise-like taste.
-
Broth: Homemade is best! However, store-bought or low-sodium chicken broth works wonderfully. You can also combine chicken and vegetable broth for a richer flavor.
Step-by-Step Instructions
-
Prep Your Chicken: Start by rinsing your chicken pieces under cold water, then pat them dry with paper towels. Season them generously with salt and pepper. This will enhance their natural flavors.
Chef Tip: You can sear the chicken in a bit of olive oil before adding it to the pot for an extra layer of depth. Just brown it for about 5 minutes on each side.
-
Sauté the Aromatics: In a large soup pot, heat a tablespoon of olive oil over medium heat. Add diced carrots and celery, cooking for about 5 minutes until they start to soften. Throw in a minced garlic clove for an extra flavor punch in the last minute.
Little Chef Hack: If you’re feeling adventurous, add a splash of white wine after sautéing the vegetables—let it reduce for a couple of minutes to enhance the flavor.
-
Add the Broth: Pour in about 8 cups of chicken broth, then add your seasoned chicken to the pot. Bring this to a gentle boil, then reduce the heat, covering partially to let it simmer. Cook for 30-40 minutes, or until the chicken is tender and fully cooked.
Chef Insight: Skimming the surface of the broth occasionally will help keep your soup clear and beautiful!
-
Shred the Chicken: Once the chicken is cooked through, carefully remove it from the pot and let it cool for a few minutes. Once it’s safe to handle, shred it using two forks. Return the shredded chicken to the pot.
-
Noodle Time: Now, add the egg noodles to the pot and let them cook for about 8-10 minutes or until they are tender. Stir occasionally to prevent them from sticking.
Quick Tip: If you prefer firmer noodles, add them toward the end of the cooking time.
-
Final Touches: Taste your soup and adjust the seasoning with extra salt, pepper, or herbs like thyme or parsley. I also love a squeeze of lemon juice at the end for a fresh pop of flavor!
-
Serve Immediately: Nothing beats the aroma of freshly cooked chicken noodle soup. Ladle it into bowls and garnish with fresh parsley for that inviting touch.
Serving Suggestions
To really elevate your chicken noodle soup experience, consider serving it with a side of crusty bread or a light salad. A sprinkle of freshly cracked pepper and a dash of chili flakes can also add a nice touch. And let’s not forget the importance of a cozy atmosphere—light some candles and get ready for a delightful meal!
Recipe Variations
-
Herbed Twist: Experiment with fresh herbs like dill or thyme for a different aromatic profile.
-
Spicy Kick: Add a pinch of red pepper flakes or a swirl of sriracha for those who like a bit of heat.
-
Creamy Version: For a rich and creamy chicken noodle soup, stir in a dollop of heavy cream toward the end of cooking.
-
Vegetarian Delight: Substitute chicken with hearty vegetables like mushrooms or chickpeas, and use vegetable broth for a satisfying, meat-free version.
-
Pasta Upgrade: Switch out egg noodles for gnocchi for a special twist that adds a fluffy texture to the soup.
Chef’s Notes
Chicken noodle soup is a timeless recipe that has evolved along with my cooking journey. I fondly recall the first time I attempted to make this dish all on my own; let’s just say it was an adventure filled with mishaps and some overcooked noodles! However, after many batches and tweaks, I’ve found a rhythm that works and a recipe that feels just right. The beauty of this soup is how customizable it is; every bowl can tell a different story!
FAQs and Troubleshooting
-
Why is my soup watery?
If your soup ends up too watery, it might be because you added too much broth or not enough noodles. To thicken it, let it simmer uncovered for a longer time to allow some liquid to evaporate or add a cornstarch slurry as a thickener. -
How can I store leftovers?
Store your chicken noodle soup in an airtight container in the fridge for up to 4 days. To freeze, portion out the soup into freezer-safe containers, leaving space for expansion. -
What if my noodles are mushy?
Mushy noodles usually happen if they are cooked too long. Next time, add them towards the final cooking stages or cook them separately and mix them in just before serving. -
Can I make it in a slow cooker?
Absolutely! Simply combine all the ingredients except the noodles in your slow cooker and cook on low for 6-8 hours. Add the noodles in the last 30 minutes of cooking.
Nutritional Info
(Optional, but helpful—calculating details to provide based on serving sizes, ingredients used, and cooking method can complement your readers’ dining choices.)
So there you have it—my take on the classic chicken noodle soup, shared with a sprinkle of love and a dash of nostalgia. I hope this recipe helps you create cozy moments and delicious memories around your own table. Don your apron, bring some friends over, and let’s make those beautiful moments last! Happy cooking!
PrintClassic Chicken Noodle Soup

A comforting chicken noodle soup recipe that warms the heart and brings family together.
- Prep Time: 15 minutes
- Cook Time: 40 minutes
- Total Time: 55 minutes
- Yield: 4 servings 1x
- Category: Main Course
- Method: Stovetop
- Cuisine: American
- Diet: Gluten-Free Option
Ingredients
- 4 bone-in, skin-on chicken thighs
- 8 cups chicken broth
- 2 cups egg noodles
- 2 carrots, diced
- 2 celery stalks, diced
- 1 garlic clove, minced
- 1 tablespoon olive oil
- Salt and pepper, to taste
Instructions
- Prep your chicken: Rinse chicken pieces under cold water, pat dry, and season with salt and pepper.
- Sauté the aromatics: In a pot, heat olive oil and cook carrots and celery for 5 minutes, adding garlic in the last minute.
- Add the broth: Pour in chicken broth, add chicken, bring to a boil, then simmer for 30-40 minutes until chicken is tender.
- Shred the chicken: Remove chicken from pot, let cool, shred, and return to pot.
- Noodle time: Add egg noodles to the pot and cook for 8-10 minutes until tender.
- Final touches: Taste and adjust seasoning with salt, pepper, and herbs. Add lemon juice if desired.
- Serve immediately: Ladle soup into bowls and garnish with parsley.
Notes
Serve with crusty bread or a light salad for an elevated experience. Customize with herbs or spices for different flavor profiles.
Nutrition
- Serving Size: 1 serving
- Calories: 350
- Sugar: 5g
- Sodium: 400mg
- Fat: 12g
- Saturated Fat: 3g
- Unsaturated Fat: 7g
- Trans Fat: 0g
- Carbohydrates: 45g
- Fiber: 3g
- Protein: 22g
- Cholesterol: 80mg
Keywords: chicken noodle soup, comfort food, classic recipe, soup recipes, warming soup

One-Pot French Onion Soup Recipe: Weeknight Comfort
The Ultimate French Onion Soup: A Bowl of Comfort and Flavor
Ah, French onion soup! The mere mention of it conjures images of cozy Parisian bistros, crisp air, and the rich smell of caramelized onions wafting through the kitchen. This soul-warming dish is not just a recipe; it’s a tradition, an experience, and a journey back to simpler times around the dinner table. At IvoryApron.com, we believe cooking is all about bringing people together, and this classic offering is no exception.
So, gather your loved ones, pour a glass of your favorite wine, and let’s recreate the magic of French onion soup right in your own kitchen. Whether you’re a seasoned chef or just learning the ropes, I promise—I’ll guide you every step of the way. Are you ready to lift the lid on this heartwarming dish?
A Personal Story: Memories of My First Bowl
Let me take you back to a chilly winter evening when I first tasted French onion soup. I was just a young home cook, living in a bustling city filled with endless culinary adventures. My boyfriend and I had found this quaint little bistro tucked away on a cobblestone street. The ambiance was perfect—dimly lit with flickering candles, laughter, and the sound of clinking glasses filled the air.
As soon as I took that first spoonful, my heart melted. The silky, slow-cooked onions paired with the deep, savory broth transported me to France in a heartbeat. It was like a warm hug in a bowl! At that moment, I knew I had to learn how to make this dish for myself. Little did I know how much joy it would bring to my table—perfect for gatherings, date nights, or even just a peaceful evening alone. Let’s dive into this recipe and create our own cozy memories!
Ingredients: A Symphony of Flavor
Here’s what you’ll need to make a rich, comforting French onion soup:
-
Onions: About 4 large yellow onions will do the trick! They’re sweeter when caramelized and provide that rich base flavor we love. If you want a milder taste, try adding a couple of shallots.
-
Beef Broth: 6 cups of good-quality beef broth. It creates a deep, savory flavor. If you’re vegetarian, opt for vegetable broth—it works surprisingly well while still maintaining the essence of the dish!
-
Baguette: You’ll need a crusty French baguette. Its texture adds that beautiful crunch when toasted, making the perfect topper for your soup. You can substitute with any good artisan bread you have on hand.
-
Gruyère Cheese: About 1.5 cups of grated Gruyère. This cheese melts into gooey perfection and adds a nutty flavor that’s quintessential for French onion soup. For a twist, feel free to experiment with Emmental or even a sharp cheddar.
-
Butter: 4 tablespoons of unsalted butter. This adds richness and helps caramelize the onions beautifully. If you’re watching your butter intake, canola oil is a decent alternative, though it won’t provide the same depth of flavor.
-
Olive Oil: A splash (around 1 tablespoon) will help in sautéing the onions, ensuring they don’t stick. You can use any neutral oil if olive oil isn’t your thing.
-
Salt and Pepper: Generously season for a balanced flavor. Freshly cracked pepper is always a great choice here!
Step-by-Step Instructions: Let’s Get Cooking!
Now that we have our ingredients, it’s time to roll up our sleeves and create this delicious dish! Ready? Let’s go!
Step 1: Slice Those Onions
Start by peeling and slicing your onions. Aim for thin, even slices—about ¼ inch thick is perfect. This helps them cook evenly and caramelize beautifully. If you’re feeling dramatic, slice them while listening to some French café music—it adds to the experience!
Step 2: Caramelize
In a large, heavy-bottomed pot (like a Dutch oven), melt the butter and olive oil over medium heat. Toss in those onions and a pinch of salt; it’ll help draw out the moisture. Stir occasionally, and let the onions slowly caramelize for about 30 to 40 minutes until they turn a lovely, golden brown. Patience is key! If they start sticking to the bottom, feel free to deglaze with a splash of broth.
Step 3: Add Flavor
Once your onions are beautifully caramelized, pour in your beef broth! Stir it all together and bring it to a gentle simmer. Cook for an additional 10-15 minutes to let the flavors meld. You can also adjust the seasoning here—add salt and pepper to taste.
Step 4: Prepare the Baguette
While the soup simmers, preheat your oven to 400°F (200°C). Take your baguette and slice it into 1-inch thick pieces. Arrange them on a baking sheet and bake for about 10 minutes or until they’re nice and crispy. This will create that perfect base for your cheese and soup!
Step 5: Cheese Time!
Remove the soup from the heat and prepare your bowls. Ladle the hot soup into oven-safe bowls, placing 1 or 2 slices of your toasted baguette on top. Generously sprinkle your grated Gruyère cheese over the bread. Now, for the next step—broil! Place the bowls under the broiler for 3-5 minutes, or until the cheese is bubbly and golden brown. Keep an eye on it—it can go from perfect to burnt in seconds!
Step 6: Serve and Savor
Carefully remove them and let them sit for a minute (they’ll be hot!). Then, sprinkle a bit of fresh thyme if you fancy, and dive into that warm, cheesy goodness!
Serving Suggestions: Plating with Love
To serve up your French onion soup in style, consider presenting it in rustic individual ramekins or bowls. Garnish with a sprig of fresh thyme to elevate the visual appeal, placing a small salad or some fresh baguette pieces on the side for that added touch. You can also pair it with a crisp white wine or a light beer to complement the rich flavors!
Recipe Variations: Flavor Twists to Try
-
Herbal Infusion: Add a few sprigs of fresh thyme or rosemary during the simmering process for a fragrant twist.
-
A Splash of Wine: Try deglazing the pot with a splash of white wine after caramelizing the onions for a deeper flavor profile.
-
Mushroom Magic: Incorporate some sautéed mushrooms for an earthy addition that fits beautifully with the onions.
-
Veggie Delight: Use vegetable broth and swap out the cheese for a vegan alternative. You can also add more veggies like carrots or diced tomatoes for added nutrition.
-
Spicy Kick: Toss in a pinch of red pepper flakes to introduce a little heat!
Chef’s Notes: A Recipe with a History
French onion soup has a long-standing history, dating back to ancient Roman times. Originally eaten by the poor, it has evolved into a beloved classic. Over the years, I’ve played with the recipe, adding new ingredients that reflect seasons or leftovers in my fridge. I once made a delicious version with caramelized apples, which added a sweet contrast to the savory notes. Always remember, creativity in the kitchen leads to delightful surprises!
FAQs and Troubleshooting
1. My onions are burning instead of caramelizing. What did I do wrong?
Ensure you’re cooking them over medium heat and stir frequently. If they’re cooking too quickly, reduce the heat, and don’t be afraid to add a splash of broth to deglaze the pot.
2. Can I make this soup in advance?
Absolutely! French onion soup can be made ahead and stored in the fridge for about 3 days. Reheat gently on the stove before serving, and then add the bread and cheese just before broiling.
3. What if my cheese doesn’t melt properly?
Ensure that you use a good-quality cheese that’s fresh. Gruyère is known for its melting characteristics, but you want to ensure it’s grated finely for the best melt. If it’s not bubbling up, try moving your bowls a bit closer to the broiler.
4. How do I store leftovers?
Let the soup cool completely before storing it in an airtight container in the refrigerator. It’s best to keep the bread separate until you’re ready to reheat to maintain its crispness.
Nutritional Info (Optional)
While I won’t get into specific numbers here, it’s safe to say that French onion soup can be quite hearty! Packed with caramelized onions and a good source of iron from the beef broth, it’s a comforting meal that satisfies the soul.
There you have it—your ultimate guide to making a delightful French onion soup that brings warmth and elegance to any dining experience. As we tie on our aprons, remember, cooking is not just about following a recipe; it’s about creating memories, sharing love, and savoring every spoonful. Let’s set the table and enjoy this timeless classic together! ✨
PrintThe Ultimate French Onion Soup

A rich, comforting dish that combines caramelized onions, savory broth, and melted cheese, perfect for gatherings and cozy nights.
- Prep Time: 15 minutes
- Cook Time: 50 minutes
- Total Time: 1 hour 5 minutes
- Yield: 4 servings 1x
- Category: Soup
- Method: Baking
- Cuisine: French
- Diet: Vegetarian (with modifications)
Ingredients
- 4 large yellow onions
- 6 cups beef broth (or vegetable broth for a vegetarian option)
- 1 crusty French baguette
- 1.5 cups grated Gruyère cheese
- 4 tablespoons unsalted butter
- 1 tablespoon olive oil
- Salt and pepper to taste
Instructions
- Slice the onions thinly, about ¼ inch thick.
- Caramelize the onions in a large pot with butter and olive oil over medium heat for 30-40 minutes until golden brown.
- Add beef broth to the caramelized onions and let simmer for an additional 10-15 minutes.
- Preheat the oven to 400°F (200°C) and slice the baguette into 1-inch pieces, baking until crispy.
- Prepare bowls by ladling soup and adding toasted baguette, topped with Gruyère cheese.
- Broil until the cheese is bubbly and golden brown, about 3-5 minutes.
- Serve with a sprinkle of fresh thyme and enjoy!
Notes
For a different flavor, consider adding fresh herbs or a splash of white wine during the cooking process. This recipe can be made in advance and heated before serving.
Nutrition
- Serving Size: 1 bowl
- Calories: 350
- Sugar: 8g
- Sodium: 900mg
- Fat: 22g
- Saturated Fat: 10g
- Unsaturated Fat: 8g
- Trans Fat: 0g
- Carbohydrates: 30g
- Fiber: 3g
- Protein: 10g
- Cholesterol: 40mg
Keywords: French onion soup, comfort food, soup recipe, classic French recipes, cozy meals

One-Pot Creamy Loaded Baked Potato Soup in 30 Minutes
Loaded Baked Potato Soup: Comfort in Every Spoonful
Hello, food lovers! Today, I’m thrilled to take you on a culinary adventure that warms not just the tummy but the heart too. We’re diving into the creamy, dreamy world of Loaded Baked Potato Soup — a dish that embodies cozy evenings, family gatherings, and all those lovely memories of snuggling up in a blanket with something delicious in hand.
Imagine it: a bowl of velvety soup infused with the flavors of crispy bacon, cheddar cheese, and a handful of green onions scattered on top. Sounds delightful, right? This recipe is perfect for welcoming in autumn chill or just enjoying a comforting dinner any night of the week. As you gather around the table with family or friends, this soup is sure to be the star of the show. So grab your potatoes, and let’s get cooking!
A Soup Memory to Cherish
Picture this: a rainy Saturday afternoon at my grandma’s house. The sky drizzled grey while the aroma of baked potatoes wafted through the air, expertly blended with the crisp scent of bacon sizzling on the stove. It was one of those magical moments that felt timeless, where the world outside disappeared, and all that mattered was the laughter and love shared around the kitchen.
I remember peeking over the counter, trying to steal glimpses of grandma’s hands working through her secret recipe. She always had a knack for making the simplest ingredients sing. Loaded Baked Potato Soup was one of her go-to recipes; it was thick, creamy, and brimming with flavor—comfort in a bowl.
I couldn’t keep my spoon down as she ladled the soup into those wonderfully mismatched bowls. It was family-style dining at its finest, where every bite felt like a warm hug. Now, every time I make this soup, it takes me back to that cozy kitchen, reminding me that good food truly builds memories.
Ingredients
You’ll need the following ingredients to whip up this hearty Loaded Baked Potato Soup:
-
Potatoes (Russet or Yukon Gold): These starchy superheroes are the base of our soup. They add creaminess and a delightful texture. I recommend Russet potatoes for their high starch content, but Yukon Gold will bring a buttery flavor too.
-
Bacon: Crispy and savory, bacon adds a rich umami flavor that complements the potatoes perfectly. Can’t have bacon? Swap it with turkey bacon or crumbled tempeh for a vegetarian twist!
-
Cheddar Cheese: A must-have for that gooey goodness! I love sharp cheddar for its bold flavor, but feel free to experiment with gouda or even pepper jack for a spicy kick.
-
Sour Cream: This is your soup’s secret weapon! It contributes a tangy creaminess that balances the richness. For a lighter option, you might consider Greek yogurt.
-
Green Onions: Fresh and crisp, green onions not only add a pop of color but also a mild onion flavor that brightens the soup. If you’re out of green onions, chives or shallots can work well too.
These ingredients come together to create not just a recipe but a cozy experience that invites everyone to gather around the table!
Step-by-Step Instructions
Now that we have our ingredients ready, let’s get down to the nitty-gritty of making our Loaded Baked Potato Soup! Follow these steps closely for that perfect bowl of comfort.
-
Prepare Your Ingredients: Start by washing and peeling your potatoes. Chop them into small cubes (about 1-inch pieces) to ensure they cook evenly. You can also chop your bacon, green onions, and cheese before you begin cooking so that everything flows seamlessly.
-
Cook the Bacon: In a large stockpot over medium heat, add the chopped bacon. Cook until crispy and golden, which usually takes about 5-7 minutes. Don’t rush this step—the bacon needs time to render its flavorful fat! Once done, use a slotted spoon to transfer the bacon to a plate lined with paper towels, leaving the drippings in the pot.
-
Sauté the Onions: In the leftover bacon fat, toss in the chopped green onions (reserve some for garnish!). Sauté them for about 2-3 minutes until they become soft and fragrant. This will create a beautiful base flavor for your soup!
-
Add Potatoes and Stock: Now it’s time to add those cubed potatoes into the pot. Stir them around for a minute or two to absorb the flavors. Next, pour in 4 cups of chicken or vegetable stock, covering the potatoes completely. Bring this mixture to a gentle boil.
-
Simmer Away: Reduce the heat to low and cover the pot, allowing it to simmer for around 20 minutes. You want the potatoes to become tender enough to mash easily—a perfect time to gather your family and share some kitchen stories!
-
Blend it Up: Once the potatoes are nice and tender, use an immersion blender to puree the soup until it reaches your desired consistency. If you don’t have an immersion blender, carefully transfer the soup in batches to a regular blender. Just be careful with that hot liquid! I like to leave some chunks for a delightful texture.
-
Stir in Cheddar and Sour Cream: After blending, return the pot to low heat and stir in the shredded cheddar cheese and sour cream. This is where the magic happens; as the cheese melts, your soup becomes indulgently creamy. Always taste and adjust the seasoning—don’t forget a pinch of salt and pepper!
-
Finish with Bacon: Toss back in most of the cooked bacon, reserving some for topping. Let the soup heat through for another 2-3 minutes. Your kitchen should smell heavenly by now!
And there you have it, my friends—a deliciously comforting bowl of Loaded Baked Potato Soup!
Serving Suggestions
Serving this beauty is simple. Ladle the soup into warm bowls and top with a sprinkle of crispy bacon, a dollop of sour cream, and a generous handful of green onions. For an extra comforting touch, you can serve it alongside a crusty loaf of bread or sprinkle some extra shredded cheese on top. Your guests will be digging into this delicious creation in no time!
Recipe Variations
Don’t be afraid to get creative! Here are a few fun twists and variations to consider:
-
Spicy Loaded Baked Potato Soup: Toss in some jalapeños or a dash of hot sauce for some heat.
-
Cheesy Broccoli and Potato Soup: Add in some steamed broccoli florets for a veggie kick—delicious and nutritious!
-
Loaded Potato Soup with Truffle Oil: Drizzle some truffle oil on top for an elevated twist that’s sure to impress at your next dinner party.
-
Vegan Loaded Potato Soup: Substitute the bacon for crispy chickpeas, use almond milk instead of cream, and swap the cheese for a vegan cheddar alternative.
Chef’s Notes
This recipe has evolved over the years, thanks to trial and error (and a few happy accidents!). I recall one time forgetting the bacon and subbing in some finely chopped mushrooms instead. It was a delightful twist that worked well—so never hesitate to play around with the ingredients!
Also, don’t stress about perfection in the kitchen. Remember my grandma’s saying, "If you can smile while cooking, you can never make a mistake!" Trust me; the joy of cooking is all about enjoying the process and the memories made along the way.
FAQs and Troubleshooting
1. My soup is too thick! What should I do?
Don’t worry! If your soup is thicker than you’d like, simply stir in some additional stock or water until you reach your desired consistency.
2. How can I make it gluten-free?
This recipe is naturally gluten-free, as long as you ensure your stock is gluten-free! Always read labels to be safe!
3. My soup is too salty. What can I do?
Try adding a tablespoon of sugar or a splash of vinegar to balance out the saltiness. Alternatively, a chopped potato can absorb excess salt—just remember to remove it after cooking!
4. Can I make this soup ahead of time?
Absolutely! The flavors deepen when it sits, making it even more delicious. Store it in the fridge for up to 3 days; just reheat gently before serving.
Nutritional Info
This Loaded Baked Potato Soup is not just delicious but can also be made healthier with substitutions. One serving typically contains around 400 calories, but this can vary based on the ingredients used. Paired with a side salad, it creates a balanced meal packed with flavor!
So there you have it, my friends—a comforting bowl of Loaded Baked Potato Soup perfect for any occasion! Gather your ingredients, pour yourself a glass of something sparkly, and let’s create some timeless moments together. Happy cooking!
PrintLoaded Baked Potato Soup

A creamy and dreamy Loaded Baked Potato Soup, infused with flavors of crispy bacon, cheddar cheese, and topped with green onions—a perfect cozy dish for chilly evenings.
- Prep Time: 15 minutes
- Cook Time: 30 minutes
- Total Time: 45 minutes
- Yield: 4 servings 1x
- Category: Soup
- Method: Stovetop
- Cuisine: American
- Diet: Non-Vegetarian
Ingredients
- 4 medium Potatoes (Russet or Yukon Gold), peeled and cubed
- 6 slices Bacon, chopped
- 1 cup Cheddar Cheese, shredded
- 1 cup Sour Cream
- 1/2 cup Green Onions, chopped
- 4 cups Chicken or Vegetable Stock
- Salt and Pepper to taste
Instructions
- Prepare Your Ingredients: Wash and peel the potatoes, and chop them into small cubes.
- Cook the Bacon: In a large stockpot over medium heat, add the chopped bacon and cook until crispy.
- Sauté the Onions: In the leftover bacon fat, add chopped green onions and sauté for 2-3 minutes.
- Add Potatoes and Stock: Add cubed potatoes and stock to the pot, covering the potatoes completely.
- Simmer Away: Reduce heat to low, cover, and simmer for around 20 minutes until potatoes are tender.
- Blend it Up: Use an immersion blender to puree the soup until reaching desired consistency.
- Stir in Cheddar and Sour Cream: Return pot to low heat, and stir in shredded cheddar cheese and sour cream.
- Finish with Bacon: Add most of the cooked bacon back into the pot and heat through for another 2-3 minutes.
Notes
Feel free to adjust seasoning; the cheese and bacon add plenty of flavor.
Nutrition
- Serving Size: 1 bowl
- Calories: 400
- Sugar: 4g
- Sodium: 800mg
- Fat: 24g
- Saturated Fat: 11g
- Unsaturated Fat: 7g
- Trans Fat: 0g
- Carbohydrates: 45g
- Fiber: 5g
- Protein: 15g
- Cholesterol: 40mg
Keywords: soup, comfort food, baked potato, creamy soup

Minute One-Pot Butternut Squash Soup: Weeknight Comfort
The Comfort of Butternut Squash Soup: A Culinary Blanket
Hello, fellow foodies! Today, I’m thrilled to share with you one of my all-time favorite recipes—Butternut Squash Soup. This dish is like a cozy blanket that wraps you up in warmth and comfort, perfect for chilly days or times when you just need a soothing bowl of goodness. As a recipe creator at Ivory Apron, I believe that cooking should be both accessible and elegant—a philosophy that truly shines through in this beautiful and heartwarming soup. So, grab your apron, and let’s dive into this delicious comfort food together!
My Personal Story with Butternut Squash Soup
Growing up, my kitchen was always filled with the most delightful aromas, thanks to my grandmother. She had this magic for turning humble ingredients into culinary masterpieces that felt like love served on a plate. One of my favorite memories revolves around her legendary butternut squash soup.
I remember rainy afternoons spent in her warm kitchen, the sound of bubbling broth harmonizing with the pitter-patter of raindrops against the windowpanes. She’d let me chop the onion (under her watchful eye, of course) and sauté it while she worked on peeling the squash. I can still picture her laughter as we made a mess of the kitchen, flour dusting our noses and threads of orange clinging to our fingers.
Her soup was velvety, aromatic, and had a depth of flavor that felt both sophisticated and familiar. To this day, every time I prepare butternut squash soup, I’m transported back to that cozy kitchen filled with love and laughter, reminding me of the beauty of gathering around the table and sharing a meal.
Ingredients
Here’s what you’ll need to create your own butternut squash soup:
-
Butternut Squash
The star of the show! Its natural sweetness and creamy texture are perfect for soups. You can also use pumpkin as a substitute if that’s what you have on hand. -
Onion
This adds depth and flavor to the base. If you’re not a fan of onions, shallots can be a wonderful, milder alternative. -
Broth (Vegetable or Chicken)
This serves as the soup’s foundation. Homemade broth adds a personal touch, but store-bought is just fine. Just be mindful of the salt content if using store-bought. -
Cream
For that luxurious finish! You can substitute with coconut milk for a dairy-free option that still offers that rich texture. -
Sage
This herb adds an earthy flavor that complements the butternut squash beautifully. Fresh sage is great, but dried sage works too—just use half the amount.
Step-by-Step Instructions
Let’s get cooking! Follow these easy steps to whip up your own butternut squash soup:
-
Prep the Butternut Squash
Start by peeling and dicing your butternut squash. A tip from the chef: Use a sharp knife and cut off the ends first for stability. If it’s slippery, you can microwave it for a minute or two to make it easier to handle. -
Sauté the Onions
In a large pot, heat a splash of olive oil over medium heat. Add the diced onion and cook until it’s translucent, about 5-7 minutes. Here’s my little hack: Don’t rush this step! Sautéing the onions evenly will create a sweet base that takes your soup from good to great. -
Add the Butternut Squash
Toss the diced butternut squash into the pot with the onions. Stir to coat the pieces in the onion mixture. Let them cook for another 5 minutes. Don’t forget to sprinkle a pinch of salt—it helps to draw out the moisture and flavors. -
Pour in the Broth
Add enough broth to cover the squash. Bring the mix to a gentle boil, then reduce the heat to a simmer. Let it bubble away for about 20-25 minutes, or until the squash is fork-tender. You can peek in and stir occasionally—this is the time to enjoy that incredible aroma filling your kitchen! -
Blend the Soup
Once cooked, use an immersion blender to blend the soup until it’s silky smooth. If you don’t have an immersion blender, carefully transfer the soup in batches to a blender (be cautious with the hot liquid!) and blend until creamy. Here’s a pro tip: blending while it’s still hot will give you a smooth consistency—just make sure to vent your blender lid to avoid a soup explosion! -
Finish with Cream and Sage
Return the soup to low heat and stir in the cream (or coconut milk) until well combined. Toss in the chopped fresh sage, letting it infuse the soup with its aromatic flavor. Taste and adjust seasoning with salt and pepper as desired.
Serving Suggestions
To plate your butternut squash soup, ladle the warm soup into beautiful bowls. A dollop of additional cream on top creates an inviting swirl, and a few sage leaves or a sprinkle of fresh herbs adds that touch of elegance. Serve it with crusty bread or garlic crostini for dipping, and you’ve got yourself a meal that’s both comforting and delightful!
Recipe Variations
Here are a few creative twists you can try with your butternut squash soup:
- Spiced Up: Add a pinch of nutmeg or cayenne pepper to give it a warm kick.
- Ginger Zing: Incorporate fresh ginger for a little zing—perfect for those chilly evenings!
- Nutty Delight: Stir in some toasted pumpkin seeds for crunch and a touch of nuttiness.
- Creamy Coconut: For a tropical twist, use coconut milk instead of cream and add a squeeze of lime.
- Herb Infusion: Experiment with other herbs like thyme or rosemary for different flavor profiles.
Chef’s Notes
As much as I adore this recipe, it has evolved over time through trial and error! I remember one time trying to rush the onions, and let’s just say—burnt onions do not make for good soup! Since then, I’ve learned the importance of patience in cooking, especially with the foundational steps. Cooking is all about confidence and making it your own—don’t hesitate to add personal touches that reflect your style!
FAQs and Troubleshooting
1. Why did my soup turn out watery?
Make sure you’re using the right amount of broth. If your squash wasn’t packed with sweetness, it might need more seasoning. Always taste and adjust!
2. Can I freeze butternut squash soup?
Absolutely! Just let it cool completely before transferring it to freezer-safe containers. It freezes well for up to three months—perfect for grabbing a quick meal on busy days!
3. My soup is too thick. What can I do?
Add extra broth or water to achieve your desired consistency. Remember to heat it up gently after thinning it out.
4. Can I make this vegan?
Yes! Simply skip the cream and use coconut milk or a plant-based cream. Be sure to verify that your broth is vegan too.
Nutritional Info (Optional)
This creamy butternut squash soup provides a comforting dose of vitamins A and C and plenty of fiber, making it a nutritious addition to your meals. Plus, with the option to use coconut milk, it can be a richer vegan choice that’s still absolutely satisfying!
So there you have it! A delicious, comforting bowl of butternut squash soup that’s sure to warm your heart and home. Don’t forget to share your culinary creations with me on social media or in the comments—I’d love to hear about your kitchen adventures! Now go ahead, tie on that apron, and let’s make mealtime magical. Happy cooking!
PrintButternut Squash Soup

A comforting and velvety butternut squash soup, perfect for chilly days, that brings warmth and nostalgia with every spoonful.
- Prep Time: 15 minutes
- Cook Time: 30 minutes
- Total Time: 45 minutes
- Yield: 4 servings 1x
- Category: Soup
- Method: Blending
- Cuisine: American
- Diet: Vegetarian
Ingredients
- 1 Butternut Squash, peeled and diced
- 1 Onion, diced
- 4 cups Broth (Vegetable or Chicken)
- 1 cup Cream (or Coconut Milk for a dairy-free option)
- 1 tbsp Sage, chopped
Instructions
- Prep the butternut squash by peeling and dicing it. Cut off the ends first for stability.
- Sauté the onions in a large pot with olive oil over medium heat until translucent, about 5-7 minutes.
- Add the diced butternut squash into the pot with the onions and stir to coat.
- Pour in enough broth to cover the squash, bring to a gentle boil, then reduce to a simmer for 20-25 minutes.
- Blend the soup until silky smooth using an immersion blender or by transferring to a blender in batches.
- Finish the soup by stirring in cream and fresh sage, and adjusting seasoning with salt and pepper.
Notes
For added flair, serve with a dollop of cream, fresh herbs, and crusty bread. Feel free to experiment with spices for customized flavor.
Nutrition
- Serving Size: 1 serving
- Calories: 250
- Sugar: 6g
- Sodium: 500mg
- Fat: 14g
- Saturated Fat: 7g
- Unsaturated Fat: 5g
- Trans Fat: 0g
- Carbohydrates: 30g
- Fiber: 4g
- Protein: 5g
- Cholesterol: 30mg
Keywords: butternut squash, soup, comfort food, vegetarian, cozy

Cheeseburger Soup
Creamy, Dreamy Cheeseburger Soup: A Cozy Bowl of Joy
Welcome back, kitchen companions! Today, I’m excited to share a recipe that takes comfort food to a whole new level—Cheeseburger Soup. Picture this: it’s a chilly evening, the air is crisp with the promise of autumn, and you want nothing more than to wrap your hands around a warm bowl of goodness that tastes just like your favorite cheeseburger. This soup is rich, creamy, and everything we crave when the temperatures drop.
I’ve always believed that food is a form of storytelling. It brings back memories, sparks laughter, and ignites connection—in short, it brings people together. So grab your apron, and let’s dive into this cheeseburger soup adventure that feels like a warm hug in a bowl!
My Cheeseburger Soup Journey
Let me take you back to a delightful autumn afternoon several years ago. I was hosting a casual get-together for friends, and I had the classic hot dogs and hamburgers on my mind. But then, a whimsical idea struck me: why not turn those iconic flavors into a cozy soup? This was a pivotal moment in my cooking journey—the moment I learned that with a little creativity, even the simplest of dishes could be transformed.
As I simmered the beef, loaded it with veggies, and added creamy cheese, the kitchen filled with familiar scents. My friends rolled in, and the laughter and stories started flowing as the soup bubbled on the stove. That first spoonful was an explosion of flavor, and we all were hooked! Every one of us knew we had discovered a new favorite, one that was bound to be brought back to the table time and time again.
Let me guide you through the steps of creating this magical cheeseburger soup so you, too, can create unforgettable memories!
Ingredients
Here’s what you’ll need for this cozy dish:
- Ground Beef: The backbone of our soup, providing that classic cheeseburger flavor. You can substitute with ground turkey or chicken for a leaner option.
- Potatoes: I recommend Yukon Gold or Russet potatoes for their starchy goodness. If you’re looking for a low-carb choice, cauliflower can work in a pinch!
- Carrots: Add a touch of sweetness and color. If you prefer, parsnips or sweet potatoes can give a unique twist.
- Cheddar Cheese: Sharp cheddar offers a bold flavor, but feel free to use any meltable cheese you love—Monterey Jack or Gouda can take this up a notch!
- Milk: This makes the soup creamy and luscious. Substitute with half-and-half for a richer soup, or use plant-based milk for a dairy-free option.
These ingredients come together to create the perfect harmony of flavors, while also offering a chance to customize based on your pantry and dietary preferences.
Step-by-Step Instructions
Now that we’ve gathered our ingredients, let’s get cozy in the kitchen!
Step 1: Brown the Beef
In a large pot or Dutch oven, heat a drizzle of oil over medium heat. Add in 1 pound of ground beef, breaking it up with a wooden spoon. Let it sizzle away until it’s browned and cooked through, about 5-7 minutes. This is where the magic begins! Drain any excess grease—too much fat can make the soup heavy.
Step 2: Add the Vegetables
To the pot, toss in 2 cups of diced potatoes and 1 cup of chopped carrots. Throw in a pinch of salt and pepper to season. Let the veggies sauté for about 3-4 minutes, stirring occasionally. This step helps build layers of flavor and enhances the sweetness of the carrots.
Step 3: Pour in the Liquid
Now, pour in 4 cups of beef broth, bringing everything to a gentle boil. The broth is your canvas, so feel free to use homemade stock if you have it—that’s the secret to a deeply flavored soup! Once it reaches a boil, reduce the heat to a simmer and let it bubble away for about 15-20 minutes, or until the potatoes are tender.
Step 4: Creamy Dreaminess
Once the potatoes are soft, stir in 1 cup of milk and 2 cups of shredded cheddar cheese. As you add the cheese, stir constantly until it melts into that beautiful creamy blend. This is also a great time to taste the soup and adjust the seasoning—don’t shy away from adding a touch more salt or pepper if it needs a little oomph!
Step 5: Final Touches
Keep simmering on low for another 5 minutes, allowing all the flavors to meld beautifully. If the soup seems too thick, simply add a splash of more broth or milk until it reaches your desired consistency. And just like that, you’ve created a pot of deliciousness that your loved ones will rave about!
Serving Suggestions
When it comes to serving your cheeseburger soup, let’s make it extra inviting! Grab some bowls and scoop generous portions. A sprinkle of crispy bacon bits or a dollop of sour cream on top adds an extra layer of indulgence. I also love garnishing with freshly chopped chives or parsley for that pop of color and flavor. Pair it with crusty bread or soft dinner rolls, and you’ve got a meal that sings of warmth and friendship.
Recipe Variations
Now, for those of you who love to put your own spin on things, here are a few creative ideas:
- Spicy Kick: Add some diced jalapeños or a splash of hot sauce to spice things up!
- Veggie-Loaded: Toss in some chopped bell peppers or zucchini for an extra veggie boost.
- Creamy Goodness: Swap the cheddar for cream cheese for a different creamy experience.
- Ground Alternatives: Use ground lamb or sausage as alternatives to beef for a unique flavor profile.
Chef’s Notes
Throughout the years, my cheeseburger soup has evolved. Each time I make it, I think of the laughter, love, and memories it brings. I’ve gone from making it just for friends to creating a big batch for family gatherings. It truly captures the spirit of community, of gathering around the table with shared stories and smiles—a staple recipe in my kitchen. So, don’t be surprised if at some point, you also find your own version of this soup evolving with your family’s tastes!
FAQs and Troubleshooting
1. My soup is too thick! What should I do?
Add a splash of broth or milk and stir until you reach your desired consistency. Gradually add to avoid making it too thin.
2. Can I make this soup in advance?
Absolutely! Just make sure to store it in an airtight container in the fridge. Reheat on the stove, adding a splash of liquid if necessary. The flavors will deepen, making it even more delicious.
3. What can I do with leftover soup?
This soup freezes beautifully! Just let it cool completely, then transfer to freezer-safe containers. It can be kept in the freezer for up to 3 months. When you’re ready, thaw it overnight in the fridge and reheat on the stove.
4. The cheese is clumping! How do I avoid this?
To prevent clumping, make sure the soup is on low heat when adding the cheese. Gradually stir in the cheese and avoid boiling after it’s added.
With every spoonful of cheeseburger soup, I hope you feel the warmth and love that’s been poured into it. It’s about more than just cooking; it’s about connection, kindness, and creating something beautiful together. So, grab that apron, a cozy blanket, and let’s create lovely memories together. Cheers to good food and great company—bon appétit!
PrintCreamy, Dreamy Cheeseburger Soup

A rich and creamy cheeseburger soup that brings comfort and warmth on chilly evenings.
- Prep Time: 10 minutes
- Cook Time: 30 minutes
- Total Time: 40 minutes
- Yield: 4 servings 1x
- Category: Main Course
- Method: Stovetop
- Cuisine: American
- Diet: None
Ingredients
- 1 pound ground beef
- 2 cups diced potatoes (Yukon Gold or Russet)
- 1 cup chopped carrots
- 4 cups beef broth
- 1 cup milk
- 2 cups shredded cheddar cheese
- Oil for cooking
- Salt and pepper to taste
Instructions
- Brown the beef in a large pot over medium heat for 5-7 minutes. Drain excess grease.
- Add the vegetables (potatoes, carrots) and season with salt and pepper. Sauté for 3-4 minutes.
- Pour in the beef broth and bring to a boil. Reduce heat and simmer for 15-20 minutes until potatoes are tender.
- Stir in the milk and cheddar cheese until melted and combined.
- Simmer on low for 5 minutes, adjusting consistency with more broth or milk if needed.
Notes
Garnish with crispy bacon bits, sour cream, chives, or parsley for extra flavor.
Nutrition
- Serving Size: 1 bowl
- Calories: 400
- Sugar: 6g
- Sodium: 900mg
- Fat: 20g
- Saturated Fat: 10g
- Unsaturated Fat: 8g
- Trans Fat: 0g
- Carbohydrates: 30g
- Fiber: 3g
- Protein: 25g
- Cholesterol: 70mg
Keywords: cheeseburger soup, comfort food, cozy recipes, autumn recipes, creamy soup

One-Pot White Chicken Chili: Creamy Comfort in 30 Minutes
Cozy Up with Creamy White Chicken Chili
Hello, lovely foodies! Today, we’re diving into a comforting bowl of goodness that promises to warm your heart and fill your belly — White Chicken Chili! 🌶️✨ This dish is the perfect blend of savory flavors and creamy textures, making it a favorite in my household, especially during chilly evenings when you’re in need of a little extra coziness.
White Chicken Chili is not just another chili recipe; it’s a celebration of ingredients that come together beautifully, creating a dish that feels so much more than the sum of its parts. Think tender chicken, hearty white beans, and a hint of spice from green chiles, all topped off with a dollop of sour cream and a squeeze of lime. It’s perfect for weeknight dinners, a casual gathering, or even game day noshing!
So, grab your apron and let’s get cooking!
A Fond Memory with White Chicken Chili
Before I dive into the nitty-gritty of this recipe, let me take you back to a memory that always puts a smile on my face. It was a crisp fall evening a few years back when my best friend decided to host a potluck dinner. She was nervous about her choice of dishes, so I encouraged her to make her version of White Chicken Chili. I still remember the fragrances wafting through the house — a warm embrace of cumin and slow-cooked chicken.
As friends gathered around her table, our conversation flowed just as easily as the chili into our bowls. I watched as my friend beamed with pride, reveling in the compliments that followed every bite. It reminded me that comfort food isn’t just about feeding the stomach; it’s about nourishing the soul and connecting with the people we love. This memory is a testament to the power of good food and good company, and it inspires me each time I make this chili.
Ingredients You’ll Need
Here’s what you’ll need to whip up a pot of White Chicken Chili that will make your kitchen smell heavenly:
-
Chicken: Use boneless, skinless chicken breasts or thighs. Thighs will give a richer flavor but either works! You can also substitute with shredded rotisserie chicken for a quicker option.
-
White Beans: Canned white beans (like Great Northern or Cannellini) save time, but you can also use dried beans. Just remember to soak them overnight and adjust cooking times!
-
Green Chiles: Canned diced green chiles lend a mild heat and depth to the chili. If you crave more spice, try using jalapeños!
-
Onion: A yellow or white onion adds essential sweetness and flavor. You can swap in shallots for a more delicate taste.
-
Cumin: This spice is key! It gives chili its signature warmth and earthiness. If you don’t have cumin, ground coriander can serve as a substitute in a pinch.
-
Broth: Chicken broth gives the chili its depth. You can use homemade stock or low-sodium versions. Vegetable broth works as a veggie alternative.
Step-by-Step Instructions
Now that we have our ingredients ready, let’s jump right into cooking!
-
Sauté the Aromatics: In a large pot or Dutch oven, heat 1 tablespoon of olive oil over medium heat. Add chopped onion and sauté until soft and translucent, about 5 minutes. This step builds the foundation of flavors. Don’t rush it! The goal is to release those fragrant oils.
-
Cook the Chicken: Next, add the chicken to the pot along with a pinch of salt and pepper. Brown the chicken on all sides for about 4-5 minutes. This “sealing” allows the meat to retain moisture, resulting in tender pieces amid the chili!
-
Season It Up: Sprinkle in 2 teaspoons of cumin now. (Feel free to adjust based on your love for cumin like me!) The warmth of the cumin will start to release flavors that make your kitchen smell divine. Stir for about 30 seconds to toast the spices.
-
Add the Liquids: Pour in about 4 cups of chicken broth; this will be the base of your chili. Then, add the drained and rinsed white beans and the diced green chiles. Stir gently to combine. Bring the mixture to a gentle boil.
-
Simmer to Perfection: Reduce the heat to low, covering your pot and letting it simmer for about 20-25 minutes. This is crucial! Allowing it to simmer helps all the flavors meld beautifully while the chicken cooks through.
-
Shred the Chicken: Once the chicken is cooked and tender, remove it from the pot. Using two forks, shred it into bite-sized pieces. Return the shredded chicken to the pot and stir to combine.
-
Final Touches: Taste your chili! Adjust with salt, pepper, and a squeeze of lime juice for balance. If it feels too thick, add more broth until you reach your desired consistency.
Serving Suggestions
To serve this delightful chili, ladle it into rustic bowls and top it with a dollop of sour cream, a sprinkle of fresh cilantro, or even some avocado slices. A squeeze of fresh lime adds a zesty kick and brightens up the flavors. Serve it alongside warm cornbread or tortilla chips for that extra crunch!
Recipe Variations
Here are a few fun twists you can try to make this dish your own:
- Add Veggies: Toss in some diced bell peppers or corn for extra crunch and sweetness.
- Spicy Kick: For those who love heat, throw in some diced jalapeños or a splash of hot sauce while cooking.
- Cheesy Goodness: Stir in some cream cheese or shredded Monterey Jack cheese for a creamier consistency.
- Herb Infusion: Fresh cilantro, lime zest, or even a touch of oregano can elevate the flavor profile with a fresh herbaceous note.
Chef’s Notes
White Chicken Chili has become a staple in my home, and the recipe has evolved over time. The beautiful part about cooking is that no two versions of a dish are ever identical. I have played around with it, swapping out ingredients based on what I had in my pantry or inviting new flavors to play. One of my favorite experiments includes using smoked paprika for a unique twist!
A funny kitchen story? The first time I attempted this dish, I accidentally bought black beans instead of white beans. While it looked a bit more colorful, it taught me that some culinary “mistakes” turn out to be delightful surprises!
FAQs and Troubleshooting
1. How do I store leftovers?
- Store any leftovers in an airtight container in the fridge for up to 4 days. The flavors get even better overnight!
2. Can I freeze White Chicken Chili?
- Absolutely! Let it cool completely before transferring to freezer-safe containers. It can be frozen for up to 3 months. Just thaw overnight in the fridge and reheat gently on the stove.
3. My chili is too thick. What do I do?
- If your chili thickens too much while sitting, simply stir in a little more broth until it reaches your desired consistency.
4. Can I make this vegetarian?
- Yes, swap the chicken for chickpeas or extra beans, and use vegetable broth instead of chicken broth. You can also play with other plant-based proteins for a hearty meal without the meat!
Nutritional Info
White Chicken Chili is a nutritious meal packed with protein from the chicken and fiber from the beans, making it not just delicious but also filling! Each serving typically contains about 350 calories, depending on additional toppings.
Cooking isn’t just about what’s on the plate but the love and intention we pour into it. I hope this White Chicken Chili recipe encourages you to gather friends and family, sharing laughter and stories over a delicious meal. So, tie on your apron, take a cozy sip of something warm, and embrace the joy of cooking! Enjoy! 🍽️❤️
PrintCreamy White Chicken Chili

A comforting bowl of White Chicken Chili, rich with tender chicken, hearty white beans, and a hint of spice, perfect for chilly evenings.
- Prep Time: 15 minutes
- Cook Time: 30 minutes
- Total Time: 45 minutes
- Yield: 4 servings 1x
- Category: Main Course
- Method: Stovetop
- Cuisine: American
- Diet: Gluten-Free
Ingredients
- 1 lb boneless, skinless chicken breasts or thighs
- 2 cans (15 oz each) white beans (like Great Northern or Cannellini)
- 1 can (4 oz) diced green chiles
- 1 onion, chopped
- 2 teaspoons ground cumin
- 4 cups chicken broth (or vegetable broth)
- 1 tablespoon olive oil
- Salt and pepper to taste
- Sour cream, for topping
- Fresh cilantro, for garnish
- Lime wedges, for serving
Instructions
- Heat 1 tablespoon of olive oil in a large pot over medium heat. Add chopped onion and sauté until soft and translucent, about 5 minutes.
- Add the chicken to the pot along with a pinch of salt and pepper. Brown the chicken on all sides for about 4-5 minutes.
- Sprinkle in 2 teaspoons of cumin and stir for about 30 seconds.
- Pour in 4 cups of chicken broth, then add the drained white beans and diced green chiles. Stir gently to combine and bring to a gentle boil.
- Reduce the heat to low, cover the pot, and let it simmer for about 20-25 minutes.
- Remove the chicken and shred it into bite-sized pieces. Return to the pot and stir to combine.
- Taste your chili and adjust with salt, pepper, and lime juice as needed.
Notes
Feel free to add diced bell peppers, jalapeños, cream cheese, or smoked paprika for variations.
Nutrition
- Serving Size: 1 bowl
- Calories: 350
- Sugar: 5g
- Sodium: 400mg
- Fat: 12g
- Saturated Fat: 4g
- Unsaturated Fat: 6g
- Trans Fat: 0g
- Carbohydrates: 45g
- Fiber: 3g
- Protein: 15g
- Cholesterol: 30mg
Keywords: chicken chili, white chili, comfort food, cozy recipes, easy dinner
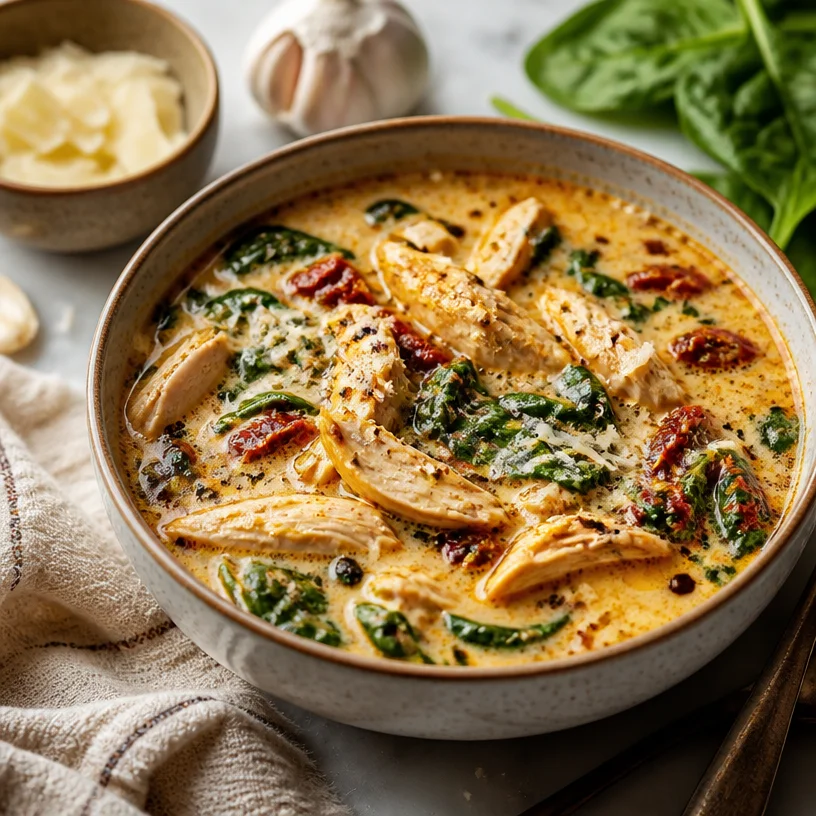
Weeknight One-Pot Marry-Me Chicken Soup in 25 Minutes
Marry Me Chicken Soup: A Love Story in a Bowl
Welcome to the kitchen, my friends! Today, I’m thrilled to share a dish that will not only warm your belly but also steal your heart. We’re diving into the delightful world of Marry Me Chicken Soup. As we step into cooking together, prepare to create a cozy comfort meal that’s perfect for chilly nights, special gatherings, or even just because! Gather your ingredients and let’s get started!
A Little Bit of Background
For me, cooking has always been about more than just following recipes; it’s a way of creating memories and building connections. One of my fondest memories involves a cozy evening spent with friends after a long work week. We were huddled in a small kitchen, laughter bouncing off the walls as I whisked together a lovely chicken soup. My friend Sarah, with her eagerness to help, unexpectedly added a twist: a generous sprinkle of sun-dried tomatoes, and the magic began.
When we sat down at the table and dug into what we lovingly called “Marry Me Chicken Soup,” I remembered how dedicated I was to crafting meals that not only tasted incredible but also brought people together. Each spoonful was rich and creamy, infused with the warmth of roasted garlic and the seasonal brightness of spinach. There’s something undeniably romantic about a meal that can wrap you in its embrace, and that night proved that good food could indeed open hearts.
Ingredients
Here’s what you’ll need to make this sumptuous Marry Me Chicken Soup:
-
Chicken Breast: This is your star protein! Lean yet flavorful, chicken breast offers a tender bite. Prefer dark meat? Feel free to substitute with chicken thighs for a deeper taste.
-
Sun-Dried Tomatoes: These little gems add a burst of umami and sweetness to your soup. If you don’t have them, you can use roasted red peppers; they’ll add a different but delightful flavor.
-
Spinach: Fresh or frozen, spinach brings a lovely green color and vital nutrients to our dish. If spinach isn’t your favorite, kale works too!
-
Garlic: Essential for depth and flavor, garlic adds aromatic warmth. Use fresh cloves for maximum impact, but minced garlic from a jar works in a pinch.
-
Parmesan Cheese: This brings a nutty, salty finish to the soup. For a dairy-free option, try nutritional yeast for a cheesy flavor without the cheese!
-
Cream: This lends that dreamy creaminess to our soup. If you’re looking for a lighter option, half-and-half or even coconut milk can be excellent substitutes.
-
Chicken Broth: The base of our soup — use homemade if you have it! Otherwise, low-sodium store-bought broth works well.
Step-by-Step Instructions
Now that we have our ingredients, it’s time to get cooking!
-
Prep the Chicken: Start by cutting your chicken breast into bite-sized pieces, about 1-inch cubes. This helps with even cooking. Season them generously with salt and pepper! A simple seasoning allows the flavor of the chicken to shine through.
-
Sauté the Aromatics: In a large pot, heat a tablespoon of olive oil over medium heat. Add minced garlic and sauté for about 30 seconds until it becomes fragrant. Don’t let it brown too much; we want sweet garlic goodness!
-
Cook the Chicken: Add your seasoned chicken pieces to the pot and sauté for about 5-7 minutes until they’re golden brown and cooked through. This is where you can kick the flavor up a notch; the fond (brown bits) left on the bottom of the pot adds depth to the soup.
-
Add the Sun-Dried Tomatoes: Toss in those sun-dried tomatoes and stir to combine. They will soften and infuse the dish with their lovely flavor.
-
Pour in the Broth: Now, it’s time to add your chicken broth. Pour in about 4 cups and bring everything to a simmer. This is when the magic happens—aromas will start wafting through your kitchen. Let it simmer for about 10 minutes to meld those flavors beautifully.
-
Incorporate Cream and Parmesan: Reduce the heat to low and stir in the cream and grated Parmesan cheese. Watch it swirl and transform the soup into a velvety masterpiece! Feel free to taste and adjust seasoning as needed — maybe a sprinkle more of salt or pepper.
-
Add Spinach: Finally, stir in the spinach, allowing it to wilt slightly. This will only take a minute or two!
-
Serve Hot: Dish up the soup while it’s hot! For extra flair, garnish with a sprinkle of more Parmesan or fresh herbs.
Serving Suggestions
For a truly charming presentation, ladle the soup into beautiful bowls and serve it alongside crusty bread or a simple green salad. A sprinkle of fresh parsley or basil on top will not only add a pop of color but also a fresh aroma that invites everyone to the table. Remember, the plate is your canvas; an inviting bowl of soup with a hunk of bread beside it creates a warm, welcoming vibe!
Recipe Variations
Spice things up with these fun twists:
-
Spicy Kick: Add a pinch of red pepper flakes for a little heat.
-
Herby Goodness: Fresh thyme or basil added during the simmering step can elevate the flavor profile beautifully.
-
Nut-Free/Seed-Free: Omit the Parmesan cheese altogether or use a nut-based cheese alternative to accommodate dietary restrictions.
-
Vegan Delight: Swap chicken with chickpeas or tofu, and use coconut cream or cashew cream for a vegan rendition.
-
Italian Flair: Add tortellini or another favorite pasta directly into the soup for a heartier meal.
Chef’s Notes
Ah, where do I even begin? This recipe has evolved beautifully over the years, and I still remember the first time I made it for my family. My aunt had just moved into the neighborhood, and I thought this soup would make her feel at home. Little did I know, it would become a family favorite! There were laughs, stories, and, of course, the one moment when someone decided to “help” with the garlic, and let’s just say we had robust flavors that night. Cooking is wild like that!
FAQs and Troubleshooting
1. Why did my soup curdle after adding cream?
For a smoother integration, try to heat the cream slightly before adding it to the soup. Always add it to the pot off the heat — this helps prevent curdling!
2. My soup is too thick; how can I fix it?
Simply add a bit more chicken broth or water to reach your desired consistency. Stir it in gradually until perfect!
3. Can I freeze this chicken soup?
Yes! The soup freezes beautifully. Just allow it to cool completely before transferring to an airtight container. Let it thaw in the fridge overnight before reheating.
4. How do I make it gluten-free?
This soup is naturally gluten-free, but if you want to add pasta, be sure to use gluten-free options.
Nutritional Info (Optional)
While I typically focus on the joy of cooking, here’s a quick glance at the nutritional aspects: this recipe is packed with protein from the chicken, beneficial vitamins from the spinach, and healthy fats from the cream, perfect for a balanced meal that warms your soul!
So there you have it! A cozy bowl of Marry Me Chicken Soup ready for you to enjoy. May this recipe bring warmth to your kitchen and love to the table. Until next time, happy cooking!
PrintMarry Me Chicken Soup

A cozy comfort meal infused with roasted garlic, sun-dried tomatoes, and creamy goodness, perfect for chilly nights.
- Prep Time: 15 minutes
- Cook Time: 30 minutes
- Total Time: 45 minutes
- Yield: 4 servings 1x
- Category: Soup
- Method: Stovetop
- Cuisine: Italian
- Diet: Nut-Free
Ingredients
- 1 lb Chicken Breast, cut into bite-sized pieces
- 1/2 cup Sun-Dried Tomatoes, chopped
- 2 cups Spinach, fresh or frozen
- 3 cloves Garlic, minced
- 1/2 cup Parmesan Cheese, grated
- 1 cup Cream
- 4 cups Chicken Broth
- 1 tbsp Olive Oil
- Salt and Pepper, to taste
Instructions
- Prep the chicken by cutting it into bite-sized pieces and seasoning generously with salt and pepper.
- Sauté the minced garlic in olive oil over medium heat for about 30 seconds until fragrant.
- Cook the seasoned chicken in the pot for about 5-7 minutes until golden brown and cooked through.
- Add the sun-dried tomatoes to the pot and stir to combine.
- Pour in the chicken broth and bring to a simmer, letting it cook for about 10 minutes.
- Incorporate the cream and Parmesan cheese, stirring to combine.
- Add the spinach and allow it to wilt for a minute.
- Serve hot, garnished with extra Parmesan or fresh herbs.
Notes
For a lighter option, substitute cream with half-and-half or coconut milk. Soup can be frozen for future meals.
Nutrition
- Serving Size: 1 bowl
- Calories: 400
- Sugar: 3g
- Sodium: 800mg
- Fat: 20g
- Saturated Fat: 10g
- Unsaturated Fat: 7g
- Trans Fat: 0g
- Carbohydrates: 15g
- Fiber: 2g
- Protein: 27g
- Cholesterol: 75mg
Keywords: chicken soup, Marry Me Chicken Soup, comfort food, Italian soup, creamy soup

One-Pot Loaded Taco Potato Soup for Busy Weeknights
Loaded Taco Potato Soup: A Warm Hug in a Bowl
Welcome to my cozy kitchen corner! Today, we’re diving into a dish that combines all your favorite comfort foods into one delightful bowl—Loaded Taco Potato Soup. You might be asking, “What’s special about potato soup?” Well, let me tell you, this isn’t just any potato soup! Imagine creamy potatoes mingling with savory ground beef, zesty taco seasoning, and a generous sprinkle of cheddar cheese—are you drooling yet?
Not only is this soup packed with flavor, but it’s also incredibly simple to make. It’s perfect for busy weeknights, lazy weekends, or any day you want to treat yourself and your loved ones to something comforting and delicious. Ready to take a culinary adventure with me? Let’s get started!
A Taste of Nostalgia
As a child, I frequently found myself by my grandmother’s side in her bustling kitchen. One of my fondest memories is of her cooking a hearty soup during the chillier months. The bold spices filled the air, and I would inhale the warmth and love that seemed to drip from every spoonful. Soup, in her kitchen, meant connection. It meant family, laughter, and stories shared over a steaming bowl.
This Loaded Taco Potato Soup was inspired by those heartfelt moments. I wanted to create a dish that not only satisfied the taste buds but also warmed the soul—just like my grandmother’s soups did. There’s something magical about gathering around the table, and with this soup, I feel like I’ve captured a piece of that magic. So, tie on your ivory apron, and let’s make some memories together!
Ingredients
Here’s what you’ll need to whip up this flavor-packed Loaded Taco Potato Soup:
-
Ground Beef
A classic for a reason! Ground beef adds a savory, hearty base to the soup. If you’re looking for alternatives, ground turkey or chicken work beautifully as leaner substitutes. -
Potatoes
The star of our show! Use russets for creaminess or Yukon Golds for a buttery flavor. Want to save time? Pre-cubed frozen potatoes are a great shortcut, though fresh tastes best! -
Taco Seasoning
Seriously, who doesn’t love the classic taco flavor? You can use store-bought (easy peasy!) or whip up a homemade blend of chili powder, cumin, garlic powder, and paprika for a personal touch. -
Cheddar Cheese
Because everything is better with cheese! Sharp cheddar makes this soup extra flavorful. If you’re feeling adventurous, try pepper jack for a spicy kick or even a vegan cheese alternative if you’re avoiding dairy. -
Broth
Chicken, beef, or veggie broth can serve as your base. Use homemade if you have it; otherwise, store-bought works just fine. You can also add extra water for a lighter soup. -
Onions
Chopped onions add depth and flavor. Sweet or yellow onions are great choices. If you’re short on time, use onion powder as a quicker alternative. -
Garlic
Freshly minced garlic brings a fragrant touch! Got garlic powder on hand? It’s a suitable second choice—just use less (about a third of the amount). -
Sour Cream
A dollop adds that creamy finish. Consider Greek yogurt for a healthier alternative or vegan sour cream if dairy’s not your thing. -
Toppings (optional)
Chopped cilantro, diced avocados, jalapeños, and tortilla chips are excellent finishing touches! Feel free to get creative with your favorite toppings.
Step-by-Step Instructions
Now that we’ve gathered our ingredients, it’s time to bring this Loaded Taco Potato Soup to life. Let’s start cooking!
-
Brown the Ground Beef
In a large pot, heat a tablespoon of olive oil over medium heat. Add the ground beef (about a pound) and break it up with a wooden spoon. Season it with some salt and pepper as it cooks. Brown until it’s fully cooked and no longer pink—about 5-7 minutes. Drain any excess fat for a cleaner soup base. -
Add the Aromatics
Toss in a chopped onion and 2-3 cloves of minced garlic. Stir and let them sweat it out together for about 3-4 minutes until the onion becomes translucent. This combination releases divine flavors—trust me; your kitchen will love you! -
Incorporate the Spices
Sprinkle in 2 tablespoons of taco seasoning. The smell will make you swoon! Mix it well, making sure the beef and onions are evenly coated with those delicious spices. -
Introduce the Potatoes
Peel and dice about 2-3 medium potatoes into small cubes (the smaller the cubes, the faster they cook!). Add them to the pot along with 4 cups of broth. Stir it all together. Cover the pot and bring it to a gentle boil. Let it simmer for about 15-20 minutes until the potatoes are fork-tender. They should break apart easily! -
Creamy It Up
Once the potatoes are cooked, use a potato masher to mash some of them right in the pot. This will give the soup a lovely creamy texture without the need for heavy cream. Pour in 1 cup of cheddar cheese, and stir until it has melted into the soup. -
Stir in the Finishing Touches
Add a dollop of sour cream, mix it in, and taste! If you want to elevate it further, add a splash of lime juice for brightness. Adjust seasoning and let it simmer for another 5 minutes, allowing all those flavors to blend. -
Serve Up That Goodness!
Ladle the soup into bowls and top with extra cheese, slices of avocado, or a drizzle of sour cream. Oh, and don’t forget those crispy tortilla chips for that perfect crunch!
Serving Suggestions
When it comes to plating, rustic is the name of the game! Serve your Loaded Taco Potato Soup in deep bowls, and don’t shy away from piling on toppings—think a generous handful of cheese, a few cilantro leaves, or even a spicy jalapeño slice for an extra kick. I like to place my bowl on a wooden board to create a cozy, rustic vibe. Grab a spoon, and let’s dig in!
Recipe Variations
Feel free to mix it up! Here are a few fun ways to put your spin on this soup:
-
Vegetarian Version: Swap out the ground beef for black beans or lentils and use vegetable broth. Add your favorite veggies like corn or zucchini for extra nutrition.
-
Spicy Kick: Add diced jalapeños or a dash of your favorite hot sauce into the mix for those who like it hot!
-
Loaded with Veggies: Throw in some chopped bell peppers or carrots while sautéing the onions and garlic. It’s a nutritious way to sneak in extra vitamins!
-
Cheesy Delight: Try a different cheese, like Monterey Jack or even a crumbled queso fresco for a fun flavor twist.
-
Low-Carb Option: Replace potatoes with cauliflower to cut down on carbs while still keeping a creamy texture.
Chef’s Notes
This recipe is a labor of love, inspired by delightful family gatherings and the cozy nostalgia of home. I’ve played around with it over the years—switching the meats, playing with spices, and even jokingly adding a few silly ingredients when I’m feeling adventurous (canned chili once made an unexpected appearance!). The beauty of this soup is its adaptability. You can adjust it to suit your preferences or whatever’s in your fridge!
Whenever I make this soup, I remember my grandmother’s kitchen filled with laughter and good company. It’s a reminder to me that food isn’t just about the meal. It’s about the connections we make and the moments we share around the table.
FAQs and Troubleshooting
1. Can I make this soup in advance?
Absolutely! This soup actually tastes better the next day as the flavors meld beautifully. Just reheat on the stove or in the microwave before serving.
2. My soup turned out too thick; what can I do?
No problem at all! If your soup is too thick, simply stir in more broth or water until it reaches your desired consistency.
3. Can I freeze leftovers?
Yes! The Loaded Taco Potato Soup freezes well. Just ensure it’s stored in an airtight container. When you’re ready to enjoy, thaw overnight in the fridge and reheat gently on the stove.
4. What can I do if the soup is too salty?
If you find your soup has become too salty, adding extra chopped potatoes can help absorb some of that saltiness. Alternatively, a splash of cream or more broth can balance things out.
Nutritional Info (optional)
If you’re curious, a serving (about 1 cup) of Loaded Taco Potato Soup contains approximately:
- Calories: 250-300 depending on cheese and toppings
- Protein: 15g
- Carbohydrates: 30g
- Fat: 10g
- Fiber: 4g
This is just a rough estimate, so feel free to adjust based on your ingredients!
I hope you enjoyed this culinary journey! There’s something so satisfying about creating a dish that warms the heart and brings people together. Let me know how your Loaded Taco Potato Soup turns out. Happy cooking, and don’t forget—every meal is an opportunity to create wonderful memories. Cheers!
PrintLoaded Taco Potato Soup

A comforting blend of creamy potatoes, savory ground beef, and zesty taco seasoning, topped with cheddar cheese.
- Prep Time: 10 minutes
- Cook Time: 30 minutes
- Total Time: 40 minutes
- Yield: 4 servings 1x
- Category: Main Course
- Method: Stovetop
- Cuisine: Mexican
- Diet: Omnivore
Ingredients
- 1 lb Ground Beef
- 2–3 medium Potatoes, diced
- 2 tbsp Taco Seasoning
- 1 cup Cheddar Cheese
- 4 cups Broth (chicken, beef, or veggie)
- 1 Onion, chopped
- 2–3 cloves Garlic, minced
- 1/2 cup Sour Cream
- Toppings: Chopped cilantro, diced avocados, jalapeños, tortilla chips
Instructions
- Brown the Ground Beef in a large pot with olive oil over medium heat for 5-7 minutes. Drain excess fat.
- Add the Aromatics: onions and garlic, and sweat for 3-4 minutes.
- Incorporate the Spices by sprinkling taco seasoning and mixing well.
- Introduce the Potatoes and broth, cover and bring to a boil. Simmer for 15-20 minutes.
- Creamy It Up: Mash some of the potatoes, then stir in cheddar cheese until melted.
- Stir in the finishing touches with sour cream and lime juice, simmer for 5 more minutes.
- Serve the soup hot, topped with extra cheese and your choice of toppings.
Notes
For a vegetarian version, replace ground beef with black beans and use vegetable broth.
Nutrition
- Serving Size: 1 cup
- Calories: 275
- Sugar: 3g
- Sodium: 750mg
- Fat: 12g
- Saturated Fat: 5g
- Unsaturated Fat: 7g
- Trans Fat: 0g
- Carbohydrates: 30g
- Fiber: 4g
- Protein: 15g
- Cholesterol: 50mg
Keywords: Taco Soup, Comfort Food, Potato Soup, Easy Dinner, Hearty Soup

Creamy Jalapeño Popper Soup: 5-Ingredient Comfort Dinner
Creamy Jalapeño Popper Soup: A Comforting Bowl of Flavor
Welcome to my kitchen, friends! Today, we’re diving into a dish that’s not just a feast for your taste buds but a warm hug in a bowl. Picture this: a rich, luscious Creamy Jalapeño Popper Soup. It’s everything you love about the classic jalapeño popper—creamy, spicy, and a little smoky—transformed into a comforting soup that’s easy to whip up. Whether you’re looking for a cozy weeknight dinner or a stunning dish to impress at your next gathering, this recipe has got you covered!
As the weather cools down, nothing beats curling up with a steaming bowl of soup. And let’s be honest, we could all use a little comfort food love right now! This Creamy Jalapeño Popper Soup is perfect for that. Let me take you on a culinary journey of flavors, textures, and fond memories that will leave you feeling both nostalgic and excited to gather around the table.
A Spoonful of Nostalgia
Whenever I think of jalapeño poppers, I’m instantly transported back to my college days, crammed in a cozy apartment with friends. We would host game nights filled with laughter, snacks, and of course, good food. One of our favorites was a platter of jalapeño poppers, the perfect blend of smoky bacon, spicy jalapeños, and gooey cream cheese. We’d luxuriate in the delight of each crunchy, flavorful bite, savoring both the food and the moments spent together. It was more than just food; it was a way to connect, to celebrate the little things, and to create cherished memories.
Fast forward to today, and while I might have traded card games for cooking experiments, my love for those poppers never faded. That’s exactly where the inspiration for this creamy soup came from. It captures all the flavors we adored in those poppers, but in a deliciously comforting way that’s perfect for sharing…or keeping all to yourself!
Ingredients
Here’s what you’ll need to bring this mouthwatering soup to life:
-
Chicken: I like using boneless, skinless chicken breasts or thighs. You could also substitute with shredded rotisserie chicken for a quicker option. If you’re looking for a vegetarian alternative, try using canned beans for protein!
-
Jalapeños: Fresh is best! They bring both heat and flavor. If you prefer less heat, remove the seeds and membranes, or swap in milder peppers like poblano.
-
Cream Cheese: This is what makes the soup creamy and rich. If you want a lighter version, you can substitute Neufchâtel cheese or even use cashew cream for a dairy-free option.
-
Bacon: Trust me on this—bacon adds a wonderful smoky flavor. For a healthier twist, you can use turkey bacon, or omit it altogether for a vegetarian soup.
-
Chicken Broth: Low-sodium is ideal for controlling saltiness. Homemade broth takes this over the top, but store-bought works just as well.
-
Onion & Garlic: Essential aromatics that lay the flavor foundation. Fresh is always better, but you could use powdered onion or garlic in a pinch.
-
Spices: Paprika, cumin, and a touch of pepper add depth. Feel free to adjust according to your taste.
-
Heavy Cream: For that final luscious touch! If you want something lighter, half-and-half or whole milk are great alternatives.
Step-by-Step Instructions
Ready to create your bowl of deliciousness? Follow these simple steps:
Step 1: Sauté the Aromatics
In a large pot, heat a drizzle of olive oil over medium heat. Add diced onions and sauté until they’re soft and translucent, about 5 minutes. This creates a sweet base for your soup. Add minced garlic and sauté for another minute, just until fragrant. Chef’s tip: Don’t overcrowd the pot; if you’re making a bigger batch, do it in batches to keep that flavor intense.
Step 2: Add the Chicken
Next, toss in your chicken. Brown the pieces for about 5-7 minutes until they’re no longer pink. If using rotisserie chicken, this is where you’ll just add it in later, after simmering to build the flavors.
Step 3: Spice it Up
Sprinkle in your spices: paprika, cumin, and pepper. Stir well to coat the chicken in the aromatic mix. This step is key—it enhances the flavor profile and adds warmth to the soup. A little extra paprika can add a lovely smokiness!
Step 4: Incorporate the Jalapeños
Add the diced jalapeños—this is where the heat comes into play. Stir well and let them cook with the chicken for another 2-3 minutes. Chef’s insight: The longer they cook, the more flavorful they become. If you really like it spicy, toss in some sliced fresh jalapeños towards the end for an extra kick!
Step 5: Pour in the Broth
Now, pour in the chicken broth and bring the pot to a gentle boil. Once bubbling, reduce the heat and let it simmer for 15 minutes. This is when the flavors meld beautifully. If using raw chicken, now’s the time to let it cook through. After simmering, you can easily shred the chicken with two forks.
Step 6: Add the Creaminess
Time to make it creamy! Stir in the cream cheese until it’s fully melted and integrated into the broth. Your soup should turn a beautiful beige, rich in texture. If you want it even creamier, add the heavy cream and stir gently. Pro tip: Always taste before seasoning—adjust with salt or more spices if needed!
Step 7: Garnish and Serve
Finally, ladle the soup into bowls and garnish with crispy bacon and a sprinkle of fresh herbs, like cilantro or parsley, to awaken those flavors. Remember, presentation matters—arranging your toppings artistically makes for a beautiful dish that invites guests to dive in!
Serving Suggestions
This Creamy Jalapeño Popper Soup is perfect with a side of crusty bread or tortilla chips for dipping. You can also serve it in individual bread bowls for a fun twist! A sprinkle of fresh lime juice right before serving can also elevate the flavors.
Recipe Variations
Feel like mixing things up? Try these creative twists:
- Cheesy Variation: Stir in shredded cheddar cheese for an extra cheesy indulgence.
- Mexican Twist: Add a splash of lime juice and garnish with avocado slices for a fresh zing.
- Spicy Southwest: Include corn and black beans for a hearty, southwestern flavor.
- Dairy-Free: Swap out cream cheese and heavy cream for coconut milk to keep it creamy yet dairy-free.
Chef’s Notes
Oh, the joys of experimenting in the kitchen! I once forgot the garlic in a batch of this soup. While it was still delicious, it taught me the importance of all those subtle layers of flavor. I started adding more toppings to keep things exciting—like crispy tortilla strips or even a dollop of salsa for an extra kick! You’ll find that this recipe is very forgiving and open to personal touches that make it uniquely yours.
FAQs and Troubleshooting
1. My soup tastes bland; what can I do?
If your soup is lacking flavor, try adding a splash of hot sauce, more seasoning, or even salt, which enhances all the flavors. Don’t shy away from adjusting your spices based on your own palate!
2. How do I prevent my cream from curdling?
To avoid curdling, always add cream to a simmer, not a boil, and stir gently. If you’re worried, temper your cream by adding a small amount of the hot soup into the cream before stirring it back into the pot.
3. Can I make this ahead of time?
Absolutely! This soup gets even better the next day after the flavors have melded. Just store it in an airtight container, and reheat gently on the stove.
4. Can I freeze this soup?
You can! Freeze in an airtight container, but skip adding the cream before freezing. Stir it in after reheating for the creamiest texture.
Nutritional Info
While I believe in enjoying every bite mindfully, here’s a rough estimate for a serving of this soup:
- Calories: 380
- Protein: 25g
- Carbohydrates: 8g
- Fats: 30g
Remember, these values can vary based on specific ingredients and portion sizes. Cook with love and enjoy every spoonful!
Thank you for joining me today! I hope this Creamy Jalapeño Popper Soup finds a beloved place in your kitchen as it has in mine. As always, happy cooking! Let’s gather around the table and celebrate the warmth we create with our food. Cheers!
PrintCreamy Jalapeño Popper Soup

A comforting and flavorful soup inspired by the classic jalapeño popper, featuring creamy textures and a hint of spice.
- Prep Time: 15 minutes
- Cook Time: 30 minutes
- Total Time: 45 minutes
- Yield: 4 servings 1x
- Category: Soup
- Method: Stovetop
- Cuisine: American
- Diet: Gluten-Free, Dairy Optional
Ingredients
- 2 boneless, skinless chicken breasts or thighs
- 2 fresh jalapeños, diced
- 8 oz cream cheese
- 4 slices of bacon, chopped
- 4 cups low-sodium chicken broth
- 1 onion, diced
- 2 cloves garlic, minced
- 1 tsp paprika
- 1 tsp cumin
- 1/2 tsp black pepper
- 1/2 cup heavy cream
- Olive oil for sautéing
Instructions
- Sauté the aromatics: In a large pot, heat a drizzle of olive oil over medium heat. Add diced onions and sauté until soft and translucent, about 5 minutes. Add minced garlic and sauté for another minute.
- Add the chicken: Toss in your chicken and brown for about 5-7 minutes until no longer pink.
- Sprinkle in your spices: Add paprika, cumin, and pepper to coat the chicken.
- Incorporate the jalapeños: Add diced jalapeños and cook with the chicken for another 2-3 minutes.
- Pour in the broth: Bring to a gentle boil, then reduce heat and simmer for 15 minutes.
- Add the creaminess: Stir in the cream cheese until melted, then add heavy cream.
- Garnish and serve: Ladle into bowls, garnishing with crispy bacon and fresh herbs.
Notes
Feel free to adjust spices to taste. This soup can be made ahead and freezes well; add cream after reheating.
Nutrition
- Serving Size: 1 serving
- Calories: 380
- Sugar: 2g
- Sodium: 800mg
- Fat: 30g
- Saturated Fat: 12g
- Unsaturated Fat: 10g
- Trans Fat: 0g
- Carbohydrates: 8g
- Fiber: 1g
- Protein: 25g
- Cholesterol: 90mg
Keywords: soup, creamy, jalapeño popper, comfort food, spicy soup