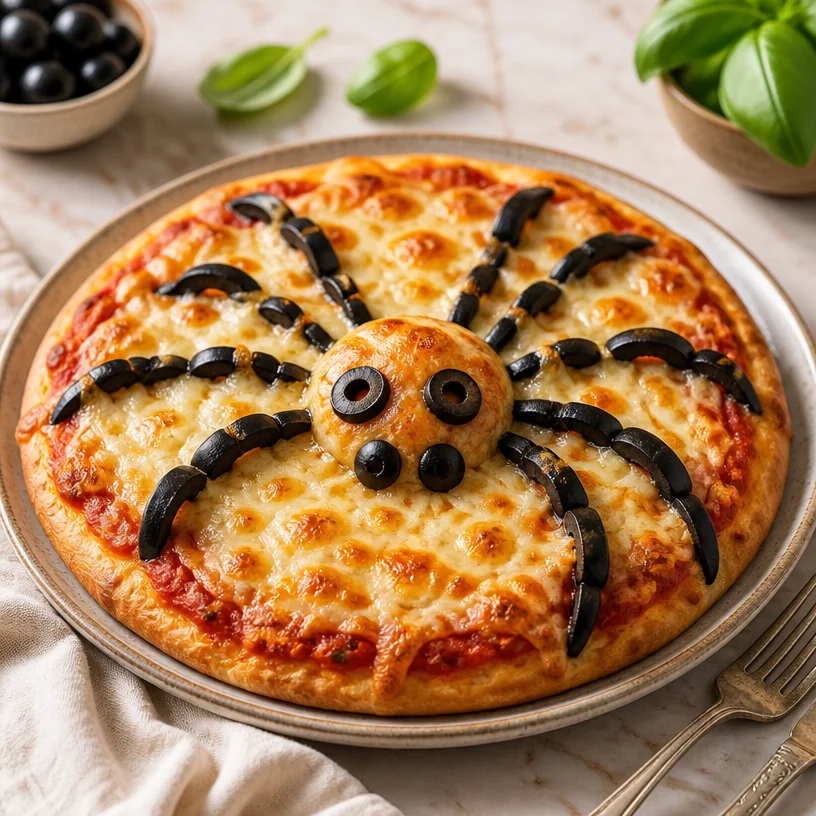
Spider Pizza
The Delightful Spookiness of Spider Pizza
Welcome, fellow food lovers! Today, we’re diving into the world of creativity that the kitchen can inspire, and I can’t wait to share a truly delightful and spooky dish: Spider Pizza. Yes, you heard that right! This isn’t just any pizza; it’s a fun and inviting way to get everyone in the mood for Halloween, or to make any dinner a little more playful and exciting.
Picture this: you’ve got a cozy evening ahead, candles flickering, and friends gathered around, when you present them with a pizza that looks like it’s been cobwebbed by culinary enchantment. This Spider Pizza is not only visually delightful but also easy to make. It brings an element of surprise that’s perfect for any gathering, whether it be a spooky celebration or a casual Friday night.
But more than that, this pizza is a way to bring people together. Cooking has a unique magic of its own; it creates memories and shared experiences. And what’s better than gathering around a table in the spirit of fun? So, let’s roll up our sleeves, don our aprons, and get ready to create this playful masterpiece together!
A Bit of Personal Story
Growing up, Halloween was always my favorite time of year. The air felt different—crisp and cool, carrying that sweet scent of fallen leaves and impending festivities. My mom would go all out with decorations, transforming our home into a playful haunted haven filled with friendly ghosts and twinkling lights. One year, we had a Halloween party, and I was tasked with “helping” in the kitchen. I’ll never forget how I watched in awe as my mom created spooky-themed dishes, bringing giggles and gasps from our friends.
That was when she introduced me to the idea of “Spider Pizza.” It was just a classic pizza elevated with some creativity—a fun mix of cheese and olives to create the spookiest of spider shapes. We giggled as we crafted our monstrous pizzas, hamming it up for our guests. The experience wasn’t just about the food; it was about bonding, laughter, and a touch of culinary magic. That love for combining creativity with cooking carried through to my own kitchen now, which is how I came to develop this recipe.
Ingredients
Here’s what you’ll need for your playful Spider Pizza. Each ingredient is carefully selected to create that elegant yet approachable feel in your dish:
-
Pizza Dough
The backbone of your pizza! You can make your own or opt for store-bought to keep things simple. If you’re feeling adventurous, whole wheat dough or gluten-free options are wonderful substitutes. -
Cheese
A blend of mozzarella and cheddar is my favorite for that gooey, melty goodness! If you want to cut down on calories or go dairy-free, try vegan cheese alternatives or a delicious cashew-based blend. -
Olives
Black olives add the perfect creepy-crawly look to your spider pizza. They also bring a deep, flavorful undertone. For a twist, green olives could mimic a different kind of spookiness, or if you’re not a fan, consider using pepperoni or even cherry tomatoes for a pop of color. -
Toppings of Choice
Feel free to get creative here! Pepperoni, bell peppers, or artichokes can all contribute to the overall allure of your spider pizza.
Step-by-Step Instructions
Let’s break this down, step by step:
-
Prep Your Dough
Start by preheating your oven to 475°F (245°C). If you’re using store-bought dough, let it sit for about 20 minutes to come to room temperature. This makes it easier to work with and ensures a lovely crust! If you’re making your own, roll it out on a floured surface until it’s about 12 inches round. Think of it like stretching your canvas—it needs to be just right. -
Shape the Pizza
Transfer your rolled-out dough onto a floured baking sheet or pizza stone. Crimp the edges slightly for a raised crust that holds in those delicious toppings. Experiment with shapes too! A simple circle works, but a bat or ghost shape adds to the fun! -
Add the Sauce
Slather on your pizza sauce; a classic tomato sauce is always a winner! Spread it evenly, leaving the edges clear for that crispy crust we all love. Not a fan of tomato sauce? A white sauce or homemade pesto can transform this pizza into something uniquely delicious. -
Cheese Time
Now for the cheese! Generously sprinkle a mix of mozzarella and cheddar over the sauce. This blend gives a creamy texture and subtle tang. It’s time to negate that “empty” look—cheese fills it deliciously! -
Create Your Spiders
Here’s where the magic happens! Slice black olives in half to create the body. Use a few halves to form the spiders—place them in clusters for added creepiness. For the legs, you can cut long strips from the leftover olives to create spider legs extending from the olive bodies. If you’re using other toppings, be playful with their positioning. -
Bake to Perfection
Slide your pizza into the oven and let it bake for about 12-15 minutes or until the crust is golden and the cheese is bubbling. Keep an eye on it to avoid over-baking; we want it just right! -
Finishing Touches
Once the pizza is bubbling and the crust is perfectly golden, remove it from the oven. Let it sit for a minute before slicing so the gooey cheese can set just a bit, making it easier to serve.
Serving Suggestions
Presentation can elevate your dish! Slice your Spider Pizza into wedges, showcasing those spooky spiders, and serve it on a simple wooden or slate board. Add fresh herbs like basil or parsley around the edges for a pop of color and freshness. Pair it with a light salad and a refreshing drink, and you’ll have an enticing meal ready to enjoy!
Recipe Variations
The beauty of pizza is its versatility! Here are a few creative twists to consider:
-
BBQ Chicken Spider Pizza
Swap out the tomato sauce for BBQ sauce and add shredded chicken along with your olives for an exciting flavor combo. -
Veggie Delight
Load your pizza with sliced bell peppers, mushrooms, and artichokes for a colorful veggie version. -
Sweet & Savory
Drizzle some honey over the crust before topping it with goat cheese, olives, and figs for a unique twist that balances sweet and savory. -
Mini Spider Pizzas
For a fun appetizer version, create individual mini pizzas using pita bread or mini dough rounds. These are perfect for parties!
Chef’s Notes
As I crafted this recipe, I fondly remembered those chaotic kitchen moments with my family, especially all the laughter and, occasionally, spills. Cooking is often like life—it’s messy, but those imperfections create the tastiest memories. Over time, I’ve tweaked this recipe countless ways, from trying different cheeses to adding seasonal veggies. Each version has taught me something new, which I hope to pass on to you!
FAQs and Troubleshooting
-
What if my dough is too sticky?
If your dough is too sticky to work with, sprinkle additional flour on your work surface and on your hands. Alternatively, let the dough rest for a bit; it may relax and become easier to handle. -
How do I store leftovers?
Store any leftover pizza in an airtight container in the fridge for up to 3 days. You can reheat slices in the oven for a few minutes to regain that glorious crispy crust! -
What if the cheese isn’t melting properly?
Make sure your oven is fully preheated and avoid overloading the pizza with too many toppings, as this can prevent the cheese from melting. -
Can I make this gluten-free?
Absolutely! Use a gluten-free pizza dough, which is widely available at stores. Just ensure that all your toppings and sauces are gluten-free as well.
Nutritional Info
While the exact nutritional info can depend on your specific ingredients, an average slice of Spider Pizza (with basic toppings, upon cutting an 8-slice pizza) can be around 200-250 calories, alongside a delightful mix of protein and carbs, making it a balanced yet cheekily indulgent meal.
Creating delicious moments in the kitchen is a journey that evolves and flourishes with each new recipe. I hope you enjoy making this whimsical Spider Pizza as much as I do! Gather your loved ones, don your aprons, and let’s create something playful together!
PrintSpider Pizza
A fun and spooky pizza perfect for Halloween or a playful dinner gathering.
- Prep Time: 20 minutes
- Cook Time: 15 minutes
- Total Time: 35 minutes
- Yield: 8 servings 1x
- Category: Main Course
- Method: Baking
- Cuisine: Italian
- Diet: Vegetarian
Ingredients
- Pizza Dough
- 1 cup Mozzarella Cheese
- 1 cup Cheddar Cheese
- Black Olives
- Toppings of Choice (e.g., Pepperoni, Bell Peppers, Artichokes)
Instructions
- Prep Your Dough: Preheat your oven to 475°F (245°C). Let store-bought dough sit for 20 minutes to come to room temperature or roll out homemade dough until 12 inches round.
- Shape the Pizza: Transfer dough to a floured baking sheet or pizza stone and crimp edges for a raised crust.
- Add the Sauce: Spread pizza sauce evenly over the dough, leaving edges clear.
- Cheese Time: Sprinkle mozzarella and cheddar generously over the sauce.
- Create Your Spiders: Slice black olives in half for the spider bodies and use strips for legs, arranging them as desired.
- Bake to Perfection: Bake pizza for 12-15 minutes until the crust is golden and cheese bubbles.
- Finishing Touches: Let sit for 1 minute before slicing and serving.
Notes
For a twist, try BBQ chicken or veggie versions. Individual mini pizzas can be made for parties.
Nutrition
- Serving Size: 1 slice
- Calories: 220
- Sugar: 3g
- Sodium: 500mg
- Fat: 9g
- Saturated Fat: 4g
- Unsaturated Fat: 3g
- Trans Fat: 0g
- Carbohydrates: 25g
- Fiber: 2g
- Protein: 10g
- Cholesterol: 25mg
Keywords: Halloween, Spider Pizza, Fun Food, Kids Recipe
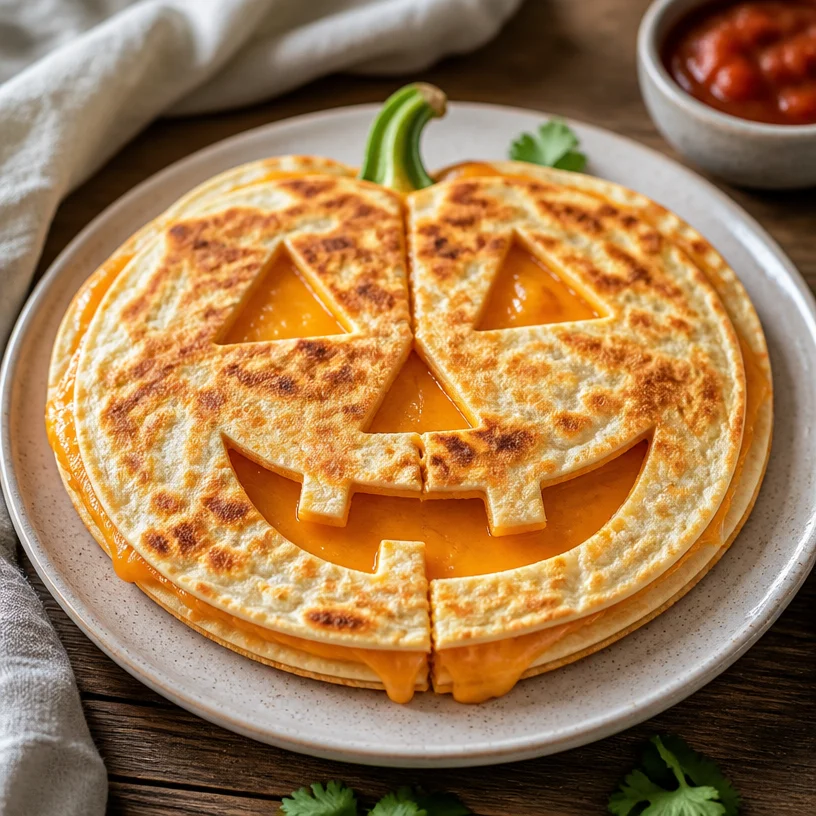
Jack-o’-Lantern Quesadillas
Jack-o’-Lantern Quesadillas: A Spooktacular Treat for Halloween!
Hello, fellow foodies! As October rolls in and the air becomes crisp, my kitchen transforms into a festive hub of creativity and culinary delight. When Halloween approaches, I find that food isn’t just about flavor; it’s an opportunity to have some fun and inject a little whimsy into our meals. Today, I’m excited to share a delightful recipe that’s not only easy to whip up but also brings a smile to everyone’s face – Jack-o’-Lantern Quesadillas!
These playful quesadillas are shaped like Jack-o’-lanterns and filled with gooey cheese, making them a perfect snack for kids and adults alike. Whether you’re hosting a spooky gathering, celebrating Halloween, or just looking to add some fun to dinner, these quesadillas are sure to be a hit. They are quick to make and can even be a crafty kitchen project to involve the little ones!
So, grab your favorite apron, and let’s dive into this culinary adventure that’s as fun to make as it is to eat!
My Personal Story: Halloween Memories in the Kitchen
Growing up, Halloween was always one of my favorite holidays. The excitement of choosing costumes, decorating the house with cobwebs and pumpkins, and, of course, the Halloween treats! I fondly recall my mom and I spending the days leading up to the 31st crafting spooky snacks. One year, we decided to have a Halloween-themed dinner party for our family, and that’s when the idea of festive food struck us.
We created all kinds of delightful dishes, but the star of the show was our pumpkin-shaped quesadillas. We used cookie cutters to give them that authentic Jack-o’-lantern look, and the cheese melted to perfection inside. It wasn’t just about the food; it was about creating lasting memories and giggles in the kitchen. As we all sat together, munching on our ghoulish goodies, I realized that Halloween wasn’t just about the spooky vibes; it was about gathering people around the table for fun, laughter, and, of course, fantastic food! These Jack-o’-Lantern Quesadillas bring back those cherished memories, and I can’t wait for you to create your own stories with them.
Ingredients
Let’s talk about the ingredients you’ll need to create these festive Jack-o’-Lantern Quesadillas. Simple, wholesome, and straightforward! Here’s what you need:
-
Tortillas:
- Use any type you prefer, such as flour or corn. Flour tortillas are generally more flexible and easier to work with, especially for shaping. You can even find whole grain or gluten-free options if you have dietary needs.
-
Cheddar Cheese:
- A classic choice, cheddar melts beautifully and provides a nice sharp flavor that pairs well with the tortilla. You can substitute with Monterey Jack for a mild taste or pepper jack for a spicy kick. If you’re looking for a dairy-free or vegan alternative, shredded vegan cheese works remarkably well too!
-
Optional Add-Ins:
- Feel free to layer in extras like beans, pre-cooked chicken, or veggies for added flavor and nutrition. Just remember to keep the filling relatively thin so the quesadillas stay crispy!
Step-by-Step Instructions
Okay, time to roll up those sleeves and get cooking! Here’s a detailed guide to creating your Jack-o’-Lantern Quesadillas:
Step 1: Prep Your Space
Set up your cooking area: grab a frying pan, spatula, a cutting board, and a sharp knife. It’s always a good idea to have everything organized before you start – saves time and avoids the last-minute scramble.
Step 2: Make the “Face”
Using a small pumpkin-shaped cookie cutter or a knife, cut out fun Jack-o’-lantern faces from one side of the tortilla. You can give them silly smiles or spooky grins – the choice is yours! Lay the tortilla flat on your cutting board and gently press down the cookie cutter. If you’re using a knife, be careful and go slowly to ensure you don’t accidentally cut all the way through.
Step 3: Heat the Pan
Heat your non-stick frying pan over medium heat. You want it hot but not too hot to scorch your quesadillas. A well-heated pan ensures that the cheese will melt perfectly while keeping the outside delightfully crispy.
Step 4: Assemble the Quesadilla
Now, it’s time to fill those tortillas! Place one uncut tortilla in the pan. Sprinkle a generous layer of shredded cheddar cheese on one half, leaving room for the other half to fold over. If you’re adding extra fillings (like cooked chicken or beans), layer them on top of the cheese evenly.
Step 5: Fold and Cook
Fold the quesadilla in half. Press it down gently with your spatula to encourage even cooking. Cook for about 2-3 minutes on one side until the cheese begins to melt and the tortilla turns golden brown. Keep an eye on it, as cooking times can vary based on your stovetop.
Step 6: Flip and Finish
Gently flip the quesadilla using your spatula and cook on the other side for another 2-3 minutes. Once it’s perfectly crispy and golden on both sides, remove it from the pan and let it sit for a minute. This resting period allows the cheese to settle a bit, making it easier to slice and serve.
Step 7: Cut and Serve
Using a sharp knife or pizza cutter, slice the quesadilla into wedges. You can also use a bit of kitchen shears to do this, which may be easier, especially for those fun shapes! Serve them warm with salsa, sour cream, or guacamole for dipping.
Quick Chef Hacks:
- To prevent your tortillas from getting soggy, avoid adding too many extra fillings.
- You can keep the finished quesadillas warm in a low oven while you cook the rest.
- For extra flavor, consider sprinkling some chili powder or taco seasoning into the cheese blend.
Serving Suggestions
Presentation is key! Arrange your Jack-o’-Lantern Quesadillas on a festive Halloween-themed platter. You can garnish with sprigs of fresh cilantro or parsley for a bright pop of color. Pair them with a bowl of salsa, guacamole, or sour cream for dipping – it adds both flavor and a fun touch. You might even consider serving them alongside a Halloween-inspired salad, maybe one with black olives and shredded carrots for a spooky effect!
Recipe Variations
Now that you’ve mastered the classic Jack-o’-Lantern version, here are some tasty variations to keep the fun going:
- Cheesy Veggie Quesadillas: Add in finely chopped peppers, spinach, or zucchini for a healthy twist.
- Spicy Chicken Quesadillas: Layer in shredded rotisserie chicken with a sprinkle of taco seasoning for added protein.
- Sweet Treat Quesadillas: For dessert, try adding cream cheese and a sprinkle of cinnamon with thinly sliced apples between two tortillas. Cook until golden and serve with caramel sauce!
- Black Bean & Cheese: Combine black beans with the cheese for a protein-rich option that’s satisfying and flavorful.
Chef’s Notes
Let me share a little kitchen quirk: one year, in my excitement to serve these Jack-o’-Lantern Quesadillas at a Halloween party, I accidentally mistook the cumin for cinnamon! The result? Well, it was an interesting flavor profile, to say the least. Everyone had a good laugh, and I think I found a new recipe in the process! Cooking is about experimenting and enjoying the ride, and this recipe is no different. I encourage you to play around with flavors and have fun in the kitchen!
FAQs and Troubleshooting
1. Can I make these quesadillas in advance?
Absolutely! You can assemble the quesadillas ahead of time and store them in the refrigerator. When you’re ready to serve, just heat them in a pan or bake them in the oven until warm and crispy.
2. My quesadillas are falling apart. What did I do wrong?
If your quesadillas are falling apart, it often means they were overstuffed. Stick to a moderate amount of filling, and ensure you have the tortilla sealed well before flipping.
3. How can I make them healthier?
You can use whole grain tortillas, reduce the amount of cheese, and pack them with more veggies, like spinach, mushrooms, or roasted peppers.
4. What if I don’t have cookie cutters?
No problem! You can use a sharp knife to carve out the pumpkin shapes. It takes a little more effort but can be a fun activity on its own, especially for kids.
Nutritional Info
While I don’t have precise nutritional info for this recipe, you can estimate it based on the tortillas and cheese you use. Generally, a single quesadilla (about 2 servings) can range from 300-500 calories depending on the ingredients.
Happy cooking, everyone! I hope these Jack-o’-Lantern Quesadillas bring joy, laughter, and deliciousness to your Halloween festivities. Remember, cooking should always be fun! So tie on that apron and let your creativity shine. Let’s gather around the table and enjoy some spooky good eats!
PrintJack-o’-Lantern Quesadillas

These playful quesadillas are shaped like Jack-o’-lanterns and filled with gooey cheese, making them a perfect snack for Halloween festivities.
- Prep Time: 15 minutes
- Cook Time: 6 minutes
- Total Time: 21 minutes
- Yield: 2 servings
- Category: Appetizer
- Method: Pan-frying
- Cuisine: Mexican
- Diet: Vegetarian
Ingredients
- Tortillas (flour or corn)
- Cheddar Cheese (or Monterey Jack, pepper jack, or vegan cheese)
- Optional Add-Ins: beans, pre-cooked chicken, or veggies
Instructions
- Prep Your Space: Set up your cooking area with all necessary tools.
- Make the “Face”: Cut out fun Jack-o’-lantern faces from the tortillas.
- Heat the Pan: Warm a non-stick frying pan over medium heat.
- Assemble the Quesadilla: Fill one tortilla with cheese and optional add-ins.
- Fold and Cook: Fold the quesadilla in half and cook until golden brown.
- Flip and Finish: Cook the other side until crispy and golden.
- Cut and Serve: Slice into wedges and serve with dipping options.
Notes
Avoid overstuffing to prevent soggy tortillas. Keep finished quesadillas warm in a low oven if needed.
Nutrition
- Serving Size: 1 quesadilla
- Calories: 400
- Sugar: 2g
- Sodium: 350mg
- Fat: 15g
- Saturated Fat: 7g
- Unsaturated Fat: 5g
- Trans Fat: 0g
- Carbohydrates: 45g
- Fiber: 3g
- Protein: 12g
- Cholesterol: 35mg
Keywords: Halloween, Quesadillas, Jack-o'-Lantern, Fun Food, Kid-Friendly
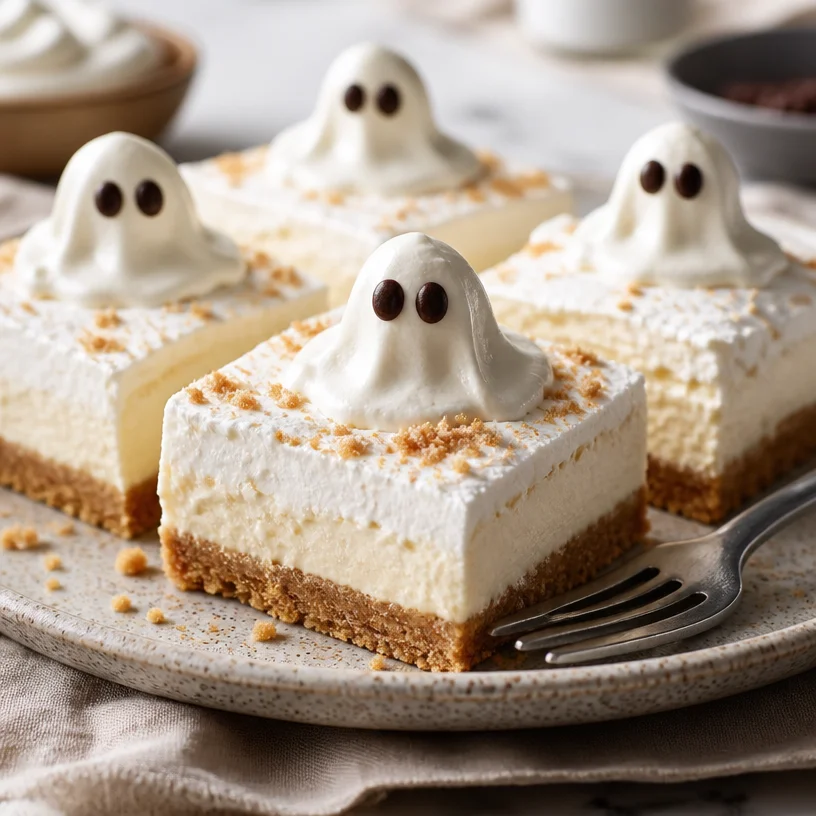
Halloween Ghost Cheesecake Bars: No-Bake Creamy Treat
Ghost Cheesecake Bars: A Spooktacular Treat for Your Halloween Gatherings
Hello, fellow food lovers! It’s Savannah here from Ivory Apron, and I’m beyond excited to share one of my absolute favorite treats that’s perfect for the spooky season: Ghost Cheesecake Bars. You might be asking yourself, “How can something that looks this cute also taste so good?” Well, my dear friend, I assure you that these bars are both a feast for the eyes and a dream for the palate. Grab your apron, and let’s get baking!
As we dive into this whimsical dessert, think about the joy of gathering with loved ones during Halloween. There’s something magical about turning the kitchen into a haunted haven, with flickering candlelight and the sweet aroma of baked goodies wafting through the air. The Ghost Cheesecake Bars are not just a delicious dessert; they are also an opportunity to create memories.
A Fun, Nostalgic Memory
I remember the first Halloween party I hosted in college—oh, what a night! I decided to get crafty and whipped up a batch of spooky treats for my friends. With a bit of imagination, I transformed simple cheesecake into what I called “Ghost Cheesecake Bites.” Picture this: soft, creamy cheesecake, adorned with little chocolate eyes on top like joyous little spirits floating on a cloud. Everyone had a blast, and we spent the night sharing ghost stories while sinking our teeth into those delightful bites. That night I learned that food has an amazing power to bring together friends and create those cherished moments we hold dear.
Fast forward to today, and I’ve refined that college creation into these delightful bars, which are perfect for serving a crowd! So, let’s get to it!
Ingredients
Gather these simple ingredients to get started on your Ghost Cheesecake Bars:
-
Cream Cheese: The star of the show! Cream cheese makes the filling rich and creamy. For a lighter version, you can substitute with a lower-fat cream cheese.
-
Graham Crackers: These little crunchy delights form the base of our bars. If you want a gluten-free option, crushed almonds or gluten-free cookies work beautifully!
-
Sugar: Adds the perfect amount of sweetness to balance the tanginess of the cream cheese. You can use coconut sugar or agave for a healthier alternative.
-
Vanilla Extract: A splash of this luscious extract enhances the flavor of the cheesecake. Use pure vanilla extract for the best taste, but imitation vanilla will work in a pinch.
-
Whipped Cream: Light and airy, whipped cream adds a dreamy texture to the filling. You can opt for store-bought or make your own for a fresher taste.
-
Chocolate or Edible Decorations: This is where the fun begins! Use melted chocolate or edible decorations to create ghostly figures on top of the bars. How about melting white chocolate and piping it out for a ghostly appearance?
Step-by-Step Instructions
Now let’s walk through the steps of making these enchanting cheesecake bars together:
-
Preheat Your Oven: Set your oven to 325°F (160°C). Pre-heating is crucial for even baking. Give your oven a moment to reach the right temperature—it’ll help ensure that your cheesecake bars turn out perfectly.
-
Prepare an 8×8 Baking Pan: Line your pan with parchment paper, allowing some overhang for easy removal later. This is a trick I swear by! It saves you from the heartbreak of broken bars.
-
Make the Graham Cracker Crust: In a mixing bowl, crush the graham crackers into fine crumbs. You could use a food processor for this, or just place them in a resealable bag and pound them with a rolling pin—it’s therapeutic! Combine the crumbs with melted butter and sugar, then mix until the mixture resembles wet sand. Press this mixture tightly into the bottom of the prepared pan. This is your sturdy foundation!
-
Bake the Crust: Pop the crust into the preheated oven and bake for about 8–10 minutes or until golden brown. The smell will be heavenly, and your kitchen will start to feel like a bakery!
-
Prepare the Cheesecake Filling: In a mixing bowl, add the softened cream cheese and sugar. Beat with an electric mixer on medium speed until smooth and creamy, about 2 minutes. Scrape down the sides of the bowl to ensure everything is mixed well.
-
Add Vanilla and Whipped Cream: Pour in the vanilla extract and fold in the whipped cream gently to keep it airy. Remember, we want lightness here! This is also the moment to taste—adjust sweetness if needed.
-
Combine and Pour: Once the mixture is fluffy, pour it over your baked crust, smoothing it out with a spatula. Don’t be shy—put your heart into it!
-
Bake the Cheesecake: Return the pan to the oven and bake for about 25–30 minutes. It’s done when the edges are set, but there’s still a slight jiggle in the middle. This will firm up as it cools.
-
Chill the Cheesecake: After baking, let it cool at room temperature for about an hour. Then, transfer it to the refrigerator and chill for at least 3 hours or overnight if time allows. Patience is key!
-
Decorate Your Ghosts: Once chilled, lift the cheesecake from the pan using the parchment overhang. Cut into bars, and now it’s time to bring those ghostly characters to life! Use melted white chocolate to create ghost shapes, or use edible decorations to make them come alive with personality. The more quirky, the better!
Serving Suggestions
When it comes to plating these delightful bars, simplicity is key! I suggest placing these on a beautiful serving platter, perhaps garnished with fresh berries or sprigs of mint for a pop of color. You can also add a drizzle of chocolate sauce around the bars for a fun effect. Don’t forget to sprinkle some edible glitter for that extra festive touch—it’s Halloween magic!
Recipe Variations
Let’s mix things up a bit! Here are some fun twists you can try:
-
Pumpkin Spice Ghost Cheesecake: Add pumpkin puree and pumpkin spice to your filling for a fall twist!
-
Chocolate Ghost Bars: Fold in melted chocolate chips or a swirl of Nutella for an indulgent chocolate version.
-
Berry Berry Ghosts: Top with fresh berry compote to add a tart freshness that complements the richness of the cheesecake.
-
Vegan Variation: Swap out traditional cream cheese for a vegan alternative and use coconut whipped cream!
-
Gluten-Free Adaptation: Use gluten-free graham crackers or an almond flour crust for gluten-free guests.
Chef’s Notes
Over the years, these Ghost Cheesecake Bars have become a staple for my Halloween gatherings. I remember one year when I dressed them up with little almond slivers to make them look extra spooky! It became a year-on-year tradition to battle for the spookiest presentation with my friends—it’s always a blast!
This recipe has blossomed over time, with little adjustments that’ve made it even better. I love experimenting with colors and flavors, connecting with the heart of the season, and creating fun memories packed in each bite.
FAQs and Troubleshooting
1. Why did my cheesecake crack?
Cracks can happen if the filling is overmixed or the cheesecake is baked at too high a temperature. Make sure to mix just until smooth and check the oven temperature with a thermometer!
2. Can I leave out the whipped cream?
You can, but it brings a lovely lightness to the filling. If you skip it, consider adding a bit of sour cream or Greek yogurt for a creamy texture.
3. How do I store leftovers?
Store any leftovers in an airtight container in the refrigerator for up to a week. They can also be frozen; just wrap them tightly for up to 3 months!
4. How can I make sure they are set properly?
The jiggle is normal, but if it looks overly wet or loose, it needs more time. You can always put it back into the oven for a few more minutes (watch it closely!).
Nutritional Info
While I recommend indulging in these bars occasionally, here’s a rough estimation per bar (yielding about 12 bars if cut evenly):
- Calories: 230
- Total Fat: 15g
- Saturated Fat: 9g
- Carbohydrates: 20g
- Sugars: 10g
- Protein: 3g
Enjoying these deliciously spooktacular Ghost Cheesecake Bars will surely draw smiles from your guests and create lasting memories around your table. So tie on that apron, gather your loved ones, and let’s cherish the moments we create together—all while indulging in the delightful flavors of Halloween. Happy cooking!
PrintGhost Cheesecake Bars
Delightful Ghost Cheesecake Bars perfect for Halloween gatherings, featuring a rich cream cheese filling and a crunchy graham cracker crust.
- Prep Time: 20 minutes
- Cook Time: 40 minutes
- Total Time: 180 minutes
- Yield: 12 servings 1x
- Category: Dessert
- Method: Baking
- Cuisine: American
- Diet: Vegetarian
Ingredients
- 8 oz Cream Cheese
- 1 cup Graham Crackers, crushed
- 1/3 cup Sugar
- 1 tsp Vanilla Extract
- 1 cup Whipped Cream
- Chocolate or Edible Decorations
Instructions
- Preheat your oven to 325°F (160°C).
- Prepare an 8×8 baking pan lined with parchment paper.
- Make the graham cracker crust by mixing crumbs with melted butter and sugar.
- Bake the crust for about 8–10 minutes until golden brown.
- Prepare the cheesecake filling by beating cream cheese and sugar until smooth.
- Add vanilla extract and fold in whipped cream gently.
- Combine the mixture and pour it over the baked crust.
- Bake the cheesecake for about 25–30 minutes until the edges are set.
- Chill the cheesecake for at least 3 hours.
- Decorate with melted white chocolate or edible decorations.
Notes
Store leftovers in an airtight container in the refrigerator for up to a week, or freeze for up to 3 months.
Nutrition
- Serving Size: 1 bar
- Calories: 230
- Sugar: 10g
- Sodium: 200mg
- Fat: 15g
- Saturated Fat: 9g
- Unsaturated Fat: 4g
- Trans Fat: 0g
- Carbohydrates: 20g
- Fiber: 1g
- Protein: 3g
- Cholesterol: 30mg
Keywords: Halloween, cheesecake, dessert, ghost, spooky treats
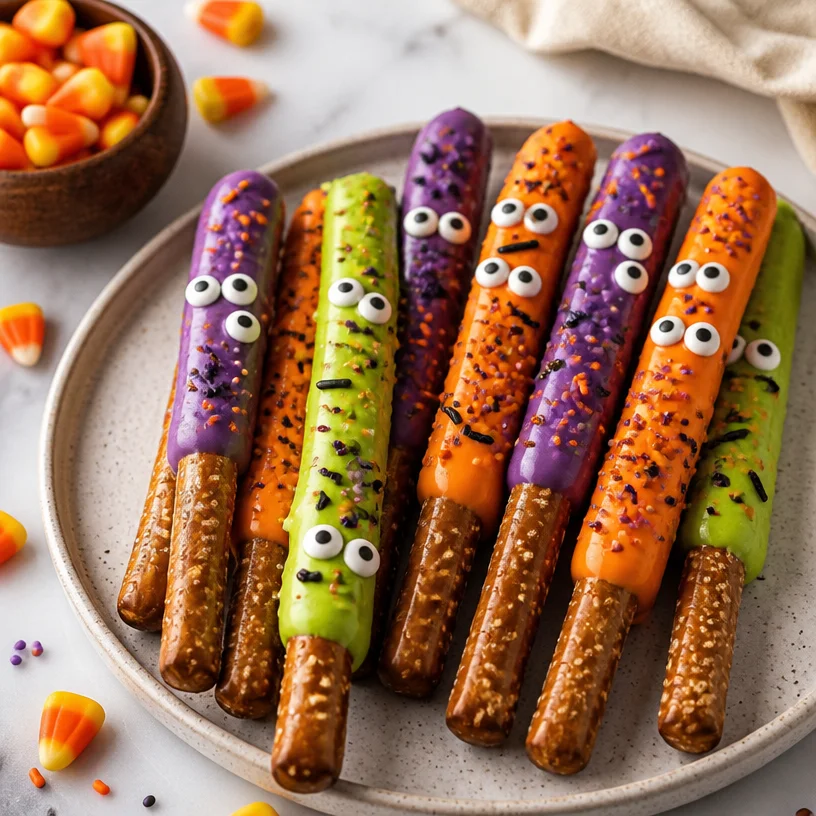
Monster Pretzel Rods: 5-Ingredient Crispy Party Treats
Monster Pretzel Rods: A Spooktacular Delight
Welcome to the thrilling world of Monster Pretzel Rods! If you’re looking for a whimsical treat that’s perfect for parties, Halloween celebrations, or simply a delightful snack that brings smiles, you’re in the right place. These crunchy, chocolate-dipped pretzel rods are not only fun to make, but they also allow your creativity to run wild.
Imagine hosting a Halloween bash, and as your guests walk through the door, they’re greeted by a platter of these adorable monster creations. With gooey, colorful candy melts transforming simple pretzel rods into frightfully fun snacks, it’s an experience that will leave you and your guests snickering with glee.
Here’s a little secret: Whenever I whip these up, I’m reminded of my childhood days where we would get together with friends to craft spooky snacks for Halloween. We’d gather around the kitchen table, the air filled with laughter, candy wrappers, and a slightly chaotic addition of sprinkles. Those moments of creativity and joy fueled my passion for cooking and entertaining, and every time I make Monster Pretzel Rods, it takes me back to those wonderful days.
So put on your favorite apron, tie your hair back, and let’s make some delightful, creepy Monster Pretzel Rods together!
Personal Story: A Spooky Tradition
I vividly remember the first time I made these Monster Pretzel Rods with my best friend, Jess. It was a few days before Halloween, and we had the grand idea of creating the ultimate spooky snack for our annual neighborhood party. Armed with a selection of candy melts, sprinkles, and of course, the ever-important pretzel rods, we transformed our kitchen into a chaotic candy wonderland.
We melted chocolate in a makeshift double boiler (because who needs fancy equipment, right?) and laughed as we dipped our pretzels, covered them in sprinkles, and stuck on candy eyes. I’ll never forget the moment Jess accidentally dropped a pretzel rod into the bowl of candy melts, sending a delightful splatter everywhere. Our culinary masterpiece may not have looked perfect, but it was ours, and that made it taste even better.
As we plated them up, we couldn’t stop giggling at our creation—half monster, half masterpiece. We took them to the party and watched as the kids devoured them, their faces lighting up with delight. Moments like those reminded me of the joy of cooking: it’s not about perfection, but the memories we create in the kitchen.
Ingredients
To make your own Monster Pretzel Rods, you’ll need the following ingredients:
- Pretzel Rods (12 count): The perfect crunchy base for our monsters—these sturdy snacks can hold up under all that delicious candy.
- Candy Melts (2-3 bags, assorted colors): This is where the magic happens! Choose vibrant colors like green, orange, purple, or black. If you can’t find candy melts, you can use chocolate chips as a substitute, but they may require some tempering.
- Candy Eyes (1 bag): You can find these at any craft store or online. They add a delightful touch and help your pretzels come to life!
- Sprinkles (various colors and shapes): Think Halloween! Look for spider or pumpkin-shaped sprinkles, or use a mix of colors for a fun, festive flair.
- Edible Glitter (optional): For an extra spooky shimmer! This is purely for aesthetic and can be left out if you prefer a more classic look.
Substitution Tips
- Gluten-Free Option: Use gluten-free pretzel rods for this recipe; they work just as well and guarantee everyone can enjoy them.
- Dairy-Free Option: Look for dairy-free candy melts, which are increasingly available in stores.
- Nuts: For those allergic to nuts, make sure to check labels on all candy decorations.
Step-by-Step Instructions
Step 1: Gather Your Ingredients
First things first, gather all your ingredients and set up a work station. Make sure to cover your surface with parchment paper—it simplifies the cleanup and gives you a place to set your completed pretzels.
Step 2: Melt Your Candy Melts
In a microwave-safe bowl, place your candy melts (about one bag at first). Microwave them in 30-second intervals, stirring in between until they’re smooth and melted. This typically takes about 1.5-2 minutes total. Pro tip: If your candy melts are too thick, add a teaspoon of coconut oil or shortening to thin them out.
Step 3: Dip the Pretzel Rods
Now comes the fun part! Take each pretzel rod, dip it into the melted candy, and gently swirl it to coat evenly. Allow any excess to drip off before laying it on the parchment paper. Don’t worry if it doesn’t look perfect; the sprinkles will do the rest!
Step 4: Load on the Sprinkles
While the candy coating is still wet, grab your sprinkles and shower them over the dipped pretzel. I like to do this over a bowl or plate to catch any leftover sprinkles to reuse later. If you’re using edible glitter, sprinkle that on too!
Step 5: Attach the Eyes
Carefully press two candy eyes onto the pretzel while the candy coating is still tacky. This is where they become monsters!
Step 6: Let Them Set
Place your completed pretzel rods to the side on the parchment paper and allow them to set up. You can speed this up by placing them in the refrigerator for about 10-15 minutes.
Step 7: Serve or Store
Once they’re completely set, your Monster Pretzel Rods are ready to be served! Enjoy them instantly or store them in an airtight container for a few days. Trust me; they’ll disappear faster than you can say “Boo!”
Serving Suggestions
When it comes to serving Monster Pretzel Rods, you can go all out or keep it simple. For a festive touch, arrange them in a tall glass like a bouquet, or lay them flat on a charming platter with some decorative spider web cotton as a backdrop. Don’t forget to add a few themed decorations or a fun sign saying, “Monster Treats Ahead!”
Recipe Variations
- Monster Mummies: Use white candy melts to coat the pretzels, then pipe on dark chocolate stripes to resemble mummy wrappings.
- Spooky Ghosts: Dip the pretzels in white candy melts and stick mini marshmallows on top as heads. Use chocolate icing to add ghostly eyes and mouths.
- Frankenstein’s Treats: Coat half of the pretzel in green candy melts, and once set, use black chocolate to create messy hair and facial features.
- Seasonal Switch: Change up your sprinkles according to the season! Use red and green for Christmas or pastel colors for Easter.
- Peanut Butter Delight: Dip the pretzel in melted peanut butter before coating in chocolate for an added nutty flavor.
Chef’s Notes
Every time I make these Monster Pretzel Rods, I chuckle at the “monstrous” shapes that come out! It’s amazing how a mere pretzel can be transformed into something so fun. I remember a time when I got a bit too ambitious and tried to create a multi-eyed monster. Let’s just say it ended up looking more comical than scary! The kitchen was full of laughter, and that’s what cooking is all about—having fun, making memories, and enjoying the company around you.
Over the years, I’ve honed this recipe, of course. I’ve discovered that different food colorings can dramatically change the vibe of your rods—deep orange feels like fall, while bright pink screams celebrations.
FAQs and Troubleshooting
-
Why did my candy melts seize up?
- This can happen if water gets into the candy melts; make sure your bowls and utensils are completely dry. To rescue them, you can add a little coconut oil to help thin them out.
-
Can I use regular chocolate instead of candy melts?
- Yes! If you prefer dark or milk chocolate, feel free to use it. Just remember that they might need to be tempered to prevent blooming.
-
What can I do if my sprinkles won’t stick?
- Make sure to sprinkle them on while the coating is still wet. If they dry, they won’t stick. Alternatively, you can lightly spray the coated pretzel with cooking spray before adding sprinkles.
-
How long do these treats keep?
- If stored in an airtight container, these treats can last about a week, although I promise they won’t last that long once you set them out!
Nutritional Info
While I always focus on the joy of cooking and sharing, it’s good to be mindful of our indulgences. Each Monster Pretzel Rod generally contains around 150 calories, with varying numbers based on the type of coating used and the amount of sprinkles added.
Ready to create some chaos in your kitchen? Grab those pretzel rods, let’s whip up some Monster Pretzel Rods, and get ready to wow your friends and family with a treat that’s as delightful to make as it is to eat! Remember, cooking is a celebration of creativity and community, so embrace the fun and let your inner child shine! Happy cooking!
PrintMonster Pretzel Rods

Whimsical and crunchy chocolate-dipped pretzel rods decorated to look like playful monsters, perfect for Halloween parties.
- Prep Time: 15 minutes
- Cook Time: 10 minutes
- Total Time: 25 minutes
- Yield: 4 servings 1x
- Category: Dessert
- Method: No-Cook
- Cuisine: American
- Diet: Vegetarian
Ingredients
- 12 Pretzel Rods
- 2–3 bags Candy Melts (assorted colors)
- 1 bag Candy Eyes
- Sprinkles (various colors and shapes)
- Edible Glitter (optional)
Instructions
- Gather your ingredients and set up a work station.
- Melt your candy melts in a microwave-safe bowl in 30-second intervals, stirring until smooth.
- Dip each pretzel rod in the melted candy, allowing excess to drip off.
- Load on the sprinkles while the candy coating is still wet.
- Attach candy eyes onto the pretzel.
- Let them set on parchment paper or place in the refrigerator for 10-15 minutes.
- Serve or store in an airtight container for a few days.
Notes
For gluten-free and dairy-free options, substitute as needed. Enjoy creating spooky variations like Monster Mummies or Spooky Ghosts!
Nutrition
- Serving Size: 1 serving
- Calories: 150
- Sugar: 20g
- Sodium: 200mg
- Fat: 6g
- Saturated Fat: 3g
- Unsaturated Fat: 3g
- Trans Fat: 0g
- Carbohydrates: 21g
- Fiber: 1g
- Protein: 1g
- Cholesterol: 0mg
Keywords: Halloween treats, Monster snacks, Pretzel rods, Chocolate dip, Fun desserts
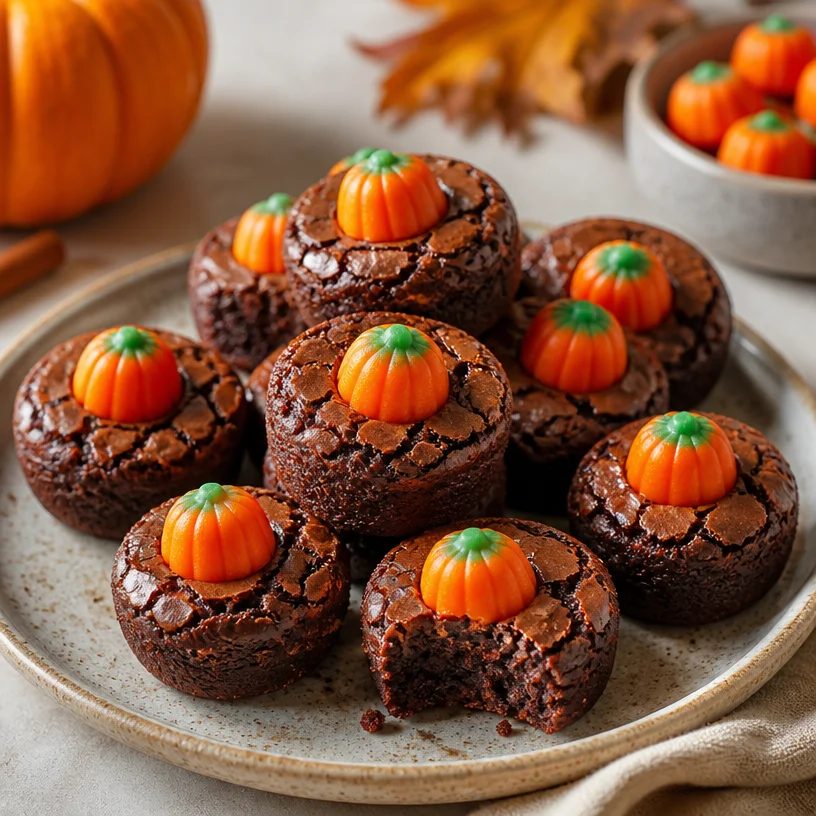
Pumpkin Brownie Bites: Quick Fall Treats for Busy Weeknights
Indulge in the Sweetness of Fall: Pumpkin Brownie Bites
Hello, fellow foodies! As the air turns crisp and the leaves begin to fall, there’s an undeniable shift that awakens my culinary curiosity. It’s the magical season of pumpkin spice, cozy sweaters, and heartwarming gatherings. Today, we’re diving into a delightful treat that brings together the rich, fudgy goodness of brownies with the festive charm of pumpkin: Pumpkin Brownie Bites.
Now, brownie lovers, get ready to elevate your dessert game! Picture this: fudgy brownie bites topped with adorable candy pumpkins, making them not just delicious but downright adorable. They’re perfect for autumn gatherings, Halloween parties, or just a cozy night in. Trust me, once you try these, you’ll want to make them a seasonal staple.
Let’s get started on this sweet adventure! Follow along as I guide you through my recipe, share some fun kitchen stories, and sprinkle in a few tips and tricks to ensure your pumpkin brownie bites come out perfectly every time.
A Slice of Nostalgia
I remember the first time I made brownies by myself. I must have been around 10 years old, pouring over my mom’s old recipe box, searching for the perfect dessert to surprise her after a long day. Little did I know I was setting the foundation for a lifelong love affair with chocolate!
As I mixed the ingredients together, there was something magical about watching that cocoa powder transform into a thick, velvety batter. The sweet aroma that filled the kitchen as they baked was pure heaven. Fast forward a few years to when the leaves turned golden and crisp—I discovered the intrigue of incorporating pumpkin into the mix. Even in the early days of my culinary journey, I understood the beauty of blending flavors and seasons.
Now, combining that childhood love of brownies with the creamy texture and warm spice of pumpkin feels like a celebration of all things cozy. With every bite, you’ll taste nostalgia, comfort, and a hint of seasonal magic. Let’s bring that feeling to life in your kitchen!
Ingredients
Here’s what you’ll need to whip up these delightful Pumpkin Brownie Bites:
-
1 cup unsweetened cocoa powder
A rich, dark cocoa powder yields the best flavor. If you’re in a pinch, you can substitute it with Dutch-process cocoa for a lighter touch. -
1 cup granulated sugar
This sweetens the brownies beautifully! For a twist, consider swapping half for brown sugar for a caramel-like complexity. -
1 cup all-purpose flour
Standard flour works best, but you can easily use a gluten-free mix if you’re accommodating those with dietary restrictions. Make sure it’s a blend specifically for baking. -
1/2 cup unsalted butter, melted
Butter adds a lovely richness to the brownies. You can substitute with coconut oil for a dairy-free option. -
3 large eggs
These give structure to your brownies. If vegan, consider using flax eggs (1 tablespoon ground flaxseed + 2.5 tablespoons water = 1 egg) instead. -
1 cup canned pumpkin puree
Look for pure pumpkin, not the spiced pie filling. This autumn staple adds moisture and flavor! -
1 teaspoon vanilla extract
Pure vanilla extract enhances all the flavors. For a fun twist, try using maple syrup instead. -
1 teaspoon baking powder
Ensures your brownies rise beautifully. If you’re out, baking soda can work as a substitute in half the amount. -
Pinch of salt
A little salt balances the sweetness. Trust me; it’s a game-changer! -
Candy pumpkins for decoration
These festive candies bring a pop of color and fun! Feel free to swap them with seasonal sprinkles or nuts for texture.
Step-by-Step Instructions
Now that we’ve gathered our ingredients, let’s bring these pumpkin brownie bites to life. Trust me, this process is just as enjoyable as the final product!
Step 1: Preheat and Prep
Preheat your oven to 350°F (175°C) and line a mini muffin tin with paper liners. If you don’t have liners, a quick spritz of non-stick spray will do the trick. This helps with easy removal later on!
Step 2: Mix Dry Ingredients
In a medium mixing bowl, whisk together the cocoa powder, granulated sugar, flour, baking powder, and salt. This step is crucial for ensuring that all the dry ingredients are well combined, promoting an even bake. Plus, it will smell heavenly!
Step 3: Blend Wet Ingredients
In another large bowl, combine your melted butter, eggs, pumpkin puree, and vanilla extract. Mix until everything is fully blended and looks smooth. This pumpkin mixture adds a warm, comforting element to your brownies.
Step 4: Combine
Pour the dry ingredients into the wet mixture and fold gently with a spatula. Be careful not to overmix; we just want everything to come together. If you see a few flour streaks—no worries! That little bit of flour will mix in when it bakes.
Step 5: Scoop and Fill
Using a small cookie scoop or spoon, fill each muffin tin cup about three-quarters of the way full. This way, they have room to rise while maintaining their bite-sized charm.
Step 6: Bake
Pop your tray into the preheated oven and bake for about 15 minutes. Keep an eye on them! You’ll know they’re ready when they puff slightly and a toothpick inserted comes out with a few moist crumbs—this will ensure that signature fudgy texture.
Step 7: Cool and Decorate
Let your brownie bites cool in the pan for 5-10 minutes before transferring them to a wire rack to cool completely. Once cooled, top each brownie with a candy pumpkin for that cute fall flair. Not only do they look great, but they add a sweet little crunch!
Serving Suggestions
To elevate your serving game, consider placing your pumpkin brownie bites on a beautiful platter adorned with autumn leaves or mini pumpkins. Drizzling a little chocolate ganache or a dusting of powdered sugar can add an extra touch of elegance. These treats can be a whimsical centerpiece at your next gathering, and trust me, they’ll disappear in a flash!
Recipe Variations
Don’t be afraid to experiment! Here are some fun twists to put your personal spin on these pumpkin brownie bites:
- Nutty Delight: Add chopped walnuts or pecans for a crunchy texture.
- Spiced Pumpkin: Mix in a teaspoon of pumpkin pie spice to intensify that fall flavor.
- Chocolate Chunk: Toss in some chocolate chips or chunks for a delightful melt-in-your-mouth experience.
- Frosted Bliss: Top them with a cream cheese frosting drizzle for a richer finish.
- Minty Fresh: Add a few drops of peppermint extract for a refreshing take when the holidays roll around.
Chef’s Notes
Every recipe tells a story, and this one is no exception! When I first combined pumpkin and brownie batter, it felt like magic in my kitchen. It’s incredible how two simple ingredients can create something so comforting and festive. Over the years, I’ve played around with spices and mix-ins, but the core joy of creating this treat has never changed. It’s like a hug in dessert form, and I can’t wait for you to experience that!
FAQs and Troubleshooting
Q1: My brownie bites are too dry. What happened?
A: This can happen if you overbake them. Be sure to check them a couple of minutes before the recommended time. The brownies will continue to set as they cool.
Q2: Can I use fresh pumpkin instead of canned?
A: Absolutely! Just make sure to cook and puree it, then drain out any excess moisture so your brownies don’t turn out soggy.
Q3: How do I ensure my brownie bites are fudgy?
A: Keep an eye on the baking time and don’t overmix the batter. Less mixing leads to a denser, fudgier texture!
Q4: Can I freeze these brownie bites?
A: Yes! They freeze wonderfully. Just ensure they’re in an airtight container, and they’ll keep for up to three months. Thaw them at room temperature before enjoying!
Nutritional Info
While I’m all about indulgence, I believe in balance too! These treats bring joy and are best enjoyed in moderation. A rough estimate is around 100 calories per brownie bite, depending on toppings and variations.
So there you have it! A fall-inspired treat that will bring warmth and joy to your gatherings and celebrations. I hope you feel inspired to tie on your apron and create these delightful Pumpkin Brownie Bites. Just remember, cooking should be fun, lighthearted, and always filled with love.
Let’s make something special together this season! Happy baking, and I can’t wait to hear how your pumpkin brownie bites turn out!
PrintPumpkin Brownie Bites
Delightfully fudgy brownie bites infused with pumpkin and topped with candy pumpkins, perfect for autumn gatherings.
- Prep Time: 15 minutes
- Cook Time: 15 minutes
- Total Time: 30 minutes
- Yield: 24 servings 1x
- Category: Dessert
- Method: Baking
- Cuisine: American
- Diet: Vegetarian
Ingredients
- 1 cup unsweetened cocoa powder
- 1 cup granulated sugar
- 1 cup all-purpose flour
- 1/2 cup unsalted butter, melted
- 3 large eggs
- 1 cup canned pumpkin puree
- 1 teaspoon vanilla extract
- 1 teaspoon baking powder
- Pinch of salt
- Candy pumpkins for decoration
Instructions
- Preheat your oven to 350°F (175°C) and line a mini muffin tin with paper liners.
- Mix together the cocoa powder, granulated sugar, flour, baking powder, and salt in a medium mixing bowl.
- Blend melted butter, eggs, pumpkin puree, and vanilla extract in another bowl until smooth.
- Combine the dry ingredients into the wet mixture and fold gently.
- Scoop and fill each muffin tin cup about three-quarters full.
- Bake in the preheated oven for about 15 minutes.
- Cool in the pan for 5-10 minutes before transferring to a wire rack and decorating with candy pumpkins.
Notes
For a vegan option, use flax eggs instead of regular eggs. You can also try using brown sugar for a caramel-like complexity.
Nutrition
- Serving Size: 1 brownie bite
- Calories: 100
- Sugar: 8g
- Sodium: 50mg
- Fat: 5g
- Saturated Fat: 2.5g
- Unsaturated Fat: 2.5g
- Trans Fat: 0g
- Carbohydrates: 13g
- Fiber: 1g
- Protein: 1g
- Cholesterol: 30mg
Keywords: pumpkin, brownies, fall dessert, Halloween treats, cozy baking
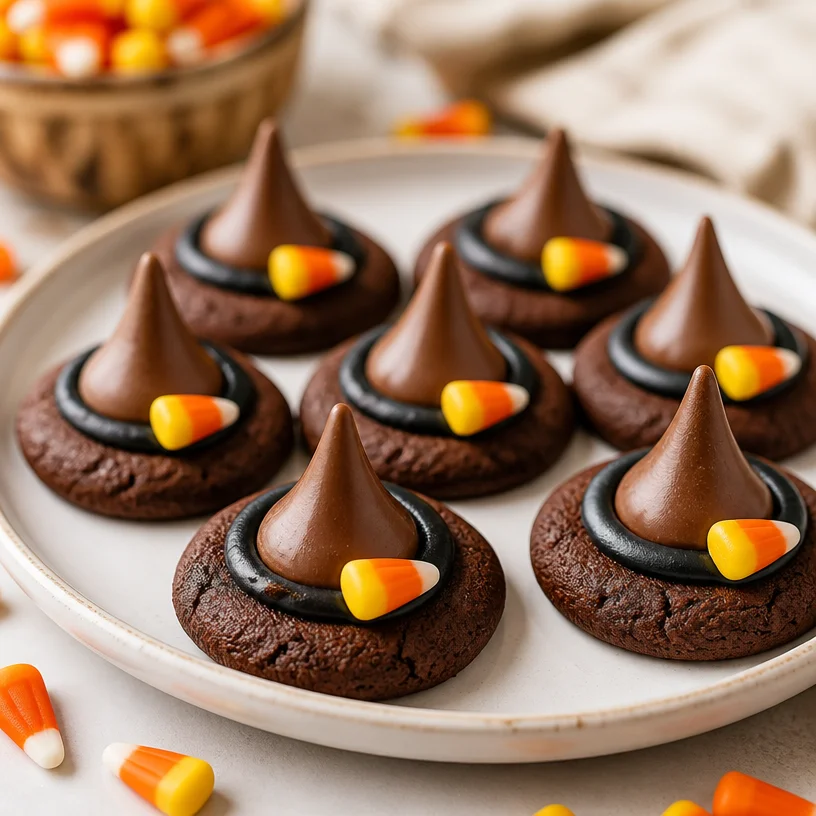
Witch Hat Cookies: 15-Minute Halloween Treats for Busy Moms
Spook-tacular Witch Hat Cookies: A Halloween Treat to Make Magic Happen!
Hello, my fellow food lovers! As Halloween creeps upon us, it’s time to conjure up some deliciously spooky treats. Today, I’m thrilled to share a delightful recipe for Witch Hat Cookies that’s not only fun to make but also a charming addition to any Halloween gathering. Whether you’re hosting a spooky soirée, bringing treats to a classroom party, or simply getting into the spirit of the season, these cookies will put a spell on you and your guests!
As we dive into this recipe, just imagine: crunchy cookies adorned with luscious chocolate kisses and candy corn, creating the perfect witch hat silhouette. It’s like a Halloween costume for your taste buds! Throughout the post, I’ll sprinkle in my personal anecdotes and tips to help you cook like a pro, even if you’re just starting out in the kitchen. So, grab your apron, and let’s brew some magic together!
A Whimsical Memory: The First Batch of Witch Hat Cookies
I still remember the first time I made Witch Hat Cookies with my little niece, Ava. She was just five years old, filled with that irresistible child-like wonder that every Halloween seems to ignite. We spent the afternoon in my cozy kitchen, splattered with flour and sugar, crafting these adorable hats. Her giggles echoed around like a sweet melody as we tried to stack the kisses on top of the cookies without them toppling over!
As we put the finishing touches on our creations, she proudly declared they were "the best witches ever!" The fearless confidence and enthusiasm in her eyes reminded me that the kitchen should always be a place of joy and exploration. Even though they may have been a little wonky—one hat even sported a candy corn that was a bit crooked—we couldn’t stop snacking on our charming little witch hats. Every bite was a reminder that cooking is about more than the food; it’s about the memories we create and the laughter we share.
Ingredients
Here’s what you’ll need to whip up your own batch of Witch Hat Cookies:
-
1 batch of chocolate chip cookie dough (store-bought or homemade)
Using chocolate chip dough gives these cookies a classic flavor. If you prefer, you can use sugar cookie dough for a sweeter base. Just watch the baking time! -
Chocolate kisses (approximately 24)
These will be the tops of our hats. You can substitute with any chocolate candies that are slightly pointed on top—like Rolos or Tootsie Rolls. Just note that you may need to adjust the baking time! -
Black icing (store-bought or homemade)
This icing will add a touch of elegance and detail. If black isn’t your preference, feel free to use purple or orange for a more colorful approach! -
Candy corn (for decoration)
Candy corn adds a fun pop of color, but if you’re not keen on it, consider using mini chocolate chips or even sprinkles as a cute alternative.
Step-by-Step Instructions
Now that we’ve gathered our magical ingredients, let’s get cooking! Follow these steps to create your very own Witch Hat Cookies:
-
Preheat the oven to 350°F (175°C). This is crucial, as starting with a preheated oven helps the cookies bake evenly.
-
Scoop the dough: Using a cookie scoop or a tablespoon, portion out the cookie dough onto ungreased baking sheets, spacing them about two inches apart. This allows room for spreading.
-
Shape the cookies: Lightly flatten each cookie dough ball with your fingers to create a more uniform shape. This step is crucial because the cookies will look more like hats if they’re firmer and thinner.
-
Bake the cookies: Pop those trays into the oven and let them bake for about 10–12 minutes until they’re just golden around the edges. Don’t worry if they seem a little soft; they’ll firm up as they cool!
-
Add the chocolate kisses: Once you take the cookies out, press a chocolate kiss gently into the center of each cookie while they’re still warm. This step allows the chocolates to meld with the cookie, almost gluing them together. Let them cool for about 5–10 minutes on the tray—it’s a crucial resting period to ensure you don’t burn yourself!
-
Decorate with icing: When the cookies have cooled and the chocolate is set, use your black icing to create a little swirl around the base of the chocolate kiss. This mimics the appearance of a witch hat and adds a delightful pop of color!
-
Crown with candy corn: Finally, place a piece of candy corn on top of the chocolate kiss—point downwards—to complete the whimsical witch hat look!
Serving Suggestions
These Witch Hat Cookies can be served on a festive platter, perhaps alongside other Halloween treats like ghost cupcakes or pumpkin-shaped brownies. For an added touch, consider arranging them on a slate board with faux spider webs or little plastic spiders. Just be sure to keep the spooky theme a fun and lighthearted one!
Recipe Variations
Let’s get creative! Here are a few fun variations to consider:
-
Flavor twist: Swap the chocolate chip cookie base for oatmeal cookie dough to ramp up the texture.
-
Nutty cookies: Add chopped nuts or crushed pretzels into the cookie dough for crunch and a deeper flavor.
-
Frosting swap: Use orange frosting instead of black for a seasonal touch that matches the candy corn.
-
Gluten-free option: Substitute regular flour with a gluten-free flour blend to accommodate gluten-sensitive guests.
-
Chocolate overload: Drizzle some melted dark chocolate over the finished cookies for an extra layer of decadence.
Chef’s Notes
Whenever I make these cookies, I can’t help but chuckle over my many attempts to create the perfect witch hat shape. I once accidentally melted the kisses too long, resulting in hats that were pancake flat! Those “pancake witches” didn’t last long. The kids loved them anyway, saying they were “wobble hats” — and that’s the magic of cooking! Remember, it doesn’t have to be perfect; the fun is in the process, and people love treats made with heart.
FAQs and Troubleshooting
What can I do if my cookies spread too much?
If your cookies flatten out too much, it’s usually because the dough is too warm. Make sure to chill the dough for at least 30 minutes before baking, especially on a warm day.
How can I make the icing thicker?
If your black icing is too runny, try adding a little powdered sugar to thicken it. If using store-bought icing, give it a good stir to mix it well before using.
Can I use other candies besides candy corn?
Absolutely! Mini chocolate chips, gummy candies, or other seasonal candies can add creative flair to your witch hats. Let your imagination fly!
How long do these cookies stay fresh?
Stored in an airtight container, these cookies will last about 5 days. You can even freeze the unbaked dough for up to 3 months and bake them fresh whenever you need a spooktacular treat!
Nutritional Info
This part is optional, but if you’d like to know, one cookie is approximately 130 calories. (Note: This may slightly vary depending on your specific ingredients.)
There you have it, folks! An enchanting recipe for Witch Hat Cookies that’s sure to delight. Cooking, much like magic, is all about the journey as much as the destination. So tie on your apron, invite over some friends or family, and celebrate the spirit of Halloween with these whimsical treats. After all, the best memories are made around the table—especially when those tables are filled with delicious, creative food. Happy baking, everyone!
PrintWitch Hat Cookies
Delicious and fun Witch Hat Cookies, perfect for Halloween gatherings.
- Prep Time: 15 minutes
- Cook Time: 12 minutes
- Total Time: 27 minutes
- Yield: 24 cookies 1x
- Category: Dessert
- Method: Baking
- Cuisine: American
- Diet: Vegetarian
Ingredients
- 1 batch of chocolate chip cookie dough (store-bought or homemade)
- Chocolate kisses (approximately 24)
- Black icing (store-bought or homemade)
- Candy corn (for decoration)
Instructions
- Preheat the oven to 350°F (175°C).
- Scoop the dough onto ungreased baking sheets, spacing them about two inches apart.
- Shape the cookies by lightly flattening each dough ball.
- Bake the cookies for about 10–12 minutes until golden around the edges.
- Add a chocolate kiss into the center of each cookie while they’re still warm.
- Decorate the cooled cookies with black icing around the base of the chocolate kiss.
- Crown with candy corn on top of the chocolate kiss, point downwards.
Notes
Chill the dough for at least 30 minutes before baking if it is warm. Decorate creatively with different candies.
Nutrition
- Serving Size: 1 cookie
- Calories: 130
- Sugar: 8g
- Sodium: 100mg
- Fat: 5g
- Saturated Fat: 2g
- Unsaturated Fat: 3g
- Trans Fat: 0g
- Carbohydrates: 18g
- Fiber: 1g
- Protein: 1g
- Cholesterol: 10mg
Keywords: Halloween cookies, Witch Hat Cookies, festive treats
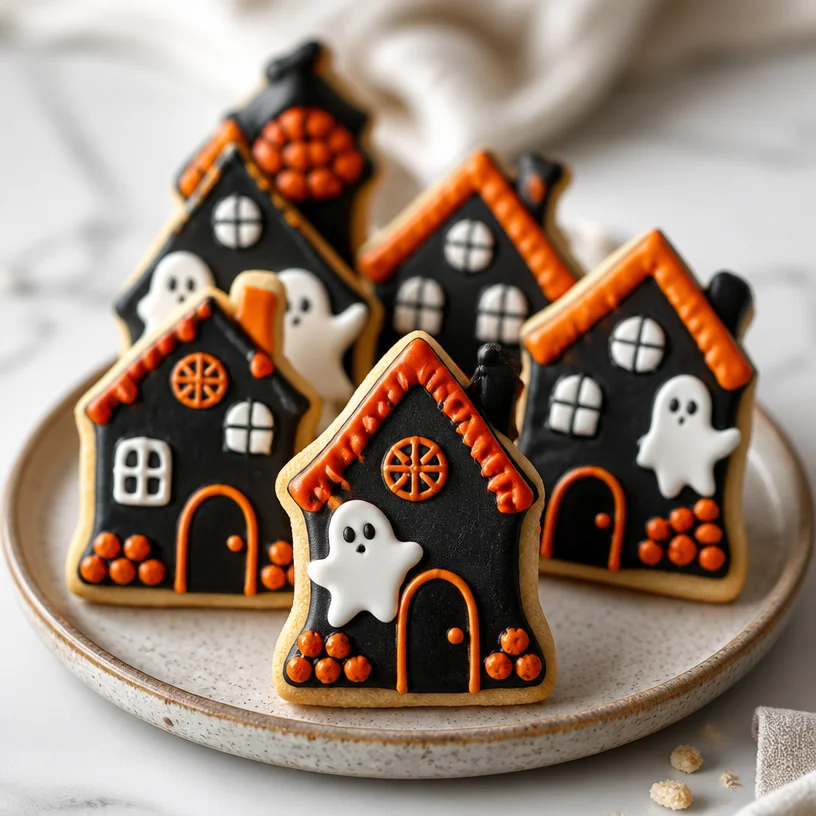
Minute Haunted House Cookies for a Spooky Halloween Treat
Spook-tacular Haunted House Cookies: A Treat for Your Halloween Gatherings!
Hello there, fellow food enthusiasts! As the leaves turn golden and the air gets that crisp bite, it’s time to channel our inner ghouls and goblins. If you’re anything like me, you can’t resist the seasonal charm that Halloween brings. Amongst the eerie decor and restless spirits, the real magic happens in the kitchen, and I have the perfect treat to elevate your spooky celebrations: Haunted House Cookies!
These aren’t just any cookies; they’re whimsical works of art that you and your little ghosts can create together. Picture this: ahouse made of delicious sugar cookies, drizzled with royal icing, and dusted with colorful sprinkles, all beckoning for a Halloween-themed gathering at your table. They’re ideal for crafting with kids, impressing your friends, or simply indulging your artistic spirit. Ready to get your mix on? Let’s dive into this delightful journey of baking!
A Whimsical Memory
Growing up, Halloween was my favorite holiday—not just because of the costumes and candies but because of the annual tradition of cookie decorating with my family. I can still recall the smell of sugar cookies baking in the oven, making the house feel warm and inviting, even when the weather outside was a bit frightful.
One crisp autumn evening, my mom and I decided to host a small gathering for my friends. We whipped up a massive batch of sugar cookie dough and rolled it out into all sorts of spooky shapes. Ghosts, tombstones, and of course, miniature haunted houses!
I remember the laughter as my friends and I got creative with icing; some cookies ended up looking like they came from a haunted nightmare, while others were surprisingly elegant! That magical night spent with family and friends over a table laden with colors, laughter, and stories is a sweet memory I carry with me. And today, I want to help you sprinkle some of that joy into your kitchen with these Haunted House Cookies!
Ingredients
Here’s what you’ll need to create your Haunted House Cookies:
-
Sugar Cookies
- These are the canvas of your cookie art! Their simplicity allows the decoration to shine through.
-
Royal Icing
- This icing is your magical glue and decorating medium. It hardens beautifully and is perfect for intricate designs. You can substitute it with buttercream icing if you prefer a softer frosting, but it won’t hold up quite as well for decoration.
-
Food Coloring
- Gel food coloring works best for bright, vibrant hues. You can get creative with shades of black, purple, and orange for that Halloween themed flair.
-
Sprinkles
- Think of sprinkles as the finishing touch or the festive confetti of your haunted houses. Without them, it’s like Halloween without a pumpkin—unthinkable!
-
Edible Decor (Candy Corn, Chocolate Chips, etc.)
- Use these to add some personality and charm to your haunted houses. They make for great windows, doors, and spooky decorations!
Step-by-Step Instructions
Grab your apron, pour yourself a spooky drink, and let’s get to baking these Haunted House Cookies!
-
Prepare the Sugar Cookie Dough
- In a large bowl, cream together softened butter and sugar until light and fluffy. (Tip: Using room temperature butter cream will ensure it mixes well and creates a light texture!)
- Mix in one egg and a splash of vanilla extract—trust me, this is the magic ingredient. Pro Tip: For an extra kick, you can add a dash of almond extract for a unique flavor!
-
Combine Dry Ingredients
- In a separate bowl, whisk together all-purpose flour, baking powder, and a pinch of salt. Gradually add this into the butter mixture until just combined. (Don’t overmix; it’s important for our cookies to be tender!)
-
Chill the Dough
- Divide the dough into two halves, wrap them in plastic wrap, and refrigerate for about 30 minutes. This step is crucial; it prevents the cookies from spreading too much while baking, keeping those beautiful shapes intact!
-
Preheat the Oven
- While the dough chills, preheat your oven to 350°F (175°C).
-
Roll Out the Dough
- Once chilled, on a floured surface, roll out the dough to about 1/4-inch thickness. Use cookie cutters to cut out spooky shapes! If you’re making haunted houses, use house-shaped cookie cutters.
-
Bake the Cookies
- Place the cookies on a parchment-lined baking sheet, giving them a little space to breathe. Bake for 8-10 minutes or until the edges are lightly golden. (Note: They’ll harden further while cooling!)
-
Cool the Cookies
- Transfer the cookies to a wire rack to cool completely. Patience, friends! You don’t want to ice warm cookies as they can melt your icing away.
-
Make the Royal Icing
- In a bowl, beat egg whites and powdered sugar until smooth and stiff peaks form. This can take a few minutes, but it’s worth the effort for that gorgeous hold. (Did you know you can use meringue powder as an egg white substitute? Perfect for those with egg allergies!)
-
Color the Icing
- Divide the icing into bowls and mix in your food coloring. For a traditional haunted house, try a spooky black, purple, and orange!
-
Decorate!
- Using piping bags, pipe outlines and details on your cookies. Don’t rush! The creative part is where the fun and stories come in. Let your imagination run wild—you might just create the next haunted cookie masterpiece!
Serving Suggestions
When it’s time to serve, gather your Haunted House Cookies on a charming platter and maybe even add a few floating candles for that spooky, enchanting ambiance. Dim the lights and let their glow highlight the edible artistry you’ve created.
For small gatherings, you can even create “cookie take-home bags” filled with a couple of decorated cookies for your guests—just tie them with a whimsical ribbon!
Recipe Variations
Now, if you’re looking to shake up the traditional haunted house vibe, here are a few creative twists:
- Gingerbread Houses: Use a gingerbread cookie recipe for a spicier twist that pairs wonderfully with icing.
- Gluten-Free Option: Substitute regular flour with a 1:1 gluten-free baking flour. Your cookies will still be tasty with an added crunch!
- Spooky Themed Flavors: Infuse your cookies with seasonal extracts, like pumpkin spice or maple, for a unique flavor experience.
- Fillings: Consider sandwiching your cookies with a layer of delicious pumpkin or gingerbread-flavored cream cheese filling. Treat yourself to that creamy goodness!
- Themed Toppers: Use different candies or edible glitter to decorate based on a theme—think “zombie apocalypse” or “witch’s brew”!
Chef’s Notes
These haunted house cookies bring back fond memories of Halloween, and over the years, I’ve expanded my decorating techniques and flavor profiles to keep the tradition alive. From my family’s kitchen to yours, these cookies have seen their fair share of spooky stories and laughs.
I can’t tell you how many Halloween parties I’ve attended with a batch of these cookies in tow, and it never fails—people love the creativity and fun that comes with decorating! Once, I brought to a party a cookie specifically designed to look like a creepy cat; let’s just say it garnered quite a few laughs and complements!
FAQs and Troubleshooting
Q: My cookies didn’t hold their shape. What went wrong?
A: This usually happens when the dough is too warm or isn’t chilled enough before baking. Make sure to chill the dough and keep your work surface floured.
Q: How can I achieve the perfect consistency for royal icing?
A: Aim for a flowy consistency that holds shape but isn’t too runny. If it’s too thick, add a tiny bit of water. If too runny, add more powdered sugar.
Q: How do I store my decorated cookies?
A: Allow the icing to dry completely before stacking or storing. Place them in an airtight container, and they can last for up to a week!
Q: Can I make these cookies in advance?
A: Absolutely! You can bake the cookies up to a week in advance and decorate them the day before your event.
Nutritional Info
While I believe good food should nourish the soul, it’s nice to keep track! One haunted house cookie roughly contains:
- Calories: 120 kcal
- Total Fat: 4 g
- Carbohydrates: 20 g
- Sugar: 10 g
- Protein: 1 g
Remember, enjoy in moderation—these cookies are certainly a treat worth every bite!
Onward to Spooky Delights!
Gather your family, your friends, or even whisk away your favorite little ghoul, and embark on this joyful baking adventure together. I promise that the laughter, creativity, and deliciousness are priceless. Wrap up your time crafting these Haunted House Cookies with a mug of hot cider or your favorite Halloween-themed drink.
Happy Halloween, my lovelies! May your days be filled with joy, creativity, and a sprinkle or two of magic. Until next time!
PrintHaunted House Cookies

Delightful sugar cookies shaped like haunted houses, perfect for Halloween gatherings!
- Prep Time: 30 minutes
- Cook Time: 10 minutes
- Total Time: 40 minutes
- Yield: 24 cookies 1x
- Category: Dessert
- Method: Baking
- Cuisine: American
- Diet: Vegetarian
Ingredients
- 3 cups all-purpose flour
- 1 cup unsalted butter, softened
- 1 cup granulated sugar
- 1 large egg
- 1 teaspoon vanilla extract
- 1/2 teaspoon almond extract (optional)
- 1 teaspoon baking powder
- 1/2 teaspoon salt
- 2 cups powdered sugar (for royal icing)
- 2 egg whites (or meringue powder)
- Gel food coloring (black, purple, orange)
- Sprinkles
- Edible decorations (candy corn, chocolate chips, etc.)
Instructions
- Prepare the Sugar Cookie Dough: In a large bowl, cream together softened butter and sugar until light and fluffy. Mix in one egg and a splash of vanilla extract; add almond extract if desired.
- Combine Dry Ingredients: In a separate bowl, whisk together flour, baking powder, and salt. Gradually add this to the butter mixture until just combined.
- Chill the Dough: Divide the dough in half, wrap in plastic, and refrigerate for 30 minutes.
- Preheat the Oven: While the dough chills, preheat your oven to 350°F (175°C).
- Roll Out the Dough: On a floured surface, roll out the dough to about 1/4-inch thickness and cut out spooky shapes.
- Bake the Cookies: Place them on a parchment-lined baking sheet, and bake for 8-10 minutes until edges are lightly golden.
- Cool the Cookies: Transfer to a wire rack to cool completely.
- Make the Royal Icing: Beat egg whites and powdered sugar until smooth and stiff peaks form.
- Color the Icing: Divide icing into bowls and mix in your food coloring.
- Decorate</strong!: Using piping bags, outline and detail your cookies creatively.
Notes
Allow the icing to dry completely before storing in an airtight container.
Nutrition
- Serving Size: 1 cookie
- Calories: 120
- Sugar: 10g
- Sodium: 50mg
- Fat: 4g
- Saturated Fat: 2g
- Unsaturated Fat: 1g
- Trans Fat: 0g
- Carbohydrates: 20g
- Fiber: 0g
- Protein: 1g
- Cholesterol: 30mg
Keywords: Halloween cookies, spooky treats, haunted house cookies
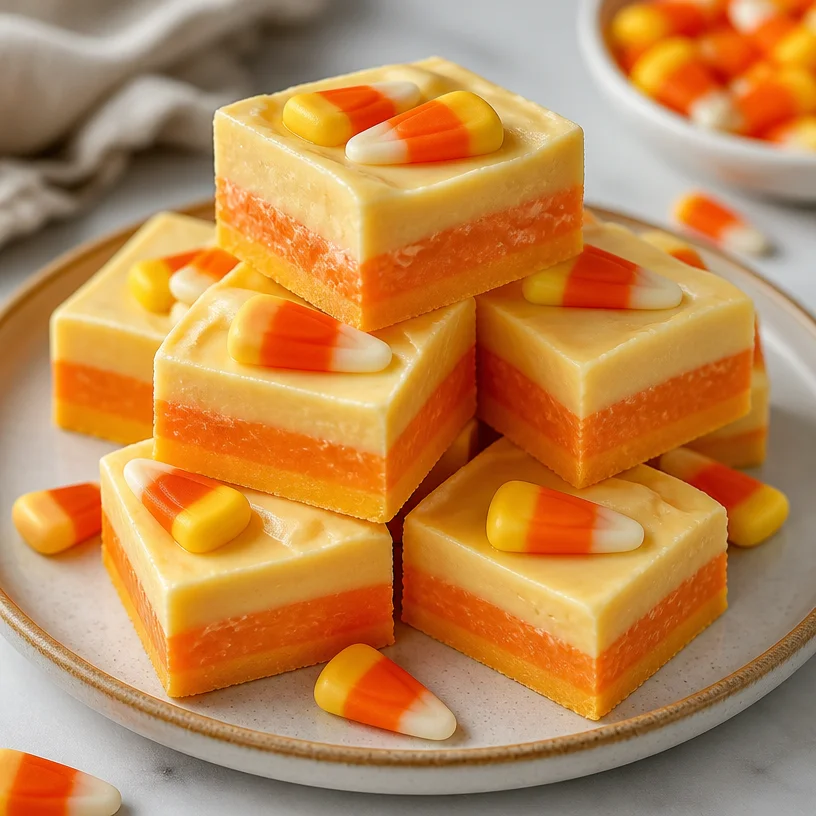
Halloween Candy Corn Fudge: 4-Ingredient Creamy Squares
Indulge in a Sweet Treat: Candy Corn Fudge
Hello, friends! If you’re looking for a fun and festive treat that screams fall and brings a touch of whimsy to your dessert table, you’ve landed in just the right spot. Today, we’re crafting something that’s as visually appealing as it is delicious: Candy Corn Fudge!
This recipe is not just an indulgence; it’s a celebration of one of the most iconic fall candies, candy corn. Picture vibrant orange and yellow wedges layered in creamy fudge, resembling a candy corn in a way that’s far more sophisticated—yet still playful. Whether you’re planning a Halloween party or simply want to indulge in something sweet with your loved ones, this candy corn fudge is the perfect choice. And trust me, once you take a bite, you’ll be transported back to those delightful childhood trick-or-treating adventures.
A Taste of Nostalgia
Let me take you back to my childhood for a moment. Growing up, Halloween was always my favorite season. The air would turn crisp, leaves crunched beneath my feet, and the promise of trick-or-treating filled the evenings with excitement. My friends and I would compare candy collections, and I’ll never forget the thrill of finding a few precious pieces of candy corn nestled among our haul.
You know how some candies can have polarizing opinions? Well, candy corn always seems to spark debates—people seem either obsessed or utterly indifferent! But there was something about its sweet, mellow flavor and the nostalgic memories it evoked that made me beam with joy. As I grew older and my culinary skills evolved, I found inspiration in that childhood delight, taking candy corn and elevating it into something sophisticated yet effortless—a luscious fudge that captures both the spirit of Halloween and the essence of joyful gatherings.
So, grab your apron and let’s dive into making this delightful treat!
Ingredients
Here’s what you’ll need to bring this Candy Corn Fudge to life:
-
2 cups of White Chocolate Chips
- Choose high-quality chips for a smoother texture. You can substitute it with white chocolate bars, chopped into small pieces, which may melt more evenly.
-
1 can (14 ounces) Sweetened Condensed Milk
- This will add richness and creaminess to our fudge. If you’re looking for a lighter option, use evaporated milk combined with a bit of sugar.
-
1 cup Candy Corn (for decoration)
- These iconic fall sweets will not only add a pop of color but also a nostalgic bite. For a twist, consider using chocolate candy corn for an extra layer of flavor!
Step-by-Step Instructions
Now that we have our ingredients together let’s transform our simple supplies into a magnificent fudge that’ll steal the show!
-
Prepare Your Baking Dish
- Line an 8-inch square baking dish with parchment paper, leaving a little overhang. This will make it super easy to lift the fudge out later. Trust me, this is a time-saver!
-
Melt the White Chocolate
- In a medium saucepan over low heat, add the white chocolate chips and sweetened condensed milk. Stir consistently until the chocolate melts completely, creating a velvety mixture.
- Chef Hack: If your mixture begins to seize, add a splash of milk to smooth out. Just keep that heat low—burnt chocolate is never a friend in the kitchen!
-
Pour and Smooth
- Once melted, pour the fudge mixture into your prepared baking dish. Use a spatula to evenly spread it into the corners, smoothing the surface like you’re icing a cake.
- Pro Tip: A slight tap on the counter can help level out the fudge and remove air bubbles!
-
Add the Candy Corn
- Before the fudge sets, sprinkle a generous layer of candy corn on top. Press it gently into the fudge, so it holds once it’s cut.
- You can get creative here! Consider adding a drizzle of melted dark chocolate to contrast with the sweetness.
-
Chill and Set
- Place the dish in the refrigerator for at least 2-3 hours or until fully set. Don’t rush this part; the chilling time is essential for the fudge to firm up properly!
-
Slice and Serve
- Once set, lift the fudge from the dish using the parchment overhang. Slice into squares and arrange on a festive platter.
- Final Touch: Dust with a hint of flaky sea salt for contrast—the sweet and salty combo is just divine!
Serving Suggestions
When it comes to plating your Candy Corn Fudge, keep it simple yet inviting. Arrange the fudge squares on a beautiful wooden board, alongside some seasonal fruits or nuts for a balanced platter. Adding sprigs of rosemary or mint can provide a beautiful pop of green, making your dessert not only a delight to eat but also visually appealing for your guests!
Recipe Variations
Feeling adventurous? Here are a few fun modifications to bring new flavors and experiences to your fudge:
-
Peanut Butter Swirl: Stir in a swirl of creamy peanut butter right before pouring it into the baking dish for a nutty flavor explosion.
-
Pumpkin Spice: Add a teaspoon of pumpkin spice to the melted mixture for a fall twist that enhances those delightful flavors.
-
Chocolate Layer: For an indulgent twist, create a base layer of dark chocolate fudge and pour the white chocolate fudge on top, making every bite a layered experience.
-
Nutty Crunch: Fold in chopped nuts like pecans or walnuts for added texture. They provide a delightful crunch that balances the creamy fudge.
-
Flavor Infusion: Experiment with flavored extracts, like bit of orange zest or almond extract, to enhance the fudge’s experience.
Chef’s Notes
I can’t help but reminisce about the first time I made this fudge. I was experimenting in the kitchen, not sure if this would turn into a kitchen flop or a masterpiece. The moment I opened the fridge and pulled out the perfectly set fudge, I couldn’t help but laugh at my childhood self. I’d unknowingly taken my candy corn obsession to a whole new level! Over time, this recipe has brought so many smiles around my dinner table, and has become a staple at fall gatherings. The beauty of this fudge lies in its adaptability, allowing everyone to put their spin on it!
FAQs and Troubleshooting
-
Why did my fudge turn out grainy?
- If you melted the chocolate over high heat or stirred too vigorously, it can become grainy. Stick to low heat, and remember to use gentle motions while stirring.
-
How can I store leftovers?
- Store your fudge in an airtight container in the refrigerator for up to two weeks. But let’s be real, leftovers might be hard to come by!
-
Can I freeze fudge?
- Yes! Cut it into squares and place it in a freezer-safe container. Ensure to layer between parchment paper. It should keep well for up to two months.
-
What if it didn’t set properly?
- If your fudge hasn’t set, try placing it back in the fridge for a bit longer. Or, you can gently reheat it and add a bit more condensed milk, then pour it back into the dish to set again.
Nutritional Info
While this indulgence isn’t exactly a health food, here’s a little overview of the nutrition per square (fudge size varies):
- Calories: Approximately 70
- Total Fat: 4g
- Saturated Fat: 3g
- Sugars: 8g
- Protein: 1g
Remember, moderation is key when it comes to sweet treats!
Conclusion
And there you have it, my dear foodies! A deliciously easy recipe for Candy Corn Fudge that’s sure to become a staple in your autumn dessert repertoire. Whether you whip it up for a special occasion or just as a little weekday treat, I hope this fudge brings a touch of sweetness and joy to your table.
So, tie on your apron and don’t forget to grab that sparkling drink while you’re at it! Let’s create beautiful memories around the table, one scrumptious bite at a time. Happy cooking!
PrintCandy Corn Fudge
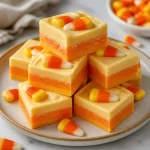
A festive and visually appealing fudge inspired by the classic fall treat, candy corn. Perfect for Halloween parties or as a sweet indulgence.
- Prep Time: 15 minutes
- Cook Time: 10 minutes
- Total Time: 150 minutes
- Yield: 16 servings 1x
- Category: Dessert
- Method: Baking
- Cuisine: American
- Diet: Vegetarian
Ingredients
- 2 cups of White Chocolate Chips
- 1 can (14 ounces) Sweetened Condensed Milk
- 1 cup Candy Corn (for decoration)
Instructions
- Prepare your baking dish by lining an 8-inch square baking dish with parchment paper.
- Melt the white chocolate chips and sweetened condensed milk in a medium saucepan over low heat, stirring constantly.
- Pour the melted fudge mixture into the prepared baking dish and smooth it out.
- Add a generous layer of candy corn on top of the fudge, pressing it gently.
- Chill in the refrigerator for at least 120 minutes or until fully set.
- Slice into squares and serve on a platter.
Notes
Try adding a drizzle of melted dark chocolate or a sprinkle of flaky sea salt for added flavor. Store leftovers in an airtight container in the refrigerator for up to two weeks.
Nutrition
- Serving Size: 1 square
- Calories: 70
- Sugar: 8g
- Sodium: 30mg
- Fat: 4g
- Saturated Fat: 3g
- Unsaturated Fat: 1g
- Trans Fat: 0g
- Carbohydrates: 10g
- Fiber: 0g
- Protein: 1g
- Cholesterol: 0mg
Keywords: Candy Corn, Fudge, Halloween Dessert, Fall Treat
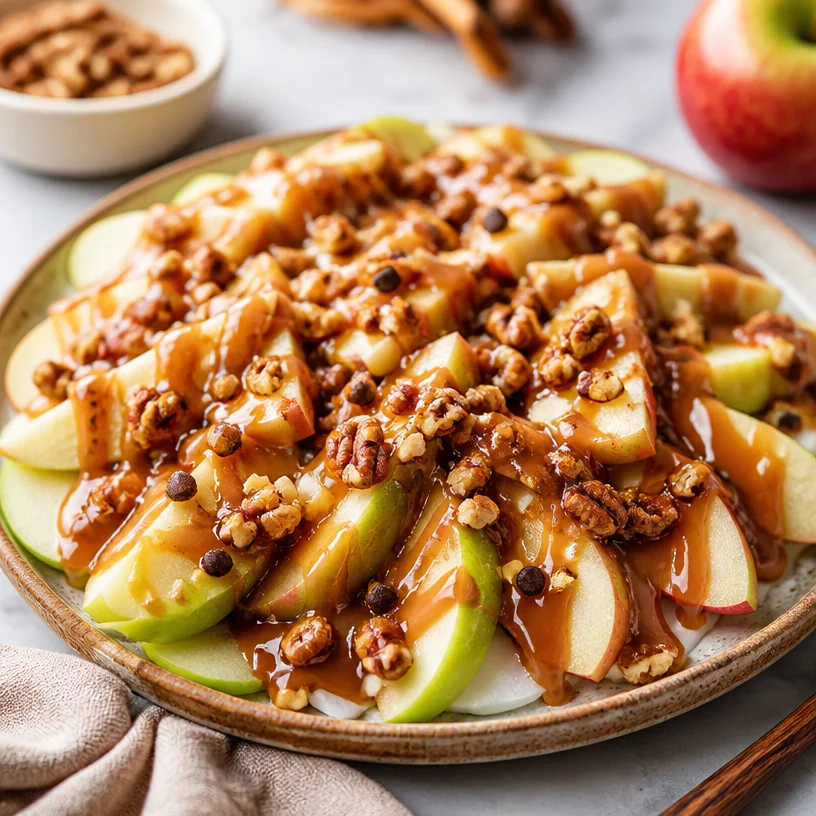
Minute Caramel Apple Nachos Recipe (Fall Treat)
Indulge in Delight: Caramel Apple Nachos
Welcome, friends! Today, we’re diving into a dish that embodies both comfort and decadence, perfect for gatherings, movie nights, or even just a cozy evening at home. Let’s talk about Caramel Apple Nachos! This sweet treat is a delightful twist on the traditional nachos we know and love but with a sweet, fruity flair that will leave your taste buds dancing. Imagine crunchy apple slices drizzled with warm caramel, topped with a sprinkle of nuts, and perhaps a dash of chocolate—need I say more?
My journey into crafting Caramel Apple Nachos started from a simple, nostalgic memory from my childhood. Every fall, my family and I would visit a local orchard, our arms loaded with apples, and our cheeks rosy from the crisp air. One memorable afternoon, we stumbled upon a small stand offering caramel-dipped apples, which became an instant favorite of mine. I can still hear the laughter and excitement as we tore into those sticky, gooey treats! Fast forward to today, and I’ve transformed that cherished experience into a satisfying dessert that’s as beautiful as it is delicious.
So, gather your ingredients, tie on your apron, and let’s make some culinary magic happen!
Ingredients
-
Apples
Crisp, tart apples like Granny Smith are ideal, but feel free to use any variety you love. Honeycrisp, Fuji, or Gala apples are great sweet options. If you want a lower-carb alternative, you can try slicing up some pears! -
Caramel Sauce
You can opt for store-bought caramel for convenience, but making your own is super easy too! Just melt some sugar and cream, and you’ll have a luscious, homemade drizzle. For those who prefer healthier options, you can substitute with almond butter or date syrup. -
Nuts
Chopped pecans, walnuts, or almonds add a wonderful crunch. Use whatever you have on hand! To make it nut-free, you can sprinkle on some seeds like pumpkin or sunflower seeds instead. -
Chocolate Drizzle (optional)
Because who doesn’t love a chocolatey touch? You can melt chocolate chips or use a store-bought chocolate syrup. Dark chocolate offers a rich flavor contrast, whereas white chocolate adds a creamy sweetness. -
Sea Salt
Just a pinch enhances all the flavors and balances the sweetness beautifully. If you’re feeling adventurous, consider flavored salt like smoked or rosemary salt!
Step-by-Step Instructions
Step 1: Preparing the Apples
Start by washing your apples thoroughly. Give them a gentle rub to remove any wax or residues. Use a sharp knife to slice them into thin wedges—about 1/4 inch thick works wonderfully. Make sure to remove the core as you slice. Honestly, I love leaving the skins on for color and texture, but you can peel them if you prefer. Remember, these nachos are all about that crunch!
Step 2: Melting the Caramel
If you’re using store-bought caramel, simply warm it up in the microwave for about 30 seconds, stirring halfway through. If you’re making it from scratch, add 1 cup of sugar to a saucepan over medium heat. Stir constantly until it melts and turns a golden brown—just be careful not to burn it! Then, stir in 1/2 cup of heavy cream and whisk until smooth. Voila, you have homemade caramel!
Step 3: Arranging the Apple Slices
On a large platter or individual plates, start arranging your apple slices in a circular pattern, overlapping slightly—get creative with it! Create a visually appealing display; this is where the fun begins. Your guests will be itching to dig in when they see this masterpiece!
Step 4: Drizzling the Caramel
Grab that warm caramel sauce and drizzle generously over the apple slices. Use a spoon or a squeeze bottle for precision. And don’t hold back; let that caramel cascade down like a sweet waterfall!
Step 5: Adding the Crunch
Now for the nuts! Sprinkle your choice of chopped nuts over the sticky caramel. The crunch is a game-changer—each bite will be a delightful contrast to the smooth caramel and crisp apples.
Step 6: Final Touches
If you’re feeling ambitious, add a chocolate drizzle for that extra flair. Just make sure it’s melted and warm for that perfect flow. Finish with a sprinkle of sea salt for that gourmet touch. It’s that contrast of sweet and salty that truly elevates these nachos!
Serving Suggestions
When it comes to serving these Caramel Apple Nachos, presentation is key! For a more casual gathering, serve them directly on a large board, inviting friends to dive in. You can add a few extra apple slices and a small bowl of caramel on the side for dipping. Alternatively, create individual servings in small bowls for a more polished look—this way, every guest has their little piece of paradise. Just grab a fork and enjoy!
Recipe Variations
Feeling adventurous? Here are some fun twists to keep every batch exciting:
- Nut-Free Delight: Swap nuts for crumbly graham crackers or granola for a crunchy topping.
- Dried Fruits: Add a handful of raisins or dried cranberries for an unexpected sweet burst.
- Spicy Kick: Drizzle with a touch of chili oil or cayenne pepper for a sweet and spicy combo.
- Vegan Version: Use dairy-free caramel sauce and top with coconut flakes for a tropical twist!
- Flavor Infusions: Mix in some cinnamon or pumpkin spice into the caramel for a warm, cozy flavor.
Chef’s Notes
Every time I make Caramel Apple Nachos, I think back to those orchard visits. It’s funny how a simple dish can encapsulate so many memories, isn’t it? Over the years, I’ve played with textures and flavors, incorporating things like pomegranate seeds or hints of citrus zest. It’s rewarding to see how something so creative can continue to evolve. Who would’ve thought nachos could be so magical?
FAQs and Troubleshooting
1. My caramel sauce turned out grainy. What happened?
This usually happens when the sugar crystallizes. Try to ensure you’re constantly stirring as it melts and keep the heat consistent. If it does crystallize, don’t worry—just add a bit more cream and keep stirring over low heat until smooth.
2. Can I make this ahead of time?
While it’s best fresh, you can prep the apples in advance. Just toss them in a bit of lemon juice to prevent browning. Keep everything else separate and assemble just before serving to maintain that crispy texture.
3. What can I use if I don’t have apples?
Pears or bananas are excellent substitutes! Just keep in mind that bananas may brown faster, so prepare them right before serving.
4. Can I make a healthier version?
Absolutely! Opt for fresh fruit, a drizzle of honey, or yogurt instead of caramel, and skip the nuts if you’re avoiding added fats.
Nutritional Info
Nutritional values will vary depending on the specific ingredients you use, but generally, each serving of Caramel Apple Nachos is rich in fiber thanks to the apples and can be adjusted for sugar and fat levels depending on your toppings.
So there you have it—Caramel Apple Nachos, a splendid treat that brings a spark of joy to any gathering. Whether you’re recreating old memories or crafting new ones, this dish is the perfect centerpiece for any occasion. So go ahead, gather your friends, and let the deliciousness unfold! Happy cooking!
PrintCaramel Apple Nachos
Indulge in a delicious twist on traditional nachos with crunchy apple slices drizzled with warm caramel and topped with nuts and chocolate.
- Prep Time: 15 minutes
- Cook Time: 5 minutes
- Total Time: 20 minutes
- Yield: 4 servings 1x
- Category: Dessert
- Method: No Cooking
- Cuisine: American
- Diet: Vegetarian
Ingredients
- 3 Crisp tart apples (Granny Smith, Honeycrisp, Fuji, Gala)
- 1 cup Caramel sauce (store-bought or homemade)
- 1/2 cup Chopped nuts (pecans, walnuts, almonds, or seeds for nut-free option)
- 1/4 cup Chocolate drizzle (optional)
- Pinch of Sea salt
Instructions
- Prepare the apples by washing and slicing into thin wedges.
- Heat the caramel sauce in the microwave for about 30 seconds, or prepare homemade caramel by melting sugar and cream together.
- Arrange the apple slices on a large platter in a circular pattern.
- Drizzle the warm caramel sauce generously over the apple slices.
- Sprinkle the chopped nuts on top for added crunch.
- Optionally, drizzle melted chocolate over the nachos and finish with a sprinkle of sea salt.
Notes
For a nut-free option, substitute nuts with graham crackers or granola. Prepare apples with lemon juice to prevent browning if made ahead.
Nutrition
- Serving Size: 1 serving
- Calories: 350
- Sugar: 25g
- Sodium: 150mg
- Fat: 15g
- Saturated Fat: 5g
- Unsaturated Fat: 8g
- Trans Fat: 0g
- Carbohydrates: 55g
- Fiber: 5g
- Protein: 3g
- Cholesterol: 10mg
Keywords: caramel apple nachos, dessert, sweet treats, fall recipe, party food
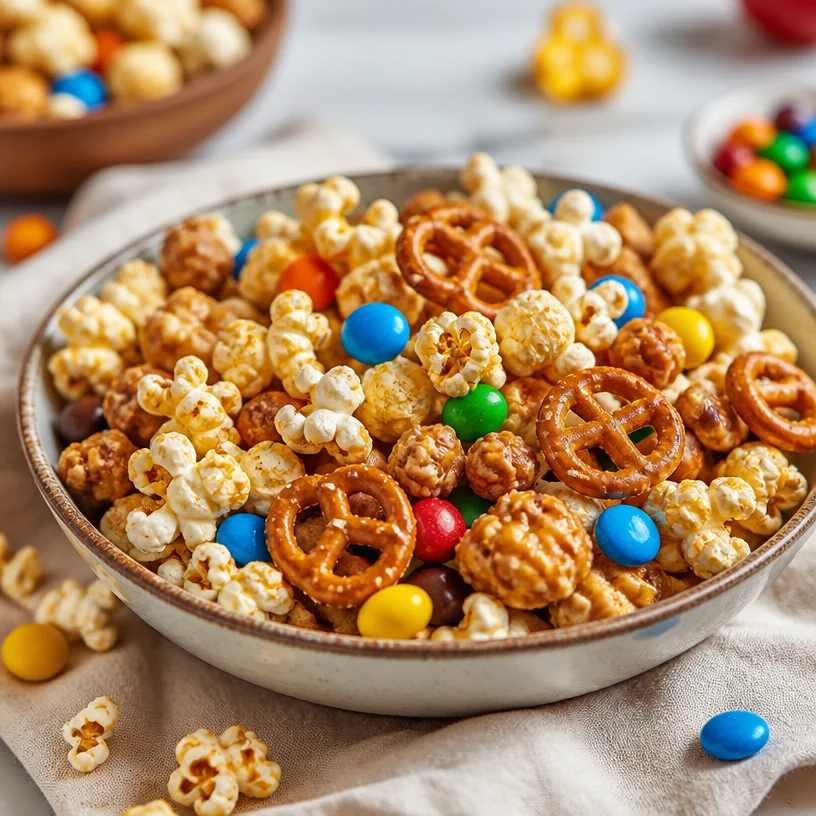
Ingredient Monster Trail Mix for Busy Weeknights
Unleashing Joy with Monster Trail Mix: A Perfect Snack for Any Occasion
Welcome to my cozy corner of the kitchen, where we’ll dive into something that every pantry should boast — a delicious, colorful, and utterly delightful creation known as Monster Trail Mix! 🎉 Whether you’re planning a lively movie night, a road trip, or just need a pick-me-up after a long day, this trail mix has got your back. It’s a celebration of textures and flavors, combining the crunch of pretzels, the fluffiness of popcorn, and the sweetness of candy into one unforgettable snack.
Let me tell you, making your own trail mix is not just about tossing some ingredients into a bowl. It’s a chance to express creativity! Picture yourself in the kitchen, sifting through your pantry, finding those treats that spark joy. Once you start mixing, you’ll find that the colors, flavors, and even the aromas create an inviting atmosphere that makes cooking an adventure.
One of the best parts about Monster Trail Mix is you can customize it to suit your cravings or seasonal themes! Maybe you want something extra festive for the holidays, or perhaps you’re looking for that perfect blend to fuel your hiking adventure. Trust me, once you’ve nailed down the basics, the variations are endless!
So grab your favorite mixing bowl, turn on some upbeat tunes, and let’s jump into the world of Monster Trail Mix. Your snack game is about to elevate!
A Little Kitchen Memory: My First Trail Mix Experience
I can still vividly remember the first time I made a version of Monster Trail Mix. I was in middle school, and my excitement for school parties was at an all-time high. The task was simple — bring a snack to share with classmates. I rummaged through our pantry and unearthed a plethora of treats: leftover popcorn from movie night, some pretzels that had been sitting dormant for far too long, and a colorful assortment of candy from Halloween. As I poured everything into a bowl, my heart raced with anticipation.
My mom walked by, raised an eyebrow, and asked, “What’s this?” I proudly declared it the “Monster Mix!” She laughed and helped me add some crushed nuts for good measure. The mixture was a hit at school, with everyone eagerly reaching for more. That moment ignited my passion for creating snacks that were not only delicious but also fostered connections. Each handful of trail mix became a bridge to shared laughter, friendship, and joy. And honestly, isn’t that what good food is about?
Ingredients for Your Monster Trail Mix
Here’s a simple yet fun list of ingredients to get you started on your own Monster Trail Mix. Feel free to consider these options as a jumping-off point!
- Pretzels: The salty crunch of pretzels adds great texture and balances out the sweetness of other ingredients. For a twist, use chocolate-covered pretzels or even flavor-infused varieties like sour cream and onion.
- Popcorn: Light and airy, popcorn is a fantastic vehicle for flavor. Use plain, kettle corn, or even cheesy popcorn for extra flair. Pro tip: Freshly popped popcorn is always a hit, but you can easily use the pre-packaged varieties for convenience.
- Candy: This is where the fun really happens! Use your favorite candies — chocolate M&Ms, gummy bears, Reese’s Pieces, or even fruit-flavored chews. Substituting with healthier options like yogurt-covered raisins or dried fruit can add a nutritious twist!
- Nuts (optional): For a protein boost and an extra crunch, throw in a handful of mixed nuts. Almonds, peanuts, or cashews all work wonderfully. For nut-free mixes, sunflower seeds are a solid alternative.
- Dried Fruit (optional): Add some chewy goodness with dried cranberries, apricots, or banana chips. They bring a lovely sweetness and can complement the salty flavors beautifully.
With these base ingredients, you’re primed for creativity!
Step-by-Step Instructions to Craft Your Monster Trail Mix
Let’s whip up this festive snack with ease and flair! Here’s how to do it:
-
Gather Your Ingredients: Set out your pretzels, popcorn, candy, nuts, and dried fruit. Having everything in front of you makes the process feel organized and exciting!
-
Pop Your Popcorn: If you’re using freshly popped popcorn, go ahead and pop it according to package instructions or your preferred method. I recommend air-popping for a healthier option, but if you love a buttery taste, make it your way! Allow the popcorn to cool slightly to avoid any melting issues when combining.
-
Mix the Base Ingredients: In a large mixing bowl, combine the pretzels and popcorn. Don’t worry about being precise; the charm lies in its rustic nature! Stir them together gently, so the pretzels don’t crumble — we want that delightful crunch!
-
Add Sweetness: This is where the fun begins! Start adding in the candy of your choice. I usually dump in a couple of generous handfuls, but adjust based on your sweet tooth. Remember, it’s all about balance! You might want to taste it as you go to find your ideal sweetness level.
-
Nuts and Dried Fruit: If you’ve chosen to include nuts and/or dried fruit, add them in now. The nuts provide protein and heartiness, while dried fruit offers a chewy counterpart to the crunchiness. So tasty!
-
Toss It All Together: Gently mix all the ingredients with your hands or a large spoon, ensuring an even distribution of all those delicious flavors. It’s a little messy, but hey, that’s half the fun!
-
Taste Test: Here comes the best part — grab a small handful and give it a taste! Adjust anything (like adding more candy) based on your preference. Feeling adventurous? Try drizzling a little melted chocolate over the top for an extra indulgence.
-
Storage: If you’re not devouring it all right away, store your newly made Monster Trail Mix in an airtight container. It can last a week or even longer if you’re mindful — although I doubt it’ll last that long!
Serving Suggestions
When it comes to serving your Monster Trail Mix, presentation can elevate the experience! You can fill small bags for easy snacking on the go or serve it in a charming bowl at a party. For an extra touch, use fun, colorful cups for guests to scoop their mix and enjoy while mingling.
Consider labeling the bowls if you have several mixes to showcase. This way, everyone can get a hint of what flavors await them!
Recipe Variations to Try
Here are a few fun variations to inspire your creativity:
-
Chocolate Lover’s Mix: Add dark chocolate chips, chocolate-covered pretzels, and chunks of a chocolate candy bar. Yum!
-
Tropical Twist: Use coconut flakes, dried mango, and macadamia nuts for a tropical vibe.
-
Trail Adventure: Snag classic trail mix ingredients like multigrain cereal, pumpkin seeds, and cinnamon-roasted almonds for a hearty, energy-boosting mix.
-
Savory Explosion: Swap candy for seasoned chickpeas, add cheese crisps, or use pretzel crisps for an exciting savory treat!
-
Nut-Free Delight: Focus entirely on pretzels, popcorn, chocolate candies, and dried fruits. Perfect for those who may have nut allergies!
Chef’s Notes
Over the years, I’ve come to cherish Monster Trail Mix as a go-to snack for any occasion. It’s perfect for kids’ birthday parties, road trips, or even cozy evenings on the couch with a good book!
One of my funniest memories revolves around an impromptu family gathering. I had made a gigantic batch of Monster Mix for my niece’s birthday party. Amidst the excitement, I accidentally spilled most of it across the floor! While I panicked initially, we all burst into laughter as we picked up the sweet, crunchy goodness, tossing it into the serving bowl. We ended up mingling around an impromptu snack, and that moment became one of our favorite family stories.
FAQs and Troubleshooting
-
Can I use microwave popcorn?
Absolutely! Microwave popcorn works great and is super convenient. Just be mindful of added flavors or butter, which can change the overall taste of your trail mix. -
How do I store the trail mix?
Keep your Monster Trail Mix in an airtight container at room temperature. It should stay fresh for a week or more, but I bet you won’t have any leftovers! -
What if it’s too sweet?
If you find your mix leaning heavily on the sweet side, consider balancing it out with more pretzels or some unsalted nuts. You could even sprinkle in some spices, like cinnamon or cayenne, for a delightful kick! -
How do I make it more nutritious?
Opt for dark chocolate, whole grain pretzels, and add more nuts or seeds! Dried fruits can also provide vitamins while keeping that sweet touch.
Nutritional Info
While I won’t go into too much detail on the nutrition side (because sometimes, we just want to indulge!), it’s worth mentioning that making your own trail mix allows you to control the ingredients—making it as healthy or indulgent as you desire.
Embrace the joy of snacking and get creative in your kitchen with this Monster Trail Mix! Remember, cooking should be fun and stress-free. So tie on your apron, pour a little something sparkling, and enjoy the delicious moments with friends and family around your table. Happy snacking! 🍿🥨🍬
PrintMonster Trail Mix

A delightful and customizable trail mix combining pretzels, popcorn, candy, and optional nuts and dried fruits, perfect for any occasion.
- Prep Time: 15 minutes
- Cook Time: 5 minutes
- Total Time: 20 minutes
- Yield: 6 servings
- Category: Snack
- Method: Mixing
- Cuisine: American
- Diet: Vegetarian
Ingredients
- Pretzels
- Popcorn
- Candy (e.g., chocolate M&Ms, gummy bears)
- Nuts (optional)
- Dried fruit (optional)
Instructions
- Gather your ingredients: Set out your pretzels, popcorn, candy, nuts, and dried fruit.
- Pop your popcorn according to package instructions or your preferred method.
- Mix the base ingredients in a large bowl, combining pretzels and popcorn gently.
- Add the candy of your choice, adjusting based on your sweet tooth.
- Add nuts and/or dried fruit if desired.
- Toss all ingredients together gently for even distribution.
- Taste test and adjust sweetness if necessary.
- Store in an airtight container if not consuming immediately.
Notes
Customize your trail mix with different ingredients and flavors based on your preference.
Nutrition
- Serving Size: 1 serving
- Calories: 250
- Sugar: 15g
- Sodium: 150mg
- Fat: 10g
- Saturated Fat: 1g
- Unsaturated Fat: 8g
- Trans Fat: 0g
- Carbohydrates: 35g
- Fiber: 2g
- Protein: 5g
- Cholesterol: 0mg
Keywords: trail mix, snack, healthy recipes, customizable snacks