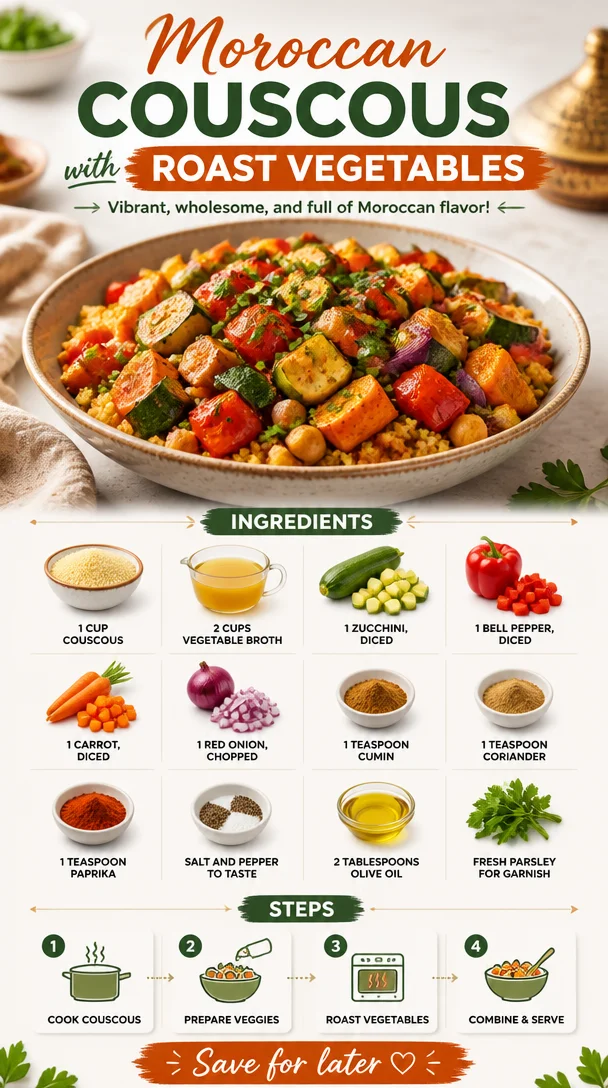
Moroccan Couscous with Roast Vegetables
Moroccan Couscous with Roast Vegetables: A Flavorful Journey
Hello, fellow foodies! Let’s embark on a delightful culinary adventure today! A dish that captures the vibrant spirit of Moroccan cuisine is none other than Moroccan Couscous with Roast Vegetables. It’s not just a meal; it’s an experience, a celebration of flavors, colors, and warmth that beckons you to the table. I’m excited to share this recipe with you today, filled with stories, tips, and all the love that goes into making it.
Introduction
Growing up, our kitchen was always bursting with life. The aroma of spices wafted through the air as my family gathered for dinner each night. One of my dear friends, a remarkable cook, introduced me to Moroccan cuisine during our college days. I remember stepping into her cozy apartment, where the scent of cinnamon and cumin welcomed us. She’d prepared a vibrant Moroccan feast, and I was instantly captivated.
Now, I want to replicate that nostalgia for you with this Moroccan Couscous recipe. Picture this: golden, fluffy couscous nestled under a heap of roasted vegetables, all coated in aromatic spices. It’s a colorful dish that feels festive yet comforting — ideal for weeknight dinners or special occasions. You don’t need a ticket to Marrakech to enjoy its flavors; we can create that magic right here! Let’s tie our aprons, put on some music, and dive into this dish together.
Personal Story
One of my fondest memories related to Moroccan Couscous involves a chilly winter evening a few years back. I had invited a few close friends over for an impromptu dinner. With busy lives and schedules, we often found it hard to come together, so I wanted this meal to feel special. While browsing through my pantry, I stumbled upon a bag of couscous and a bounty of seasonal vegetables from the local farmer’s market, and a delicious idea sparked!
I roasted the veggies until they were beautifully caramelized, infused them with spices, and piled them atop a bed of fluffy couscous. As the evening unfolded, our laughter filled the room, and we savored every bite of the meal. It was a reminder of how food has the magical ability to bring people together, creating unforgettable moments around the table. That dinner not only presented a beautiful dish but also reignited a deeper appreciation for how sharing food nurtures connection.
Ingredients
Here’s what you’ll need for this mouthwatering Moroccan Couscous with Roast Vegetables:
-
1 cup couscous
Couscous is the heart of this dish! It’s quick to prepare, light, and incredibly versatile. -
2 cups vegetable broth
Using vegetable broth instead of water adds rich flavor to the couscous. Feel free to use chicken broth for a non-vegetarian option! -
1 zucchini, diced
Zucchini adds a subtle sweetness and crisp texture. You can substitute it with yellow squash if you prefer. -
1 bell pepper, diced
I recommend using a red or yellow bell pepper for a pop of color and a mild, sweet taste. Green peppers will work, too, but they’re more bitter. -
1 carrot, diced
The natural sweetness of carrots enhances the overall flavor. You can also use parsnips for a different twist. -
1 red onion, chopped
The sweetness of roasted red onion rounds out the dish beautifully. White or yellow onions can serve as a substitute. -
1 teaspoon cumin
Cumin is a warm spice that adds depth. If you’re looking for a milder flavor, try ground coriander. -
1 teaspoon coriander
This herb brings in a citrusy, fresh flavor. Fennel seeds can work in a pinch, offering a different, yet delightful essence. -
1 teaspoon paprika
Sweet paprika elevates the dish with a smoky flavor. You can kick it up a notch with smoked paprika for extra depth. -
Salt and pepper to taste
Always remember to season your dishes! This enhances all the vibrant flavors. -
2 tablespoons olive oil
Olive oil not only helps roast the veggies beautifully but also adds healthy fats. Avocado or grapeseed oil can be substituted if desired. -
Fresh parsley for garnish
A sprinkle of fresh parsley adds a lovely touch, brightening the dish visually and flavor-wise. Mint can offer a refreshing alternative.
Step-by-Step Instructions
-
Preheat the Oven
Begin by preheating your oven to 400°F (200°C). A hot oven is key to achieving perfectly roasted vegetables with a lovely caramelization. -
Prepare the Vegetables
In a large bowl, combine the diced zucchini, bell pepper, carrot, and chopped red onion. Add the olive oil, cumin, coriander, paprika, salt, and pepper. Toss the vegetables until they are evenly coated. Here’s a hack: use your hands to mix them – it’s more effective! Just don’t forget to wash them afterward. -
Roast the Vegetables
Spread the vegetable mixture on a baking sheet in a single layer. This helps them roast evenly and achieve that gorgeous golden edge. Roast for 25–30 minutes, or until the vegetables are tender and caramelized. You might want to flip them halfway through for an even roast. -
Prepare the Couscous
In a medium saucepan, bring the vegetable broth to a boil. Once boiling, remove from heat and stir in the couscous. Cover it with a lid and let it sit for about 5 minutes. The couscous will absorb the broth and become fluffy! A tricky way to check for doneness: use a fork to fluff it up after resting. -
Combine the Flavors
After the vegetables are done roasting and the couscous is ready, combine them in a large serving bowl. Fluff the couscous with a fork, and gently fold in the roasted veggies. It’s key to be gentle here so you don’t mash the vegetables. -
Garnish and Serve
Top with fresh parsley for an extra pop of color. Just the thought of that contrast brings a smile to my face! Optional: Drizzle a bit more olive oil over the top for a lovely finish.
Serving Suggestions
For a beautiful presentation, serve your Moroccan Couscous in a large bowl, allowing everyone to help themselves. You can even present it on a rustic wooden board, surrounded by small bowls of additional garnishes, like toasted almonds or crumbled feta cheese for those who’d like to add a touch of creaminess. Perfect for family-style dining!
Recipe Variations
- Add Protein: For a heartier dish, toss in chickpeas for a vegetarian protein boost, or grilled chicken or shrimp for a non-vegetarian option.
- Spice it Up: Add a pinch of cayenne pepper or red pepper flakes if you enjoy some heat.
- Switch it Up: Substitute quinoa for couscous for a gluten-free twist, or use different seasonal vegetables like eggplant or butternut squash.
- Go Green: Mix in some spinach or kale right before serving for an added boost of greens.
Chef’s Notes
One of the best things about this recipe is its versatility. I’ve experimented with various vegetable combinations over the years, often depending on what’s in season or what I have in the fridge. You’ll find that this dish is forgiving, encouraging creativity. I once made a batch with an accidental sprinkle of cinnamon — it was a delightful surprise that became a new favorite!
FAQs and Troubleshooting
-
What if my couscous is clumpy?
No worries! Fluff it with a fork after it’s cooked. If it’s still clumpy, try adding a touch of olive oil to separate the grains. -
Can I prepare this dish in advance?
Absolutely! You can roast the veggies and prepare the couscous in advance. Mix them just before serving to avoid sogginess. -
What if I don’t have vegetable broth?
You can use water in a pinch, but for added flavor, try using a combination of half water and half white wine. -
How can I store leftovers?
Keep the couscous and vegetables in an airtight container in the fridge for up to three days. Reheat gently on the stovetop or in the microwave, adding a little splash of vegetable broth if needed to revive the dish.
Nutritional Info
While I typically leave nutritional details optional based on preferences, a serving of this Moroccan Couscous with Roast Vegetables offers a great balance of carbs, fiber, and healthy fats, making it a comforting yet nutritious choice!
To wrap up, cooking is all about discovering flavors, sharing joy, and creating memories. I hope this Moroccan Couscous with Roast Vegetables brings warmth and delight to your table. Enjoy the process, invite loved ones, and let’s keep celebrating the beauty of good food together. Happy cooking, my friends!
PrintMoroccan Couscous with Roast Vegetables
A flavorful Moroccan dish featuring golden couscous topped with beautifully roasted vegetables and aromatic spices.
- Prep Time: 15 minutes
- Cook Time: 30 minutes
- Total Time: 45 minutes
- Yield: 4 servings 1x
- Category: Main Course
- Method: Roasting
- Cuisine: Moroccan
- Diet: Vegan
Ingredients
- 1 cup couscous
- 2 cups vegetable broth
- 1 zucchini, diced
- 1 bell pepper, diced
- 1 carrot, diced
- 1 red onion, chopped
- 1 teaspoon cumin
- 1 teaspoon coriander
- 1 teaspoon paprika
- Salt and pepper to taste
- 2 tablespoons olive oil
- Fresh parsley for garnish
Instructions
- Preheat the oven to 400°F (200°C).
- Combine the diced zucchini, bell pepper, carrot, and chopped red onion in a large bowl with olive oil and spices.
- Spread the vegetable mixture on a baking sheet.
- Roast for 25–30 minutes until tender and caramelized.
- Bring the vegetable broth to a boil in a medium saucepan.
- Stir in the couscous, cover, and let it sit for 5 minutes.
- Fluff the couscous with a fork and combine it with the roasted vegetables in a large serving bowl.
- Garnish with fresh parsley and serve.
Notes
This dish is versatile; try adding chickpeas or different seasonal vegetables. For gluten-free, substitute quinoa for couscous.
Nutrition
- Serving Size: 1 serving
- Calories: 350
- Sugar: 5g
- Sodium: 400mg
- Fat: 12g
- Saturated Fat: 2g
- Unsaturated Fat: 10g
- Trans Fat: 0g
- Carbohydrates: 45g
- Fiber: 6g
- Protein: 10g
- Cholesterol: 0mg
Keywords: Moroccan, Couscous, Vegetarian, Roasted Vegetables, Healthy Dinner

Ingredient Pink Lemonade with Strawberries in 10 Minutes
Sip & Savor: The Ultimate Pink Lemonade with Strawberries Recipe
Hello there, fellow food lover! Today, I’m so excited to share a refreshing homemade recipe that channels summer vibes no matter the season: Pink Lemonade with Strawberries. This drink is not just pretty; it’s a symphony of sweet and tangy flavors that’ll quench your thirst and put a smile on your face.
A Toast to Memories
When I think of pink lemonade, I’m instantly transported to my childhood backyard picnics on warm Sundays. My family had this old, weathered picnic table covered with a cheerful checkered tablecloth, where we would gather under the shade of a giant oak tree. My mom, with her classic charm, would whip up a batch of pink lemonade, using freshly squeezed lemons and sugar—none of that powdered mix nonsense! She’d pour it into a large glass pitcher, and as soon as the ice plunked in, it’d create a refreshing “slosh” sound that was music to our ears.
I remember sneaking strawberries from the patch beside our home and tossing them into my cup. Watching those ruby red beauties floating in that inviting pink liquid was pure magic. Bottling that joy into a recipe is what we’ll be doing today. It’s all about celebrating the simple joys, just like Mom did, and I can’t wait for you to experience it with me!
Ingredients
Here’s what you’ll need to create this delightful drink:
-
1 cup fresh strawberries, hulled and sliced
Strawberries add that lovely sweetness and natural pink hue. If fresh isn’t available, you can use frozen strawberries—just thaw and slice! -
1 cup freshly squeezed lemon juice
Freshness is key! It makes all the difference in taste. You can substitute with bottled lemon juice in a pinch, but I promise you’ll miss that bright, zesty flavor. -
1 cup sugar
Sugar balances the tartness of the lemons. For a healthier twist, you can swap this out for honey or agave syrup (start with a bit less and adjust to taste). -
4 cups water
This is the base for your lemonade. Use cold or sparkling water for a fizzy kick! -
Ice
Essential for a refreshing drink. The more, the better! Feel free to freeze some lemon or lemonade in ice cube trays for a fun touch. -
Lemon slices and additional strawberries for garnish
These aren’t just for show—they infuse a little extra flavor into each glass and make for a beautiful presentation!
Step-by-Step Instructions
Let’s dive into the delightful world of making your pink lemonade!
-
Prep Your Strawberries: Start by hulking and slicing your strawberries. This is the part where you can really enjoy those bursts of summer fresh flavors. As you’re doing this, feel free to pop a few slices in your mouth—taste-testing is a must, right?
-
Juice Those Lemons: Grab about 4-6 lemons, as you’ll need about a cup of lemon juice. Roll the lemons on your countertop with a gentle press. This helps release the juices easier when you cut them. Once they’re sliced, use a citrus juicer or your trusty hands to extract that tangy goodness.
-
Heat the Sugar: In a small saucepan, over medium heat, combine 1 cup of sugar and 1 cup of water. Stir until the sugar completely dissolves. This step creates a simple syrup that helps distribute sweetness evenly in your lemonade. Plus, it keeps your drink lovely and smooth.
-
Mix it All Together: In a large pitcher, combine the freshly squeezed lemon juice, your homemade simple syrup, and the remaining 3 cups of water. Give it a good stir. This is where magic happens! Taste and adjust sweetness if necessary.
-
Add Strawberries: Toss in those sliced strawberries. They’ll infuse flavor while also adding that stunning visual appeal to your drink. Let it sit for a few minutes to allow the flavors to meld—this is critical for achieving a refreshing taste!
-
Serve Over Ice: Fill tall glasses with ice and pour your gorgeous pink lemonade over the top. Float a few extra sliced strawberries and lemon slices on top for that professional touch.
Chef Tip: Always taste before serving! If it’s too tart, add a little more sugar; if it’s too sweet, a splash of water can help balance it out.
Serving Suggestions
Wondering how to elevate your lemonade moment? Serve it in beautiful glassware to showcase that vibrant color. A few sprigs of fresh mint or basil as a garnish can be a lovely twist. Accentuate the summer feels with colorful straws, or even a lovely little paper umbrella—why not? This drink invites creativity!
Recipe Variations
Feel free to get playful with this recipe! Here are a few twists you might enjoy:
-
Berry Blast: Add a mixture of berries like raspberries, blueberries, or blackberries for a berry medley lemonade!
-
Herbal Infusion: Infuse some fresh mint or basil into your simple syrup for a refreshing herbal note.
-
Sparkling Lemonade: Use sparkling water instead of still water for a fizzy delight that feels even more celebratory!
-
Citrus Medley: Use a blend of citrus fruits—like limes, oranges, or grapefruits—to create a zesty citrus punch.
-
Adult Version: Add a splash of gin or vodka for a delightful summer cocktail!
Chef’s Notes
Here’s a little secret: this is one of those recipes that only gets better over time. As it sits in the fridge, the flavors marry and deepen, which means leftovers (if you have them!) are a real treat. I’ve been known to throw a pitcher in the fridge after a gathering and enjoy it for breakfast as a refreshing wake-up call, but maybe that’s just my inner foodie talking.
Plus, this lemonade is perfect for using up those lemons and strawberries that may be slightly past their prime. Nothing should go to waste in our kitchens!
FAQs and Troubleshooting
1. What do I do if my lemonade is too sweet?
No worries! Just add some extra water or a splash of lemon juice to balance it out.
2. How can I make this ahead of time?
You can prepare the lemonade base and keep it in the fridge for up to 3 days. Just add ice and garnishes right before serving to keep it fresh!
3. Can I use store-bought lemon juice?
Sure! While nothing beats the freshness of real lemons, store-bought can be a great backup if you’re in a pinch.
4. How do I avoid pulp in my lemonade?
Use a fine mesh strainer to strain the juice after squeezing the lemons. But remember, a little pulp can add to the rustic charm!
Nutritional Info
This refreshing Pink Lemonade with Strawberries recipe serves about 8 (8 oz. servings), making it perfect for summer barbecues or cozy dinners. Each serving contains approximately:
- Calories: 120
- Carbs: 30g
- Sugar: 25g
- Vitamin C: 30% of Daily Value
And there you have it! Your guide to crafting the perfect Pink Lemonade with Strawberries. I hope you enjoy every sip and share this delightful drink with friends and family around your table. Remember, it’s not just about the taste—it’s about creating special moments centered around good food. Cheers and happy sipping!
PrintUltimate Pink Lemonade with Strawberries

A refreshing homemade pink lemonade with the sweetness of strawberries, perfect for summer gatherings.
- Prep Time: 10 minutes
- Cook Time: 5 minutes
- Total Time: 15 minutes
- Yield: 8 servings 1x
- Category: Beverage
- Method: Mixing
- Cuisine: American
- Diet: Vegetarian
Ingredients
- 1 cup fresh strawberries, hulled and sliced
- 1 cup freshly squeezed lemon juice
- 1 cup sugar
- 4 cups water
- Ice
- Lemon slices and additional strawberries for garnish
Instructions
- Prep Your Strawberries: Start by hulking and slicing your strawberries.
- Juice Those Lemons: Grab about 4-6 lemons to yield 1 cup of lemon juice.
- Heat the Sugar: In a small saucepan, combine 1 cup of sugar and 1 cup of water over medium heat until dissolved.
- Mix it All Together: In a large pitcher, combine lemon juice, simple syrup, and remaining 3 cups of water. Stir well.
- Add Strawberries: Toss in sliced strawberries and let it sit for a few minutes.
- Serve Over Ice: Fill glasses with ice and pour pink lemonade over the top. Garnish with extra strawberries and lemon slices.
Notes
This lemonade gets better as it sits, making it perfect for leftovers. Consider using slightly overripe lemons and strawberries to reduce waste.
Nutrition
- Serving Size: 1 serving
- Calories: 120
- Sugar: 25g
- Sodium: 5mg
- Fat: 0g
- Saturated Fat: 0g
- Unsaturated Fat: 0g
- Trans Fat: 0g
- Carbohydrates: 30g
- Fiber: 1g
- Protein: 0g
- Cholesterol: 0mg
Keywords: pink lemonade, strawberry drink, refreshing beverage, summer drink, homemade lemonade
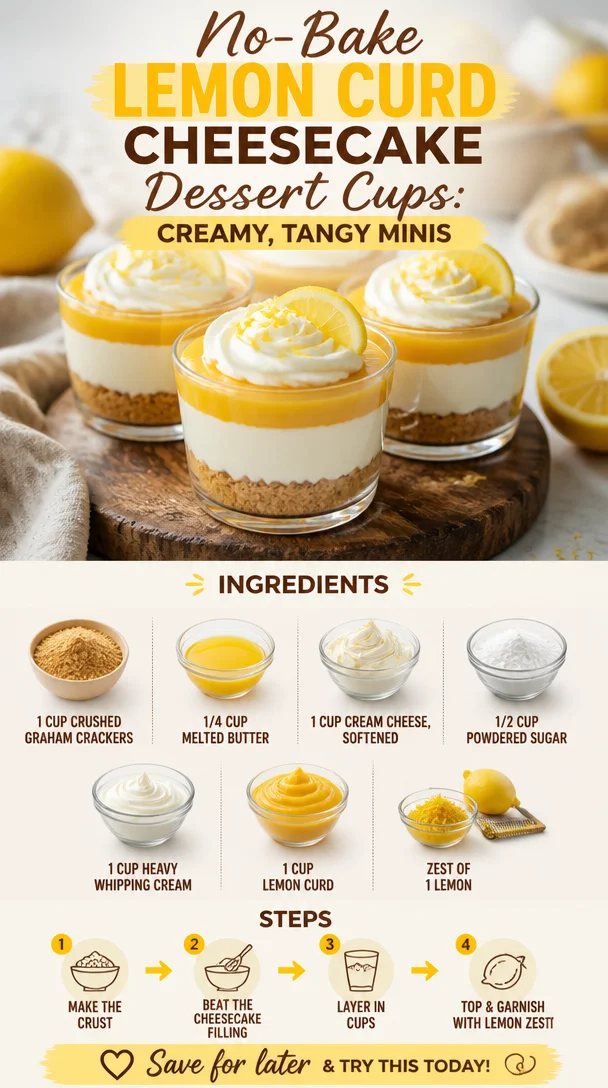
No-Bake Lemon Curd Cheesecake Dessert Cups: Creamy, Tangy Minis
Lemon Curd Cheesecake Dessert Cups: A Sweet Symphony
Cooking is like a beautiful dance, where every ingredient glides harmoniously into the next. I’m thrilled to share a recipe that brings that dance into your kitchen, and it’s one I hold near and dear to my heart: Lemon Curd Cheesecake Dessert Cups. Perfect for a sunny afternoon gathering or even just as a treat for yourself, these dessert cups are the essence of elegance and joy rolled into one!
Imagine this: a bright, zesty lemon curd that sings summer, layered over a creamy, dreamy cheesecake filling, all nestled on a crunchy graham cracker crust. These dessert cups are not only visually stunning but also incredibly easy to whip up. You’ll be the toast of any gathering, whether it’s a picnic with friends or a quiet evening at home. Let’s dive into the delightful world of lemony goodness!
A Slice of My Past
When I think of lemons, I can’t help but smile at the memories of summers spent at my grandparents’ house. They had a garden bursting with colors and fragrances, and the lemon tree was always my favorite spot to visit. I can still hear my grandmother’s laughter as she encouraged me to pick the ripest lemons. Her famous lemon meringue pie was legendary, and the taste of that zesty filling combined with the soft, fluffy meringue remains etched in my memory.
It was during those warm afternoons, her bustling kitchen filled with nostalgia, that I fell in love with the idea of transforming simple ingredients into beautiful dishes. Those sweet memories of citrusy delights inspired me to create these Lemon Curd Cheesecake Dessert Cups you’ll love to make and share.
Ingredients
Here’s what you’ll need to grab for this delightful recipe:
-
1 cup crushed graham crackers
A classic dessert base that adds that lovely crumbly texture. You can substitute with digestive biscuits for a slightly different flavor. -
1/4 cup melted butter
It binds the graham cracker crumbs together. If you want a lighter version, try coconut oil as a substitution. -
1 cup cream cheese, softened
This creamy dream gives the cheesecake its rich texture. For a lighter option, consider using ricotta cheese instead. -
1/2 cup powdered sugar
It sweetens the mixture without the graininess of granulated sugar. You can use coconut sugar for a healthier alternative, but adjust amounts as it’s less sweet. -
1 cup heavy whipping cream
This is what makes the cheesecake luxuriously creamy. If you’re looking for a dairy-free option, coconut cream works wonderfully here. -
1 cup lemon curd
The star of the show! You can find store-bought lemon curd or easily make your own at home. A bit of passion fruit curd can add an exotic twist! -
Zest of 1 lemon
This adds explosive flavor and aroma. Don’t toss it out—zest away! You can use lime zest for a more tropical flair.
Step-by-Step Instructions
Step 1: Make the Crust
-
Preheat Your Oven
Set your oven to 350°F (175°C) to prepare for baking. -
Mix the Crust
In a medium bowl, combine the crushed graham crackers with melted butter until well mixed. The mixture should have the consistency of wet sand. -
Press into Cups
Choose your favorite serving cups (mason jars are fabulous for this!). Press the graham cracker mix firmly into the bottom of each cup to form a crust. Bake in the preheated oven for about 8-10 minutes until golden. Remove and let cool completely.
Step 2: Prepare the Filling
-
Cream the Cheese
In a large mixing bowl, beat the softened cream cheese and powdered sugar together until smooth and creamy. I love using a hand mixer for this step, but a spatula works beautifully too; it just takes a little more elbow grease! -
Whip the Cream
In another bowl, whip the heavy cream until stiff peaks form. This step is crucial as it brings lightness to your cheesecake filling. It’s all about texture! -
Fold Together
Gently fold the whipped cream into the cream cheese mixture until just combined. Be careful not to deflate the whipped cream; we want it to stay fluffy and light! -
Add Lemon Curd and Zest
Carefully fold in the lemon curd and lemon zest into the cheesecake filling until thoroughly combined. The vibrant color and aroma will brighten up your kitchen, making it feel like summer all year long!
Step 3: Assemble Your Dessert Cups
-
Layering Time
Spoon the cheesecake filling into each cup on top of the cooled graham cracker crust. You can use a piping bag if you’d like a more polished finish! -
Chill
Refrigerate the assembled cups for at least 2 hours to allow the flavors to meld and the filling to set perfectly atop that crunchy base.
Step 4: Serve
- Garnish
Just before serving, add a dollop of additional lemon curd on top and perhaps a sprinkle of lemon zest or a fresh mint leaf for that added pop of color.
These adorable dessert cups are ready for you to gather friends or family around the table and enjoy.
Serving Suggestions
Serve these cheerful dessert cups chilled, with perhaps a side of fresh berries or a light, herby salad for an unexpected twist. They also pair beautifully with a glass of sparkling wine—perfect for those spontaneous celebrations.
Recipe Variations
- Berry Bliss: Swirl in some fresh berry puree with the lemon curd for a tangy berry twist.
- Chocolate Lovers: Drizzle chocolate ganache over the top to bridge the tangy lemon and creamy cheesecake elements with rich chocolate flavors.
- Nutty Additions: For extra texture, fold in crushed nuts like pistachios or walnuts into the crust for that delightful crunch.
- Gluten-Free: Use gluten-free graham crackers or almond flour for the base, and ensure all other ingredients are gluten-free certified.
Chef’s Notes
This recipe has evolved from various inspirations over the years. I first started playing with lemon curd back in culinary school, and it became a staple in my kitchen. I loved how it could be used in so many applications—from tarts to cheesecakes. My friends always knew they could expect me to bring something lemony to any gathering.
I remember one night, I forgot to purchase enough lemon curd, so I decided to make my own—what a mess! But it turned out to be one of the best cooking adventures, resulting in my now-famous homemade lemon curd! So, know that if you ever feel like making things from scratch, jump right in!
FAQs and Troubleshooting
-
My cheesecake filling is too runny. What did I do wrong?
Make sure your cream cheese is softened and well-blended, and ensure the heavy cream is whipped to stiff peaks. Too much moisture in the filling can also lead to a runny consistency. -
How can I incorporate more lemony flavor?
Add a bit of lemon extract to the cream cheese mixture for an extra punch! Just a teaspoon will do, but taste and adjust as needed. -
Can I make these cups in advance?
Absolutely! These dessert cups taste even better the next day after the flavors have had time to meld in the fridge. Just add garnishes right before serving. -
What should I do if my graham cracker crust crumbles?
Ensure you’ve added enough melted butter to bind the crumbs. If it’s too dry, simply warm a bit more butter and add it, mixing until the desired consistency is achieved.
Nutritional Info
While I won’t dive deep into the numbers today, I can tell you that these dessert cups are a delicious treat best enjoyed in moderation. If you find yourself wanting to make it a tad lighter, use lower-fat cream cheese and whipped cream substitutes.
Here you have it, my dear foodies—a luscious, delightful recipe for Lemon Curd Cheesecake Dessert Cups! I hope you feel inspired to throw on that apron, gather your favorite ingredients, and whip up some sweet memories in your kitchen. Happy cooking, and may your gatherings be filled with laughter, love, and lots of lemony goodness!
PrintLemon Curd Cheesecake Dessert Cups

Delightful dessert cups featuring zesty lemon curd layered over creamy cheesecake filling on a crunchy graham cracker crust.
- Prep Time: 20 minutes
- Cook Time: 10 minutes
- Total Time: 130 minutes
- Yield: 4 servings 1x
- Category: Dessert
- Method: Chilling
- Cuisine: American
- Diet: Vegetarian
Ingredients
- 1 cup crushed graham crackers
- 1/4 cup melted butter
- 1 cup cream cheese, softened
- 1/2 cup powdered sugar
- 1 cup heavy whipping cream
- 1 cup lemon curd
- Zest of 1 lemon
Instructions
- Preheat your oven to 350°F (175°C).
- Mix the crushed graham crackers with melted butter until well combined.
- Press the mixture firmly into the bottom of each cup to form a crust, then bake for 8-10 minutes until golden. Allow to cool.
- Cream the softened cream cheese and powdered sugar until smooth.
- Whip the heavy cream until stiff peaks form.
- Fold the whipped cream into the cream cheese mixture until just combined.
- Add the lemon curd and lemon zest, gently folding until evenly mixed.
- Spoon the cheesecake filling into each cup on top of the cooled crust.
- Chill the cups for at least 2 hours.
- Garnish with a dollop of lemon curd and lemon zest before serving.
Notes
These dessert cups can be made in advance and taste better the next day. Try adding berry puree or chocolate ganache for variations.
Nutrition
- Serving Size: 1 cup
- Calories: 320
- Sugar: 25g
- Sodium: 210mg
- Fat: 22g
- Saturated Fat: 10g
- Unsaturated Fat: 8g
- Trans Fat: 0g
- Carbohydrates: 30g
- Fiber: 1g
- Protein: 4g
- Cholesterol: 50mg
Keywords: lemon curd, cheesecake, dessert cups, summer dessert, easy dessert
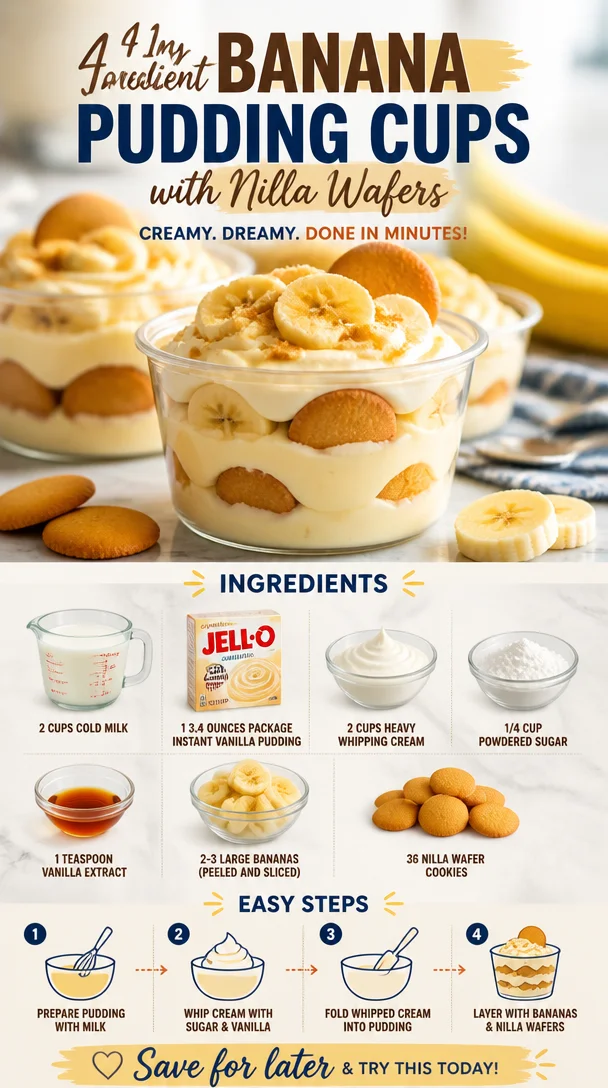
Ingredient Banana Pudding Cups with Nilla Wafers
Nilla Wafer Banana Pudding Cups: A Sweet Nostalgic Delight
Hello, fellow food lovers! Today, we’re diving into a dessert that feels like a warm hug after a long day—Nilla Wafer Banana Pudding Cups. This delightful treat is perfect for any occasion, whether you’re hosting a cozy dinner party or simply craving a sweet bite on a Tuesday night. The balance of creamy vanilla pudding, fresh bananas, and the crunch of Nilla Wafers makes this dessert not just delicious but also a brilliant trip down memory lane.
A Personal Story: A Dessert That Brings Back Memories
I can still picture the summer afternoons of my childhood, sun filtering through the kitchen window, and the enticing aroma of freshly baked treats wafting through the air. My grandma, the ultimate hostess, was a magician in the kitchen, always whipping up something delightful just for us. One of my favorite memories centers around her legendary banana pudding. In her version, layers of ripe bananas, homemade vanilla custard, and crisp Nilla Wafers came together to create a sensational treat that was the highlight of any family gathering.
The best part? She often let me help! I was in charge of layering the bananas and wafers, which was a messy but fun job that always ended with a little pudding on my nose. As we spooned the pudding into cups, we would sneak bites when no one was looking (because who could resist?).
Years later, I still cherish that dish, and now, I’m bringing my own twist to the table with these Nilla Wafer Banana Pudding Cups. They’re a gorgeous tribute to my grandma’s recipe, with a simple yet elegant presentation that feels just right for today’s gatherings.
Ingredients
To whip up these delightful Nilla Wafer Banana Pudding Cups, you’ll need the following ingredients:
-
2 cups cold milk
The base for our pudding. Whole milk works best for a creamy texture, but you can substitute with almond milk or any other milk alternative if you want to lighten things up! -
1 (3.4 ounces) package instant vanilla pudding
This is your shortcut to creamy deliciousness. If you’re feeling adventurous, a homemade vanilla pudding can be a beautiful alternative, although it requires more time and attention. -
2 cups heavy whipping cream
Whipping cream gives a rich, luxurious feel to the pudding. If you’re looking for a lighter option, you can use half-and-half, but be cautious as it won’t whip as beautifully. -
1/4 cup powdered sugar
Sweetens up the whipped cream and pudding without grittiness. Feel free to adjust the amount based on your sweetness preference; you can even use coconut sugar for a less refined choice. -
1 teaspoon vanilla extract
A splash of pure vanilla extract takes the flavor up a notch. I always recommend sticking to pure extract rather than imitation for the best flavor. -
2-3 large bananas (peeled and sliced)
Ripe bananas are key; the sweeter and softer, the better. If you’re worried about browning, toss them in a little lemon juice after slicing! -
36 Nilla Wafer cookies
These little gems add the crunch and classic taste everyone loves. If you’re feeling adventurous, feel free to swap for a chocolate wafer or even almond cookies for a fun twist!
Step-by-Step Instructions
-
Prep the Pudding
In a large mixing bowl, pour in the cold milk. Gradually whisk in the instant vanilla pudding until smooth. Together, they’ll be the creamy base for your delicious cups. -
Whip the Cream
In another bowl, pour in the heavy whipping cream. Add in the powdered sugar and vanilla extract. Using an electric mixer, beat on medium-high speed until soft peaks form. This should take about 3-5 minutes. Make sure not to overbeat; you want it fluffy, but not too stiff! -
Combine
Gently fold the whipped cream into the pudding mixture using a spatula. Be careful not to deflate the whipped cream; we want all that airy goodness to stay intact! -
Prepare Your Cups
Now for the fun part! Grab your dessert cups or any small glasses you want to use. Start with a layer of Nilla Wafers on the bottom of each cup. Feel free to break some of them if they don’t fit! -
Layer the Pudding
Add a generous spoonful of the pudding mixture over the wafers, followed by a layer of banana slices. Repeat the layers—Nilla Wafers, pudding, bananas—until you reach the top, finishing with a dollop of pudding. -
Chill
Cover the cups with plastic wrap and refrigerate for at least 2 hours. If you can let them sit overnight, even better! This is when the flavors meld, and the cookies soften, creating a luscious treat. -
Top & Serve
Before serving, crush a few Nilla Wafers and sprinkle them on top. Feel free to add a small dollop of whipped cream if desired. You’ll end up with a gorgeous presentation that’s sure to impress guests!
Serving Suggestions
For plating, I love serving these Nilla Wafer Banana Pudding Cups on a rustic wooden platter, lined with fresh mint leaves for a pop of color. You could also sprinkle some crushed nuts or chocolate shavings on top for added flair. Either way, these cups will steal the show!
Recipe Variations
Here are a few fun twists to this classic recipe:
- Chocolate Lovers: Swap half of the vanilla pudding for chocolate pudding for a delightful chocolate-banana combo.
- Nutty Banana Bliss: Incorporate chopped walnuts or pecans in between the layers for a crunch!
- Coconut Cream Twist: Use coconut milk instead of regular milk and add shredded coconut into the pudding mixture.
- Add Some Spice: A pinch of cinnamon or nutmeg can add a warm tone to the pudding—perfect for autumn!
Chef’s Notes
This recipe is one that has evolved over time for me. I can’t tell you how many attempts I made trying to get the texture just right! I initially tried using regular whipped cream instead of heavy whipping cream, but the result was never as satisfying. You live and learn! And while my grandma’s version will always hold a special place in my heart, I love how these cups feel modern yet nostalgic. They’re a blend of everything I adore about cooking—comfort, family, and a touch of creativity!
FAQs and Troubleshooting
1. My pudding didn’t set properly! What went wrong?
This often happens if the milk wasn’t cold enough or if it wasn’t whisked enough with the pudding mix. Make sure both are really cold for the right consistency.
2. Are there alternatives to Nilla Wafers?
Absolutely! Try using oreo cookies for a cookies-and-cream twist, or even graham crackers for a classic flavor.
3. Can I make this ahead of time?
Yes! These pudding cups hold up well in the fridge. They’re actually better after a night in the fridge, so feel free to prep them the day before your event.
4. How do I keep my bananas from browning?
Tossing them in a splash of lemon juice is the easiest way to keep them looking fresh and vibrant!
Nutritional Info
While I’m not a nutritionist, it’s worth noting that this dessert does contain rich ingredients like heavy cream and sugar. For those tracking calories, an approximation per cup would be about 320-350 calories, depending on portion sizes and any variations you make. Enjoy in moderation, or make them specially for those “just because” moments!
So there you have it! Nilla Wafer Banana Pudding Cups that bring joy, nostalgia, and deliciousness to your table. Remember, cooking is all about sharing love and creating memories—so gather your people, tie on that apron, and let’s get to work. Happy cooking!
PrintNilla Wafer Banana Pudding Cups
A delightful dessert that combines creamy vanilla pudding, fresh bananas, and the crunch of Nilla Wafers, perfect for any occasion.
- Prep Time: 15 minutes
- Cook Time: 0 minutes
- Total Time: 135 minutes
- Yield: 6 servings 1x
- Category: Dessert
- Method: Chilling
- Cuisine: American
- Diet: Vegetarian
Ingredients
- 2 cups cold milk
- 1 (3.4 ounces) package instant vanilla pudding
- 2 cups heavy whipping cream
- 1/4 cup powdered sugar
- 1 teaspoon vanilla extract
- 2–3 large bananas (peeled and sliced)
- 36 Nilla Wafer cookies
Instructions
- Pour the cold milk into a large mixing bowl. Gradually whisk in the instant vanilla pudding until smooth.
- Add the heavy whipping cream to another bowl. Incorporate the powdered sugar and vanilla extract. Beat on medium-high speed until soft peaks form (about 3-5 minutes).
- Gently fold the whipped cream into the pudding mixture using a spatula.
- Grab your dessert cups and start layering Nilla Wafers on the bottom of each cup.
- Add a spoonful of pudding mixture over the wafers, followed by a layer of banana slices. Repeat layers until reaching the top.
- Cover the cups with plastic wrap and refrigerate for at least 2 hours, or overnight for best results.
- Before serving, crush a few Nilla Wafers and sprinkle them on top, optionally adding a dollop of whipped cream.
Notes
For plating, serve on a rustic wooden platter with mint leaves for color. Experiment with toppings like crushed nuts or chocolate shavings.
Nutrition
- Serving Size: 1 cup
- Calories: 350
- Sugar: 24g
- Sodium: 85mg
- Fat: 25g
- Saturated Fat: 15g
- Unsaturated Fat: 7g
- Trans Fat: 0g
- Carbohydrates: 35g
- Fiber: 1g
- Protein: 4g
- Cholesterol: 80mg
Keywords: banana pudding, dessert, Nilla Wafers, pudding cups, nostalgic dessert
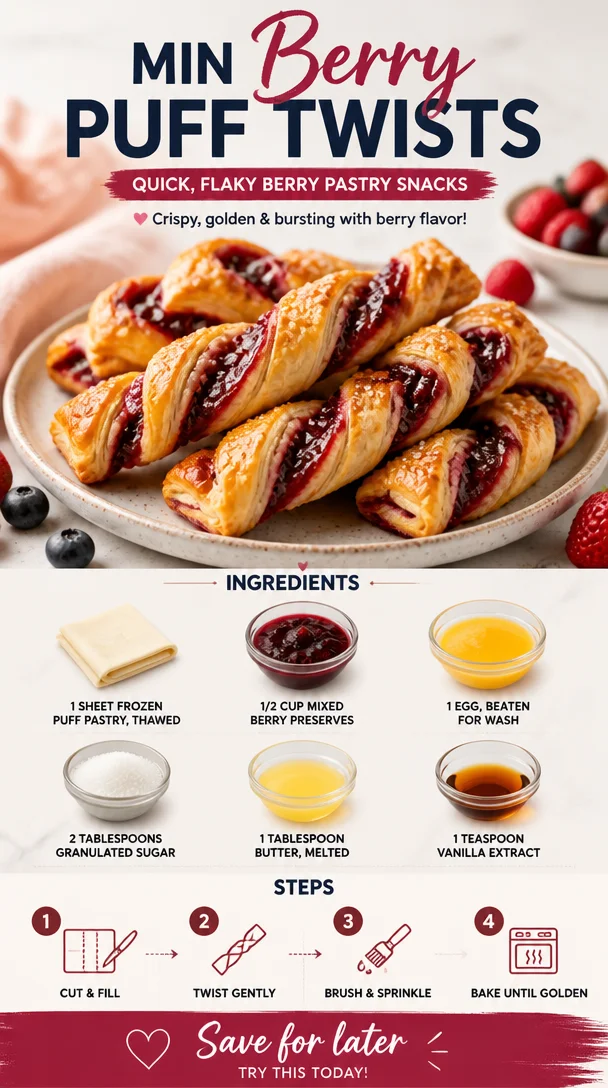
Min Berry Puff Twists: Quick, Flaky Berry Pastry Snacks
Indulge in Sweet Simplicity: Berry Puff Twists
Hello there, fellow foodies! Today, we’re diving into a delightful treat that perfectly balances simplicity with elegance. Imagine biting into a warm, flaky pastry filled with luscious, fruity goodness—the ultimate indulgence for both special occasions and a cozy night in. Say hello to my Berry Puff Twists! These adorable pastries are not just delicious, but they also offer that ‘wow’ factor that’s sure to impress your loved ones without sending you into a culinary panic. Let’s explore why this recipe is a staple in my kitchen and how you can master it effortlessly.
A Sweet Slice of Nostalgia
I still remember the first time I made puff pastry treats. It was a crisp autumn afternoon, and I had invited a few friends over for a casual gathering. Excited to showcase my culinary skills, I decided to fill the kitchen with the warm aroma of baking. Drawing inspiration from my childhood, I turned to my secret stash of berry preserves—a family heirloom passed down through my grandmother.
As we gathered around the table, the moment those golden puff pastry twists came out of the oven, their glossy tops shimmering, I could feel my heart race. With the first bite, a symphony of flavors unfolded—sweet, tangy berries enveloped in buttery, flaky pastry. The laughter and chatter as we devoured those treats made it one of those unforgettable memories. Fast-forward to today, and I still whip up these Berry Puff Twists whenever I want to create warm, cozy moments!
What You’ll Need
Here’s a quick look at the ingredients you’ll need to recreate this feast at home:
-
1 sheet frozen puff pastry, thawed
This is your foundation for easy, flaky layers. You can use homemade pastry if you’re feeling adventurous, but store-bought is a time-saver on busy days! -
1/2 cup mixed berry preserves
Bursting with flavor, berry preserves add sweetness and depth. Substitute with raspberry, strawberry, or even peach preserves for a unique twist. -
1 egg, beaten for wash
This egg wash gives your pastry that golden, glossy finish. If you’re vegan, a splash of almond or soy milk works too! -
2 tablespoons granulated sugar
A sprinkle of sugar elevates the sweetness and adds a delightful crunch. For a healthier alternative, you can substitute with coconut sugar. -
1 tablespoon butter, melted
Butter brings richness to the party! You can swap in vegan butter or even coconut oil for a dairy-free option. -
1 teaspoon vanilla extract
Vanilla enhances the flavor profile beautifully. Feel free to use almond extract for a fun flavor surprise!
Step-by-Step Instructions
Let’s get cooking! Follow these step-by-step directions, and you’ll have those delicious Berry Puff Twists on your table in no time!
-
Preheat Your Oven
Preheat your oven to 400°F (200°C). Ensuring your oven is hot enough is crucial to achieving that puff and flaky texture you crave. -
Prepare Your Puff Pastry
Once your puff pastry is thawed, roll it out on a lightly floured surface. You want to ensure it’s cold, so if it feels warm, pop it back in the fridge for a few moments. The colder, the better for maximum flakiness! -
Cut the Pastry
Using a sharp knife or pizza cutter, cut your pastry into strips—about 1 inch wide and 6 inches long. Don’t overthink it! Imperfections can make your dish feel homemade. -
Add the Berry Preserves
Spoon a small amount of mixed berry preserves onto the center of each strip. You want just enough to give flavor without making a mess. If you’re feeling generous, go wild—who doesn’t love extra sweetness? -
Twist the Pastry
Here comes the fun part! Fold the strips over the preserves, pinching the edges to seal them tightly. Then, twist each strip several times to create those adorable twists. Keep it loose! You want to let the filling peek through—trust me, it’s the prettiest part. -
Brush with Egg Wash
Place your twists on a parchment-lined baking sheet, leaving some space in between. Brush each one with the beaten egg wash for that sun-kissed glow when baked. -
Sprinkle with Sugar
Finally, here comes the sugar! Sprinkle granulated sugar over each twist. This step adds a delightful crunch, enhancing the overall texture. Who doesn’t love a bit of sparkle? -
Bake Until Golden
Pop your baking tray in the oven and let those beauties bake for about 15-20 minutes or until they’re golden brown and incredibly fragrant. The smell will drive you wild!
Serving Suggestions
Once your Berry Puff Twists are out of the oven and cooled slightly, it’s time to serve! Arrange them on a beautiful plate, perhaps garnishing with fresh mint leaves or a dusting of powdered sugar for that extra touch of elegance. These treats are perfect as an afternoon snack with tea, a festive addition to brunch, or as a dessert centerpiece for your next gathering.
Recipe Variations
Looking to switch things up? Here are a few creative twists on this classic recipe:
-
Nutty Decision: Add a sprinkle of chopped toasted almonds or hazelnuts with the preserves for extra crunch and flavor.
-
Chocolate Dream: Replace the berry preserves with chocolate hazelnut spread for a decadent dessert option. Who could resist that?
-
Seasonal Fruits: Experiment with seasonal fruit preserves like apricot or even fig for a gourmet twist.
-
Savory Surprise: Use savory fillings, such as cream cheese mixed with fresh herbs, for an irresistible appetizer option.
Chef’s Notes
Over the years, my Berry Puff Twists have morphed into a family favorite, adored by friends and relatives alike. They’ve traveled from cozy evenings at home to lively summer picnics and festive holiday gatherings. I once accidentally mixed up the egg wash with coffee creamer once (oops!), which led to some amusing reactions, but it resulted in a surprisingly delicious treat. These moments keep the journey alive and make cooking an adventure worth embarking on!
FAQs and Troubleshooting
1. My pastry didn’t puff up! What went wrong?
This could happen if your oven wasn’t hot enough or if the pastry was too warm before baking. Never underestimate the power of a preheated oven!
2. Can I make these a day ahead of time?
Absolutely! You can prepare the twists in advance and keep them in the fridge, covered with plastic wrap. Bake them fresh just before serving for that scrumptious aroma and crisp texture.
3. What can I use if I don’t have puff pastry?
You could try using phyllo dough, but keep in mind that the texture will be different. Alternatively, biscuit dough can offer a fun, fluffy base.
4. How can I store leftovers?
Store any uneaten twists in an airtight container at room temperature for up to 3 days. For longer storage, pop them in the freezer for up to a month. Just remember to warm them back up in the oven to regain that puffiness!
And there you have it—a delightful treat that tastes just as good as it looks! Your Berry Puff Twists are ready to shine, whether for a casual evening treat or a show-stopping dessert. I hope you enjoy every step of the process and feel inspired to create beautiful, tasty moments in your kitchen. Let’s cherish those little yet special gatherings around the table—because good food is all about connection, creativity, and love. Happy baking!
PrintBerry Puff Twists

Warm, flaky pastries filled with luscious berry preserves, perfect for any occasion.
- Prep Time: 15 minutes
- Cook Time: 20 minutes
- Total Time: 35 minutes
- Yield: 4 servings 1x
- Category: Dessert
- Method: Baking
- Cuisine: American
- Diet: Vegetarian
Ingredients
- 1 sheet frozen puff pastry, thawed
- 1/2 cup mixed berry preserves
- 1 egg, beaten for wash
- 2 tablespoons granulated sugar
- 1 tablespoon butter, melted
- 1 teaspoon vanilla extract
Instructions
- Preheat your oven to 400°F (200°C).
- Prepare your puff pastry by rolling it out on a lightly floured surface.
- Cut the pastry into strips—about 1 inch wide and 6 inches long.
- Add a small amount of mixed berry preserves onto the center of each strip.
- Twist the strips over the preserves, pinching the edges to seal.
- Brush each twist with the beaten egg wash.
- Sprinkle granulated sugar over each twist.
- Bake for about 15-20 minutes or until golden brown.
Notes
Serve warm, optionally garnished with fresh mint leaves or powdered sugar.
Nutrition
- Serving Size: 1 serving
- Calories: 250
- Sugar: 10g
- Sodium: 200mg
- Fat: 10g
- Saturated Fat: 5g
- Unsaturated Fat: 4g
- Trans Fat: 0g
- Carbohydrates: 30g
- Fiber: 1g
- Protein: 3g
- Cholesterol: 40mg
Keywords: berry pastry, puff pastry, dessert, baking, easy recipes
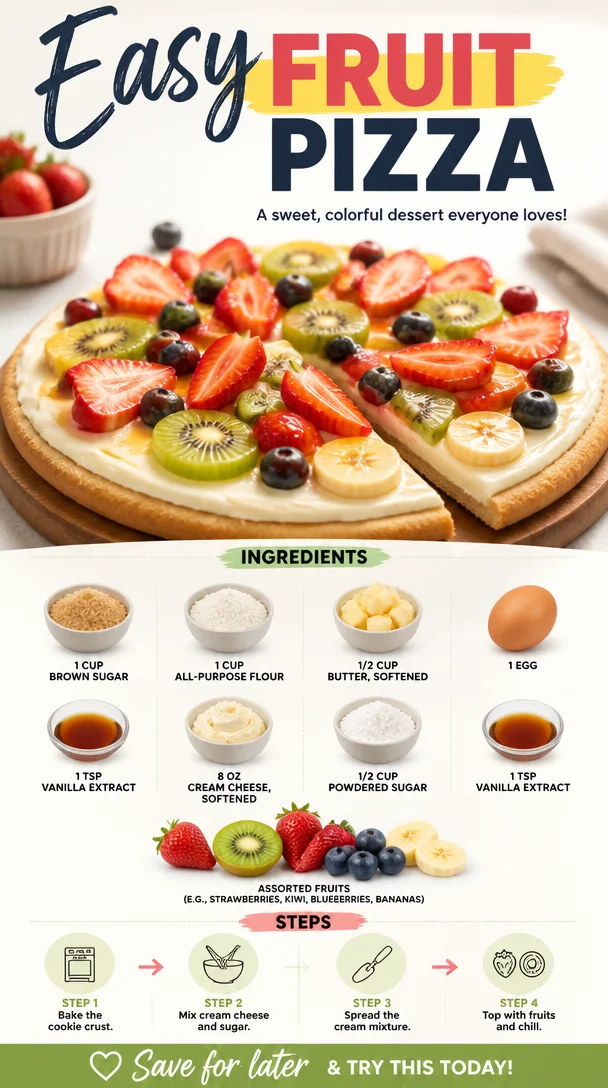
Easy Fruit Pizza
Easy Fruit Pizza: A Sweet Slice of Nostalgia
Hello, foodies! Gather round, because today, we’re diving into the world of colorful, fruity deliciousness with an Easy Fruit Pizza recipe that’s sure to bring a smile to your face and warmth to your kitchen. If you’re looking to impress at your next gathering or simply want an exciting dessert that’s a breeze to whip up, you’re in the right place!
Growing up, my summers were loaded with family gatherings, and fruit pizza was the star of the show. Every time it made an appearance, it drew everyone in like moths to a flame. The beautiful colors, the sweet aroma, and that glorious crunch followed by creamy delight—what’s not to love? I remember helping my mom in the kitchen, meticulously layering the vibrant fruits. We laughed, we talked about our day, all the while the kitchen was filled with that unmistakable fragrance of baked goodness. It was those little moments, standing beside her, that ignited my passion for cooking. I loved how a dessert could bring us together and create memories that linger long after the last bite is finished.
So, with all of that sentiment swirling around, let’s get rolling with this delightful Easy Fruit Pizza that’s just as much fun to make as it is to eat!
Ingredients
Here’s what you’ll need to create this masterpiece. I’ve even added a few chef insights to help you along the way:
-
1 cup brown sugar
- This adds sweetness and a hint of caramel flavor to your crust. If you’re in a pinch, you can substitute it with white sugar mixed with a touch of molasses for similar results.
-
1 cup all-purpose flour
- The base for our cookie crust. Whole wheat flour works too for a nuttier flavor and added fiber!
-
1/2 cup butter, softened
- This gives richness and helps create that melt-in-your-mouth texture. If you prefer a lighter version, you can use coconut oil or a vegan butter substitute.
-
1 egg
- Binding agent for our crust. For a vegan option, unsweetened applesauce (1/4 cup) or ground flaxseed mixed with water (1 tbsp flaxseed + 2.5 tbsp water) can do the trick!
-
1 tsp vanilla extract
- Adds a warm flavor. Don’t skip this! For an extra touch, try almond extract instead for a delightful twist.
-
8 oz cream cheese, softened
- The creamy center that holds it all together. You can use Greek yogurt for a tangy swap or a dairy-free cream cheese alternative if you’re lactose intolerant.
-
1/2 cup powdered sugar
- Sweetens the cream cheese layer. You can make your own powdered sugar by blending regular granulated sugar until super fine!
-
1 tsp vanilla extract (again!)
- Just a little more for the cream cheese mixture. You can also play around with citrus zest for a vibrant twist.
-
Assorted fruits (e.g., strawberries, kiwi, blueberries, bananas)
- The more, the merrier! Feel free to use whatever seasonal fruits you adore. Pineapple, peaches, or even mango can elevate your pizza to tropical levels.
Step-by-Step Instructions
Alright, let’s get down to business and make some fruit pizza!
-
Preheat the Oven
- Preheat your oven to 350°F (175°C). This ensures your cookie crust will bake evenly and come out golden brown.
-
Make the Cookie Crust
- In a mixing bowl, cream together 1/2 cup of softened butter and 1 cup of brown sugar until it’s light and fluffy—about 2-3 minutes.
- Add the egg and 1 tsp of vanilla extract into the bowl, mixing until fully incorporated.
- Gradually add 1 cup of all-purpose flour. It may look a little crumbly initially, but keep mixing until it forms a dough. You’re looking for a nice, cohesive ball of goodness!
-
Bake the Crust
- Spread the dough onto a pizza stone or a greased baking sheet, shaping it into a round circle (about 12 inches in diameter). Use your hands or a spatula to get it nice and smooth.
- Pop it into the preheated oven for 12-15 minutes or until it’s golden around the edges. Don’t you just love that smell wafting through the kitchen?
-
Prepare the Cream Cheese Layer
- While the crust is cooling, beat the softened cream cheese until it turns creamy and smooth—about 2 minutes.
- Add in 1/2 cup of powdered sugar and the remaining tsp of vanilla extract. Mix until well blended. Taste it! Add a pinch more sugar if you like it sweeter. It’s always fun to adjust based on your preferences.
-
Assemble Your Fruit Pizza
- Once the crust has completely cooled, spread the cream cheese mixture evenly over the top. Use an offset spatula or the back of a spoon to make this easy.
- Now, the fun part! Arrange your assorted fruits atop the cream cheese layer like a colorful tapestry. Be creative—overlapping the fruits can add a beautiful visual touch!
-
Final Touches
- If you want to get extra fancy, drizzle a little honey or maple syrup over the top for added sweetness and shine. You could also sprinkle some fresh mint for an aromatic finish!
-
Chill and Serve
- For the best experience, pop your fruit pizza in the fridge for about an hour before serving to let all those flavors meld together.
Serving Suggestions
When it comes to serving, slice your fruit pizza into wedges, just like you would a pizza. You could also use cookie cutters to make fun shapes if you’re feeling playful! Serve it all on a beautiful platter, and you immediately elevate the experience. Add a sprig of mint on the side for a pop of green—totally Instagram-worthy!
Recipe Variations
Let’s explore ways you can personalize your fruit pizza:
-
Berry Bonanza: Use a mix of raspberries, strawberries, and blueberries for a vibrant red, white, and blue theme!
-
Tropical Twist: Swap traditional fruits for tropical ones like mango, pineapple, and passion fruit for an island vibe.
-
Chocolate Drizzle: Melt some dark chocolate and drizzle it over the fruit for a decadent addition!
-
Nutty Delight: Top your fruit pizza with slivered almonds or chopped pecans for a crunchy texture.
-
Zesty Lemon: Add lemon curd under your cream cheese layer for a refreshing zing!
Chef’s Notes
This Easy Fruit Pizza has been a cherished recipe in my family for years. I vividly remember my first attempt at making it solo when I was around ten. Let’s just say it turned out more like a fruit salad on a cookie than a pizza! But that mishap didn’t deter me; it fueled my love for experimenting.
Over the years, I’ve played around with various toppings and cream cheese combinations. I particularly enjoy adding zesty lime or orange to the cream cheese layer for an added kick. This recipe has evolved, just like my culinary journey, and it reminds me that perfection isn’t the goal; it’s all about having fun and enjoying the process!
FAQs and Troubleshooting
1. My cookie crust is too crumbly. What did I do wrong?
- It might be that your butter wasn’t softened enough or that your flour measurement was a bit too generous. Always be sure to spoon flour into your measuring cup and level it off for accuracy.
2. Can I make the cream cheese layer ahead of time?
- Absolutely! You can prepare the cream cheese mixture a day in advance. Just store it in your fridge and spread it on the crust when you’re ready to serve.
3. How long will the fruit pizza last?
- Enjoy it within 2-3 days for the best texture. After that, the fruits may start to weep and soften.
4. Can I freeze the fruit pizza?
- I recommend not freezing it once topped with fruit due to the moisture release. However, you can freeze the baked crust for later use—just thaw and add toppings when you’re ready to serve!
I hope this Easy Fruit Pizza recipe becomes a lovely addition to your kitchen repertoire, sparking joy and delicious memories as it did for me. Remember, it’s all about the love and joy of gathering around the table. Happy cooking, and let’s keep creating beautiful moments together! 🍕✨
PrintEasy Fruit Pizza
A colorful and delightful dessert that’s fun to make and perfect for gatherings, featuring a creamy layer and an assortment of fresh fruits.
- Prep Time: 15 minutes
- Cook Time: 15 minutes
- Total Time: 30 minutes
- Yield: 8 servings 1x
- Category: Dessert
- Method: Baking
- Cuisine: American
- Diet: Vegetarian
Ingredients
- 1 cup brown sugar
- 1 cup all-purpose flour
- 1/2 cup butter, softened
- 1 egg
- 1 tsp vanilla extract
- 8 oz cream cheese, softened
- 1/2 cup powdered sugar
- 1 tsp vanilla extract (again!)
- Assorted fruits (e.g., strawberries, kiwi, blueberries, bananas)
Instructions
- Preheat the Oven: Preheat your oven to 350°F (175°C).
- Make the Cookie Crust: Cream together 1/2 cup butter and 1 cup brown sugar until light and fluffy. Add the egg and 1 tsp vanilla, mixing until incorporated. Gradually add 1 cup all-purpose flour until it forms a dough.
- Bake the Crust: Spread the dough onto a pizza stone or a greased baking sheet into a 12-inch circle. Bake for 12-15 minutes or until golden around the edges.
- Prepare the Cream Cheese Layer: Beat the softened cream cheese until creamy. Add 1/2 cup powdered sugar and the remaining tsp of vanilla, mixing until well blended.
- Assemble Your Fruit Pizza: Spread the cream cheese mixture over the cooled crust and arrange assorted fruits on top.
- Chill and Serve: Chill in the fridge for about an hour before serving.
Notes
Feel free to personalize with your favorite fruits or toppings. A drizzle of honey or chocolate adds a delightful touch!
Nutrition
- Serving Size: 1 slice
- Calories: 320
- Sugar: 18g
- Sodium: 300mg
- Fat: 15g
- Saturated Fat: 8g
- Unsaturated Fat: 5g
- Trans Fat: 0g
- Carbohydrates: 43g
- Fiber: 2g
- Protein: 4g
- Cholesterol: 40mg
Keywords: fruit pizza, dessert recipe, summer dessert, colorful dessert, easy recipe
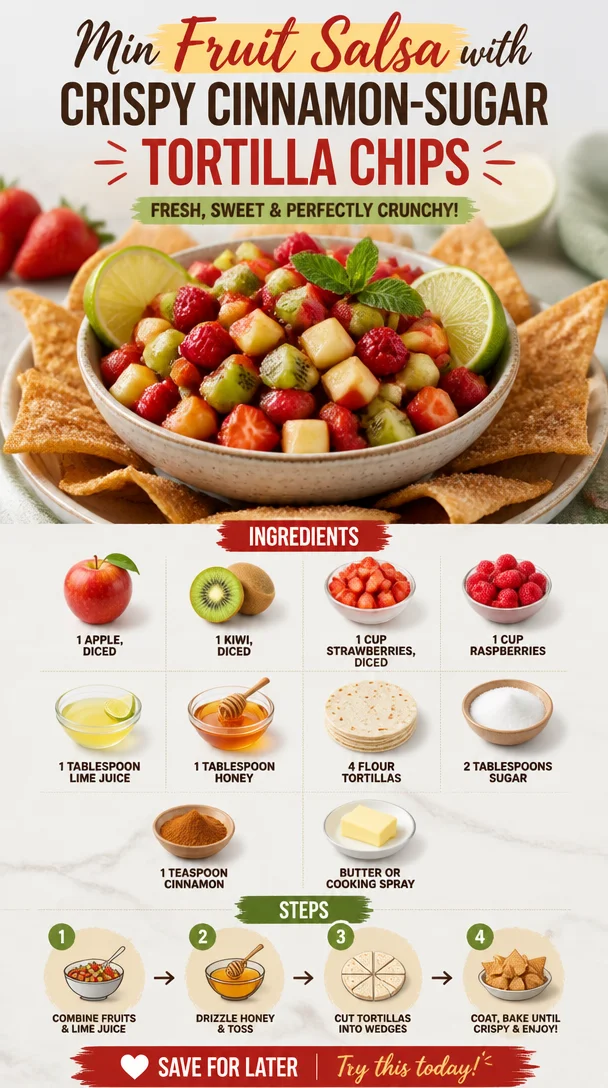
Min Fruit Salsa with Crispy Cinnamon-Sugar Tortilla Chips
Sweet Fruit Salsa with Cinnamon Sugar Tortilla Chips
Hello, lovely foodies! Today we’re diving into a vibrant and delightful treat that’s absolutely perfect for summer gatherings or cozy nights in—the Sweet Fruit Salsa with Cinnamon Sugar Tortilla Chips! This recipe will not only tickle your taste buds but also bring a smile to your face and a spark of joy to your table. So let’s get those aprons on, pour ourselves a refreshing drink, and create something truly delicious together!
A Flavorful Introduction
Picture this: the sun is shining, the birds are chirping, and you’re gathered with loved ones in the backyard. A light breeze sweeps across the table filled with laughter and lively conversation. Now, while there may be a grilled feast happening, there’s one dish that steals the show every time—the Sweet Fruit Salsa with Cinnamon Sugar Tortilla Chips. This isn’t just a dessert; it’s a celebration in a bowl!
This recipe holds a special place in my heart. It’s the perfect way to showcase fresh, seasonal fruits, and it embodies my love for putting a twist on the traditional. The sweet and zesty salsa paired with crunchy, cinnamon-sugar dusted chips creates a delightful contrast that pleases the palate and brings a smile to everyone’s face. Every time I whip this dish up, I’m reminded of my summer childhood escapades—picking fresh fruit with my family, giggling as we raced to see who could gather the most delicious gems from the orchard.
The best part? This recipe is as easy as it is impressive, making it perfect for both casual evenings at home and festive gatherings. You don’t need to be a gourmet chef to whip this up; I promise, even the kitchen novice will shine with this one!
My Sweet Inspiration
One of my fondest memories relates to this sweet treat, and it takes me back to warm summer evenings at my grandmother’s house. Every Sunday, she would host family gatherings, which always revolved around a big, hearty meal. But what I really looked forward to was her dessert table. Among an array of goodies, she’d often serve a simple fruit salsa that would shine like a jewel.
I was fascinated by the way she would casually combine the sweetest fruits with a bit of citrus and a drizzle of honey. It was fresh, fun, and always served with crispy tortilla chips on the side. In my mind, that was the epitome of summer! Watching her prepare it inspired me to create my own version, adding my signature cinnamon-sugar twist to those chips. And thus, the Sweet Fruit Salsa was born—a little homage to those cherished family moments while infusing my creative spark.
Ingredients
Now, let’s get into what you’ll need to make this delicious dish:
-
1 apple, diced
A sweet and crunchy fruit that adds texture. Granny Smith or Honeycrisp works beautifully! Looking for a swap? Any type of firm apple will do the trick. -
1 kiwi, diced
This adds a vibrant color and a hint of tanginess. If you’re not a fan of kiwi, try using a pear instead for a softer texture! -
1 cup strawberries, diced
Juicy and sweet, strawberries are essential in any fruit salsa. If they’re out of season, frozen strawberries can also work—just make sure to thaw and drain any excess moisture. -
1 cup raspberries
These little gems add a pop of color and a bit of tartness. Blueberries could be a great alternative if you’re looking for something different! -
1 tablespoon lime juice
This brightens up the flavors and prevents browning in your fruit. Should you want a twist, consider using lemon juice for a similar zing! -
1 tablespoon honey
A natural sweetener that binds the salsa together. If you prefer a vegan option, agave nectar will work just as well! -
4 flour tortillas
These will be transformed into your crispy chips. Corn tortillas can work too if you want that authentic crunch! -
2 tablespoons sugar
This is for sprinkling on your chips. You can substitute it with coconut sugar for a slight flavor twist! -
1 teaspoon cinnamon
Cinnamon brings warmth and a hint of spice. If you’re feeling adventurous, a dash of nutmeg can add an unexpected flavor note. -
Butter or cooking spray
We’ll use this to brush the tortillas for a lovely, golden finish. Olive oil spray is a great substitute for a lighter option.
Step-by-Step Instructions
Now that we’ve gathered all our colorful ingredients, it’s time to roll up our sleeves and get cooking! Follow these simple steps to create your Sweet Fruit Salsa with Cinnamon Sugar Tortilla Chips:
-
Prepare the Fruit
Start by rinsing all your fruits. Dice the apple, kiwi, strawberries, and raspberries into bite-sized pieces. You want all your fruits to be similar in size for an even distribution of flavors. Pro tip: cut the apples last to prevent browning! -
Mix It Up
In a medium bowl, combine the diced fruits. Drizzle the lime juice and honey over the mix. Using a gentle folding motion, stir to ensure everything is coated evenly. This is where the magic happens! The lime juice will help bring out the vibrant notes of each fruit. -
Chill It
Cover the bowl with plastic wrap and let the fruit salsa chill in the refrigerator for at least 30 minutes. This allows the flavors to meld and intensify, creating that scrumptious zing we love! -
Prep the Tortilla Chips
While your salsa is chilling, let’s work on those crunchy tortilla chips. Preheat your oven to 350°F (175°C). In a small bowl, combine the sugar and cinnamon. Brush both sides of each tortilla with butter or spray with cooking spray. -
Sprinkle Away
Generously sprinkle the cinnamon-sugar mixture over both sides of the tortillas. I like to press lightly to ensure the mixture adheres well—nobody likes a shy sprinkle! -
Cut and Bake
Using a pizza cutter or a sharp knife, slice the tortillas into wedges (like a pizza!). Spread them out in a single layer on a baking sheet. Bake for about 10-12 minutes or until they’re crispy and golden, flipping halfway through—don’t let them burn! You want to fish them out just before they get too brown; they’ll continue to crisp up once out of the oven. -
Serve and Enjoy
Once your tortilla chips are out and cooled off a bit, pile them high on a colorful platter alongside your refreshing fruit salsa. Don’t forget to snap a few photos before digging in—this dish is just too pretty not to share!
Serving Suggestions
For a visually stunning presentation, serve your Sweet Fruit Salsa in a clear glass bowl to show off all those vibrant colors. Pair it with a beautiful plate of chip triangles fanned out around the bowl for a delightful display. Sprinkle a bit of extra cinnamon-sugar on top for that added touch of elegance—because, why not?
Recipe Variations
- Berry Bliss: Swap the apple and kiwi for blackberries and chopped peaches for a summery twist.
- Coconut Crunch: Add a sprinkle of toasted coconut flakes to your salsa for an exotic flair.
- Spicy Kick: For those who crave a bit of heat, toss in a pinch of finely chopped jalapeño for a sweet and spicy combo.
- Nutty Addition: Drizzle in a tablespoon of almond butter into the mix for a creamy texture that’s absolutely to die for!
- Chocolate Drizzle: Drizzle some melted dark chocolate over the salsa for a decadent dessert spin.
Chef’s Notes
I can’t help but chuckle at how this recipe has evolved over time. Originally, I would just slice up fruit and serve it plain—can you believe that? But once I introduced the cinnamon sugar tortilla chips, it transformed into a showstopper! I remember one event where I had seamless flow until a cheeky guest exclaimed, “Savannah, you’ve outdone yourself!”
And honestly, it’s the simple recipes like this that remind me why I started cooking in the first place: to bring people together over good food. So grab your loved ones, share some laughs, and let the salsa create new memories around the table!
FAQs and Troubleshooting
1. Can I use frozen fruit?
Absolutely! If you’re out of fresh fruit or it’s not in season, thawed and drained frozen fruit can work just as well. Just keep in mind that the texture might be softer.
2. What can I do if my salsa is too sweet?
If your salsa turns out too sweet, add a little more lime juice or a pinch of salt to balance the flavors. Tasting as you go is key!
3. How long can I store leftovers?
You can keep any leftover salsa in the fridge for up to three days. However, the crackers may lose their crispiness, so I recommend preparing them fresh as needed.
4. How do I make this recipe gluten-free?
Swap out the flour tortillas for corn tortillas, which are naturally gluten-free. Just check labels to ensure there’s no gluten cross-contamination if you have a severe allergy.
Nutritional Info
This Sweet Fruit Salsa with Cinnamon Sugar Tortilla Chips comes in at approximately 200 calories per serving (including the chips). It’s loaded with vitamins from the fruits, providing a refreshing, sweet treat without being overly indulgent!
So there you have it, my sweet friends! Your guide to making a delightful Sweet Fruit Salsa with Cinnamon Sugar Tortilla Chips. With this recipe, you have everything you need to bring a little sparkle to your table and create cherished moments with those you love. Now, go out and get cooking—you’ve got this! Happy cooking! 🍓✨
PrintSweet Fruit Salsa with Cinnamon Sugar Tortilla Chips
A vibrant and delightful treat perfect for summer gatherings, combining fresh fruit salsa with cinnamon sugar tortilla chips.
- Prep Time: 15 minutes
- Cook Time: 12 minutes
- Total Time: 45 minutes
- Yield: 4 servings 1x
- Category: Dessert
- Method: Baking
- Cuisine: American
- Diet: Vegetarian
Ingredients
- 1 apple, diced
- 1 kiwi, diced
- 1 cup strawberries, diced
- 1 cup raspberries
- 1 tablespoon lime juice
- 1 tablespoon honey
- 4 flour tortillas
- 2 tablespoons sugar
- 1 teaspoon cinnamon
- Butter or cooking spray
Instructions
- Prepare the fruit by rinsing and dicing into bite-sized pieces.
- Mix the diced fruits in a medium bowl with lime juice and honey.
- Chill the salsa in the refrigerator for at least 30 minutes.
- Prep the tortilla chips by preheating your oven to 350°F (175°C).
- Sprinkle the cinnamon-sugar mixture over both sides of the tortillas.
- Cut the tortillas into wedges and bake for about 10-12 minutes.
- Serve the chips alongside the fruit salsa and enjoy!
Notes
For a visually stunning presentation, serve in a clear bowl with chips fanned around it. You can also customize the salsa with various fruits or toppings.
Nutrition
- Serving Size: 1 serving
- Calories: 200
- Sugar: 15g
- Sodium: 150mg
- Fat: 6g
- Saturated Fat: 2g
- Unsaturated Fat: 4g
- Trans Fat: 0g
- Carbohydrates: 35g
- Fiber: 3g
- Protein: 2g
- Cholesterol: 0mg
Keywords: fruit salsa, cinnamon sugar chips, summer dessert, easy recipe, healthy snack
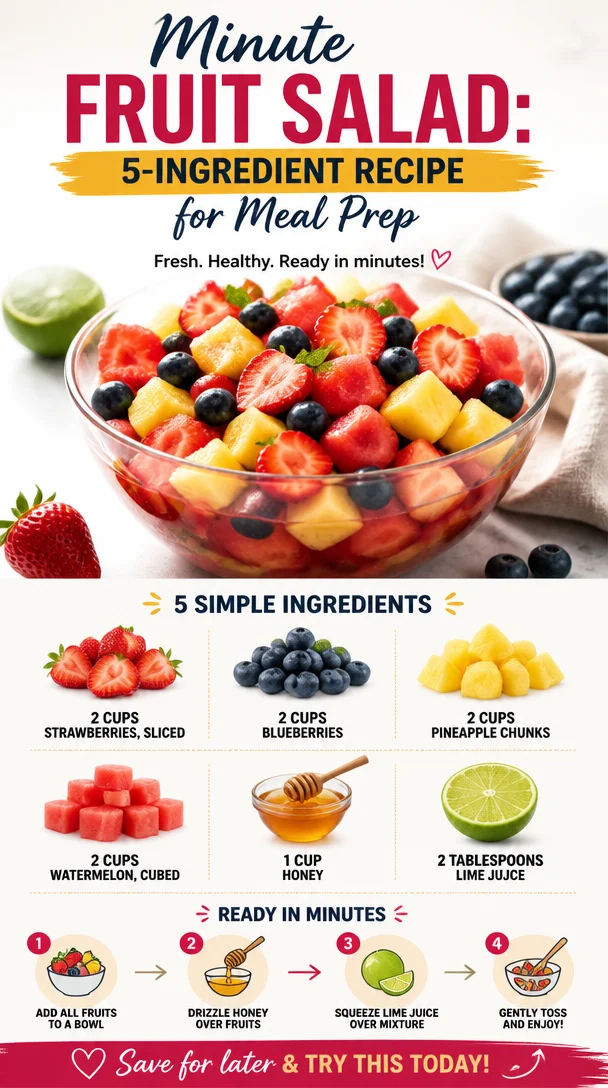
Minute Fruit Salad: 5-Ingredient Recipe for Meal Prep
Easy Fruit Salad: A Rainbow of Refreshment
Hello, lovely foodies! Welcome to another delicious corner of Ivory Apron, where cooking is as vibrant and joyful as the fresh ingredients we use. Today, we’re diving into a dish that sings with color, flavor, and simplicity: an Easy Fruit Salad.
Picture this: It’s a warm day, the sun is shining, and you want something refreshing but effortlessly delightful to serve — whether it’s for a picnic, a brunch gathering, or just because you deserve a treat! This Easy Fruit Salad is your perfect companion. With a mix of juicy fruits and a hint of lime to elevate the flavors, it’s not just a salad; it’s a celebration of nature’s bounty.
Gather your friends and family around the table, because this is one dish that invites connection and joy. It’s perfect for any occasion, whether it’s a birthday party, a casual weekday lunch, or a light dessert after a hearty meal. Let’s get started on creating this vibrant dish that celebrates fresh flavors and brings smiles all around!
A Slice of Nostalgia
As I reflect on my childhood summers, one particular memory shines bright amidst the joyful chaos of family gatherings. My grandmother used to whip up her famous fruit salad, a medley of whatever juicy fruits she could find at the farmer’s market. It was her special treat, served in a big glass bowl, and it was always about more than just the food.
I remember how we’d gather on her sun-drenched porch, laughter mingling with the sweet aromas of ripening fruit. The colorful salad became a centerpiece, accompanied by stories and memories like a warm blanket. My little fingers would dive into the bowl, eager to cut through the vibrant watermelon or pluck ripe strawberries. We’d argue over whose turn it was to pick from the assortment, all while sharing tales from our week.
That dish instilled in me not just a love for fruit, but a love for the moments shared around the table. So, as we create this Easy Fruit Salad, let’s channel that same warmth and joy, turn on some fun music, and make it a culinary adventure!
Ingredients
Here’s what you’ll need to create your stunning Easy Fruit Salad:
-
2 cups strawberries, sliced: Sweet, juicy, and bursting with flavor, strawberries are an absolute classic. If you can’t find fresh ones, frozen strawberries work too — just thaw and drain them!
-
2 cups blueberries: These little gems add a delightful pop of color and are packed with antioxidants. You can also swap them for blackberries or raspberries for a different flavor.
-
2 cups pineapple chunks: Pineapple brings a lovely tropical twist with its sweet and tangy notes. Using fresh pineapples is great, but canned chunks (in juice, not syrup) can save time!
-
2 cups watermelon, cubed: Nothing screams summer more than watermelon! It’s juicy and hydrating but also easy to swap out for cantaloupe or honeydew if you prefer.
-
1 cup honey: Adds natural sweetness and binds it all beautifully together. If you want a less sweet salad, feel free to reduce the honey or substitute it with agave syrup.
-
2 tablespoons lime juice: This is where the magic happens! Lime juice brightens the flavors and keeps the fruits fresh. If you’re fresh out, lemon juice works beautifully too.
Step-by-Step Instructions
Now, let’s get this fruity adventure underway! Follow these steps to create your Easy Fruit Salad:
-
Prep Your Workstation: Before diving into slicing and dicing, make sure your workspace is tidy and you have all your ingredients in front of you. A clean workspace not only inspires creativity but also keeps the process smooth!
-
Slice the Strawberries: Grab your fresh strawberries and slice off the green tops. Then, cut them into halves or quarters, depending on their size. I love to slice them thinly so they mix well with the other fruits and create a beautiful base.
-
Rinse the Blueberries: Place your blueberries in a colander and rinse under cold running water. Give them a gentle shake to remove excess moisture. No need to slice these — their little bursts of flavor are best enjoyed whole!
-
Cube the Pineapple: If you’re using a fresh pineapple, cut off the top, bottom, and the outer skin. Then, slice it into quarters, remove the core, and cut the fruit into bite-sized pieces. Canned pineapple, drained, can be added directly to the mix!
-
Cut the Watermelon: Watermelon can be a bit messy — a fun, juicy kind of mess! Cut it into half and then scoop out cubes using a sharp knife. Aim for about an inch in size; this helps to get a nice mix, and each bite is refreshing.
-
Combine the Fruits: In a large mixing bowl, toss together the strawberries, blueberries, pineapple chunks, and watermelon. Use gentle movements to avoid crushing the tender fruits.
-
Whisk the Honey and Lime Juice: In a smaller bowl, whisk together the honey and lime juice until they blend perfectly. The acidity from the lime will enhance the sweetness of the honey, creating a delightful dressing.
-
Dress the Salad: Pour the honey-lime mixture over your fruits. Gently toss them again to ensure every piece is coated with that zesty sweetness. It’s like giving your fruits a little spa treatment!
-
Chill and Serve: Cover the salad and let it chill in the refrigerator for about 30 minutes before serving. This allows the flavors to meld together, creating a medley of refreshing goodness.
Serving Suggestions
When serving your Easy Fruit Salad, consider using a gorgeous, large serving bowl to showcase the vibrant colors. You can garnish it with a sprinkle of fresh mint leaves or serve in individual cups for a fun, casual gathering. This not only elevates the dish but also adds an inviting and personal touch!
Recipe Variations
Get creative with your Easy Fruit Salad! Here are a few twists to inspire your culinary imagination:
- Tropical Fruit Fiesta: Swap the berries for mango chunks and add coconut flakes for a beach vacation vibe.
- Berry Medley: Use an assortment of berries—blackberries, raspberries, and strawberries—for a berry-packed treat that’s bursting with flavor.
- Savory Fruit Salad: Add a sprinkle of feta cheese and some chopped fresh basil for a savory twist that’s perfect as a side dish.
- Greek Yogurt Parfait: Layer your fruit salad with Greek yogurt and granola for a healthy breakfast or snack!
- Nutty Crunch: Toss in some chopped almonds or pecans for added texture and crunch — a hint of nuttiness elevates the fruit flavors beautifully.
Chef’s Notes
This Easy Fruit Salad is one of those recipes that feels like a canvas waiting for your personal touch! Over the years, I’ve mingled various fruits depending on the season, and it always turns out well. A funny kitchen story? I once accidentally added a splash of balsamic vinegar instead of the honey-lime mixture while experimenting — and let me tell you, it was an unexpectedly delicious mistake that’s still a favorite in our household!
Each time I make this fruit salad, I’m reminded of that sun-drenched porch with my grandmother. It evolves, just like memories do, but the essence remains — vibrant, joyous, and filled with love.
FAQs and Troubleshooting
1. Why is my fruit salad getting soggy?
- A common issue! Make sure you’re using truly ripe fruits, and avoid over-mixing once the dressing is added. If possible, serve the dressing on the side until ready to eat.
2. Can I make this salad ahead of time?
- Absolutely! You can prep the fruits a few hours in advance and combine them with the dressing right before you’re ready to serve.
3. My fruits are not sweet enough. What can I do?
- If your fruits lack sweetness, feel free to adjust the honey in the dressing. You can also add a sprinkle of sugar or another sweetener if needed.
4. Are there any fruits I should avoid in this salad?
- Fruits that brown quickly, like bananas or apples, should be added just before serving. They can still be great, but they’ll change the aesthetics!
Nutritional Info
While enjoying our Easy Fruit Salad, you’re delving into a healthy mix of vitamins, antioxidants, and fiber. The fruits provide a fair amount of natural sugars, but with the added benefit of essential nutrients. Incorporating this salad into your meals can contribute to a balanced and colorful plate!
In closing, I hope you feel inspired and excited to create your Easy Fruit Salad. Cooking is all about fun, creativity, and connection, and I can’t wait to hear your stories as you gather around your table. So tie on your apron, pour something sparkling, and let’s make beautiful moments together. Happy cooking!
PrintEasy Fruit Salad
A vibrant and refreshing Easy Fruit Salad featuring a delightful mix of juicy fruits and a hint of lime.
- Prep Time: 15 minutes
- Cook Time: 30 minutes
- Total Time: 45 minutes
- Yield: 6 servings 1x
- Category: Dessert
- Method: No-Cook
- Cuisine: American
- Diet: Vegan
Ingredients
- 2 cups strawberries, sliced
- 2 cups blueberries
- 2 cups pineapple chunks
- 2 cups watermelon, cubed
- 1 cup honey
- 2 tablespoons lime juice
Instructions
- Prep your workstation: Make sure your workspace is tidy and all ingredients are ready.
- Slice the strawberries: Remove the tops and cut them into halves or quarters.
- Rinse the blueberries: Rinse them under cold running water.
- Cube the pineapple: Cut the fresh pineapple into bite-sized pieces, or use canned pineapple.
- Cut the watermelon into cubes using a sharp knife.
- Combine the fruits in a large mixing bowl and toss gently.
- Whisk the honey and lime juice together until blended.
- Dress the salad with the honey-lime mixture and toss gently.
- Chill in the refrigerator for about 30 minutes before serving.
Notes
This salad is versatile; feel free to swap fruits based on availability and season. Avoid adding fruits that brown quickly until just before serving.
Nutrition
- Serving Size: 1 serving
- Calories: 210
- Sugar: 35g
- Sodium: 5mg
- Fat: 0g
- Saturated Fat: 0g
- Unsaturated Fat: 0g
- Trans Fat: 0g
- Carbohydrates: 54g
- Fiber: 4g
- Protein: 1g
- Cholesterol: 0mg
Keywords: fruit salad, easy dessert, summer salad, healthy snack
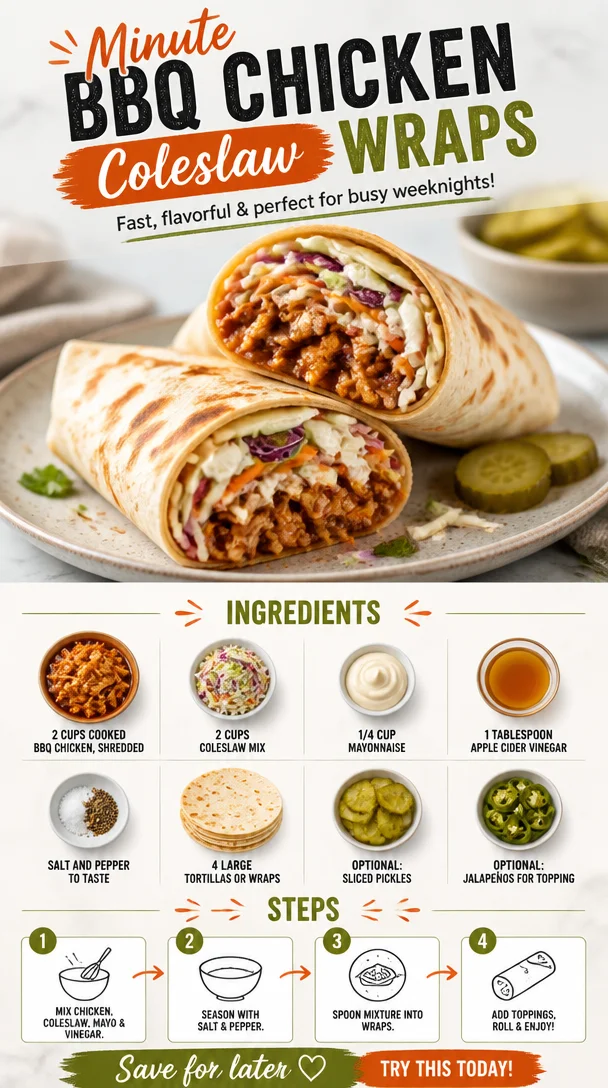
Minute BBQ Chicken Coleslaw Wraps for Busy Weeknights
BBQ Chicken Coleslaw Wraps: A Flavorful Journey
Welcome back, fellow food lovers! Today, I’m thrilled to share with you a dish that’s as vibrant and dynamic as the moments we create around our tables: BBQ Chicken Coleslaw Wraps. Picture this: tender, flavorful BBQ chicken nestled in a chilly, creamy coleslaw, all wrapped up in a warm tortilla. Sounds mouthwatering, right? Trust me, once you try these wraps, they will become a staple in your kitchen repertoire.
Now, let’s be real for a moment. Life can get busy, and sometimes, we need meals that are not only delicious but also quick and easy to prepare. These BBQ Chicken Coleslaw Wraps come together in a flash and are perfect for casual gatherings, fun weeknight dinners, or even a packed lunch. The sweet and tangy BBQ chicken pairs perfectly with the crunchy coleslaw, making each bite a delight.
So gather around, and let’s dive into the process of creating these flavorful wraps, along with a few fun stories and tips to elevate your cooking game. I promise by the end of this post, you’ll want to tie on that apron and give it a whirl!
My BBQ Chicken Memory
Whenever I think of BBQ chicken, I’m transported back to summer BBQs at my childhood home. My family was big on grilling, and my dad was the reigning BBQ champion. He had this sweet and smoky BBQ sauce that made everything it touched sing. I remember those lazy Sunday afternoons when the smell of chicken marinating in that sauce would waft through the air, tantalizing everyone nearby.
On one particularly sun-soaked day, my father decided to try a new recipe he’d found. He marinated the chicken with a hint of tangy apple cider vinegar, which made the flavor pop! As we gathered in the backyard, my siblings and I couldn’t wait for the first bite. Once the chicken was off the grill, we tore into it and, of course, made a huge mess—sauce everywhere! But those moments of laughter and messy fingers are what made those BBQs unforgettable. It is this joyous spirit of togetherness that inspires me to share my BBQ Chicken Coleslaw Wraps with you today.
Ingredients
Here’s what you’ll need to create these delightful wraps:
-
2 cups cooked BBQ chicken, shredded
This can be leftovers or rotisserie chicken for a quick fix! If you don’t have BBQ chicken, feel free to use grilled chicken or even shredded beef with BBQ sauce. -
2 cups coleslaw mix
A convenient pre-packaged mix of shredded cabbage and carrots will save you prep time. If you prefer, shred your own veggies for a fresher feel. You can also substitute with any crunchy veggies you love! -
1/4 cup mayonnaise
This gives the slaw its creaminess. You can replace it with Greek yogurt for a lighter twist or even a vegan mayo if you’re going plant-based. -
1 tablespoon apple cider vinegar
A splash of this tangy vinegar brightens the flavors. If you don’t have apple cider vinegar, white wine vinegar will work just as well. -
Salt and pepper to taste
Don’t skimp on seasoning! Always taste your slaw and adjust as needed for maximum flavor. -
4 large tortillas or wraps
Whole wheat, spinach, or herbed wraps are lovely alternatives. Feel free to use small tortillas for bite-sized appetizers! -
Optional: sliced pickles or jalapeños for topping
Adding pickles brings in a nice crunch, while jalapeños add a spicy kick. Customize the toppings to suit your taste!
Step-by-Step Instructions
Let’s get cooking! Here’s how to make your BBQ Chicken Coleslaw Wraps:
-
Shred or Prepare Chicken
If you’re using rotisserie chicken, shred it with two forks in a bowl. If you have leftover BBQ chicken, simply chop it into bite-sized pieces. For those who prefer to grill, marinate chicken breasts with your favorite BBQ sauce, grill them until fully cooked, and shred when cool. -
Mix the Coleslaw
In a large mixing bowl, combine the coleslaw mix, mayonnaise, apple cider vinegar, salt, and pepper. Mix it well until the veggies are coated evenly with the dressing. Here’s a little tip: taste your coleslaw! If you like it tangier, add a pinch more vinegar. If it’s too thick, consider a splash of water or an extra dollop of mayo. -
Combine Chicken and Slaw
Add the shredded BBQ chicken to the coleslaw mix and gently fold it together until everything is mixed well. This is where the magic happens! The warm chicken mingles beautifully with the cool, creamy slaw, creating a harmony of flavors. -
Warm the Tortillas
Heat your large tortillas in a dry skillet over medium heat for about 20-30 seconds on each side, just until they are pliable. This step is crucial because it ensures your wraps won’t crack or tear when you fill them. -
Wrap It Up!
Lay a warm tortilla on a flat surface, and spoon a generous amount of the BBQ chicken and coleslaw mixture in the center. If you’re feeling adventurous, add some sliced pickles or jalapeños. Fold in the sides of the tortilla and then roll it tightly from the bottom up. Voilà! You’ve created a wrap. -
Slice and Serve
Cut the wrap in half diagonally for a beautiful presentation. Arrange on a plate, and if you wish, serve them with extra BBQ sauce on the side for dipping.
Serving Suggestions
When it comes to serving these BBQ Chicken Coleslaw Wraps, presentation is key. Arrange them on a rustic wooden board or a colorful platter. Drizzle a little extra BBQ sauce on the side and sprinkle fresh herbs, like cilantro or parsley, for a pop of color. You can even add a small bowl of chips for that perfect crunch! These wraps are not just a meal; they’re an experience.
Recipe Variations
One of the best aspects of cooking is the ability to play around with flavors. Here are a few creative twists on the classic BBQ Chicken Coleslaw Wraps:
-
Asian-Inspired Wraps: Swap out BBQ sauce for teriyaki sauce and add sesame oil to the coleslaw for an Asian twist.
-
Spicy Buffalo Wraps: Use shredded buffalo chicken instead of BBQ, and incorporate blue cheese crumbles into the slaw.
-
Taco Variation: Add taco seasoning to the chicken and replace coleslaw with a fresh Pico de Gallo for a zesty taco flavor.
-
Vegetarian Option: Substitute the chicken for charred veggies like zucchini and bell peppers, and use black beans for a protein punch.
-
Fruit and Nut Twist: Toss in some chopped apples and walnuts in the coleslaw for a crunchy, sweet variation.
Chef’s Notes
As I reflect on this recipe, it’s fascinating how BBQ Chicken Coleslaw Wraps can adapt to seasons, occasions, and personal preferences. Over time, my family has turned to these wraps for everything from backyard gatherings to rainy movie nights. And trust me, every time we gather, laughter, stories, and a tiny bit of good-natured kitchen disaster follows! I remember one birthday party when someone forgot to seal the wrap properly, and let’s just say, the chicken got an unexpected adventure. But that’s part of the joy of cooking—embracing the messiness and making laughter a part of the meal.
FAQs and Troubleshooting
Q: Can I make the coleslaw in advance?
A: Absolutely! You can prepare the coleslaw a day ahead, but keep the chicken and coleslaw separate until you’re ready to make the wraps. This ensures your tortillas stay fresh and prevent sogginess.
Q: What if I don’t have BBQ chicken?
A: No worries! You can use any seasoned chicken or even pulled pork. If you want a quick change, roasted vegetables or tofu also work great with BBQ sauce!
Q: Can I freeze the wraps?
A: While these wraps are best enjoyed fresh, you can freeze the fillings separately. Just make sure to wrap them securely, and reheat them from frozen when you crave these beauties again.
Q: What are some good sides to serve with these wraps?
A: Fresh fruit salads, roasted sweet potatoes, or a refreshing cucumber salad make great accompaniments to these wraps!
Nutritional Info
(If you’re keen on tracking your macros or calories, here’s a rough idea per wrap, excluding additional toppings.)
- Calories: Approximately 400
- Protein: 30g
- Carbs: 45g
- Fat: 15g
And that’s a wrap—quite literally! I hope this recipe brings some joy to your kitchen and a burst of flavor to your table. Whether you’re making a casual dinner for two or hosting a backyard gathering, these BBQ Chicken Coleslaw Wraps are sure to impress!
So, grab your apron, pour a glass of something bubbly, and let’s bring a little bit of warmth and joy to your dining experience. Happy cooking, my friends!
PrintBBQ Chicken Coleslaw Wraps
Delicious BBQ Chicken Coleslaw Wraps combining shredded BBQ chicken with creamy coleslaw wrapped in warm tortillas.
- Prep Time: 15 minutes
- Cook Time: 30 minutes
- Total Time: 45 minutes
- Yield: 4 servings 1x
- Category: Main Course
- Method: Wrap
- Cuisine: American
- Diet: None
Ingredients
- 2 cups cooked BBQ chicken, shredded
- 2 cups coleslaw mix
- 1/4 cup mayonnaise
- 1 tablespoon apple cider vinegar
- Salt and pepper to taste
- 4 large tortillas or wraps
- Optional: sliced pickles or jalapeños for topping
Instructions
- Shred or prepare chicken.
- Mix the coleslaw in a large bowl with mayonnaise, apple cider vinegar, salt, and pepper.
- Combine shredded BBQ chicken with the coleslaw mix.
- Warm the tortillas in a skillet until pliable.
- Wrap the mixture in the tortillas, folding in the sides and rolling tightly.
- Slice the wrap in half diagonally and serve.
Notes
Customize your wraps with additional toppings like pickles or jalapeños for added flavor.
Nutrition
- Serving Size: 1 wrap
- Calories: 400
- Sugar: 4g
- Sodium: 600mg
- Fat: 15g
- Saturated Fat: 3g
- Unsaturated Fat: 7g
- Trans Fat: 0g
- Carbohydrates: 45g
- Fiber: 3g
- Protein: 30g
- Cholesterol: 60mg
Keywords: BBQ chicken, coleslaw, wraps, quick meals, easy dinner
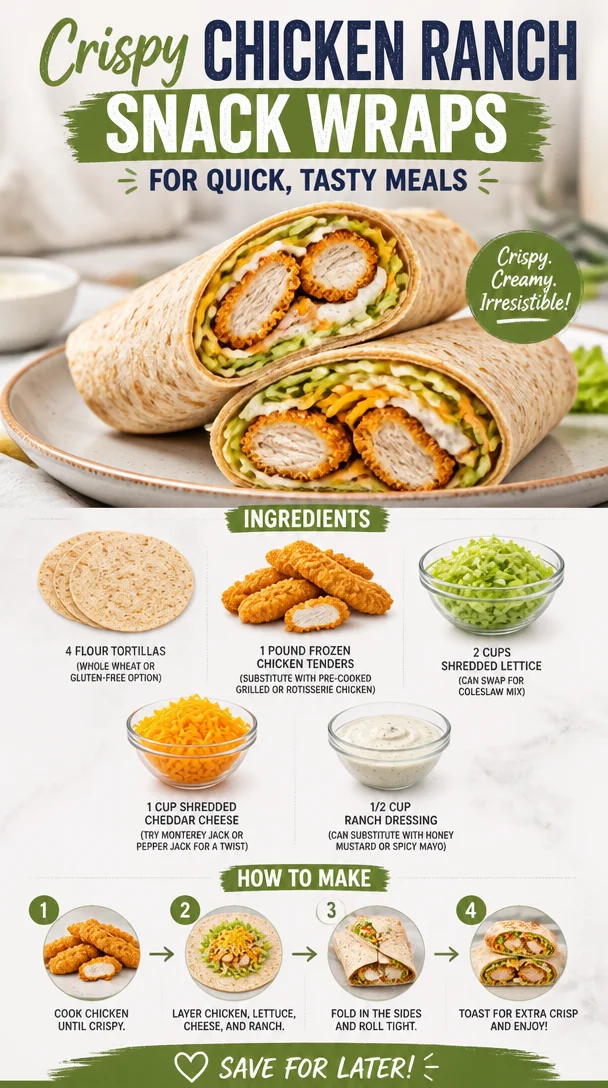
Crispy Chicken Ranch Snack Wraps for Quick, Tasty Meals
Crispy Chicken Ranch Snack Wraps for Quick, Tasty Meals
Hello, friends! Today, we’re diving into a recipe that is a total game changer for quick meals—Crispy Chicken Ranch Snack Wraps. Picture this: it’s a busy weeknight, friends are coming over, or maybe you’ve just had a long day at work. You want to whip up something that feels satisfying yet doesn’t require hours in the kitchen. These snack wraps are not only fast to prepare but also deliver an explosion of flavor in every bite! Trust me, once you fold these up, you’ll wonder where these wraps have been all your life!
Introduction: The Perfect Snack Wrap Solution
One of the things I love most about cooking is its ability to bring comfort and joy, especially when life gets busy. Growing up, there was nothing better than coming home to the smell of something delicious cooking in the kitchen. My mom always had a knack for turning simple ingredients into fabulous meals that felt like a hug from the inside.
When I created my quick Crispy Chicken Ranch Snack Wraps, I wanted to capture that very same feeling: warmth, comfort, and satisfaction—minus the hassle. Now, let’s be honest—when you grab a wrap, you’re grabbing more than just food. You’re grabbing ease, fun, and a little bit of nostalgia. Whether it’s a quick lunch on the go or a crowd-pleasing appetizer for your next gathering, these wraps deliver on all fronts.
The crispy chicken tender, the crunch of fresh lettuce, the creaminess of ranch dressing, and the oozy, melty cheese all come together beautifully, creating layers of texture and flavor that will leave you coming back for more. Let’s get rolling (pun intended!) and whip up a batch of these delightful wraps, shall we?
Personal Story: A Taste of Nostalgia
One of my fondest memories in the kitchen revolves around my college days. I was living with two roommates, and let me tell you, we were all about easy meals that could fuel our late-night study sessions. One of our go-to "late-night hacks" was to throw frozen chicken tenders in the oven, bake them to crispy perfection, and load them into tortillas with all our favorite toppings.
We would gather around the kitchen table, and amid laughter and lighthearted debates over who made the best dip, those humble chicken wraps became our late-night tradition. They sat delicately on our plates, drizzled with ranch dressing, and every bite was bursting with flavor. Those wraps not only fed our tired bodies; they brought us closer together, creating memories that stand the test of time.
Fast forward to today, and I am thrilled to offer you a version of that nostalgic recipe—Crispy Chicken Ranch Snack Wraps—perfect for any occasion, big or small!
Ingredients
Here’s what you’ll need to create your Crispy Chicken Ranch Snack Wraps:
-
4 small flour tortillas
Soft and pliable, flour tortillas are the classic choice. If you’re looking for a healthier twist, opt for whole wheat or even gluten-free alternatives to accommodate dietary preferences. -
1 pound frozen chicken tenders
These are your quick and easy protein source! If you’re in a pinch, feel free to swap them out with pre-cooked grilled chicken or shredded rotisserie chicken for even less prep time. -
2 cups shredded lettuce
Crisp and refreshing, shredded lettuce adds a fantastic crunch. Alternatively, you can use coleslaw mix for a delicious twist that includes added flavor and texture. -
1 cup shredded cheddar cheese
Cheddar is a classic for good reason—it melts beautifully! For a unique flavor profile, experiment with Monterey Jack or even spicy pepper jack cheese to kick things up a notch. -
1/2 cup ranch dressing
Creamy and tangy, ranch dressing is the star of the show here! But if you’re looking for something different, don’t hesitate to substitute it with honey mustard or spicy mayo to match your taste buds.
Step-by-Step Instructions
Let’s roll up our sleeves and get started on these snack wraps!
-
Preheat the Oven: First things first, take a moment to preheat your oven to 400°F (200°C). This will ensure those chicken tenders turn out beautifully crispy.
-
Prepare Your Chicken: Spread the frozen chicken tenders on a baking sheet lined with parchment paper. Bake according to the package instructions—usually about 20-25 minutes—until golden brown and crispy. Flip them halfway through for even cooking. This is where the magic happens!
Tip: While the chicken is baking, you can use this time to chop your veggies and set up your wrap station.
-
Chop & Prep: While the chicken is baking, grab your lettuce and shred it (if it’s not pre-shredded). Feel free to add some diced tomatoes or finely chopped red onions for extra flavor if you’re feeling adventurous.
-
Warm Those Tortillas: Wrap your tortillas in aluminum foil and place them in the oven during the last 5 minutes of the chicken cooking time. Alternatively, you can pop them in the microwave for about 15 seconds to make them warm and supple.
-
Layer It Up: Once your chicken is crispy and your tortillas are warm, it’s time to assemble! Start by placing a warm tortilla on a plate. Lay down a few chicken tenders in the center (about 2-3), followed by a generous handful of shredded lettuce and about 2 tablespoons of cheese.
Chef’s insight: The order of your fillings matters! Place the chicken first to create a sturdy base and prevent your wrap from getting soggy.
-
Dress It: Drizzle your ranch dressing over the top of your fillings, adding however much you like—go big or go home, right?
-
Wrap It Up: Here comes the fun part! Start folding the sides of the tortilla inwards, then roll it up tightly from the bottom. If it feels like it’s going to burst, that’s a good sign—more deliciousness inside!
-
Slice & Enjoy: Finally, slice your wrap in half diagonally for that perfect presentation. Serve alongside extra ranch dressing for dipping, and you’re set!
Chef’s hack: If you want to make it even more fun, you can secure the wraps with a toothpick, or personalize them with colorful skewers before serving!
Serving Suggestions
To elevate your wrap experience, I love serving these crispy chicken ranch wraps on a wooden platter, alongside a colorful array of veggies like baby carrots, cherry tomatoes, and cucumber slices. Lay a few small bowls filled with various dips—think guacamole, salsa, or even a zesty yogurt dip—to create a fun DIY station for your guests. Everyone loves choosing their own adventure!
Recipe Variations
Here are a few fun variations to switch things up:
-
Buffalo Chicken Wrap: Toss the cooked chicken tenders in buffalo sauce for a spicy kick.
-
Mediterranean Style: Substitute ranch with tzatziki sauce, add some cucumber and feta to the mix.
-
Loaded Veggie Wrap: Skip the chicken altogether and load up on grilled veggies, black beans, and avocado.
-
Southwestern Flair: Add corn, black beans, and a dollop of chipotle mayo for a smoky twist.
-
Breakfast Wrap: Scramble some eggs and add them in for a breakfast version, perfect for brunch!
Chef’s Notes
Every time I make these wraps, I can’t help but smile at how simple yet satisfying they are. I remember one time during a particularly busy week, I turned these crispy wraps into an impromptu feast by inviting friends over for a “make-your-own” wrap night. We set up a toppings bar and let everyone personalize their creations. It turned a casual dinner into a lively evening of laughter and cheer. It’s a fun reminder that cooking should be about connecting and enjoying the moment!
FAQs and Troubleshooting
-
Can I use cooked chicken instead of frozen tenders?
Absolutely! Pre-cooked grilled chicken or leftover rotisserie chicken works splendidly. Just warm it through before adding it to your wraps. -
What if my tortillas are breaking?
Warming them is key! If they still break, consider using fresher tortillas or a type with a bit more elasticity, like whole wheat. -
Can I prepare these in advance?
For the best taste and texture, I recommend assembling them fresh. However, you can prep the ingredients (like chopping veggies) a few hours ahead of time. -
How do I keep them crispy?
To maintain that crispy texture, avoid overstuffing your wraps and ensure your chicken is well-cooked and crispy. Serving them immediately after assembling is also a must!
Nutritional Info
While I don’t have specific nutritional info handy, I encourage you to consider the ingredients you choose. Whole wheat tortillas and serving with fresh veggies can elevate the health factor while still keeping it delicious!
There you have it—my Crispy Chicken Ranch Snack Wraps, ready to fit seamlessly into your lifestyle! They’re quick to prepare, share a few laughs over, and serve as a blank canvas for your creativity. So tie on that apron and let’s make some enjoyable moments around the dinner table. Happy cooking, foodie friends!
PrintCrispy Chicken Ranch Snack Wraps

Quick and flavorful Crispy Chicken Ranch Snack Wraps perfect for busy weeknights or gatherings.
- Prep Time: 10 minutes
- Cook Time: 25 minutes
- Total Time: 35 minutes
- Yield: 4 servings 1x
- Category: Snack
- Method: Baking
- Cuisine: American
- Diet: None
Ingredients
- 4 small flour tortillas
- 1 pound frozen chicken tenders
- 2 cups shredded lettuce
- 1 cup shredded cheddar cheese
- 1/2 cup ranch dressing
Instructions
- Preheat the oven to 400°F (200°C).
- Prepare the frozen chicken tenders on a baking sheet lined with parchment paper and bake according to package instructions (20-25 minutes). Flip halfway through.
- Chop your lettuce (and other desired veggies).
- Warm tortillas in aluminum foil in the oven during the last 5 minutes of cooking the chicken.
- Layer a tortilla with chicken tenders, lettuce, and cheese.
- Dress with ranch dressing.
- Wrap tightly by folding the sides and rolling from the bottom.
- Slice in half diagonally and serve with extra ranch dressing.
Notes
Warm tortillas before wrapping for best results. Use pre-cooked chicken for even quicker prep time.
Nutrition
- Serving Size: 1 wrap
- Calories: 350
- Sugar: 2g
- Sodium: 800mg
- Fat: 20g
- Saturated Fat: 5g
- Unsaturated Fat: 10g
- Trans Fat: 0g
- Carbohydrates: 30g
- Fiber: 2g
- Protein: 15g
- Cholesterol: 50mg
Keywords: snack wrap, chicken wraps, quick meal, crispy chicken, ranch dressing