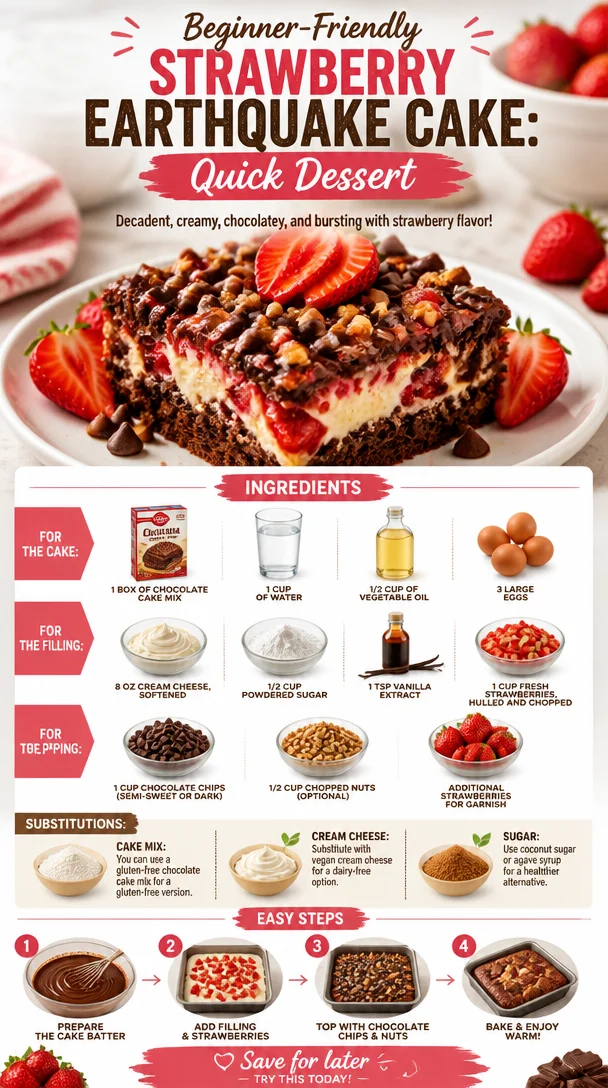
Beginner-Friendly Strawberry Earthquake Cake: Quick Dessert
Strawberry Earthquake Cake: A Deliciously Unique Dessert
Hello, fellow food lovers! I’m so excited to share a delightful treat that’s just bursting with flavors and memories—my delicious Strawberry Earthquake Cake! This cake is a delightful mix of melt-in-your-mouth chocolate, creamy filling, and fresh strawberries, creating a dessert that’s truly unforgettable.
But before we dive into the recipe, let me take you on a little journey down memory lane, back to a time when flavors were bold, and desserts were the pièce de résistance of every gathering.
Personal Story
One of my favorite childhood memories revolves around summer BBQs at my grandparents’ house. The backyard was filled with the smell of grilled vegetables, and laughter echoed around as family and friends came together. But what truly brought everyone together at the end of the meal was my grandma’s famous cake. She had a special recipe that combined chocolate and fresh strawberries, and it was always the star of the show.
I still remember the anticipation as the cake cooled down on the counter, the aroma wafting through the air, making our mouths water. When Grandma sliced into that cake, it was like an earthquake—rich chocolate and creamy layers would ooze out, making everyone gasp. That moment of delight has stuck with me, and it inspired this Strawberry Earthquake Cake. Let’s create that same magic together in your kitchen!
Ingredients
To get started on your Strawberry Earthquake Cake, here’s what you’ll need:
For the Cake:
-
1 box of chocolate cake mix (or homemade chocolate cake)
You can use any chocolate cake mix you love or make your chocolate cake from scratch for an enhanced flavor. -
1 cup of water
Just tap water will do the trick. You could also use milk for a richer flavor. -
1/2 cup of vegetable oil
Vegetable oil keeps the cake moist. Olive oil adds a delicious twist, but it may alter the flavor slightly. -
3 large eggs
Room temperature eggs blend better and help the cake rise higher.
For the Filling:
-
8 oz cream cheese, softened
Gives a wonderfully creamy texture. For a dairy-free option, choose vegan cream cheese. -
1/2 cup powdered sugar
Sweetens the filling without the graininess of granulated sugar. You can use coconut sugar for a more natural alternative. -
1 tsp vanilla extract
Enhances the flavor beautifully. A splash of almond extract adds a unique twist too! -
1 cup fresh strawberries, hulled and chopped
Fresh strawberries give the filling a juicy, fruity burst. You can substitute with other berries if you prefer.
For the Topping:
-
1 cup chocolate chips (semi-sweet or dark)
Chocolate chips add that gooey chocolatey goodness. Swap with butterscotch chips for a different flavor profile! -
1/2 cup chopped nuts (optional)
Nuts give a delightful crunch. Walnuts or pecans work wonderfully, but leave them out if you have nut allergies. -
Additional strawberries for garnish
Always a classic touch to decorate your dessert and add a pop of color!
Step-by-Step Instructions
Now that you’ve gathered your ingredients, let’s get down to the nitty-gritty of making this showstopper!
-
Preheat Your Oven
Set your oven to 350°F (175°C). This is always the key first step—your oven needs to be nice and hot when your cake is ready to go in! -
Prepare Your Baking Pan
Grease a 9×13 inch baking dish with butter or non-stick spray. This will prevent any sticky situations later on! -
Mix the Cake Batter
In a large mixing bowl, combine the chocolate cake mix with 1 cup of water, 1/2 cup of vegetable oil, and 3 large eggs. Whisk until everything is combined and smooth. You can use an electric mixer for a fluffier texture, but a hand whisk works just fine too. A little elbow grease never hurt anybody! -
Pour and Bake
Pour half of the cake batter into your prepared baking dish and smooth it out evenly. Now comes the fun part—set it aside and let’s make the filling. -
Prepare the Cream Cheese Filling
In a separate bowl, mix the softened cream cheese, powdered sugar, and vanilla extract until creamy and combined. You can use a fork or an electric mixer—whichever you have handy works. -
Layer It Up
Spoon dollops of the cream cheese mixture over the cake batter, followed by the chopped fresh strawberries. You want to create pockets of sweetness that will erupt like an earthquake when the cake bakes! -
Top with Remaining Batter
Carefully pour the remaining cake batter over the cream cheese and strawberries. It doesn’t need to cover completely—some filling peeking through is just what we want. -
Sprinkle on Chocolate Chips and Nuts
Now sprinkle those chocolate chips and nuts over the top. Those chocolate morsels are going to melt down into the cake, creating delicious pockets of gooeyness. -
Bake
Pop your cake into the oven and let it bake for about 30-35 minutes, or until a toothpick inserted in the center comes out clean. The tops should be slightly cracked (hence the ‘earthquake’ effect!). -
Cool
Let the cake cool in the pan for at least 10-15 minutes. It’ll be hot and bubbly, full of delicious flavors waiting to meld together.
Serving Suggestions
When it comes time to serve, here’s a tip: Slice your Strawberry Earthquake Cake into generous squares and plate each piece with a sprinkle of powdered sugar on top. Add a fresh strawberry or two for garnish, and if you’re feeling fancy, a scoop of vanilla ice cream on the side will elevate your presentation and taste to new heights.
Recipe Variations
Looking to switch things up? Here are some fun variations to try:
-
Chocolate Lovers Delight: Swap out the vanilla extract in the filling for a bit of chocolate extract, giving you a double chocolate punch!
-
Add a Zesty Twist: Mix in a little zest from an orange or lemon into the cream cheese filling for a zesty, refreshing flavor.
-
Berry Bonanza: Replace the strawberries with a mix of your favorite berries (like blueberries, raspberries, or blackberries) for a burst of color and flavor.
-
Nutty for Nuts: If you love nuts, try adding some pecans or walnuts to your filling, too—they’ll add a delightful crunch against the creaminess.
-
Gluten-Free Goodness: Use a gluten-free chocolate cake mix to make this delightful dessert gluten-free — trust me, no one will be able to tell the difference!
Chef’s Notes
Over the years, this Strawberry Earthquake Cake has evolved from my grandmother’s original recipe into my very own creation. Each time I make it, I find myself reminiscing about those warm summer nights filled with family laughter and delicious desserts. It’s become a staple in my home, and my friends can’t get enough of it.
Don’t worry if it isn’t perfect – remember, it’s all about the journey in the kitchen and the memories you create along the way. I once accidentally added double the amount of strawberries to the filling, and while it didn’t look quite right, the taste was phenomenal! That’s the beauty of cooking: you’re always learning and adjusting.
FAQs and Troubleshooting
1. Why is my cake too dense?
If the cake feels dense, it’s possible you overmixed the batter. Mixing just until everything is incorporated helps keep it light and fluffy.
2. Can I make this ahead of time?
Absolutely! You can bake the cake a day ahead and store it covered in the refrigerator. Just let it come to room temperature before serving.
3. How do I store leftovers?
Keep any leftover cake covered at room temperature for a day or two or in the refrigerator for longer storage. Just remember to enjoy it within a week!
4. My chocolate chips sank to the bottom; what happened?
This happens sometimes when the batter is too thin. Next time, consider chilling the chocolate chips in the fridge before sprinkling them on. It helps them stay suspended in the batter!
Nutritional Info
While I believe in enjoying dessert in moderation, if you’re curious, here’s a quick overview of the nutritional benefits of this delightful cake—especially when made with fresh strawberries! They provide Vitamin C, antioxidants, and have relatively low calories. Pair that with the rich chocolate cake, and you find both comfort and joy in every delicious bite.
And there you have it! Your very own Strawberry Earthquake Cake awaits. I’m thrilled you joined me on this tasty adventure, and I can’t wait to hear how your baking turns out. So, tie on that ivory apron, pour a glass of something bubbly, and let’s create more magical moments around our tables! Happy baking!
PrintStrawberry Earthquake Cake
A delightful mix of melt-in-your-mouth chocolate, creamy filling, and fresh strawberries that creates a dessert truly unforgettable.
- Prep Time: 15 minutes
- Cook Time: 35 minutes
- Total Time: 50 minutes
- Yield: 12 servings 1x
- Category: Dessert
- Method: Baking
- Cuisine: American
- Diet: Vegetarian
Ingredients
- 1 box chocolate cake mix
- 1 cup water
- 1/2 cup vegetable oil
- 3 large eggs
- 8 oz cream cheese, softened
- 1/2 cup powdered sugar
- 1 tsp vanilla extract
- 1 cup fresh strawberries, hulled and chopped
- 1 cup chocolate chips (semi-sweet or dark)
- 1/2 cup chopped nuts (optional)
- Additional strawberries for garnish
Instructions
- Preheat your oven to 350°F (175°C).
- Prepare a 9×13 inch baking dish by greasing it with butter or non-stick spray.
- Mix the chocolate cake mix with 1 cup of water, 1/2 cup of vegetable oil, and 3 large eggs in a large mixing bowl until smooth.
- Pour half of the cake batter into the prepared baking dish and smooth it out evenly.
- Prepare the cream cheese filling by mixing softened cream cheese, powdered sugar, and vanilla extract until creamy.
- Layer dollops of the cream cheese mixture over the cake batter, followed by the chopped fresh strawberries.
- Top with the remaining cake batter over the cream cheese and strawberries.
- Sprinkle chocolate chips and nuts over the top.
- Bake for 30-35 minutes, or until a toothpick comes out clean.
- Cool the cake in the pan for at least 10-15 minutes before serving.
Notes
For variations, consider adding a zesty twist with citrus zest or using a gluten-free chocolate cake mix.
Nutrition
- Serving Size: 1 slice
- Calories: 350
- Sugar: 20g
- Sodium: 450mg
- Fat: 15g
- Saturated Fat: 6g
- Unsaturated Fat: 7g
- Trans Fat: 0g
- Carbohydrates: 45g
- Fiber: 2g
- Protein: 6g
- Cholesterol: 70mg
Keywords: cake, dessert, chocolate, strawberries, family recipe, baking
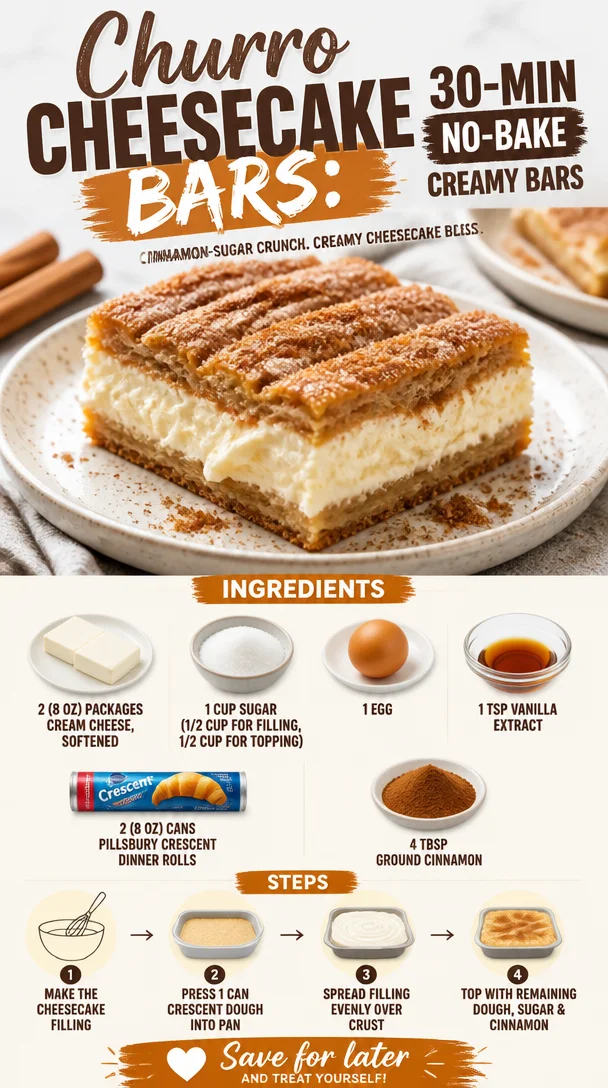
Churro Cheesecake Bars: 30-Min No-Bake Creamy Bars
Churro Cheesecake Bars: A Sweet Delight to Share
Hello, my culinary friends! Today, I’m excited to share a dessert that you won’t just want to make once—you’ll want to whip it up time and again: Churro Cheesecake Bars! These delightful little squares combine the creamy goodness of cheesecake with the cinnamon-sugar magic of churros, and trust me, they are a game-changer for your dessert table. Whether you’re hosting a dinner party or simply indulging for a cozy night in, these bars are sure to impress and delight.
Now, before we dive into the recipe, let’s talk a little about what inspired this creation.
Personal Story
It was a crisp autumn afternoon, and I was in my childhood kitchen, the air filled with sweet aromas wafting from my mother’s oven. She’d always have something magical baking. On this particular day, it was her famous churros. The warm scent of cinnamon and sugar enveloped the room as we gathered around the table, waiting eagerly for those warm, crispy bites.
As I bit into a crunchy churro, the idea sparked in my mind: Why not take the essence of that beloved treat and blend it into a cheesecake? I could almost hear my mom’s laughter and encouragement as I tinkered with recipes in my head. Fast forward a few years, and voilà! Churro Cheesecake Bars were born, each bite unearthing those delicious memories of laughter and love from my childhood. Let’s bring that warmth into your kitchen now!
Ingredients
Now, let’s gather our ingredients. Here’s what you’ll need to create these scrumptious Churro Cheesecake Bars:
-
2 (8 oz) packages cream cheese, softened
Cream cheese is the heart of our cheesecake. Make sure it’s softened to room temperature for a smooth filling. If you’re in a pinch, you can substitute with mascarpone for a slightly different flavor profile. -
1 cup sugar (1/2 cup for filling, 1/2 cup for topping)
Sugar adds sweetness and balances the cream cheese’s tanginess. Use coconut sugar for a more caramel-like flavor. -
1 egg
The egg acts as a binding agent, giving structure to the creamy filling. If you want to make this dish vegan, try a flax egg (1 tablespoon ground flaxseed mixed with 3 tablespoons water) instead! -
1 tsp vanilla extract
Vanilla adds depth to our cheesecake filling. For a twist, consider using almond extract or a splash of bourbon for a richer flavor. -
2 (8 oz) cans Pillsbury crescent dinner rolls
These are a convenient way to create a flaky crust reminiscent of churro dough. You can also use puff pastry if you want a flakier base—just adjust the baking time slightly. -
4 Tbsp ground cinnamon
Of course, cinnamon is our star! It adds warmth and that cherished churro flavor. If you’re feeling adventurous, try mixing in a bit of nutmeg for an interesting twist.
Let’s get cooking!
Step-by-Step Instructions
-
Preheat your oven
Preheat your oven to 350°F (175°C). This step is crucial to ensure your bars bake evenly. -
Prepare your baking dish
Grab a 9×13-inch baking dish and lightly grease it or line it with parchment paper. If you’re feeling fancy, you can create a decorative edge with the parchment—this makes for easy lifting later! -
Make the cream cheese filling
In a mixing bowl, combine the softened cream cheese, 1/2 cup of sugar, egg, and vanilla extract. Using a hand mixer or a stand mixer, whip everything together until it’s creamy and smooth. Don’t rush this step—the better you mix, the creamier your filling! -
Roll out the crescent dough
Open one can of crescent rolls and gently unroll it. Place it into the bottom of your prepared baking dish, pressing the seams together to form a crust. If you’re using puff pastry, roll it out to fit the bottom of the dish, making sure there are no holes. -
Spread the cream cheese filling
Pour your luscious cream cheese mixture over the crust and spread it evenly. You might want to lick the spoon—totally acceptable! -
Top it off
Open the second can of crescent rolls and repeat the rolling process, placing it over the cream cheese filling. It doesn’t need to fit perfectly—those little gaps add charm and create lovely crispy parts! -
Mix cinnamon and sugar for sprinkling
In a small bowl, mix the remaining 1/2 cup of sugar with the ground cinnamon. Sprinkle this heavenly mixture generously over the top of your crescent dough. The aroma will be intoxicating as it bakes! -
Bake to perfection
Place your Churro Cheesecake Bars in the preheated oven and let them bake for 30-35 minutes. Keep an eye on them—the top should be golden brown, and a toothpick should come out clean when poked. -
Let them cool
Once baked, remove the bars from the oven and let them cool for at least 30 minutes. It’s hard, I know, but allowing them to set will make cutting them much neater. -
Slice and serve
Once cooled, cut into squares, serve, and prepare for a chorus of "Wow!" as everyone digs in!
Serving Suggestions
For a beautiful presentation, plate your Churro Cheesecake Bars on a lovely serving platter. Dust with a light sprinkle of cinnamon-sugar for that extra touch! Consider serving them with a scoop of vanilla ice cream or a dollop of whipped cream on the side—they make a fabulous pairing!
Recipe Variations
Want to switch things up? Here are a few variations to inspire you:
-
Nutty Churro Bars: Add chopped pecans or walnuts to your cream cheese filling for a delightful crunch.
-
Chocolate Drizzle: Drizzle melted chocolate over the top of your bars once they’re cooled for an indulgent touch!
-
Spicy Churro Bars: Include a pinch of cayenne pepper in your cinnamon-sugar mix for a unique sweet heat twist.
-
Fruit-Inspired: Swirl in some fresh fruit puree—like raspberry or strawberry—into the cream cheese filling for a fruity burst.
-
Dairy-Free Option: Use non-dairy cream cheese and your preferred dairy-free crescent rolls to create a delicious vegan version.
Chef’s Notes
These Churro Cheesecake Bars are incredibly versatile. I originally developed this recipe for a friend’s birthday party, and it quickly became a hit! Since then, I’ve played around with flavors, turning them into seasonal offerings for various events. Every time I make them, I’m transported back to that cozy kitchen where the aroma of churros filled the air.
One tip: if you ever have leftovers (though, let’s be honest, there probably won’t be), they make for a delightful breakfast treat the next day—just reheat them in the oven!
FAQs and Troubleshooting
Q: My bars turned out too gooey! What happened?
A: If your bars are gooey, it’s likely that they need a bit more baking time. Every oven is a little different, so keep an eye on them as they near the 30-minute mark. They should puff up slightly and have a golden-brown crust.
Q: Can I freeze these bars?
A: Absolutely! Once cooled, cut and wrap individual pieces in plastic wrap, then store in an airtight container. They can be frozen for up to three months. Just thaw in the fridge overnight when you’re ready to enjoy them again!
Q: How can I make sure they don’t stick to the pan?
A: Grease your pan well or line it with parchment paper, allowing for some overhang. This makes for easy lifting and clean-cut portions!
Q: Can I use homemade crescent dough instead of store-bought?
A: Of course! If you’re up for a little kitchen adventure, feel free to use your favorite homemade dough. Just ensure it’s rolled thin enough for that delicious flaky texture.
Nutritional Info
While I focus more on taste than nutritional stats, here’s a basic idea per serving (assuming 12 servings):
- Calories: 280
- Fat: 18g
- Carbohydrates: 30g
- Protein: 4g
Keep in mind that indulgence is part of the fun—these bars are meant to be savored!
And there you have it—Churro Cheesecake Bars that’ll transport you straight to a happy place! Now, gather around, tie on your apron, and let’s create some memories together. Happy baking, my friends!
PrintChurro Cheesecake Bars
A delightful dessert combining creamy cheesecake with cinnamon-sugar churros, perfect for sharing.
- Prep Time: 15 minutes
- Cook Time: 35 minutes
- Total Time: 50 minutes
- Yield: 12 servings 1x
- Category: Dessert
- Method: Baking
- Cuisine: Mexican
- Diet: Vegetarian
Ingredients
- 2 (8 oz) packages cream cheese, softened
- 1 cup sugar (1/2 cup for filling, 1/2 cup for topping)
- 1 egg
- 1 tsp vanilla extract
- 2 (8 oz) cans Pillsbury crescent dinner rolls
- 4 Tbsp ground cinnamon
Instructions
- Preheat your oven to 350°F (175°C).
- Prepare a 9×13-inch baking dish by greasing it or lining it with parchment paper.
- In a mixing bowl, combine the softened cream cheese, 1/2 cup of sugar, egg, and vanilla extract and whip until creamy.
- Open one can of crescent rolls and unroll it into the bottom of the prepared baking dish, pressing seams together.
- Pour the cream cheese mixture over the crust and spread it evenly.
- Open the second can of crescent rolls and place it over the cream cheese filling.
- Mix the remaining 1/2 cup of sugar with ground cinnamon and sprinkle generously over the top.
- Place the bars in the preheated oven and bake for 30-35 minutes until golden brown.
- Remove from the oven and let cool for at least 30 minutes before slicing.
- Serve and enjoy!
Notes
For best results, allow the bars to cool before slicing for neater cuts. These bars can also be frozen for up to three months.
Nutrition
- Serving Size: 1 serving
- Calories: 280
- Sugar: 20g
- Sodium: 300mg
- Fat: 18g
- Saturated Fat: 10g
- Unsaturated Fat: 8g
- Trans Fat: 0g
- Carbohydrates: 30g
- Fiber: 1g
- Protein: 4g
- Cholesterol: 50mg
Keywords: churro cheesecake, dessert bars, sweet treat
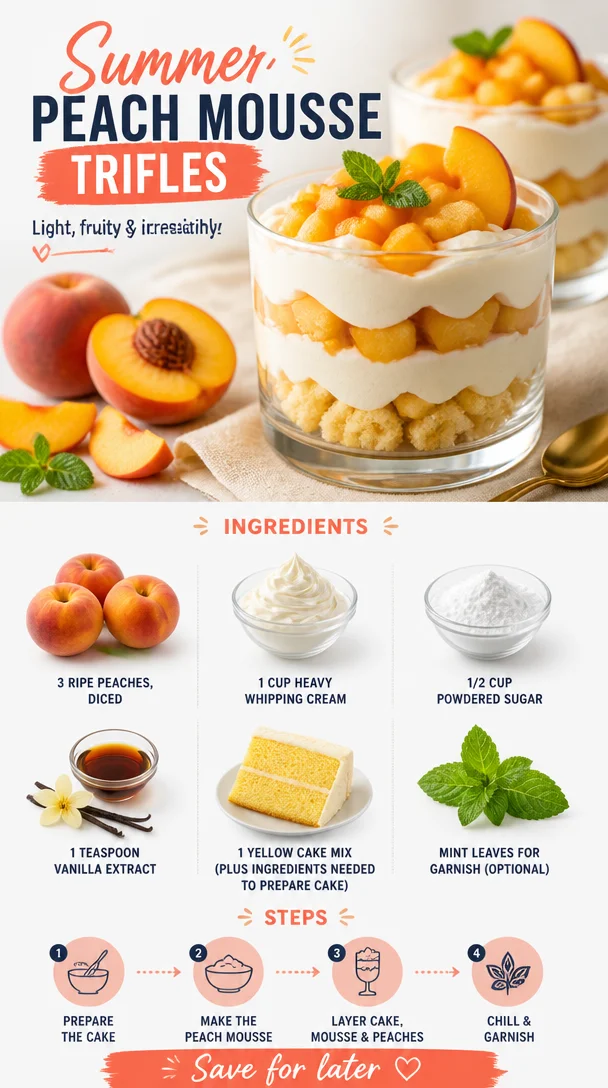
Summer Peach Mousse Trifles
Sweet Summertime Delight: Summer Peach Mousse Trifles
Hello, food lovers! Today, I’m excited to share a recipe that’s as vibrant as a summer sunset and as refreshing as a breeze on a hot afternoon. Summer Peach Mousse Trifles are the perfect way to showcase those juicy, sun-ripened peaches that tempt you at every farmer’s market. This dessert is all about layering flavors and textures—light, fluffy mousse meets moist cake, and fresh fruity goodness. So grab a spoon (and maybe a friend or two), and let’s get started!
Personal Story
Growing up, summers in my family were synonymous with afternoons spent in my grandmother’s sun-drenched kitchen, where stone fruits were in their prime. One memory that stands out is the time my grandma and I ‘borrowed’ a few peaches from our neighbor’s tree (with their permission, of course!) and turned them into a sweet treat. With the radio softly playing oldies in the background, we experimented with ingredients, laughter echoing as we stumbled through each step together.
It wasn’t just about the food; it was about the connection—the joy of creation, the anticipation of that first bite, and the warm satisfaction of sharing something homemade. That day, we whipped up a light peach mousse layered with fluffy cake, a dish that would become a family favorite. These trifles evoke those cherished memories and carry a piece of my heart with every lovely bite.
Ingredients
Here’s what you’ll need to whip up these delightful Summer Peach Mousse Trifles:
-
3 ripe peaches, diced
Choose firm peaches that yield slightly to pressure. If they’re not in season, feel free to use canned peaches (in syrup or juice) as a substitute. -
1 cup heavy whipping cream
This is essential for that luscious mousse texture. If you’re looking for a lighter version, you can use coconut cream or a whipped topping, but I highly recommend the real deal! -
1/2 cup powdered sugar
Perfect for sweetening your mousse without grit. Don’t have powdered sugar? You can easily blend granulated sugar in a food processor until fine. -
1 teaspoon vanilla extract
A splash of this extract adds warmth and elevates the overall flavor. For a twist, try almond extract instead! -
1 yellow cake mix
I love the convenience here, but you can make your favorite homemade cake if you’re feeling adventurous! Just remember to prepare it according to the package instructions. -
Mint leaves for garnish (optional)
Fresh mint adds a pop of color and a fragrant touch to your dessert. Plus, it’s a great way to impress your guests!
Step-by-Step Instructions
Now, let’s dive into the cooking process! Here’s how to create these beautiful trifles.
-
Bake the Cake:
Preheat your oven to the temperature indicated on the cake mix package (usually around 350°F/175°C). Prepare the yellow cake mix according to the package instructions. Pour it into a greased baking pan and bake until golden brown and a toothpick inserted in the center comes out clean—about 25 to 30 minutes. Once baked, let it cool in the pan for about 10 minutes before transferring it to a wire rack. -
Prepare the Peaches:
While the cake cools, let’s make use of those gorgeous peaches! Start by dicing them into small, bite-sized pieces. If you find that your peaches are a little tart, feel free to sprinkle them with a bit of sugar and let them sit for about 10 minutes. This will draw out their natural juices and enhance their sweetness. -
Whip the Cream:
In a large mixing bowl, pour in the heavy whipping cream and add the powdered sugar and vanilla extract. Using a hand mixer or a stand mixer, whip the cream on medium-high speed until it forms soft peaks. Be careful not to over-whip—you want it fluffy, not grainy! This step is where the magic happens, transforming simple cream into a cloud-like topping. -
Fold in the Peaches:
Gently fold the diced peaches into the whipped cream. The goal is to combine them without deflating the whipped cream—think light and airy! If you want a more peachy flavor throughout, save a few peach pieces for layering later. -
Assemble the Trifles:
Now it’s time to combine everything! Start with a layer of cake at the bottom of your trifle glass or a small dessert bowl. Top with a generous dollop of the peach mousse, followed by a layer of any leftover diced peaches. Repeat the layers until each glass is full, finishing with a generous swirl of mousse on top. -
Chill:
Once assembled, place the trifles in the refrigerator for at least 30 minutes to set. This helps meld the flavors beautifully! -
Garnish and Serve:
Just before serving, top with fresh mint leaves for that extra visual appeal and a burst of freshness.
Serving Suggestions
Serve your Summer Peach Mousse Trifles chilled, either individually in glasses or as a large trifle in a beautiful bowl for family-style sharing. Presenting them in clear glasses really showcases the gorgeous layers! Feel free to serve alongside extra peach slices or a drizzle of honey for a little added elegance.
Recipe Variations
Feeling adventurous? Here are a few twists you can try with your trifles:
-
Berry Blush: Substitute peaches with fresh strawberries, blueberries, or raspberries for a berry trifle. You could even mix in some lemon zest for a refreshing twist!
-
Chocolate Delight: Combine cubes of chocolate cake with the peach mousse instead of yellow cake. Chocolate and peach are a surprisingly delightful combo!
-
Nutty Crunch: Add a layer of crushed cookies or nuts between the mousse and cake for some texture—think graham crackers, almonds, or vanilla wafers.
-
Dairy-Free Version: Use coconut cream and a dairy-free cake mix to make these trifles suitable for those with dietary restrictions.
-
Spiced Up: Sprinkle a little cinnamon or nutmeg into the mousse for warmth and added flavor dimensions.
Chef’s Notes
Creating this recipe takes me back to that sun-soaked kitchen with my grandmother, pouring love into every scoop and layer. I remember one of our trials—my grandma accidentally added too much sugar to the mousse, and while we thought we had ruined it, the overly sweet dessert ended up being a hit! It just goes to show there are no mistakes in the kitchen—only delicious surprises. This recipe has evolved along with my culinary journey, and each time I make it, it feels like rekindling those joyful memories.
FAQs and Troubleshooting
1. My mousse turned out runny; what did I do wrong?
This could happen if you overwhip the cream initially, or if your peaches are too juicy. Make sure to whip the cream just to soft peaks and drain any excess juice from the peaches before folding them in.
2. Can I prepare these trifles in advance?
Absolutely! You can assemble them a day ahead. Just make sure to keep them refrigerated until you’re ready to serve.
3. What if I can’t find ripe peaches?
If fresh peaches aren’t available, you can use canned peaches or switch to another fruit like nectarines or plums. Just make sure to adjust the sweetness if they’re tinned in syrup!
4. Can I use a different type of cake?
Yes! Feel free to get creative. Pound cake, sponge cake, or even a brownie base would work beautifully with this mousse. Just keep the layers light and playful!
Nutritional Info
While I won’t provide exact numbers this time, remember that moderation is key when indulging! The trifles are rich from the cream and cake but packed with wholesome fruit. Enjoy them as a treat, and live a little!
And there you have it, my culinary friends! My Summer Peach Mousse Trifles are more than just a dessert; they are a celebration of summer flavors and sweet memories. So, gather your ingredients, don your favorite apron, and let the kitchen adventures begin!
PrintSummer Peach Mousse Trifles
A vibrant and refreshing dessert featuring layers of light peach mousse, moist cake, and fresh diced peaches, perfect for summer gatherings.
- Prep Time: 15 minutes
- Cook Time: 30 minutes
- Total Time: 45 minutes
- Yield: 4 servings 1x
- Category: Dessert
- Method: No-Bake
- Cuisine: American
- Diet: Vegetarian
Ingredients
- 3 ripe peaches, diced
- 1 cup heavy whipping cream
- 1/2 cup powdered sugar
- 1 teaspoon vanilla extract
- 1 yellow cake mix
- Mint leaves for garnish (optional)
Instructions
- Preheat your oven to the temperature indicated on the cake mix package (usually around 350°F/175°C). Prepare the yellow cake mix according to the package instructions. Pour it into a greased baking pan and bake until golden brown and a toothpick inserted in the center comes out clean—about 25 to 30 minutes. Once baked, let it cool in the pan for about 10 minutes before transferring it to a wire rack.
- While the cake cools, start by dicing the peaches into small, bite-sized pieces. If they are a little tart, sprinkle them with a bit of sugar and let them sit for about 10 minutes.
- In a large mixing bowl, pour in the heavy whipping cream and add the powdered sugar and vanilla extract. Beat on medium-high speed until soft peaks form.
- Gently fold the diced peaches into the whipped cream, saving a few pieces for later layering if desired.
- Start by layering cake at the bottom of your trifle glass or dessert bowl, followed by a generous layer of the peach mousse, and diced peaches. Repeat layers until glasses are full.
- Once assembled, place the trifles in the refrigerator for at least 30 minutes to set.
- Just before serving, top with fresh mint leaves.
Notes
Feel free to prepare the trifles a day in advance and keep them refrigerated. Variations include using different fruits or types of cake.
Nutrition
- Serving Size: 1 serving
- Calories: 350
- Sugar: 20g
- Sodium: 100mg
- Fat: 24g
- Saturated Fat: 14g
- Unsaturated Fat: 6g
- Trans Fat: 0g
- Carbohydrates: 36g
- Fiber: 2g
- Protein: 4g
- Cholesterol: 80mg
Keywords: peach mousse, summer dessert, trifles, peach dessert, layered dessert
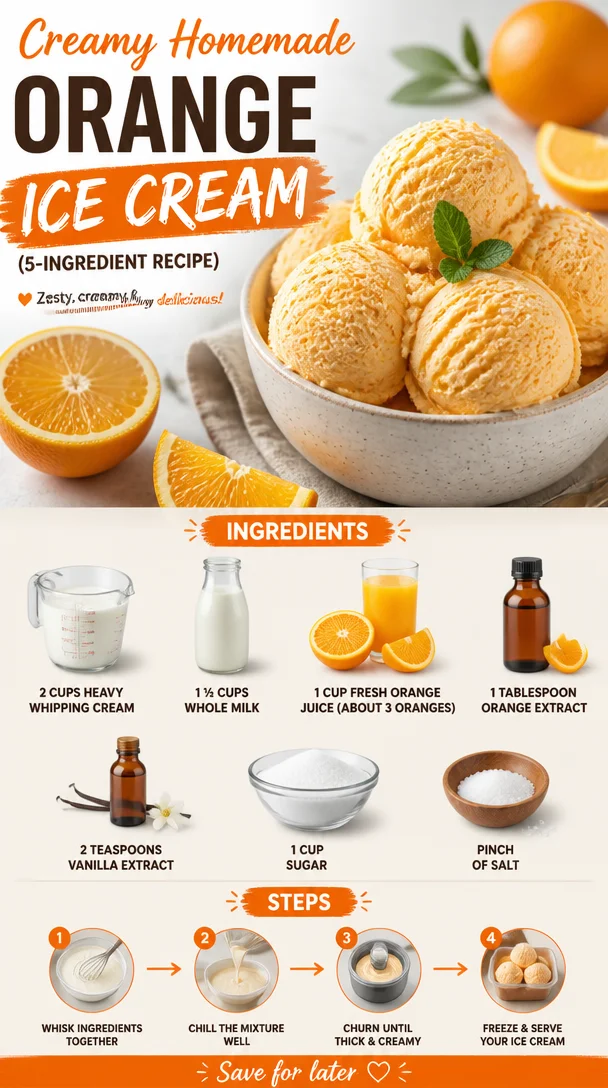
Creamy Homemade Orange Ice Cream (5-Ingredient Recipe)
Homemade Orange Ice Cream: A Zesty Delight
Hello and welcome to my kitchen! Today, you’re in for a real treat as we whip up some homemade orange ice cream that will not only cool you down but also transport you back to those sunny summer days of your childhood. There’s something magical about the rich, creamy texture combined with the zesty brightness of fresh oranges that makes this dessert a true delight.
Picture this: the sun casts its warm glow, the air is filled with laughter, and there you are, indulging in a scoop of the most refreshing ice cream. Every lick is a reminder of summers spent in the backyard, perhaps chasing after a soccer ball or lounging under a shady tree. Ice cream was the ultimate reward—nothing could beat the joy of savoring a treat that tasted like sunshine.
The beauty of making your own ice cream at home is that you can control the ingredients and customize the flavors to your heart’s content. My recipe for homemade orange ice cream is easy to follow and uses fresh ingredients that are not only delicious but good for you too. So, grab your apron and let’s get started!
My Ice Cream Memory
One summer evening, I remember sitting on the porch with my grandma, who had just finished churning a batch of her famous orange ice cream. The churning sound of the old machine was music to my ears. As we waited for those creamy dreams to solidify in the freezer, we shared stories about her childhood. That evening became one of my favorite memories, not only for the delicious treat but for the warmth of family stories and connection.
Grandma’s recipe had its quirks, and she always said the best part of making ice cream was tasting the mixture before it went into the churn. It felt like stealing a little secret. Now, I want to share that joy with you through this recipe. So let’s dive into the wonderful world of homemade ice cream!
Ingredients
Here’s what you’ll need to make this zesty delight:
-
2 cups heavy whipping cream: This gives the ice cream its rich, velvety texture. If you’re looking for a lighter version, you can use half and half.
-
1 ½ cups whole milk: Complements the cream for a perfectly smooth consistency. You can swap it out for low-fat milk or even a plant-based milk like coconut milk, but keep in mind the flavor may change slightly.
-
1 cup fresh orange juice (about 3 oranges): Freshly squeezed juice is a must for the bright, refreshing flavor! You can use bottled juice, but make sure it’s 100% orange juice without added sugars or preservatives.
-
1 tablespoon orange extract: This enhances the orange flavor and gives it an extra kick. If you want to tone it down, start with a teaspoon and adjust to taste.
-
2 teaspoons vanilla extract: Adds depth to the ice cream flavor and balances the citrus. Using homemade vanilla extract is a chef’s best-kept secret for an extra layer of warmth.
-
1 cup sugar: Sweetens the mixture perfectly. If you’re looking for a healthier alternative, you can use agave syrup or honey (and adjust the liquid content accordingly).
-
Pinch of salt: A little salt elevates the flavors, bringing out the sweetness and balancing the acidity of the oranges.
Step-by-Step Instructions
Ready to make some magic? Here’s how to create your homemade orange ice cream!
-
Juicing the Oranges (15 minutes): Start by juicing your fresh oranges. You’ll want about one cup of juice, so squeeze those beauties! This is the fun part; the fragrance of the freshly squeezed juice will fill your kitchen and bring a burst of sunshine. Tip: Use a citrus juicer or even a fork if you don’t have one handy. Don’t forget to strain out any seeds!
-
Mixing the Base (10 minutes): In a large mixing bowl, combine the heavy whipping cream, whole milk, fresh orange juice, orange extract, vanilla extract, sugar, and a pinch of salt. Chef Hack: Use a whisk to mix all the ingredients until the sugar is dissolved. This step is crucial because it ensures that your ice cream will be creamy and smooth without any gritty texture from undissolved sugar.
-
Chill the Mixture (1-2 hours): Cover the bowl with plastic wrap and place it in the refrigerator for at least one hour. Chilling the mixture will help it churn better, resulting in a creamier texture. Pro Tip: If you have time, letting it chill longer (even overnight) enhances the flavor!
-
Churning (20-30 minutes): Once chilled, pour the mixture into your ice cream maker and churn according to the manufacturer’s instructions. This process usually takes about 20-30 minutes. Tip: The mixture should thicken and double in size, becoming light and fluffy.
-
Freezing (4 hours or overnight): Transfer the churned ice cream into an airtight container and smooth the top with a spatula. Cover it with a piece of parchment paper before sealing the container to prevent ice crystals from forming. Freeze for at least four hours or overnight for best results.
-
Serve and Enjoy (5 minutes): Scoop your homemade orange ice cream into bowls or cones and savor the flavor! Serving Tip: Garnish with a few orange zest shavings or a sprig of mint to elevate the presentation.
Serving Suggestions
When it comes to serving your homemade orange ice cream, presentation is key! Use beautiful bowls or waffle cones to showcase your creation. Add an orange slice or a mint leaf on top for that extra touch of elegance!
For a more decadent dessert, serve it alongside a slice of warm chocolate cake or drizzle some melted dark chocolate over the top. The combination of sweet and tangy will make your taste buds dance!
Recipe Variations
Want to switch things up? Here are a few fun ideas to personalize your orange ice cream recipe:
-
Citrus Medley: Incorporate other citrus fruits like lemon or lime for a refreshing twist.
-
Creamy Sorbet: Substitute the cream with coconut milk for a dairy-free version that’s just as delicious.
-
Orange Creamsicle: Add a bit of zest and vanilla bean to replicate the classic summer treat.
-
Liqueur Infusion: For an adult version, consider adding a splash of triple sec or orange liqueur into the mix before churning.
-
Chocolate Chip: Stir in mini chocolate chips or candied orange peel just before transferring the mixture to the freezer for a delightful texture contrast.
Chef’s Notes
Creating this homemade orange ice cream has been a labor of love for me. Over time, I’ve experimented with different combinations and techniques. There was one particularly memorable concoction where I added in cardamom for a unique twist, which reminded me of my travels.
Also, I learned the hard way to always taste as you go. There was an unfortunate batch where I accidentally overdid the sugar, and I ended up with a soupy orange sugar syrup. It was still tasty, but you know—every error is just an opportunity to learn!
FAQs and Troubleshooting
1. My ice cream turned out hard! What did I do wrong?
- If your ice cream is too hard, it may have been frozen too long without being stirred. Allow it to sit at room temperature for a few minutes before scooping.
2. Can I make this without an ice cream maker?
- Yes! You can whip the mixture by hand or use a blender, pouring it into a container and mixing every 30 minutes for the first few hours to break up ice crystals.
3. Why is my ice cream grainy?
- This might happen if the sugar didn’t dissolve completely or if it froze too quickly. Make sure to mix well and chill before churning!
4. Can I add mix-ins?
- Absolutely! You can add in your favorite candies, nuts, or fruit chunks just before transferring to the freezer.
Making homemade orange ice cream is not just about whipping up a refreshing dessert; it’s about creating memories and enjoying the process in the kitchen. So tie on your apron, put on your favorite tunes, and let’s get to creating something delicious! I can’t wait for you to share your homemade creations—because good food isn’t just about the final product; it’s about the journey. Happy cooking!
PrintHomemade Orange Ice Cream

A refreshing homemade orange ice cream that combines rich creaminess with zesty brightness. Perfect for summer days!
- Prep Time: 15 minutes
- Cook Time: 30 minutes
- Total Time: 60 minutes
- Yield: 8 servings 1x
- Category: Dessert
- Method: Churning
- Cuisine: American
- Diet: Vegetarian
Ingredients
- 2 cups heavy whipping cream
- 1 ½ cups whole milk
- 1 cup fresh orange juice (about 3 oranges)
- 1 tablespoon orange extract
- 2 teaspoons vanilla extract
- 1 cup sugar
- Pinch of salt
Instructions
- Juicing the oranges: Start by juicing your fresh oranges. You’ll want about one cup of juice, so squeeze those beauties! Strain out any seeds.
- Mixing the base: In a large mixing bowl, combine the heavy whipping cream, whole milk, fresh orange juice, orange extract, vanilla extract, sugar, and a pinch of salt. Use a whisk to mix until the sugar is dissolved.
- Chill the mixture: Cover the bowl with plastic wrap and place it in the refrigerator for at least one hour.
- Churning: Once chilled, pour the mixture into your ice cream maker and churn according to the manufacturer’s instructions, usually taking about 20-30 minutes.
- Freezing: Transfer the churned ice cream into an airtight container, cover it with parchment paper, and freeze for at least four hours or overnight.
- Serve and enjoy: Scoop your homemade orange ice cream into bowls or cones and garnish as desired.
Notes
Feel free to customize with add-ins like chocolate chips or citrus zest. For a lighter version, use half and half instead of heavy cream.
Nutrition
- Serving Size: 1 serving
- Calories: 250
- Sugar: 25g
- Sodium: 80mg
- Fat: 15g
- Saturated Fat: 9g
- Unsaturated Fat: 3g
- Trans Fat: 0g
- Carbohydrates: 30g
- Fiber: 0g
- Protein: 3g
- Cholesterol: 60mg
Keywords: orange ice cream, homemade ice cream, summer dessert, citrus dessert
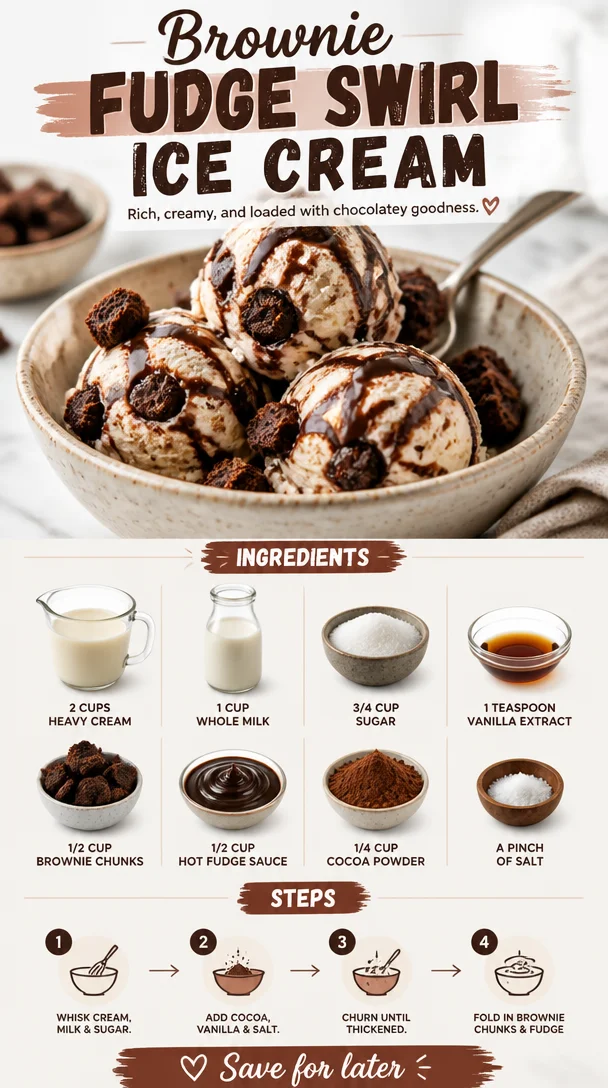
Brownie Fudge Swirl Ice Cream
Indulge in Homemade Brownie Fudge Swirl Ice Cream
Hello, ice cream lovers! Today, we’re diving into a sweet, creamy adventure that brings nostalgia and indulgence right into your kitchen. I’m excited to share with you my recipe for Brownie Fudge Swirl Ice Cream — a luscious treat that marries rich brownie chunks and decadent hot fudge into a silky ice cream base. This recipe is not only fun to make, but it also creates moments of pure joy when shared with family and friends around your table.
Picture this: it’s a warm summer evening, and you’ve just hosted a dinner party. The sun is golden, the candles are flickering, and laughter fills the air. As dinner wraps up, you whisk out bowls of this mouthwatering Brownie Fudge Swirl Ice Cream. Your guests’ eyes light up with excitement as the indulgent flavors of chocolate dance at the forefront, while the brownie bits add a delightful chew. It’s these kinds of moments that remind me of why I love cooking and sharing food so much.
But let me take you back to my very first homemade ice cream experience. It was years ago, during a cozy summer break when I was just starting my culinary journey. Armed with a newly acquired ice cream maker and an insatiable sweet tooth, I decided to create a classic vanilla base. However, in my eager spirit, I tossed in everything I could find in my pantry — chocolate chips, fresh berries, and yes, even crushed-up brownies! The result? A wonderfully chaotic and delicious swirl of flavors that completely swept me off my feet. That whimsical experiment inspired my love for creating ice cream that’s not only delicious but also tells a story.
Fast forward to today, this Brownie Fudge Swirl Ice Cream has become a staple in my kitchen. It’s a perfect representation of how simple ingredients can come together to create something remarkable. Ready to whip some up yourself? Let’s get started!
Ingredients
Let’s gather our ingredients! Here’s what you’ll need to bring this dreamy ice cream to life:
-
2 cups heavy cream: The cream is the star here, giving our ice cream that luxurious, rich texture. Opt for heavy cream, as it has a higher fat content which translates to creamier ice cream. If you’re looking for a lighter version, you can use half-and-half instead, but keep in mind the texture will be slightly different.
-
1 cup whole milk: This adds a slight lightness to our ice cream while balancing the richness of the heavy cream. If you’re dairy-free, you could substitute with coconut milk for a tropical twist.
-
3/4 cup sugar: Sugar not only sweetens our ice cream but also keeps it scoopable by lowering the freezing point. For a healthier alternative, consider using honey or agave syrup, but reduce the amount since they are sweeter than sugar.
-
1 teaspoon vanilla extract: Vanilla is a classic flavor enhancer that elevates every sweet dish. Use pure vanilla extract for the best flavor; however, you can use a vanilla bean for a more intense infusion (just scrape the seeds right into the mixture).
-
1/2 cup brownie chunks: The hero of our dessert! You can use store-bought brownies or homemade ones—whatever you prefer. If you’re in a pinch, even chocolate cake can work!
-
1/2 cup hot fudge sauce: This adds rich chocolatey goodness and a beautiful ribbon of flavor. You can either make your own or purchase a quality store-bought version. If you want a lighter option, a chocolate ganache can be a great substitute.
-
1/4 cup cocoa powder: This deepens the chocolate flavor of our ice cream beautifully. Use Dutch-processed cocoa for a smoother taste, or stick to natural cocoa for a more pronounced chocolate punch.
-
A pinch of salt: Salt is the secret ingredient that enhances all those sweet flavors. Don’t skip this — it’s a game-changer!
Step-by-Step Instructions
Ready to create some magic? Let’s dive into the steps:
-
Prepare Your Ice Cream Base: In a mixing bowl, whisk together the heavy cream, whole milk, sugar, cocoa powder, and vanilla extract until the sugar and cocoa are fully dissolved. This might take a few minutes of good whisking. I love using a whisk for this step to really incorporate air into the mixture — it makes for extra fluffy ice cream!
-
Chill the Mixture: Now, pour the mixture into an airtight container and place it in the refrigerator for at least 2 hours, or ideally overnight. This chilling ensures that your mixture is super cold when it hits the ice cream maker, which helps achieve that creamy texture!
-
Churn Time: When you’re ready to turn your chilled mixture into ice cream, get your ice cream maker ready. Pour the base into your machine and churn according to the manufacturer’s instructions. Typically this takes about 20-30 minutes. As it churns, you’ll see it start to thicken up — this is the best part!
-
Adding Brownie and Fudge: Once the ice cream is thick and creamy, gently fold in the brownie chunks. I like to break the brownies into smaller pieces so that there’s a perfect bite of brownie in every spoonful. Then, drizzle in the hot fudge sauce and swirl it gently — you want beautiful ribbons but not a full blend. The visual contrast is as appetizing as the taste!
-
Freeze Your Ice Cream: Transfer the ice cream to a lidded container and smooth the top. Freeze for at least 4 hours, or until firm. While waiting is hard, it gives all those flavors time to meld together beautifully. And trust me, it’s worth the wait!
-
Ready to Serve: When you’re ready to dig in, take your ice cream out of the freezer and let it sit for about 10 minutes to soften just slightly — this makes it easier to scoop.
Serving Suggestions
Plating your Brownie Fudge Swirl Ice Cream can be just as fun as making it! Serve it in classic ice cream bowls and top it with a sprinkle of chocolate shavings, a drizzle of extra hot fudge, or even some whipped cream for that extra flair. For an elegant touch, consider garnishing with fresh mint leaves or a sprinkle of sea salt, which can elevate that chocolate flavor profile.
Recipe Variations
One of the best things about homemade ice cream is the ability to customize. Here are a few fun variations you can try:
- Nutty Twist: Add a handful of chopped pecans or walnuts along with the brownie chunks for a delightful crunch.
- Mint Chocolate Fudge: Incorporate peppermint extract for a refreshing mint flavor that pairs beautifully with chocolate.
- Cookie Dough Delight: Instead of brownies, fold in chunks of edible cookie dough for a fun twist.
- Fruity Fudge: Consider swirling in strawberry or raspberry puree for a fruity contrast to the fudge — sweet and tart at the same time!
Chef’s Notes
I must confess, this recipe has gone through a few delightful evolutions over the years! Initially, I was skeptical about adding hot fudge to ice cream — wouldn’t it just melt and mess everything up? But oh, how wrong I was! That wonderful gooey chocolate actually creates a texture that is to die for. I remember one summer party where my friends and I had a contest to see who could come up with the craziest ice cream combination. There were some epic flavor fusions, but nothing could top this brownie fudge creation. I still smile at the memories and laughter that filled my kitchen that night.
FAQs and Troubleshooting
-
Why is my ice cream too hard to scoop?
- If your ice cream is almost rock solid, it could be due to excess air being churned into the mixture or it simply being frozen for too long. For a softer texture, try letting it sit out at room temperature for about 10 minutes before scooping.
-
Can I make this ice cream without an ice cream maker?
- Absolutely! Simply pour the cold ice cream base into a shallow dish, place it in the freezer, and stir every 30 minutes for about 3-4 hours, or until it reaches a smooth creamy consistency.
-
How can I make my ice cream smoother?
- Make sure to chill your mixture thoroughly before churning, and don’t skip the process of folding in your chocolate and brownie after churning. Over-churning can also introduce too much air, making it less creamy.
-
Can I make this ice cream dairy-free?
- Yes! Substitute the heavy cream and milk with coconut cream and almond milk or any other dairy-free milk of your choice. Ensure your brownie chunks are also dairy-free!
Nutritional Info
While you’re savoring this indulgent treat, keep in mind that moderation is key. Enjoy personal-sized scoops, and relish every bite!
Conclusion
I hope you’re as excited as I am to create this delightful Brownie Fudge Swirl Ice Cream! It’s more than just a dessert; it’s a heartwarming experience that leads to sweet memories at the table. Whether you enjoy it on a hot summer day, at a celebration, or simply to treat yourself, I promise this ice cream will bring smiles all around. So grab your ingredients, tie on that apron, and let’s make some delicious memories together! Cheers to sweet moments!
PrintBrownie Fudge Swirl Ice Cream
Indulge in a delicious Brownie Fudge Swirl Ice Cream made with rich brownie chunks and decadent hot fudge.
- Prep Time: 15 minutes
- Cook Time: 30 minutes
- Total Time: 270 minutes
- Yield: 8 servings 1x
- Category: Dessert
- Method: Churning
- Cuisine: American
- Diet: Vegetarian
Ingredients
- 2 cups heavy cream
- 1 cup whole milk
- 3/4 cup sugar
- 1 teaspoon vanilla extract
- 1/2 cup brownie chunks
- 1/2 cup hot fudge sauce
- 1/4 cup cocoa powder
- A pinch of salt
Instructions
- Prepare Your Ice Cream Base: In a mixing bowl, whisk together the heavy cream, whole milk, sugar, cocoa powder, and vanilla extract until fully dissolved.
- Chill the Mixture: Pour it into an airtight container and refrigerate for at least 2 hours or overnight.
- Churn Time: Pour the chilled mixture into your ice cream maker and churn according to instructions, usually about 20-30 minutes.
- Adding Brownie and Fudge: Slowly fold in the brownie chunks and drizzle in the hot fudge sauce, swirling gently.
- Freeze Your Ice Cream: Transfer to a lidded container and freeze for at least 4 hours or until firm.
- Ready to Serve: Let it sit for about 10 minutes at room temperature before scooping.
Notes
For a dairy-free version, substitute heavy cream and milk with coconut cream and almond milk.
Nutrition
- Serving Size: 1 scoop
- Calories: 350
- Sugar: 25g
- Sodium: 150mg
- Fat: 20g
- Saturated Fat: 12g
- Unsaturated Fat: 8g
- Trans Fat: 0g
- Carbohydrates: 40g
- Fiber: 2g
- Protein: 5g
- Cholesterol: 80mg
Keywords: ice cream, dessert, brownie, fudge, homemade
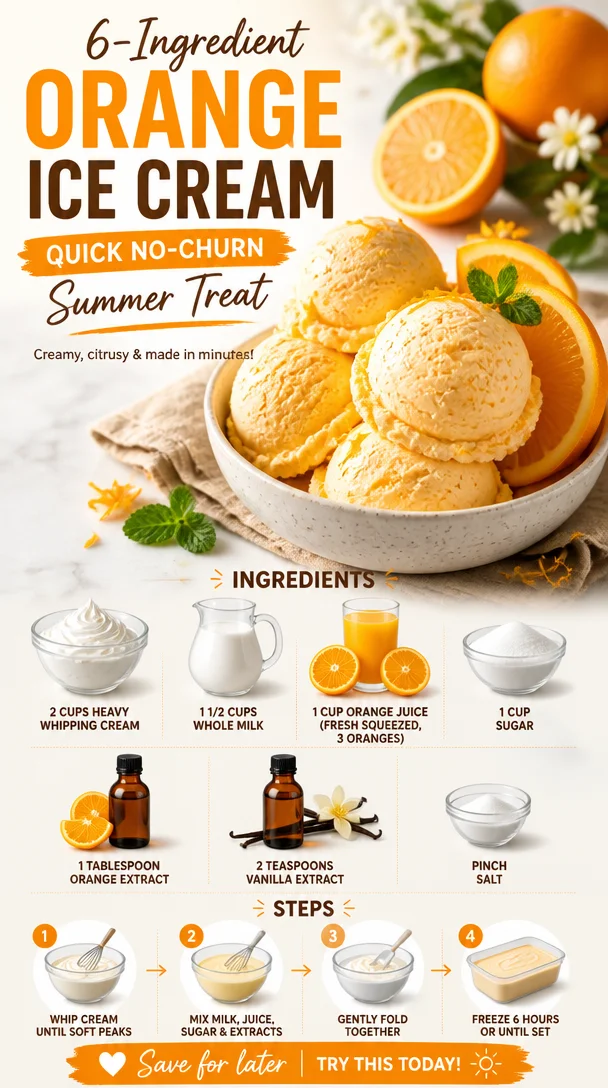
Ingredient Orange Ice Cream: Quick No-Churn Summer Treat
The Creamy Sunshine of Summer: Homemade Orange Ice Cream Recipe
There’s something magical about homemade ice cream that brings a smile to everyone’s face. It’s a simple pleasure, a labor of love, and a nostalgic taste of summer wrapped in a sweet, creamy dream. Today, I’m excited to share my Orange Ice Cream recipe with you – a vibrant, refreshing treat that’s perfect for warm days and a delightful way to gather family and friends around the table.
This Orange Ice Cream will not only cool you down but also evoke the joy of summer picnics and family gatherings. Imagine yourself lounging on the porch, the sun setting in a blaze of orange and pink, with a bowl of this luscious ice cream in hand. I still remember the first time I made this recipe; it was during a family barbecue, and everyone was so excited about the sweet citrus flavor that they couldn’t resist coming back for seconds (and thirds!).
This isn’t just any frozen dessert; it’s a creamy embrace, a scoop of sunshine to brighten your day. Ready to roll up your sleeves? Let’s dive into the delicious world of homemade Orange Ice Cream!
A Taste of Nostalgia
I can still picture it: a backyard full of laughter, the smell of grilled burgers wafting through the air, and my grandma pulling out the old ice cream maker from the back of the pantry. It had a few dents and a faded paint job, but to me, it was a treasure chest of sweet memories. Every summer, she’d gather the family for homemade ice cream day, a tradition we all eagerly anticipated. She’d mix the ingredients by hand, and I remember how the kitchen would be filled with the zesty aroma of fresh oranges.
As she patiently cranked away, we’d gather round, eyes wide with excitement, waiting for that delicious treat to reveal itself. When it finally emerged, creamy and perfectly orange, we knew it was worth the wait. Each scoop was a celebration of summer—the citrus notes bursting with flavor, each bite reminding us of sun-kissed days and carefree moments spent together.
Making this Orange Ice Cream transports me back to those cherished summers, and I love sharing this joyful recipe with friends and family. It’s not just about the ice cream; it’s about creating memories. So tie on your apron, and let’s make some of our own!
Ingredients
Here’s a list of everything you’ll need to create this delicious treat:
-
2 cups heavy whipping cream
The star of the show! This is what gives our ice cream that luxurious, creamy texture. If you want something lighter, you can substitute half-and-half, but the end result won’t be quite as rich. -
1 1/2 cups whole milk
This balances the creaminess and keeps the texture smooth. If you’re looking for a lower-fat version, you can use 2% milk, but it might be slightly less creamy. -
1 cup orange juice (fresh squeezed, about 3 oranges)
Fresh is key here! The bright flavor from freshly squeezed oranges can’t be beaten. If you’re short on time, use 100% pure orange juice without added sugars for a quicker option. -
1 cup sugar
This sweetens the deal! If you’re looking to cut down on sugar, you can try using agave syrup or honey, but keep in mind the balance of flavors may shift a bit. -
1 tablespoon orange extract
This boosts the orange flavor! If you find yourself without orange extract, vanilla extract can substitute, imparting a different kind of flavor but still very tasty. -
2 teaspoons vanilla extract
A classic addition that rounds out the flavors beautifully. You could also experiment with almond extract for a twist! -
Pinch of salt
A touch of salt enhances the sweetness and balances the flavors. Don’t skip it; it makes a difference!
Step-by-Step Instructions
Now that we’ve gathered our ingredients, let’s whip up this delicious Orange Ice Cream!
-
Mix the Base: In a large mixing bowl, whisk together the heavy whipping cream, whole milk, and granulated sugar. Keep whisking until the sugar fully dissolves. This step is crucial for a smooth finish—no one likes grainy ice cream!
-
Add the Citrus: Pour in the fresh orange juice, orange extract, vanilla extract, and a pinch of salt. Mix gently but thoroughly—this is where the flavor magic happens! Tasting your mixture at this point is key; it should be sweet and bursting with citrus goodness.
-
Chill the Mixture: Cover your bowl and place it in the fridge for at least one hour. This allows the flavors to meld beautifully! If you’re in a hurry, chilling for 30 minutes will work, but I promise the extra time is worth it.
-
Churn the Ice Cream: After chilling, pour the mixture into your ice cream maker and churn according to the manufacturer’s instructions. Most machines take about 20-30 minutes to churn to a soft-serve consistency. Pro tip: If you don’t have an ice cream maker, you can use a blender; just blend your mixture until smooth, pour it into a container, and freeze it, stirring every 30 minutes for the first 2-3 hours to break up ice crystals.
-
Freeze to Firm Up: Once churned, transfer the ice cream to a lidded container and freeze for at least 4 hours, or until firm. If you like a softer ice cream, feel free to eat it right away after churning—it will have a lovely, soft, scoopable texture!
-
Serve and Enjoy: Scoop into bowls, add your favorite toppings, and dig in! I love adding a sprinkle of zest or a slice of fresh orange for that extra pop of color!
Serving Suggestions
For the perfect serving experience, scoop your Orange Ice Cream into chilled bowls for that ultra-refreshing feel. A few sprigs of fresh mint or a thin slice of orange on the edge can elevate the look of your dish while adding a pop of color. Feeling extra fancy? A drizzle of honey or a sprinkle of crushed pistachios on top adds a delightful crunch that perfectly complements the creamy texture.
Recipe Variations
- Citrus Blast: Mix in zest from lemons or limes for a tangy twist.
- Creamy Dreamsicle: Add a swirl of vanilla ice cream to create a dreamy creamsicle effect.
- Orange Chocolate Delight: Fold in some dark chocolate chips or orange-infused chocolate shavings for an indulgent treat.
- Tropical Vibes: Combine orange juice with pineapple juice for a fruity tropical ice cream!
- Dairy-Free Option: Swap out the cream and milk for coconut cream and almond milk for a delicious dairy-free treat.
Chef’s Notes
Having fun in the kitchen can come with its fair share of mishaps! One time, I thought I’d be clever and try adding a batch of frozen berries to my orange ice cream. Let’s just say, “swampy orange” wasn’t quite the look I was going for. That’s the beauty of experimenting, though; if you try something new, you can learn what works and what doesn’t! My Orange Ice Cream recipe has evolved over the years, and I find new ways to put a twist on it with every batch. It’s all about making it your own!
FAQs and Troubleshooting
-
Why is my ice cream icy?
If your ice cream has ice crystals, it’s likely due to not enough fat in your base or not mixing it often enough while it freezes. Make sure to use full-fat cream and stir if you’re not using an ice cream maker! -
My mixture isn’t sweet enough. What can I do?
Taste your mixture before churning! If it’s lacking sweetness, feel free to add a little more sugar or honey until it hits just right. -
Can I make this without an ice cream maker?
Yes! If you don’t have an ice cream maker, simply blend your mixture until smooth, pour it into a freezer-safe container, and freeze, stirring every 30 minutes for the first few hours to break up ice crystals. -
How long does homemade ice cream last?
If properly stored in an airtight container, this Orange Ice Cream will last about 2-3 weeks in the freezer. However, I doubt it’ll last that long—it’s too delicious not to devour!
Nutritional Info
While homemade ice cream can be a tasty indulgence, moderation is key. This Orange Ice Cream will typically have around 240 calories per ½ cup serving, with about 14 grams of fat, 21 grams of carbohydrates, and 3 grams of protein. Nutritional values can vary based on substitutions and portion sizes, so always feel free to adjust according to your dietary needs!
There you have it – a delectable, refreshing Orange Ice Cream recipe that’s perfect for summer. I can’t wait for you to try this and create your own memories in the kitchen. Whether you’re enjoying it on your porch or serving it at a family gathering, I hope it brings as much joy to you as it has to me. So grab your ingredients, tie on that apron, and let’s make some kitchen magic happen together!
PrintHomemade Orange Ice Cream

A vibrant and refreshing Orange Ice Cream recipe, perfect for warm summer days.
- Prep Time: 15 minutes
- Cook Time: 0 minutes
- Total Time: 5 hours 15 minutes
- Yield: 8 servings 1x
- Category: Dessert
- Method: Churning
- Cuisine: American
- Diet: Vegetarian
Ingredients
- 2 cups heavy whipping cream
- 1 1/2 cups whole milk
- 1 cup orange juice (fresh squeezed, about 3 oranges)
- 1 cup sugar
- 1 tablespoon orange extract
- 2 teaspoons vanilla extract
- Pinch of salt
Instructions
- Mix the Base: In a large mixing bowl, whisk together the heavy whipping cream, whole milk, and granulated sugar until the sugar fully dissolves.
- Add the Citrus: Pour in the fresh orange juice, orange extract, vanilla extract, and a pinch of salt. Mix gently.
- Chill the Mixture: Cover your bowl and place it in the fridge for at least one hour.
- Churn the Ice Cream: Pour the mixture into your ice cream maker and churn according to the manufacturer’s instructions.
- Freeze to Firm Up: Transfer the ice cream to a lidded container and freeze for at least 4 hours.
- Serve and Enjoy: Scoop into bowls, add your favorite toppings, and dig in!
Notes
Serve with fresh mint or a slice of orange for added freshness. For a touch of elegance, drizzle with honey or sprinkle with crushed pistachios.
Nutrition
- Serving Size: 1/2 cup
- Calories: 240
- Sugar: 21g
- Sodium: 50mg
- Fat: 14g
- Saturated Fat: 8g
- Unsaturated Fat: 3g
- Trans Fat: 0g
- Carbohydrates: 21g
- Fiber: 0g
- Protein: 3g
- Cholesterol: 50mg
Keywords: orange ice cream, homemade ice cream, summer dessert, creamy dessert
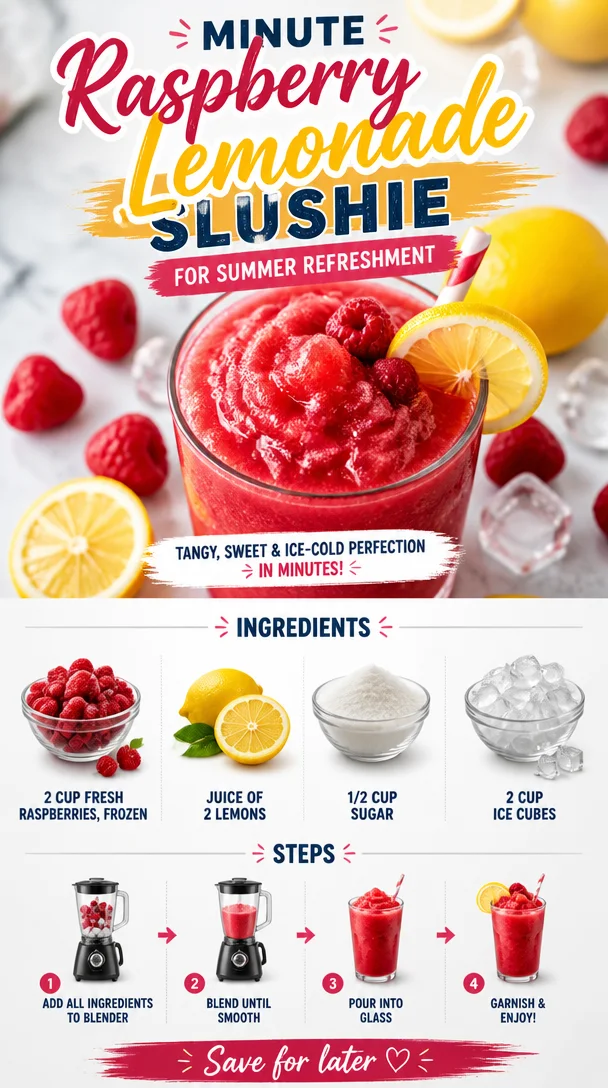
Minute Raspberry Lemonade Slushie for Summer Refreshment
Refreshing Raspberry Lemonade Slushie Recipe: A Delightful Summer Treat
Hello, my friends! Is there anything more refreshing than sipping on a chilled fruity slushie on a hot summer day? Let me tell you, when the temperatures start to rise and the sun shines bright, a Raspberry Lemonade Slushie is the ultimate treat. You can almost hear the sound of laughter and the splashes from the pool as you drink this vibrant, icy refreshment.
In today’s post, I’m excited to share not only how to whip up this delightful drink but also some warm memories associated with it. I hope to inspire you to gather friends, grab a blender, and make your own versions of this delicious summertime classic!
A Personal Connection: Childhood Memories
Growing up, my summers were filled with epic adventures outdoors: family barbecues, long afternoons at the local pool, and, of course, my mom’s famous lemonade slushies. She used to say that the only thing better than cold lemonade was cold lemonade with raspberries. And she was right! I remember running around with my siblings, sticky-faced and giggling, and then rushing to grab a cup of my mom’s slushie concoction to cool down.
Fast forward to today, I can almost still taste the sweetness of those summers. That joy inspired me to create my own version of the Raspberry Lemonade Slushie, bringing together both the tanginess of lemons and the delightful sweetness of raspberries. Every sip feels like a little piece of nostalgia that I can share with you all here at Ivory Apron.
Ingredients
Let’s dive into the essentials for making this vibrant slushie. Here’s what you’ll need:
-
2 cups fresh raspberries (frozen)
Raspberries bring a bright tartness that balances wonderfully with sweet lemonade. You can use fresh or frozen raspberries, but if you want an extra icy texture, frozen is the way to go. Typically, I prefer to freeze fresh berries myself to lock in that garden-fresh flavor! -
Juice of 2 lemons
Fresh lemon juice adds a zesty brightness to the drink, lifting the flavor profile. You can substitute with bottled lemon juice in a pinch, but trust me, fresh is best! -
1/2 cup sugar
This sweetens the drink and helps balance the tartness. If you’re looking for a healthier option, try using honey or agave syrup, but adjust the quantity to taste since they’re sweeter than regular sugar! -
2 cups ice cubes
Ice is the key to achieving that perfect slushie texture. You can also use crushed ice if that’s what you have on hand—it’ll blend super easily!
Step-by-Step Instructions
Now that we’ve covered the ingredients, let’s get down to the fun part: blending it all together! Here’s how you prepare this slushie:
-
Prep Your Ingredients
Start by gathering all your ingredients. Make sure your raspberries are either thawed if using fresh or ready to go if they’re frozen. Juice your lemons and measure out your sugar while reminiscing about those childhood summer days. It’s all about the vibe! -
Combine in Blender
In a blender, add the frozen raspberries, fresh lemon juice, sugar, and ice cubes. Blend until the mixture is smooth and everything is well incorporated. Here’s a little pro tip: if your blender struggles with ice, add the sugar and some lemon juice first as it helps to move the ice along! -
Check the Texture
Stop the blender and take a little taste. The texture should be slushy, not soupy. If it’s too thick, add a splash of water or an extra squeeze of lemon juice. Blend again to incorporate. -
Serve Immediately
Once you’ve achieved that slushie perfection, pour the deliciousness into chilled glasses. The colorful hue will not only look appealing but will also excite your taste buds before you even take a sip! -
Add Garnishes (Optional)
If you’re feeling fancy, garnish your slushies with a sprig of fresh mint or a lemon slice on the rim. It’s all about presenting something that feels special, even if it’s a casual gathering.
Here’s a fun little hack: for an added twist, blend in a shot of vodka or gin for a festive outing! Just blend it in when you mix your ingredients.
Serving Suggestions
These Raspberry Lemonade Slushies are best enjoyed ice-cold on a sunny day! Serve them right away for maximum slushie goodness. For an extra touch, you can use mason jars or fun striped straws to present them in style. Pair them with light snacks like tortilla chips with salsa or fresh fruit for a delightful summer afternoon gathering.
Recipe Variations
Looking to switch things up? Here are a few ideas for delicious variations on this classic slushie:
- Berry Blast: Combine raspberries with other berries such as strawberries or blueberries for a mixed berry slushie.
- Minty Fresh: Toss in a handful of fresh mint leaves while blending for a refreshing mintiness.
- Sparkling Lemonade Slushie: Top off each glass with sparkling water or soda for added fizz!
- Non-Alcoholic Mojito Inspiration: Replace the lemonade with a minty limeade for a unique take that’s perfect for summer parties!
- Tropical Twist: Mix in a bit of coconut water or pineapple juice for a tropical vibe, making your slushie a mini-vacation in a glass.
Chef’s Notes
Making this slushie has been a summertime tradition for years now! I’ve experimented with various fruits and have even tried blending in some low-fat yogurt for a creamy twist. Every version brings back memories of fun summer days filled with laughter and gatherings. Most importantly, remember that this recipe is flexible—feel free to adjust the sweetness, tartness, or fruitiness to suit your taste. Cooking is like a dance; sometimes, you just have to move with the rhythm of what feels good!
FAQs and Troubleshooting
Q: What if my slushie is too thick?
A: If your slushie turns out too thick, simply add a little lemon juice or water to loosen it up and blend it again.
Q: Can I use bottled lemon juice instead of fresh?
A: Absolutely! While fresh is always preferred for the best flavor, bottled lemon juice works in a pinch—just use it to taste.
Q: Can I make this slushie ahead of time?
A: Slushies are best consumed fresh, but you can make the fruit mixture ahead of time. Store it in the freezer and then blend with ice shortly before serving.
Q: How can I reduce the sugar in this recipe?
A: Use a natural sweetener like stevia or monk fruit, or simply adjust the sugar to your taste for a lower-calorie treat!
Nutritional Info
This slushie is not only delicious but also refreshing! While the nutritional values can vary based on the ingredients and portions, on average, one serving contains around 150 calories, with a good ratio of carbohydrates stemming from the natural sugars found in fruit.
Now, my fellow food lovers, I hope you feel inspired to embrace the simplicity and joy of making your own Raspberry Lemonade Slushie. Whether it’s a sunny afternoon or a gathering with friends, this recipe is sure to impress and delight. So, gather your ingredients, tie on that apron, and let’s celebrate the flavors of summer—one slushie at a time! Cheers!
PrintRefreshing Raspberry Lemonade Slushie
A delightful and refreshing Raspberry Lemonade Slushie, perfect for hot summer days.
- Prep Time: 10 minutes
- Cook Time: 0 minutes
- Total Time: 10 minutes
- Yield: 4 servings 1x
- Category: Beverage
- Method: Blending
- Cuisine: American
- Diet: Vegetarian
Ingredients
- 2 cups fresh raspberries (frozen)
- Juice of 2 lemons
- 1/2 cup sugar
- 2 cups ice cubes
Instructions
- Prep your ingredients by gathering them and preparing your raspberries and lemon juice.
- Combine in a blender the frozen raspberries, fresh lemon juice, sugar, and ice cubes. Blend until smooth.
- Check the texture, adjusting with water or lemon juice if too thick.
- Serve immediately in chilled glasses with optional garnishes.
Notes
For a festive twist, blend in a shot of vodka or gin. Serve with fun straws or in mason jars for appeal.
Nutrition
- Serving Size: 1 serving
- Calories: 150
- Sugar: 20g
- Sodium: 5mg
- Fat: 0g
- Saturated Fat: 0g
- Unsaturated Fat: 0g
- Trans Fat: 0g
- Carbohydrates: 38g
- Fiber: 3g
- Protein: 1g
- Cholesterol: 0mg
Keywords: slushie, raspberry, lemonade, summer drink, refreshing beverage
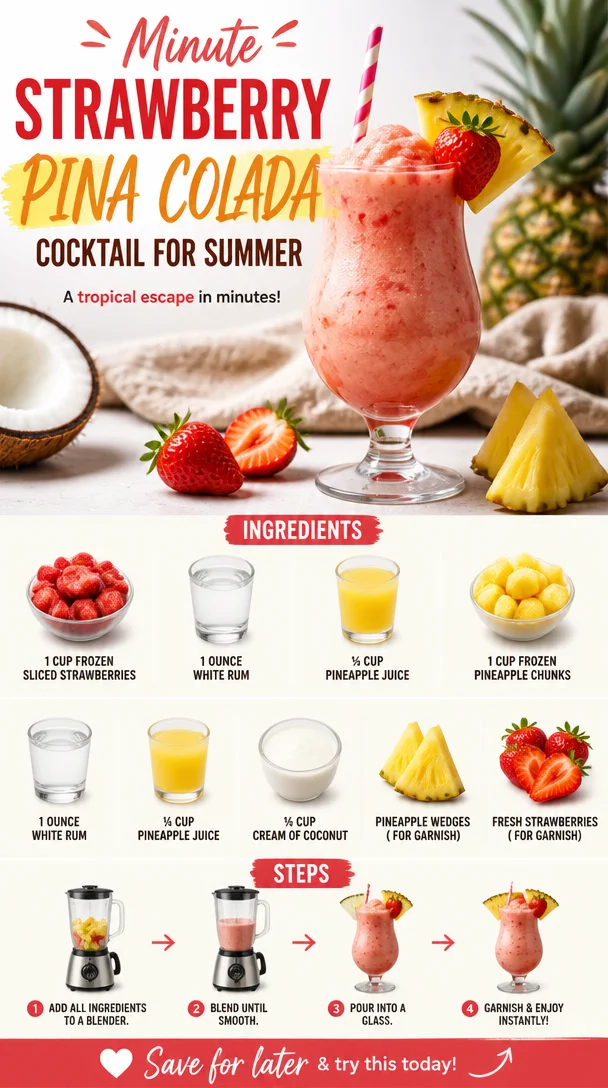
Minute Strawberry Pina Colada Cocktail for Summer
Strawberry Pina Colada: A Tropical Escape in a Glass
As the summer sun warms our days, there’s nothing quite like sipping a refreshing cocktail that whisks you away to a tropical paradise—even if it’s just in your backyard or kitchen! That’s why I’m thrilled to share this delightful Strawberry Pina Colada recipe with you. It’s a fruity, creamy concoction that’s as beautiful as it is delicious, perfect for summer gatherings or a cozy evening on your porch.
Picture this: You’re lounging by the pool or in your favorite chair, the gentle breeze sways the palm trees (or maybe just the neighbor’s garden), and the warm sun wraps around you like a cozy blanket. As you take your first sip of a Strawberry Pina Colada, the cold, luscious flavors dance across your tongue and transport you straight to the islands. Who wouldn’t want that? Let’s embark on this tropical adventure together as you learn how to create this heavenly drink that’ll impress your friends and family and make you feel like a gourmet mixologist in no time!
A Memory to Savor
One sunny afternoon, years ago, I gathered a few close pals for an impromptu summer get-together. It was one of those perfect days where the sky was a brilliant blue, and the laughter echoed in the air. I wanted to create something special for everyone—a drink that would reflect the joy and vibes of our unexpected celebration. That’s when I decided on a Strawberry Pina Colada.
Combining the sweetness of strawberries with the tropics of pineapple and coconut, this drink was a hit—and a great way to beat the heat. We blended the ingredients right in the kitchen while sharing stories and music, and those simple moments of connection became lasting memories. Now, every time I whip up this delightful beverage, I’m reminded of that joyful day, the laughter, and the sheer bliss of being surrounded by good friends, sunny weather, and delicious food. And I hope that when you make it, it creates special moments for you too!
Ingredients
Gathering fresh ingredients is key to making the perfect Strawberry Pina Colada, so let’s take a look at what you’ll need:
-
1 cup frozen sliced strawberries: These provide a luscious sweetness and vibrant color. If you can find fresh strawberries, feel free to use those and add a bit of ice for the frozen texture!
-
1 ounce white rum: The classic spirit of the Pina Colada adds an island flair. If you prefer a non-alcoholic version, swap this out for coconut water for a refreshing drink without the buzz.
-
½ cup pineapple juice: This brings bright acidity and sweetness. Look for 100% pure juice to avoid added sugars if you can; it makes a difference!
-
1 cup frozen pineapple chunks: Just like the strawberries, these give that incredible tropical taste and texture. You can always use fresh ones if you don’t mind adding a bit of ice.
-
¼ cup cream of coconut: Sweet and rich, this is what makes this drink extra creamy! If you want a lighter option, you can substitute half with coconut milk for a less sweet version.
-
Pineapple wedges (for garnish): They make your drink look extra fancy! Plus, they provide a little edible decoration that resonates with the tropical vibe.
-
Fresh strawberries (for garnish): A pop of color that complements the drink beautifully. They’re also a delightful treat to nibble on!
Step-by-Step Instructions
Now that we have our ingredients, let’s shake things up in the kitchen! Follow these steps to create your Strawberry Pina Colada, and don’t hesitate to dance a little while you blend—it makes it more fun!
-
Blend the base: In your blender, start by adding 1 cup of frozen sliced strawberries. Then pour in ½ cup of pineapple juice. Finally, add 1 ounce of white rum (or substitute for coconut water).
Tip: If your blender isn’t overly powerful, you might want to let the frozen strawberries sit for a minute, just to soften a bit for that easier blending. Trust me, that smoothie-like consistency will make all the difference!
-
Add the tropical essence: Next, toss in 1 cup of frozen pineapple chunks and ¼ cup of cream of coconut.
Chef Hack: To make sure the cream of coconut blends smoothly, scoop it out from the can and gently warm it up (just a few seconds in the microwave) before adding it to the blender. This will ensure it blends evenly and gives you that lovely creamy texture.
-
Blend until smooth: Secure the lid tightly and blend on high until the mixture is smooth and all the fruits are well incorporated. You want to achieve a creamy, thick consistency that’s easy to sip but still refreshing.
Note: If you find it’s too thick, add a bit more pineapple juice until you reach your desired consistency. Keep blending until everything is perfectly combined!
-
Taste and adjust: After blending, take a little taste. Do you want it sweeter? You can add a tablespoon of honey, agave, or more cream of coconut to boost the sweetness. Add ice if you want it colder or thicker!
Kitchen Wisdom: Remember, flavors change as they chill, especially with fruity drinks. So adjust before you pour!
-
Serve up the sunshine: Grab your favorite glasses, pour the mixture in, and give it a good garnish with a wedge of pineapple and a fresh strawberry on the rim.
Presentation Tip: You can also go the extra mile with a little cocktail umbrella for that true tropical vibe!
Serving Suggestions
To serve your Strawberry Pina Colada, opt for tall, chilled glasses to keep your drink nice and cool. Add a cute straw and maybe even a sprig of mint for a lovely touch. Set the scene with a fun summer playlist in the background and enjoy the vibrant colors that reflect the beautiful taste. If you’re feeling extra fancy, consider serving them alongside coconut macaroons or tropical fruit skewers for a full experience!
Recipe Variations
Feel free to play with this recipe and make it your own! Here are a few variations to consider:
-
Berry Mix: Swap strawberries for other berries like raspberries or blueberries, or mix a combination for a berry twist.
-
Coconut-Lime Zing: Add a squeeze of fresh lime juice for a refreshing citrus twist that uplifts the flavors beautifully.
-
Vegan Delight: Use coconut cream instead of cream of coconut and stick to plant-based juices for a vegan-licensed version—you’ll still get that tropical taste!
-
Spicy Kick: Add a dash of chili powder or cayenne pepper if you’re feeling adventurous—this can elevate the sweetness and provide a unique smoky contrast.
-
Creamy Banana: Throw in half a ripe banana to your blend for an extra creamy texture and a subtly sweet flavor.
Chef’s Notes
This Strawberry Pina Colada recipe has been a staple in my summer gatherings for years, and I always get asked for the recipe! What started as a fun experiment turned into a reliable crowd-pleaser. The recipe has evolved over the years, with guests always suggesting something new, and I’ve learned that the key is to have fun and feel free to make adjustments! Whether you’re hosting a lively summer barbecue or enjoying a quiet evening at home, this drink is versatile and adaptable, just like you. Cheers to making wonderful memories with your loved ones—one sip at a time!
FAQs and Troubleshooting
Here are a few common questions that pop up when making a Pina Colada:
-
What if my Pina Colada is too thick?
If you’ve blended in ice and your drink is thicker than you’d like, simply add more pineapple juice, a bit of coconut water, or even milk, and re-blend until you reach your desired consistency. -
Can I make it ahead of time?
Yes! You can blend everything but the ice ahead of time, then mix in fresh ice just before serving to ensure it stays chilled and fresh. -
How can I make it non-alcoholic?
You’re in luck! Simply omit the rum and add more coconut water or soda to replace the volume. It’ll still keep that tropical flavor! -
What to do if it’s too sweet?
If your drink turns out sweeter than expected, a splash of lime juice or even a pinch of salt (yes, salt) can help balance the flavors without losing the tropical vibe.
Nutritional Info
While this Strawberry Pina Colada is about indulgence, it does pack quite a bit of nutrition thanks to the fruit! Each serving typically contains around 200-300 calories, depending on the sweeteners and ingredients used. The strawberries and pineapples provide essential vitamins such as Vitamin C and antioxidants. Just keep in mind, as with any cocktail, moderation is key for the best enjoyment!
So there you have it! A deliciously crafted Strawberry Pina Colada that is sure to brighten even the cloudiest day. Remember, good food is all about connection and joy—so gather your friends, tie on your apron, and let’s toast to love, laughter, and a bit of island bliss!
PrintStrawberry Pina Colada

A fruity, creamy cocktail that transports you to a tropical paradise, perfect for summer gatherings.
- Prep Time: 10 minutes
- Cook Time: 0 minutes
- Total Time: 10 minutes
- Yield: 2 servings 1x
- Category: Cocktail
- Method: Blending
- Cuisine: Tropical
- Diet: Vegetarian
Ingredients
- 1 cup frozen sliced strawberries
- 1 ounce white rum (or coconut water for non-alcoholic)
- ½ cup pineapple juice
- 1 cup frozen pineapple chunks
- ¼ cup cream of coconut
- Pineapple wedges (for garnish)
- Fresh strawberries (for garnish)
Instructions
- Blend the base: In your blender, start by adding 1 cup of frozen sliced strawberries. Then pour in ½ cup of pineapple juice. Finally, add 1 ounce of white rum (or substitute for coconut water).
- Add the tropical essence: Next, toss in 1 cup of frozen pineapple chunks and ¼ cup of cream of coconut.
- Blend until smooth: Secure the lid tightly and blend on high until the mixture is smooth and all the fruits are well incorporated.
- Taste and adjust: After blending, take a little taste. Adjust sweetness or consistency to your liking.
- Serve up the sunshine: Grab your favorite glasses, pour the mixture in, and garnish with a pineapple wedge and a fresh strawberry.
Notes
Use chilled glasses for serving and consider adding a cocktail umbrella for a festive touch.
Nutrition
- Serving Size: 1 serving
- Calories: 250
- Sugar: 30g
- Sodium: 10mg
- Fat: 6g
- Saturated Fat: 4g
- Unsaturated Fat: 2g
- Trans Fat: 0g
- Carbohydrates: 40g
- Fiber: 3g
- Protein: 1g
- Cholesterol: 0mg
Keywords: Strawberry, Pina Colada, Cocktail, Summer Drink, Tropical, Refreshing Beverage
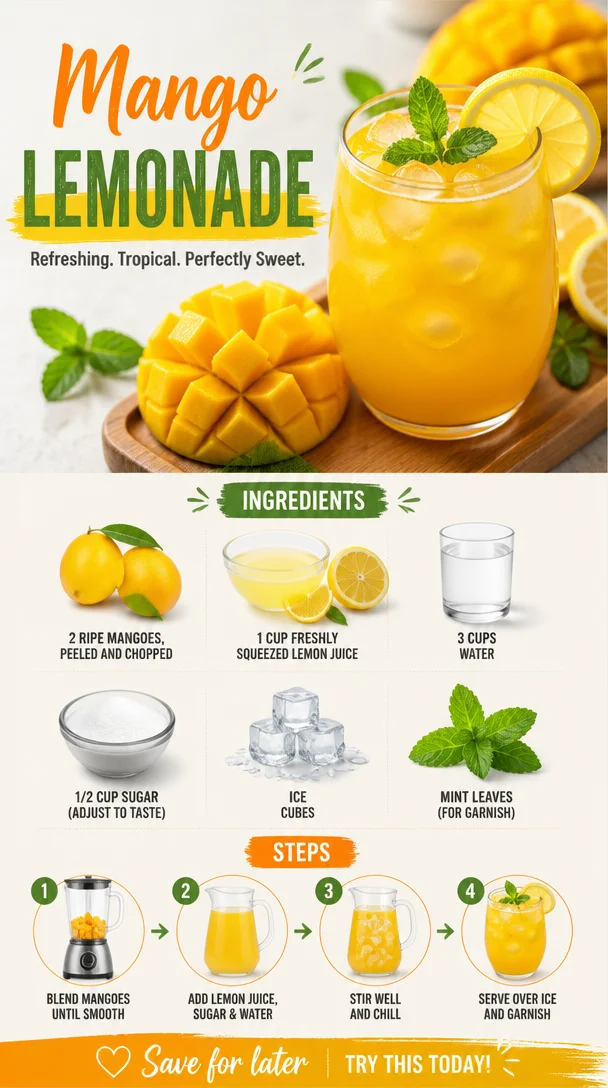
Mango Lemonade
Refreshing Mango Lemonade: The Perfect Summer Sip
Hello, dear friends! I’m absolutely thrilled to have you here as we embark on a delightful journey into the world of summery sips. Today, we’re making something that’s close to my heart and always brings a smile to my face: Mango Lemonade! This vibrant drink strikes the perfect balance between sweet and tart, making it an ideal choice for those balmy summer days. As you gather your friends and family around the table, this refreshing beverage is bound to be a crowd-pleaser.
There’s something undeniably special about summertime. The sun kisses our skin, fresh fruits are at their peak, and the laughter of loved ones fills the air. This Mango Lemonade encapsulates all of that joy with its lovely hues and playful flavors. Imagine lounging on the patio, a glass of this sunshine in hand, and feeling the moment stretch luxuriously. It’s these simple pleasures that inspire my cooking and hosting, and I can’t wait to share this gem with you!
Let me take you back to a sun-drenched afternoon from my childhood. I can recall a warm family gathering where we spent the day chasing fireflies and telling stories of old. My aunt would whip up an enormous batch of her famous lemonade, infusing it with whatever seasonal fruits she had on hand. One particular summer, she introduced us to mangoes, and my world changed forever. The sweetness of the mango combined with the tangy lemon was pure bliss! From that moment, I vowed to recreate that feeling, and this recipe is my evolution of her original creation. Each time I make this Mango Lemonade, I’m transported back to that sunny day, surrounded by laughter and love.
Ingredients
Let’s gather the essentials for this delectable drink. Here’s what you’ll need:
-
2 ripe mangoes, peeled and chopped
Fresh, juicy mangoes will add sweetness and a tropical flair. Choose ones that yield slightly to gentle pressure for optimal ripeness. If mangoes aren’t in season, feel free to use frozen mango chunks (thawed) for convenience! -
1 cup freshly squeezed lemon juice
Lemon juice provides the much-needed tang. Always opt for fresh lemons for the best flavor—bottled juice just doesn’t compare! If you prefer a milder flavor, start with 3/4 cup and adjust to your taste. -
3 cups water
Water acts as the base. You can replace some of it with sparkling water for a fizzy delight or herbal tea for a unique undertone! -
1/2 cup sugar (adjust to taste)
Sugar balances the tartness of the lemons. You can substitute it with honey or agave nectar for a healthier option; just remember to adjust based on sweetness preferences. -
Ice cubes
Ice is essential for a chill factor! Crush it for a slushy feel or keep it whole for a classic lemonade look. -
Mint leaves (for garnish)
Fresh mint adds a touch of elegance and a refreshing aroma. If you don’t have mint on hand, basil leaves could also be a delightful substitute.
Step-by-Step Instructions
Alright, friends, let’s dive into the magic of making this Mango Lemonade! Grab your apron, and let’s get started.
-
Prepare the Mangoes
Begin by peeling and chopping the mangoes into small chunks. Take a moment to admire their vibrant color—nature’s artwork! This is a great time to taste a piece and revel in that tropical sweetness. If your mangoes are slightly under-ripe, a splash of honey can help enhance their flavor. -
Juice those Lemons
Next, squeeze the lemons until you’ve collected one cup of juice. I highly recommend using a citrus juicer to get the most juice out of them. As you squeeze, make sure to fish out any seeds that may pop out uninvited. The fresh juice makes all the difference, trust me! -
Blend it Up
In a blender, add the chopped mangoes and the freshly squeezed lemon juice. Pour in one cup of water. Blend everything until smooth and creamy. You should have a beautiful mango-lemon puree. Isn’t it gorgeous? -
Strain the Mixture
For a silky texture, pour the puree through a fine-mesh sieve into a large pitcher. Use a spatula to press it through, leaving any fibers behind. This step ensures a delightful drink without any pulp. Don’t forget to taste it at this stage—you may need to adjust sweetness! -
Combine and Chill
Add the remaining two cups of water to the strained mango-lemon mixture, followed by the sugar. Stir well until the sugar dissolves completely. At this point, you can taste again and adjust sweetness to your liking. If you prefer a stronger mango flavor, feel free to add less water. -
Chill and Serve
Pop the pitcher into the fridge for at least 30 minutes to chill. This is essential for flavor development (and keeping it refreshing!). When ready to serve, fill glasses with ice cubes, pour the Mango Lemonade over the ice, and garnish with fresh mint leaves.
Serving Suggestions
There’s something special about how you present a drink—it’s the cherry on top! Serve your Mango Lemonade in tall glasses adorned with colorful straws for that extra pop. For a touch of sophistication, rim your glasses with sugar for a sweet surprise with each sip. Add a slice of lemon on the rim and a sprig of mint for visual appeal.
Recipe Variations
Get creative and make this Mango Lemonade your own! Here are a few fun variations to try:
-
Spicy Kick: Add a pinch of cayenne pepper or a few slices of jalapeño while blending for a spicy twist.
-
Berry Delight: Mix in fresh berries like strawberries or raspberries along with the mango for a colorful, mixed fruit lemonade.
-
Coconut Breeze: Swap in coconut water for some of the regular water to make a tropical, hydrating version.
-
Herbal Infusion: Steep some fresh basil or rosemary in the water while it’s warming (before adding to the blend) for a fragrant twist.
-
Sparkling Wonder: For a fizzy feel, mix sparkling water in right before serving instead of still water.
Chef’s Notes
I can’t help but smile as I think back on the many gatherings where this Mango Lemonade stole the show. It’s become a staple at my summer parties, and people often ask for the recipe. Over the years, I’ve perfected my method to ensure it captures that nostalgic charm from my childhood. I remember trying to replicate my aunt’s drink, the times I experimented with herbs, and the lucky moments when I accidentally created a new variation that became my favorite!
Remember, cooking is all about experimentation. Don’t be afraid to tweak the recipe, change things up, and put your personal stamp on it. Now, let your creativity flow and have fun with flavors!
FAQs and Troubleshooting
-
What if my mangoes are not ripe enough?
If you’re facing firm, less ripe mangoes, consider letting them sit at room temperature for a couple of days. Alternatively, you can add a bit more sugar and blend in a ripe banana to enhance the tropical flavor. -
How can I adjust the recipe for a larger crowd?
This recipe can easily be doubled (or tripled!) depending on your gathering size. Just be mindful of the balance between mangoes, lemons, and water! -
How can I prevent my lemonade from getting watery as the ice melts?
For an exciting flavor twist and to avoid watered-down lemonade, freeze some of the lemonade in ice cube trays. Use these cubes instead of regular ice when serving! -
Can I make this ahead of time?
Absolutely! You can prepare the Mango Lemonade a day in advance, but it’s best to add the ice and mint just before serving to keep it fresh and vibrant.
Nutritional Info
While I believe that every drink should be enjoyed without guilt, here’s a basic rundown of the nutritional content per serving (without added sugar):
- Calories: 70
- Total Fat: 0g
- Sodium: 10mg
- Total Carbohydrates: 18g
- Sugars: 15g
- Protein: 1g
So there you have it! A refreshing Mango Lemonade that brings joy and a splash of sunshine to your gatherings. I can’t wait for you to try this recipe and make it your own. Remember, it’s all about enjoying the process of cooking and celebrating the beautiful moments around the table. So, let’s raise a glass of this delightful drink and toast to the sweet little moments in life! Cheers! 🍹
PrintRefreshing Mango Lemonade

A vibrant and refreshing beverage that perfectly balances sweet and tart, ideal for summer gatherings.
- Prep Time: 15 minutes
- Cook Time: 0 minutes
- Total Time: 45 minutes
- Yield: 4 servings 1x
- Category: Beverage
- Method: Blending
- Cuisine: International
- Diet: Vegetarian
Ingredients
- 2 ripe mangoes, peeled and chopped
- 1 cup freshly squeezed lemon juice
- 3 cups water
- 1/2 cup sugar (adjust to taste)
- Ice cubes
- Mint leaves (for garnish)
Instructions
- Prepare the mangoes by peeling and chopping them into small chunks.
- Juice the lemons until you’ve collected one cup of juice.
- Blend the chopped mangoes, lemon juice, and one cup of water until smooth.
- Strain the mixture through a fine-mesh sieve into a large pitcher.
- Combine the remaining two cups of water and sugar into the pitcher, stirring until dissolved.
- Chill in the fridge for at least 30 minutes.
- Serve over ice cubes and garnish with fresh mint leaves.
Notes
Feel free to adjust sweetness and explore variations like adding berries or using coconut water.
Nutrition
- Serving Size: 1 serving
- Calories: 70
- Sugar: 15g
- Sodium: 10mg
- Fat: 0g
- Saturated Fat: 0g
- Unsaturated Fat: 0g
- Trans Fat: 0g
- Carbohydrates: 18g
- Fiber: 1g
- Protein: 1g
- Cholesterol: 0mg
Keywords: mango lemonade, summer drink, refreshing beverage, mango, lemonade
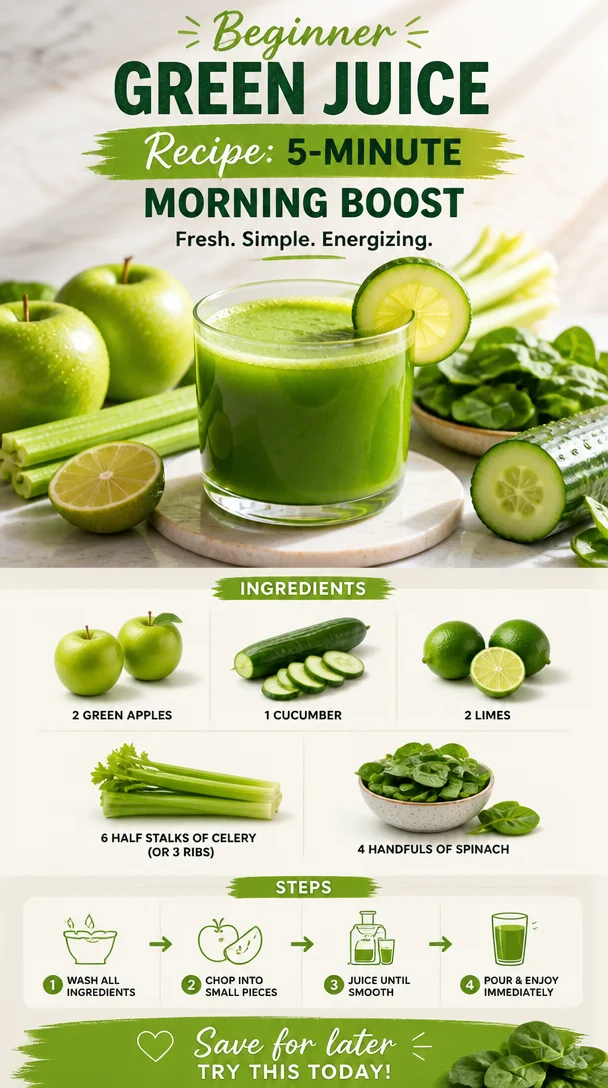
Beginner Green Juice Recipe: 5-Minute Morning Boost
The Ultimate Green Juice Recipe for Beginners: Fresh, Vibrant, and Packed with Goodness
Hello, fellow food lovers! Let’s dive into something refreshingly green: a delicious and nutrient-packed green juice that’s perfect for beginners. You know, that feeling when you’re too busy to sit down for a full meal, but you still want to get your daily dose of vitamins and minerals? That’s where green juice comes in — it’s like a garden in a glass!
This Green Juice Recipe is incredibly simple yet bursting with flavor and health benefits. Whether you’re looking to kickstart your morning, refresh after a workout, or simply add some greens into your day without the fuss, this juice is here to save the day. Trust me, once you try it, you’ll feel like a kitchen wizard, conjuring up magic in your blender!
Now, I’ll be your guide every step of the way — like a friendly fairy godmother of green goodness. So, roll up those sleeves, grab your apron (maybe even one that’s not too pristine!), and let’s get started.
A Trip Down Memory Lane: My First Green Juice Adventure
I still remember the first time I ever tried green juice. It was a bright summer day, and my best friend Lisa invited me over for a health kick. I was skeptical — "Celery and spinach in a drink? No thanks!" she gently insisted, coaxing me to take a sip of this bizarre concoction. And let me tell you, that first taste was a revelation. The bright green hue was like liquid sunshine, and to my surprise, it was refreshing and invigorating!
That day not only ignited my love for green juices, but it also cemented a beloved routine between Lisa and me. We ended up juicing together every Sunday afternoon. We swapped stories, laughter, and secrets of the kitchen while turning simple ingredients into vibrant elixirs. Now, green juice feels like a hug in a glass for me. And I hope to inspire you to form your own juicy traditions!
Ingredients for the Green Juice
Here’s what you’ll need for our refreshing green juice:
-
2 Green Apples: These add a natural sweetness and a wonderful zing. Feel free to substitute with other apple varieties like Fuji for a sweeter taste or Granny Smith for extra tartness.
-
1 Cucumber: Refreshing and hydrating, cucumbers are a perfect base ingredient. If you’re out of cucumbers, you can use zucchini or even celery for a different texture.
-
2 Limes (juiced): Their bright acidity brings the juice to life! If you’re in a pinch, you can use lemons instead, or even omit the citrus if you like it mellow.
-
6 Half Stalks of Celery (or 3 ribs): Celery provides a crisp texture and light flavor. It’s also great for hydration! No celery? No worries! You could substitute with kale for extra greens.
-
4 Handfuls of Spinach: Spinach is nutrient-dense and blends beautifully. If you want to mix things up, try kale or Swiss chard for a slightly different flavor profile.
Step-by-Step Instructions
-
Prepare Your Ingredients:
- Wash your fruits and veggies thoroughly. Remember, we want the freshest taste! Remove any stickers from the apples and chop them into quarters. No need to peel them; the skin is where a lot of nutrients are! Slice the cucumber into manageable pieces as well.
-
Juice the Apples and Cucumber:
- If you’re using a juicer, toss in the apple quarters and cucumber slices. If you don’t have a juicer, you can use a blender instead! Just blend them with a little water to help it blend smoothly.
-
Add Celery and Spinach:
- Next, add the celery and spinach to your juicer/blender. If you’re using a blender, you might want to add another splash of water to keep things moving. The green leaves and crunchy celery will enhance the freshness!
-
Squeeze in Lime Juice:
- After extracting the juice, don’t forget about those limes! Squeeze the juice from each lime right into the green mixture. It adds a lovely brightness that cuts through the sweetness.
-
Mix and Taste:
- If using a juicer, you might need to stir your juice a bit. In the case of a blender, pour the juice through a fine mesh strainer or cheesecloth into a large bowl or pitcher. This will separate the fiber from the liquid. You can skip this step if you love a thicker juice!
-
Serve and Enjoy:
- Pour your vibrant green juice into a glass and sip it right away for all those fabulous nutrients. Garnish with a slice of lime or an apple wedge for a pretty presentation!
Pro Tips:
-
Chill Your Ingredients: For an extra refreshing drink, chill your ingredients beforehand or serve over ice.
-
Experiment with Flavor: Don’t be afraid to play around with the ratios! If you’re feeling adventurous, throw in a small piece of ginger or a handful of fresh mint for a unique twist.
Serving Suggestions
Presentation matters! Pour your beautiful green juice into clear glasses to showcase that vibrant color. Consider serving with a colorful straw or alongside a light snack, like a handful of nuts or some whole grain crackers, for a lovely, balanced refreshment experience. Even a sprig of mint on top can elevate your serving!
Recipe Variations
Here are a few fun twists you can give your green juice:
-
Tropical Green Juice: Add pineapple or mango for a tropical flair that will transport you to summer vibes!
-
Herbal Boost: Toss in a handful of fresh basil or cilantro for a herbal kick!
-
Green Smoothie: Want to make it thicker? Toss in half a banana or a scoop of your favorite yogurt (dairy or non-dairy) for a smoothie-style treat.
-
Spicy Green Juice: Add a slice of jalapeño for a spicy kick that wakes up your taste buds!
-
Vegan Protein Boost: A scoop of plant-based protein powder can turn this juice into a satiating post-workout drink.
Chef’s Notes
This green juice recipe has evolved from those early kitchen experiments with Lisa. We started with whatever greens were in the fridge. Sometimes, we added herbs, sometimes we ended up with fruit combinations that made us laugh (like watermelon with spinach — note to self: it was not the best!). My advice? Embrace the process! Don’t worry if it doesn’t look perfect — what matters is that it tastes good, and you’re going to benefit from those healthy ingredients.
FAQs and Troubleshooting
1. Why is my juice foamier than expected?
Juicing fruits and veggies, especially leafy greens, can create foam due to air being incorporated. If you prefer a smoother juice, let it sit for a few moments, then skim off the foam before serving.
2. Can I store the juice for later?
Fresh juice is best consumed immediately for optimal nutrients. However, you can store it in an airtight container in the fridge for up to 24 hours. Just remember to give it a good shake before enjoying!
3. My juice tastes bitter; what went wrong?
Bitterness can sometimes come from using too much celery or over-juicing bitter greens like kale. Try balancing the flavor with more sweet fruits like apples, or a little extra lime or cucumber.
4. How do I clean my juicer/blender?
For easy cleaning, rinse immediately after use! If using a juicer, most parts are dishwasher safe. For blenders, blend a little soapy water for a few seconds, then rinse!
Nutritional Info (if applicable)
Plus, this green juice is not just delicious — it’s packed with nutrients! It contains antioxidants from apples, hydration from cucumbers, vitamins A and K from spinach, and nutrients from celery — making it a wonderful addition to a balanced diet.
So there you have it: a beginner-friendly green juice recipe that’s easy, flavorful, and downright invigorating! I hope this inspires you to step into the kitchen and create something you can sip on with joy. Happy juicing! 🍏🥒
PrintThe Ultimate Green Juice Recipe for Beginners
A delicious and nutrient-packed green juice that’s perfect for beginners, bursting with flavor and health benefits.
- Prep Time: 10 minutes
- Cook Time: 0 minutes
- Total Time: 10 minutes
- Yield: 2 servings 1x
- Category: Beverage
- Method: Juicing
- Cuisine: American
- Diet: Vegan
Ingredients
- 2 Green Apples
- 1 Cucumber
- 2 Limes (juiced)
- 6 Half Stalks of Celery (or 3 ribs)
- 4 Handfuls of Spinach
Instructions
- Prepare your ingredients: Wash your fruits and veggies thoroughly and chop apples into quarters. Slice the cucumber.
- Juice the apples and cucumber: Use a juicer or blender to blend with a little water if needed.
- Add celery and spinach: Blend or juice them in, adding water if necessary for a smooth mixture.
- Squeeze in lime juice: Add fresh lime juice for brightness.
- Mix and taste: Stir the juice if using a juicer or strain through a fine mesh strainer if using a blender.
- Serve and enjoy: Pour into a glass and garnish with lime or apple.
Notes
Chill your ingredients beforehand for a refreshing drink. Experiment with flavors by adding ginger or mint.
Nutrition
- Serving Size: 1 serving
- Calories: 150
- Sugar: 20g
- Sodium: 100mg
- Fat: 0g
- Saturated Fat: 0g
- Unsaturated Fat: 0g
- Trans Fat: 0g
- Carbohydrates: 35g
- Fiber: 3g
- Protein: 3g
- Cholesterol: 0mg
Keywords: green juice, healthy drink, juicing, vegan smoothie, beginner recipe