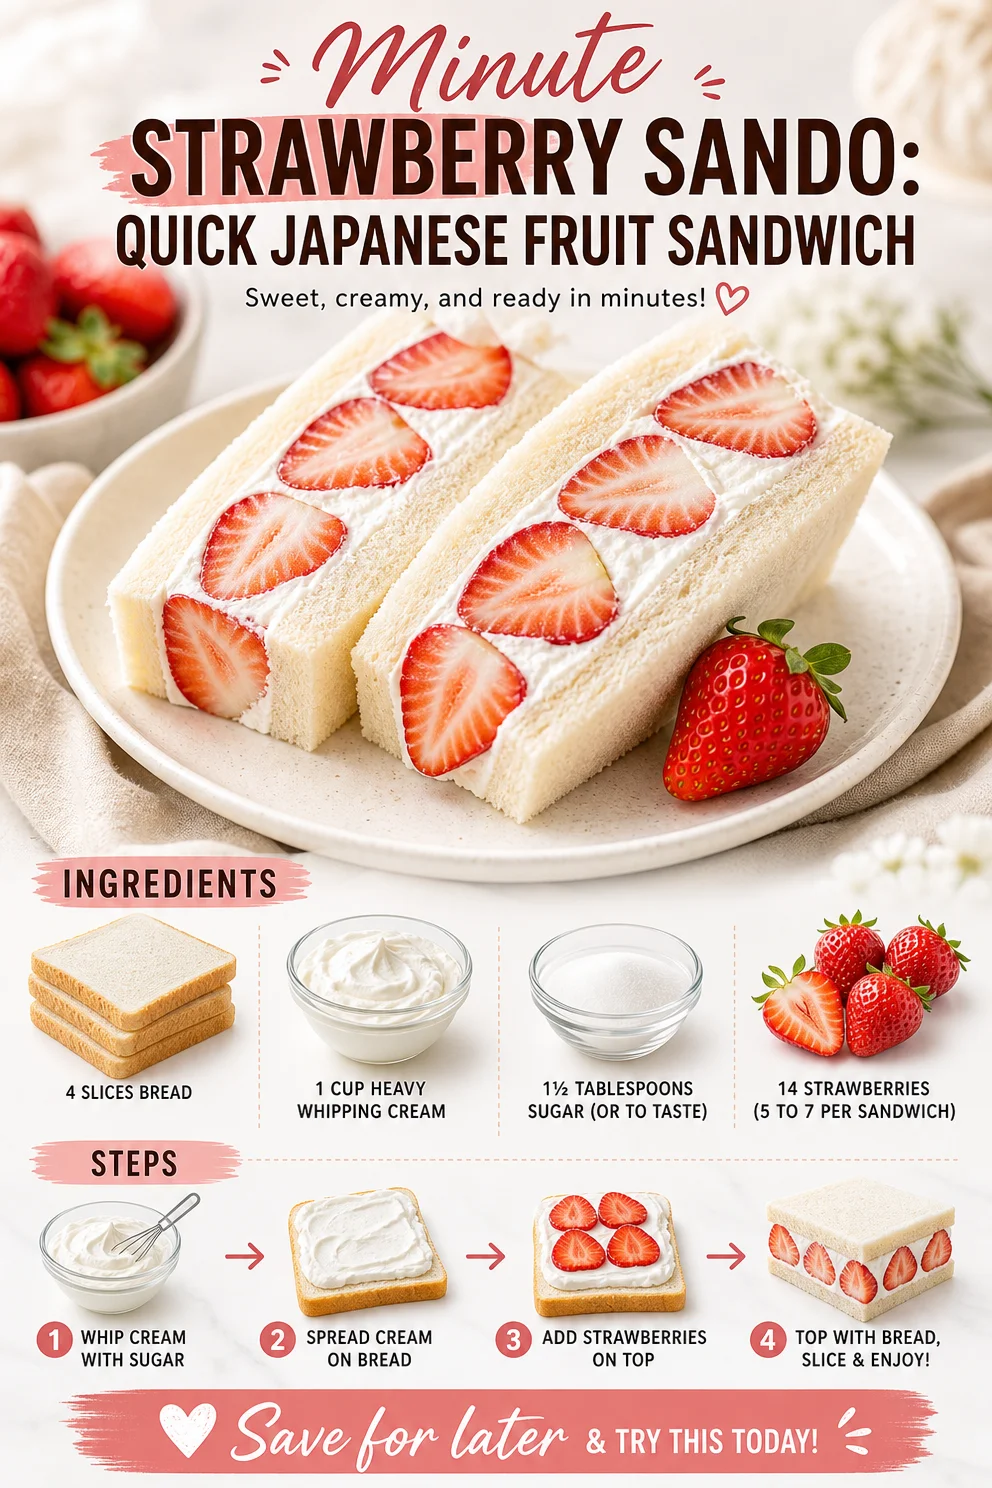
Minute Strawberry Sando: Quick Japanese Fruit Sandwich
Strawberry Sando: A Taste of Japan in Your Kitchen
Hello, fellow foodies! Today, we’re diving into one of Japan’s most delightful culinary trends—the Fruit Sandwich, or as it’s affectionately known in Japan, フルーツサンド (Furūtsu Sando). Specifically, I’m all about the luscious Strawberry Sando that’s guaranteed to elevate your snack game.
Imagine this: a soft, fluffy bread cradle holding juicy strawberries intertwined with sweetened heavy cream. Delicious, right? These delightful sandwiches feel like a bite of sunshine and are perfect for any occasion—be it brunch with friends or a sweet afternoon treat.
Now, if you’ve never experienced a Fruit Sandwich before, you’re in for a real treat! It’s simple yet impressive, beautifully balancing rich creaminess with the freshness of seasonal fruit. Plus, there’s something quite magical about the presentation—who wouldn’t want to dig into a sandwich that looks like it belongs in a design magazine? So, are you ready to tie on your apron and create this indulgent delight? Let’s get started!
My Strawberry Sando Story
One of my happiest childhood memories involves my grandmother and a nearby market that sold the biggest, juiciest strawberries I had ever seen. Every summer, we would visit together, handpicking these vibrant red berries, filling our baskets to the brim. After a long day in the sun, we’d head back to her cozy kitchen where the magic happened.
My grandmother would whip up her signature Strawberry Sando. I can still picture her—an ivory apron tied at her waist, laughter bubbling up as she taught me the secrets to the perfect whipped cream. The smell of fresh strawberries and sweet cream filled the air, creating an irresistible atmosphere full of love. We would make sandwiches, cut them into neat triangles, and savor each bite like it was a little piece of joy.
Through this, I learned how simple ingredients and a little creativity can transform a mundane meal into something memorable. And today, I want to share that joy with you. Let’s make some Strawberry Sando that your friends and family will rave about!
Ingredients
Here’s what you need to achieve this strawberry perfection:
-
4 slices of soft bread: Look for a high-quality white or milk bread. For a twist, you could use brioche or even matcha-flavored bread for a Japanese flair!
-
1 cup of heavy whipping cream: This is what gives your sandwich that luxurious, creamy texture. If you’re looking to lighten it up, feel free to substitute with coconut cream or a non-dairy whipped topping.
-
1 ½ tablespoons of sugar: This sweetener will enhance the cream’s flavor. Adjust the amount based on your sweetness preference; honey or maple syrup could be fun alternatives to experiment with!
-
14 strawberries: Ideal for making 2-3 sandwiches. Use 5 to 7 strawberries per sandwich. Look for plump, ripe strawberries for the best flavor. If strawberries are out of season, you can also use kiwi or mango slices.
These ingredients are straightforward, and sourcing them shouldn’t be too difficult. Remember, quality matters when it comes to creating an elevated dish. Choose ingredients that you love!
Step-by-Step Instructions
1. Prep Your Strawberries
Start by washing your strawberries thoroughly. As you rinse them in cool water, take a moment to admire their luscious red color; trust me, it adds to the overall cooking experience!
Tip: After washing, gently dry them with a paper towel. Excess moisture can dilute the cream and the sandwich won’t hold together as well.
2. Slice Them Up
Remove the green tops and slice the strawberries. Aim for even slices, about ¼ inch thick.
Chef Hack: Keep some whole for garnishing later or for tasting—quality control, right?
3. Make the Whipping Cream
In a mixing bowl, combine your heavy whipping cream and sugar. Using either a hand whisk or an electric mixer, whip the mixture until you reach stiff peaks. Soft peaks are great, but for this recipe, we want that dreaminess that holds its shape!
Tip: Be cautious not to over-whip; if you do, your cream could turn into butter.
4. Assemble Your Sando
Lay a slice of bread flat on your cutting board. Generously spread a layer of whipped cream over the slice. Now, arrange your strawberry slices on top—don’t be shy, this is the fun part!
Cooking Commentary: You can create art here, layering the strawberries beautifully, or just throw them on for a more rustic feel.
5. Top It Off
Add another layer of whipped cream on top of the strawberries and then cover with another slice of bread. Press down gently but firmly to create a nice sandwich.
6. Slice and Serve
Use a sharp knife to cut the sandwich into half, then into triangles, or even into fourths if you’re feeling fancy!
Presentation Tip: A quick dusting of powdered sugar on the top can really wow your guests. Add a strawberry on the side for extra flair!
Serving Suggestions
To serve your delicious Strawberry Sando, plate them on a charming platter. You might want to surround them with a few whole strawberries for decoration or even a mint leaf for a pop of color. Whether it’s for brunch, dessert, or an afternoon pick-me-up, these sandwiches look delightful on any table!
Recipe Variations
-
Tropical Twist: Swap strawberries with kiwi and pineapple for a tropical vibe.
-
Nutty Flavor: Spread a thin layer of almond or hazelnut spread on the bread before adding the whipped cream for a delightful depth of flavor.
-
Herbal Infusion: Add fresh mint leaves or basil to the strawberries for a refreshing herbal note.
-
Choco-Lover: Drizzle some melted chocolate on top of your strawberries before assembling for a chocolate-dipped experience.
-
Vegan Version: Use a cashew cream or coconut whipped topping in place of heavy cream, and opt for vegan bread.
Chef’s Notes
This recipe is close to my heart not just because it reminds me of my grandmother but also due to its versatility: you can really make it your own! Over the years, I’ve experimented with different fruits and flavors, and what I’ve learned is that the joy of cooking comes from the personal touch you add—whether it’s a sprinkle of cinnamon, a splash of vanilla, or even a remix of the fruit! Also, I laughed while making these recently when I accidentally used salt instead of sugar in my whipping cream. Who knew a tiny error could lead to such a salty surprise?
FAQs and Troubleshooting
Q: What if my whipped cream isn’t fluffy?
A: Ensure you start with chilled heavy cream and chill your mixing bowl and whisk too! This helps maintain that luxurious fluffiness.
Q: Can I prepare these sandwiches ahead of time?
A: While you can prepare the components in advance (like the whipped cream and sliced strawberries), it’s best to assemble them just before serving to keep the bread fresh and prevent sogginess.
Q: What if my strawberries are too sour?
A: Simply adjust the sugar in your whipped cream to balance the tartness. Or toss the strawberries in a bit of sugar and let them sit for a few minutes to create a natural syrup.
Q: Is there a gluten-free option for the bread?
A: Absolutely! There are many delicious gluten-free bread options available now that will work perfectly in this recipe.
Nutritional Info
For 1 serving (2 sandwich halves):
- Calories: 300-350 (based on standard ingredients)
- Protein: 4g
- Carbs: 30g
- Fat: 21g
Don’t forget, these numbers can vary based on your unique ingredient choices!
So there you have it, your guide to making a delightful Strawberry Sando! This simple yet stunning creation will leave your taste buds dancing with joy and your guests begging for your secret recipe. Remember, it’s not just about the food; it’s about the love you put into it and the moments you create around the table. Enjoy your cooking, and let’s continue to celebrate the beautiful little moments that food brings into our lives! Happy cooking, friends!
PrintStrawberry Sando
Delightful Japanese Fruit Sandwich featuring juicy strawberries and sweetened heavy cream, perfect for brunch or a sweet treat.
- Prep Time: 15 minutes
- Cook Time: 0 minutes
- Total Time: 15 minutes
- Yield: 2 servings 1x
- Category: Dessert
- Method: No Cooking
- Cuisine: Japanese
- Diet: Vegetarian
Ingredients
- 4 slices of soft bread (white or milk bread)
- 1 cup of heavy whipping cream
- 1 ½ tablespoons of sugar
- 14 strawberries
Instructions
- Prep your strawberries by washing them thoroughly and drying them with a paper towel.
- Slice the strawberries into even slices, about ¼ inch thick.
- Make the whipping cream by combining heavy whipping cream and sugar, then whip until stiff peaks form.
- Assemble by spreading whipped cream on a slice of bread, arranging strawberry slices on top.
- Top it off with another layer of whipped cream and cover with a second slice of bread.
- Slice the sandwich into halves or triangles for serving.
Notes
Best served immediately to keep the bread fresh. Can garnish with powdered sugar and whole strawberries.
Nutrition
- Serving Size: 2 sandwich halves
- Calories: 325
- Sugar: 15g
- Sodium: 150mg
- Fat: 21g
- Saturated Fat: 12g
- Unsaturated Fat: 8g
- Trans Fat: 0g
- Carbohydrates: 30g
- Fiber: 2g
- Protein: 4g
- Cholesterol: 50mg
Keywords: strawberry, fruit sandwich, Japanese recipe, dessert, easy recipe
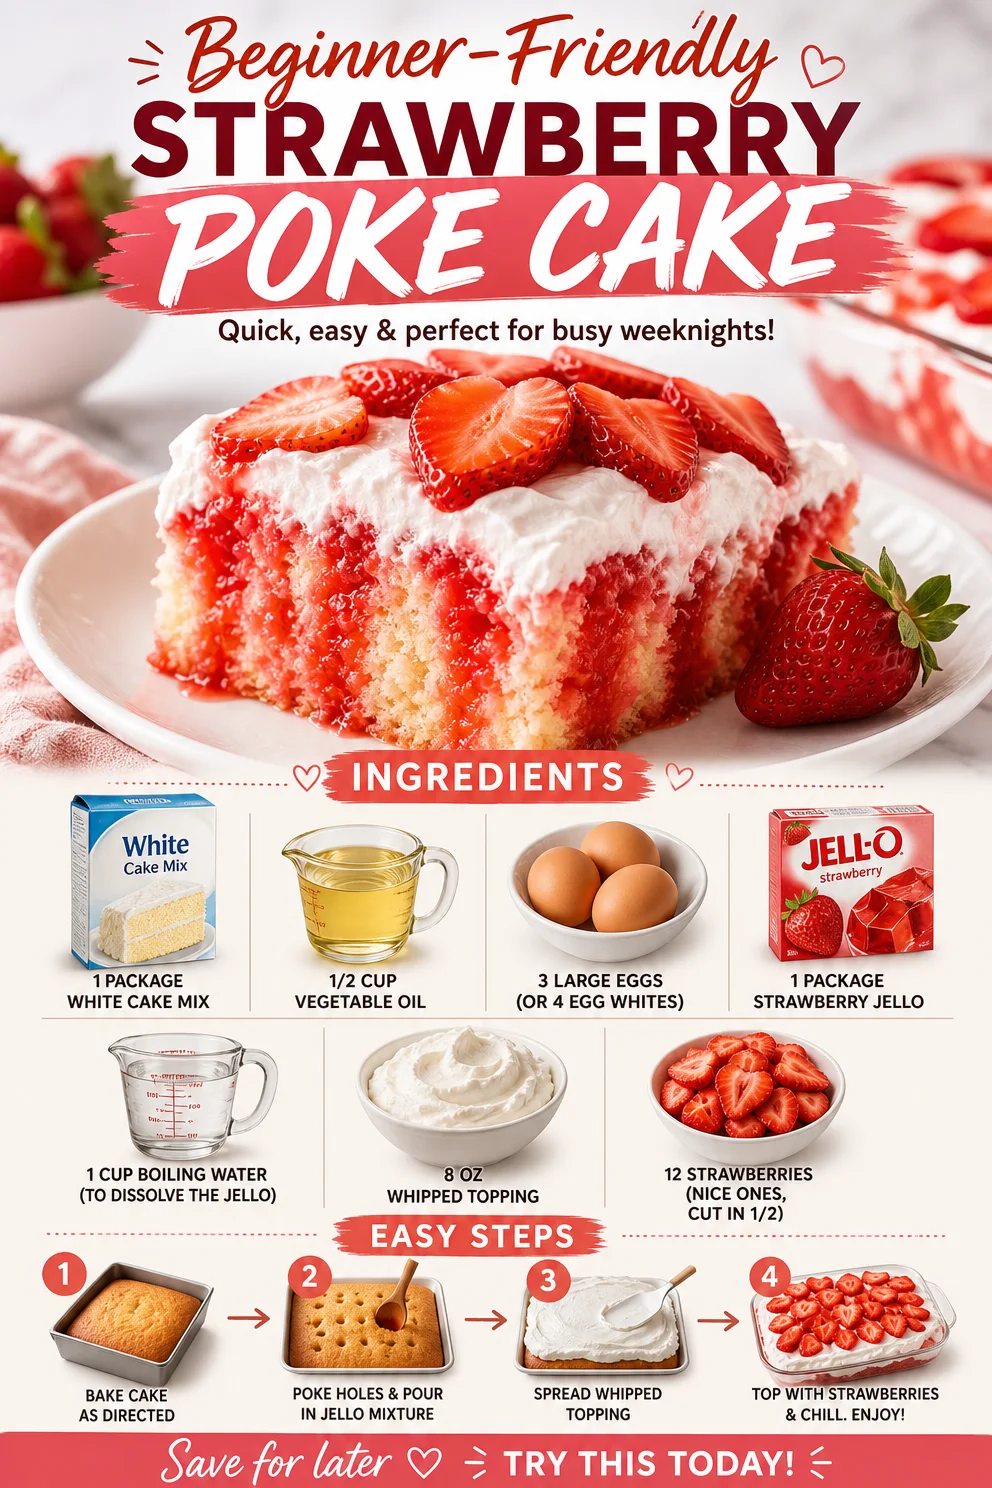
Beginner-Friendly Strawberry Poke Cake (Quick Weeknight)
Easy Strawberry Poke Cake: A Slice of Joy
Hello, fellow food lovers! Today, we’re diving into a delightful dessert that’s as colorful as it is delicious: the Easy Strawberry Poke Cake. This cake has a special place in my heart—not just because it’s incredibly easy to whip up (hello, who doesn’t love a no-fuss dessert?), but also because it brings back those beautiful, sun-soaked summer days when my family would gather in the backyard to celebrate every little thing.
Imagine a warm afternoon, the scent of fresh strawberries filling the air, kids giggling in the background, and the table set with laughter and joy. That’s what this cake embodies. The bright strawberries peeking through a fluffy layer of whipped topping invite everyone to take a slice, making it impossible to resist! So, grab your apron, and let’s create some mouthwatering memories with this strawberry poke cake that’s sure to impress your friends and family.
My Strawberry Cake Memory
Let me take you back to one of those summer afternoons when I first discovered this recipe. My grandmother had a knack for creating simple yet sensational desserts. One day, she decided to make her famous poke cake after everyone had devoured a hearty barbecue feast. As a kid, I remember being fascinated by how she would poke holes into the cake and let fruity flavors seep into every slice. It’s like magic, but with food!
The delightful aroma of strawberries mixed with the sweetness of whipped topping made the kitchen feel warm and inviting. Once it was time to serve, I watched as she cut into that delightful cake, and my heart raced with anticipation. Every bite was a blissful explosion of flavor, and I fondly recall sneaking seconds… and maybe thirds! It’s one of those recipes that has been passed down through generations—a real testament to how food can create a sense of togetherness. Today, we’re going to recreate that joyful experience, one slice at a time!
Ingredients
To bring this Easy Strawberry Poke Cake to life, you’ll need the following ingredients:
-
1 package white cake mix
This is your base! Any brand will do, but I love a good classic Betty Crocker or Duncan Hines for reliability. If you want to switch things up, a lemon cake mix can add a tangy twist! -
1/2 cup vegetable oil
This keeps the cake moist and tender. Canola or sunflower oil work just as well if you don’t have vegetable oil on hand. -
3 large eggs (or 4 egg whites)
Eggs are essential for the cake’s structure and moisture. If you’re looking to cut some calories, just swapping for egg whites is a smart option! -
1 package Strawberry Jell-O
This is where the magic happens! It gives flavor and that oh-so-pretty color. If strawberries aren’t your jam, feel free to swap for raspberry or cherry Jell-O for a different color and taste. -
1 cup boiling water
This helps to dissolve the Jell-O completely, ensuring a smooth blend of flavors. If you want to make this step faster, boiling water from an electric kettle works wonders! -
8 oz whipped topping
This is the fluffy topping that’s sure to steal the show. If you prefer, you can whip up some heavy cream with a bit of sugar for a fresher alternative. -
12 strawberries (nice ones, cut in half)
Use the freshest strawberries you can find! Look for vibrant red berries with fresh green tops; they truly elevate the dish. Want a fun twist? Replace with halved peaches or even raspberries for different seasonal vibes.
Step-by-Step Instructions
-
Preheat your oven to 350°F (175°C). This may seem like a no-brainer, but starting with a preheated oven ensures that your cake bakes evenly and beautifully!
-
Prepare the cake mix according to the package instructions. Combine the white cake mix, vegetable oil, and eggs in a bowl. Mix well until just combined but don’t overmix—some lumps are perfectly fine! Pour the batter into a greased 9×13 inch baking pan.
-
Bake the cake in the preheated oven for 25-30 minutes or until a toothpick inserted into the center comes out clean. As the cake bakes, your kitchen will start smelling heavenly!
-
Cool the cake for about 15 minutes before the next step. This cooling period is essential because it allows the cake to settle and makes it easier to poke holes without tearing it apart.
-
Prepare the Jell-O by mixing the package with 1 cup of boiling water in a bowl. Stir until the Jell-O is fully dissolved. This bright, vibrant mixture is going to color and flavor our cake in such a fun way!
-
Poke holes in the cake using the end of a wooden spoon or a fork. Aim for about 20 holes evenly spaced throughout. Get excited—the more holes, the more the flavors will soak in!
-
Pour the dissolved Jell-O over the cake, making sure to cover every hole. Allow it to seep in fully—this is how we achieve that delicious layer of flavor that makes this cake truly special.
-
Refrigerate the cake for at least 3 hours (or preferably overnight) to allow the Jell-O to set completely. This is the hardest part—waiting!
-
Top the cake with whipped topping once you’re ready to serve. You can spread it evenly or get creative by creating peaks with a spatula.
-
Garnish with strawberries. Place the halved strawberries on top of the whipped topping for that pop of freshness and color. A sprinkle of mint leaves can add a lovely touch, too!
Serving Suggestions
When it comes to serving this delightful cake, presentation is key! Slice into squares, and make sure each piece gets a delectable layer of strawberries, with the sparkling colors of your Jell-O peeking through. Serve on a pretty plate with a sprig of mint for an added touch, and don’t forget to have forks ready! It’s the kind of dessert that brings everyone together, igniting conversations and smiles.
Recipe Variations
Looking to shake things up? Here are a few fun variations to try:
-
Lemon Poke Cake: Use lemon cake mix and lemon Jell-O for a zesty alternative that’s refreshing and perfect for summer!
-
Chocolate Strawberry Delight: Swap the white cake mix for chocolate cake and use strawberry Jell-O. The rich chocolate pairs beautifully with the berries!
-
Gluten-Free Option: Use a 1:1 gluten-free cake mix and ensure your Jell-O is gluten-free.
-
Coconut Twist: Add unsweetened shredded coconut to the whipped topping for a tropical vibe, or mix it into the cake batter before baking!
Chef’s Notes
One of my favorite things about this recipe is its versatility. It’s a blank canvas that you can dress up however you like! I’ve even hosted a “poke cake competition” at my home, encouraging friends to bring their unique spin on this beloved treat. Each version was delightful, leading to laughter and friendly debate over whose was best. Spoiler alert: it was always mine! (Just kidding—everyone did well. It’s tough to compete when it’s all about flavor and fun!)
FAQs and Troubleshooting
-
What if my cake falls apart when poking holes?
- No worries! Just be gentle when poking the holes. If your cake becomes crumbly, try using a skewer instead of a fork, which will create more precise holes.
-
How long can I store the leftovers?
- Covered in the fridge, this cake lasts for about 3-4 days. Just make sure to keep it sealed, so it stays fresh!
-
Can I make this cake a day in advance?
- Absolutely! In fact, letting it sit overnight allows the flavors to blend beautifully, so it’s often even better the day after.
-
Can I freeze the cake?
- Yes! Just be sure to freeze it before adding the whipped topping. Wrap it tightly in plastic wrap and foil; it can be stored for up to 3 months.
Nutritional Info
While I always recommend enjoying food in moderation, here’s a rough idea of the nutritional info per serving (based on 12 servings):
- Calories: 220
- Fat: 8g
- Carbohydrates: 35g
- Protein: 2g
- Sugar: 15g
Remember, these are estimated values and can vary depending on the specific ingredients you choose!
I hope this Easy Strawberry Poke Cake brings you as much joy and deliciousness as it has to me for all these years. It’s perfectly casual for any gathering and truly celebrates the sweetness of life. So, tie on that apron, dive into your kitchen, and let’s make some unforgettable moments and mouthwatering memories together! Happy baking!
PrintEasy Strawberry Poke Cake

A delightful dessert that layers fresh strawberries and fluffy whipped topping over a moist poke cake, perfect for summer gatherings.
- Prep Time: 15 minutes
- Cook Time: 30 minutes
- Total Time: 195 minutes
- Yield: 12 servings 1x
- Category: Dessert
- Method: Baking
- Cuisine: American
- Diet: Vegetarian
Ingredients
- 1 package white cake mix
- 1/2 cup vegetable oil
- 3 large eggs (or 4 egg whites)
- 1 package Strawberry Jell-O
- 1 cup boiling water
- 8 oz whipped topping
- 12 strawberries, cut in half
Instructions
- Preheat your oven to 350°F (175°C).
- Prepare the cake mix according to the package instructions by combining the white cake mix, vegetable oil, and eggs in a bowl. Mix well until just combined.
- Pour the batter into a greased 9×13 inch baking pan.
- Bake in the preheated oven for 25-30 minutes or until a toothpick inserted comes out clean.
- Cool the cake for about 15 minutes.
- Prepare the Jell-O by mixing with 1 cup of boiling water in a bowl until fully dissolved.
- Poke holes in the cake using the end of a wooden spoon or a fork, aiming for about 20 holes.
- Pour the dissolved Jell-O over the cake, making sure to cover every hole.
- Refrigerate for at least 3 hours (or overnight) to allow the Jell-O to set completely.
- Top the cake with whipped topping once ready to serve.
- Garnish with halved strawberries on top of the whipped topping.
Notes
This cake can be made a day in advance for better flavor absorption. Store leftovers in the fridge for 3-4 days.
Nutrition
- Serving Size: 1 slice
- Calories: 220
- Sugar: 15g
- Sodium: 200mg
- Fat: 8g
- Saturated Fat: 1g
- Unsaturated Fat: 7g
- Trans Fat: 0g
- Carbohydrates: 35g
- Fiber: 0g
- Protein: 2g
- Cholesterol: 30mg
Keywords: strawberry, poke cake, dessert, summer cake, easy cake
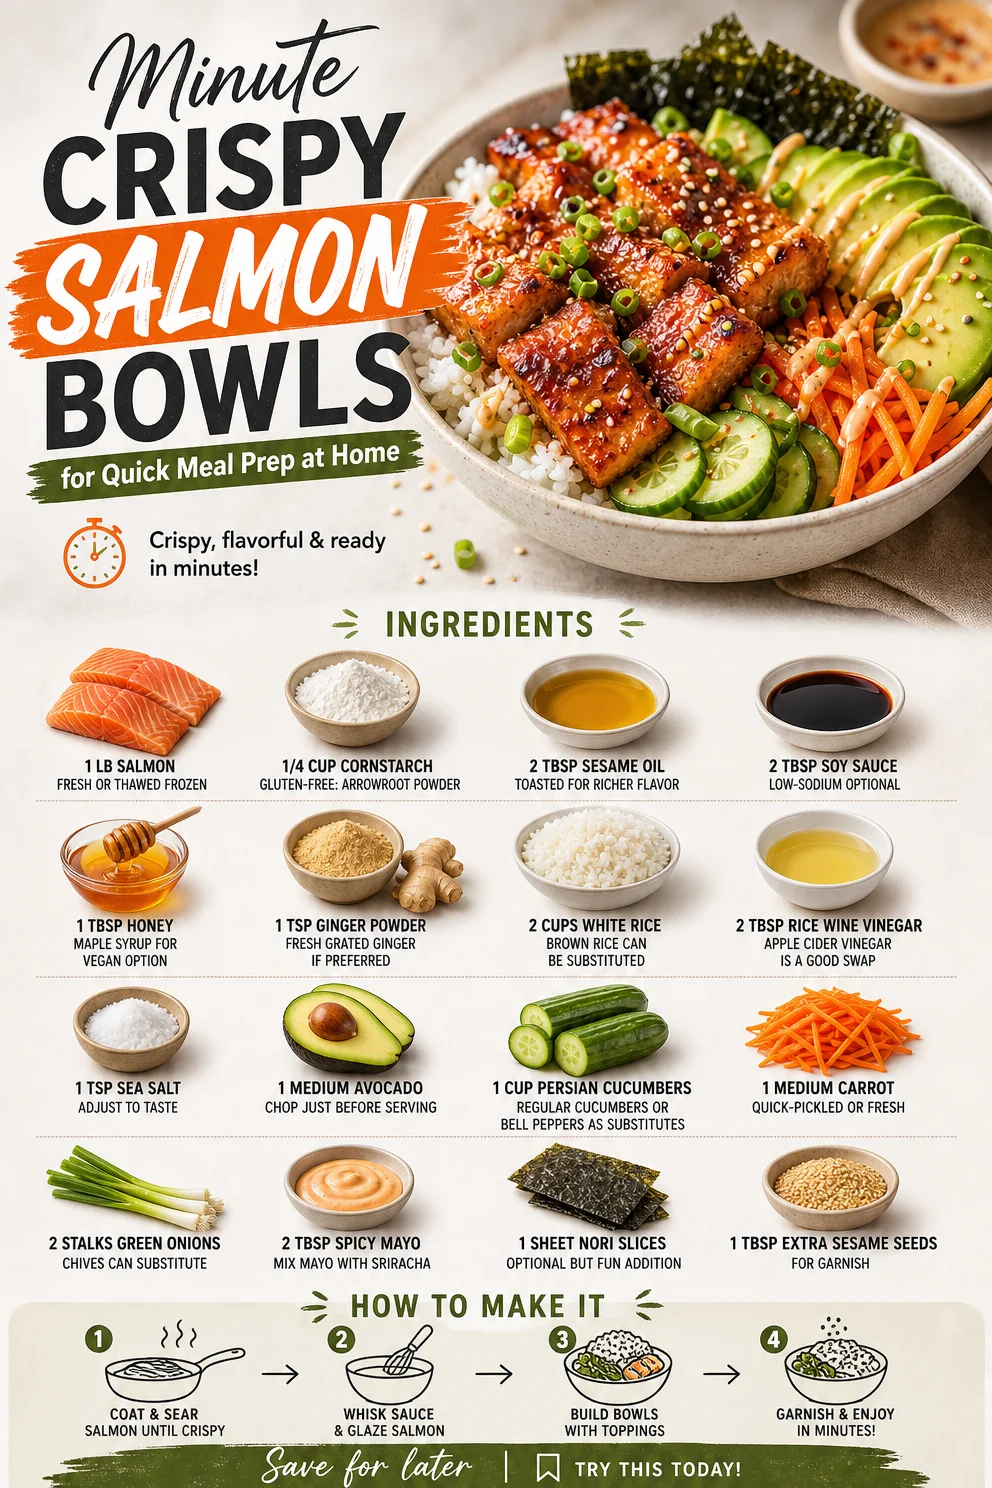
Minute Crispy Salmon Bowls for Quick Meal Prep at Home
Crispy Salmon Bowls: A Flavorful Customizable Delight
Hello, friends! Today, I’m thrilled to share a dish that’s not only bursting with flavor but also offers the ultimate versatility — Crispy Salmon Bowls! Whether you’re hosting friends for a cozy dinner or just treating yourself to a delightful meal at home, these bowls are sure to impress. They’re colorful, nutritious, and just downright delicious. So, grab your apron, and let’s dive in!
The Art of the Bowl: A Personal Story
I remember the first time I experienced a rice bowl. It was during a trip to a vibrant food market in Japan, surrounded by bustling vendors and the tantalizing aroma of grilled fish. I was a bit intimidated at first, but then I was enchanted by the colors and flavors swirling in each bowl. The crispy salmon, perfectly seasoned, perched upon a bed of fluffy rice, garnished with fresh vegetables — it felt like art you could eat! I couldn’t wait to recreate that delicious experience back home.
Fast forward to a cozy evening in my kitchen. I was experimenting with salmon when the idea of a customizable bowl struck me. I wanted to create something that reminded me of that special market experience but that I could also easily share with loved ones around my own table. That night, I crafted my first crispy salmon bowl, balancing flavors and textures to achieve that delightful crunch and freshness. Since then, it’s become a staple in my home, and I can’t wait for you to make it your own!
Ingredients
Here’s what you’ll need to stir up some magic in your kitchen:
-
1 lb Salmon: Fresh is always the way to go, but if frozen is all you have, just make sure to thaw it thoroughly for even cooking. Salmon is rich in omega-3 fatty acids, making it a healthy protein option.
-
1/4 cup Cornstarch: This is your secret ingredient for that crispy exterior! If you’re looking for a gluten-free alternative, arrowroot powder works wonderfully, too.
-
2 tbsp Sesame Oil: Use toasted sesame oil for a deeper flavor; it’s nutty and aromatic! If you’re in a pinch, olive oil is a decent substitute, though you’ll miss that signature toastiness.
-
2 tbsp Soy Sauce: Opt for low-sodium soy sauce to keep it light, or swap it out for tamari to cater to gluten-free diets.
-
1 tbsp Honey: A natural sweetener to balance the savory elements. For a vegan twist, maple syrup does the trick!
-
1 tsp Ginger Powder: Ground ginger is easy, but if you have fresh ginger, go ahead and grate some for a bolder kick.
-
2 cups White Rice: Fluffy white rice is a classic base. Brown rice is nutritious, just adjust the cooking time as needed.
-
2 tbsp Rice Wine Vinegar: This gives a lovely tang. If you’re out, apple cider vinegar will work in a pinch.
-
1 tsp Sea Salt: Please adjust to your preference; we all have different saltiness levels!
-
1 medium Avocado: Chop just before serving to keep it fresh and vibrant.
-
1 cup Persian Cucumbers: They’re crisp and sweet, but regular cucumbers will do. Bell peppers can add a punch of color and crunch, too!
-
1 medium Carrot: You can use it fresh or get creative with quick-pickling for an extra zing.
-
2 stalks Green Onions: These are versatile and add a great flavor punch. Chives are a lovely substitute if you have them on hand.
-
2 tbsp Spicy Mayo: Super simple to make — just mix mayo with sriracha to achieve that perfect kick!
-
1 sheet Nori slices: This is optional, but adding nori gives a beautiful ocean flavor. Plus, it’s fun!
-
1 tbsp Extra Sesame Seeds: For garnish, these add a nice finishing touch and a little crunch!
Step-by-Step Instructions
Let’s get cooking! Here’s how to whip up your crispy salmon bowls:
-
Prepare the Salmon: Start by patting the salmon dry with paper towels to remove excess moisture. This is key for that crispy texture. Then, cut the salmon into bite-sized pieces.
-
Coat with Cornstarch: In a large bowl, mix the cornstarch with a pinch of salt. Toss the salmon pieces in the cornstarch mixture until well-coated. This gives the salmon its crunchy coating — trust me, you’ll want that!
-
Heat the Oil: In a large non-stick skillet, heat the sesame oil over medium-high heat. You want it hot enough to create a sizzle when you add the salmon. If you’re unsure, toss in a small piece; if it sizzles, the oil is ready!
-
Sear the Salmon: Place the salmon in the skillet in a single layer, making sure not to overcrowd it (work in batches if you need). Cook for about 3-4 minutes on each side until beautifully golden brown and crispy. Don’t poke them too much; let them get that nice crust!
-
Add Flavors: Once the salmon is nearly cooked through, drizzle the soy sauce and honey mixture over the salmon in the pan. If you’re using ginger, sprinkle it at this stage. Cook for an additional minute, allowing the sauce to caramelize slightly.
-
Cook the Rice: Meanwhile, cook your rice per the package instructions. Fluff it once done and stir in the rice wine vinegar for a tasty tang.
-
Prep Your Ingredients: While everything’s cooking, chop your cucumbers and carrots. If you’re pickling your carrots, slice them thin and toss them in a mixture of vinegar, sugar, and salt to soften them up!
-
Assemble the Bowls: To serve, start with a generous scoop of rice as your base. Top it with your crispy salmon pieces. Add the chopped cucumbers, carrots, and avocado.
-
Dress It Up: Drizzle the spicy mayo over the top and garnish with freshly sliced green onions and a sprinkle of sesame seeds. If you’re feeling adventurous, add your nori strips for that oceanic flair!
Serving Suggestions
When you present your crispy salmon bowls, keep it colorful — the more vibrant the dish, the more inviting it is! Use a large, shallow bowl for a beautiful display. Remember, your food should look as delightful as it tastes!
Recipe Variations
Get creative with your bowls! Here are a few variations:
-
Grain Swap: Try quinoa or farro instead of rice for a nutty flavor and extra texture.
-
Vegan Delight: Replace the salmon with pan-seared tofu or tempeh for a plant-based version that’s equally delicious.
-
Sriracha Bliss: Add a swirl of sriracha for those who love a little heat in their life.
-
Tropical Twist: Use mango chunks instead of avocado for a fresh, fruity flavor boost!
Chef’s Notes
I can still remember the day I accidentally added too much cornstarch to my salmon — let’s just say I ended up with salmon crisps! While it was not what I intended, they were oddly delightful. My family loved the unexpected crunch, and from that day on, we’ve embraced happy accidents in the kitchen. This recipe has evolved to include all my favorite textures and flavors — each bite a tiny reminder of those beautiful bowls in Japan.
FAQs and Troubleshooting
-
What if my salmon isn’t crispy enough?
- Ensure that your skillet is hot enough when you add the salmon. A dry surface is key to creating that crispy exterior. If needed, you can put it under the broiler for a minute to help.
-
Can I make this in advance?
- You can prepare the rice and chop the veggies ahead of time. However, I suggest waiting to cook the salmon until just before serving to keep that crispy texture intact!
-
What if I don’t have sesame oil?
- No worries! Olive oil will work, or you could use avocado oil—both will provide a nice flavor without compromising the dish.
-
How do I store leftovers?
- Store the salmon and the rice in an airtight container in the refrigerator for up to 2 days. Reheat gently to avoid losing that lovely crunch!
Nutritional Info
This vibrant dish is not just tasty; it’s packed with nutrients! A standard serving of the crispy salmon bowl provides approximately 550 calories, with protein from the salmon, healthy fats from the avocado, and plenty of vitamins from the fresh veggies.
Thanks for joining me on this culinary adventure! I can’t wait for you to try out these crispy salmon bowls and maybe share your own story around the table. Remember, cooking is all about joy and connection. Happy cooking, and don’t forget to tie on that apron!
PrintCrispy Salmon Bowls
Delightful and customizable crispy salmon bowls, bursting with flavor and nutrition.
- Prep Time: 15 minutes
- Cook Time: 30 minutes
- Total Time: 45 minutes
- Yield: 4 servings 1x
- Category: Main Course
- Method: Searing
- Cuisine: Japanese
- Diet: Gluten-Free
Ingredients
- 1 lb Salmon
- 1/4 cup Cornstarch
- 2 tbsp Sesame Oil
- 2 tbsp Soy Sauce
- 1 tbsp Honey
- 1 tsp Ginger Powder
- 2 cups White Rice
- 2 tbsp Rice Wine Vinegar
- 1 tsp Sea Salt
- 1 medium Avocado
- 1 cup Persian Cucumbers
- 1 medium Carrot
- 2 stalks Green Onions
- 2 tbsp Spicy Mayo
- 1 sheet Nori slices
- 1 tbsp Extra Sesame Seeds
Instructions
- Prepare the salmon: Start by patting the salmon dry with paper towels to remove excess moisture. Cut into bite-sized pieces.
- Coat with cornstarch: In a bowl, mix cornstarch with a pinch of salt. Toss salmon pieces until well-coated.
- Heat the oil: In a skillet, heat sesame oil over medium-high heat until hot.
- Sear the salmon: Place salmon in a single layer in the skillet and cook for about 3-4 minutes on each side until golden brown.
- Add flavors: Drizzle soy sauce and honey over the salmon, and cook for an additional minute.
- Cook the rice: Prepare rice per package instructions and stir in rice wine vinegar.
- Prep your ingredients: Chop cucumbers and carrots; pickle carrots if desired.
- Assemble the bowls: Start with rice, top with salmon, cucumbers, carrots, and avocado.
- Dress it up: Drizzle spicy mayo and garnish with green onions and sesame seeds.
Notes
Feel free to customize your bowls with different grains, proteins, or veggies. Enjoy!
Nutrition
- Serving Size: 1 serving
- Calories: 550
- Sugar: 6g
- Sodium: 600mg
- Fat: 20g
- Saturated Fat: 3g
- Unsaturated Fat: 15g
- Trans Fat: 0g
- Carbohydrates: 60g
- Fiber: 4g
- Protein: 25g
- Cholesterol: 60mg
Keywords: salmon, rice bowls, customizable, healthy dinner, quick meal
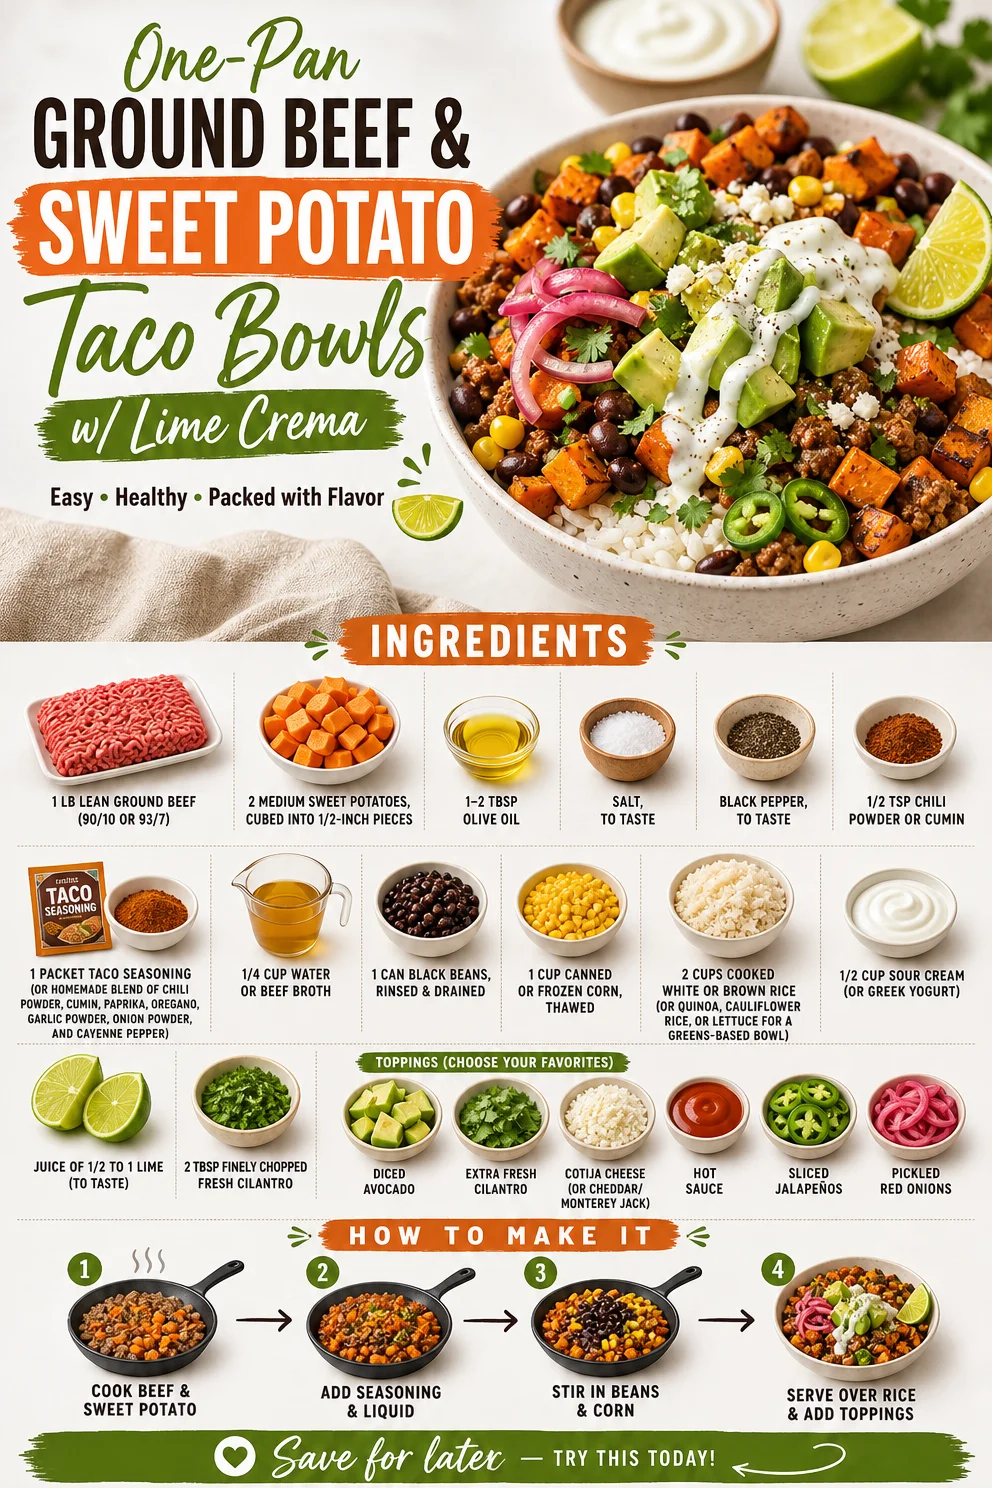
One-Pan Ground Beef & Sweet Potato Taco Bowls w/ Lime Crema
Delicious Ground Beef Sweet Potato Taco Bowl with Lime Crema
Introduction
Hello, my fellow food lovers! If you’re looking for a dish that’s bursting with flavor, easy to prepare, and perfect for a weeknight dinner or a fun gathering with friends, then this Ground Beef Sweet Potato Taco Bowl with Lime Crema is just the ticket. Picture this: flavorful, seasoned ground beef, tender roasted sweet potatoes, and creamy lime-infused goodness all piled into a bowl and topped with vibrant fixings. Sounds inviting, doesn’t it?
As we embark on this culinary adventure together, rest assured that every bite of this taco bowl invites warmth and comfort into your home. With just the right balance of spices and textures, this dish is as lovely to look at as it is to eat. Your dinner guests will be raving, and you’ll be the star of the night, all without the slightest hint of kitchen intimidation!
Before we dive into the details, let’s take a moment to appreciate how a simple bowl of food can foster connections and create memories. Food has an incredible way of bringing us together, sparking laughter, and igniting conversations that linger far beyond the meal itself. So, grab your apron and let’s bring some magic to your table with this scrumptious Ground Beef Sweet Potato Taco Bowl!
Personal Story
Let me take you back to one of my early cooking escapades. It was a rainy afternoon, and my best friend Anna and I decided to host an impromptu taco night. With only a few ingredients on hand, we scavenged through the pantry and discovered some lean ground beef, a couple of sweet potatoes, and a nearly empty taco seasoning packet hiding in the back. Challenge accepted!
As we chopped, sautéed, and seasoned, the sweet aroma of caramelizing sweet potatoes filled the kitchen, weaving its way through my home, creating an atmosphere filled with warmth and excitement. We added a dollop of sour cream and a squeeze of lime, and, oh my goodness, it was heavenly! We couldn’t believe how delightful a few simple ingredients could turn into such a feast. That night, we reminisced about childhood memories, shared dreams, and created new ones—all while enjoying our spontaneous creation. It’s moments like these that make me love cooking deeply; it’s not just about the food; it’s about the memories we create around the table.
Ingredients
-
1 lb lean ground beef (90/10 or 93/7)
Perfect for a flavorful base that’s not overly greasy. You can substitute with ground turkey or chicken for a lighter option. -
2 medium sweet potatoes, cubed into 1/2-inch pieces
Sweet potatoes add a natural sweetness and a boost of nutrients. Feel free to swap with regular potatoes or even butternut squash! -
1-2 tablespoons olive oil
A drizzle enhances the flavor of the sweet potatoes while helping them caramelize. Avocado oil or grapeseed oil work well too! -
Salt, to taste
Elevates all the flavors! Always season as you go for the best results. -
Black pepper, to taste
A sprinkle adds depth. Try using freshly cracked for an extra punch. -
1/2 teaspoon chili powder or cumin
Either spice ranks high in flavor. They add warmth; if you enjoy heat, consider adding some cayenne! -
1 packet taco seasoning (or homemade blend of chili powder, cumin, paprika, oregano, garlic powder, onion powder, and cayenne pepper)
Taco seasoning is a lifesaver for flavor! Homemade blends can be tailored to your taste. -
1/4 cup water or beef broth
This helps to combine the spices and beef, creating a sauce-like consistency. Use vegetable broth for a vegetarian option. -
1 can black beans, rinsed and drained
You can never go wrong with black beans! They’re rich in protein and fiber; kidney beans are also a good option. -
1 cup canned or frozen corn, thawed
Sweet corn adds pops of sweetness and color. Fresh corn can be used in season for extra flavor. -
2 cups cooked white or brown rice (or quinoa, cauliflower rice, or lettuce for a greens-based bowl)
Rice serves as the hearty base. Quinoa or cauliflower rice keeps it lighter; use crispy lettuce for a fresh crunch! -
1/2 cup sour cream (or Greek yogurt)
The creamy touch balances the dish beautifully. For a lighter alternative, try plain Greek yogurt! -
Juice of 1/2 to 1 lime (to taste)
Lime adds brightness. Adjust based on your preference! -
2 tablespoons finely chopped fresh cilantro
Fresh herbs create a lovely freshness; parsley can substitute if cilantro isn’t your thing. -
Toppings: diced avocado, extra fresh cilantro, cotija cheese (or cheddar/Monterey Jack), hot sauce, sliced jalapeños, pickled red onions
These toppings are all about personal preference and creativity! Customize your bowl with what you love.
Step-by-Step Instructions
-
Prepare the Sweet Potatoes
Preheat your oven to 425°F (220°C). While it heats, start peeling and chopping your sweet potatoes into 1/2-inch cubes. The uniform size ensures even cooking! Toss the cubes in a bowl with 1-2 tablespoons of olive oil, salt, black pepper, and chili powder or cumin. Spread them out on a baking sheet, making sure they’re not overcrowded. We want that gorgeous caramelization, so give them room to roast! Bake for about 20-25 minutes or until they’re golden and tender. Flip halfway through for the best results. -
Cook the Ground Beef
While the sweet potatoes roast, let’s get that delicious beef cooking! Heat a large skillet over medium heat. Add the lean ground beef and cook, breaking it apart with a spoon until browned, about 5-7 minutes. Use a slotted spoon to drain excess grease if needed. The key here is to let it develop those brown bits on the bottom of the pan for extra flavor—so don’t rush this step! -
Flavor the Beef
Once the beef is cooked, add your taco seasoning and stir it in. Pour in 1/4 cup of water or beef broth, and let it simmer for about 5 minutes. This step creates a thicker sauce—perfect for your bowls! Make sure it’s well combined, and if you feel fancy, taste and adjust the seasoning as necessary. -
Heat the Black Beans and Corn
In another pan or the same one if you prefer, toss in the drained black beans and thawed corn. Heat them over medium heat until warmed through, about 3-4 minutes. For extra flavor, add a pinch of salt and pepper! -
Make the Lime Crema
In a small bowl, whisk together the sour cream (or Greek yogurt) and lime juice. It should be smooth and creamy with a zesty kick! Adjust the lime juice according to your taste. You can even sprinkle some lime zest for an extra burst! -
Assemble Your Taco Bowls
Now for the fun part! Start with a base of warm, fluffy rice or your choice of grain in each bowl. Then pile on the seasoned ground beef, followed by the roasted sweet potatoes, black beans, and corn. -
Dress It Up
Drizzle that lime crema generously over the top, and don’t forget your toppings! A sprinkle of cilantro, a few slices of avocado, a handful of cotija cheese, and perhaps a dash of hot sauce or sliced jalapeños if you’re feeling adventurous!
Serving Suggestions
To plate, consider using shallow bowls or deep plates that allow you to layer the ingredients attractively. Start by creating a beautiful swirl of rice at the bottom, followed by the beef, and finish with a colorful display of sweet potatoes, beans, and corn. The dreamy lime crema can be artfully drizzled on top in a circular motion for that Instagram-worthy touch. For a finishing touch, bring the toppings to the side for a pop of color and a DIY feel!
Recipe Variations
- Vegetarian Twist: Swap out the ground beef for a mix of sautéed mushrooms, bell peppers, and zucchini for a veggie-packed bowl.
- Spicy Kick: Add diced chipotle peppers in adobo sauce to the beef for a smoky heat.
- Southwest Style: Mix in chopped bell peppers and diced tomatoes with the beef for added freshness and flavor.
- Quinoa Base: Use cooked quinoa instead of rice for a protein-packed alternative that’s also gluten-free.
- Sweetness and Heat: Drizzle sriracha or a sweet chili sauce for a unique sweet and spicy experience.
Chef’s Notes
This recipe is one of those lovely dishes that has evolved wonderfully over time. What started as a simple, on-the-fly dinner has blossomed into a beloved go-to for any occasion. I often recall that rainy afternoon spent laughing with Anna, and it warms my heart to see my family and friends enjoy bowls filled with love and flavor. The great thing about this taco bowl is that it’s incredibly adaptable! You can truly make it your own with endless combinations. Don’t hesitate to play around with the spices and toppings! After all, cooking should be a joyful experience.
FAQs and Troubleshooting
-
My sweet potatoes are soggy! What went wrong?
An overcrowded baking sheet can lead to steaming instead of roasting. Ensure that your sweet potatoes have enough space when baking! -
Can I use a different protein?
Absolutely! Ground turkey, chicken, or even tofu can be fantastic substitutes. Adjust cooking times as necessary. -
What if I don’t have taco seasoning?
Don’t fret! You can create a quick mix with chili powder, cumin, paprika, oregano, garlic powder, onion powder, and a pinch of cayenne pepper for some heat. -
How can I make this dish ahead of time?
You can prep the ingredients and roast the sweet potatoes in advance. Assemble the taco bowls just before serving, or store them separately in the fridge until you’re ready to enjoy!
Nutritional Info
This taco bowl is not only delicious but also packed with nutrients. With the lean beef providing protein, sweet potatoes offering fiber and vitamins, and beans contributing additional protein and nutrients, it’s a well-rounded meal. Each serving provides a hearty amount of energy with balanced macronutrients—making it perfect for fueling your busy days!
So there you have it, a delightful dining experience wrapped up in a bowl! Each component works in harmony, making your taste buds dance with joy while you and your loved ones share and create lasting memories around the table. Happy cooking, and I can’t wait to hear how your Ground Beef Sweet Potato Taco Bowls turn out!
PrintGround Beef Sweet Potato Taco Bowl with Lime Crema
A flavorful and easy-to-prepare taco bowl featuring seasoned ground beef, roasted sweet potatoes, and a creamy lime sauce, perfect for any weeknight dinner or gathering.
- Prep Time: 15 minutes
- Cook Time: 30 minutes
- Total Time: 45 minutes
- Yield: 4 servings 1x
- Category: Main Course
- Method: Baking, Sautéing
- Cuisine: Mexican
- Diet: Gluten-Free
Ingredients
- 1 lb lean ground beef (90/10 or 93/7)
- 2 medium sweet potatoes, cubed into 1/2-inch pieces
- 1–2 tablespoons olive oil
- Salt, to taste
- Black pepper, to taste
- 1/2 teaspoon chili powder or cumin
- 1 packet taco seasoning (or homemade blend)
- 1/4 cup water or beef broth
- 1 can black beans, rinsed and drained
- 1 cup canned or frozen corn, thawed
- 2 cups cooked white or brown rice (or quinoa, cauliflower rice, or lettuce for a greens-based bowl)
- 1/2 cup sour cream (or Greek yogurt)
- Juice of 1/2 to 1 lime (to taste)
- 2 tablespoons finely chopped fresh cilantro
- Toppings: diced avocado, extra fresh cilantro, cotija cheese (or cheddar/Monterey Jack), hot sauce, sliced jalapeños, pickled red onions
Instructions
- Preheat your oven to 425°F (220°C). Peel and chop sweet potatoes into 1/2-inch cubes. Toss with olive oil, salt, pepper, and chili powder or cumin. Spread on a baking sheet and bake for about 20-25 minutes.
- Heat a large skillet over medium heat and add the ground beef. Cook until browned, about 5-7 minutes.
- Add taco seasoning and water or beef broth, simmer for about 5 minutes until well combined.
- Toss the black beans and corn in a pan and heat for 3-4 minutes.
- Whisk together sour cream and lime juice to make the lime crema.
- Assemble the taco bowls starting with a base of rice, topped with ground beef, sweet potatoes, black beans, and corn.
- Drizzle lime crema over the top and add your choice of toppings.
Notes
Feel free to customize the toppings and spice levels to your preference. The recipe allows for plenty of variations for dietary needs.
Nutrition
- Serving Size: 1 serving
- Calories: 450
- Sugar: 6g
- Sodium: 600mg
- Fat: 18g
- Saturated Fat: 6g
- Unsaturated Fat: 10g
- Trans Fat: 0g
- Carbohydrates: 45g
- Fiber: 8g
- Protein: 25g
- Cholesterol: 70mg
Keywords: taco bowl, ground beef, sweet potato, lime crema, easy dinner
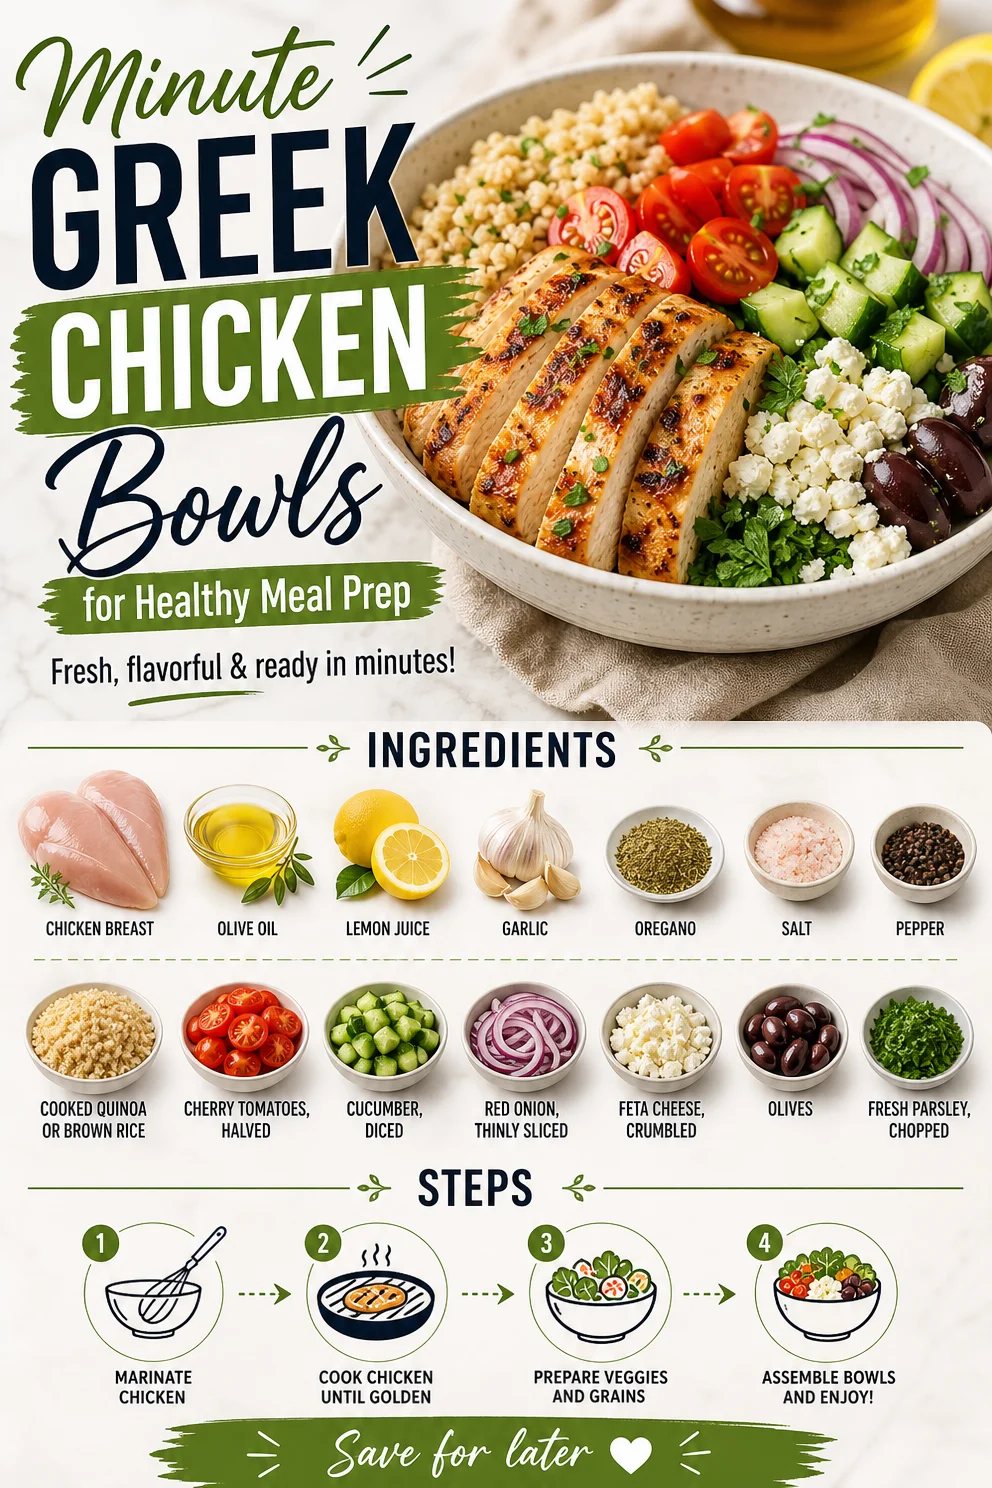
Minute Greek Chicken Bowls for Healthy Meal Prep
Ultimate Healthy Greek Chicken Bowls
Hello friends! Today, I’m excited to embark upon a culinary adventure that transports your taste buds straight to the sunny shores of Greece. We’re whipping up my Ultimate Healthy Greek Chicken Bowls, a dish that’s as vibrant as it is nourishing. Picture tender chicken marinated in zesty lemon and fragrant herbs, nestled atop a bed of fluffy quinoa or brown rice, all crowned with a rainbow of fresh veggies and a sprinkle of tangy feta. Can you hear the Mediterranean calling? Let’s dive in!
Personal Story
I remember the first time I had a taste of a true Greek meal; it was at a cozy little taverna in Santorini, with twinkling lights and the most delightful ambiance. My family and I had spent the day exploring the stunning cliffside views and the turquoise waters that seemed to stretch endlessly. As the sun dipped below the horizon, we settled down to enjoy a feast. Someone ordered a traditional chicken souvlaki, and, oh, the flavors! The juicy chicken paired with the bright fresh vegetables and salty feta was a match made in heaven. Fast forward a few years, and this inspired me to recreate that magic in my own kitchen. The Ultimate Healthy Greek Chicken Bowls were born out of nostalgia, love, and a desire to share that same joy with you.
Ingredients
Here’s what you’ll need to create your Greek masterpiece:
-
Chicken Breast: Boneless, skinless chicken breast is perfect for grilling. It’s lean and packed with protein. You can substitute it with chicken thighs for a juicier option or even use tofu for a plant-based delight.
-
Olive Oil: A staple in Mediterranean cooking! It adds depth and richness. If you’re looking for alternatives, avocado oil works wonderfully as well.
-
Lemon Juice: Freshly squeezed lemon juice brightens the entire dish. Bottled juice works in a pinch, but fresh is always best for flavor!
-
Garlic: Minced garlic adds aromatic goodness. For a milder taste, you can roast garlic or use garlic powder — just make sure it’s high quality.
-
Oregano: Dried oregano is my herb of choice for that classic Greek flavor. If you’re out, try using Italian seasoning or even fresh oregano if you have it on hand.
-
Salt & Pepper: Essential for seasoning! Always taste as you go to ensure the flavors are just right.
-
Cooked Quinoa or Brown Rice: Both are excellent bases for this dish, offering a wholesome dose of fiber. Swap in cauliflower rice for a lower-carb version.
-
Cherry Tomatoes: Sweet and juicy, they add a pop of color and flavor. You can substitute regular tomatoes but chop them smaller.
-
Cucumber: Crunchy and refreshing! Feel free to replace it with bell peppers or shredded carrots for a different crunch.
-
Red Onion: Thinly sliced adds a bite. Use sweet onions or scallions if you prefer a milder taste.
-
Feta Cheese: Crumbled feta brings creaminess and tang. For a dairy-free version, try a vegan feta made from nuts.
-
Olives: Black or green olives add a briny touch. If you’re not an olive fan, capers can provide a similar flavor punch.
-
Fresh Parsley: Chopped parsley adds color and a bright finish. You could swap it for mint for an extra flavor twist.
Step-by-Step Instructions
Now, let’s get cooking!
-
Marinate the Chicken: In a mixing bowl, whisk together 3 tablespoons of olive oil, the juice of one lemon, minced garlic, dried oregano, salt, and pepper. Add your chicken breasts to the bowl, making sure they’re all evenly coated in that lovely marinade. Cover and let them soak in those flavors for at least 30 minutes — or longer if you’ve got the time! This is where the magic starts, trust me.
-
Cook the Quinoa or Rice: While the chicken marinates, prepare the quinoa (or rice) according to package instructions. This will usually involve bringing 2 cups of water to a boil, adding 1 cup of quinoa, reducing to low heat, and simmering for about 15 minutes until it’s fluffy. Pro tip: add a pinch of salt to the water for enhanced flavor!
-
Grill the Chicken: Preheat your grill or grill pan over medium-high heat. Once hot, add your marinated chicken. Grill for about 6-7 minutes per side, or until the chicken is cooked through with nice grill marks. The internal temperature should reach 165°F (75°C). Have a meat thermometer on hand for best results.
-
Prep the Veggies: While the chicken is grilling, chop the cherry tomatoes, cucumber, and red onion. Feel free to get creative with how you present your vegetables — remember, we eat with our eyes first!
-
Compile the Bowls: Once the chicken is ready, let it rest for a few minutes before slicing it. This ensures it stays juicy! Then, take your bowl and layer the cooked quinoa or rice as the base. Top it with sliced chicken, cherry tomatoes, cucumber, red onion, crumbled feta, and olives. Drizzle with a touch more olive oil and a squeeze of lemon juice for that extra oomph.
-
Garnish and Serve: Sprinkle chopped parsley over the top for a fresh finish. Serve your bowls immediately and watch as your friends’ eyes light up at the sight of this colorful dish.
Serving Suggestions
For a lovely presentation, serve these bowls in large, shallow dishes or rustic wooden boards. You can even create a DIY Greek bowl bar, where everyone can customize their own to their heart’s content. Add a side of pita bread and a little tzatziki for an authentic touch!
Recipe Variations
Here are a few creative twists you can try:
-
Mediterranean Veggie Bowl: Add roasted red peppers, artichoke hearts, or zucchini for a more robust veggie experience.
-
Greek Meatballs: Swap the grilled chicken for Greek meatballs made with ground lamb or beef, seasoned with fresh herbs.
-
Spicy Chicken Bowl: Add a pinch of red pepper flakes to the marinade for a spicy kick.
-
Cauliflower Rice Bowl: Replace quinoa or brown rice with cauliflower rice for a low-carb option that still delivers on flavor.
-
Vegan Delight: Replace the chicken with grilled portobello mushrooms and use a cashew feta for a tasty plant-based dish.
Chef’s Notes
This recipe has been a cherished one in my collection, evolving over time as I experimented with seasonal ingredients and flavor combinations. I fondly recall the time I invited a group of friends over to enjoy this dish and accidentally used way too much salt in the marinade. We laughed it off and decided to create a "salty" cocktail to balance it out, making memories that night! Cooking is always an opportunity to learn and adapt, and I hope this recipe inspires you to do the same.
FAQs and Troubleshooting
-
What if my chicken is still pink inside?
- If the internal temperature hasn’t reached 165°F (75°C), let it grill for another minute, checking occasionally to ensure it doesn’t overcook.
-
Can I make this dish ahead of time?
- Absolutely! You can marinate the chicken, cook the grain, and chop veggies ahead of time. Just store everything separately in the fridge and assemble before serving!
-
How do I store leftovers?
- Keep leftovers in an airtight container in the refrigerator for up to 3 days. The flavors will meld beautifully!
-
Can I use frozen chicken?
- While it’s best to use fresh, thawed chicken, if you’re short on time, just make sure it’s completely thawed and marinated before grilling.
Nutritional Info
This dish is packed with protein, healthy fats, and fiber, making it a nourishing option for a well-rounded meal. A typical serving (with chicken, quinoa, and veggies) contains approximately 450 calories, 30g of protein, and 15g of healthy fats.
And there you have it—the Ultimate Healthy Greek Chicken Bowls are ready to be served! Cooking doesn’t have to be complicated, and with a little intention and love, you can make something truly special. Whether you’re hosting a dinner party or just making a weeknight meal a bit more vibrant, this dish is sure to impress. Let’s set the table, pour a drink, and enjoy the beauty of food together! Happy cooking!
PrintUltimate Healthy Greek Chicken Bowls
A vibrant and nourishing dish featuring tender chicken marinated in lemon and herbs, served on quinoa or brown rice with fresh veggies and feta.
- Prep Time: 30 minutes
- Cook Time: 15 minutes
- Total Time: 45 minutes
- Yield: 4 servings 1x
- Category: Main Course
- Method: Grilling
- Cuisine: Greek
- Diet: Healthy, High Protein
Ingredients
- 1 lb Boneless, skinless chicken breast
- 3 tbsp Olive oil
- Juice of 1 Lemon
- 3 cloves Garlic, minced
- 2 tsp Dried oregano
- Salt & Pepper to taste
- 1 cup Cooked quinoa or brown rice
- 1 cup Cherry tomatoes, halved
- 1 cup Cucumber, diced
- 1/2 Red onion, thinly sliced
- 1/2 cup Feta cheese, crumbled
- 1/4 cup Olives (black or green)
- 1/4 cup Fresh parsley, chopped
Instructions
- Marinate the chicken: Whisk together olive oil, lemon juice, garlic, oregano, salt, and pepper. Add chicken and coat well. Cover and marinate for at least 30 minutes.
- Cook the quinoa or rice according to package instructions, typically simmering for about 15 minutes after boiling.
- Grill the chicken: Preheat grill to medium-high. Grill chicken for 6-7 minutes per side, until cooked through (internal temperature of 165°F).
- Prep the veggies: Chop cherry tomatoes, cucumber, and red onion.
- Compile the bowls: Layer cooked quinoa or rice, sliced chicken, veggies, feta, and olives. Drizzle with olive oil and lemon juice.
- Garnish with parsley and serve immediately.
Notes
For a lower-carb option, substitute quinoa or rice with cauliflower rice. Feel free to customize with seasonal vegetables.
Nutrition
- Serving Size: 1 bowl
- Calories: 450
- Sugar: 5g
- Sodium: 300mg
- Fat: 15g
- Saturated Fat: 3g
- Unsaturated Fat: 12g
- Trans Fat: 0g
- Carbohydrates: 40g
- Fiber: 6g
- Protein: 30g
- Cholesterol: 70mg
Keywords: Greek chicken bowls, healthy meal prep, Mediterranean recipes
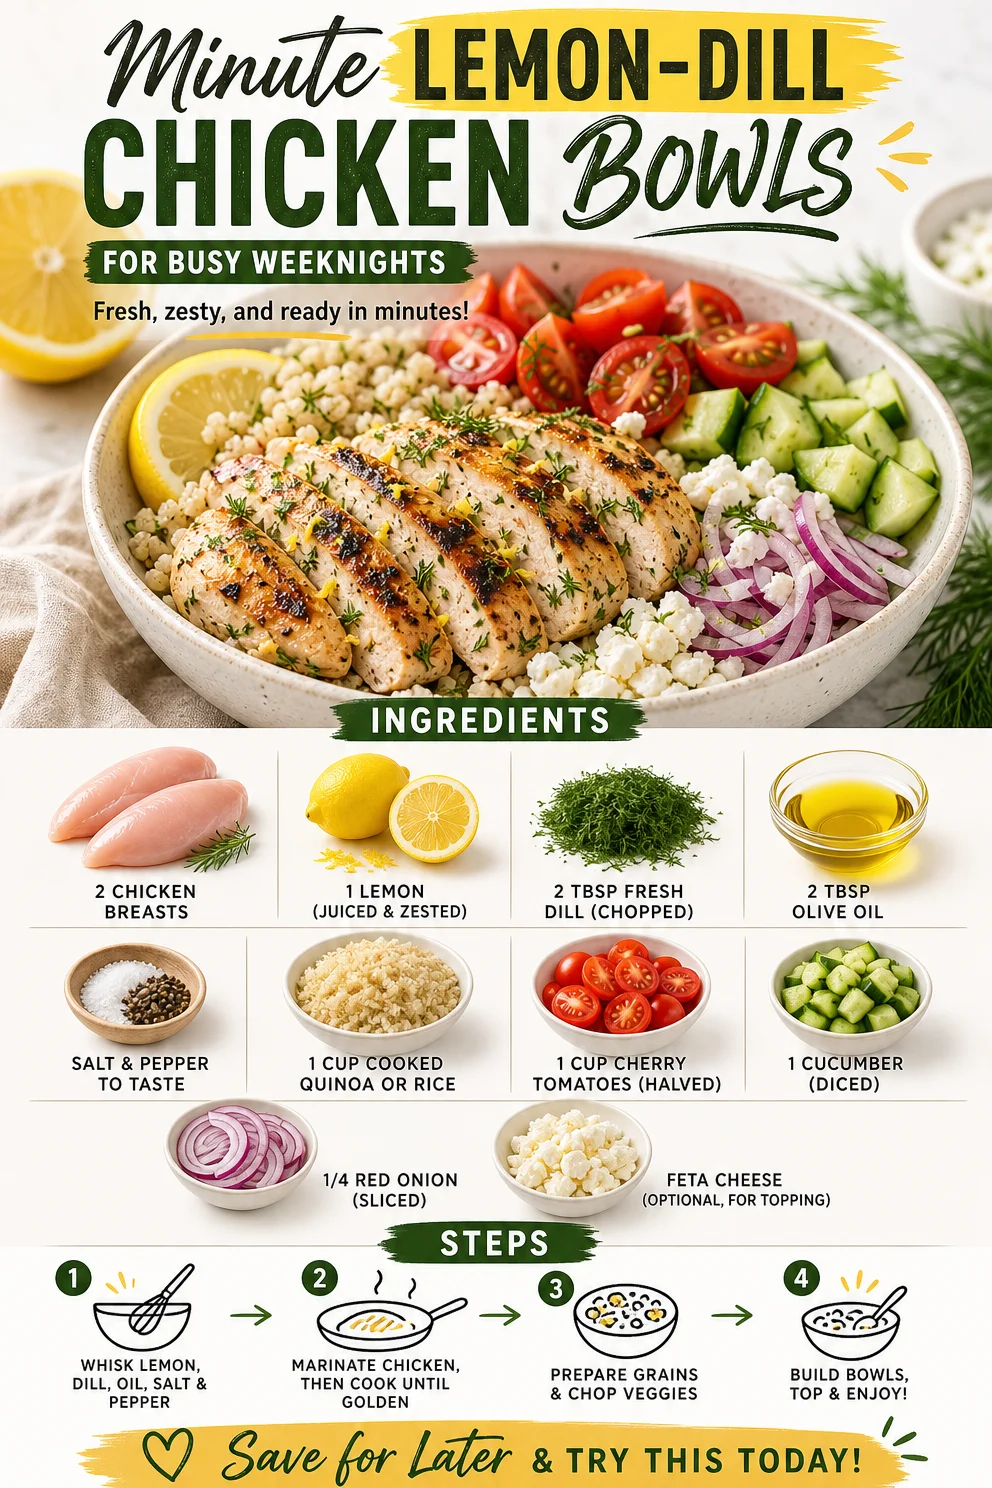
Minute Lemon-Dill Chicken Bowls for Busy Weeknights
Lemon-Dill Chicken Bowls: A Fresh Taste of Summer
Hello, lovely foodies! If you’ve ever found yourself in the middle of a busy week, ready to tiptoe into culinary creativity yet longing for something simple and breezy, then you’re in for a treat. Today, we’re diving into a dish that’s bright, fresh, and perfect for any day of the week: Lemon-Dill Chicken Bowls.
This recipe is a symphony of flavors, combining tender chicken marinated in zesty lemon and aromatic dill, all served atop a fluffy base of quinoa or rice, and complemented by colorful veggies that add a beautiful crunch. It’s the kind of meal that makes you feel like you’ve taken a mini-vacation to a sunlit terrace, even if you’re just in your own kitchen.
A Memory to Savor
Ah, lemon-dill chicken — this dish is more than just a recipe for me; it’s a nostalgic gateway to summers spent at my grandmother’s house. Picture this: a sunny afternoon, the sound of waves lapping against the shore in the background, and the scent of fresh dill filling the air. Every Sunday, Grandma would whip up her famous lemon-dill chicken as part of our family gathering.
She had a knack for turning the simplest ingredients into culinary masterpieces. I can still see her zesting lemons with a smile, while I eagerly awaited the moment when the chicken would be ready. We’d gather around her well-worn wooden table, and every bite was infused with love, laughter, and the kind of joy that only family meals can bring. It’s a memory that reminds me of the power of good food to create bonds and forge connections — which is exactly what I strive for with every recipe I create here at Ivory Apron.
Ingredients You’ll Need
Here’s the list of ingredients that will help you bring this delightful dish to life:
-
2 pieces chicken breasts
- Opt for boneless, skinless chicken for easy cooking. You can substitute with turkey breasts if you want a leaner option.
-
1 piece lemon (juiced and zested)
- Freshly squeezed lemon juice elevates the dish. If you’re in a pinch, bottled juice works, but fresh is best!
-
2 tablespoons fresh dill (chopped)
- This herb adds a bright flavor. Dried dill can substitute, though the taste will be a tad different (1 tablespoon dried for 2 tablespoons fresh).
-
2 tablespoons olive oil
- Use extra virgin for a touch of luxury! Alternatively, avocado oil is a great substitute for a different flavor profile.
-
Salt and pepper to taste
- Season generously! You can also experiment with smoked salt for a unique twist.
-
1 cup cooked quinoa or rice
- Quinoa is full of protein, while rice is classic and comforting. Feel free to try cauliflower rice for a low-carb option!
-
1 cup cherry tomatoes (halved)
- These sweet gems add freshness. If they’re out of season, opt for grape tomatoes or even diced regular tomatoes.
-
1 piece cucumber (diced)
- Crunchy and refreshing! Zucchini can be sliced and peeled if you want to mix things up a bit.
-
1/4 piece red onion (sliced)
- Adds a bite! Green onions can also be used for a milder flavor.
-
Feta cheese (optional, for topping)
- A sprinkle of feta brings a lovely saltiness. Vegan feta is an option if you’re keeping it plant-based.
Step-by-Step Instructions
Let’s cook up some magic! Follow these steps to create your zesty Lemon-Dill Chicken Bowls.
-
Marinate the Chicken:
- In a bowl, combine olive oil, lemon juice, lemon zest, fresh dill, salt, and pepper. Whisk until blended.
- Place your chicken breasts in the marinade, making sure they’re coated evenly. Let it marinate for at least 30 minutes (or up to 2 hours in the fridge). This allows the flavors to penetrate deeply, making every bite burst with brightness!
-
Cook the Chicken:
- Heat a non-stick skillet or grill pan over medium heat. Add a touch of olive oil to lightly grease.
- Once the pan is hot, add the marinated chicken breasts. Cook for about 6-7 minutes on each side, or until the internal temperature reaches 165°F (75°C). A golden crust should form, bringing those comforting aromas to life!
- Remove the chicken and allow it to rest for 5 minutes before slicing. Resting helps to retain the juices, keeping the chicken moist.
-
Prepare the Quinoa or Rice:
- If you’re making quinoa, rinse it in cold water beforehand to remove the saponins (which can taste bitter). Cook according to package instructions — usually, a 2:1 ratio of water to quinoa.
- For rice, follow the cooking directions on your chosen grain. This is your foundation, so feel free to season the water with a pinch of salt as it cooks.
-
Chop the Veggies:
- While the chicken is resting, dice your cucumber and halve the cherry tomatoes. Thinly slice the red onion.
- This is also the time to prepare any additional toppings, like crumbled feta — the more texture, the better!
-
Assemble the Bowls:
- Start with a generous scoop of quinoa or rice in your bowl. Top it with the sliced chicken, cherry tomatoes, diced cucumber, and onion. Add feta, if desired, for that creamy finish.
Serving Suggestions
To serve your Lemon-Dill Chicken Bowls, consider a beautiful wooden platter or a vibrant colored bowl to make it pop! Drizzle some extra olive oil and a squeeze of fresh lemon over the top for added flair. Garnish with more fresh dill for a beautiful presentation that’s as enticing as it is delicious!
Recipe Variations
Feel like getting a little creative? Here are a few variations you can try:
- Herbed Chicken: Swap in thyme or rosemary for the dill for a different herbaceous flavor.
- Spicy Kick: Add chili flakes or a splash of hot sauce to the marinade for a zesty jolt.
- Grilled Veggies: Toss seasonal vegetables (like bell peppers or zucchini) on the grill for added smokiness.
- Coconut Twist: Use coconut rice instead of traditional rice for a tropical flare.
- Vegetarian Option: Replace the chicken with grilled tofu or chickpeas for a plant-based delight.
Chef’s Notes
Creating this vibrant dish has been a delight through the years, and I’ve found it evolving with each season. Spring brings fresh peas and asparagus, while fall sometimes calls for roasted butternut squash. I once had a mishap with over-cooking the chicken, resulting in an accidental ‘chicken salad’ scenario for my lunch the next day. Instead of disaster, it became a happy accident!
Food is all about exploration, right? So don’t hesitate to play around with this recipe! Cooking should be an adventure filled with delicious surprises.
FAQs and Troubleshooting
1. How do I know when the chicken is cooked properly?
- Use a meat thermometer to check the internal temperature, which should be 165°F (75°C). If you don’t have a thermometer, pierce the thickest part of the chicken with a knife; the juices should run clear.
2. What if my quinoa turns out mushy?
- Mushy quinoa typically indicates it was overcooked or too much water was used. To avoid this in the future, be sure to rinse it well and follow the cooking times precisely.
3. Can I make this dish ahead of time?
- Yes! Cook the chicken and prepare the quinoa ahead of time. You can store everything separately in the fridge and assemble right before serving; just reheat the chicken and quinoa.
4. What other grains can I use instead of quinoa or rice?
- Try farro, barley, or even bulgur for a different texture and flavor. Each grain will give a unique twist to your chicken bowls!
With these tips and my trusty Lemon-Dill Chicken Bowls recipe, I hope you feel inspired to get in the kitchen and create something delicious today! Here’s to memorable meals that bring joy to the table — even on the busiest of days. Let’s cook up a storm!
PrintLemon-Dill Chicken Bowls
A bright and fresh dish featuring tender chicken marinated in lemon and dill, served over quinoa or rice with colorful veggies.
- Prep Time: 30 minutes
- Cook Time: 15 minutes
- Total Time: 45 minutes
- Yield: 4 servings 1x
- Category: Main Course
- Method: Grilling
- Cuisine: Mediterranean
- Diet: Gluten-Free, Low-carb
Ingredients
- 2 pieces chicken breasts (boneless, skinless)
- 1 piece lemon (juiced and zested)
- 2 tablespoons fresh dill (chopped)
- 2 tablespoons olive oil
- Salt and pepper to taste
- 1 cup cooked quinoa or rice
- 1 cup cherry tomatoes (halved)
- 1 piece cucumber (diced)
- 1/4 piece red onion (sliced)
- Feta cheese (optional, for topping)
Instructions
- Marinate the chicken: In a bowl, combine olive oil, lemon juice, lemon zest, fresh dill, salt, and pepper. Whisk until blended. Place your chicken breasts in the marinade, making sure they’re coated evenly. Let it marinate for at least 30 minutes (or up to 2 hours in the fridge).
- Cook the chicken: Heat a non-stick skillet or grill pan over medium heat. Add a touch of olive oil to lightly grease. Once the pan is hot, add the marinated chicken breasts. Cook for about 6-7 minutes on each side, or until the internal temperature reaches 165°F (75°C). Remove the chicken and allow it to rest for 5 minutes before slicing.
- Prepare the quinoa or rice: Rinse quinoa in cold water and cook according to package instructions. For rice, follow cooking directions on your chosen grain.
- Chop the veggies: Dice cucumber and halve cherry tomatoes. Thinly slice the red onion.
- Assemble the bowls: Start with a generous scoop of quinoa or rice in your bowl. Top it with the sliced chicken, cherry tomatoes, diced cucumber, and onion. Add feta, if desired.
Notes
Drizzle extra olive oil and fresh lemon juice over the bowls for added flavor. Garnish with fresh dill for presentation.
Nutrition
- Serving Size: 1 serving
- Calories: 400
- Sugar: 6g
- Sodium: 450mg
- Fat: 14g
- Saturated Fat: 2g
- Unsaturated Fat: 10g
- Trans Fat: 0g
- Carbohydrates: 38g
- Fiber: 5g
- Protein: 30g
- Cholesterol: 75mg
Keywords: lemon, dill, chicken, bowls, quinoa, healthy, quick meals
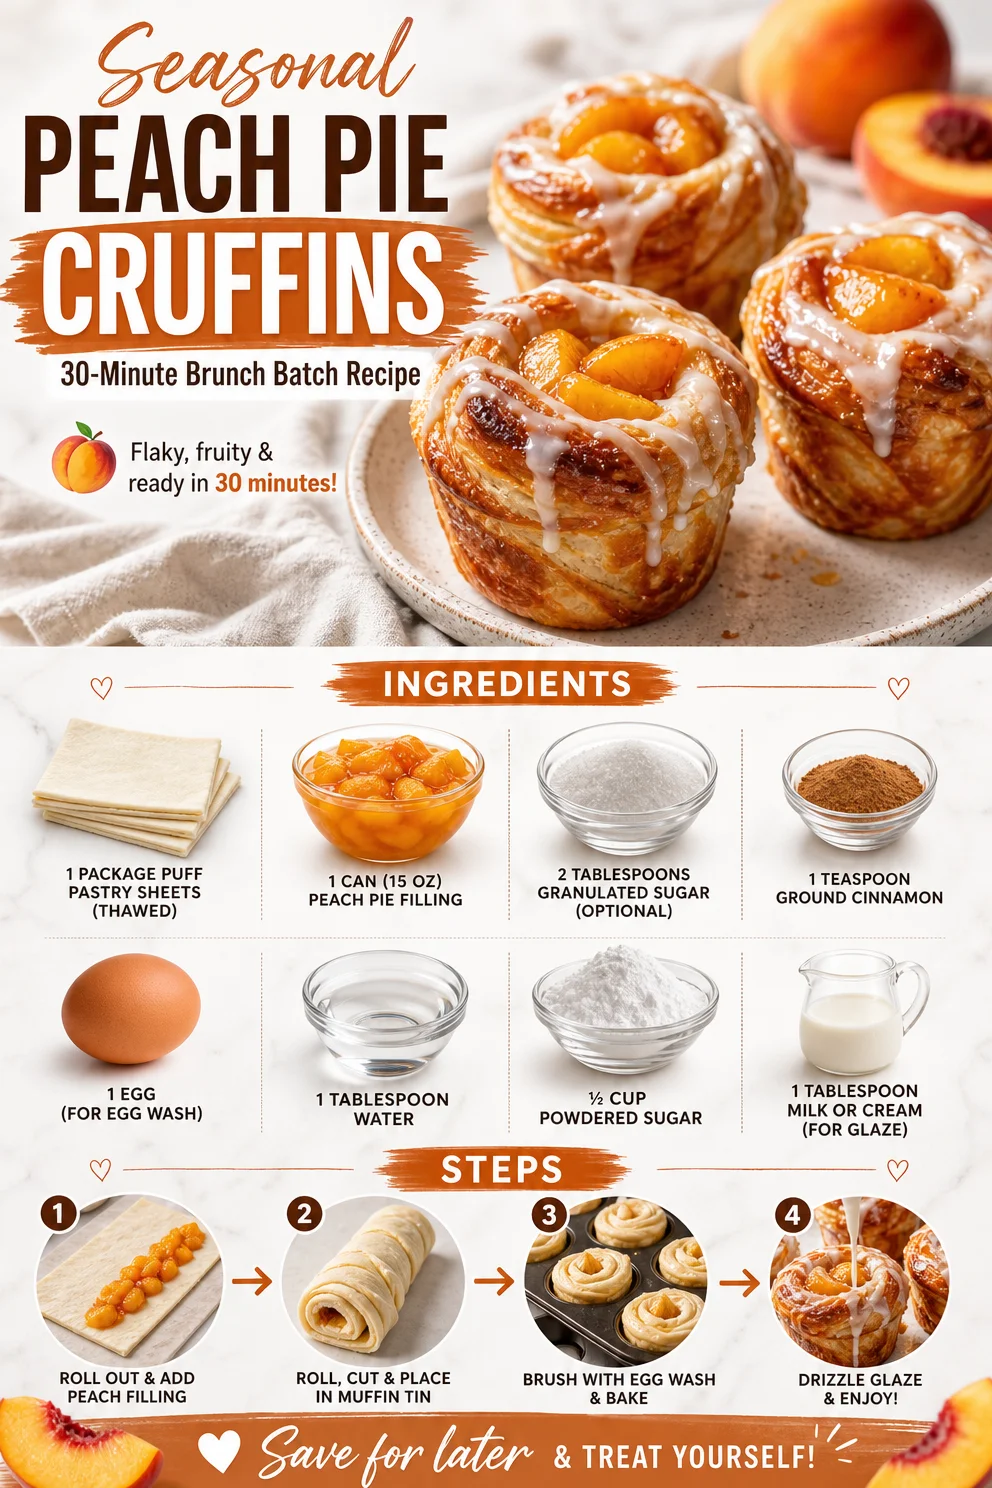
Seasonal Peach Pie Cruffins: 30-Minute Brunch Batch Recipe
Peach Pie Cruffins: A Sweet Twist on a Classic Delight
There’s something magical about the aroma of peaches wafting through the kitchen on a warm summer day. Those juicy, sun-kissed fruits remind me of lazy afternoons spent in my grandmother’s backyard, picking ripe peaches straight from the tree. The scent was so sweet and intoxicating that I often found myself longing for the fruit to transform into a glorious dessert. Fast forward to today, and here I am, combining nostalgia and creativity in a delightful treat: Peach Pie Cruffins.
Cruffins—a hybrid of croissants and muffins—offer the perfect vessel for the luscious peach filling. These flaky, buttery delights captivate the heart and the palate. Each bite is like a warm hug, with layers of crispy pastry giving way to a sweet, gooey center. This is the treat you didn’t know you needed, and I’m thrilled to share this recipe with you.
Whether you’re hosting a brunch, surprising someone special, or simply indulging in a self-care day, these Peach Pie Cruffins will elevate the moment. Together, we’ll transform humble puff pastry into something extraordinary, bringing joy and warmth to your table. Ready to dive in? Let’s get started!
A Sweet Memory: The Origin of Peach Pie Cruffins
As a child, summers meant one thing for our family—peach-picking adventures. My grandmother, the queen of baking, would take my siblings and me to our favorite orchard, where the trees stood heavy with ripe, fuzzy peaches. I can still hear her laughter as we raced one another to see who could collect the juiciest fruits. Little did I know that those peaches were destined for her famous peach pie—a recipe passed down through generations.
When it was pie-baking day, the entire house filled with the sweet aroma of cinnamon and sugar, mixing harmoniously with that perfect peach scent. I was always tasked with stemming and slicing the precious fruit. One day, I accidentally dropped a piece on the floor, and my grandma laughed, saying, "Not to worry, dear! Even the imperfect peaches can make the best memories." That philosophy stuck with me in the kitchen: it’s the joy and love you infuse into the food that counts.
Years later, inspired by my grandmother’s wisdom, I decided to put a modern twist on her classic peach pie by inventing these cruffins. While they carry the essence of her beloved dessert, they also embody a new adventure in flavor and texture. Join me as we create something beautiful that carries the spirit of those sun-drenched summer days!
Ingredients for Peach Pie Cruffins
Here’s what you’ll need to bring these delightful treats to life:
-
1 package puff pastry sheets (thawed)
Puff pastry is the star of this show! It gives these cruffins their signature flaky texture. If you can’t find puff pastry, you can use phyllo dough — just make sure to layer it for that flaky goodness. -
1 can (15 oz) peach pie filling
This is the heart of our cruffins. However, fresh peaches sautéed with sugar and cinnamon make a fantastic substitute if you’re feeling adventurous. You can even simmer frozen peaches with a bit of sugar! -
2 tablespoons granulated sugar (optional)
Adding sugar to the filling can enhance the sweetness, especially if your peaches are not as ripe. Adjust according to your taste; a sprinkle may be all you need! -
1 teaspoon ground cinnamon
A warm sprinkle of cinnamon not only compliments the peaches wonderfully but also adds an extra layer of flavor that makes these cruffins truly special. -
1 egg (for egg wash)
This is essential for achieving that golden-brown finish on your cruffins, making them shine in all their glory. -
1 tablespoon water
Mixed with the egg, this will help you achieve that perfect wash for deeper color. -
½ cup powdered sugar
For the sweet glaze on top! This will give the cruffins that dreamy, sugary finish. -
1 tablespoon milk or cream (for glaze)
Just enough to create a lovely drizzle for your cruffins. Swap with almond milk or coconut milk for a dairy-free option.
Step-by-Step Instructions
Ready to embark on this delightful baking journey? Let’s break this down step by step:
-
Preheat Your Oven
Preheat the oven to 400°F (200°C). This ensures a perfectly flaky and cooked cruffin when they go in. -
Prepare the Puff Pastry
Roll out your thawed puff pastry sheets on a lightly floured surface. If using pre-rolled sheets, ensure they’re completely thawed for easy handling. Cut each sheet into square pieces, about 4×4 inches. -
Layer the Dough
Take each square and gently stretch it to make it larger (about 5×5 inches). Layer two pieces on top of each other to create a slightly thicker base. This will yield more flakiness in your cruffins! -
Add the Peach Filling
Spoon about 2 tablespoons of peach pie filling into the center of each layered square. Make sure to leave some space around the edges to seal later. -
Sprinkle the Cinnamon and Sugar
Dust a pinch of ground cinnamon and a smidgen of granulated sugar (if using) over the peach filling. This little addition enhances the flavor beautifully! -
Fold and Roll
Fold the corners of the dough squares toward the center, making an envelope-like shape. Gently roll from one end to the other to form a spiral. This is where the magic happens—the layers will create that stunning flakiness. -
Prepare the Egg Wash
In a small bowl, whisk together the egg and water until combined. Brush the mixture over the top of each cruffin for that gorgeous golden finish. -
Bake
Place the cruffins in a muffin tin, ensuring they have a bit of space to puff up. Bake in the preheated oven for 15-20 minutes or until they are golden brown and puffed. -
Make the Glaze
While they cool, create the glaze by whisking together powdered sugar and milk/cream in a bowl until smooth. It should be thick but pourable. -
Glaze the Cruffins
Once the cruffins are cool enough to handle, drizzle the glaze over the top. The sweetness will balance beautifully with the peach filling.
And voila! Your Peach Pie Cruffins are ready to be enjoyed. Don’t forget to share, although they’re hard to resist!
Serving Suggestions
For a delightful presentation, serve your Peach Pie Cruffins warm out of the oven with a dusting of powdered sugar on top. You can also add a scoop of vanilla ice cream or a dollop of whipped cream for extra indulgence. Pair them with a refreshing iced tea or a cup of coffee for the ultimate treat experience at brunch or dessert time.
Recipe Variations
-
Berry Mix: Swap out the peach filling for your choice of berries (blueberries, raspberries, or strawberries) for a fresh twist.
-
Nutty Crust: Add a layer of crushed almonds or pecans to the filling for a delightful crunch and nutty flavor.
-
Spiced Pear: Use spiced pear filling instead of peach for a fall-inspired cruffin.
-
Vegan Version: Use vegan puff pastry, a flax egg for the wash, and almond milk for the glaze.
-
Chocolate Drizzle: For a decadent surprise, fold mini chocolate chips into the filling!
Chef’s Notes
These Peach Pie Cruffins have evolved through many iterations in my kitchen. Originally aiming to recreate my grandmother’s peach pie, I stumbled upon cruffins one rainy afternoon, and the rest is history! I experimented wildly, only to find that even the simplest ingredient combinations can create striking experiences. I chuckle every time a friend asks where my recipe came from because now they insist I’m a ‘pastry genius’! Remember, cooking is as much about creativity as it is about technique. Embrace the journey, and don’t forget to laugh at any little mishaps along the way!
FAQs and Troubleshooting
-
Why are my cruffins not rising?
Make sure your puff pastry is thawed properly. If it’s too cold or overworked, it won’t puff up as desired. -
Can I make these in advance?
Yes! You can prepare the cruffins and store them in the fridge before baking. Just bake them fresh when you want to serve them. -
What if my filling leaks out?
Ensure you seal the edges well after folding and rolling. You can also place the cruffins in muffin tins to help them maintain shape. -
Can I freeze these cruffins?
Absolutely! Before baking, you can freeze them in an airtight container. Bake from frozen—just add an extra few minutes to the cooking time.
Embrace your inner pastry chef and create these Peach Pie Cruffins with love. Remember, the kitchen is all about connection and joy—enjoy the sweet process, and tie on that apron! Happy baking!
PrintPeach Pie Cruffins

Delightful Peach Pie Cruffins combine flaky puff pastry with sweet peach filling for a unique twist on a classic dessert.
- Prep Time: 15 minutes
- Cook Time: 20 minutes
- Total Time: 35 minutes
- Yield: 12 servings 1x
- Category: Dessert
- Method: Baking
- Cuisine: American
- Diet: Vegetarian
Ingredients
- 1 package puff pastry sheets (thawed)
- 1 can (15 oz) peach pie filling
- 2 tablespoons granulated sugar (optional)
- 1 teaspoon ground cinnamon
- 1 egg (for egg wash)
- 1 tablespoon water
- ½ cup powdered sugar
- 1 tablespoon milk or cream (for glaze)
Instructions
- Preheat the oven to 400°F (200°C).
- Prepare the thawed puff pastry sheets on a lightly floured surface and cut into 4×4 inch squares.
- Layer two squares on top of each other to create a thicker base.
- Add 2 tablespoons of peach pie filling into the center of each layered square.
- Sprinkle ground cinnamon and sugar (if using) over the filling.
- Fold the corners of the squares toward the center and roll to form a spiral.
- Prepare the egg wash by mixing egg and water, then brush over each cruffin.
- Bake in the preheated oven for 15-20 minutes until golden brown.
- Make the glaze by whisking powdered sugar and milk/cream until smooth.
- Glaze the cool cruffins with the prepared mixture before serving.
Notes
Serve warm with a dusting of powdered sugar or a scoop of ice cream for a special treat.
Nutrition
- Serving Size: 1 cruffin
- Calories: 250
- Sugar: 12g
- Sodium: 200mg
- Fat: 12g
- Saturated Fat: 4g
- Unsaturated Fat: 6g
- Trans Fat: 0g
- Carbohydrates: 30g
- Fiber: 1g
- Protein: 4g
- Cholesterol: 75mg
Keywords: Peach Pie, Cruffins, Dessert, Baking, Summer Treat
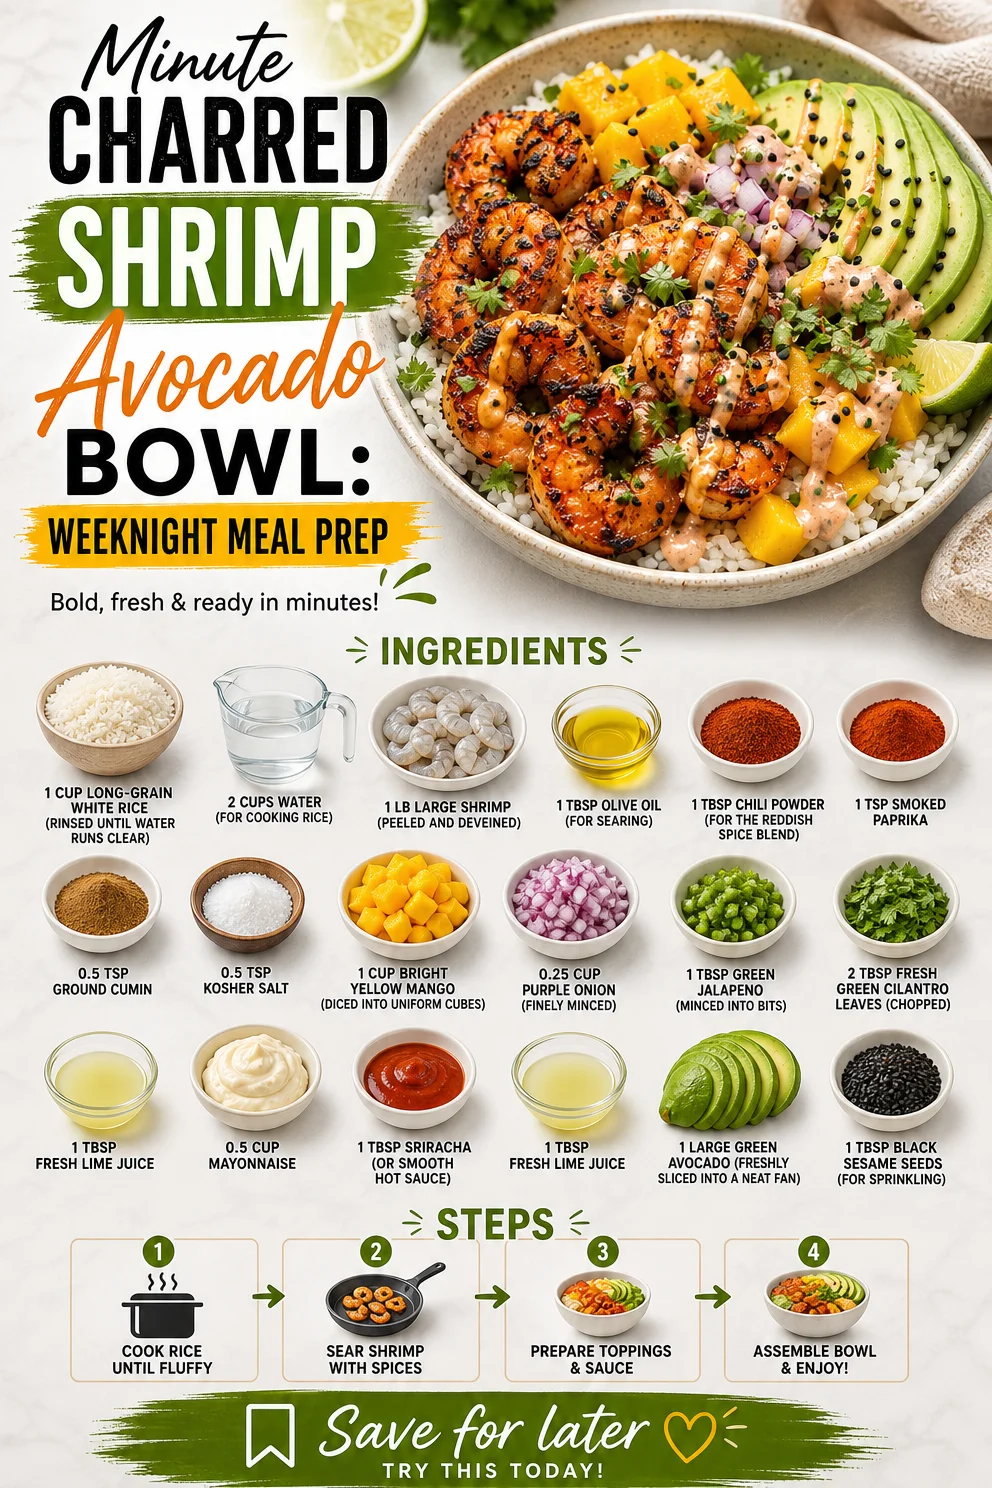
Minute Charred Shrimp Avocado Bowl: Weeknight Meal Prep
The Ultimate Charred Shrimp and Avocado Bowl: A Flavorful Journey
Hello, my fellow food lovers! Today, I’m thrilled to take you on a culinary adventure that stems from one of my absolute favorite dishes—the Charred Shrimp and Avocado Bowl. It’s colorful, packed with flavor, and oh-so satisfying, making it the perfect meal for any occasion. Whether you’re hosting a dinner party or simply looking to spice up your weekday dinner routine, this dish is bound to impress. So, roll up your sleeves, tie on that apron, and let’s get cooking!
A Taste of Nostalgia
Ah, shrimp! This little seafood gem has been a part of many delightful gatherings in my life. I vividly remember a sunny afternoon at my Aunt Mae’s beach house, where she would host fabulous summer cookouts. As children, we would run excitedly along the shoreline while the adults prepared a feast that filled the air with mouthwatering aromas.
One afternoon, Aunt Mae introduced us to her famous charred shrimp skewers, which she marinated in zesty spices and grilled to perfection. It was love at first bite! The smoky flavor combined with a hint of citrus is forever etched in my culinary heart. That experience sparked my passion for cooking and entertaining—teaching me that food is not just about sustenance; it’s about connection and creating cherished memories.
Fast forward to today, and I’ve transformed that memory into my own Charred Shrimp and Avocado Bowl. It brings together juicy shrimp, creamy avocado, and vibrant mango for a dish that sings with freshness and flavor. Are you ready to dive in? Let’s talk ingredients!
Ingredients
-
1 cup long-grain white rice
This serves as the hearty base of your bowl. Rinse the rice well until the water runs clear to remove excess starch for fluffier grains. If you prefer something different, substitute with quinoa or cauliflower rice for a low-carb option. -
2 cups water
Essential for cooking the rice. You can also infuse the water with a bay leaf or a garlic clove for extra flavor. -
1 lb large shrimp
Peeled and deveined, these beauties bring an excellent protein punch. If you’re not a fan of shrimp, feel free to swap in scallops or grilled chicken. -
1 tbsp olive oil
Perfect for searing the shrimp while adding a subtle richness. Don’t have olive oil? Avocado oil or melted butter work just as well. -
1 tbsp chili powder
This spice adds a delicious kick! If you prefer less heat, go easy on it or try a sweeter paprika blend instead. -
1 tsp smoked paprika
This gives a wonderful smoky flavor reminiscent of grill marks, enhancing our charred theme. You can use regular paprika if you prefer a milder taste. -
0.5 tsp ground cumin
Cumin adds warmth and depth. Feel free to experiment with different spices like coriander for an additional layer of flavor! -
0.5 tsp kosher salt
A must for flavor development! You can also try sea salt for a more delicate taste or skip it if you’re watching your sodium intake. -
1 cup bright yellow mango
Fresh mango adds a burst of sweetness and color! If mango isn’t in season, substitute it with peach or pineapple for an equally delightful twist. -
0.25 cup purple onion
Finely minced, this brings a sharp, slightly sweet flavor. Red onion is perfect, but you can also use green onion (scallions) or shallots if preferred. -
1 tbsp green jalapeño
Minced jalapeño adds a nice touch of heat. For those who prefer milder flavors, omit it or replace it with a sprinkle of red pepper flakes. -
2 tbsp fresh green cilantro leaves
Chopped cilantro ties the dish together with its bright herbal notes. If you’re not a fan of cilantro, fresh parsley works nicely! -
1 tbsp fresh lime juice
A splash of lime juice brightens all the flavors! You can substitute with lemon juice if that’s what you have on hand. -
0.5 cup mayonnaise
This creamy base helps create a luscious sauce for the shrimp. If you want to lighten it up, swap half for Greek yogurt or try a vegan mayo. -
1 tbsp sriracha
This adds an exciting heat to the sauce. For less heat, opt for sweet chili sauce or leave it out entirely. -
1 large green avocado
Sliced into a fan for that Instagram-worthy presentation! Make sure your avocado is ripe for that creamy texture. If avocados are scarce, try using sliced cucumbers. -
1 tbsp black sesame seeds
For a final decorative touch! They add a nice crunch and visual pop. White sesame seeds or crushed nuts are wonderful alternatives.
Step-by-Step Instructions
Step 1: Prepare the Rice
Begin by rinsing the 1 cup of long-grain white rice under cold water until the water runs clear. This will help remove excess starch and keep your rice fluffy. In a medium saucepan, combine rinsed rice and 2 cups of water. Bring to a boil over high heat, then reduce to a simmer. Cover and cook for about 18-20 minutes, or until the water is absorbed and the rice is tender. Once done, fluff it with a fork and set it aside.
Chef Tip: Letting the rice rest for a few minutes after cooking allows it to firm up and prevents clumping.
Step 2: Season the Shrimp
While the rice is cooking, let’s get the shrimp ready! In a bowl, combine the 1 lb shrimp with 1 tbsp olive oil, 1 tbsp chili powder, 1 tsp smoked paprika, 0.5 tsp ground cumin, and 0.5 tsp kosher salt. Mix well, ensuring all the shrimp are coated evenly with the spices.
Chef Insight: Don’t be afraid to let the shrimp marinate for 15-30 minutes if you want an extra flavor punch.
Step 3: Sear the Shrimp
Heat a skillet over medium-high heat. Once hot, add the seasoned shrimp in a single layer. Cook for about 2-3 minutes on each side, until they turn pink and opaque. You might want to do this in batches to avoid overcrowding the pan.
Chef Hack: For an extra layer of flavor, squeeze a little lime juice over the shrimp while they cook.
Step 4: Make the Sauce
In a small bowl, combine 0.5 cup mayonnaise, 1 tbsp sriracha, and 1 tbsp fresh lime juice. Mix until smooth and set aside. This sauce will elevate the shrimp and bring everything together.
Serving Suggestion: Try using Greek yogurt instead of mayo for a lighter option!
Step 5: Build Your Bowl
Now comes the fun part! In your serving bowls, start by adding a generous scoop of the fluffy rice. Top it with the charred shrimp, then layer on the diced mango, purple onion, minced jalapeño, chopped cilantro, and the sliced avocado.
Plating Tip: Arrange the avocado in a beautiful fan shape to impress your guests!
Step 6: Drizzle with Sauce and Garnish
Drizzle your spicy mayo sauce over the top, then finish with a sprinkle of black sesame seeds. Voila! You now have a stunning Charred Shrimp and Avocado Bowl.
Serving Suggestions
Presentation is key! Serve the Charred Shrimp and Avocado Bowl in bright, colorful bowls that highlight the dish’s freshness. A sprinkle of fresh herbs and a squeeze of lime on top will add an inviting touch. For a side, consider crunchy tortilla chips or a light salad for added texture.
Recipe Variations
- Spicy Mango Salsa: Swap the diced mango for a spicy mango salsa by mixing diced mango with jalapeños, red onion, and lime juice for a zesty twist.
- Coconut Rice: Replace the water used for cooking rice with coconut milk for a creamy, tropical vibe.
- Herbed Quinoa: Change up the base from rice to quinoa, and toss in fresh herbs for an earthy touch.
- Lime Cilantro Rice: Mix lime zest and chopped cilantro into your cooked rice for added flavor.
- Cauliflower Rice: For a low-carb option, use cauliflower rice instead of traditional grains for a new spin.
Chef’s Notes
As I reflect on the evolution of this dish, I remember the first time I attempted to prepare shrimp. It was a disaster, to say the least! Overcooked shrimp is the enemy—chewy and tough. I learned through countless tries and errors that timing is everything. The added layer of flavors came after experimenting endlessly with sauces and spices. My goal is to pass along these lessons to you and instill confidence in your cooking journey!
FAQs and Troubleshooting
Q: How do I know when shrimp are cooked?
A: Cooked shrimp should be opaque and pink. You can also give them a gentle squeeze; they should feel firm but still tender.
Q: What if I don’t have fresh lime juice?
A: Bottled lime juice can work in a pinch, but fresh is always best for flavor. If you need a substitute, lemon juice is a great alternative.
Q: How can I prevent the avocado from browning?
A: To keep your avocado fresh, sprinkle a little lime juice over the slices before serving.
Q: Can I make this dish ahead of time?
A: Yes! You can prepare the shrimp and rice in advance and store them in airtight containers in the fridge. Just assemble the bowl when you’re ready to enjoy!
Nutritional Info (Optional)
- Calories: 490
- Protein: 34g
- Fat: 26g
- Carbohydrates: 43g
- Fiber: 5g
There you have it! The Ultimate Charred Shrimp and Avocado Bowl is a delightful balance of textures and flavors that perfectly showcases fresh ingredients. It’s an ode to my past memories while being an accessible dish for any night of the week.
So, gather your friends, tie on your apron, and embark on this delicious culinary adventure. Because, at the end of the day, it’s all about sharing beautiful moments around the table over incredible food. Happy cooking!
PrintUltimate Charred Shrimp and Avocado Bowl
A colorful and flavorful bowl featuring charred shrimp, creamy avocado, and vibrant mango, perfect for any occasion.
- Prep Time: 15 minutes
- Cook Time: 20 minutes
- Total Time: 35 minutes
- Yield: 4 servings 1x
- Category: Main Course
- Method: Searing
- Cuisine: Mexican
- Diet: Seafood
Ingredients
- 1 cup long-grain white rice
- 2 cups water
- 1 lb large shrimp, peeled and deveined
- 1 tbsp olive oil
- 1 tbsp chili powder
- 1 tsp smoked paprika
- 0.5 tsp ground cumin
- 0.5 tsp kosher salt
- 1 cup bright yellow mango, diced
- 0.25 cup purple onion, finely minced
- 1 tbsp green jalapeño, minced
- 2 tbsp fresh green cilantro leaves, chopped
- 1 tbsp fresh lime juice
- 0.5 cup mayonnaise
- 1 tbsp sriracha
- 1 large green avocado, sliced
- 1 tbsp black sesame seeds
Instructions
- Prepare the Rice: Rinse the rice under cold water until the water runs clear. Combine the rinsed rice and water in a medium saucepan and bring to a boil. Reduce to a simmer, cover, and cook for about 18-20 minutes. Fluff with a fork and set aside.
- Season the Shrimp: In a bowl, combine the shrimp with olive oil, chili powder, smoked paprika, ground cumin, and kosher salt. Mix well to coat the shrimp evenly.
- Sear the Shrimp: Heat a skillet over medium-high heat and add the seasoned shrimp in a single layer. Cook for about 2-3 minutes on each side until cooked through and opaque.
- Make the Sauce: In a small bowl, combine mayonnaise, sriracha, and lime juice. Mix until smooth and set aside.
- Build Your Bowl: In serving bowls, add a scoop of rice, topped with charred shrimp, diced mango, purple onion, minced jalapeño, cilantro, and sliced avocado.
- Drizzle with Sauce: Drizzle the spicy mayo sauce over the top and sprinkle with black sesame seeds.
Notes
To prevent avocado from browning, sprinkle with lime juice before serving. This dish can be made ahead of time; just assemble when ready to eat.
Nutrition
- Serving Size: 1 bowl
- Calories: 490
- Sugar: 10g
- Sodium: 600mg
- Fat: 26g
- Saturated Fat: 4g
- Unsaturated Fat: 14g
- Trans Fat: 0g
- Carbohydrates: 43g
- Fiber: 5g
- Protein: 34g
- Cholesterol: 220mg
Keywords: shrimp bowl, avocado recipe, healthy seafood
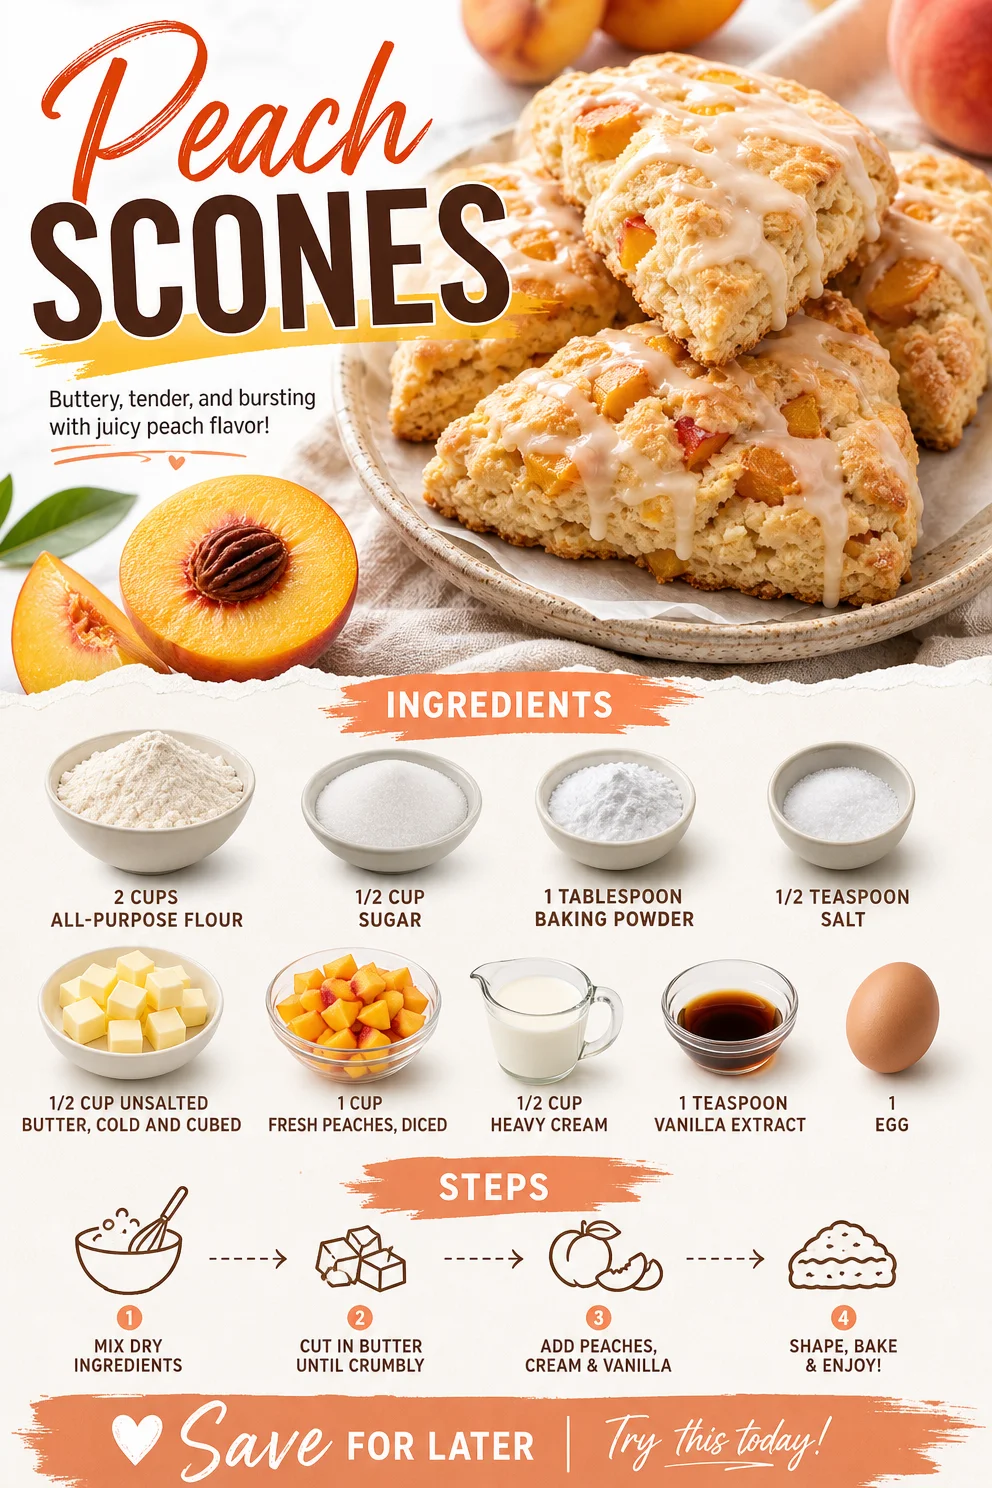
Peach Scones
The Sweetest Slice of Summer: Peach Scones
Welcome back to Ivory Apron, my cooking haven where elegance meets simplicity! Today, I’m thrilled to share one of my absolute favorite recipes: Peach Scones. There’s just something so heartwarming about biting into a warm scone, fresh out of the oven, especially when it’s bursting with juicy peach goodness. This recipe is perfect for a leisurely weekend brunch, a delightful afternoon tea, or even a special gathering with friends. So, let’s tie on our aprons and dive into this sweet adventure!
My Whimsical Peach Memory
Peaches have always held a special place in my heart. I fondly remember summer weekends at my grandparents’ house, where the air was filled with the sweet scent of ripe peaches from the tree in their backyard. My grandmother would gather us around the kitchen, and while we played underfoot, she’d whip up her irresistible peach cobbler. Oh, the joy of eating those juicy, sun-kissed peaches combined with the warmth of her laughter and the aromatic warmth of baked goods wafting through the kitchen!
Fast forward to today, and peaches still evoke that same nostalgia. They remind me that cooking is so much more than just following a recipe; it’s about creating memories and bringing loved ones together. This Peach Scone recipe draws inspiration from my grandmother’s kitchen, infusing it with a touch of elegance, proving that you don’t need a special occasion to indulge in deliciousness!
Ingredients
Let’s gather our ingredients for these delightful Peach Scones:
- 2 cups all-purpose flour: The backbone of any scone. You can substitute with whole wheat flour for a nuttier flavor or a gluten-free blend to suit different dietary needs.
- 1/2 cup sugar: This sweetens the dough just right. If you prefer a healthier option, consider natural sweeteners like honey or maple syrup; just adjust the liquid content accordingly.
- 1 tablespoon baking powder: This is our leavening agent, helping the scones rise. Make sure it’s fresh for optimal fluffiness; old baking powder can doom your scones to a flat fate.
- 1/2 teaspoon salt: A little bit of salt enhances all flavors, bringing the sweetness of the peaches forward.
- 1/2 cup unsalted butter, cold and cubed: Butter is essential for flakiness! If you’re in a pinch, coconut oil works well; just ensure it’s cold too.
- 1 cup fresh peaches, diced: Fresh peaches are essential! They add moisture and flavor, but you can swap them for nectarines or even mixed berries for a different twist.
- 1/2 cup heavy cream: This gives the scones a rich texture. Greek yogurt or a non-dairy cream can be used as alternatives.
- 1 teaspoon vanilla extract: Adds depth and warmth. Homemade vanilla extract can elevate the flavor even further.
- 1 egg: Used for richness and helping to bind everything together. If you’re vegan, a flax egg can work here (mix 1 tablespoon ground flaxseed with 2.5 tablespoons water)!
Step-by-Step Instructions
Alright, let’s get baking! Follow these detailed steps for perfectly golden peach scones.
-
Preheat the Oven: Preheat your oven to 400°F (200°C). This ensures your scones begin baking in the ideal hot environment, promoting a lovely rise!
-
Mix the Dry Ingredients: In a large mixing bowl, whisk together the flour, sugar, baking powder, and salt until they’re well combined. Chef Tip: Make sure to sift the flour to avoid clumps – this helps create a lighter texture.
-
Cut in the Butter: Add the cold, cubed butter to the flour mixture. Using a pastry cutter or your fingertips, quickly mix the butter into the flour until it resembles coarse crumbs. Little Hack: It’s key to keep the butter cold – this is what gives your scones their flaky layers, so try to work quickly!
-
Toss in the Peaches: Gently fold in the diced peaches. Commentary: The gesture of stirring should be gentle; you don’t want to bruise your lovely peaches too much.
-
Combine Wet Ingredients: In a separate bowl, whisk together the heavy cream, egg, and vanilla extract until smooth. Slowly pour this mixture into your dry ingredients, stirring until just combined. Tip: Do not overmix! The dough should be a tad sticky; that’s perfectly okay!
-
Shape the Dough: On a lightly floured surface, turn out the dough. Pat it into a circle about 1-inch thick; it doesn’t have to be perfect! Using a sharp knife or a bench scraper, cut the dough into 8 triangles. Chef Insight: If you prefer round scones, use a biscuit cutter instead!
-
Prepare for Baking: Place the scone triangles onto a parchment-lined baking sheet, leaving a bit of space between each. For a nice golden crust, brush the tops lightly with extra heavy cream. Bonus Trick: A sprinkle of sugar on top right before baking adds a delightful crunch!
-
Bake: Pop them in the oven and bake for about 15-20 minutes or until golden brown on top. Your kitchen will fill with that famous aroma – pure bliss!
-
Cool & Serve: Once baked, allow them to cool slightly on a wire rack. Serve warm, and prepare to be met with smiles and satisfied sighs!
Serving Suggestions
These scones are best enjoyed warm, straight from the oven! Serve them with a dollop of fresh whipped cream or a drizzle of honey. For an elegant twist, pair them with a chilled glass of lemonade or a steaming cup of tea. Presentation is key; arrange them on a beautiful cake stand or a rustic wooden platter. Trust me, your friends will feel pampered!
Recipe Variations
Here are some fun twists to try with your scones:
- Berry Peach Medley: Swap half of the peaches for raspberries or blueberries for a fruity explosion.
- Spiced Peach Scones: Add a pinch of cinnamon or nutmeg for a warm, cozy flavor.
- Savory Peach Scones: Mix in some crumbled cheese (like feta or cheddar) for a savory twist.
- Peach and Ginger: Add some finely chopped crystallized ginger for an unexpected zing!
Chef’s Notes
I can’t help but chuckle when reminiscing about my first batch of scones. You might say they were a bit of a disaster – I forgot to add the sugar! It was a lesson learned and a reminder of how essential every ingredient is to creating the dish’s harmony. Over the years, I’ve played with this recipe, adding a pinch of spice here and a new fruit there, but these classic peach scones always hold a special place in my heart. They never fail to spark a conversation or bring a smile!
FAQs and Troubleshooting
-
Why are my scones too dry?
If your scones end up dry, it might be due to overmixing the dough or measuring the flour incorrectly. Always spoon the flour into your measuring cup and level it off with a knife! -
Can I make the dough ahead of time?
Absolutely! You can prepare the dough, cut them into triangles, and refrigerate them. Just pop them in the oven when you’re ready, adding an extra 5 minutes to the baking time. -
What if my peaches are not ripe?
If your peaches are hard, try submerging them in warm water for 10 minutes to gently speed up the ripening process. Alternatively, you can sauté them in a bit of butter before adding them to the dough for enhanced flavor. -
How can I store leftovers?
Scones are best enjoyed fresh, but you can store leftovers in an airtight container at room temperature for up to two days. Reheat gently in the oven to bring back their warmth!
Nutritional Info
While these peach scones are not a health food, they’re a delightful indulgence! For those keeping an eye on nutrition, each scone (without any toppings) contains approximately:
- Calories: 250
- Fat: 10g
- Carbohydrates: 38g
- Protein: 3g
- Sugar: 7g
Remember, everything in moderation! Enjoy these beauties as part of a balanced diet.
I hope you feel inspired to try these Peach Scones in your own kitchen! With every bite, you’ll experience a little piece of nostalgia, a bit of elegance, and a whole lot of love. Happy baking, my friends! Don’t forget to share your creations and savor the moments around your table.
Let’s make every meal a beautiful memory!
PrintPeach Scones

Delightful peach scones, perfect for brunch or tea time, infused with nostalgia and flavor.
- Prep Time: 15 minutes
- Cook Time: 20 minutes
- Total Time: 35 minutes
- Yield: 8 scones 1x
- Category: Snack
- Method: Baking
- Cuisine: American
- Diet: Vegetarian
Ingredients
- 2 cups all-purpose flour
- 1/2 cup sugar
- 1 tablespoon baking powder
- 1/2 teaspoon salt
- 1/2 cup unsalted butter, cold and cubed
- 1 cup fresh peaches, diced
- 1/2 cup heavy cream
- 1 teaspoon vanilla extract
- 1 egg
Instructions
- Preheat your oven to 400°F (200°C).
- Mix together the flour, sugar, baking powder, and salt in a large mixing bowl.
- Cut in the cold, cubed butter until it resembles coarse crumbs.
- Toss in the diced peaches gently.
- Combine the heavy cream, egg, and vanilla extract in another bowl.
- Pour the wet mixture into the dry ingredients and stir until just combined.
- Shape the dough into a circle about 1-inch thick and cut into 8 triangles.
- Prepare a baking sheet with parchment paper and place the scone triangles on it.
- Bake for about 15-20 minutes or until golden brown.
- Cool on a wire rack and serve warm.
Notes
These scones are best enjoyed warm. Serve with whipped cream or honey for an extra treat.
Nutrition
- Serving Size: 1 scone
- Calories: 250
- Sugar: 7g
- Sodium: 150mg
- Fat: 10g
- Saturated Fat: 6g
- Unsaturated Fat: 4g
- Trans Fat: 0g
- Carbohydrates: 38g
- Fiber: 1g
- Protein: 3g
- Cholesterol: 30mg
Keywords: peach scones, breakfast, brunch, baking, summer treats
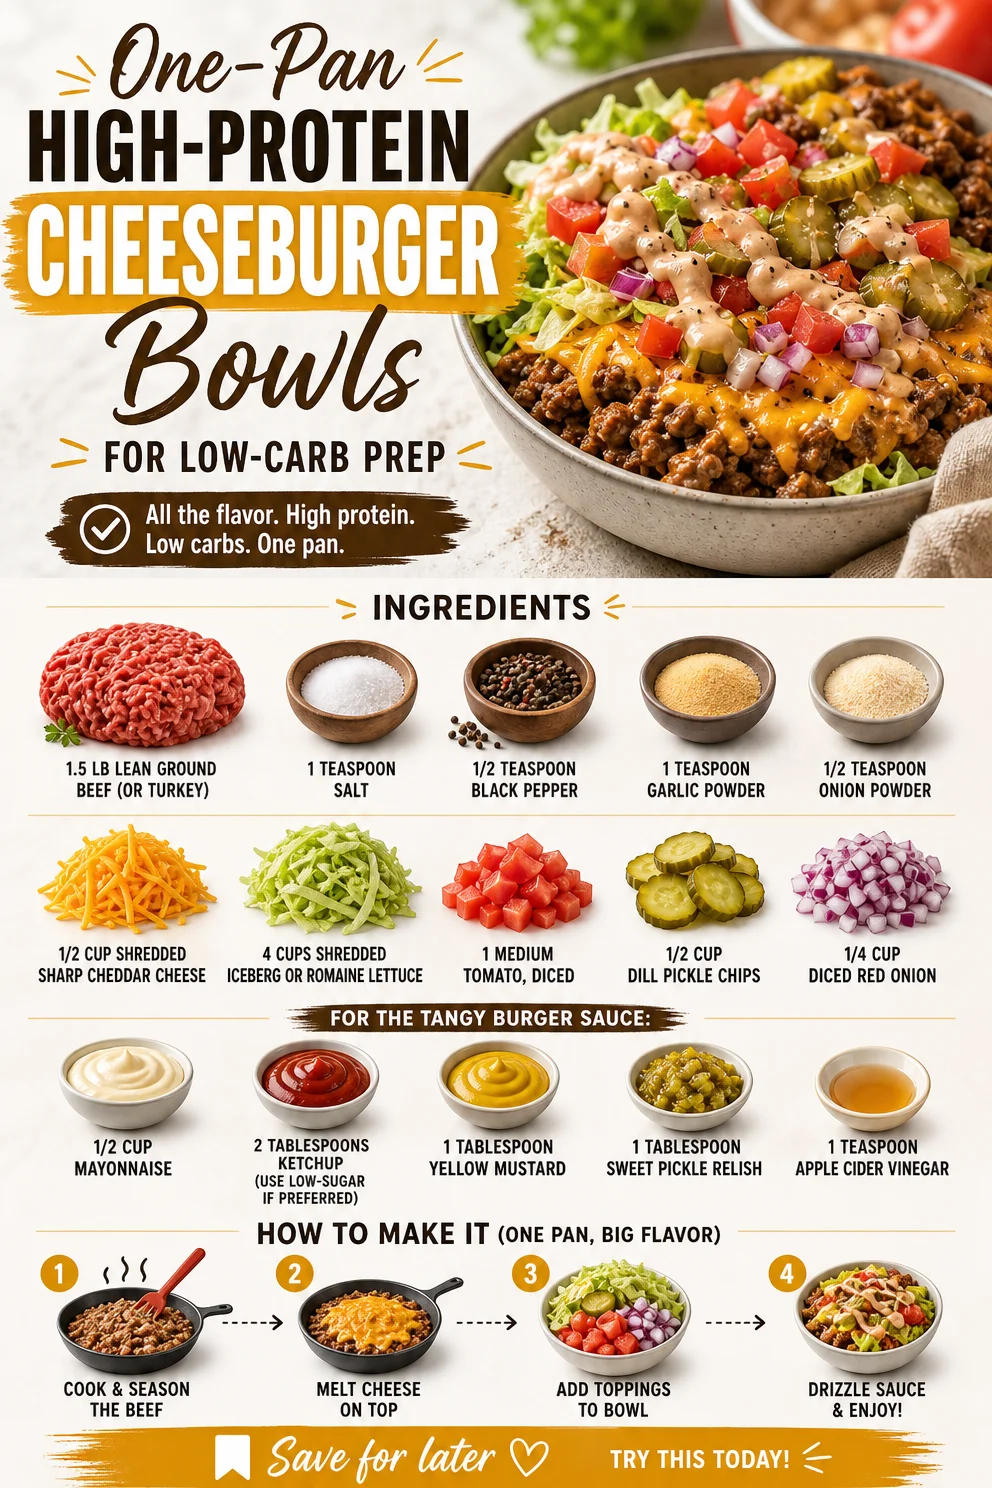
One-Pan High-Protein Cheeseburger Bowls for Low-Carb Prep
High-Protein Cheeseburger Bowls: Easy Low-Carb Meal Prep
Hello, lovely foodies! Today, we’re diving into a dish that’s not just satisfying but also packed with flavor: High-Protein Cheeseburger Bowls. For those looking to enjoy all the juicy, savory goodness of a cheeseburger while keeping things low-carb and meal-prep-friendly, this recipe is a fantastic option. Picture this: a delicious, hearty bowl filled with seasoned ground beef (or turkey, for my leaner friends), fresh veggies, melty cheese, and a tangy burger sauce that pulls it all together. It’s a simple, yet gourmet meal that makes weeknight dinners feel special and keeps you on track with your health goals.
As we journey into this recipe together, I’ll share playful insights, helpful tips, and even a bit of my kitchen history. Trust me; you’ll want to keep your apron on for this one! Let’s roll up those sleeves and create a dish that satisfies cravings and nourishes your body, one simple step at a time.
Personal Story
One of my fondest memories in the kitchen is a summer night spent grilling with my family. Picture this: the sun setting, a slight breeze rustling the leaves, and the smell of burgers cooking on the grill wafting through the air. My siblings and I would dart around, setting the picnic table, and waiting impatiently for our dad to deliver those delicious patties. As soon as the burgers hit the table, we’d pile them high with toppings, trying to outdo each other with extravagant creations.
This memory always brings a smile to my face—a reminder of laughter, love, and that joy of sharing good food with great company. Fast-forward to today, and while I’ve traded the grill for a stovetop on some days, the essence of those cheeseburgers remains. These High-Protein Cheeseburger Bowls embrace that nostalgic flavor with an elegant twist that fits my lifestyle today. Let’s capture that fun spirit of summer nights in a wholesome bowl that you can enjoy all week long!
Ingredients
Let’s get started on gathering our ingredients! I promise, they’re simple, and many are likely already hanging out in your pantry or fridge. Here’s what you’ll need:
-
1.5 lb Lean Ground Beef (or Ground Turkey):
- I prefer lean ground beef for a juicy burger flavor, but ground turkey is a fantastic low-fat substitute. Just make sure you season it well, as turkey can be a bit bland on its own.
-
1 teaspoon Salt:
- Essential for enhancing flavor! If you’re watching sodium, try using a low-sodium blend instead.
-
1/2 teaspoon Black Pepper:
- Freshly cracked pepper elevates the entire dish. Feel free to adjust according to your spice tolerance.
-
1 teaspoon Garlic Powder:
- A pantry staple that delivers that savory depth. If you have fresh garlic on hand, you can use 1-2 minced cloves for an extra kick.
-
1/2 teaspoon Onion Powder:
- Similar to garlic powder, it adds a warm flavor without the texture of fresh onions.
-
1/2 cup Shredded Sharp Cheddar Cheese:
- Cheddar adds creaminess and a bold flavor. You can swap it for pepper jack for some extra heat.
-
4 cups Shredded Iceberg or Romaine Lettuce:
- This is the base of your bowl! Feel free to mix in different greens, like spinach or kale, for variety and nutrition.
-
1 Medium Tomato, Diced:
- Freshness matters! You can swap for cherry tomatoes if you prefer those sweet little bites.
-
1/2 cup Dill Pickle Chips:
- The crunchiness and acidity of pickles complement the richness beautifully. If you’re not a fan, try sliced jalapeños for a spicy note instead.
-
1/4 cup Diced Red Onion:
- This adds a nice bite and color to your bowl. For a milder flavor, use green onions or omit altogether.
For the Tangy Burger Sauce:
-
1/2 cup Mayonnaise:
- A creamy base for your sauce. Try Greek yogurt for a lighter version!
-
2 tablespoons Ketchup:
- A touch of sweetness. You can opt for a sugar-free version to reduce the carbs.
-
1 tablespoon Yellow Mustard:
- Adds that classic tang! Feel free to use Dijon for a fancier twist.
-
1 tablespoon Sweet Pickle Relish:
- For that sweet-and-sour flavor! You can also use chopped olives for a different taste.
-
1 teaspoon Apple Cider Vinegar:
- A splash of acidity brightens the whole sauce. You can replace it with regular vinegar if that’s what you have.
Step-by-Step Instructions
Now that your ingredients are ready, let’s get cooking! Here’s how to make these delicious High-Protein Cheeseburger Bowls:
-
Cook the Ground Meat:
- In a large skillet over medium heat, add your ground beef or turkey. Use a wooden spoon to break it apart as it cooks. Cook until browned, about 8-10 minutes.
- Chef Tip: Ensure the pan is hot enough before adding the meat. It sears the surface, locking in flavors!
-
Season It Up:
- Once the meat is cooked through, sprinkle salt, black pepper, garlic powder, and onion powder over it. Stir well to distribute the spices evenly.
- Commentary: Trust me, the seasoning is key! Feel free to adjust based on your taste preferences.
-
Prepare the Burger Sauce:
- In a medium bowl, mix together the mayonnaise, ketchup, mustard, relish, and apple cider vinegar until smooth. Taste and adjust seasonings if needed.
- Chef Hack: If you’re a sauce lover, make a double batch! It’s also great on sandwiches or as a dip for veggies.
-
Assemble the Bowls:
- Start by placing a generous portion of shredded lettuce at the bottom of each bowl. Add a scoop of the seasoned meat on top.
- Plating Tip: You can layer it strategically for a beautiful presentation—lettuce on the bottom, meat in the middle, and topping at the end!
-
Add Fresh Toppings:
- Scatter diced tomatoes, dill pickle chips, and red onion over the meat. Top it all with shredded cheddar cheese.
- Chef Insight: If you’re using hot meat, the cheese will melt slightly, making it extra tasty!
-
Drizzle the Sauce:
- Spoon the tangy burger sauce over the cheese and toppings. Don’t be shy—this sauce packs the flavor!
- Presentation Note: Drizzle it artistically for that extra touch of elegance!
-
Serve and Enjoy:
- Dig in while it’s warm! These bowls can be enjoyed right away, but they also store beautifully for meal prep throughout the week.
- Final Tip: If you’re meal prepping, keep the lettuce separate until serving to prevent wilting.
Serving Suggestions
When it comes to serving these High-Protein Cheeseburger Bowls, keep it casual yet elevated. Dish out generous portions in wide bowls to encourage everyone to dig in! You can garnish with fresh herbs like parsley or chives for an added pop of color and flavor. If you’re feeling fancy, serve with a side of roasted veggies or zucchini fries for that classic diner experience. Enjoy it with a sparkling drink or a refreshing iced tea for that perfect meal vibe.
Recipe Variations
Get creative with your High-Protein Cheeseburger Bowls! Here are some fun twists you can try:
- Spicy Kick: Add sliced jalapeños or a sprinkle of crushed red pepper flakes for heat.
- Southwest Style: Toss in black beans, corn, and avocado for a southwestern flair.
- Mediterranean Twist: Swap the beef for lamb, add feta cheese, olives, and a drizzle of tzatziki for a Greek-inspired bowl.
- Cauliflower Substitute: For a low-carb spin, replace the lettuce with cauliflower rice.
- Vegan Option: Use lentils or mushrooms as your base, and swap the mayo for a vegan alternative.
Chef’s Notes
As I reflect on how this recipe evolved, it’s amusing to recognize how many interpretations it’s taken over the years. Initially inspired by those summer burger nights, I wanted to create something that felt indulgent yet healthy. Since then, I’ve played with flavors, textures, and ingredients, making it a staple in my kitchen. One memorable dinner, I mistakenly added way too much garlic powder, and the family joke became my “garlic cheeseburger bowls.” The laughter shared over food is what keeps me cooking and experimenting in the kitchen!
FAQs and Troubleshooting
Q: Can I make this in advance for meal prep?
A: Absolutely! These bowls store well in individual containers. Just keep the lettuce separate until you’re ready to eat to keep it fresh. They last for about 3-4 days in the fridge!
Q: What if I don’t have certain ingredients?
A: No worries! Feel free to swap out ingredients based on what you have. Use different greens, cheeses, or proteins; adapt it to your taste!
Q: Is this recipe family-friendly?
A: Yes! Kids love the handheld nature of burger bowls, and you can let them customize their toppings for extra fun.
Q: How can I reduce the fat content?
A: Opt for ground turkey or extra-lean ground beef. You can also reduce or omit the cheese and use a lighter sauce!
Nutritional Info
(Nutritional info is optional and based on specific serving sizes. Consider including it for audience specificity.)
Enjoy the journey of cooking these High-Protein Cheeseburger Bowls! It’s all about savoring the flavors, making memories, and gathering around the table. Happy cooking, my friends! Let’s create something timeless together at Ivory Apron.
PrintHigh-Protein Cheeseburger Bowls
Enjoy all the juicy goodness of a cheeseburger in a low-carb bowl packed with seasoned meat, fresh veggies, and a tangy sauce.
- Prep Time: 15 minutes
- Cook Time: 30 minutes
- Total Time: 45 minutes
- Yield: 4 servings 1x
- Category: Main Course
- Method: Stovetop
- Cuisine: American
- Diet: Low-Carb
Ingredients
- 1.5 lb Lean Ground Beef (or Ground Turkey)
- 1 teaspoon Salt
- 1/2 teaspoon Black Pepper
- 1 teaspoon Garlic Powder
- 1/2 teaspoon Onion Powder
- 1/2 cup Shredded Sharp Cheddar Cheese
- 4 cups Shredded Iceberg or Romaine Lettuce
- 1 Medium Tomato, Diced
- 1/2 cup Dill Pickle Chips
- 1/4 cup Diced Red Onion
- 1/2 cup Mayonnaise
- 2 tablespoons Ketchup
- 1 tablespoon Yellow Mustard
- 1 tablespoon Sweet Pickle Relish
- 1 teaspoon Apple Cider Vinegar
Instructions
- Cook the ground meat in a large skillet over medium heat for about 8-10 minutes until browned.
- Season the meat with salt, pepper, garlic powder, and onion powder.
- Prepare the burger sauce by mixing mayonnaise, ketchup, mustard, relish, and vinegar until smooth.
- Assemble the bowls with a base of shredded lettuce, then add the seasoned meat.
- Add fresh toppings: diced tomatoes, dill pickles, and red onion, followed by shredded cheese.
- Drizzle the tangy burger sauce over the top.
- Serve warm and enjoy!
Notes
For meal prep, store the lettuce separately until serving to keep it fresh.
Nutrition
- Serving Size: 1 bowl
- Calories: 450
- Sugar: 3g
- Sodium: 600mg
- Fat: 25g
- Saturated Fat: 10g
- Unsaturated Fat: 10g
- Trans Fat: 0g
- Carbohydrates: 15g
- Fiber: 3g
- Protein: 35g
- Cholesterol: 90mg
Keywords: cheeseburger bowls, meal prep, low-carb, healthy dinner, savory