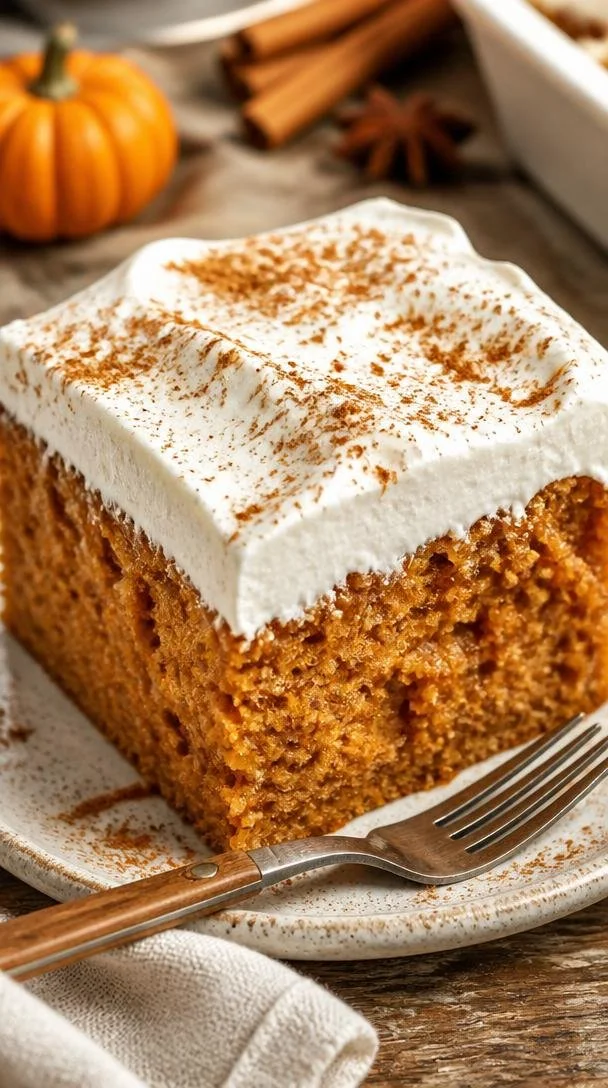
Minute Pumpkin Spice Poke Cake: Cozy Fall Dessert
Pumpkin Spice Poke Cake – Easy and Delicious Recipe
Introduction
Hello, my lovely foodies! With the air becoming crisp and cozy sweaters making their much-awaited appearance, it’s officially fall—a season that stirs up warm memories and a craving for everything pumpkin. You might have guessed it already; today, we are diving into the world of delightful desserts with my favorite Pumpkin Spice Poke Cake! This recipe combines all the warm, inviting flavors of pumpkin spice with a moist, decadent cake that literally begs to be slathered with cream cheese frosting.
Now, let me start by telling you why this cake holds a special place in my heart. Imagine a bustling kitchen filled with laughter, the sweet scent of cinnamon wafting through the air, and the excitement of a family gathering for the first autumn dinner. That’s how I discovered the glory that is the Pumpkin Spice Poke Cake! This cake not only dazzles the taste buds but also serves as a delicious centerpiece for any fall gathering. It’s big, it’s bold, and it’s begging to be devoured!
What I love about this poke cake is how easy it is to make, yet it feels fancy enough to serve at a holiday gathering or a cozy dinner party. Picture yourself tieing on that ivory apron, pouring a little something sparkling for your guests, and lifting the mood with this delicious delight. Are you ready? Let’s roll up our sleeves and get started on this fabulous fall dessert!
Personal Story
Ah, the memories attached to this beautiful cake are quite sweet. I recall one particular fall evening when I decided to host an impromptu dinner party for my friends. The leaves outside were a vibrant tapestry of orange, red, and yellow, and as I polished the dining table, my mind was racing with ideas. What dish could reflect the essence of fall?
After a brief moment of pondering the traditional pumpkin pie, an idea struck me—why not create a cake that embodies all that warm, spiced goodness but with a twist? That’s when the Pumpkin Spice Poke Cake was born! I whipped up the batter, plunged holes into the warm cake, and let the luscious cream soak in like a warm hug. As I served the cake, I watched as my friends’ faces lit up with joy. That moment was the perfect reminder of how food has the power to bring people together and create memories, one delicious bite at a time.
Ingredients
Here’s what you’ll need to create this scrumptious Pumpkin Spice Poke Cake:
-
1 box spice cake mix (or homemade spice cake)
Spice cake mix is packed with the warm flavors of cinnamon, nutmeg, and allspice. If you’re feeling adventurous, you can make your own spice cake from scratch! -
1 can (15 oz) pumpkin puree
Pumpkin puree gives the cake a rich flavor and moist texture. Be sure to avoid pumpkin pie filling, as it contains added sugars and spices. -
1 cup water
Water helps create the perfect batter consistency. You can substitute it with milk for an even richer flavor. -
1/2 cup vegetable oil
This ingredient adds moisture. You can use melted coconut oil or melted butter as a substitution for added flavor. -
4 large eggs
Eggs provide structure and help bind the ingredients together. For an egg-free option, try using unsweetened applesauce (1/4 cup per egg). -
1 cup sweetened condensed milk
This is what makes this cake a poke cake! This milk adds sweetness and richness. If you’re looking for a lighter option, you can try evaporated milk, but the texture may vary slightly. -
1 ½ cups cream cheese frosting
Cream cheese frosting is the crowning glory of this cake. You can use store-bought or whip up your favorite homemade version! -
1 tsp cinnamon (for garnish)
To sprinkle on top for a lovely finishing touch. You can also use pumpkin pie spice for an extra flavor boost.
Step-by-Step Instructions
Now, let’s get into the nitty-gritty of making this delightful dessert! Follow along with these steps, and I promise you’ll be a pumpkin spice pro in no time!
-
Preheat Your Oven
Start by preheating your oven to 350°F (175°C). This step is crucial for baking perfection because a hot oven helps the cake rise beautifully. -
Prepare Your Pan
Grease and flour a 9×13-inch baking dish. You want your cake to slide out easily when it’s time to serve. You can also line with parchment paper for easy removal. -
Mix Your Ingredients
In a large mixing bowl, combine the spice cake mix, pumpkin puree, water, vegetable oil, and eggs. Gently blend until moistened; then mix on medium speed for about 2 minutes. Pro tip: making sure not to over mix will help keep your cake light and fluffy! -
Pour the Batter
Pour the batter into your prepared baking dish, spreading it evenly with a spatula. Pop it into the preheated oven and bake for 25-30 minutes. You’ll notice that delicious aroma filling your kitchen in no time! -
Check for Doneness
To ensure your cake is perfectly baked, insert a toothpick into the center. If it comes out clean or with just a few moist crumbs, your dessert is ready to be pulled from the oven! -
Poke It
Once your cake has cooled for about 10-15 minutes, take a wooden skewer or the handle of a wooden spoon, and poke holes all over the cake. This is where the magic happens—the holes will allow the sweetened condensed milk to seep beautifully into the cake. -
Pour the Sweetened Condensed Milk
Drizzle the sweetened condensed milk evenly over the cake. Don’t be shy here! Allow it to soak in for at least 30 minutes. This soaking time is what makes this poke cake so uniquely moist and flavorful. -
Frosting Time
After the cake has soaked up all that condensed milk goodness, it’s time to frost! Spread the cream cheese frosting over the top evenly. You can use a knife or a spatula for this step. I like to add a little swirl for visual flair! -
Garnish Your Creation
Finish things off with a light sprinkle of cinnamon on top of the frosting. Just enough to dazzle! -
Chill Out
For an even more heavenly experience, place your cake in the fridge for an hour before serving. This gives the frosting a chance to firm up and the flavors to meld.
Congratulations, you’ve created a Pumpkin Spice Poke Cake that’s as stunning as it is scrumptious!
Serving Suggestions
When it comes to serving this delightful treat, simplicity is key. I love to present slices on rustic wooden platters with a sprinkle of cinnamon around the edges for an elegant touch. A dollop of whipped cream alongside each slice, or an optional drizzle of caramel sauce, will add an extra layer of indulgence. This cake is best enjoyed with a cup of hot coffee or spiced cider, bringing a cozy and inviting vibe to your table.
Recipe Variations
Feeling adventurous? Here are a few alternatives to shake things up!
- Add Chocolate Chips: Fold in 1 cup of mini chocolate chips into the batter for a decadent surprise.
- Nutty Crunch: Include ½ cup chopped walnuts or pecans in the frosting for added texture and flavor.
- Maple Syrup: Swap the sweetened condensed milk for maple syrup for a delightful twist on sweetness.
- Gluten-Free Option: Use a gluten-free spice cake mix for a gluten-free version of this delicious dessert!
- Dairy-Free Delight: Use coconut cream for the frosting and almond milk in the cake mix for a delightful dairy-free alternative.
Chef’s Notes
Over the years, this Pumpkin Spice Poke Cake has become a staple at my fall gatherings, and it never fails to impress! I initially started experimenting with different ingredients and techniques, and what I love is how easily this recipe evolves. Sometimes I play around with frosting flavors, like adding orange zest or spices to enhance that fall vibe. The best part is that no matter how you tweak it, the essence of this cake—the warm spices and luscious texture—remains delightful.
And let me tell you about the time I forgot to poke holes in the cake. Oh boy! It was like serving a beautiful, but dry cake! Don’t make the same mistake! Remember, poking those holes is what makes this cake a showstopper.
FAQs and Troubleshooting
Q: My cake came out dry. What did I do wrong?
A: Overbaking is usually the culprit. Make sure to check for doneness with a toothpick a few minutes before the timer goes off.
Q: Can I use a different frosting?
A: Absolutely! While cream cheese frosting pairs beautifully with pumpkin spice, you could try whipped cream, chocolate frosting, or even a simple glaze. Just keep that flavor balance in mind!
Q: How do I store leftovers?
A: If there are any leftovers, store them in an airtight container in the fridge for up to 4 days. You can serve it chilled straight from the fridge, or warm it up for a few seconds in the microwave.
Q: Can I freeze this cake?
A: Yes, you can freeze the unfrosted cake for up to 3 months. Just make sure to wrap it tightly in plastic wrap.
Nutritional Info (optional)
For those of you who like to keep track, the estimated nutritional information per serving (1 slice) is approximately:
- Calories: 350
- Total Fat: 16g
- Saturated Fat: 6g
- Cholesterol: 70mg
- Sodium: 300mg
- Carbohydrates: 49g
- Fiber: 1.5g
- Sugars: 30g
- Protein: 4g
Let’s embrace the warmth of fall together through this delicious Pumpkin Spice Poke Cake! I can’t wait for you to try it, share your experiences, and create new memories around your own beautiful table. Remember, cooking is all about intention and love, so don’t shy away from making every moment special. Happy baking!
PrintPumpkin Spice Poke Cake
A moist and decadent pumpkin spice poke cake soaked in sweetened condensed milk and topped with cream cheese frosting, perfect for fall gatherings.
- Prep Time: 15 minutes
- Cook Time: 30 minutes
- Total Time: 45 minutes
- Yield: 12 servings 1x
- Category: Dessert
- Method: Baking
- Cuisine: American
- Diet: Vegetarian
Ingredients
- 1 box spice cake mix
- 1 can (15 oz) pumpkin puree
- 1 cup water
- 1/2 cup vegetable oil
- 4 large eggs
- 1 cup sweetened condensed milk
- 1 ½ cups cream cheese frosting
- 1 tsp cinnamon (for garnish)
Instructions
- Preheat your oven to 350°F (175°C).
- Prepare a 9×13-inch baking dish by greasing and flouring it.
- Mix the spice cake mix, pumpkin puree, water, vegetable oil, and eggs in a large mixing bowl until moistened; then mix on medium speed for about 2 minutes.
- Pour the batter into your prepared baking dish, spreading it evenly.
- Bake for 25-30 minutes until a toothpick comes out clean.
- Poke holes in the cake with a wooden skewer after cooling for 10-15 minutes.
- Pour sweetened condensed milk evenly over the cake and let it soak for at least 30 minutes.
- Frost the top with cream cheese frosting.
- Garnish with a sprinkle of cinnamon.
- Chill in the fridge for an hour before serving.
Notes
For a lighter option, consider using evaporated milk. Variations include adding chocolate chips or swapping sweetened condensed milk for maple syrup.
Nutrition
- Serving Size: 1 slice
- Calories: 350
- Sugar: 30g
- Sodium: 300mg
- Fat: 16g
- Saturated Fat: 6g
- Unsaturated Fat: 8g
- Trans Fat: 0g
- Carbohydrates: 49g
- Fiber: 1.5g
- Protein: 4g
- Cholesterol: 70mg
Keywords: pumpkin spice, poke cake, fall dessert, cream cheese frosting, autumn recipe
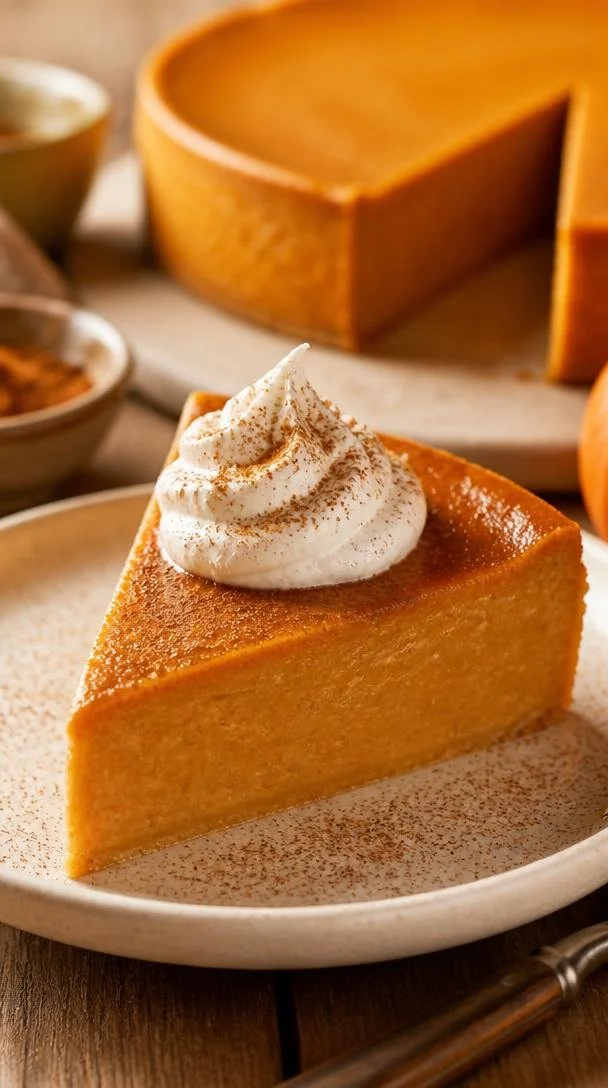
Ingredient No-Bake Crustless Pumpkin Pie (Seasonal)
Crustless Pumpkin Pie: A Celebration of Flavor and Simplicity
Hello, my lovely foodies! 🧡 If you’re anything like me, the fall season sparks an undeniable craving for warm, comforting flavors, and what embodies this cozy vibe better than pumpkin pie? Today, I’m thrilled to share my version of a crustless pumpkin pie that’s not only easy to make but also lets the delightful pumpkin flavor shine through without any fuss.
Now, don’t get me wrong—I love a good pie crust. But sometimes, life gets busy, and a crustless creation can save time without skimping on flavor. This recipe is perfect for those moments, reminding us that sometimes simplicity is the key to success.
A Slice of Nostalgia
As a kid, I can still picture my grandmother in her bright yellow kitchen, whipping up her signature pumpkin pie every Thanksgiving. The smell of spices wafting through the air was our invitation to gather around the table. I remember sneaking bites of the filling before it even hit the oven. It was creamy, sweet, and had just the right amount of spice—perfection in a bite!
I remember asking her how she made it, and she smiled, her eyes twinkling as she said, “It’s all about the pumpkins, darling.” That moment stuck with me, and it ignited my curiosity about cooking. Today, I hope to take you back to that feeling of warmth and nostalgia with this crustless version, where we focus on what matters most—the flavor!
Ingredients
Here’s what you’ll need to create this dreamy crustless pumpkin pie. Let’s take a closer look at our star players:
-
1 can (15 oz) pumpkin puree
Pumpkin puree is the heart of this dish. It brings that warm, earthy flavor we love. If you want to go fancy, you can roast and puree your own pumpkins, but canned works just as well—trust me! -
1 cup evaporated milk
This adds a creamy texture without the excess fat of heavy cream. Whole milk can be a substitute if necessary; just know you might lose a bit of that richness. -
3/4 cup sugar
Sweetness is essential, but feel free to reduce this a tad or use maple syrup or honey for a natural alternative! -
3 large eggs
Eggs help bind everything together and give the pie a fluffy texture. If you’re looking for an egg-free version, consider substituting with flax eggs (3 tablespoons water mixed with 1 tablespoon flaxseed meal = 1 egg). -
1 teaspoon vanilla extract
Vanilla enhances the overall flavor, making it even more delightful. If you’re feeling adventurous, try almond extract for a unique twist. -
1 teaspoon ground cinnamon
Cinnamon is the classic spice for pumpkin pie, adding warmth and sweetness. You can also use freshly grated nutmeg if you have it on hand for an extra kick! -
1/2 teaspoon ground ginger
Ginger offers a lovely warmth. If you prefer more zing, fresh ginger can also be an invigorating substitute—just grate a little in! -
1/4 teaspoon ground nutmeg
This spice truly elevates the flavor profile. Don’t skip it! If you’re a nutmeg lover, a bit more won’t hurt! -
1/2 teaspoon salt
Salt balances the sweetness and enhances the flavors. A touch of sea salt can add a delightful contrast!
Step-by-Step Instructions
Ready to create some kitchen magic? Let’s dive right into the step-by-step process of bringing this crustless pumpkin pie to life!
-
Preheat your oven: Start by preheating your oven to 350°F (175°C). This is crucial because a properly preheated oven ensures even baking. Nobody wants a soggy pie!
-
Mix the base ingredients: In a large mixing bowl, combine your canned pumpkin puree, evaporated milk, and sugar. Use a whisk to blend everything together until smooth. Pro tip: If you want a super creamy texture, you can use a hand mixer for this step!
-
Add the eggs: Crack in your three large eggs and whisk again until fully incorporated. Eggs are essential for giving your pie that fluffy, custard-like texture. If your batter seems a bit thick at this point, don’t worry—it’s supposed to be!
-
Spice it up: Time to incorporate those spices! Add in the vanilla extract, ground cinnamon, ground ginger, ground nutmeg, and salt. Whisk vigorously for about a minute to ensure that the spices are evenly distributed. Smelling that aromatic blend yet? I absolutely love this part!
-
Prepare the baking dish: Lightly grease a pie dish (or an 8-inch square baking dish, if you prefer). I often sprinkle a bit of cinnamon and sugar on the greased surface for an extra flavor boost and a delightful caramelization.
-
Pour the batter: Pour your pumpkin mixture into the prepared dish. Make sure to evenly distribute it; a well-centered pie will bake more evenly.
-
Bake it: Pop it in the preheated oven and bake for 45-50 minutes. You’ll know it’s ready when the edges are set and the center has a slight jiggle (think of it as the pie’s little dance!).
-
Let it cool: Once baked, let your pie cool at room temperature. This step is essential for it to set up properly. It’ll also allow all those beautiful flavors to meld together.
-
Chill it: After cooling on the counter for about an hour, place it in the refrigerator to chill. Serve it cold for that classic pie experience!
Serving Suggestions
When it comes to serving, a simple yet elegant presentation goes a long way! Slice your pie into generous wedges and serve it on a beautiful plate. A dollop of freshly whipped cream or a scoop of vanilla ice cream on top can add that finishing touch, making it feel extra special. Drizzle with caramel sauce or sprinkle some crushed pecans for an elegant twist—but let’s be real, that creamy pumpkin filling packs all the flavor you need!
Recipe Variations
If you’re feeling adventurous and want to jazz up this crustless pumpkin pie, here are a few variations to consider:
- Chocolate swirl: Add melted chocolate to half of the batter before pouring it into the dish for a rich twist.
- Maple pecan topping: Stir in chopped pecans and a little maple syrup into the mix for a nutty sweetness.
- Dairy-free: Substitute the evaporated milk with coconut milk for a tropical flair.
- Spiced chai: Add chai spice or more ginger and cinnamon for a warm, spiced flavor.
- Pumpkin spice latte: Incorporate some brewed coffee for an exciting coffee-flavored version!
Chef’s Notes
This crustless pumpkin pie has been a cherished recipe over the years, evolving with my tastes and cooking style. I’ve played with the spices, tried different type of sweeteners, and even experimented with various cooking methods. But the essence remains the same—creating something that warms the heart and invites others to gather.
Funny story—one Thanksgiving, I decided to impress my friends by making two versions: one traditional crust pie and this crustless beauty. Let’s just say the crustless pie vanished before the traditional one! It’s a testament that honesty in flavor doesn’t need an elaborate presentation.
FAQs and Troubleshooting
1. Why is my pie too watery?
If your pie has excess moisture, it might be due to the pumpkin puree. Make sure to use good-quality pumpkin puree that’s thick, or try draining it a bit before mixing.
2. How do I know when it’s done?
The center should be set, with a slight jiggle (not slump) when tapped. If it seems too wobbly, bake for a few more minutes.
3. Can I freeze this pie?
Absolutely! Allow the pie to cool completely and then wrap it tightly with plastic wrap, followed by aluminum foil. Thaw it in the refrigerator before serving.
4. Can I use fresh pumpkin instead of canned?
Yes! Just make sure to cook and puree the pumpkin first. This may require more effort, but fresh adds a lovely depth of flavor!
Nutritional Info
While I typically don’t dive deep into nutritional info here, a slice of this crustless pumpkin pie offers a comforting balance of flavors, making it a delightful treat without the heaviness of traditional pies.
Now, dear friends, it’s time to put on your aprons and whip up this delightful crustless pumpkin pie! I can’t wait to hear how it turns out for you! Remember, cooking is an adventure – enjoy every moment of it! 🧡
PrintCrustless Pumpkin Pie
A simple, yet delicious crustless pumpkin pie that highlights the warm flavors of fall.
- Prep Time: 15 minutes
- Cook Time: 50 minutes
- Total Time: 65 minutes
- Yield: 8 servings 1x
- Category: Dessert
- Method: Baking
- Cuisine: American
- Diet: Vegetarian
Ingredients
- 1 can (15 oz) pumpkin puree
- 1 cup evaporated milk
- 3/4 cup sugar
- 3 large eggs
- 1 teaspoon vanilla extract
- 1 teaspoon ground cinnamon
- 1/2 teaspoon ground ginger
- 1/4 teaspoon ground nutmeg
- 1/2 teaspoon salt
Instructions
- Preheat your oven to 350°F (175°C).
- Mix the canned pumpkin puree, evaporated milk, and sugar in a large mixing bowl until smooth.
- Add in the three large eggs and whisk until fully incorporated.
- Spice it up by incorporating the vanilla extract, ground cinnamon, ground ginger, ground nutmeg, and salt. Whisk vigorously.
- Prepare a pie dish by lightly greasing it.
- Pour the pumpkin mixture into the prepared dish.
- Bake for 45-50 minutes until the edges are set and the center jiggles slightly.
- Let it cool at room temperature before chilling it in the refrigerator.
Notes
Serve with whipped cream or ice cream on top for an extra special touch.
Nutrition
- Serving Size: 1 slice
- Calories: 300
- Sugar: 25g
- Sodium: 200mg
- Fat: 10g
- Saturated Fat: 4g
- Unsaturated Fat: 6g
- Trans Fat: 0g
- Carbohydrates: 40g
- Fiber: 2g
- Protein: 6g
- Cholesterol: 80mg
Keywords: pumpkin pie, crustless pie, fall dessert, Thanksgiving dessert
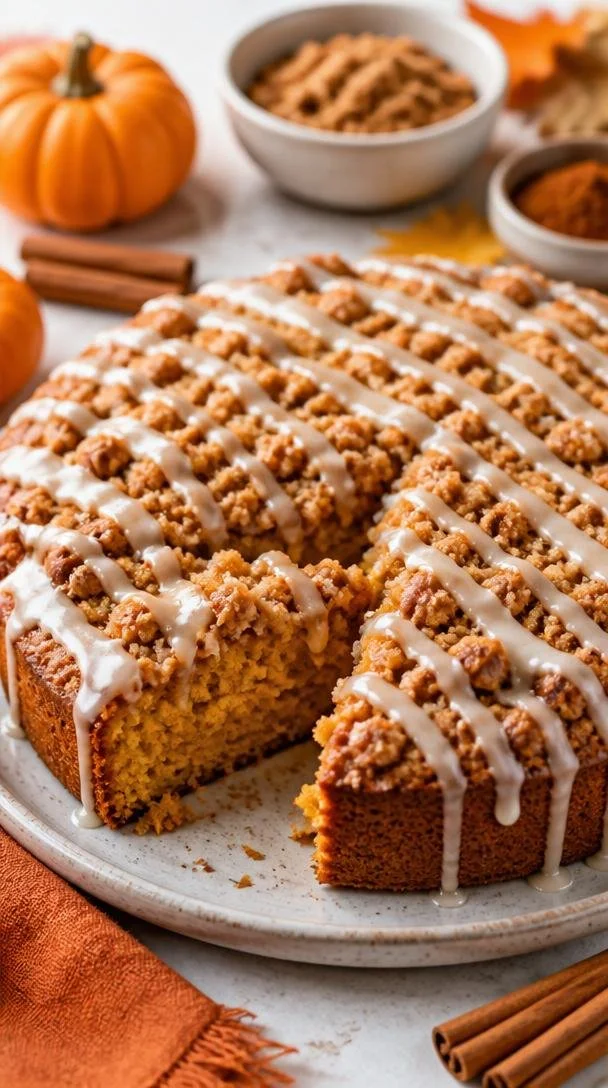
Minute Cinnamon Streusel Pumpkin Coffee Cake (Fall Recipe)
The Perfect Cinnamon Streusel Pumpkin Coffee Cake Recipe
Hello, lovely foodies! Welcome back to my kitchen! Today, I’m excited to share one of my all-time favorite recipes that perfectly marries fall flavors with that comforting, coffee shop vibe: Cinnamon Streusel Pumpkin Coffee Cake. Imagine the aroma of warm spices wafting through your home, wrapping you in a cozy hug while you enjoy a slice with your morning coffee or an afternoon tea. Sounds delightful, doesn’t it?
This cake is not only delicious but also so simple to make. It’s perfect for weekend brunches, holiday gatherings, or just because you’re craving something sweet and spicy. Trust me, this dreamy creation is going to be a staple in your recipe collection!
A Slice of Nostalgia
Let me take you back to my childhood for a moment—a lovely autumn day in my grandmother’s kitchen. I can still picture her standing at the counter, her hands dusted with flour, as she brought to life her famous pumpkin coffee cake. The aroma of cinnamon and nutmeg dancing in the air made the whole house feel like a warm embrace.
I remember sneaking spoonfuls of her special streusel topping, feeling like a little chef in training. We’d sit at her cozy kitchen table, mugs of hot apple cider beside us, and savor each slice of that fluffy cake topped with a crumbly, sweet topping. Those moments inspired my love of baking and cooking as an expression of love and connection, and they still resonate deeply with me today.
This Cinnamon Streusel Pumpkin Coffee Cake is a modernization of that cherished memory, adjusted with my little chef hacks to make it easy for you to recreate that same warmth and joy!
Ingredients
Here’s what you’ll need to whip up this heavenly cake:
-
2 cups all-purpose flour: This is the foundation of our cake. You can swap it for a gluten-free blend if you need a gluten-free alternative.
-
1 cup granulated sugar: For sweetness! You can reduce this to ¾ cup if you prefer a less sweet cake or use coconut sugar for a slightly different flavor.
-
½ cup brown sugar: Adds moisture and a hint of caramel flavor. Light or dark brown sugar works here—use dark for a deeper taste.
-
1 tablespoon baking powder: The magic that makes our cake rise and feel fluffy. Don’t skip this one!
-
½ teaspoon salt: Balances the sweetness. It’s a tiny but mighty ingredient.
-
1 teaspoon ground cinnamon: A warm spice that complements pumpkin wonderfully.
-
½ teaspoon pumpkin spice: This blend usually includes nutmeg and ginger, enhancing the fall flavors. If you don’t have it, a pinch more cinnamon can do the trick!
-
½ cup unsalted butter, softened: Adds richness to the cake. You can use vegan butter or applesauce for a lighter option.
-
1 cup canned pumpkin puree: Make sure it’s pure pumpkin and not pumpkin pie filling, which has added sugars and spices.
-
2 large eggs: Binds everything together and adds moisture.
-
1 teaspoon vanilla extract: Elevates the flavor.
-
½ cup milk: Use whole milk, almond milk, or any milk of your choice.
-
½ cup chopped nuts (optional): Pecans or walnuts add a lovely crunch if you like a bit of texture.
For the Streusel Topping:
-
½ cup flour: To give it a crumbly texture. Substitute with oats for a different twist!
-
½ cup brown sugar: Sweetens and enhances the streusel.
-
¼ cup unsalted butter: Rub into the dry ingredients for that perfect crumb.
-
1 teaspoon cinnamon: A dash of spice to tie it all together.
For the Icing:
-
Powdered sugar: To give your cake a sweet finish.
-
Milk (to desired consistency): Adjust the amount for your preferred thickness.
Step-by-Step Instructions
Alright, foodies, let’s dive into the cooking magic!
-
Preheat Your Oven: First, set your oven to 350°F (175°C) to get it nice and toasty while we mix our ingredients.
-
Grease Your Pan: Grab a 9×13-inch baking pan and grease it lightly with butter or non-stick spray. You want your cake to come out easily!
-
Mix the Dry Ingredients: In a large bowl, whisk together the flour, granulated sugar, brown sugar, baking powder, salt, cinnamon, and pumpkin spice. This ensures that everything is well-distributed and avoids clumps.
-
Cream the Butter: In another bowl, cream the softened butter until it’s light and fluffy. This usually takes about 2-3 minutes. It’s one of those tasks where patience pays off!
-
Incorporate the Wet Ingredients: Add the pumpkin puree, eggs, vanilla extract, and milk to the creamed butter. Mix well until everything is combined. The batter should be smooth and creamy—feel free to lick the spoon!
-
Combine the Mixtures: Gradually add the dry mixture to the wet mixture. Stir until just combined; don’t overmix! We want a soft batter that will produce a tender cake.
-
Prepare the Streusel: In a small bowl, combine flour, brown sugar, cinnamon, and cold butter. Use your fingers or a fork to mix until crumbly. This streusel topping is going to make our cake sing!
-
Pour the Batter into the Pan: Spread the batter evenly into the greased baking pan. It’s time for that gooey goodness!
-
Add the Streusel: Sprinkle the streusel mix generously over the top of the batter. Don’t be shy—this is where the magic happens!
-
Bake Away: Place your cake in the preheated oven and bake for 30-35 minutes. The cake is ready when a toothpick inserted into the center comes out clean. Your kitchen will smell divine, and you’ll be eagerly waiting!
-
Icing Time!: While the cake is cooling, make your icing by whisking together powdered sugar and milk until you reach your desired consistency. Drizzle it over the cooled cake for the final touch!
Serving Suggestions
When it comes to serving this beauty, cut it into squares and serve it warm with a dollop of whipped cream or a scoop of vanilla ice cream on the side. For an extra flair, I love garnishing it with a sprinkle of cinnamon or some edible flowers. Set it on a pretty cake stand, and you’ve got an Instagram-worthy dessert that will wow your guests!
Recipe Variations
-
Chocolate Chip Twist: Add ½ cup of chocolate chips to the batter for a decadent version that chocolate lovers will adore!
-
Apple-Pumpkin Fusion: Fold in some finely chopped apples along with the pumpkin for an extra layer of flavor and texture.
-
Gluten-Free Edition: Use a 1:1 gluten-free flour blend instead of all-purpose flour for a gluten-free version that’s just as delicious.
-
Dairy-Free Delight: Swap out the milk for almond or coconut milk, and use plant-based butter to create a completely dairy-free cake.
-
Nut-Free Option: Skip the nuts altogether or substitute with a seed like pumpkin seeds for that crunchy element without the allergens.
Chef’s Notes
Cooking and baking always come with a side of fun and sometimes mishaps! One time I forgot to add the baking powder, and while the cake was still edible, it turned out more like a flatbread. It’s a great reminder to read the recipe twice (or thrice!) before diving in! Over the years, I have tweaked this original recipe, ensuring it’s simple yet still delivers that “wow” factor. It’s truly a beautiful blend of nostalgia and creativity.
FAQs and Troubleshooting
-
Why is my cake dense?
- A common culprit can be overmixing the batter. Mix just until combined, and ensure your baking powder is fresh!
-
How do I store leftovers?
- This cake keeps well wrapped in foil at room temperature for up to 2-3 days, or you can refrigerate it for up to a week. Reheat in the microwave for a cozy treat!
-
Can I freeze the coffee cake?
- Absolutely! Wrap slices tightly in plastic wrap and foil before freezing. Thaw overnight in the refrigerator when you’re ready to enjoy!
-
What if I don’t have pumpkin puree?
- You can substitute with applesauce, or homemade puréed sweet potatoes can also work in a pinch.
Nutritional Info (Optional)
While I believe in enjoying all foods in moderation, here’s a breakdown of the estimated nutritional info per serving:
- Calories: 250
- Fat: 10g
- Carbohydrates: 38g
- Protein: 3g
- Fiber: 1g
- Sugar: 18g
With these numbers in mind, you can enjoy your slice guilt-free!
So there you have it! A warming, aromatic, and absolutely delicious recipe for Cinnamon Streusel Pumpkin Coffee Cake. Remember, the joy of cooking comes not just from eating but from sharing these moments with loved ones. I hope this recipe brings you as much joy as it does for me. Tie on that ivory apron, and let’s bake something timeless together! Happy cooking!
PrintCinnamon Streusel Pumpkin Coffee Cake

A delightful coffee cake that combines the flavors of pumpkin and cinnamon, topped with a crumbly streusel for a perfect treat.
- Prep Time: 15 minutes
- Cook Time: 35 minutes
- Total Time: 50 minutes
- Yield: 12 servings 1x
- Category: Dessert
- Method: Baking
- Cuisine: American
- Diet: Vegetarian
Ingredients
- 2 cups all-purpose flour
- 1 cup granulated sugar
- ½ cup brown sugar
- 1 tablespoon baking powder
- ½ teaspoon salt
- 1 teaspoon ground cinnamon
- ½ teaspoon pumpkin spice
- ½ cup unsalted butter, softened
- 1 cup canned pumpkin puree
- 2 large eggs
- 1 teaspoon vanilla extract
- ½ cup milk
- ½ cup chopped nuts (optional)
- For the Streusel Topping:
- ½ cup flour
- ½ cup brown sugar
- ¼ cup unsalted butter
- 1 teaspoon cinnamon
- For the Icing:
- Powdered sugar
- Milk (to desired consistency)
Instructions
- Preheat your oven to 350°F (175°C).
- Grease a 9×13-inch baking pan with butter or non-stick spray.
- Mix the dry ingredients in a large bowl: flour, granulated sugar, brown sugar, baking powder, salt, cinnamon, and pumpkin spice.
- Cream the softened butter in another bowl until light and fluffy.
- Incorporate the pumpkin puree, eggs, vanilla extract, and milk into the creamed butter, mixing until smooth.
- Combine the dry mixture with the wet mixture until just combined.
- Prepare the streusel by mixing flour, brown sugar, cinnamon, and cold butter until crumbly.
- Pour the batter into the greased pan and spread evenly.
- Add the streusel topping generously over the cake batter.
- Bake for 30-35 minutes or until a toothpick inserted comes out clean.
- Icing time: whisk powdered sugar and milk until desired consistency and drizzle over the cooled cake.
Notes
Serve warm with whipped cream or ice cream for an extra treat. Customize with chocolate chips or apples for variations.
Nutrition
- Serving Size: 1 slice
- Calories: 250
- Sugar: 18g
- Sodium: 200mg
- Fat: 10g
- Saturated Fat: 6g
- Unsaturated Fat: 3g
- Trans Fat: 0g
- Carbohydrates: 38g
- Fiber: 1g
- Protein: 3g
- Cholesterol: 40mg
Keywords: coffee cake, pumpkin, cinnamon, desserts, fall flavors

One-Pan Pumpkin Crunch Cake: Easy Fall Dessert in 30 Minutes
Pumpkin Crunch Cake: A Cozy Slice of Fall Happiness
Hello, friends! Today, we’re diving into the warm, nostalgic world of Pumpkin Crunch Cake. If you’re like me, the scent of pumpkin and spices takes you back to those crisp autumn days, the kind best spent nestled in a cozy kitchen, surrounded by family and friends. What’s more delightful than a cake that looks inviting, tastes divine, and doesn’t require a culinary degree to whip up? A cake that brings everyone together is surely what we need as the leaves begin to change and the air turns a little cooler. So, let’s roll up our sleeves, tie on our aprons, and create something truly special!
Personal Story
One of my fondest memories featuring pumpkin crunch cake is from a family gathering several years back. My aunt, armed with her trusty recipe cards, decided it was high time to host a pumpkin-themed dinner. As we sipped warm apple cider, the tantalizing smell of spices wafted through the house. When it came time for dessert, she unveiled her Pumpkin Crunch Cake, and the room erupted in exclamations of delight. The golden crust on top gave way to a rich, moist, pumpkin center, topped off with a dollop of whipped cream—pure perfection. I remember stealing a slice while no one was looking and savoring that moment alone in the kitchen. It was pure bliss! Today, I get to share this lovely recipe with all of you, so let’s make some memory-worthy moments of our own.
Ingredients
Here’s what you’ll need to make this scrumptious Pumpkin Crunch Cake:
-
1 box yellow cake mix
This is your base! The cake mix provides a great foundation for a moist and tender crumb. You can substitute it with a homemade cake mix if you’re feeling adventurous! -
1 can (15 oz) pumpkin puree
Pumpkin is the star here! It gives the cake that earthy flavor and a beautiful orange hue. You could use sweet potato puree as a substitute for a unique twist. -
1 can (12 oz) evaporated milk
Evaporated milk enriches the cake, making it creamy and luscious. If you’re looking for a lighter version, use almond milk or coconut milk instead. -
3 large eggs
Eggs add structure and richness to the cake. You can substitute with ground flaxseed mixed with water for a vegan alternative. -
1 cup sugar
Sugar sweetens your cake, but you can swap half for brown sugar for a deeper flavor, or use coconut sugar for a healthier alternative. -
1 tsp cinnamon
This spice is essential for that comforting, warm flavor. Feel free to experiment with a pumpkin pie spice mix for even more complexity. -
1/2 tsp nutmeg
Nutmeg adds a lovely aromatic note that pairs beautifully with pumpkin. If you don’t have nutmeg, a pinch of allspice can work wonders in a pinch. -
1/2 cup butter, melted
Butter brings richness to the cake while helping it stay moist. If you’re aiming for a dairy-free option, use melted coconut oil instead! -
1 cup chopped pecans or walnuts
Nuts give delightful crunch and added flavor. If you have an almond allergy, feel free to leave them out or replace them with pumpkin seeds. -
Whipped cream for serving (optional)
A dollop of whipped cream is the perfect (and tasty) finishing touch for this cake. You can use cool whip or a vegan whipped topping to make it accessible for everyone!
Step-by-Step Instructions
Now that we have our ingredients ready, let’s dive into making this delightful Pumpkin Crunch Cake!
-
Preheat your oven!
Start by preheating your oven to 350°F (175°C). Preheating is crucial to ensure your cake bakes evenly, giving it that lovely rise. It’s also a great time to line your baking dish with parchment paper or grease it lightly—you want that cake to come out beautifully! -
Mix the pumpkin goodness!
In a large mixing bowl, combine the pumpkin puree, evaporated milk, eggs, sugar, cinnamon, nutmeg, and melted butter. Grab your whisk and beat everything together until smooth. Keep that energy up; we’re building flavor here! -
Incorporate the cake mix!
Next, gently fold in the yellow cake mix. Don’t overmix; just blend until there are no dry patches left. The batter will be a little thick—that’s what we want. -
Nuts about it!
Now, fold in the chopped pecans or walnuts. This step adds texture and a delightful crunch, which provides contrast to the creamy pumpkin filling. -
Pour and distribute!
Pour the batter into your prepared baking dish (about 9×13 works perfectly). Use a spatula to spread the batter evenly and get those nuts nestled in there! -
Time to bake!
Pop the dish in the preheated oven and let it bake for about 40-50 minutes. You’ll know it’s done when you see a golden crust forming on top and a toothpick inserted in the center comes out clean (or with just a few moist crumbs). -
Cool it down!
Once baked, remove your cake from the oven and allow it to cool for a bit in the pan. This is crucial so that it can firm up a bit and become easier to slice. About 15-20 minutes should do! -
Serve with flair!
Cut yourself a generous slice, add a dollop of whipped cream, and maybe even sprinkle a pinch of cinnamon on top for that finishing touch. You’re ready to impress your guests (or yourself)!
Serving Suggestions
Place your Pumpkin Crunch Cake on a rustic wooden board or a fragrant autumn-themed platter. It looks stunning with a bit of whipped cream on top and a sprinkle of chopped pecans on the side. Don’t forget to serve it with a hot cup of apple cider or coffee to elevate your dessert experience!
Recipe Variations
-
Vegan Twist: Substitute eggs with flaxseed, use almond milk instead of evaporated milk, and replace the butter with coconut oil for a yummy vegan version.
-
Chocolate Lovers: Mix in some chocolate chips into the batter for a delightful contrast of flavors.
-
Spicy Kick: Add a teaspoon of ginger or a pinch of cayenne for a subtle spicy warmth.
-
Fruitful Addition: Toss in some fresh cranberries or chocolate chunks for a pop of color and flavor!
Chef’s Notes
I’ve been tinkering with this recipe for years, and honestly, it continues to evolve with every dinner party I host. I remember one Thanksgiving when my cousin thought he could outsmart me and decided to use pumpkin pie spice instead of individual spices—let’s just say it took a minute for everyone to figure out what was different! Every mishap in the kitchen is a learning experience that makes us better cooks, right? So embrace your unique kitchen adventures—who knows what delicious mistakes might come out of them!
FAQs and Troubleshooting
1. Why did my cake sink in the middle?
Overmixing your batter or not allowing it to bake long enough can cause it to sink. Remember the gentle folding motion and rely on that toothpick to check for doneness.
2. Can I make this cake ahead of time?
Absolutely! You can make it a day in advance. Just store it covered at room temperature, and it’ll taste even more flavorful the next day!
3. My cake is too dense. What went wrong?
This can happen if the cake mix isn’t blended well or the eggs weren’t beaten enough. Make sure to mix until everything is just combined.
4. Can I freeze this cake?
Yes! Allow the cake to cool completely, then wrap it tightly in plastic wrap and foil. It can stay frozen for up to three months. Thaw it overnight in the fridge before serving.
Nutritional Info
For those curious about nutrition, each slice of Pumpkin Crunch Cake (based on 12 slices) has approximately:
- Calories: 250
- Protein: 5g
- Fat: 10g
- Carbohydrates: 38g
- Fiber: 1g
Well, there you have it! A friendly take on making a timeless Pumpkin Crunch Cake that has the power to spark joy in every bite. I hope this warms your kitchen and fills your hearts with happiness. Remember, cooking should be a delightful experience—so let’s enjoy making this beautiful cake together! Happy baking, and as always—let’s set the table!
PrintPumpkin Crunch Cake

A cozy and delightful dessert perfect for fall, combining the warmth of pumpkin spices with a crunchy topping.
- Prep Time: 15 minutes
- Cook Time: 50 minutes
- Total Time: 65 minutes
- Yield: 12 servings 1x
- Category: Dessert
- Method: Baking
- Cuisine: American
- Diet: Vegetarian
Ingredients
- 1 box yellow cake mix
- 1 can (15 oz) pumpkin puree
- 1 can (12 oz) evaporated milk
- 3 large eggs
- 1 cup sugar
- 1 tsp cinnamon
- 1/2 tsp nutmeg
- 1/2 cup butter, melted
- 1 cup chopped pecans or walnuts
- Whipped cream for serving (optional)
Instructions
- Preheat your oven to 350°F (175°C).
- Mix the pumpkin puree, evaporated milk, eggs, sugar, cinnamon, nutmeg, and melted butter in a large mixing bowl until smooth.
- Incorporate the yellow cake mix gently until no dry patches remain.
- Fold in the chopped pecans or walnuts.
- Pour the batter into a prepared baking dish (about 9×13).
- Bake for about 40-50 minutes until golden and a toothpick comes out clean.
- Cool the cake in the pan for 15-20 minutes.
- Serve with whipped cream and a sprinkle of cinnamon.
Notes
This cake can be made a day in advance for enhanced flavor. For a vegan version, substitute the eggs with flaxseed and the dairy products accordingly.
Nutrition
- Serving Size: 1 slice
- Calories: 250
- Sugar: 20g
- Sodium: 150mg
- Fat: 10g
- Saturated Fat: 5g
- Unsaturated Fat: 4g
- Trans Fat: 0g
- Carbohydrates: 38g
- Fiber: 1g
- Protein: 5g
- Cholesterol: 50mg
Keywords: Pumpkin, Cake, Fall Dessert, Cozy, Spices
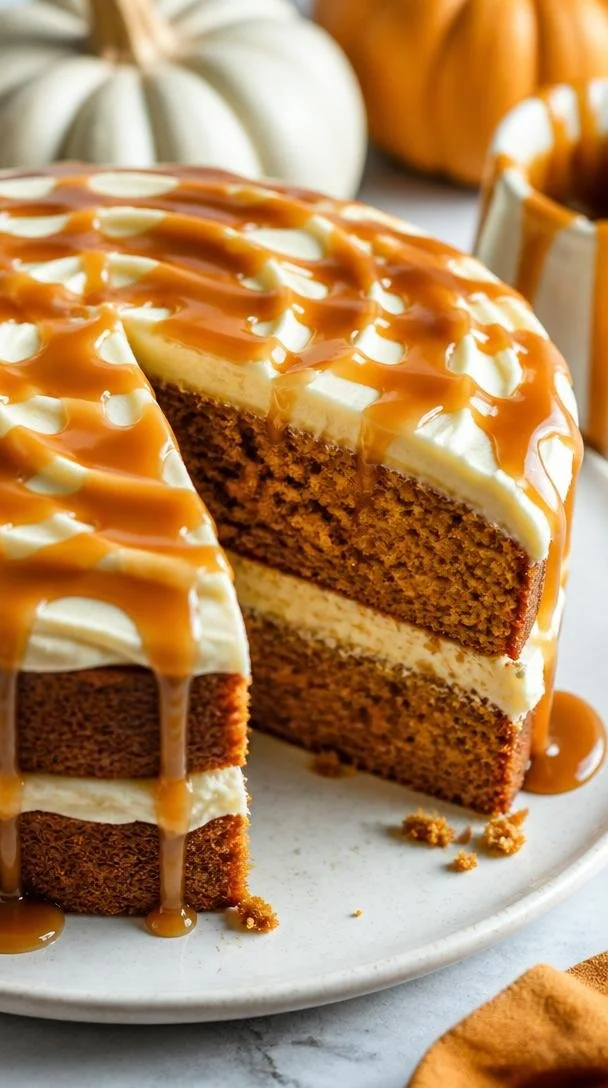
Pumpkin Cake with Caramel Cream Cheese Frosting
Fall in Love with Pumpkin Cake: A Sweet Slice of Heaven
Hello fellow food enthusiasts! There’s something undeniably magical about the fall season, especially when it comes to cozy baking. And what better way to embrace those autumn vibes than with a slice of warm, spiced pumpkin cake topped with luscious caramel cream cheese frosting? Whether you’re gathering around the table with friends or simply indulging in a sweet moment with a good book, this cake brings a delightful warmth to your home.
Pumpkin desserts hold a special place in my heart. They remind me of golden afternoons spent in the kitchen with my grandmother, who had a way of turning simple ingredients into beloved treats. I can still hear her laughter echoing as she would mix the dough, teaching me the art of patience while waiting for the cakes to bake. That intoxicating aroma of spices wafting through the house is something I never want to forget—a memory beautifully encapsulated in this pumpkin cake recipe.
I love sharing this treat during family gatherings, where the cake often takes center stage, adorned with its creamy frosting that glimmers with sweet caramel drizzle. It’s a crowd-pleaser, and I promise it will become a staple in your home too. So, grab that apron and let’s create something incredibly delicious together!
A Sweet Memory
As a child, I would often help my grandmother prepare for the holiday dinners. She had an entire ritual: selecting the freshest ingredients at the market, setting them out on her kitchen counter, and inviting me to join her. One year, she decided to experiment with pumpkin, inspired by a recent trip to a local pumpkin patch. I still remember how we giggled as we scooped out the pumpkin puree, our hands messily covered in orange goodness.
That year, her pumpkin cake stole the show. Family members would rave about it for weeks, and I found joy not just in eating the cake but in the smiles it created. Those exhilarating moments in the kitchen ignited my passion for cooking—a passion that has only grown over time. Now, I want to inspire you to create your own joyful memories with this scrumptious pumpkin cake recipe!
Ingredients
Gather these fabulous ingredients to make your pumpkin cake truly delicious:
- 2 cups all-purpose flour: The backbone of your cake. For a gluten-free option, substitute with a 1:1 gluten-free flour blend.
- 2 cups sugar: Sweetness personified! You can use brown sugar for deeper flavor or coconut sugar for a healthier alternative.
- 1 cup vegetable oil: Makes your cake moist and fluffy. If you prefer, you can substitute with melted coconut oil or applesauce for a lighter option.
- 4 large eggs: Provide structure and richness. For an egg-free version, try using flax eggs (1 tbsp flaxseed meal + 2.5 tbsp water per egg).
- 1 can (15 oz) pumpkin puree: The star of the show! Make sure it’s pure pumpkin and not pumpkin pie filling, which has added sugar and spices.
- 1 tsp baking powder: Helps the cake rise. You can use baking soda (1/4 tsp more) if that’s all you have.
- 1 tsp baking soda: A leavening agent that works wonders in achieving that light texture.
- 1 tsp cinnamon: Such a warm spice that gives this cake its lovely aroma! Feel free to toss in some pumpkin pie spice if you have it on hand.
- 1/2 tsp nutmeg: Adds a warm, nutty flavor; fresh nutmeg is always a fantastic choice if you have it.
- 1/2 tsp salt: Balances the sweetness and enhances all the flavors.
- 1/2 cup cream cheese, softened: The creamy base for our frosting. Neufchâtel cheese is a lighter alternative.
- 1/2 cup salted caramel sauce: This adds richness and sweetness to the frosting. You can make your own or purchase it from the store.
- 2 cups powdered sugar: Sweetness overload! You can reduce this if you’d like a less sweet frosting.
- 1 tsp vanilla extract: Brings everything together harmoniously. Use pure vanilla for a richer flavor.
Step-by-Step Instructions
Now, let’s dive into the glorious world of baking this pumpkin cake!
-
Preheat Your Oven: Begin by throwing your oven into action and preheating it to 350°F (175°C). This ensures that your cake starts to bake evenly right from the moment you pour in the batter.
-
Prepare Your Pans: Lightly grease and flour two 9-inch round cake pans. You can also line the bottoms with parchment paper if you want an extra smooth release. Trust me, you don’t want to lose any of this scrumptious cake!
-
Mix the Dry Ingredients: In a medium bowl, whisk together your flour, baking powder, baking soda, cinnamon, nutmeg, and salt. This step is essential for ensuring that your leavening agents are evenly distributed— a little chef hack to avoid any surprises later on!
-
Whisk the Wet Ingredients: In a large mixing bowl, combine the sugar and vegetable oil, and whisk until they become cohesive and slightly lightened in color. Next, add in the eggs, one at a time, beating well after each addition for that extra fluff!
-
Pumpkin Time: Stir in the pumpkin puree and vanilla extract, combining them gently until you have a smooth mixture. It’s like a warm hug in a bowl!
-
Combine the Mixtures: Gradually fold the dry ingredients into the wet mixture, being careful not to overmix. You want to be gentle here! Overmixing can lead to a dense cake, and nobody wants that.
-
Pour and Bake: Pour your batter evenly into your prepared pans, spreading it out to ensure that it bakes uniformly. Pop them in the oven and let them bake for about 25 to 30 minutes, or until a toothpick inserted in the center comes out clean. That aroma will start dancing around your kitchen in no time!
-
Cool the Cakes: Once baked, remove them from the oven and let them cool in the pans for about 10 minutes. Then, take them out and let them cool completely on a wire rack. Patience is key!
-
Whip Up the Frosting: In a mixing bowl, beat together the softened cream cheese, salted caramel sauce, and vanilla extract until it’s smooth and creamy. Gradually add the powdered sugar, mixing well until fluffy and dreamy.
-
Frost the Cake: Once your cakes are completely cool, place one layer on a serving platter. Spread a generous amount of frosting on top before adding the second layer. Finish with more frosting on top and let it drizzle down the sides. Trust me; it’s a sight to behold!
Serving Suggestions
For a beautiful presentation, serve the cake with a drizzle of leftover caramel sauce and a sprinkle of cinnamon on top. You can place a few pecans or walnuts around the base of the cake for added flavor and style. And don’t forget to brew a pot of warm spiced tea or coffee to accompany this delightful treat. Your guests will feel like royalty!
Recipe Variations
Feeling adventurous? Here are a few fun twists you can try:
- Spiced Nut Pumpkin Cake: Add chopped pecans or walnuts into the batter for an extra crunch.
- Chocolate Chip Version: Fold in a cup of semi-sweet chocolate chips for that luscious chocolate-pumpkin combo!
- Gluten-Free: Use a gluten-free flour blend to make this cake suitable for gluten-sensitive friends.
- Vegan Alteration: Substituting flax eggs and non-dairy cream cheese can easily make this a vegan dessert.
- Ginger Snap Kick: Pre-add minced crystallized ginger into the batter for a zesty kick!
Chef’s Notes
This pumpkin cake recipe has gone through some lovely transformations over the years. Originally, I used a boxed cake mix when I first started baking, but as my cooking journey flourished, I felt compelled to create something from scratch that connected with the warmth from my childhood.
One day, I decided to add caramel to the frosting—a kiss of sweetness that completed the cake perfectly! Funny enough, I once got a bit too generous with the frosting and ended up with a “caramel waterfall.” It’s one of my favorite kitchen mishaps and a reminder that perfection isn’t the goal—deliciousness is!
FAQs and Troubleshooting
1. My cake is too dense. What did I do wrong?
- This usually happens from overmixing the batter. Be gentle when folding the dry ingredients into the wet ingredients!
2. Can I use fresh pumpkin instead of canned?
- Absolutely! Just make sure to cook and puree it until smooth. It may require slightly more attention to achieve the right consistency compared to canned.
3. Why did my frosting turn out runny?
- If your frosting is too thin, try adding more powdered sugar to reach your desired consistency. You want it spreadable but not dripping off the cake.
4. How can I make this cake ahead of time?
- You can bake the cake layers ahead and freeze them. Just wrap them tightly in plastic wrap and store them in the freezer. Thaw them out and frost on the day you plan to serve.
Nutritional Info
While I don’t often focus heavily on nutritional content, this cake does yield about 12 servings with around 350 calories each, depending on generous frosting application. It’s all about balance, right? Enjoy a slice as a treat and savor the flavors!
So there you have it! A delectable pumpkin cake with caramel cream cheese frosting that promises not only to taste divine but to create lasting memories around your table. Remember, cooking is all about joy and connection—so let’s get baking and share those delicious moments! Happy baking, my friends!
PrintPumpkin Cake with Caramel Cream Cheese Frosting

Delightful pumpkin cake with spiced flavors, topped with rich caramel cream cheese frosting.
- Prep Time: 20 minutes
- Cook Time: 30 minutes
- Total Time: 50 minutes
- Yield: 12 servings 1x
- Category: Dessert
- Method: Baking
- Cuisine: American
- Diet: Vegetarian
Ingredients
- 2 cups all-purpose flour
- 2 cups sugar
- 1 cup vegetable oil
- 4 large eggs
- 1 can (15 oz) pumpkin puree
- 1 tsp baking powder
- 1 tsp baking soda
- 1 tsp cinnamon
- 1/2 tsp nutmeg
- 1/2 tsp salt
- 1/2 cup cream cheese, softened
- 1/2 cup salted caramel sauce
- 2 cups powdered sugar
- 1 tsp vanilla extract
Instructions
- Preheat your oven to 350°F (175°C).
- Prepare your pans by greasing and flouring two 9-inch round cake pans.
- Mix the dry ingredients: whisk together flour, baking powder, baking soda, cinnamon, nutmeg, and salt.
- Whisk the wet ingredients: combine sugar and vegetable oil, then add in the eggs, beating well.
- Stir in the pumpkin puree and vanilla extract until smooth.
- Combine the dry ingredients into the wet mixture, folding gently.
- Pour the batter into prepared pans and bake for 25 to 30 minutes.
- Cool the cakes in the pans for 10 minutes, then transfer to a wire rack.
- Whip up the frosting: beat cream cheese, salted caramel, and vanilla until smooth, then gradually add powdered sugar.
- Frost the cooled cakes, layering generously with frosting between and on top.
Notes
For best results, be gentle when mixing to avoid a dense cake. Feel free to add nuts or chocolate chips for variations.
Nutrition
- Serving Size: 1 slice
- Calories: 350
- Sugar: 35g
- Sodium: 450mg
- Fat: 15g
- Saturated Fat: 5g
- Unsaturated Fat: 8g
- Trans Fat: 0g
- Carbohydrates: 52g
- Fiber: 2g
- Protein: 5g
- Cholesterol: 30mg
Keywords: pumpkin cake, autumn dessert, caramel frosting
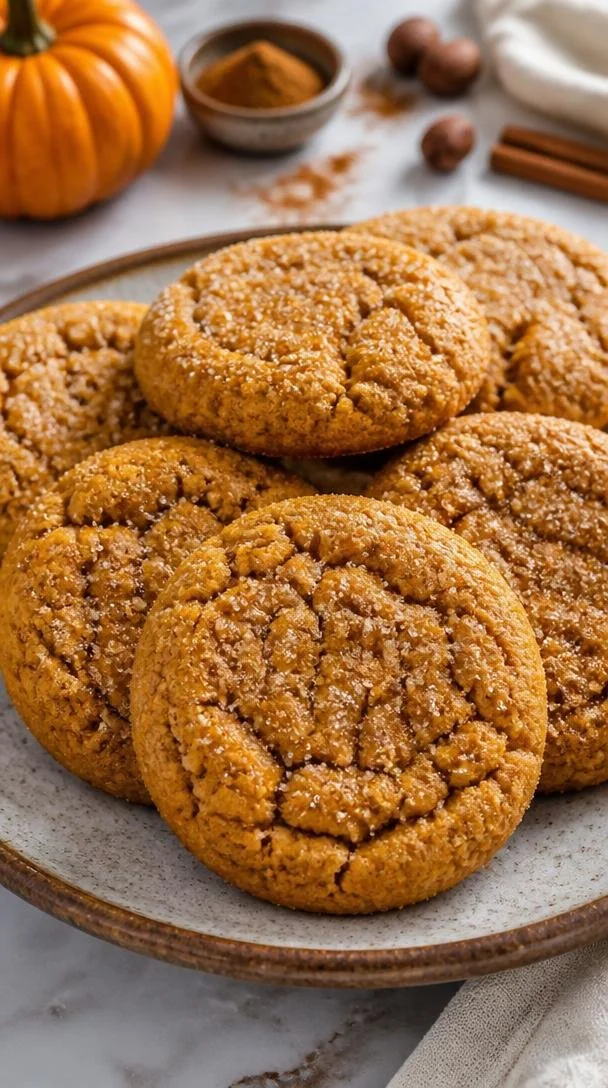
Easy One-Bowl Chewy Pumpkin Cookies in 25 Minutes Flat
Chewy Pumpkin Cookies: A Delicious Fall Treat
Welcome, food lovers! Today, we’re diving into the cozy world of baking with a recipe that brings a taste of autumn right into your kitchen: chewy pumpkin cookies. These delightful treats are perfect for crisp evenings when you want to enjoy something sweet that’s also a bit wholesome. Plus, they’re incredibly easy to whip up, making them a favorite around my table.
I remember the first time I tried a pumpkin cookie. It was at a friend’s autumn gathering, where the air was filled with the rich aroma of spices and baked goods. As soon as I took a bite, I was transported to a haven of fall flavors—the warm spices, the soft texture, and that subtly sweet pumpkin flavor all wrapped up in one cookie. It was love at first taste! Since then, I’ve perfected my chewy pumpkin cookie recipe, and I can’t wait to share it with you.
So, whether you’re cozying up at home, hosting a gathering, or just looking to satisfy a sweet tooth, let’s get started on these scrumptious chewy pumpkin cookies that will make your heart—and tummy—happy!
My Pumpkin Cookie Memory
One of my fondest memories is from a few years ago when I decided to host an impromptu pumpkin-themed gathering to celebrate the season. It was one of those crisp October days; the leaves were changing, and the sun was shining brightly. My friends and I gathered around the kitchen island, sipping spiced apple cider and sharing stories. The star of the show? My chewy pumpkin cookies, of course!
With laughter filling the room, we rolled out dough, sprinkled flour everywhere, and turned what could have been a stressful baking session into a joyful experience. When those cookies came out of the oven, we could hardly wait for them to cool! The sweet scent filled the house, and as we finally took our first bites, you could hear the “Mmm”s echoing through the room. Those cookies not only filled our stomachs but also created a warm atmosphere filled with connection and joy—reminding me that food truly brings people together.
Ingredients
Let’s gather our ingredients! Here’s what you’ll need for these gooey, chewy pumpkin cookies, along with some handy tips for each component:
-
1 cup pumpkin puree
(Canned or homemade, pumpkin puree is the star of the show. If you’re feeling adventurous, you can use butternut squash puree as a fantastic substitute!) -
1 cup brown sugar
(This adds moisture and rich flavor! For a lighter touch, you can swap half of this with coconut sugar or white sugar.) -
1/2 cup granulated sugar
(Gives just the right amount of sweetness without overpowering the pumpkin. Feel free to reduce this slightly for a less sweet cookie.) -
1/2 cup butter (softened)
(Butter contributes to that fabulous chewy texture. If you want to make it dairy-free, coconut oil or vegan butter works well!) -
1 egg
(This binds everything together. You can replace it with a flax egg for a vegan option: mix 1 tablespoon ground flaxseed with 2.5 tablespoons water and let it sit for a few minutes to thicken.) -
2 cups all-purpose flour
(Essential for structure! For a gluten-free version, feel free to use a 1:1 gluten-free flour blend.) -
1 teaspoon baking soda
(This helps the cookies rise and gives them a nice texture. Make sure it’s fresh for the best results!) -
1 teaspoon baking powder
(Works in conjunction with baking soda for extra fluffiness!) -
1 teaspoon pumpkin spice
(A blend of cinnamon, nutmeg, and clove that gives our cookies that wonderful autumn flavor. You can make your own mix too!) -
1/2 teaspoon salt
(Enhances all the flavors! Don’t skimp on this step.) -
1/4 cup granulated sugar (for topping)
(This gives the cookies a lovely sugary crust! You can opt for sparkling sugar for a little extra sparkle.)
Step-by-Step Instructions
Now that we have our ingredients ready, let’s get baking! Follow these steps carefully, and I promise you’ll have a batch of scrumptious pumpkin cookies in no time.
Step 1: Preheat Your Oven
First things first—let’s get the oven preheating! Set it to 350°F (175°C). This ensures our cookies bake evenly and come out perfectly chewy.
Step 2: Cream the Butter and Sugars
In a large mixing bowl, beat together the softened butter, brown sugar, and granulated sugar until the mixture is light and fluffy—about 2-3 minutes. Tip: Using a hand mixer or stand mixer can save you some elbow grease, but a good old wooden spoon works too!
Step 3: Add the Egg and Pumpkin
Next, crack in your egg and add the pumpkin puree, mixing until well combined. This is where the magic starts to happen. The pumpkin will add moisture and flavor, and your mix will have a beautiful orange hue. Chef’s Hack: For a hint of flavor, try adding a touch of vanilla extract to this mix!
Step 4: Dry Ingredients Unite
In another bowl, whisk together the all-purpose flour, baking soda, baking powder, pumpkin spice, and salt. This step ensures that all the leaveners and spices are evenly distributed throughout the flour. Tip: Sifting the flour can provide an even lighter cookie, but it’s not absolutely necessary.
Step 5: Combine Wet and Dry Ingredients
Slowly add the dry mixture to the pumpkin mixture in increments, gently folding until just combined. Pro Tip: Don’t overmix! We want those cookies to stay tender and chewy, and overworking the dough can lead to extra gluten formation.
Step 6: Scoop and Shape
Using a cookie scoop or a tablespoon, drop rounded mounds of dough onto a parchment-lined baking sheet, spacing them about 2 inches apart. This allows room for them to spread! If you want, you can slightly flatten the tops with your fingers for an even bake.
Step 7: Sugar Crust
Before popping them in the oven, sprinkle a little granulated sugar on top of each cookie. This not only gives them a lovely sweet crust but adds a festive touch. Remember to resist eating the dough—though it may be tempting!
Step 8: Bake
Bake your cookies in the preheated oven for 10-12 minutes or until they’re light golden around the edges but still soft in the center. Tip: They will continue to firm up as they cool, so don’t overbake!
Step 9: Cool and Enjoy!
Let the cookies cool on the baking sheet for about 5 minutes before transferring them to a wire rack to cool completely. This waiting period allows them to set while remaining soft and chewy. And now, patience is key, my friends!
Serving Suggestions
When you’re ready to serve, consider plating these cookies on a beautiful platter sprinkled with extra pumpkin spice or a drizzle of white chocolate for added flair. Pair them with a warm cup of spiced chai tea or a latte, and you’ll have an irresistible snack that’s perfect for sharing (if you’re feeling generous!).
Recipe Variations
Want to switch it up a bit? Here are a few ideas:
- Chocolate Chip Twist: Fold in a cup of chocolate chips for a classic combo!
- Nutty Delight: Add 1/2 cup of chopped walnuts or pecans for a crunchy texture.
- Gluten-Free: Use a gluten-free flour blend instead of all-purpose flour.
- Spiced Up: Increase the pumpkin spice to 1.5 teaspoons for an extra kick of flavor.
- Frosted Version: Top with a cream cheese frosting for a decadent dessert!
Chef’s Notes
Ah, these cookies have a special place in my heart! This recipe has evolved over time, adapted from my classic sugar cookie base to incorporate the deliciousness of pumpkin. I vividly remember my first attempt—I accidentally spilled too much pumpkin puree, and that batch turned out a bit too chewy for my liking. But guess what? They were still gobbled up by my friends! The lesson? Often, the best moments in the kitchen come from those happy accidents.
FAQs and Troubleshooting
1. Why are my cookies flat?
If your cookies spread too much, it could be due to too much butter or not enough flour. Always carefully measure your ingredients, and if your butter was too soft, try chilling the dough for 30 minutes before baking.
2. How do I store my pumpkin cookies?
These cookies can be stored in an airtight container at room temperature for up to a week. If you’d like them to last longer, freeze the baked cookies. Just be sure to let them cool completely before freezing and place parchment paper between layers.
3. Can I make these ahead of time?
Absolutely! You can whip up the dough ahead of time and refrigerate it for up to 3 days before baking. Alternatively, freeze the shaped cookie dough balls and bake them directly from the freezer—just add an extra minute or two to the baking time.
4. How do I know when they’re done?
Look for edges that are set and lightly golden; the centers will appear soft. Trust your instinct—it’s the best guide!
Nutritional Info
(For reference, here’s a high-level breakdown of the nutritional info per cookie if you make about 24 cookies—calories may vary.)
- Calories: 108
- Protein: 1.5g
- Fat: 4.5g
- Carbohydrates: 16g
- Fiber: 0.5g
- Sugar: 6g
And there you have it! Your guide to creating these delightful chewy pumpkin cookies. With a warm, inviting texture and a sprinkle of fall flavors, they’re bound to become a favorite in your baking repertoire. I can’t wait to hear about your own kitchen adventures and the wonderful moments these cookies help create. So, tie on your apron, grab that mixer, and let’s bake a batch together! Happy baking, friends!
PrintChewy Pumpkin Cookies

Delicious chewy pumpkin cookies that capture the essence of fall with warm spices and a soft texture.
- Prep Time: 15 minutes
- Cook Time: 12 minutes
- Total Time: 27 minutes
- Yield: 24 cookies 1x
- Category: Dessert
- Method: Baking
- Cuisine: American
- Diet: Vegetarian
Ingredients
- 1 cup pumpkin puree
- 1 cup brown sugar
- 1/2 cup granulated sugar
- 1/2 cup butter (softened)
- 1 egg
- 2 cups all-purpose flour
- 1 teaspoon baking soda
- 1 teaspoon baking powder
- 1 teaspoon pumpkin spice
- 1/2 teaspoon salt
- 1/4 cup granulated sugar (for topping)
Instructions
- Preheat your oven to 350°F (175°C).
- Cream the softened butter, brown sugar, and granulated sugar until light and fluffy.
- Add the egg and pumpkin puree, mixing until combined.
- Whisk together flour, baking soda, baking powder, pumpkin spice, and salt in another bowl.
- Combine the dry mixture with the pumpkin mixture until just mixed.
- Scoop rounded mounds of dough onto a parchment-lined baking sheet.
- Sprinkle granulated sugar on top of each cookie.
- Bake for 10-12 minutes until golden around the edges.
- Cool for 5 minutes on the baking sheet before transferring to a wire rack.
Notes
These cookies can be stored in an airtight container for up to a week. Dough can be refrigerated for up to 3 days or frozen for later use.
Nutrition
- Serving Size: 1 cookie
- Calories: 108
- Sugar: 6g
- Sodium: 200mg
- Fat: 4.5g
- Saturated Fat: 2.5g
- Unsaturated Fat: 2g
- Trans Fat: 0g
- Carbohydrates: 16g
- Fiber: 0.5g
- Protein: 1.5g
- Cholesterol: 30mg
Keywords: pumpkin cookies, fall cookies, chewy cookies, dessert, autumn treats
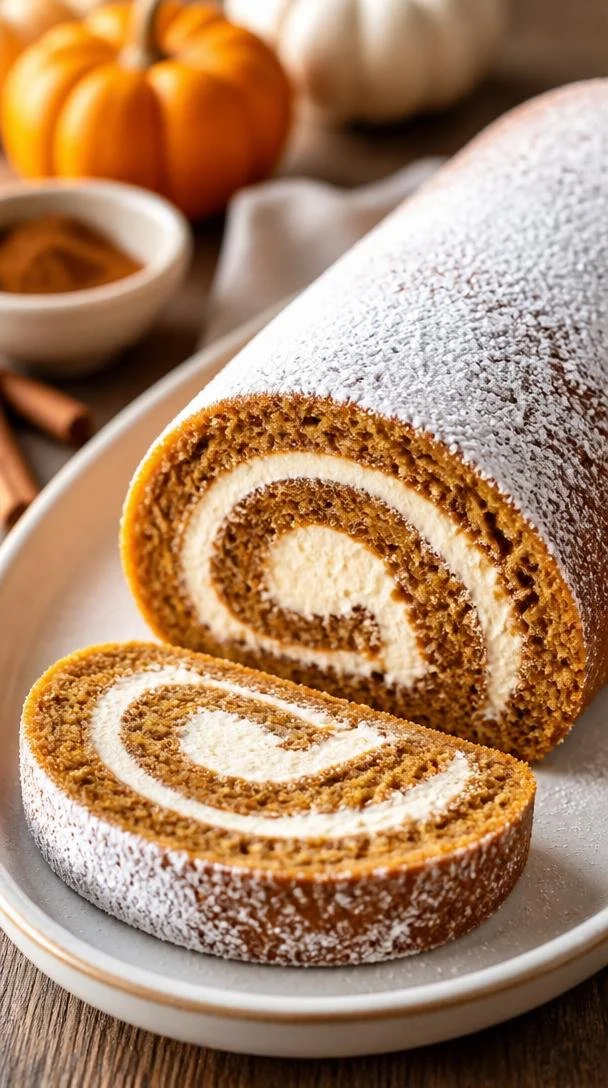
Beginner-Friendly From-Scratch Autumn Pumpkin Roll Recipe
The Classic Pumpkin Roll: A Slice of Fall Perfection
Hello and welcome back, my fellow food enthusiasts! As the leaves turn golden and a hint of chill fills the air, it’s time to whip up something truly special—a classic pumpkin roll! There’s something magical about the way pumpkin brings warmth and comfort to any gathering. If you’ve never made a pumpkin roll before, don’t worry! I’m here to guide you through this delightful treat that impresses without overwhelming.
Imagine serving a moist, spiced pumpkin cake, beautifully rolled with a creamy, tangy filling. It’s like autumn on a plate! This elegant dessert is perfect for everything from casual family dinners to festive holiday gatherings. No culinary degree? No problem! With just a little intention and great ingredients, you’ll soon have your own stunning pumpkin roll ready to impress your friends and family.
A Slice of Nostalgia
Before I dive into the nitty-gritty of this delicious recipe, let me take you back to one of my fondest memories associated with pumpkin rolls. It was a crisp November afternoon, and I had decided to host my first Thanksgiving dinner. The air was filled with the aroma of roasting turkey, stuffing, and simmering cranberry sauce.
But the real star of the show? The pumpkin roll, of course! My mom had gifted me her cherished recipe, wrapped in a handwritten note, adorned with flour smudges and scribbled tips. I remember nervously rolling the cake for the first time, worrying it would crack. To my surprise, it turned out beautifully! Everyone at the table was almost as impressed with my baking skills as they were with the flavor. As we savored each slice, laughter and warmth filled the room. That day solidified my love for baking and sparked my journey toward creating memorable meals for loved ones.
Now, I want to share this joy with you! So let’s roll up our sleeves and dive into the heart of this recipe.
Ingredients
Here’s what you’ll need to create your delicious pumpkin roll:
-
4 tablespoons powdered sugar
This sweetness will help prevent sticking and adds to the lovely finish! -
3/4 cup all-purpose flour (115g)
The foundation of our cake! If you’re gluten-free, feel free to use a gluten-free flour blend that measures cup-for-cup. -
1/2 teaspoon baking powder
This will give our pumpkin roll a little lift! -
1/2 teaspoon baking soda
Works in tandem with the baking powder for that perfect fluffy texture. -
1/2 teaspoon ground cinnamon
Cinnamon adds warmth and a touch of spice. -
1/2 teaspoon ground cloves
For a richer flavor profile—cloves bring that unmistakable fall essence. -
1/4 teaspoon salt
Just a pinch to balance out the sweetness. -
3 large eggs (room temperature)
Helps in creating the desired structure and moisture! -
1 cup granulated sugar (225g)
The primary source of sweetness in our cake! -
2/3 cup canned pumpkin (175g)
The star of the show! You can use homemade pumpkin puree if you have some on hand. -
8 ounces cream cheese (softened, 227g)
For that creamy filling that makes this roll simply irresistible. -
1 cup powdered sugar (125g)
Sweetness for the filling; it also blends nicely with cream cheese. -
6 tablespoons butter (softened, 84g)
Adds richness to the filling. -
1 teaspoon vanilla extract
Enhances all the flavors beautifully. -
2 tablespoons powdered sugar (for garnish, if desired)
Just a sprinkle for that elegant finish!
Step-by-Step Instructions
Ready to get baking? Let’s break it down step by step!
-
Preheat Your Oven
Preheat your oven to 375°F (190°C). Give your baking pan a little TLC by lining it with parchment paper, leaving an overhang to help you with the roll later on. It’ll make for easy lifting. -
Mix Dry Ingredients
In a medium bowl, whisk together the flour, baking powder, baking soda, ground cinnamon, ground cloves, and salt. This will ensure that everything is evenly distributed for a perfect bake! -
Beat Eggs and Sugar
In a large bowl, beat the eggs and granulated sugar together until it’s light and fluffy. This usually takes about 2-3 minutes either with a hand whisk or an electric mixer. The air you incorporate here will help the cake rise! -
Add Pumpkin
Stir in the canned pumpkin and mix gently. There’s something so satisfying about the vibrant color of pumpkin, isn’t there? -
Combine Dry and Wet Ingredients
Gradually add the dry ingredients into the wet mixture, folding them together until just combined. Be careful not to over-mix! You want to keep that beautiful light texture. -
Spread and Bake
Pour your batter onto the prepared baking pan, spreading it evenly. Bake for 13-15 minutes or until a toothpick inserted into the center comes out clean. Trust me, your kitchen will smell heavenly! -
Prepare for Rolling
When the cake is baked, remove it from the oven and let it cool for a couple of minutes. While it’s still warm, sprinkle a clean kitchen towel with powdered sugar and gently flip the cake onto it. Remove the parchment paper carefully. -
Roll it Up
Starting from one end, roll the cake (with the towel with it) tightly. This is important to help the cake hold its shape. Let it cool to room temperature in this rolled-up form—this is where the magic happens, my friends! -
Make the Cream Cheese Filling
In a bowl, beat together the softened cream cheese, butter, powdered sugar, and vanilla extract until it’s smooth and creamy. Taking a moment to taste this filling is totally acceptable! -
Unroll and Fill
Once the cake is cool, carefully unroll it. Spread the cream cheese mixture evenly over the cake, leaving a little room at the edges. It’ll feel indulgent, I promise! -
Roll it Back Up
Roll it back up, this time without the towel, and wrap it tightly in plastic wrap. Chill in the fridge for at least one hour—like a mini spa treatment for your pumpkin roll! -
Serve and Enjoy
When you’re ready to serve, dust the top with additional powdered sugar for a lovely finish. Slice it up, and watch those smiles bloom!
Serving Suggestions
When it comes to plating your pumpkin roll, simplicity is key. Place one beautiful slice on a plate, perhaps alongside a dollop of whipped cream or a scoop of vanilla ice cream. Drizzle with caramel sauce or sprinkle with crushed nuts for a little extra crunch. Feel free to get creative—after all, presentation matters!
Recipe Variations
Here are a few fun twists to make this pumpkin roll truly your own:
-
Spiced Nut Filling: Fold in some chopped pecans or walnuts into the cream cheese filling for an added crunch!
-
Chocolate Drizzle: Melt some chocolate and drizzle it over the top before serving for a chocolaty touch.
-
Maple Flavor: Swap out the vanilla extract for maple extract in your filling for a different sweet dimension.
-
Pumpkin Spice Lovers: Add an extra sprinkle of pumpkin spice to the batter for a bolder flavor!
-
Gluten-Free Option: Substitute an all-purpose gluten-free blend for the flour to make this recipe gluten-free.
Chef’s Notes
Oh, the memories this recipe has gifted me! Over the years, I’ve made many versions of this pumpkin roll—from mini rolls to double the layers—each with its own story. The first time I presented this glorious dessert, I was so nervous about it cracking. But it turns out that even if it cracks slightly, it’s still just as delicious. Life, just like baking, is all about those little imperfections—even the most luscious rolls have their quirks!
FAQs and Troubleshooting
Here are a few common questions and potential pitfalls to keep in mind:
-
Why did my pumpkin roll crack?
Cracking can happen for a couple of reasons—either the oven temperature is too high, or the cake is rolled too tightly. Make sure to keep the temperature steady and roll gently! -
How can I store leftovers?
Wrap the pumpkin roll tightly in plastic wrap and store it in the fridge for up to a week. You can also freeze it for longer—just make sure to wrap it well in plastic and foil! -
Can I use fresh pumpkin instead of canned?
Absolutely! Just ensure it’s pureed really well and cooked down to a suitable texture. It will give your roll a fresh flavor! -
What should I do if my filling is too runny?
If it’s too runny, it may need a bit more powdered sugar or cream cheese until it firms up. It should be spreadable but not dripping!
Nutritional Info
While I don’t dive deep into nutritional specifics, this pumpkin roll serves up a delightful balance of indulgence and seasonal goodness. Enjoy it in moderation, and savor every bite!
As we wrap up another delightful culinary adventure, remember: good food is about making memories and sharing joyful moments. This classic pumpkin roll is not just a recipe; it’s a pieced-together tapestry of flavors, aromas, and heartwarming experiences. So tie on that apron, grab those ingredients, gather your loved ones, and let’s make some kitchen magic together. Happy baking! 🍂🍰
PrintClassic Pumpkin Roll
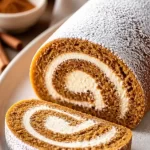
A moist, spiced pumpkin cake rolled with a creamy, tangy filling – the perfect autumn dessert.
- Prep Time: 20 minutes
- Cook Time: 15 minutes
- Total Time: 35 minutes
- Yield: 8 servings 1x
- Category: Dessert
- Method: Baking
- Cuisine: American
- Diet: Vegetarian
Ingredients
- 4 tablespoons powdered sugar
- 3/4 cup all-purpose flour (115g)
- 1/2 teaspoon baking powder
- 1/2 teaspoon baking soda
- 1/2 teaspoon ground cinnamon
- 1/2 teaspoon ground cloves
- 1/4 teaspoon salt
- 3 large eggs (room temperature)
- 1 cup granulated sugar (225g)
- 2/3 cup canned pumpkin (175g)
- 8 ounces cream cheese (softened, 227g)
- 1 cup powdered sugar (125g)
- 6 tablespoons butter (softened, 84g)
- 1 teaspoon vanilla extract
- 2 tablespoons powdered sugar (for garnish, if desired)
Instructions
- Preheat your oven to 375°F (190°C) and line your baking pan with parchment paper.
- Mix the flour, baking powder, baking soda, cinnamon, cloves, and salt together in a medium bowl.
- Beat the eggs and granulated sugar in a large bowl until light and fluffy, about 2-3 minutes.
- Add the canned pumpkin and mix gently.
- Combine the dry ingredients with the wet ingredients until just mixed.
- Spread the batter in the prepared pan and bake for 13-15 minutes.
- Prepare for rolling by cooling the cake for a few minutes, then flipping it onto a powdered sugar-dusted towel.
- Roll the cake tightly, let it cool in this form.
- Make the cream cheese filling by beating cream cheese, butter, powdered sugar, and vanilla until smooth.
- Unroll the cake, spread the filling, and roll it back up without the towel.
- Chill in plastic wrap for at least one hour.
- Serve with a dusting of powdered sugar on top.
Notes
Wrap leftovers tightly in plastic wrap and store in the fridge for up to a week. Can be frozen for longer storage.
Nutrition
- Serving Size: 1 slice
- Calories: 300
- Sugar: 25g
- Sodium: 200mg
- Fat: 16g
- Saturated Fat: 8g
- Unsaturated Fat: 6g
- Trans Fat: 0g
- Carbohydrates: 38g
- Fiber: 1g
- Protein: 4g
- Cholesterol: 70mg
Keywords: pumpkin roll, fall dessert, holiday baking
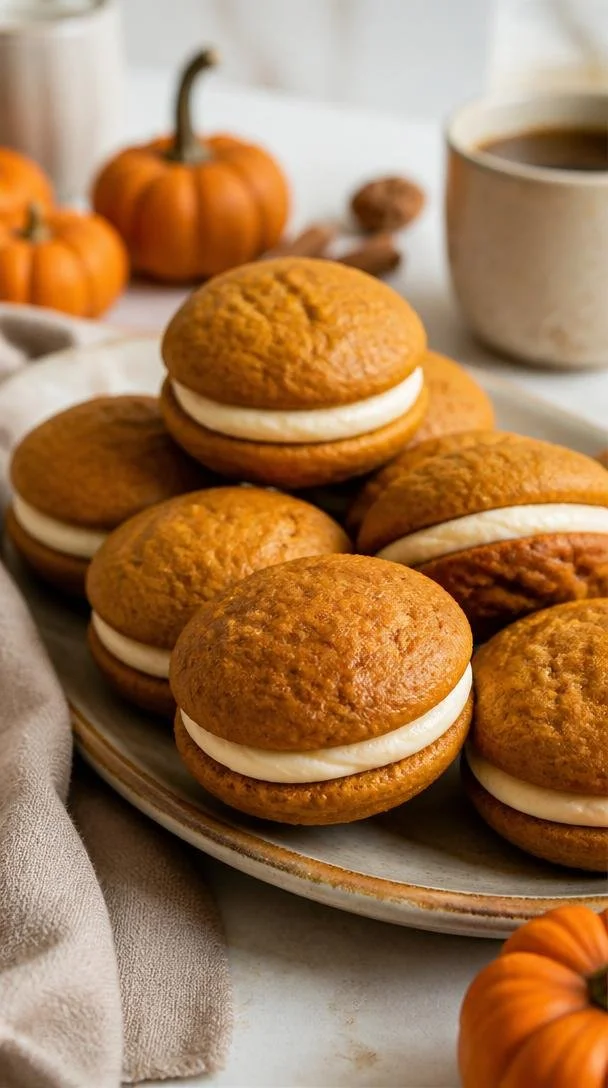
One-Bowl 30-Minute Pumpkin Whoopie Pies (Fall Comfort Treat)
Pumpkin Whoopie Pies: An Autumn Delight
Hello, friends! Today, I’m thrilled to share with you one of my absolute favorite autumn treats — Pumpkin Whoopie Pies! When the leaves start to turn and that crispness fills the air, there’s nothing quite like the warm, spicy aroma of pumpkin goodies baking in the oven. Trust me, this recipe will not only fill your kitchen with delightful scents but will also transport you to a cozy fall afternoon, sipping cider while savoring these tasty treats.
Personal Story
As a kid, there was nothing more exciting than the annual autumn bake-off in my neighborhood! Everyone brought their best creations, and I remember my mom whipping up pumpkin whoopie pies that quickly became the star of the show. I’d watch as she mixed the ingredients, the vibrant orange pumpkin swirling into the batter, and I loved the way she would sneak a taste of the creamy filling before it made its debut between those soft, spiced cakes. The joy on everyone’s faces when they took that first bite is something I still cherish today. It made me realize how food has this magical power to bring people together and create lasting memories, no matter how simple the dish may be.
Ingredients
Here’s what you’ll need for these scrumptious Pumpkin Whoopie Pies, along with some handy tips:
-
2 cups all-purpose flour
A staple in most kitchens, this is the base for our whoopie pies. If you need a gluten-free option, try substituting with a gluten-free all-purpose blend. -
1 teaspoon baking powder
This helps our pies rise just right. Ensure your baking powder is fresh for optimal fluffiness! -
1 teaspoon baking soda
Another leavener that works in tandem with baking powder. The combination gives our pies that perfect texture. -
1 teaspoon cinnamon
A warm spice that’s essential for flavoring! Feel free to swap with pumpkin pie spice for an all-in-one flavor boost. -
1/2 teaspoon nutmeg
Adds depth and warmth to the pumpkin flavor. If you’re lacking nutmeg, a touch more cinnamon can be a decent substitute. -
1/2 teaspoon salt
Balances out the sweetness and enhances the flavors. Don’t skip this; it’s necessary for a well-rounded pie. -
1 cup pumpkin puree
Use canned or homemade — just ensure it’s pure pumpkin, not pumpkin pie filling! This is where our signature flavor comes from. -
1/2 cup vegetable oil
This keeps our whoopie pies moist. If you prefer, you can replace it with melted coconut oil for a different flavor profile. -
1 cup brown sugar
Brown sugar adds that lovely caramel flavor and moisture. Light or dark works here, depending on how deep a flavor you desire. -
1 egg
Acts as a binder. If vegan, you can swap it for a flax egg (1 tablespoon ground flaxseed mixed with 2.5 tablespoons water). -
1 teaspoon vanilla extract
A hint of sweetness and depth. Always go for pure vanilla extract when possible; it makes a difference. -
1 cup cream cheese
The star of our filling. Allow it to soften at room temperature so it blends beautifully! -
1/2 cup powdered sugar
Sweetens our filling. Feel free to adjust to your taste — add more or less! -
1/4 cup maple syrup
Adds a deliciously complex sweetness to the filling; you can also use honey if you prefer.
Step-by-Step Instructions
Now, let’s dive into the fun part — baking these beauties!
-
Preheat the Oven
Preheat your oven to 350°F (175°C). While it heats, you can gather the rest of your ingredients and make sure your baking sheets are ready. -
Mix the Dry Ingredients
In a medium bowl, whisk together the flour, baking powder, baking soda, cinnamon, nutmeg, and salt. This ensures everything is evenly distributed so your whoopie pies rise and flavor nicely. -
Combine the Wet Ingredients
In a larger bowl or a stand mixer, combine the pumpkin puree, vegetable oil, brown sugar, egg, and vanilla extract. Mix until everything is smooth and well combined; the mixture should be thick and luscious. -
Incorporate Dry Ingredients
Gradually add your dry mix into the wet, stirring gently until just combined. Overmixing can lead to tougher cakes, so stop once you see no dry flour patches. -
Scoop and Bake
Using a cookie scoop or two spoons, drop even amounts of batter onto your prepared baking sheets, spacing them about 2 inches apart. Bake for 12-15 minutes, or until they spring back when lightly pressed. Let cool on the sheets for a few minutes before transferring them to a wire rack. -
Prepare the Filling
While the cakes cool, let’s whip up the filling! In a bowl, beat together the cream cheese and powdered sugar until smooth, then add the maple syrup. Mix until creamy. You can adjust the sweetness based on your preference — feel free to taste and tweak! -
Assemble the Whoopie Pies
Once your cakes are completely cooled, pair them up (a big one with a big one for maximum filling!). Spread or pipe a generous amount of filling on the flat side of one cake, then top with another. -
Chill and Enjoy
For best results, refrigerate the whoopie pies for at least 30 minutes before serving. The flavors meld beautifully, and it makes them easier to handle.
Serving Suggestions
Serve these Pumpkin Whoopie Pies on a beautiful platter; perhaps with a sprinkle of cinnamon or a drizzle of melted chocolate for added flair! Pair them with a cup of spicy chai tea or hot cider to complete the cozy vibe.
Recipe Variations
Feel free to mix things up with these creative twists for your whoopie pies:
- Chocolate Pumpkin Whoopie Pies: Substitute half of the flour for cocoa powder for a chocolate-dusted delight.
- Spiced Cream Cheese Filling: Add a bit of cinnamon and nutmeg to the cream cheese filling for extra flavor.
- Nutty Texture: Incorporate chopped walnuts or pecans into the batter for added crunch.
- Vegan Version: Use aquafaba instead of egg and swap to a vegan cream cheese substitute for the filling.
Chef’s Notes
These whoopie pies have evolved so much from my mom’s original recipe! I’ve played with flavors and fillings over the years, and I truly enjoy adding unique ingredients that excite the palate. Plus, they freeze wonderfully! You can make a batch, freeze them, and treat yourself to a warm pie anytime you’re craving that pumpkin taste. A quick zap in the microwave for about 10 seconds brings them right back to life!
FAQs and Troubleshooting
-
Why are my whoopie pies flat?
Make sure your baking soda and baking powder are fresh! Old leavening agents can cause them not to rise. -
Can I use fresh pumpkin puree?
Absolutely! Just ensure your pumpkin is well-cooked and drained of excess moisture. -
What do I do if my filling is too runny?
You can add more powdered sugar to thicken it up; start with a tablespoon at a time until you reach your desired consistency. -
How do I store leftover whoopie pies?
Keep them in an airtight container in the refrigerator for up to a week or freeze them for longer storage.
Nutritional Info
If you’re curious about the nutritional breakdown, a single Pumpkin Whoopie Pie (including filling) is approximately:
- Calories: 200
- Carbs: 28g
- Protein: 2g
- Fat: 9g
- Fiber: 1g
So there you have it! The perfect pumpkin whoopie pie recipe is ready to grace your table with warmth and flavor this fall. I can’t wait for you to try this delectable treat — I promise it will become a cherished favorite like it is in my home! Happy baking! 🍂
PrintPumpkin Whoopie Pies

Delicious pumpkin whoopie pies that bring the warmth and flavors of autumn into your kitchen.
- Prep Time: 15 minutes
- Cook Time: 15 minutes
- Total Time: 30 minutes
- Yield: 12 servings 1x
- Category: Dessert
- Method: Baking
- Cuisine: American
- Diet: Vegetarian
Ingredients
- 2 cups all-purpose flour
- 1 teaspoon baking powder
- 1 teaspoon baking soda
- 1 teaspoon cinnamon
- 1/2 teaspoon nutmeg
- 1/2 teaspoon salt
- 1 cup pumpkin puree
- 1/2 cup vegetable oil
- 1 cup brown sugar
- 1 egg
- 1 teaspoon vanilla extract
- 1 cup cream cheese
- 1/2 cup powdered sugar
- 1/4 cup maple syrup
Instructions
- Preheat your oven to 350°F (175°C).
- Mix the dry ingredients: flour, baking powder, baking soda, cinnamon, nutmeg, and salt.
- Combine the wet ingredients: pumpkin puree, vegetable oil, brown sugar, egg, and vanilla extract until smooth.
- Incorporate the dry ingredients into the wet until just combined.
- Scoop even amounts of batter onto prepared baking sheets, spacing them about 2 inches apart.
- Bake for 12-15 minutes until springy when lightly pressed and let cool.
- Prepare the filling by beating cream cheese and powdered sugar until smooth, then add maple syrup.
- Assemble the whoopie pies by spreading filling between two cooled cakes.
- Chill the final pies for at least 30 minutes before serving.
Notes
These whoopie pies can be frozen and reheated. Adjust sweetness of the filling to taste.
Nutrition
- Serving Size: 1 pie
- Calories: 200
- Sugar: 15g
- Sodium: 200mg
- Fat: 9g
- Saturated Fat: 3g
- Unsaturated Fat: 5g
- Trans Fat: 0g
- Carbohydrates: 28g
- Fiber: 1g
- Protein: 2g
- Cholesterol: 30mg
Keywords: pumpkin, whoopie pies, autumn dessert, fall baking, cozy treats
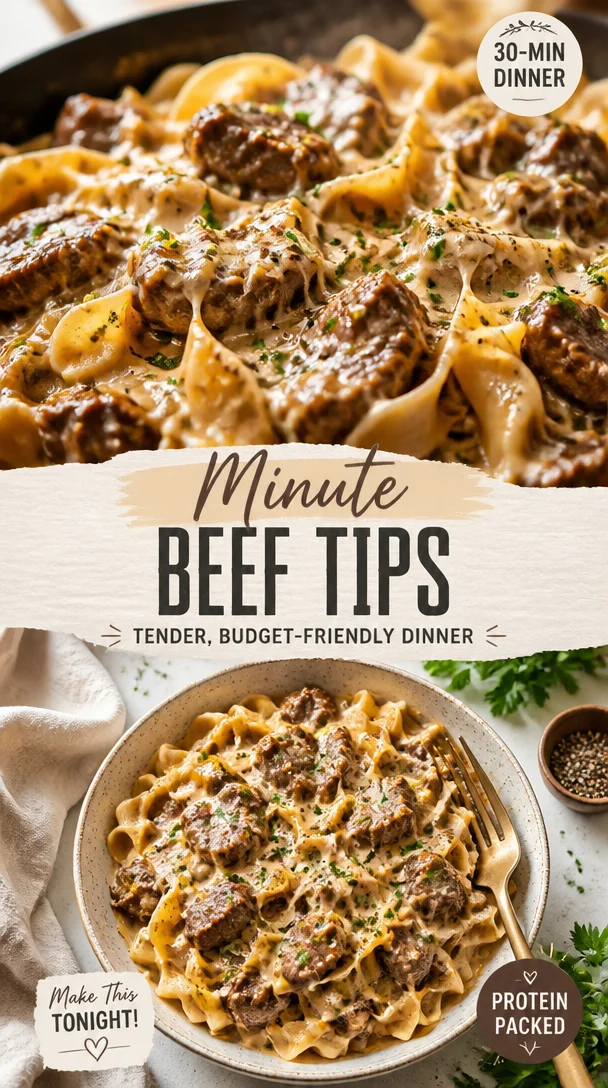
Minute Beef Tips: Tender, Budget-Friendly Dinner
The Best-Ever Beef Tips: Comfort Food with a Twist
Hello, my fellow food enthusiasts! Today, we’re diving into a dish that’s not only a crowd-pleaser but also a staple of home-cooked comfort food—beef tips! Tender, savory, and saucy, these beef tips bring back memories of cozy family dinners and warm gatherings around the table. Are you ready to elevate your next meal with this delicious recipe? Let’s get started!
Personal Story: A Family Tradition
I still remember the first time I experienced the magic of beef tips. I was about eight years old, and my grandmother was hosting one of her legendary Sunday dinners. The smell wafted through the house, pulling the family together like a culinary siren song. She would prepare her famous beef tips, simmering for hours until they were fork-tender, bathing in a savory sauce that made my taste buds dance.
We all gathered around the table—eagerly anticipating the feast about to unfold. I could see the warmth in her eyes as she plated the beef, along with a side of buttery mashed potatoes and steamed green beans. It was the kind of meal that made you feel wrapped in a cozy blanket, no matter the weather outside.
That evening, as laughter filled the room and stories were shared, I realized that food is so much more than just fuel; it’s about connection, love, and tradition. Now, I create my own version of those beloved beef tips, making them my own while keeping the spirit of family cooking alive.
Ingredients
Gathering the right ingredients is half the fun! Here’s what you’ll need for your Best-Ever Beef Tips, along with some handy tips and substitution ideas.
-
2 lbs beef (chuck roast or sirloin)
- Tip: Chuck roast is marbled and tender, making it perfect for this dish. Sirloin also works well for a leaner option. If using sirloin, just make sure not to overcook it!
-
1 cup beef broth
- Substitution: If you don’t have beef broth on hand, vegetable broth or chicken broth can work in a pinch. Just keep in mind that it may alter the flavor slightly.
-
1 onion, chopped
- Chef Insight: Yellow onions are a classic choice here—they add a sweetness as they caramelize. If you prefer a sharper taste, go for white onions.
-
2 cloves garlic, minced
- Quick Tip: Fresh garlic gives so much flavor, but if you’re in a rush, garlic powder can substitute in at a pinch (1/4 tsp per clove).
-
1/4 cup soy sauce
- Substitution: If you’re watching your sodium intake or prefer gluten-free, use tamari or coconut aminos for a similar umami flavor.
-
1 tablespoon Worcestershire sauce
- Insight: This adds a depth of flavor that rounds out the dish. If you’re out, a dash of balsamic vinegar can add that tangy zing instead!
-
2 tablespoons cornstarch
- Hint: This will help thicken your sauce beautifully. If you’re looking for a gluten-free option, you can use arrowroot powder.
-
1/4 cup water
- Usage: This will help dissolve the cornstarch for a smooth sauce.
-
Salt and pepper to taste
- Pro Tip: Always taste and adjust seasoning at the end for the best flavor profile.
-
Cooked rice or mashed potatoes for serving
- Serving Tip: Both are great at soaking up that delicious sauce, so pick whichever you’re in the mood for!
Step-by-Step Instructions
Now that you have your ingredients prepped, let’s get cooking! Follow along with these simple steps to create your Best-Ever Beef Tips.
-
Sear the Beef: Start by cutting your beef into bite-sized pieces. Heat a large skillet over medium-high heat with a splash of oil. Once it’s hot, add the beef pieces in batches (don’t crowd the pan), searing them until they’re browned on all sides. This will lock in those juicy flavors and give the dish a delicious depth. Don’t skip this step!
-
Sauté the Aromatics: Remove the browned beef from the skillet and set it aside. In the same pan, add the chopped onion. Sauté for about 2-3 minutes until it turns translucent and aromatic. Then add in the minced garlic and sauté for another minute. The combination of these two ingredients is where the magic begins!
-
Deglaze the Pan: Pour in the beef broth and use a wooden spoon to scrape up any brown bits stuck to the bottom of the skillet. This is called “deglazing” and it’s where you get all that concentrated flavor. Let the broth come to a gentle simmer.
-
Combine Everything: Once the broth is simmering, return the beef to the skillet. Add the soy sauce and Worcestershire sauce next, stirring to combine all the ingredients. This is where your beef will soak up all those delightful flavors.
-
Thicken the Sauce: In a small bowl, mix the cornstarch with water until smooth. Slowly whisk the mixture into your beef and broth. This will create a luscious, thick sauce that clings to the beef beautifully. Allow everything to simmer for another 15-20 minutes until the beef is tender and the sauce has thickened. You can adjust the seasoning with salt and pepper at this stage.
-
Serve and Enjoy: Once your beef tips are cooked to perfection, it’s time to serve! I like to present them over a bed of fluffy rice or creamy mashed potatoes, drizzling that gorgeous sauce over the top. A sprinkle of fresh herbs—like parsley or chives—adds a pop of color and freshness.
Serving Suggestions
When plating your Best-Ever Beef Tips, remember that presentation adds to the experience! If you’ve chosen rice, use a shallow bowl or plate to scoop a generous helping in the center, then top with your beef tips and sauce. For mashed potatoes, create a small well in the center before adding the beef and let that sauce cascade beautifully over the mound. Maybe add a side of sautéed greens or roasted vegetables for color and added nutrients. Voilà—dinner is served!
Recipe Variations
This recipe is incredibly versatile! Here are a few creative twists or dietary swaps to consider:
- Stout Beef Tips: Replace beef broth with a rich stout beer for a deeper flavor.
- Herb-Infused: Toss in fresh thyme or rosemary while simmering for an aromatic touch.
- Spicy Kick: Add a splash of hot sauce or a pinch of red pepper flakes for heat.
- Vegetarian Version: Swap the beef for hearty mushrooms like portobello and use vegetable broth for a plant-based delight.
- Zesty Citrus: Finish with a squeeze of lemon juice or orange zest for a bright, fresh flavor.
Chef’s Notes
Over the years, my beef tip recipe has evolved, just like my cooking style. Initially, I used to stick to a strict method, but now I embrace improvisation based on what I have in my pantry. Some of my greatest kitchen victories came from experimenting with leftover veggies or spices. Don’t be afraid to make this recipe your own—cooking is about joy, freedom, and creativity!
Also, here’s a funny kitchen story: One time, I was so excited to make these beef tips that I completely forgot to add the cornstarch. I served them in a rush, only to realize the sauce was too thin. My guests, in good spirits, lovingly dubbed the meal "Beef Soup." Since then, I always double-check my ingredients before diving in!
FAQs and Troubleshooting
Q: What should I do if my beef tips are tough?
A: This can happen if the beef isn’t cooked long enough or at a high enough temperature. Make sure to simmer them low and slow until tender.
Q: Can I make this dish ahead of time?
A: Yes! Beef tips actually taste even better the next day as the flavors meld. Just cool and store them in an airtight container in the fridge, then reheat gently.
Q: What if my sauce isn’t thickening?
A: If it’s not thickening to your liking, you can create more cornstarch slurry (1 tablespoon of cornstarch mixed with 2 tablespoons of cold water) and add it in gradually while stirring.
Q: How can I tell if my beef is cooked properly?
A: For beef tips, you want fork-tender pieces. If they can easily be shredded or cut with minimal effort, they’re ready!
Nutritional Info (Optional)
While this dish is undeniably comforting, it’s also packed with protein and nutrients. Here’s a rough breakdown for each serving (based on 6 servings):
- Calories: 350
- Protein: 36g
- Fat: 15g
- Carbohydrates: 25g
Feel free to adjust these numbers based on your chosen type of beef and the sides you pair with it!
There you have it—my Best-Ever Beef Tips recipe, made to share and delight! Remember, cooking is about more than just ingredients; it’s about the connections you make and the memories you create. So, tie on that apron, invite some loved ones over, and let’s savor the joy of good food together! Happy cooking!
PrintBest-Ever Beef Tips

Tender and savory beef tips simmered in a rich sauce, perfect for cozy family dinners.
- Prep Time: 15 minutes
- Cook Time: 30 minutes
- Total Time: 45 minutes
- Yield: 6 servings 1x
- Category: Main Course
- Method: Stovetop
- Cuisine: American
- Diet: None
Ingredients
- 2 lbs beef (chuck roast or sirloin)
- 1 cup beef broth
- 1 onion, chopped
- 2 cloves garlic, minced
- 1/4 cup soy sauce
- 1 tablespoon Worcestershire sauce
- 2 tablespoons cornstarch
- 1/4 cup water
- Salt and pepper to taste
- Cooked rice or mashed potatoes for serving
Instructions
- Sear the beef: Cut beef into bite-sized pieces and sear in a hot skillet.
- Remove beef and sauté onion until translucent; add garlic.
- Deglaze the pan with beef broth, scraping brown bits.
- Combine beef with sauces and simmer.
- Thicken the sauce with cornstarch mixture and let simmer until tender.
- Serve over rice or mashed potatoes, garnished with herbs.
Notes
Adjust seasoning at the end for best flavor. Experiment with variations such as stout beer or adding fresh herbs.
Nutrition
- Serving Size: 1 serving
- Calories: 350
- Sugar: 3g
- Sodium: 800mg
- Fat: 15g
- Saturated Fat: 5g
- Unsaturated Fat: 8g
- Trans Fat: 0g
- Carbohydrates: 25g
- Fiber: 2g
- Protein: 36g
- Cholesterol: 90mg
Keywords: beef tips, comfort food, family recipe, savory beef, quick dinner

Crispy Chicken Wraps
Crispy Chicken Wraps: A Delightful Journey to Flavor Town
Hello, fellow foodies! If you’re searching for the perfect easy-to-make dish that delivers on both taste and texture, look no further! Today, we’re diving into the delightful world of Crispy Chicken Wraps, a dish that’s not only satisfying but also packed with crispy goodness, fresh vegetables, and your favorite sauces. Imagine biting into a warm, crunchy wrap filled with juicy chicken, crisp lettuce, and a zingy sauce—sounds divine, right? So grab your apron, and let’s make some delicious memories together!
A Nostalgic Culinary Adventure
As I reflect on the meals that have brought me the most joy, Crispy Chicken Wraps always sneak into my mind. I fondly remember summer nights spent with my family in our backyard, where laughter filled the air, and the grill was our favorite gathering spot. My dad would whip up his famous fried chicken, and we would all await the crunchy delight. Although my version is oven-baked and offers a healthier twist, the essence of crispy, juicy chicken is ever-present. I recall one particularly fun evening when we had a build-your-own wrap night, where everyone could customize their wraps with various toppings. Watching my younger siblings go wild with toppings was a cherished sight, and it made me appreciate how food can bring people together. Those wraps weren’t just meals; they were vessels of laughter and connection, a true celebration of simple joys.
Ingredients That Shine
Let’s gather our ingredients before we embark on this crispy journey! Here’s what you’ll need:
-
2 large chicken breasts (boneless, skinless)
The star of our dish! Chicken breasts are lean and easy to work with. You can also use chicken thighs for a juicier option. -
1 cup all-purpose flour
This helps create a crispy coating. For a gluten-free version, substitute with almond flour or gluten-free flour. -
2 large eggs
Acting as a binding agent for the coating—beaten well. Flaxseed meal mixed with water can serve as a vegan substitute. -
1 cup breadcrumbs (or panko)
These provide that crunch we crave! Panko creates a lighter, crispier texture, but regular breadcrumbs work just fine too. -
1 teaspoon salt
Essential for bringing out flavors. Feel free to experiment with flavored salts for an added twist. -
1 teaspoon black pepper
A classic pairing with chicken. You can swap this with cayenne pepper for a kick of heat! -
1 teaspoon garlic powder
For that savory depth! Fresh garlic can be used but will alter the texture slightly. -
1 teaspoon paprika
Adding subtle smokiness and color; smoked paprika can enhance the flavor even more. -
4 large tortillas
The vessel for our wrap! Whole wheat or spinach tortillas give a lovely flavor and color contrast. -
1 cup lettuce (shredded)
Adds a fresh crunch. You can swap for spinach or kale if you prefer. -
1 large tomato (sliced)
Brings juiciness and freshness. Any seasonal tomato will do, or even roasted tomatoes for a different take. -
1/2 cup mayonnaise or ranch sauce
For creamy goodness! Greek yogurt or a dairy-free option can replace it for a healthier variant. -
1/2 cup shredded cheddar cheese
Because cheese makes everything better! Feel free to substitute with your favorite cheese—feta or pepper jack can add other dimensions of flavor. -
1/2 cup cooking oil
To ensure that crispy exterior! Avocado oil or coconut oil also work well as healthier options.
Cooking Steps: Crispy Goodness Awaits
Now that we have our ingredients ready let’s dive into the cooking steps. Follow along, and I promise you’ll be thrilled with the results!
-
Prep Your Chicken: Start by slicing the chicken breasts into strips or bite-sized pieces. This not only cuts down on cooking time but also makes for easier wrapping later. If you want, you can marinate them in a mix of spices and a splash of buttermilk for extra tenderness!
-
Set Up Your Breading Station: In three separate bowls, arrange your flour mixed with salt, beaten eggs, and breadcrumbs. Set these up like a little assembly line. This step will make your life so much easier; no mess, no stress!
-
Coat the Chicken: Take each piece of chicken and dip it into the flour first, shaking off any excess. Next, dunk it into the eggs and then coat it thoroughly with breadcrumbs. Make sure each piece is well covered—this is where the crispy magic happens!
-
Heat the Oil: In a non-stick skillet, add enough cooking oil to cover the bottom. Heat it over medium heat until the oil is hot. You can test it by dropping a breadcrumb in; it should sizzle nicely. Keeping the oil at the right temperature is crucial to achieve that golden color without overcooking the chicken!
-
Fry the Chicken: Carefully place your breaded chicken pieces into the hot oil, giving them enough space to fry evenly. Don’t overcrowd the pan! Fry for about 4-5 minutes on each side or until golden and cooked through. A little tip: Avoid flipping too soon, or the coating may come off. Patience is a virtue!
-
Drain the Excess Oil: Once cooked, transfer your chicken to a plate lined with paper towels to absorb any excess oil. This ensures the chicken stays crispy and isn’t greasy.
-
Warm the Tortillas: While the chicken is draining, quickly warm your tortillas in a dry skillet over low heat for about 30 seconds on each side. Warming them makes them more pliable and helps prevent tearing.
-
Assemble Your Wraps: Now comes the fun part! Place a generous scoop of shredded lettuce in the center of the tortilla. Top with crispy chicken, sliced tomatoes, a drizzle of your sauce of choice, and sprinkle shredded cheese on top.
-
Wrap It Up: Fold the sides of the tortilla toward the center, then roll from the bottom up, tucking in all the delicious fillings. Use a toothpick to secure them if they’re uncooperative (no shame in that game!).
Serving Suggestions: Pretty on a Plate
Presentation is everything, my friends! Serve your Crispy Chicken Wraps on a beautiful platter, perhaps with a side of crispy sweet potato fries or a fresh garden salad. For an added touch, you can drizzle a little extra sauce over the top and garnish with fresh herbs like parsley or cilantro. It makes the dish pop visually and adds a splash of color!
Recipe Variations: Get Creative
Feel free to have fun with this recipe! Here are some delicious variations you can try:
-
Buffalo Chicken Wraps: Toss the cooked chicken in buffalo sauce before assembling for a spicy kick!
-
Veggie Wraps: Skip the chicken and load your wrap with grilled veggies like zucchini, bell peppers, and mushrooms for a hearty, vegetarian option.
-
Mediterranean Wraps: Add feta cheese, olives, and a drizzle of tzatziki sauce for a Mediterranean twist.
-
Southwestern Chicken Wraps: Mix black beans, corn, and avocado with the chicken for a fiesta of flavors!
-
Breakfast Wraps: Swap the chicken for scrambled eggs and add crumbled sausage, cheese, and a splash of hot sauce for a hearty breakfast option.
Chef’s Notes: Kitchen Shenanigans
Whenever I think of crispy chicken, I can’t help but recall a hilarious incident involving an oversized cooking spoon. Picture this: I was trying to coat the chicken in breadcrumbs, and the spoon flung across the kitchen, sending breadcrumbs everywhere while my mischievous dog darted in to "help." It’s moments like these that remind me cooking isn’t always about perfection; it’s about enjoying the process! Over time, my recipe has evolved with these little mishaps, perfecting the method and spreading a little joy in the kitchen with every wrap.
FAQs and Troubleshooting
Let’s address some common questions and potential hiccups you might encounter!
-
My chicken isn’t crispy! What went wrong?
Ensure your oil is hot enough before adding the chicken. If it’s not hot, the coating will absorb oil and become soggy rather than crispy. -
How do I stop my wraps from falling apart?
Properly wrapping the tortillas is crucial. Make sure you fold in the sides tightly while rolling. If it’s still an issue, using toothpicks can help secure them until you’re ready to serve. -
Can I bake these wraps instead?
Absolutely! Preheat your oven to 400°F (200°C), place your assembled wraps seam-side down on a baking sheet, and bake for about 15-20 minutes or until crispy. -
What can I serve as a side?
Sweet potato fries, carrot sticks, or a refreshing coleslaw make excellent companions to these wraps, balancing the meal beautifully.
Nutritional Info (Optional)
While indulgent, these wraps can fit into a balanced meal plan. Depending on the ingredients and sauces you select, each wrap gives approximately:
- Calories: ~450-500 per wrap
- Protein: 35g
- Carbohydrates: 35g
- Fat: 20g
Feel free to adjust the ingredients to meet your dietary needs!
And there you have it! A delightful journey through Crispy Chicken Wraps that will bring warmth and joy to your table. Cooking should be a celebration, so tie on that apron and let’s create beautiful moments, one delicious wrap at a time! Enjoy every crunchy, flavor-packed bite!
PrintCrispy Chicken Wraps

A delightful journey to flavor town with easy-to-make crispy chicken wraps packed with juicy chicken, fresh vegetables, and delicious sauces.
- Prep Time: 15 minutes
- Cook Time: 20 minutes
- Total Time: 35 minutes
- Yield: 4 servings 1x
- Category: Main Course
- Method: Frying
- Cuisine: American
- Diet: None
Ingredients
- 2 large chicken breasts (boneless, skinless)
- 1 cup all-purpose flour
- 2 large eggs (beaten)
- 1 cup breadcrumbs (or panko)
- 1 teaspoon salt
- 1 teaspoon black pepper
- 1 teaspoon garlic powder
- 1 teaspoon paprika
- 4 large tortillas
- 1 cup lettuce (shredded)
- 1 large tomato (sliced)
- 1/2 cup mayonnaise or ranch sauce
- 1/2 cup shredded cheddar cheese
- 1/2 cup cooking oil
Instructions
- Prep Your Chicken: Start by slicing the chicken breasts into strips or bite-sized pieces.
- Set Up Your Breading Station: In three separate bowls, arrange your flour mixed with salt, beaten eggs, and breadcrumbs.
- Coat the Chicken: Take each piece of chicken and dip it into the flour first, then dunk in the eggs and coat with breadcrumbs.
- Heat the Oil: In a non-stick skillet, add enough cooking oil and heat it over medium heat until hot.
- Fry the Chicken: Carefully place the breaded chicken pieces into the hot oil, frying for about 4-5 minutes on each side.
- Drain the Excess Oil: Transfer the cooked chicken to a plate lined with paper towels.
- Warm the Tortillas: Quickly warm your tortillas in a dry skillet over low heat for about 30 seconds on each side.
- Assemble Your Wraps: Place shredded lettuce in the center of the tortilla, topping with crispy chicken, sliced tomatoes, sauce, and cheese.
- Wrap It Up: Fold the sides of the tortilla toward the center, then roll from the bottom up, securing with a toothpick if needed.
Notes
Experiment with various sauces and toppings to customize your wraps. Serve with sides like sweet potato fries or garden salad for a complete meal.
Nutrition
- Serving Size: 1 wrap
- Calories: 450
- Sugar: 2g
- Sodium: 800mg
- Fat: 20g
- Saturated Fat: 5g
- Unsaturated Fat: 10g
- Trans Fat: 0g
- Carbohydrates: 35g
- Fiber: 2g
- Protein: 35g
- Cholesterol: 160mg
Keywords: crispy chicken wraps, easy chicken recipe, homemade wraps, chicken tortilla wraps, delicious chicken