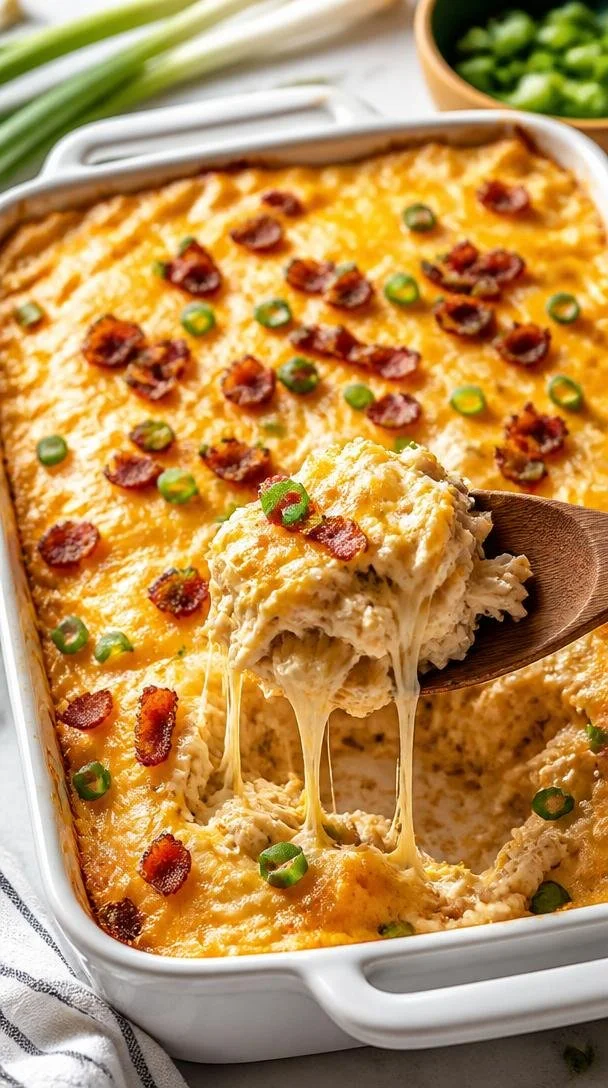
Creamy Crack Chicken Casserole: 30-Minute Meal Prep
Creamy Crack Chicken Casserole: A Comfort Food Delight
Hello, friends! Today, we’re diving into a dish that truly feels like a hug on a plate: Creamy Crack Chicken Casserole! If you’ve never had this dish before, prepare yourself for a symphony of flavors that’s both indulgent and comforting.
Introduction
As the seasons change and the crisp air rolls in, my thoughts turn to cozy nights, warm kitchens, and, of course, soul-satisfying meals. Nothing beats the feeling of gathering friends and family around a hearty dish that warms the heart and fills the belly. Creamy Crack Chicken Casserole does just that — it’s creamy, cheesy, and loaded with flavor.
Now, why call it “crack chicken”? The name comes from the irresistible nature of this dish; one bite and you’ll understand. The combination of shredded chicken, creamy cheese, savory bacon, and the tangy zest of ranch dressing create an explosion of flavors that no one can resist. Plus, it’s an absolute crowd-pleaser, making it perfect for dinner parties, potlucks, or just a cozy night in.
So, grab your apron, pour yourself a glass of something sparkly, and let’s get cooking together!
Personal Story
I remember the first time I made Creamy Crack Chicken Casserole. It was an impromptu gathering at my place, and I found myself with a fridge full of leftover rotisserie chicken. Thinking quickly, I melted the cream cheese and mixed in some ranch dressing, cheddar cheese, and bacon bits, hoping for the best. I layered it all up in a casserole dish and popped it in the oven, my heart racing with excitement.
When I pulled it out, the aroma enveloped the kitchen, drawing everyone to the table. As we dug in, laughter filled the room — that warm, inviting kind of laughter that makes memories. Each bite felt like a little celebration. From that day on, it became a staple in my dinner rotation. Now, it’s a dish that not only fills bellies but also brings people together, wrapping them in a blanket of comfort and joy. Every time I serve it, I’m reminded of that initial gathering, the unwavering bond of shared meals, and the unforgettable moments we create around the table.
Ingredients
Here’s what you’ll need to whip up this fantastic casserole:
-
3 cups cooked, shredded chicken breast: Rotisserie chicken works perfectly here. Not only does it save time, but the flavor is incredibly rich and savory. You can also use leftover chicken or cook your own if you prefer!
-
6 slices bacon, cooked and crumbled: I recommend using thick-cut bacon for maximum flavor. If you’re looking for a healthier option, turkey bacon is a great substitute. Just know that it might not crisp up quite the same way.
-
8 oz cream cheese, softened: This is the heart of your creamy sauce! Make sure to let it sit at room temperature for easier blending. For a lighter option, you could try Neufchâtel cheese instead.
-
½ cup ranch dressing: You can choose store-bought or whip up a homemade version. If you’re feeling adventurous, try a different dressing like blue cheese for some tang!
-
1½ cups shredded cheddar cheese (about 6 oz): Cheddar adds the gooey, cheesy goodness this dish craves. You can go for sharp for an extra punch or mild if you prefer something more subtle.
-
½ cup sour cream (optional but recommended): A dollop of sour cream elevates the creaminess factor. If you’re looking for a lighter option, Greek yogurt is an excellent substitute.
-
2 stalks green onions, thinly sliced: These give a crunchy texture and fresh flavor. You can switch with chives if you want something milder.
-
1 teaspoon garlic powder: This brings depth to the dish. If you have fresh garlic on hand, feel free to use that instead, roughly one clove should do.
-
Salt and pepper to taste: Always taste as you go! It’s the best way to personalize the dish to your liking.
Step-by-Step Instructions
Now that we’ve got our ingredients ready, let’s make some kitchen magic happen! Follow these easy steps for a deliciously creamy casserole:
-
Preheat the Oven: Start by preheating your oven to 350°F (175°C). This will ensure that your casserole bakes evenly and gets bubbly and golden on top.
-
Cook the Bacon: In a skillet over medium heat, cook your bacon until it’s nice and crispy, about 7-10 minutes. Tip: If you slice the bacon into pieces before cooking, it will crisp up faster and feel more integrated into the dish later. Once done, set the bacon aside on paper towels to drain and cool.
-
Mix the Base: In a large bowl, combine your softened cream cheese and ranch dressing. Use an electric mixer or a fork to blend until smooth and creamy. Pro Tip: If you forgot to take the cream cheese out before starting, microwave it for about 15-20 seconds to soften it quickly.
-
Shred that Chicken: If you haven’t already shredded your chicken, do it now. You want those delicious pieces to be bite-sized and ready to mingle with the sauce.
-
Combine Ingredients: In the same bowl, add the shredded chicken, crumbled bacon, half of the cheddar cheese (saving the other half for topping), sour cream, green onions, garlic powder, salt, and pepper. Gently fold everything together. Ensure that the chicken is evenly coated, and all ingredients are well-combined.
-
Transfer to Casserole Dish: Grease a 9×13-inch casserole dish with cooking spray or a bit of butter. Pour the chicken mixture into the dish, spreading it out evenly.
-
Top It Off: Sprinkle the remaining cheddar cheese over the top of the casserole. The cheese will melt into a lovely, golden layer as it bakes!
-
Bake: Place the casserole in the preheated oven and bake for 25-30 minutes, or until it’s hot and bubbly. You’ll know it’s done when the edges are slightly golden, and the center is warmed through.
-
Serve & Enjoy: Once it’s done, let the casserole cool for a few minutes. This will help everything set up nicely before serving. Garnish with extra green onions if you like, and watch everyone gather around the table in anticipation!
Serving Suggestions
To serve, plate generous portions on individual plates, or let everyone scoop their own from the casserole dish. I love adding a side salad for a burst of freshness or some buttery garlic bread for that perfect pairing. You could even throw together a quick veggie platter for some crunch on the side. The colors and textures will complement the creamy casserole beautifully!
Recipe Variations
Here are a few fun twists to make this dish your own:
-
Spicy Kick: Add some diced jalapeños or sliced banana peppers into the mixture for a spicy version that gives your taste buds a fun surprise!
-
Pasta Bake: Fold in some cooked pasta, like rotini or penne, to turn this into a hearty pasta bake.
-
Vegetarian Version: Swap out chicken for some sautéed mushrooms and spinach. You can also add in chopped bell peppers for extra texture and color.
-
Herb Infusion: Toss in some fresh herbs like thyme or parsley for an aromatic touch to brighten up the flavors.
-
Gluten-Free: This dish is naturally gluten-free as long as you ensure your ranch dressing and any other additions are labeled as such.
Chef’s Notes
You know, cooking is all about flexibility! When I first started experimenting with this recipe, I didn’t have a firm grasp on measurements; I was just playing with flavors. Each time I made it, it took on a new character based on what I had in my pantry or how I was feeling that day. That’s the beauty of cooking — it evolves alongside your creativity.
One of my funniest kitchen moments related to this casserole was when I accidentally mistook cinnamon for garlic powder. Let’s say it was a bold flavor, and not one I’ll ever replicate! But hey, if it taught me anything, it was to always label those jars clearly!
FAQs and Troubleshooting
1. Can I prepare this casserole ahead of time?
Absolutely! You can assemble the casserole the night before and store it in the fridge. Just be sure to let it sit at room temperature for about 30 minutes before baking it.
2. My casserole is too dry; how can I fix it?
If you find your casserole is drier than expected after baking, consider adding a drizzle of chicken broth or extra ranch dressing just before serving. It’ll help moisten things up without disrupting the flavors!
3. Can I freeze leftovers?
Yes, Creamy Crack Chicken Casserole freezes well! Just make sure it’s cooled completely before transferring it to an airtight container or freezer bag. It should keep well for about 3 months. Reheat it in the oven for the best results.
4. What if I don’t have enough chicken?
No worries! You can fill in with more veggies like zucchini or mushrooms, or add in a can of drained white beans or chickpeas to keep the casserole hearty and satisfying.
Nutritional Info
(As a reference, this is a very approximate nutritional breakdown based on the recipe when made as instructed):
- Calories: 450
- Protein: 30g
- Carbohydrates: 7g
- Fat: 35g
- Fiber: 1g
Final Thoughts
And there you have it! A delightful Creamy Crack Chicken Casserole ready to steal the show at your next meal. Remember, cooking is about embracing the process, enjoying the flavors, and creating beautiful moments around the table. As you experiment with this dish, I hope it brings you as much joy as it has brought me over the years.
So, let’s continue to celebrate good food and great company, one recipe at a time. Happy cooking, friends!
Thank you for joining me in my kitchen today. Don’t forget to tie on your ivory apron and create your own culinary memories. Until next time!
PrintCreamy Crack Chicken Casserole

A comforting, creamy casserole made with shredded chicken, savory bacon, and a tangy ranch dressing that brings everyone together.
- Prep Time: 20 minutes
- Cook Time: 30 minutes
- Total Time: 50 minutes
- Yield: 8 servings 1x
- Category: Main Course
- Method: Baking
- Cuisine: American
- Diet: None
Ingredients
- 3 cups cooked, shredded chicken breast
- 6 slices bacon, cooked and crumbled
- 8 oz cream cheese, softened
- ½ cup ranch dressing
- 1½ cups shredded cheddar cheese (about 6 oz)
- ½ cup sour cream (optional but recommended)
- 2 stalks green onions, thinly sliced
- 1 teaspoon garlic powder
- Salt and pepper to taste
Instructions
- Preheat the oven to 350°F (175°C).
- Cook the bacon in a skillet over medium heat for about 7-10 minutes until crispy.
- Mix the softened cream cheese and ranch dressing in a large bowl until smooth.
- Shred the cooked chicken into bite-sized pieces.
- Combine the shredded chicken, crumbled bacon, half of the cheddar cheese, sour cream, green onions, garlic powder, salt, and pepper in the bowl. Fold gently to mix.
- Transfer the mixture to a greased 9×13-inch casserole dish.
- Top with the remaining cheddar cheese.
- Bake for 25-30 minutes, or until hot and bubbly.
- Serve and enjoy with optional extra green onions on top.
Notes
This casserole can be prepared ahead of time and stored in the fridge. It also freezes well for about 3 months.
Nutrition
- Serving Size: 1 serving
- Calories: 450
- Sugar: 2g
- Sodium: 800mg
- Fat: 35g
- Saturated Fat: 15g
- Unsaturated Fat: 15g
- Trans Fat: 0g
- Carbohydrates: 7g
- Fiber: 1g
- Protein: 30g
- Cholesterol: 100mg
Keywords: creamy casserole, chicken casserole, comfort food, easy dinner
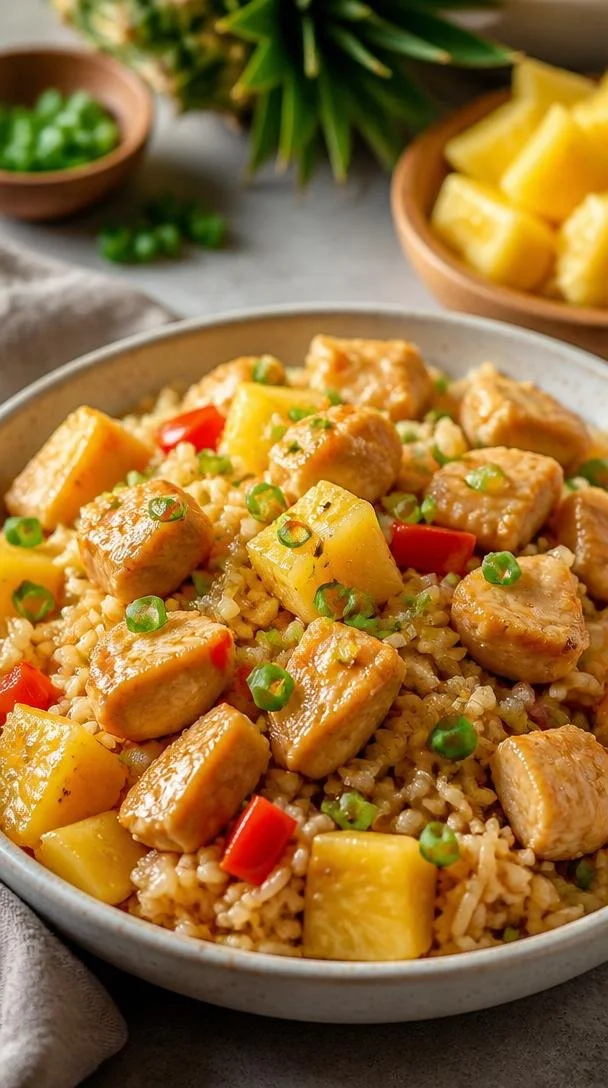
Pineapple Chicken and Rice: An Incredible Ultimate Recipe
Pineapple Chicken and Rice: An Incredible Ultimate Recipe
Introduction
Hello, fellow food lovers! Today, I’m thrilled to share a recipe that not only warms the heart but also, quite literally, brings the sunshine to your plate—Pineapple Chicken and Rice! This dish is a delightful blend of savory and sweet, featuring succulent chicken pieces, juicy pineapple, colorful bell peppers, and fluffy rice that all come together in a beautiful harmony. Imagine sitting down to a colorful plate that evokes tropical vibes, making it hard to resist a smile.
I started whipping up this dish during college when the grocery budget was tight, and the craving for flavor was high. This could easily be a frequent flyer on your dinner party menu because it’s not only scrumptious but also visually appealing, making it perfect for impressing your guests. Plus, it’s versatile! Whether you’re serving a casual weeknight dinner or entertaining friends, this dish is sure to be a hit.
Just think about that first bite—tender chicken melded with the sweetness of fresh pineapple, complemented by the herby brightness of green onions. And let’s not forget the rice; it soaks up all that flavor like a little sponge, ensuring no deliciousness goes to waste.
Ready to dive into this culinary adventure? Grab your apron, and let’s get started!
Personal Story
I can never forget the first time I made Pineapple Chicken and Rice for my closest friends. It was a warm summer evening, and we had gathered on my apartment balcony, fairy lights twinkling in the backdrop—the perfect ambiance. I was anxious since I wanted to impress them without spending hours in the kitchen. Thankfully, everything came together flawlessly, and as that first bite was taken, the room erupted in compliments!
What I didn’t know was that this simple dish would become a tradition amongst my friends. Our monthly get-togethers evolved into themed evenings focused on different cuisines, with my Pineapple Chicken and Rice invariably stealing the spotlight. It became a comfort food staple that not only satisfied our taste buds but also nourished our friendship, creating beautiful memories together. Each time, I’d switch up the ingredients a little, making it fun and new yet familiar all at once.
Ingredients
Now that we have you dreaming of that first bite, let’s gather our ingredients:
-
2 cups of cooked white rice
Use leftover rice or cook fresh rice just before starting your dish. If you’re feeling adventurous, try brown rice for a nuttier flavor! -
1 pound chicken breast, cut into bite-sized pieces
Chicken thighs can also be a great substitute for juicier meat. Don’t skimp on seasoning them ahead of time! -
1 cup fresh pineapple chunks (or canned, drained)
Fresh pineapple adds vibrancy and sweetness, while canned pineapple works in a pinch. Just make sure to drain it well to avoid excess liquid. -
1 tablespoon olive oil
Olive oil adds a lovely richness. Avocado oil works fine, too, if you’re looking for a different flavor profile. -
1 small onion, diced
Sweet onions are great, but any kind will do. Sautéing brings out their natural sweetness, adding depth to the dish. -
2 cloves garlic, minced
Fresh garlic takes this recipe to another level. If you’re short on time, pre-minced garlic works! -
1 bell pepper (red or green), chopped
Red bell peppers bring sweetness, while green offers slight bitterness. Choose whichever you’d prefer or mix them for a colorful flair! -
1 cup chicken broth
Homemade broth is the best option, but store-bought works well if you need convenience. Just check for low-sodium options if you’re watching salt. -
2 tablespoons soy sauce
This adds a savory umami punch. Tamari or coconut aminos are excellent gluten-free alternatives. -
1 tablespoon brown sugar
A hint of sweetness balances the savory components. You could also use honey or maple syrup. -
1 teaspoon ginger, minced
Fresh ginger adds vibrant warmth! If you only have ground ginger, start with half the amount as it packs a different punch. -
Salt and pepper to taste
Always adjust to your liking! I recommend seasoning in layers as you cook for maximum flavor. -
Chopped green onions for garnish (optional)
These lend freshness and color; don’t skip them if you can help it!
Step-by-Step Instructions
Now for the fun part! Here’s how to bring this delightful dish to life:
-
Prep Your Ingredients: Start by cutting your chicken into bite-sized pieces and dicing your onion and bell pepper. Try to keep everything around the same size for even cooking. Also, chop your pineapple chunks if you’re using fresh pineapple.
-
Cook the Rice: You can use previously cooked rice (it’s often even better as it fluffs up!) or cook your rice now. If cooking fresh, follow package instructions, or start by boiling water, adding a pinch of salt, then simmer until all the water is absorbed and rice is fluffy. Set aside once done.
-
Heat the Oil: In a large skillet or wok, heat the olive oil over medium-high heat. You want it hot enough to brown the chicken without burning!
-
Cook the Chicken: Once the oil shimmers, add the chicken pieces in a single layer. Season with a sprinkle of salt and pepper. Cooking in batches can prevent overcrowding. Brown them for about 5-6 minutes until they turn golden. Stir occasionally and watch for that irresistible golden crust!
-
Sauté the Vegetables: Add the diced onion and bell pepper to the skillet. Cook these for about 3-4 minutes, stirring frequently, until they start to soften and become fragrant. This step will build a lovely flavor base.
-
Add Garlic and Ginger: Toss in your minced garlic and ginger, cooking for another minute or until fragrant. Be cautious not to burn the garlic—it can become bitter quickly.
-
Incorporate Pineapple and Chicken Broth: Gently fold in the pineapple chunks, followed by the chicken broth, soy sauce, and brown sugar. Bring this bubbling beauty to a simmer.
-
Simmer and Combine: Allow it to simmer for about 5-7 minutes, letting all those rich flavors meld beautifully. If you notice it’s thickening too much, add a splash more chicken broth!
-
Bring It Together: Once that simmering is done, add the cooked rice right into the skillet. Gently fold the rice into the mix, ensuring every grain gets coated in the glorious sauce. Taste and adjust seasoning as needed—maybe a little more soy sauce or a dash of pepper for that added zing!
-
Serve and Garnish: Once everything is well combined and heated through, remove from heat. Scooping it onto plates, sprinkle with chopped green onions for that fresh touch.
Serving Suggestions
For a lovely presentation, serve your Pineapple Chicken and Rice family-style on a big, colorful platter, or plate it individually in bowls to show off that gorgeous medley of colors. A sprinkle of cilantro can add a pop of green, and fresh lime wedges served alongside enhance those tropical vibes.
Recipe Variations
Get creative with this dish! Here are a few ideas to mix things up:
-
Tropical Twist: Add other fruits like mango or desiccated coconut for a beachy flavor.
-
Spicy Kick: Throw in some red pepper flakes or a splash of sriracha for heat.
-
Vegetarian Option: Swap out the chicken for firm tofu or chickpeas for a plant-based version that still retains protein.
-
Curry Flavor: Add a teaspoon of curry powder to the mix for a warm, exotic flavor twist.
-
Nutty Delight: Top with toasted cashews or almonds for a crunchy contrast!
Chef’s Notes
I can fondly recall one night when a friend inadvertently added way too much brown sugar—resulting in a sweet surprise that turned out to be absolutely delicious! Those kitchen mishaps often lead to the best discoveries. I find the beauty in celebrating each unique creation, not just the perfect ones. Over the years, my Pineapple Chicken and Rice has evolved to include seasonal additions that keep it fresh, so don’t hesitate to make this recipe your own.
FAQs and Troubleshooting
1. What if my chicken is tough or dry?
It might be overcooked. Next time, monitor your cooking time closely and avoid cooking on high heat for extended periods.
2. Can I make this dish ahead of time?
Absolutely! Just store the components separately in airtight containers. Reheat gently in the microwave or stovetop to avoid overcooking.
3. Why is my rice mushy?
If your rice ends up mushy, it may have had too much water while cooking. Ensure you’re following the cooking instructions carefully next time.
4. How can I make this gluten-free?
Use tamari instead of soy sauce, and check all ingredient labels to ensure there are no hidden gluten sources.
Nutritional Info
(Optional: Adjust based on your specific recipe and ingredient usage)
- Calories: Approximately 400 per serving
- Protein: 35g
- Carbohydrates: 45g
- Fat: 12g
And there you have it! An incredible Pineapple Chicken and Rice recipe that’s simplistic yet so full of flavor. May your kitchen be filled with warmth and laughter as you create new memories around the table. Enjoy every delicious bite!
PrintPineapple Chicken and Rice

A delightful blend of savory and sweet featuring chicken, pineapple, colorful bell peppers, and fluffy rice that brings tropical vibes to your plate.
- Prep Time: 15 minutes
- Cook Time: 30 minutes
- Total Time: 45 minutes
- Yield: 4 servings 1x
- Category: Main Course
- Method: Stovetop
- Cuisine: Tropical
- Diet: Gluten-Free
Ingredients
- 2 cups cooked white rice
- 1 pound chicken breast, cut into bite-sized pieces
- 1 cup fresh pineapple chunks (or canned, drained)
- 1 tablespoon olive oil
- 1 small onion, diced
- 2 cloves garlic, minced
- 1 bell pepper (red or green), chopped
- 1 cup chicken broth
- 2 tablespoons soy sauce
- 1 tablespoon brown sugar
- 1 teaspoon ginger, minced
- Salt and pepper to taste
- Chopped green onions for garnish (optional)
Instructions
- Prep your ingredients: Start by cutting your chicken into bite-sized pieces and dicing your onion and bell pepper.
- Cook the rice: Use previously cooked rice or cook your fresh rice now.
- Heat the oil: In a large skillet or wok, heat the olive oil over medium-high heat.
- Cook the chicken: Add the chicken pieces and season with salt and pepper, browning for about 5-6 minutes.
- Sauté the vegetables: Add the diced onion and bell pepper, cooking for about 3-4 minutes until softened.
- Add garlic and ginger: Toss in your minced garlic and ginger, cooking for another minute.
- Incorporate pineapple and chicken broth: Fold in the pineapple, chicken broth, soy sauce, and brown sugar.
- Simmer and combine: Allow it to simmer for about 5-7 minutes.
- Bring it together: Add the cooked rice and gently fold everything to combine.
- Serve and garnish: Remove from heat and sprinkle with chopped green onions before serving.
Notes
Feel free to switch up ingredients for variety, such as adding tropical fruits or a spicy kick with red pepper flakes.
Nutrition
- Serving Size: 1 serving
- Calories: 400
- Sugar: 8g
- Sodium: 600mg
- Fat: 12g
- Saturated Fat: 2g
- Unsaturated Fat: 10g
- Trans Fat: 0g
- Carbohydrates: 45g
- Fiber: 2g
- Protein: 35g
- Cholesterol: 70mg
Keywords: Pineapple Chicken, Tropical Rice, Comfort Food, Easy Dinner Recipe
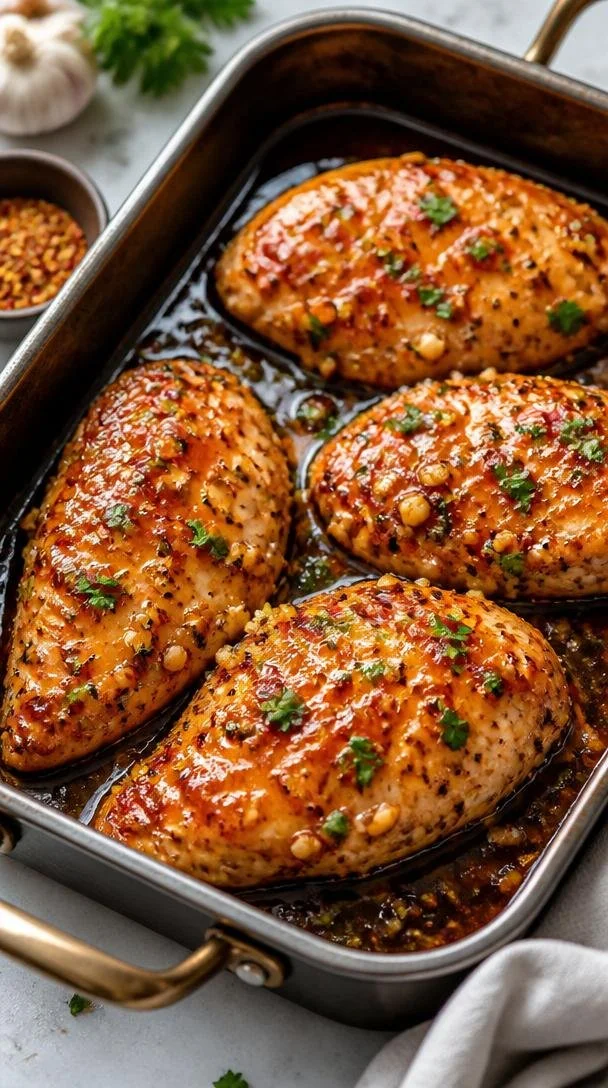
One-Pan Honey Garlic Chicken Bake: Juicy Weeknight Dinner
Baked Honey Garlic Chicken Breast: Easy Juicy Dinner Idea
Hello, fellow food lovers! Today, I’m excited to share with you one of my go-to recipes that beautifully combines simplicity and flavor—the Baked Honey Garlic Chicken Breast. It’s the kind of dish that practically cooks itself while you enjoy a glass of wine or gather your loved ones around the table. Whether you’re trying to impress a special someone or just want to whip up something delicious on a weeknight, this recipe will not disappoint. Let’s dive in!
Introduction
Imagine this: it’s a busy night after a long day, and you’re craving something tasty yet effortless to prepare. You open your fridge and spot some chicken breasts, and suddenly inspiration strikes! This Baked Honey Garlic Chicken Breast recipe uses a handful of everyday ingredients to create a dish that’s sweet, savory, and utterly irresistible.
The best part? It’s baked in the oven, freeing you up to talk, laugh, and unwind while your kitchen fills with the delicious aroma of garlic and honey. Plus, cleanup is a breeze! I mean, who doesn’t love a one-pan meal that delivers on both flavor and ease? As I share this recipe, I’ll sprinkle in some of my favorite kitchen tips and personal stories to make your cooking experience even more enjoyable. So, tie on your apron, and let’s get started!
Personal Story
Ah, chicken—a staple that has a special place in my heart as well as my kitchen. I’ll never forget the first time I tried making a honey garlic sauce. I was in college and threw a small dinner party for my friends before finals week. All I knew was I wanted a dish that was easy and would impress. After experimenting with a few different flavor combinations, I crafted a honey garlic sauce that was just perfect.
We gathered around my tiny dining table—papers strewn about, laughter and memories shared. The highlight of the evening was definitely that chicken. My friends devoured it and begged for the recipe. It became a tradition in our group; we would always cook it for our study nights. Nostalgia washes over me each time I prepare it now. It’s funny how some recipes carry so many memories, isn’t it?
Ingredients
Here’s what you’ll need for this delightful dish:
-
4 boneless, skinless chicken breasts (about 6 ounces / 170 grams each)
Tender and juicy, these are the perfect canvas for our honey garlic sauce. You can substitute with thighs if you prefer a bit more flavor! -
1/4 cup honey (85 grams)
Sweet and sticky, honey adds a rich flavor. You can swap it with maple syrup for a different sweetness or agave for a vegan option. -
4 cloves garlic, minced
Garlic is the heart of this dish—it adds depth and pungency. Fresh is best, but you can use jarred minced garlic in a pinch. Use less if you’re not a garlic fan! -
1/4 cup low sodium soy sauce (60 ml)
This brings the savory umami flavor. For gluten-free options, tamari will work wonders! -
1 tablespoon apple cider vinegar (15 ml)
A little acidity balances the sweetness of the honey. You can substitute with rice vinegar or lemon juice if that’s what you have on hand. -
2 tablespoons olive oil (30 ml)
This not only adds to the flavor but helps keep the chicken moist. Feel free to use avocado oil for a subtle touch. -
1/2 teaspoon freshly ground black pepper
Black pepper adds an aromatic kick! You can omit it if you prefer a milder dish. -
1/4 teaspoon red pepper flakes (optional)
A hint of heat, this can be skip or adjusted based on personal preference—level up the spiciness by adding a pinch more! -
Fresh parsley, chopped (for garnish)
A pop of color and freshness to finish off the dish! You can also use cilantro for a different flair.
Step-by-Step Instructions
Now, let’s get to the good part—cooking! Here’s how to create this heavenly dish:
-
Preheat Your Oven:
Start by preheating your oven to 375°F (190°C). This ensures that your chicken breasts will cook evenly and become juicy and tender while you prepare the marinade. -
Make the Marinade:
In a medium-sized bowl, whisk together the honey, minced garlic, soy sauce, apple cider vinegar, olive oil, black pepper, and red pepper flakes. As you mix, take a moment to inhale the warm, sweet smell of the honey and garlic mingling together. It’s a taste of what’s to come! -
Prepare the Chicken:
In a baking dish, layout your chicken breasts in a single layer. Make sure they’re spaced out a bit—this helps them cook uniformly. -
Add the Marinade:
Pour the marinade over the chicken, making sure it’s well-coated. Use a spoon to dollop extra marinade on top—don’t be shy! Allow the chicken to marinate at room temperature for about 20 minutes if you have time, or stick it in the fridge for up to 4 hours. The longer it soaks, the more flavor it absorbs. -
Bake the Chicken:
Pop the baking dish into the preheated oven and bake for about 25-30 minutes. You want your chicken to reach an internal temperature of 165°F (74°C). If you have a digital meat thermometer, now’s the time to pull it out! -
Broil (Optional):
For a little extra color, switch your oven to broil and broil the chicken for an additional 2-3 minutes. This gives it a beautiful glaze and a delightful crispy top—just keep an eye on it so it doesn’t burn! -
Rest and Serve:
Once done, remove the chicken from the oven and let it rest for about 5 minutes. This allows the juices to redistribute, making each bite luscious and flavorful.
Serving Suggestions
Now, it’s time to plate up! Slice the chicken breasts and serve them on a beautiful platter. Drizzle some of that luscious honey garlic sauce from the baking dish over the top. Sprinkle freshly chopped parsley for a pop of color, and don’t forget to add your favorite sides! This dish pairs perfectly with steamed broccoli, fluffy rice, or a fresh salad.
Recipe Variations
Feel free to get creative with this dish! Here are a few variations you might enjoy:
- Add Citrus: Incorporate the zest and juice of a lemon or orange into the marinade for a zesty twist.
- Spice It Up: Mix in some Sriracha or your favorite hot sauce to the marinade for extra heat.
- Herbaceous Flavors: Add fresh thyme or rosemary to the marinade for an aromatic touch.
- Fruit Fusion: Toss in some sliced pineapples or peaches for a sweet addition that caramelizes beautifully in the oven.
- Make it Sticky Rice: Serve with coconut sticky rice instead of regular rice for a Thai-inspired flair.
Chef’s Notes
I’ve been making variations of this honey garlic chicken for years now. What started as a simple way to impress friends has turned into a staple in my home cooking repertoire! Over time, I’ve played around with flavor profiles and sides to match my mood or what’s in season. It’s incredible how one recipe can adapt and grow with you, much like hosting itself!
Oh, and I have to share this story: I once hosted a dinner party, and the chicken was so good that it became a running joke. I had friends asking me weekly if I was serving "the chicken" for dinner. They even started showing up unexpectedly because they could smell it wafting from my kitchen!
FAQs and Troubleshooting
1. My chicken turned out dry. What happened?
Cooking chicken can be tricky! Make sure you’re not overcooking it, as it can dry out quickly. Aim for 165°F internal temperature, and let it rest before cutting.
2. Can I marinate it overnight?
Absolutely! Marinating overnight can enhance the flavors even more. Just remember not to leave it longer than 24 hours, as the chicken can start to get mushy.
3. How do I know if chicken is done without a thermometer?
If you don’t have one, you can cut into the thickest part of the breast; the juices should run clear and there should be no pink remaining!
4. Can I use frozen chicken?
Frozen chicken is a no-go for this recipe. Thaw it in the fridge before marinating and baking to ensure even cooking.
Nutritional Info (Optional)
While I don’t usually focus on nutritional info, if you’re curious, this dish provides protein, healthy fats, and can be balanced with colorful veggies on the side!
There you have it—a warm, welcoming dive into one of my favorite dishes! I hope you’re inspired to try this Baked Honey Garlic Chicken Breast recipe in your own kitchen. Remember, cooking should be fun and not a chore. Enjoy the process, gather around the table, and create wonderful memories with the people you love. Happy cooking!
PrintBaked Honey Garlic Chicken Breast

A sweet and savory baked chicken dish that’s easy to prepare and perfect for any weeknight dinner.
- Prep Time: 15 minutes
- Cook Time: 30 minutes
- Total Time: 45 minutes
- Yield: 4 servings 1x
- Category: Main Course
- Method: Baking
- Cuisine: American
- Diet: None
Ingredients
- 4 boneless, skinless chicken breasts (about 6 ounces / 170 grams each)
- 1/4 cup honey (85 grams)
- 4 cloves garlic, minced
- 1/4 cup low sodium soy sauce (60 ml)
- 1 tablespoon apple cider vinegar (15 ml)
- 2 tablespoons olive oil (30 ml)
- 1/2 teaspoon freshly ground black pepper
- 1/4 teaspoon red pepper flakes (optional)
- Fresh parsley, chopped (for garnish)
Instructions
- Preheat Your Oven: Start by preheating your oven to 375°F (190°C).
- Make the Marinade: In a medium-sized bowl, whisk together the honey, minced garlic, soy sauce, apple cider vinegar, olive oil, black pepper, and red pepper flakes.
- Prepare the Chicken: In a baking dish, layout your chicken breasts in a single layer.
- Add the Marinade: Pour the marinade over the chicken, making sure it’s well-coated.
- Bake the Chicken: Pop the baking dish into the preheated oven and bake for about 25-30 minutes.
- Broil (Optional): For a little extra color, switch your oven to broil and broil the chicken for an additional 2-3 minutes.
- Rest and Serve: Once done, remove the chicken from the oven and let it rest for about 5 minutes.
Notes
Feel free to experiment with add-ins like citrus or herbs to customize the flavor.
Nutrition
- Serving Size: 1 serving
- Calories: 350
- Sugar: 20g
- Sodium: 600mg
- Fat: 12g
- Saturated Fat: 2g
- Unsaturated Fat: 10g
- Trans Fat: 0g
- Carbohydrates: 38g
- Fiber: 0g
- Protein: 30g
- Cholesterol: 70mg
Keywords: chicken, honey garlic, baked chicken, easy dinner, weeknight meal

One-Pan Crispy Parmesan Chicken with Garlic Cream Sauce
Crispy Parmesan Chicken with Garlic Cream Sauce Delight
Hello, my fellow food enthusiasts! Today, we’re diving into a dish that perfectly balances crispy and creamy, taking your taste buds on a delightful journey: Crispy Parmesan Chicken with Garlic Cream Sauce Delight. If you love comforting flavors with a touch of elegance, you’re in for a real treat!
Introduction
Picture this: It’s a cozy Friday night, and you’re craving something comforting yet special enough to make you feel like a culinary rockstar. Enter Crispy Parmesan Chicken! This dish has it all — tender chicken breasts, a crunchy cheesy coating, and a lush garlic cream sauce that’s simply irresistible.
What I adore most about this recipe is how it transforms a routine dinner into a memorable occasion — just like I love doing with every meal at Ivory Apron. With a few simple ingredients and some kitchen love, you can create a dish that not only impresses but also feels warm and inviting, just like a hug from an old friend.
This recipe is everything I believe cooking should be: approachable, elegant, and effortlessly enticing. So, let’s roll up our sleeves, tie on those aprons, and step into the delightful world of cooking!
Personal Story
I still remember the first time I made this dish. I was hosting a small gathering to celebrate a friend’s promotion, and the pressure was on. I wanted to create something that would wow them, but I didn’t want to be stuck in the kitchen all night. So, I turned to my trusty Crispy Parmesan Chicken recipe, which has become a staple in my entertaining arsenal.
As I breaded the chicken, I recalled my grandmother’s kitchen, where the aroma of garlic and cheese always brought everyone together. I drizzled on that creamy garlic sauce with a bit of nervous anticipation, hoping it would dazzle my friends just as it had dazzled my family for generations. Spoiler alert: it did! Everyone raved about it, and we laughed and reminisced until the candles burned low. That night, food was not just something to eat; it was an experience, a celebration of friendship and love.
Ingredients
To create this delectable dish, here’s what you’ll need:
-
4 pieces boneless, skinless chicken breasts
A lean protein that soaks in flavors beautifully. You can substitute with thighs for extra juiciness. -
1 teaspoon salt
Essential for enhancing all the other flavors. Feel free to adjust based on your dietary needs. -
1 teaspoon black pepper
Adds a touch of warmth and complexity. White pepper can be used for a milder taste. -
1 teaspoon Italian seasoning
A blend of dried herbs like oregano and basil. Fresh herbs can be substituted for a bolder flavor! -
1 cup Parmesan cheese (grated)
The star of the crispy coating! You could use Pecorino Romano for a sharper kick. -
1 cup breadcrumbs (preferably panko)
For that incredible crunch! Regular breadcrumbs work too, but panko makes it extra crispy. -
2 pieces eggs (beaten)
These act as the glue for your breadcrumbs. For a vegan version, use a flax egg! -
1 cup heavy cream
For that luscious, velvety texture in your sauce. Half-and-half or coconut cream can work as lighter alternatives. -
3 cloves garlic (minced)
Garlic is the essence of flavor here! You can adjust based on how garlicky you want your dish. -
1 tablespoon olive oil
A healthy fat that adds richness. You can use butter if you prefer a richer flavor profile. -
2 tablespoons fresh parsley (chopped)
For a pop of color and brightness. Thyme or basil can also be lovely alternatives.
Step-by-Step Instructions
-
Prep Your Chicken
Start by preheating your oven to 375°F (190°C). Take those lovely chicken breasts and season them with salt, pepper, and Italian seasoning. These flavors will penetrate the chicken beautifully! -
Set Up Your Breading Station
In one bowl, place the beaten eggs. In another, combine the grated Parmesan and breadcrumbs. This is where the magic happens! The eggs will help the cheesy coating stick.Chef Tip: For an extra layer of flavor, mix in some garlic powder or paprika into the breadcrumb mixture.
-
Bread the Chicken
Dip each seasoned chicken breast into the egg wash, allowing excess to drip off. Then, coat it liberally with the Parmesan breadcrumb mixture. Press it in there so it sticks well!Chef Hack: Use one hand for wet (egg) and one for dry (breadcrumbs) to keep things less messy. Trust me; you’ll thank me later!
-
Bake the Chicken
Place the breaded chicken breasts on a baking sheet lined with parchment paper. Drizzle or spray a bit of olive oil over them for added crispiness. Bake for 25-30 minutes until golden and crispy.Chef’s Insight: If you have a cooking thermometer handy, the chicken should reach an internal temperature of 165°F (74°C).
-
Make the Garlic Cream Sauce
While the chicken is baking, it’s time to make that dreamy garlic cream sauce. In a sauté pan, heat the olive oil over medium heat. Add the minced garlic and sauté until fragrant (about 1-2 minutes).Watch closely: Garlic goes from perfect to burnt really fast!
-
Add the Cream
Pour in the heavy cream and stir well. Bring it to a simmer and then reduce the heat. This is where patience pays off! Let it simmer for 3-5 minutes until it thickens.Chef’s Tip: For added depth, you can add a splash of white wine and let it reduce slightly before adding the cream.
-
Finishing Touches
Once your sauce has thickened, taste it and adjust the seasoning, adding salt and pepper if necessary. Stir in the chopped parsley right before serving as it will brighten the dish!
Serving Suggestions
To plate your Crispy Parmesan Chicken, simply place a chicken breast on a plate and generously drizzle the garlic cream sauce over the top. You can sprinkle a bit more fresh parsley for that touch of color. Serve alongside some roasted vegetables or a light salad to balance the richness. Your guests will be swooning!
Recipe Variations
Here are a few creative twists and variations to make this dish your own:
-
Lemon Herb Parmesan Chicken: Add some lemon zest and juice to the chicken marinade for a zesty twist!
-
Spinach and Artichoke Chicken: Top the chicken with a mix of sautéed spinach and artichoke before adding the sauce for an elevated touch.
-
Cajun Spiced Chicken: Add Cajun seasoning to the breading mixture for a spicy kick!
-
Gluten-Free Option: Swap out the breadcrumbs for gluten-free panko, ensuring everyone can enjoy!
Chef’s Notes
As I’ve made this dish over the years, I’ve come to appreciate its versatility. It started as a basic weeknight dinner but has evolved into my go-to for everything from casual family dinners to elegant dinner parties. The joy it brings is palpable, especially when served with good company and great conversation.
Remember, the kitchen is a place to let your creativity shine! Feel free to play with flavors, swap ingredients, and make this recipe uniquely yours.
FAQs and Troubleshooting
1. My chicken isn’t crispy. What went wrong?
Check if you preheated your oven adequately and made sure to use panko breadcrumbs. If the coating doesn’t stick, your chicken might be too wet after the egg wash.
2. Can I make the sauce ahead of time?
Of course! Just reheat gently on the stove, adding a splash of cream to loosen it up.
3. How can I store leftovers?
Store in an airtight container in the refrigerator for up to three days. The chicken may lose some of its crispiness, but it’ll still be delicious!
4. Can I freeze this dish?
While I recommend freezing the uncooked, breaded chicken for the best results, you can freeze leftovers. Just thaw and reheat in the oven to restore some crispiness.
Nutritional Info
While I encourage balance and moderation in cooking, here’s a brief nutritional breakdown per serving:
- Calories: Approximately 500
- Protein: 40g
- Fat: 30g
- Carbohydrates: 20g
- Fiber: 1g
There you have it, my deliciously crispy and creamy creation: Crispy Parmesan Chicken with Garlic Cream Sauce Delight! I hope this recipe inspires you to create beautiful moments in your kitchen and bring loved ones together at your table. Happy cooking!
PrintCrispy Parmesan Chicken with Garlic Cream Sauce Delight

A delightful dish featuring crispy chicken breasts coated in Parmesan and served with a rich garlic cream sauce, perfect for a cozy dinner or a special gathering.
- Prep Time: 15 minutes
- Cook Time: 30 minutes
- Total Time: 45 minutes
- Yield: 4 servings 1x
- Category: Main Course
- Method: Baking
- Cuisine: Italian
- Diet: Gluten-Free option available
Ingredients
- 4 pieces boneless, skinless chicken breasts
- 1 teaspoon salt
- 1 teaspoon black pepper
- 1 teaspoon Italian seasoning
- 1 cup Parmesan cheese (grated)
- 1 cup breadcrumbs (preferably panko)
- 2 pieces eggs (beaten)
- 1 cup heavy cream
- 3 cloves garlic (minced)
- 1 tablespoon olive oil
- 2 tablespoons fresh parsley (chopped)
Instructions
- Prep your chicken by preheating your oven to 375°F (190°C). Season the chicken breasts with salt, pepper, and Italian seasoning.
- Set up your breading station with beaten eggs in one bowl and a mixture of Parmesan and breadcrumbs in another.
- Bread the chicken by dipping in the egg wash and then coating with the breadcrumb mixture.
- Bake the chicken on a parchment-lined baking sheet for 25-30 minutes until golden and crispy.
- Make the garlic cream sauce by sautéing minced garlic in olive oil, then pouring in the heavy cream, stirring, and simmering until thickened.
- Add seasonings to the sauce, then stir in fresh parsley before serving.
Notes
For extra flavor, consider adding garlic powder or paprika to the breadcrumb mixture. Store leftovers in an airtight container for up to three days.
Nutrition
- Serving Size: 1 serving
- Calories: 500
- Sugar: 2g
- Sodium: 800mg
- Fat: 30g
- Saturated Fat: 15g
- Unsaturated Fat: 10g
- Trans Fat: 0g
- Carbohydrates: 20g
- Fiber: 1g
- Protein: 40g
- Cholesterol: 250mg
Keywords: chicken, crispy, Parmesan, garlic cream sauce, easy dinner
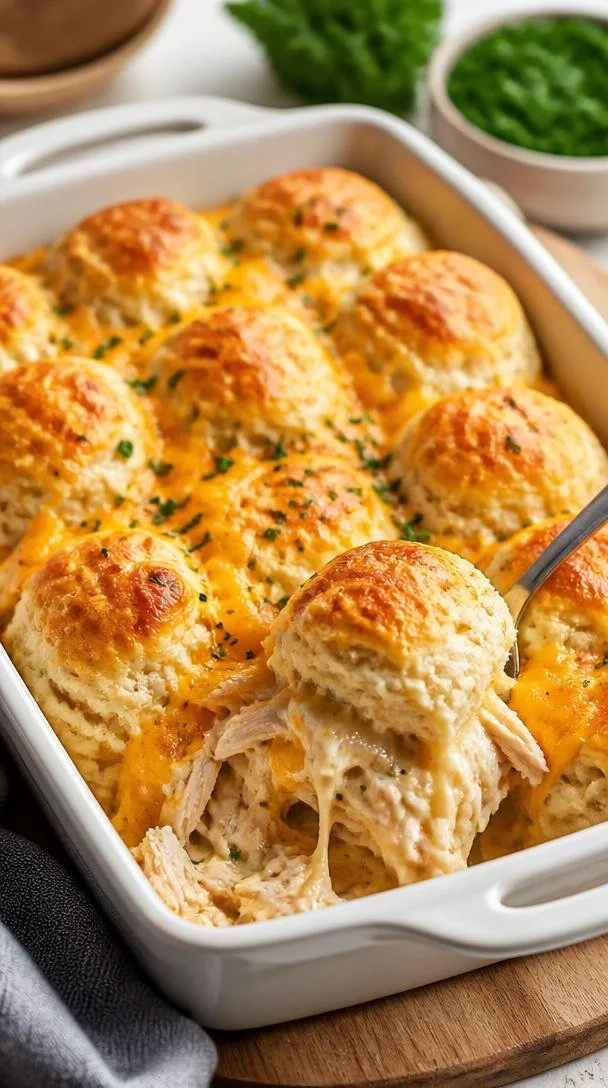
Chicken Bubble Biscuit Bake Casserole
Chicken Bubble Biscuit Bake Casserole: A Hug in a Dish
Welcome to my kitchen, friends! Today, I’m excited to share a comforting dish that feels like a warm hug – Chicken Bubble Biscuit Bake Casserole. This cozy meal is a delightful mashup of flavors that are family-friendly, effortless to make, and sure to please even the pickiest of eaters. Imagine tucking into a fluffy biscuit soaked in savory chicken goodness with a creamy sauce and a sprinkle of cheese. It’s the kind of dish that brings everyone to the table and makes them linger for one more bite.
Creating this casserole is not just about throwing ingredients together; it’s about the joy of mixing, baking, and gathering. Cooking should feel generous and fun, and this recipe reflects that perfectly! Whether you’re having a simple weeknight dinner or hosting friends, this Chicken Bubble Biscuit Bake will add that extra touch of warmth to your meal. Grab your apron and let’s jump into this!
A Little Nostalgic Memory
Let me whisk you back to my childhood for a moment. Picture this: it’s a chilly Sunday evening, and the delightful aroma of something baking wafts through the house. It’s my grandma’s Chicken Biscuit Casserole, a family favorite. She would gather us around the kitchen table, always with plenty of stories to share about her own family’s mealtime memories.
I remember watching her effortlessly pop open those biscuit cans with a satisfying “pop!” sound and scatter bits of chicken throughout the dish. Even now, the sight of biscuit dough feels nostalgic and comforting. Each bite of that casserole was a tapestry of flavors, wrapped in love and laughter. It’s that same essence I want to bring to your kitchen with this modern take on a classic recipe. Let’s create those very same memories that bridge generations, just like grandma did!
Ingredients
Here’s what you’ll need to create your Chicken Bubble Biscuit Bake Casserole:
-
1 can (16 oz) refrigerated biscuit dough: Look for regular-sized biscuits, not Grands. They’ll puff up beautifully as they bake, creating those iconic ‘bubbles.’ You can use any brand; just keep an eye out for the freshest dough!
-
2 cups cooked shredded chicken: You can use leftover chicken, rotisserie chicken, or even poach some chicken breasts. If you want a healthier option, turkey also works.
-
1 can (10.5 oz) cream of chicken soup: This adds creaminess and flavor, acting as the base of our savory sauce. If you prefer, you can make a homemade version using a roux!
-
1 cup sour cream: This helps balance flavors and adds thickness. Plain Greek yogurt makes a great substitute if you’re looking for a lighter touch.
-
1 cup shredded cheddar cheese: I love using sharp cheddar for flavor, but feel free to mix in mozzarella or pepper jack for a different twist!
-
1/3 cup milk: This brings the sauce together. If you’re watching calories, use skim or almond milk to lighten it up.
-
1/2 teaspoon garlic powder: A pantry staple that adds depth. Fresh minced garlic can work too — just adjust according to your love for garlic!
-
1/2 teaspoon onion powder: Enhances the overall flavor profile. Fresh onions sautéed beforehand can bring a delicious touch if you have a bit more time.
-
Salt and pepper to taste: Essential for elevating all those flavors! Don’t shy away from seasoning; it’s your dish!
-
Optional: chopped parsley for garnish: A sprinkle of fresh herbs not only makes it visually appealing, but it also adds a fresh bite!
Step-by-Step Instructions
Ready to dive in? Let’s get cooking!
-
Preheat the oven: Start by preheating your oven to 350°F (175°C). A hot oven is essential for those biscuits to rise perfectly! You want it nice and toasty.
-
Prepare your chicken: If you’re using rotisserie chicken, take it out of the container, shred it using two forks, and place it in a large mixing bowl. If you’re using leftover chicken, make sure it’s warmed up a bit for easier shredding!
-
Mix the creamy sauce: In that same bowl with the chicken, add the cream of chicken soup, sour cream, milk, garlic powder, onion powder, salt, and pepper. Use a spatula to mix everything until it’s well combined. This is where the magic of flavor begins!
-
Transfer to a baking dish: Grab a greased 9×13-inch baking dish and pour the chicken mixture into it. Spread it evenly, ensuring each little piece of chicken is nestled in the creamy embrace.
-
Prepare the biscuits: Now for the fun part! Open the can of biscuit dough and cut each biscuit into quarters. This isn’t an exact science, so no need to stress about perfect sizing! Just cut them into rough quarters; they’ll expand in the oven.
-
Sprinkle the biscuit pieces: Scatter the biscuit pieces across the top of the chicken mixture. This randomness gives your dish that classic bubble appearance once it’s baked!
-
Add the cheese: Oh, yes! Sprinkle a cup of shredded cheddar cheese over the top. Feel free to add more if you’re like me and can’t resist cheesy goodness!
-
Bake: Place the casserole in your preheated oven and bake for around 30-35 minutes, or until the biscuits are golden brown and fully cooked through. If you notice the top is browning too quickly, cover it lightly with foil.
-
Garnish and enjoy: Once baked, take it out carefully, and let it cool for about 5 minutes. If you’re feeling fancy, sprinkle your chopped parsley for that vibrant finishing touch.
-
Dig in and savor: Serve warm right from the dish, inviting everyone to help themselves. Enjoy every bite and the smiles it brings!
Serving Suggestions
For a lovely presentation, consider plating this casserole family-style right in the baking dish. A simple side salad or roasted veggies can complement this hearty meal beautifully. If you want to elevate it even more, pair it with crusty bread for dipping into that creamy sauce. Don’t be afraid to get a little rustic with your serving style; it adds to the charm!
Recipe Variations
-
Vegetarian Twist: Swap the chicken for canned chickpeas or a medley of your favorite roasted vegetables. You could also use tofu for some protein-packed goodness!
-
Hearty & Wholesome: Add a cup of cooked quinoa or wild rice into the chicken mixture for more texture and a nutritional boost.
-
Spicy Kick: Add diced jalapeños or a sprinkle of red pepper flakes to the chicken mixture if you enjoy a bit of heat!
-
Herb-infused: Stir in some fresh chopped thyme or rosemary into the mix for an aromatic touch.
-
Cheesy Delight: Mix in a variety of cheeses for a gooey topping. Think pepper jack, Gouda, or even blue cheese for a unique flavor!
Chef’s Notes
This Chicken Bubble Biscuit Bake has undergone quite the transformation since my initial attempt in my small apartment kitchen. One of my first attempts resulted in a slightly soupy disaster due to not measuring my chicken correctly! But hey, those quirky kitchen moments led to great laughter and prompted me to create more accessible recipes that inspire home cooks. Over time, I’ve perfected the flavors while keeping the comforting essence of the dish intact.
Feel free to make this recipe your own. Bring in family traditions, switch ingredients based on what you have, and always taste as you go. Cooking isn’t just about following rules; it’s about creating experiences!
FAQs and Troubleshooting
1. My biscuits didn’t rise! What happened?
This could be due to expired biscuit dough or not having enough heat in the oven. Make sure to check the dough’s expiration date and always preheat your oven.
2. Can I use frozen chicken?
Absolutely! Just make sure to thaw it and cook it properly before shredding. Precooked, shredded frozen chicken can also be a great time saver.
3. What if my mixture seems too thick?
You can add a little extra milk until you reach your desired consistency. Remember, the biscuits will absorb some moisture, so it’s okay for it to be a little soupy before baking!
4. How can I make this dish gluten-free?
You could use gluten-free biscuit mix or flour and ensure your cream of chicken soup is gluten-free. There are great gluten-free biscuit options you can find at the store!
Nutritional Info
While I usually skip the calculations, if you’re curious, this dish can be a wholesome choice. It packs protein from the chicken and dairy while satisfying your taste buds. Just keep in mind that portions matter when considering calories, especially with all that cheesy goodness!
I hope you enjoy creating this Chicken Bubble Biscuit Bake Casserole as much as I do when I share it with my loved ones! Trust me, it’s going to become a mealtime staple in your home, bursting with flavors and warmth! Happy cooking, and let’s gather around the table!
PrintChicken Bubble Biscuit Bake Casserole

A comforting Chicken Bubble Biscuit Bake Casserole that combines fluffy biscuits with savory chicken and creamy sauce, perfect for family dinners.
- Prep Time: 15 minutes
- Cook Time: 35 minutes
- Total Time: 50 minutes
- Yield: 4 servings 1x
- Category: Main Course
- Method: Baking
- Cuisine: American
- Diet: None
Ingredients
- 1 can (16 oz) refrigerated biscuit dough
- 2 cups cooked shredded chicken
- 1 can (10.5 oz) cream of chicken soup
- 1 cup sour cream
- 1 cup shredded cheddar cheese
- 1/3 cup milk
- 1/2 teaspoon garlic powder
- 1/2 teaspoon onion powder
- Salt and pepper to taste
- Optional: chopped parsley for garnish
Instructions
- Preheat the oven to 350°F (175°C).
- Prepare your chicken by shredding it and placing it in a large mixing bowl.
- Mix the creamy sauce by combining cream of chicken soup, sour cream, milk, garlic powder, onion powder, salt, and pepper in the bowl with chicken.
- Transfer the chicken mixture to a greased 9×13-inch baking dish and spread it evenly.
- Prepare the biscuits by cutting each one into quarters.
- Sprinkle the biscuit pieces across the top of the chicken mixture.
- Add the shredded cheddar cheese on top.
- Bake for 30-35 minutes or until the biscuits are golden brown.
- Garnish with parsley and let cool for 5 minutes before serving.
- Dig in and enjoy!
Notes
Feel free to customize this recipe with different proteins or add vegetables for a healthier option.
Nutrition
- Serving Size: 1 serving
- Calories: 400
- Sugar: 3g
- Sodium: 600mg
- Fat: 20g
- Saturated Fat: 10g
- Unsaturated Fat: 8g
- Trans Fat: 0g
- Carbohydrates: 35g
- Fiber: 2g
- Protein: 25g
- Cholesterol: 60mg
Keywords: chicken, casserole, biscuit bake, comfort food, family dinner

One-Pan Chicken Romano: 20-Minute Weeknight Dinner
Crave-Worthy Chicken Romano: An Incredible Ultimate Recipe
Hey there, fellow food lovers! I’m so excited to share this amazing recipe for Chicken Romano with you. If you’re looking for a dish that feels elegant and comforting all at the same time, look no further! This dish, with its crispy golden exterior and cheesy, savory flavor, can transform any weeknight dinner into a special occasion, and it’s sure to impress even the most discerning palates.
Ellie, my dear friend—and let me tell you, she has quite the knack for finding the latest trendy restaurants—raved about a Chicken Romano dish at a little bistro downtown. As she described it, I could just envision the crispy panko crust, that lovely Romano cheese flavor, and the beautiful plating. Instantly, I was inspired to recreate it at home, not just for her but to make it a staple in my own kitchen.
This recipe is all about balance and joy. The flavors meld together beautifully, while the crispy texture plays perfectly against the tender chicken. Whether you’re hosting friends for a cozy dinner party, cooking for your family, or just indulging a little yourself on a Tuesday night, I promise this dish is here to elevate your dining experience. Plus, it’s so easy to prepare that you’ll find yourself whipping it up again and again!
So, grab your apron, pour yourself a glass of your favorite wine, and let’s dive into this crave-worthy Chicken Romano recipe!
Personal Story
Let me take you back to a delightful summer barbecue we had a few years ago. It was one of those perfect weekends, where the sun shone brightly, and the smell of good food hung in the air. I had invited over some friends and family, and I was determined to make the experience unforgettable. In the lineup was this fantastic Chicken Romano that quickly became the star of the show.
As I prepared the dish, I recalled my grandmother’s kitchen, where she taught me the importance of patience and care in cooking. I can still picture her, apron on, leaning over the stove with a spoon in hand and that cheeky grin, reminding me that cooking is an art. By the time the Chicken Romano was plated, everyone was gathered around, their conversations fading as they eyed the food in excitement. It was one of those magical moments when laughter, good vibes, and delicious smells danced around the table.
As I served the Golden Chicken Romano, I felt that familiar warmth of connection. From the first bite, everyone was hooked! It’s moments like these that fuel my love for cooking, reminding me that food is not just about sustenance; it’s about those shared experiences that linger in our hearts long after the plates are cleared.
Ingredients
So, let’s break down the ingredients you’ll need for this lovely dish!
-
4 boneless, skinless chicken breasts: The star of the show! Make sure they’re even in thickness for even cooking. If you want to substitute for a leaner option, turkey cutlets work well too.
-
1 cup grated Romano cheese: This is where the flavor magic happens. Romano has a sharper taste than Parmesan. If you can’t find it, feel free to swap it out for another hard cheese like Pecorino.
-
1 cup breadcrumbs (preferably Italian-style): They’ll give the chicken that delightful crunch. You can use panko for an extra crispy coating, or make your own from stale bread.
-
2 large eggs: These help bind everything together beautifully. For a vegan option, try using a flaxseed mixture (1 tablespoon of ground flaxseed mixed with 3 tablespoons of water) as a binding agent.
-
2 tablespoons all-purpose flour: A light dusting before you dip it into the egg mixture gives the perfect base. If you need a gluten-free option, almond flour can work wonderfully!
-
1 teaspoon garlic powder: For that extra punch of flavor! You could use fresh minced garlic, but keep in mind it might stick to the breadcrumbs.
-
1 teaspoon dried oregano: A classic herb that adds a Mediterranean flair. Fresh oregano could be chopped and substituted if available!
-
1 teaspoon salt: Essential for flavor enhancement. Adjust to taste, especially if you’re watching your sodium intake!
-
1/2 teaspoon black pepper: Just a touch for that subtle kick.
-
1/4 cup olive oil: We need this to pan-fry our chicken, creating that irresistible golden crust.
-
Fresh parsley, for garnish (optional): A beautiful touch of color and flavor. If you want to mix it up, try adding some fresh basil!
Step-by-Step Instructions
-
Prep Your Chicken: Begin by placing your chicken breasts between two pieces of plastic wrap. This helps to even them out. Grab a meat mallet or rolling pin, and gently pound the chicken until it’s about 1/2 inch thick. This not only ensures even cooking, but it also makes for a tender bite. Set aside.
-
Set Up Your Breading Station: In one shallow bowl, combine the flour, garlic powder, oregano, salt, and pepper. In a second bowl, whisk together the eggs. In a third bowl, spread out the breadcrumbs, and mix in half of the grated Romano cheese. Clear a space on your countertop to lay out the bowls in an assembly line style—trust me; this makes everything easier!
-
Dredge the Chicken: First, take each chicken breast and dip it into the flour mixture, shaking off any excess. Then, dip it into the egg mixture, ensuring it’s fully coated. Finally, press it gently into the breadcrumb mixture, making sure to cover all sides thoroughly. Place the breaded chicken on a plate.
-
Heat the Oil: In a large skillet, heat the olive oil over medium-high heat. You’ll know it’s ready when a pinch of breadcrumbs sizzles upon contact. This step is critical because it will create that crispy, golden layer we’re looking for.
-
Cook the Chicken: Once the oil is hot, carefully place the breaded chicken breasts into the skillet without overcrowding (you may need to do this in batches). Cook for about 4-5 minutes on each side, or until they’re golden brown and cooked through. To check for doneness, insert a meat thermometer into the thickest part of the chicken—160°F is your target!
-
Drain and Rest: Once cooked, transfer the chicken to a paper towel-lined plate to drain excess oil. Let them rest for a few minutes—this allows the juices to redistribute, making for an even juicier bite!
-
Plate and Garnish: Now it’s time for the fun part! Arrange your Chicken Romano on a serving platter or individual plates and sprinkle the remaining Romano cheese over the top along with fresh parsley for that beautiful visual appeal.
Serving Suggestions
This Chicken Romano is perfect served beside a fresh arugula salad tossed with lemon vinaigrette for a lovely contrast. You can also go for a simple pasta with marinara sauce or some roasted seasonal vegetables. And don’t forget a slice of crusty artisan bread to soak up all those delicious flavors!
Recipe Variations
Feeling adventurous? Here are some creative twists for your Chicken Romano:
-
Add a Kick: Try mixing crushed red pepper flakes into your breadcrumb mixture for a spicy touch.
-
Herb Variation: Swap out oregano for fresh basil or thyme for a different herbal note.
-
Cheesy Delight: Mix in some shredded mozzarella with the Romano cheese for an extra cheesy texture.
-
Zesty Twist: Add some lemon zest into the breadcrumb mixture for a refreshing citrus flavor.
-
Veggie Version: For a meatless option, try using eggplant or zucchini slices, breading them just like the chicken.
Chef’s Notes
Oh, how this recipe has evolved! It originally started as a simple breaded chicken dish, but over time, with every gathering and dinner party, it transformed into this crave-worthy Chicken Romano that I can’t get enough of. Each time I make it, I learn something new about flavors and textures that come together beautifully.
And let’s not forget the joyful moments that come along with cooking. I still chuckle when I think about the time I forgot to add the salt. My friend Sarah took a bite and, with the utmost politeness, asked, "Was it supposed to be a low-sodium version?" Lesson learned—always taste as you go!
FAQs and Troubleshooting
1. Why is my Chicken Romano soggy?
If your chicken ends up soggy, it might have been overcrowded in the pan or not cooked long enough. Ensure enough oil is heated before frying and avoid overcrowding, which can lower the oil temperature.
2. Can I bake Chicken Romano instead of frying?
Absolutely! Preheat your oven to 400°F, place the breaded chicken on a greased baking sheet, and bake for about 20-25 minutes or until golden brown and cooked through.
3. What can I serve with Chicken Romano?
This dish pairs beautifully with garlic mashed potatoes, a bright green salad, or even a side of pasta. You can choose sides based on the vibe you want to create for your meal!
4. Can I freeze Chicken Romano?
Yes, you can freeze the breaded raw chicken for up to 3 months. Just be sure to separate pieces with parchment paper to prevent sticking. When ready to cook, thaw overnight in the fridge and follow the cooking instructions as usual.
Nutritional Info
While nutritional values can vary based on specific brands and preparation methods, here’s a basic estimate for one serving of Chicken Romano (based on this recipe yielding 4 servings):
- Calories: 350
- Protein: 30g
- Fat: 20g
- Carbohydrates: 10g
- Fiber: 1g
And there you have it, folks! A delightful, delicious, and utterly crave-worthy Chicken Romano recipe that will not only satisfy your tastebuds but may even bring back your best kitchen memories. So get cooking and enjoy every moment around your table! Good food isn’t just about what’s on your plate; it’s about the love and laughter shared while you savor it. Happy cooking!
PrintCrave-Worthy Chicken Romano

A delightful Chicken Romano recipe featuring crispy, golden chicken coated in Romano cheese, perfect for any occasion.
- Prep Time: 15 minutes
- Cook Time: 30 minutes
- Total Time: 45 minutes
- Yield: 4 servings 1x
- Category: Main Course
- Method: Pan Frying
- Cuisine: Italian
- Diet: None
Ingredients
- 4 boneless, skinless chicken breasts
- 1 cup grated Romano cheese
- 1 cup breadcrumbs (preferably Italian-style)
- 2 large eggs
- 2 tablespoons all-purpose flour
- 1 teaspoon garlic powder
- 1 teaspoon dried oregano
- 1 teaspoon salt
- 1/2 teaspoon black pepper
- 1/4 cup olive oil
- Fresh parsley, for garnish (optional)
Instructions
- Prep your chicken: Place chicken breasts between plastic wrap and pound to about 1/2 inch thick. Set aside.
- Set up your breading station: Combine flour, garlic powder, oregano, salt, and pepper in one bowl; whisk eggs in another; spread breadcrumbs and mix in half of Romano cheese in a third bowl.
- Dredge the chicken: Dip each breast in flour, egg, and then breadcrumbs, ensuring all sides are coated.
- Heat the oil: In a large skillet, heat olive oil over medium-high until ready.
- Cook the chicken: Place breaded chicken in the skillet and cook for 4-5 minutes on each side until golden and cooked through.
- Drain and rest: Transfer cooked chicken to a paper towel-lined plate to drain excess oil. Let rest a few minutes.
- Plate and garnish: Arrange on a serving platter, sprinkle remaining Romano cheese, and add fresh parsley.
Notes
Serve alongside arugula salad, pasta with marinara, or roasted vegetables for a delicious meal.
Nutrition
- Serving Size: 1 serving
- Calories: 350
- Sugar: 1g
- Sodium: 400mg
- Fat: 20g
- Saturated Fat: 5g
- Unsaturated Fat: 10g
- Trans Fat: 0g
- Carbohydrates: 10g
- Fiber: 1g
- Protein: 30g
- Cholesterol: 150mg
Keywords: Chicken Romano, Italian recipe, comfort food, weeknight dinner, savory dish

One-Pan Chicken Fajita Casserole: 30-Minute Weeknight Dinner
Chicken Fajita Casserole: A Crowd-Pleasing Feast
Hello, fellow food enthusiasts! If you’re looking for a dish that combines vibrant flavors, comforting textures, and just the right amount of zing, you’ve landed in the right spot. Today, I’m thrilled to share my Chicken Fajita Casserole recipe that will have you wagging your fork in excitement and declaring it a family favorite before the first bite is out of the oven. This recipe is not just a meal; it’s a celebration of good times, laughter, and the joy of gathering around the table.
Introduction
Let’s set the stage: You’ve had a long day at work, or maybe it’s just one of those days where time feels like it’s sprinting ahead of you. The last thing you want to do is spend hours in the kitchen, but your heart tells you that a homemade dinner is the only way to go. Enter the Chicken Fajita Casserole—a delightful one-dish wonder that brings all the gourmet vibes to your dinner table without the gourmet effort.
This casserole is straightforward to put together, and it’s loaded with ingredients that deliver a flavor punch! You can customize it to suit your crew’s tastes, making it a versatile option whether you’re cooking for one, two, or a small army. Plus, who doesn’t love a dish that can be made ahead and simply popped in the oven when it’s time for dinner?
So, grab your favorite apron (how about a stylish Ivory one?) and let’s dive into a dish that marries the fabulous flavors of chicken fajitas with the ease of a casserole. By the end of this post, you’ll be ready to whip it up with flair, and maybe learn a little something along the way!
Personal Story
I can still remember the first time I tried making a casserole. It was a chilly evening in my college dorm, and I needed something warm and filling that wouldn’t require too many ingredients or much time—a typical college dilemma! I had some leftover chicken from a previous dinner, a few bell peppers from taco night, and tons of enthusiasm. As I tossed everything together in one pan, I realized the magic happening before my eyes. The flavors blended together beautifully in the oven, filling my small living space with the most incredible aroma.
That first casserole night turned into a weekly ritual. My friends began showing up on my doorstep, lured in by that heavenly scent wafting through the air. Little did I know, this simple, thrown-together meal would become a cherished tradition of laughter-filled evenings and shared stories around my tiny table. This Chicken Fajita Casserole is a tribute to those nights—great food that brings people together.
Ingredients
Here’s what you’ll need to create this delightful casserole:
-
2 cups cooked chicken, shredded
Cooked rotisserie chicken is a fantastic time-saver here! Feel free to use turkey instead, or for a vegetarian option, swap in roasted zucchini or mushrooms. -
1 cup bell peppers, sliced (red, green, yellow)
These colorful beauties not only taste amazing but also add a pop of color to your dish! If you’re short on bell peppers, any other mild peppers will work, or addition of fresh spinach can also add a great taste. -
1 cup onion, sliced
Sweet onions or yellow onions are great choices here. If you’re more into a milder flavor, consider using shallots instead! -
1 can black beans, drained and rinsed
These beans bring a hearty texture and protein boost. You could substitute with pinto beans or garbanzo beans if you prefer. -
1 cup corn kernels (fresh or frozen)
Sweet corn adds a delicious crunch! If you’re in a pinch, canned corn works too—just be sure to rinse it. -
1 cup salsa
Go for your favorite salsa, whether it’s chunky, smooth, or spicy! You can make fresh salsa at home or even use a jarred version. -
2 cups shredded cheese (cheddar or Mexican blend)
Cheese makes everything better! Experiment with pepper jack for a little heat or go for a vegan cheese option if you’re dairy-free. -
1 teaspoon chili powder
This spice adds depth and warmth. If you want to kick it up a notch, try using chipotle chili powder for a smoky flavor! -
1 teaspoon cumin
Cumin lends that authentic fajita flair. If you’re out of cumin, coriander can be a lovely alternative. -
Salt and pepper to taste
Essential for bringing all those flavors together! -
Tortilla chips (optional for topping)
Crushed tortilla chips on top add a brilliant crunch. You could also get creative with crushed cornflakes or even crunchy fried onions!
Step-by-Step Instructions
Ready to bring this delicious casserole to life? Follow these steps, and you’ll be savoring every layer of flavor in no time!
-
Preheat Your Oven
Preheat your oven to 350°F (175°C). This step is crucial to ensure your casserole bakes evenly, giving it the perfect texture. -
Prepare Your Ingredients
While your oven preheats, take a moment to shred your cooked chicken if you haven’t done so already. This can be done with two forks or in a stand mixer with a paddle attachment. Get those bell peppers and onion sliced! -
Sauté the Vegetables
In a large skillet, add a drizzle of olive oil over medium heat. Toss in the sliced onions and bell peppers. Sauté for about 5-7 minutes, or until they’re soft and fragrant. A little browning on the edges adds extra flavor! -
Combine the Casserole Ingredients
In a large mixing bowl, combine the shredded chicken, sautéed peppers and onions, black beans, corn, salsa, chili powder, cumin, salt, and pepper. Stir until everything is well mixed. You want every bite to be packed with flavor! -
Layer with Cheese
Now, it’s time to bring the cheesy goodness into play. In your casserole dish, pour half of your chicken mixture. Top it with half of the shredded cheese, and then layer the remaining chicken mixture on top. Finish off with the rest of the cheese for a deliciously gooey topping. -
Bake Away
Cover your casserole dish with aluminum foil and pop it in the oven. Bake for 25 minutes, then remove the foil and bake for an additional 10-15 minutes, or until the cheese is golden and bubbly. If you like a little extra crunch, treat yourself to a broil for a minute or two at the end—just keep a close eye on it! -
Presentation Time
Once your casserole is out of the oven and has slightly cooled, you’re ready to plate! If you’re using tortilla chips, sprinkle some on top for that delightful crunch. Fresh cilantro or a squeeze of lime can add that burst of flavor!
Serving Suggestions
This casserole is a magnificent dish on its own, but serving it with sides can elevate your dining experience. Pair it with a fresh garden salad, guacamole, or a bowl of sour cream for dipping! You could even serve it with warm tortillas on the side for a more traditional touch.
Recipe Variations
Feeling creative? Here are a few fun twists you can try:
-
Spicy Chicken Fajita Casserole: Add some diced jalapeños to the mix for an extra kick.
-
Italian-Inspired Fajita Casserole: Swap out the salsa for a jar of marinara sauce, and add Italian seasoning instead of chili powder and cumin.
-
Vegetarian Delight: Replace the chicken with a mix of roasted vegetables, such as zucchini, eggplant, and bell peppers.
-
Fiesta Casserole: Add sliced black olives and top with fresh avocado for that fiesta flair!
Chef’s Notes
I’ve made this casserole countless times with friends and family, and it never fails to impress. One of my funniest kitchen mishaps happened while I was developing this recipe—I accidentally grabbed the cayenne instead of chili powder! Let’s just say the unexpected heat had everyone reaching for drinks and laughing as they admired my “courageous” cooking decision.
Over the years, I’ve simplified the steps and made it more accessible while ensuring all the flavors shine through. This recipe has evolved with countless feedback, altering this crowd-pleaser endlessly, but one thing always remains the same: the joy it brings to my dining table.
FAQs and Troubleshooting
1. Can I prepare this casserole ahead of time?
Absolutely! You can assemble the casserole a day in advance, cover it, and keep it in the fridge. When you’re ready, just pop it in the oven—adjust baking time as it might need a bit longer if refrigerated.
2. Why is my casserole dry?
If your casserole turns out dry, it might be due to overbaking. Keep an eye on the cheese and cover it with foil if it starts to brown too soon. Adding a bit more salsa can also help keep it moist.
3. Can I freeze leftovers?
Yes, this casserole freezes beautifully! Just be sure to cool it completely before placing it in an airtight container. It should last about three months in the freezer. Reheat by thawing overnight in the fridge, then bake in the oven until warm.
4. What can I do if I don’t have certain ingredients?
No problem! As we mentioned in the ingredients section, you can swap in a variety of beans, vegetables, or spices based on what you have on hand. Fajitas are all about personalization!
Nutritional Info
One serving of this Chicken Fajita Casserole is approximately:
- Calories: 380
- Protein: 35g
- Carbs: 30g
- Fat: 18g
Tailor your sides and servings according to your dietary needs!
Now that you’ve got the scoop on this delectable Chicken Fajita Casserole, I hope your kitchen is buzzing with excitement just like mine. Your family and friends are going to love this dish as much as I do, and I can’t wait for you to experience the joy it brings! So, let’s get cooking, shall we? Happy feasting, friends!
PrintChicken Fajita Casserole

A delightful one-dish wonder that combines the fabulous flavors of chicken fajitas with the ease of a casserole.
- Prep Time: 15 minutes
- Cook Time: 40 minutes
- Total Time: 55 minutes
- Yield: 6 servings 1x
- Category: Main Course
- Method: Baking
- Cuisine: Mexican
- Diet: Paleo
Ingredients
- 2 cups cooked chicken, shredded
- 1 cup bell peppers, sliced (red, green, yellow)
- 1 cup onion, sliced
- 1 can black beans, drained and rinsed
- 1 cup corn kernels (fresh or frozen)
- 1 cup salsa
- 2 cups shredded cheese (cheddar or Mexican blend)
- 1 teaspoon chili powder
- 1 teaspoon cumin
- Salt and pepper to taste
- Tortilla chips (optional for topping)
Instructions
- Preheat your oven to 350°F (175°C).
- Prepare your ingredients by shredding the chicken and slicing the bell peppers and onion.
- Sauté the vegetables in a large skillet over medium heat with olive oil for about 5-7 minutes.
- Combine the shredded chicken, sautéed peppers and onions, black beans, corn, salsa, chili powder, cumin, salt, and pepper in a bowl.
- Layer half of the chicken mixture in a casserole dish, top with half of the cheese, then add the remaining mixture and finish with the remaining cheese.
- Bake covered with aluminum foil for 25 minutes, then uncover and bake for an additional 10-15 minutes until cheese is golden and bubbly.
- Plate and serve, topping with crushed tortilla chips if desired.
Notes
Make ahead and refrigerate; adjust baking time if cooking from cold.
Nutrition
- Serving Size: 1 serving
- Calories: 380
- Sugar: 4g
- Sodium: 600mg
- Fat: 18g
- Saturated Fat: 8g
- Unsaturated Fat: 8g
- Trans Fat: 0g
- Carbohydrates: 30g
- Fiber: 8g
- Protein: 35g
- Cholesterol: 75mg
Keywords: Chicken Fajita, Casserole, Easy Dinner, One Dish Meal, Family Recipe

Bang Bang Chicken in 15 Minutes: Crispy, Spicy Peanut-Sauce Skillet
A Flavor Explosion: Bang Bang Chicken Recipe
Hello, dear friends! I’m so excited to have you join me here at Ivory Apron as we dive into one of my all-time favorite dishes: Bang Bang Chicken! This dish isn’t just about flavor; it’s a story. It’s an invitation to gather around the table, to share laughter, and to create memories that linger long after the last bite. So roll up those sleeves, tie on your apron, and let’s get cooking!
A Personal Story: The First Bite of Bang Bang Chicken
I still remember the first time I tasted Bang Bang Chicken. It was a balmy summer evening, and I was at a charming little bistro with friends. The atmosphere was vibrant with laughter and the clinking of glasses, while the tantalizing aroma of spices filled the air. As I took my first bite, I was taken aback by the delightful crunch of the chicken followed by a creamy, spicy sauce that danced on my taste buds. That moment was magic—a perfect blend of heat and sweetness, and from then on, I was hooked!
Fast forward to my kitchen at home, experimenting with flavors and techniques to recreate that unforgettable dish. Each attempt became a delightful memory in itself, laughter echoed through the kitchen as I tried to find the right balance of flavors. The essence of this dish is not just about eating; it’s about sharing with loved ones, making every dinner a fun gathering!
Ingredients: What You’ll Need for Bang Bang Chicken
Now, let’s gather our ingredients to whip up this savory delight. Here’s what you’ll need:
-
1 lb chicken tenderloins
Tenderloins are juicy and quick-cooking, but you can substitute them with chicken breasts if needed—just slice them into thin strips for even cooking! -
1 cup panko breadcrumbs
These light, Japanese-style breadcrumbs give a delightful crunch. You can use regular breadcrumbs, but panko will always have that extra texture! -
1/2 cup all-purpose flour
This helps in coating the chicken and creating a lovely crisp. If you need a gluten-free option, almond flour or a gluten-free flour blend works great too. -
2 eggs, beaten
The egg wash helps the breadcrumbs adhere nicely. If you’re avoiding eggs, try using flaxseed meal mixed with water (1 tablespoon flaxseed + 2.5 tablespoons water). -
Oil for deep frying
We want that perfect sizzle! For frying, canola or peanut oils are excellent choices due to their high smoke point. -
Salt and pepper to taste
Always essential! Freshly cracked pepper will give the dish a lovely bite. -
1/2 cup mayonnaise
This is the creamy base for our bang bang sauce—super versatile and adds a base cloud of creaminess! Feel free to swap it with Greek yogurt for a lighter version. -
2 tablespoons sweet chili sauce
Trust me, this is the magic ingredient that brings in that sweet and tangy flavor. -
1 tablespoon sriracha sauce
Spice it up! Adjust according to your taste—we want that kick without overwhelming the dish. -
1 tablespoon lime juice
Adds brightness to the sauce. If you’re out of fresh limes, bottled lime juice will do!
Step-by-Step Instructions: Let’s Cook!
-
Prep Your Chicken
Start by patting your chicken tenderloins dry with a paper towel. This step helps the coating stick better. Season them with salt and pepper. A little seasoning goes a long way, so don’t skimp here! -
Set Up Your Breading Station
In one bowl, place the all-purpose flour. In the second bowl, beat the eggs until well mixed. In the third bowl, add the panko breadcrumbs. This is your assembly line—let’s keep it tidy! -
Coat the Chicken
Take each seasoned tenderloin and dip it into the flour, ensuring it’s fully coated to prevent the egg from washing off during the next step. Next, dip it into the beaten eggs, letting the excess drip off. Finally, roll it in the panko breadcrumbs, pressing lightly to ensure they adhere well. Set aside on a plate. -
Heat the Oil
In a deep skillet or pot, pour enough oil to cover the bottom, about an inch deep. Heat it over medium-high heat. You can test the oil’s readiness by dropping a few breadcrumbs in—if they sizzle right away, you’re good to go! -
Fry the Chicken
Carefully add your coated chicken tenderloins in batches, making sure not to overcrowd the pan (this can lower the oil temperature). Fry for about 3-4 minutes on each side until golden brown and crispy. Use a slotted spoon to transfer the cooked chicken onto a plate lined with paper towels to drain any excess oil. Don’t rush this step; it’s where the magic happens! -
Make the Bang Bang Sauce
In a small bowl, combine the mayonnaise, sweet chili sauce, sriracha, and lime juice. Stir until smooth and well blended. Taste it—this is your chance to adjust the heat or sweetness! -
Toss the Chicken
In a large bowl, gently toss your crispy chicken with the bang bang sauce. You want to coat each piece but not drown them—let that lovely crunch shine through!
Serving Suggestions: How to Present It
Now for the fun part—serving! I love to plate my Bang Bang Chicken in a shallow dish that showcases the golden-brown crispy chicken. Drizzle a little extra bang bang sauce over the top for that beautiful finish, and scatter some chopped fresh cilantro or green onions for a pop of color. Pair it with a side of steamed rice and perhaps some crisp vegetables for a balanced meal!
Recipe Variations: Get Creative!
Looking to switch it up? Here are a few variations of Bang Bang Chicken to keep your taste buds dancing:
-
Bang Bang Tofu: For a vegetarian twist, substitute the chicken with cubes of firm tofu. Fry it up until it’s golden and crispy, just like the chicken.
-
Bang Bang Shrimp: Use shrimp in place of the chicken! The cooking time will be shorter, about 2-3 minutes each side.
-
Spicy Garlic Bang Bang: Add minced garlic into the sauce to give it a lovely garlicky kick.
-
Bang Bang Bowls: Serve the crispy chicken over a bed of leafy greens with shredded carrots, cucumbers, and avocado, drizzled with the bang bang sauce as a salad!
-
Zesty Citrus: Add some lemon zest into your sauce for an extra layer of flavor and brightness!
Chef’s Notes: A Few Final Thoughts
Bang Bang Chicken has become a staple in my household. What started as an experiment has turned into a family favorite. I often prepare it for get-togethers, and it’s always met with applause (and some happy dance moves)! Nowadays, I love serving it with a side of grilled veggies or a refreshing tomato salad to cut through the richness. And remember to embrace those little imperfections—sometimes my chicken turns out a bit more rustic than picture-perfect but that just makes it feel more homemade and inviting!
FAQs and Troubleshooting
-
Why is my chicken not crispy?
If your chicken isn’t getting the desired crunch, check that your oil is hot enough before adding the chicken. A common mistake is trying to cook too many pieces at once, which can drop the temperature. -
Can I make this ahead of time?
While Bang Bang Chicken is best served fresh, you can prepare the sauce in advance and store it in the fridge. Just reheat the chicken briefly in the oven to regain some crispiness before serving. -
How do I store leftovers?
Store any leftover chicken in an airtight container in the fridge for up to 2 days. To reheat, pop it in the oven for a quick re-crisp! -
What if I can’t find sweet chili sauce?
You can substitute with equal parts honey and chili flakes for a quick DIY version!
Nutritional Info (Optional)
If you’re keeping an eye on nutrition, roughly, one serving of Bang Bang Chicken contains about 350 calories, with protein from the chicken and healthy fats from the oil. Pair it with veggies for a balanced meal!
And there you have it—Bang Bang Chicken brought to life in your kitchen! I hope you enjoyed this culinary journey with me and that you feel inspired to gather around your own table. Cooking should always be fun, filled with creativity and joy. So tie on that apron and let’s whip up something amazing together! Happy cooking!
PrintBang Bang Chicken

A crispy and flavorful dish featuring chicken tenderloins coated in panko breadcrumbs and tossed in a creamy, spicy bang bang sauce.
- Prep Time: 15 minutes
- Cook Time: 20 minutes
- Total Time: 35 minutes
- Yield: 4 servings 1x
- Category: Main Course
- Method: Frying
- Cuisine: Asian
- Diet: Gluten-Free (if using gluten-free flour and breadcrumbs)
Ingredients
- 1 lb chicken tenderloins
- 1 cup panko breadcrumbs
- 1/2 cup all-purpose flour
- 2 eggs, beaten
- Oil for deep frying
- Salt and pepper to taste
- 1/2 cup mayonnaise
- 2 tablespoons sweet chili sauce
- 1 tablespoon sriracha sauce
- 1 tablespoon lime juice
Instructions
- Prep your chicken: Pat the chicken tenderloins dry and season with salt and pepper.
- Set up your breading station with bowls for flour, beaten eggs, and panko breadcrumbs.
- Coat the chicken by dipping it into flour, then eggs, and finally rolling it in panko breadcrumbs.
- Heat the oil in a deep skillet over medium-high heat.
- Fry the chicken in batches for about 3-4 minutes on each side until golden brown and crispy.
- Make the bang bang sauce by combining mayonnaise, sweet chili sauce, sriracha, and lime juice in a bowl.
- Toss the crispy chicken with the bang bang sauce in a large bowl.
Notes
Serve with steamed rice and vegetables for a balanced meal. For variations, try Bang Bang Tofu or Bang Bang Shrimp.
Nutrition
- Serving Size: 1 serving
- Calories: 350
- Sugar: 5g
- Sodium: 400mg
- Fat: 12g
- Saturated Fat: 1.5g
- Unsaturated Fat: 7g
- Trans Fat: 0g
- Carbohydrates: 45g
- Fiber: 2g
- Protein: 15g
- Cholesterol: 30mg
Keywords: Bang Bang Chicken, Crispy Chicken, Asian Recipe, Chicken Tenderloins, Panko Chicken

Minute One-Pan Chicken Fajitas Casserole for Weeknights
Chicken Fajitas Casserole: Easy and Cheesy!
Hello there, fellow food lovers! If you’re anything like me, you know there’s nothing quite like the hearty, comforting embrace of a delicious casserole. And when it comes to effortless meals that please a crowd, my Chicken Fajitas Casserole is a go-to. It’s cheesy, loaded with flavor, and takes the classic fajitas to a whole new level! So, grab your apron, and let’s dive into this journey of nostalgia and flavor.
A Flavorful Journey Down Memory Lane
I remember the first time I made chicken fajitas from scratch. I was in college, living in a tiny apartment with my friends. We would host these “Taco Tuesdays” that turned into a spectacular, flavor-filled fiesta. One week, I decided to experiment and turned everything into a casserole. I shoved all the vibrant bell peppers, tender chicken, and cheesy goodness into a single dish, baked it until it was bubbly golden, and lo and behold, a star was born! My friends couldn’t stop raving about it, and that night turned into a tradition.
It became our weekly ritual—gathering around that simple, cheesy casserole, reminiscing and making memories. There’s just something magical about sharing food that brings people together, right? So let’s get cooking and create your own memories with this easy Chicken Fajitas Casserole!
Ingredients
Here’s what you’ll need to make this delectable Chicken Fajitas Casserole:
-
1 tablespoon olive oil
A heart-healthy choice that brings flavor and moisture to the chicken. If you’re out of olive oil, feel free to use avocado oil or even melted butter. -
6 boneless skinless chicken thighs or breasts (4 to 6 ounces each, cut into bite-sized pieces)
Chicken thighs add tenderness and moisture, but you can swap them for chicken breasts or even cooked, shredded rotisserie chicken to save time! -
4 bell peppers (sliced; vary the colors for a vibrant presentation)
The more colors, the better! Red, yellow, green, and orange peppers add sweetness and a pop of color. Can’t find fresh peppers? Use frozen bell pepper strips instead. -
1 small onion (sliced)
An essential aromatic that adds depth to your casserole. You can also use shallots or green onions for a different flavor profile. -
1 recipe or package fajita seasoning mix
The key to delightful flavor! You can make your own spice mix with chili powder, cumin, paprika, garlic powder, and salt, or grab a pre-packaged version for convenience. -
1 cup sour cream
This adds creaminess and tang. Greek yogurt can be a lighter alternative if you prefer. -
4 ounces cream cheese (softened)
It contributes to that luscious texture. Neufchâtel cheese or even ricotta can be interesting substitutes! -
2 cups grated cheddar cheese
The ultimate melty topping! Feel free to mix it up with Monterey Jack, pepper jack, or even a Mexican blend for added flair. -
Optional for serving:
- Avocado
Creamy and nutritious, adds a stunning finish to the dish. - Guacamole
Easy and oh-so-yummy! - Additional sour cream
Because why not? - Salsa
Adds a zesty kick!
- Avocado
Step-by-Step Instructions
Now that you have your ingredients lined up, let’s embark on the cooking adventure!
-
Preheat Your Oven:
Start by preheating your oven to 375°F (190°C). This is essential for that perfect, golden-brown topping! -
Sauté the Chicken:
In a large skillet, heat the olive oil over medium heat. Once hot, toss in the bite-sized pieces of chicken. Season with half the fajita seasoning mix. Cook the chicken for about 5-7 minutes, stirring occasionally, until it’s browned and almost cooked through. Chef’s Tip: Don’t overcrowd the pan; you want each piece to get that lovely sear! -
Add the Veggies:
Toss in the sliced onion and colorful bell peppers. Cook for an additional 5 minutes, allowing the veggies to soften. They should just begin to wilt, keeping some crunch. Hacks: If you like a smoky flavor, add a sprinkle of smoked paprika at this point! -
Mix the Creamy Base:
In a bowl, combine the softened cream cheese and sour cream with the remaining fajita seasoning. Mix until smooth. This is where the magic happens—creating that creamy, cheesy layer. Tip: If you’re in a hurry, you can microwave the cream cheese for about 15-20 seconds to make it easier to mix. -
Combine Everything:
Once the chicken and veggies are ready, remove them from the heat. In a greased 9×13-inch baking dish, layer the chicken and veggies evenly. Spread the creamy mixture over the top, followed by the grated cheddar cheese. Pro Tip: Reserve a bit of cheddar cheese to sprinkle on top for an eye-catching finish! -
Bake to Perfection:
Cover the dish with foil and bake for 20 minutes. Remove the foil, sprinkle the remaining cheese on top, and bake for an additional 10-15 minutes until the cheese is bubbling and golden. The anticipation will be killer, but trust me; it’s worth the wait!
Serving Suggestions
When it’s finally out of the oven, let it cool for a few minutes—if you can resist! Garnish with freshly sliced avocado, a scoop of guacamole, or a dollop of sour cream. A sprinkling of chopped cilantro or parsley elevates it further both in taste and presentation. Serve it straight from the dish for a cozy, family-style vibe!
Recipe Variations
Want to mix it up? Here are some fun variations:
-
Tex-Mex Twist: Add black beans or corn for extra flavor and texture!
-
Spicy Kick: Toss in some sliced jalapeños or drizzle with hot sauce when serving.
-
Vegetarian Delight: Swap the chicken for chickpeas or additional colorful veggies like zucchini and mushrooms.
-
Gluten-Free Adaptation: Double-check your seasoning packet and use gluten-free wraps if serving with tortillas on the side.
-
Low-Carb Option: Make this casserole keto-friendly by using cauliflower rice instead of bell peppers.
Chef’s Notes
One of the things I love most about this Chicken Fajitas Casserole is how effortlessly it adapts over time. As you settle into your own cooking ways, you’ll find that this dish is perfect for using up leftovers—think of it as a "clean out the fridge" casserole!
Plus, every time I make it, I’m reminded of those carefree college days filled with laughter and good times. Cooking has this incredible way of transcending time, doesn’t it?
FAQs and Troubleshooting
-
Can I prep this casserole in advance?
Absolutely! Assemble the casserole a day ahead and refrigerate it. Just pop it in the oven when you’re ready to serve; you may need to add a few extra minutes to the baking time if it’s cold. -
What if my casserole ends up too dry?
If you find that your casserole is a bit dry, there are a couple of fixes. First, ensure you have enough cream cheese and sour cream, as they provide moisture. You can also drizzle a small amount of chicken broth over the dish before serving for extra moisture. -
Can I freeze leftovers?
Yes! This casserole freezes well. Just cool it completely, wrap it tightly in plastic wrap, and store it in a freezer-safe dish. When you’re ready to enjoy it, reheat it in the oven from frozen or thaw overnight in the fridge. -
Why doesn’t my chicken look browned?
Browning is all about technique! Ensure your pan is hot enough before adding the chicken pieces and avoid overcrowding the pan. This will give you that beautiful golden crust!
Nutritional Info (Optional)
Not including specifics here as it can vary based on ingredients; however, if you want to get a ballpark figure, consider a balanced approach with proteins, healthy fats, and colorful veggies to create a fulfilling meal.
The warmth of this Chicken Fajitas Casserole goes beyond just its cheesy goodness; it’s about the stories you create, the people you share it with, and the love that fills the room. So whip out those aprons, get cooking, invite your friends over, and let this dish be a centerpiece for laughter and joy! Happy cooking, my friends!
PrintChicken Fajitas Casserole

This Chicken Fajitas Casserole is cheesy, loaded with flavor, and elevates classic fajitas into a hearty comfort dish.
- Prep Time: 15 minutes
- Cook Time: 30 minutes
- Total Time: 45 minutes
- Yield: 4 servings 1x
- Category: Main Course
- Method: Baking
- Cuisine: Tex-Mex
- Diet: Gluten-Free
Ingredients
- 1 tablespoon olive oil
- 6 boneless skinless chicken thighs or breasts (cut into bite-sized pieces)
- 4 bell peppers (sliced)
- 1 small onion (sliced)
- 1 package fajita seasoning mix
- 1 cup sour cream
- 4 ounces cream cheese (softened)
- 2 cups grated cheddar cheese
Instructions
- Preheat your oven to 375°F (190°C).
- Sauté the chicken in a skillet with olive oil and half the fajita seasoning for about 5-7 minutes until browned.
- Add the sliced onion and bell peppers, cooking for an additional 5 minutes.
- Mix the softened cream cheese and sour cream with the remaining fajita seasoning in a bowl.
- Combine the chicken and veggies in a greased baking dish, layer the creamy mixture on top, and sprinkle with cheddar cheese.
- Bake covered with foil for 20 minutes, then remove the foil and bake for another 10-15 minutes until golden.
Notes
You can make this casserole in advance and store it in the fridge before baking. Add extras like black beans or jalapeños for a twist.
Nutrition
- Serving Size: 1 serving
- Calories: 400
- Sugar: 6g
- Sodium: 600mg
- Fat: 20g
- Saturated Fat: 10g
- Unsaturated Fat: 8g
- Trans Fat: 0g
- Carbohydrates: 30g
- Fiber: 4g
- Protein: 25g
- Cholesterol: 85mg
Keywords: casserole, chicken fajitas, easy recipes, comfort food
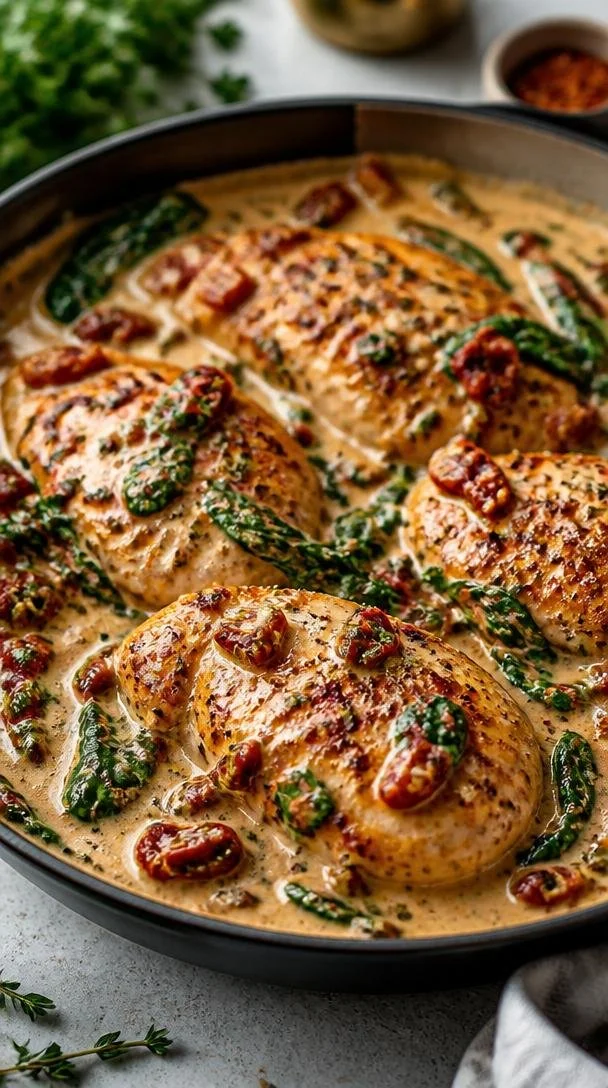
Marry Me Chicken
Marry Me Chicken: A Love Story in Every Bite
Introduction
Welcome back, culinary adventurers! Today, we’re diving into one of the most romantic dishes you’ll ever have the pleasure of crafting in your kitchen: Marry Me Chicken. What’s in a name, you ask? Well, let me tell you, this dish isn’t just about chicken – it’s a whole experience! With its creamy, dreamy sauce, sun-dried tomatoes, and vibrant spinach, Marry Me Chicken is a dish that promises to steal hearts and make taste buds dance.
Now, picture this: you’ve just come home from a long day, your kitchen is your little sanctuary, and you want something that looks elegant but feels cozy. Every time I prepare Marry Me Chicken, it reminds me of those laid-back evenings spent with friends and family where laughter fills the air, glasses are raised, and the aroma of good food invites everyone to the table. It’s the kind of dish that makes you feel like a culinary magician, effortlessly transforming a few ingredients into something extraordinary.
When I first discovered this recipe, I didn’t just fall in love with its rich flavors; I fell in love with how simple it was to impress my loved ones. The first time I served it, there were gasps around the table – gasps of joy, that is! Spoiler alert: there may have been a proposal – and no, not from me! This dish has a way of making moments memorable, and I can’t wait for you to experience it for yourself. So, let’s roll up our sleeves, tie on those aprons, and create some magic!
Personal Story
I’ll never forget the first time I made Marry Me Chicken. It was a warm summer evening, and I had invited a few of my closest friends over for dinner. The sun was setting, and the golden light cast a dreamy glow in my small kitchen. I wanted to impress, but my goal was also to create a cozy atmosphere where everyone would feel at home.
As I prepared this dish, I could hear the laughter of my friends wafting in from the living room. When I served them, their eyes lit up! The first bite was met with silence, and that’s how I knew I had success. After a few moments, one of my friends declared, “If I didn’t know better, I’d say this tastes like I’m dining in an upscale restaurant!” Little did I know, that night would solidify a tradition of gathering friends around the table, sharing not just food, but love, laughter, and unforgettable memories. Every time I cook Marry Me Chicken, I’m transported back to that beautiful moment – a reminder of the magic that happens when we share food with those we cherish.
Ingredients
To create this heartwarming dish, you’ll need the following ingredients:
-
4 boneless, skinless chicken breasts: This is your canvas! You can substitute with chicken thighs if you prefer a richer flavor or even use turkey cutlets for a lighter option.
-
Salt and pepper to taste: Essential for enhancing flavors. Feel free to experiment with other seasonings, but these basics are a must.
-
2 tablespoons olive oil: A healthier fat that adds flavor and helps to sear the chicken. You can swap olive oil with avocado oil for a different flavor profile.
-
4 cloves garlic, minced: Garlic adds depth and aroma. You can use garlic powder in a pinch, but fresh truly shines here!
-
1 teaspoon dried Italian herbs (basil, oregano, thyme): This a blend of classic Italian flavors. Substitute with Herbes de Provence for a twist.
-
1 cup heavy cream: The star of the show for that luscious sauce. For a lighter version, you might use half-and-half, but be aware it won’t have the same richness.
-
1 cup chicken broth: This enhances the sauce’s richness. You can use vegetable broth if you want to make it vegetarian-friendly.
-
1/2 cup sun-dried tomatoes, chopped: A burst of tangy sweetness! If you can’t find sun-dried tomatoes, you could use roasted red peppers for a different flavor.
-
1 cup spinach: This adds color and nutrition. Kale can be a fabulous substitute if you’d like a sturdier green.
-
Parmesan cheese, grated for serving: The finishing touch that brings it all together. Feel free to sprinkle with pecorino or nutritional yeast for a dairy-free option.
Step-by-Step Instructions
-
Prepare Your Ingredients
Start by gathering all your ingredients. This makes the cooking process smoother and less stressful. Take a moment to admire all the beautiful colors and textures. Trust me, cooking is way more fun when you feel inspired! -
Season the Chicken
Lightly season your chicken breasts with salt and pepper. Don’t be shy – this is where flavor starts! Heat your olive oil in a large skillet over medium-high heat. Once hot, add the chicken. -
Sear the Chicken
Cook the chicken for about 6-7 minutes on each side until it’s golden brown and cooked through. You want a nice caramelization for depth of flavor. Use tongs to flip them; that satisfying sizzle is music to my ears! -
Make the Garlic Magic
Remove the chicken from the skillet and set aside. Lower the heat to medium and toss in the minced garlic. Sauté for about 30 seconds until fragrant – but be careful not to burn it! It’s a fine line, and burnt garlic is a no-go! -
Add the Flavors
Stir in the dried Italian herbs and chicken broth. Be sure to scrape up any brown bits from the bottom of the pan – that’s flavor gold! Let it bubble gently for a minute or two. -
Creamy Indulgence
Pour in the heavy cream and let it come to a gentle simmer. This is where the magic happens, folks! You’ll notice the sauce thickening and becoming luscious. Add the sun-dried tomatoes and spinach. Stir until the spinach wilts and everything is coated in this dreamy sauce. -
Bring It All Together
Return the chicken to the skillet and allow it to soak in all those fantastic flavors for another 5 minutes. Turn off the heat, and sprinkle with grated Parmesan cheese. Let your kitchen soak in that delightful aroma!
Serving Suggestions
To plate your Marry Me Chicken, serve it over a bed of al dente pasta, creamy mashed potatoes, or even fluffy rice. Ladle that rich sauce generously over the chicken and garnish with a sprinkle of additional Parmesan and fresh herbs. Setting the table with some candles and a beautiful cloth can really create an inviting atmosphere, perfect for any gathering or even a special dinner for one.
Recipe Variations
-
Spicy Twist: Add some crushed red pepper flakes to the garlic for a spicy kick that will wake up your taste buds.
-
Mushroom Lover: Sauté sliced mushrooms alongside the garlic for an earthy addition.
-
Pesto Delight: Stir in a tablespoon of pesto instead of the Italian herbs for a different depth of flavor.
-
Citrusy Zing: Squeeze some fresh lemon juice into the sauce right before serving for a bright, refreshing finish.
-
Vegan version: Use plant-based chicken substitutes, coconut cream instead of heavy cream, and vegetable broth for a delightful vegan twist.
Chef’s Notes
Whenever I make Marry Me Chicken, it feels nostalgic. It reminds me of years spent trying to impress my friends and family with my cooking skills – and boy, did I learn a lot along the way! You can bet many failed soufflés and dry chicken breasts have led me to this creamy perfection. I love talking with my friends about our culinary experiences, and we often share stories about the dishes that transformed our home cooking.
Over time, I have played around with the recipe, adding different ingredients and spices, but I always come back to this version. It’s simple, elegant, and never fails to make everyone around the table feel special. Plus, there’s something utterly charming about a dish that’s downright swoon-worthy yet so easy to prepare!
FAQs and Troubleshooting
-
What can I serve with Marry Me Chicken?
Great question! This dish pairs beautifully with pasta, rice, or a fresh green salad. Garlic bread or crusty baguette is also a crowd-pleaser for soaking up that creamy sauce! -
Can I make this dish ahead of time?
Absolutely! You can cook it a few hours in advance and then reheat it gently on the stove. Just be cautious not to overheat or dry out the chicken. -
Why is my sauce not thickening?
If your sauce isn’t thickening, make sure you’re letting it simmer long enough. If it’s still runny, you can mix a cornstarch slurry (1 tablespoon of cornstarch and 2 tablespoons of cold water) and gradually add it to the sauce while stirring. -
Can I freeze Marry Me Chicken?
Yes! Allow it to cool fully before transferring it to an airtight container. It should last up to 3 months in the freezer. Just remember to thaw it in the fridge before reheating!
Nutritional Info
While it’s not the primary focus of this dish, an approximate nutritional breakdown per serving (based on 4 servings) includes:
- Calories: ~520
- Protein: ~36g
- Carbohydrates: ~6g
- Fat: ~40g
And there you have it! A delightful journey through Marry Me Chicken that’s sure to become a staple in your home. This dish is all about love, warmth, and creating cherished moments around the dinner table. Happy cooking, dear friends! Don’t forget to share your own culinary stories and transformations – I can’t wait to hear about your delicious adventures!
PrintMarry Me Chicken

A romantic dish featuring creamy sauce, sun-dried tomatoes, and vibrant spinach that is perfect for impressing loved ones.
- Prep Time: 15 minutes
- Cook Time: 30 minutes
- Total Time: 45 minutes
- Yield: 4 servings 1x
- Category: Main Course
- Method: Sautéing
- Cuisine: Italian
- Diet: Mediterranean
Ingredients
- 4 boneless, skinless chicken breasts
- Salt and pepper to taste
- 2 tablespoons olive oil
- 4 cloves garlic, minced
- 1 teaspoon dried Italian herbs (basil, oregano, thyme)
- 1 cup heavy cream
- 1 cup chicken broth
- 1/2 cup sun-dried tomatoes, chopped
- 1 cup spinach
- Parmesan cheese, grated for serving
Instructions
- Prepare your ingredients by gathering all of them for a smooth cooking process.
- Season your chicken breasts with salt and pepper, then heat olive oil in a large skillet over medium-high heat.
- Sear the chicken for about 6-7 minutes on each side until golden brown and cooked through.
- Make the garlic magic by sautéing minced garlic for 30 seconds in the same skillet.
- Add the dried herbs and chicken broth, scraping up any brown bits from the bottom of the pan.
- Pour in the heavy cream and allow to simmer until thickened, stirring in the sun-dried tomatoes and spinach.
- Bring the chicken back into the skillet and let it soak in the flavors for another 5 minutes.
Notes
This dish pairs beautifully with pasta, rice, or a fresh green salad. You can prepare it in advance and reheat when ready to serve.
Nutrition
- Serving Size: 1 serving
- Calories: 520
- Sugar: 5g
- Sodium: 600mg
- Fat: 40g
- Saturated Fat: 16g
- Unsaturated Fat: 20g
- Trans Fat: 0g
- Carbohydrates: 6g
- Fiber: 1g
- Protein: 36g
- Cholesterol: 100mg
Keywords: chicken, creamy sauce, romantic dinner, Italian recipe, comfort food