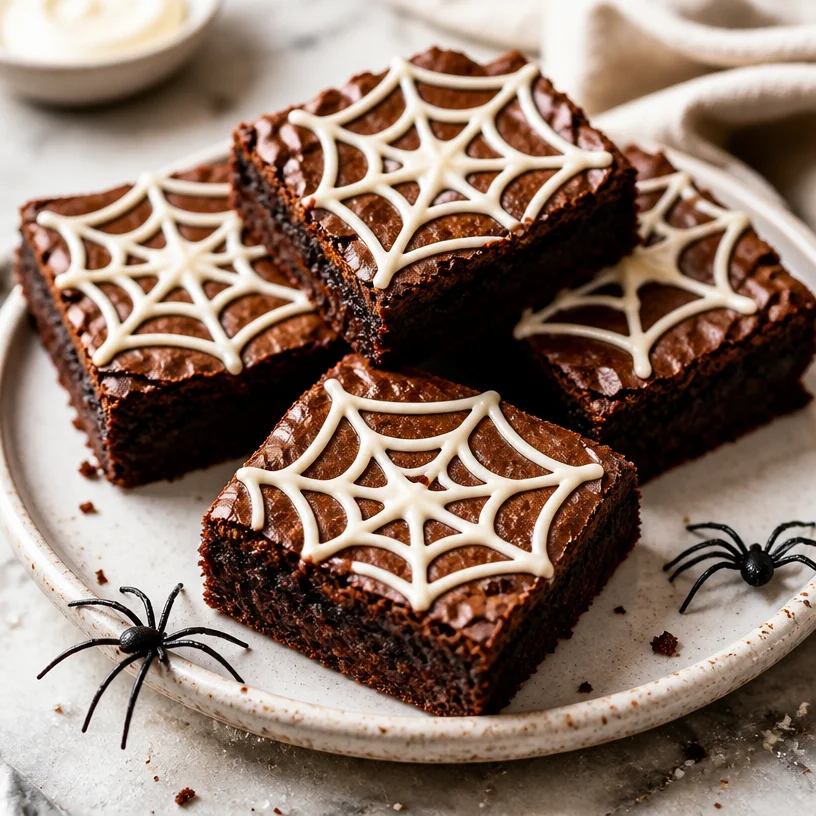
Halloween Spider Web Brownies: Easy Crowd-Pleasing Treat
Spider Web Brownies: A Spooktacular Treat for Every Occasion
Hello, fellow food lovers! Get ready to indulge in a delightful fusion of decadence and whimsy with my Spider Web Brownies. These rich, fudgy brownies topped with easy-to-make white icing are sure to be a hit at any gathering—be it a Halloween celebration, a cozy get-together, or even a potluck. The combination of ooey-gooey chocolate and a playful spooky design will have everyone reaching for seconds!
A Taste of Nostalgia
When I think about brownies, I can’t help but remember my childhood baking marathons with my grandmother. She would invite me into her warm kitchen, filling the air with rich chocolate aromas that felt like a warm hug. We would whip up her famous brownies, and she would let me add the finishing touches—sometimes nuts, sometimes frosting, but always with a sprinkle of love.
One Halloween, we got a bit adventurous and decided to turn those classic brownies into Spider Web Brownies. With some white icing for web designs and a few plastic spiders as dramatic decor, we transformed her tray of delectable treats into spooky masterpieces. Watching my friends’ eyes widen with delight when they saw those eerie yet adorable treats is a memory I’ll always cherish. Let’s dive into this joy of baking together!
Ingredients
To create your own Spider Web Brownies, you’ll need the following ingredients:
-
1 batch of brownies (your favorite recipe or box mix)
- Chef Insight: If you opt for a box mix, choose a high-quality one to ensure rich flavors. Can’t find a mix? My simple homemade brownie recipe uses dark chocolate for extra depth!
-
White icing (store-bought or homemade)
- Substitution Tip: If you prefer to avoid store-bought icing, mix powdered sugar with a tiny bit of milk and vanilla extract until you reach a smooth, pipeable consistency. Easy and delicious!
Step-by-Step Instructions
Ready to dive into the fun? Let’s get those brownies baking!
-
Prepare Your Brownies:
- Preheat your oven as per your brownie recipe’s instructions (usually around 350°F or 175°C).
- Grease a baking pan with non-stick spray or line it with parchment paper for easy removal. Trust me; you’ll thank me later!
-
Mixing the Batter:
- If you’re making brownies from scratch, melt your chocolate and butter together. Stir in sugar, then eggs, followed by flour and vanilla. Mix until combined, being careful not to over-mix.
- For boxed brownies, follow the package instructions—make sure to mix until smooth.
-
Bake the Brownies:
- Pour your batter into the prepared pan, spreading it evenly. Bake for the recommended time (usually about 20–25 minutes) until a toothpick inserted comes out with a few moist crumbs. Remember, it’s okay if they look a little gooey—they’ll firm up as they cool!
-
Cool and Decorate:
- Once baked, remove the brownies from the oven and let them cool completely in the pan before transferring them to a wire rack.
- Once cool, drizzle the white icing on top. This is where the fun begins! To make a spider web, start by piping a spiral from the center outward. Then make straight lines from the center to the edge of the pan to create the iconic web design. Use a toothpick or skewer to gently drag lines for the web effect.
-
Add Some Spooky Flair:
- As a final touch, you can add some plastic spiders (or candy spiders for a sweeter twist) on top. They’ll give your brownies that perfect spooky vibe.
Serving Suggestions
Serve your Spider Web Brownies on a festive platter, and don’t forget to decorate the table with some fall-themed items. Add a few mini pumpkins or fake cobwebs to create an inviting atmosphere. When serving, be sure to cut generous squares—these treats are meant to be shared and savored!
Recipe Variations
Feeling adventurous? Here are some fun twists you can try with your Spider Web Brownies:
- Peanut Butter Swirl: Before baking, swirl in some peanut butter for an extra layer of flavor.
- Minty Madness: Add a drop of peppermint extract to the brownie batter for a minty surprise.
- Nutty Delight: Toss in some chopped walnuts or pecans to add a crunchy texture.
- Gluten-Free Alternative: Substitute traditional flour with a gluten-free blend for a delicious inclusive option.
- Flavored Icing: Use colored icing or flavored icings (like vanilla or almond) to switch things up!
Chef’s Notes
These Spider Web Brownies have a special place in my heart and have evolved over the years. Initially, I used to go all out with themes for every holiday. Now, I appreciate the simplicity of elegant touches. Although I still sprinkle in those fun designs, I love how they can add a little magic to everyday moments.
Once during a cooking class, I jokingly added gummy worms to the mix thinking it’d be hilarious. Let’s just say, it was way more popular than I anticipated! Though I’m back to spiders for the classic Halloween vibes, don’t be afraid to get creative with toppings.
FAQs and Troubleshooting
1. Why are my brownies too cakey?
If your brownies turned out too cakey, it may be because you overmixed the batter or baked them too long. Stick to the cooking time indicated in the recipe, and resist the urge to over-mix!
2. My icing is too runny. How can I fix it?
If your icing is runny, add more powdered sugar a tablespoon at a time until it reaches your desired thickness. You want it smooth but pipeable!
3. Can I freeze the brownies?
Absolutely! Once the brownies are fully cooled, you can freeze them before icing. Wrap them tightly in plastic wrap and foil, and they’ll last up to three months in the freezer. Just thaw and ice them when you’re ready to enjoy!
4. How do I store the decorated brownies?
Store your decorated brownies in an airtight container at room temperature for up to five days. If using icing, it’s best to consume them sooner for the best taste and presentation.
Nutritional Info
While nutritional information will vary based on your chosen recipe for brownies and icing, a typical serving boasts around 250-300 calories. Each brownie brings a delightful mix of fats, sugars, and carbohydrates that cater to your sweet tooth while keeping those moments around the table joyful. Just remember: moderation is key!
There you have it—a whimsical yet delectable recipe for Spider Web Brownies that will bring delight to any gathering. I hope you enjoy making these spooky treats as much as I enjoyed sharing the recipe with you! Tie on that apron, have some fun in the kitchen, and remember that every bite should be as joyous as the gathering itself. Happy baking!
PrintSpider Web Brownies
Delightful fudgy brownies decorated with a spooky spider web design, perfect for Halloween or any gathering.
- Prep Time: 15 minutes
- Cook Time: 25 minutes
- Total Time: 40 minutes
- Yield: 16 servings 1x
- Category: Dessert
- Method: Baking
- Cuisine: American
- Diet: Vegetarian
Ingredients
- 1 batch of brownies (your favorite recipe or box mix)
- White icing (store-bought or homemade)
Instructions
- Preheat your oven as per your brownie recipe’s instructions (usually around 350°F or 175°C).
- Grease a baking pan with non-stick spray or line it with parchment paper for easy removal.
- Melt your chocolate and butter together if making from scratch, then stir in sugar, eggs, flour, and vanilla until combined.
- Pour your batter into the prepared pan and bake for 20–25 minutes until a toothpick comes out with a few moist crumbs.
- Cool completely in the pan before transferring to a wire rack.
- Drizzle white icing on top to create the spider web design by piping a spiral and dragging lines with a toothpick.
- Add plastic spiders or candy spiders on top for decoration.
Notes
These brownies can be customized with different toppings and flavors to suit your taste. Enjoy the festive presentation!
Nutrition
- Serving Size: 1 brownie
- Calories: 300
- Sugar: 25g
- Sodium: 200mg
- Fat: 15g
- Saturated Fat: 8g
- Unsaturated Fat: 6g
- Trans Fat: 0g
- Carbohydrates: 40g
- Fiber: 2g
- Protein: 4g
- Cholesterol: 30mg
Keywords: brownies, Halloween, dessert, spider web, chocolate
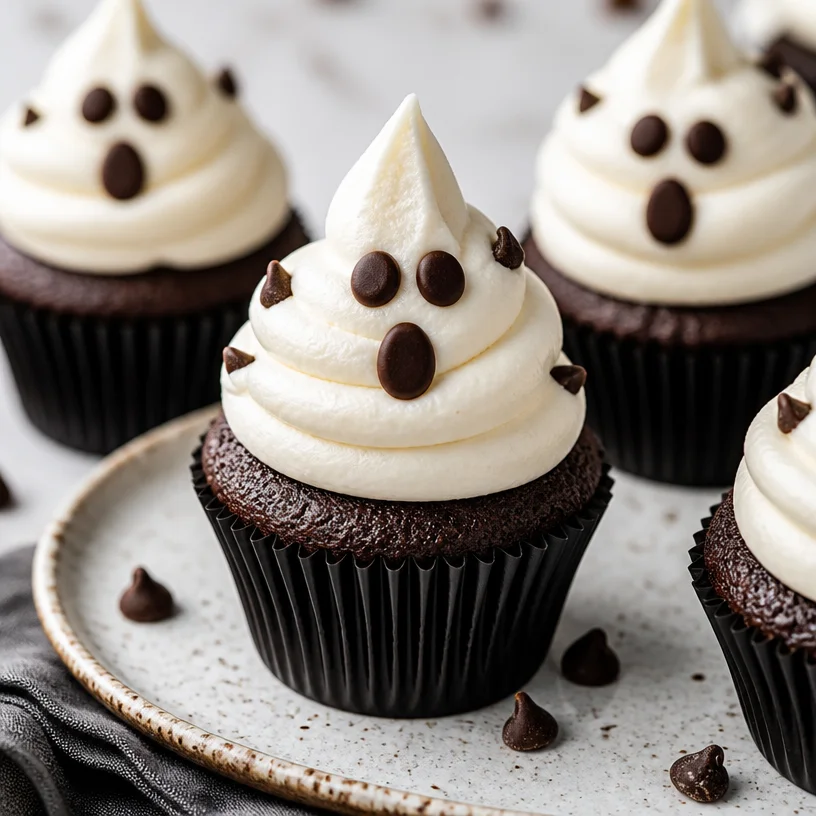
Ghost Cupcakes
Ghost Cupcakes: A Spooktacular Treat for Ghoulish Gatherings
Hello, fellow food enthusiasts! Today, we’re diving into the whimsically delicious world of Ghost Cupcakes—the perfect treat to haunt your kitchen and delight your guests! Whether you’re hosting a Halloween bash or simply looking to add a touch of seasonal fun to your dessert table, these charming little cupcakes will brighten any gathering with their spooky faces and delightful flavors.
Imagine soft, fluffy cupcakes topped with silky buttercream, decorated to look like friendly little ghosts—irresistible, right? I remember the first time I made these whimsical treats with my niece. We set out on an adventurous baking mission, armed with a sprinkle of mischief and a whole lot of enthusiasm. As we whipped up the batter, flour flew into the air like a cloud of spooky magic, and giggles echoed throughout the kitchen. The best part? Licking the bowl and, of course, decorating those cupcakes to capture the perfect ghostly spirit!
Baking allows us to create memories and share joy, and these Ghost Cupcakes are no exception. So, let’s slip on our aprons, grab those mixing bowls, and channel our inner ghostly chefs!
My Ghostly Baking Memory
One Halloween night, many years ago, I found myself whipped up a cupcake party in our kitchen with friends. We were a motley crew of aspiring bakers, and our task was to concoct the spookiest treats we could dream of. Little did we know that what started as a quest for the creepiest cupcake would result in a night of belly laughs, flour fights, and plenty of ghostly confections.
As the evening rolled on, we experimented with flavors, and I decided to add a light touch of almond extract to my batter. My friends were curious—how would that taste? By the end of the night, those cupcakes turned out not just to be frighteningly adorable but also absolutely delicious! That night, amidst the laughter and chaos, I learned a valuable lesson: Baking isn’t just about the final product; it’s about the joy of creating together. And now, I’m excited to share this ghostly delight with you!
Ingredients
Let’s gather our ingredients for these delightful Ghost Cupcakes! I promise you’ll find every bite worth haunting.
-
1 ½ cups all-purpose flour
A vital ingredient for structure and stability. For gluten-free options, you can swap this with a 1:1 gluten-free baking flour blend. -
1 ½ teaspoons baking powder
This is our little magic ingredient that makes cupcakes rise and become fluffy! Make sure it’s fresh; old baking powder can lead to dense cupcakes. -
½ teaspoon salt
A pinch of salt enhances the flavor of the sweet ingredients, bringing balance to your cupcakes. -
½ cup unsalted butter, softened
Creaming butter adds a rich flavor and tender texture. If you’re dairy-free, substituting with coconut oil or a vegan margarine works just as well. -
1 cup sugar
This is essential for sweetness! For a healthier option, you could use coconut sugar or a sugar substitute, but make sure to check your ratios. -
2 large eggs
Eggs help bind the ingredients, creating a wonderful structure. For vegan cupcakes, you can use ½ a mashed banana or ¼ cup of applesauce per egg. -
1 teaspoon vanilla extract
Pure vanilla extract adds fragrance and depth of flavor. If you’re in a pinch, imitation vanilla works, but there’s no substitute for the real thing! -
½ cup milk
This moisture-rich ingredient keeps your cupcakes tender. You can easily use any plant-based milk, like almond or oat milk, to suit dietary needs. -
1 cup buttercream frosting
The ghoulish topping! If time is tight, you can use store-bought buttercream or whip up a quick homemade version. -
Chocolate chips, for eyes
Mini chocolate chips are perfect for creating a spooky yet cute look for our ghosts!
Step-by-Step Instructions
Now that we have our ingredients, let’s get our ghostly bake on! Follow these steps for perfectly fluffy Ghost Cupcakes:
Step 1: Preheat and Prep
Preheat your oven to 350°F (175°C). Line a cupcake pan with paper liners—choose fun ones to add to the spirit of the occasion. I like to use white liners to complement the ghostly theme!
Step 2: Whisk Dry Ingredients
In a large mixing bowl, whisk together the flour, baking powder, and salt. Get your whisk moving! This is crucial for ensuring the baking powder is evenly distributed, leading to beautifully risen cupcakes.
Step 3: Cream the Butter and Sugar
In another bowl, cream the softened butter and sugar together until light and fluffy—about 3–4 minutes. If your butter isn’t soft enough, cheat a little and microwave it for 10 seconds. Just remember, we want it soft, not melted!
Step 4: Add Eggs and Vanilla
Crack in the eggs one at a time, mixing well after each addition. Pour in that glorious vanilla extract and give it a quick mix. Your kitchen should be starting to smell divine by now!
Step 5: Combine Wet and Dry
Next, alternate adding the flour mixture and milk to the butter mixture, starting and ending with the flour. This method ensures that the batter remains light and fluffy. Mix just until combined—don’t overdo it!
Step 6: Fill the Cupcake Liners
With a spoon (or a cookie scoop for even portions), fill each cupcake liner about ⅔ of the way full with batter. This gives them enough room to rise without overflowing.
Step 7: Bake!
Place your cupcake pan in the preheated oven and bake for 18–20 minutes, or until a toothpick inserted in the center comes out clean. Every oven is different, so start checking at the 18-minute mark.
Step 8: Cool Completely
Once baked, let your cupcakes cool in the pan for 5 minutes, then carefully transfer them to a wire rack to cool completely. Resist the urge to frost them when they’re warm; let them cool down to prevent your buttercream from melting away!
Step 9: Frost the Ghosts
Once the cupcakes are completely cool, it’s time to frost! If you have a piping bag, use a round tip for that ghostly swirl, or you can apply frosting with a spatula. Let your creativity flow like a spooky apparition!
Step 10: Create Ghostly Faces
Use mini chocolate chips to stick onto the buttercream, creating cute little eyes. You can make them happy, surprised, or even mischievous! Just remember, the scarier the face, the sweeter the treat.
Serving Suggestions
To serve, arrange your Ghost Cupcakes on a spooky-themed cake stand or a simple white platter. They look fabulous when surrounded by seasonal décor—think pumpkins, spider webs, and a few flickering candles for a hauntingly festive atmosphere!
Recipe Variations
Feeling adventurous? Here are some fun twists you can try with your Ghost Cupcakes:
- Choco-Ghost Delight: Incorporate mini chocolate chips into the batter for extra chocolatey goodness.
- Pumpkin Spice Ghosts: Replace ½ cup of the flour with canned pumpkin puree and add 1 teaspoon pumpkin spice for a fall twist.
- Colorful Spooks: Tweak the vanilla buttercream with some food coloring for pastel or vibrant ghosts.
- Vegan Ghosties: Follow the substitutions mentioned in the ingredient section to make your treats vegan-friendly.
- Spicy Cinnamon Ghosts: Add a teaspoon of cinnamon and a pinch of nutmeg for a warm, spicy flavor perfect for autumn.
Chef’s Notes
Ghost Cupcakes hold a special place in my heart—not only for their incredible flavors but also for the joy they bring when shared. Over the years, this recipe has evolved; whether experimenting with different flavors or offering gluten-free choices, each iteration has added to the fun! The true essence of these cupcakes lies in the smiles they bring as friends and family gather around. So, grab your favorite spooky playlist, and let’s bake up a storm!
FAQs and Troubleshooting
Q: My cupcakes sunk in the middle. What went wrong?
A: Most often, this can be due to overmixing the batter or not testing your oven temperature accurately. Always ensure your batter is mixed just until combined, and consider using an oven thermometer for precision!
Q: Can I make the batter ahead of time?
A: You can prepare the batter in advance, but I recommend baking them right before you need them. Freshly baked cupcakes yield the best flavor and texture.
Q: How do I store unused cupcakes?
A: Store your Ghost Cupcakes in an airtight container at room temperature for up to 3 days. If you frost them, they can last a little less. For longer storage, freeze un-frosted cupcakes for up to 3 months.
Q: What should I do if my frosting is too runny?
A: If your buttercream is runny, try adding more powdered sugar to thicken it up. You can also refrigerate it for a short while to firm it up before frosting.
Now that you’ve dipped your toes into this delightful Halloween treat, I hope you feel inspired to bake your own Ghost Cupcakes! They’re not just a treat; they’re a chance to create connections and build memories around your table. Happy baking!
PrintGhost Cupcakes
Whimsical Ghost Cupcakes topped with silky buttercream, perfect for Halloween gatherings.
- Prep Time: 15 minutes
- Cook Time: 20 minutes
- Total Time: 35 minutes
- Yield: 12 servings 1x
- Category: Dessert
- Method: Baking
- Cuisine: American
- Diet: Vegetarian
Ingredients
- 1 ½ cups all-purpose flour
- 1 ½ teaspoons baking powder
- ½ teaspoon salt
- ½ cup unsalted butter, softened
- 1 cup sugar
- 2 large eggs
- 1 teaspoon vanilla extract
- ½ cup milk
- 1 cup buttercream frosting
- Chocolate chips, for eyes
Instructions
- Preheat your oven to 350°F (175°C). Line a cupcake pan with paper liners.
- Whisk together the flour, baking powder, and salt in a large mixing bowl.
- Cream the softened butter and sugar together until light and fluffy—about 3–4 minutes.
- Add the eggs one at a time, mixing well after each addition. Pour in the vanilla extract and mix again.
- Combine the flour mixture and milk to the butter mixture, alternating between the two, starting and ending with flour.
- Fill each cupcake liner about ⅔ of the way full with batter.
- Bake for 18–20 minutes, or until a toothpick inserted in the center comes out clean.
- Cool the cupcakes in the pan for 5 minutes, then transfer to a wire rack to cool completely.
- Frost the cooled cupcakes with frosting and use mini chocolate chips for eyes to create ghostly faces.
Notes
For gluten-free cupcakes, swap all-purpose flour with a gluten-free baking flour blend. You can personalize frosting colors and add flavors to the batter for variations.
Nutrition
- Serving Size: 1 cupcake
- Calories: 200
- Sugar: 15g
- Sodium: 150mg
- Fat: 8g
- Saturated Fat: 5g
- Unsaturated Fat: 2g
- Trans Fat: 0g
- Carbohydrates: 28g
- Fiber: 0g
- Protein: 2g
- Cholesterol: 30mg
Keywords: Ghost Cupcakes, Halloween Treats, Dessert, Fun Recipes, Baking
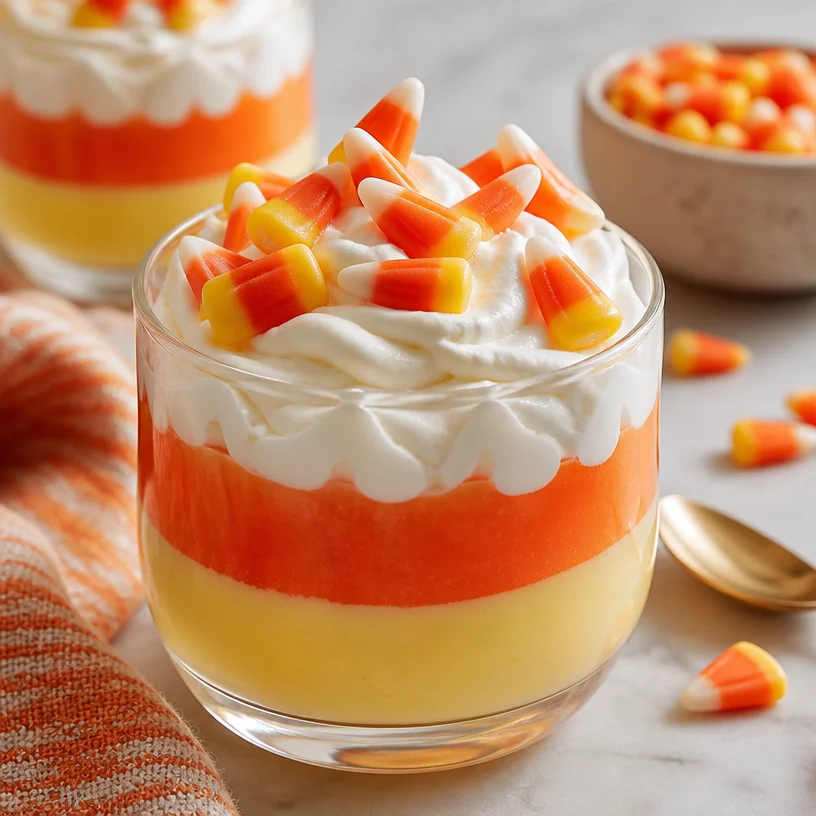
Seasonal Halloween Candy Corn Parfaits: No-Bake Creamy Treats
Celebrate Fall with Candy Corn Parfaits!
As the leaves begin to turn and the crispness of fall fills the air, there’s a certain excitement that washes over us. It’s that wonderful time of year when pumpkins, spiced desserts, and yes, candy corn suddenly take center stage in our culinary adventures. Today, I’m thrilled to share a delightful treat that’s as nostalgic as it is delicious: Candy Corn Parfaits! These layered delights not only celebrate the quintessential flavors of autumn but also bring a splash of color to your table, making them a hit for any gathering or just a fun weekday dessert!
Creating these parfaits offers a perfect opportunity to gather friends and family, whether you’re hosting a casual afternoon get-together or looking for a fun way to get the little ones involved in the kitchen. While they might look like a gourmet creation, I promise— they come together effortlessly and make a fabulous centerpiece for any fall festivity. So, let’s bring a taste of joy and comfort to our tables, shall we?
A Taste of Nostalgia
You know, every time I think of candy corn, it takes me back to my childhood Halloweens spent trick-or-treating with my friends. I can almost hear their laughter and the crinkling of candy wrappers as we proudly displayed our loot. Amongst all the chocolate bars and gummy goodies, there was always that distinct triangular treat: candy corn. While some folks appreciate it, others seem to be divided, but it’s hard to deny that these little morsels are synonymous with autumn!
One year, we decided to host a Halloween party—a gathering for our closest friends complete with spooky decorations, themed games, and, of course, plenty of sugary snacks. Those candy corn parfaits became a usual request, not just because of their beautiful layers but because they sparked joy. Each layer represented a different aspect of the season, combining flavors and textures that brought everyone together in cheerful anticipation. This tradition made its way back into my kitchen, leading me to the luscious recipe I’m excited to share with you today.
Ingredients
Let’s start by gathering everything we need for these fabulous Candy Corn Parfaits. Here’s what you’ll need:
-
Vanilla Pudding
A creamy base that provides a smooth and rich flavor. You can make it from scratch or use instant pudding mix for quicker preparation. -
Orange Gelatin
It gives these parfaits that wonderful candy corn color and a light, fruity sweetness. If you’re looking for a citrusy kick, a lemon flavor can work, too! -
Whipped Cream
This fluffy topping adds a delightful lightness to the dessert. Use freshly whipped cream for the best taste, or opt for store-bought if you’re short on time. For a twist, you could try flavored whipped cream, like vanilla or cinnamon. -
Candy Corn
The star of our parfaits! Use classic candy corn for sweetness and color. If you’re feeling adventurous, consider mixing in some chocolate-covered varieties for a different flavor.
Chef Insight
If you’re short on time or just want to simplify the process, you can layer these parfaits in clear plastic cups for easy serving. Just remember, the clearer the vessel, the better the color contrast will shine through!
Step-by-Step Instructions
Alright, are you ready to dive into the kitchen? Let’s get these parfaits layered and beautiful, one spoonful at a time.
-
Prepare the Vanilla Pudding
Start by whisking together your vanilla pudding mix with cold milk. If you’re using a cooked recipe, be sure to follow the package instructions to achieve that perfect texture. This typically takes about 2 minutes. Let it sit for 5 minutes so it can thicken up beautifully. It’s like magic watching it go from liquid to creamy! -
Mix the Orange Gelatin
While the pudding is setting, prepare the orange gelatin according to package instructions. Usually, this requires dissolving the gelatin powder in boiling water and then adding cold water. Just follow the instructions and let it cool for a moment. This is your vibrant layer that brings a zesty contrast to our dessert! -
Get Your Cups Ready
Grab some clear glasses or jars—this is where your parfaits will shine! You want to showcase those beautiful layers, so the more transparent, the better. Set them on a baking tray or your counter for easy assembly. -
Layer Like a Pro
Start with a generous spoonful of vanilla pudding at the bottom of each glass. Aim for about a quarter of the cup. Follow it with a layer of the orange gelatin, then another layer of pudding. If you want to be fancy, you can create additional layers by alternating between the two. -
Top it Off
Once your layers are assembled, it’s time for the whipped cream! Spoon a dollop on the top of each parfait; don’t be shy—make it fluffy! For an even more playful look, pipe it on with a star tip for those perfect peaks. -
Add the Finishing Touch
Sprinkle the top with a handful of candy corn. This not only adds decoration but also that quintessential sweetness and a bit of crunch. If you’d like, add some extra whipped cream around the edges for a more extravagant appearance!
And just like that, your Candy Corn Parfaits are done! Chill them in the fridge for a little while if you want the layers to set nicely, then get ready to impress.
Serving Suggestions
When it’s time to serve, place these candy corn parfaits as the centerpiece of your dessert table. You could even create a Halloween or fall-themed table setting with pumpkins and fairy lights for an added festive feel! Make sure to provide spoons for that perfect scoop of layers, and watch your guests’ faces light up as they unveil the colorful layers with each bite.
Recipe Variations
Looking to switch things up? Here are a few fun variations you can try for your parfaits:
- Chocolate Layer: Swap one layer of vanilla pudding for chocolate pudding for a delicious chocolate/candy corn combo.
- Fruit Flavor: Try using a fruit-flavored gelatin, like peach or mango, to introduce refreshing tastes.
- Healthy Twist: Use Greek yogurt mixed with a bit of honey for a healthier version of the pudding layer—still delicious and much lighter!
- Seasonal Spice: Add a dash of cinnamon to the vanilla pudding for a warm, fall flavor, making it perfectly cozy.
- Candy Bow-Tie: Incorporate mini chocolate candies or sprinkles between the layers for a crunchier texture and a playful twist.
Chef’s Notes
Creating these parfaits over the years has been a delightful journey, filled with laughter and joy. I’ll always remember one Halloween when my niece insisted on adding gummy worms to her parfait, saying it needed to be a "creepy dessert." It turned into a fun tradition, and now those peanut butter-filled little horrors often make a guest appearance in our family gatherings!
As I play with flavors and ideas, it’s fascinating to see how a simple dessert can evolve into something new and exciting. When you allow yourself to experiment and have fun in the kitchen, that’s when the magic truly happens.
FAQs and Troubleshooting
Q: What can I do if my pudding doesn’t thicken?
A: If your vanilla pudding isn’t thickening, make sure you whisk it well for the right amount of time. If it’s still too runny, you can always sprinkle a little cornstarch into the mix as it cooks. Let it cook longer; patience is key!
Q: Can I make these parfaits ahead of time?
A: Absolutely! You can prepare the layers a day in advance and assemble them a few hours before serving. Just keep them covered in the fridge to maintain freshness!
Q: What if I can’t find candy corn?
A: No candy corn? No problem! You could use colorful fruit like mandarin oranges or tropical candies to create a similar vibrant and fun look in your parfaits.
Q: How can I prevent my whipped cream from deflating?
A: For whipping cream that holds its shape, ensure you chill your mixing bowl and beaters beforehand. Using heavy cream also helps, as it whips up thicker and more stable!
Now, that’s a wrap! Your Candy Corn Parfaits are ready to dazzle, spiral, and deliver joy to your table. With their colorful layers and delicious flavors, they’ll bring a bit of nostalgia while celebrating the best of fall. Whether for a gathering or just to sweeten up your week, I hope they become a cherished favorite just like they are in my kitchen. Happy cooking, and let’s keep gathering around the table!
PrintCandy Corn Parfaits
Delightful layered desserts that celebrate the flavors of autumn with vibrant colors and sweet candy corn.
- Prep Time: 10 minutes
- Cook Time: 0 minutes
- Total Time: 10 minutes
- Yield: 4 servings 1x
- Category: Dessert
- Method: No-Cook
- Cuisine: American
- Diet: Vegetarian
Ingredients
- 2 cups Vanilla Pudding
- 1 package Orange Gelatin
- 1 cup Whipped Cream
- 1 cup Candy Corn
Instructions
- Prepare the Vanilla Pudding by whisking together the pudding mix with cold milk. Let it sit for 5 minutes to thicken.
- Mix the Orange Gelatin according to package instructions and let it cool.
- Grab some clear glasses or jars for layering the parfaits.
- Layer the ingredients starting with vanilla pudding, followed by orange gelatin, and repeat until you reach the top.
- Top off with a dollop of whipped cream on each parfait.
- Add a sprinkle of candy corn for decoration and extra sweetness.
Notes
For easy serving, layer the parfaits in clear plastic cups and chill them for a bit before serving.
Nutrition
- Serving Size: 1 serving
- Calories: 250
- Sugar: 20g
- Sodium: 90mg
- Fat: 8g
- Saturated Fat: 4g
- Unsaturated Fat: 4g
- Trans Fat: 0g
- Carbohydrates: 40g
- Fiber: 0g
- Protein: 2g
- Cholesterol: 15mg
Keywords: candy corn, parfait, fall desserts, Halloween treats, layered desserts
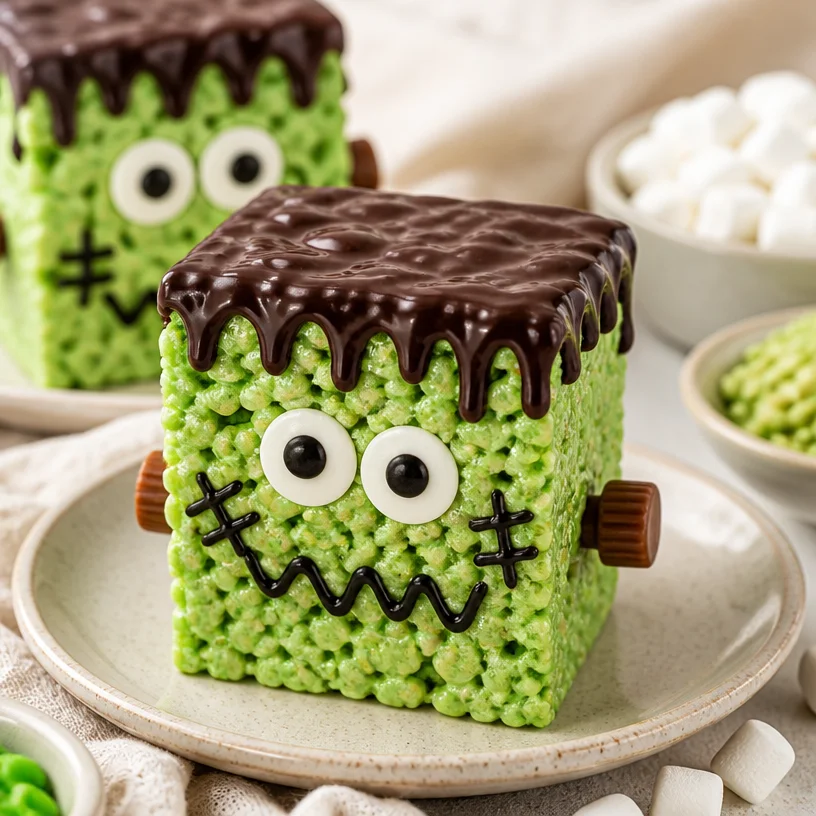
Frankenstein Rice Krispie Treats: Spooky No-Bake Halloween
Unleash the Halloween Fun with Frankenstein Rice Krispie Treats!
Hello, my lovely foodies! Welcome back to the delightful world of Ivory Apron, where cooking is all about elegance mixed with a sprinkle of fun! Today, I’m thrilled to share a spooky twist on a childhood favorite—Frankenstein Rice Krispie Treats! Perfect for Halloween or any festive gathering, these treats are not only super fun to make but also a fantastic way to gather friends or family in the kitchen.
As we dive into this deliciously sinister recipe, let’s embrace the nostalgia of kitchen experiments and playful creativity. Who said cooking had to be serious? It’s all about having fun and making memories, and what’s better than crafting adorable (and a little creepy) treats that will make everyone smile?
So, grab your apron (preferably your ivory one!), gather those little helpers or friends, and let’s embark on a kooky kitchen adventure. Trust me—the happiness on faces when they see these Frankenstein-themed treats will be worth every sticky hand and giggle along the way!
A Sweet, Spooky Memory
Growing up, my family’s kitchen was always alive with the sounds of laughter, and Halloween was no exception. One year, my mom decided that our treats would be as fun to make as they were to eat! We rolled up our sleeves, donned our aprons, and got messy making Rice Krispie treats. The challenge? Make them spooky!
As we melted marshmallows and added our favorite colors, we each had a hand in creating the ultimate Halloween treat. I remember my little brother, with marshmallow-covered fingers, declaring he would make the scariest monster anyone had ever seen. With a few googly eyes and candy decorations, we turned those treats into hilarious, spooky creatures that would go on to haunt our kitchen tables for years to come.
Every time I recreate these Frankenstein Rice Krispie Treats, I’m taken back to that sweet chaos in our family kitchen. They remind me that cooking isn’t just about the food—it’s about the experiences we share and the joy we create together. Now, I’m here to help you make your own spooky creations with this easy, delightful recipe!
Ingredients
To create your own Frankenstein Rice Krispie Treats, gather the following ingredients:
-
Rice Cereal: 6 cups
Perfect for that classic crunch! You can use any brand, but the classic Rice Krispies work best. If you want a twist, try a fruity cereal for a different flavor. -
Marshmallows: 10 ounces (about 4 cups)
The glue that holds these treats together! Mini marshmallows melt faster, while regular ones give a chewier texture. You can also use vegan marshmallows for a plant-based version. -
Butter: 4 tablespoons
Adds delicious flavor and richness. If you’re looking for a dairy-free option, coconut oil works beautifully here—just keep the flavor in mind! -
Green Food Coloring: 5-10 drops
This is what gives your Frankenstein its spooky hue! You can substitute with natural food coloring or even experiment with adding matcha for a green tint. -
Candy for Decoration: Use gummy worms, chocolate chips, candy eyes, or any spooky sprinkle
The fun part! Let your creativity run wild. Use anything festive to decorate your treat monsters—think orange and black for an extra Halloween touch!
Step-by-Step Instructions
Ready to create some monster magic? Follow these simple steps to whip up your own Frankenstein Rice Krispie Treats:
-
Prepare Your Workspace:
Start by greasing a 9×13-inch baking pan with cooking spray or butter. This will ensure that your treats release easily once they’re set. I like to keep everything organized before I begin—trust me, it saves so much time when you’re elbow-deep in gooey marshmallows! -
Melt the Butter and Marshmallows:
In a large saucepan, melt the butter over medium heat. Once melted, add in the marshmallows, stirring constantly until they’re completely melted and smooth. This part is crucial, so keep an eye on it—burnt marshmallows can throw off the flavor! -
Add Food Coloring:
Once your marshmallows are smooth, remove the pot from heat. Now comes the fun part! Add your green food coloring a few drops at a time, mixing well until you achieve your desired spooky green shade. Feel free to taste-test this creaminess—just make sure no one is watching! -
Mix the Cereal:
Slowly add the Rice Cereal to the marshmallow mixture, stirring gently until every piece is coated. You want to be careful here to avoid crushing the cereal too much. If it gets too sticky to handle, lightly grease your hands with butter—this is the ultimate kitchen hack! -
Press into the Pan:
Transfer the green cereal mixture to your prepared baking pan. Use a greased spatula or your hands to press it down evenly. Don’t pack it too tightly—fluffy treats are what we’re aiming for! -
Cool and Cut:
Allow the treats to cool for at least 30 minutes. Once they’re set, use a sharp knife to cut them into squares or rectangles. The fun doesn’t stop here; let’s make them look like Frankenstein! -
Decorate Your Monsters:
This is where you get to unleash your creativity! Use candy eyes and various candies to decorate your treats to look like little Frankenstein monsters. Gummy worms can be fun, and chocolate chips can be used for mouths. Each one can have its own character!
Serving Suggestions
Once you’ve decorated your Frankenstein Rice Krispie Treats, they’re ready for the spotlight! Arrange them on a bright platter, maybe with some spooky decor like mini pumpkins or edible spider confetti to enhance the festive vibes. The best way to serve them is to let everyone choose their monster—this adds to the fun and invites each guest to pick their favorite spooky creation!
Recipe Variations
Feeling adventurous? Here are some fun twists you can try with these treats:
- Monster Mash-Up: Mix in some crushed Oreo cookies into the Rice Krispie batter for a chocolatey twist.
- Peanut Butter Lovers: Stir in a little peanut butter to the melted marshmallow mixture for a nutty flavor.
- Sprinkle Surprise: Add in festive sprinkles while combining the cereal for a colorful crunch.
- Vegan Version: Use vegan marshmallows and coconut oil to keep it deliciously dairy-free!
- Spooky Flavors: Experiment with flavored extracts like mint or almond for an extra layer of taste.
Chef’s Notes
Every recipe has its tales, and this one is no different! I remember making a giant batch of these once for a neighborhood Halloween bash, and I had forgotten to add the food coloring until the very end. So, there I was, with a large green lump of Rice Krispie Treats in the center of my kitchen, frantically mixing in color while laughing at my mistake. It was the most playful kitchen fiasco, and the treats still turned out adorable! These Frankenstein Rice Krispie Treats are forgiving and always turn out delicious—plus, they’re always a hit, regardless of their color along the way!
FAQs and Troubleshooting
-
My Rice Krispie Treats are too hard. What happened?
This usually happens if they were overcooked. Make sure to melt the marshmallows just until they’re smooth—not boiling! If they are too hard, you can try warming them slightly in the microwave to soften. -
How can I make these treats last longer?
Store them in an airtight container at room temperature. They will stay fresh for about 3 days—but let’s be honest, they probably won’t last that long! -
Can I freeze these treats?
Yes! Wrap them tightly in plastic wrap and then place them in an airtight container. They can be frozen for up to two months. Let them sit at room temperature for a while before serving. -
What can I use instead of butter?
Coconut oil or vegan butter are fantastic alternatives if you’re looking for something dairy-free. Just keep the flavors in mind—coconut oil may impart a slight coconut flavor.
Conclusion
Bringing a festive spirit to your kitchen with these Frankenstein Rice Krispie Treats is a wonderful way to connect, create, and indulge in deliciousness! Remember, cooking is all about community, laughter, and sometimes a little friendly chaos. I hope this recipe inspires you to gather your loved ones and craft your own spooky treats this Halloween.
Tie on that apron, unleash your inner chef, and let’s make some delightful memories together! Happy cooking and happy haunting from Ivory Apron.
PrintFrankenstein Rice Krispie Treats
A spooky twist on classic Rice Krispie Treats, perfect for Halloween gatherings!
- Prep Time: 15 minutes
- Cook Time: 10 minutes
- Total Time: 45 minutes
- Yield: 12 servings 1x
- Category: Dessert
- Method: No-Bake
- Cuisine: American
- Diet: Vegetarian
Ingredients
- 6 cups Rice Cereal
- 10 ounces (about 4 cups) Marshmallows
- 4 tablespoons Butter
- 5–10 drops Green Food Coloring
- Candy for Decoration (gummy worms, chocolate chips, candy eyes, or festive sprinkles)
Instructions
- Prepare Your Workspace: Grease a 9×13-inch baking pan with cooking spray or butter.
- Melt the Butter and Marshmallows: In a large saucepan, melt the butter over medium heat. Add in the marshmallows and stir constantly until melted and smooth.
- Add Food Coloring: Remove from heat and mix in green food coloring until desired shade is achieved.
- Mix the Cereal: Slowly add the Rice Cereal to the marshmallow mixture and stir gently until coated.
- Press into the Pan: Transfer the mixture to the prepared baking pan and press down evenly.
- Cool and Cut: Allow to cool for 30 minutes, then cut into squares or rectangles.
- Decorate Your Monsters: Use candies to decorate the treats to look like Frankenstein monsters.
Notes
Store treats in an airtight container at room temperature for up to 3 days or freeze for up to 2 months.
Nutrition
- Serving Size: 1 treat
- Calories: 180
- Sugar: 15g
- Sodium: 95mg
- Fat: 6g
- Saturated Fat: 3g
- Unsaturated Fat: 3g
- Trans Fat: 0g
- Carbohydrates: 30g
- Fiber: 0g
- Protein: 1g
- Cholesterol: 15mg
Keywords: Halloween treats, Rice Krispie Treats, spooky snacks
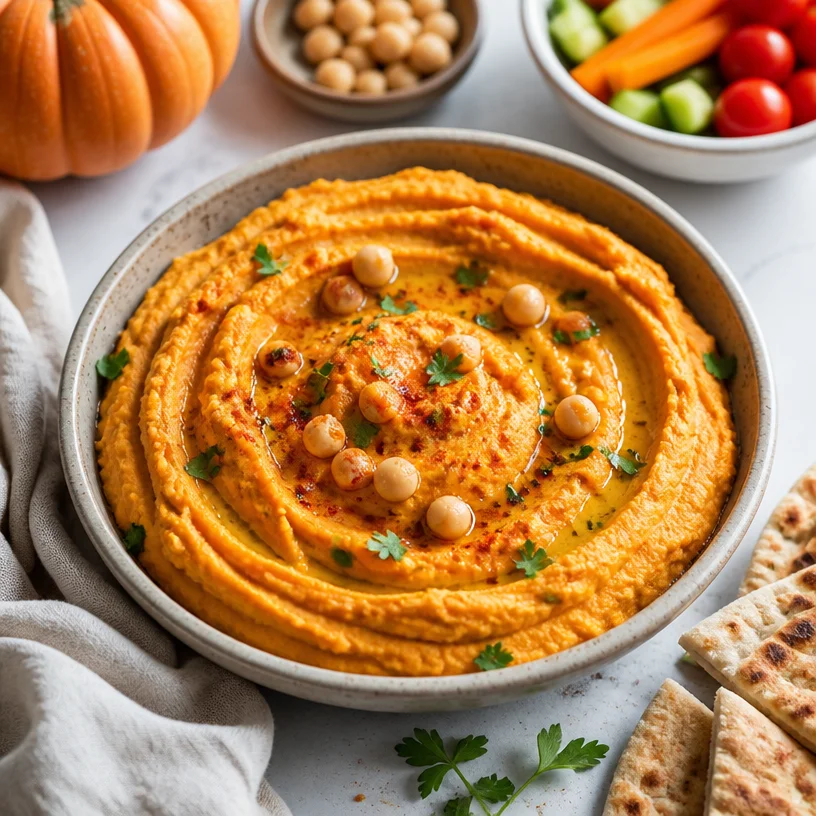
Pumpkin Hummus
Pumpkin Hummus: A Fall Favorite
Hello, fellow food lovers! Today, I’m excited to share with you one of my favorite fall recipes: pumpkin hummus. Trust me, this delightful twist on traditional hummus is not only a crowd-pleaser but also perfect for cozy gatherings, harvest dinners, or even a simple snack at home. With its creamy texture and subtle sweetness, pumpkin hummus will elevate your spread and warm your spirit.
Embracing Pumpkin’s Warmth
Growing up, autumn meant one thing for our family: pumpkin everything! From pancakes drizzled with maple syrup to the perfectly spiced pumpkin pie, the rich, warm flavors of pumpkin were synonymous with family gathering and cozy nights. One particular memory stands out: our annual fall harvest gathering. The table was a feast of flavors, and I vividly remember my grandmother serving her famous pumpkin dip with an array of fresh veggies and crunchy pita chips. Everyone clamored around, laughter echoing through the room.
That moment inspired my journey of creating this pumpkin hummus—a dish that encapsulates all those heartwarming memories while remaining easy and approachable. It feels like a big hug for your taste buds!
Ingredients
Here’s what you’ll need for this deliciously creamy pumpkin hummus:
-
1 can (15 oz) of chickpeas
Chickpeas are the base of any hummus, offering a creamy texture and protein boost. Drain and rinse for a cleaner taste! -
1 cup of pumpkin puree
Pumpkin puree adds a sweet, earthy flavor and vibrant color. You can use canned puree or roast your own pumpkin for a fresh twist. -
3 tablespoons tahini
This sesame paste lends a nutty richness to the dip. If you’re nut-free, sunflower seed butter makes a great alternative! -
2 tablespoons olive oil
Olive oil brings richness and helps with blending. For a different flavor, use walnut oil or avocado oil. -
2 tablespoons lemon juice
Fresh lemon juice brightens up the flavors. If you’re in a pinch, bottled lemon juice works too. -
1 teaspoon garlic powder
Garlic powder provides a mellow garlicky kick. If you enjoy fresh flavors, feel free to use one clove of minced garlic instead. -
1 teaspoon ground cumin
This adds an earthy depth to the hummus. Smoked paprika would also add a delicious twist. -
Salt and pepper to taste
Seasoning is essential. Adjust according to your preference, and remember to taste as you go! -
Paprika (for garnish)
A sprinkle of paprika adds a pop of color and a smoky finish. -
Veggies or pita chips for dipping
Think crunchy carrots, bell peppers, cucumber slices, or toasted pita chips. You can’t go wrong!
Step-by-Step Instructions
Let’s dive into the kitchen and whip up this creamy pumpkin goodness!
-
Prepare Your Chickpeas
Start with the chickpeas: drain and rinse one can, and set them aside. This step is crucial because it removes excess sodium and any canning juices, ensuring your hummus has a clean flavor. -
Combine Ingredients in a Food Processor
In a food processor, combine the chickpeas, pumpkin puree, tahini, olive oil, lemon juice, garlic powder, ground cumin, and a sprinkle of salt and pepper.Chef Tip: If your food processor struggles to blend, add a bit of water, a tablespoon at a time, until it’s smooth. You want that silky consistency!
-
Pulse and Scrape
Pulse the mixture on high until it’s well-blended. Stop the processor occasionally to scrape down the sides with a spatula—this ensures everything blends evenly.Chef Hack: If you don’t have a spatula handy, use the back of a spoon!
-
Taste and Adjust
Here comes the fun part: taste your hummus! Adjust the flavors by adding more salt, lemon juice, or spices until it’s just how you like it. Don’t be shy—seasoning is key! -
Plate It Beautifully
Once you’ve reached hummus perfection, transfer it to a serving bowl. This is where presentation comes into play! Use the back of a spoon to create a swirl in the middle. -
Drizzle and Garnish
Drizzle a little olive oil on top and sprinkle with paprika. This not only makes it look stunning but also adds that little extra oomph of flavor. -
Serve with Style
Arrange your veggies and pita chips around the hummus, and don’t forget to set out some extra olive oil and paprika for guests to enjoy.
Serving Suggestions
To serve, place the pumpkin hummus at the center of your table. Surround it with colorful veggie sticks—think vibrant carrots, crisp cucumbers, and sweet bell peppers. Add pita chips for that perfect crunch! This spread not only looks inviting but also offers something for everyone to enjoy.
Recipe Variations
Now, let’s get a little creative! Here are some fun ways to switch things up with your pumpkin hummus:
-
Spiced Pumpkin Hummus: Add a pinch of cinnamon or nutmeg for a more festive, spiced flavor.
-
Maple Pumpkin Hummus: Incorporate a drizzle of maple syrup for added sweetness—perfect for a holiday gathering!
-
Savory Pumpkin Hummus: Stir in some finely chopped roasted garlic or fresh herbs like rosemary or thyme for an herbaceous kick.
-
Nutty Pumpkin Hummus: Fold in some crushed nuts like pecans or walnuts for added texture and flavor.
-
Roasted Red Pepper Pumpkin Hummus: Blend in roasted red peppers for some smokiness and depth.
Chef’s Notes
As I reflect on how this recipe has evolved, I’m reminded of the first time I made pumpkin hummus—it was a happy accident! I had leftover pumpkin puree after baking a pie and thought, “Why not make hummus?” It turned into a delightful dip that my friends devoured. Over the years, I’ve played around with flavors, and it has become a staple at my gatherings.
Another fun kitchen story: I once served this at a potluck, and a friend tried to guess the secret ingredient! When I finally revealed it was pumpkin, there was a delightful mix of surprise and glee. It’s moments like these that remind me how food brings us together in unexpected and beautiful ways.
FAQs and Troubleshooting
1. Can I use fresh pumpkin instead of canned?
Absolutely! Roasting your own pumpkin adds a wonderful freshness and depth of flavor. Just make sure to puree it well.
2. My hummus is too thick. What should I do?
No worries! Simply add a tablespoon of cold water or olive oil and blend again until you reach your desired consistency.
3. How long does this hummus last in the fridge?
Stored in an airtight container, it should last up to a week. Just give it a little stir before serving again!
4. What can I do with leftover hummus?
It’s versatile! Use it as a spread on sandwiches, a salad dressing base, or even as a topping for roasted chicken or fish.
Nutritional Info (Optional)
While the nutritional content will vary based on specific brands and ingredients you use, this pumpkin hummus is generally low in calories and high in fiber, thanks to the chickpeas and pumpkin. It’s a great source of protein and healthy fats, making it a guilt-free indulgence!
So there you have it—my go-to recipe for pumpkin hummus! It’s perfect for holiday gatherings or simply a cozy night at home on the couch. I hope this dip brings as much joy to your table as it has to mine. Don your apron, grab your favorite veggies, and let’s savor the flavors of fall together! Happy cooking!
PrintPumpkin Hummus
A delightful twist on traditional hummus, creamy pumpkin hummus is perfect for cozy gatherings or a simple snack.
- Prep Time: 10 minutes
- Cook Time: 0 minutes
- Total Time: 10 minutes
- Yield: 4 servings 1x
- Category: Appetizer
- Method: Blending
- Cuisine: Mediterranean
- Diet: Vegetarian
Ingredients
- 1 can (15 oz) of chickpeas, drained and rinsed
- 1 cup pumpkin puree
- 3 tablespoons tahini
- 2 tablespoons olive oil
- 2 tablespoons lemon juice
- 1 teaspoon garlic powder
- 1 teaspoon ground cumin
- Salt and pepper to taste
- Paprika (for garnish)
- Veggies or pita chips for dipping
Instructions
- Prepare your chickpeas: Drain and rinse one can, and set them aside.
- Combine ingredients in a food processor: In a food processor, combine the chickpeas, pumpkin puree, tahini, olive oil, lemon juice, garlic powder, ground cumin, and sprinkle of salt and pepper.
- Taste and adjust the flavors by adding more salt, lemon juice, or spices until it’s just how you like it.
- Plate it beautifully: Transfer to a serving bowl.
- Drizzle and garnish: Drizzle with olive oil and sprinkle with paprika.
- Serve with style: Arrange veggies and pita chips around the hummus.
Notes
Feel free to experiment with flavors like adding cinnamon for a spiced version or maple syrup for sweetness.
Nutrition
- Serving Size: 1 serving
- Calories: 200
- Sugar: 4g
- Sodium: 300mg
- Fat: 10g
- Saturated Fat: 1g
- Unsaturated Fat: 9g
- Trans Fat: 0g
- Carbohydrates: 25g
- Fiber: 6g
- Protein: 8g
- Cholesterol: 0mg
Keywords: pumpkin hummus, fall appetizer, vegetarian dip, healthy snack, chickpea dip
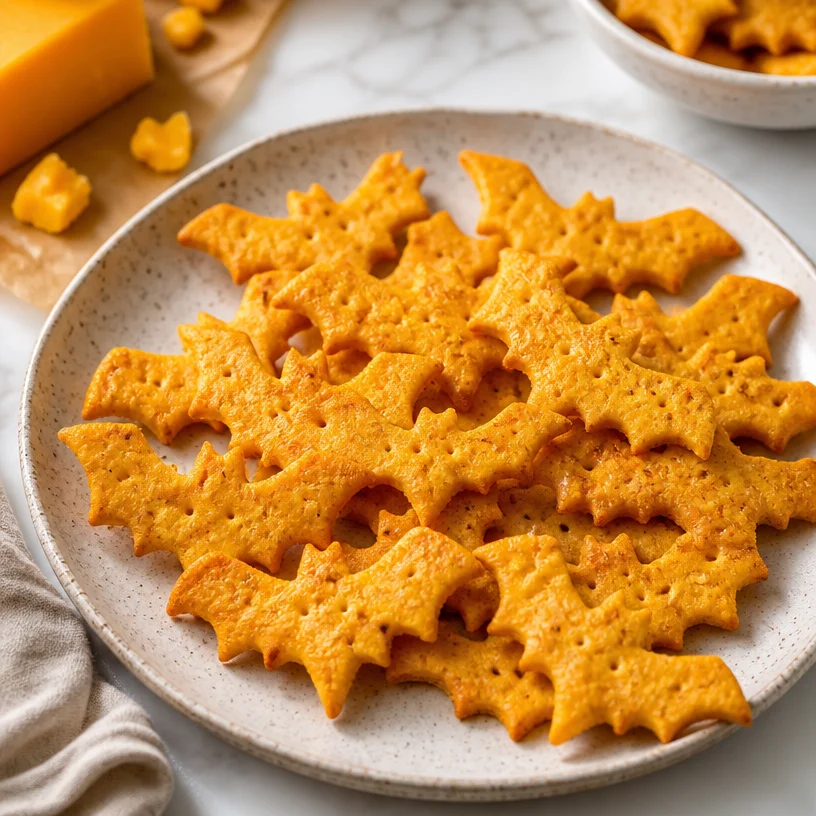
Halloween Bat Cheese Crackers: Crispy, Easy 15-Minute Snack
The Ultimate Guide to Bat Cheese Crackers: A Fun, Flavorful Snack for Everyone
Welcome to the delectable world of Bat Cheese Crackers! If there’s one snack that can elevate a casual gathering or just make your afternoon a little brighter, it’s this delightful creation. They’re delicious, easy to prepare, and make for the perfect companion to a glass of wine or a chilly drink. Whether you’re entertaining guests, hosting an impromptu movie night, or simply looking for a scrumptious snack to enjoy solo, Bat Cheese Crackers are here to bring joy to your table.
There’s something wonderfully charming about homemade snacks. They carry a sort of love that store-bought options simply can’t replicate. And today, we’re going to make these delightful crackers from scratch, infusing them with a touch of nostalgia and excitement. As a passionate recipe creator, I love to share my kitchen escapades, and these Bat Cheese Crackers hold a special place in my heart. They remind me of long evenings spent with friends, laughter echoing off the walls, and the aroma of warm, cheesy goodness wafting through the air.
So, grab your apron, tie it on, and let’s dive into the crispy, cheesy world of Bat Cheese Crackers. With just a handful of ingredients, we’ll transform humble cheddar cheese into charming snacks that are sure to impress anyone who indulges in them!
A Fond Memory
I can’t help but smile when I think back to my childhood and my grandmother’s kitchen. Her little home was a treasure trove of culinary delights, and every summer, she’d host family gatherings filled with laughter, warmth, and of course, tremendous food. One of my fondest memories is of her pulling trays of freshly baked cheese crackers from the oven, the golden edges crisping just perfectly.
The whole family would gather around the kitchen table, joyfully crunching on those cheesy treats while sharing stories and updates from our lives. It was pure magic! Inspired by her spirit and those incredible gatherings, I’ve evolved her traditional recipe into my version: the Bat Cheese Crackers. They’re a celebration of those cherished memories and a nod to the communal experience of sharing good food.
Let’s recreate that magic in our kitchens today!
Ingredients
Here’s what you’ll need to whip up a batch of Bat Cheese Crackers. Each ingredient plays a role in creating those mouthwatering bites of cheese perfection.
-
Cheddar Cheese (2 cups, shredded)
The star ingredient! Aged cheddar adds a rich, sharp flavor. Feel free to substitute with Gruyère or even a sharp white cheddar for a twist! -
All-Purpose Flour (1 cup)
This gives the crackers their structure. For a healthier option, try whole wheat flour or a gluten-free blend to accommodate dietary needs. -
Butter (½ cup, cold and cubed)
Unsalted butter adds richness. You could also use coconut oil for a dairy-free alternative, but be mindful of the temperature. -
Salt (½ teaspoon)
Brings out the flavor of the cheese. You can adjust this according to taste or use garlic salt for an extra flavor kick. -
Paprika (1 teaspoon)
A touch of smoky paprika adds complexity. Experiment with smoked paprika for deeper flavor, or even a sprinkle of cayenne if you’re in the mood for a little heat! -
Water (cold, as needed)
Just enough to bind it all together. If you want to infuse the dough with extra flavor, consider using a splash of broth instead!
With these stars in our lineup, we are well on our way to creating a delightful snack that recalls fond memories while making new ones!
Step-by-Step Instructions
Now that we have our ingredients prepped, let’s roll up our sleeves and get to the cooking! Here’s how to make your fabulous Bat Cheese Crackers step-by-step:
-
Preheat Your Oven
Start by preheating your oven to 350°F (175°C). This is the perfect temperature for our crackers to bake into crispy perfection without burning. -
Mix Dry Ingredients
In a large mixing bowl, combine the flour, salt, and paprika. Whisk them together to blend evenly. This helps ensure that the seasoning is distributed well throughout the crackers. -
Incorporate the Cheese
Add the shredded cheddar cheese to the dry ingredients. Using your hands or a fork, mix until the cheese is well-coated with the flour mixture—a technique you can thank me later for, as it prevents clumping. -
Cut in the Butter
Add the cold, cubed butter to the bowl. Using a pastry cutter (or your fingertips), cut the butter into the mixture until it resembles coarse crumbs. This is where the magic happens; the butter will help create flaky layers in your crackers. -
Add Water Gradually
Start adding cold water, one tablespoon at a time, and mix until the dough comes together. You want it to be moist but not sticky. If it feels too dry, don’t hesitate to add a bit more water. Be cautious—too much can lead to chewy crackers! -
Chill the Dough
Once the dough is formed, shape it into a disk, wrap it in plastic wrap, and refrigerate for about 30 minutes. This will help the flavors meld and make rolling it out much easier. -
Roll Out the Dough
After the dough has chilled, dust your work surface with a little flour. Roll out the dough to about ¼ inch thick. Keep your surface floured to prevent sticking, and don’t stress if the edges aren’t perfectly straight—imperfections add character! -
Cut Into Shapes
Using a cookie cutter or a knife, cut the dough into desired shapes. Classic squares or fun bat shapes (perfect for the theme!) are fabulous! -
Arrange and Bake
Place the cut-out crackers onto a parchment-lined baking sheet. If you want, sprinkle a little more salt on top of each cracker for that extra punch. Pop them into the oven and bake for 15-20 minutes, or until they are golden brown. -
Cool and Enjoy!
Once out of the oven, let them cool for a few minutes on the baking sheet before transferring them to a cooling rack. This will keep them crispy! Serve warm or store in an airtight container for later snacking.
Chef Tip: To check if the crackers are done, lift one from the pan. The underside should be slightly golden, and when you crunch it, there should be a satisfying snap!
Serving Suggestions
When it comes to serving these Bat Cheese Crackers, presentation can elevate even the simplest dish! Arrange them on a beautiful wooden board or a colorful platter. Pair them with a tangy dipping sauce or some fresh fruit. They’re delightful with a side of homemade chili, a creamy dip, or even a luscious guacamole for a twist on flavor!
For an extra special touch, consider garnishing the platter with fresh herbs or a sprinkle of extra cheese. This adds a dash of elegance and makes them irresistible!
Recipe Variations
The beauty of Bat Cheese Crackers is their versatility! Here are a few variations to mix things up:
- Herbed Cheese Crackers: Incorporate dried herbs like rosemary or oregano into the dough for a fragrant twist.
- Spicy Jalapeño Cheddar: Add finely chopped jalapeños for a spicy kick, making these the ultimate snack for heat lovers.
- Cheese Medley: Experiment with a blend of cheeses like gouda and parmesan for different flavor profiles.
- Sweet Potato Edition: For a hint of sweetness, replace some cheese with roasted sweet potato purée (and a touch of cinnamon!) for a unique flavor.
- Gluten-Free Version: Use a gluten-free flour blend to accommodate those with dietary restrictions—everyone deserves a delicious snack!
Chef’s Notes
As I reflect on my journey with Bat Cheese Crackers, it’s heartwarming how these little creations have evolved. From my grandmother’s humble recipe to this fun twist, each bite is steeped in love and nostalgia. They’ve been present at countless gatherings, making every occasion feel special.
One particularly hilarious moment I recall happened during a family reunion. As the excitement grew, I decided to experiment by adding cayenne pepper for some extra flair. In the frenzy of laughter and conversation, I completely forgot about the spice level! Let’s just say, my uncle wasn’t smiling anymore after the first bite! But that’s the beauty of cooking—unexpected twists and tons of laughter weave together delightful memories.
FAQs and Troubleshooting
-
Why are my crackers tough?
Overworking the dough can lead to tough crackers. Remember to mix just until combined, and don’t add too much water! -
How do I store the leftovers?
Keep leftover crackers in an airtight container at room temperature. They should stay crispy for a few days — if they last that long! -
Can I freeze the dough?
Absolutely! You can freeze the unbaked dough wrapped tightly for up to three months. Thaw it in the fridge before rolling and baking! -
What’s the best way to know when they’re done?
Look for a golden brown color and listen for that satisfying crunch when you bite into one. Trust me—your taste buds will certainly let you know!
Nutritional Info (Optional)
Serving Size: 1 oz (about 6 crackers)
Calories: 120
Total Fat: 8g
Saturated Fat: 5g
Cholesterol: 20mg
Sodium: 150mg
Total Carbohydrates: 8g
Dietary Fiber: 0g
Sugars: 0g
Protein: 5g
Feel free to adjust the cheese or type of flour you use to customize the nutritional profile to fit your needs!
And there you have it—a comprehensive journey into the delightful world of Bat Cheese Crackers! With every crunch, you’ll not only be savoring a delicious snack but also creating memories. Happy cooking, and may your kitchen be filled with warmth and creativity!
PrintBat Cheese Crackers

Delightful homemade cheese crackers, perfect for snacks or gatherings, infused with nostalgia and cheesy goodness.
- Prep Time: 15 minutes
- Cook Time: 20 minutes
- Total Time: 35 minutes
- Yield: 4 servings 1x
- Category: Snack
- Method: Baking
- Cuisine: American
- Diet: Vegetarian
Ingredients
- 2 cups Cheddar Cheese, shredded
- 1 cup All-Purpose Flour
- ½ cup Butter, cold and cubed
- ½ teaspoon Salt
- 1 teaspoon Paprika
- Cold Water, as needed
Instructions
- Preheat your oven to 350°F (175°C).
- Mix flour, salt, and paprika in a large bowl.
- Add the shredded cheddar cheese to the dry ingredients and blend.
- Cut in the cold, cubed butter until resembling coarse crumbs.
- Add cold water gradually until the dough comes together.
- Chill the dough by wrapping it and refrigerating for about 30 minutes.
- Roll out the dough to about ¼ inch thick.
- Cut into desired shapes using a cookie cutter or knife.
- Arrange on a baking sheet and bake for 15-20 minutes until golden brown.
- Cool on a rack before serving.
Notes
For variation, try adding herbs, jalapeños, or different cheese blends.
Nutrition
- Serving Size: 1 serving
- Calories: 120
- Sugar: 0g
- Sodium: 150mg
- Fat: 8g
- Saturated Fat: 5g
- Unsaturated Fat: 3g
- Trans Fat: 0g
- Carbohydrates: 8g
- Fiber: 0g
- Protein: 5g
- Cholesterol: 20mg
Keywords: snack, cheese crackers, homemade snacks, entertaining
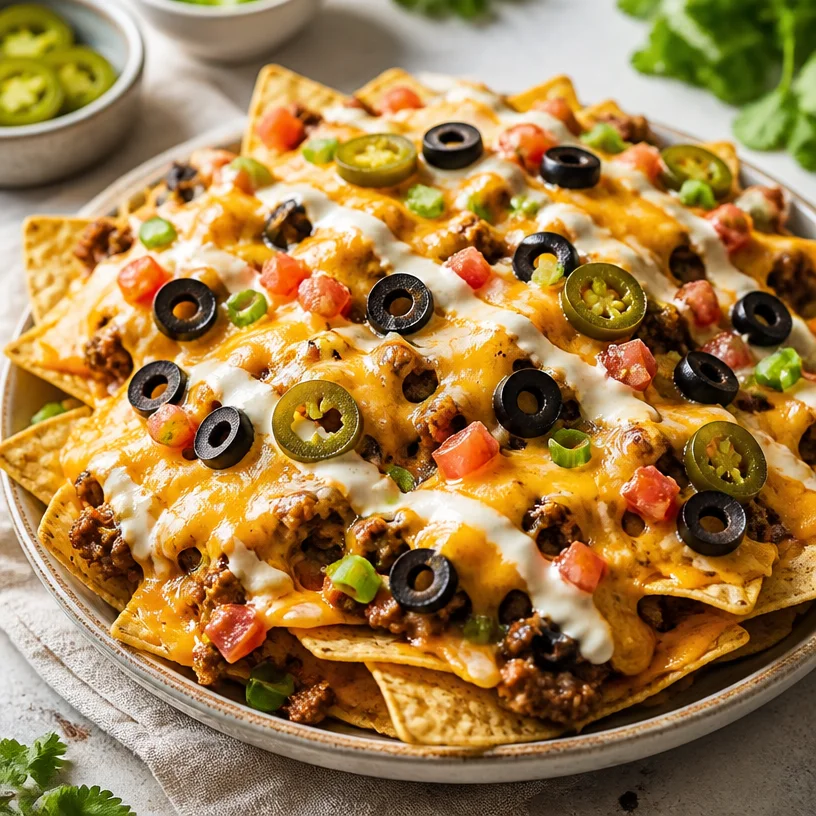
Monster Nachos
Introducing Monster Nachos: The Ultimate Comfort Food
Hello, nacho lovers! If you’re anything like me, no gathering is complete without a glorious platter of nachos, piled high with all the goodies. That crispy crunch paired with ooey-gooey cheese creates a symphony in your mouth that’s hard to resist! Today, we’re diving deep into the art of crafting Monster Nachos — a dish that’s perfect for game nights, casual hangouts, or simply elevating your Netflix-and-chill snacks.
Why are these nachos called "Monster"? Because we’re stacking them high, pushing the limits of what nachos can be! Grab your favorite blanket, pour yourself a drink, and let’s get ready to chip away at this deliciousness together.
Nachos hold a special place in my heart. They remind me of those carefree afternoons spent around the table with friends, plates overflowing with cheesy magic, laughter echoing, and the occasional heated debate over whether pineapple belongs on pizza (spoiler: it does!). There was one summer night when my friends and I decided to host an impromptu movie marathon. One of us whipped out a bag of tortilla chips and some leftover cheese, and before we knew it, our simple snack morphed into an elaborate nacho feast layered with varying flavors and textures. We got a little creative with toppings, and the result? A nacho creation that propelled our movie night to legendary status.
Speaking of legendary, let’s dive into the ingredients for these Monster Nachos!
Ingredients
To create your own mountain of nacho goodness, you’ll need the following ingredients:
-
Tortilla Chips: The foundation of your nachos! Opt for sturdy chips that can hold up the weight of all those toppings. If you want to make your own, simply cut corn tortillas into triangles and bake until crispy.
-
Cheese: A nacho classic! Use a mix of sharp cheddar for flavor and a bit of Monterey Jack for meltiness. Need a substitute? Try vegan cheese or a mix of nutritional yeast and cashew cream for a dairy-free option.
-
Olives: Black olives add a briny flavor that contrasts beautifully with the cheese. If you’re not an olive fan, try pickled jalapeños or banana peppers for a zesty kick.
-
Jalapeños: Fresh or pickled, they bring the heat! If you like it mild, remove the seeds and membranes. For more spice, keep them intact. Alternatively, you could use diced green chilis for a smoky touch.
These ingredients are just the beginning. The beauty of nachos is their versatility — you can dress them up or down based on what you love or have on hand.
Step-by-Step Instructions
Ready to craft your Monster Nachos? Let’s bring it all together. Follow these step-by-step instructions for a nacho experience that’ll have your friends begging for the recipe!
-
Preheat Your Oven: Start off by preheating your oven to 400°F (200°C). This is essential! You want your nachos to come out bubbly and golden.
-
Layer the Chips: On a large baking sheet, spread out a generous layer of tortilla chips. Make sure they’re overlapping a bit — this allows for even cheese distribution.
-
Add Cheese: Now, sprinkle a healthy layer of your cheese mix over the chips. Don’t hold back! This is where the magic really starts. The more cheese, the better, right?
-
Toppings Time!: Scatter the olives and jalapeños over the cheese. Get creative! You could also toss in some diced tomatoes, corn, or cooked ground beef for added protein.
-
Bake: Place the baking sheet in the preheated oven and bake for about 10-15 minutes, or until the cheese is bubbly and starting to brown. Keep a close eye so it doesn’t overcook!
-
Final Touches: Once baked, remove the nachos from the oven. Before serving, consider drizzling with fresh salsa or guacamole, and perhaps a sprinkle of fresh cilantro for an aromatic finish.
Chef Tip: When layering, think about contrast! Make sure chips are covered in cheese and toppings, or you’ll end up with some sad, naked chips at the end!
Serving Suggestions
Your Monster Nachos are looking gooey and gorgeous — now, how do you serve them? I love to transfer my nachos to a large, rustic wooden board for that communal feel. Use a large spoon to scoop up some toppings as you serve — no one wants to miss out on the cheese!
For a fun twist, place small bowls of toppings like guacamole, sour cream, and pico de gallo around your nacho platter. This way, your guests can customize their bites, making it a truly interactive experience.
Recipe Variations
Want to mix things up? Here are a few creative variations to take your Monster Nachos to the next level:
-
BBQ Chicken Nachos: Add shredded BBQ chicken for a smoky twist! Layer it underneath the cheese for ultimate flavor.
-
Mediterranean Nachos: Swap out traditional toppings for feta cheese, roasted red peppers, and a drizzle of tzatziki sauce — a fresh and tangy alternative.
-
Loaded Veggie Nachos: Load them up with black beans, corn, diced bell peppers, and avocado for a hearty meatless option.
-
Buffalo Chicken Nachos: Use shredded rotisserie chicken tossed in buffalo sauce. Top with blue cheese crumbles for a spicy flavor bomb.
-
Breakfast Nachos: Layer with scrambled eggs, cherry tomatoes, avocado, and a drizzle of hot sauce. Perfect for brunch!
Chef’s Notes
Over the years, my Monster Nachos recipe has gotten quite the makeover! Initially, I started with just cheese and jalapeños, but as my taste evolved, so did my nachos. I’ve added everything from savory meats to fresh herbs, and you can bet my nachos have become a crowd favorite at every party!
I once had a New Year’s Eve bash where someone mistakenly grabbed a handful of nachos thinking they were chips! Let’s just say, it made for a hilarious moment when the person realized it wasn’t just a chip. The laughter that ensued? Priceless!
FAQs and Troubleshooting
1. My cheese didn’t melt well! What went wrong?
Make sure you’re using cheese that’s known for melting well, like cheddar or Monterey Jack. If you’re shredding it yourself, avoid pre-shredded cheese, which often has anti-caking agents that can hinder meltiness.
2. How do I prevent soggy nachos?
To avoid soggy chips, ensure your toppings (like salsa or guacamole) are served on the side, or use them sparingly. Always layer cheese on top to create a protective layer for the chips.
3. Can I make these in advance?
Prepare your chips and toppings ahead of time, but assemble and bake right before serving. Nachos are best enjoyed fresh!
4. What if I don’t have an oven?
No worries! You can make these nachos in an air fryer or even on the stovetop. Just layer the ingredients in a pan and cover with a lid to melt the cheese.
Nutritional Info
Although nachos are meant to be a delicious indulgence, moderation is key! Depending on how many toppings you add, a serving of these Monster Nachos can range around 300-500 calories. But hey, it’s all about enjoyment and sharing good food!
In Conclusion
There you have it, friends! Your ultimate guide to Monster Nachos, where every bite is a celebration of flavor and creativity. Cooking should always feel approachable and fun, just like these nachos! So gather your ingredients, invite some friends over, and let the nacho magic unfold.
At the end of the day, it’s not just about the nachos; it’s about the memories you create around the table. Here’s to good food and even better company! Cheers!
PrintMonster Nachos: The Ultimate Comfort Food

A glorious platter of nachos piled high with toppings, perfect for gatherings and movie nights.
- Prep Time: 10 minutes
- Cook Time: 15 minutes
- Total Time: 25 minutes
- Yield: 6 servings
- Category: Appetizer
- Method: Baking
- Cuisine: Mexican
- Diet: Vegetarian
Ingredients
- Tortilla Chips
- Sharp Cheddar Cheese
- Monterey Jack Cheese
- Black Olives
- Jalapeños
Instructions
- Preheat your oven to 400°F (200°C).
- Layer the chips on a large baking sheet, overlapping them for even cheese distribution.
- Add a generous sprinkle of cheese mix over the chips.
- Scatter olives and jalapeños over the cheese, adding any additional toppings you like.
- Bake for about 10-15 minutes until the cheese is bubbly and golden.
- Remove from oven and drizzle with salsa or guacamole, garnishing with cilantro if desired.
Notes
Try variations like BBQ chicken, Mediterranean, or breakfast nachos!
Nutrition
- Serving Size: 1 serving
- Calories: 400
- Sugar: 1g
- Sodium: 500mg
- Fat: 24g
- Saturated Fat: 10g
- Unsaturated Fat: 12g
- Trans Fat: 0g
- Carbohydrates: 35g
- Fiber: 4g
- Protein: 12g
- Cholesterol: 30mg
Keywords: nachos, comfort food, appetizer, party food, cheese
Bloody Mozzarella Eyeballs: Easy Halloween Party Snack
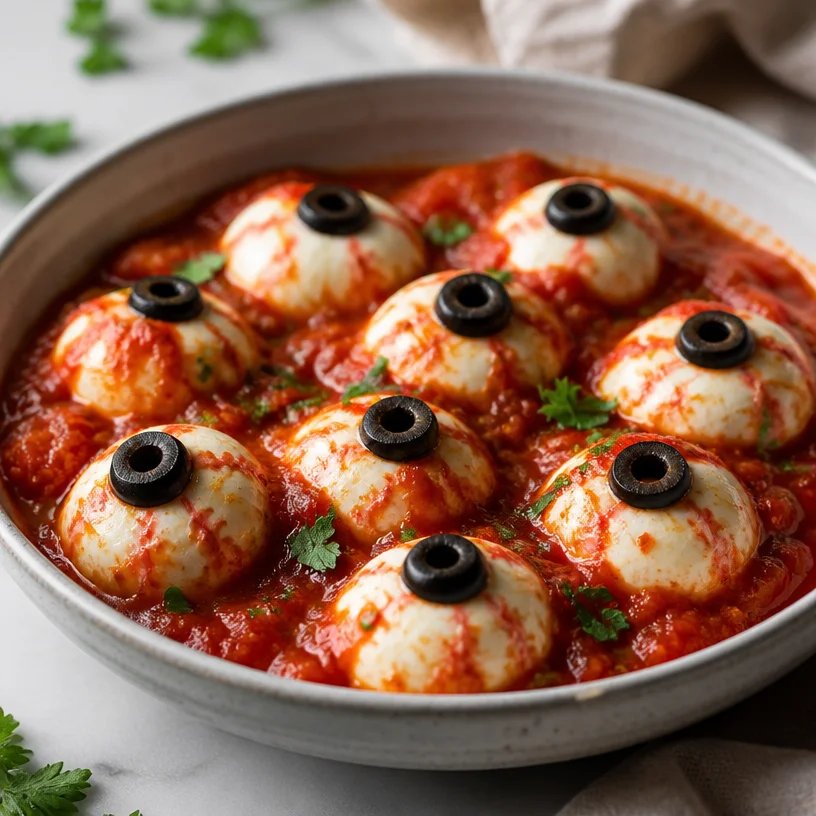
Bloody Mozzarella Eyeballs: A Spooky and Fun Treat
Hello, fellow foodies! If you’re looking for a fun, spooky dish that’s perfect for Halloween parties, movie nights, or any gathering that calls for a touch of the macabre, you’ve come to the right place. Today, we’re diving into the world of Bloody Mozzarella Eyeballs — a delightfully eerie appetizer that’s as simple to make as it is fun to eat. With just a few ingredients, you can transform everyday mozzarella balls into little “eyeballs” that will shock and delight your guests. So, grab your apron, and let’s get started!
Personal Story
Growing up, my family took Halloween quite seriously. Each year, my mom would whip up culinary creations that were both horrifying and delicious. One of my favorites was a spooky cheese platter adorned with grape “eyeballs” and macabre cheeses shaped like skulls. I still fondly remember the gasps and giggles from my friends when they took their first bites. My mom infused the kitchen with love and laughter, turning even the simplest dishes into a theatrical experience. This year, I wanted to bring back that nostalgia with my own twist: Bloody Mozzarella Eyeballs! They’re not just eye-catching but also a fantastic way to get everyone involved in the spooky spirit of the holiday.
Ingredients
Here’s what you will need to make these frightfully fun treats:
-
Fresh Mozzarella Balls: The stars of our dish! These soft, creamy balls will form the base of our eyeballs. Choose medium-sized balls for a more realistic look. If you can’t find fresh mozzarella, you can substitute with string cheese, but the texture won’t be as creamy.
-
Black Olives: These will serve as the “pupil” of our eyeballs. I prefer using pitted black olives to avoid any pit surprises! If you’re not a fan of olives, you can use cherry tomatoes or capers for an alternative look.
-
Marinara Sauce: Our “bloody” ingredient! A good quality marinara or even store-bought will work great. You could make your own to elevate the flavor, but honestly, this is about fun, so no pressure! For a twist, try using a spicy arrabbiata sauce for an extra kick.
Step-by-Step Instructions
Let’s dive into the delicious details of crafting our Bloody Mozzarella Eyeballs!
-
Prepare the Ingredients: Start by gathering all your ingredients. This is a fun, casual recipe, so set the mood with some eerie decorations or your favorite Halloween playlist. It’ll help get you in the spirit!
-
Drain the Mozzarella: If your mozzarella balls are packed in water, drain them well and pat them dry with a paper towel. This helps the marinara stick better later on. You want the mozzarella to be nice and firm, not soggy.
-
Slice the Olives: Using a sharp knife, slice the black olives into thin circles. You will want to keep them about a quarter of an inch thick. You can also cut a slice in half for smaller eyeballs. It’s fun to play around with the sizes!
-
Assemble the Eyeballs: Take a mozzarella ball and gently press an olive slice into the center for the pupil. Don’t worry about making it perfect; the more misaligned they are, the creepier they look, and we’re going for spooky, right?
-
Create the “Blood”: In a serving dish, pour enough marinara sauce to cover the bottom. Gently place your mozzarella eyeballs on top of the sauce. Feel free to drizzle a little more marinara over the mozzarella for a bloody effect. Create a design that oozes out for extra horror points!
-
Chill (Optional): If you have the time, cover and let the dish chill in the fridge for about 30 minutes. This helps the flavors meld, plus it makes for a refreshing chilled appetizer!
-
Serve: Once you’re ready to serve, garnish with fresh basil leaves if desired, and present your Bloody Mozzarella Eyeballs to your guests, watching their reactions as they dig in!
Serving Suggestions
Plating these eyeless wonders is simple yet effective. Use a shallow, wide dish for your marinara base to highlight the bloody effect. Place a handful of fresh basil around the edges to contrast with the red sauce and add a pop of color. You can also sprinkle some chili flakes on top for a spicy kick and an extra layer of creepiness. Serve with toothpicks or sturdy crackers to make them easy to grab — no one wants to fumble with a gooey eyeball!
Recipe Variations
Want to mix things up? Here are a few creative twists you can try:
- Spooky Stuffed Eyeballs: Fill the mozzarella balls with pesto before inserting the olive slice — it adds a herby twist!
- Cheesy Eyeballs: Add a small dollop of cream cheese or goat cheese into the mozzarella for a creamy center.
- Vegetarian Twist: Instead of olives, you can use colorful bell pepper rings for the pupils, creating a beautiful and vibrant dish!
- Spicy Eyeballs: Incorporate a finely diced jalapeño into the marinara sauce for a spicy kick that plays well with the creamy mozzarella.
- Herb-Infused Sauce: Stir in some fresh herbs, like basil or oregano, into your marinara sauce to elevate the flavor further!
Chef’s Notes
Ah, the joys of culinary creativity! This dish has evolved over the years, many a Halloween party transformed into a culinary showcase thanks to my love of spooky food. While Bloody Mozzarella Eyeballs may sound a little twisted, they’re all in good fun. I remember one party where we had rubber eyeballs scattered amongst the food, and guests couldn’t tell the little mozzarella treats from the decor! The laughter was contagious, proving that the kitchen is truly a place for joy, antics, and creating unforgettable memories.
FAQs and Troubleshooting
Q1: What if I can’t find fresh mozzarella?
A1: No problem! You can easily use string cheese or any small cheese ball, like burrata, for a similar effect. Just keep in mind that the flavor and texture might be slightly different.
Q2: How long can I keep these before serving?
A2: It’s best to serve them fresh or within a day. If you plan to make them ahead of time, store the ingredients separately and assemble them right before your gathering.
Q3: My marinara sauce is too thick; what can I do?
A3: You can thin out your marinara with a splash of water or stock until you reach your desired consistency. A dash of olive oil can also enrich the flavor!
Q4: What if I overdid it with the sauce?
A4: No worries! If you find the sauce too overpowering, serve the eyeballs on a separate platter and let guests dip them in the sauce as they please. You might even create a mini assembly line for added fun!
Nutritional Info
Because who doesn’t want to know a little about what they’re eating? Keep in mind that the nutritional values will vary based on portions and brands used, but here’s a ballpark estimate for a serving of Bloody Mozzarella Eyeballs (2):
- Calories: 150
- Protein: 8g
- Carbs: 10g
- Fat: 10g
So there you have it, my little culinary adventurers! Bloody Mozzarella Eyeballs are a delightful and effortless way to add a touch of spooky elegance to your next gathering. With just a handful of ingredients and a bit of creativity, you can impress your guests and create lasting memories around your table. As always, remember that cooking is all about enjoyment, so let your personality shine through and make it your own. Happy haunting!
PrintBloody Mozzarella Eyeballs
A spooky and fun appetizer featuring mozzarella balls transformed into creepy eyeballs, perfect for Halloween gatherings.
- Prep Time: 15 minutes
- Cook Time: 0 minutes
- Total Time: 15 minutes
- Yield: 4 servings
- Category: Appetizer
- Method: No Cooking
- Cuisine: Italian
- Diet: Vegetarian
Ingredients
- Fresh Mozzarella Balls
- Black Olives, sliced
- Marinara Sauce
Instructions
- Prepare the ingredients by gathering all items and setting a fun mood.
- Drain the mozzarella balls and pat them dry with a paper towel.
- Slice the black olives into thin circles.
- Assemble the eyeballs by pressing an olive slice into the center of a mozzarella ball.
- Create the “blood” by pouring marinara sauce in a serving dish and placing the mozzarella eyeballs on top.
- Chill in the fridge for about 30 minutes if desired.
- Serve the assembled dish with optional garnish of fresh basil leaves.
Notes
For a twist, try using spicy arrabbiata sauce or fill the mozzarella with pesto for a herby flavor.
Nutrition
- Serving Size: 2 eyeballs
- Calories: 150
- Sugar: 2g
- Sodium: 300mg
- Fat: 10g
- Saturated Fat: 2g
- Unsaturated Fat: 8g
- Trans Fat: 0g
- Carbohydrates: 10g
- Fiber: 1g
- Protein: 8g
- Cholesterol: 25mg
Keywords: Halloween, spooky appetizer, mozzarella, party food, easy recipes
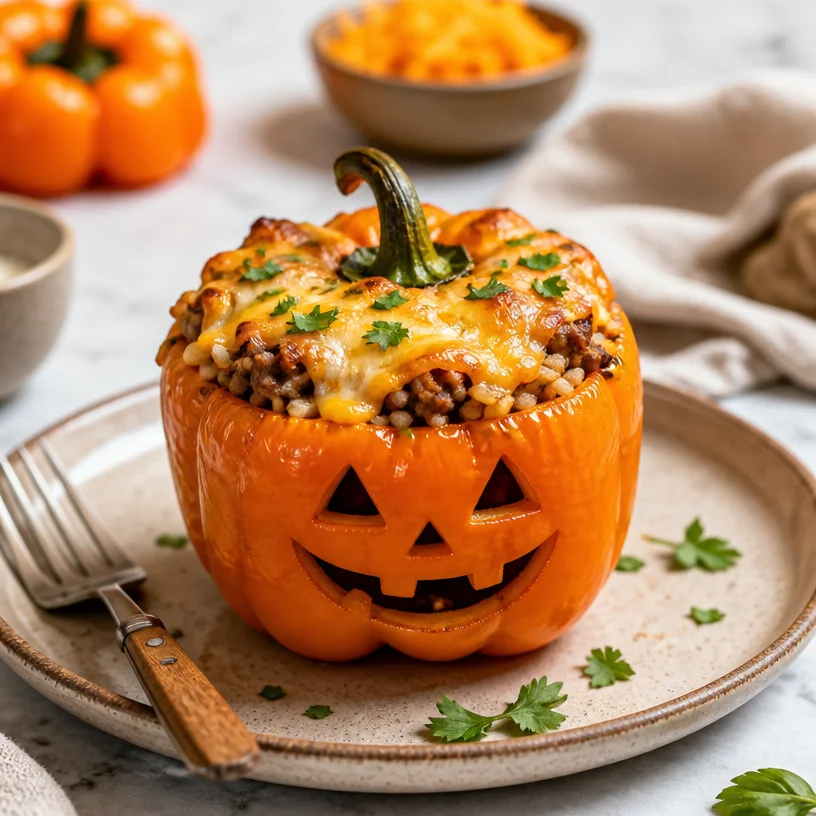
Jack-o’-Lantern Stuffed Peppers
Jack-o’-Lantern Stuffed Peppers: A Spooktacular Treat
As the leaves turn and autumn settles in, the excitement of Halloween begins to swirl through the air. There’s something undeniably magical about this time of year, isn’t there? The crispness of the air, the vibrant colors of the foliage, the warm scents of cinnamon and nutmeg filling the kitchen — it all creates an atmosphere ripe for cozy gatherings. And what better way to celebrate the season than by inviting friends and family around the table for a festive twist on a favorite dish?
Today, I’m thrilled to share my recipe for Jack-o’-Lantern Stuffed Peppers! These cheerful creations aren’t just perfect for Halloween; they are an engaging way to serve a delicious meal in a fun guise. With a hearty filling of seasoned beef and rice nestled inside bright orange peppers, these dishes not only look delightful, but they also embody the spirit of comfort food. Plus, they give everyone a reason to smile — I mean, who doesn’t love a food item that doubles as a Halloween decoration?
I’ve whipped up this recipe to be approachable, elegant, and just a tad whimsical, perfect for both a festive gathering or a cozy meal at home. So, tie on that apron and let’s dive into this charming dish that’s guaranteed to be a hit with guests of all ages!
My Pumpkin Patch Memories
Let me take you on a little trip back in time. Growing up, one of my favorite Halloween traditions was visiting the pumpkin patch with my family. The thrill of selecting the perfect pumpkin — plump, round, and vibrant orange — always filled me with delight. I particularly loved designing sinister faces to carve on those pumpkins, embodying everything spooky and magical about the season.
One October evening, after returning from the pumpkin patch, my mom surprised us with stuffed peppers for dinner as a nod to our favorite tradition. They were vibrant, colorful, and shaped like little pumpkins, instantly reminding us of our adventures. I remember digging into the peppers, savoring the comforting ground beef and rice filling, all while carving silly faces into our pumpkins in tandem.
That meal became a ritual over the years, and this Jack-o’-Lantern Stuffed Pepper recipe is my homage to those warm, joy-filled evenings. It’s a fusion of nostalgia and creativity that makes the kitchen feel alive with laughter and cheer during the fall season.
Ingredients
Here’s what you’ll need to create these delightful Jack-o’-Lantern Stuffed Peppers:
-
4 large orange bell peppers
These are your pumpkins! Select firm peppers with a rich, bright orange hue. Green or red peppers can also be used, but orange gives that perfect Halloween vibe. -
1 pound ground beef
Choose lean ground beef for a balance of flavor and health. If you prefer, ground turkey or plant-based meat alternatives work wonderfully as substitutes for a lighter version! -
1 cup cooked rice
Feel free to use any kind of rice you prefer: white, brown, or even cauliflower rice for a low-carb option! Leftover rice from a previous meal fits perfectly here. -
1 small onion, diced
Onions add a sweet and savory depth of flavor to the stuffing. Shallots can work here too if you want a milder taste. -
2 cloves garlic, minced
Garlic gives that extra zing! You can also experiment with garlic powder if you’re in a pinch. -
1 cup diced tomatoes (canned or fresh)
Tomatoes add moisture and flavor. If you like a little heat, consider adding diced tomatoes with green chilies! -
1 teaspoon smoked paprika
This adds depth and a touch of smokiness that brings the flavors to life. Regular paprika or even chili powder can work if that’s what you have on hand. -
Salt and pepper, to taste
Essential for bringing out all that wonderful flavor! -
Grated cheese, for topping (optional)
Cheddar or mozzarella for a melty finish. You can skip this for a dairy-free option.
Step-by-Step Instructions
Let’s get cooking! Here’s how to craft your delightful Jack-o’-Lantern Stuffed Peppers:
-
Prepare Your Peppers
Start by preheating your oven to 375°F (190°C). Next, carefully slice off the top of each bell pepper (like a little cap!) and remove the seeds and membranes inside. This will give you the perfect canvas for your little “jack-o-lanterns.” Set aside. -
Sauté the Vegetables
In a large skillet over medium heat, add a drizzle of olive oil. Once hot, toss in the diced onion. Sauté for about 3-4 minutes, or until translucent, then add garlic. Cook for another 1-2 minutes until fragrant. Pro tip: Stir the onions often to avoid burning — no one likes that bitter flavor! -
Cook the Ground Beef
Add the ground beef to the skillet, breaking it apart with a wooden spoon. Season with salt, pepper, and smoked paprika. Cook until browned, about 5-7 minutes. Make sure to drain any excess fat if you’re using higher-fat beef. The smell should make your kitchen feel inviting! -
Mix in the Good Stuff
Stir in the cooked rice and diced tomatoes, mixing everything together until well combined. Allow the mixture to simmer for a couple of minutes, letting all of those flavors mingle. Have a taste test here — are you happy with the seasoning? If it feels a bit bland, don’t hesitate to add more salt or spices! -
Stuff Those Peppers
Carefully spoon the beef and rice mixture into each orange pepper, packing it gently but firmly. Don’t be shy — pile it high! If you’re using cheese, sprinkle some on top of the stuffed peppers for that extra ooey-gooey factor. -
Carve Faces (Optional)
Now, if you’re feeling creative, here’s where you can add some character to your peppers! Using a small knife, carve little eyes, noses, and mouths into the sides of each pepper to create your Jack-o’-lantern faces. Just be careful not to cut all the way through! -
Bake
Place the peppers upright in a baking dish. You might want to add a splash of water to the bottom of the dish to keep things nice and moist while they bake. Cover with foil and pop them into the preheated oven for about 30 minutes. After 30 minutes, remove the foil and bake for an additional 10-15 minutes, until the peppers are tender and the cheese is bubbly and golden. -
Let Them Rest
Once they’re done, remove the stuffed peppers from the oven and let them rest for about 5 minutes. This allows all the flavors to settle — taste buds, rejoice!
Serving Suggestions
These Jack-o’-Lantern Stuffed Peppers are visually appealing and fun. Simply arrange them on a large platter adorned with fresh herbs or a scatter of colorful autumn leaves. They make the perfect centerpiece for your Halloween table! A dollop of sour cream or a sprinkle of fresh herbs on each one before serving adds a nice touch of freshness.
Recipe Variations
- Vegetarian Delight: Swap out the beef for a mixture of black beans and quinoa for a deliciously healthy option.
- Fiesta Stuffing: Replace the ground beef with chorizo and add some corn and black beans for a zesty twist!
- Asian-Inspired: Use ground turkey or chicken seasoned with soy sauce, ginger, and sesame oil, and swap the rice for jasmine rice or quinoa.
- Spicy Kick: Add some diced jalapeños or chili flakes to the filling for those who enjoy a little heat!
- Cheesy Goodness: Add cream cheese or a dollop of ricotta in the mixture for a creamy texture, making your peppers extra indulgent.
Chef’s Notes
Making these peppers brings back such fond memories! Each year, as we carve our pumpkins, I always like to reminisce about that special dinner with my family. What started as a simple comfort food recipe has transformed into a festive tradition in my own household. I love how easy it is to get creative with this dish, too — the filling possibilities are endless.
Fun fact: the idea of making Jack-o’-lantern themed foods was born when I had a group of friends over for a Halloween dinner. We decided to hold a friendly contest to see who could make the scariest (or silliest) themed dishes. Ever since, these stuffed peppers have become a beloved favorite among my circle. Who says Halloween food can’t be delicious?
FAQs and Troubleshooting
1. Why are my peppers tough after baking?
This often happens if the peppers were overcooked. Ensure you’re not baking them longer than necessary; a parboil (boiling for a few minutes prior) can be used before stuffing to ensure they cook through perfectly.
2. Can I make the stuffing ahead of time?
Absolutely! Prepare the stuffing a day in advance and store it in the refrigerator. Just stuff the peppers and bake when you’re ready.
3. How do I know when my peppers are done?
You’ll want to see them softening but still holding their shape. A fork should easily pierce through the skin without collapsing the pepper.
4. What should I do if I have leftover filling?
You can bake it up in a small dish as a side or use it to fill tortillas for burritos or tacos. It’s delicious and so versatile!
Now that we’ve made our way through this delightful recipe, I hope you’re inspired to bring Jack-o’-Lantern Stuffed Peppers to your kitchen this season! They’ll bring a smile to your table and warmth to your gatherings with friends and family. Happy cooking, and may your Halloween be filled with treats, laughter, and delicious food!
PrintJack-o’-Lantern Stuffed Peppers
Delightful stuffed peppers shaped like jack-o’-lanterns, filled with seasoned beef and rice, perfect for Halloween gatherings.
- Prep Time: 15 minutes
- Cook Time: 40 minutes
- Total Time: 55 minutes
- Yield: 4 servings 1x
- Category: Main Course
- Method: Baking
- Cuisine: American
- Diet: Beef
Ingredients
- 4 large orange bell peppers
- 1 pound ground beef
- 1 cup cooked rice
- 1 small onion, diced
- 2 cloves garlic, minced
- 1 cup diced tomatoes (canned or fresh)
- 1 teaspoon smoked paprika
- Salt and pepper, to taste
- Grated cheese, for topping (optional)
Instructions
- Prepare your peppers by preheating your oven to 375°F (190°C) and slicing off the tops of each bell pepper, removing the seeds and membranes.
- Sauté the onions in a skillet with olive oil until translucent, then add garlic and cook until fragrant.
- Cook the ground beef in the skillet, breaking it apart, and season with salt, pepper, and smoked paprika until browned.
- Mix in the cooked rice and diced tomatoes, allowing it to simmer and combine.
- Stuff each pepper with the beef and rice mixture, packing it gently, and top with cheese if desired.
- Carve faces into the peppers for decoration if you choose.
- Bake the peppers in a baking dish covered with foil for 30 minutes, then uncover and bake for an additional 10-15 minutes until tender.
- Let them rest for 5 minutes before serving.
Notes
These stuffed peppers can be customized with various fillings for different flavors. Serve on a platter for a festive touch.
Nutrition
- Serving Size: 1 pepper
- Calories: 350
- Sugar: 5g
- Sodium: 400mg
- Fat: 12g
- Saturated Fat: 4g
- Unsaturated Fat: 6g
- Trans Fat: 0g
- Carbohydrates: 45g
- Fiber: 3g
- Protein: 15g
- Cholesterol: 30mg
Keywords: stuffed peppers, Halloween recipe, jack-o-lantern, fall recipe, comfort food
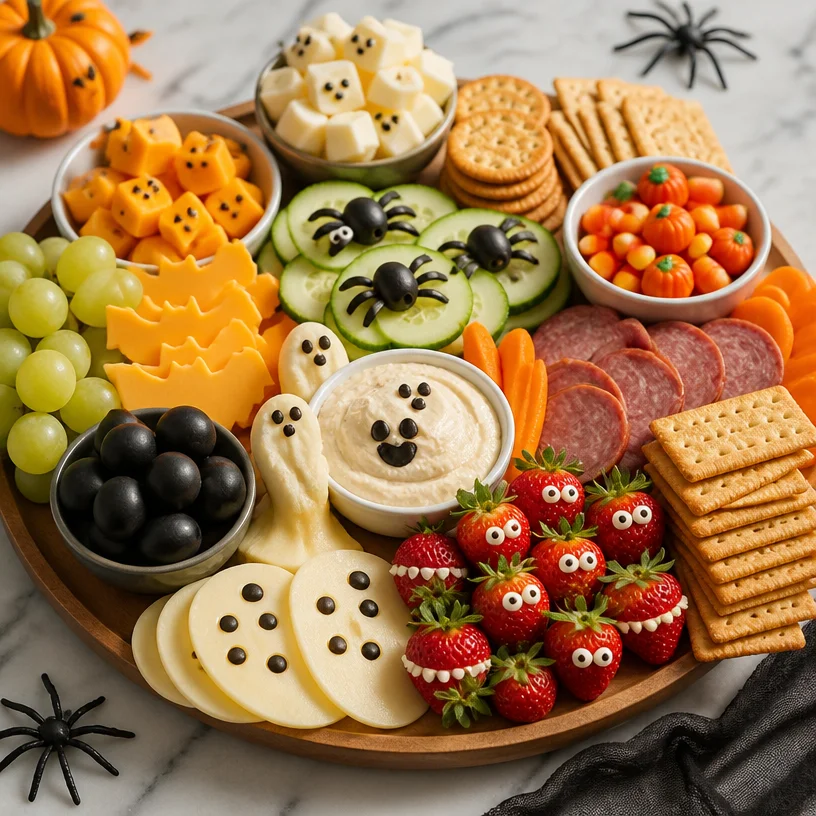
Minute Halloween Snack Board for Spook-tacular Parties
Spooktacular Snacking: Your Guide to Creating the Ultimate Halloween Snack Board
As the air turns crisp and the leaves start to dance in a kaleidoscope of colors, the anticipation of Halloween fills the air. It’s that magical time of year when costumes come alive, laughter echoes, and the sweet scent of candy wafts through the neighborhood. But what really brings everyone together during this festive season? Delicious snacks and sharing spooky stories around the table! That’s where the Halloween Snack Board comes in, and I can’t wait to share my secrets on how to create your own enchanting spread.
Imagine a beautifully arranged board filled with vibrant fruits, crunchy vegetables, delectable cheeses, and, let’s not forget, a touch of candy for that sweet kick. Not only does it look fabulous, but it also caters to all taste buds and dietary preferences. And the best part? Constructing this board is as much about creativity and enjoyment as it is about the food itself. Whether you’re hosting a spooky gathering or simply want to treat the kids after their trick-or-treating adventure, this Halloween Snack Board is your ticket to a festive feast that’s simple yet stunning.
Pull on your apron and join me in this culinary adventure as we craft the ultimate Halloween Snack Board that’s sure to impress — let’s set the stage for a frightfully good time!
A Taste of Nostalgia
I’ll never forget the first Halloween gathering I hosted at my home. It was a crisp October evening, and the scent of freshly baked pumpkin bread filled the air. I wanted to create a centerpiece that would capture the spirit of the season, so I decided to craft a snack board. I fondly recall the laughter and chatter that surrounded the table as friends dug in, sneaking candy while grabbing veggies and swapping ghost stories. It was a moment that sparked my love for effortless entertaining — all thanks to a simple board brimming with seasonal snacks.
Over the years, I’ve refined the idea, incorporating seasonal themes, vibrant colors, and a variety of textures. I love how a snack board invites everyone to nibble and chat while they create their own perfect bite. It became a staple for every Halloween, and I’m excited to share it with you — and trust me, you’ll want to make it a tradition in your home too!
Ingredients
Let’s dive into what you’ll need to create your magnificent Halloween Snack Board. Feel free to customize it based on your guests’ tastes, allergies, and preferences:
-
Fruits: Choose seasonal fruits like apple slices, grapes, or clementines. They add a burst of color and sweetness! Want a Halloween twist? Use a cookie cutter to shape apple slices into spooky figures, or make clementines look like mini pumpkins by adding a green stem with a piece of celery.
-
Vegetables: Carrot sticks, cucumber slices, and assorted bell peppers bring crunch and freshness. Experiment with fun shapes, like turning cucumber slices into little ghosts with a bit of edible marker or cream cheese for eyes.
-
Cheese: Select a variety of cheeses — perhaps sharp cheddar, creamy brie, or a spooky black cheese like aged gouda for a unique flavor profile. Need a replacement? Consider vegan cheese or a nut-based option for a dairy-free version.
-
Crackers: Offer a crunchy contrast with whole grain, herb-infused, or gluten-free crackers. Flatbreads can also provide a rustic touch; try serving them cut into shapes for that extra festive flair!
-
Candy: Make sure to include a selection of candies for that sweet element. Think chocolate-covered pretzels, gummy worms, or even festive candy corn. Feel free to swap in healthier options like dark chocolate-covered almonds or dried fruits for a satisfying crunch.
Step-by-Step Instructions
Now that we have our ingredients, it’s time to start assembling that stunning Halloween Snack Board! Here’s how to put it together with some tips along the way:
-
Choose Your Base: Start with a large wooden board, a platter, or even a fun Halloween-themed tray. The size will depend on how many guests you’re expecting. I love to use something rustic, as it adds an inviting touch to the table.
-
Select Your Layout: Before you start placing items, take a moment to envision how you want your board to look. Do you want clusters of colors, or would you prefer a more organized layout? It’s up to you! Create sections for each type of ingredient.
-
Place the Cheeses: Begin by placing your cheeses on the board. Cut a few slices of each and arrange them in a way that makes them easily accessible. I often pile the soft cheeses high to create height and interest.
-
Add the Fruits: Next, fill in the gaps with fruits. Scatter apple slices, grapes, and those adorable clementines around the cheeses. Want to make it extra special? Use a melon baller to create little fruit balls for easy snacking!
-
Incorporate the Vegetables: It’s time for those vibrant veggies. Arrange the carrot sticks, cucumber slices, and bell pepper strips in a way that complements the colors of the fruits. A simple tip: group colors together for a visually striking presentation.
-
Add Crackers: Now for the crackers — place them alongside the cheeses so guests can easily grab them. You might stand them upright in a jar for a fun touch or create a little stack. This also encourages guests to build their perfect bite!
-
Fill in With Candy: Finally, it’s time for the sugar rush! Nestle candy around the board — keep it within reach, but make sure it doesn’t overpower the other sections. You don’t want your guests to forget the array of deliciousness surrounding those sweets!
-
Final Touches: Once everything is in place, finish your board with fresh herbs for garnish. Rosemary sprigs or parsley can add a beautiful touch of green! It’s like the cherry on top for a snack board that is both Instagram-ready and mouthwatering.
Serving Suggestions
Now that your stunning Halloween Snack Board is ready, how do you get guests to dig in? One idea is to place some cute personalized labels next to each section, adding a lighthearted touch with funny names like “Witches’ Veggies” or “Goblin Grapes.” You can present it on a table with flickering candles or fairy lights to enhance the enchanting atmosphere. Encourage your guests to build their own plates, mixing and matching flavors. Trust me, it’s all about creating those interactive moments that leave everyone feeling connected and satisfied!
Recipe Variations
Here’s where the fun really starts! Don’t hesitate to mix things up. Here are a few creative twists to consider:
-
Themed Color Board: Stick to a color theme, such as all orange and black items, to boost your Halloween spirit!
-
Savory Bites Board: Swap out fruit for more savory elements like olives, sun-dried tomatoes, or charcuterie. Perfect for adults!
-
Dessert-Driven Board: Opt for all candies and sweet treats, including brownies, cookies, and chocolate-covered strawberries for those who have a major sweet tooth.
-
Kid-Friendly Board: For little ones, include peanut butter-filled crackers, sliced bananas, and yogurt dips to keep things playful and delicious.
-
Vegan-Friendly Board: Substitute everything with plant-based options like hummus, vegetable chips, coconut yogurt, and vegan cheese.
Chef’s Notes
One of the most exciting things about creating a snack board is witnessing how it evolves with each gathering. I have fond memories of guests chatting and laughing, their plates brimming with color and flavor variations. I once hosted a Halloween party where each guest contributed a "spooky" snack of their own, resulting in the most eclectic and delicious spread! Sharing that experience opened my kitchen to a world of creativity and connection, reminding me of why I adore cooking and entertaining.
FAQs and Troubleshooting
Q: Can I make my snack board ahead of time?
Absolutely! You can prep most of the ingredients a day in advance. Just keep everything covered and stored well in the fridge, and toss it all together just before serving. I recommend storing cut fruits and veggies in airtight containers to preserve freshness.
Q: What if my guests have allergies or dietary restrictions?
That’s no problem! Just ensure you inquire about any dietary preferences beforehand and incorporate a variety of options. The beauty of a snack board is that it can cater to everyone!
Q: How can I keep my fruits from browning?
A simple trick is to toss apple slices in a mixture of water and lemon juice before arranging them on the board. This helps to keep their vibrant color while retaining their crunch.
Q: What should I serve as a dip?
Consider including a couple of dips, such as hummus, ranch dressing, or guacamole. Not only do they add flavor, but they also provide a fun interactive element as guests scoop and spread!
Nutritional Info
While creating a snack board is all about enjoyment and celebration, it’s always nice to be mindful. Here’s a rough estimate of what a serving might look like:
- Calories: Approximately 250-300 (depending on portion sizes and specific ingredients used)
- Protein: Varies based on cheese and meat choices
- Carbohydrates: Varies based on crackers and fruits
- Fiber: Fruits and vegetables provide a nice fiber boost
Remember, the nutritional aspect comes second to the joy of gathering with loved ones and creating beautiful memories around your Halloween Snack Board.
So there you have it! A complete guide to constructing the ultimate Halloween Snack Board that is sure to delight your guests, fuel laughter, and fill your home with warmth and holiday spirit. I can’t wait to see how your boards turn out, so don’t forget to share your creations with me! Happy snacking and enjoy a spooktacular Halloween!
PrintHalloween Snack Board
Create a festive and colorful Halloween Snack Board filled with seasonal fruits, crunchy vegetables, delicious cheeses, and sweet treats.
- Prep Time: 30 minutes
- Cook Time: 0 minutes
- Total Time: 30 minutes
- Yield: 8 servings
- Category: Appetizer
- Method: No-Cook
- Cuisine: American
- Diet: Vegetarian
Ingredients
- Seasonal fruits: apple slices, grapes, clementines
- Vegetables: carrot sticks, cucumber slices, assorted bell peppers
- Cheese: sharp cheddar, creamy brie, aged gouda
- Crackers: whole grain, herb-infused, gluten-free
- Candy: chocolate-covered pretzels, gummy worms, candy corn
Instructions
- Choose Your Base: Start with a large wooden board or platter.
- Select Your Layout: Decide on clusters of colors or sections for each ingredient.
- Place the Cheeses: Arrange your cheeses to make them easily accessible.
- Add the Fruits: Scatter fruits around the cheeses, using a melon baller if desired.
- Incorporate the Vegetables: Arrange vibrant veggies to complement the fruits’ colors.
- Add Crackers: Place them alongside cheeses for easy grabbing.
- Fill in With Candy: Nestle candy around the board without overpowering it.
- Finish with Fresh Herbs: Add decorative herbs for garnish.
Notes
Customize the board based on guests’ tastes and dietary restrictions. Consider including dips for added flavor.
Nutrition
- Serving Size: 1 serving
- Calories: 275
- Sugar: 15g
- Sodium: 300mg
- Fat: 10g
- Saturated Fat: 5g
- Unsaturated Fat: 3g
- Trans Fat: 0g
- Carbohydrates: 36g
- Fiber: 5g
- Protein: 8g
- Cholesterol: 20mg
Keywords: Halloween snack board, party food, festive snacks, seasonal fruits, vegetable platter