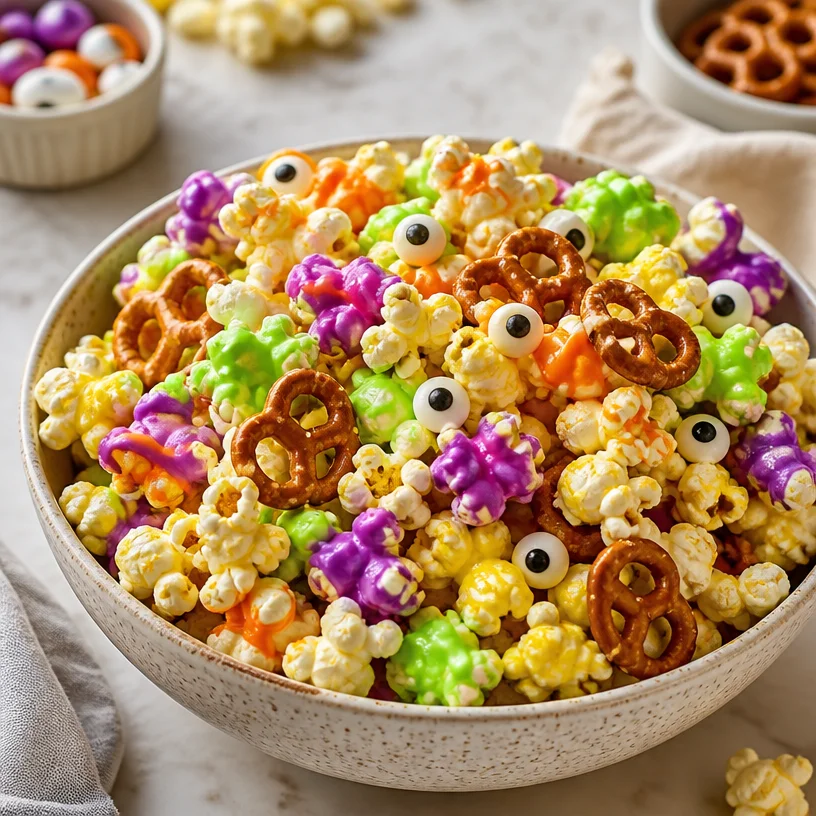
Monster Popcorn Mix
Monster Popcorn Mix: A Spooktacular Treat
Hello, fellow foodies! Today, we’re diving into something utterly delightful and perfect for any occasion that calls for a little extra fun in the kitchen. Get ready to unleash your creativity with this Monster Popcorn Mix—the ultimate festive snack that’s equal parts whimsical and delicious!
Introduction
Imagine this: it’s a crisp autumn evening, the leaves are turning, and there’s a delightful chill in the air. You gather your friends around for a cozy movie night or a spooky Halloween bash, and you want to serve something that sparks joy and maybe a scream or two! This Monster Popcorn Mix is just the ticket. It’s simple to make, incredibly fun, and absolutely irresistible!
Cooking should be a mix of creativity and joy, and this recipe embodies that spirit perfectly. Picture fluffy popcorn drizzled with colorful candy melts, crunchy pretzels, and, for a bit of flair, those ever-adorable candy eyes (yes, they really do make everything more fun!). This mix isn’t just a treat; it’s an experience. It’s about gathering around the table (or couch!), sharing laughs, and indulging in something that’s a delightful feast for both the eyes and the taste buds.
Let’s not forget, this colorful concoction is perfect for any occasion! Birthdays, Halloween, or just a fun movie night—this popcorn mix is a crowd-pleaser. So tie on your apron and let’s get popping!
Personal Story
I’ll never forget the first time I made a candy-coated popcorn mix. It was during a sleepover with my best friends in middle school, and we decided to take on the kitchen as our mission for the night. Armed with a giant bowl of popcorn, we spontaneously added everything we could find—mini marshmallows, chocolate chips, and a rainbow of colored candies. It was chaos in the best way! We spent the evening munching away, watching scary movies, and laughing until our sides hurt.
From that day on, I realized that food is more than just sustenance; it’s about creating memories. Every time I whip up a popcorn mix, I think of that magical night filled with laughter and a bit of sugar-induced silliness. Now, I get to share that joy with you through this Monster Popcorn Mix recipe, bringing whimsy and delight to your gatherings!
Ingredients
Here’s what you’ll need to make this eye-popping treat:
-
Popcorn:
- Use plain, unbuttered popcorn. You can pop your own kernels or use store-bought microwave popcorn. For a healthier option, air-popping is fantastic! If you’re feeling adventurous, try flavored popcorn for an added twist!
-
Candy Melts:
- These colorful chocolate wafers melt beautifully, adding sweetness and a vibrant pop to your mix. Feel free to substitute with almond bark or white chocolate melted down with a bit of vegetable oil for that same glossy finish!
-
Pretzels:
- Choose your favorite variety, whether it’s classic or chocolate-covered. They add a delightful crunch that perfectly balances the sweetness! Consider using mini pretzels for bite-sized fun or gluten-free options if needed.
-
Candy Eyes:
- These quirky little decorations take your mix to the next level. They’re available at most craft or baking stores. If you can’t find them, try using mini M&Ms or chocolate chips to achieve a similar fun effect.
Step-by-Step Instructions
-
Pop the Popcorn:
- Start by popping your popcorn according to package instructions. If you’re using a stovetop method, use about ½ cup of kernels. Once done, transfer it to a large, clean bowl—this mess is worth it!
-
Melt the Candy Melts:
- Using a microwave-safe bowl, place your candy melts (about 1 cup for starters) and microwave in 30-second intervals, stirring in between, until completely melted. Don’t rush this process; chocolate can go from perfect to burnt in a second! If using white chocolate, a teaspoon of vegetable oil can help it melt smoother.
-
Coat the Popcorn:
- Once your candy melts are silky and smooth, drizzle it generously over the popcorn. Use a spatula or large spoon to gently fold the melted candy into the popcorn until it’s evenly coated. It’s going to get a little sticky, but that’s part of the fun!
-
Add Pretzels:
- Fold in your pretzels next. You can break them into smaller pieces for easier munching. This is where the magic happens; the sweet and salty combination is just divine!
-
Add Candy Eyes:
- While the mixture is still warm and slightly sticky, sprinkle the candy eyes on top. This is a great time to get creative! Place them strategically for fun monster faces or just sprinkle them generously for a whimsical effect.
-
Set and Cool:
- Lay the popcorn mix out on parchment paper to cool completely. It might take about 30 minutes. Once set, it’ll be easier to break apart if it clumps together.
-
Serve and Enjoy:
- Finally, serve your beautiful monster mix in fun bowls or jars. If you’re feeling festive, add a few little decorations—think cobwebs or plastic spiders for a Halloween twist!
Serving Suggestions
For a fun presentation, consider serving your Monster Popcorn Mix in festive bowls or large mason jars. You could even portion them in individual bags tied with colorful ribbons for an adorable treat for parties or gatherings. And don’t forget to accompany it with a movie or some games; it’s perfect for sharing!
Recipe Variations
Here are some ideas to spice things up with your Monster Popcorn Mix:
-
Chocolate Drizzle: Add a drizzle of melted dark or milk chocolate on top for a rich flavor contrast.
-
Halloween Sprinkles: Toss in some Halloween-themed sprinkles for an extra festive flair.
-
Nutty Crunch: Add some chopped nuts like almonds or walnuts for an added texture.
-
Dried Fruits: Consider mixing in some dried cranberries or raisins for a touch of natural sweetness.
-
Savory Twist: For a unique take, sprinkle some cheese powder or experiment with savory snack toppings!
Chef’s Notes
As I whipped up this Monster Popcorn Mix, I couldn’t help but reminisce about countless joyful moments spent in kitchens with friends, trying new things and making delightful messes. This recipe has evolved over the years; I’ve tried everything from different types of chocolate melts to quirky add-ins, and honestly, the happiness remains the same. Each batch conjures up laughter and good times, making it a staple for friends and family gatherings!
FAQs and Troubleshooting
Q: What should I do if my candy melts didn’t melt smoothly?
A: It’s essential to heat them gently and stir often. If your melts are clumpy, try adding a drop of vegetable oil and microwaving in small intervals until smooth.
Q: Can I make this in advance?
A: Absolutely! Just store it in an airtight container at room temperature and consume within a week for the best crunch.
Q: How can I prevent my popcorn from getting soggy?
A: Make sure your popcorn is entirely cool before storing. If the moisture gets trapped, it can make the popcorn chewy rather than crunchy.
Q: Is it possible to make this recipe dairy-free?
A: Definitely! Look for dairy-free candy melts and check that your pretzels are also dairy-free. There are plenty of options on the market nowadays!
Nutritional Info
(As this popcorn mix can vary greatly depending on the ingredients used, please consider this a fun treat in moderation. Enjoy with joy!)
And there you have it—the ultimate Monster Popcorn Mix! Simple to make, packed with flavor and nostalgia, and utterly delightful. I can’t wait to hear about the memories you create with this delicious mix. Happy cooking! 🍿✨
PrintMonster Popcorn Mix
A whimsical and colorful popcorn mix perfect for any festive occasion.
- Prep Time: 15 minutes
- Cook Time: 10 minutes
- Total Time: 25 minutes
- Yield: 8 servings 1x
- Category: Snack
- Method: Mixing
- Cuisine: American
- Diet: Vegetarian
Ingredients
- Plain popcorn (about ½ cup kernels)
- 1 cup colorful candy melts
- 1 cup pretzels (classic or chocolate-covered)
- Candy eyes (for decoration)
Instructions
- Pop the popcorn according to package instructions and transfer it to a large bowl.
- Melt the candy melts in a microwave-safe bowl in 30-second intervals, stirring until smooth.
- Coat the popcorn with the melted candy, folding gently until evenly coated.
- Add the pretzels, breaking them into smaller pieces if desired.
- Add candy eyes while the mixture is still warm.
- Set the mix on parchment paper to cool completely, about 30 minutes.
- Serve in festive bowls or jars and enjoy!
Notes
This mix can be made in advance and stored in an airtight container for up to a week.
Nutrition
- Serving Size: 1 serving
- Calories: 200
- Sugar: 15g
- Sodium: 300mg
- Fat: 7g
- Saturated Fat: 3g
- Unsaturated Fat: 3g
- Trans Fat: 0g
- Carbohydrates: 32g
- Fiber: 1g
- Protein: 2g
- Cholesterol: 0mg
Keywords: popcorn, snack, Halloween, festive treat, candy melts
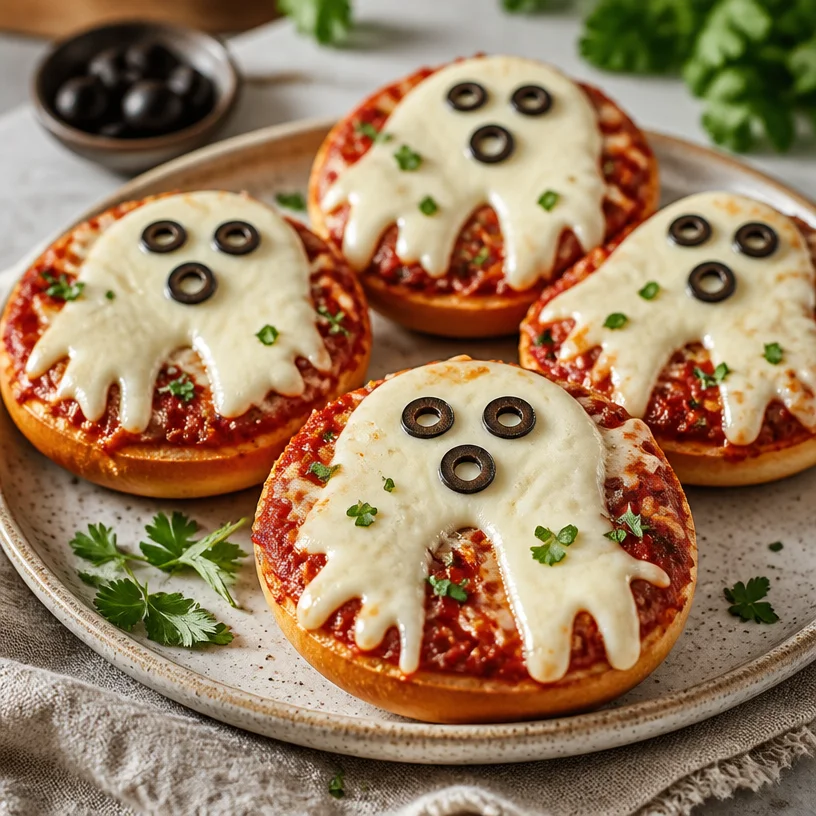
Minute Ghost Pizza Bagels: Quick Spooky Weeknight Meal
Ghost Pizza Bagels: A Spooktacular Treat for Every Occasion
Welcome to the ultimate pizza adventure, my dear foodie friends! Today, we’re diving into a fun, easy, and oh-so-delicious recipe that will summon the ghostly vibes of Halloween while being perfect for any time of year: Ghost Pizza Bagels! Whether you’re hosting a gathering, enjoying a cozy night in, or simply looking for a playful treat that brings a smile, these whimsical bagels will have everyone asking for seconds. So grab your apron and let’s unleash some culinary magic!
A Nostalgic Tale of Ghost Pizza Bagels
I’ll never forget my first spooky season after college when I decided to throw a Halloween party. I wanted to impress my guests but also keep things simple. One evening, while rummaging through my kitchen, I had an idea: why not make pizza bagels with a haunting twist? Armed with a bag of bagels, some pizza sauce, and my love for creativity, I turned ordinary pizza bagels into spooky delights by adding ghostly cheese shapes and olive “eyes.”
The laughter and joy that filled the room as my friends took their first bites were priceless. Every ghost pizza bagel brought back a wave of nostalgia, reminding me of family pizza nights in my childhood. The simplicity of putting them together allowed for laughter and light-hearted banter—my favorite part of any cooking experience! It reminded me that food is not just about nourishment; it’s about connection. And let me tell you, while these delightfully spooky bagels looked great, they tasted even better!
Ingredients
Before we conjure up these ghostly delights, here’s what you need:
-
Bagels
These are your canvas! Whether you go for plain, garlic, or everything bagels, they all work beautifully. If you want a gluten-free option, there are great gluten-free bagels available that will hold up just as nicely. -
Pizza Sauce
Use your favorite pizza sauce, whether store-bought or homemade! Feel free to substitute with marinara or even a creamy alfredo sauce if you’re feeling adventurous. It all depends on what flavors you want to play with. -
Mozzarella Cheese
Fresh mozzarella is fantastic if you want that ooey-gooey texture. Shredded mozzarella is quicker and easier for melting! For a vegan alternative, try almond or cashew cheese—a delicious creamy substitute. -
Olives
Black olives are perfect for those little eyes, but you can also experiment with green olives or even cherry tomatoes for a splash of color. Just slice them up creatively to make sure they look spooktacular on your bagels!
Step-by-Step Instructions
Now, let’s get into the fun part—cooking! Follow these steps to create your ghost pizza bagels:
-
Preheat the Oven
Start by preheating your oven to 375°F (190°C). This step is crucial! A properly preheated oven ensures even cooking and that delightful golden crust. -
Prep Your Bagels
Take your bagels and slice them in half horizontally. Lay them cut-side up on a baking sheet lined with parchment paper. Baking them on parchment makes for an easy clean-up and prevents sticking—who doesn’t love that? -
Spread the Pizza Sauce
Grab a spoon and generously spread pizza sauce over each bagel half. Use as much or as little as you like. If you have kids helping, let them dab on the sauce! -
Add the Mozzarella
Here’s where the fun begins! Sprinkle a generous amount of mozzarella cheese over the saucy bagels. You can layer it on thick for that gooey pizza effect. If you’re feeling creative, use a cookie cutter to shape the mozzarella into ghostly silhouettes! -
Create the Ghostly Features
Now, take your olives and slice them into small circles for the "eyes." Place a slice or two on each ghostly pizza bagel. Feel free to get imaginative—how about some peppers as well for the mouths? -
Bake to Perfection
Pop the baking sheet into your preheated oven and bake for about 12-15 minutes, or until the cheese is wonderfully melted and the edges of the bagels are golden. Keep an eye on them—oven times may vary! -
Cool and Serve
Once baked, let them cool for a couple of minutes. I know it’s hard to wait, but trust me, your mouth will thank you later when you aren’t burning your tongue!
Serving Suggestions
When it comes to presentation, keep it playful. I love to serve my ghost pizza bagels on a black platter to channel spooky vibes. Scatter some decorative plastic spiders for a lively touch, or serve them on parchment paper for a rustic feel. If you have it, a sprinkle of fresh basil can add a lovely pop of color. Feel free to get creative with the arrangement—make it a mini ghost pizza bagel platter for everyone to enjoy!
Recipe Variations
Want to switch things up? Here are some creative twists for your ghost pizza bagels:
-
Spicy Ghosts
Add some sliced jalapeños or pepperoncini for a spicy kick—perfect for those who love a little heat! -
Herb-Infused
Mix in some fresh herbs like basil or oregano into the pizza sauce for extra flavor. -
Mini-Bagels
Use mini bagels for bite-sized versions—great for parties where guests can try more than one! -
Fun Shapes
Instead of ghost shapes, try using cookie cutters to create other Halloween shapes like bats or pumpkins! -
Veggie Lovers’ Ghosts
Top with assorted vegetables like bell peppers, mushrooms, or spinach for a nutritious twist.
Chef’s Notes
As with all great recipes, this one has evolved over the years. Initially, they were just simple pizza bagels, but every Halloween rolled around, I added new twists based on what I had on hand or whatever caught my eye at the store. One memorable year, I even attempted to make a “frankenstein” version using green food coloring and green olives for eyes! It was a hit with the kids (and a huge mess!).
Never be afraid to experiment in the kitchen! It’s through creativity that flavor profiles expand, and beautiful moments at the table are created.
FAQs and Troubleshooting
Q: Can I use different kinds of bagels?
Absolutely! Feel free to use whatever flavor bagels you love—everything bagels add a delightful crunch of flavor!
Q: How do I store leftovers?
These bagels are best enjoyed fresh, but if you have leftovers, store them in an airtight container in the fridge for up to three days. Reheat them in the oven for a few minutes to bring back that melty goodness.
Q: What if my cheese doesn’t melt well?
If your cheese isn’t melting as you desire, try placing the bagels under the broiler for a couple of minutes at the end of baking. Just watch them closely to avoid burning!
Q: Can I make these ahead of time?
You can pre-prep the bagels and keep them covered in the fridge for a few hours before baking. Just add a few extra minutes to the baking time if they’re cold out of the fridge.
Nutritional Info
While I don’t have specific nutritional information prepared, these ghost pizza bagels are definitely a fun treat! To make them healthier, consider using whole-grain bagels, low-fat cheese, and load them up with veggies.
There you have it! Ghost Pizza Bagels that will surely impress anyone at your table while bringing joyous memories of spooky celebrations. So gather your fellow foodies, tie on your apron, and let’s make some new kitchen stories together! Happy cooking!
PrintGhost Pizza Bagels
A playful twist on traditional pizza bagels, perfect for Halloween or any occasion.
- Prep Time: 10 minutes
- Cook Time: 15 minutes
- Total Time: 25 minutes
- Yield: 4 servings
- Category: Snack
- Method: Baking
- Cuisine: American
- Diet: Vegetarian
Ingredients
- Bagels (plain, garlic, or everything)
- Pizza Sauce (store-bought or homemade)
- Mozzarella Cheese (fresh or shredded)
- Olives (black or green for decoration)
Instructions
- Preheat your oven to 375°F (190°C).
- Slice the bagels in half horizontally and lay them cut-side up on a lined baking sheet.
- Spread pizza sauce over each bagel half.
- Sprinkle a generous amount of mozzarella cheese over the saucy bagels.
- Create ghostly features by slicing olives for eyes and placing them on the bagels.
- Bake for about 12-15 minutes, or until the cheese is melted and edges are golden.
- Cool for a couple of minutes before serving.
Notes
For variations, try mini bagels, add jalapeños for spice, or mix in fresh herbs into the sauce.
Nutrition
- Serving Size: 1 bagel half
- Calories: 250
- Sugar: 3g
- Sodium: 350mg
- Fat: 9g
- Saturated Fat: 4g
- Unsaturated Fat: 4g
- Trans Fat: 0g
- Carbohydrates: 30g
- Fiber: 2g
- Protein: 10g
- Cholesterol: 20mg
Keywords: pizza, bagels, halloween, snacks, easy recipes
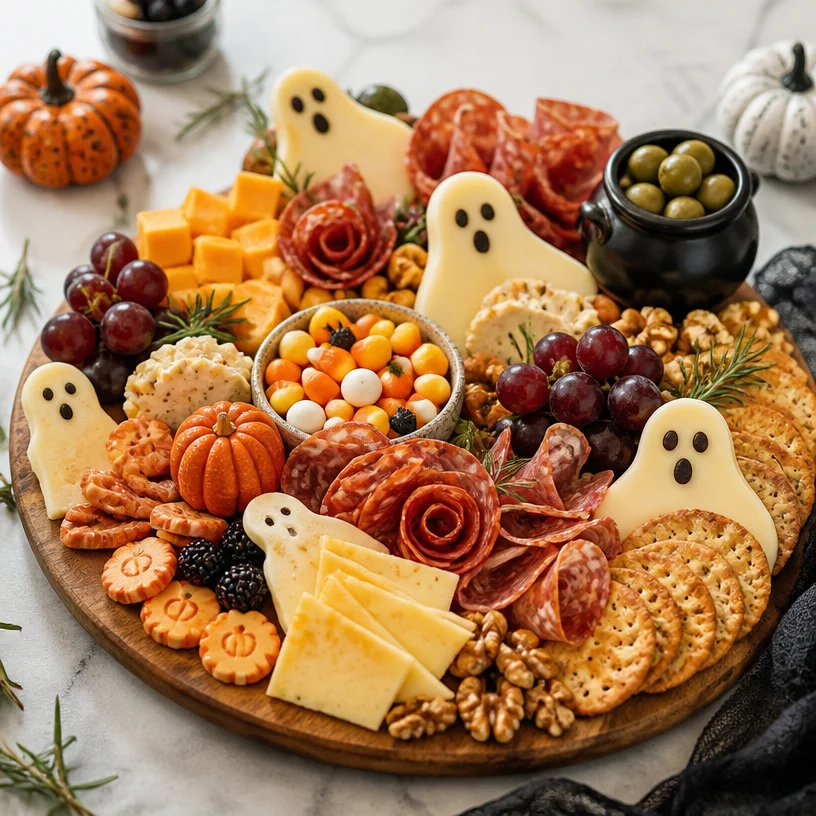
Minute Halloween Charcuterie Board for Spooky Gatherings
A Spooktacular Halloween Charcuterie Board: Elevate Your Festivities
Hello, fabulous foodies! As we approach the season of pumpkin spice lattes, crisp fall air, and all things spooky, it’s time to embrace the fun of Halloween! There’s nothing quite like gathering friends and family for a ghoulishly delightful night filled with good company and great food. Today, I’m thrilled to share my ultimate guide to creating a Halloween-themed charcuterie board that will be the centerpiece of your Halloween festivities.
Charcuterie boards are a crowd-pleaser, perfect for any occasion, but when you add a touch of Halloween magic, they become something truly special. Think of a delightful array of meats, cheeses, fruits, and sweet treats, all artfully arranged to capture the charm of the Halloween spirit. Whether you’re hosting a spooky gathering, a Halloween party, or simply looking to impress your family with a fun dinner, this charcuterie board will become a beloved tradition for years to come.
So, let’s roll up our sleeves, tie on our aprons, and get creative!
A Memory to Cherish
I remember the first Halloween party I hosted back in college. I was nervous but excited to welcome friends into my little apartment. It was an eclectic decor frenzy — cobwebs draped over every surface, jack-o’-lanterns illuminating the room, and of course, a table filled with an array of snacks.
That was my first time crafting a charcuterie board, although I called it a “spooky snack platter.” My friends and I filled it with whatever we could find: a mishmash of cheeses, old crackers, and a bag of candy corn that had seen better days. You know what? It didn’t matter! What made it special was the laughter, the “boo” jokes, and the memories we created around that table. That night sparked my love for food styling and entertaining.
Fast forward to today, and I can’t wait to share elevated, easy-to-create charcuterie boards that make hosting as enjoyable as attending. Now let’s dive into creating your Halloween charcuterie board!
Ingredients You’ll Need
To get started, here’s a simple breakdown of the ingredients you’ll need to create your Halloween masterpiece:
-
Cheese: A variety of textures and flavors adds depth. Think sharp cheddar, creamy brie, and tangy goat cheese. For dairy-free options, try cashew or almond-based cheeses.
-
Meats: Select a mix of cured meats such as salami, prosciutto, and pepperoni. If you’re catering to vegetarians, consider adding marinated tempeh or smoked tofu.
-
Crackers: Choose an assortment—some crisp, some soft—to provide a crispy contrast. Gluten-free options are easy too! Look for rice cakes or nut-based crackers.
-
Fruit: Fresh fruits like grapes, figs, or apple slices give a refreshing burst; dried fruits like apricots and cranberries add chewiness. Opt for seasonal picks like blood oranges or pomegranate seeds to keep things festively colorful!
-
Candy: No Halloween board is complete without some sweet treats! Mini chocolate bars, gummy worms, and candy corn add a playful touch. For a healthier twist, use dark chocolate-covered almonds.
-
Nuts: Don’t forget a sprinkle of nuts for crunch! Almonds, walnuts, or dry roasted pistachios add sophistication and flair.
Let your creativity flow as you shop! Don’t hesitate to swap in seasonal ingredients or local finds.
Step-by-Step Instructions
1. Gather Your Supplies
Before diving in, make sure you have a lovely wooden board or platter, as well as small bowls or ramekins for dips or spreads. Once you’ve set the stage, grab your ingredients and let’s get building!
Pro Tip: A good charcuterie board starts with a balanced flow — work on visual appeal. Consider a triangle or circular shape, allowing your ingredients to shine evenly.
2. Start with Cheese
Begin by placing your cheese selections on the board. Slice some and leave others whole for added texture. Arrange them a bit artistically, varying heights and angles. For instance, a creamy brie can sit in a center position flanked by sharp cheddar blocks and crumbles of blue cheese.
Chef Hack: For a ghoulish twist, use a cookie cutter to slice your cheeses into festive shapes! Ghosts, bats, or pumpkins are always a hit.
3. Add the Meats
Next, it’s meat time! Fan out the cured meats around the cheese, folding them in creative shapes to add visual intrigue. Think of creating mini “rose” shapes with salami or prosciutto.
Chef Insight: Laying down parchment paper before adding meats can help with cleanup and keep your board looking pristine.
4. Crackers and Fruits
Now, sprinkle your crackers around the cheesiest parts of the board, alternating shapes and sizes. Then, tuck in your fresh fruits like grapes and slices of apples. Use bursts of color from figs and pomegranates to create visual contrast!
Tip: Hiding some of the fruit under meats and cheeses creates layers, drawing the eye in deeper.
5. Sweeten the Deal
It’s time for treats! Place your candy and sweets in the gaps around the board. This is where you can really have fun! If you want, fill a small bowl with gummy worms or stack chocolate bars for a haunted house look.
Chef Story: I remember adding gummy spiders one year for extra creepiness, and the kids went wild!
6. Sprinkle with Nuts
Finally, fill in any remaining gaps with nuts for that satisfying crunch. Scatter them around the fruits and as accents to the meats and cheeses.
7. Include Dips or Spreads
Consider adding a small dish of honey, mustard, or a festive pumpkin hummus for variety. If using a spooky spread, like a “blood” (tomato-based) sauce, this elevates the fun even more!
Serving Suggestions
To serve your Halloween charcuterie board, simply set it in the center of the table or kitchen island for easy access. Provide small plates and napkins for guests as they help themselves. For a cozy atmosphere, consider dimming the lights and lighting some candles — it’s all about creating a warm, inviting space.
Recipe Variations
-
Vegetarian Delight: Replace meat with marinated vegetables like roasted peppers, olives, or artichoke hearts for a colorful vegetarian board.
-
Sweet Tooth Special: Include an assortment of cheeses paired with caramel drizzles or sweet spreads alongside fresh figs for a dessert-inspired twist.
-
Savory and Spicy: Add spicy spreads, jalapeño cheddar, or hot salami for those who crave heat!
-
Kid-Friendly Edition: Use colorful fruits, mini pizza bagels, and cookies instead of traditional meats and cheeses to appeal to younger guests.
-
Gluten-Free: Opt for gluten-free crackers, fresh veggies like cucumber, and crisp apple slices for dipping in dips and spreads.
Chef’s Notes
Creating charcuterie boards should never feel stressful! If you find yourself short on time, it’s perfectly okay to grab pre-sliced meats and cheeses from the deli — they can still look fantastic! Remember, the goal is to share delicious food with your favorite people.
I recall a last-minute Halloween party where I threw together a hodgepodge of leftover cheeses and fruits. It wasn’t Pinterest-perfect, but everyone raved about the flavors. Sharing food is about the connection, not the perfection!
FAQs and Troubleshooting
1. How can I keep my fruits from browning?
To keep your apple slices fresh, soak them in a mixture of water and lemon juice for a few minutes before adding them to the board. Rinse and dry before serving.
2. What if my board feels too sparse?
Filling in gaps with nuts, dried fruits, or even little chocolates can bridge areas and create a fuller presentation!
3. How can I ensure flavors work well together?
When building your board, aim for a balance of flavors—sharp vs. creamy, sweet vs. salty. Tasting along the way will guide you in finding a delightful mix!
4. What if I have dietary restrictions among guests?
Communicate with your guests ahead of time regarding dietary needs and swap in alternatives accordingly. This will ensure there’s always something delicious for everyone.
Nutritional Info
While charcuterie boards can vary widely, remember the beauty lies in their customization. If you’re concerned about nutritional values, consider factors like portion sizes for meats and cheeses and balance them with fruits and nuts for a wholesome experience.
Let’s elevate our Halloween with style this year! Making this charcuterie board will not only feed your guests but also create memories filled with laughter and delight. So, gather ‘round the table (and add some spooky decor!), and let’s celebrate the season together. Happy Halloween, my fellow food lovers!
PrintHalloween Charcuterie Board
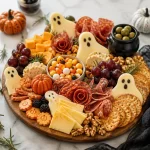
Create a stunning Halloween-themed charcuterie board filled with festive meats, cheeses, fruits, and treats for your celebrations.
- Prep Time: 15 minutes
- Cook Time: 0 minutes
- Total Time: 15 minutes
- Yield: 8 servings
- Category: Appetizer
- Method: No-Cook
- Cuisine: American
- Diet: Vegetarian
Ingredients
- Sharp cheddar cheese
- Creamy brie cheese
- Tangy goat cheese
- Salami
- Prosciutto
- Pepperoni
- Marinated tempeh (for vegetarian option)
- Smoked tofu (for vegetarian option)
- Assorted crackers (choose gluten-free if needed)
- Grapes
- Figs
- Apple slices
- Dried apricots
- Cranberries
- Blood oranges
- Pomegranate seeds
- Mini chocolate bars
- Gummy worms
- Candy corn
- Dark chocolate-covered almonds
- Almonds
- Walnuts
- Dry roasted pistachios
- Dips: honey, mustard, or pumpkin hummus
Instructions
- Gather your supplies including a wooden board and small bowls for dips.
- Start with cheese, slicing some and leaving others whole.
- Add the meats, folding them into creative shapes.
- Sprinkle crackers around the cheese and tuck in fresh fruits.
- Sweeten the deal by placing candy in gaps on the board.
- Sprinkle nuts around for crunch.
- Consider including dips or spreads for variety.
Notes
Feel free to swap in seasonal or local ingredients as desired.
Nutrition
- Serving Size: 1 serving
- Calories: 400
- Sugar: 15g
- Sodium: 600mg
- Fat: 24g
- Saturated Fat: 10g
- Unsaturated Fat: 14g
- Trans Fat: 0g
- Carbohydrates: 40g
- Fiber: 5g
- Protein: 15g
- Cholesterol: 25mg
Keywords: Halloween, charcuterie board, appetizers, festive recipes, party food
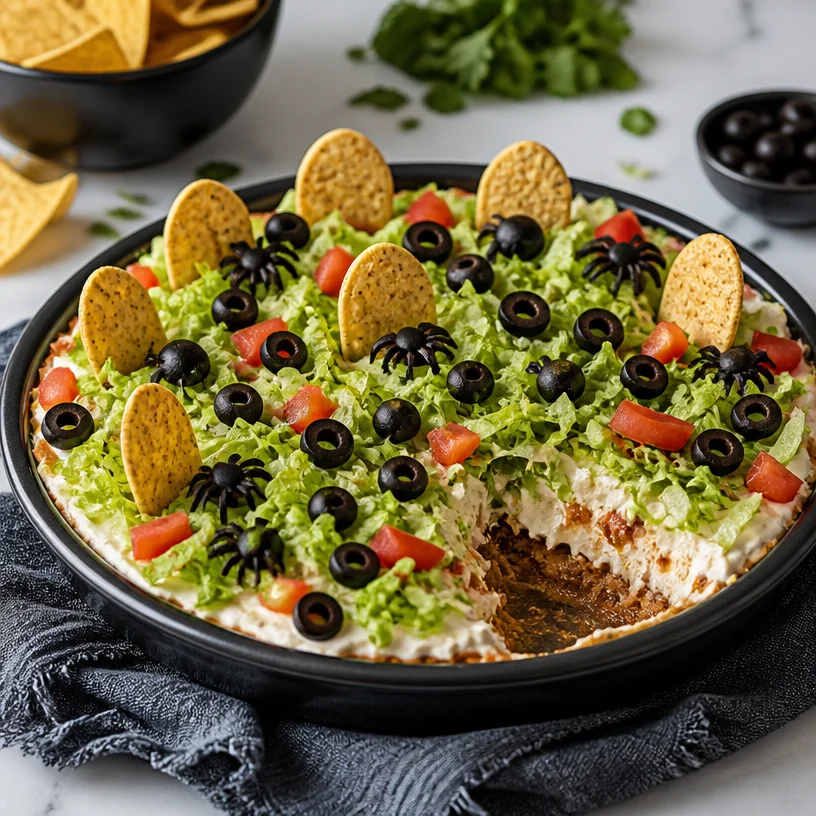
Minute Graveyard Taco Dip for Halloween Parties
Dive into Deliciousness with Graveyard Taco Dip!
Hello, my fabulous friends! Are you ready to turn an ordinary gathering into a spook-tacular feast? Today, we’re bringing the world of entertaining to your table with a dish that’s sure to impress—Graveyard Taco Dip! This delightful creation isn’t just a fantastic appetizer; it’s a crowd-pleaser that’s perfect for parties, game days, or a cozy movie night in. Let’s embrace the warmth of sharing delicious flavors while adding a bit of whimsy to our presentation.
Now, you might be thinking, “Graveyard Taco Dip? What’s that all about?” Well, fear not! This dip blends all the tasty elements of a classic taco while looking like a festively eerie graveyard scene. Picture layers of creamy goodness topped with fresh lettuce, zesty taco meat, and topped with some eerie decor. Plus, this dish is as fun to make as it is to eat! Let’s dive right in!
A Memory That Takes Me Back
Before we get into the deliciousness of Graveyard Taco Dip, I want to share a fond memory that’s close to my heart. It was a cool October evening, and I was hosting my very first Halloween party. I was buzzing with excitement and a hint of nerves as I set the stage with spooky decorations and flickering candles.
My best friend, Jess, waltzed in with a grin, carrying a bubbling cauldron of taco dip—though I should mention the “graveyard” aesthetic came from us being a bit overly creative with some olives and breadsticks!
Not only did Jess’s creation steal the show, but it also became the hit of the evening. Everyone was gathering around, excited to dig into the layers of cheesy goodness while giggling over the creative grave markers. That night ignited my passion for hosting and the thrill of creating amazing memories over food. Now, years later, I still make my own version of that Graveyard Taco Dip, infusing it with my own flair while evoking those delightful nostalgia vibes.
Ingredients You’ll Need
Here’s what you’ll need to whip up this fantastic Graveyard Taco Dip:
-
Cream Cheese: This is the velvety base for our dip! If you want to cut back on calories, you can use low-fat cream cheese or even Greek yogurt for a tangy twist.
-
Taco Meat: Seasoned ground beef or turkey is traditional, but feel free to swap in shredded chicken, lentils, or a plant-based meat for a delightful vegetarian option.
-
Lettuce: Crisp and fresh! Iceberg is great for crunch, but romaine or even baby spinach works. It’s all about adding that refreshing layer.
-
Olives: The spooky touch! Black olives add a savory bite. If you’re not a fan, consider using diced jalapeños for a spicy kick or cherry tomatoes for a pop of color.
-
Tortilla Chips: The perfect scoopers for our taco dip! You can use regular, lime-flavored, or even make your own baked tortilla chips at home for a healthier option.
-
Additional Taco Toppings (optional): Think cheese, jalapeños, salsa, or avocado! Get creative here.
Fun Chef Insight:
When assembling your dip, ensure your cream cheese is softened to room temperature for easy mixing. Leaving it out for about 30 minutes before you begin helps create that luscious, creamy texture we all love without the arm workout!
Step-by-Step Instructions: Let’s Get Cooking!
-
Preheat and Prepare: Start by preheating your oven to 350°F (175°C) if you’ll be baking your taco meat. In a skillet over medium heat, brown your meat until it’s fully cooked. Drain any excess fat to keep things light and tasty!
-
Season the Meat: While the meat is cooking, add in your favorite taco seasoning—store-bought or homemade! My personal go-to mix includes chili powder, cumin, garlic powder, and a sprinkle of paprika for a smoky kick. Feel free to adjust based on your heat preference. Cook everything together for another 2-3 minutes until fragrant.
-
Cream Cheese Layer: In a large mixing bowl, take that softened cream cheese and whip it until smooth. You can use a handheld mixer or just a whisk—whatever floats your culinary boat! Spread the cream cheese mixture evenly in the bottom of a baking dish (a pretty 9×9 works great!).
-
Build Up Layers: Pour your taco meat evenly over the cream cheese layer. Take your time here and spread it out nicely, ensuring everyone gets a bite of that seasoned goodness.
-
Lettuce Add-On: Next, sprinkle a generous layer of shredded lettuce over the meat. This adds freshness and a great crunch alongside those cozy textures.
-
Olives as Headstones: Now comes the fun part! Slice black olives into rounds and place them sporadically on top of your dip to resemble gravestones. You can even get creative and cut them into spooky shapes for extra flair!
-
Bake It (Optional): If you want to warm everything together to enhance those flavors, pop the dip into the oven for about 10-15 minutes until it’s all bubbly and perfect. If you prefer it cold, feel free to skip this step!
-
Final Touches: Remove your dip from the oven, and let it sit for a minute to cool slightly before serving. That’s when you can add any additional toppings like shredded cheese or salsa, depending on your taste.
Serving Suggestions
To serve, scoop generous portions onto a plate or serve straight from the baking dish. Add a few tortilla chips alongside, and don’t forget to encourage your guests to add any desired toppings directly onto their dips. You could even lay out a colorful array of toppings so everyone can customize their own spooky graveyard scene!
Recipe Variations to Get Creative
-
Spicy Graveyard: Add diced jalapeños to your taco meat for a fiery kick, or sprinkle some crushed red pepper flakes into the cream cheese layer for extra heat!
-
Veggie Delight: Swap the taco meat for sautéed mushrooms or roasted vegetables, mixing in some black beans or chickpeas for heartiness.
-
Cheesy Explosion: Layer in freshly shredded cheese between the cream cheese and taco meat for a cheesy surprise every time you dig in.
-
Guacamole Bliss: Top with a layer of homemade guacamole instead of or in addition to the olives for a creamy, earthy taste.
-
Seasonal Twist: For a festive touch around Halloween or fall, sprinkle the top with crushed tortilla chips to resemble dirt!
Chef’s Notes: A Recipe That Keeps Evolving
This recipe has become a staple at all of my gatherings over the years! What’s great about it is how it evolves with every party. One year, I added in shredded barbecue chicken instead of traditional taco meat, and it was a hit. The next, I swirled in some spicy salsa just to kick things up! The best part? This dip never runs out of possibilities and always holds a special place in my heart.
And let me tell you, let your creativity run wild! You can even use leftover dip ingredients to create a taco platter or loaded nachos for another meal. Waste not, want not, right?
FAQs and Troubleshooting Your Taco Dip
1. Why is my dip too runny?
If you find that your dip is watery, it’s usually due to the meat or other ingredients releasing juices. Try draining the excess liquid before assembling your dip. Also, ensure your cream cheese is well blended and firm to help maintain that luscious texture.
2. Can I make this ahead of time?
Absolutely! This Taco Dip is perfect for meal prep. Just prepare it a day in advance, cover it tightly with plastic wrap, and keep it in the fridge. If you want it warm, just pop it in the oven for a few minutes before serving.
3. How can I make this a healthier option?
Try substituting lean ground turkey for the beef or using fat-free cream cheese! Adding more veggies like diced bell peppers or corn can also enhance the nutrition without compromising taste.
4. What’s the best way to store leftovers?
If you have any dip leftover (which is rare, but it happens!), transfer it to an airtight container. It stays fresh in the fridge for a few days. Just give it a good mix before serving again.
Nutritional Info (Optional)
While I love to emphasize enjoying good food, it’s also great to be conscious of nutrition. This dip, made with lean meat and fresh ingredients, can fit into your meal plan nicely. It’s packed with protein due to the meat and provides vitamins from the fresh lettuce and any additional toppings you choose.
Final Thoughts
There you have it, my wonderful foodies! Graveyard Taco Dip is not just a recipe; it’s a delightful experience waiting to happen. Whether you’re serving it at a spooky gathering or a casual hangout, it’s sure to bring smiles and tasty memories to the table. So, tie on that apron, gather your friends, and let’s celebrate the joy of cooking together!
Thank you for stopping by Ivory Apron today! Happy cooking, and may your gatherings be filled with warmth, laughter, and heaps of delicious food!
PrintGraveyard Taco Dip
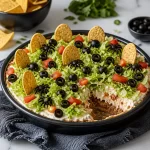
A spooky and delicious taco dip perfect for gatherings, combining layers of cream cheese, seasoned meat, and festive garnishes to create a fun graveyard scene.
- Prep Time: 15 minutes
- Cook Time: 15 minutes
- Total Time: 30 minutes
- Yield: 6 servings
- Category: Appetizer
- Method: Baking
- Cuisine: Mexican
- Diet: Vegetarian option available
Ingredients
- Cream Cheese
- Taco Meat (ground beef, turkey, or vegetarian alternative)
- Lettuce (iceberg, romaine, or spinach)
- Olives (black or alternatives like jalapeños or tomatoes)
- Tortilla Chips
- Additional Taco Toppings (cheese, jalapeños, salsa, avocado)
Instructions
- Preheat the oven to 350°F (175°C) if you’re baking the taco meat.
- Brown the meat in a skillet over medium heat, then drain excess fat.
- Add taco seasoning to the meat and cook for another 2-3 minutes.
- Whip the softened cream cheese until smooth and spread it in a baking dish.
- Pour the cooked taco meat over the cream cheese layer.
- Sprinkle shredded lettuce on top of the meat.
- Slice black olives and arrange them on the dip to resemble gravestones.
- Bake for 10-15 minutes if desired, or serve cold.
- Remove from the oven, let cool slightly, and add additional toppings if desired.
Notes
This dip is versatile and can be customized with various toppings. Perfect for make-ahead preparation and can be served warm or cold.
Nutrition
- Serving Size: 1 serving
- Calories: 300
- Sugar: 2g
- Sodium: 480mg
- Fat: 20g
- Saturated Fat: 8g
- Unsaturated Fat: 10g
- Trans Fat: 0g
- Carbohydrates: 24g
- Fiber: 4g
- Protein: 10g
- Cholesterol: 30mg
Keywords: taco dip, appetizer, Halloween recipe, party food, festive dip
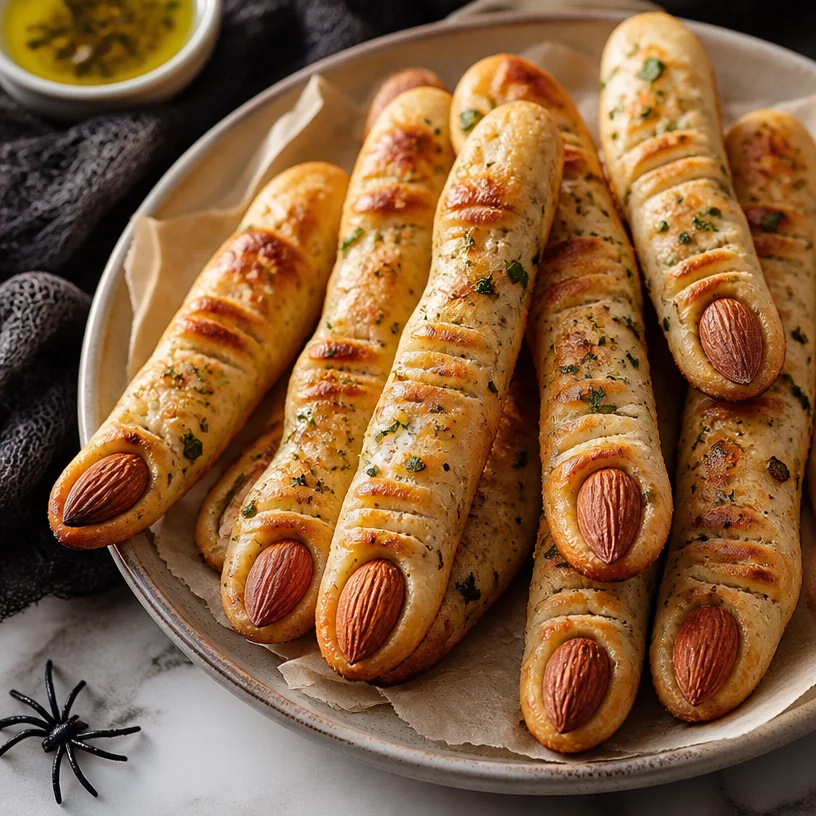
Halloween Witch Finger Breadsticks: 30-Minute Party Appetizer
Witch Finger Breadsticks: A Spooktacular Treat
Hello, fellow food lovers! Savannah here from Ivory Apron, and I’m thrilled to guide you through the delightfully eerie world of Witch Finger Breadsticks. Perfect for themed parties, Halloween feasts, or simply to surprise your loved ones, these breadsticks are as fun to make as they are to eat. Trust me, your friends and family will be intrigued and entertained when they spot these spooky treats on the dinner table!
A Dash of Nostalgia
When I think of Halloween, I can’t help but sway back to the days of crafting creative treats for school parties. Growing up, my friends and I always made a point to outdo each other with extravagant culinary concoctions. One year, I decided to whip up something a little out of the ordinary—Witch Finger Breadsticks! My mom and I spent the afternoon creating a mini culinary masterpiece. The dough shaped like fingers, complete with almond nails painted with garlic butter—pure creativity on a plate. That Halloween, we had not only a tasty treat but the biggest laugh as we handed them out to our friends at school. It was a moment that perfectly embodies what cooking is all about: fun, creativity, and a sprinkle of nostalgia.
Ingredients You’ll Need
Let’s dive into the essentials for your Witch Finger Breadsticks. Here’s what you’ll need:
-
Pizza Dough: This is the star of your breadsticks! You can use store-bought or homemade pizza dough. If you’re looking for a healthier option, whole wheat dough works nicely, too.
-
Almonds: These will serve as your witchy fingernails. Go for slivered almonds for easy application. If you prefer something nut-free, consider using peeled sunflower seeds or even roasted pumpkin seeds for a spooky touch.
-
Garlic Butter: A blend of melted butter with minced garlic, this concoction will add tons of flavor. You can make it healthier by swapping out the butter for olive oil, or even a vegan butter substitute if you want to keep these breadsticks dairy-free.
Step-by-Step Instructions
Ready to conjure up some magic in your kitchen? Let’s bake!
-
Preheat your Oven: First things first, preheat your oven to 400°F (200°C). This ensures your breadsticks get all warm and golden while baking.
-
Prepare the Pizza Dough: If using store-bought pizza dough, let it sit at room temperature for about 15 minutes—this makes it easier to handle. If you’re feeling ambitious, homemade dough always delivers that warm-from-the-oven feel. Roll or stretch your dough into a rectangular shape on a well-floured surface.
-
Cutting the Fingers: Take a sharp knife or pizza cutter and slice the dough into strips about 1 inch wide and 5-6 inches long. Think about the width and length of a finger—after all, we want these to look as ghoulish as possible!
-
Shape the Fingers: Here comes the fun part! Take each strip of dough and gently pinch one end to form a knobby fingertip. You can twist the dough slightly to create a more natural look. Most important? Don’t worry about perfection; the more unique they look, the spookier they’ll be!
-
Add the Almond Nails: Place a slivered almond at the tip of each finger to mimic a fingernail. Press it in gently so it holds during baking.
-
Brush with Garlic Butter: Melt some butter in a small saucepan and add minced garlic. Let it infuse for a minute, then remove from heat. Brush the garlic butter mixture over each breadstick, ensuring to coat them thoroughly—this adds a rich flavor that’ll make your mouth water.
-
Bake the Breadsticks: Place your witch fingers on a parchment-lined baking sheet and pop them into the oven. Bake them for about 15-20 minutes or until they’re golden brown and irresistible to the eye.
-
Serve with Style: Once out of the oven, you may want to brush them again with garlic butter for an extra punch. Let them cool slightly before arranging them on a spooky platter.
Serving Suggestions
Presentation matters almost as much as taste, right? Arrange your Witch Finger Breadsticks in a skeleton hand or atop a spooky-themed platter with some marinara sauce for dipping on the side. Maybe even throw in some creepy decorations like fake spider webs or mini pumpkins to complete the look. The more festive, the better!
Recipe Variations
Let’s explore some fun twists to keep things fresh:
-
Cheesy Witch Fingers: Sprinkle some shredded mozzarella or parmesan cheese on top of the dough before baking for an added cheesy touch!
-
Spicy Twist: Mix in a pinch of red pepper flakes to your garlic butter for a bit of heat that will elevate your Witch Fingers!
-
Herb-Infused: Add some dried herbs like oregano or thyme to your garlic butter for a herbal kick that enhances the flavor.
-
Sweet Version: For a dessert alternative, use crescent roll dough, brush with honey or cinnamon sugar, and use chocolate chips for “nails”!
Chef’s Notes
Oh, where do I begin? Making Witch Finger Breadsticks has become a Halloween tradition in my household. Every year, I seem to come up with new ways to personalize them. One time, we even topped them with pesto for a vibrant green look that absolutely screamed “witch!” I’ve also experimented by adding a drop of food coloring to the dough for an extra spooky twist. Just a reminder, the kitchen is your playground—don’t be shy about getting creative!
FAQs and Troubleshooting
1. Can I freeze these breadsticks?
Absolutely! Prepare them as instructed, but instead of baking, let them cool and pop them in the freezer. When you’re ready, bake from frozen, adding a few extra minutes to the time.
2. My dough didn’t rise — what happened?
Ensure your yeast is fresh if making homemade dough. If you’ve used store-bought dough and it didn’t rise, it might have been frozen for too long. Always check the date!
3. What can I use if I don’t have garlic butter?
No garlic butter? No problem! You can use olive oil with minced garlic or even a blend of butter and Italian herbs for flavor.
4. The breadsticks are too crispy.
If they come out overly crispy, your oven might be too hot, or they may have baked longer than necessary. Ensure you keep an eye on them as every oven is a bit different.
Nutritional Info
For a serving size of approximately 2 Witch Finger Breadsticks, you can expect about:
- Calories: 120-150
- Total Fat: 6g
- Carbohydrates: 15g
- Protein: 3g
Keep in mind, this can vary based on your dough and any toppings you add!
There you have it! Witch Finger Breadsticks are not just a delightfully spooky treat; they embody the essence of crafting beautiful memories in the kitchen. So when you gather your friends or family around the table this Halloween, serve them with a side of laughter, stories, and of course, a sprinkle of culinary magic.
I can’t wait to hear how your Witch Finger Breadsticks turn out! Don’t forget to share your creations with me on social media, and happy cooking!
PrintWitch Finger Breadsticks

Perfect for Halloween feasts or themed parties, these spooky breadsticks are shaped like witch fingers and topped with almond nails and garlic butter.
- Prep Time: 15 minutes
- Cook Time: 20 minutes
- Total Time: 35 minutes
- Yield: 8 servings 1x
- Category: Snack
- Method: Baking
- Cuisine: American
- Diet: Vegetarian
Ingredients
- 1 lb pizza dough (store-bought or homemade)
- 1/2 cup slivered almonds
- 1/4 cup garlic butter (melted butter with minced garlic)
Instructions
- Preheat your oven to 400°F (200°C).
- Prepare the pizza dough by letting it sit at room temperature for 15 minutes.
- Cut the dough into strips about 1 inch wide and 5-6 inches long.
- Shape each strip by pinching one end to form a knobby fingertip.
- Add a slivered almond at the tip of each finger.
- Brush each breadstick with garlic butter mixture.
- Bake for 15-20 minutes until golden brown.
- Serve with marinara sauce on a spooky platter.
Notes
Feel free to experiment with toppings like cheese, herbs, or even sweet variations!
Nutrition
- Serving Size: 2 breadsticks
- Calories: 135
- Sugar: 1g
- Sodium: 250mg
- Fat: 6g
- Saturated Fat: 3g
- Unsaturated Fat: 2g
- Trans Fat: 0g
- Carbohydrates: 15g
- Fiber: 1g
- Protein: 3g
- Cholesterol: 15mg
Keywords: Halloween, spooky snacks, Witch Finger Breadsticks, fun food, party food
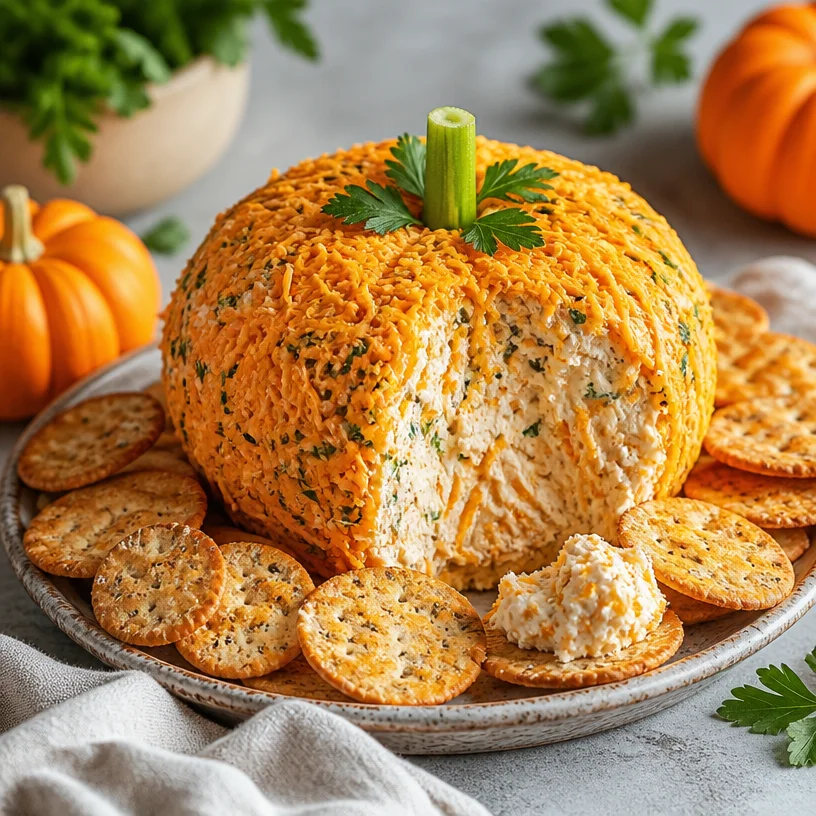
No-Bake Pumpkin Cheese Ball (4-Ingredient) for Fall Parties
The Ultimate Pumpkin Cheese Ball Recipe: A Fall Favorite
Hello, fellow food lovers! With fall in the air, there’s something magical about the sight of vivid orange pumpkins appearing everywhere. It’s that cozy time of year when we gather with friends and family, celebrating the beauty of the harvest season. One of my go-to recipes during this time is a delightful Pumpkin Cheese Ball—a fun, festive twist on the classic cheese ball that never fails to impress!
Imagine hosting a gathering, and as your guests enter, they’re greeted by a stunning Pumpkin Cheese Ball adorned with a sprinkle of fresh herbs or chopped nuts. It’s a conversation starter, a burst of flavor, and a visual piece of art all in one. Perfect for game nights, potlucks, or simply enjoying with your loved ones, this cheese ball brings warmth and cheer to any occasion.
Today, I want to share my simple, yet enchanting recipe for a Pumpkin Cheese Ball. This dish is rich, creamy, and brimming with flavor, creating moments of indulgence and joy around your table. Grab your apron, pour yourself a cup of cider or perhaps something sparkly, and let’s dive right into this delectable fall treat!
A Little Nostalgic Pumpkin Tale
As I think about pumpkins, I can’t help but recall my childhood years spent in the kitchen with my grandmother. Every fall, we would visit the local pumpkin patch, selecting the perfect pumpkins—ones that had just the right shape and color.
Once back in her warm kitchen, we would embark on a culinary adventure together. One particularly rainy afternoon, we decided to make a savory cheese ball. The kitchen filled with the comforting aroma of spices as we laughed, mixed, and rolled ingredients into a ball shape, all while stealing bites of deliciousness along the way.
That cheese ball became a staple at family gatherings, decorated with cheddar cheese and herbs, reminding us all of the love and creativity that food brings. Fast forward to today, and while the recipes and flavors have evolved a bit, the essence of togetherness and warmth remains the same. My Pumpkin Cheese Ball is a nod to those cherished memories, blending nostalgia with contemporary flair.
Ingredients You’ll Need
Here’s a simple list of ingredients you’ll need to create this delightful Pumpkin Cheese Ball, along with some tips to make the most of each one!
-
8 oz Cream Cheese: The base of our cheese ball, cream cheese provides the creamy texture. Make sure it’s softened for easy blending. If you’re looking for a lighter option, try using reduced-fat cream cheese.
-
1 cup Cheddar Cheese: Aged cheddar adds a rich, sharp flavor that pairs wonderfully with the creaminess of the cream cheese. You can swap it for gouda or pepper jack for a twist.
-
1 packet Ranch Seasoning Mix: This seasoning infuses the cheese ball with a burst of flavor. If you’re feeling adventurous, consider substituting homemade ranch seasoning using herbs like dill, parsley, and garlic powder.
-
1 tsp Fresh Parsley: For garnish and flavor! Parsley adds a refreshing touch on top. Feel free to get creative with toppings—chopped nuts, pumpkin seeds, or even bacon bits can add an interesting dimension.
-
Optional: A dash of paprika or cayenne: If you enjoy a bit of heat, a sprinkle of cayenne will warm it up beautifully.
Step-by-Step Instructions
Let’s get cooking! Follow these easy steps to whip up your Pumpkin Cheese Ball:
-
Prepare Your Ingredients:
- Start by gathering all your ingredients and letting the cream cheese sit out for about 30 minutes to soften. This will make mixing a snap.
-
Mix the Bases:
- In a mixing bowl, add the softened cream cheese and shredded cheddar cheese. Use your favorite spatula or fork to bring the ingredients together. Take your time—this is where the flavors start to dance!
-
Add Flavor:
- Throw in the packet of ranch seasoning. If you’re making your own homemade ranch seasoning, feel free to sprinkle in about 2 tablespoons. Use your spatula to combine it all thoroughly—this is where the magic happens! You’re looking for a smooth, creamy mixture with bits of cheese sprinkled throughout.
-
Shape the Ball:
- Once your mixture is well combined, it’s time to form it into a ball. With clean hands, scoop the cheese mixture, rolling it gently until you achieve a nice round shape. Feel free to make it as big or as small as you like!
-
Chill Time:
- Wrap the cheese ball tightly in plastic wrap and place it in the refrigerator for at least 2 hours. This chilling time allows the flavors to meld beautifully and makes it easier to handle.
-
Decorate:
- Once chilled, it’s time to make it look like a pumpkin! Roll the cheese ball in finely chopped nuts or fresh parsley to cover it entirely. For a more festive flair, use a small piece of fresh parsley for a “stem” effect.
-
Serve:
- Place your stunning Pumpkin Cheese Ball on a festive platter and surround it with an assortment of crackers, veggie sticks, or even apple slices.
Serving Suggestions
When it comes to serving, presentation is everything. I love using a rustic wooden board to display the Pumpkin Cheese Ball. Surround it with colorful accompaniments like sliced cucumbers, fresh carrot sticks, and an array of crunchy crackers. You can even add seasonal fruits like grapes and apple slices for that extra touch of fall flavor.
To elevate the experience, have some cheese knives available for easy scooping, and don’t forget to encourage your guests to experiment with different pairings!
Recipe Variations
Feeling adventurous? Here are some delightful variations to consider for your Pumpkin Cheese Ball:
-
Spicy Twist: Add a diced jalapeño or some crushed red pepper flakes for an extra kick.
-
Sweet and Savory: Mix in a few tablespoons of dried cranberries or chopped walnuts for a nutty sweetness.
-
Herb Infusion: Swap in different herbs and spices. You could try dill, chives, or even a touch of garlic powder for a different flavor profile.
-
Cheddar Alternative: Use crumbled feta cheese or goat cheese for a tangier taste.
-
Vegan Option: Substitute cream cheese with a vegan cream cheese alternative and nutritional yeast for a cheesy flavor.
Chef’s Notes
Food is all about stories, and I have a funny one to share! A few years back, at a friend’s potluck, I brought along my usual cheese ball. While it was destined to be a hit, things took a turn when I realized I didn’t have Ranch seasoning on hand. In a pinch, I grabbed a taco seasoning mix instead! To my surprise, it was a total hit—the cheese ball was devoured in minutes, and everyone was asking for the “secret ingredient.” From that day on, I realized that sometimes unanticipated kitchen mishaps can lead to delightful discoveries!
Frequently Asked Questions
1. Can I make this cheese ball ahead of time?
Absolutely! In fact, making it a day in advance enhances the flavors. Just keep it wrapped in plastic in the fridge until you’re ready to serve.
2. How long does the cheese ball last in the fridge?
Typically, it can last for about 3-4 days if stored properly. But trust me, it won’t last that long once your guests get a taste!
3. Can you freeze a cheese ball?
Yes, you can freeze it, but be mindful that the texture may change slightly when thawed. To freeze, wrap it tightly in plastic wrap and then aluminum foil for extra protection. Thaw it in the fridge before serving.
4. What can I serve with the cheese ball?
I recommend pairing it with a variety of options, like crackers, veggies, pretzels, or even slices of baguette. You could also serve alongside a nice charcuterie board to complement the flavors.
Nutritional Info
(Optional): This section can include calorie counts, sugar content, and other relevant nutritional facts if desired.
Final Thoughts
See—making a show-stopping Pumpkin Cheese Ball is not only easy but also a wonderful way to create cherished moments around your table! Whether it’s for a cozy get-together, a festive holiday party, or just because, this recipe is sure to bring smiles and satisfaction to your table.
So, what are you waiting for? Grab your ingredients and let’s get crafting this pumpkin delight—because good food is all about good company and unforgettable memories! Happy cooking!
PrintUltimate Pumpkin Cheese Ball
A delightful Pumpkin Cheese Ball—a fun, festive twist on the classic cheese ball that impresses at any gathering.
- Prep Time: 15 minutes
- Cook Time: 0 minutes
- Total Time: 135 minutes
- Yield: 8 servings 1x
- Category: Appetizer
- Method: Chilling
- Cuisine: American
- Diet: Vegetarian
Ingredients
- 8 oz Cream Cheese, softened
- 1 cup Cheddar Cheese, shredded
- 1 packet Ranch Seasoning Mix
- 1 tsp Fresh Parsley, for garnish
- Optional: A dash of paprika or cayenne
Instructions
- Prepare your ingredients by letting the cream cheese sit out for 30 minutes to soften.
- Mix the softened cream cheese and shredded cheddar cheese in a mixing bowl until combined.
- Add the packet of ranch seasoning or homemade ranch and mix until smooth and creamy.
- Shape the mixture into a ball using clean hands.
- Chill the cheese ball in plastic wrap for at least 120 minutes.
- Decorate the chilled cheese ball with chopped nuts or parsley for a pumpkin look.
- Serve on a platter accompanied by crackers, veggie sticks, or apple slices.
Notes
Make it a day in advance for enhanced flavors. Store wrapped in the fridge for 3-4 days.
Nutrition
- Serving Size: 1 serving
- Calories: 250
- Sugar: 2g
- Sodium: 350mg
- Fat: 18g
- Saturated Fat: 10g
- Unsaturated Fat: 6g
- Trans Fat: 0g
- Carbohydrates: 6g
- Fiber: 0g
- Protein: 6g
- Cholesterol: 30mg
Keywords: pumpkin cheese ball, fall appetizer, cheese ball recipe, festive cheese ball
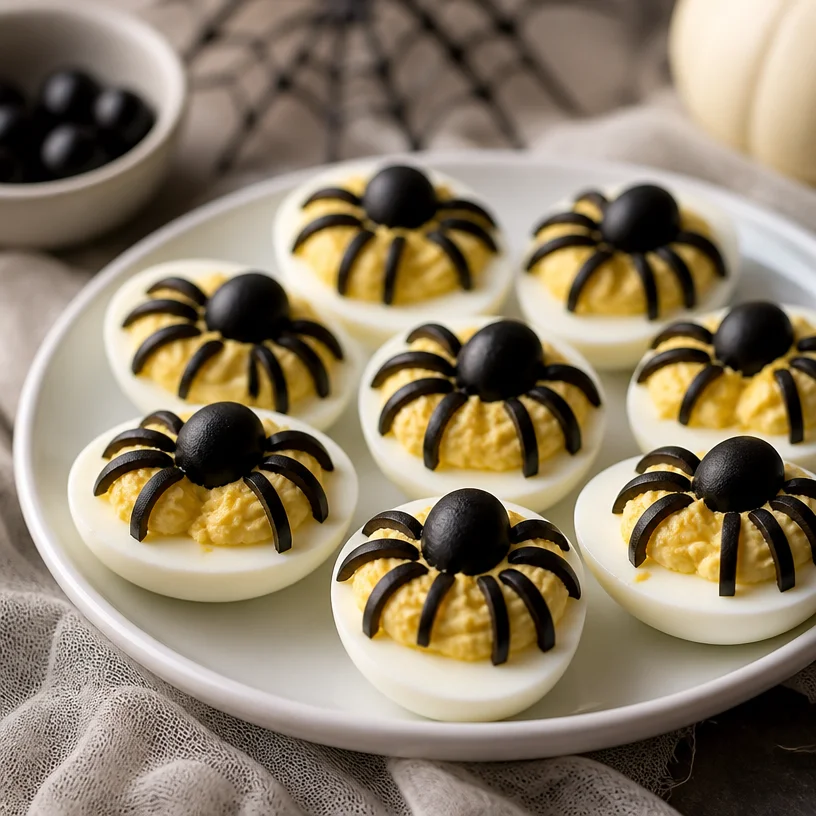
Spooky Spider Deviled Eggs for Halloween Party Appetizers
Spider Deviled Eggs: A Delightful Twist on a Classic Fave
Hello foodies! Today, we’re diving deep into a dish that’s a staple at any gathering—Deviled Eggs. But wait, we’re adding a cool twist for Halloween or any fun occasion: these are Spider Deviled Eggs! They’re just as creamy and delicious as the classic version, but with a playful presentation that’ll make your guests smile. Let’s get into it! 🕷️
Introduction
We all have that one dish that brings back cherished memories, don’t we? For me, it’s deviled eggs. I remember my grandmother whipping them up for every family gathering, her laughter filling the kitchen as she’d joke about how "a little bit of devil can bring out the angel in all of us!" I have to agree—there’s something magical about gathering around a table full of delicious food, sharing stories and laughter.
Traditionally, deviled eggs are simple: hard-boiled eggs transformed into creamy, flavorful bites. But why not add a little flair? This playful take is perfect for Halloween parties, family BBQs, or even just a fun dinner with friends. The best part? They’re still super easy to make, while creating a delightful centerpiece that’s sure to impress!
Imagine a platter of deviled eggs, each one topped with a black olive spider perched, making them not only delicious but also the talk of the evening. Grab your apron, and let’s get started on these whimsical Spider Deviled Eggs that will surely add a sense of fun and elegance to your gatherings!
Personal Story
It was one Halloween, and I decided to host a little get-together for my closest friends. I wanted to create a menu that was festive but approachable—something that captured the playful spirit of the night without scaring anyone away from the kitchen. As I brainstormed, the image of deviled eggs popped into my mind, but of course, I couldn’t just serve plain ones!
So, I turned to my trusty black olives and came up with this spooky little twist! I carefully crafted a few veggies and olives into little spider shapes atop the eggs, and as I laid them out on the table, the smiles on my friends’ faces were priceless. It turned out to be a hit, with everyone snapping photos before they even took a bite! That night wasn’t just about the food—it was a reminder that when we get a little creative in the kitchen, we can transform simple memories into lasting traditions.
Ingredients
Here’s what you’ll need to whip up these delightful Spider Deviled Eggs:
-
Eggs: The cornerstone of this dish! Use large eggs, as they yield the perfect creamy filling. Tip: For easier peeling, use eggs that are at least a week old.
-
Mayonnaise: Adds creaminess and richness. If you’re looking for a lighter option, swap half of the mayonnaise with Greek yogurt for a tangy twist.
-
Dijon Mustard: This brings a lovely depth of flavor. If you want a little heat, a spicy mustard could elevate the dish!
-
Black Olives: These are your spider legs! Slice them in half for the body and cut the remaining pieces into leg shapes. If black olives aren’t your thing, any dark olive works just as well.
-
Salt and Pepper: Essential for seasoning, don’t skip this step! Taste as you mix to ensure your filling hits the right flavor notes.
A friendly tip: You can add a pinch of smoked paprika for a subtle smokiness or some chopped fresh herbs like chives for a fresher flavor!
Step-by-Step Instructions
-
Hard Boil the Eggs: Start by placing your eggs in a pot and covering them with cold water, about an inch or two above the eggs. Bring that to a rolling boil over medium-high heat. Once boiling, turn off the heat, cover the pot, and let them sit for about 12 minutes. What’s great? This method reduces the chances of that greenish ring around the yolks!
-
Cool and Peel: Once the time is up, transfer your eggs to an ice bath (a bowl filled with ice water) for about 5-10 minutes. This will stop the cooking and make peeling easier. Crack the shells gently and peel under running water if you need. Embrace the kitchen mantra: a little patience goes a long way!
-
Prepare the Filling: Slice the cooled eggs in half lengthwise and gently remove the yolks into a mixing bowl. Use a fork to smash them until they’re crumbly. Add in the mayonnaise, Dijon mustard, salt, and pepper. Mix until smooth and creamy. Here’s a pro tip: Don’t overmix— a little texture adds personality to your filling!
-
Fill the Egg Halves: Grab a piping bag or a ziplock bag (with the corner snipped off) and fill the egg whites with that luscious yolk mixture. Neater filling means prettier eggs, so take your time!
-
Add the Spooky Spiders: Time to make these eggs fun! Take your black olives—cut half of each olive for the body and slice the other halves into legs. Arrange them on top of the filled egg whites to create your little spiders!
-
Chill and Serve: Place your Spider Deviled Eggs in the fridge for about 30 minutes to firm up a bit. Serving chilled eggs ensures a refreshing bite!
Serving Suggestions
For presentation, lay the eggs on a rustic platter with a sprinkle of fresh herbs or a drizzle of olive oil. You could even throw in some around cut veggies to create a Halloween scene—think mini pumpkins or a little cobweb effect with some shredded cheese. Your guests will appreciate the aesthetic just as much as they will the taste!
Recipe Variations
Feeling adventurous? Here are a few fun ways to shake things up with your Spider Deviled Eggs:
-
Spicy Kick: Add a few dashes of hot sauce or some chopped jalapeños into the yolk mixture for a delightful heat that wakes up the taste buds.
-
Bacon Bits: Who doesn’t love bacon? Fold in some crumbled cooked bacon into your yolk filling for a smoky, savory twist.
-
Herb Love: Mix in finely chopped fresh herbs like cilantro or dill for a fresh taste that pops.
-
Cheesy Delight: Stir in some shredded cheese, like sharp cheddar or crumbled feta, for extra flavor layers.
-
Vegan Option: Swap the eggs for avocado halves and fill them with a mixture of mashed avocado, vegan mayonnaise, and mustard for a creamy, egg-free alternative.
Chef’s Notes
Creating these Spider Deviled Eggs has become a cherished tradition in my home. Over the years, I’ve played with flavors and presentations—sometimes swapping out olives for cherry tomatoes for a more colorful take! I recall one Halloween where I turned these into scary mummy eggs by wrapping them in strips of crescent dough and baking them. The kitchen filled with laughter as everyone debated if they looked more spooky or silly!
In cooking, it’s often about experimenting and having fun—so don’t worry about being perfect. Let your creativity shine!
FAQs and Troubleshooting
Q: My yolks crumbled too much, how can I fix that?
A: If your yolks are crumbling and not blending smoothly, make sure to use fresh eggs that are easier to peel. Additionally, take your time mashing; a slight twist of a fork can help create a creamier texture.
Q: Can I make these ahead of time?
A: Absolutely! Make them a day in advance and keep them covered in the fridge. Just add the olive spiders right before serving to keep them fresh!
Q: How do I know when my eggs are perfectly hard-boiled?
A: The cooking method I mentioned should give you excellent results. If you’re concerned about overcooking, set a timer for 10 minutes, then cool immediately to stop the cooking process.
Q: What if I don’t have an ice bath?
A: Not to worry! Just run the eggs under cold water once they’re done boiling. While it doesn’t cool them as quickly, it still helps with the peeling.
And there you have it! Your guide to creating Spider Deviled Eggs that are sure to unite people around your table, full of joy, laughter, and deliciousness. Remember, good food is about connection, intention, and of course—having a little fun along the way! So tie on that apron, whip up a batch, and let the gathering begin. Happy cooking!
Nutritional Info (Per Egg Half):
- Calories: 70
- Protein: 3.6g
- Fat: 6g
- Carbohydrates: 1g
- Fiber: <1g
Enjoy your culinary adventures, and remember: every great dish starts with loving the process! 👩🍳✨
PrintSpider Deviled Eggs
A playful twist on classic deviled eggs, perfect for Halloween gatherings or creative appetizers.
- Prep Time: 15 minutes
- Cook Time: 12 minutes
- Total Time: 27 minutes
- Yield: 12 servings 1x
- Category: Appetizer
- Method: Boiling
- Cuisine: American
- Diet: Vegetarian
Ingredients
- 6 large eggs
- 1/4 cup mayonnaise
- 1 tsp Dijon mustard
- Black olives
- Salt and pepper to taste
- Optional: smoked paprika, fresh chives
Instructions
- Hard boil the eggs by placing them in a pot and covering with water. Bring to a boil, then cover and let sit for 12 minutes.
- Cool the eggs in an ice bath for 5-10 minutes.
- Prepare the filling by removing yolks and mixing with mayonnaise, mustard, salt, and pepper until smooth.
- Fill egg whites with the mixture using a piping bag or ziplock bag.
- Add sliced black olives on top to create spider shapes.
- Chill the eggs in the fridge for about 30 minutes before serving.
Notes
Enhance flavor with herbs or spices; excellent for parties and gatherings.
Nutrition
- Serving Size: 1 egg half
- Calories: 70
- Sugar: 0g
- Sodium: 60mg
- Fat: 6g
- Saturated Fat: 1g
- Unsaturated Fat: 5g
- Trans Fat: 0g
- Carbohydrates: 1g
- Fiber: <1g
- Protein: 3.6g
- Cholesterol: 186mg
Keywords: deviled eggs, Halloween, appetizers, party food, spider deviled eggs
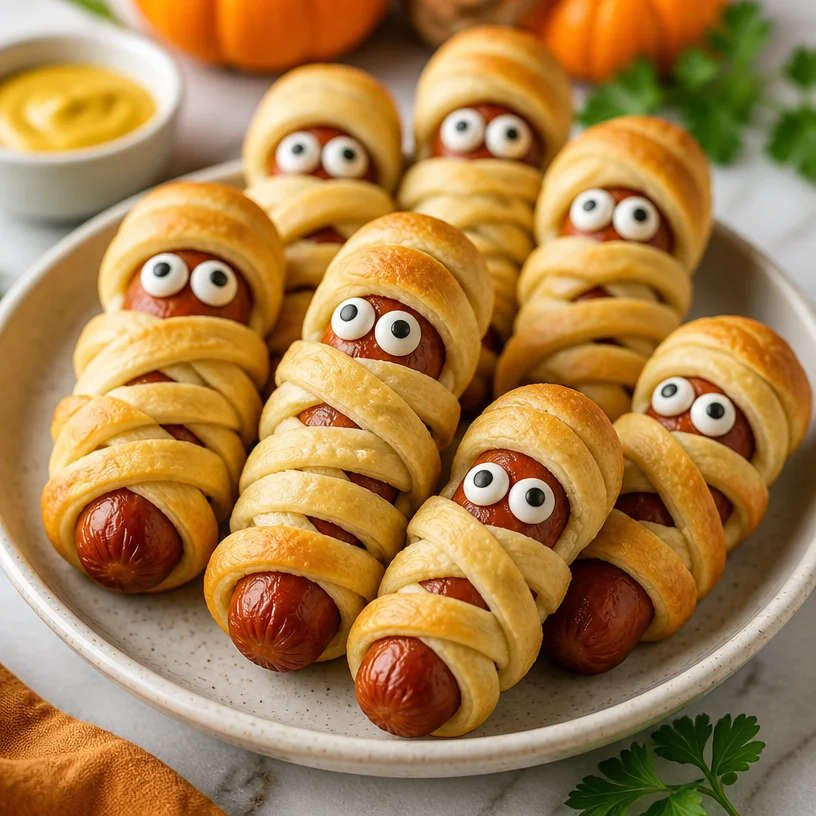
Mummy Hot Dogs
Mummy Hot Dogs: A Halloween Treat That Wows
It’s that exciting time of year again when the leaves change hue, the air turns crisp, and spooky season creeps around the corner. Halloween is a special time for families and friends to come together and indulge in festive treats that are both fun and delicious! This year, let’s put a whimsical spin on a classic favorite with “Mummy Hot Dogs.” This spooky twist is a hit among kids and adults alike, providing not just a taste of nostalgia but a chance to gather around the table for some tasty fun.
As a self-proclaimed lover of culinary creativity, I adore taking simple dishes and giving them a delightful makeover. The best part? These Mummy Hot Dogs are incredibly simple to make, ensuring that even novice chefs can whip them up in no time. Imagine this: you’re stirring a pot while the kids enjoy engaging in Halloween crafts, energy buzzing in the air. You hear laughter, and in the next room, there’s a flurry of activity as they prepare for their Halloween adventure. Just like those happy moments, these Mummy Hot Dogs are here to transport you to a place of warmth, joy, and hearty laughter.
In this post, I’ll walk you through not just the recipe but also some fun kitchen stories, tips to impress your guests, and creative variations to suit every palate. So, grab your apron (no, not ivory this time—with these Mummy Hot Dogs, we might want to keep it a bit more Halloween-themed!), and let’s get cooking!
A Spooky Memory with Mummy Hot Dogs
I still remember the first time I made Mummy Hot Dogs for a Halloween get-together. It was a brisk October evening, and the warmth of laughter filled my home. I had just hosted a Halloween-themed craft party for my children and their friends. The kids were buzzing with excitement, just as much as the adults, who were ready to enjoy some well-deserved treats. As they crafted their ghostly decorations, I decided to surprise everyone with a spooky snack idea I had seen floating around on social media.
I pulled out a package of crescent dough, hot dogs, and some candy eyes. As I wrapped each hot dog with strips of dough, the kids gathered around, intrigued by the unusual combination of ingredients. We giggled at our creations resembling mini mummies, and the anticipation in the air grew palpable. When the golden, flaky dogs came out of the oven, we all gathered around the table for a “mummy feast.”
With the candy eyes perched on top, they transformed into adorable little creatures, and the flavor? Let’s just say they were devoured in minutes! Making Mummy Hot Dogs became a cherished tradition in my family. It reminds me that food is not just about sustenance; it’s about creating shared moments together, weaving stories, and filling the atmosphere with merriment.
Ingredients
To get started on these Mummy Hot Dogs, let’s gather our ingredients. Here’s what you’ll need:
-
Hot Dogs: The stars of the dish! You can use beef, turkey, chicken, or even plant-based links for an alternative option. Don’t forget that the size can change the number of strips, so keep that in mind.
-
Crescent Dough: This flaky dough serves as the mummy wrap. You can substitute it with puff pastry for a different texture. Remember, the dough should be kept chilled until you’re ready to use it; warm dough is much harder to work with!
-
Candy Eyes: These add a fun, spooky touch to your mummies! You can find them at craft stores or online. If you can’t find candy eyes, you can always use small pieces of olives or chocolate chips as substitutes.
-
Ketchup or Mustard (optional): These can serve as dipping sauces for an added zing. A little bit of creativity here can turn an ordinary condiment into something festive—how about a “bloody” ketchup?
Step-by-Step Instructions
Now that we’ve got our ingredients ready, let’s dive into the cooking process!
-
Preheat your oven: Start by preheating your oven to 375°F (190°C). The goal here is to achieve that glorious golden brown on your crescent dough!
-
Prepare the hot dogs: Take your hot dogs and set them aside. You can choose to cut each one in half if you’re craving mini mummies for a fun appetizer variation.
-
Unroll the crescent dough: Carefully take the crescent dough out of its package and lay it flat on a clean, lightly floured surface. Optionally, you can roll out the dough with a rolling pin for a thinner texture.
-
Cut the dough into strips: Using a pizza cutter or sharp knife, cut the dough into thin strips, about 1/4 inch wide. You want enough length to wrap around your hot dogs multiple times.
-
Wrap the hot dogs: Take a strip of dough and start wrapping it around the hot dog. Be creative! Leave gaps here and there, as that’ll give it a more authentic mummy look. The idea is to make it look messy and spooky all at once. Secure the ends to prevent the dough from unraveling during baking.
-
Place on a baking sheet: Line a baking sheet with parchment paper for easy cleanup. Place your wrapped hot dogs on the sheet, ensuring they aren’t too crowded.
-
Bake to perfection: Pop them in your preheated oven and bake for about 12-15 minutes, or until the dough is golden brown and puffed-up. Stay nearby so you can admire them as they bake—seriously, nothing beats that delightful smell wafting through your home!
-
Add candy eyes: Once they’re out of the oven and have cooled for a couple of minutes, it’s time to bring your mummies to life! Dot some hot glue or frosting on the candy eyes and attach them to the hot dogs for that final spooky touch.
-
Serve warm: Serve with ketchup or mustard on the side for dipping. Get ready to hear the giggles and oohs and aahs as everyone dives into these yummy mummies!
Serving Suggestions
To plate your Mummy Hot Dogs, consider serving them on a festive platter lined with parchment paper for that rustic, haunted house vibe. To elevate the theme, you could add a few fake spiders or mini pumpkins around the platter. Not only will it create visual interest, but it also enhances the entire Halloween theme!
Recipe Variations
Feeling adventurous? Here are a few creative twists you might want to explore:
-
Cheesy Mummies: Place a small piece of cheese inside each hot dog before wrapping it with crescent dough for a gooey surprise!
-
Vegetarian Mummies: Swap the hot dogs for veggie dogs or even some cooked tofu to cater to plant-based eaters.
-
Nom Nom Nachos: Cut mini tortillas in the shape of bones for a crunchy side dish, pairing perfectly with your mummy hot dogs!
-
Spicy Mummies: Use jalapeño hot dogs for those who enjoy a bit of heat. These will surely add a kick to your Halloween spread!
-
Saucy Mummies: Incorporate BBQ sauce or a spicy mustard into the mix for fun dipping options. Mix different sauces to create a “Witch’s Brew” for dipping!
Chef’s Notes
These Mummy Hot Dogs hold a special place in my culinary heart. I’ve served them at numerous Halloween parties, always experimenting with different fillings and variations. One year, I decided to put a fun spin on it and invited guests to create their own mummies with various toppings and sauces. Watching everyone’s creativity bloom was the highlight of the evening, and let’s just say, some unique mummies were born!
This recipe, although simple, evolves with the seasons. Every time I make it, I realize that it brings people together, sharing laughs and delighting in the sheer joy of cooking. Remember, the kitchen is not just for cooking; it’s a space for crafting memories.
FAQs and Troubleshooting
-
What if my crescent dough is losing its shape?
Make sure your dough is cold before you start wrapping. If it gets too warm, it may become stretchy and hard to manage. You can pop it in the fridge for a few minutes to firm it back up. -
How do I know when they’re done?
Keep an eye on them! Once they turn golden brown, they’re ready. If they’re golden all around, that’s a sure sign of perfection! -
Can I freeze Mummy Hot Dogs?
Yes! You can freeze unbaked wrapped hot dogs. Just assemble them, freeze on a baking sheet, then store in an airtight container. Bake from frozen, adding a few extra minutes to the cooking time. -
What other sauces go well with Mummy Hot Dogs?
Besides ketchup and mustard, consider ranch dressing, sriracha, or a creamy garlic dip. Each adds its unique flair!
Nutritional Info
While I don’t dwell heavily on the nutritional aspect of cooking, I know it’s important for many. A single Mummy Hot Dog is about 200-300 calories, depending on the type of hot dog and dough. Pair with some veggie sticks for a well-rounded, festive meal that’s as enjoyable as it is delicious!
Now that you have your plan, roll up those sleeves, get your loved ones involved, and let’s create something wonderful this Halloween! Gather around the table, savor the moment, and enjoy making memories with these delightful Mummy Hot Dogs. Happy cooking!
PrintMummy Hot Dogs

A fun and spooky take on a classic favorite, these Mummy Hot Dogs are perfect for Halloween gatherings, combining deliciousness with creativity.
- Prep Time: 15 minutes
- Cook Time: 15 minutes
- Total Time: 30 minutes
- Yield: 8 servings
- Category: Appetizer
- Method: Baking
- Cuisine: American
- Diet: Vegetarian option available
Ingredients
- Hot Dogs (beef, turkey, chicken, or plant-based)
- Crescent Dough (alternatively puff pastry)
- Candy Eyes (or small olives/chocolate chips)
- Ketchup or Mustard (optional)
Instructions
- Preheat your oven to 375°F (190°C).
- Prepare the hot dogs by setting them aside.
- Unroll the crescent dough onto a clean, lightly floured surface.
- Cut the dough into thin strips, about 1/4 inch wide.
- Wrap the hot dogs with strips of dough, leaving gaps for a mummy look.
- Place the wrapped hot dogs on a lined baking sheet.
- Bake for 12-15 minutes or until golden brown.
- Add candy eyes to the cooled mummies using hot glue or frosting.
- Serve warm with ketchup or mustard for dipping.
Notes
Experiment with different fillings and toppings for unique mummy creations. Keep the dough cold for easier handling and best results.
Nutrition
- Serving Size: 1 serving
- Calories: 250
- Sugar: 2g
- Sodium: 600mg
- Fat: 15g
- Saturated Fat: 5g
- Unsaturated Fat: 8g
- Trans Fat: 0g
- Carbohydrates: 20g
- Fiber: 1g
- Protein: 7g
- Cholesterol: 25mg
Keywords: Halloween, Mummy Hot Dogs, spooky snack, festive treat, kid-friendly recipe
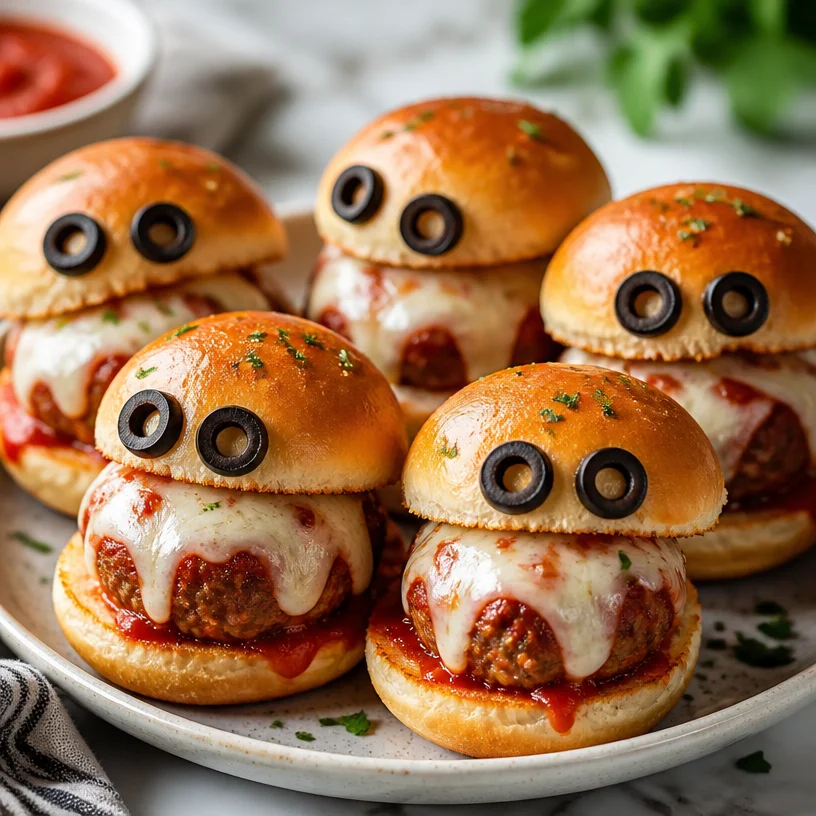
Minute Monster Meatball Sliders for Weeknight Feasts
Monster Meatball Sliders: A Fun and Flavorful Feast
Hello, foodies! If you’re ready to take your dining experiences to a new level of fun and flavor, then you’re in for a treat! Today, I’m absolutely thrilled to share one of my all-time favorite recipes that perfectly combines nostalgia with a dash of creativity: Monster Meatball Sliders! These sliders are not only delicious but also incredibly fun to serve — perfect for parties, family gatherings, or even a cozy movie night at home.
As I was developing this recipe, I couldn’t help but reminisce about the weekend get-togethers at my grandmother’s house. Her kitchen was always filled with the incredible aroma of rich tomato sauce simmering on the stove, and giant meatballs rolling around like they had a life of their own! The atmosphere was always lively, filled with laughter and animated conversations over plates piled high with spaghetti and homemade meatballs.
Inspired by those cherished memories, I wanted to create something that encapsulated the childhood warmth of those gatherings but with a twist that would bring a smile to everyone’s face — hence the Monster Meatball Sliders! Imagine a perfectly seasoned meatball, snugly tucked into a fluffy slider bun, all topped off with gooey mozzarella and a touch of marinara. With a bit of creativity, these sliders become a playful dish that even the littlest foodies will adore. So, let’s dig in and get our hands a bit messy!
A Fond Kitchen Memory
One sunny afternoon while experimenting with recipes, I came across a few leftover meatballs from a previous dinner party. Rather than letting them go to waste, I decided to transform them into sliders. I can still picture the surprised faces of my friends when I plopped these glorious little sandwiches in front of them, complete with olive “eyes” and a light-hearted monster theme. Everyone couldn’t help but laugh and immediately dug in!
That day lit a little spark inside me — food isn’t just about sustenance; it’s about creating an experience, a memory that brings people together. These Monster Meatball Sliders became a staple at my gatherings, a fun way to evoke joy around the table. The blend of classic flavors with a whimsical presentation makes this dish a delightful addition to any table.
Ingredients
To make your Monster Meatball Sliders, you’ll need the following ingredients:
- Meatballs:
- You can use store-bought or homemade meatballs. If you’re feeling adventurous, making them from scratch using ground beef, breadcrumbs, cheese, and seasoning will elevate this dish immensely!
- Slider Buns:
- Opt for soft slider buns or mini brioche rolls. These add just the right touch of sweetness and texture. For a gluten-free option, use gluten-free buns or lettuce wraps.
- Mozzarella:
- Fresh mozzarella balls (bocconcini) work wonderfully for that melt-in-your-mouth factor. If you want something sharper, use provolone or cheddar for a flavor twist!
- Marinara Sauce:
- A good-quality marinara sauce is essential. You can easily swap this with pesto or a homemade tomato sauce for added flair.
- Olive Eyes:
- Black olives are perfect for creating those adorable little eyes! Feel free to use green olives for a pop of color or skip them altogether if you’re not a big olive fan.
Step-by-Step Instructions
Let’s get cooking! Follow these simple steps, and you’ll be well on your way to crafting your very own Monster Meatball Sliders.
-
Preheat the Oven:
- Begin by preheating your oven to 375°F (190°C). A warm oven is essential for that toasty bun experience!
-
Prepare the Meatballs:
- If you’re making your own meatballs, mix together your ground meat, breadcrumbs, eggs, minced garlic, and Italian seasoning. Roll them into golf ball-sized rounds. If you’re using store-bought, just set them aside while you prepare the rest.
-
Bake the Meatballs:
- Place your meatballs on a baking sheet lined with parchment paper. Bake them for about 20 minutes or until they are browned and cooked through. This step helps to lock in moisture and flavor!
-
Heat the Marinara Sauce:
- While the meatballs are baking, gently heat your marinara sauce in a small saucepan over medium heat. I sometimes like to add a pinch of red pepper flakes for that extra kick!
-
Assemble the Sliders:
- Once your meatballs are ready, slice your slider buns in half. Spread a spoonful of marinara sauce on the bottom half of each slider bun. Then, place a meatball on top, followed by a generous layer of mozzarella.
-
Melt the Cheese:
- Place the sliders in the oven for about 5-7 minutes until the cheese is bubbly and golden. This is the time to grab a kitchen towel and get ready to plate!
-
Add the Olive Eyes:
- Once out of the oven, use a toothpick or skewer to add two black olives to each slider — our deliciously cute monster eyes! It’s all about the presentation here—get creative!
-
Complete the Sliders:
- Top off each slider with the other half of the bun, and voilà! Your delicious Monster Meatball Sliders are ready to be devoured.
Serving Suggestions
When it comes to serving these sliders, I love to plate them on a large wooden board or platter for that family-style feel. You can add a sprinkle of fresh parsley or dried oregano on top for a garnish, and serve with extra marinara for dipping. Pair these sliders with a crisp green salad or a side of sweet potato fries to round out the meal.
Recipe Variations
Looking to mix it up a bit? Here are some fun variations to try:
- Buffalo Style: Toss your meatballs in buffalo sauce prior to baking for a zesty spin, and top with blue cheese crumbles instead of mozzarella.
- Vegetarian Option: Substitute meatballs with a plant-based meatball or roasted vegetables with spices to create a veggie-friendly version.
- Beachy Flavor: Use seafood meatballs made with crab or shrimp, and serve with a zesty lemon aioli!
- Cheesy Goodness: Go wild with cheese! Mix in cheddar or pepper jack instead of mozzarella for a flavorful punch.
Chef’s Notes
One of the first times I made these sliders, I thought I’d impress everyone with a fancy herb-infused sauce. However, I realized my friends loved the simple, comforting flavors of classic marinara more than anything else! It’s a reminder that sometimes simplicity wins, and that’s perfectly okay. If I could share one piece of advice, it’s to never hesitate to experiment, but also honor the classics that bring back nostalgic memories!
FAQs and Troubleshooting
-
What if my meatballs are dry?
- If your meatballs turn out dry, ensure you’re not overcooking them. Drizzling a bit of olive oil or adding moisture (like milk) to the mixture can help too!
-
Can I make this ahead of time?
- Absolutely! You can make the meatballs and sauce ahead of time, store them in the fridge, and assemble the sliders just before serving for that warm, fresh taste.
-
What are some good sides to pair with these sliders?
- Fresh salads, crispy fries, or even a charcuterie board work wonderfully. You’ll want something light to balance the hearty sliders.
-
How can I make this gluten-free?
- Simply swap out traditional breadcrumbs for gluten-free breadcrumbs, and check that your slider buns are gluten-free!
Nutritional Info
While I don’t always focus on the numbers, if you’re curious, a typical Monster Meatball Slider has approximately 250 calories, 12g protein, and 15g of fat per serving. Adjust portions based on your needs!
And there you have it—your guide to crafting delightful Monster Meatball Sliders! I hope this recipe brings as much joy to your table as it has to mine. Don your apron, roll up those sleeves, and let the kitchen festivities begin. Celebrate the art of cooking and the joy of eating together. Until next time, happy cooking!
PrintMonster Meatball Sliders

Fun and delicious sliders featuring seasoned meatballs, mozzarella, and marinara sauce served in fluffy buns, perfect for parties or family gatherings.
- Prep Time: 15 minutes
- Cook Time: 30 minutes
- Total Time: 45 minutes
- Yield: 4 servings
- Category: Appetizer
- Method: Baking
- Cuisine: American
- Diet: None
Ingredients
- Meatballs (store-bought or homemade)
- Soft slider buns or mini brioche rolls
- Fresh mozzarella balls (bocconcini)
- Good-quality marinara sauce
- Black olives for eyes
Instructions
- Preheat the oven to 375°F (190°C).
- Prepare the meatballs by mixing ground meat, breadcrumbs, eggs, minced garlic, and Italian seasoning, rolling them into golf ball-sized rounds.
- Bake the meatballs on a parchment-lined baking sheet for about 20 minutes or until browned.
- Heat the marinara sauce in a small saucepan over medium heat.
- Assemble the sliders by slicing the buns, spreading marinara, and adding a meatball and mozzarella.
- Melt the cheese in the oven for 5-7 minutes until bubbly.
- Add two black olives to each slider for eyes.
- Complete the sliders by placing the other half of the bun on top.
Notes
Feel free to experiment with meatball variations, including buffalo style or vegetarian options.
Nutrition
- Serving Size: 1 slider
- Calories: 250
- Sugar: 3g
- Sodium: 600mg
- Fat: 15g
- Saturated Fat: 7g
- Unsaturated Fat: 6g
- Trans Fat: 0g
- Carbohydrates: 20g
- Fiber: 1g
- Protein: 12g
- Cholesterol: 30mg
Keywords: meatball sliders, party food, fun recipes, family gathering, comfort food