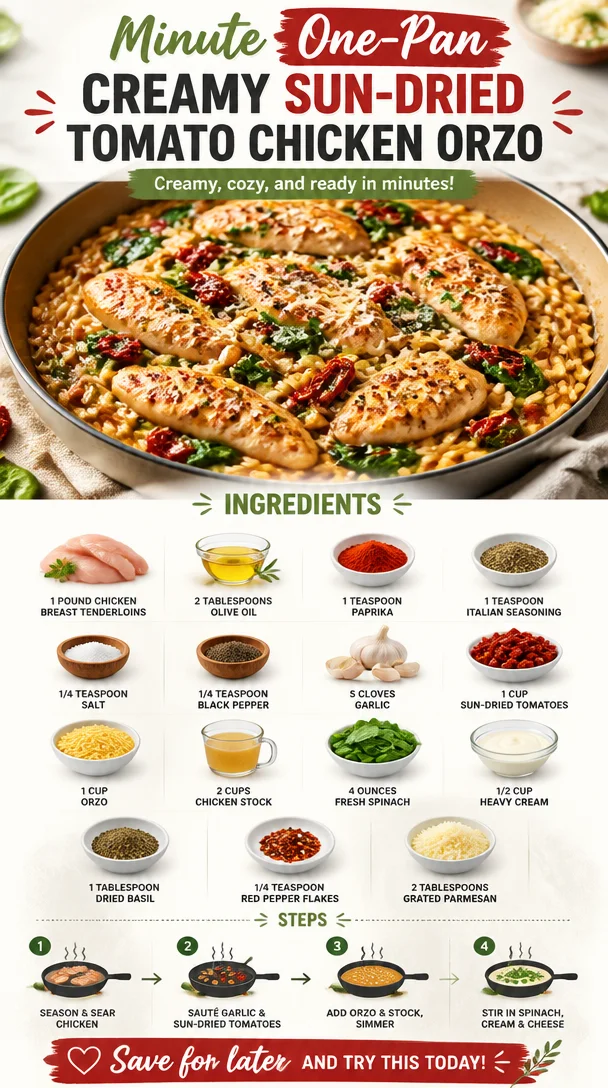
Minute One-Pan Creamy Sun-Dried Tomato Chicken Orzo
Irresistible Creamy Sun-Dried Tomato Chicken Orzo
Introduction
Hey there! Welcome back to my kitchen, where delicious food and warm memories simmer together. Today, I’m excited to share a bold and beautiful recipe that’s sure to impress—Creamy Sun-Dried Tomato Chicken Orzo. This dish is my go-to for busy weeknights or whenever I want to bring a touch of elegance to my dinner table without a mountain of stress.
Creamy, comforting, and packed with flavors, this orzo dish embodies everything I love about cooking: simple, quality ingredients that come together to create something truly special. Sun-dried tomatoes bring a pop of tanginess, while the chicken is tender and cooked to perfection. Plus, the creaminess wraps it all up in a cozy, fulfilling hug.
As you prepare this dish, I hope you’ll find bliss in the little things — the sound of the sizzling chicken, the aroma of garlic, and the vibrant colors of the ingredients melding beautifully in your pan. Cooking is all about creating moments to savor, and when you gather loved ones around to share in this culinary delight, those moments turn into cherished memories.
So, grab your apron, let’s tie it on, and dive into creating this irresistible dish that promises to make your kitchen the heart of your home!
Personal Story
I can still remember the first time I made a version of this dish for friends. We were in college, pretending to be upscale dinner party hosts despite our mismatched plates and thrift store flatware. I had just discovered sun-dried tomatoes at a local market — they seemed exotic and sophisticated, perfect for impressing my crew.
One rainy evening, with candles flickering and laughter filling the air, I whipped up a creamy tomato sauce with pasta and some chicken. We all gathered around a small, wobbly table, and before we knew it, we had turned that simple meal into a celebration. Everyone was raving about how delicious the dish was, and the compliments warmed my heart. That moment inspired me to continue experimenting with flavors and ingredients, eventually leading me to create my beloved blog, IvoryApron.com.
Whenever I cook this Creamy Sun-Dried Tomato Chicken Orzo now, I think back to those quaint college nights filled with love, laughter, and homemade food. It only proves that the memories we make in the kitchen are just as important as the food we serve.
Ingredients
Let’s gather our ingredients! Here’s what you’ll need to create this delightful dish:
-
1 pound Chicken breast tenderloins
The star protein! These tender bites cook quickly and stay juicy. Feel free to substitute with chicken thighs for richer flavor or tofu for a plant-based option. -
2 tablespoons Olive oil
Perfect for searing the chicken and giving a hint of richness. If you’re in a hurry, avocado oil or even butter work well, too. -
1 teaspoon Paprika
Adds a mild smokiness and a beautiful color to the dish. Try using smoked paprika for a deeper flavor. -
1 teaspoon Italian seasoning
A classic blend of herbs that enhances the flavor of the chicken and sauce. You can make your own blend or use your favorite dry herbs. -
1/4 teaspoon Salt (Divided)
Helps bring out the flavors. Remember, you can always add more later! -
1/4 teaspoon Black pepper
Just a gentle hint of spice to balance the dish. -
5 cloves Garlic (Minced)
Ahh, garlic! It’s the aromatic foundation that brings a cozy warmth to your orzo. -
1 cup Sun-dried tomatoes (Chopped)
Opt for oil-packed dried tomatoes; they’re soft, flavorful, and add that wonderful tanginess that’s hard to resist. You can substitute with fresh tomatoes if needed, but adjust the cooking time. -
1 cup Orzo (Uncooked)
This charming pasta shape effortlessly soaks up flavors. You may swap it with any small pasta or even rice, adjusting cooking times accordingly. -
2 cups Chicken stock
The delicious base for your sauce! Use homemade or low-sodium store-bought to keep things healthy. -
4 ounces Fresh spinach
Wilts down beautifully and adds a delightful color to the dish. Kale or arugula can work in its place if you’re looking for a bit of variety. -
1/2 cup Heavy cream
For that luscious, creamy texture. If you want a lighter twist, try using coconut cream or a dairy-free alternative. -
1 tablespoon Dried basil
Adds a fragrant herbal note that brightens the dish up. Fresh basil can definitely be used if you have it on hand! -
1/4 teaspoon Red pepper flakes
For a whisper of warmth—just enough to elevate the flavors without overwhelming the palate. -
2 tablespoons Grated Parmesan
For that savory umami finish that ties everything together! Nutritional yeast can be swapped for a lovely vegan option.
Step-by-Step Instructions
Now that we have our ingredients ready and our aprons tied, let’s break down the steps to create this creamy masterpiece!
-
Sear the Chicken
Heat the olive oil in a large skillet over medium-high heat. When it shimmers, season your chicken tenderloins with paprika, Italian seasoning, salt, and black pepper. Add them to the pan in a single layer. Let them sear for 4-5 minutes until golden, then flip and cook the other side. Knowing how to sear is key; avoid moving the chicken around too much to allow that beautiful crust to form! -
Garlic & Tomatoes
Once your chicken is cooked through (about 7-8 minutes total), remove it from the skillet and set it aside. In the same skillet, toss in the minced garlic. Sauté for 1 minute until fragrant, then add the chopped sun-dried tomatoes. Stir them alongside the garlic for about another 2 minutes until they become aromatic. -
Cook the Orzo
Now, pour in the uncooked orzo. Stir it into the sun-dried tomatoes and garlic, allowing it to toast for a minute. This step adds depth of flavor; trust me, you’ll thank yourself later! Next, add the chicken stock and bring everything to a gentle simmer. Cover and let it cook according to package instructions (usually 8-10 minutes) until the orzo is tender and has absorbed a good amount of the liquid. -
Add Cream & Spinach
Once the orzo is cooked, introduce the heavy cream to the skillet, stirring gently to combine. The magic of the creamy sauce starts here; it’s rich without being overwhelming. Toss in the fresh spinach, letting it wilt down. This brings not just amazing color, but also nutrients to the dish! -
Return the Chicken
Slice the cooked chicken into bite-sized pieces and add it back into the skillet, ensuring it’s nestled nicely among the creamy orzo goodness. Stir in the dried basil and red pepper flakes for a punch of flavor. -
Finishing Touches
Taste and adjust seasoning as you see fit. You might want a tad more salt or a sprinkle of black pepper. Finally, finish things off with a generous handful of grated Parmesan cheese. Stir to melt it into the dish for that final creamy finish.
Voila! Your kitchen now smells heavenly, and your Creamy Sun-Dried Tomato Chicken Orzo is ready to shine!
Serving Suggestions
When it comes time to serve, I like to plate this dish in an elegant, rustic bowl or a deep plate that showcases the colors. Garnish with additional Parmesan and a sprinkle of fresh basil or parsley for a pop of freshness. Maybe pair it with a crisp salad or some crusty bread to soak up that delicious sauce!
Recipe Variations
This recipe is versatile, so feel free to sprinkle in your own creativity:
- Mediterranean Twist: Toss in some olives and feta cheese for a Mediterranean vibe.
- Lemon Zest: Add a squeeze of fresh lemon juice and zest to brighten up the flavors.
- Spicy Kick: If you love heat, throw in diced jalapeños or more red pepper flakes.
- Veggie Delight: Want it more plant-forward? Swap in zucchini, bell peppers, or asparagus.
- Herbed Delight: Experiment with fresh herbs like dill or oregano for a refreshing twist.
Chef’s Notes
This Creamy Sun-Dried Tomato Chicken Orzo is a dish that has evolved with me over time. Initially, I played around with various pasta shapes and ingredients, but this combination has become a staple because of its simplicity and the joy it brings to the table. One funny memory is a time I was making this in a hurry and forgot the cream completely. My friends jokingly dubbed it "dry orzo," but we still devoured it — it just goes to show that even in the kitchen mistakes can turn into laughter and good memories!
FAQs and Troubleshooting
1. My orzo is too sticky. What can I do?
If the orzo becomes sticky, it’s likely overcooked or not enough liquid was added. Next time, keep an eye on the cooking time and add a touch more stock or water if the liquid is absorbed too quickly!
2. Can I make this dish ahead of time?
Absolutely! This dish can be prepared in advance and stored in the refrigerator. Reheat gently in a skillet, adding a splash of chicken stock to prevent it from drying out.
3. What can I substitute for orzo?
You can use small pasta shapes like couscous, or even make it gluten-free with quinoa or rice; just be sure to adjust the cooking time accordingly.
4. How do I store leftovers?
Simply let the orzo cool completely, then place it in an airtight container in the fridge for 3-4 days. You can reheat portions in the microwave or on the stove with a splash of cream or stock to revitalize the flavors.
Nutritional Info
(For a standard serving of Creamy Sun-Dried Tomato Chicken Orzo)
- Calories: Approximately 550
- Protein: 30g
- Total Fat: 25g
- Carbohydrates: 55g
- Dietary Fiber: 3g
Thanks for joining me today! I hope you savor every moment as you cook this Creamy Sun-Dried Tomato Chicken Orzo. Remember: Cooking is a journey, so enjoy your time in the kitchen. Happy cooking!
PrintCreamy Sun-Dried Tomato Chicken Orzo

A creamy, comforting orzo dish packed with flavors of sun-dried tomatoes, tender chicken, and fresh spinach, perfect for busy weeknights.
- Prep Time: 15 minutes
- Cook Time: 30 minutes
- Total Time: 45 minutes
- Yield: 4 servings 1x
- Category: Main Course
- Method: Stovetop
- Cuisine: Italian
- Diet: Non-Vegetarian
Ingredients
- 1 pound Chicken breast tenderloins
- 2 tablespoons Olive oil
- 1 teaspoon Paprika
- 1 teaspoon Italian seasoning
- 1/4 teaspoon Salt (Divided)
- 1/4 teaspoon Black pepper
- 5 cloves Garlic (Minced)
- 1 cup Sun-dried tomatoes (Chopped)
- 1 cup Orzo (Uncooked)
- 2 cups Chicken stock
- 4 ounces Fresh spinach
- 1/2 cup Heavy cream
- 1 tablespoon Dried basil
- 1/4 teaspoon Red pepper flakes
- 2 tablespoons Grated Parmesan
Instructions
- Sear the Chicken: Heat the olive oil in a large skillet over medium-high heat. Season your chicken tenderloins with paprika, Italian seasoning, salt, and black pepper. Add them to the pan in a single layer and sear for 4-5 minutes until golden. Then flip and cook the other side.
- Remove the chicken from the skillet and set aside. In the same skillet, add the minced garlic and sauté for 1 minute until fragrant. Then add the chopped sun-dried tomatoes and stir for about another 2 minutes.
- Pour in the uncooked orzo, stirring it into the sun-dried tomatoes and garlic. Allow it to toast for a minute. Add the chicken stock and bring to a gentle simmer. Cover and cook according to package instructions (usually 8-10 minutes) until the orzo is tender.
- Add the heavy cream to the skillet, stirring gently to combine. Toss in the fresh spinach, letting it wilt down.
- Slice the cooked chicken into bite-sized pieces and return it to the skillet, ensuring it’s well mixed with the sauce. Stir in dried basil and red pepper flakes.
- Finish off by tasting and adjusting seasoning as needed. Top with grated Parmesan cheese and stir to melt into the dish.
Notes
This dish can be prepared in advance and reheats well. Adjust seasoning to taste before serving.
Nutrition
- Serving Size: 1 serving
- Calories: 550
- Sugar: 5g
- Sodium: 600mg
- Fat: 25g
- Saturated Fat: 12g
- Unsaturated Fat: 8g
- Trans Fat: 0g
- Carbohydrates: 55g
- Fiber: 3g
- Protein: 30g
- Cholesterol: 90mg
Keywords: Creamy Chicken Orzo, Sun-Dried Tomato Chicken, Easy Dinner Recipes
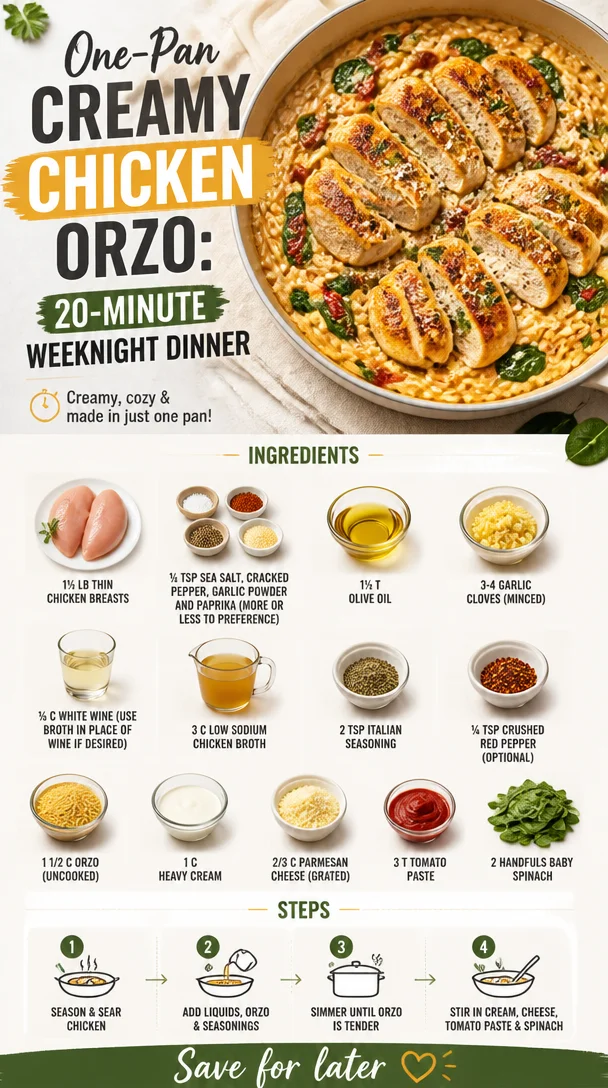
One-Pan Creamy Chicken Orzo: 20-Minute Weeknight Dinner
Creamy Orzo With Chicken: A Delightful Dish for Any Occasion
Hello, my fellow food lovers! Today, we’re diving into a dish that’s become a staple in my kitchen: Creamy Orzo with Chicken. This cozy, wholesome meal has a unique way of wrapping you up in its creamy goodness, making it perfect for weeknight dinners or even those special occasions. Whether you’re cooking for a loved one or yourself (hey, self-care with food is legit!), this dish is sure to deliver comfort and elegance without the fuss.
A Kitchen Memory to Relish
Let me take you back to a chilly autumn evening a few years ago. My friends and I decided to host a cozy gathering filled with hearty recipes and laughter. It was one of those nights where golden leaves swirled outside, and the air was tinged with the warmth of candles flickering on the dining table. I had planned to impress everyone with a very ambitious recipe for a traditional risotto. Spoiler alert: It didn’t go as planned!
Halfway through cooking, I realized I’d bitten off more than I could chew—pun intended—when I found myself standing over a bubbling pot, constantly stirring, and a bit frazzled. Suddenly, one of my friends stepped in and suggested we pivot to something easier yet elegantly delicious. That’s when we whipped together creamy orzo with chicken. Everyone jumped in to help, and, let me tell you, it became the star of the night. We served it straight from the stovetop, and amidst the laughter and clinking glasses, it dawned on me that sometimes, the best memories are created around the table with good food and even better company. Since then, this recipe has become my go-to for cozy get-togethers, and I can’t wait to share it with you!
Ingredients
Let’s gather our ingredients! Here’s what you’ll need to whip up this luxurious dish:
- 1½ lb thin chicken breasts: Tender and quick-cooking, these are perfect for this dish. If you’re after a leaner option, turkey breast can work too.
- ½ tsp sea salt: This brings out all the flavors; feel free to adjust based on your taste.
- Cracked pepper, garlic powder, and paprika: A touch of seasoning tailored to your palate! Adjust according to how bold you want the flavors.
- 1½ T olive oil: Adds richness and helps in a lovely sear for the chicken. You can substitute it with avocado oil for a similar effect.
- 3–4 garlic cloves (minced): Fresh garlic infuses the dish with irresistible flavor. You can use garlic powder in a pinch, but fresh truly elevates the dish.
- ⅓ c white wine: Adds depth! If you prefer not to cook with wine, feel free to substitute it with chicken broth or a splash of lemon juice.
- 3 c low sodium chicken broth: Helps cook the orzo and add flavor. Vegetable broth is a great substitute if you’re going for a vegetarian twist!
- 2 tsp Italian seasoning: A great shortcut to add herby goodness. You can substitute with a mix of dried basil, oregano, and thyme.
- ¼ tsp crushed red pepper (optional): For a bit of heat! Skip this if you prefer a milder dish.
- 1.5 c orzo (uncooked): This small pasta shape absorbs flavors beautifully. You could use other small pasta shapes if you’re in a pinch.
- 1 c heavy cream: This gives the dish its creamy texture! You can swap this with coconut cream or a dairy-free alternative if desired.
- ⅔ c Parmesan cheese (grated): Adds richness and a savory depth. Nutritional yeast is a great dairy-free alternative if you’re avoiding cheese.
- 3 T tomato paste: A touch of sweetness and acidity that helps balance the dish. You could try using fresh tomatoes or tomato sauce instead.
- 2 handfuls baby spinach: For a pop of color and nutrients! Kale or Swiss chard can be good substitutes if you prefer.
Step-by-Step Instructions
Are you ready to dive into cooking? Let’s do it!
-
Season the Chicken: Start by sprinkling the chicken breasts with sea salt, cracked pepper, garlic powder, and paprika on both sides. Give it a gentle rub to let those spices get cozy with the chicken. This will create a flavorful base for your dish!
-
Sear the Chicken: Heat the olive oil in a large skillet over medium-high heat. When the oil shimmers, add the chicken. Sear for about 5-7 minutes on each side, or until golden brown and cooked through (an internal temperature of 165°F). Don’t crowd the skillet; you’ll want to maintain that sizzle!
-
Remove the Chicken: Once cooked, remove the chicken from the skillet and set it aside to rest. Cover it with foil to keep it warm. Resting is crucial—the juices redistribute, keeping your chicken tender!
-
Sauté the Garlic: In the same skillet (don’t you dare wash it—flavors!), add the minced garlic. Sauté for about 30 seconds until fragrant, stirring to avoid burning. Your kitchen will start smelling divine at this point!
-
Deglaze with Wine: Pour in the white wine, scraping any lovely brown bits from the pan. This step is magic; it incorporates all the flavors. Let it simmer for about 2-3 minutes, allowing the wine to reduce a bit.
-
Add Broth and Seasonings: Pour in the chicken broth. Stir in the Italian seasoning and crushed red pepper (if using). Bring this flavorful mixture to a gentle boil.
-
Stir in the Orzo: Add the uncooked orzo to the skillet, stirring thoroughly so it doesn’t clump together. Lower the heat to a simmer and cook, stirring occasionally, until the orzo is al dente (about 10 minutes).
-
Add Cream and Cheese: Once the orzo is cooked, reduce the heat to low. Stir in the heavy cream, cheese, and tomato paste. This will create a creamy sauce that envelopes the orzo beautifully. Keep stirring until everything is combined and the cheese melts into magical gooeyness.
-
Incorporate Spinach: Toss in the baby spinach and stir until it wilts and integrates into the dish. The vibrant green color makes this dish visually appealing!
-
Return the Chicken: Slice the rested chicken and place it back in the skillet. Give everything a good stir to combine; this is where the magic happens!
Serving Suggestions
Now that your creamy orzo is ready, it’s time to plate. Serve it warm in shallow bowls, with a sprinkle of freshly grated Parmesan and a few cracks of black pepper on top. If you want to add an elegant touch, consider a light drizzle of extra virgin olive oil or a few extra spinach leaves as a garnish. Pair it with a crisp garden salad and a glass of white wine to round out this wonderful meal!
Recipe Variations
Let’s get creative! Here are some variations you can try out:
- Mushroom Medley: Add sautéed mushrooms along with the garlic for an earthy flavor.
- Herbed Lemon Zest: Finish with a squeeze of lemon juice and some lemon zest for brightness.
- Sun-Dried Tomato Bliss: Mix in chopped sun-dried tomatoes for a sweet and tangy twist.
- Vegetarian Delight: Swap chicken for chickpeas and use vegetable broth for a satisfying plant-based meal.
- Cheesy Broccoli: Add steamed broccoli florets for extra texture and nutrients—this makes it even more colorful!
Chef’s Notes
This recipe has evolved over the years in my kitchen, often changing based on what I have on hand or my cravings. One evening, I threw in some leftover roasted vegetables, and wow—what a delight! I also love to play around with different herbs based on the season, so don’t hesitate to customize! Cooking should be enjoyable and a little adventurous.
Also, a funny story: one time, I got distracted while stirring the orzo, and thanks to my curious cat, who found a way to sneak onto the counter, I nearly lost half the dish! Thankfully, a quick toss saved the day. Lesson learned: keep an eye on both your food and your furry friends!
FAQs and Troubleshooting
Q: My orzo turned mushy! What happened?
A: This could happen if it cooks too long. Keep an eye on it, as orzo cooks quickly! Check the package instructions for timing.
Q: Can I make it ahead of time?
A: While this dish is best fresh, you can prepare the components and combine them right before serving. Reheating can make the orzo stick together.
Q: What if I don’t have chicken broth?
A: No worries! Water will work in a pinch, but you might want to add extra seasoning.
Q: How do I store leftovers?
A: Store in an airtight container in the fridge for up to three days. Reheat gently on the stovetop with a splash of broth or cream to loosen it up.
Nutritional Info (per serving)
- Calories: 650
- Protein: 40g
- Carbs: 40g
- Fat: 30g
This is an estimate and can vary based on specific ingredient brands and preparation methods.
There you have it! Creamy Orzo with Chicken is not just a recipe; it’s a celebration of flavors, comfort, and togetherness. I hope you enjoy making it as much as I do, and may it create lovely memories around your table, just like it has in mine. Happy cooking!
PrintCreamy Orzo with Chicken

A cozy and wholesome dish that wraps you in creamy goodness, perfect for weeknight dinners or special occasions.
- Prep Time: 15 minutes
- Cook Time: 30 minutes
- Total Time: 45 minutes
- Yield: 4 servings 1x
- Category: Main Course
- Method: Stovetop
- Cuisine: Italian
- Diet: None
Ingredients
- 1½ lb thin chicken breasts
- ½ tsp sea salt
- Cracked pepper, garlic powder, and paprika to taste
- 1½ T olive oil
- 3–4 garlic cloves (minced)
- ⅓ c white wine
- 3 c low sodium chicken broth
- 2 tsp Italian seasoning
- ¼ tsp crushed red pepper (optional)
- 1.5 c orzo (uncooked)
- 1 c heavy cream
- ⅔ c Parmesan cheese (grated)
- 3 T tomato paste
- 2 handfuls baby spinach
Instructions
- Season the chicken breasts with sea salt, cracked pepper, garlic powder, and paprika.
- Sear the chicken in olive oil over medium-high heat for 5-7 minutes on each side until cooked through.
- Remove the chicken from the skillet and let it rest.
- Sauté minced garlic in the same skillet for about 30 seconds.
- Deglaze the pan with white wine and let it simmer for 2-3 minutes.
- Add chicken broth, Italian seasoning, and crushed red pepper; bring to a gentle boil.
- Stir in uncooked orzo and cook for about 10 minutes until al dente.
- Add heavy cream, cheese, and tomato paste; stir until combined.
- Incorporate baby spinach until wilted.
- Return the sliced chicken to the skillet and stir to combine.
Notes
Serve warm with extra Parmesan and a drizzle of olive oil. Great with a garden salad.
Nutrition
- Serving Size: 1 serving
- Calories: 650
- Sugar: 5g
- Sodium: 800mg
- Fat: 30g
- Saturated Fat: 15g
- Unsaturated Fat: 10g
- Trans Fat: 0g
- Carbohydrates: 40g
- Fiber: 3g
- Protein: 40g
- Cholesterol: 120mg
Keywords: creamy orzo, chicken, pasta, comfort food, main course

One-Pan Crispy Garlic Dill Potatoes for Weeknight Dinners
Garlicky Potatoes with Dill: A Comfort Food Delight
Hello, fellow food lovers! Today, I’m thrilled to share a dish that’s close to my heart and a staple in my kitchen: Garlicky Potatoes with Dill. If you’re looking for a side dish that perfectly marries earthy flavors and fresh herbs, you’re in for a treat. This recipe is not only easy to whip up but it’s also impressively versatile—perfect for both casual family dinners and fancy soirées.
Introduction
There’s something enchanting about a simple potato dish that warms the soul and brings a smile to your face. At Ivory Apron, we believe that good food doesn’t have to be complicated. This dish is the epitome of elegance meeting ease, with drag-you-in aromas of garlic and the refreshing zest of dill. Whether you’re a seasoned cook or just starting out, this recipe empowers you to create something divine without the stress.
Garlicky Potatoes with Dill finds its roots in my childhood memories of family gatherings. Picture this: a long table adorned with colorful dishes, laughter echoing, and the air thick with the delightful scent of garlic wafting from the kitchen. As a little girl, I remember hopping onto a stool to help my mom peel the potatoes. I would sneak little bites, savoring the creamy texture and the warm garlic-infused flavors. It was in those moments that my love for cooking blossomed—a passion that I’ve since transformed into my cherished recipe collection.
This dish embodies the joy of cooking together, sharing stories, and creating lasting memories. So, let’s tie on our aprons, gather our ingredients, and get started on this comforting journey!
Personal Story
Growing up, my family had a tradition of gathering every Sunday for what we called “Family Feast Day.” It was an opportunity to catch up, share laughs, and, of course, enjoy a hearty meal together. My grandmother was the kitchen queen, and her version of Garlicky Potatoes would steal the show every time. They weren’t just delicious; they were a symbol of love and the heart of our gatherings.
One particular Sunday, I remember trying to impress my grandmother by making the potatoes myself. But, as fate would have it, I accidentally grabbed the wrong spice jar, sprinkling cinnamon instead of salt! The look on my grandmother’s face was priceless. Instead of disappointment, she chuckled and turned it into a learning moment. We spent the afternoon perfecting the dish together, and I’ll never forget that lesson in kitchen resilience. It taught me that even the smallest mistakes could lead to the biggest memories—and that’s what this recipe is all about.
Ingredients
Let’s gather our stars for this delectable dish:
-
4 Medium Potatoes: I love using Yukon Gold or Russet potatoes for their creamy texture. Both are excellent choices! If you’re looking for a lower-carb option, try using cauliflower instead.
-
2 Cloves Garlic: These little wonders bring depth and flavor. If you adore garlic, feel free to add more! For a milder taste, you can roast the garlic first before adding it to the potatoes.
-
2 Tablespoons Fresh Dill: This herb adds a bright and fresh note that pairs beautifully with the potatoes. If you can’t find dill, fresh parsley or chives work well as substitutes.
-
Salt to Taste: Salt is essential for enhancing flavor. Always start with a little and adjust according to your preference.
Step-by-Step Instructions
Now that we have all our ingredients ready, let’s dive into the preparation! Here’s how to make Garlicky Potatoes with Dill:
-
Prep the Potatoes: Start by washing the potatoes thoroughly to remove any dirt. Then, peel them if you prefer; I usually keep the skins on for added texture and nutrition. Cut them into even-sized chunks (about 1-inch) to ensure they cook evenly.
-
Boil the Potatoes: Place the diced potatoes in a large pot filled with cold, salted water. This is important! Starting with cold water helps the potatoes cook evenly. Bring to a boil over high heat. Once boiling, reduce the heat to a simmer for about 15-20 minutes or until fork-tender. You want them soft but not mushy—consider this your first chef hack!
-
Sauté the Garlic: While the potatoes are cooking, peel and finely mince your garlic cloves. In a skillet, heat a tablespoon of olive oil over medium heat. Add the minced garlic and sauté for about 1-2 minutes, just until it becomes fragrant. Be careful not to let it burn (trust me, burnt garlic is a kitchen sin!)—you want that lovely golden hue.
-
Drain and Toss: Once the potatoes are cooked, drain them in a colander and return them to the pot while they’re still hot. This helps them absorb some moisture and flavor. Quickly pour the sautéed garlic and olive oil over the warm potatoes.
-
Add Dill and Season: Now comes the magic moment! Add the fresh dill and salt to the potatoes. Toss everything gently to combine, making sure not to mash them. You want all those delightful flavors to embrace each other without losing the integrity of the potato.
-
Taste and Adjust: Here’s where you get to play the chef! Take a small bite and see if it needs more salt or dill. Adjust to your liking, and don’t hesitate to sprinkle a bit more garlic if you love that bold flavor.
Serving Suggestions
When it comes to plating, think simple yet inviting. Transfer your Garlicky Potatoes to a beautiful serving dish, perhaps a rustic wooden bowl or a vibrant ceramic plate. Garnish with a few extra sprigs of dill for a pop of color. You can also drizzle a little olive oil on top for that finishing touch. Serve them alongside your favorite protein—grilled chicken, roasted fish, or a hearty vegetable stew—and watch them disappear!
Recipe Variations
Now, let’s get creative! Here are a few variations to take your Garlicky Potatoes to the next level:
-
Lemon Zest: Add the zest of one lemon for a bright, zingy flavor that complements the garlic beautifully.
-
Cheesy Delight: Sprinkle some grated parmesan or feta cheese on top before serving for a creamy, savory twist.
-
Spicy Kick: Toss in a pinch of red pepper flakes with the garlic for a delightful heat.
-
Herbed Mashed Potatoes: If you’re in the mood for mash, simply mash the cooked potatoes with some heavy cream and whip in fresh dill for a creamy side dish.
-
Smoky Flavor: Add a hint of smoked paprika to the garlic while sautéing for a subtle smokiness in every bite.
Chef’s Notes
This recipe is definitely a labor of love in my kitchen. I’ve played around with it over the years, adjusting flavors and ingredients until it felt just right. One of my favorite kitchen memories is when I made this for a group of friends who had no idea how easy it was to make. Their surprised expressions when they tasted them for the first time was priceless!
I’d love to hear what your version of Garlicky Potatoes turns out like! The beauty of cooking is making each recipe uniquely yours. Embrace the process, and don’t hesitate to experiment. The kitchen should be your playground!
FAQs and Troubleshooting
Here are a few common questions and potential pitfalls when making Garlicky Potatoes:
-
Q: My potatoes turned mushy. What happened?
A: This typically happens if they are boiled too long. Be sure to test regularly with a fork for doneness and drain them as soon as they’re tender. -
Q: What if I don’t have fresh dill?
A: No worries! Dried dill can be used as a substitute, but use less—about 1 teaspoon should do. You can also try fresh parsley or chives for a different flavor profile. -
Q: Can I make these potatoes ahead of time?
A: Absolutely! You can prepare the potatoes and toss them in garlic and dill up to a day in advance. Just reheat them gently before serving to retain their texture. -
Q: How can I prevent my garlic from burning?
A: Always sauté garlic over medium heat and keep an eye on it. If you notice it browning too quickly, lower the heat. Another trick is to add a splash of broth or water to the pan if you’re worried about it cooking too fast.
Nutritional Info (Optional)
While I love indulging in delightful flavors, I also keep an eye on nutrition. Each serving of Garlicky Potatoes contains a fair amount of fiber and vitamins from the potatoes, and the olive oil adds heart-healthy fats. Overall, it’s a balanced and wholesome side dish!
Thank you for joining me today at Ivory Apron! I hope you feel inspired to try these Garlicky Potatoes with Dill in your own kitchen. Remember, the essence of cooking is to enjoy the process and share love with others through food. Happy cooking, friends!
PrintGarlicky Potatoes with Dill

A simple and comforting dish featuring creamy potatoes infused with garlic and fresh dill.
- Prep Time: 15 minutes
- Cook Time: 20 minutes
- Total Time: 35 minutes
- Yield: 4 servings 1x
- Category: Side Dish
- Method: Boiling and Sautéing
- Cuisine: American
- Diet: Vegetarian
Ingredients
- 4 Medium Potatoes (Yukon Gold or Russet)
- 2 Cloves Garlic (minced)
- 2 Tablespoons Fresh Dill (chopped)
- Salt to Taste
- 1 Tablespoon Olive Oil
Instructions
- Prep the potatoes by washing and peeling them if desired, then cut into 1-inch chunks.
- Boil the potatoes in a large pot of cold, salted water, bringing to a boil and then simmer for 15-20 minutes until fork-tender.
- Sauté the minced garlic in olive oil over medium heat for 1-2 minutes until fragrant.
- Drain the cooked potatoes and return them to the pot while hot.
- Add the sautéed garlic and olive oil over the potatoes, then toss gently.
- Mix in the fresh dill and salt, adjusting to taste.
Notes
For variations, consider adding lemon zest, cheese, or spices like red pepper flakes.
Nutrition
- Serving Size: 1 serving
- Calories: 220
- Sugar: 1g
- Sodium: 300mg
- Fat: 10g
- Saturated Fat: 1g
- Unsaturated Fat: 8g
- Trans Fat: 0g
- Carbohydrates: 30g
- Fiber: 3g
- Protein: 4g
- Cholesterol: 0mg
Keywords: potatoes, garlic, dill, side dish, comfort food

Quick Dill Pickle Ranch Smash Chicken Tacos: Tangy Twist
Dill Pickle Ranch Smash Chicken Tacos: A Flavorful Twist
Hello, my fellow food enthusiasts! I’m excited to share a dynamite recipe that’s recently become a favorite in my home—Dill Pickle Ranch Smash Chicken Tacos. It’s not just a meal; it’s a flavorful experience that takes everyday ingredients and transforms them into something everyone will rave about. By combining the zesty tang of dill pickles with the creamy goodness of ranch, we’re creating not just tacos, but a culinary adventure that packs a punch.
A Flavorful Introduction
Imagine it’s a warm evening, the sun is setting, and the air is filled with the tantalizing aroma of taco night! You’re gathered around the kitchen table with friends or family, laughter bubbling over as you build your perfect taco. That’s the vibe these Dill Pickle Ranch Smash Chicken Tacos evoke, and trust me, once you give this recipe a try, you’ll want to make it a regular feature in your dinner repertoire.
Why “smash” chicken, you ask? Well, I’ve found that smashing your ground chicken in the skillet gives it a delightful crispy texture that’s simply irresistible. Combine that with the fresh flavors of dill pickles and the creamy ranch dressing, and you’ve got a taco filling that can’t be beat. It’s about bringing those simple ingredients together and letting them shine, creating a dinner that feels both elegant and homely.
Now, let’s embark on this delicious journey together. You’ll be thanking yourself for trying this recipe, so grab your apron, pour a glass of something refreshing, and let’s dive into the wonderful world of Dill Pickle Ranch Smash Chicken Tacos!
Personal Story
Funny enough, this dish was inspired by an unassuming trip to the local county fair. You know those spots that serve indulgent fair food? I found a taco truck that had a wild line of people keen to try their unique takes on classic tacos. Among them was a dill pickle-inspired creation. I took a chance, and boy, did it deliver! The tangy crunch combined with the warm, savory filling spoke to me on another level, and I was instantly transported back to my childhood, where my grandmother would whip up similar combinations using pickles from her garden.
Sweet and tangy memories of growing up filled my mind as I savored every bite. Naturally, I returned home determined to recreate that delightful flavor. Thus, Dill Pickle Ranch Smash Chicken Tacos were born! This recipe brings together the nostalgic flavors of my childhood and the enthusiasm I have for creatively enhancing our traditional taco nights.
Ingredients
Here’s what you’ll need to create these mouthwatering tacos:
-
1 pound Ground Chicken
A fantastic lean protein choice! If you’re looking for alternatives, ground turkey or even a plant-based option like crumbled tempeh or lentils works beautifully. -
1 teaspoon Garlic Powder
A flavor-packed seasoning that amps up the aroma. Feel free to adjust according to your taste—garlic lovers might want to add a pinch more! -
1 teaspoon Paprika
This gives a lovely warm notes to your filling. If you prefer a little spice, swap in chili powder for an extra kick! -
1 teaspoon Salt
Essential for elevating all the flavors in your taco filling—don’t skip it! -
1 teaspoon Black Pepper
Offers an excellent earthy balance. Use freshly cracked pepper if you can; it makes a difference. -
8 small Tortillas
Your base for the tacos. For a gluten-free option, try corn tortillas; they’re just as tasty! -
1 cup Shredded Mozzarella or Jack Cheese
A delicious, gooey melt is key here! Feel free to swap with your favorite melting cheese—cheddar is a great option too. -
1/2 cup Chopped Dill Pickles
The star of the show! If you’d like a sweet twist, consider using sweet pickles or even olives for a briny flavor profile. -
2 tablespoons Pickle Brine (Optional)
Adds an extra layer of flavor. Don’t throw out your pickle brine; it’s liquid gold! -
1 cup Shredded Cabbage
Adds a nice crunch and freshness. Any greens you love can work here—crunchy lettuce or even a slaw. -
1/2 cup Cottage Cheese
Blend this with ranch seasoning and a squeeze of lemon, and you’ve got a creamy dressing that brings everything together.
Step-by-Step Instructions
Now that we have our ingredients ready, let’s kick it into high gear!
-
Prepare Your Ingredients
Start off by getting all your ingredients ready. Chop the dill pickles, shred the cabbage, and measure everything out. Cooking is more fun when there’s less stress during the actual process! -
Cook the Ground Chicken
In a large skillet over medium heat, add a splash of olive oil. Once it’s nice and hot, add your ground chicken. Break it up with a spatula, and don’t forget to season with garlic powder, paprika, salt, and pepper. Cook until the chicken is golden and no longer pink—about 5-7 minutes. Here’s a tip: smashing the chicken down with your spatula while it cooks can lead to better browning and a fantastic texture! -
Add the Dill Pickles and Brine
When your chicken is nearly done, stir in the chopped dill pickles and pickle brine. Let it cook for an additional 2-3 minutes—this will allow the flavors to meld beautifully. The aroma will be heavenly! -
Warm the Tortillas
As your chicken is finishing up, warm your tortillas. You can do this in a dry pan for about 15-30 seconds on each side or wrap them in foil and pop them in the oven at low temperature. I prefer the skillet method—nothing beats that slight char! -
Make the Cottage Cheese Dressing
While everything else is cooking, blend your cottage cheese with ranch seasoning and a squeeze of lemon. This step is optional but oh-so-rewarding! The tanginess works perfectly with the savory chicken. -
Assemble the Tacos
Now comes the fun part—taco assembly! Take a warm tortilla, spoon a generous amount of your dill pickle ranch chicken filling, then sprinkle with shredded cheese and cabbage. Drizzle that delicious cottage cheese dressing on top for an indulgent finish.
Serving Suggestions
To elevate your taco night, try plating your tacos on a colorful platter with bowls of additional toppings—think fresh cilantro, avocado slices, or extra pickles for those who can’t get enough! Pair them with a side of tortilla chips and salsa for a complete feast, and don’t forget a refreshing beverage—perhaps a zesty homemade lemonade or your favorite cold brew!
Recipe Variations
-
Spicy Kick
Add chopped jalapeños or a sprinkle of crushed red pepper to the chicken mixture for a spicy version that brings the heat! -
Veggie Delight
Swap out half the ground chicken for black beans or roasted veggies for a delightful vegetarian option that still hits all the right flavor notes. -
Shrimp Tacos
Replace the chicken with some succulent shrimp for a seafood twist that’s just as delicious! -
BBQ Dill Pickle Chicken
Mix in some barbecue sauce with the chicken filling for a smoky spin that transforms these tacos into a whole new treat. -
Crave-Worthy Crunch
Top your tacos with crushed tortilla chips for an extra crunchy element that adds texture and makes your tacos even more fun to eat!
Chef’s Notes
This recipe has evolved over time; initially, I only used the ground chicken and classic toppings. As I experimented with flavors, I discovered that the mixture of dill pickle and ranch allows everyone to enjoy familiar tastes while embracing something exciting. Cooking is all about discovery and adaptation, so don’t hesitate to make this recipe your own—add your personal flair!
Remember, not every taco needs to be perfect. Embrace the messiness; that’s part of the fun! Find joy in cooking, and remember it’s all about gathering around the table and enjoying magnificent moments.
FAQs and Troubleshooting
-
What if my chicken is dry?
If your chicken is drying out, try cooking it over lower heat and be sure not to overcook it. Smash and stir, so it gets evenly cooked but doesn’t dry out! -
Can I use a different type of cheese?
Absolutely! Feel free to use any melting cheese you love. Pepper jack for a kick or a classic cheddar would work wonderfully! -
How can I make this dish healthier?
You can swap out ground chicken for leaner cuts or even go for a plant-based protein. Whole wheat or corn tortillas are also healthier options! -
What sides go with these tacos?
Guacamole and chips, a light corn salad, or even a simple black bean salad make excellent companions for these delightful tacos!
Nutritional Info (Optional)
While exact nutrition can vary depending on the ingredients used, here’s a rough estimate per serving (2 tacos):
- Calories: 350
- Protein: 25g
- Carbohydrates: 30g
- Fat: 14g
Conclusion
And there you have it: Dill Pickle Ranch Smash Chicken Tacos! I hope you’re feeling inspired to head into your kitchen and whip up this delightful meal that brings together flavors, textures, and some nostalgic warmth. Remember to enjoy the process and have fun with your food! Good cooking is all about experimentation, connection, and joy. Until next time, keep gathering, keep creating, and as always, happy cooking!
PrintDill Pickle Ranch Smash Chicken Tacos

A flavorful twist on tacos featuring zesty dill pickles and creamy ranch smashed chicken.
- Prep Time: 15 minutes
- Cook Time: 10 minutes
- Total Time: 25 minutes
- Yield: 4 servings 1x
- Category: Main Course
- Method: Stovetop
- Cuisine: Mexican
- Diet: None
Ingredients
- 1 pound Ground Chicken
- 1 teaspoon Garlic Powder
- 1 teaspoon Paprika
- 1 teaspoon Salt
- 1 teaspoon Black Pepper
- 8 small Tortillas
- 1 cup Shredded Mozzarella or Jack Cheese
- 1/2 cup Chopped Dill Pickles
- 2 tablespoons Pickle Brine (Optional)
- 1 cup Shredded Cabbage
- 1/2 cup Cottage Cheese
Instructions
- Prepare your ingredients. Chop the dill pickles, shred the cabbage, and measure everything out.
- Cook the ground chicken in a skillet over medium heat, seasoning with garlic powder, paprika, salt, and pepper until golden—about 5-7 minutes.
- Add the chopped dill pickles and pickle brine to the chicken, cooking for an additional 2-3 minutes.
- Warm your tortillas in a dry pan for about 15-30 seconds on each side.
- Make the cottage cheese dressing by blending with ranch seasoning and a squeeze of lemon.
- Assemble the tacos with the filling, shredded cheese, cabbage, and drizzle the cottage cheese dressing on top.
Notes
Feel free to experiment with additional toppings or switch ingredients for a personalized twist.
Nutrition
- Serving Size: 2 tacos
- Calories: 350
- Sugar: 2g
- Sodium: 400mg
- Fat: 14g
- Saturated Fat: 5g
- Unsaturated Fat: 7g
- Trans Fat: 0g
- Carbohydrates: 30g
- Fiber: 3g
- Protein: 25g
- Cholesterol: 70mg
Keywords: tacos, chicken, dill pickle, ranch, comfort food

Minute Creamy Garlic-Lime Cilantro Sauce for Weeknights
Creamy Garlic Lime Cilantro Sauce: Elevate Your Dish with a Zesty Touch
Welcome, food lovers! Today, I’m excited to share a vibrant, zesty, and oh-so-creamy sauce that will become a staple in your kitchen: Creamy Garlic Lime Cilantro Sauce. This sauce brings a burst of flavor to anything you drizzle it on, making it a perfect addition to grilled meats, tacos, salads, or even as a dip for fresh veggies.
But before I dive into the details of this delightful recipe, let’s have a little chat about the heart of this dish and why it holds a special place in my culinary journey.
A Culinary Journey: My Love for Sauces
I still remember the first time I made this sauce. Picture this: a warm summer evening, the sun setting in a glorious burst of colors, and my friends gathered around my dining table. I had just grilled some chicken and needed a killer sauce to bring it all together. As I grabbed a bunch of fresh cilantro and those bright, zesty limes, I could feel the excitement bubbling inside me.
My kitchen quickly filled with the inviting aroma of garlic sizzling away. The clang of pots, laughter from friends, and clinking of glasses created an atmosphere of joy and warmth. Once I finished whipping up this creamy green concoction, I served it up, and the look of delight on my friends’ faces was priceless. As they dipped their forks into the sauce, they couldn’t get enough! It transformed the ordinary meal into something extraordinary.
That night not only solidified my love for cooking but also taught me the magic of a great sauce and its ability to pull everyone together. So, let’s get cooking and make your own unforgettable moments around the table with this Creamy Garlic Lime Cilantro Sauce!
Ingredients
For the Creamy Garlic Lime Cilantro Sauce, you’ll need:
-
1 bunch of Cilantro (stems and all)
Cilantro adds a fresh, herbal flavor that’s absolutely essential for this sauce. If you’re not a fan of cilantro, you can substitute it with parsley for a milder taste. -
1-2 Limes (juiced)
Lime juice gives the sauce its bright, tangy kick. Freshly squeezed is always best. If you don’t have limes, lemon juice works as a great substitute too! -
1-2 Jalapeños (stem removed)
These little green peppers pack a punch and add a subtle heat to the sauce. If you prefer less spice, you can opt for a single jalapeño or remove the seeds before mixing. -
5-10 cloves Garlic
Garlic is the backbone of this sauce, giving it that rich, savory flavor. Feel free to adjust the amount based on your garlic love (or tolerance!). Roasted garlic can be swapped for a more mellow flavor. -
2 cups Mayonnaise (Hellman’s or Duke’s preferred)
Mayonnaise creates a creamy base for the sauce and balances all the flavors beautifully. If you’re looking for a lighter option, Greek yogurt can be a wonderful substitute.
Step-by-Step Instructions
Now that we have our ingredients lined up and ready to go, let’s get started on making your own Creamy Garlic Lime Cilantro Sauce!
-
Prep Your Ingredients
Begin by washing the cilantro thoroughly to remove any dirt. Pat it dry with a kitchen towel or let it air-dry. Next, cut the limes in half and have your juicer ready. Slice the jalapeños in half and remove the seeds if you prefer milder heat. Lastly, peel your garlic cloves.Chef Tip: Always taste your jalapeños before adding them. The heat level can vary significantly from pepper to pepper!
-
Blend the Sauce
In a blender or food processor, combine the cilantro, lime juice, jalapeños, garlic, and mayonnaise. Secure the lid and blend on high until the mixture is smooth and creamy. Take a moment to admire that vibrant color you’re creating!Chef Insight: If the sauce feels too thick, add a teaspoon of water at a time until you reach your desired consistency. Just be cautious not to dilute the flavor!
-
Taste and Adjust
After blending, take a small spoonful and taste the sauce. Does it need a little more lime juice? A pinch of salt? This is the fun part! Adjust to your preference but remember, the flavors will intensify a bit when chilled.Fun Fact: For a twist, try adding a touch of honey or agave for a sweet contrast to the zesty lime!
-
Chill Out
Transfer the sauce into an airtight container and let it chill in the fridge for at least 30 minutes. This allows the flavors to meld beautifully. Plus, a chilled sauce is a refreshing surprise in warm weather! -
Serve and Enjoy
Once it’s time to serve, give the sauce a good stir. Drizzle it over your prepared dish, or serve it as a dipping option on the side. Trust me, this sauce never fails to impress!Serving Tip: Use a squeeze bottle for easy drizzling presentation. It looks fancy and is so much easier for your guests to use!
Serving Suggestions
Are you ready to plate this dreamy sauce? Here are some ideas to make your dishes shine:
- Over Grilled Chicken or Fish: Drizzle the sauce generously over your protein for a pop of flavor!
- In Tacos: Use it as a topping for tacos, adding a creamy layer that ties all the ingredients together beautifully.
- With Fresh Veggies: Serve it as a dip alongside an array of colorful veggies for a delightful appetizer.
- On Salads: Toss your greens with this sauce for an elevated salad dressing that packs a punch.
Recipe Variations
Want to switch things up a bit? Here are some fun variations you can try:
- Spicy Cilantro Lime Sauce: Add a couple of pinches of cayenne pepper for an extra kick!
- Creamy Avocado Twist: Blend in half an avocado for a richer, creamier texture.
- Ginger-Lime Sauce: Incorporate a small piece of fresh ginger for a hint of warmth and spice.
- Vegan Version: Swap out mayonnaise for vegan mayonnaise or silken tofu for a creamy but plant-based treat!
Chef’s Notes
Over the years, I’ve played around with this recipe to make it my own. There have been experiments with herbs, spices, and even yogurt alternatives! One fun memory is adding a hint of orange zest at a dinner party — it turned out to be a delightful surprise for my guests. The result? A deliciously fresh and zesty citrus twist that I still love to sprinkle in from time to time.
Cooking should always be an adventure, so don’t hesitate to experiment and make this sauce truly yours!
FAQs and Troubleshooting
Q1: Can I freeze this sauce?
Absolutely! You can freeze the sauce in an airtight container. When you’re ready to use it, just thaw in the fridge overnight and give it a good stir.
Q2: Why is my sauce too thick?
If your sauce turns out thicker than you’d like, add a bit of water or additional lime juice until you reach your desired consistency.
Q3: The sauce is too spicy for me—what should I do?
If you find your sauce has too much heat, consider mixing in additional mayonnaise or a dollop of sour cream to mellow it out.
Q4: Can I use dried herbs instead of fresh cilantro?
While fresh cilantro is recommended, if you’re in a pinch, you can swap with dried cilantro. Use about 1 tablespoon, but it won’t have that same vibrant flavor.
Nutritional Info
(optional)
While the details can vary based on your specific ingredients and portion sizes, a serving of this creamy sauce typically contains around 100 calories, with fats primarily from the mayonnaise, which also provides some protein.
So there you have it, my friends—a delightful recipe for Creamy Garlic Lime Cilantro Sauce that will elevate your meals and bring people together around the table. Remember, cooking is all about enjoyment and connection. I can’t wait to see how you make this recipe your own! Now, tie on that apron, grab your ingredients, and let’s create something special. Cheers!
PrintCreamy Garlic Lime Cilantro Sauce

A vibrant and zesty sauce that elevates grilled meats, tacos, salads, and veggies with its creamy garlic and lime flavors.
- Prep Time: 10 minutes
- Cook Time: 5 minutes
- Total Time: 45 minutes
- Yield: 4 servings 1x
- Category: Sauce
- Method: Blending
- Cuisine: Mexican
- Diet: Vegetarian
Ingredients
- 1 bunch of Cilantro (stems and all)
- 1–2 Limes (juiced)
- 1–2 Jalapeños (stem removed)
- 5–10 cloves Garlic
- 2 cups Mayonnaise (Hellman’s or Duke’s preferred)
Instructions
- Prep your ingredients by washing cilantro, juicing limes, and preparing jalapeños and garlic.
- Blend the cilantro, lime juice, jalapeños, garlic, and mayonnaise in a blender until smooth and creamy.
- Taste the sauce and adjust lime juice or salt as needed.
- Chill the sauce in an airtight container for at least 30 minutes.
- Serve by drizzling it over dishes or using it as a dip.
Notes
For a milder flavor, substitute cilantro with parsley and taste jalapeños before adding.
Nutrition
- Serving Size: 2 tablespoons
- Calories: 100
- Sugar: 1g
- Sodium: 200mg
- Fat: 10g
- Saturated Fat: 1g
- Unsaturated Fat: 9g
- Trans Fat: 0g
- Carbohydrates: 5g
- Fiber: 0g
- Protein: 1g
- Cholesterol: 10mg
Keywords: sauce, creamy, garlic, lime, cilantro, dip, taco, salad

Basil Lemonade
Refreshing Basil Lemonade: A Flavorful Twist for Your Summer Gatherings
Hello, friends! Get ready to quench your thirst with a twist on a classic summer drink—Basil Lemonade! This sipper is not just a refreshing treat, but also an elevated way to impress your guests with simple but sophisticated flavors. As you’re sitting around your table, nothing says “I’m a thoughtful host” quite like serving up a drink that’s as delightful to look at as it is to taste. So grab your apron, and let’s dive into the aromatic world of basil lemonade!
A Sip of Nostalgia: My Basil Adventure
One of my fondest memories of summer involves endless afternoons spent at my grandmother’s house. She had a beautiful little garden filled with herbs, vegetables, and flowers, but her basil plants stood out the most. I remember the rich scent that would envelop you as you approached her kitchen. She would pick fresh basil leaves and toss them into a bright lemonade mixture, sending us kids into a whirlwind of excitement. This natural and vibrant drink became a staple of our summer BBQs, and my love for combining fresh herbs with beverages began there.
Fast forward to today, and that same sweet, tangy goodness dances across my taste buds every time I whip up a batch of basil lemonade. It has become my go-to drink for hot summer days, pool parties, and cozy backyard gatherings. Making it is like taking a trip down memory lane while delighting everyone around me. Trust me, as you make it and share it, you’ll create your own beautiful moments—just like I did.
Ingredients: What You’ll Need
Here’s a quick breakdown of the ingredients you’ll need to create your own basil lemonade. Each one brings something special to the table!
-
1 cup fresh basil leaves
Basil adds a fragrant, herbaceous note to the lemonade, elevating it beyond your average drink. When picking basil, look for vibrant, green leaves without blemishes. If fresh basil isn’t available, try using 2 tablespoons of dried basil instead—but be aware that the flavor will be more concentrated! -
1 cup lemon juice
Freshly squeezed lemon juice brings that bright, tangy kick we love. You can substitute with store-bought if you’re in a pinch, but nothing beats the refreshing taste of freshly squeezed! -
1 cup sugar
Sugar balances the tartness of the lemon. For a healthier alternative, consider using honey or agave syrup; just remember these will alter the flavor profile slightly, which can also be delightful. -
4 cups water
Water acts as the base for your beverage, diluting the potent flavors to create a refreshing drink. If you want to infuse even more flavor, try using sparkling water for a bubbly twist or herbal tea for an added layer of taste.
Step-by-Step Instructions: Let’s Make Some Magic!
Ready to shake things up? Follow these simple steps to create your very own basil lemonade.
-
Prepare Your Ingredients
Start by gathering all your ingredients and measuring them out. It’s always best to have everything at your fingertips before you start mixing, so you can flow through the recipe effortlessly. -
Create a Basil Infusion
In a medium saucepan, combine 1 cup of water and the fresh basil leaves. Bring this mixture to a simmer over medium heat, allowing the basil to release its oils and aroma. This process, known as infusing, is crucial—it’s where all that delicious flavor begins to develop. Stir gently for about 5 minutes, then remove from heat and let it cool for at least 15 minutes. -
Combine the Lemonade Base
While your basil is steeping, you can prepare the lemon juice. If you haven’t already, squeeze enough lemons to yield 1 cup of juice. Now, in a separate large pitcher, mix the lemon juice and sugar together. Stir until the sugar is fully dissolved. The beauty of this step is that if you taste-test and prefer it sweeter, don’t hesitate to add a bit more sugar! -
Strain the Basil
Once your basil infusion has cooled down, strain the mixture using a fine mesh strainer into your pitcher with the lemonade base. Discard the solid basil leaves (or compost them if you’re feeling eco-friendly!). This is where the rich basil flavor really shines in your lemonade! -
Add the Remaining Water
Now comes the fun part! Add the remaining 3 cups of water to the pitcher. Stir well to combine all the flavors, and if you’re like me, sneak a little taste. Adjust with more sugar or water if necessary. This is your chance to tweak the lemonade to perfection. -
Chill and Serve
Refrigerate the basil lemonade for at least an hour to let the flavors meld together. When you’re ready to serve, pour it over ice in a glass. This drink doesn’t just quench thirst; it looks stunning too, so feel free to garnish with fresh lemon slices and additional basil leaves.
Serving Suggestions: Elevate Your Presentation
Presentation is key when serving up basil lemonade! Pour the drink into highball glasses filled with crushed ice and add a sprig of fresh basil on top for that extra flair. You can even rim the glasses with sugar for that fun cocktail vibe! For an Instagram-worthy moment, slice lemon wheels and float them in the drink. A colorful straw or a stylish drink stirrer can add the finishing touch!
Recipe Variations: Get Creative!
Now that you’ve mastered the classic basil lemonade, why not experiment a little? Here are some creative twists you can try:
-
Citrus Basil Lemonade: Add in a splash of orange or lime juice to the lemonade for a zesty twist.
-
Berry Basil Lemonade: Muddle fresh strawberries or raspberries with the basil infusion to add a deeply fruity flavor.
-
Cucumber Basil Lemonade: Add thin slices of cucumber to your mixture; this brings a refreshing coolness that complements the basil beautifully.
-
Spicy Basil Lemonade: For those who love a kick, add a thin slice of jalapeño to the basil infusion while it simmers.
-
Sparkling Basil Lemonade: Substitute sparkling water for still water to give your drink a bubbly, celebratory twist!
Chef’s Notes: Cooking Stories and Tips
Over the years, I’ve experimented with countless variations of lemonade, but this basil version holds a special place in my heart—and my kitchen. I once had a hilarious mishap when attempting to make a basil-infused syrup; I mistakenly grabbed mint instead of basil in a dimly lit kitchen. Let’s just say the flavors didn’t mesh quite as I hoped, but it turned out to be a delicious mojito base instead! Every kitchen adventure teaches us something new, so never fear experimenting.
I’ve also learned to embrace simplicity. Not every gathering needs elaborate drinks; sometimes, the simplest things, like this basil lemonade, can hold the most flavor and hold the sweetest memories.
FAQs and Troubleshooting
-
Can I use dried basil instead of fresh?
Yes! Dried basil can be used, but remember to reduce the amount to about 2 tablespoons, as its flavor is more concentrated. -
What if my lemonade is too sweet?
If you find your lemonade too sweet, simply add a touch more lemon juice or extra water to balance the sweetness. -
How long can I store leftover lemonade?
You can keep the basil lemonade stored in an airtight container in the refrigerator for up to 4 days. Just give it a good stir before serving, as the ingredients may settle. -
Can I make this ahead of time?
Absolutely! In fact, letting it chill overnight enhances the flavors. Just keep it chilled, and you’ll have a refreshing drink ready to go when guests arrive.
Nutritional Info
While I typically focus on the joy of cooking rather than the numbers, here’s a brief overview for those curious about what’s in their glass:
- Serving Size: 1 cup (240ml)
- Calories: Approximately 120 calories
- Sugar: 24g (varies depending on sweetness preference)
Remember, enjoying delicious drinks like this is all about balance and moderation!
So there you have it! Your journey to crafting a delectable basil lemonade is not just about mixing drink ingredients; it’s forging connections around the table and cherishing the moments that matter. Dive into this fragrant blend of lemon and basil, and feel free to share your own kitchen stories and variations with me. Until next time, keep those aprons tied and the flavors fresh! Cheers!
PrintRefreshing Basil Lemonade

A flavorful twist on a classic summer drink, this basil lemonade is refreshing and perfect for gatherings.
- Prep Time: 15 minutes
- Cook Time: 10 minutes
- Total Time: 25 minutes
- Yield: 4 servings 1x
- Category: Beverage
- Method: Infusion
- Cuisine: American
- Diet: Vegan
Ingredients
- 1 cup fresh basil leaves
- 1 cup lemon juice
- 1 cup sugar
- 4 cups water
Instructions
- Prepare your ingredients by gathering and measuring them out.
- Create a basil infusion by combining 1 cup of water and fresh basil in a saucepan, simmer for 5 minutes, then cool.
- Combine the lemon juice and sugar in a pitcher until dissolved.
- Strain the cooled basil infusion into the pitcher, discarding the leaves.
- Add the remaining 3 cups of water and stir to combine.
- Chill in the refrigerator for at least an hour before serving over ice.
Notes
For an Instagram-worthy presentation, garnish with lemon slices and fresh basil leaves. Experiment with variations like citrus, berry, or cucumber basil lemonade.
Nutrition
- Serving Size: 1 cup
- Calories: 120
- Sugar: 24g
- Sodium: 0mg
- Fat: 0g
- Saturated Fat: 0g
- Unsaturated Fat: 0g
- Trans Fat: 0g
- Carbohydrates: 30g
- Fiber: 0g
- Protein: 0g
- Cholesterol: 0mg
Keywords: basil lemonade, summer drinks, refreshing beverages
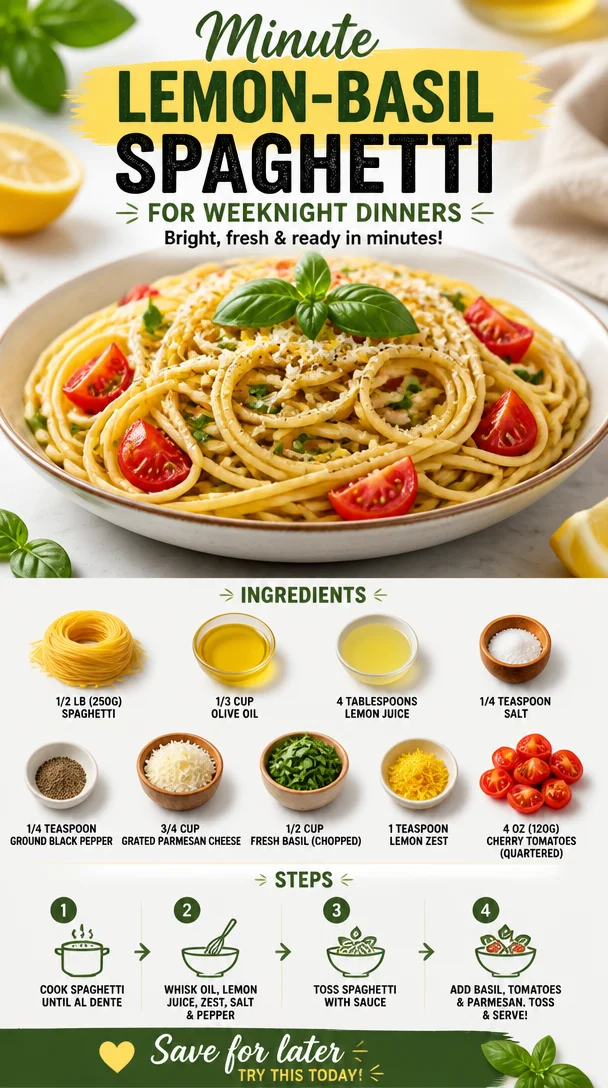
Minute Lemon-Basil Spaghetti for Weeknight Dinners
Lemon-Basil Spaghetti: A Dish to Brighten Your Day
Hello, lovely food enthusiasts! Today, we’re diving into a dish that is equal parts fresh, zesty, and utterly delightful: Lemon-Basil Spaghetti. This vibrant dish embodies my cooking philosophy at Ivory Apron — it’s elegant but never intimidating, perfect for both a weeknight dinner and a special gathering.
Picture this: it’s a sun-drenched afternoon, the air is fragrant with fresh basil, and you have a bubbling pot of pasta waiting to embrace a silky, lemony sauce. Sounds dreamy, right? This Lemon-Basil Spaghetti is destined to become a go-to recipe in your culinary arsenal. With its refreshing flavors, it’s like a little sunshine on your plate, inviting everyone to the table for a relaxed, joyful meal. Let’s get cooking!
A Taste of Nostalgia
When I think of lemon-basil spaghetti, I’m transported back to a charming Italian bistro that I stumbled upon during a trip to the Amalfi Coast. The sun was setting, casting a golden hue over everything, and the atmosphere was warm and inviting. I ordered a simple plate of spaghetti tossed with fresh basil, bright lemon, and an ample sprinkle of Parmesan.
With each bite, I was enveloped in the flavors of summer. It was a dish prepared with such love and simplicity that it felt incredibly personal. This inspired me to recreate that feeling when I returned home, experimenting in my kitchen until I found the perfect balance of tangy, herbal, and cheesy goodness. This Lemon-Basil Spaghetti is my homage to that incredible meal, and I can’t wait for you to experience it too.
Ingredients
Here’s what you’ll need to create this delightful dish:
-
1/2 lb (250g) spaghetti: This classic pasta is perfect for capturing the light, zesty sauce. Feel free to substitute with linguine or fettuccine for a thicker bite.
-
1/3 cup olive oil: Use a good-quality extra virgin olive oil for depth of flavor. If you want to keep it lighter, avocado oil can be a lovely alternative.
-
4 tablespoons lemon juice: Freshly squeezed is a must! It brightens the dish beautifully. In a pinch, bottled lemon juice will work, but I promise you, the fresh stuff is worth it!
-
1/4 teaspoon salt: This enhances all the flavors, but adjust it to your taste! If you’re watching your sodium intake, consider using a salt substitute.
-
1/4 teaspoon ground black pepper: For a little kick! White pepper could also work here if you’re aiming for a milder flavor.
-
3/4 cup grated Parmesan cheese: The real deal! Choose a good-aged Parmesan for an exquisite depth of flavor. If you’re vegan or dairy-free, a nut-based cheese can be a fun swap!
-
1/2 cup fresh basil (chopped): This herb is the star of the show! Swap for arugula or spinach in a pinch, but fresh basil brings that bright, fragrant note that’s essential.
-
1 teaspoon lemon zest: A game-changer for flavor! If you don’t have a zester, a fine grater works too. You could also experiment with orange zest for a different twist.
-
4 oz (120g) cherry tomatoes (quartered): These little jewels add a pop of sweetness and color. Grape tomatoes or even sun-dried tomatoes can be a fun alternative.
Step-by-Step Instructions
Ready to create some magic in your kitchen? Let’s get started!
-
Boil the Pasta:
Start by filling a large pot with water, bringing it to a boil over high heat. Add a generous pinch of salt. Once it’s bubbling, add in your spaghetti. Cook according to the package instructions until al dente—you want it to have a slight bite!Chef Tip: Reserve about 1/2 cup of the pasta water before draining. This starchy liquid is a secret weapon for making sauces creamy without adding extra ingredients!
-
Prepare the Lemon-Basil Sauce:
While your pasta is cooking, whisk together the olive oil, lemon juice, salt, and black pepper in a large mixing bowl. This creates a light and zesty dressing.Chef Hack: If you want to amp up the flavor, try adding a pinch of red pepper flakes or a minced garlic clove for an extra kick!
-
Combine Pasta and Sauce:
Drain your pasta and immediately add it to the bowl with your lemon dressing. Toss well to coat the spaghetti evenly.Tip: If the pasta seems too dry, add a little bit of that reserved pasta water until you achieve the desired consistency!
-
Add the Cheese and Herbs:
Stir in the grated Parmesan, fresh basil, and zest of one lemon. This is where the dish starts to come alive! The cheese will start to melt into the warm pasta, enhancing its flavor.Chef Insight: If you like a creamier texture, feel free to add an extra sprinkle of cheese or a splash of cream at this stage. Just remember, keep it simple and fresh!
-
Incorporate the Cherry Tomatoes:
Gently fold in the quartered cherry tomatoes. They add a burst of color and sweetness that contrasts beautifully with the lemon and basil.Fun Hack: If you want to carmelize them for extra sweetness, you can sauté them in a skillet with olive oil for a few minutes before adding to the pasta.
-
Taste and Adjust:
Before serving, sample your pasta. Adjust it with more salt, lemon juice, or cheese if needed.Chef’s Tip: Always taste before serving! Adjusting flavors at this stage can take your dish from good to absolutely fabulous in a matter of seconds.
Serving Suggestions
To serve, grab a large bowl or individual plates and plate the spaghetti with a flourish! You can top each serving with additional grated Parmesan, a sprinkle of fresh basil, and a drizzle of olive oil for that extra touch of elegance. Maybe a lemon wedge on the side for an added pop of color and freshness? Trust me, your guests will be wowed!
Recipe Variations
Want to mix things up? Here are a few exciting twists on this Lemon-Basil Spaghetti:
-
Lemon-Basil Pesto: Blend fresh basil, lemon juice, nuts (like pine nuts or walnuts), and Parmesan for a scrumptious pesto that can replace the dressing!
-
Add Protein: Toss in grilled chicken, shrimp, or chickpeas for a heartier meal.
-
Veggie Boost: Add steamed asparagus, zucchini ribbons, or spinach for a nutritional punch and an added layer of flavor.
-
Creamy Twist: Stir in cream cheese or mascarpone for a richer, creamier sauce.
-
Spicy Kick: Mix in some sautéed chili flakes or fresh sliced jalapeños for a spicy twist!
Chef’s Notes
This Lemon-Basil Spaghetti is incredibly versatile. Over the years, I’ve played with the ingredients, tweaking them to fit seasonal produce and whatever I have on hand. It’s amazing how simply changing the protein or throwing in some seasonal vegetables can completely transform the dish.
I remember one dinner party when I decided to add grilled shrimp. The combination with the lemon and basil was a stunning hit! My friends are still talking about it today — so never hesitate to experiment and make this dish uniquely yours!
FAQs and Troubleshooting
1. What can I do if my spaghetti is too sticky?
If your spaghetti clumps together, it might be undercooked or lacked enough salt in the water. Always ensure you’re salting the water well and tossing the pasta in the sauce while it’s warm for optimal coating.
2. How can I store leftovers?
You can keep leftovers in an airtight container in the fridge for up to three days. Reheat gently in a saucepan, adding a splash of olive oil and a little reserved pasta water to loosen it back up.
3. Can I use dried herbs instead of fresh?
Absolutely! While fresh basil is ideal, dried herbs can work in a pinch. Just remember that dried herbs are more potent, so use about one-third of the amount.
4. Can I make this dish vegan?
Definitely! Swap out the Parmesan for a dairy-free option, and consider using nutritional yeast for that cheesy flavor. Also, replace the butter in the sauce if you choose to add any.
Nutritional Info
While I usually focus on flavor and enjoyment rather than strict nutrition, it’s worth noting that this dish is packed with fresh ingredients! It’s light yet fulfilling, making it a wonderful addition to any meal plan.
So there you have it — a refreshing Lemon-Basil Spaghetti recipe that’s sure to bring a little brightness to your table. Tie on that apron, and let’s create some delicious memories together! Whether you’re hosting a dinner party or just craving a cozy night in, this dish is ready to shine. Happy cooking!
PrintLemon-Basil Spaghetti
A zesty and fresh spaghetti dish combining vibrant lemon and aromatic basil, perfect for both weeknight dinners and special gatherings.
- Prep Time: 15 minutes
- Cook Time: 10 minutes
- Total Time: 25 minutes
- Yield: 4 servings 1x
- Category: Main Course
- Method: Boiling and Tossing
- Cuisine: Italian
- Diet: Vegetarian
Ingredients
- 1/2 lb (250g) spaghetti
- 1/3 cup olive oil
- 4 tablespoons lemon juice
- 1/4 teaspoon salt
- 1/4 teaspoon ground black pepper
- 3/4 cup grated Parmesan cheese
- 1/2 cup fresh basil (chopped)
- 1 teaspoon lemon zest
- 4 oz (120g) cherry tomatoes (quartered)
Instructions
- Boil the Pasta: Start by filling a large pot with water, bringing it to a boil over high heat. Add a generous pinch of salt. Once it’s bubbling, add in your spaghetti. Cook according to the package instructions until al dente—you want it to have a slight bite!
- Prepare the Lemon-Basil Sauce: While your pasta is cooking, whisk together the olive oil, lemon juice, salt, and black pepper in a large mixing bowl.
- Combine Pasta and Sauce: Drain your pasta and immediately add it to the bowl with your lemon dressing. Toss well to coat the spaghetti evenly.
- Add the Cheese and Herbs: Stir in the grated Parmesan, fresh basil, and zest of one lemon.
- Incorporate the Cherry Tomatoes: Gently fold in the quartered cherry tomatoes.
- Taste and Adjust: Before serving, sample your pasta. Adjust it with more salt, lemon juice, or cheese if needed.
Notes
For added flavor, consider experimenting with red pepper flakes or garlic. This dish is highly adaptable; feel free to include grilled protein or seasonal vegetables.
Nutrition
- Serving Size: 1 serving
- Calories: 350
- Sugar: 5g
- Sodium: 400mg
- Fat: 12g
- Saturated Fat: 4g
- Unsaturated Fat: 6g
- Trans Fat: 0g
- Carbohydrates: 45g
- Fiber: 3g
- Protein: 15g
- Cholesterol: 30mg
Keywords: spaghetti, lemon, basil, Italian, vegetarian

Beginner-Friendly Homemade Fruit Tart: 6-Ingredient Recipe
Delight in Every Slice: Homemade Fruit Tart Recipe
Hello, fellow food lovers! It’s Savannah Pierce here from Ivory Apron, and today we’re diving into the wonderful world of homemade fruit tarts. There’s something simply magical about the vibrant colors and refreshing flavors of a fruit tart, wouldn’t you agree? Not only do they look stunning on any table, but they also taste like a slice of summer, no matter what the season!
Imagine this: a buttery, flaky crust cradling a creamy, dreamy filling, all topped with an array of freshly sliced fruits glistening like jewels. It’s the perfect dessert for any occasion, from casual family dinners to elegant gatherings. And the best part? You don’t need to be a pastry chef to impress your guests with this beauty. All it takes is a little guidance and a sprinkle of love!
In this blog post, I’ll take you through my cherished fruit tart recipe step by step. You’ll hear some of my kitchen stories, get a taste of the techniques that make this dessert shine, and discover ways to customize it to suit your taste. So, tie on that apron, grab your whisk, and let’s create a dessert that’ll bring smiles all around the table!
A Slice of Nostalgia
Let me take you back to my childhood for a moment. I can still picture the scene—my grandmother’s kitchen was always buzzing with activity, the air fragrant with the delicious aromas of baked goods and fresh fruits. Every summer, when the fruits were at their peak, she’d gather us around the table to make her famous fruit tart.
The process was a family affair. My siblings and I would help wash the strawberries, peel the kiwi, and hunt for the ripest blueberries in her garden. Laughter filled the kitchen as we fought over who got to pour the creamy custard into the crust. But the best part? Watching my grandmother carefully arrange the fruits into an elaborate design, as if she was painting a masterpiece.
Those moments taught me that cooking is about more than just food; it’s about love and togetherness. Today, as I share this homemade fruit tart recipe with you, I hope you’ll create your own memories in the kitchen—just like my family did!
Ingredients
Let’s get to the fun part! Here’s what you’ll need to create this gorgeous fruit tart:
-
1 1/2 cups all-purpose flour
The foundation of our tart crust. For a gluten-free option, you can use a 1:1 gluten-free flour blend. -
1/2 cup powdered sugar
This adds just the right amount of sweetness to our crust while keeping it light and tender. If you’re in a pinch, you can blend regular granulated sugar in a blender for a quick substitute. -
1/2 cup unsalted butter, softened
The buttery goodness is what gives our tart its rich flavor and flaky texture. If you’re watching your dairy intake, coconut oil can be a good alternative, though it may alter the flavor slightly. -
1 large egg yolk
This adds richness and helps bind our crust together. Use a flaxseed meal mixed with water for a vegan substitute if needed. -
1 teaspoon vanilla extract
Adds a lovely hint of sweetness and depth to the crust. Feel free to use almond extract for an exciting twist! -
2 cups milk
The base for our creamy custard filling. You can substitute almond milk, coconut milk, or any other milk alternative for a dairy-free version. -
1/4 cup granulated sugar
Balances the flavors in our custard. You can reduce the amount for a less sweet filling, or use honey or maple syrup for a natural touch. -
3 tablespoons cornstarch
Acts as a thickener for our custard. If you don’t have cornstarch, you can use the same amount of all-purpose flour, though the texture might be slightly different. -
1/4 teaspoon salt
A pinch of salt enhances all the flavors and balances the sweetness in our filling. -
1 teaspoon vanilla extract
A repeat here because it just adds that extra zest to our custard. -
Assorted fresh fruits (strawberries, kiwi, blueberries, etc.)
The star of our tart! Feel free to use any fresh fruits you love—mango, peaches, and raspberries make fabulous choices too!
Step-by-Step Instructions
Now that we’ve gathered all our ingredients, let’s get cooking! Here’s how to whip up this delightful fruit tart:
1. Preheat the Oven
Preheat your oven to 350°F (175°C). This will ensure that your crust bakes evenly and turns golden brown. While the oven is heating up, let’s get started on the crust!
2. Make the Tart Crust
In a mixing bowl, combine the all-purpose flour and powdered sugar. Use a whisk to blend them together nicely. Next, add the softened butter and egg yolk. Using a fork or your fingers, mix until the mixture resembles coarse crumbs.
Chef Tip: If your butter is too cold, it’ll be hard to incorporate. Make sure it’s at room temperature and soft to achieve that perfect buttery texture.
3. Form the Dough
Now, add the vanilla extract and mix until the dough begins to come together. If it feels too crumbly, try adding a teaspoon of ice-cold water at a time until it holds together.
4. Chill the Dough
Shape the dough into a disc, wrap it in plastic wrap, and place it in the fridge for about 30 minutes. Chilling helps the butter solidify, which will yield a flakier crust.
5. Roll Out the Dough
Once chilled, sprinkle a little flour on your countertop and roll out the dough to about 1/4-inch thickness. Carefully transfer the dough to a 9-inch tart pan, pressing it into the corners and trimming any excess dough hanging over the edges.
Chef Hack: Use a fork to poke a few holes in the bottom of the crust to allow steam to escape, preventing it from puffing up while baking.
6. Bake the Crust
Line the crust with parchment paper and fill it with pie weights or dried beans to weigh it down. Bake for 15-20 minutes or until the edges are lightly golden. Allow it to cool completely before adding the filling.
7. Create the Custard Filling
In a medium saucepan, combine milk, granulated sugar, cornstarch, salt, and vanilla extract. Whisk this mixture over medium heat until it thickens—this usually takes about 5-7 minutes. Keep stirring constantly to prevent any lumps from forming.
8. Cool the Custard
Remove the custard from heat and let it cool for a few minutes. Pour it into the cooled tart shell and spread it out evenly with a spatula.
Chef Tip: You can place plastic wrap directly on the surface of the custard to prevent a skin from forming as it cools!
9. Arrange the Fresh Fruits
Once the custard has cooled completely, it’s time to decorate! Slice your fresh fruits and artistically arrange them on top of the custard. Have fun with the colors and shapes—this is your chance to get creative!
Serving Suggestions
For serving, consider keeping it simple yet elegant! Slice the tart into wedges and place each piece on a beautiful plate. A sprinkle of powdered sugar on top adds an enchanting touch, while a dollop of whipped cream or a scoop of vanilla ice cream elevates the experience even more.
Recipe Variations
Want to mix things up? Here are some fun variations to consider:
-
Chocolate Custard: Add unsweetened cocoa powder to the custard for a rich chocolate twist.
-
Lemon Zest: Enhance the custard with lemon zest for a refreshing citrus flavor.
-
Nut Crust: Swap half the flour with ground almonds to create a nutty and crunchy crust.
-
Savory Tart: Replace the fruits with roasted vegetables and add goat cheese for a delicious savory option.
Chef’s Notes
This fruit tart recipe has been a staple in my family for years. It’s one of those lovely desserts that you can whip up for any occasion, and it always brings a smile to people’s faces. Over the years, I’ve experimented endlessly with different fruits and flavors, but the classic version still steals my heart.
One of my favorite kitchen anecdotes involves a particularly messy attempt to slice strawberries. I ended up with juice all over my shirt and kitchen counter, but I couldn’t stop laughing at myself. It’s moments like these that remind me that cooking doesn’t have to be perfect—it just has to be enjoyed!
FAQs and Troubleshooting
1. Why is my tart crust soggy?
Make sure to pre-bake the crust fully and allow it to cool before adding the custard. The pie weights are crucial to prevent bubbling.
2. How do I store leftover tart?
Store it in the refrigerator, tightly wrapped in plastic wrap for up to 2-3 days. Note that the fruits may lose some freshness over time.
3. Can I use frozen fruits?
While fresh fruits are ideal for presentation, you can use frozen fruits if they are thawed and properly drained to avoid excess moisture on top of the custard.
4. How do I stop my custard from curdling?
Constant stirring is key! Keep the heat medium—not too high. If you notice it thickening too quickly, remove it from the heat momentarily while you stir.
Nutritional Info (Optional)
While I encourage enjoying desserts like this in moderation, I understand that nutritional details can be helpful! This tart is rich in vitamins from the fresh fruits and provides a delightful balance of carbohydrates and fats from the crust and filling.
And there you have it—a homemade fruit tart that’s as delightful to make as it is to eat! So gather your loved ones, indulge in some kitchen fun, and create a beautiful dessert that will not only satisfy your sweet tooth but also whisk you down memory lane, just like my grandmother did for me. Happy baking, friends!
PrintHomemade Fruit Tart

A delightful homemade fruit tart featuring a buttery crust, creamy custard, and an assortment of fresh fruits.
- Prep Time: 30 minutes
- Cook Time: 20 minutes
- Total Time: 50 minutes
- Yield: 8 servings 1x
- Category: Dessert
- Method: Baking
- Cuisine: American
- Diet: Vegetarian
Ingredients
- 1 1/2 cups all-purpose flour
- 1/2 cup powdered sugar
- 1/2 cup unsalted butter, softened
- 1 large egg yolk
- 1 teaspoon vanilla extract
- 2 cups milk
- 1/4 cup granulated sugar
- 3 tablespoons cornstarch
- 1/4 teaspoon salt
- 1 teaspoon vanilla extract
- Assorted fresh fruits (strawberries, kiwi, blueberries, etc.)
Instructions
- Preheat your oven to 350°F (175°C).
- Combine the flour and powdered sugar in a mixing bowl.
- Add the softened butter and egg yolk, mixing until it resembles coarse crumbs.
- Mix in the vanilla extract until the dough starts to come together.
- Shape the dough into a disc, wrap it in plastic wrap, and chill for 30 minutes.
- Roll out the dough to about 1/4-inch thickness and transfer to a tart pan.
- Line the crust with parchment paper, fill with pie weights, and bake for 15-20 minutes.
- Combine milk, granulated sugar, cornstarch, salt, and vanilla in a saucepan and whisk over medium heat until thickened.
- Remove from heat and let cool, then pour into the tart shell.
- Arrange the fresh fruits on top of the cooled custard.
Notes
For variations, consider chocolate custard, lemon zest, a nut crust, or replacing fruits with roasted vegetables.
Nutrition
- Serving Size: 1 slice
- Calories: 250
- Sugar: 10g
- Sodium: 180mg
- Fat: 14g
- Saturated Fat: 8g
- Unsaturated Fat: 4g
- Trans Fat: 0g
- Carbohydrates: 32g
- Fiber: 2g
- Protein: 4g
- Cholesterol: 40mg
Keywords: fruit tart, dessert, baking, fresh fruits, custard tart
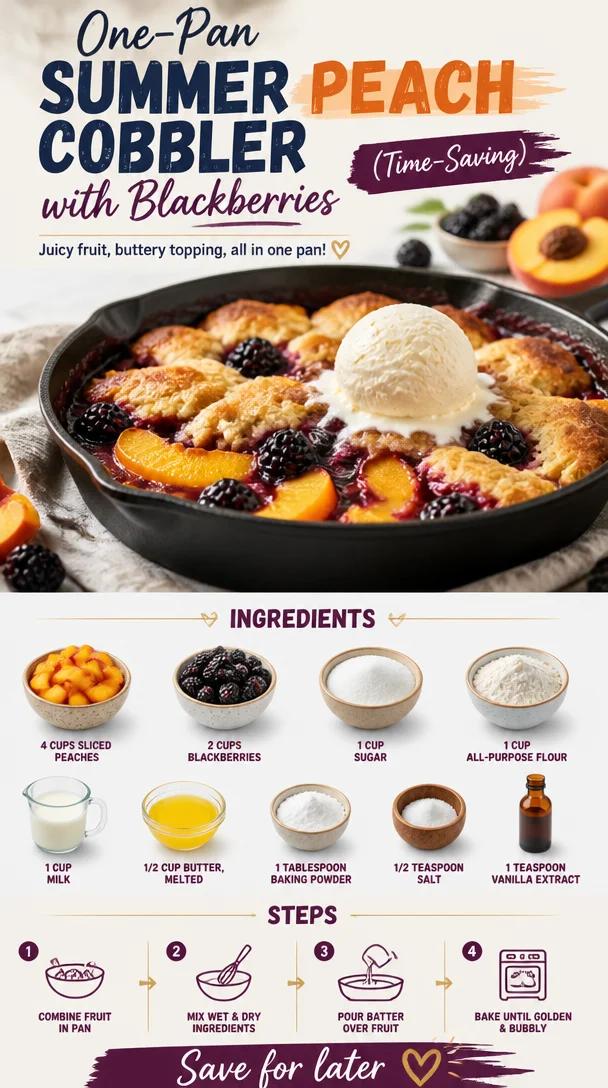
One-Pan Summer Peach Cobbler with Blackberries (Time-Saving)
A Warm Welcome to My Kitchen: Peach Cobbler with Blackberries
Hello, fellow food lovers! Today, we’re diving into one of my absolute favorite desserts—Peach Cobbler with Blackberries. This dish doesn’t just bring a cascade of summer flavors; it’s a beautiful reminder of family gatherings, lazy afternoons, and those moments when you catch the scent of something baking and your entire spirit just lifts. I can feel the warmth of those sun-soaked days just thinking about it!
Now, imagine this: It’s a golden afternoon, your kitchen is filled with the intoxicating aroma of ripe peaches and sweet blackberries bubbling away in the oven. The cobbler is golden, and you can hear that satisfying sizzle as it begins to cool. And when it’s finally time to serve up, everyone gathers around the table with eager eyes and spoons at the ready. This is the magic of peach cobbler, and that’s exactly what we’re creating today!
My love for cobblers, especially this peach and blackberry version, goes way back to summer visits at my grandmother’s house. She’d have baskets of fresh fruit from her garden, and the moment those peaches ripened, we knew what was coming—her famous cobbler! I still recall how we would race to the kitchen, excited to help mix and pour, tasting the luscious filling straight from the bowl. Those moments of pure joy—sticky fingers and laughter—are etched in my memory, and they inspire me to recreate this dish and share that same warmth through my cooking.
Ingredients
Let’s gather everything we need to whip up this fabulous dessert! Here are the ingredients and a bit of chef insight to help you make the best cobbler ever.
-
4 cups sliced peaches
Fresh peaches are key! Make sure they’re juicy and ripe for the best flavor. If you can’t find fresh peaches, you can substitute with frozen (just thaw them first). -
2 cups blackberries
These little gems add a delightful tartness that perfectly complements the sweetness of the peaches. If blackberries are out of season, raspberries or blueberries work just as well! -
1 cup sugar
This is your ticket to sweetness! Feel free to adjust to your taste. If you’re looking to cut back on sugar, coconut sugar or a sugar substitute can also work—just keep in mind the flavor profiles might change slightly. -
1 cup all-purpose flour
The foundation of our cobbler topping. If you’re looking for a gluten-free option, you could use a gluten-free all-purpose blend, though results may vary slightly. -
1 cup milk
Whole milk provides the best richness, but feel free to swap it with almond milk or oat milk if you’re going dairy-free. -
1/2 cup butter, melted
Nothing beats the flavor of good old-fashioned butter. If you’re vegan or dairy-free, coconut oil can be an excellent substitute. -
1 tablespoon baking powder
This is what makes our cobbler rise beautifully! Double check your baking powder is fresh for optimal fluffiness. -
1/2 teaspoon salt
A pinch of salt elevates all the sweet flavors. Never skip it! -
1 teaspoon vanilla extract
Vanilla adds a depth of flavor that’s absolutely divine. Make sure it’s pure vanilla extract for the best results—no imitators here!
Step-by-Step Instructions
Alright, my culinary companions, let’s get started on this delicious Peach Cobbler with Blackberries! Here’s how to make it happen, step-by-step.
1. Preheat Your Oven:
Start by preheating your oven to 375°F (190°C). This is a crucial step; we want that oven nice and hot when we pop our cobbler in for that perfect golden crust!
2. Prepare the Fruit Filling:
In a mixing bowl, combine the sliced peaches and blackberries. Sprinkle 1/2 cup of sugar over the fruit. Let it sit for about 10 minutes to allow the juices to mingle. You’ll be amazed at how flavorful this mixture becomes!
Chef Tip: If you like a little spice, feel free to add a dash of cinnamon or nutmeg to this mix for an extra flavor boost!
3. Make the Batter:
In another bowl, whisk together the flour, remaining 1/2 cup of sugar, baking powder, and salt. Create a well in the center and add the melted butter, milk, and vanilla extract. Mix until just combined—don’t overdo it; a few lumps are okay!
Chef Hack: To incorporate air into your batter for a lighter cobbler, consider folding in the flour and liquid rather than stirring vigorously.
4. Assemble the Cobbler:
Grease a baking dish (a 9×13 works beautifully) and pour the batter evenly into the bottom. Spoon the peach and blackberry mixture over the batter, trying to distribute the fruit evenly. Don’t worry if it looks a bit messy; that’s part of the charm!
Pro Tip: Patience is key! Resist the urge to stir the fruit into the batter. The fruit will sink as it bakes, resulting in a lovely layered effect.
5. Bake:
Pop your baking dish into the oven and let it bake for about 40-45 minutes. You’ll know it’s ready when the top is golden brown and a toothpick inserted into the batter comes out clean.
6. Cool and Serve:
Once it’s out of the oven, allow the cobbler to cool for about 10-15 minutes. It will continue to set as it cools, giving you a more scoop-able dessert.
Serving Suggestions
When it comes to serving your Peach Cobbler with Blackberries, I like to keep it simple yet elegant. Serve warm, straight from the dish, and don’t forget a generous scoop of vanilla ice cream on top! The warm cobbler pairs perfectly with the cold, creamy ice cream, creating a delightful contrast. Also, you can sprinkle a bit of fresh mint on top for that pop of color and freshness!
Recipe Variations
Let’s mix it up a little! Here are some fun variations you can try:
-
Add Spices:
Throw in a dash of cinnamon, nutmeg, or even ginger for those spicy notes that warm your heart. -
Crispy Topping:
For a crunchy twist, sprinkle some rolled oats or crushed nuts over the batter before baking. -
Fruit Swap:
If peaches or blackberries aren’t your jam, try mixing it up with apples and cranberries or pears and blueberries! -
Zesty Lemon:
Grate in some lemon zest into the batter for a bright, zesty touch that cuts through the sweetness. -
Vegan Twist:
Swap the butter for coconut oil and use plant-based milk to make this dish vegan-friendly.
Chef’s Notes
Oh, I can’t help but share a little kitchen story as I reflect on this recipe! The first time I attempted this cobbler on my own, I miscounted the sugar. Can you imagine? Instead of 1 cup, I added 2! Let’s just say it was a pretty sweet experience—literally! Everyone teased me about creating a “dessert with a side of fruit,” but I ended up adjusting the recipe and making it even better over time. Sometimes, those little kitchen flukes lead to the best culinary creations!
This recipe has evolved, much like my cooking style. It has gone from a simple family dish shared around the table to a cherished favorite that warms hearts at gatherings, celebrating everything from summer BBQs to cozy fall evenings.
FAQs and Troubleshooting
-
Can I use frozen fruit instead of fresh?
Yes, you can! Just make sure to thaw and drain excess liquid from the fruit before using it in the recipe. -
What if my cobbler is too watery?
If you find your cobbler is overly juicy, it might be from too much fruit or not enough baking time. Next time, consider reducing the fruit quantity or letting it bake a little longer. -
How do I store leftovers?
Store any leftovers in an airtight container in the fridge for up to 3 days. Reheat in the oven for that fresh-out-of-the-oven taste! -
Can I prepare this ahead of time?
You can prepare the fruit filling a day in advance and store it in the fridge. Just make the batter fresh when you’re ready to bake.
Nutritional Info
(If applicable, please include specific nutritional value, like calories, fat, sugars, etc., for this cobbler.)
And there you have it, my friends! A warm, delicious Peach Cobbler with Blackberries that’s not just a dessert but a delightful experience filled with nostalgia and joy. I hope you feel inspired to gather your loved ones around the table and create your own sweet memories. Don’t forget to tie on that apron, pour something sparkling, and enjoy every moment in the kitchen. Happy cooking!
PrintPeach Cobbler with Blackberries

A delightful summer dessert featuring juicy peaches and tart blackberries, topped with a golden cobbler crust.
- Prep Time: 15 minutes
- Cook Time: 45 minutes
- Total Time: 60 minutes
- Yield: 8 servings 1x
- Category: Dessert
- Method: Baking
- Cuisine: American
- Diet: Vegetarian
Ingredients
- 4 cups sliced peaches
- 2 cups blackberries
- 1 cup sugar
- 1 cup all-purpose flour
- 1 cup milk
- 1/2 cup butter, melted
- 1 tablespoon baking powder
- 1/2 teaspoon salt
- 1 teaspoon vanilla extract
Instructions
- Preheat your oven to 375°F (190°C).
- Combine the sliced peaches and blackberries in a mixing bowl. Sprinkle 1/2 cup of sugar over the fruit and let sit for about 10 minutes.
- Whisk together the flour, remaining 1/2 cup of sugar, baking powder, and salt in another bowl. Create a well in the center and add the melted butter, milk, and vanilla extract. Mix until just combined.
- Grease a 9×13 baking dish and pour the batter evenly into the bottom. Spoon the peach and blackberry mixture over the batter.
- Bake for 40-45 minutes until the top is golden brown.
- Cool for about 10-15 minutes before serving.
Notes
Serve warm with vanilla ice cream for a delightful treat. You can also add a sprinkle of fresh mint on top for garnish.
Nutrition
- Serving Size: 1 serving
- Calories: 380
- Sugar: 22g
- Sodium: 300mg
- Fat: 18g
- Saturated Fat: 10g
- Unsaturated Fat: 8g
- Trans Fat: 0g
- Carbohydrates: 49g
- Fiber: 3g
- Protein: 5g
- Cholesterol: 40mg
Keywords: peach cobbler, blackberry dessert, summer recipe, fruit cobbler
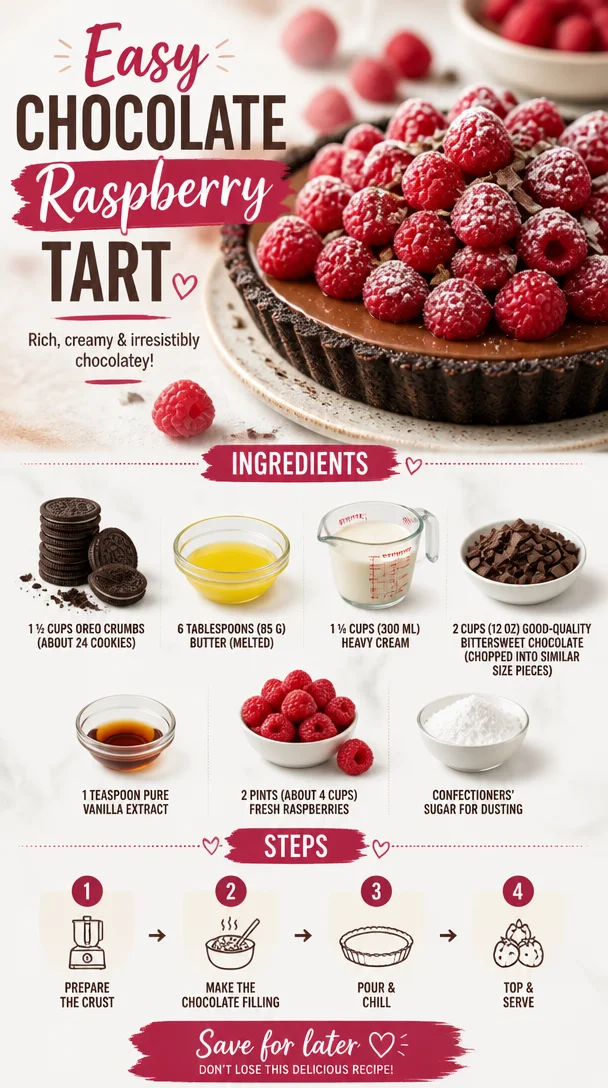
Easy Chocolate Raspberry Tart
Decadent Delight: Easy Chocolate Raspberry Tart
Hello and welcome, fellow foodies! If you’re in the mood for something indulgent, delicious, and oh-so-chic, then let’s talk about one of my all-time favorite desserts — the Easy Chocolate Raspberry Tart. Simple to whip up yet impressively elegant, this tart is a showstopper for any gathering, whether you’re hosting a chic soirée or a cozy dinner with loved ones. So grab your apron, and let’s dive into this delightful chocolatey creation!
Introduction
There’s something magical about dessert, isn’t there? It’s the sweet ending to a beautiful meal, the special treat that brings a smile to our faces, and let’s be honest, the perfect excuse to indulge a little bit. When it comes to desserts that capture elegance without the fuss, this Easy Chocolate Raspberry Tart reigns supreme.
Imagine a velvety chocolate filling cradled in a buttery Oreo crust, topped with vibrant, fresh raspberries that pop in both flavor and color. Together, they create a beautiful harmony of taste — rich yet refreshing, decadent yet light. Each slice tells a story of indulgence that feels just right, no matter the occasion.
What I adore about this tart is how effortlessly it comes together. You don’t need any advanced culinary skills to pull it off; just a bit of love, attention to detail, and maybe a glass of wine to sip on as you create this edible masterpiece. It’s the perfect balance of sophistication and simplicity, making it a must-have recipe in your collection.
Now, let’s talk about the heartwarming personal memory I have with this dish that adds a sprinkle of nostalgia to every bite.
Personal Story
I vividly remember the first time I made this Easy Chocolate Raspberry Tart for my best friend’s birthday. We were both in college, broke but brimming with enthusiasm and dreams of becoming gourmet chefs. On that warm summer afternoon, I laid out the ingredients on our tiny kitchen counter, excitedly chatting with her about our plans while the sun streamed through the windows. As I crushed the Oreos into crumbs, we shared laughter and memories. It felt like a scene from a movie — two aspiring chefs concocting a delicious creation that would bring smiles and joy.
When the tart was finally ready, and we saw the rich chocolate filling juxtaposed with the vibrant raspberries, we couldn’t contain our excitement. We plated it up, dusting it with confectioners’ sugar like true chefs, and sat down to enjoy it together. The combination of smooth chocolate and tart raspberries was heavenly! It was a special moment filled with friendship and the joys of cooking that shaped my passion for sharing food with loved ones.
Now, let’s get into the details of creating this unforgettable dessert so you can make your own delicious memories!
Ingredients
Here’s what you’ll need for this heavenly Easy Chocolate Raspberry Tart. I’ve added some chef insights and substitution tips to guide you along the way.
-
1 ½ cups Oreo crumbs (about 24 cookies)
These provide a rich, chocolatey crust that’s super easy to make. If you’re not a fan of Oreos, feel free to use a homemade chocolate cookie or even graham cracker crumbs mixed with cocoa powder for an alternate twist. -
6 Tablespoons (85 g) butter (melted)
The melted butter brings everything together, adding richness and moisture. You can substitute it with coconut oil for a dairy-free option, but be mindful of the flavor it might impart. -
1 ¼ cups (300 ml) heavy cream
The heavy cream is the backbone of the chocolate filling, making it smooth and rich. If you’re looking for a lighter option, you can use full-fat coconut milk, but the texture will be slightly different. -
2 cups (12 oz) good-quality bittersweet chocolate (chopped into similar size pieces)
I recommend a chocolate with at least 60% cacao for a well-balanced flavor. If you prefer milk chocolate, feel free to use that, but reduce the sugar in the recipe slightly since it’ll be sweeter. -
1 teaspoon pure vanilla extract
This enhances the chocolate flavor and adds warmth. Don’t skip it! However, if you’re out, almond extract can work in a pinch for an intriguing twist. -
2 pints (about 4 cups) fresh raspberries
The fresh raspberries not only add a beautiful pop of color but also a fabulous tartness that cuts through the richness of the chocolate. If fresh berries are out of season, frozen raspberries can work; just thaw and drain any excess moisture. -
Confectioners’ sugar for dusting
This is optional but adds a lovely final touch. You can also use cocoa powder for a deeper chocolate flavor.
Step-by-Step Instructions
Ready to get baking? Here’s a detailed walkthrough for making your Easy Chocolate Raspberry Tart!
-
Prepare the Oreo Crust
Start by preheating your oven to 350°F (175°C). While it heats, combine the Oreo crumbs and melted butter in a mixing bowl. Use a fork or your hands to mix until the crumbs are evenly moistened.Chef Insight: Make sure that the consistency resembles wet sand. You want it to hold together when pressed. Once mixed, firmly press the crumb mixture into the bottom and up the sides of a 9-inch tart pan to create an even layer. Bake for about 10 minutes until set, then let it cool completely while you prepare the filling.
-
Make the Chocolate Ganache
In a medium saucepan, heat the heavy cream over medium heat until it just begins to simmer — you’ll see bubbles forming around the edges. Remove it from the heat and pour it over the chopped bittersweet chocolate in a heatproof bowl. Let it sit for a minute to soften the chocolate.Tip: This is the perfect time to check the texture of your chocolate. If you’re using chocolate chips, they will melt easily, but chopped chocolate bars create a smoother ganache.
-
Stir in Vanilla
After a minute, stir gently until the chocolate is completely melted and the mixture is smooth. Add the vanilla extract and stir to incorporate.Hack: If your ganache has lumps, you can give it a quick blitz with an immersion blender to smooth it out!
-
Pour the Mixture into the Cool Crust
Pour the luscious chocolate ganache into the cooled Oreo crust, spreading it into an even layer. Allow it to set at room temperature for a bit before transferring it to the refrigerator to chill for at least 2 hours, or until firm to the touch.Chef Tip: For an easier release from the tart pan, gently run a knife around the edges before slicing. It makes for a clean cut!
-
Add the Fresh Raspberries
Just before serving, take the tart out of the refrigerator and decorate the top with fresh raspberries. Dust with confectioners’ sugar for that extra wow factor. -
Slice and Serve
Use a sharp knife to slice the tart into wedges, serving it alongside extra raspberries if desired.Pro Tip: If the chocolate gets too solid in the fridge, let it sit at room temperature for a few minutes before slicing for cleaner cuts.
Serving Suggestions
When you serve this tart, think of the presentation! Place a slice on a dessert plate and garnish it with a few fresh raspberries on the side for a pop of color. A dollop of whipped cream or a scoop of vanilla ice cream also pairs splendidly with the tart — the creamy elements balance the rich chocolate beautifully.
Recipe Variations
-
Nutty Crust Variation
Swap out half the Oreo crumbs for finely ground almonds or walnuts for a nutty twist! -
Mint Chocolate Version
Add a drop or two of peppermint extract to the ganache mixture for a refreshing mint chocolate experience. -
Dairy-Free Delight
Use dairy-free chocolate and coconut cream instead of heavy cream to create a vegan-friendly version that doesn’t skimp on flavor. -
Fruit Medley Topping
Mix it up with different fruits! Strawberries or blueberries can provide a delightful change and add a fresh twist to the tart. -
Espresso Infusion
Add a teaspoon of instant espresso powder to the ganache to enhance the chocolate flavor for coffee lovers.
Chef’s Notes
This Easy Chocolate Raspberry Tart has a special place in my heart, and it’s evolved over time. Initially, I used to struggle with cooling the chocolate too quickly, which led to a lumpy ganache. But as I learned to gently heat the cream and give the ganache time to meld, I found that patience truly makes for a richer and smoother filling. Plus, this recipe has become a beloved favorite among friends and family, often making an appearance at birthdays and holiday gatherings. That’s what I cherish about cooking — sharing food that carries love and intention.
FAQs and Troubleshooting
-
Why did my ganache turn out grainy?
This can happen if the chocolate gets too hot or if it’s not stirred enough. Always heat the cream gently and let the chocolate sit to soften before stirring. -
Can I make this tart ahead of time?
Absolutely! You can prepare the tart a day in advance. Just keep it covered in the refrigerator until you’re ready to serve. -
What if my crust crumbled when I tried to slice it?
If the crust crumbles, it may be due to not enough butter binding it together. Next time, consider adding an extra tablespoon of melted butter to the crust mixture. -
How do I store leftovers?
Store any leftovers in the refrigerator in an airtight container for up to four days. However, I doubt it’ll last that long — it’s hard to resist!
Nutritional Info
While this tart is undoubtedly rich and indulgent, it’s all about balance in the kitchen. Each slice contains a delightful mix of flavors with quality ingredients that elevate your sweet indulgence.
So there you have it, my sweet friends! The Easy Chocolate Raspberry Tart is more than just a dessert; it’s a memory maker, a show-stopper, and an absolute treat that you’ll confidently serve time and again. Whether it’s a special occasion or just a Tuesday, let’s gather around the table and enjoy the beautiful moments that good food can create. Happy baking!
PrintEasy Chocolate Raspberry Tart

A simple yet elegant dessert featuring a rich chocolate filling in a buttery Oreo crust, topped with fresh raspberries.
- Prep Time: 20 minutes
- Cook Time: 10 minutes
- Total Time: 130 minutes
- Yield: 8 servings 1x
- Category: Dessert
- Method: Baking
- Cuisine: American
- Diet: Vegetarian
Ingredients
- 1 ½ cups Oreo crumbs (about 24 cookies)
- 6 Tablespoons (85 g) butter (melted)
- 1 ¼ cups (300 ml) heavy cream
- 2 cups (12 oz) good-quality bittersweet chocolate (chopped into similar size pieces)
- 1 teaspoon pure vanilla extract
- 2 pints (about 4 cups) fresh raspberries
- Confectioners’ sugar for dusting (optional)
Instructions
- Preheat your oven to 350°F (175°C). Combine the Oreo crumbs and melted butter in a mixing bowl. Mix until evenly moistened.
- Press the crumb mixture into the bottom and sides of a 9-inch tart pan. Bake for about 10 minutes until set, then let it cool.
- Heat the heavy cream over medium heat until it simmers, then pour it over the chopped bittersweet chocolate. Let it sit for a minute.
- Stir gently until the chocolate is completely melted and smooth. Add the vanilla extract and stir to incorporate.
- Pour the ganache into the cooled Oreo crust. Let it set at room temperature, then refrigerate for at least 2 hours.
- Decorate the tart with fresh raspberries just before serving. Dust with confectioners’ sugar if desired.
- Slice the tart into wedges and serve alongside extra raspberries or whipped cream.
Notes
This tart can be made a day ahead of time. Store in the refrigerator and cover to keep it fresh.
Nutrition
- Serving Size: 1 slice
- Calories: 350
- Sugar: 20g
- Sodium: 250mg
- Fat: 18g
- Saturated Fat: 10g
- Unsaturated Fat: 6g
- Trans Fat: 0g
- Carbohydrates: 45g
- Fiber: 2g
- Protein: 4g
- Cholesterol: 30mg
Keywords: chocolate tart, raspberry dessert, easy dessert, chocolate raspberry tart