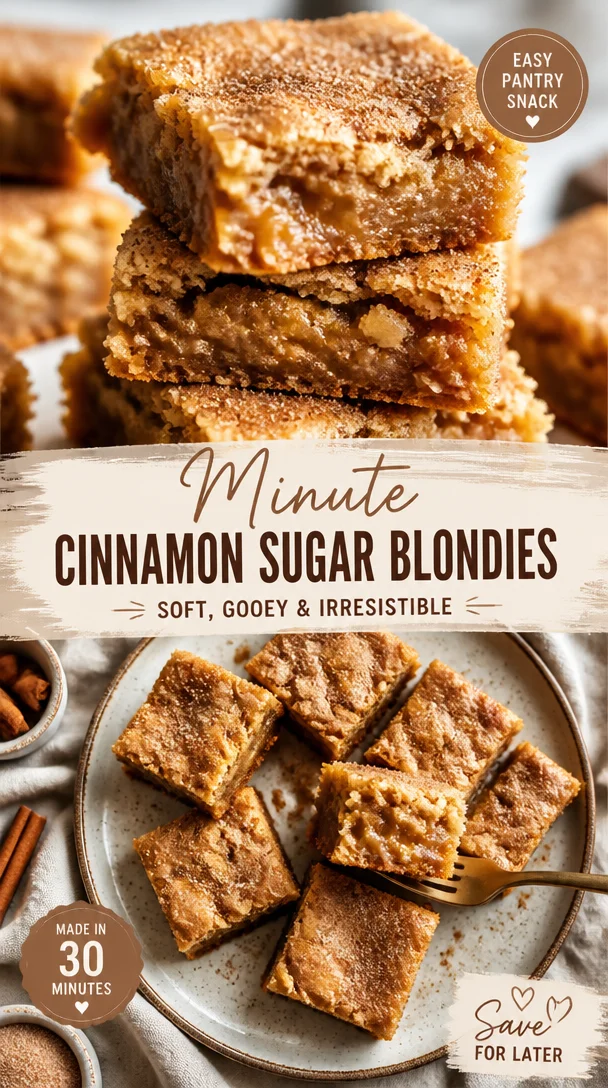
Minute Cinnamon Sugar Blondies (Easy Pantry Snack)
Sweet, Chewy Cinnamon Sugar Blondies: Your New Favorite Treat!
Hello, sweet friends! Welcome back to the warmth of my kitchen! If you’re searching for a dessert that holds a delightful balance of comfort and indulgence, look no further than these Cinnamon Sugar Blondies. They are chewy, loaded with rich, buttery goodness, and topped with a sprinkle of cinnamon sugar to create that perfect finishing touch.
This recipe sings all the right notes for any occasion—be it a cozy night in, a casual gathering with friends, or just a special midweek treat for yourself. Trust me, these blondies are so delicious that you’ll find yourself baking them again and again! So, grab your apron, pour yourself a warm drink, and let’s dive into this delightful treat!
A Sweet Memory
As a little girl, one of my favorite memories was baking with my grandmother on chilly Sunday afternoons. The kitchen would be filled with the comforting aroma of melted butter and sugar as we whipped up her famous desserts. The best days were when we made her legendary blondies. The moment those warm, gooey bars emerged from the oven, we’d sprinkle them with cinnamon sugar—her secret touch—that created a heavenly blend of flavors.
With each bite, I was reminded of her love and the joyful moments we shared. Now, I pass this cherished recipe down to you, with a few of my twists, and hope it brings you as much warmth and happiness as it did for me!
Ingredients
Let’s gather our ingredients! Each one plays a vital role in crafting our perfect blondies. Here’s what you’ll need:
-
1 cup brown sugar: This gives the blondies their rich, caramel-like flavor. You can substitute with light brown sugar for a milder taste or even coconut sugar for a healthier twist.
-
1/2 cup butter, melted: Melted butter creates that sought-after chewy texture. Unsalted butter is best for control over the sweetness, but if you use salted, just omit the extra salt in the recipe.
-
1 large egg: The binding agent! If you’re vegan, you can swap in a flax egg (1 tablespoon ground flaxseed mixed with 2.5 tablespoons water) for a great substitute.
-
1 teaspoon vanilla extract: This adds depth and enhances the sweetness. Pure vanilla extract is always recommended, but imitation can work in a pinch.
-
1 cup all-purpose flour: The base of your blondies. For a gluten-free option, try a 1:1 gluten-free blend.
-
1/2 teaspoon baking powder: This is key for fluffiness. If you’re out, baking soda can work, but use only a quarter teaspoon.
-
1/4 teaspoon salt: Just a touch to enhance all the flavors.
-
1 tablespoon cinnamon sugar (for topping): A glorious finish! Combine cinnamon and granulated sugar to taste; feel free to adjust it for your preference!
Step-by-Step Instructions
Ready to get those sweet smells wafting through the kitchen? Let’s make our Cinnamon Sugar Blondies!
-
Preheat Your Oven: First things first, preheat your oven to 350°F (175°C). This ensures even baking—no half-baked blondies here!
-
Prepare Your Pan: Grease an 8×8-inch baking pan with butter or line it with parchment paper for easy removal. This will help those blondies come out perfectly!
-
Mix the Wet Ingredients: In a mixing bowl, combine your melted butter and brown sugar. Whisk until smooth and creamy—this should take about a minute. The warmth of the melted butter will help dissolve the sugar, leading to a chewy texture.
-
Add the Egg and Vanilla: Next, crack in your egg and pour in the vanilla extract. Give it a good whisk until fully incorporated. Your batter should look shiny and smooth!
-
Combine Dry Ingredients: In a separate bowl, whisk together the flour, baking powder, and salt. This step helps to evenly disperse the baking powder throughout the flour, avoiding any pesky lumps.
-
Incorporate Dry into Wet: Gradually add the dry mixture into the wet ingredients, folding gently until just combined. Avoid overmixing to keep those blondies tender.
-
Spread the Batter: Pour the luscious batter into your prepared baking pan. Use a spatula to evenly spread it out. You’ll notice the rich color and glossy texture—yum!
-
Sprinkle with Cinnamon Sugar: Here’s where the magic happens! Generously sprinkle the cinnamon sugar mixture over the top of your batter. This will create a delightful crust that’s both crunchy and sweet.
-
Bake Away: Place your pan in the preheated oven and bake for 20–25 minutes. Keep a close eye on them, as different ovens can vary in cooking time. They’re done when the edges look golden and the center has set but is still slightly soft to the touch.
-
Cool & Cut: Once out of the oven, let the blondies cool in the pan for about 10 minutes before transferring them to a wire rack. This cooling period helps firm them up for easy slicing. Cut into squares or rectangles, and get ready to enjoy!
Serving Suggestions
When it comes to serving these blondies, the options are as plentiful as the smiles they’ll bring! Plate them with a scoop of vanilla ice cream on the side for a delightful contrast. You can also drizzle a little warm caramel sauce or chocolate ganache over them for an extra layer of indulgence. Trust me, no one will be able to resist!
Recipe Variations
Want to mix things up? Here are a few fun ideas to customize your blondies:
-
Nutty Delight: Add a half-cup of chopped walnuts or pecans to the batter for a delightful crunch.
-
Choco-Lover’s Dream: Fold in semi-sweet chocolate chips or butterscotch chips to create an irresistible sweet sensation.
-
Cranberry Bliss: Toss in a half-cup of dried cranberries for a tart contrast that pairs beautifully with the sweetness.
-
Spiced Up: Add a pinch of nutmeg or allspice to your cinnamon sugar mix for a warm, autumn twist.
-
Caramel Swirl: Drizzle some caramel into the batter before baking for pockets of gooey goodness!
Chef’s Notes
Oh, the stories my kitchen could tell! I can’t help but chuckle thinking about that time I accidentally mistook baking soda for powdered sugar while whipping up a batch of these blondies. Let’s just say they were a little less fluffy than I intended, but the flavor was still spot on!
These blondies have come a long way since my grandmother’s original recipe. Over time, I’ve tinkered and adjusted various elements to create these perfectly chewy treats. It’s amazing how a little bit of experimentation can spark joy in the kitchen!
FAQs and Troubleshooting
Q: Why are my blondies dry?
A: Overbaking is often the culprit! Make sure to watch the timer, and remove them from the oven as soon as they look set but still soft in the center.
Q: How can I store leftovers?
A: Keep your blondies in an airtight container at room temperature for up to 3 days. You can also freeze them (wrapped individually) for up to 2 months. Just thaw at room temperature or pop them in the microwave for a few seconds when you’re ready to enjoy!
Q: Can I double the recipe?
A: Absolutely! Just bake in a 9×13-inch pan and adjust the baking time as needed, checking for doneness as you go.
Q: Can I make these gluten-free?
A: Yes! Use a 1:1 gluten-free flour blend, and the blondies will be just as delicious!
Nutritional Info
While I believe in treating yourself, it’s always nice to know what’s in your food! A typical serving (one blondie) contains approximately:
- Calories: 200
- Fat: 8g
- Carbs: 30g
- Protein: 2g
- Sugar: 15g
(Note: Values may vary based on exact ingredients and portion sizes!)
And there you have it, friends! Your very own Cinnamon Sugar Blondies, ready to spread happiness and bring a bit of sweetness into your life. I can’t wait for you to try this recipe and savor every bite—remember to share your delightful creations with me! Let’s keep the spirit of food and sharing alive, one scrumptious treat and kitchen adventure at a time. Happy baking! 🍪✨
PrintSweet Chewy Cinnamon Sugar Blondies

Delightfully chewy blondies topped with a crunchy cinnamon sugar crust, perfect for any occasion.
- Prep Time: 10 minutes
- Cook Time: 25 minutes
- Total Time: 35 minutes
- Yield: 16 servings 1x
- Category: Dessert
- Method: Baking
- Cuisine: American
- Diet: Vegetarian
Ingredients
- 1 cup brown sugar
- 1/2 cup butter, melted
- 1 large egg
- 1 teaspoon vanilla extract
- 1 cup all-purpose flour
- 1/2 teaspoon baking powder
- 1/4 teaspoon salt
- 1 tablespoon cinnamon sugar (for topping)
Instructions
- Preheat your oven to 350°F (175°C).
- Prepare an 8×8-inch baking pan with butter or parchment paper.
- Mix the melted butter and brown sugar until smooth and creamy.
- Add the egg and vanilla extract and whisk until fully incorporated.
- Combine the flour, baking powder, and salt in a separate bowl.
- Incorporate the dry mixture into the wet ingredients, folding gently.
- Spread the batter into the prepared baking pan evenly.
- Sprinkle the cinnamon sugar over the top of the batter.
- Bake for 20–25 minutes, until golden on the edges.
- Cool in the pan for 10 minutes before transferring to a wire rack and slicing.
Notes
Serve with vanilla ice cream or drizzle with warm caramel sauce for an indulgent treat.
Nutrition
- Serving Size: 1 blondie
- Calories: 200
- Sugar: 15g
- Sodium: 100mg
- Fat: 8g
- Saturated Fat: 5g
- Unsaturated Fat: 3g
- Trans Fat: 0g
- Carbohydrates: 30g
- Fiber: 1g
- Protein: 2g
- Cholesterol: 35mg
Keywords: blondies, dessert, cinnamon sugar, baking, sweet treat
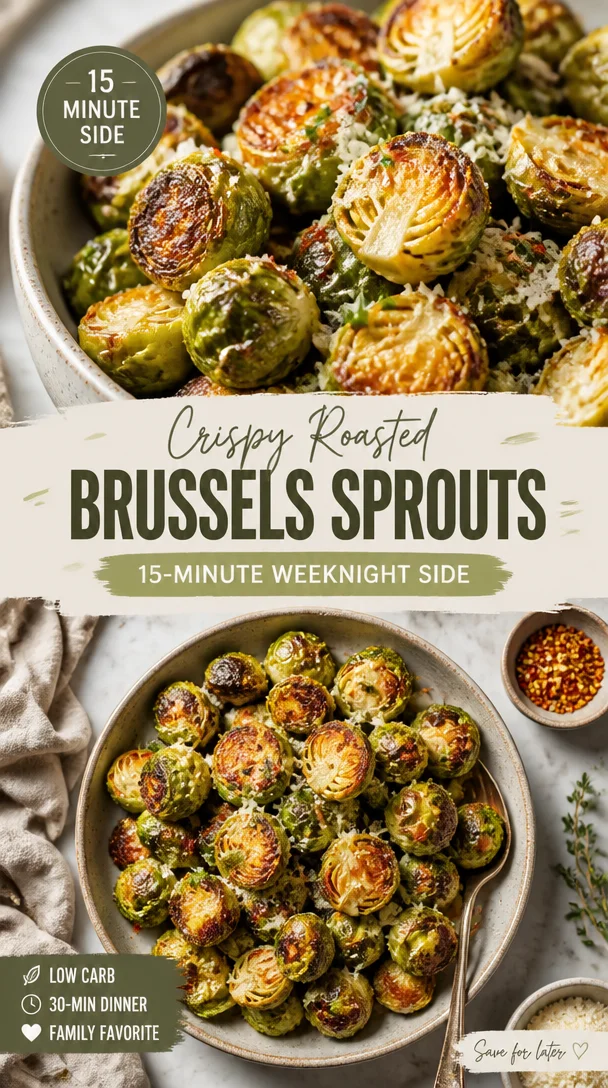
Crispy Roasted Brussels Sprouts: 15-Minute Weeknight Side
Discover the Delight of Roasted Brussels Sprouts
Hello there, food enthusiasts! Gather ‘round because today we’re diving into a delightful dish that’s sure to turn even the staunchest vegetable skeptics into converts: Roasted Brussels Sprouts. These little green gems may have had a bad rap in our childhoods, but trust me – when roasted, they become sweet, nutty, and downright delicious! I can almost hear the sizzle in the oven and see those crispy edges now. So, whether you’re prepping for a family dinner or seeking a standout side for your next get-together, let’s get started on this journey to roasted perfection.
Brussels sprouts are like those unassuming friends who surprise you with their hidden talents. You might glance at them on the grocery shelf and think twice, as they sit there, green and slightly knobby. But when they meet a hot oven, magic happens! The outer leaves caramelize to a golden brown, while the inner layers grow tender and luscious. Not only are they tasty, but they’re also packed with nutrients, making them a guilt-free pleasure.
In this blog post, I’ll guide you through a straightforward yet rewarding recipe that’s perfect for any occasion. So, roll up your sleeves, tie on your favorite apron, and let’s discover a fresh way to enjoy these underrated vegetables!
A Fond Memory
Reflecting on my love for Brussels sprouts takes me back to a memorable family holiday gathering. I remember it vividly – my grandmother’s dining table was laden with a feast that could make anyone drool. She would always prepare a large batch of roasted Brussels sprouts, an essential staple alongside the turkey and stuffing.
One year, as I was setting the table, I noticed the color of those sprouts just popping against the white serving dish. My grandma was generous with her seasoning, tossing them with olive oil, garlic, and a touch of balsamic vinegar, and roasting them until they were gloriously golden. As everyone gathered around, I watched my uncle, who had always declared his aversion, reach for a spoonful – and you could almost see the lightbulb go off! That first bite prompted laughter and astonishment. Suddenly, everyone was raving about how good the Brussels sprouts were, and the once-avoided vegetable became an honorary member of the holiday menu.
To this day, those roasted Brussels sprouts hold a special place in my heart, bringing back warmth and joy with every bite. And I strive to recreate that magic in my own kitchen to share with friends and family.
Ingredients
Now let’s go over the ingredients you’ll need to whip up these scrumptious roasted Brussels sprouts:
-
Brussels Sprouts: The star of the show! Opt for fresh sprouts with tight, unblemished leaves. If they’re larger, simply slice them in half to ensure even cooking. If fresh isn’t available, look for frozen sprouts – just be sure to thaw and pat them dry before roasting.
-
Olive Oil: This not only helps the sprouts roast beautifully but also adds a lovely flavor. Extra virgin is ideal for its rich taste, but you can use regular olive oil or even avocado oil.
-
Salt: A must to enhance all those savory flavors. Sea salt or kosher salt works best, but table salt is fine if that’s what you have on hand.
-
Pepper: Freshly cracked black pepper gives a robust flavor that pairs perfectly with the sprouts. If you’re feeling adventurous, try some red pepper flakes for a touch of heat!
-
Garlic Powder: Adds depth without the fuss of fresh garlic. It infuses the sprouts with flavor. If you prefer fresh garlic, feel free to swap in a couple of minced cloves – just watch for burning!
-
Onion Powder: This brings out earthy undertones. You can substitute it with finely chopped shallots or omit it if desired.
Step-by-Step Instructions
Ready to get roasting? Let’s dive into the cooking process!
-
Preheat the Oven: Start by preheating your oven to 425°F (220°C). This high temperature is crucial! It helps achieve the perfect char and caramelization that will make your sprouts sing.
-
Prep the Brussels Sprouts: Rinse the sprouts under cold water to remove any dirt. Trim the stems and remove any discolored outer leaves. Cut the larger sprouts in half to ensure they cook evenly; smaller ones can stay whole.
-
Season the Sprouts: In a large mixing bowl, toss the cleaned Brussels sprouts with a generous drizzle of olive oil. Aim for about 2 tablespoons, but feel free to adjust based on your preference. Add salt, freshly cracked pepper, garlic powder, and onion powder. This is the fun part – get your hands in there! Mix until all the sprouts are fully coated and seasonings are evenly distributed.
-
Arrange on a Baking Sheet: Spread the seasoned sprouts onto a large baking sheet in a single layer. Avoid overcrowding; these little guys need space to breathe and sizzle. If you’re making a larger batch, consider using two sheets.
-
Roast Away: Place the baking sheet in the preheated oven and roast for about 20-25 minutes, shaking the pan halfway through to promote even cooking. Keep an eye on them – you’re looking for golden-brown edges and a fork-tender center. If you want an extra crispy finish, turn the broiler on for the last couple of minutes – but watch closely, as we don’t want them to burn!
-
Taste Test: Once out of the oven, let them rest for a minute (if you can!) and sneak a taste. They should be a perfect combination of crispy on the outside and tender on the inside. If needed, adjust the seasoning with more salt and pepper to get that glorious flavor just right.
Serving Suggestions
Now comes the best part – serving these beauties! Transfer your roasted Brussels sprouts to a lovely serving platter. For a finishing touch, consider drizzling a bit of balsamic reduction or some freshly squeezed lemon juice over the top for that delightful brightness. You can also sprinkle some grated Parmesan or pecorino for an extra layer of flavor. Arrange them artfully, perhaps with some fresh herbs for a pop of color.
These roasted sprouts make a fantastic side dish for any meat or plant-based main course, or serve them as a part of a joyful veggie-centric spread. Share them on a beautiful table and watch how guests flock to them!
Recipe Variations
Feel free to get creative with your Brussels sprouts! Here are a few variations to switch things up:
-
Maple Glazed: Drizzle maple syrup over the sprouts before roasting for a sweet-tart combination that’s simply divine, especially in fall!
-
Spicy Garlic: Toss in some red pepper flakes and fresh minced garlic for an extra kick. Just be careful with the garlic – no one wants burnt bits!
-
Balsamic & Honey: Mix equal parts balsamic vinegar and honey to create a tangy glaze to drizzle on the sprouts just before they finish roasting.
-
Mediterranean Flare: Add kalamata olives, sun-dried tomatoes, and feta cheese for a Mediterranean twist and to elevate your flavor profile.
-
Lemon & Dill: Toss with lemon zest and fresh chopped dill after roasting for a fresh and zesty taste.
Chef’s Notes
These roasted Brussels sprouts are a dish that’s truly evolved with me over the years. I remember experimenting back in my kitchen days, trying to convince my friends to give Brussels sprouts a chance. I started with the classic combination of butter and garlic, but over time I found that roasting brought out their natural sweetness better than any stovetop method.
To this day, I’m continually inspired by the changing seasons and the availability of fresh produce. Every time I roast a batch, I find myself tweaking the recipe a little more, playing with spices and glazes to highlight their perfectly crunchy, tender qualities.
One funny story that always cracks me up is when I served them at a dinner party, and my friend mistook my carefully crafted balsamic drizzle for chocolate syrup. The look on his face was priceless when he took that first bite! Let’s just say he became a fan that night!
FAQs and Troubleshooting
Q: My Brussels sprouts turned out mushy. What happened?
A: This can happen if they are overcrowded on the baking sheet or not roasted at a high enough temperature. Make sure there’s enough space for the sprouts to brown and try roasting them at 425°F as suggested.
Q: How do I know when they’re done?
A: You’re looking for that beautiful golden color on the outside with just a little bit of crispy char. A fork should go through them easily when checked!
Q: Can I make these ahead of time?
A: While roasted Brussels sprouts are best served fresh, you can prepare them ahead by cleaning and seasoning them. Store them in an airtight container in the fridge and roast right before serving!
Q: What if I have leftovers?
A: Lucky you! Leftover roasted Brussels sprouts can be stored in the refrigerator for up to 3 days. Just reheat them in the oven to regain some of their crispy texture.
Nutritional Info
Although I don’t focus too much on strict nutritional guidelines, roasted Brussels sprouts are a fantastic source of vitamins K and C, fiber, and offer some healthy antioxidants. They’re low in calories and rich in nutrients, making them a wonderful addition to your meals!
Thank you for joining me on this colorful culinary adventure! I hope you feel inspired to bring Brussels sprouts into your kitchen and share the joy of roasting them with your loved ones. Let’s keep spreading that love of food and gathering together around the table. Happy cooking, and remember, good food is all about good company!
PrintRoasted Brussels Sprouts

Delightful roasted Brussels sprouts that transform skeptics into fans with their sweet and nutty flavor.
- Prep Time: 10 minutes
- Cook Time: 25 minutes
- Total Time: 35 minutes
- Yield: 4 servings 1x
- Category: Side Dish
- Method: Roasting
- Cuisine: American
- Diet: Vegetarian
Ingredients
- 1 pound Brussels sprouts
- 2 tablespoons olive oil
- 1 teaspoon salt
- 1/2 teaspoon black pepper
- 1 teaspoon garlic powder
- 1 teaspoon onion powder
Instructions
- Preheat the oven to 425°F (220°C).
- Prep the Brussels sprouts by rinsing them under cold water, trimming the stems, and removing discolored leaves.
- Season the sprouts with olive oil, salt, pepper, garlic powder, and onion powder in a mixing bowl.
- Arrange them on a large baking sheet in a single layer.
- Roast for 20-25 minutes, shaking the pan halfway through.
- Taste and adjust seasoning as necessary before serving.
Notes
For extra flavor, consider drizzling with balsamic reduction or lemon juice before serving.
Nutrition
- Serving Size: 1 serving
- Calories: 120
- Sugar: 2g
- Sodium: 300mg
- Fat: 7g
- Saturated Fat: 1g
- Unsaturated Fat: 6g
- Trans Fat: 0g
- Carbohydrates: 12g
- Fiber: 4g
- Protein: 4g
- Cholesterol: 0mg
Keywords: Brussels sprouts, roasted vegetables, healthy side dish
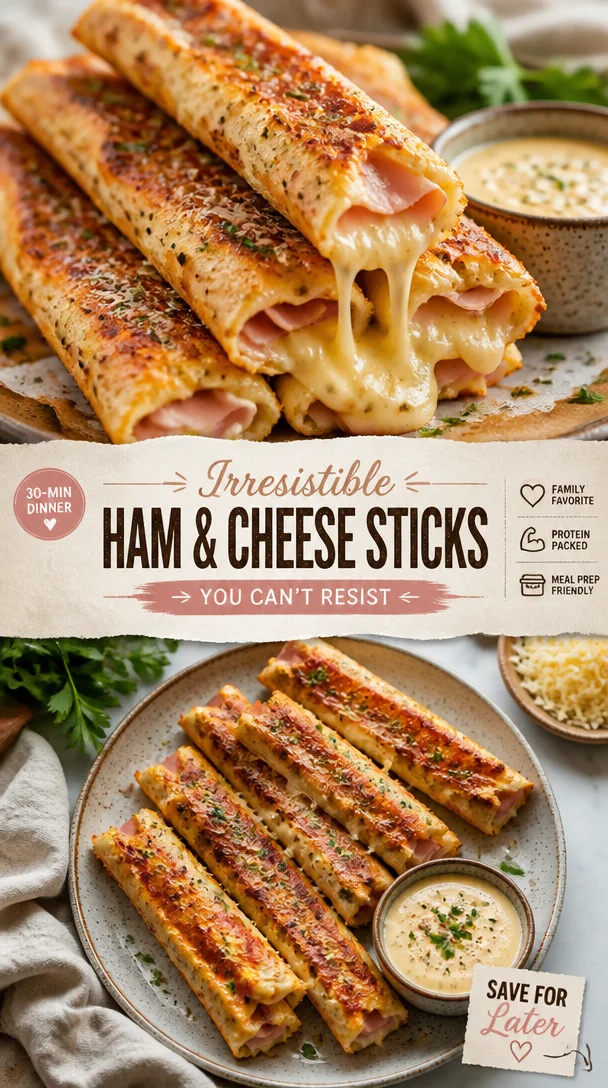
Irresistible Ham and Cheese Sticks You Can’t Resist
Irresistible Ham and Cheese Sticks You Can’t Resist
Welcome to my cozy corner of the culinary world! If you’re in search of a dish that hits all the right notes—savory, flaky, and utterly irresistible—then you’re in for a treat today. We’re diving into the delightful world of Ham and Cheese Sticks, a snack or appetizer that will leave everyone begging for more. Picture this: crispy, golden puff pastry wrapped around layers of delicious ham and melted cheese, brushed with a hint of mustard, and sprinkled with fresh parsley. What’s not to love?
It’s funny how some of the foods we cherish the most come wrapped in a little nostalgia. For me, the joy of Ham and Cheese Sticks stems from glorious afternoons spent in my grandmother’s kitchen, where the air was filled with the aroma of baking treats and laughter echoed off the walls. Every Sunday, she would whip up these delightful snacks for our family gathering. As a child, I was fascinated by the way those golden sticks would appear from the oven, a glorious triumph in both flavor and fun. It always felt like magic, and I knew I wanted to carry that tradition into my own kitchen.
So, whether you’re prepping for a family gathering, game night with friends, or just treating yourself, let’s embark on this culinary adventure together! Ready to tie on your apron and create something amazing? Let’s get cooking!
My Personal Story: The Sunday Staple
Memory is a powerful ingredient in cooking, don’t you think? I can still picture my grandmother’s hands—gentle yet skilled—rolling out the dough while we kids squealed in anticipation. The moment those Ham and Cheese Sticks came out of the oven, we’d crowd around the kitchen island, each hoping to snag the first bite. I remember how she always saved the last one just for me, a little secret between us as she winked and said, "You deserve it, darling."
Those sticks became a staple, a tradition that brought our family together every Sunday. Over time, I’ve made adjustments, trying out different cheeses and spices, but my love for this dish has remained constant. It represents not only comfort but also the joy of sharing moments with loved ones around the table.
Ingredients
Here’s what you’ll need to whip up these fabulous Ham and Cheese Sticks:
-
1 sheet thawed puff pastry
This flaky wonder serves as the perfect base to hold in all that savory goodness. If you don’t have puff pastry, you can swap it for phyllo dough, but remember, it will be flakier and might need careful handling. -
8 slices deli ham
Adds a salty, savory layer that pairs beautifully with the cheese. Feel free to use turkey or even plant-based deli slices for a lighter option. -
1 cup cheddar or mozzarella cheese
Choose your favorite cheese for a melty, rich filling that everyone will love! For a bolder flavor, consider sharp cheddar or pepper jack. -
1 large beaten egg
Provides a golden, shiny finish to your Ham and Cheese Sticks. If you’re vegan, a splash of non-dairy milk can work as an alternative glaze. -
1 tablespoon Dijon mustard
A tangy kick that elevates the flavor of the filling. You can also use whole grain mustard for a bit of texture or a touch of honey mustard for sweetness. -
2 tablespoons chopped fresh parsley (optional)
Adds freshness and color. You could substitute with fresh thyme or chives for a different herbal note. -
to taste salt
Essential for rounding out the flavors. Just a pinch will do, especially if your ham is salty. -
to taste pepper
Essential, too! Freshly cracked black pepper can enhance the overall seasoning of the dish.
Step-by-Step Instructions
Now, let’s dive into the kitchen. It’s time to create these irresistible Ham and Cheese Sticks!
-
Preheat Your Oven
Set your oven to 400°F (200°C). Preheating is essential for achieving that perfect flaky texture—trust me! -
Prepare the Pastry
Roll out your thawed puff pastry on a lightly floured surface. You want it to be as thin as possible without tearing. Think of it as a delicious canvas waiting for your masterpiece. -
Cut Your Pastry
Using a sharp knife or pizza cutter, slice the pastry into rectangles, roughly 3 inches by 5 inches. These will be your individual Ham and Cheese Sticks, so size them according to your appetite! -
Layer the Ingredients
Start with a slice of ham, laying it in the center of each pastry rectangle. Next, sprinkle a generous amount of cheese over the ham. Remember, the more cheese, the merrier! -
Add a Brush of Mustard
If you like a bit of tanginess, spread a tiny dollop of Dijon mustard on top of the cheese. It adds great depth and keeps everything deliciously moist. -
Fold and Seal
Fold the pastry over the filling to create a pocket, then pinch the edges together to seal them securely. This is where our flavors will cozy up during baking! -
Brush with Egg
Place the prepared sticks on a baking sheet lined with parchment paper. Brush the tops with the beaten egg for that golden sheen. Don’t be shy; it makes all the difference! -
Sprinkle with Seasoning
A light dusting of salt and pepper on top will elevate your Ham and Cheese Sticks. If you’re feeling fancy, throw on some sesame seeds or everything bagel seasoning for an extra pop of flavor. -
Bake
Slide your baking sheet into the preheated oven and bake for 15-20 minutes or until everything is puffed and gloriously golden brown. Keep an eye on them—no one likes a burnt stick! -
Cool & Serve
Once baked, let the sticks cool on a wire rack for a minute. This helps them retain their crispiness. But don’t wait too long; they’re best enjoyed warm!
Serving Suggestions
To plate these lovely Ham and Cheese Sticks, consider serving them on a beautiful wooden board. Pair with a small bowl of honey mustard or a tangy dip on the side for an extra zing! You can even garnish with a sprinkle of fresh parsley for a pop of color—as always, presentation is key!
Recipe Variations
Looking to mix things up? Here are some creative twists to consider:
- Spicy Kick: Add some sliced jalapeños or red pepper flakes to the filling for a spicy version.
- Herb Infusion: Experiment with fresh herbs, like thyme or rosemary, mixed in with your cheese for an aromatic lift.
- Veggie Delight: Toss in some diced bell peppers or spinach to the filling for added nutrition and flavor.
- Sweet Twist: Spread a thin layer of fig jam before layering ham and cheese for a sweet-savory combo.
- Cheesy Surprise: Mix a variety of cheeses, like brie and gouda, for a rich, decadent filling.
Chef’s Notes
As I’ve played with this recipe over the years, I’ve learned that the beauty lies in its adaptability. One day I might feel like making them spicy, while another might call for that classic sweet and savory flavor. And let me tell you, I’ve had my fair share of culinary missteps! I once forgot to seal the edges entirely, which sent melted cheese oozing out all over my baking sheet. The result? A mess—but also a new favorite dish inspired by the chaos!
Every burn, spill, and success in the kitchen shapes our cooking journey. So, embrace it all, and remember: cooking is about joy, not perfection.
FAQs and Troubleshooting
1. What do I do if my puff pastry is tearing?
If your pastry tears, don’t panic! You can easily patch it up with a bit of water to create a seal, or just use extra dough to cover the spot.
2. Can I make these ham and cheese sticks ahead of time?
Absolutely! You can prepare them a few hours in advance, cover them with plastic wrap, and pop them in the fridge until you’re ready to bake. Just be sure to brush them with the egg wash right before baking.
3. What can I serve alongside these sticks?
Pair these delightful bites with a fresh salad, a charcuterie board, or even a simple bowl of tomato soup for dipping!
4. Why are my Ham and Cheese Sticks not puffing up?
Ensure your oven is fully preheated before baking, and avoid overcrowding the baking sheet. Fresh puff pastry should give you that lovely rise. If in doubt, try chilling the pastry before baking to help with the puffing!
Nutritional Info
While I believe good food is about balance, here’s a quick nutritional overview per serving (based on one stick, for a batch of 8):
- Calories: 200
- Protein: 8g
- Carbohydrates: 15g
- Fat: 12g
So there you have it! From nostalgic memories to decadent flavors, these Ham and Cheese Sticks are sure to delight. I hope you find as much joy in making them as I do. Happy cooking, and remember—good food isn’t just about nourishment; it’s about connection. Tie on your apron and let’s keep spreading those culinary smiles!
PrintIrresistible Ham and Cheese Sticks

Delicious crispy puff pastry filled with savory ham and melted cheese, brushed with mustard and sprinkled with parsley.
- Prep Time: 15 minutes
- Cook Time: 20 minutes
- Total Time: 35 minutes
- Yield: 8 servings 1x
- Category: Appetizer
- Method: Baking
- Cuisine: American
- Diet: None
Ingredients
- 1 sheet thawed puff pastry
- 8 slices deli ham
- 1 cup cheddar or mozzarella cheese
- 1 large beaten egg
- 1 tablespoon Dijon mustard
- 2 tablespoons chopped fresh parsley (optional)
- to taste salt
- to taste pepper
Instructions
- Preheat your oven to 400°F (200°C).
- Prepare the puff pastry on a lightly floured surface.
- Cut the pastry into 3×5 inch rectangles.
- Layer the ham and cheese in the center of each rectangle.
- Add a tiny dollop of Dijon mustard on top of the cheese.
- Fold the pastry over the filling and pinch edges to seal.
- Brush the tops with the beaten egg.
- Sprinkle with salt and pepper.
- Bake for 15-20 minutes until golden brown.
- Cool on a wire rack before serving.
Notes
Serve warm with dipping sauce for extra flavor.
Nutrition
- Serving Size: 1 stick
- Calories: 200
- Sugar: 1g
- Sodium: 600mg
- Fat: 12g
- Saturated Fat: 4g
- Unsaturated Fat: 7g
- Trans Fat: 0g
- Carbohydrates: 15g
- Fiber: 1g
- Protein: 8g
- Cholesterol: 30mg
Keywords: ham, cheese, puff pastry, appetizer, snack, party food
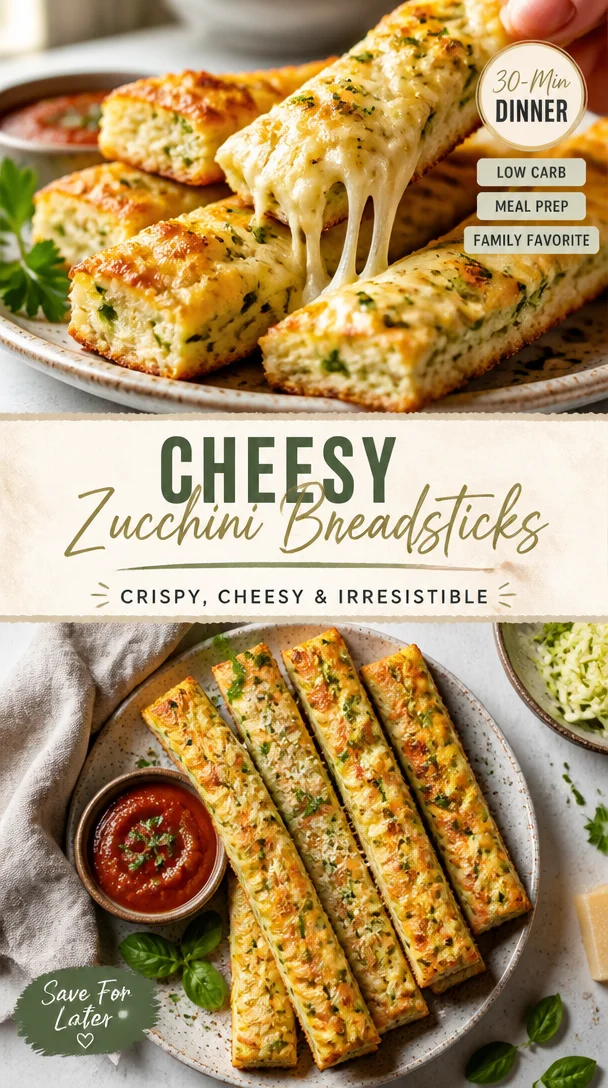
Cheesy Zucchini Breadsticks
From Garden to Table: Cheesy Zucchini Breadsticks
Welcome to my kitchen! Today, I’m excited to share a delightful recipe that perfectly combines comfort and creativity: Cheesy Zucchini Breadsticks. If you’re like me and love to sneak a little veggie goodness into your meals, these cheesy delights are just the ticket. They’re a fantastic appetizer, an irresistible snack, or even a fun addition to your weeknight dinner.
Zucchini is one of those underappreciated heroes of the vegetable kingdom. Not only does it provide moisture and subtle sweetness, but it also soaks up flavors beautifully, making it a versatile ingredient in so many dishes. And combined with gooey, melty cheese? Well, let’s just say it’s a match made in culinary heaven!
These Cheesy Zucchini Breadsticks are packed with flavor and texture, perfect for impressing your guests or simply indulging yourself. They’re crispy on the outside, cheesy on the inside, and bursting with flavor. Plus, they’re gluten-free, making them a great option for everyone around your table!
So grab your apron, and let’s get started. I’m ready to cook alongside you!
A Slice of Nostalgia
Growing up, my family had a beautiful garden bursting with vegetables. I can still remember those sun-drenched summer days spent picking zucchini, my hands tinged with dirt and the smell of fresh herbs wafting through the air. My mom would whip up all sorts of dishes, but her cheesy zucchini fritters were always a family favorite. As kids, we’d devour them straight from the skillet, refusing to let them cool down!
Fast forward to today, and my love for zucchini hasn’t waned; it’s just evolved. These breadsticks are my homage to those cherished moments in the kitchen—messy, joyful, and so full of flavor. I invite you to share in this delightful memory and to create new ones around your own table.
Ingredients
Here’s what you’ll need for these delectable Cheesy Zucchini Breadsticks:
-
2 medium zucchinis (about 2 cups shredded)
Fresh zucchini adds moisture and a subtle sweetness. If you can’t find zucchini, yellow squash works nicely too! -
2 large eggs
Eggs act as a binder, helping everything stick together. If you need a vegan alternative, you can use flax eggs (1 tablespoon of ground flaxseed mixed with 2.5 tablespoons of water, let it sit for 5 minutes). -
½ cup shredded mozzarella cheese
Mozzarella brings that melt-in-your-mouth texture. Feel free to substitute with any cheese that melts well, like provolone or gouda. -
¼ cup grated Parmesan cheese
Parmesan adds a wonderful depth and nuttiness. Nutritional yeast can serve as a great dairy-free substitute if you want a cheesy taste without the cheese. -
1 teaspoon garlic powder
This enhances the overall flavor. Fresh minced garlic can be used too—just go for 2-3 cloves. -
1 teaspoon Italian seasoning
A blend of dried herbs that pairs beautifully with the zucchini. You can create your own mix with basil, oregano, and thyme if you prefer. -
½ teaspoon salt
Salt enhances all the flavors but adjust to your taste, especially if you’re using salted cheese. -
¼ teaspoon black pepper
For a little kick. Feel free to add more if you enjoy a peppery punch! -
1 cup shredded mozzarella cheese (for topping)
Because who doesn’t love extra cheese on top? -
Optional: fresh parsley or basil for garnish
Fresh herbs add a lovely pop of color and freshness to your dish.
Step-by-Step Instructions
Let’s dive into the heart of cooking these Cheesy Zucchini Breadsticks! Here’s how to make them step-by-step:
-
Preheat Your Oven
Preheat your oven to 425°F (220°C). This high temperature will help create that perfect crispy texture on the outside of your breadsticks. -
Prep the Zucchini
Using a box grater or food processor, shred the zucchini. I love the rustic feel of hand-grating, but do what makes you happy! Once shredded, place the zucchini in a clean kitchen towel or cheesecloth. Squeeze out as much moisture as you can. This step is crucial as excess water can make your breadsticks soggy. -
Mix Ingredients
In a large mixing bowl, combine the squeezed zucchini, eggs, mozzarella cheese, Parmesan cheese, garlic powder, Italian seasoning, salt, and black pepper. Mix until everything is well incorporated. You want a uniform mixture that holds together. Pro tip: don’t be afraid to get your hands in there! -
Line the Baking Sheet
Line a baking sheet with parchment paper for easy cleanup and to prevent sticking. Trust me, parchment paper is a chef’s best friend! -
Shape the Breadsticks
With your mixture ready, scoop out portions and shape them into small rectangles or “sticks” on the baking sheet. Each should be about ½ inch thick. Try to keep them uniform so they cook evenly. Feel free to use a spatula to smooth the tops out and create neat edges! -
Bake First Time
Pop the baking sheet in the oven and bake for about 15-20 minutes until the breadsticks are golden and firm to the touch. This initial bake is crucial for texture! -
Add Toppings
Remove the breadsticks from the oven and sprinkle the remaining shredded mozzarella cheese evenly over the top. Don’t be shy—this is your chance for a cheesy crown! -
Final Bake
Return the cheesy zucchini breadsticks to the oven and bake for an additional 5-10 minutes until the cheese is melted and bubbly. The aroma will be divine—get ready for it! -
Cool and Serve
Once done, let them cool on the baking sheet for about 5 minutes. This helps them firm up a little more, making them easier to cut and serve.
Serving Suggestions
Serving these Cheesy Zucchini Breadsticks can be as simple or as elegant as you like! I love to cut them into strips and serve them alongside a bowl of marinara for dipping—classic! You can also sprinkle some fresh chopped parsley or basil on top for a stunning presentation. Pair these with a crisp salad or a cozy bowl of soup, and you have a well-rounded meal that’s both fun and satisfying.
Recipe Variations
Want to mix things up? Here are some fun variations you can experiment with:
-
Spicy Twist: Add red pepper flakes to the mixture for a little heat.
-
Herbed Delight: Incorporate fresh chopped herbs like thyme or dill for a fresh flavor boost.
-
Cheeseboard Style: Swap out the mozzarella for a mix of feta and goat cheese for a tangy twist.
-
Vegetable Medley: Add in some finely chopped spinach or bell peppers for extra nutrition and flavor.
-
The Sweet Tooth: Mix in some grated parmesan and a sprinkle of cinnamon for an unexpected sweet twist.
Chef’s Notes
These Cheesy Zucchini Breadsticks have come a long way from my childhood memories. They started as a grab-and-go snack but have now evolved into a beloved appetizer that finds its way into many of my gatherings. During one particularly memorable potluck, I forgot to squeeze out the excess moisture from the zucchini, and the result was hilariously disastrous! But the guests loved them so much, they didn’t care. It’s those little imperfections that make cooking so relatable and enjoyable. And the best part? You can always learn from your kitchen conquests!
FAQs and Troubleshooting
1. My breadsticks turned out soggy. What went wrong?
This is often due to excess moisture in the zucchini! Make sure you squeeze out as much liquid as possible before mixing.
2. Can I freeze these Cheesy Zucchini Breadsticks?
Absolutely! Just bake them, let them cool completely, and then freeze in an airtight container. When you’re ready to enjoy, bake straight from the freezer—just add a few extra minutes to the cooking time.
3. What if I don’t have zucchini?
No worries! You can substitute with other vegetables such as yellow squash, or even finely shredded carrots for a different texture and flavor.
4. How can I tell when they’re done?
Look for a golden brown exterior and ensure the cheese is melted and bubbly. They should feel firm to the touch when you lightly press down on them.
Nutritional Info
While I love making delicious food, I also want to ensure we’re conscious about nutrition! These Cheesy Zucchini Breadsticks are a great source of vitamins and protein, making them an excellent choice for both snacks and appetizers. They’re low-carb, gluten-free, and high in veggies, making them guilt-free indulgences!
There you have it—Cheesy Zucchini Breadsticks that you can easily whip up for any occasion! I hope this recipe inspires you to gather people around your table and create lasting memories. Don’t forget to share your cooking adventures with me—I love seeing your takes on my recipes! Happy cooking, and remember, good food isn’t just about showing off. It’s all about showing up for the people you love. Cheers!
PrintCheesy Zucchini Breadsticks

Delicious cheesy zucchini breadsticks that are crispy on the outside and gooey on the inside, perfect as an appetizer or snack.
- Prep Time: 15 minutes
- Cook Time: 30 minutes
- Total Time: 45 minutes
- Yield: 4 servings 1x
- Category: Appetizer
- Method: Baking
- Cuisine: American
- Diet: Gluten-Free
Ingredients
- 2 medium zucchinis (about 2 cups shredded)
- 2 large eggs
- ½ cup shredded mozzarella cheese
- ¼ cup grated Parmesan cheese
- 1 teaspoon garlic powder
- 1 teaspoon Italian seasoning
- ½ teaspoon salt
- ¼ teaspoon black pepper
- 1 cup shredded mozzarella cheese (for topping)
- Optional: fresh parsley or basil for garnish
Instructions
- Preheat your oven to 425°F (220°C).
- Prep the zucchini by shredding and squeezing out excess moisture.
- Mix all ingredients in a large mixing bowl until well combined.
- Line a baking sheet with parchment paper.
- Shape the mixture into small rectangles on the baking sheet.
- Bake for about 15-20 minutes until golden and firm.
- Add the topping mozzarella cheese and bake for an additional 5-10 minutes.
- Cool on the baking sheet for 5 minutes before serving.
Notes
Serve with marinara sauce for dipping. Can be frozen and baked straight from the freezer.
Nutrition
- Serving Size: 1 serving
- Calories: 250
- Sugar: 3g
- Sodium: 320mg
- Fat: 10g
- Saturated Fat: 4g
- Unsaturated Fat: 6g
- Trans Fat: 0g
- Carbohydrates: 30g
- Fiber: 2g
- Protein: 12g
- Cholesterol: 70mg
Keywords: zucchini breadsticks, cheesy appetizer, gluten-free snacks, vegetable recipes
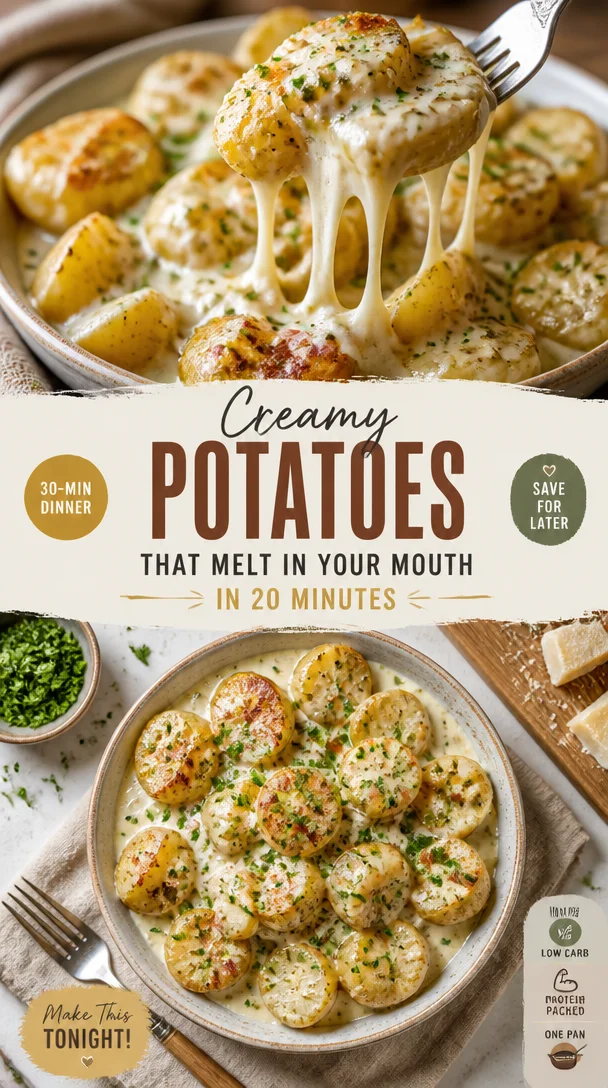
Creamy Potatoes That Melt in Your Mouth in 20 Minutes
Melt In Your Mouth Potatoes
Hello, my lovely food friends! Today, we’re diving into the cozy world of cooking and embracing one of life’s simplest yet most comforting side dishes—Melt In Your Mouth Potatoes. Trust me; these little gems are going to become your new best friend in the kitchen. With a golden, buttery exterior and a creamy interior that practically begs to be devoured, this dish is perfect for both weeknight dinners and fancy gatherings.
As we navigate the culinary landscape together, I’ll share not just the recipe but the stories and inspirations behind these potatoes, making this experience truly special. So, pull up a chair, tie your apron, and let’s get cooking!
A Nostalgic Gathering
One of my favorite memories in the kitchen revolves around a family gathering that epitomized warmth, laughter, and, of course, delicious food. I can vividly recall my grandmother’s kitchen during the holidays, where the air was filled with the irresistible aroma of her famous buttery roasted potatoes. She had this magical knack for transforming simple ingredients into extraordinary dishes, using nothing but love and a little bit of elbow grease.
One particular Thanksgiving, she let me take the reins for the potato dish. I was nervous, but her encouraging smile reassured me. We peeled and chopped together while exchanging stories about family recipes and the importance of warmth and hospitality around the table. Those Melt In Your Mouth Potatoes became more than just comfort food—they symbolized connection, celebration, and the joy of gathering. It is in those moments that I understood the heart of cooking: it’s not merely about the food but the emotions and memories we create around it.
Ingredients
Here’s what you’ll need to create your delightful Melt In Your Mouth Potatoes:
-
2 lbs (900 g) Yukon Gold or baby potatoes
These potatoes are creamy and buttery, perfect for achieving that melt-in-your-mouth texture. If you can’t find Yukon Golds, feel free to use red potatoes or even small fingerlings. -
4 tablespoons unsalted butter (melted)
Butter is the key to rich flavor. If you’re dairy-free, swap it with olive oil or a vegan butter alternative for a guilt-free version! -
2 tablespoons olive oil
This adds another layer of flavor and helps achieve that beautiful golden-brown color. You can use avocado oil instead for a different taste. -
3 cloves garlic (finely minced)
Fresh garlic elevates the dish! If you’re in a pinch, garlic powder can substitute—use about 1 teaspoon. -
1 teaspoon salt
Just the right amount to enhance flavors—not too much, or you’ll overpower the dish. -
½ teaspoon black pepper
Freshly cracked pepper produces the best flavor. It’s a game-changer! -
1 teaspoon dried thyme or rosemary (optional)
Fresh or dried, these herbs pair beautifully with potatoes. If you love herbaceous flavors, feel free to mix in your favorites! -
½ cup (120 ml) chicken or vegetable broth
This helps infuse flavor and keeps the potatoes moist during baking. Homemade broth is ideal, but store-bought works just fine, too. -
Fresh parsley (chopped for garnish, optional)
A sprinkle of fresh herbs brightens up the dish and adds a splash of color!
Step-by-Step Instructions
Now that we have our ingredients, let’s dive into the cooking process! Here’s how to turn those humble potatoes into a luxurious side dish:
-
Preheat the Oven
Preheat your oven to 400°F (200°C). Think of it as setting the stage for the delicious show about to unfold! -
Prepare the Potatoes
Scrub your Yukon Gold or baby potatoes under cool running water to get rid of any dirt. If you’re using larger potatoes, cut them into halves or quarters for even cooking. Smaller baby potatoes can be left whole. -
Make the Sauce
In a large bowl, whisk together the melted butter, olive oil, minced garlic, salt, black pepper, and herbs (if using). This is where the magic begins. The aromas alone will have your stomach growling! -
Coat the Potatoes
Add the potatoes to the bowl and toss them in the butter mixture until they’re thoroughly coated. Don’t be shy! Get your hands in there and ensure every morsel is enveloped in that buttery goodness. -
Transfer to Baking Dish
Spread the potatoes in a single layer in a large baking dish or on a parchment-lined baking sheet. Pour any remaining butter mixture over the top—no need to waste that flavor! -
Add the Broth
Carefully pour the chicken or vegetable broth around the potatoes in the baking dish. This will keep them moist while roasting, ensuring they absorb all the delicious flavors. -
Roast Away
Pop those potatoes into the preheated oven and roast for about 30-40 minutes. Halfway through, give them a gentle shake or stir to promote even browning. After 20 minutes, you can start checking for doneness. When they’re tender and golden brown, they’re ready! -
Finishing Touches
Once they’re out of the oven, sprinkle optional fresh parsley over the top for a pop of color and freshness. Let them rest for a few minutes before serving—trust me, the patience will pay off!
Serving Suggestions
Plating your Melt In Your Mouth Potatoes shouldn’t feel like a chore! For a beautiful presentation, arrange them in a shallow serving dish, allowing the golden tops to peek out. Drizzle any remaining broth over the potatoes and garnish with freshly chopped parsley for that added touch of elegance. They pair beautifully with roasted meats, grilled fish, or as a stunning centerpiece for a vegetarian feast.
Recipe Variations
Here are a few creative twists to personalize your Melt In Your Mouth Potatoes:
-
Cheesy Delight: Add 1 cup of grated cheese (like cheddar or Parmesan) to the top for the last 10 minutes of roasting for a gooey, cheesy finish.
-
Spicy Kick: Include a pinch of red pepper flakes or smoked paprika in the butter mixture for a flavorful heat.
-
Lemon Zest: A dash of lemon zest brings brightness that perfectly balances the rich flavors of the potatoes.
-
Herb Garden: Experiment with fresh herbs! Thyme, rosemary, or even dill will bring new life to each bite.
-
Vegan Version: Swap butter for vegan alternatives and use vegetable broth to make this a plant-based delight!
Chef’s Notes
Over the years, my Melt In Your Mouth Potatoes have transformed alongside my cooking journey. I remember the first time I attempted to make them for a dinner party. I was stressing about every little detail, but my friends loved them so much they didn’t even notice the couple of imperfections. They reminded me that cooking is as much about the experience as it is about the food itself! Now, I freely experiment with flavors and enjoy the process more than ever.
FAQs and Troubleshooting
Here are a few common reader questions that might help you on your cooking adventure:
-
Why are my potatoes not crispy enough?
Ensure they are well-coated in oil and butter. A hot oven is crucial for crisping them up. Also, make sure they’re in a single layer on your baking sheet. -
Can I prepare these in advance?
Absolutely! You can prep the potatoes, toss them in the butter mixture, and refrigerate them up to a day in advance. Just add a little extra time to your baking if they’re cold from the fridge. -
What if they’re overcooked?
Overcooked potatoes can still be delicious. Serve them mashed with extra broth and herbs for a creamy alternative! -
Can I use different kinds of potatoes?
Yes! Just keep in mind that different varieties will yield slightly different textures, but experimenting is half the fun.
Nutritional Info (if applicable)
While I believe food is meant to be enjoyed, it can also be helpful to be mindful of nutrition! This recipe is rich in vitamins and healthy fats, especially if you utilize olive oil. Each serving has roughly:
- Calories: 210
- Fat: 11g
- Carbohydrates: 29g
- Protein: 2g
Keep that in mind, and remember that sharing these potatoes around the table brings joy and warmth—what can be better than that?
And there you have it! Your guide to Melt In Your Mouth Potatoes, filled with love, stories, and tasty tips that celebrate everything I adore about cooking. I can’t wait for you to dive into this recipe and share your own stories around the dinner table. Happy cooking, and remember—good food is about showing up and creating memories!
PrintMelt In Your Mouth Potatoes

Experience the comforting delight of Melt In Your Mouth Potatoes, featuring a buttery exterior and a creamy interior that’s perfect for any occasion.
- Prep Time: 10 minutes
- Cook Time: 30 minutes
- Total Time: 40 minutes
- Yield: 4 servings 1x
- Category: Side Dish
- Method: Baking
- Cuisine: American
- Diet: Vegetarian
Ingredients
- 2 lbs (900 g) Yukon Gold or baby potatoes
- 4 tablespoons unsalted butter (melted)
- 2 tablespoons olive oil
- 3 cloves garlic (finely minced)
- 1 teaspoon salt
- ½ teaspoon black pepper
- 1 teaspoon dried thyme or rosemary (optional)
- ½ cup (120 ml) chicken or vegetable broth
- Fresh parsley (chopped for garnish, optional)
Instructions
- Preheat your oven to 400°F (200°C).
- Scrub your Yukon Gold or baby potatoes under cool running water.
- In a large bowl, whisk together the melted butter, olive oil, minced garlic, salt, black pepper, and herbs (if using).
- Add the potatoes to the bowl and toss them in the butter mixture until they’re thoroughly coated.
- Spread the potatoes in a single layer in a large baking dish or on a parchment-lined baking sheet.
- Carefully pour the chicken or vegetable broth around the potatoes in the baking dish.
- Pop those potatoes into the preheated oven and roast for about 30-40 minutes.
- Once they’re golden brown, sprinkle optional fresh parsley over the top for a pop of color.
Notes
To enhance flavors, feel free to experiment with different herbs and add cheese or a spicy twist!
Nutrition
- Serving Size: 1 serving
- Calories: 210
- Sugar: 1g
- Sodium: 400mg
- Fat: 11g
- Saturated Fat: 4g
- Unsaturated Fat: 7g
- Trans Fat: 0g
- Carbohydrates: 29g
- Fiber: 3g
- Protein: 2g
- Cholesterol: 30mg
Keywords: potatoes, side dish, vegetarian, comfort food, baking
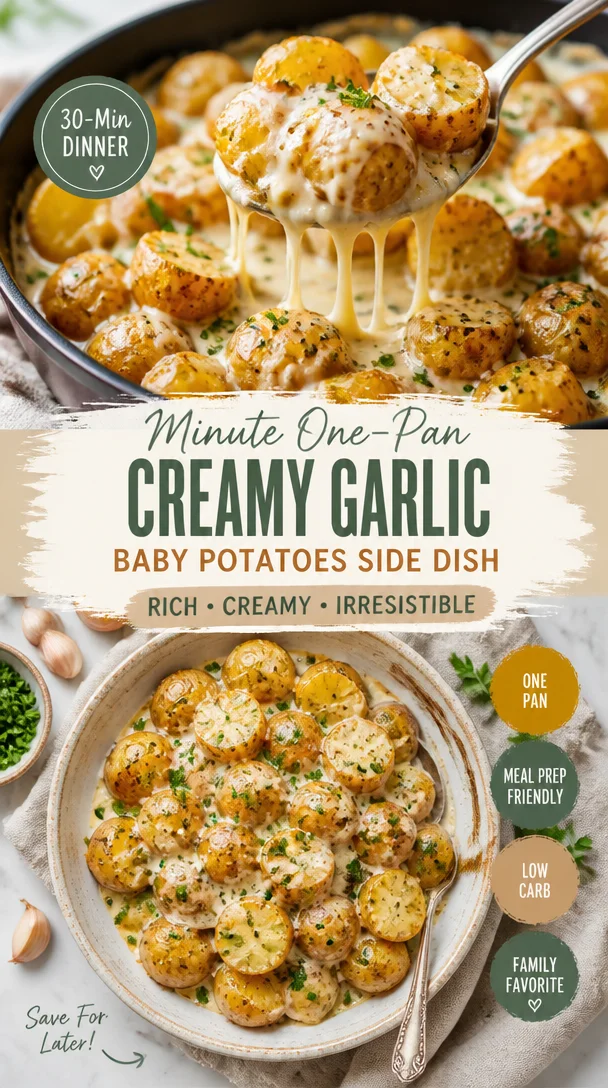
Minute One-Pan Creamy Garlic Baby Potatoes Side Dish
Creamy Garlic Sauce Baby Potatoes: A Comfort Food Classic
Hello, fellow food enthusiasts! Let’s dive into a dish that’s the ultimate combination of creamy, garlicky goodness and crispy little bites of joy — Creamy Garlic Sauce Baby Potatoes. Whether it’s a weeknight dinner or a special occasion, this dish captures the essence of comforting home cooking that makes everyone feel welcome. Trust me, your taste buds are in for a treat!
Picture this: It’s a chilly autumn evening, and the golden leaves are rustling outside as the sun begins to set. The kitchen is alive with warmth and the inviting aroma of garlic sautéing in butter. A pot of baby potatoes simmers on the stove, and you can’t help but sneak a few tastes along the way. This meal is not just about food; it’s about creating an experience, a memory that lingers long after the last bite. As I prepare this dish, I think back to my childhood when simple ingredients were transformed into something magical at my parents’ dinner table. Those moments shaped my love for cooking, and I hope this recipe does the same for you.
Let’s gather around the table and make these Creamy Garlic Sauce Baby Potatoes together. They’re not just a side dish; they’re a star!
My Favorite Kitchen Memory
Growing up, family dinners were a cherished ritual in my home. No matter how busy the week had been, we would gather around the table, ready to unwind and reconnect. One of my favorite memories involves my grandmother, a woman whose culinary skills were legendary in our family. She would often prepare her version of garlic potatoes, a dish she claimed was her secret to winning hearts.
One specific night, I remember her teaching me how to infuse oil with garlic while making sure not to let it burn—an art, really! As we stood shoulder to shoulder, she shared stories from her childhood and seasoned her words with laughter and love. It was more than a recipe; it was a lesson in nurturing relationships through food. Now, every time I whip up these Creamy Garlic Sauce Baby Potatoes, I channel that same warmth into my kitchen.
Ingredients
For our Creamy Garlic Sauce Baby Potatoes, here’s what you’ll need:
-
1 pound baby potatoes: These little gems are tender, creamy, and perfect for soaking up our luscious sauce. You can substitute with regular potatoes, but baby potatoes have a unique bite and elegance.
-
4 tablespoons butter: This is where the flavor starts. Butter adds richness to our sauce. For a vegan option, feel free to use coconut oil or vegan butter.
-
4 cloves garlic, minced: Fresh garlic is crucial here! Its aromatic kick brings everything together. If you don’t have fresh garlic, you can substitute with 1 teaspoon of garlic powder, but fresh really does shine.
-
1 cup heavy cream: This is what makes our sauce creamy and dreamy! You can use half-and-half for a lighter version or dairy-free alternatives like coconut cream if you’re keeping it plant-based.
-
1/2 cup grated Parmesan cheese: This adds umami and a nutty note. If you want a nondairy option, nutritional yeast can be a great substitute, giving you that cheesy flavor without the milk.
-
Salt and pepper to taste: Always taste as you go! Adjusting seasoning is key to bringing out the best in every dish.
-
Fresh parsley for garnish: A pop of color and a fresh taste to balance the richness of the sauce.
Step-by-Step Instructions
Ready to create something delicious? Let’s get cooking!
-
Prep the Potatoes: Start by giving your baby potatoes a good rinse under cold water. This will help remove any dirt. Next, place them in a pot and cover them with cold water. Add a generous pinch of salt, and bring them to a boil over high heat. As they cook, the salt helps enhance their natural flavor. Cook them for about 12-15 minutes or until fork-tender.
-
Sauté the Garlic: While the potatoes are cooking, heat the butter in a large skillet over medium heat. Once it melts, throw in the minced garlic. This is where the magic happens! Sauté it for about 1-2 minutes, stirring constantly, until fragrant but not browned. If the garlic burns, it can turn bitter, so keep an eye on it.
-
Make the Cream Sauce: Once the garlic is perfectly aromatic, pour in the heavy cream. Stir to combine, and bring the mixture to a gentle simmer. You’ll see it start to thicken slightly. This is a great time to taste! Add salt and pepper according to your preference.
-
Add the Cheese: Stir in the grated Parmesan cheese. Watch as it melts beautifully into the cream, creating a luscious, decadent sauce. Reserve a bit of cheese for garnishing later if you’d like!
-
Combine It All: Drain the cooked potatoes and carefully add them to the skillet with the creamy sauce. Gently toss them until they’re completely coated with that heavenly sauce. Let them simmer for another minute or two to soak in all that flavor.
-
Garnish and Serve: Finally, sprinkle chopped fresh parsley over the top. It adds excellent color contrast and a fresh burst of flavor!
Serving Suggestions
Plating is all about making your dish inviting. Serve these Creamy Garlic Sauce Baby Potatoes in a shallow bowl or on a beautiful platter. Drizzle any extra sauce over the potatoes and sprinkle with extra Parmesan and parsley. Pair these delightful potatoes with a simple green salad, roasted chicken, or grilled veggies for a well-rounded meal that feels fancy without any fuss!
Recipe Variations
Here are a few fun twists you can try with this recipe:
-
Herbed Garlic Potatoes: Add a teaspoon of dried herbs like thyme or rosemary to the butter while sautéing the garlic for a herby flavor.
-
Spicy Garlic Sauce: Incorporate a pinch of red pepper flakes into the garlic while sautéing for a kick of heat.
-
Lemon Garlic Sauce: Add the juice and zest of one lemon to the sauce for a bright, zesty taste that cuts through the creaminess.
-
Cheesy Spinach Potatoes: Incorporate a handful of fresh spinach in with the cream and Parmesan for added color and nutrition.
Chef’s Notes
As I fine-tune this recipe over the years, I’ve learned that it’s all about adjusting based on personal preference. The creamy garlic sauce can be altered to suit a variety of tastes or dietary needs. One of my funniest kitchen stories involves accidentally adding 4 tablespoons of garlic instead of 4 cloves! Let’s just say that my friends had a memorable pizza night, complete with a few jokes about warding off vampires! Mistakes happen, and they often lead to the most creative discoveries in the kitchen.
FAQs and Troubleshooting
Here are some common questions you might have while making these Creamy Garlic Sauce Baby Potatoes:
-
What if my sauce is too thick?
If your sauce is thicker than desired, add a splash of milk or broth until it reaches your preferred consistency. -
How do I prevent the garlic from burning?
Always sauté the garlic over medium heat and keep stirring. If it begins to brown too quickly, lower the heat. -
Can I make this dish ahead of time?
Yes! You can prepare the potatoes and sauce separately and combine them right before serving. Just reheat the sauce gently. -
What if I don’t have heavy cream?
You can use half-and-half or even Greek yogurt for a creamy texture, though the taste may slightly differ.
Nutritional Info
Each serving of these Creamy Garlic Sauce Baby Potatoes is comfort food at its best, rich in flavors and textures. While I prefer not to dwell too much on the numbers, they are hearty and satisfying, perfect for sharing!
There you have it! A warm, comforting dish that’s perfect for any occasion. I hope you enjoy making and sharing these Creamy Garlic Sauce Baby Potatoes as much as I do. Remember, cooking is about connection and love. So, tie on your apron and invite someone to join you at your table for a cozy meal that’s sure to impress! Happy cooking!
PrintCreamy Garlic Sauce Baby Potatoes

A comforting dish of baby potatoes in a creamy garlic sauce that makes a delightful side or star of the meal.
- Prep Time: 15 minutes
- Cook Time: 15 minutes
- Total Time: 30 minutes
- Yield: 4 servings 1x
- Category: Side Dish
- Method: Sautéing
- Cuisine: American
- Diet: Vegetarian
Ingredients
- 1 pound baby potatoes
- 4 tablespoons butter
- 4 cloves garlic, minced
- 1 cup heavy cream
- 1/2 cup grated Parmesan cheese
- Salt and pepper to taste
- Fresh parsley for garnish
Instructions
- Prep the potatoes: Rinse the baby potatoes under cold water. Place in a pot, cover with cold water, add a pinch of salt, and bring to a boil. Cook for about 12-15 minutes until fork-tender.
- Sauté the garlic: Heat the butter in a skillet over medium heat. Add the minced garlic and sauté for 1-2 minutes until fragrant.
- Make the cream sauce: Pour in the heavy cream and stir to combine. Bring to a gentle simmer, and add salt and pepper to taste.
- Add the cheese: Stir in the grated Parmesan cheese until melted and combined.
- Combine it all: Drain the potatoes and add them to the skillet, tossing gently until coated in the sauce. Let simmer for an additional minute.
- Garnish and serve: Sprinkle fresh parsley over the potatoes and serve hot.
Notes
For a vegan option, substitute butter and heavy cream with coconut oil and coconut cream.
Nutrition
- Serving Size: 1 serving
- Calories: 350
- Sugar: 5g
- Sodium: 400mg
- Fat: 20g
- Saturated Fat: 10g
- Unsaturated Fat: 8g
- Trans Fat: 0g
- Carbohydrates: 45g
- Fiber: 4g
- Protein: 10g
- Cholesterol: 30mg
Keywords: baby potatoes, creamy garlic sauce, comfort food, side dish, vegetarian, garlic recipes
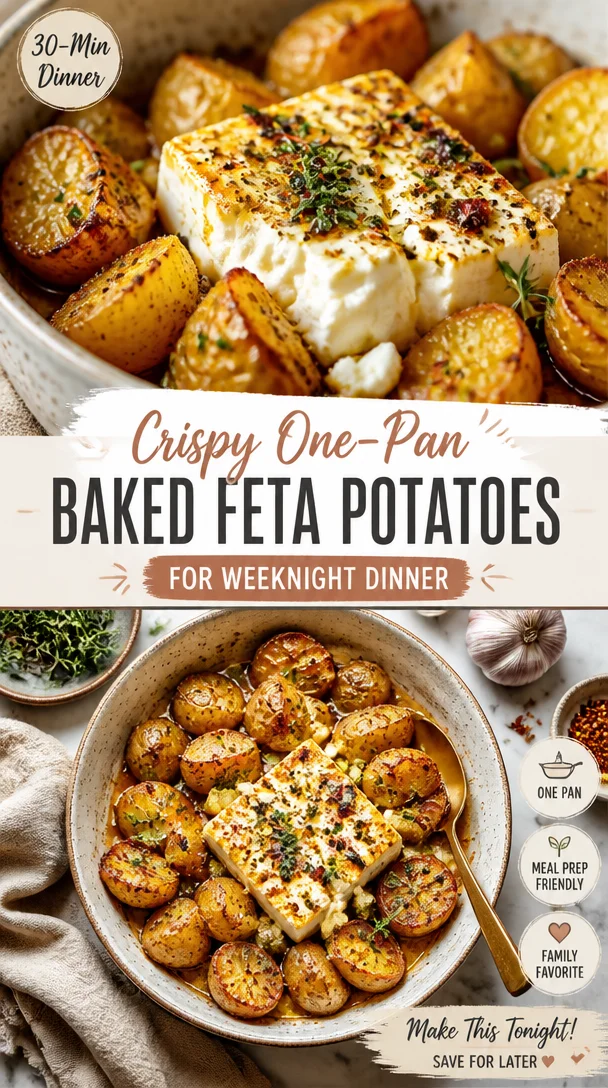
Crispy One-Pan Baked Feta Potatoes for Weeknight Dinner
Baked Feta Potatoes – A Comforting Culinary Hug
Hello, fellow food lovers! Today, we’re diving into the realm of comfort food that warms your heart and fills your belly – Baked Feta Potatoes! This dish is both simple and elegant, perfect for cozy nights in or impressing your friends at a dinner party. Who knew a potato could be so versatile and delicious?
Picture this: it’s a chilly evening, and you’re nestled in your kitchen, fragrant herbs wafting in the air, while you prepare a meal that not only nourishes your body but also your soul. Grab your apron, and let’s get started on this delightful dish that can transform ordinary ingredients into an extraordinary experience!
Personal Story
This Baked Feta Potatoes recipe holds a special place in my heart. I remember the first time I made it during a cozy get-together with friends. We had gathered for a casual dinner party, and I wanted to try something new. With the potatoes and the block of feta cheese sitting in my fridge, I decided to whip up this dish, inspired by the deliciousness I had seen scrolling through my feeds.
As the potatoes roasted in the oven, the aroma filled the room, inviting all of us to the kitchen. We laughed, told stories, and eagerly anticipated the meal. When I pulled the bubbling tray out of the oven, adorned with golden potatoes, creamy melted feta, and fragrant garlic, it felt like a warm culinary hug. From that day on, this dish became a staple for gatherings and has accompanied many joyous moments in my home. I can’t wait to share it with you!
Ingredients
Let’s get to the good stuff! Here’s what you’ll need for Baked Feta Potatoes:
- 2 large baking potatoes: The stars of the dish! Choose Russet or Idaho potatoes for their fluffy interiors. If you’re in a pinch, sweet potatoes work great too.
- 200g block of feta cheese: Creamy and tangy, feta adds a unique flavor. If you can’t find feta, goat cheese will give you a similar creamy texture and a slightly different flavor twist.
- 2 tbsp olive oil: A must-have for drizzling on potatoes. It not only adds richness but helps achieve a lovely golden crust. Avocado oil can be a great substitute if you prefer.
- 1 tsp dried thyme: This herb lends a beautiful aroma and pairs well with the other ingredients. Fresh thyme works too; just double the amount!
- 1 tsp dried oregano: A classic herb that adds depth and warmth. You can substitute with Italian seasoning if you have it.
- 1 head of garlic (top cut off): Roasting garlic brings out its sweetness and mellows its sharpness. If you’re short on garlic, you can use garlic powder, but roasted garlic really elevates this dish!
- 1 lemon (quartered): The zesty freshness of lemon brightens up the flavors. If you’re not a lemon lover, a splash of balsamic vinegar can give a different yet delightful tang.
- 1 tbsp honey: Just a touch of sweetness balances the saltiness of the feta. Maple syrup can be used for a vegan alternative.
- Fresh basil for garnish: Adds a pop of color and a fresh herbaceous note. If basil isn’t handy, feel free to use parsley or chives!
Step-by-Step Instructions
Alright! It’s time to roll up our sleeves and get cooking. Here’s how to create these mouthwatering Baked Feta Potatoes:
-
Preheat the Oven: Preheat your oven to 400°F (200°C). This ensures a nice, hot environment for roasting. While the oven is heating up, wash and scrub the potatoes thoroughly under running water to remove any dirt.
-
Prepare the Baking Dish: Drizzle a tablespoon of olive oil on a baking sheet or an oven-safe dish. This will prevent the potatoes from sticking and add a lovely flavor.
-
Prep the Potatoes: Pat the potatoes dry and poke them a few times with a fork. This helps steam escape during baking, preventing them from bursting. Rub the potatoes with the remaining olive oil, and sprinkle them with the thyme and oregano.
-
Roast: Place the potatoes on the baking sheet and add the garlic head (top cut off) and lemon wedges around them. Roast in the preheated oven for about 45-50 minutes or until the potatoes are fork-tender and the skin is crisp. This roasting process caramelizes the edges, making them super flavorful.
-
Add the Feta: After 30 minutes, add the block of feta cheese to the baking dish, tucking it right in with the potatoes. Drizzle the honey over the feta to caramelize it as it bakes.
-
The Final Bake: Return everything to the oven for an additional 15-20 minutes, until the feta is golden and soft, and the potatoes are delectably crispy.
-
Garnish and Serve: Once out of the oven, squeeze the roasted garlic cloves out of their skins, into a bowl. Mash them up with a fork, mixing it with the melted feta and the juices from the lemons for a pillowy spread. Serve the potatoes hot, garnished with fresh basil.
Chef’s Tip: Keep an eye on the feta during the last few minutes of baking, as it can go from golden to overly browned quite quickly!
Serving Suggestions
Plating is where the magic truly unfolds! Serve your Baked Feta Potatoes family-style on a large platter, drizzled with any leftover honey and olive oil from the baking dish for added richness. Don’t forget to top it off with a generous handful of fresh basil – it adds a burst of color and flavor!
These potatoes are fantastic on their own or paired with a fresh side salad or roasted vegetables for a complete meal. You can even serve them with a dollop of yogurt for added creaminess and a little zing!
Recipe Variations
While this recipe is delectable on its own, why not mix things up a bit? Here are some creative twists you can try:
- Spicy Kick: Add red pepper flakes or a sprinkle of cayenne pepper to the oil before roasting for a spicy finish.
- Mediterranean Style: Toss in chopped Kalamata olives or sundried tomatoes for a Mediterranean flair.
- Vegan Option: Swap the feta cheese with a vegan cheese alternative or a cashew cream topping.
- Herby Delight: Experiment with fresh herbs like rosemary or dill for different flavor profiles.
- Comforting Addition: Sprinkle crispy bacon bits or sautéed mushrooms on top before serving for a savory crunch!
Chef’s Notes
Baked Feta Potatoes are a wonderfully adaptable dish. In my kitchen, I often use whatever herbs or add-ins I have on hand, making them a great go-to for last-minute meals. They pair great with wine, laughter, and good conversation.
One fun memory I have is when I was recipe-testing in my tiny apartment, and the aroma brought my neighbor knocking on my door to check if I was cooking something special. We ended up sharing a plate, bonding over flavors and laughs. That’s the essence of cooking – it connects us and creates lasting memories.
FAQs and Troubleshooting
-
What if my potatoes aren’t tender after the cooking time?
No worries! Just pop them back in the oven for an extra 10-15 minutes and check them again. Oven times can vary based on size and type of potatoes. -
Can I make this dish ahead of time?
Yes! Pre-cook the potatoes and add the feta just before serving – just warm them back in the oven when you’re ready to eat. -
How do I know if my garlic is roasted perfectly?
Roasted garlic should be soft and lightly caramelized. If you see it turning too dark, it might taste bitter, so keep an eye on its color! -
What are some great side dishes to pair with Baked Feta Potatoes?
A fresh arugula salad with lemon vinaigrette or grilled veggies complement this dish beautifully. You can also serve it alongside grilled chicken or fish for a complete feast.
Nutritional Info
While I love sharing the flavor experiences, I also believe in enjoying food without obsessing over the numbers! Each serving of Baked Feta Potatoes can be balanced with wholesome side dishes – just remember to savor the moment rather than tallying up the calories.
And there you have it, my friends! Dive into this comforting, chic recipe that proves you can elevate simplicity without the stress. Tie on that apron, gather your ingredients, and let’s elevate dinner time into a beautiful experience. Happy cooking!
PrintBaked Feta Potatoes

A comforting dish featuring roasted potatoes with creamy feta cheese, garlic, and fresh herbs.
- Prep Time: 15 minutes
- Cook Time: 50 minutes
- Total Time: 65 minutes
- Yield: 4 servings 1x
- Category: Main Course
- Method: Baking
- Cuisine: Mediterranean
- Diet: Vegetarian
Ingredients
- 2 large baking potatoes (Russet or Idaho)
- 200g block of feta cheese
- 2 tbsp olive oil
- 1 tsp dried thyme
- 1 tsp dried oregano
- 1 head of garlic (top cut off)
- 1 lemon (quartered)
- 1 tbsp honey
- Fresh basil for garnish
Instructions
- Preheat the oven to 400°F (200°C).
- Drizzle a tablespoon of olive oil on a baking sheet.
- Pat the potatoes dry and poke them with a fork.
- Rub the potatoes with olive oil, thyme, and oregano.
- Place the potatoes on the baking sheet with garlic and lemon.
- Roast for 45-50 minutes or until fork-tender.
- Add feta cheese after 30 minutes and drizzle honey.
- Return to oven for an additional 15-20 minutes.
- Garnish with mashed roasted garlic, feta, and serve with fresh basil.
Notes
Keep an eye on the feta during the last few minutes to prevent over-browning.
Nutrition
- Serving Size: 1 serving
- Calories: 350
- Sugar: 5g
- Sodium: 400mg
- Fat: 12g
- Saturated Fat: 4g
- Unsaturated Fat: 6g
- Trans Fat: 0g
- Carbohydrates: 45g
- Fiber: 3g
- Protein: 15g
- Cholesterol: 30mg
Keywords: baked feta potatoes, comfort food, Mediterranean recipe, vegetarian dish, easy dinner
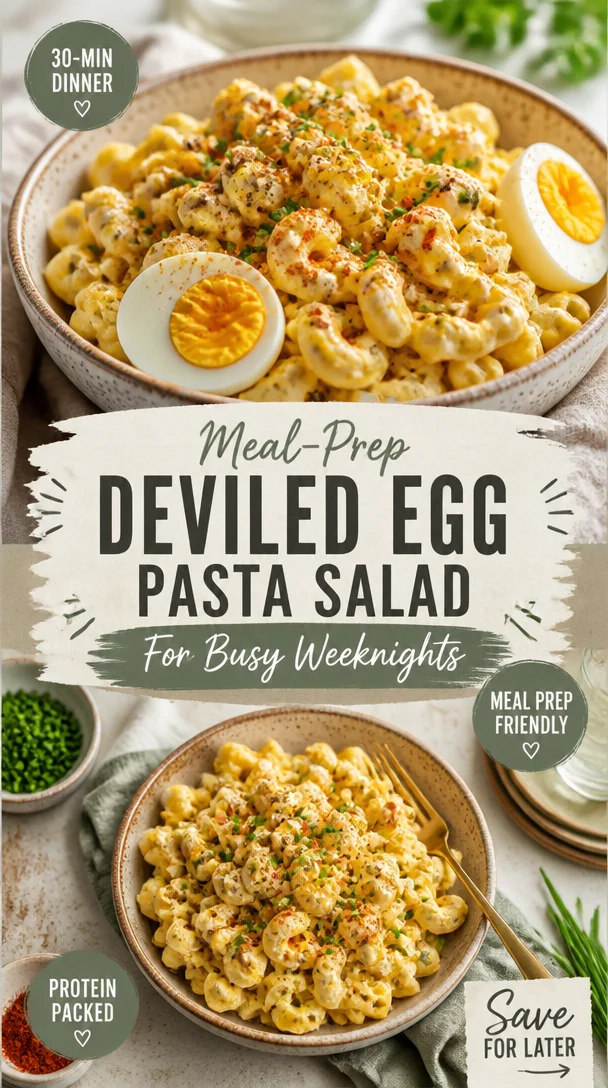
Meal-Prep Deviled Egg Pasta Salad for Busy Weeknights
Deviled Egg Pasta Salad: A Recipe with Heart and Flavor
Hello, food lovers! Today we’re diving into a recipe that’s both nostalgic and oh-so-delicious: Deviled Egg Pasta Salad. Picture this: it’s a sunny afternoon, the kitchen is filled with laughter, and the table is set for a gathering of friends and family. With every bite of this creamy, tangy pasta salad, you’ll be reminded of picnics in the park, summer barbecues, and the joy of simply being together. Ready to whip up something that brings back all those warm memories? Let’s get cooking!
Personal Story
Growing up, my family had a tradition: every summer, we’d host a neighborhood cookout where everyone brought their favorite dish. There was always a beautiful array of food—grilled burgers, charred veggies, and of course, my mom’s famous deviled eggs. She’d whip them up with a dash of pickle juice and a sprinkle of paprika. But one year, she decided to transform these beloved egg bites into something even more spectacular—a pasta salad that combined all the goodness of her deviled eggs with the comforting heartiness of pasta.
That day, the sun was shining bright, and as we gathered around the picnic table adorned with checkered tablecloths, I remember the laughter erupting with every forkful of that pasta salad. It was a serious culinary breakthrough that brought everyone together, both in the kitchen and at the table. Since then, this Deviled Egg Pasta Salad has become my go-to dish for parties, potlucks, and every gathering where I want to spread a little love and a lot of flavor.
Ingredients
Here’s what you’ll need to whip up this delightful dish:
-
8 ounces small pasta (like elbows or ditalini): Choose any shape you love! Small pasta is great for holding onto the creamy dressing. If you’re gluten-free, feel free to substitute with a gluten-free pasta version.
-
3/4 cup mayonnaise: The creamy base that brings it all together! If you prefer a lighter option, substitute half of it with Greek yogurt for a delicious twist.
-
1 tablespoon pickle juice: This adds that tangy kick you find in traditional deviled eggs. Don’t have pickle juice? Lemon juice works just as well.
-
1 tablespoon Dijon mustard: For that perfect balance of tanginess. If you want to swap it out, yellow mustard works in a pinch.
-
6 hard-boiled eggs, peeled and diced: The heart of our dish! You can use store-bought hard-boiled eggs or boil them yourself. Just remember, the fresher, the better!
-
1/2 cup red onion, finely diced: This adds a sweet crunch. If you prefer a milder flavor, try using green onions or scallions.
-
1/3 cup chopped pickles: Dill or sweet, whichever you fancy! If you don’t like pickles, try chopped olives or capers for a briny flavor.
-
1 teaspoon garlic powder: For that subtle depth. Fresh garlic can work too, but go with half a clove minced for the same flavor punch.
-
1/2 teaspoon paprika: This adds flavor and a lovely color. Don’t skip this—it’s a deviled egg staple!
-
Salt and pepper: Essential for enhancing all the flavors. Season to taste!
-
Green onions, sliced, for serving: Fresh and vibrant, these add a finishing touch!
Step-by-Step Instructions
Now that we’ve gathered our ingredients, let’s get to the fun part—cooking!
-
Cook the Pasta: Bring a large pot of salted water to a boil. Add in your pasta and cook according to package instructions until al dente, usually about 8-10 minutes. Remember, we want that perfect bite—not too mushy! Once it’s done, drain it and give it a quick rinse under cold water to stop the cooking process. This also helps the pasta to cool down for our salad.
-
Prepare the Eggs: If you’re making your hard-boiled eggs, place them in a pot and cover them with cold water. Bring the water to a boil, then remove from heat, cover, and let them sit for about 12 minutes. Afterward, cool them under cold running water and peel! For our salad, we want them diced into hearty pieces.
-
Mix the Dressing: In a large mixing bowl, combine the mayonnaise, pickle juice, and Dijon mustard. Use a whisk to blend well—this is where all that creamy goodness starts to come together. Season with salt, pepper, and the garlic powder. Give it a taste—if you love more tang, sprinkle in extra pickle juice!
-
Toss in the Ingredients: Once the pasta is cooled, add it to the bowl with your creamy dressing. Then, gently fold in the diced hard-boiled eggs, red onion, and chopped pickles. Be gentle here, as we don’t want to mash the eggs—mix the salad until everything is coated in that lovely dressing.
-
Season and Chill: Now, sprinkle in your paprika and mix again. Taste the pasta salad and adjust the seasoning if needed. If it seems a bit dry, adding a splash more mayo or pickle juice can work wonders! Cover the bowl with plastic wrap and let it chill in the refrigerator for at least 30 minutes. This allows all those flavors to meld together beautifully.
-
Garnish and Serve: Before serving, give it a good stir and taste once more. Adjust the seasoning and add any additional green onions for a vibrant pop! You can serve it chilled or at room temperature—both are delicious!
Serving Suggestions
When it comes to plating your Deviled Egg Pasta Salad, simplicity is key. A large, shallow bowl showcases its creamy, pastel tones beautifully. You can sprinkle extra paprika on top for a pop of color, or lay a few sliced green onions over the salad for a fresh touch. Pair it with crusty bread or a fresh green salad for an extra layer of delight.
Recipe Variations
Let’s get a little creative with this base recipe! Here are some fun variations to consider:
-
Bacon Deviled Egg Pasta Salad: Add crispy bacon bits for a smoky flavor. Who doesn’t love the combo of bacon and eggs?
-
Spicy Deviled Egg Pasta Salad: Mix in some chopped jalapeños or a dash of hot sauce for a kick that’ll wake up your taste buds.
-
Herbed Deviled Egg Pasta Salad: Fold in fresh herbs like dill, chives, or parsley to brighten the flavors. It’ll feel like summer in every bite!
-
Mediterranean Twist: Swap out pickles for chopped sun-dried tomatoes and add olives for a different flavor profile entirely.
-
Vegan Deviled Egg Pasta Salad: Use vegan mayo and substitute the eggs with diced avocado or chickpeas for the creamy element—goodness knows you won’t miss the eggs!
Chef’s Notes
Over the years, I’ve played around with this recipe and made it a staple in my kitchen. I’ll never forget the first time I made it for a big family gathering. I underestimated how quickly it would disappear! Everyone came back for seconds—or even thirds! The beauty of this pasta salad is how it’s traveled with me through different phases of life. Each gathering, every cookout, and every picnic has allowed it to evolve, always bringing a smile to faces. And that’s what cooking is all about—creating memories, one dish at a time!
FAQs and Troubleshooting
1. Can I make this recipe ahead of time?
Absolutely! In fact, it’s best to let it chill for a bit before serving. You can make it up to a day in advance, just remember to keep it chilled in the refrigerator.
2. What can I substitute if I don’t like mayonnaise?
No worries! You can use Greek yogurt, sour cream, or a dairy-free mayo if you prefer. Just mix with the other ingredients to maintain that creamy texture.
3. How can I store leftovers?
Keep any leftovers in an airtight container in your refrigerator for up to 3 days. The salad may thicken as it sits, so feel free to add a bit more mayo or pickle juice when serving again.
4. What if my pasta is sticky?
If your pasta clumps together after cooking, be sure to rinse it well with cold water before mixing it with the other ingredients. Adding a small drizzle of olive oil can also keep it from sticking together.
Creating Deviled Egg Pasta Salad is more than just a recipe; it’s about inviting people into your home, sharing flavors, and making memories. So tie on that apron, crank up some music, and don’t forget—cooking is supposed to be fun! I can’t wait to hear how your pasta salad turns out. Happy cooking!
PrintDeviled Egg Pasta Salad

A creamy and tangy pasta salad that combines the flavors of deviled eggs with comforting pasta for a delightful dish perfect for gatherings.
- Prep Time: 15 minutes
- Cook Time: 20 minutes
- Total Time: 35 minutes
- Yield: 6 servings 1x
- Category: Salad
- Method: Mixing
- Cuisine: American
- Diet: Vegetarian
Ingredients
- 8 ounces small pasta (like elbows or ditalini)
- 3/4 cup mayonnaise
- 1 tablespoon pickle juice
- 1 tablespoon Dijon mustard
- 6 hard-boiled eggs, peeled and diced
- 1/2 cup red onion, finely diced
- 1/3 cup chopped pickles
- 1 teaspoon garlic powder
- 1/2 teaspoon paprika
- Salt and pepper to taste
- Green onions, sliced, for serving
Instructions
- Cook the pasta: Bring a large pot of salted water to a boil. Add in your pasta and cook according to package instructions until al dente, usually about 8-10 minutes. Drain and rinse under cold water.
- Prepare the eggs: If making your hard-boiled eggs, place them in a pot, cover with cold water, boil, cover, and let sit for about 12 minutes. Cool under cold running water and peel. Dice into hearty pieces.
- Mix the dressing: In a large mixing bowl, combine mayonnaise, pickle juice, and Dijon mustard. Whisk well. Season with salt, pepper, and garlic powder.
- Toss in the ingredients: Add cooled pasta into the dressing bowl, fold in diced hard-boiled eggs, red onion, and chopped pickles.
- Season and chill: Sprinkle in paprika, adjust seasoning if needed, and let chill in the refrigerator for at least 30 minutes.
- Garnish and serve: Stir, taste, and adjust seasoning if needed before serving chilled or at room temperature.
Notes
Best served chilled, can be made a day in advance. Remember to keep chilled in the refrigerator.
Nutrition
- Serving Size: 1 serving
- Calories: 450
- Sugar: 3g
- Sodium: 300mg
- Fat: 30g
- Saturated Fat: 5g
- Unsaturated Fat: 20g
- Trans Fat: 0g
- Carbohydrates: 45g
- Fiber: 2g
- Protein: 12g
- Cholesterol: 170mg
Keywords: deviled eggs, pasta salad, picnic salad, creamy salad, side dish
Oreo Cheesecake
Indulge in Decadence: The Ultimate Oreo Cheesecake Recipe
Hello, fellow food lovers! Today, I’m excited to share with you a recipe that’s near and dear to my heart—Oreo Cheesecake. If you love the rich creaminess of classic cheesecake and the delightful crunch of Oreos, then this dessert is about to sweep you off your feet. Think of it as a delicious hug in dessert form.
A Slice of Nostalgia
Let me take you back to a sunny afternoon when I was in my late teens. My best friend and I decided it was time for a baking showdown. Both of us had an affinity for sweets, especially anything chocolatey. After some epic back-and-forth banter, we both settled on the idea of making cheesecake. But not just any cheesecake—an Oreo cheesecake.
Strapped with aprons and armed with ample bags of Oreos, we turned our tiny kitchen into a bustling bakery. There was flour flying, laughter echoing, and maybe a minor meltdown when we nearly burnt the crust. But moments like these create the best memories. After hours of mixing and mastering our cheesecakes, we finally sat down to taste the fruits of our labor. The creamy, rich filling blended flawlessly with the chocolatey crunch of the Oreos. It was pure magic! Thus began my love affair with cheesecake, filled with experiments, tweaks, and, of course, a sprinkle of joyful chaos.
Ingredients
Here’s what you’ll need for this decadent Oreo Cheesecake, along with some handy tips:
-
63 Oreos: The star of the show! Use regular Oreos for the classic chocolate flavor. If you want to switch it up, try using golden Oreos or mint-flavored ones for a twist!
-
2 tablespoons unsalted butter: This adds richness to the crust. You can substitute with coconut oil for a dairy-free option.
-
16 oz cream cheese, softened: Make sure it’s at room temperature for a smooth, creamy consistency when mixing. You can use a full-fat or even a lighter cream cheese if preferred, just avoid non-fat versions, as they won’t yield the same richness.
-
1 cup granulated sugar: This balances the creaminess. If you’re cutting down on sugar, you can use a sugar substitute like stevia, but keep in mind it may alter the texture a bit.
-
1 teaspoon vanilla extract: A natural vanilla extract enhances the flavor. If you’re in a pinch, you can use imitation vanilla, but the taste will differ slightly.
-
4 large eggs: Make sure they’re at room temperature to help the cheesecake bake evenly. If you’re vegan, you can substitute this with flax eggs (1 tablespoon ground flaxseed mixed with 2.5 tablespoons water per egg, let sit for 5 minutes).
-
1 cup heavy cream: This gives the cheesecake a luscious texture. You can use whipped coconut cream for a dairy-free version.
-
1 cup chocolate chips: Semi-sweet or dark chocolate adds a wonderful richness. For an even sweeter bite, opt for milk chocolate chips.
Step-by-Step Instructions
Let’s dive into the delightful process of creating this Oreo Cheesecake!
-
Prep Your Space: Preheat your oven to 325°F (160°C). This ensures even cooking right from the get-go. Meanwhile, grab a 9-inch springform pan, grease it lightly, and set it aside.
-
Make the Crust: In a food processor, combine 36 Oreos (yes, we’re using half the package!) and pulverize them into fine crumbs. This is the moment when you can really let loose—feel free to sneak a few bites of Oreos; you deserve it! Once crushed, add the melted butter and pulse until the mixture resembles wet sand. Transfer the mixture to your prepared pan, and press it firmly into the bottom and slightly up the sides. You want a sturdy crust here! Bake for about 10 minutes, then allow to cool while you whip up the filling.
-
Cheesecake Filling: In a large mixing bowl, beat the softened cream cheese with an electric mixer until smooth and creamy. This is where patience comes in; a well-beaten cream cheese is the key to avoiding lumps in your cheesecake. Gradually add in the sugar and continue to mix. Once combined, add in the vanilla extract, and mix until combined. One by one, mix in the eggs, making sure each one is fully incorporated. Scrape down the sides of the bowl as needed.
-
Add the Heavy Cream: Pour in the heavy cream, and mix until it’s all silky and blended. For an added touch, briefly stir in half of the crushed remaining Oreos (the other half will go on top later).
-
Assemble the Cheesecake: Carefully pour the cheesecake filling over the cooled crust, smoothing out the top with a spatula. Pop it in the oven for about 60–70 minutes. You want the edges to be set, but the center should still have a slight jiggle when you gently shake it. Don’t worry; it will firm up as it cools!
-
Cool and Chill: After baking, turn the oven off and crack the oven door. Allow the cheesecake to cool in the oven for about an hour (this prevents cracking). Then transfer it to a wire rack to cool completely. Once cooled, cover it and chill in the fridge for at least 4 hours, or preferably overnight. The waiting is tough, but trust me—it’s worth it!
-
Ultimate Topping: Before serving, melt the chocolate chips in a microwave-safe bowl, heating in short bursts of 20 seconds so you don’t scorch them. Drizzle this melted goodness over the chilled cheesecake. Crumble the remaining Oreos and sprinkle them on top for that extra crunch. And voila—your cheesecake is now ready to shine!
Serving Suggestions
Slice your Oreo cheesecake with a sharp knife and serve it on beautiful plates. I love dolloping some whipped cream on each slice and a sprinkle of crushed Oreos for that extra touch. You might also lay down a bed of fresh raspberries or strawberries alongside each slice for a delightful contrast in flavor and presentation. If you’re feeling extra fancy, serve with a side of chocolate sauce for drizzling!
Recipe Variations
Feel free to get creative with this Oreo cheesecake. Here are a few variations to inspire you:
-
Mint Oreo Cheesecake: Use mint-flavored Oreos and add a splash of peppermint extract to the filling for a refreshing twist.
-
Peanut Butter Lovers: Swirl in some creamy peanut butter into the filling before baking for a delightful peanut butter Oreo cheesecake.
-
Pumpkin Spice: Mix in half a cup of pumpkin puree and a teaspoon of pumpkin spice for a festive flavor in the fall.
-
Nutty Delight: Incorporate crushed nuts like pecans or walnuts in the crust for a delightful crunch.
-
Low-Sugar Option: Replace sugar with a sugar substitute and follow the previous substitution tips to create a healthier version.
Chef’s Notes
This recipe has followed me through countless family dinners, birthdays, and celebrations. I remember once forgetting to take my cheesecake out of the oven in time and being left with an extremely jiggly center. So, I wrapped it in chocolate ganache and called it a “molten cheesecake.” It was a hit! While baking can come with some surprises, learning to pivot and adapt can lead to delightful kitchen adventures.
Over the years, I’ve perfected this Oreo cheesecake, slowly tweaking the ratios and playing with flavors. It’s funny how a recipe can evolve, much like our culinary skills!
FAQs and Troubleshooting
-
Why did my cheesecake crack? Cracks can happen when the cheesecake is baked at too high a temperature or if it cools too quickly. To prevent this, make sure to bake it low and slow, and let it cool gradually in the oven.
-
Can I make this cheesecake in advance? Absolutely! In fact, it’s best to make this cheesecake a day ahead. The flavors meld beautifully after chilling overnight.
-
How do I know when the cheesecake is done? The edges should be set with a slight jiggle in the middle. It will continue to firm up as it cools.
-
What’s the best way to cut a cheesecake? For clean slices, use a sharp knife and dip it in hot water, then wipe it dry before cutting each piece. This helps achieve that perfect, clean edge!
Nutritional Info (optional)
Serves: 12
Calories per slice: Approximately 440 calories
Total Fat: 30g
Saturated Fat: 18g
Carbohydrates: 36g
Sugar: 26g
Protein: 6g
Thank you for stopping by today, fellow foodies! I can’t wait to see your take on this Oreo Cheesecake. Remember, the kitchen is the heart of the home, so embrace the joy of cooking, and always keep experimenting. Until next time, happy baking, and don’t forget to gather your loved ones around the table—after all, that’s what great food is all about!
PrintOreo Cheesecake

Indulge in the rich creaminess of this classic Oreo Cheesecake, combining the delightful crunch of Oreos with a smooth filling.
- Prep Time: 30 minutes
- Cook Time: 70 minutes
- Total Time: 4 hours 30 minutes
- Yield: 12 servings 1x
- Category: Dessert
- Method: Baking
- Cuisine: American
- Diet: Vegetarian
Ingredients
- 63 Oreos
- 2 tablespoons unsalted butter
- 16 oz cream cheese, softened
- 1 cup granulated sugar
- 1 teaspoon vanilla extract
- 4 large eggs
- 1 cup heavy cream
- 1 cup chocolate chips
Instructions
- Preheat your oven to 325°F (160°C).
- Combine 36 Oreos in a food processor and pulverize into fine crumbs.
- Add the melted butter and pulse until resembling wet sand.
- Transfer the mixture to the prepared pan, pressing it firmly into the bottom.
- Bake for about 10 minutes, then allow to cool.
- Beat the softened cream cheese with an electric mixer until smooth.
- Add in the sugar and vanilla extract, mixing until combined.
- Incorporate the eggs one by one, mixing fully.
- Pour in the heavy cream and mix until silky.
- Pour the cheesecake filling over the cooled crust.
- Bake for about 60–70 minutes.
- Cool the cheesecake in the oven for about an hour.
- Chill in the fridge for at least 4 hours.
- Melt the chocolate chips and drizzle over the cheesecake before serving.
- Crumble the remaining Oreos and sprinkle on top.
Notes
Serve with whipped cream and fresh berries for an extra touch.
Nutrition
- Serving Size: 1 slice
- Calories: 440
- Sugar: 26g
- Sodium: 400mg
- Fat: 30g
- Saturated Fat: 18g
- Unsaturated Fat: 8g
- Trans Fat: 0g
- Carbohydrates: 36g
- Fiber: 1g
- Protein: 6g
- Cholesterol: 90mg
Keywords: Oreo, Cheesecake, Dessert, Chocolate, Baking
Minute No-Bake Reese’s Cheesecake: Creamy Peanut Butter
Indulge in a Slice of Heaven: Reese’s Cheesecake Recipe
Hello, fellow food lovers! Today, I’m bringing to your kitchen a scrumptious treat that’s bound to sweeten your day—Reese’s Cheesecake. Imagine the velvety creaminess of traditional cheesecake mingling with the rich, nutty flavor of peanut butter and the comforting crunch of Oreo crust. If you’re a peanut butter fan (like I am), this is the dessert for you! So, grab your apron, and let’s dive into this delightful baking adventure together!
A Slice of Nostalgia
Growing up, my family had a tradition of “treat Fridays.” Each week was a culinary surprise: brownies one week, cookies another, and sometimes—even cheesecake. I still remember the excitement of arriving home from school, greeted by a heavenly scent wafting through the house. But it was one Friday that I discovered the magic of peanut butter: my mom whipped up a cheesecake inspired by a recipe she found tucked away in an old cookbook. It featured a chocolate crust and a peanut buttery filling that seemed to have a personality all its own.
We devoured that cheesecake as a family, and the laughter, stories, and crumbs that followed are etched in my heart forever. Since then, I have been on a mission to recreate that moment of joy—with my own twist. So, let’s channel our inner peanut butter lovers and create a masterpiece that’ll evoke those sweet memories while adding a deliciously modern flair.
Ingredients
Gather these ingredients for a cheesecake that will impress everyone at your table:
-
2 3/4 cups (369g) Oreo crumbs (about 31 Oreos)
These provide a rich, chocolatey base. No Oreos? Substitute with graham cracker crumbs mixed with cocoa powder for a similar flavor. -
5 tbsp (70g) unsalted butter, melted
This helps bind the crust. You can swap for coconut oil if you want a different layer of flavor—just ensure it’s melted. -
24 oz (678g) cream cheese, room temperature
Essential for creaminess. Don’t have cream cheese? Mascarpone can be a lovely alternative, yielding a slightly different—but equally delicious—taste! -
1 cup (207g) sugar
Sweetness personified. For a less sweet option, consider using coconut sugar or a sugar substitute if desired. -
3 tbsp (24g) all-purpose flour
This stabilizes the filling. If gluten-free, use almond flour or a gluten-free blend. -
3/4 cup (173g) sour cream, room temperature
The tang balances the sweetness. Greek yogurt works as a great substitute while keeping that creamy texture. -
3/4 cup (210g) creamy peanut butter
The star of the show! For a crunchy touch, use crunchy peanut butter—literally adding that extra crunch. -
2 tsp vanilla extract
Vanilla amplifies flavor. If you’re in a pinch, try almond extract for a different but delightful twist. -
4 large eggs, room temperature
Eggs provide structure. If you prefer a vegan option, you can use flax eggs (1 tbsp ground flaxseed mixed with 2.5 tbsp water = 1 egg) or silken tofu blended until smooth. -
34 (297g) mini Reese’s peanut butter cups, unwrapped, chopped
The little treasures that make every bite feel decadent. You can also use other chocolate candies if you wish to mix it up! -
4 oz (113g) semi-sweet chocolate chips
For a rich topping. Dark chocolate chips or milk chocolate can be substituted based on your preference! -
6 tbsp (90ml) heavy whipping cream
This adds a luscious element to the topping. If needed, coconut cream is a fantastic dairy-free option. -
3/4 cup (180ml) heavy whipping cream, cold
Ensure it’s cold for the best whipped cream! Again, coconut cream can do wonders here. -
1/2 cup (58g) powdered sugar
Sweetens the whipped cream beautifully. You might find success with powdered erythritol if looking for a sugar alternative. -
3 tbsp (48g) creamy peanut butter
You know it—more peanut butter goodness! -
1/2 tsp vanilla extract
A dab here enhances the whipped cream flavor. -
7 full-size Reese’s peanut butter cups, unwrapped and cut in half
These glorious halves crown our cheesecake—an irresistible touch!
Step-by-Step Instructions
Alright, folks, it’s time to bring this beautiful cake to life! Follow these steps, and I’ll sprinkle in some of my favorite tips along the way:
-
Preheat your oven to 325°F (163°C). A warm oven will help the cheesecake bake evenly, creating that perfect texture we crave.
-
Make the Oreo crust: In a mixing bowl, combine the Oreo crumbs and melted butter. Use a fork to mix until the crumbs are well-coated. It should resemble wet sand! Press the mixture firmly into the bottom of a 9-inch springform pan, ensuring it’s evenly distributed. This step is key—don’t skip it! Use the back of a measuring cup for an even, firm crust.
-
Bake the crust: Place your crust in the preheated oven and bake for about 10 minutes. This helps set the crust while adding a subtle toasty flavor. Once done, let it cool while you whip up the filling.
-
Beat the cream cheese: In a large mixing bowl, beat the room-temperature cream cheese until creamy. Ensure there are no lumps—nobody wants a lumpy cheesecake!
-
Add sugar and flour: Gradually add in the sugar and flour, mixing until well combined. This step is crucial for achieving that smooth texture.
-
Incorporate the sour cream and peanut butter: Mix in the sour cream and peanut butter until fully blended. Here’s a tip: feel free to sneak a taste of the filling—it’s divine!
-
Add vanilla and eggs: Next, mix in the vanilla extract, and then add the eggs, one at a time. Be sure to scrape down the sides of the bowl in between—nobody wants missed pockets of cream cheese!
-
Fold in the Reese’s cups: Gently fold in the chopped mini Reese’s cups. This adds bursts of chocolate and peanut butter that’ll make every bite memorable.
-
Pour into the crust: Carefully pour the cheesecake filling onto your prepared Oreo crust, smoothing the top with a spatula.
-
Bake the cheesecake: Bake in the oven for about 50-60 minutes, or until the edges are set but the center still jiggles slightly. This step ensures a creamy texture without overcooking.
-
Let it cool and refrigerate: Once baked, turn off the oven and crack the oven door. Let the cheesecake cool in the oven for about an hour—this helps prevent cracking! Next, refrigerate for at least 4 hours, but ideally overnight.
-
Prepare the chocolate ganache: For the topping, heat the 6 tbsp of heavy cream in a small saucepan until it’s just about to simmer. Pour it over the chocolate chips in a bowl, and let it sit for a couple of minutes. Then, stir until smooth and glossy—oh la la!
-
Make the whipped cream: In a chilled bowl, whip the cold heavy cream until soft peaks form. Gradually add in the powdered sugar, vanilla extract, and peanut butter until your whipped cream is fluffy and light. We want it to hold shape, but not be too stiff.
-
Assemble: After chilling the cheesecake, pour the ganache on top and spread it evenly. Then top generously with whipped cream. Finally, place the halved Reese’s cups around the edge like little crowns on a delicious cake!
Serving Suggestions
Now, it’s time to serve your masterpiece. Slice this beauty into generous pieces, allowing everyone to admire those gooey, chocolatey layers. I recommend serving it on a beautiful platter topped with fresh raspberries or a drizzle of chocolate sauce for a touch of elegance. Let each guest embellish their slice with extra whipped cream or nuts if they’re feeling adventurous!
Recipe Variations
Want to mix things up a little? Here are some creative variations you can try:
-
Nutty Twist: Add crushed nuts like walnuts or pecans to your Oreo crust for extra crunch and flavor.
-
Chocolate Lover’s Delight: Replace half of the peanut butter with melted chocolate for a chocolate-peanut butter cheesecake hybrid.
-
Cookie Dough Swirl: Add dollops of cookie dough throughout the cheesecake before baking for indulgent bites.
-
Banana Lovers: For a fruity touch, mix in mashed ripe bananas into the filling, leaving you with a sweet and creamy banana-peanut butter cheesecake.
-
Vegan Version: Use vegan cream cheese, almond milk yogurt, and plant-based whipped cream for a soulful dessert that everyone can enjoy!
Chef’s Notes
This recipe has had quite the journey! I’ve tweaked it over the years, adjusting the balance of flavors and the textures to make it just right. One of my dear friends once decided to make this cake but forgot the eggs—can you imagine? It turned out more like a mousse! While her creation was still delicious, we all had a hearty laugh, and it became an inside joke. Remember, every little mishap is an opportunity for your kitchen adventure!
FAQs and Troubleshooting
Here are some common questions and tips to make sure your cheesecakes turn out perfectly:
Q: Why did my cheesecake crack?
A: Cracks often happen due to rapid temperature changes. Let your cheesecake cool gradually in the oven with the door slightly ajar.
Q: How can I tell if my cheesecake is done?
A: The edges will be set while the center should still jiggle slightly when you move it. It will continue to set while it cools.
Q: Can I make this cheesecake ahead of time?
A: Absolutely! In fact, I recommend it. Cheesecake tastes even better the next day after all the flavors have had time to mingle.
Q: How do I store leftovers?
A: Store your cheesecake in the refrigerator for up to a week. Simply cover it tightly with plastic wrap or place it in an airtight container.
Nutritional Info
Here’s a basic breakdown (per slice, making about 16):
- Calories: Approximately 400
- Total Fat: 25g
- Saturated Fat: 12g
- Carbohydrates: 42g
- Fiber: 2g
- Sugar: 30g
- Protein: 6g
There you have it—your go-to Reese’s Cheesecake recipe that’s sure to impress and delight. Gather your loved ones, share some laughter, and let the feasting begin! Let’s make memorable moments around the table, one slice at a time. Happy baking, friends! 🍰❤️
PrintReese’s Cheesecake

Indulge in the rich, creamy delight of Reese’s Cheesecake, featuring a decadent Oreo crust and a peanut butter filling, perfect for peanut butter lovers.
- Prep Time: 30 minutes
- Cook Time: 60 minutes
- Total Time: 390 minutes
- Yield: 16 servings 1x
- Category: Dessert
- Method: Baking
- Cuisine: American
- Diet: Vegetarian
Ingredients
- 2 3/4 cups (369g) Oreo crumbs
- 5 tbsp (70g) unsalted butter, melted
- 24 oz (678g) cream cheese, room temperature
- 1 cup (207g) sugar
- 3 tbsp (24g) all-purpose flour
- 3/4 cup (173g) sour cream, room temperature
- 3/4 cup (210g) creamy peanut butter
- 2 tsp vanilla extract
- 4 large eggs, room temperature
- 34 (297g) mini Reese’s peanut butter cups, unwrapped, chopped
- 4 oz (113g) semi-sweet chocolate chips
- 6 tbsp (90ml) heavy whipping cream
- 3/4 cup (180ml) heavy whipping cream, cold
- 1/2 cup (58g) powdered sugar
- 3 tbsp (48g) creamy peanut butter
- 1/2 tsp vanilla extract
- 7 full-size Reese’s peanut butter cups, unwrapped and cut in half
Instructions
- Preheat your oven to 325°F (163°C).
- Make the Oreo crust by mixing Oreo crumbs and melted butter until well-coated. Press firmly into the bottom of a 9-inch springform pan.
- Bake the crust for about 10 minutes, then let it cool.
- Beat the cream cheese until creamy with no lumps.
- Add sugar and flour, mixing until well combined.
- Incorporate sour cream and peanut butter until fully blended.
- Add vanilla extract and then eggs, one at a time, mixing well.
- Fold in chopped mini Reese’s cups.
- Pour the cheesecake filling onto the prepared crust, smoothing the top.
- Bake for about 50-60 minutes, until the edges are set but the center jiggles slightly.
- Let the cheesecake cool in the oven for about an hour, then refrigerate for at least 4 hours.
- Prepare the chocolate ganache by heating heavy cream and pouring it over chocolate chips, stirring until smooth.
- Make the whipped cream by whipping cold heavy cream until soft peaks form; add powdered sugar, vanilla extract, and peanut butter.
- Assemble the cheesecake by pouring ganache on top, spreading whipped cream, and garnishing with halved Reese’s cups.
Notes
Store leftovers in the refrigerator for up to a week.
Nutrition
- Serving Size: 1 slice
- Calories: 400
- Sugar: 30g
- Sodium: 300mg
- Fat: 25g
- Saturated Fat: 12g
- Unsaturated Fat: 8g
- Trans Fat: 0g
- Carbohydrates: 42g
- Fiber: 2g
- Protein: 6g
- Cholesterol: 70mg
Keywords: cheesecake, peanut butter, dessert, chocolate, Oreos