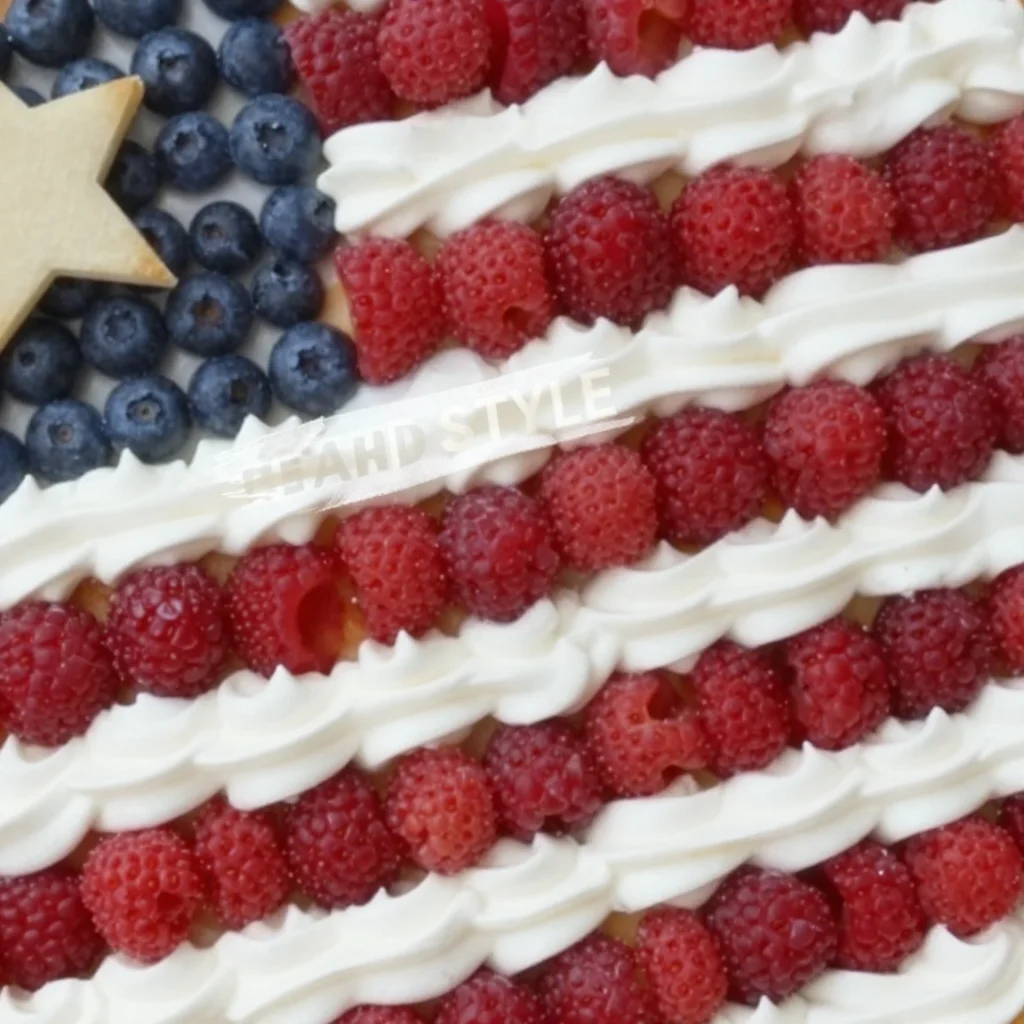
Fourth of July Flag Fruit Pizza Recipe: Patriotic Dessert
American Flag Fruit Pizza: A Celebration on a Plate
Hello, food lovers! Today, I’m excited to share a delightful dessert that’s as festive as it is delicious—the American Flag Fruit Pizza. Whether you’re hosting a Fourth of July barbecue, a summer picnic, or just looking for a fun way to brighten up a weeknight dessert, this vibrant pizza will steal the show and leave your guests smiling.
Imagine a buttery sugar cookie crust topped with a dreamy cream cheese frosting, adorned with fresh strawberries and blueberries in a patriotic pattern. It’s not just a treat; it’s a masterpiece that showcases the beauty of simple ingredients! Let’s dive into this sweet adventure together.
Personal Story: A Sweet Memory
Growing up, summer meant vibrant barbecues and backyard gatherings where my family would commune around a picnic table, laughter mingling with the scent of chargrilled goodies. One dessert, in particular, stood out during these celebrations—my Aunt Mabel’s “Flag Cake.” It was an iconic summer staple, and the centerpiece for every independence day. I fondly remember how her kitchen would radiate warmth and welcoming scents while she whipped up her cake. We would eagerly wait for her to bring it out, and the joy on everyone’s faces was a sight to behold. When I stumbled upon the idea of creating a fruit pizza that captured the same cheerful spirit, I knew I had to put my spin on it. Not only is this recipe a nod to my childhood, but it’s also a means to create new memories with the ones I love, just like Aunt Mabel.
Ingredients
To craft this deliciously festive fruit pizza, you’ll need the following ingredients:
-
1 tube Refrigerated Sugar Cookie Dough (16.5 oz)
This ready-to-bake dough saves time in the kitchen and has the perfect sweetness and texture for a base. If you prefer homemade, you can easily whip up a sugar cookie dough from scratch! -
8 oz Cream Cheese (softened)
A classic choice for rich frosting. Make sure it’s softened for easy mixing. If you’re looking for a lighter option, you can substitute Neufchâtel cheese. -
2/3 cup Sugar
For that perfect sweetness that balances the fresh fruit. Feel free to reduce the sugar slightly or opt for a sugar substitute if you prefer a less sweet frosting. -
1 teaspoon Vanilla
Pure vanilla extract adds a warm, comforting flavor. Always go for pure when you can; artificial vanilla just doesn’t have the same depth. -
8 oz Whipped Topping (thawed)
This lightens up the cream cheese frosting and gives it a fluffy quality. You can also use freshly whipped cream if you’re up for it! -
12 oz Fresh Raspberries (about 3 to 4 cups)
Beautifully red and slightly tart, raspberries make a delicious addition. If they’re out of season, strawberries work wonderfully too. -
1 dry pint Fresh Blueberries (about 2 cups)
These little gems provide a burst of sweetness and color to your pizza. A fun alternative is to use blackberries if you prefer a bolder flavor.
Step-by-Step Instructions
Now that we’ve gathered our ingredients, it’s time to bring this beautiful pizza to life!
-
Preheat the Oven
Preheat your oven to 350°F (175°C). This step is essential as it ensures even baking for that perfect golden crust! -
Prepare the Sugar Cookie Crust
On a large baking sheet, break out your refrigerated sugar cookie dough. Using your fingers, spread the dough into a uniform circle, roughly 12 inches in diameter. You can lightly flour your hands if the dough is too sticky. Don’t worry about making it perfect—it’s all about creating a base for our luscious toppings! -
Bake the Crust
Pop the baking sheet into the oven and let it bake for about 10-12 minutes or until the edges are lightly golden. Keep an eye on it because sugar cookie dough can go from perfectly baked to too browned quite quickly. Once done, remove it from the oven and let it cool completely on a wire rack. Patience is key here! -
Make the Cream Cheese Frosting
In a large mixing bowl, beat the softened cream cheese with an electric mixer until it’s smooth and creamy. Add in the sugar and vanilla, mixing well until it’s fluffy. Gently fold in the whipped topping until well combined. This fluffiness adds a cloud-like texture that perfectly complements the crust and fruit. -
Assemble the Pizza
Once the crust is completely cool, spread the cream cheese frosting evenly across the top. Use a spatula to create a lovely, even layer. Here’s the fun part! Take the fresh raspberries and blueberries, and arrange them in the pattern of the American flag. For perfectionists, you could measure out the specific quadrant sizes, but I find that the joy of free-form design represents creativity more than symmetry ever could. -
Chill
Once assembled, place your fruit pizza in the fridge for about 30 minutes to chill. This helps the frosting set a bit and makes it easier to slice! -
Slice and Serve
Finally, slice into wedges and serve! The thrill of cutting into this colorful masterpiece adds to the festive ambiance.
Serving Suggestions
When serving your American Flag Fruit Pizza, think about how to make it shine! You might place each slice on a vibrant plate to highlight the colors or serve each person a slice topped with a mint leaf for that extra pop of freshness. You can also serve it alongside a scoop of vanilla ice cream for an indulgent twist!
Recipe Variations
Looking to mix things up? Here are a few variations to consider:
-
Gluten-free Option: Swap out the sugar cookie dough for a gluten-free cookie mix or try an almond flour crust for a nutty flavor.
-
Fruit Swap: Substitute the raspberries with strawberries and create stripes of alternating fruit—maybe even use sliced bananas for a unique twist!
-
Nutty Crunch: Add a layer of crushed nuts (like pecans or walnuts) between the crust and the frosting for a delightful crunch.
-
Citrus Zest: Spice up your cream cheese frosting with a touch of lemon or orange zest to enhance the bright flavors of the fruit.
-
Chocolate Drizzle: For a decadent twist, drizzle some melted chocolate over the top just before serving for a chocolatey flair!
Chef’s Notes
Through all these years of creating recipes, this American Flag Fruit Pizza holds a special place in my heart. It’s a delightful combination of flavors and colors, and it brings back those joyous memories of family gatherings. I remember one Fourth of July where I forgot the whipped topping! I quickly made a homemade whipped cream with vanilla and a touch of sugar instead. It was a hit, showing me yet again that we can adapt, and food is all about loving the process!
FAQs and Troubleshooting
-
Can I make this in advance?
Absolutely! Prepare the crust and frosting the day before, store them separately in airtight containers in the fridge, and assemble just before serving. -
What if my crust is too thick?
If yours turns out thicker than desired, it’s okay! Just bake it a few more minutes to ensure it cooks all the way through. -
How do I store leftovers?
Keep any leftovers covered in the fridge for up to 2-3 days. However, keep in mind that the cookies may get softer over time. -
Can I use frozen fruit?
While fresh is best for presentation, frozen fruit works too! Just ensure you thaw and drain any excess liquid.
Nutritional Info
While this fruit pizza is all about celebrating and enjoying, moderation is key. Each slice packs in sweetness from the cookie dough and frosting, along with the light and fresh fruits contributing vitamins and antioxidants.
Now that you’ve got all the tips and tricks up your sleeve, tie on your apron, and let’s make some edible art that embodies the spirit of gathering—together at the table, sharing stories, laughter, and good food. Welcome to your new summer favorite, the American Flag Fruit Pizza!
PrintAmerican Flag Fruit Pizza

A festive dessert featuring a buttery sugar cookie crust topped with cream cheese frosting and fresh strawberries and blueberries in a patriotic pattern.
- Prep Time: 15 minutes
- Cook Time: 12 minutes
- Total Time: 45 minutes
- Yield: 8 servings 1x
- Category: Dessert
- Method: Baking
- Cuisine: American
- Diet: Vegetarian
Ingredients
- 1 tube Refrigerated Sugar Cookie Dough (16.5 oz)
- 8 oz Cream Cheese (softened)
- 2/3 cup Sugar
- 1 teaspoon Vanilla
- 8 oz Whipped Topping (thawed)
- 12 oz Fresh Raspberries (about 3 to 4 cups)
- 1 dry pint Fresh Blueberries (about 2 cups)
Instructions
- Preheat your oven to 350°F (175°C).
- Prepare the sugar cookie crust by spreading the dough into a uniform circle on a baking sheet.
- Bake the crust for about 10-12 minutes until edges are lightly golden.
- Make the cream cheese frosting by beating softened cream cheese, sugar, and vanilla until fluffy, then fold in whipped topping.
- Assemble the pizza by spreading the frosting on the cooled crust and arranging fresh raspberries and blueberries in the pattern of the American flag.
- Chill the assembled pizza in the fridge for about 30 minutes.
- Slice into wedges and serve!
Notes
Can be modified with gluten-free crust or different fruits. Store leftovers covered in the fridge for up to 2-3 days.
Nutrition
- Serving Size: 1 slice
- Calories: 250
- Sugar: 20g
- Sodium: 150mg
- Fat: 10g
- Saturated Fat: 4g
- Unsaturated Fat: 5g
- Trans Fat: 0g
- Carbohydrates: 36g
- Fiber: 1g
- Protein: 3g
- Cholesterol: 20mg
Keywords: fruit pizza, dessert, summer, Independence Day, festive recipe
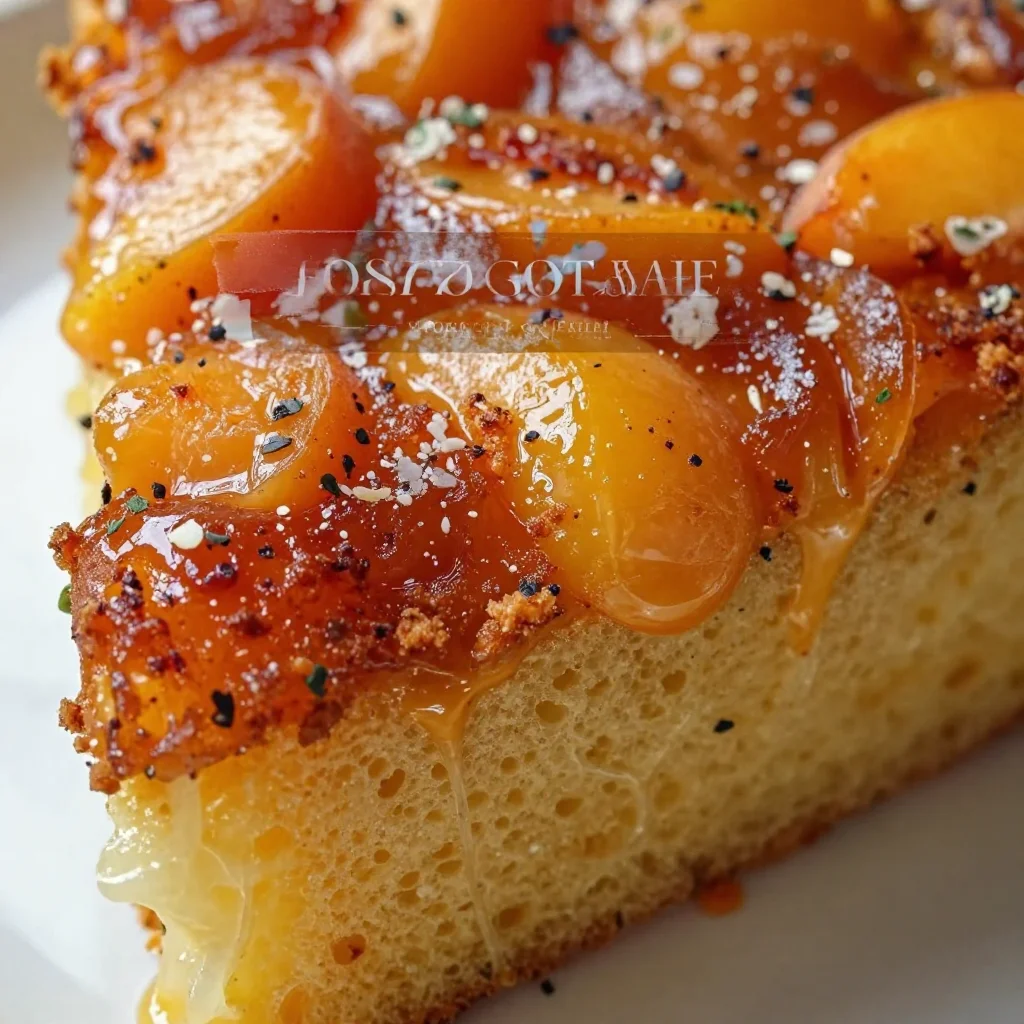
Minute Peach Upside-Down Cake for Summer Moments
Peach Upside Down Cake That Will Delight Your Taste Buds!
Hello, fellow food lovers! Today, I’m thrilled to share a recipe that’s not only a feast for the senses but also a nostalgic journey back to my childhood. Let’s dive into the world of Peach Upside Down Cake—a dessert that elegantly combines the luscious sweetness of ripe peaches with a moist and fluffy cake. If you’ve never tried making an upside-down cake before, don’t worry! I’ll guide you through it step-by-step, all with a sprinkle of joy and a dash of laughter.
A Slice of Nostalgia
Growing up in a household where culinary creativity was always encouraged, desserts were a cherished event in our family. I distinctly remember my grandmother’s kitchen, where the air was always rich with the scent of baked goods—especially when ripe peaches were in season. One particularly hot summer day, my grandmother decided to whip up her famous Peach Upside Down Cake. She’d sing while she mixed the batter, her sweet voice harmonizing with the sound of the oven timer.
As the cake baked, I ventured outside to pick fresh peaches from the tree in our backyard. I remember the sun shining down, making the peaches feel like little suns themselves—so juicy and sweet! When I returned, the kitchen was filled with this beautiful aroma that made my mouth water. The cake was golden brown, the peaches glistening like jewels atop a fluffy base. Sharing those sweet moments with my family ignited my passion for cooking and shaped my desire to create beautiful memories in the kitchen.
Let’s recreate that magic together!
Ingredients
Here’s what you’ll need to make this delightful Peach Upside Down Cake:
-
4 ripe peaches, sliced
- Look for peaches that yield slightly to pressure, indicating ripeness. You can substitute with nectarines or plums for a twist!
-
1/2 cup unsalted butter
- Unsalted butter gives you control over the saltiness. If you’re using salted butter, just reduce the added salt in the recipe by half.
-
1 cup brown sugar
- Brown sugar adds depth and a slight molasses flavor. Feel free to use coconut sugar for a healthier alternative.
-
1 1/2 cups all-purpose flour
- This is your base! If you need a gluten-free option, gluten-free all-purpose flour blends work well.
-
1 cup granulated sugar
- Granulated sugar ensures a light, fluffy cake texture. If you prefer less sweetness, you can reduce the amount by 1/4 cup.
-
3/4 cup milk
- Full-fat milk enhances creaminess, but you can substitute with almond milk or oat milk for a dairy-free version.
-
3 large eggs
- Eggs help with structure and moisture. For a vegan option, replace each egg with 1/4 cup unsweetened applesauce.
-
2 teaspoons baking powder
- This is the leavening agent that makes the cake rise. Ensure it’s fresh for optimal results!
-
1 teaspoon vanilla extract
- Vanilla extract adds warmth and richness. Feel free to use vanilla bean paste for a luxurious touch.
-
1/2 teaspoon salt
- A pinch of salt enhances all the flavors. It’s essential in sweet dishes!
Step-by-Step Instructions
-
Preheat the Oven:
Preheat your oven to 350°F (175°C). A hot oven is key to getting that perfect rise! -
Prepare the Pan:
In a 9-inch round cake pan, melt the unsalted butter over low heat on the stovetop or in the microwave. Once melted, sprinkle the brown sugar evenly over the butter. This serves as your caramel base. -
Arrange the Peaches:
Layer the sliced peaches on top of the brown sugar mixture—getting creative with your arrangement. This is where you can express yourself! Set aside the pan to cool slightly. -
Mix Dry Ingredients:
In a medium bowl, whisk together the all-purpose flour, baking powder, and salt. This helps distribute the leavening agent, ensuring an even rise. -
Cream Butter and Sugars:
In a large mixing bowl, beat the granulated sugar and half of the melted butter with an electric mixer until creamy. This should take about 2-3 minutes. -
Add Eggs and Vanilla:
Add the eggs, one at a time, beating well after each addition. Don’t forget to stir in the vanilla extract! -
Combine the Mixtures:
Gradually add the dry ingredients to the wet mixture alternately with milk. Start and end with the flour mixture, mixing just until combined—overmixing can lead to a dense cake. -
Pour Batter Into Pan:
Carefully pour the batter over the arranged peaches and spread it evenly using a rubber spatula. -
Bake:
Place the pan in the preheated oven and bake for about 45-50 minutes or until a toothpick inserted into the center comes out clean. The top should be a golden brown, and your kitchen will smell heavenly! -
Cool and Flip:
Allow the cake to cool in the pan for about 10-15 minutes. Then, carefully invert it onto a serving plate. If any peaches stick, simply replace them back on top—imperfections add character!
Serving Suggestions
To serve, dust the top of the cake with powdered sugar or a dollop of whipped cream for an extra touch of elegance. Pair it with a scoop of vanilla ice cream, and you have a dessert that’s worthy of any gathering or just a cozy night in!
Recipe Variations
Looking to mix things up? Here are a few tasty twists on this classic:
-
Spiced Peach Variation: Add a teaspoon of ground cinnamon and a pinch of nutmeg to the batter for a spiced version that will tear through cold winter nights.
-
Tropical Twist: Swap out the peaches for mango or pineapple for a refreshing tropical flair.
-
Nutty Crunch: Add chopped walnuts or pecans to the batter or sprinkle on top just before baking for a delightful crunch.
-
Berry Fusion: Incorporate blueberries or raspberries with the peaches for a mixed berry upside down cake that bursts with flavor.
-
Lemon Zest: Add the zest of one lemon to the batter for a bright, fresh flavor!
Chef’s Notes
This recipe has been a beloved staple in my kitchen for years, evolving as I’ve experimented with different fruits and flavor combinations. I once tried making this cake with apricots, which turned out beautifully! There’s something so comforting about a cake that feels both rustic and refined. And hey, a little mishap—like dropping a few peaches on the floor—can turn into laughter shared with loved ones.
FAQs and Troubleshooting
1. Why is my cake dense?
Overmixing can lead to a dense texture. Mixing just until combined is key to a light and fluffy cake!
2. Can I use frozen peaches?
Absolutely! Just make sure to thaw them and pat them dry to avoid excess moisture.
3. My peaches turned brown on top. What happened?
Peaches are prone to browning. Make sure they’re young and ripe—if they’re too soft, they’ll break down during baking.
4. How do I store leftovers?
Keep the cake covered at room temperature for a day or two, or refrigerate it in an airtight container to last up to a week.
Nutritional Info (optional)
Disclaimer: Nutritional values are estimates and may vary based on ingredients used.
- Serving Size: 1 slice (1/12 of recipe)
- Calories: Approximately 320
- Total Fat: 10g
- Saturated Fat: 5g
- Cholesterol: 75mg
- Sodium: 180mg
- Total Carbohydrates: 52g
- Dietary Fiber: 1g
- Sugars: 30g
- Protein: 4g
So there you have it, my delightful Peach Upside Down Cake! Tie on your apron, gather some friends, and let’s make memories that are as sweet as this wonderful dessert. Trust me, your taste buds will thank you! Happy baking!
PrintPeach Upside Down Cake
A delightful Peach Upside Down Cake that combines fresh peaches with a moist and fluffy cake for a nostalgic dessert experience.
- Prep Time: 15 minutes
- Cook Time: 50 minutes
- Total Time: 65 minutes
- Yield: 12 servings 1x
- Category: Dessert
- Method: Baking
- Cuisine: American
- Diet: Vegetarian
Ingredients
- 4 ripe peaches, sliced
- 1/2 cup unsalted butter
- 1 cup brown sugar
- 1 1/2 cups all-purpose flour
- 1 cup granulated sugar
- 3/4 cup milk
- 3 large eggs
- 2 teaspoons baking powder
- 1 teaspoon vanilla extract
- 1/2 teaspoon salt
Instructions
- Preheat your oven to 350°F (175°C).
- In a 9-inch round cake pan, melt the unsalted butter over low heat and sprinkle the brown sugar evenly over the butter.
- Layer the sliced peaches on top of the brown sugar mixture.
- In a medium bowl, whisk together the all-purpose flour, baking powder, and salt.
- Beat the granulated sugar and half of the melted butter until creamy.
- Add the eggs, one at a time, beating well after each addition, then stir in the vanilla extract.
- Gradually add the dry ingredients to the wet mixture alternately with milk.
- Carefully pour the batter over the arranged peaches.
- Place the pan in the preheated oven and bake for about 45-50 minutes.
- Allow the cake to cool in the pan for about 10-15 minutes before inverting it onto a serving plate.
Notes
For serving, dust with powdered sugar or top with whipped cream and a scoop of vanilla ice cream. Store leftovers covered at room temperature or in the refrigerator for up to a week.
Nutrition
- Serving Size: 1 slice
- Calories: 320
- Sugar: 30g
- Sodium: 180mg
- Fat: 10g
- Saturated Fat: 5g
- Unsaturated Fat: 4g
- Trans Fat: 0g
- Carbohydrates: 52g
- Fiber: 1g
- Protein: 4g
- Cholesterol: 75mg
Keywords: peach cake, upside down cake, summer dessert, easy cake recipe, nostalgic dessert
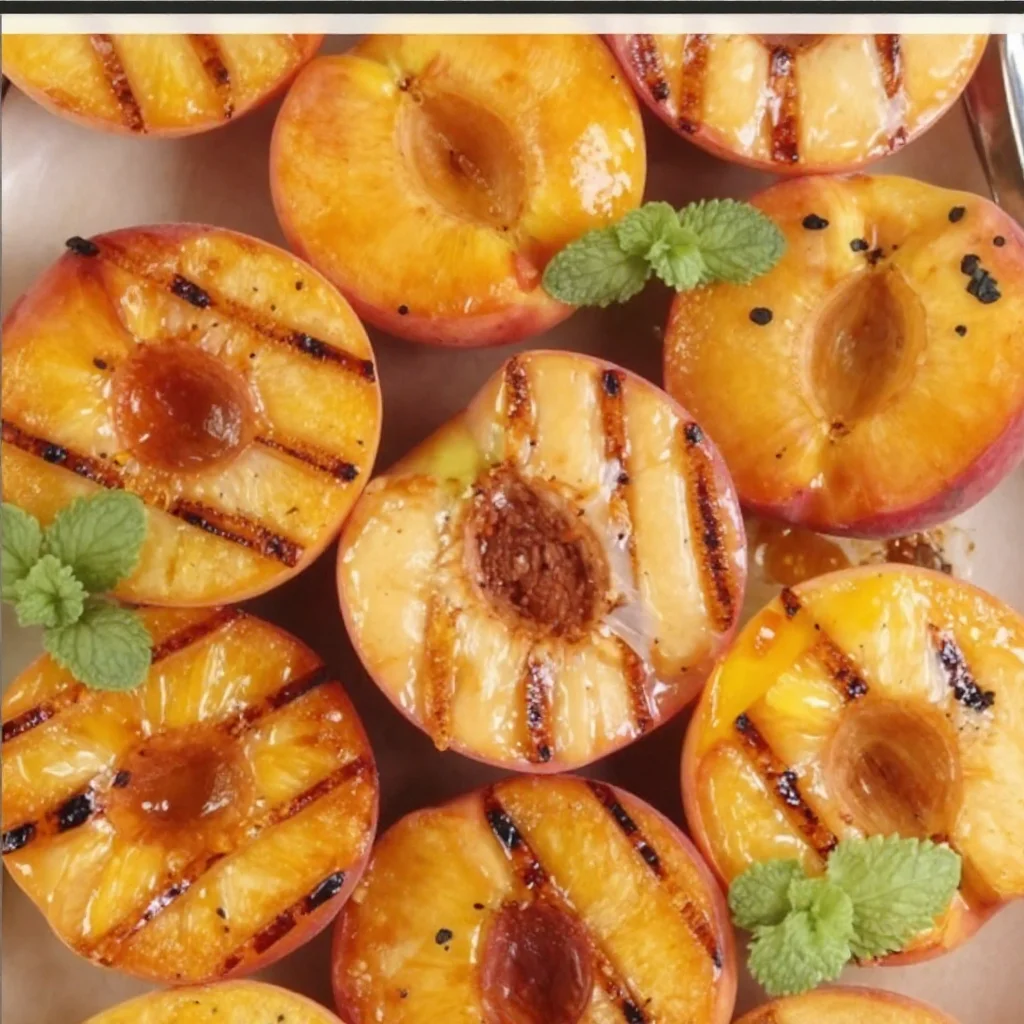
Minute Grilled Cinnamon Peaches: Quick Summer Treat
Grilled Peaches with Cinnamon: A Sweet Summer Delight
Hello and welcome back, foodie friends! Today, we’re stepping into a world of sweet indulgence with a delightful recipe that embodies the essence of summer: Grilled Peaches with Cinnamon. If you’re a fan of simple, delicious desserts that look like you’ve embraced your inner gourmet chef, you’re in for a treat!
Imagine this: the sun is shining, you’re outside enjoying a leisurely afternoon, and the smell of peaches caramelizing on the grill fills the air. This isn’t just a recipe; it’s a celebration of summer flavors that will transform how you enjoy one of nature’s sweetest offerings. Grilling brings out the natural sugars in the fruit, creating little bites of heaven that are juicy and tender, with a touch of warmth and spice from the cinnamon. A scoop of vanilla ice cream on top, or a drizzle of caramel sauce, takes this dish over the top!
Not only is this recipe incredibly easy to whip up, but it also allows you to share a beautiful dish that looks like you put in hours of effort — and trust me, nobody needs to know just how simple it really is! So grab your apron, and let’s get cooking!
A Memory of Peaches
Let me take you back to a summer evening spent at my grandparents’ house in the countryside. The air was fragrant with blooming jasmine, and the sun was dipping below the horizon, painting the sky in shades of pink and orange. My grandmother would gather all of us kids around her little charcoal grill in the backyard, and we’d line up as she skewered fresh fruits. That’s when I first tasted grilled peaches.
She would coat them lightly with olive oil and sprinkle on cinnamon, placing them directly on the hot grill. As the peaches cooked, we could hardly contain our anticipation, the sweet aroma wafting through the air, mingling with the sounds of laughter and summer insects. When those peaches came off the grill, they were soft and slightly charred, and we’d scoop them up with vanilla ice cream. Every bite was pure bliss, a moment of pure summer joy.
That memory has always stayed with me, a reminder that the simplest ingredients can create the most meaningful experiences. So, let’s recreate that magic and make our own grilled peach memories!
Ingredients
Here’s what you’ll need to bring this sweet summer creation to life:
-
4 ripe peaches
Choose peaches that give slightly when pressed; they should be ripe but not overly soft. If you can’t find peaches, nectarines make a great substitute too! -
2 tablespoons olive oil
A high-quality extra virgin olive oil adds richness and enhances the fruit’s natural sweetness. You can also use melted coconut oil for a unique flavor twist. -
1 teaspoon ground cinnamon
This spice adds warmth and a cozy aroma to your peaches. If you want to get adventurous, consider trying cardamom or nutmeg for a different flavor profile. -
2 tablespoons brown sugar
The brown sugar caramelizes beautifully on the grill, enhancing the sweetness of the peaches. If you’re looking for a lighter option, you can replace it with honey or maple syrup. -
Optional: ice cream or caramel sauce for serving
A scoop of creamy vanilla ice cream or a drizzle of rich caramel sauce elevates this dish to pure indulgence. Go for dairy-free ice cream if you want to keep it vegan!
Step-by-Step Instructions
Now, let’s dive into the cooking! Follow these steps for perfectly grilled peaches:
-
Prepare the Peaches
Start by washing the peaches under cold water. Dry them gently, then cut each peach in half, removing the pit. If you’re using particularly ripe peaches, be careful with your knife; they should yield easily but still hold their shape. -
Preheat the Grill
Heat your grill to medium-high heat. If you’re using a charcoal grill, let the coals settle until they’re glowing red-hot. A well-prepped grill is crucial for achieving those perfect grill marks and caramelized flavors. -
Create the Mixture
In a small bowl, whisk together the olive oil, cinnamon, and brown sugar. This mixture should form a paste that lightly coats the peach halves. It’s a flavor bomb and will enhance the caramelization process. -
Brush the Peaches
Take a pastry brush and generously brush the olive oil mixture onto the cut sides of each peach half. Make sure to coat them well, as this step is key to flavor and caramelization. -
Grill Time
Place the peaches cut side down on the grill. Grill for about 3-4 minutes until you see those lovely grill marks start to form. Keep an eye on them; you want them to soften without falling apart! -
Flip and Grill Again
Carefully flip the peaches over using tongs or a spatula. Grill for another 2-3 minutes. This allows the olive oil and sugar mixture to caramelize beautifully. You’ll know they’re ready when they’re fragrant and slightly soft to the touch. -
Remove and Let Cool
Once done, remove the peaches from the grill and place them on a plate. Give them a few moments to cool slightly; they’ll be steaming hot! -
Serve
If you’ve chosen to use ice cream or caramel sauce, go ahead and serve the grilled peaches warm alongside a scoop of ice cream or drizzle caramel over the top. You can also sprinkle some extra cinnamon if you feel like it.
Tip: Make sure to gather your friends or family around. This dish is all about sharing joy and creating memories!
Serving Suggestions
When it comes to plating, simplicity is key. You want to showcase the gorgeous golden-brown grill marks and the lusciousness of the peaches. Place the warm grilled halves on a vibrant plate, allowing the juices to pool slightly. Add a generous scoop of ice cream right in the center, and a drizzle of caramel sauce over it all. A sprig of mint or a dusting of additional cinnamon elevates the presentation, making it feel extra special — all without too much fuss.
Recipe Variations
Want to mix things up a bit? Here are some fun variations to try:
-
Balsamic Grilled Peaches: Drizzle some balsamic glaze over the peaches before grilling for a tangy contrast.
-
Spiced Pecans or Walnuts: Add chopped and toasted nuts on top for a delicious crunch. It adds texture and complements the sweetness beautifully.
-
Honey Drizzle: Replace sugar with a drizzle of honey if you want a more natural sweetener.
-
Minty Twist: Add finely chopped mint leaves as a topping for a refreshing flavor boost that brightens the dish.
-
Flavored Ice Cream: Experiment with different ice cream flavors like cinnamon, caramel, or coconut for a unique taste experience!
Chef’s Notes
This recipe is truly a reflection of the beauty of seasonal cooking. My own grilling adventure with peaches has evolved over the years, from just dessert to becoming a centerpiece at summer cookouts. I often find myself experimenting with spices and toppings, and it never ceases to amaze me how versatile grilled peaches can be.
I once made this dish for a backyard barbecue, and unexpectedly, a close friend ended up at the hospital that day! It was a wild adventure, and I ended up serving grilled peaches as a dessert to all our other friends while regularly checking my phone for updates about our friend. It brought laughter and lightness to the situation, reminding me that good food can create joy even in challenging moments.
FAQs and Troubleshooting
1. What’s the best way to tell if peaches are ripe?
Look for peaches that give slightly to pressure. They should be fragrant and have a nice golden hue. If they’re hard, let them sit at room temperature until they soften.
2. My peaches fell apart while grilling! Tips?
Overripe peaches can be tricky! Next time, choose slightly firmer peaches, and handle them gently when flipping to keep the halves intact.
3. Can I make this recipe ahead of time?
While grilled peaches are best served fresh, you can prep them ahead of time by cutting and coating them, then grilling just before serving.
4. How do I store leftovers?
If you have leftovers, store them in the refrigerator in an airtight container for up to 2 days. Gently reheat them in a microwave or on the grill to enjoy again!
Nutritional Info
While I don’t usually add nutritional info, here’s a little insight: Peaches are rich in vitamins A and C, and fiber, making them a healthy dessert option. Paired with ice cream, you get an indulgent treat, so enjoy every bite mindfully!
With every grilled peach you make, you’re not just serving dessert — you’re sharing a piece of summer and creating warm memories. Let’s gather around the table and make moments that matter, one delicious bite at a time. Happy grilling, friends! 🍑✨
PrintGrilled Peaches with Cinnamon

A simple and delicious dessert featuring grilled peaches caramelized with cinnamon and served warm, perfect for summer indulgence.
- Prep Time: 10 minutes
- Cook Time: 10 minutes
- Total Time: 20 minutes
- Yield: 4 servings 1x
- Category: Dessert
- Method: Grilling
- Cuisine: American
- Diet: Vegetarian
Ingredients
- 4 ripe peaches
- 2 tablespoons olive oil
- 1 teaspoon ground cinnamon
- 2 tablespoons brown sugar
- Optional: ice cream or caramel sauce for serving
Instructions
- Prepare the peaches by washing them and cutting in half, removing the pit.
- Preheat the grill to medium-high heat, ensuring coals are glowing if using charcoal.
- Create the mixture by whisking together olive oil, cinnamon, and brown sugar in a small bowl.
- Brush the mixture onto the cut sides of the peach halves with a pastry brush.
- Grill the peaches cut side down for about 3-4 minutes until grill marks form.
- Flip the peaches and grill for another 2-3 minutes until fragrant and soft.
- Remove the peaches from the grill and let cool slightly on a plate.
- Serve warm with ice cream or caramel sauce and enjoy!
Notes
Make sure to gather friends and family around to share this delightful dessert!
Nutrition
- Serving Size: 1 peach half
- Calories: 180
- Sugar: 15g
- Sodium: 0mg
- Fat: 8g
- Saturated Fat: 1g
- Unsaturated Fat: 7g
- Trans Fat: 0g
- Carbohydrates: 24g
- Fiber: 2g
- Protein: 2g
- Cholesterol: 0mg
Keywords: grilled peaches, summer dessert, cinnamon peaches, easy dessert
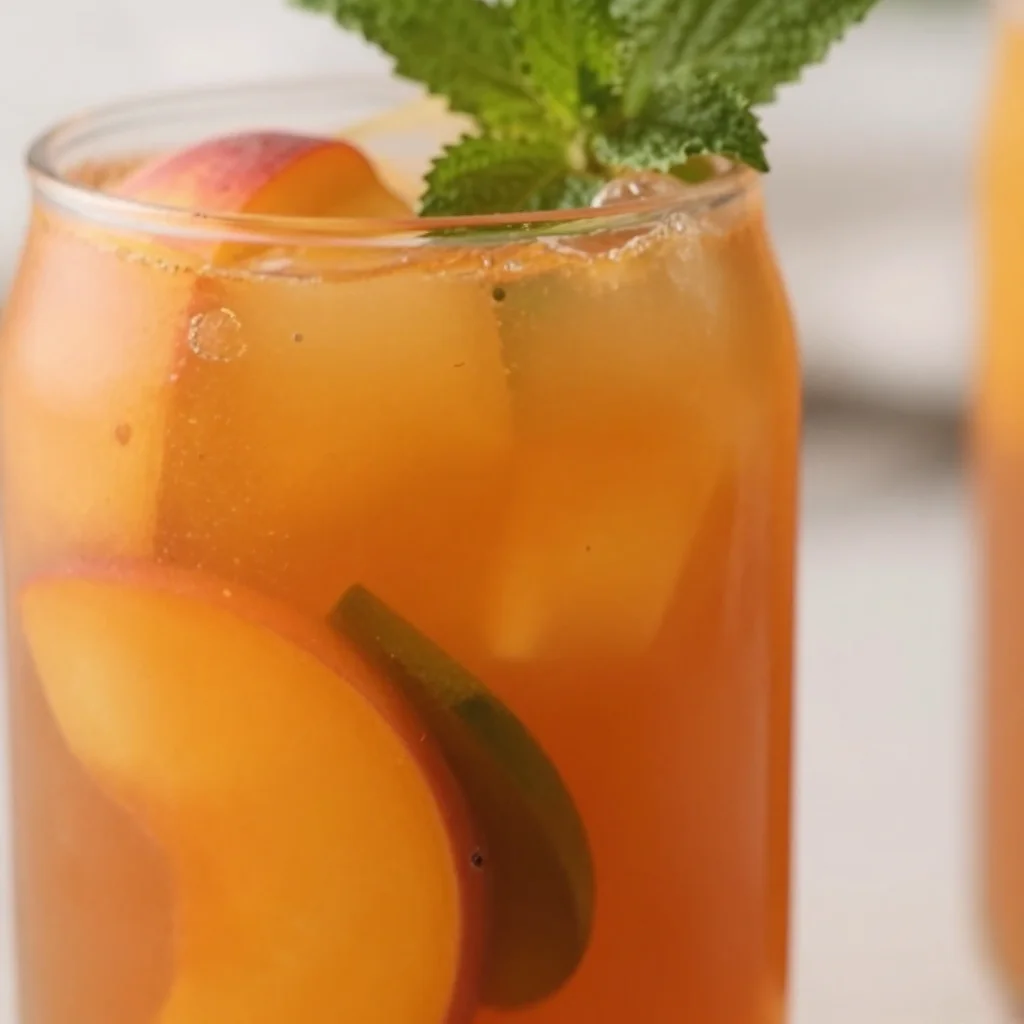
Minute 3-Ingredient Peach Iced Tea for Busy Summer Days
Refreshing 3-Ingredient Peach Iced Tea: A Sip of Summer
Hello, my lovely foodies! Welcome back to the kitchen, where we’re about to whip up something so refreshing and delicious, it’ll make you feel like you’re lounging under a warm sun, cocktail in hand. Today’s star ingredient? The beautiful, juicy peach! You might be wondering how a simple peach can elevate a classic iced tea, but let me tell you, this 3-Ingredient Peach Iced Tea is about to become your go-to drink for any occasion—whether it’s a sunny afternoon, a chic brunch, or a cozy evening on the porch.
Picture this: It’s a sweltering summer day, your friends come over (let’s call it “spontaneous gathering central”), and you have nothing fancy in the fridge. Not to worry! This easy-peasy recipe using just three simple ingredients will not only cool everyone down but also impress them with its vibrant flavor. Let’s dive into the sweet nectar of the peach and brew up some nostalgia!
A Trip Down Memory Lane
Ah, peaches… they remind me of childhood summers spent at my grandmother’s house. She had this stunning orchard in the backyard overflowing with ripe peaches, and we would relish the sweet scent wafting through the air. As a kid, I believed it was magic that those fuzzy fruits could turn into something so delightful. My favorite memory? Watching her brew her special iced tea, infused with fresh peaches and the essence of summertime.
We would gather around the table after a hot day, sipping our homemade iced tea while she shared stories of her youth, each sip filled with laughter and love. It wasn’t just a drink; it was a beautiful ritual that connected us. And now, every time I make this Peach Iced Tea, I’m transported back to those cherished days, reminding me that the simplest things can create the most wonderful memories.
Ingredients
Let’s explore the three ingredients that will create this delightful drink!
-
3 Black Tea Bags
Black tea is the backbone of this beverage, offering a robust flavor and a lovely caffeine kick if you desire. If you’re looking for a lighter version, you can swap for green tea or herbal tea for a caffeine-free alternative. -
4 Cups Boiling Water
The magic happens when boiling water meets the tea bags! It extracts all those rich flavors. If you’re in a hurry, you can use cold brew methods, just steep the bags longer in cold water. -
3 Large Ripe Peaches
Sweet, juicy peaches are the star here! They not only infuse the tea with that delightful peachy flavor but also give it a lovely natural sweetness. Don’t have fresh peaches? You can use frozen peaches or even peach juice in a pinch! -
2 Cups Water
This helps balance your flavors! You can adjust this based on how diluted you prefer your tea. For a fruitier taste, feel free to add another cup if you want it lighter and less concentrated. -
1/3 Cup Granulated Sugar
Just enough sweetness to elevate those gorgeous peach flavors. If you have a sweet tooth, bump it up to 1/2 cup, or experiment with natural sweeteners like honey or agave syrup for a healthier twist!
Step-by-Step Instructions
Now, let’s get our hands busy! Follow these simple steps, and you’ll soon have a refreshing pitcher of Peach Iced Tea ready to sip on.
-
Boil the Water
Start by bringing 4 cups of water to a rolling boil. This is your time to shine! Once it’s bubbling, drop in those 3 black tea bags. Let them steep for about 5–7 minutes, depending on how strong you like your tea. If you prefer a milder flavor, steep for 3-5 minutes. Try not to wander off—over-steeping can lead to bitterness! -
Prepare the Peaches
While your tea is steeping, let’s prep those peaches. Wash them thoroughly, remove the pits, and slice them into small pieces. No need for perfection here—rustic is beautiful! If you’re feeling adventurous, you can even juice a couple of slices to intensify the flavor. -
Combine the Sugar and Peaches
In a medium saucepan, combine the sliced peaches and the 1/3 cup of granulated sugar. Stir until the sugar has coated all the peach slices. This creates a lovely peach syrup! Let it sit for about 10 minutes while the sugar draws out the juices, making it even sweeter. -
Muddle & Simmer
After the peaches have marinated, gently muddle them with a spoon or a muddler to release more juice. Turn the heat on low and allow it to simmer for about 5 minutes. If you love those peachy chunks, stop here; if you want a smoother texture, you can blend it before moving to the next step! -
Combine the Tea & Peach Mixture
Once your tea is steeped to perfection, remove the tea bags and combine the brewed tea with your peach syrup. Add 2 cups of cold water to the mix for that refreshing iced tea effect. Give it a gentle stir to incorporate all that peachy goodness. -
Chill
Now, transfer your Peach Iced Tea to a pitcher and place it in the fridge for at least an hour to chill. This step is essential for enhancing those lovely flavors—so maybe take this opportunity to grab a snack! -
Serve & Sip
Once chilled, pour your delightful concoction over ice, garnished with fresh peach slices and mint if you’re feeling extra fancy. Get ready to bask in those summer vibes!
Serving Suggestions
For a beautiful presentation, I love serving Peach Iced Tea in clear glasses with ice cubes dancing inside. A sprig of fresh mint and a slice of peach on the rim elevate the look instantly. Want to be even fancier? You could serve it with a fun straw or garnish with edible flowers for a delightful summer soirée!
Recipe Variations
Feeling creative? Here are some fun twists you can explore:
-
Berry Bliss: Add a handful of fresh raspberries or strawberries while simmering the peaches for a mixed berry iced tea.
-
Citrus Splash: Squeeze in some lemon or orange juice for a zesty twist that brightens up the flavor.
-
Minty Fresh: Add a handful of fresh mint leaves during the steeping process for a refreshing herbal note.
-
Herbal Delight: Substitute black tea with chamomile or hibiscus for a completely different flavor profile.
-
Sparkling Surprise: Just before serving, top off your iced tea with some sparkling water for a fizzy treat!
Chef’s Notes
This Peach Iced Tea is a crowd-pleaser and has become a staple at my summer gatherings. Since its inception, I’ve played around with numerous variations. I once experimented by roasting the peaches first—oh boy, talk about a flavor explosion! And while it’s a relatively simple recipe, the love and care you put into it make all the difference. Also, be sure to have your friends try your first taste; their buzz of excitement will be your sweetest reward!
FAQs and Troubleshooting
Q: What if my iced tea is too sweet?
A: No worries! Just dilute it with a bit more cold water or add more brewed tea. You can also balance sweetness with a splash of lemon juice to brighten the flavors.
Q: Can I store leftover iced tea?
A: Absolutely! Keep your tea in the fridge for up to 3 days. Just give it a good stir before serving, as some of the peach bits might settle at the bottom.
Q: What if I don’t have fresh peaches?
A: Don’t fret! You can use frozen peaches or peach nectar as a substitute. Just remember that using sweetened nectar might alter the overall sweetness.
Q: Can I use different types of tea?
A: Indeed! This recipe is adaptable. Swap black tea for green tea, white tea, or even herbal blends. Just adjust your steeping time according to the type you choose.
Nutritional Info
Note: Nutritional values are approximate and can vary based on ingredients.
- Calories per serving (based on 8 servings): Approximately 70 calories
- Carbohydrates: 17g
- Sugars: 9-12g (depending on added sugar)
- Protein: 0g
- Fat: 0g
And there you have it! Your refreshing 3-Ingredient Peach Iced Tea is ready to be enjoyed. It’s a simple yet elegant drink that captures the essence of summer in every sip. So gather your loved ones, pour that iced tea, and make some beautiful memories around the table. Happy sipping!
Print3-Ingredient Peach Iced Tea

A refreshing iced tea infused with juicy peaches, perfect for summer gatherings.
- Prep Time: 10 minutes
- Cook Time: 15 minutes
- Total Time: 25 minutes
- Yield: 8 servings 1x
- Category: Beverage
- Method: Brewing
- Cuisine: American
- Diet: Vegetarian
Ingredients
- 3 Black Tea Bags
- 4 Cups Boiling Water
- 3 Large Ripe Peaches, sliced
- 2 Cups Water
- 1/3 Cup Granulated Sugar
Instructions
- Boil the water and steep black tea bags for 5–7 minutes.
- Prepare the peaches by washing, pitting, and slicing them.
- Combine the sliced peaches and sugar in a saucepan; let sit for 10 minutes.
- Muddle the peaches, then simmer for 5 minutes.
- Combine the brewed tea with peach syrup and add 2 cups of cold water.
- Chill in the fridge for at least an hour.
- Serve over ice with garnishes if desired.
Notes
Add fresh mint or other fruits for variations. Can store in the fridge for up to 3 days.
Nutrition
- Serving Size: 1 serving
- Calories: 70
- Sugar: 9g
- Sodium: 0mg
- Fat: 0g
- Saturated Fat: 0g
- Unsaturated Fat: 0g
- Trans Fat: 0g
- Carbohydrates: 17g
- Fiber: 1g
- Protein: 0g
- Cholesterol: 0mg
Keywords: iced tea, peach tea, summer drink, refreshing beverage, easy recipe
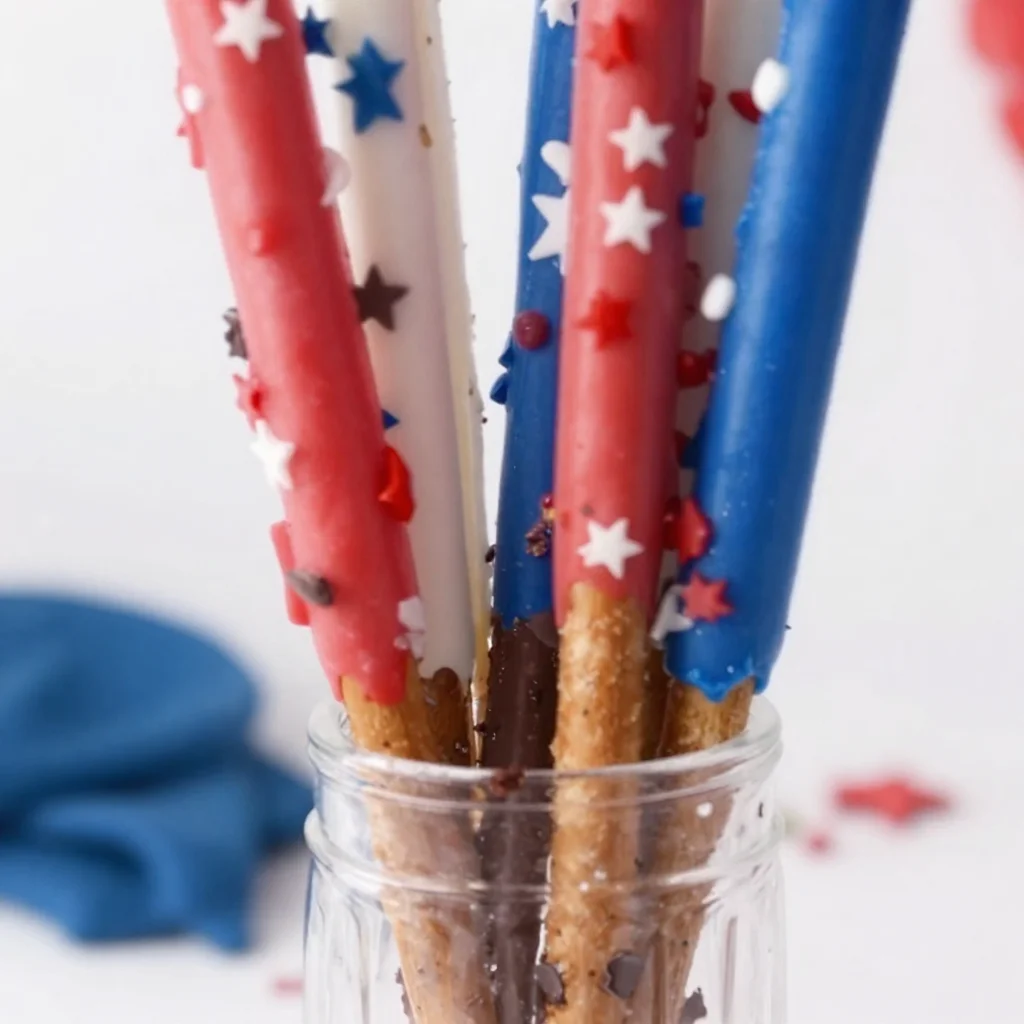
4th of July: No-Bake Patriotic Chocolate-Dipped Pretzel Rods
Patriotic Chocolate Dipped Pretzel Rods: A Festive and Fun Treat!
Ah, summer! The warm breeze, the sound of laughter echoing through backyards, and the joyful anticipation of holiday celebrations. One of my favorite summer holidays is the Fourth of July, filled with backyard barbecues, spectacular firework displays, and, of course, delicious food. This year, let’s add a touch of fun and flair to our festivities with a delightful and easy-to-make treat: Patriotic Chocolate Dipped Pretzel Rods!
These pretzel rods are the perfect blending of salty and sweet, providing the ideal crunch while being beautifully decorated in red, white, and blue. Not only are they festive and gorgeous to look at, but they’re also incredibly simple to whip up, making them an ideal project for little hands that want to help in the kitchen. Picture this: a mini kitchen assembly line filled with eager little chefs dipping pretzels, drizzling chocolate, and sprinkling star sprinkles. It’s a memory in the making!
As we dive into this recipe, I’ll share some personal stories, valuable tips, and everything you need to know to make these delightful treats. So gather around the kitchen, let’s create something beautiful and delicious to celebrate our great nation together!
A Nostalgic Bite
When I think of holiday treats that take me back in time, chocolate-covered pretzels instantly transport me to my childhood. Growing up, my mom would always involve us kids in the kitchen during holiday preparations. I remember a particular Fourth of July BBQ when we decided to create our own red, white, and blue snacks. Armed with pretzels, candy melts, and a little creativity, we made the messiest, most colorful chocolate-dipped pretzels.
The kitchen was filled with giggles as my siblings and I fought over who got to sprinkle the star decorations. In those moments, we didn’t just create delicious snacks; we built lasting memories. Today, I recreate that joyful chaos with my loved ones every year, and I hope these Patriotic Chocolate Dipped Pretzel Rods inspire you to do the same!
Ingredients
Here’s what you’ll need to create these festive snacks:
-
12 Pretzel Rods: You can find these in most grocery stores. They add a delightful crunch and salty balance to the sweetness of the chocolate. Plus, they’re the perfect size for little hands!
-
½ Cup Red Candy Melts: These are easy to find around holidays. If you can’t locate red, white, or blue melts, regular chocolate chips will work, but the vibrant colors of candy melts really make the presentation pop.
-
½ Cup Blue Candy Melts: Just like the red melts, feel free to substitute with other colors depending on the occasion. For instance, for a fall event, caramel or orange melts would be fantastic.
-
½ Cup White Candy Melts: White melts provide a beautiful contrast and a creamy sweetness. You could also use white chocolate chips if you prefer a real chocolate flavor, just melt them down carefully to avoid burning.
-
2 Tablespoons Patriotic Star Sprinkles: These charming little sprinkles add just the right touch of festivity. If you can’t find star sprinkles, go for any confetti or colored sprinkles! They’ll still add a playful flair.
Each ingredient carries a hint of tradition, a sprinkle of creativity, and a dash of nostalgia. Feel free to get creative as you prepare your pretzel rods!
Step-by-Step Instructions
Let’s dive into the fun part—preparing your Patriotic Chocolate Dipped Pretzel Rods!
-
Prepare Your Workspace: Grab a baking sheet and line it with parchment paper. This makes the cleanup easier and is crucial for letting your pretzel rods set without sticking.
-
Melt the Candy Melts: In microwave-safe bowls, place your red, white, and blue candy melts. Heat them in 30-second intervals, stirring in between, until they’re smooth and melted. Be cautious not to overheat—this can lead to a grainy texture. If you do, a splash of vegetable oil can help bring them back to a silky consistency!
-
Dip the Pretzel Rods: Once your melts are ready, it’s time for the fun part! Holding a pretzel rod, dip it into the colored candy melts about two-thirds of the way down. Allow any excess to drip off, and if you need a thicker coating, dip it again.
-
Sprinkle Away: Immediately after dipping, sprinkle the star sprinkles generously onto the wet chocolate. You’ll want to do this step quickly before the chocolate hardens, so enlist your little helpers here! Gently shake off any excess sprinkles if needed.
-
Set the Pretzel Rods: Place the decorated pretzel rod onto the lined baking sheet. Repeat this process with all your pretzel rods, mixing if you’d like to alternate colors.
-
Let Them Set: Once all your pretzel rods are dipped and decorated, let them sit at room temperature or pop them in the refrigerator for about 10-15 minutes to harden completely.
-
Pack Up and Enjoy: Once the chocolate has set, you can serve them immediately or package them nicely in cellophane bags tied with a ribbon for a delightful treat to share!
Cooking is all about taking your time and enjoying the process. Feel free to dance around your kitchen, sing a song, and soak in those memories while you create something delicious!
Serving Suggestions
To serve your Patriotic Chocolate Dipped Pretzel Rods, simply arrange them on a festive platter or into individual treat bags tied with red, white, and blue ribbons. You can even create a fun display by placing them in a decorative jar or a tall glass. Don’t forget to make some space for ice-cold lemonade or refreshing iced tea to complete the festive atmosphere.
Recipe Variations
Feel free to add your own twist with these variations:
-
Drizzle of Dark Chocolate: After dipping the pretzels in candy melts, drizzle some melted dark chocolate over the top for an extra chocolatey flavor.
-
Peanut Butter Twist: Dip your pretzels in melted peanut butter before covering them in candy melts for a deliciously nutty twist.
-
Texture Variety: Mix in crushed nuts or toffee bits with your sprinkles for added crunch and flavor dimension.
-
Seasonal Colors: Change the colors of the candy melts to fit different holidays. Green and red for Christmas, pastels for Easter—the possibilities are endless!
-
Dairy-Free Option: Use dairy-free chocolate chips or melts to make this recipe suitable for dairy allergies or preferences.
Chef’s Notes
Over the years, this recipe has evolved from simple, messy kitchen fun to a festive activity for friends and family. The smiles that come from dipping pretzels and the laughter that fills the room are priceless. I’ll never forget that one time we almost had a mini chocolate fight—let’s just say, chocolate makes everything more fun!
Each time I make these pretzel rods, I’m reminded of that nostalgia and how food binds us together. Whether you’re celebrating the Fourth of July, a birthday, or simply a sunny day, making these treats is about creating moments in the kitchen that you’ll cherish forever.
FAQs and Troubleshooting
Q1: My chocolate got hard before I dipped all the pretzels. What can I do?
A: No worries! You can reheat the chocolate in short intervals, stirring well between bursts. If it’s still too thick, add a teaspoon of vegetable oil to smooth it out!
Q2: Can I use regular chocolate chips instead of candy melts?
A: Absolutely! Just remember that chocolate chips won’t give you the vibrant colors you want. Make sure to melt them gently to avoid burning.
Q3: My pretzel rods broke during dipping! How can I prevent this?
A: Pretzel rods can be fragile. Make sure to dip them gently and not apply too much pressure. Dipping in small batches can also help.
Q4: How long can I store these pretzel rods?
A: These treats can last for about 1-2 weeks, stored in an airtight container at room temperature. If it’s really hot, consider refrigerating them to keep the chocolate firm!
Nutritional Info (optional)
For those counting calories or tracking nutrition, here’s a rough estimate per serving (1 pretzel rod):
- Calories: 120
- Total Fat: 7g
- Saturated Fat: 4g
- Carbohydrates: 14g
- Sugars: 9g
- Protein: 1g
These values can vary depending on the type of chocolate or substitutes you choose, so always check your specific ingredients for accurate info!
There you have it! Celebrate your next gathering with these fun and festive Patriotic Chocolate Dipped Pretzel Rods. They’re sure to be a hit, spark joy, and remind everyone to indulge in the simple pleasures of life and good food. Happy cooking!
PrintPatriotic Chocolate Dipped Pretzel Rods

These festive and easy-to-make pretzel rods are dipped in red, white, and blue chocolate, perfect for celebrating the Fourth of July.
- Prep Time: 15 minutes
- Cook Time: 10 minutes
- Total Time: 25 minutes
- Yield: 12 servings 1x
- Category: Dessert
- Method: Dipping
- Cuisine: American
- Diet: Vegetarian
Ingredients
- 12 Pretzel Rods
- ½ Cup Red Candy Melts
- ½ Cup Blue Candy Melts
- ½ Cup White Candy Melts
- 2 Tablespoons Patriotic Star Sprinkles
Instructions
- Prepare your workspace by lining a baking sheet with parchment paper.
- Melt the candy melts in microwave-safe bowls, heating in 30-second intervals until smooth.
- Dip each pretzel rod into the melted candy melts about two-thirds of the way down.
- Sprinkle star sprinkles onto the wet chocolate immediately after dipping.
- Set the decorated pretzel rods on the lined baking sheet.
- Let them sit at room temperature or refrigerate for about 10-15 minutes to harden completely.
- Pack up and enjoy your festive treats!
Notes
Feel free to get creative with colors and toppings to fit different holidays.
Nutrition
- Serving Size: 1 Pretzel Rod
- Calories: 120
- Sugar: 9g
- Sodium: 230mg
- Fat: 7g
- Saturated Fat: 4g
- Unsaturated Fat: 2g
- Trans Fat: 0g
- Carbohydrates: 14g
- Fiber: 1g
- Protein: 1g
- Cholesterol: 0mg
Keywords: patriotic treats, chocolate dipped pretzels, Fourth of July snacks, festive desserts
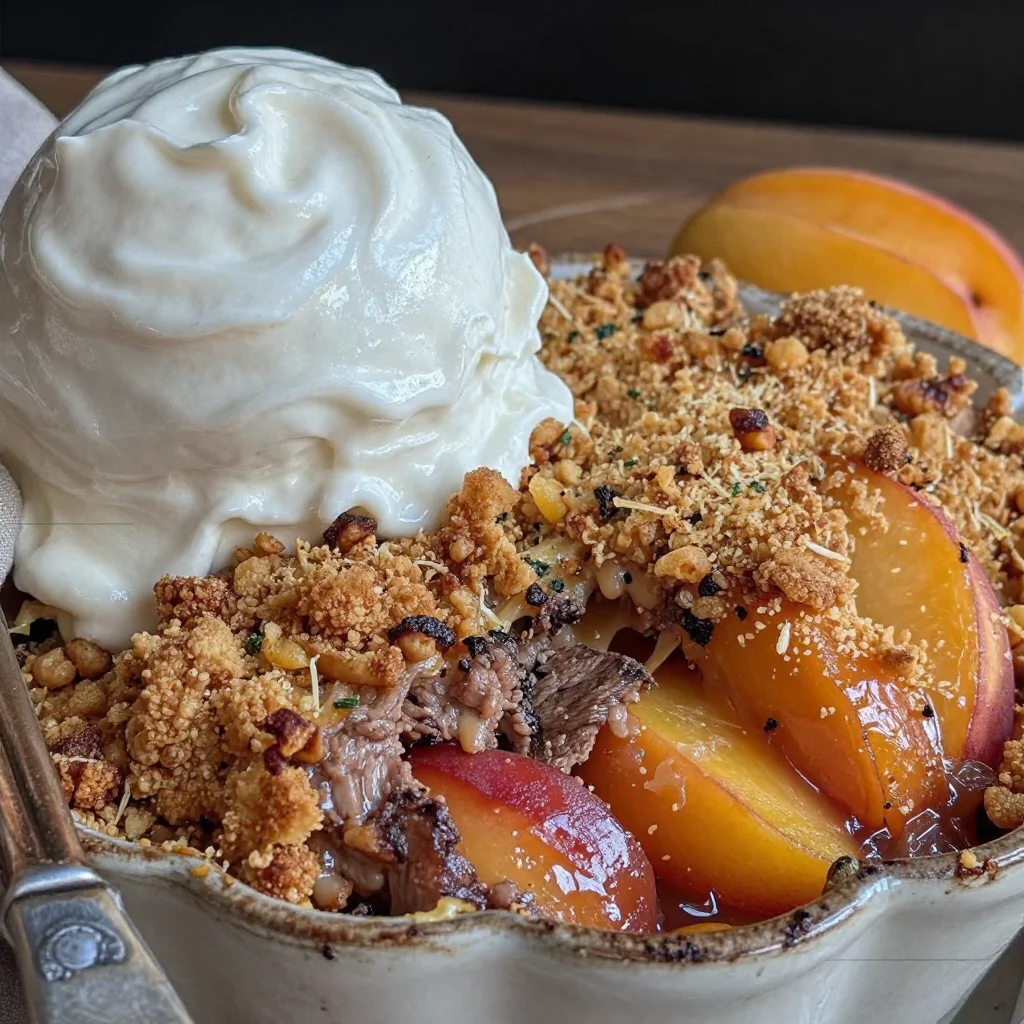
Brown Sugar Crunch Peach Crumble with Salted Vanilla Cream
Easy Peach Crumble Recipe with Brown Sugar Crunch and Salted Vanilla Cream for Perfect Summer Dessert
Introduction
Hello, my fellow food lovers! Today, we’re diving into the sun-kissed, juicy world of peaches, perfect for creating a dish that is as delightful to eat as it is to prepare. Nothing says summer quite like a warm bowl of Peach Crumble, especially when that crumbly topping is laced with rich brown sugar and served with a drizzle of salted vanilla cream. Get ready for a recipe that brings a smile to your face and joy to your kitchen!
Growing up, my summers were filled with memories of picking peaches at a local orchard. The air was sweet, and the trees were heavy with ripe, golden fruit just begging to be picked. Once we got home, we would slice those juicy treasures and toss them into a baking dish, filling the house with the heady scent of freshness and warmth. As the crumble baked, we’d sit on the porch, listening to the gentle rustle of leaves, excited for that first scoop straight from the oven.
This Easy Peach Crumble recipe captures all that nostalgia and joy. With just a handful of ingredients, you’ll create a dessert that feels indulgent yet is simple enough for any weeknight gathering. The best part? It’s incredibly forgiving, so even novice bakers can shine! Whether you’re hosting a backyard barbecue, celebrating a summer birthday, or just seeking a cozy treat for a quiet evening, this crumble is here for you. So, let’s get to work and make something special together that will impress your guests and satisfy your sweet tooth!
Personal Story
One of my most cherished memories as a child was spent in my grandmother’s kitchen during peach season. She had this magical ability to turn fresh fruit into something extraordinary. I remember her handing me a wooden spoon, insisting I take part in the exciting process of creating her famous peach crumble. We fought over the sweetest peaches—the ones that were just a tad too ripe, bursting with flavor—and her laughter filled the room as I tried to sneak bites of the sugary crumble topping before it even made it onto the fruit.
We’d prepare the dish together, her seasoned hands guiding mine as we mixed and stirred, sharing stories about our family while the crumble baked. That delicious aroma drifting through the house was a precursor to our evening ritual—gathering around the table with family, a warm serving of peach crumble topped with vanilla ice cream waiting for each of us. The crumble always held a special place in my heart, not solely for its flavor but for the shared moments and love that came with it. Now, I carry that tradition forward in my own kitchen, sharing these recipes and stories with all of you on this journey filled with flavor and warmth.
Ingredients
Let’s gather the ingredients for our Peach Crumble. Each component plays a crucial role in creating that perfect dessert!
-
4 cups fresh peaches, peeled and sliced (about 5-6 medium peaches): The star of the show! Look for those juicy, ripe peaches that give a little under pressure—this means they’re perfectly sweet and ready for dessert. If peaches aren’t in season, feel free to substitute with nectarines or even frozen peaches. Just be sure to thaw and drain them first.
-
2 tablespoons granulated sugar: This helps sweeten the peaches and balances out their natural tartness. You can swap it for coconut sugar for a more caramel-like flavor if you prefer.
-
1 teaspoon fresh lemon juice: Adds a lovely brightness and keeps your peaches from browning. If you don’t have fresh lemons, bottled lemon juice will work in a pinch.
-
1 teaspoon vanilla extract: This is your flavor enhancer! Pure vanilla extract is always best, but you could use imitation vanilla if that’s what you have on hand.
-
1/2 teaspoon cinnamon (optional): This spice brings warmth and depth to the fruit. Feel free to omit it if you’re looking for a more refreshing flavor, or substitute with ginger for a zesty kick.
-
1 tablespoon cornstarch: This will thicken the peach juices as they cook, preventing a soggy bottom. If you don’t have cornstarch, you can use all-purpose flour instead, though the texture may vary slightly.
-
1 cup all-purpose flour: The base for our crumb topping. For a gluten-free version, substitute with an all-purpose gluten-free flour blend.
-
1/2 cup packed light brown sugar: This sugar adds richness and a lovely chewiness to the topping, balancing nicely with the fresh fruit. If you’re out of brown sugar, you can combine granulated sugar with a bit of molasses for a close match.
-
1/2 cup unsalted butter, cold and cubed: Cold butter is key for a crumbly topping! If you’re in a pinch, coconut oil can also work but will alter the flavor slightly.
-
1/2 teaspoon salt: A little salt enhances all the flavors in the dish, bringing everything together.
-
1/2 teaspoon ground cinnamon or nutmeg (optional): A comforting spice that can be added to the topping for an extra layer of flavor. Choose your favorite or even omit it altogether!
-
1 cup heavy cream: For our luscious salted vanilla cream. You could swap it for half-and-half for a lighter version, but I highly recommend keeping the richness of heavy cream!
-
2 tablespoons powdered sugar: This helps sweeten the cream; you can adjust to taste!
-
1 teaspoon pure vanilla extract: Because vanilla never goes out of style in desserts!
-
1/4 teaspoon flaky sea salt: This is the special touch that makes the salted cream shine, countering the sweetness perfectly.
Step-by-Step Instructions
Alright, let’s roll up our sleeves and get cooking! Follow these steps, and you’ll have a fabulous peach crumble ready to share in no time.
-
Preheat the Oven: Start by preheating your oven to 350°F (175°C). This gives your oven a head start and ensures everything bakes evenly!
-
Prepare the Peaches: In a large bowl, combine your sliced peaches, granulated sugar, lemon juice, vanilla extract, cinnamon (if using), and cornstarch. Toss gently to combine while ensuring each slice of peach is coated. This mixture should sit for about 10-15 minutes, allowing the flavors to meld wonderfully. Meanwhile, the sugar will draw out the peach juices, creating a luscious filling.
-
Make the Crumble Topping: In another bowl, combine the flour, brown sugar, cold cubed butter, salt, and optional spices (cinnamon or nutmeg). Using a pastry cutter or your fingers, mix the ingredients until crumbly with pea-sized lumps. It’s totally okay if some bits are larger; those will give you that delightful texture!
-
Assemble the Dish: Grease a 9×13-inch baking dish or an equivalent-sized oven-safe dish. Pour the peach mixture into the dish, spreading it out evenly. Then, sprinkle the crumble topping generously over the peaches. You want to cover them, but don’t worry about perfection—some peeks should show through!
-
Bake: Place the dish in your preheated oven and bake for about 35-40 minutes, or until the topping is golden brown and the peaches are bubbling. Halfway through, keep an eye on it; if the top is browning too quickly, cover it loosely with aluminum foil.
-
Make the Salted Vanilla Cream: While the crumble is baking, let’s whip up that dreamy cream. In a mixing bowl, combine the heavy cream, powdered sugar, vanilla extract, and flaky sea salt. Using an electric mixer, beat until soft peaks form. Don’t overmix; you want it to be luscious and airy!
-
Serve and Enjoy: Once your crumble is out of the oven, let it cool for about 10 minutes. Serve warm with a generous scoop of that silky salted vanilla cream on top. Trust me, it’s pure heaven!
Serving Suggestions
For presentation, scoop out a generous portion of peach crumble into a shallow bowl, drizzling the salted vanilla cream over the top. You can even garnish with a sprig of mint or a sprinkle of crushed nuts for a lovely touch. Don’t be shy to serve additional cream on the side; it’s a crowd-pleaser!
Recipe Variations
Why not make this dish your own? Here are some fun variations you can try:
-
Berry Peach Crumble: Mix in some blueberries or raspberries for a delightful berry twist that is bursting with flavor.
-
Nutty Crunch: Add chopped pecans or walnuts to the crumble topping for added crunch and flavor.
-
Spiced Peaches: For a touch of warmth, add a pinch of nutmeg or a splash of bourbon to the peach filling.
-
Coconut Cream: Substitute the heavy cream with coconut cream for a tropical flavor that pairs beautifully with peaches!
-
Grain-Free Option: Use almond flour or a gluten-free blend for the crumble topping for a grain-free dessert.
Chef’s Notes
As a passionate cook, I’ve seen this recipe evolve over the years. Whenever I make it, it transports me back to those sweet summer days in my grandmother’s kitchen, filled with laughter and love. I’ve tried various modifications, from adding different fruits to adjusting the sweetness of the crumble. Each version tells a different story, just like each gathering around the table. Remember, cooking is an adventure—don’t hesitate to play around with flavors and make this crumble uniquely yours!
FAQs and Troubleshooting
Q: My crumble topping turned out soggy. What happened?
A: This could happen if the peaches were too juicy or if they sat too long before baking. Make sure to drain excess liquid and use cornstarch to absorb some moisture.
Q: Can I make this ahead of time?
A: Yes! You can prepare the peach filling and crumble topping separately and assemble just before baking. You can even bake it a few hours in advance; just reheat before serving.
Q: How do I store leftovers?
A: Store any leftover peach crumble in an airtight container in the refrigerator for up to 3 days. Reheat in the oven for the best texture, but you can use a microwave if you’re in a hurry.
Q: Can I freeze this crumble?
A: Absolutely! You can freeze the unbaked peach crumble. Just wrap it tightly and bake it from frozen—add an extra 10-15 minutes to your bake time.
Nutritional Info (optional)
While not necessary, if you’d like a rough estimate of nutrition, here’s a quick breakdown per serving (assuming 8 servings): approximately 300 calories, 15g fat, 40g carbohydrates, and 3g protein. Enjoy in moderation!
Conclusion
And there you have it! A heartwarming recipe for the perfect summer dessert—Easy Peach Crumble with Brown Sugar Crunch and Salted Vanilla Cream. I truly hope you enjoy making this dish as much as I do. It’s more than a dessert; it’s a reminder of the joy that comes from gathering around the table, sharing stories, and indulging in life’s sweeter moments. So tie on that apron, embrace your inner chef, and let the baking begin! Happy cooking!
PrintEasy Peach Crumble with Brown Sugar Crunch and Salted Vanilla Cream

A delightful summer dessert featuring juicy peaches topped with a brown sugar crumble and paired with silky salted vanilla cream.
- Prep Time: 15 minutes
- Cook Time: 40 minutes
- Total Time: 55 minutes
- Yield: 8 servings 1x
- Category: Dessert
- Method: Baking
- Cuisine: American
- Diet: Vegetarian
Ingredients
- 4 cups fresh peaches, peeled and sliced
- 2 tablespoons granulated sugar
- 1 teaspoon fresh lemon juice
- 1 teaspoon vanilla extract
- 1/2 teaspoon cinnamon (optional)
- 1 tablespoon cornstarch
- 1 cup all-purpose flour
- 1/2 cup packed light brown sugar
- 1/2 cup unsalted butter, cold and cubed
- 1/2 teaspoon salt
- 1/2 teaspoon ground cinnamon or nutmeg (optional)
- 1 cup heavy cream
- 2 tablespoons powdered sugar
- 1 teaspoon pure vanilla extract
- 1/4 teaspoon flaky sea salt
Instructions
- Preheat the oven to 350°F (175°C).
- Combine sliced peaches, granulated sugar, lemon juice, vanilla extract, cinnamon (if using), and cornstarch in a large bowl.
- Make the crumble topping by mixing flour, brown sugar, cold butter, salt, and optional spices until crumbly.
- Grease a 9×13-inch baking dish and layer the peach mixture evenly.
- Sprinkle the crumble topping generously over the peaches.
- Bake for 35-40 minutes until the topping is golden brown.
- Whip the heavy cream with powdered sugar, vanilla extract, and flaky sea salt until soft peaks form.
- Serve warm with salted vanilla cream on top.
Notes
Feel free to experiment with adding other fruits or nuts to the crumble topping for variations.
Nutrition
- Serving Size: 1 serving
- Calories: 300
- Sugar: 15g
- Sodium: 200mg
- Fat: 15g
- Saturated Fat: 9g
- Unsaturated Fat: 5g
- Trans Fat: 0g
- Carbohydrates: 40g
- Fiber: 3g
- Protein: 3g
- Cholesterol: 30mg
Keywords: peach crumble, summer dessert, brown sugar crumble, salted vanilla cream
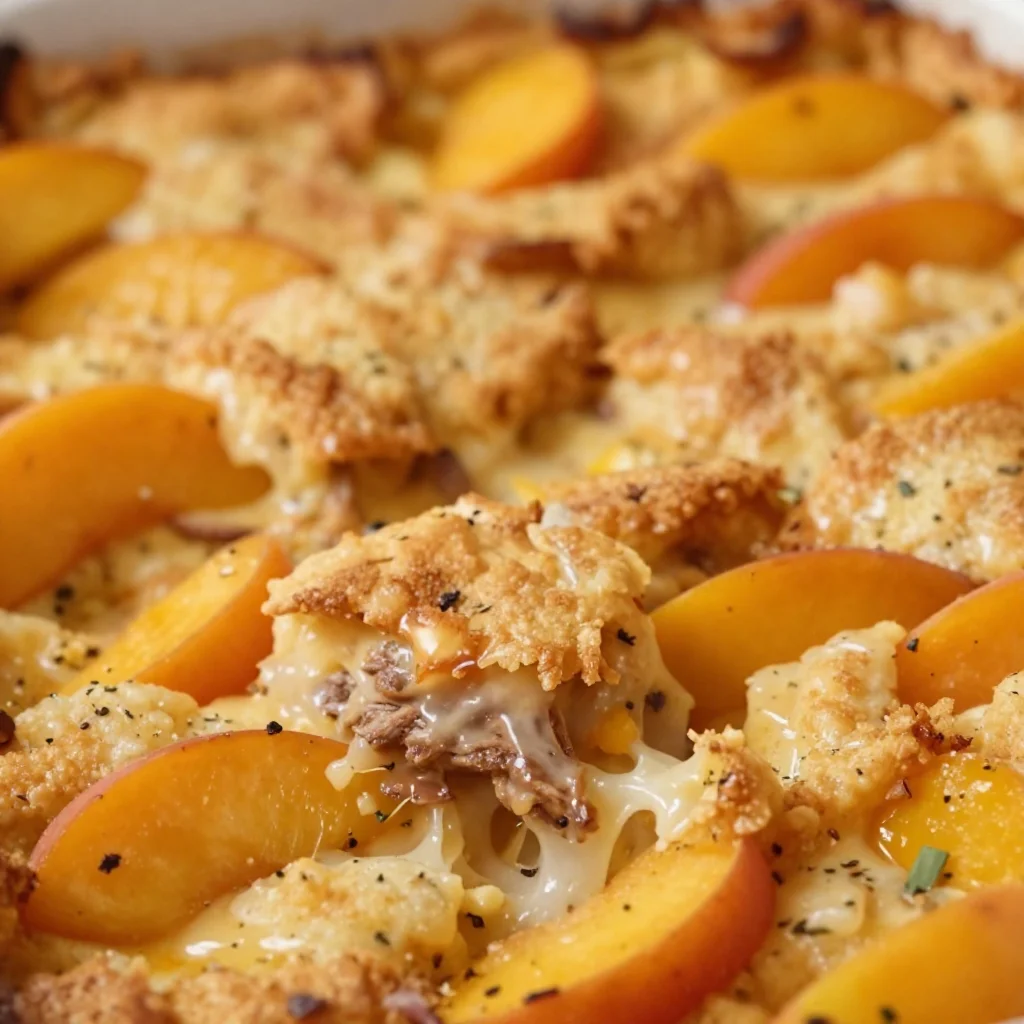
One-Pan 15-Minute Peach Cobbler with Canned Peaches
Easy Peach Cobbler with Canned Peaches: A Delightful Dessert
Hello, fellow food enthusiasts! Today, I’m excited to whip up a beloved classic that will warm the heart and bring smiles to your table — Easy Peach Cobbler with Canned Peaches. This recipe is not just about indulging in a sweet treat; it’s a way to celebrate the joy of gathering. Picture a golden, bubbling dessert served warm, topped with a scoop of vanilla ice cream while everyone around the table savors every bite. Sounds dreamy, right?
Peach cobbler is the kind of dessert that invites memories and laughter, and it’s incredibly simple to make — perfect for busy weeknights or casual gatherings with friends. Let’s get started on this delightful culinary adventure!
A Nostalgic Memory
Growing up, the kitchen was the heart of my home, filled with laughter, love, and, of course, the sweet aroma of my grandmother’s desserts. One vivid memory that always brings a smile is her peach cobbler. Every summer, when peaches were in season, she would gather the family, setting the stage for a fun-filled afternoon of baking and bonding. She had a magical way of transforming simple canned peaches into something that felt like summer itself.
I remember standing on a stool next to her, eagerly mixing the ingredients and stealing spoonfuls of the syrupy peaches (don’t tell her!). Her cobbler often emerged from the oven golden and bubbling, the sweet smell wafting through the house. Sitting at the table with family, indulging in that velvety, buttery goodness, was a feeling like no other.
That memory ignited my passion for cooking and inspired me to create this easy peach cobbler recipe, perfect for anyone who loves simple yet elegant desserts. With just a few ingredients, we can create a dish that’s steeped in warmth and happy memories.
Ingredients
Before we dive into the cooking process, let’s gather our ingredients. Here’s what you’ll need:
-
2 cans of peaches in syrup, drained: Canned peaches are convenient and maintain their sweetness. If you prefer fresher options, you can use fresh peaches (about 4-5 medium), but make sure to peel and slice them first!
-
1 cup all-purpose flour: This forms the base of our cobbler and creates that lovely golden crust. For gluten-free options, consider using a gluten-free flour blend.
-
1 cup granulated sugar: This adds the essential sweetness, balancing the tartness of the peaches. You can reduce this slightly if you want a less sweet dessert or substitute with coconut sugar for a different flavor profile.
-
1 cup milk: Milk gives our batter a nice consistency. Unsweetened almond milk or oat milk works as good alternatives if you’re dairy-free.
-
1/2 cup unsalted butter, melted: Butter enhances the flavor and creates a beautiful golden crust. You can also use coconut oil for a dairy-free option.
-
1 tablespoon baking powder: This is crucial for giving our cobbler that lovely rise. Remember, double-check the expiration date to ensure freshness!
-
1/2 teaspoon salt: Just a pinch helps balance out the sweetness and enhances the flavors.
-
1 teaspoon vanilla extract: Vanilla adds a lovely aroma and rich flavor — a must-have in any dessert!
Step-by-Step Instructions
Now that we have our ingredients ready, let’s get started on making this easy peach cobbler! Follow these steps carefully, and I promise you’ll have a delightfully scrumptious dessert in no time.
-
Preheat Your Oven: Begin by preheating your oven to 350°F (175°C). A well-heated oven ensures that your cobbler rises beautifully and cooks evenly.
-
Prepare the Baking Dish: Grab an 8×8-inch or 9×9-inch baking dish. You can spray it lightly with cooking spray or butter it up to prevent sticking. It’s an extra step, but trust me, it’s worth it!
-
Mix the Batter: In a bowl, combine the flour, sugar, baking powder, and salt. Whisk together until well combined. Next, add in the milk, melted butter, and vanilla extract. Mix until smooth. The batter should be somewhat runny but well combined. Don’t be too fussy here — small lumps are perfectly fine!
-
Pour the Batter: Carefully pour your batter into the prepared baking dish. It’s okay if it doesn’t cover every inch of the dish. It will rise and spread as it bakes, creating that beautiful cobbled texture.
-
Add the Peaches: Open your cans of peaches, drain the syrup, and evenly distribute the peaches over the batter. This layering technique allows the sweet juices to seep into the batter, creating a luscious flavor.
-
Bake: Place the baking dish in the preheated oven and bake for approximately 35-40 minutes, or until the cobbler is golden brown and bubbling. The top should have a delightful, slightly crisp texture — a sign that it’s cooked perfectly!
-
Cool and Serve: Once baked, remove it from the oven and let it cool for a few minutes. This allows the juices to settle and makes it easier to serve. If you can resist the urge to dive in immediately, let it cool for about 10-15 minutes.
Serving Suggestions
When it’s time to serve your peach cobbler, get creative! A delightful scoop of vanilla ice cream or a dollop of whipped cream can elevate your dessert to a whole new level of deliciousness. Plate it in simple bowls to showcase the rustic beauty of your cobbler, and don’t forget to sprinkle a little cinnamon on top for an extra pop of flavor and presentation. Trust me; your guests will rave about this dish!
Recipe Variations
Here are a few creative twists on the classic peach cobbler:
-
Berry Twist: Mix in some fresh or frozen berries such as blueberries or raspberries with the peaches for a delightful fruity explosion.
-
Cinnamon Spice: Add 1 teaspoon of ground cinnamon or a pinch of nutmeg to the batter for added warmth and depth of flavor.
-
Nutty Crunch: Stir in a handful of chopped nuts (like pecans or almonds) into the batter for some crunch and a lovely texture contrast.
-
Coconut Delight: Use coconut milk instead of regular milk and sprinkle some shredded coconut on top before baking for a tropical twist.
-
Chili Flake Surprise: For the adventurous spirit, sprinkle a pinch of chili flakes into the batter to create a surprising but delightful kick.
Chef’s Notes
This easy peach cobbler recipe has evolved over the years as I’ve played around with flavors and textures. The first time I made it with canned peaches was a eureka moment! It made the process so much simpler, and not having to worry about peeling fresh peaches means anyone can join in on the fun.
I’ve tried various toppings, and while traditional ice cream is my go-to, drizzling some caramel sauce over the top can be heavenly, too! Don’t hesitate to make this recipe your own and play around with seasonal ingredients. Food is all about joy and exploration; embrace it!
FAQs and Troubleshooting
1. What if my cobbler is too runny?
If your cobbler turns out runny, it’s likely due to the moisture from the fruit. Try adding a tablespoon or two of cornstarch to the peaches before placing them in the batter. Alternatively, letting it cool a bit longer may help thicken it up.
2. Can I use frozen peaches?
Absolutely! Just thaw and drain the frozen peaches, and they will work beautifully in this recipe. You might want to include a tablespoon of flour to counteract excess moisture.
3. What can I do if my topping is browning too quickly?
If you notice the cobbler starting to brown too quickly, cover it loosely with aluminum foil during baking. This will allow the cobbler to cook through without burning the top.
4. How can I store leftovers?
Store any leftovers in an airtight container in the refrigerator for up to 3-4 days. Reheat in the oven or microwave before serving again. Enjoying it warmed up can be just as blissful!
Nutritional Info
This delightful peach cobbler feels like an indulgence, but in moderation, it can be enjoyed guilt-free! While the nutritional breakdown can vary based on portion sizes and added toppings, a typical serving contains:
- Calories: Approximately 250
- Protein: 3g
- Fat: 8g
- Carbohydrates: 41g
- Sugar: 18g
Conclusion
Creating an Easy Peach Cobbler with Canned Peaches connects us to cherished culinary memories while allowing us to create new ones around the table. With simple ingredients and straightforward steps, you can whip up this delightful dish in no time! So, give it a try, tie on that apron, and invite friends or family to share in this beautiful experience. Every bite will awaken the taste of nostalgia, turning an ordinary day into something truly special. Happy baking, friends!
PrintEasy Peach Cobbler with Canned Peaches

A delightful dessert that combines convenience and nostalgia, perfect for gatherings and sweet cravings.
- Prep Time: 15 minutes
- Cook Time: 40 minutes
- Total Time: 55 minutes
- Yield: 8 servings 1x
- Category: Dessert
- Method: Baking
- Cuisine: American
- Diet: Vegetarian
Ingredients
- 2 cans of peaches in syrup, drained
- 1 cup all-purpose flour
- 1 cup granulated sugar
- 1 cup milk
- 1/2 cup unsalted butter, melted
- 1 tablespoon baking powder
- 1/2 teaspoon salt
- 1 teaspoon vanilla extract
Instructions
- Preheat your oven to 350°F (175°C).
- Prepare an 8×8-inch or 9×9-inch baking dish.
- Mix the flour, sugar, baking powder, and salt in a bowl.
- Add the milk, melted butter, and vanilla extract; mix until smooth.
- Pour the batter into the prepared baking dish.
- Add the peaches evenly over the batter.
- Bake for approximately 35-40 minutes or until golden brown.
- Cool for a few minutes before serving.
Notes
Serve with vanilla ice cream or whipped cream. You can also add a sprinkle of cinnamon for extra flavor.
Nutrition
- Serving Size: 1 serving
- Calories: 250
- Sugar: 18g
- Sodium: 200mg
- Fat: 8g
- Saturated Fat: 5g
- Unsaturated Fat: 3g
- Trans Fat: 0g
- Carbohydrates: 41g
- Fiber: 1g
- Protein: 3g
- Cholesterol: 30mg
Keywords: peach cobbler, dessert, easy recipe, canned peaches, baking
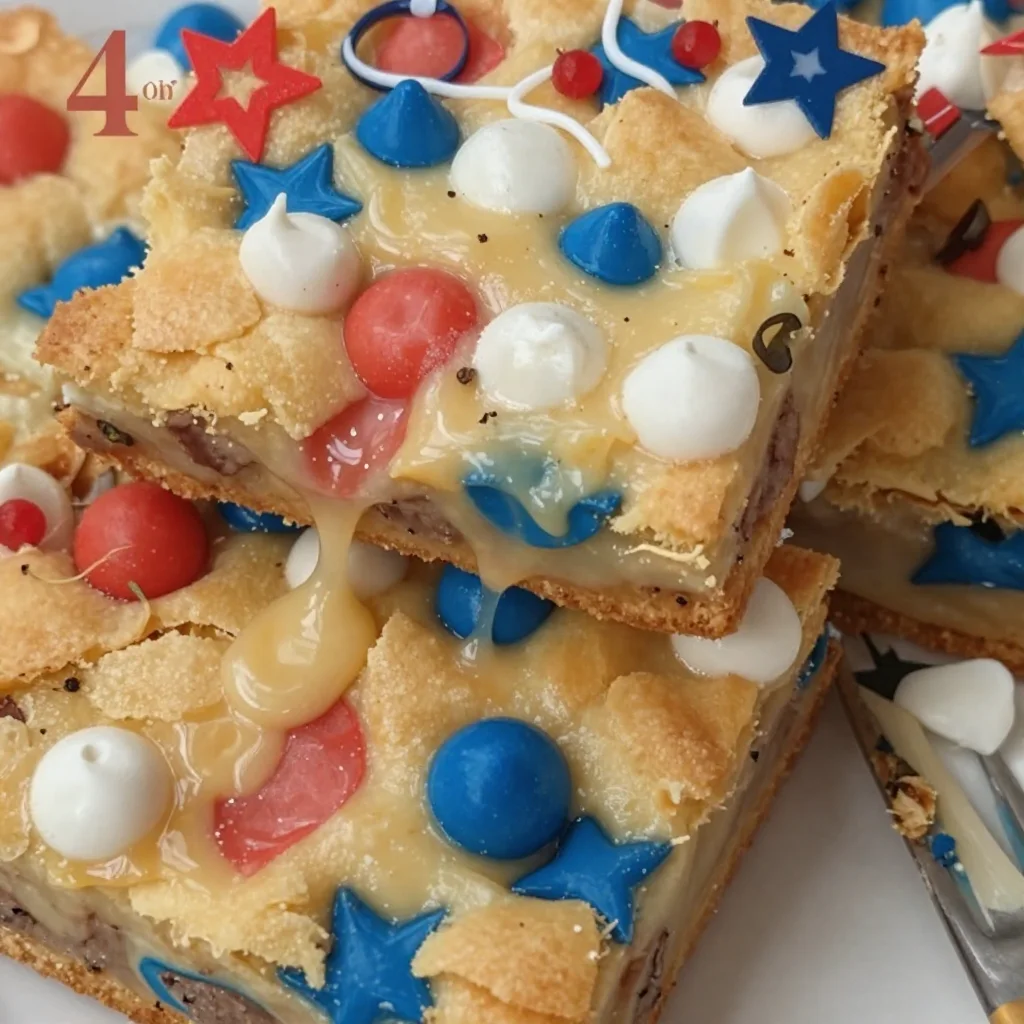
Patriotic 4th of July Cake-Mix Cookie Bars (Quick & Easy)
Celebrate with 4th of July Cake-Mix Cookie Bars: A Sweet Way to Honor Independence Day
Hello, sweet friends! If you’re like me, you’re all about celebrating every little moment with a big, beautiful treat. And as we gear up for a magnificent 4th of July celebration, there’s no better way to honor our independence than with a colorful, festive dessert. Today, I’m thrilled to share my recipe for 4th of July Cake-Mix Cookie Bars — they’re easy to whip up, irresistibly delicious, and bring a burst of red, white, and blue to your table.
Imagine this: warm, gooey cookie bars studded with white chocolate chips, and crunchy M&M’s — they melt in your mouth and are so simple to make. They’ll have your friends and family gathering around the dessert table, and maybe even returning for seconds (or thirds!). So, grab your apron and let’s dive into this delightful, festive treat!
A Sweet Memory: Baking with Mom
I can still remember the thrill of watching my mom whip up a batch of cookies in our cozy kitchen. The air would become sweet and warm, filled with the comforting aroma of baking. One summer, she decided to host a backyard barbecue for our neighborhood, and we made a giant batch of colorful cookies to celebrate the holiday.
Those cookies weren’t just snacks; they were little tokens of joy, sprinkled liberally with love and laughter. With bowls of red and blue sprinkles scattered across the countertops, we talked about our dreams while flour danced through the air. The best part? Watching our neighbors’ faces light up as they took a bite, transforming the simple gathering into a cherished memory.
It’s that spirit of joy and togetherness that inspired me to create these 4th of July Cake-Mix Cookie Bars. They embody the same feelings of love and camaraderie — perfect for sharing with friends and family during summer festivities!
Ingredients
Here’s what you’ll need to create these delightful cookie bars:
-
1 box cake mix (red velvet or vanilla)
A classic cake mix makes this recipe super simple! Either option will work beautifully, but red velvet adds an extra pop of color and flavor. -
1/2 cup vegetable oil
This ingredient keeps our bars moist and delicious. You could substitute it with melted coconut oil for a hint of tropical flavor. -
2 large eggs
These bind our ingredients together, providing structure and richness. If you’re in a pinch, use 1/2 cup of unsweetened applesauce per egg for a great vegan substitute! -
1/2 cup funfetti sprinkles (red, white, and blue)
Rainbow sprinkles bring joy to any dessert and are perfect for our patriotic theme! You can swap these for chocolate sprinkles or omit them if you prefer a more classic look. -
1/2 cup white chocolate chips
They add a creamy sweetness that balances the flavors perfectly. If you’re not a fan of white chocolate, feel free to use semi-sweet chocolate chips or even butterscotch chips for a fun twist. -
1/2 cup blue M&M’s
These festive treats add crunch and color! Swap them out for any colored candy to suit seasonal celebrations or personal favorites. -
1/2 cup red M&M’s
Just like the blue ones, these will provide that lovely crunch. You can easily replace them with peanut M&M’s for an extra layer of flavor.
Step-by-Step Instructions
Let’s get cookin’! Follow these simple steps to create your 4th of July Cake-Mix Cookie Bars:
-
Preheat the Oven: Start by preheating your oven to 350°F (175°C). This ensures that your cookie bars bake evenly and come out perfectly golden brown.
-
Prepare Your Baking Pan: Grease a 9×13-inch baking pan with non-stick spray or line it with parchment paper for easy removal. This is a little chef hack to make sure your cookie bars don’t stick and are easy to cut into neat squares later!
-
Mix the Ingredients: In a large mixing bowl, combine the cake mix, vegetable oil, and eggs. Give it a good stir with a spatula until everything is well mixed. Be careful not to overmix — we want these bars chewy, not tough!
-
Add the Fun Stuff: Gently fold in the funfetti sprinkles, white chocolate chips, and both red and blue M&M’s. Enjoy the beautiful colors as they swirl into the batter — it’s like a little celebration in the bowl!
-
Pour the Batter: Scrape the cookie batter into your prepared baking pan. Use an offset spatula or the back of a spoon to spread it out evenly in the pan. It might be a little thick, but that’s okay!
-
Bake: Place the pan in the preheated oven and bake for about 20-25 minutes. Start checking around the 20-minute mark. You want the edges to be lightly golden and a toothpick inserted in the center should come out mostly clean, meaning a few crumbs are okay — that’s what keeps it chewy!
-
Cool and Cut: Once baked to perfection, take the pan out of the oven and let it cool on a wire rack. Once cooled, carefully lift the bars out using the parchment (if you used it) and cut them into squares.
-
Serve and Enjoy: These bars can be enjoyed warm or at room temperature, but I suggest serving them slightly warm with a scoop of vanilla ice cream for an extra indulgent treat!
Serving Suggestions
When it comes to serving your 4th of July Cake-Mix Cookie Bars, presentation is key! Here’s a simple way to elevate them:
- Plate the bars on a large, colorful platter and sprinkle a few extra funfetti sprinkles around for a festive touch.
- Drizzle a little melted white chocolate on top for a touch of elegance.
- Add fresh berries like strawberries and blueberries around the bars for a pop of natural color and a refreshing balance to the sweetness.
Recipe Variations
Let’s get creative! Here are a few fun variations to customize your cookie bars:
-
Chocolate Chip Cookie Bars: Substitute half of the white chocolate chips for milk chocolate or dark chocolate chips for a classic flavor twist.
-
Nutty Bars: Stir in 1/2 cup of chopped walnuts or pecans for an added crunch and richness.
-
Peppermint Twist: Add ½ teaspoon peppermint extract and replace M&M’s with crushed peppermint candies for a winter holiday twist.
-
Gluten-Free Version: Use a gluten-free cake mix and ensure your other ingredients are gluten-free to make these bars suitable for those with gluten intolerance.
-
Fudge Brownie Bars: Use a brownie mix instead of cake mix for a decadent, fudgy treat your chocolate-loving friends will adore.
Chef’s Notes
This recipe has evolved over my years of baking. I initially started with a basic cookie recipe, but as I learned from friends and family, I incorporated fun flavors and colors to match the lively atmosphere of festive gatherings. Now, these cookie bars are not just a summer favorite but a year-round delight, customizable for any occasion.
One funny memory? I once forgot the eggs! Can you imagine my surprise when the mixture turned out more like a pancake batter? Lesson learned: always double-check your ingredients before mixing!
FAQs and Troubleshooting
-
What should I do if my bars are too chewy?
If your bars turn out too chewy, it might be from overmixing. Next time, mix just until combined and avoid overbaking. A higher ratio of cake mix to liquid can also cause this; always ensure you’re following the measurements closely. -
How do I store leftover cookie bars?
Store your cookie bars in an airtight container at room temperature for up to 4 days. You can also freeze them for later; just wrap them tightly in plastic wrap and then place in a freezer-safe container. -
Can I use another type of cake mix?
Absolutely! Any cake mix flavor can work well. Try chocolate, lemon, or even pumpkin spice for a festive twist depending on the season! -
Why did my cookie bars puff up?
If your bars puffed up while baking, it could be due to overmixing or them being overbaked. Just keep an eye on the baking time and aim for a chewy, slightly underbaked finish!
Nutritional Info
(Optional but helpful: If you wish to include this, it could look something like this):
- Serving Size: 1 bar
- Calories: 210
- Total Fat: 10g
- Saturated Fat: 4g
- Cholesterol: 30mg
- Sodium: 150mg
- Total Carbohydrates: 26g
- Dietary Fiber: 1g
- Sugars: 14g
- Protein: 2g
So there you have it; my delightful 4th of July Cake-Mix Cookie Bars recipe! I hope they add a burst of color and sweetness to your celebrations, just like those cherished memories in my kitchen. It’s all about connection, joy, and a touch of magic in every bite. Happy baking, friends, and let’s make this Independence Day one to remember!
Tie on your apron, pour yourself a sparkling drink, and let’s get baking!
Print4th of July Cake-Mix Cookie Bars

Celebrate Independence Day with these colorful and easy cake-mix cookie bars, perfect for summer festivities!
- Prep Time: 10 minutes
- Cook Time: 25 minutes
- Total Time: 35 minutes
- Yield: 12 servings 1x
- Category: Dessert
- Method: Baking
- Cuisine: American
- Diet: Vegetarian
Ingredients
- 1 box cake mix (red velvet or vanilla)
- 1/2 cup vegetable oil
- 2 large eggs
- 1/2 cup funfetti sprinkles (red, white, and blue)
- 1/2 cup white chocolate chips
- 1/2 cup blue M&M’s
- 1/2 cup red M&M’s
Instructions
- Preheat the oven to 350°F (175°C).
- Prepare a 9×13-inch baking pan with non-stick spray or parchment paper.
- Mix the cake mix, vegetable oil, and eggs in a large mixing bowl until just combined.
- Add the funfetti sprinkles, white chocolate chips, and both red and blue M&M’s.
- Pour the batter into the prepared baking pan, spreading it evenly.
- Bake for 20-25 minutes, until edges are lightly golden and a toothpick comes out mostly clean.
- Cool the bars on a wire rack, then cut into squares.
- Serve warm or at room temperature, optionally with vanilla ice cream.
Notes
For added flavor, substitute half the white chocolate chips with milk or dark chocolate chips. Store in an airtight container for up to 4 days.
Nutrition
- Serving Size: 1 bar
- Calories: 210
- Sugar: 14g
- Sodium: 150mg
- Fat: 10g
- Saturated Fat: 4g
- Unsaturated Fat: 6g
- Trans Fat: 0g
- Carbohydrates: 26g
- Fiber: 1g
- Protein: 2g
- Cholesterol: 30mg
Keywords: 4th of July, dessert, cookie bars, cake mix, festive treats
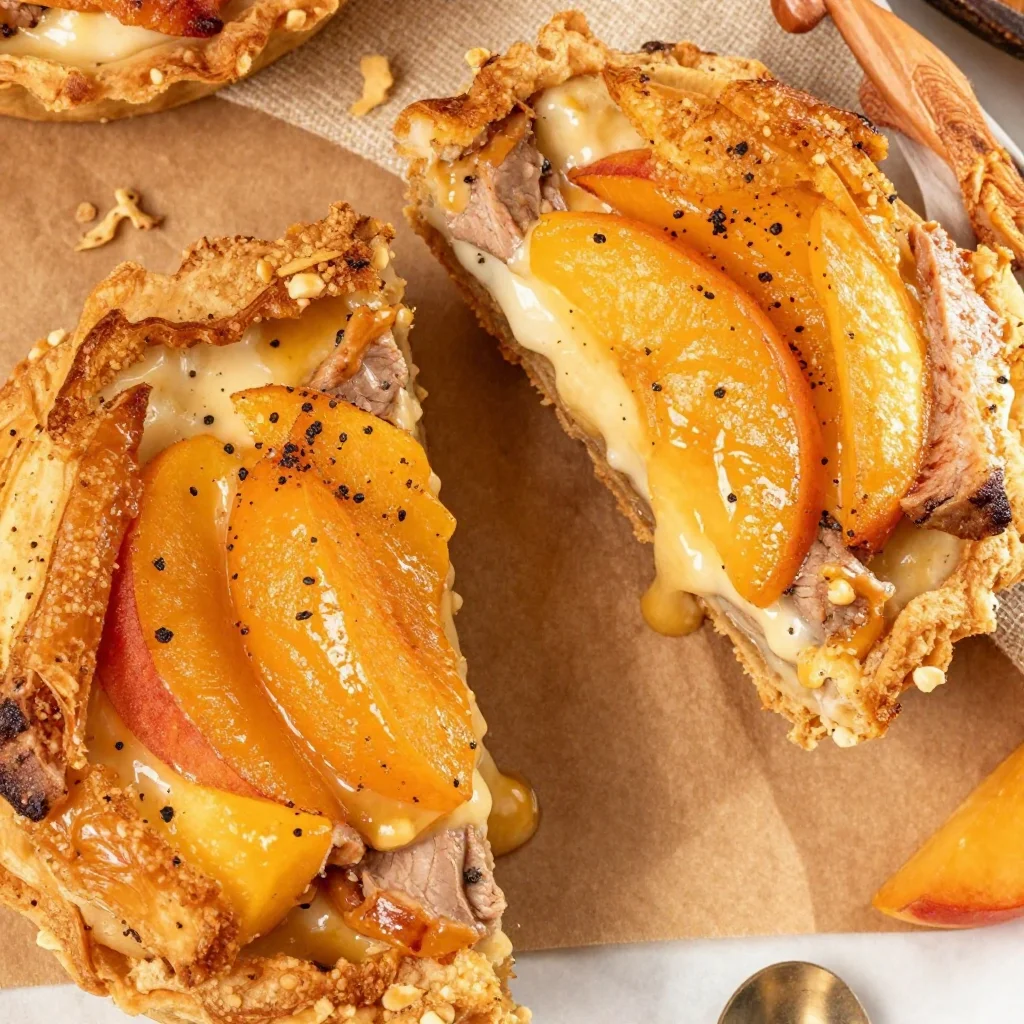
Ingredient Mini Peach Cream Cheese Tarts in 20 Minutes
Mini Peach and Cream Cheese Tarts: A Slice of Summer Bliss
Hello, my dear friends! Today, I’m thrilled to share a delightful treat that embodies summer sweetness and a touch of elegance: Mini Peach and Cream Cheese Tarts. These tarts are the perfect marriage of rich cream cheese and juicy, ripe peaches, all wrapped up in flaky puff pastry. Imagine your kitchen filled with the aroma of baked pastry and cinnamon while you indulge in these bite-sized delights.
Cooking is all about creating memories, and I’m excited to take you on this journey. So, tie on your apron, grab your favorite drink, and let’s dive into this scrumptious recipe that’ll have your taste buds singing!
A Slice of My Childhood
Growing up, summer meant peach season. Our local farm would host a peach-picking day, and I can still recall the thrill of plucking those fuzzy gems right from the tree. As we loaded up our baskets, my mother would talk about her favorite peach desserts, each story woven with laughter and love. One afternoon, after a long day of picking, she surprised us all with a batch of mini tarts, topped with fresh fruit and a creamy filling.
Those tarts were little miracles! Each bite was a memory, a warm hug on a sunny afternoon. As I watched my family gather around the table, enjoying those tarts, I realized that food has an incredible power to connect us. That’s why I wanted to recreate something similar here—an easy yet impressive treat that encourages you to gather your loved ones and share stories over something delicious.
Ingredients
For these Mini Peach and Cream Cheese Tarts, you’ll need the following ingredients:
-
Puff Pastry: This flaky pastry is the perfect base for our tarts. If you don’t have puff pastry on hand, you can use pie crust or even phyllo dough for a different texture. Just remember to pre-bake it according to the package instructions.
-
Fresh Peaches, Sliced: The star of the show! Ripe, juicy peaches bring sweetness and color. If peaches are out of season, feel free to use nectarines or even canned peaches (drained) in a pinch.
-
Cream Cheese Slices: Cream cheese adds that luscious, creamy texture we all crave. For a lighter option, consider using Neufchâtel cheese or a vegan cream cheese alternative.
-
Cinnamon: This spice not only warms the flavor but also enhances the natural sweetness of peaches. For a twist, you could try nutmeg or allspice instead.
-
Lemon Juice: A splash of lemon juice brightens up the flavors and keeps the peaches from browning. If you don’t have lemon, lime juice works nicely too.
-
Honey: This natural sweetener adds a touch of sweetness without overwhelming the dish. Maple syrup or agave nectar can be good substitutes if you prefer.
Each ingredient works together harmoniously, creating a balance of flavors that’s absolutely irresistible.
Step-by-Step Instructions
Now, let’s get down to business! Follow these steps for crafting your Mini Peach and Cream Cheese Tarts:
-
Preheat Your Oven: Start by preheating your oven to 400°F (200°C). The warm air will help your tarts puff up beautifully, creating that flaky texture we love.
-
Prepare the Puff Pastry: Roll out your puff pastry on a lightly floured surface. It should be about ¼ inch thick. Using a round cutter (or a glass), cut out circles—about 3 to 4 inches in diameter. You should have enough for a dozen mini tarts. Place the pastry circles on a parchment-lined baking sheet.
Chef’s Tip: If you want an extra golden finish, brush the edges of the pastry with an egg wash (1 beaten egg mixed with a splash of water).
-
Pre-bake the Pastry: Prick the centers of each pastry circle with a fork to prevent it from puffing up too much. Bake in the preheated oven for 8-10 minutes, or until they are lightly golden.
-
Craft the Filling: While the pastry is baking, it’s time to prep the filling. In a small bowl, combine your cream cheese, honey, and a splash of lemon juice. Beat everything together until smooth. You want it to be creamy and spreadable.
Little Hack: If your cream cheese is too firm, pop it in the microwave for a few seconds to soften it up!
-
Slice the Peaches: Take your fresh peaches and slice them into thin wedges. If peaches are really ripe, you might want to chill them slightly to make slicing easier.
-
Assemble the Tarts: Once the pastry is done and has cooled for a few moments, spread a generous layer of cream cheese mixture in the center of each tart. Then, carefully arrange the peach slices on top in a circular pattern. Sprinkle a light dusting of cinnamon over the peaches for that warm spice flavor.
-
Final Bake: Return the tarts to the oven and bake for an additional 5-7 minutes, until everything is warmed through and your kitchen is filled with an intoxicating aroma. The peaches should be tender but not mushy.
-
Cool and Serve: Let the tarts cool on the baking sheet before transferring them to a serving platter. Drizzle a little extra honey on top for that added touch of sweetness.
Serving Suggestions
To make your presentation shine, serve these Mini Peach and Cream Cheese Tarts on a beautiful platter, garnished with fresh mint leaves or edible flowers for that touch of whimsy. Pair them with a scoop of vanilla ice cream or a dollop of whipped cream for an extra indulgent experience. Perfect for a summer gathering or a cozy family dessert night!
Recipe Variations
Feel free to get creative with this recipe! Here are a few variations you might enjoy:
-
Berry Medley: Swap out the peaches for mixed berries like strawberries, blueberries, and raspberries for a delightful twist.
-
Spiced Up: Add a pinch of cardamom to the cream cheese filling for an exotic flavor profile.
-
Nutty Delight: Top the tarts with crushed almonds or pecans before baking for added crunch.
-
Chocolate Drizzle: Finish with a drizzle of melted chocolate for something truly decadent.
-
Gluten-Free Option: Use gluten-free puff pastry to make this treat accessible for everyone.
Chef’s Notes
As always, each time I whip up these tarts, I remember that sunny day in the orchard with my family. Cooking isn’t just about food; it’s about those feelings of nostalgia and connection. These Mini Peach and Cream Cheese Tarts have become a summer staple in my kitchen, and I hope they will become a cherished recipe in yours too!
FAQs and Troubleshooting
-
What if my puff pastry gets soggy?
- Make sure to prick the pastry before baking and avoid overloading with the cream cheese filling.
-
Can I make the filling ahead of time?
- Absolutely! Prepare the cream cheese mixture a day in advance, but keep it stored in the fridge, covered. Assemble the tarts just before baking.
-
How do I store leftover tarts?
- Store any leftover tarts in an airtight container in the fridge for up to 2 days. They taste best fresh, so enjoy them ASAP!
-
How do I know when the peaches are ripe?
- Look for peaches that are slightly soft to the touch but not mushy. They should have a fragrant aroma, signaling sweetness!
Nutritional Info
While I won’t bore you with all the numbers, these Mini Peach and Cream Cheese Tarts are a lovely balance of indulgence and fresh ingredients. Each tart is a delightful treat and can definitely be enjoyed in moderation as part of a balanced diet!
I hope you enjoyed this culinary journey into my kitchen! These Mini Peach and Cream Cheese Tarts are not just about satisfying your sweet tooth; they’re about making memories, sharing love, and connecting with the people around you. So gather your ingredients, bring your friends together, and let’s create something beautiful. Happy baking, friends! 🍑✨
PrintMini Peach and Cream Cheese Tarts

A delightful treat that combines rich cream cheese with juicy peaches wrapped in flaky puff pastry.
- Prep Time: 15 minutes
- Cook Time: 20 minutes
- Total Time: 35 minutes
- Yield: 12 servings 1x
- Category: Dessert
- Method: Baking
- Cuisine: American
- Diet: Vegetarian
Ingredients
- 1 sheet Puff Pastry
- 2 Fresh Peaches, sliced
- 4 oz Cream Cheese, sliced
- 1 tsp Cinnamon
- 1 tbsp Lemon Juice
- 2 tbsp Honey
Instructions
- Preheat your oven to 400°F (200°C).
- Prepare the puff pastry by rolling it out to ¼ inch thickness and cutting circles of 3 to 4 inches.
- Pre-bake the pastry circles for 8-10 minutes until lightly golden.
- Craft the filling by combining the cream cheese, honey, and lemon juice until smooth.
- Slice your peaches into thin wedges.
- Assemble the tarts by spreading the cream cheese mixture on each pastry and topping with peach slices.
- Return the tarts to the oven and bake for an additional 5-7 minutes.
- Cool the tarts on a baking sheet before serving.
Notes
Serve with mint leaves or edible flowers and pair with ice cream or whipped cream for a perfect treat.
Nutrition
- Serving Size: 1 tart
- Calories: 200
- Sugar: 10g
- Sodium: 150mg
- Fat: 10g
- Saturated Fat: 5g
- Unsaturated Fat: 4g
- Trans Fat: 0g
- Carbohydrates: 22g
- Fiber: 1g
- Protein: 3g
- Cholesterol: 15mg
Keywords: peach tarts, cream cheese, dessert, summer, baking
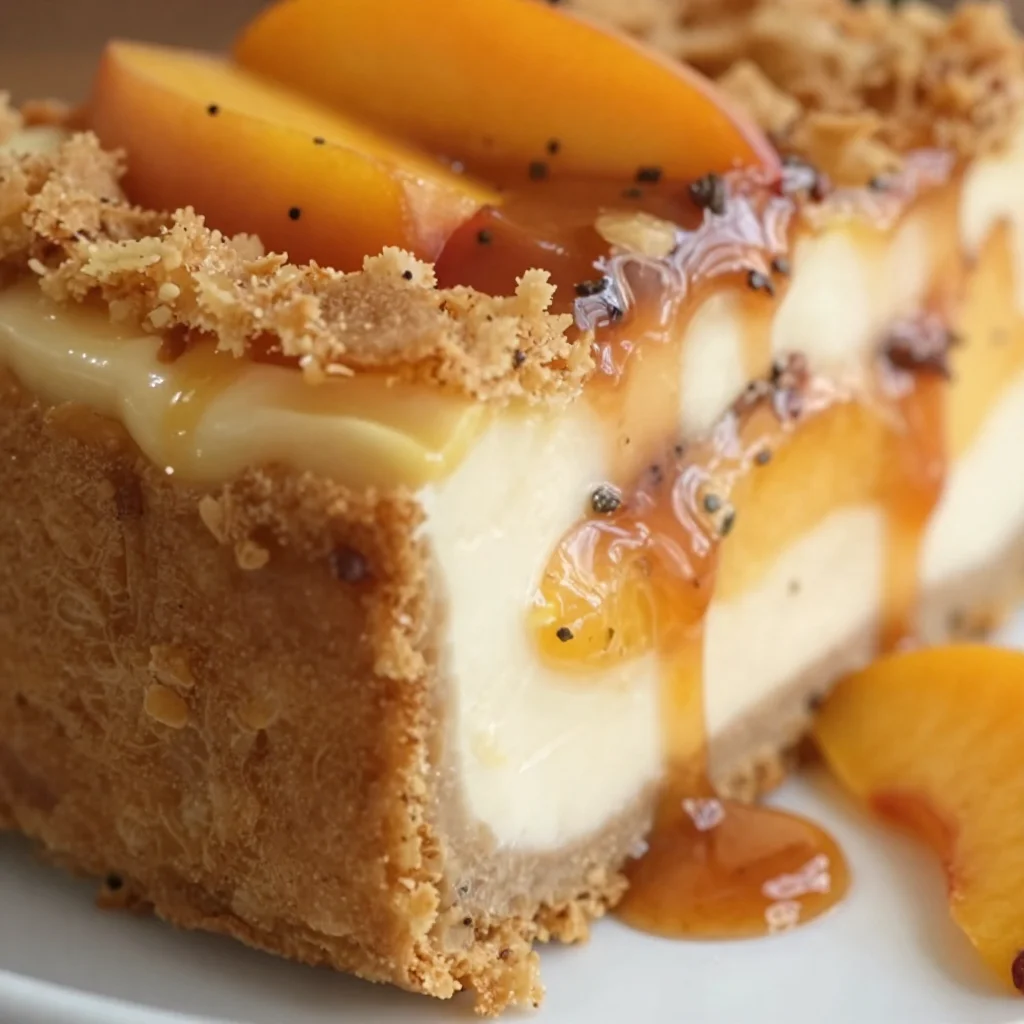
Ingredient Peach Cobbler Cheesecake
Sweet Harmony: Peach Cobbler Cheesecake Recipe
Hello, dear friends! Today, I’m excited to bring you a delightful fusion of two classic desserts: Peach Cobbler and Cheesecake. Yes, you heard that right! This Peach Cobbler Cheesecake combines the creamy decadence of cheesecake with the warm, comforting essence of summer peaches and that buttery, crumbly topping we all love. It’s like a dreamy hug on a plate, and let me tell you, it’s a showstopper that’ll impress your guests or make a quiet evening at home feel extra special.
A Slice of Nostalgia
Before we jump into this enticing recipe, I want to share a little story with you. Growing up, my family would gather every summer for a big peach-picking weekend. The smell of ripe peaches filled the air, and the sun-kissed fruits glistened like jewels on the trees. We would spend the day plucking peaches and brainstorming all the delicious things we could make with them.
One summer, my grandmother introduced me to her famous peach cobbler. I can still picture her in the kitchen, humming to her favorite tunes as she mixed and poured. She taught me that cooking is about love, creativity, and, most importantly, sharing. Her cobbler was always a hit, and the leftovers (if there were any!) would mysteriously vanish by morning. This recipe is a tribute to those cherished memories and the joy of sharing good food with loved ones.
Ingredients
Here’s what you’ll need to create this Peach Cobbler Cheesecake masterpiece:
-
1 ½ cups graham cracker crumbs
These provide the perfect buttery base and a subtle crunch. If you’re feeling adventurous, try using crushed vanilla wafers for a twist! -
½ cup unsalted butter, melted
This binds the crumbs together and gives the crust its delicious richness. Make sure it’s unsalted to control the overall saltiness of the dessert. -
2 cups cream cheese, softened
The star of our cheesecake! It creates that rich, creamy texture. If you’re looking for a lighter option, you can use Neufchâtel cheese (it’s lower in fat!). -
1 cup granulated sugar
This sweetens our cheesecake filling. If you’re trying to cut back on sugar, consider using a sweetener like monk fruit or a reduced-sugar alternative. -
1 teaspoon vanilla extract
For that warm, aromatic flavor that makes everything better! A splash of almond extract can also elevate the taste. -
3 large eggs
They add structure and help set the cheesecake. Want an egg-free version? You can substitute each egg with ¼ cup unsweetened applesauce. -
2 cups fresh peaches, sliced
Use ripe, juicy peaches for the best flavor. If peaches are out of season, frozen peaches work too—just make sure to thaw and drain them well first! -
½ cup brown sugar
This gives an extra caramel-like flavor to the peaches and enhances their sweetness. Don’t have brown sugar? A mix of white sugar and a bit of molasses can do the trick! -
1 teaspoon cinnamon
A warm spice that complements the peaches perfectly. Feel free to experiment with nutmeg or even pumpkin pie spice! -
1 tablespoon cornstarch
This helps thicken the peach mixture and gives it that delectable saucy quality. Arrowroot powder can be substituted if preferred. -
1 tablespoon lemon juice
A splash of acidity to balance the sweetness. Lime juice can be a nice alternative and adds a fun twist!
Step-by-Step Instructions
Alright, let’s get cooking! Follow these steps to create your Peach Cobbler Cheesecake.
-
Preheat Your Oven:
Begin by preheating your oven to 325°F (163°C). This allows the cheesecake to bake evenly, creating that perfectly creamy texture we all love. -
Prepare the Crust:
In a mixing bowl, combine the graham cracker crumbs and melted butter until the mixture resembles wet sand. Press this mixture firmly into the bottom of a 9-inch springform pan. Make sure it’s compact, as this will hold everything together. Plus, a little tip: you can use the bottom of a measuring cup to smooth it out perfectly! -
Bake the Crust:
Pop the crust into your preheated oven for about 8-10 minutes or until it’s lightly golden. This helps set the crust, ensuring it holds up against the creamy cheesecake filling. Let it cool while we work on the filling. -
Make the Filling:
In a mixing bowl, beat the softened cream cheese until smooth (about 2 minutes). Gradually add the granulated sugar and beat until combined. We want that mixture creamy and dreamy! Scrape down the sides of the bowl to catch any lumps—no one likes unexpected lumps in their cheesecake! -
Add Vanilla and Eggs:
Stir in the vanilla extract. Then, add the eggs, one at a time, beating on low speed after each addition until just combined. Be careful not to over-mix here; we want a light and fluffy texture, not an airy one. -
Prepare the Peach Layer:
In a small bowl, toss the sliced peaches with brown sugar, cinnamon, cornstarch, and lemon juice. Let them sit for about 10 minutes until they’re nice and juicy. The natural flavors will meld beautifully, creating an incredible topping for our cheesecake. -
Layer It Up:
Pour half of the cheesecake mixture over the cooled crust, then carefully layer half of the peach mixture on top. Follow with the remaining cheesecake filling and sprinkle the rest of the peaches on top. Don’t worry about perfection; this is all part of the charm! -
Bake the Cheesecake:
Bake in the oven for about 60-70 minutes until the edges are set, but the center still slightly jiggles (it will set more as it cools). Here’s a little chef hack: to prevent cracking, you can place a shallow pan of water in the oven alongside the cheesecake. It creates steam and keeps your cheesecake from drying out. -
Cool and Chill:
Once it’s done, turn off the oven and leave the cheesecake inside for an additional hour, cracking the door slightly. This allows it to cool gradually, reducing the chances of cracks. After an hour, let it cool fully before transferring it to the refrigerator to chill for at least 4 hours (or overnight if you can handle the wait!).
Serving Suggestions
When it’s finally time to serve your Peach Cobbler Cheesecake, carefully run a knife around the edge of the springform pan before releasing the sides. You can serve it plain, or dress it up with a dollop of whipped cream or a scoop of vanilla ice cream on the side—you can never go wrong with that classic combination!
Recipe Variations
- Add Crunch: Mix in some chopped pecans or walnuts to the peach layer for added texture.
- Flavor Substitutions: Try using blueberries or raspberries instead of peaches for a berry cobbler cheesecake surprise.
- Healthy Twist: Swap out the graham crackers for almond flour or oat flour to make a gluten-free crust without sacrificing flavor.
- Celebrate Fall: Feel free to mix in some pumpkin puree into the cheesecake batter for a seasonal variation!
- Dairy-Free Delight: Use cashew cream and a dairy-free butter substitute to make a vegan version without sacrificing creaminess.
Chef’s Notes
This recipe has evolved from my traditional peach cobbler. Initially, I had a simple, straightforward way of making it, but over the years it morphed into a creamy cheesecake that carries that nostalgic flavor of my grandma’s cobbler. I’m constantly amazed at how the simplest of ingredients can turn into something so exquisite. I still remember one time making it for a picnic—by the time we reached our destination, the cheesecake was gone! Everyone raved about it, wanting the recipe immediately. I couldn’t help but smile, knowing it brought a little joy to their day!
FAQs and Troubleshooting
Q: Why does my cheesecake have cracks on the surface?
A: Cracking can happen due to overmixing the batter or baking it at too high of a temperature. Always mix on low speed and try to bake it in a water bath for extra moisture.
Q: How do I know my cheesecake is done?
A: The edges should be set, but the center will still have a slight jiggle when you gently shake the pan. It will firm up more as it cools.
Q: Can I freeze my Peach Cobbler Cheesecake?
A: Absolutely! To freeze, cover the cooled cheesecake tightly with plastic wrap and then again with aluminum foil. It can be frozen for up to 2 months. Just thaw in the fridge overnight before serving.
Q: What if I don’t have fresh peaches?
A: No worries! Frozen peaches work perfectly. Just be sure to thaw and drain any excess liquid to avoid a soggy cheesecake.
Conclusion
And there you have it, my dear friends! A beautiful Peach Cobbler Cheesecake that’s sure to become a treasured recipe in your collection. Not only does it blend two beloved desserts into one, but it also carries with it a personal story—a reminder of the joy that comes from gathering around the table and sharing moments with those we love.
So, gather your favorite people, tie on your apron, and get ready to create something incredible. And remember, as you whip up this delightful dessert, it’s not just about the ingredients; it’s about the love and intention you put into it. Enjoy every bite, and happy cooking!
PrintPeach Cobbler Cheesecake
A delightful fusion of creamy cheesecake and warm, comforting peach cobbler, perfect for impressing guests or enjoying at home.
- Prep Time: 20 minutes
- Cook Time: 70 minutes
- Total Time: 90 minutes
- Yield: 8 servings 1x
- Category: Dessert
- Method: Baking
- Cuisine: American
- Diet: Vegetarian
Ingredients
- 1 ½ cups graham cracker crumbs
- ½ cup unsalted butter, melted
- 2 cups cream cheese, softened
- 1 cup granulated sugar
- 1 teaspoon vanilla extract
- 3 large eggs
- 2 cups fresh peaches, sliced
- ½ cup brown sugar
- 1 teaspoon cinnamon
- 1 tablespoon cornstarch
- 1 tablespoon lemon juice
Instructions
- Preheat your oven to 325°F (163°C).
- Combine the graham cracker crumbs and melted butter until the mixture resembles wet sand. Press into the bottom of a 9-inch springform pan.
- Bake the crust for about 8-10 minutes until lightly golden. Let it cool.
- Beat the softened cream cheese until smooth, then gradually add the granulated sugar and mix.
- Stir in the vanilla extract and add the eggs one at a time, mixing on low speed until just combined.
- Toss the sliced peaches with brown sugar, cinnamon, cornstarch, and lemon juice, then let sit for about 10 minutes.
- Pour half of the cheesecake mixture over the cooled crust, layer half of the peach mixture on top, then add the remaining cheesecake filling and the rest of the peaches.
- Bake in the oven for about 60-70 minutes until the edges are set but the center still jiggles.
- Cool the cheesecake inside the oven for an hour with the door slightly cracked, then refrigerate for at least 4 hours.
Notes
Serve plain or with whipped cream or vanilla ice cream. You can also mix in nuts for added texture or swap fruits for variations.
Nutrition
- Serving Size: 1 slice
- Calories: 400
- Sugar: 25g
- Sodium: 300mg
- Fat: 25g
- Saturated Fat: 15g
- Unsaturated Fat: 5g
- Trans Fat: 0g
- Carbohydrates: 45g
- Fiber: 2g
- Protein: 6g
- Cholesterol: 90mg
Keywords: peach cobbler, cheesecake, dessert, summer dessert, fruity cheesecake