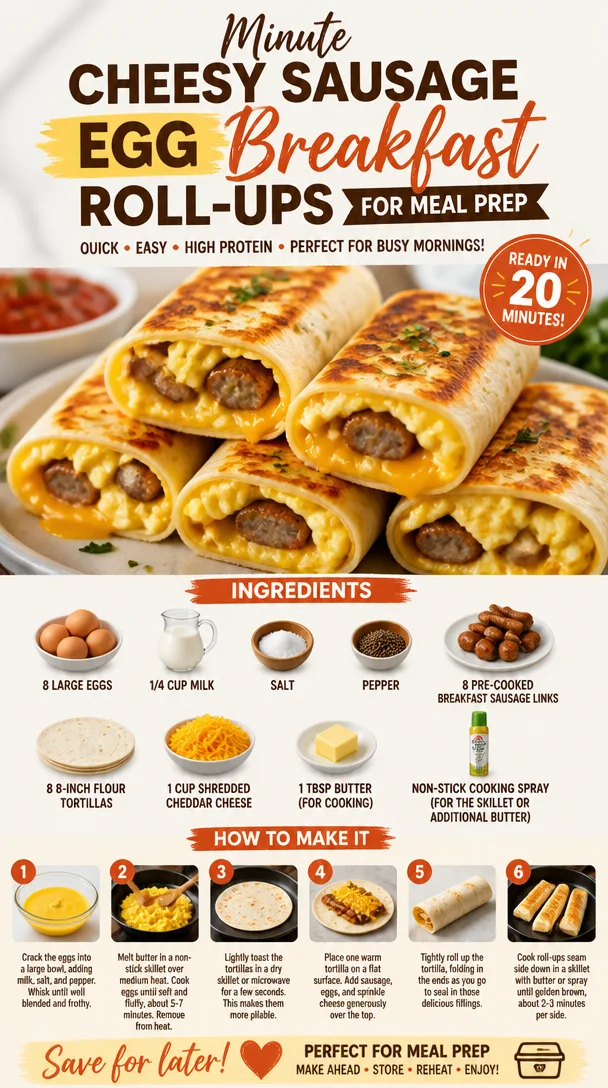
Minute Cheesy Sausage Egg Breakfast Roll-Ups for Meal Prep
Irresistibly Cheesy Sausage Egg Breakfast Roll-Ups to Savor
Hello, my lovely foodies! Today we’re diving into a comforting breakfast classic that’s sure to make your mornings a little brighter and your taste buds dance with joy. Grab your apron, and let’s whip up some Irresistibly Cheesy Sausage Egg Breakfast Roll-Ups! These little gems are not just delicious; they are fun to make and customizable to suit every palate, from kids to brunch enthusiasts. So, whether you’re gearing up for a lazy Sunday or meal prepping for the busy week ahead, these roll-ups have your back!
Personal Story
I remember the first time I tried making breakfast roll-ups. It was during one of those cozy weekends when my friends and I were gathered around my apartment, sipping coffee and rifling through the Sunday paper. We needed something hearty to fuel our lazy day of talking and planning our next adventure. So, I hit the kitchen, excited to whip up something on the fly. I decided to mix up scrambled eggs with whatever we had in the fridge—cue the breakfast sausage, cheese, and of course, a soft flour tortilla.
The aroma wafting through the air brought my friends from the couch to the kitchen, and before long, we were all rolling up our breakfast creations together, laughing, and competing over who could make the most extravagant filling. We ended up creating our version of the ultimate breakfast wrap, and I learned that cooking is so much more than just feeding people; it’s about creating memories. Now, every time I make these roll-ups, I’m transported back to that cozy Sunday, surrounded by good company, great conversation, and, of course, delicious food.
Ingredients
Here’s what you’ll need to make these cheesy roll-ups:
-
8 large eggs (room temperature)
These are the base of our dish! Room temperature eggs mix better, creating fluffier scrambled eggs. You can substitute with egg whites if you prefer. -
1/4 cup milk
This adds that creamy goodness. You might use plant-based milk for a dairy-free option! -
Salt (to taste)
A little seasoning goes a long way! Feel free to try herbs like garlic powder or smoked paprika for a different flavor profile. -
Pepper (to taste)
Freshly cracked black pepper is my go-to, but you can spice it up with cayenne for a hint of heat. -
8 pre-cooked breakfast sausage links
You can find a variety of sausage options, including turkey or plant-based. These are perfect for saving time—just heat them up! -
8 8-inch flour tortillas
Make sure they’re soft and pliable for easy rolling. Corn tortillas are a gluten-free alternative. -
1 cup shredded cheddar cheese
Who doesn’t love cheese? Sharp cheddar gives a rich flavor, but you can mix in Monterey Jack or pepper jack for an extra kick. -
1 tbsp butter (for cooking)
Use unsalted butter for better control over seasoning. Olive oil can also work wonderfully here. -
Non-stick cooking spray (for the skillet or additional butter)
Prevents sticking and ensures a golden-brown base for those roll-ups.
Step-by-Step Instructions
Let’s get rolling! Here’s how to bring this delicious recipe to life:
-
Prep your ingredients.
First things first—everything gets a little easier when you lay out your ingredients. Crack your eggs into a large bowl and add the milk. Whisk them together until fully combined. This aerates the eggs and gets them ready for fluffy perfection. -
Season up!
Add salt and pepper to your egg mixture. I recommend tasting a bit if you’re comfortable; seasoning is key! Remember, you can always add more later, but it’s hard to fix under-seasoned eggs. -
Cook the sausage.
Heat a non-stick frying pan over medium heat. Spray it lightly with the cooking spray or melt half the butter in the pan. Add in the pre-cooked sausage links to warm them through, about 4-5 minutes. Once they’re heated, remove and slice them into small pieces—this opens up every bite to flavorful sausage goodness. -
Scramble those eggs!
In the same pan (no need to clean it!), pour in your egg mixture. Stir continuously with a spatula as they start to set, about 3-6 minutes. Don’t rush this! You want soft curds and lovely fluffy eggs. When they’re nearly done (a little runny still), stir in the sausage and cheese. Fold until the cheese melts and everything is well combined. -
Warm the tortillas.
In a separate dry skillet, warm up the flour tortillas for about 15 seconds on each side. This makes them more pliable so they can hold all that deliciousness without cracking! -
Assemble your roll-ups.
Lay a warm tortilla on a clean surface and spoon in a generous amount of that scrumptious egg and sausage mixture—about 1/3 cup works well. Roll it up tightly, tucking the ends in as you go. Trust me; it makes a difference! -
Finishing touches.
Place the roll-ups seam-side down back in the skillet with the remaining butter. Cook them for 1-2 minutes on each side until they’re golden brown and crispy. This adds a nice texture to contrast against the creamy filling!
Serving Suggestions
These Cheesy Sausage Egg Breakfast Roll-Ups are perfect on their own, but I love to serve them with a side of fresh salsa, avocado slices, or a dollop of crème fraîche. A sprinkle of fresh herbs like cilantro or chives adds a lovely touch too! Pop a toothpick in each roll-up for easy handling if you’re serving them at a brunch spread.
Recipe Variations
Here are a few twists you can try to make this recipe your own:
- Veggie Delight: Substitute half of the eggs with diced bell peppers, spinach, or mushrooms for a hearty veggie load.
- Spicy Kick: Add jalapeños or a dash of hot sauce to the egg mixture for those who love a little heat.
- Southwestern Flair: Swap cheddar cheese for pepper jack and add black beans and corn for a fun twist.
- Breakfast-for-Dinner: These roll-ups are fabulous anytime, so try serving it with a side of breakfast potatoes for a delightful dinner treat!
- Low-Carb Option: Use lettuce wraps instead of tortillas for a low-carb version that’s just as tasty.
Chef’s Notes
I can’t help but smile whenever I think about the roll-up extravaganzas that erupted in my kitchen. Each time friends gathered, they’d put their spin on the dish—some with salsa, others dabbling into unconventional toppings like pickled jalapeños. They never ceased to get creative, and I welcomed all the surprises! Over the years, I’ve learned that the best recipes are the ones you can make your own.
Also, if you happen to end up with leftovers (they’re rare!), these roll-ups freeze beautifully. Just pop them in an airtight container, and you’ve got breakfast handled for busy mornings!
FAQs and Troubleshooting
Q: Can I make these ahead of time?
A: Absolutely! Prepare the filling and roll them up the night before, then just warm them in the skillet when you’re ready to eat.
Q: How do I prevent the eggs from getting rubbery?
A: The key is to cook them low and slow, stirring gently. Remember, they should be slightly undercooked before you add the cheese, as the residual heat will finish cooking while they’re in the roll-ups!
Q: Can I use other meats?
A: For sure! Feel free to change the sausage to bacon, ham, or even leftover chicken for a different flavor profile.
Q: What if my roll-ups come apart?
A: Ensure you roll them tightly and place them seam side down in the skillet to help them stay together. If one unravels, simply refold it!
Nutritional Info (optional)
While I don’t typically dive into the nutritional details, here’s a rough idea per roll-up (including flour tortilla, cheese, and sausage):
- Calories: 350
- Protein: 18g
- Carbohydrates: 25g
- Fat: 20g
These roll-ups are certainly a yummy treat with ample flavor, so enjoy them guilt-free!
And there you have it, my fellow culinary adventurers! Irresistibly Cheesy Sausage Egg Breakfast Roll-Ups that are easy to prepare, delightful to personalize, and bring people together around the breakfast table. So, next time you need a delicious morning boost or a hearty brunch, you know just what to make.
Happy cooking, and cheers to delicious memories made in the kitchen!
PrintIrresistibly Cheesy Sausage Egg Breakfast Roll-Ups

Delicious and comforting breakfast roll-ups filled with cheesy scrambled eggs and sausage, perfect for any morning or brunch gathering.
- Prep Time: 10 minutes
- Cook Time: 20 minutes
- Total Time: 30 minutes
- Yield: 4 servings 1x
- Category: Breakfast
- Method: Cooking
- Cuisine: American
- Diet: None
Ingredients
- 8 large eggs (room temperature)
- 1/4 cup milk
- Salt (to taste)
- Pepper (to taste)
- 8 pre-cooked breakfast sausage links
- 8 8-inch flour tortillas
- 1 cup shredded cheddar cheese
- 1 tbsp butter (for cooking)
- Non-stick cooking spray (for the skillet or additional butter)
Instructions
- Prep your ingredients.
- Season up!
- Cook the sausage.
- Scramble those eggs!
- Warm the tortillas.
- Assemble your roll-ups.
- Finishing touches.
Notes
These roll-ups are customizable and can be frozen for later. Enjoy with salsa or avocado slices for a complete meal.
Nutrition
- Serving Size: 1 roll-up
- Calories: 350
- Sugar: 2g
- Sodium: 800mg
- Fat: 20g
- Saturated Fat: 10g
- Unsaturated Fat: 6g
- Trans Fat: 0g
- Carbohydrates: 25g
- Fiber: 2g
- Protein: 18g
- Cholesterol: 300mg
Keywords: breakfast, roll-ups, sausage, eggs, cheesy, brunch
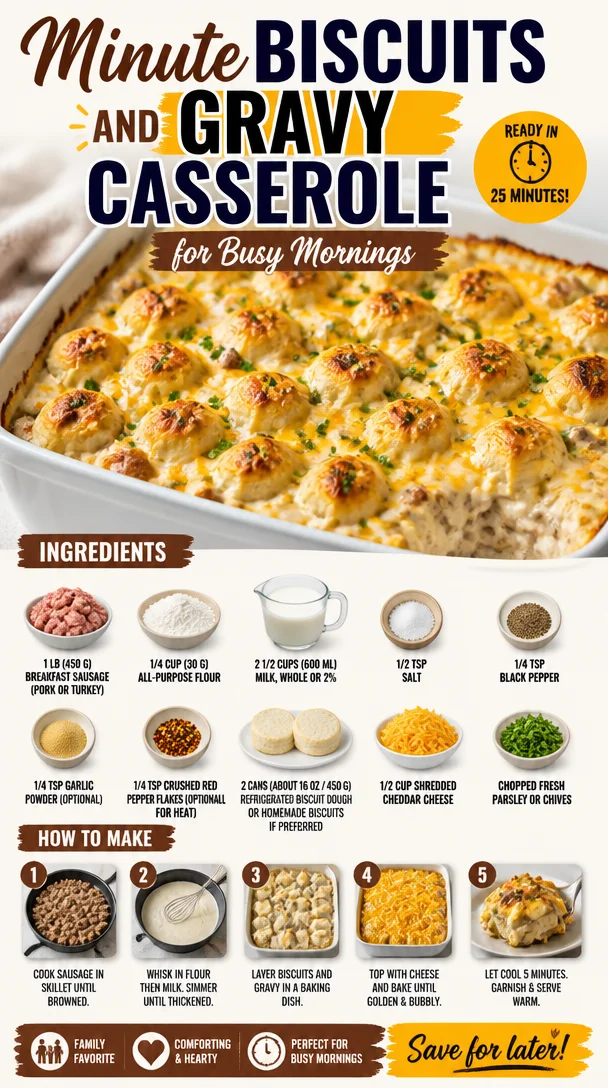
Minute Biscuits and Gravy Casserole for Busy Mornings
Biscuits and Gravy Casserole: The Ultimate Comfort Food
Hello, food lovers! If you’re looking for a hearty dish that encapsulates the warmth and comfort of home-cooked meals, you just hit the jackpot. Today, we’re diving into a delightful Biscuits and Gravy Casserole. Imagine soft, flaky biscuits drenched in creamy, savory sausage gravy—it’s like a warm hug on a plate! Perfect for brunch, family gatherings, or even a cozy weeknight dinner, this dish is sure to please everyone around your table. So, roll up your sleeves, tie on your apron, and let’s get started on this delicious journey!
A Heartwarming Memory
When I think of biscuits and gravy, memories of lazy Sunday mornings flood my mind. I remember gathering around the kitchen table with my family, the smell of freshly baked biscuits wafting through the air. My grandmother would be bustling around the kitchen, her laughter mingling with the sizzle of sausage on the stovetop. She had a knack for making everything feel special, and her biscuits were always the star of the show. I still can’t replicate that perfect flaky texture, but I’ve made it my mission to create dishes inspired by those cozy mornings we shared. This casserole captures that essence, combining the comforting elements of biscuits and gravy into a generous, shareable dish that’s just as warm and inviting as those Sunday breakfasts.
Ingredients
Here’s what you’ll need to whip up this Biscuits and Gravy Casserole:
-
1 lb (450 g) breakfast sausage (pork or turkey)
Use your favorite brand, or try a local butcher for a homemade experience! For a lighter option, turkey sausage works beautifully as a substitute. -
1/4 cup (30 g) all-purpose flour
This is the secret to thickening your gravy and giving it that luscious texture. If you’re gluten-free, a 1:1 gluten-free flour blend can do the trick! -
2 1/2 cups (600 ml) milk, whole or 2%
Whole milk adds richness, but 2% works just fine. For a dairy-free option, almond or oat milk can be good substitutes. -
1/2 tsp salt
Essential for enhancing flavors! Adjust as needed based on your sausage, as some brands can be saltier than others. -
1/4 tsp black pepper
Gives a nice subtle kick. If you’re a fan of spice, feel free to add more! -
1/4 tsp garlic powder (optional)
Garlic powder adds depth and flavor. Fresh garlic can substitute if you prefer! -
1/4 tsp crushed red pepper flakes (optional for heat)
Just a pinch can elevate your dish! Adjust based on your spice tolerance. -
2 cans (about 16 oz / 450 g) refrigerated biscuit dough
Store-bought biscuits are quick and convenient. If you’re feeling adventurous, homemade biscuits can take this casserole to the next level. -
1/2 cup shredded cheddar cheese
Cheddar cheese adds creaminess and flavor. Try pepper jack for a little extra kick, or a blend of your favorites! -
Chopped fresh parsley or chives
A sprinkle on top not only adds color but freshens the dish!
Step-by-Step Instructions
-
Preheat Your Oven
Begin by preheating your oven to 350°F (175°C). It’s essential to start with a hot oven for that perfect bake. -
Cook the Sausage
In a large skillet, heat the breakfast sausage over medium heat. Break it up with a spoon and cook until it’s browned and cooked through, about 5-7 minutes. Don’t forget to savor that amazing aroma! For a twist, consider adding diced onions or bell peppers to the sausage as it cooks. -
Make the Gravy
Once your sausage is beautifully browned, sprinkle in the flour directly into the skillet. Stir it for about a minute to cook out that raw flour taste. Gradually whisk in the milk, ensuring no lumps form. Bring the mixture to a simmer. Season with salt, pepper, garlic powder, and crushed red pepper flakes. Let it bubble for a few minutes until it thickens – this is your silky gravy! -
Prepare the Biscuits
While your gravy simmers, prepare the biscuit dough. If you’re using canned biscuits, simply cut each biscuit into quarters. Feel free to bake homemade biscuits concurrently if time permits! -
Combine in a Casserole Dish
Lightly grease a 9×13 inch casserole dish (or whatever you have on hand). Spread half of the biscuit pieces evenly on the bottom of the dish. Pour half of the savory sausage gravy over the biscuits, then layer the remaining biscuits and top with the rest of the gravy. -
Add Cheese
Sprinkle the shredded cheddar cheese liberally on top of the dish. Trust me; it’ll melt into gooey deliciousness! -
Bake
Pop your casserole in the preheated oven and bake for 25-30 minutes, or until it’s hot, bubbly, and the biscuits are cooked through. You want that golden brown color on top—almost as irresistible as it smells. -
Garnish and Serve
Once your gorgeous casserole is out of the oven, finish with a sprinkle of freshly chopped parsley or chives for that delightful pop of color and flavor.
Serving Suggestions
To serve this comforting dish, scoop generous portions into bowls or onto plates. For an extra special touch, accompany it with fresh fruit or a light garden salad to balance the richness of the casserole. A side of orange juice or your favorite morning beverage completes the experience beautifully!
Recipe Variations
Feeling adventurous? Here are a few delicious twists you can try:
-
Spicy Sausage: Use spicy breakfast sausage for an extra kick.
-
Veggie Delight: Add sautéed mushrooms, spinach, or bell peppers to the sausage for a veggie-rich casserole.
-
Cheese Galore: Mix different cheeses like Monterey Jack or Gouda for a layered flavor experience.
-
Herb Infusion: Try adding fresh rosemary or thyme into the gravy for a fragrant touch.
-
Gluten-Free: Substitute the all-purpose flour with a gluten-free flour mix and use gluten-free biscuit dough.
Chef’s Notes
This Biscuits and Gravy Casserole has evolved with each stirring and tasting session in my kitchen. I’ve played with different sausage types, milks, and cheese combinations, but at its core, it remains an ode to those cherished family breakfasts. One fun thing I’ve learned along the way? Always save a little bit of gravy to drizzle on top just before serving! Your guests will appreciate that extra flavor—trust me.
FAQs and Troubleshooting
1. My casserole turned out dry. What went wrong?
If your casserole results are dry, it may be due to overbaking or insufficient gravy. Ensure you’re using enough milk, and keep an eye on your baking time.
2. Can I make this dish ahead of time?
Absolutely! Assemble it the night before, cover it tightly, and refrigerate. Bake it in the morning, and you’ll have a delicious breakfast ready to go!
3. Can I freeze leftovers?
Yes, you can freeze portions of the casserole. Once cooled, cover it tightly and store it in the freezer for up to three months. Just remember to reheat thoroughly!
4. What can I serve with this casserole?
Pair it with a fresh fruit salad or a light green salad for a well-rounded meal. A side of freshly brewed coffee or mimosas is perfect for brunch!
Nutritional Info (Optional)
Per Serving (Based on 8 servings):
- Calories: 450
- Protein: 20g
- Carbohydrates: 30g
- Fat: 30g
- Fiber: 1g
- Sugars: 2g
There you have it! A Biscuits and Gravy Casserole that’s not only packed with flavor but also sprinkled with memories. I can’t wait for you to give this recipe a try. It’s all about creating those special moments around your table. So let your culinary creativity shine, and enjoy every bite! Happy cooking!
PrintBiscuits and Gravy Casserole
A hearty Biscuits and Gravy Casserole that combines soft, flaky biscuits with creamy, savory sausage gravy, perfect for brunch or family gatherings.
- Prep Time: 15 minutes
- Cook Time: 30 minutes
- Total Time: 45 minutes
- Yield: 8 servings 1x
- Category: Main Course
- Method: Baking
- Cuisine: American
- Diet: None
Ingredients
- 1 lb (450 g) breakfast sausage (pork or turkey)
- 1/4 cup (30 g) all-purpose flour
- 2 1/2 cups (600 ml) milk, whole or 2%
- 1/2 tsp salt
- 1/4 tsp black pepper
- 1/4 tsp garlic powder (optional)
- 1/4 tsp crushed red pepper flakes (optional for heat)
- 2 cans (about 16 oz / 450 g) refrigerated biscuit dough
- 1/2 cup shredded cheddar cheese
- Chopped fresh parsley or chives
Instructions
- Preheat your oven to 350°F (175°C).
- Cook the breakfast sausage in a large skillet over medium heat, breaking it up and cooking until browned, about 5-7 minutes.
- Make the gravy by sprinkling flour into the skillet, stirring for a minute, then gradually whisking in the milk and seasoning until thickened.
- Prepare the biscuit dough by cutting canned biscuits into quarters.
- Combine the biscuit pieces and gravy in a greased 9×13 inch casserole dish.
- Add cheese on top before baking.
- Bake for 25-30 minutes until hot, bubbly, and golden brown.
- Garnish with parsley or chives before serving.
Notes
For a lighter option, try turkey sausage. You can also use gluten-free substitutions if needed.
Nutrition
- Serving Size: 1 serving
- Calories: 450
- Sugar: 2g
- Sodium: 900mg
- Fat: 30g
- Saturated Fat: 12g
- Unsaturated Fat: 8g
- Trans Fat: 0g
- Carbohydrates: 30g
- Fiber: 1g
- Protein: 20g
- Cholesterol: 70mg
Keywords: biscuits, gravy, casserole, comfort food, brunch
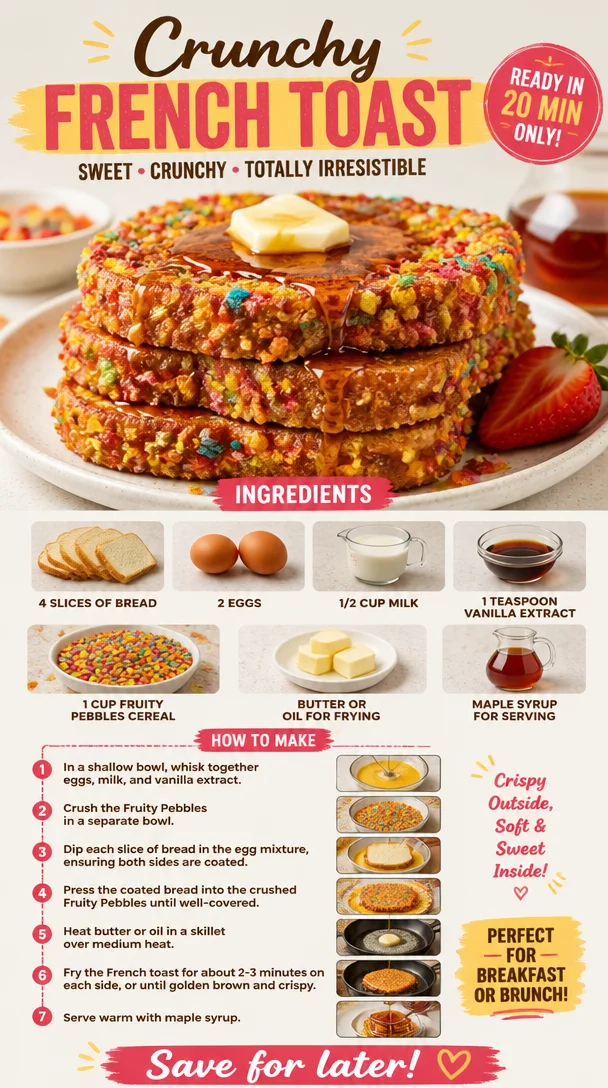
Crunchy French Toast
Crunchy French Toast: A Sweet Way to Start Your Day
Hello, fellow food lover! Today, I’m excited to share a delightful twist on a classic breakfast favorite that will have everyone at the table smiling and reaching for seconds—Crunchy French Toast! I can already hear the sizzle of butter in the pan and see the vibrant colors of Fruity Pebbles cereal ready to add that unique crunch. But more than just a recipe, this is a journey back to sunny mornings filled with laughter and a touch of nostalgia.
A Morning to Remember
Let me take you back to my childhood. I was probably eight or so, and every Saturday morning, the kitchen would come alive with the smell of fluffy pancakes or frying bacon. But my absolute favorite was breakfast at my grandma’s house—a little place cluttered with her eclectic collection of cookbooks and mismatched tableware. She had this magical way of turning simple dishes into extraordinary experiences.
One day, just when I thought we’d have our usual pancakes, she revealed her creation: Rainbow Crunch French Toast. I vividly remember the excited chatter as she let us, my cousin and me, sprinkle the Fruity Pebbles on top. The colors were just as vibrant as our giggles! She poured the maple syrup with a flourish, and I can still taste the sweetness that balanced perfectly with the crispy, soft bread.
Years later, my love for entertaining and cooking blossomed, and I wanted to recreate that cherished memory. Thus, the idea for Crunchy French Toast was born! It combines the traditional comforting elements of the classic with a fun and surprising crunch—perfect for welcoming friends or indulging on a cozy weekend morning. So, roll up your sleeves, and let’s dive into this colorful adventure!
Ingredients
Before we leap into the fun of cooking, here’s what you’ll need for your Crunchy French Toast:
-
4 slices of bread: Use a hearty bread like brioche or challah for richness, or go for whole-grain for a healthier option. If you need a gluten-free version, any gluten-free bread will work beautifully!
-
2 eggs: These are vital for binding everything together and giving your French toast its delightful texture. If you’re looking to swap these out, a flax egg (1 tablespoon of flaxseed meal mixed with 2.5 tablespoons of water) works well too.
-
1/2 cup milk: The milk adds creaminess! You can use any milk you like—dairy, almond, oat, or soy—as long as you enjoy the flavor.
-
1 teaspoon vanilla extract: This adds a warm, aromatic sweetness that elevates the dish. For a fun twist, consider using almond extract instead for a unique flavor profile.
-
1 cup Fruity Pebbles cereal: Here’s where the magic happens! These colorful, crunchy bits will create a party texture. If you prefer something less sweet, opt for cornflakes or even crushed nuts.
-
Butter or oil for frying: Use butter for rich flavor, or go for coconut oil or olive oil for a lighter touch.
-
Maple syrup for serving: Because what’s French toast without syrup? Choose pure maple syrup for that authentic taste, or experiment with flavored syrups like blueberry or caramel for an extra surprise.
Step-by-Step Instructions
Let’s bring those ingredients to life! Here’s how to whip up your Crunchy French Toast step by step.
-
Prepare Your Setup: Start by gathering all your ingredients. Clear a large space on your countertop and set out a mixing bowl, a flat dish for the egg mixture, and a frying pan over medium heat. If you want to stay organized, have everything within arm’s reach!
-
Whisk the Egg Mixture: In a mixing bowl, crack the two eggs and add the milk and vanilla extract. Whisk them together until the mixture is well incorporated and a little frothy. This is what makes your French toast fluffy, so be sure to mix it well!
-
Crush the Cereal: Place your Fruity Pebbles in a zip-top bag and give them a good crush—don’t turn them into dust, just a rough chop will do! You want some nice textures in there, so you enjoy varying levels of crunch. Pour this into a flat dish for easy access.
-
Dip and Coat: Take one slice of bread, dip it into the egg mixture, letting it soak for about 10 seconds. You want it well-coated but not soggy. Once it’s beautifully coated, transfer it to the plate with the crushed Fruity Pebbles.
-
Press for Crunch: Gently press the bread into the cereal, ensuring it’s evenly coated on both sides. The more cereal you can stick to it, the crunchier your French toast will be!
-
Fry Away: Melt a tablespoon of butter or oil in your pan until it’s shimmering. Carefully add the coated bread to the pan—don’t overcrowd it! Fry for 2-3 minutes on each side until golden and crispy. Adjust the heat if needed; you want that perfect golden crust!
-
Serve Hot: As each batch finishes, transfer the toast to a warmed plate. Drizzle with warm maple syrup as you go, or get creative and serve syrup on the side.
Serving Suggestions
Presentation matters, my friend! Serve your Crunchy French Toast stacked high with a drizzle of warm maple syrup cascading down the sides. You could even top it with fresh berries or a dollop of whipped cream for an extra special touch. Serve it alongside crispy bacon and a fresh fruit salad for a brunch that feels like a celebration!
Recipe Variations
-
Coconut Crunch: Substitute the Fruity Pebbles with toasted coconut flakes for a tropical twist.
-
Decadent Chocolate Chip: Sprinkle mini chocolate chips over the dipped bread before frying for a gooey, sweet treat.
-
Nutty Crunch: Swap the cereal for crushed nuts such as pecans or almonds for added protein and crunch.
-
Savory Delight: Try using savory bread like cheddar or herb bread, and skip the syrup for a delightful breakfast sandwich experience.
-
Pumpkin Spice Twist: Add 1 tablespoon of pumpkin puree and a pinch of cinnamon to the egg mixture for a fall-inspired version!
Chef’s Notes
Here’s a little backstory I love to share! The idea for Crunchy French Toast evolved right from my grandma’s Rainbow Crunch French Toast. I wanted to take the nostalgic elements from my childhood but bring in new textures and flavors. Over the years, I’ve adapted it countless ways based on what I had on hand or liked at the moment—switching cereals, adding flavorings, and playing with toppings has kept this dish exciting. It’s the little twists that keep the joy in cooking alive!
FAQs and Troubleshooting
1. What if my French Toast is soggy?
Make sure to dip the bread quickly in the egg mixture; letting it soak too long will lead to sogginess. Also, ensure your pan is hot enough before adding the bread.
2. Can I make this ahead of time?
You can certainly prep the egg mixture the night before and store it in the fridge. Just avoid coating the bread until you’re ready to fry it.
3. What do I do if the cereal isn’t sticking?
Consider lightly pressing the bread into the cereal after dipping it in the egg mixture, making sure to coat it well.
4. Can I use different types of bread?
Absolutely! Brioche and challah are classics, but feel free to experiment with whatever you love—French baguette, sourdough, or gluten-free varieties.
Nutritional Info (Optional)
This dish, packed with delightful flavors, is roughly 250 calories per serving when using traditional bread and without toppings. However, feel free to tailor it to your nutritional needs—substituting ingredients can drastically change calorie counts, which is always a plus!
So there you have it! Whether it’s a special occasion or just another day, this Crunchy French Toast is a fun and delicious way to start the day or surprise your guests. Remember, cooking is all about joy and connection—so tie on that apron, gather your favorite people, and enjoy creating beautiful moments around the table. Happy cooking!
PrintCrunchy French Toast
A delightful twist on classic French toast, this recipe features a crunchy coating of Fruity Pebbles for a fun breakfast experience.
- Prep Time: 10 minutes
- Cook Time: 15 minutes
- Total Time: 25 minutes
- Yield: 4 servings 1x
- Category: Breakfast
- Method: Frying
- Cuisine: American
- Diet: Vegetarian
Ingredients
- 4 slices of bread (brioche, challah, whole-grain, or gluten-free)
- 2 eggs
- 1/2 cup milk
- 1 teaspoon vanilla extract
- 1 cup Fruity Pebbles cereal
- Butter or oil for frying
- Maple syrup for serving
Instructions
- Prepare your setup: Gather all ingredients and clear space on your countertop.
- Whisk the egg mixture: In a bowl, combine eggs, milk, and vanilla extract until frothy.
- Crush the cereal: Place Fruity Pebbles in a bag and gently crush them, then pour into a flat dish.
- Dip and coat: Dip one slice of bread in the egg mixture for about 10 seconds, then transfer to the cereal.
- Press for crunch: Press the bread into the cereal so it’s evenly coated.
- Fry away: Melt butter or oil in a pan and fry the coated bread for 2-3 minutes on each side until golden.
- Serve hot: Transfer to a warm plate and drizzle with maple syrup.
Notes
For variations, try coconut flakes, mini chocolate chips, or different types of bread.
Nutrition
- Serving Size: 1 serving
- Calories: 250
- Sugar: 10g
- Sodium: 300mg
- Fat: 10g
- Saturated Fat: 5g
- Unsaturated Fat: 5g
- Trans Fat: 0g
- Carbohydrates: 30g
- Fiber: 2g
- Protein: 8g
- Cholesterol: 150mg
Keywords: French toast, breakfast, Fruity Pebbles, easy recipe, nostalgic cooking
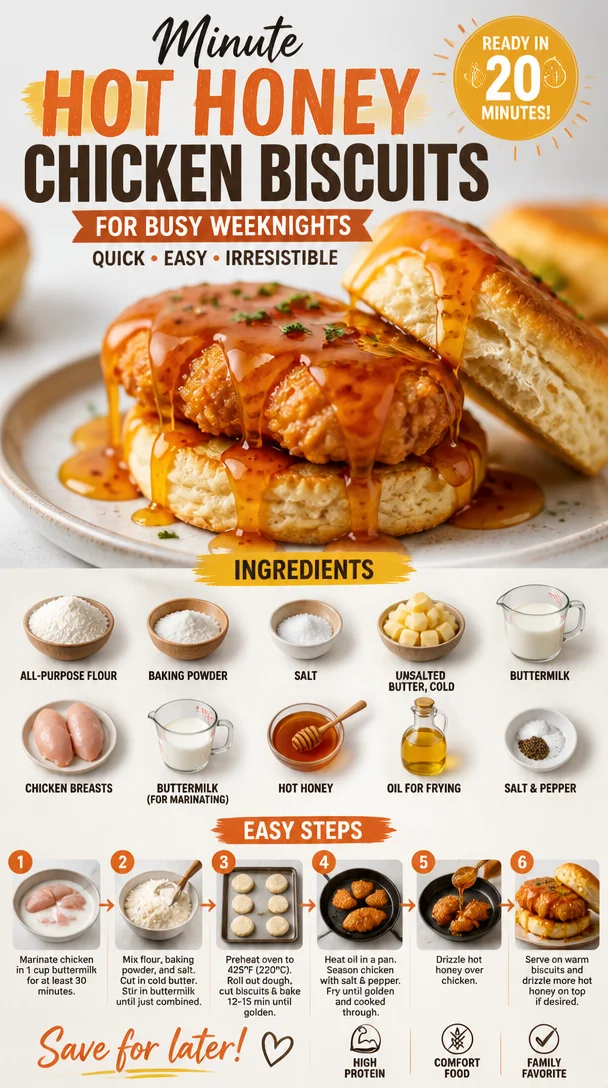
Minute Hot Honey Chicken Biscuits for Busy Weeknights
The Comfort of Home: Hot Honey Chicken Biscuits Recipe
Hello, fellow food lovers! Grab your apron and let’s dive into a kitchen adventure that’s all about warm flavors and comfort food. Today, I’m thrilled to share with you one of my ultimate favorites: Hot Honey Chicken Biscuits. This dish not only hits the spot but also carries a story of warmth, coziness, and a little bit of spice that I can’t wait to share!
Opening the Door to Nostalgia
You know those dishes that transport you back to a special moment in time? For me, that’s my Hot Honey Chicken Biscuits. Picture this: it’s a lazy Sunday afternoon, and the air is filled with a mix of sweet and spicy aromas wafting from the kitchen. I remember standing next to my grandmother as she stirred a pot of her renowned chicken marinade while the biscuits were perfectly rising in the oven. The combination of the crispy, flaky biscuits and the kick of heat in that honey sauce has always been a showstopper.
Back then, cooking wasn’t just about preparing meals; it was a way to gather our family around the table. The laughter, stories, and, of course, the delightful food. Those memories inspired me to develop this recipe that’s not only delicious but deeply meaningful. Every bite of these hot honey chicken biscuits is a comforting hug, reminiscent of cozy family gatherings and shared moments.
And the best part? You don’t need to be a seasoned chef to whip these up! Just a little love for cooking and an eagerness to create something special. So, let’s roll up our sleeves and embark on this culinary journey together!
Ingredients You’ll Need
Let’s gather our ingredients! Here’s what you’ll need to create these warm, scrumptious Hot Honey Chicken Biscuits:
- 2 cups all-purpose flour: The foundation for our biscuits. You can substitute with whole wheat flour for a nutty flavor or gluten-free blend for a gluten-free option.
- 1 tablespoon baking powder: This magical ingredient gives our biscuits that lovely lift! Baking soda can be a substitute—just remember to adjust the quantity.
- 1 teaspoon salt: It amplifies all the flavors. You can use kosher salt or sea salt if that’s what you have on hand.
- 1/4 cup unsalted butter, cold and cubed: For that flaky, tender texture. If you’re vegan or dairy-free, coconut oil or margarine works well.
- 3/4 cup buttermilk: This gives the biscuits richness and a tender crumb. If you don’t have buttermilk, mix 3/4 cup milk with 1 tablespoon of vinegar or lemon juice and let it sit for 5 minutes to sour.
- 2 chicken breasts, boneless and skinless: The star of our dish! Feel free to use chicken thighs for a juicier experience.
- 1 cup buttermilk (for marinating): Enhances the chicken’s flavor and tenderness. You can use plain yogurt if you’re out of buttermilk.
- 1 cup hot honey: This sweet and spicy mixture elevates the dish! You can create your own by mixing honey with chili flakes or use store-bought if it’s easier.
- Oil for frying: Choose a high smoke-point oil like canola or vegetable oil for frying.
- Salt and pepper to taste: Essential for seasoning to ensure every layer of flavor shines through!
Getting Cooking: Step-by-Step Instructions
Now that we have our ingredients all set, let’s get cooking! Here’s how to bring these delightful Hot Honey Chicken Biscuits to life.
-
Marinate the Chicken: Start by taking your beautifully trimmed chicken breasts and soaking them in 1 cup of buttermilk. This will help to tenderize the chicken and infuse it with flavor. Let it marinate for at least 30 minutes, but if you’re in the mood for marinading longer, go ahead and pop it in the fridge for a couple of hours. Trust me, your taste buds will thank you later!
-
Prepare the Biscuit Dough: In a large bowl, whisk together the all-purpose flour, baking powder, and salt. Ensure there are no lumps — we want a smooth dough, friends! Next, add the cold, cubed butter to the flour mixture. Use your fingers or a pastry cutter to blend until it resembles coarse crumbs – a little flakiness never hurt anyone!
-
Mix in the Buttermilk: Gradually add in the 3/4 cup of buttermilk and stir until just combined. Be careful not to overmix! We’re aiming for a dough that feels a little crumbly but comes together nicely. Turn it out onto a floured surface and pat it into a rectangle about 1-inch thick.
-
Cut the Biscuits: Using a biscuit cutter or a glass, cut out rounds from your dough. The key is to press straight down without twisting, which helps to maintain that lovely rise we want in our biscuits! Place the cut biscuits on a baking sheet lined with parchment paper. Don’t throw away the scraps—gather them and reform the dough to cut out more biscuits!
-
Fry the Chicken: While your biscuits are resting, it’s time to focus on that chicken! Take the marinated chicken from the buttermilk and season it with salt and pepper. Heat a skillet and pour in enough oil to cover the bottom. Fry the chicken for about 6-8 minutes on each side until golden brown and cooked through. The color should be inviting, and the aroma will be simply irresistible!
-
Glaze with Hot Honey: In a bowl, mix the hot honey with a touch of extra heat if you prefer—think chili flakes! Once the chicken is cooked, slather it all over with that glorious hot honey.
-
Bake the Biscuits: While you’re busy with the chicken, pop your biscuits into the oven at 425°F (220°C) and bake for about 12-15 minutes. You want them golden brown and just begging to be devoured!
Serving Suggestions
Now that we have an ensemble of warm, flaky biscuits and spicy honey-kissed chicken, it’s time to serve! I like to stack a biscuit high with a piece of the glazed chicken right on top. Drizzle a bit more hot honey over everything for that sweet, glossy finish. You can’t go wrong with adding a sprinkle of fresh herbs like parsley or chives for an extra pop of color and flavor. Serve alongside a simple green salad or some roasted vegetables, and you’ve got a meal fit for royalty!
Recipe Variations
Feeling adventurous? Here are a few fun twists and tweaks to make this recipe your own:
- Spicy Southern Style: Add cayenne pepper to your flour for that kick in the biscuits and use a spicy honey blend for the chicken for extra heat!
- Herbed Biscuits: Mix in fresh herbs like rosemary or thyme to the biscuit dough for an aromatic twist.
- Sweet and Savory: Use maple syrup instead of honey for a different sweet profile, and pair it with crispy bacon on the biscuit for that sweet-savory delight.
- Vegan Option: Substitute chicken with a vegan alternative, like crispy tofu or mushroom, and use almond milk with vinegar for the biscuit!
- BBQ Glaze: Swap out the hot honey for your favorite barbecue sauce for a smoky, sweet twist that pairs beautifully with the chicken!
Chef’s Notes
As with any cherished recipe, Hot Honey Chicken Biscuits holds a special place in my heart. This dish has evolved over time, especially thanks to different friends and family members who have inspired me along the way. I once hosted a dinner party where I forgot to marinate the chicken! I had to make do with an overnight marinade and was pleasantly surprised at how flavorful it turned out, proving sometimes happy accidents create the best dishes!
The beautiful thing about this recipe is its versatility — you can adjust it to suit your tastes or what’s in your pantry. So don’t stress too much about perfection. Let your instincts guide you, embrace those little quirks, and most importantly, have fun along the way!
FAQs and Troubleshooting
Here are some common questions you might have as you embark on this delicious cooking journey:
-
Why are my biscuits dense?
- This can happen if you overmix the dough or don’t use cold ingredients. Remember, a little lumpy is perfectly fine!
-
How do I keep the chicken from drying out?
- Marinating in buttermilk is key! Ensure your oil is hot enough for frying to keep it juicy. You can test it by dropping a small piece of dough into the oil—if it bubbles, you’re good to go!
-
Can I make the dough ahead of time?
- Absolutely! You can prepare the biscuit dough ahead and refrigerate it. Just be sure to roll and cut right before baking for maximum freshness!
-
What can I do with leftover biscuits?
- Those left-over biscuits can be stored in an airtight container for a day or two. Toast them up for breakfast the next day or turn them into a delightful biscuit sandwich!
Nutritional Info
If you’re curious, the nutritional information for a biscuit with chicken and hot honey roughly comes to about 600 calories per serving. Keep in mind; the exact numbers can change based on how much honey you use or if you choose to add extra toppings.
Now that you’ve got the full scoop on making Hot Honey Chicken Biscuits, I can’t wait for you to head into the kitchen and create this incredible dish. Remember, good food is all about making connections, both with the ingredients and the people around your table. So tie on that apron, pour yourself a drink, and let’s cook up some beautiful moments. Happy cooking, friends!
PrintHot Honey Chicken Biscuits

A comforting dish featuring flaky biscuits layered with marinated chicken glazed in a sweet and spicy hot honey sauce.
- Prep Time: 30 minutes
- Cook Time: 30 minutes
- Total Time: 60 minutes
- Yield: 4 servings 1x
- Category: Main Course
- Method: Frying and Baking
- Cuisine: American
- Diet: Non-Vegetarian
Ingredients
- 2 cups all-purpose flour
- 1 tablespoon baking powder
- 1 teaspoon salt
- 1/4 cup unsalted butter, cold and cubed
- 3/4 cup buttermilk
- 2 chicken breasts, boneless and skinless
- 1 cup buttermilk (for marinating)
- 1 cup hot honey
- Oil for frying
- Salt and pepper to taste
Instructions
- Marinate the chicken by soaking it in 1 cup of buttermilk for at least 30 minutes.
- Prepare the biscuit dough by whisking together flour, baking powder, and salt.
- Add cold cubed butter and blend until it resembles coarse crumbs.
- Mix in 3/4 cup of buttermilk until just combined and turn onto a floured surface.
- Cut out rounds from the dough using a biscuit cutter or glass.
- Fry the marinated chicken in oil for 6-8 minutes on each side until golden brown.
- Glaze the cooked chicken with hot honey.
- Bake the biscuits in a preheated oven at 425°F (220°C) for 12-15 minutes.
Notes
For extra flavor, consider adding herbs to the biscuit dough or using a spicy honey blend for glazing.
Nutrition
- Serving Size: 1 serving
- Calories: 600
- Sugar: 30g
- Sodium: 800mg
- Fat: 30g
- Saturated Fat: 10g
- Unsaturated Fat: 15g
- Trans Fat: 0g
- Carbohydrates: 45g
- Fiber: 2g
- Protein: 25g
- Cholesterol: 90mg
Keywords: chicken biscuits, hot honey, comfort food, fried chicken, easy recipe
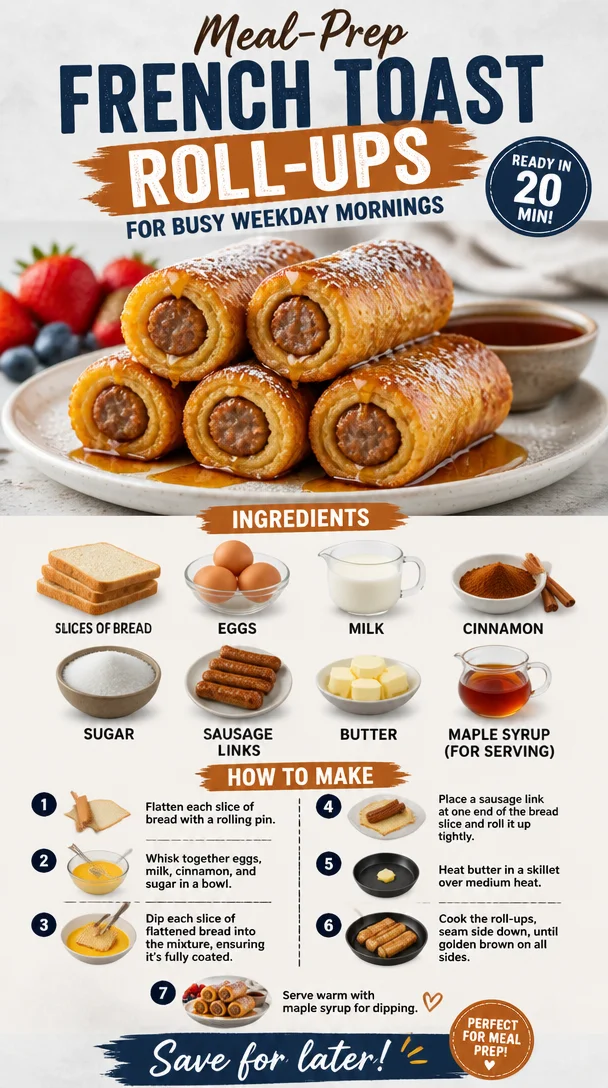
Meal-Prep French Toast Roll-Ups for Busy Weekday Mornings
Deliciously Fun French Toast Roll-Ups: A Breakfast to Remember
Hello food lovers! Today, I’m thrilled to dive into one of my all-time favorite breakfast treats: French Toast Roll-Ups. Not only are they a feast for the eyes with their whimsical appearance, but they also take the classic comfort of French toast and elevate it to a whole new level of deliciousness. Picture this: crispy, golden-brown rolls filled with sweet goodness, drizzled with maple syrup, and served up alongside some savory sausage links. Oh, yes, please!
A Toast to Nostalgia: My French Toast Adventure
I’ll never forget the magical mornings of my childhood, lounging in my pajamas as the smells of breakfast wafted through the air. My mom would whip up a variety of breakfast delights, but nothing garnered more excitement than her French toast. However, one day, she introduced a twist that changed the game forever: French Toast Roll-Ups!
There I was, sitting at the table, wide-eyed and excited as she used slices of white bread, rolled them out, filled them with a delightful mixture of cream cheese and cinnamon sugar, and dipped them in an egg-milk mixture. It felt like magic! As we rolled the slices up and cooked them to perfection, the anticipation grew. The crispy texture combined with the gooey, sweet filling was an instant hit!
Fast forward to now, and those happy memories remain alive and well in my heart — and in my kitchen! This dish has become a staple at our family gatherings, where everyone eagerly looks forward to munching on these delicious French toast roll-ups. So, grab your apron, and let’s recreate this delightful memory together!
Ingredients
- Slices of bread: Any type you love will work! A classic white bread is perfect, but whole grain and brioche add a unique flavor. You can even use gluten-free bread if needed.
- Eggs: This is the binding agent that gives our roll-ups their delicious custardy texture. Using large eggs is ideal, but feel free to substitute with egg whites or flaxseed meal as a vegan option.
- Milk: Whole milk gives a creamier texture. You can swap this for almond milk, oat milk, or any dairy-free alternative — just be aware that it may slightly alter the flavor.
- Cinnamon: A warm, aromatic spice that brings comfort to your taste buds. You can also play around with nutmeg or even allspice for a fun twist.
- Sugar: Regular granulated sugar sweetens the filling nicely. If you’re looking for a healthier alternative, try coconut sugar or a sugar substitute like Stevia.
- Sausage links: A savory pairing! Finish off the meal with pork, turkey, or plant-based sausage for a delicious contrast.
- Butter: You’ll want this for cooking for that rich flavor and beautiful golden crust. Consider using olive oil or vegan margarine for a lighter option.
- Maple syrup (for serving): The pièce de résistance! It ties all flavors together. If you’re feeling adventurous, try flavored syrups, like vanilla or cinnamon.
Step-by-Step Instructions
-
Prep Your Bread: Start by taking your slices of bread and rolling them out gently with a rolling pin. This will make them easier to fill and roll. Get those muscles working — it’s a mini workout! If you don’t have a rolling pin handy, a wine bottle works just as well in a pinch!
-
Make the Filling: In a small bowl, combine a generous couple of tablespoons of cream cheese — softened to room temperature — with a sprinkle of cinnamon and sugar. Mix well until creamy. This step is crucial; it’s what makes our roll-ups decadent! If you really want to make it a party, add a few mini chocolate chips for a surprise inside.
-
Fill and Roll: Take your rolled-out slice of bread, spread a tablespoon of the cream cheese mixture down the center, and roll it up tightly, tucking in the ends to seal. It’s a bit of a rolling adventure — just make sure they don’t unravel! You might feel like a sushi chef; just keep those rolls secure, friends!
-
Prepare the Egg Mixture: In a shallow bowl, whisk together eggs and milk. This combination will coat the roll-ups, enriching them with that classic French toast flavor. Add a pinch of salt, and let’s get dipping!
-
Heat the Pan: In a non-stick skillet or griddle, melt a bit of butter over medium heat. This is where the magic begins! You want that butter to foam slightly but not burn, just like the perfect backdrop for your culinary masterpiece.
-
Dunk and Cook: Take each rolled-up piece and dip it into the egg mixture, ensuring it’s well-coated. Gently place it in the hot skillet seam side down. Allow them to cook for about 2-3 minutes on each side until they’re golden brown and crispy.
-
Serve with Flair: Once cooked, carefully transfer your gorgeous roll-ups to a plate. Top them with a dusting of powdered sugar and, why not, a drizzle of warm maple syrup. Serve with some sausage links on the side, and voilà — breakfast is served!
Serving Suggestions
When it comes to plating, go for a rustic vibe. Arrange the French Toast Roll-Ups diagonally on a large platter. Finish with a light dusting of powdered sugar and a glorious drizzle of maple syrup for that ooey-gooey effect. You can even add a sprig of mint for a pop of color — it’s the little things that count!
Recipe Variations
- Berry Bliss: Add fresh berries into the filling for a burst of fruity flavor! Strawberries, blueberries, or raspberries work beautifully.
- Chocolate Indulgence: Swap out the cream cheese filling for Nutella or peanut butter for a rich, chocolaty alternative. Talk about over-the-top!
- Savory Spin: Transform your roll-ups into a savory dish by including scrambled eggs and sautéed veggies in the filling. Top with avocado for extra creaminess!
- Overnight Option: Prepare everything the night before, pop them in the fridge, and just cook them up in the morning for a seamless breakfast experience.
Chef’s Notes
Oh, how this recipe has evolved! Years ago, it started as a simple breakfast favorite to accommodate my family’s sweet cravings. Since then, it’s become a canvas for creativity in my kitchen! I’ve experimented with flavors, fillings, and assorted toppings. My daughters even started making their own versions, and I couldn’t be prouder! Every roll-up has its own story and providing this dish to friends or family always sparks joy.
FAQs and Troubleshooting
1. Why did my roll-ups unravel while cooking?
- Make sure to roll them tightly and seal the ends before dipping. If it’s still happening, try using a bit of the egg mixture to seal the seam more securely.
2. My filling is oozing out. What happened?
- This usually happens if the filling is too generous or if it’s not rolled tightly enough. Next time, opt for smaller amounts of filling, and be sure to press the rolls firmly together.
3. Can I use whole grain bread?
- Absolutely! Whole grain bread will add a nutty flavor and make it a bit healthier. Just keep in mind that different breads may absorb the egg mixture differently.
4. Can I make these ahead of time?
- Yes! Feel free to prep them the night before and store them in the fridge. Just pop them in the skillet in the morning for a quick breakfast!
Now that you have the recipe to create these scrumptious French Toast Roll-Ups, I hope you’ll adventure into your kitchen with glee! Remember, cooking is all about the joy of creating and sharing with loved ones. So, tie that apron, gather your ingredients, and let’s make some magic happen. Your breakfast table is about to be transformed!
Welcome to your new breakfast tradition. Happy cooking!
PrintDeliciously Fun French Toast Roll-Ups

These French Toast Roll-Ups are crispy, golden-brown rolls filled with a sweet cream cheese mixture, drizzled with maple syrup for an unforgettable breakfast treat.
- Prep Time: 15 minutes
- Cook Time: 10 minutes
- Total Time: 25 minutes
- Yield: 4 servings 1x
- Category: Breakfast
- Method: Pan-frying
- Cuisine: American
- Diet: Vegetarian
Ingredients
- Slices of bread (white, whole grain, brioche, or gluten-free)
- 4 large Eggs
- 1 cup Whole milk (or dairy-free alternative)
- 1 tsp Cinnamon
- 1/4 cup Sugar
- Sausage links (pork, turkey, or plant-based)
- Butter (for cooking)
- Maple syrup (for serving)
Instructions
- Prep your bread by rolling it out gently with a rolling pin.
- Make the filling by mixing cream cheese, cinnamon, and sugar until creamy.
- Fill each slice of bread with the cream cheese mixture and roll it up tightly.
- Prepare the egg mixture by whisking together eggs and milk with a pinch of salt.
- Heat a non-stick skillet or griddle over medium heat and melt some butter.
- Dunk each roll-up in the egg mixture and cook seam side down until golden brown.
- Serve with a dusting of powdered sugar and warm maple syrup.
Notes
Feel free to experiment with different fillings, such as berries or chocolate, and serve with a side of sausage for a complete meal.
Nutrition
- Serving Size: 1 serving
- Calories: 350
- Sugar: 10g
- Sodium: 300mg
- Fat: 15g
- Saturated Fat: 8g
- Unsaturated Fat: 7g
- Trans Fat: 0g
- Carbohydrates: 45g
- Fiber: 2g
- Protein: 12g
- Cholesterol: 150mg
Keywords: French toast, breakfast, roll-ups, sweet treat
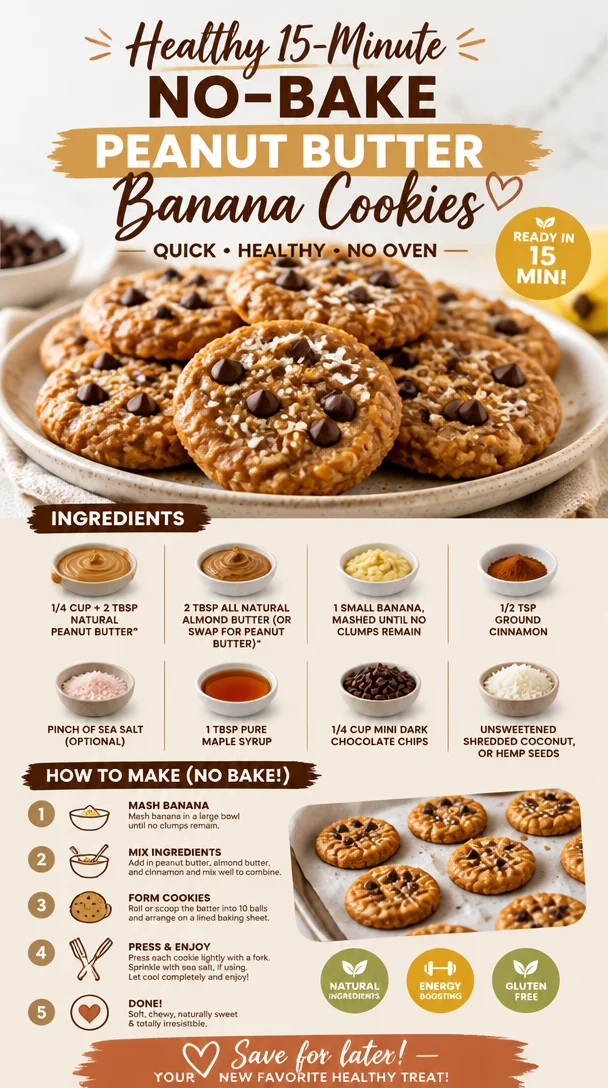
Healthy 15-Minute No-Bake Peanut Butter Banana Cookies
Healthy Peanut Butter Banana Cookies: A Sweet and Nutritious Treat
Welcome, fellow food enthusiasts! Today, I’m thrilled to share one of my absolute favorite recipes that’s perfect for anyone seeking a delicious treat without the guilt—Healthy Peanut Butter Banana Cookies! These cookies are not only a delightful snack but also packed with wholesome ingredients that are sure to charm your taste buds.
Imagine sinking your teeth into a soft, chewy cookie that tastes indulgent yet is nutritious enough to enjoy any time of the day. The combination of natural peanut butter, ripe bananas, and a hint of cinnamon creates a nostalgic flavor that reminds me of cozy afternoon baking sessions in my grandma’s kitchen. With just a few simple ingredients, you can whip up a batch that’s perfect for school lunches, post-workout snacks, or a midday treat that will keep you energized!
The best part? This cookie recipe is gluten-free, dairy-free, and completely customizable to suit your dietary preferences. So grab your apron because we’re about to dive into a fun kitchen adventure that will leave your home smelling delicious and your heart feeling full!
My Sweet Connection to These Cookies
I can vividly recall the first time I experimented with peanut butter and banana cookies. It was a rainy Saturday afternoon, and my cozy kitchen was filled with the scent of freshly baked goods. I had just finished an intense workout and wanted something satisfying yet healthy. Inspired by my childhood love for peanut butter sandwiches, I wanted to create a cookie that could indulge my sweet tooth without all the sugar.
After a few rounds of trial and error (and a fair number of taste tests that I graciously conducted on my unsuspecting friends), I finally landed on the perfect blend. This memory holds a special place in my heart because it encapsulates the joy of cooking—transforming simple ingredients into a delightful creation that brings people together.
Every time I make these cookies, I’m reminded of how food can connect us—whether it’s sharing them with friends or savoring a solitary moment with a warm cookie and a glass of milk. Now, let’s gather our ingredients and get cooking!
Ingredients
Here’s what you’ll need for these scrumptious Healthy Peanut Butter Banana Cookies:
-
1/4 cup + 2 tablespoons natural peanut butter
Look for peanut butter that’s free of added sugars and oils. You can substitute with almond butter if you’re going nut-free! -
2 tablespoons all-natural almond butter (or swap for peanut butter)
Almond butter adds a lovely creaminess and complements the peanut flavor beautifully. Any nut butter works wonders here! -
1 small banana, mashed until no clumps remain
Use a ripe banana; the more speckles the better! This not only sweetens the cookies but also helps bind everything together. -
1/2 teaspoon ground cinnamon
This magic spice adds warmth and a hint of sweetness—plus, it’s great for metabolism! -
Pinch of sea salt (optional)
A little pinch can elevate flavors. Just a touch will do; you don’t want it too salty! -
1 tablespoon pure maple syrup
Pure maple syrup adds an extra layer of sweetness. You can replace it with honey or agave syrup for a vegan alternative. -
1/4 cup mini dark chocolate chips
These are optional but highly recommended for a touch of indulgence—dark chocolate is great for your health in moderation! -
Unsweetened shredded coconut or hemp seeds
These add texture and nutrients. Feel free to skip them, but they make for an interesting addition!
Step-by-Step Instructions
Now that we’ve gathered our ingredients, it’s time to put everything together! Follow these steps carefully, and I promise you’ll end up with a batch of cookies that will disappear in no time.
-
Preheat Your Oven
Preheat your oven to 350°F (175°C). This is crucial for getting those cookies to bake evenly. If you skip this step, your cookies might spread too much in the oven. -
Mix Your Wet Ingredients
In a medium-sized mixing bowl, combine the peanut butter, almond butter, mashed banana, and maple syrup. Use a fork or spatula to mix everything until it’s creamy and well-blended. Don’t worry if it’s thick; that’s exactly what you want! -
Incorporate the Dry Ingredients
Add the ground cinnamon and pinch of sea salt to the wet mixture. Stir to combine. If you’re feelin’ fancy, you can sift the cinnamon—though I usually skip this step because, let’s be real, I’m all about saving time! -
Fold in Your Chocolate Chips
Gently fold in the mini dark chocolate chips (and shredded coconut or hemp seeds, if you’re using them). The goal is to incorporate these ingredients without overmixing the batter. -
Scoop and Shape the Dough
Using a spoon or a cookie scoop, place heaping tablespoons of dough onto a parchment-lined baking sheet. Be sure to leave some space between each scoop since they’ll spread slightly while baking. No need to flatten them out; they’ll spread nicely in the oven. -
Bake to Perfection
Place your baking sheet in the oven and bake for about 10-12 minutes or until the edges are golden brown. Keep an eye on them; different ovens can vary! -
Cool and Enjoy
Once baked, let them cool on the baking sheet for a few minutes before transferring them to a wire rack to cool completely. This allows them to firm up a bit before you dive in. Trust me, the wait is worth it!
Serving Suggestions
Serve these delightful cookies warm or at room temperature. Create a cute cookie platter adorned with fresh fruits and nuts for a lovely presentation. Pair them with a glass of almond milk or your favorite plant-based yogurt for a well-rounded treat. You can also enjoy them alongside a cup of herbal tea for a cozy afternoon snack!
Recipe Variations
Feel free to get creative with these cookies! Here are some ideas to mix things up:
- Nut-Free Version: Swap out both the peanut and almond butter for sun butter or tahini.
- Add Some Crunch: Mix in chopped nuts like walnuts or pecans for an extra crunch.
- Flavor Twists: Add vanilla extract or replace cinnamon with pumpkin spice for a seasonal twist.
- Protein Boost: Toss in a scoop of your favorite protein powder to make them a post-workout snack.
- Dried Fruits: Experiment with dried cranberries or raisins for added sweetness.
Chef’s Notes
Each time I make these cookies, I’m reminded of how versatile and forgiving this recipe is! The first time I made them, I accidentally used crunchy peanut butter instead of creamy. To my surprise, it turned out quite delicious, adding a delightful texture.
Also, these cookies tend to be less sweet than your average cookie, which is part of their charm. If you prefer sweet treats, you might want to add a tad more maple syrup or throw in more chocolate chips. Kitchen experimentation is all part of the fun, right?
FAQs and Troubleshooting
1. My cookies spread too much! What happened?
This can happen if your dough was too warm when placed in the oven or if you didn’t chill it beforehand. If you find your dough runs a little soft, you can refrigerate it for about 30 minutes before scooping.
2. Can I make these cookies vegan?
Absolutely! Just make sure to use maple syrup and ensure your chocolate chips are dairy-free. Both of these swaps keep the cookies plant-based.
3. How can I make these cookies chewier?
If you like a chewier texture, try adding an extra banana or a dash of almond milk to the dough.
4. Can I freeze these cookies?
Yes! You can freeze the cookies either before baking or after. Simply place them in a freezer bag, and they’ll last up to three months. Thaw them in the fridge overnight before enjoying.
Nutritional Info
These cookies are not just delicious—they’re also a healthier alternative to traditional cookies. Packed with protein and healthy fats, they can be a great post-workout snack or a quick breakfast on the go. The exact nutritional values can vary, but here’s an estimate per cookie (based on a batch of 12):
- Calories: 100
- Protein: 3g
- Carbohydrates: 12g
- Fat: 5g
- Fiber: 1g
Conclusion
Healthy Peanut Butter Banana Cookies are the perfect way to satisfy your sweet cravings while keeping your nutrition on track. With their delightful flavor and simple preparation, these cookies are a staple in my kitchen, and I hope they become a favorite in yours too!
So, roll up those sleeves, tie on your apron, and let’s bake up some delicious memories together. Don’t forget to share your cookie creations with your loved ones—or keep them all to yourself. Happy baking!
PrintHealthy Peanut Butter Banana Cookies
Delicious and nutritious treat packed with wholesome ingredients, perfect for any time of the day!
- Prep Time: 10 minutes
- Cook Time: 12 minutes
- Total Time: 22 minutes
- Yield: 12 cookies 1x
- Category: Snack
- Method: Baking
- Cuisine: American
- Diet: Gluten-Free, Dairy-Free, Vegan
Ingredients
- 1/4 cup + 2 tablespoons natural peanut butter
- 2 tablespoons all-natural almond butter
- 1 small banana, mashed until no clumps remain
- 1/2 teaspoon ground cinnamon
- Pinch of sea salt (optional)
- 1 tablespoon pure maple syrup
- 1/4 cup mini dark chocolate chips
- Unsweetened shredded coconut or hemp seeds (optional)
Instructions
- Preheat your oven to 350°F (175°C).
- Mix the peanut butter, almond butter, mashed banana, and maple syrup in a medium-sized mixing bowl until creamy and well-blended.
- Incorporate the ground cinnamon and pinch of sea salt into the wet mixture and stir to combine.
- Fold in the mini dark chocolate chips (and shredded coconut or hemp seeds, if using).
- Scoop heaping tablespoons of dough onto a parchment-lined baking sheet, leaving space between each scoop.
- Bake for about 10-12 minutes or until edges are golden brown.
- Cool on the baking sheet for a few minutes before transferring to a wire rack.
Notes
Feel free to customize with different nut butters, add chopped nuts, or experiment with dried fruits.
Nutrition
- Serving Size: 1 cookie
- Calories: 100
- Sugar: 3g
- Sodium: 50mg
- Fat: 5g
- Saturated Fat: 1g
- Unsaturated Fat: 4g
- Trans Fat: 0g
- Carbohydrates: 12g
- Fiber: 1g
- Protein: 3g
- Cholesterol: 0mg
Keywords: cookies, peanut butter, banana, healthy snacks, gluten-free
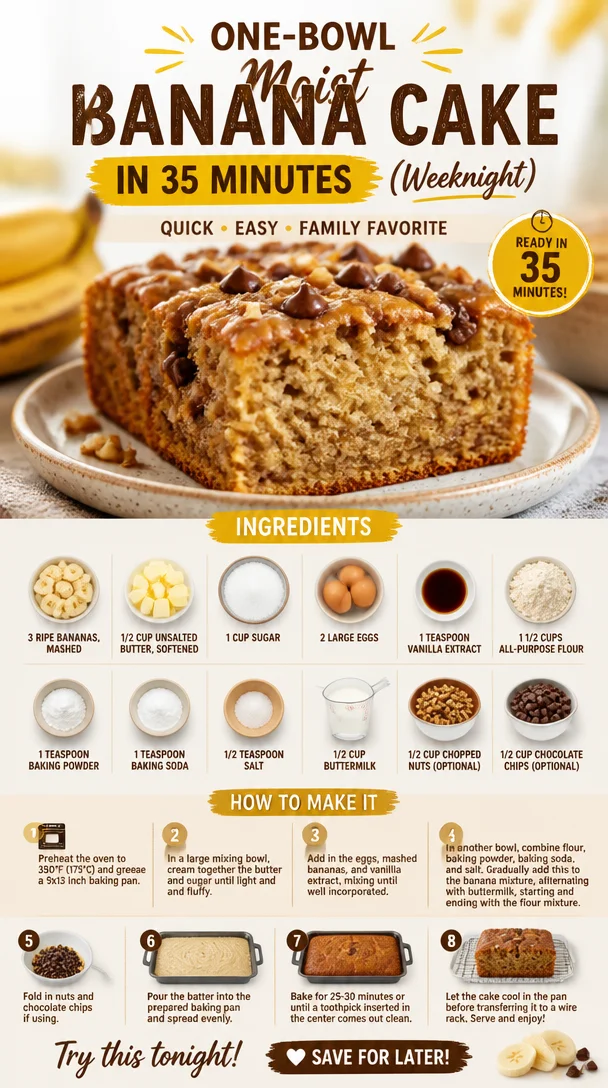
One-Bowl Moist Banana Cake in 35 Minutes (Weeknight)
The Ultimate Moist Banana Cake: A Slice of Joy
Hello, dear food lovers! Today, we’re diving into the world of moist banana cake—a delightful dessert that feels like a warm hug on a chilly day. This recipe brings together the sweetness of ripe bananas with the richness of butter, creating a cake that’s tender, flavorful, and oh-so-satisfying. If you’re looking to impress your friends or just treat yourself, you’re in for a real treat!
A Slice of My Childhood
Let me take you back to my childhood—when baking was more like an adventure than a chore. I vividly remember standing on a stool in my grandmother’s kitchen, my little hands clumsily mixing ingredients in a bowl that was almost as big as I was. The aroma of ripe bananas filling the air would lure my brothers and me in, and soon we would be fighting over the beaters and scraping the bowl clean.
My grandma had a magic touch; her banana cake was famous in our family. It was more than just cake; it was an experience, bringing us all together for celebrations, birthdays, and even the most mundane Tuesdays. As we gathered around the table, my grandma’s laughter filled the room alongside the sweet scent of warm banana cake. Each bite was moist and flavorful, the kind of cake that made you feel like everything was right in the world.
Now, I want to share that same joy with you. This moist banana cake is perfect for any occasion, or even for when you just need a moment of sweet comfort. So tie on your apron, and let’s create a cake that’s brimming with memories and deliciousness!
Ingredients
Here’s what you’ll need to bake this delectable banana cake:
-
3 ripe bananas, mashed
The riper, the better! Brown spots on the skin mean maximum sweetness and moisture. You can also use frozen bananas—just thaw them first and drain any excess liquid. -
1/2 cup unsalted butter, softened
Butter adds richness and flavor. If you’re in a pinch, feel free to swap with coconut oil or a plant-based margarine for a dairy-free option. -
1 cup sugar
Granulated sugar gives our cake the sweetness it needs. For a healthier twist, you could use coconut sugar or brown sugar; it’ll add a nice depth of flavor. -
2 large eggs
Eggs help bind everything together and contribute to the cake’s fluffiness. If you need a vegan alternative, try using flax eggs (1 tablespoon ground flaxseed + 2.5 tablespoons water = 1 egg). -
1 teaspoon vanilla extract
This enhances the sweetness and flavor profile of our cake. You can substitute with almond extract for a different taste. -
1 1/2 cups all-purpose flour
All-purpose flour is your go-to here, but if you want a gluten-free version, use a 1:1 gluten-free flour blend. -
1 teaspoon baking powder
This helps our cake rise. Ensure it’s fresh for maximum fluffiness! -
1 teaspoon baking soda
Another leavener that pairs with the acidity in the bananas for a perfect rise. -
1/2 teaspoon salt
Salt balances the sweetness and enhances all the flavors—don’t skip it! -
1/2 cup buttermilk
This adds moisture and a subtle tang. You can make your own by adding a tablespoon of vinegar or lemon juice to regular milk and letting it sit for a few minutes. -
1/2 cup chopped nuts (optional)
Walnuts or pecans add a crunchy texture and nutty flavor. Feel free to skip this if nuts aren’t your thing! -
1/2 cup chocolate chips (optional)
Who can resist chocolate? Add these in for a delightful chocolatey twist, or use dark chocolate for a gourmet feel!
Step-by-Step Instructions
Ready to get baking? Let’s walk through this recipe step-by-step!
-
Preheat Your Oven
Start by preheating your oven to 350°F (175°C). This ensures our cake bakes evenly from the get-go. -
Prepare Your Pan
Grease and flour a 9-inch round cake pan (or two for a layer cake). You can also line the bottom with parchment paper to prevent sticking—trust me; it’s the little things that make a big difference! -
Mash Those Bananas
In a bowl, mash the ripe bananas with a fork until they’re smooth but still have a few small chunks for texture. The more disheveled, the better! -
Cream the Butter and Sugar
In a separate bowl, beat the softened butter and sugar together until light and fluffy. This will take about 3-5 minutes. Creaming is crucial; it incorporates air into the batter, ensuring a light cake! -
Add Eggs and Vanilla
Next, add the eggs, one at a time, mixing well after each addition. This step helps with emulsifying the mixture. Don’t forget to add the vanilla extract – you want those flavor notes to dance in the background! -
Combine Wet Ingredients
Stir in the mashed bananas and buttermilk. This is where the magic begins. The batter will start to come together beautifully! -
Sift in Dry Ingredients
In a separate bowl, whisk together the flour, baking powder, baking soda, and salt. Gradually fold the dry ingredients into the wet mixture. Be gentle—overmixing can lead to a dense cake! -
Gently Fold in Extras
If you’re using nuts or chocolate chips, this is the time to add them in. Use a spatula or wooden spoon to fold them carefully into the batter. -
Pour and Level
Pour the batter into your prepared pan(s), smoothing the top with a spatula. Give the pan a little shake to level it all out—you want an even rise. -
Bake Away!
Place in the preheated oven and bake for 25-30 minutes (if using round pans) or 45-50 minutes for a single layer. A toothpick inserted in the center should come out clean! -
Cool it Down
Once baked, remove from the oven and let it cool in the pan for about 10 minutes. Then, transfer it to a wire rack to cool completely. Patience is key here—resist the urge to dive in too soon!
Serving Suggestions
For the best presentation, I like to serve slices of this banana cake on a beautiful plate, perhaps garnished with a sprig of mint or a dusting of powdered sugar. You can pair it with a scoop of vanilla ice cream or a dollop of whipped cream for an elevated dessert experience. Feel free to get creative with toppings—candied nuts or a drizzle of chocolate sauce could take it over the top!
Recipe Variations
Here are a few twists to make this recipe your own:
- Banana Nutella Cake: Swirl Nutella into the batter before baking for a decadent chocolate hazelnut vibe.
- Lemon Zest Banana Cake: Add a tablespoon of lemon zest for a fresh, zesty flavor contrast.
- Coconut Banana Cake: Incorporate shredded coconut into the batter for a tropical twist.
- Spiced Banana Cake: Add a pinch of cinnamon and nutmeg for extra warmth and flavor.
- Banana Oatmeal Cake: Substitute half the flour with rolled oats for a heartier, more filling texture.
Chef’s Notes
You know, every time I bake this banana cake, I can’t help but think about my grandma. She always said that the secret ingredient was love, and I truly believe that! Over the years, I’ve experimented with countless recipes, but this one remains a classic in my kitchen. It’s simple, straightforward, and never fails to bring smiles.
One little kitchen mishap I remember was the time I tried to rush the process. I grabbed a bowl straight from the sink without drying it fully, and my beautiful cake had a weird, soapy taste. Lesson learned! Always use a clean bowl—it makes all the difference.
FAQs and Troubleshooting
1. My cake turned out dry. What went wrong?
It could be a few things—overmixing the batter or baking it too long can both lead to dryness. Make sure to check the cake a few minutes before the timer goes off!
2. Can I make this recipe in advance?
Absolutely! You can bake the cake a day ahead and store it covered at room temperature. You can also freeze it for longer storage; just ensure it’s wrapped tightly!
3. My cake sank in the middle. Why did this happen?
This could be due to underbaking or a sudden change in temperature. Make sure to bake it until the toothpick test (clean or with a few moist crumbs) passes, and adjust your oven temperature accordingly.
4. Can I add more bananas?
Sure! Just be cautious not to add too much extra moisture. Substituting one ripe banana for a bit of flour can help balance it out as needed.
Nutritional Info (Optional)
While this cake is a treat, it’s always good to be aware of portions. A standard slice contains roughly 250-300 calories, depending on added ingredients. Enjoy every bite in moderation!
Now that you have all the tips, tricks, and a slice of my history, you’re ready to bake your own moist banana cake! Remember, great cooking is about the joy you share and the love you put in. So tie your apron, gather your ingredients, and let’s make some delicious memories together! Happy baking!
PrintThe Ultimate Moist Banana Cake
A delightful moist banana cake that combines the sweetness of ripe bananas with the richness of butter, perfect for any occasion.
- Prep Time: 15 minutes
- Cook Time: 30 minutes
- Total Time: 45 minutes
- Yield: 8 servings 1x
- Category: Dessert
- Method: Baking
- Cuisine: American
- Diet: Vegetarian
Ingredients
- 3 ripe bananas, mashed
- 1/2 cup unsalted butter, softened
- 1 cup sugar
- 2 large eggs
- 1 teaspoon vanilla extract
- 1 1/2 cups all-purpose flour
- 1 teaspoon baking powder
- 1 teaspoon baking soda
- 1/2 teaspoon salt
- 1/2 cup buttermilk
- 1/2 cup chopped nuts (optional)
- 1/2 cup chocolate chips (optional)
Instructions
- Preheat your oven to 350°F (175°C).
- Prepare a 9-inch round cake pan with grease and flour.
- Mash the ripe bananas in a bowl.
- Cream the butter and sugar together until light and fluffy.
- Add the eggs one at a time and mix well.
- Stir in the mashed bananas and buttermilk until combined.
- Sift the flour, baking powder, baking soda, and salt together, then gradually fold into the wet mixture.
- Gently fold in nuts and chocolate chips if using.
- Pour the batter into the prepared pan.
- Bake for 25-30 minutes or until a toothpick comes out clean.
- Cool in the pan for 10 minutes, then transfer to a wire rack to cool completely.
Notes
Serve with a garnish of mint, powdered sugar, or a scoop of vanilla ice cream for an elevated dessert experience.
Nutrition
- Serving Size: 1 slice
- Calories: 275
- Sugar: 16g
- Sodium: 300mg
- Fat: 10g
- Saturated Fat: 5g
- Unsaturated Fat: 4g
- Trans Fat: 0g
- Carbohydrates: 38g
- Fiber: 1g
- Protein: 3g
- Cholesterol: 40mg
Keywords: banana cake, moist cake, baking, dessert, sweet treats
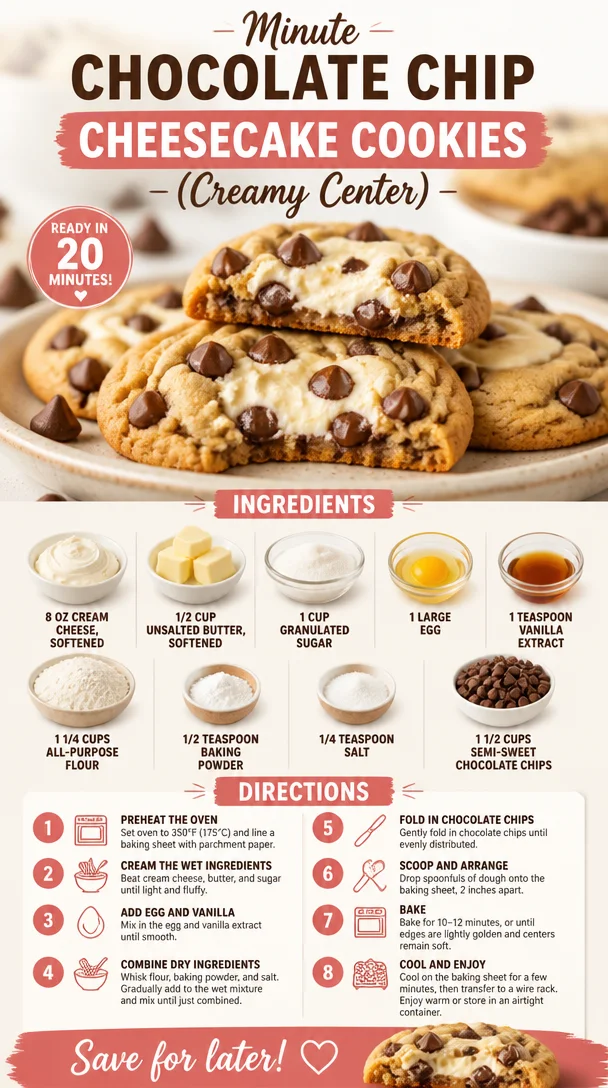
Minute Chocolate Chip Cheesecake Cookies (Creamy Center)
Indulge in Delight: Chocolate Chip Cheesecake Cookies
Hello there, fellow food lover! Are you ready to embark on a delicious journey that brings together the creamy perfection of cheesecake with the comforting charm of cookies? Yes, you heard me right! Today, we’re diving into the world of Chocolate Chip Cheesecake Cookies. This delightful treat combines the best of both worlds and is sure to make your taste buds dance!
Creating these cookies is not just about baking; it’s a walk down memory lane, full of laughter, love, and a sprinkle of culinary magic. So, let’s roll up our sleeves, tie on our aprons, and whip up a batch of these irresistible cookies that’ll have your friends and family coming back for seconds—if not thirds!
My Culinary Journey with Cookies
Let me take you back to one of my fondest childhood memories. It was a sunny Saturday afternoon, and my mom and I were in the kitchen, surrounded by a colorful array of ingredients. I can still picture the kitchen filled with the sweet aroma of vanilla and melting chocolate. We were on a mission to create something spectacular for that night’s family gathering.
Mom had her old, trusty recipe book out, flipping through the yellowed pages, when she suddenly exclaimed, “What do you think about combining cheesecake with cookies?” My eyes lit up! I had always loved cookie dough straight from the bowl, and cheesecake was my ultimate weakness. To my delight, we started mixing, measuring, and laughing our way to a delightful concoction.
After a few experimental batches and some epic kitchen fails (like the time we forgot the baking powder), we finally perfected it: the Chocolate Chip Cheesecake Cookie. My family raved about them, claiming they were the best cookies they had ever tasted! This recipe became a staple in our household, and every time I make them, I’m reminded of those joyful moments spent in the kitchen with my mom.
Ingredients You’ll Need
Let’s gather our ingredients for these scrumptious cookies! Here’s what you’ll need:
-
8 oz cream cheese (softened)
This rich and creamy base adds the cheesecake element to our cookies. If you’re looking for a lighter version, try using Neufchâtel cheese. It offers a similar taste with less fat! -
1/2 cup unsalted butter (softened)
Butter brings flavor and creates that delightful melt-in-your-mouth texture. You can substitute with coconut oil for a dairy-free option! -
1 cup granulated sugar
Sweetness is key! This helps to balance the tanginess of the cream cheese. You could swap it with brown sugar for a hint of molasses flavor or use coconut sugar for a healthier alternative. -
1 large egg
The egg binds everything together beautifully. If you need an egg substitute, a flax egg (1 tablespoon ground flaxseed mixed with 2.5 tablespoons water) works well! -
1 teaspoon vanilla extract
Vanilla adds depth and warmth to the cookies. If you want to change it up, almond extract can add a lovely twist! -
1 1/4 cups all-purpose flour
This is the backbone of our cookie. For a gluten-free option, try using a 1:1 gluten-free baking mix. -
1/2 teaspoon baking powder
This helps our cookies rise and gives them that perfect fluffiness. For a bit of a twist, consider using baking soda for a different texture! -
1/4 teaspoon salt
A pinch of salt enhances all the flavors in the cookies. You can use sea salt for a touch of gourmet! -
1 1/2 cups semi-sweet chocolate chips
These beauties are the cherry on top! Feel free to swap for dark chocolate chips, white chocolate, or even butterscotch for a fun variation.
Baking Up a Storm: Step-by-Step Instructions
Now, let’s bake these beauties! Follow these steps, and you’ll have perfectly decadent Chocolate Chip Cheesecake Cookies in no time.
-
Preheat your oven
Let’s get the oven warmed up to 350°F (175°C). Preheating is critical because it ensures your cookies bake evenly and develop that amazing texture! -
Cream the butter and cream cheese
In a large mixing bowl, beat together the softened butter and cream cheese until smooth and creamy. This will take about 2-3 minutes. Make sure to scrape down the sides so everything is mixed evenly. Pro tip: Use a hand mixer or a stand mixer for a perfectly fluffy texture. -
Add sugar and egg
Gradually add the granulated sugar to the creamed mixture, continuing to beat until it’s light and fluffy. Then, add in the egg and vanilla extract. Mix until well combined. Your batter should have a silky smooth consistency now! -
Combine the dry ingredients
In a separate bowl, whisk together the flour, baking powder, and salt. This step ensures that the baking powder is evenly distributed and prevents any bitter bites in your cookies. -
Gradually add dry to wet
Slowly mix the dry ingredients into the wet mixture, stirring until just combined. Be careful not to overmix; a few floury pockets are okay! This will keep your cookies tender. -
Fold in the chocolate chips
Now comes the fun part! Gently fold in the chocolate chips until they’re evenly distributed throughout the dough. Do taste the dough! That’s a must! -
Scoop and bake
Using a cookie scoop or tablespoon, drop rounded balls of dough onto a lined baking sheet, spacing them about 2 inches apart. Bake in your preheated oven for about 12-15 minutes, or until the edges are lightly golden. They might look slightly underbaked, but trust me—this is where the magic happens! They’ll continue to cook as they cool. -
Cool and enjoy
Let the cookies cool on the baking sheet for about 5 minutes before transferring them to a wire rack to cool completely. This waiting period allows them to set up just right!
Serving Suggestions
When it comes to serving, these cookies are delightful on their own, but why not elevate the moment? Serve them warm with a scoop of vanilla ice cream on top for the ultimate dessert experience! Drizzle with a bit of chocolate sauce or even a dusting of powdered sugar to make them even more charming.
If you’re presenting them at a dinner party, stack them on a beautiful platter and watch the compliments roll in. Trust me; they’ll be the centerpiece of your dessert table!
Recipe Variations
Here are a few fun twists to keep things exciting:
- Nutty Delight: Stir in some chopped walnuts or pecans for an added crunch.
- Spiced Twist: Add a dash of cinnamon or pumpkin spice to the dough for a seasonal touch.
- Fragrant Citrus: Stir in some lemon or orange zest for a bright, citrusy flavor that cuts through the richness.
- Decadent Fudge: For an ultra-rich treat, swap half of the chocolate chips for brownie bits!
- Gluten-Free: Use a gluten-free flour blend in place of all-purpose flour, and you’re all set!
Chef’s Notes
Every time I whip up these Chocolate Chip Cheesecake Cookies, I’m reminded of the laughter-filled afternoons with my mom. It’s amazing how a simple recipe can hold such heartwarming memories! Over the years, I’ve played around with different flavors and textures, but the classic version remains unbeatable.
Once, I even tried incorporating espresso powder for a mocha twist, and they vanished within minutes! I have to say, sharing these cookies with loved ones and seeing their faces light up is the real joy of cooking.
FAQs and Troubleshooting
Q1: My cookies flattened out too much! What went wrong?
A: Flattening can happen for a few reasons! Make sure your butter and cream cheese are at room temperature, not overly melted. Additionally, ensure you’re measuring your flour correctly—too little flour can lead to flat cookies.
Q2: Can I store these cookies?
A: Absolutely! Store your cookies in an airtight container at room temperature for up to a week. They also freeze well for up to three months. Just thaw them at room temperature when you’re ready to enjoy!
Q3: Why are my cookies doughy in the middle?
A: If your cookies are doughy in the center, they may not have baked long enough. Always keep an eye on them in the last few minutes of baking; they should be slightly golden around the edges but soft in the middle.
Q4: Can I use lower-fat cream cheese?
A: Yes, you can! Just keep in mind that the texture may be slightly different, but the flavor will still shine through.
Indulging in Goodness
These Chocolate Chip Cheesecake Cookies are more than just cookies; they’re a celebration of flavors and memories. Whether you’re whipping them up for family, friends, or simply indulging by yourself (no judgment here!), I hope you find joy in every bite.
So, let’s get to baking! Just remember, it’s not just about the final product; it’s about the experience. Grab your apron, have fun, and create some lovely moments in your kitchen.
Happy baking, and let’s make some delicious memories!
PrintChocolate Chip Cheesecake Cookies
Delightful cookies combining the creamy essence of cheesecake with the classic charm of chocolate chip cookies.
- Prep Time: 15 minutes
- Cook Time: 15 minutes
- Total Time: 30 minutes
- Yield: 24 cookies 1x
- Category: Dessert
- Method: Baking
- Cuisine: American
- Diet: Vegetarian
Ingredients
- 8 oz cream cheese (softened)
- 1/2 cup unsalted butter (softened)
- 1 cup granulated sugar
- 1 large egg
- 1 teaspoon vanilla extract
- 1 1/4 cups all-purpose flour
- 1/2 teaspoon baking powder
- 1/4 teaspoon salt
- 1 1/2 cups semi-sweet chocolate chips
Instructions
- Preheat your oven to 350°F (175°C).
- Cream the butter and cream cheese in a large mixing bowl until smooth and creamy.
- Add sugar and egg, mixing until light and fluffy.
- Combine the dry ingredients in a separate bowl.
- Gradually add the dry mixture to the wet mixture, stirring until just combined.
- Fold in the chocolate chips until evenly distributed.
- Scoop rounded balls of dough onto a lined baking sheet, spacing them about 2 inches apart.
- Bake for 12-15 minutes, or until edges are lightly golden.
- Cool on the baking sheet for 5 minutes, then transfer to a wire rack.
Notes
Serve warm with vanilla ice cream or a drizzle of chocolate sauce for an extra treat.
Nutrition
- Serving Size: 1 cookie
- Calories: 170
- Sugar: 10g
- Sodium: 150mg
- Fat: 8g
- Saturated Fat: 4g
- Unsaturated Fat: 3g
- Trans Fat: 0g
- Carbohydrates: 21g
- Fiber: 1g
- Protein: 2g
- Cholesterol: 25mg
Keywords: chocolate chip cookies, cheesecake cookies, dessert recipes
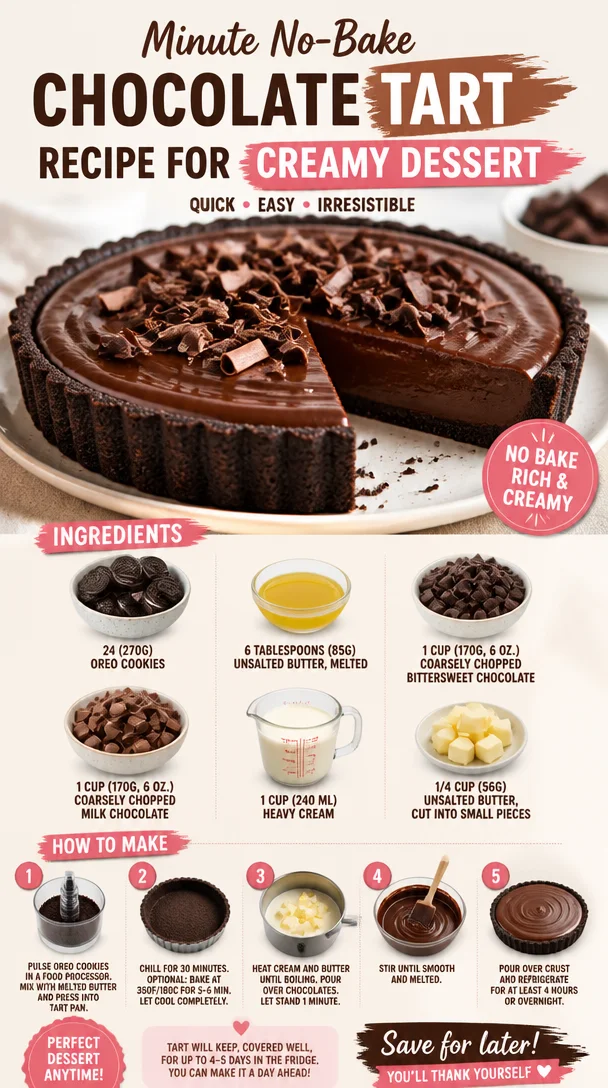
Minute No-Bake Chocolate Tart Recipe for Creamy Dessert
Indulge in Elegance: No-Bake Chocolate Tart
Hello, fellow foodies! Today, I’m thrilled to share a recipe that’s a surefire way to impress your guests without spending hours in the kitchen. I’m talking about the silky-smooth, decadently rich No-Bake Chocolate Tart. If you’ve ever thought that creating a dessert that looks elegant means dealing with complicated techniques, think again! This tart is not only distressingly easy to make, but it also tastes like it belongs in a fancy patisserie.
Picture this: a buttery, cookie crust cradling a luscious filling of bittersweet and milk chocolate, all topped off with lightly whipped cream. And the best part? You don’t have to turn on your oven! Whether it’s a dinner party, a special celebration, or just a cozy night at home, this tart fits beautifully into any occasion. So let’s dive in and create something delicious together!
A Sweet Memory
Before I get into the nitty-gritty of making this tart, let me share a little story that always brings a smile to my face. It was one hot summer evening, and I was tasked with preparing dessert for a family gathering. My grandma, a brilliant baker herself, had shown me the importance of balancing flavors and textures. I can still hear her soft voice guiding me.
I wanted to impress everyone and decided to whip up a no-bake chocolate tart! So there I was, smirking with confidence, when I discovered I’d accidentally used salted butter instead of unsalted in my crust. Instead of panicking, I laughed it off and thought, "Why not embrace the unexpected?" The result? An intriguing sweet-savory contrast that everyone adored. From then on, my family started asking for that "salted version" of the tart. That little mishap became a beautiful culinary story and a signature dish in our home. Let’s preserve that spirit of adventure as we make this tart today!
Ingredients
Before we begin rolling up our sleeves, let’s gather the stars of our show:
-
24 (270g) Oreo cookies: The base of our tart! These provide a perfect chocolatey flavor. Feel free to substitute with any chocolate cookie or even graham crackers if you’re feeling adventurous.
-
6 tablespoons (85g) unsalted butter, melted: This helps bind the crust together and gives it a rich flavor. If you want a dairy-free option, use coconut oil instead!
-
1 cup (170g, 6 oz.) coarsely chopped bittersweet chocolate: This chocolate adds that deep, intense chocolate flavor we all adore. You can swap it with dark chocolate if you prefer something even richer.
-
1 cup (170g, 6 oz.) coarsely chopped milk chocolate: For a sweeter note to balance the bittersweet chocolate. If you like it more intense, you can fully substitute it with dark chocolate.
-
1 cup (240 ml) heavy cream: The creaminess of the filling comes from this ingredient. If you need a lighter version, you can use half-and-half, but the texture will be less creamy.
-
1/4 cup (56g) unsalted butter, cut into small pieces: This adds a luscious finish to our chocolate filling and helps it set beautifully. Substitute with vegan butter for a dairy-free option.
Step-by-Step Instructions
Ready to get your hands chocolatey? Let’s get started on this delightful No-Bake Chocolate Tart!
Step 1: Prepare the Crust
-
Crush the Cookies: Place the Oreo cookies into a food processor and pulse them into fine crumbs. You can also seal them in a zip-top bag and crush them with a rolling pin if you don’t have a food processor—great way to let off some steam!
- Chef Tip: For a crunchy texture, leave a few larger pieces in the mix.
-
Mix with Melted Butter: In a mixing bowl, combine the cookie crumbs with the melted unsalted butter. Stir until the mixture resembles wet sand.
- Commentary: This step is super crucial as it binds the crust together.
-
Form the Crust: Press the mixture evenly into the bottom and up the sides of a tart pan. Make sure it’s compact so it holds together when we slice into it later.
- Little Hack: If you don’t have a tart pan, you can use a pie dish!
-
Chill: Pop the crust into the fridge for about 30 minutes to firm up. Trust me; this little patience pays off.
Step 2: Make the Filling
-
Prepare the Chocolate: In a medium bowl, combine the chopped bittersweet and milk chocolates. If you have a double boiler, that’s fabulous! If not, a heat-safe bowl over a pot of simmering water works well too—just ensure the bowl isn’t touching the water.
-
Heat the Cream: In a saucepan, gently heat the heavy cream over medium heat until it begins to simmer. Watch closely; you don’t want it to boil.
- Tip: Swirl the pan occasionally for even heating.
-
Combine: Pour the hot cream over the chopped chocolate. Let it sit for a minute or two, which allows the chocolate to melt.
- Chef Insight: This step is crucial for getting that silky texture!
-
Stir: Gently stir until the mixture is smooth and glossy. If using, add in the small pieces of butter and stir until fully melted in.
- Commentary: Look at that shine! If it’s not melting completely, you can return it to the heat for a few seconds.
Step 3: Assemble the Tart
-
Pour Filling into the Crust: Carefully pour the luscious chocolate mixture into the prepared crust.
- Tip: Use a spatula to spread it evenly for a smooth finish.
-
Chill Again: Return the tart to the fridge and allow it to set for at least two hours, or overnight if you can resist.
- Secret: The longer it sets, the better it tastes!
Step 4: Serve and Enjoy!
- Slice and Serve: When you’re ready to indulge, take the tart out of the fridge. Slice into generous wedges and serve as is, or add a dollop of whipped cream on top for that extra flair. Garnish with chocolate shavings or fresh berries to elevate your presentation.
- Plating Tip: Serve on a beautiful cake stand for a touch of elegance!
Recipe Variations
Feeling creative? Here are a few delicious variations you might enjoy:
- Mint Chocolate Tart: Add a few drops of peppermint extract to the chocolate filling for a refreshing twist.
- Nutty Delight: Incorporate crushed nuts like almonds or hazelnuts into the crust for added flavor and crunch.
- Fruit Infusion: Top with fresh raspberries or strawberries, or swirl in a raspberry puree before setting.
- Spiced Chocolate: Add a pinch of sea salt or a sprinkle of cayenne pepper to the filling for a subtle kick!
Chef’s Notes
This No-Bake Chocolate Tart has been a staple in my repertoire for years. Over time, I have experimented with various flavors and toppings, and each time it astonishes me how something so simple can impress on so many levels. I’ve had friends who were convinced they couldn’t cook make this tart with success! It’s become a culinary bridge for many, introducing them to the joys of dessert-making without the fuss.
There’s also something magical about watching the filling set—believe me when I say the wait is worth it! Everyone deserves a slice of indulgence, and this tart is just the ticket to create those joyful moments around the table.
FAQs and Troubleshooting
-
Why is my chocolate filling not smooth?
- If your filling has lumps, it may be that the chocolate didn’t melt completely. Be sure to stir thoroughly and return it to gentle heat to salvage the texture.
-
Can I freeze the tart?
- Yes! You can freeze the tart. Just wrap it well in plastic wrap. To serve, let it defrost in the fridge for several hours.
-
How do I store leftovers?
- Store any leftover tart in an airtight container in the fridge for up to 4-5 days. If you don’t lose your willpower, that is!
-
My crust is falling apart when I slice it!
- Ensure that you pressed the crust firmly into the pan. If it still crumbles, consider adding a little more melted butter next time to help bind it better.
Nutritional Info
Per slice (based on 12 servings): Approximately 320 calories, 22g fat, 34g carbs, 4g protein (note: values will vary depending on specific ingredients used).
Now that you have the recipe, I hope you feel inspired to make this No-Bake Chocolate Tart! Remember, good cooking is not just about the end result; it’s about the stories and experiences we create along the way. So tie on your apron, gather those ingredients, and let’s make something delectable together. Cheers to wonderful moments around your table!
PrintNo-Bake Chocolate Tart
Impress your guests with this easy and elegant No-Bake Chocolate Tart, featuring a cookie crust and a luscious chocolate filling.
- Prep Time: 15 minutes
- Cook Time: 0 minutes
- Total Time: 135 minutes
- Yield: 12 servings 1x
- Category: Dessert
- Method: No-Bake
- Cuisine: French
- Diet: Vegetarian
Ingredients
- 24 Oreo cookies (270g), crushed
- 6 tablespoons (85g) unsalted butter, melted
- 1 cup (170g) coarsely chopped bittersweet chocolate
- 1 cup (170g) coarsely chopped milk chocolate
- 1 cup (240ml) heavy cream
- 1/4 cup (56g) unsalted butter, cut into small pieces
Instructions
- Prepare the Crust
- Crush the cookies in a food processor or zip-top bag.
- Mix the cookie crumbs with melted butter until it resembles wet sand.
- Form the crust in a tart pan, pressing it evenly.
- Chill for about 30 minutes.
- Make the Filling
- Prepare the chocolate in a bowl over simmering water.
- Heat the cream in a saucepan until it simmers.
- Combine the hot cream with chocolate and let it sit.
- Stir until smooth and glossy, then add the butter.
- Assemble the Tart
- Pour the filling into the cooled crust.
- Chill for at least 2 hours.
- Serve by slicing and adding whipped cream on top if desired.
Notes
For a crunchy texture, leave some larger cookie pieces in the crust. Add variations like mint extract or fresh fruit toppings for extra flair.
Nutrition
- Serving Size: 1 slice
- Calories: 320
- Sugar: 20g
- Sodium: 130mg
- Fat: 22g
- Saturated Fat: 12g
- Unsaturated Fat: 8g
- Trans Fat: 0g
- Carbohydrates: 34g
- Fiber: 2g
- Protein: 4g
- Cholesterol: 30mg
Keywords: chocolate tart, no-bake dessert, easy dessert, elegant dessert
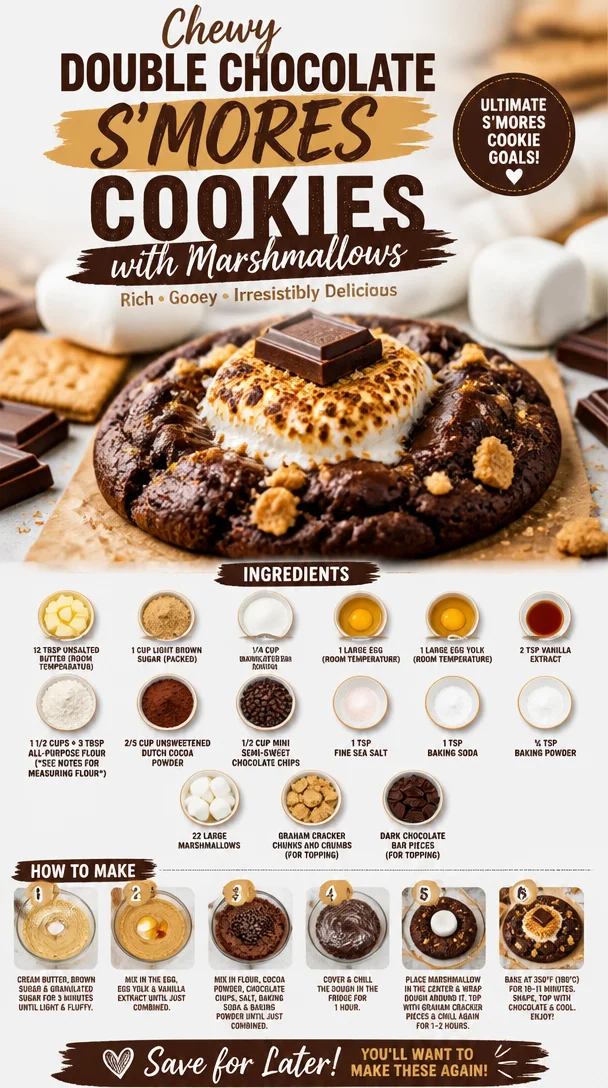
Chewy Double Chocolate S’mores Cookies with Marshmallows
Double Chocolate S’mores Cookies: A Delicious Twist on a Classic Treat
Welcome back, food lovers! Today, I’m excited to share with you a recipe that marries the classic campfire treat of s’mores with the irresistible chewiness of cookies. Introducing: Double Chocolate S’mores Cookies! These little delights are not just cookies; they’re a nostalgic journey to summer nights, laughter, and the joy of good food shared among friends.
These cookies encapsulate everything we love about s’mores—the gooey marshmallows, rich chocolatey goodness, and the satisfying crunch of graham crackers. Remember those evenings spent huddled around a fire, roasting marshmallows until they were gloriously golden? With this recipe, you can bring that same magic into your kitchen year-round.
Let’s get started on this scrumptious adventure that’s sure to impress friends and family alike. So, tie on that apron, chat with me as we dive into the sweet, indulgent world of double chocolate s’mores cookies!
A Culinary Memory
Growing up, our backyard was the hub of activity during the summer. My family would host the most fantastic bonfire nights, complete with blankets, flashlights, and of course, s’mores. I still recall the excitement of watching my dad expertly roast marshmallows—sometimes achieving that perfectly gooey texture, other times awkwardly setting one ablaze. My sister and I would giggle, eagerly waiting to sandwich those marshmallows between graham crackers and squares of chocolate, eagerly anticipating that first bite.
Fast forward years later when I began experimenting in the kitchen, yearning to recreate that sense of warmth and community using my own twist on those classic flavors. That’s how these Double Chocolate S’mores Cookies came to life—a tribute to those cherished memories with a rich, chocolatey flair. Each cookie I bake feels like I’m bringing a piece of that joyful energy into my kitchen, filling it with laughter and, of course, the mouthwatering aroma of melting chocolate and toasted marshmallows.
Ingredients
Here’s what you’ll need for these delightful treats:
-
12 tbsp unsalted butter (room temperature): This is the magic maker for any cookie, giving them that rich, tender texture. If you’re in a pinch, you can substitute with coconut oil, but the flavor will be a tad different.
-
1 cup light brown sugar (packed): The brown sugar adds that hint of caramel flavor and, combined with granulated sugar, keeps the cookies soft. If you need a substitute, you can use dark brown sugar for more depth or even coconut sugar for a healthier option.
-
1/4 cup granulated sugar: This helps to balance out the flavors and achieve the perfect sweetness. You could swap it with a sugar alternative like monk fruit sweetener, but the texture may be slightly different.
-
1 large egg (room temperature): Eggs provide structure and moisture. For a vegan alternative, you can use a flax egg (1 tablespoon ground flaxseed mixed with 2.5 tablespoons water).
-
1 large egg yolk (room temperature): Including an extra yolk ensures the cookies remain chewy. If you want to skip the egg, use an additional flax egg.
-
2 teaspoons vanilla extract: A splash of vanilla elevates the flavor! Feel free to use vanilla bean or a flavored extract for a unique twist.
-
1 1/2 cups + 3 tbsp all-purpose flour: This is your base. For a gluten-free option, substitute with a gluten-free flour blend, but check for specific measuring requirements.
-
2/3 cup unsweetened Dutch cocoa powder: This gives the cookies their chocolatey richness. You can swap it with carob powder for a different flavor profile, but it will alter the taste.
-
1/2 cup mini semi-sweet chocolate chips: Chocolate chips in the dough add those melty pockets of chocolate. Use dark chocolate chips or white chocolate if you crave a different flavor.
-
1 teaspoon fine sea salt: Salt enhances sweetness and balances flavor, so don’t skip it! If you have kosher salt, use slightly more as it’s less concentrated.
-
1 teaspoon baking soda & ½ teaspoon baking powder: These leavening agents create that perfect cookie lift. If unavailable, you can use baking powder alone, but the texture will change slightly.
-
22 large marshmallows: The star of the show! You can cube them for even distribution or use mini marshmallows if that’s what you have.
-
Graham cracker chunks and crumbs (for topping): This adds the quintessential crunch and flavor of s’mores to the cookies, reminiscences of summer fires. If you don’t have graham crackers, digestive biscuits can work too.
-
Dark chocolate bar pieces (for topping): Melty dark chocolate on top? Yes, please! You can substitute this with a milk chocolate bar or even a nut-based chocolate for a vegan option.
Step-by-Step Instructions
Now that we have our ingredients ready, let’s dive into the cookie-making process. These steps will lead you to deliciousness and a warm, inviting kitchen filled with mouthwatering scents!
-
Preheat Your Oven: Begin by preheating your oven to 350°F (175°C). This ensures your cookies bake evenly—always a good start!
-
Prepare Baking Sheets: Line your baking sheets with parchment paper. Not only does it prevent sticking, but it also makes clean-up a breeze.
-
Cream the Butter and Sugars: In a large mixing bowl, cream together the room-temperature butter, brown sugar, and granulated sugar until the mixture is fluffy and pale. This step is essential for airy cookies, so don’t rush it! You want to incorporate as much air as possible.
-
Add the Egg and Vanilla: Crack in your large egg and egg yolk, followed by the vanilla extract. Beat the mixture until combined—the batter should look glossy and creamy.
-
Incorporate the Dry Ingredients: In a separate bowl, whisk together the flour, cocoa powder, salt, baking soda, and baking powder. Gradually add this dry mix to the butter mixture, stirring until just combined. Avoid overmixing here; it’s perfectly okay if there are still some flour streaks.
-
Add in the Chocolate Chips: Fold in the mini chocolate chips—this is where you get those delightful, gooey bites in each cookie. Oh yes!
-
Chill the Dough: For a better texture, chill the dough in the fridge for about 30 minutes. This helps prevent the cookies from spreading too much while baking. Plus, it enhances the flavor!
-
Form the Cookies: Using a cookie scoop or your hands, form medium-sized balls of dough and place them on your prepared sheet, spacing them about 2 inches apart. Gently press down so they’re not too round, as this helps them spread out properly.
-
Add Marshmallows and Graham Crackers: Place 1-2 marshmallows on top of each cookie, followed by chunks of graham crackers. Press them gently into the dough to ensure they stick.
-
Bake the Cookies: Pop your cookies into the oven and bake for 10-12 minutes or until the edges are set but the centers are still gooey. They will continue to bake on the sheet, so don’t overdo it!
-
Top with Dark Chocolate: As soon as they come out, press a piece of dark chocolate on each warm cookie. Allow it to melt just a bit—heavenly!
-
Cool and Enjoy: Let your cookies cool on the baking sheet for about 5 minutes before transferring them to a wire rack. Enjoy them warm or store them in an airtight container for later. But let’s be honest—they might not last long!
Serving Suggestions
Presentation is key, so let’s make these cookies shine! Serve your Double Chocolate S’mores Cookies on a rustic wooden platter, draped with a cute checkered cloth for a homemade vibe. You can pair them with a glass of cold milk, rich coffee, or even a scoop of vanilla ice cream for a delightful dessert experience. And don’t forget to sprinkle a few graham cracker crumbs on top for extra flair!
Recipe Variations
Looking to shake things up? Here are a few variations you might enjoy:
-
Nutty Delight: Add chopped nuts such as walnuts or pecans into the dough for a crunch.
-
Spicy Kick: Stir in a dash of cayenne pepper or cinnamon for a warming spice that beautifully balances the chocolate.
-
Chocolate overload: Swap half of the cocoa powder for white chocolate chips for a fun twist on the classic.
-
Healthier Version: Use whole wheat flour and reduce the sugar by half, while adding a little applesauce for moisture.
-
Vegan S’mores Cookies: Follow the egg substitutes mentioned above, use coconut butter, and vegan chocolate for a completely plant-based treat!
Chef’s Notes
Every recipe has a story, and this one is no different! These Double Chocolate S’mores Cookies have evolved from my kitchen experiments. One evening, I melted a few marshmallows and added them to a basic chocolate cookie recipe—and it was a game-changer! Since then, I’ve fine-tuned this recipe to create the delightful blend of flavors you’ll experience today.
Every batch comes with delightful surprises: sometimes the graham crackers crumble just the right amount, sometimes they’re a little more crunchy. But that’s the beauty of baking—each time holds the potential for something unique. And honestly, who doesn’t love a surprise sweet moment?
FAQs and Troubleshooting
Q: My cookies turned out too flat—what happened?
A: This usually means that the butter was too warm when creamed, or you didn’t factor in chilling the dough. Make sure your butter is softened but not melted, and always chill your dough!
Q: Can I freeze the dough for later?
A: Absolutely! Once you scoop the dough into balls, place them on a baking sheet to freeze until solid, then transfer to a zip bag. You can bake them directly from frozen, just add a couple of extra minutes to the baking time.
Q: What if I don’t have Dutch cocoa powder?
A: If you only have regular cocoa powder, you can use that instead. The flavor will be slightly different, perhaps a bit more acidic, but it’ll still yield delicious cookies!
Q: My cookies are too cakey—what went wrong?
A: Overmixing can lead to cakey cookies. Once you add the flour mixture, mix until just combined. It’s okay if there are lumps!
Now you’re equipped with everything you need to whip up these delicious Double Chocolate S’mores Cookies. I hope this recipe brings as much joy to your home as it has to mine! Happy baking, and remember: good food isn’t just about the ingredients; it’s about the love and laughter shared around your table. Let’s make some memories!
PrintDouble Chocolate S’mores Cookies
A delicious twist on the classic campfire treat, these cookies combine gooey marshmallows, rich chocolate, and graham crackers for a nostalgic dessert experience.
- Prep Time: 30 minutes
- Cook Time: 12 minutes
- Total Time: 42 minutes
- Yield: 24 cookies 1x
- Category: Dessert
- Method: Baking
- Cuisine: American
- Diet: Vegetarian
Ingredients
- 12 tbsp unsalted butter (room temperature)
- 1 cup light brown sugar (packed)
- 1/4 cup granulated sugar
- 1 large egg (room temperature)
- 1 large egg yolk (room temperature)
- 2 teaspoons vanilla extract
- 1 1/2 cups + 3 tbsp all-purpose flour
- 2/3 cup unsweetened Dutch cocoa powder
- 1/2 cup mini semi-sweet chocolate chips
- 1 teaspoon fine sea salt
- 1 teaspoon baking soda
- 1/2 teaspoon baking powder
- 22 large marshmallows
- Graham cracker chunks and crumbs (for topping)
- Dark chocolate bar pieces (for topping)
Instructions
- Preheat your oven to 350°F (175°C).
- Prepare your baking sheets by lining them with parchment paper.
- Cream together the butter, brown sugar, and granulated sugar until fluffy.
- Add the egg, egg yolk, and vanilla extract, mixing until combined.
- Incorporate the dry ingredients in a separate bowl, then gradually mix them into the wet ingredients.
- Add the mini chocolate chips and fold them into the dough.
- Chill the dough in the fridge for about 30 minutes.
- Form medium-sized balls of dough and place them on the prepared baking sheet.
- Add 1-2 marshmallows and graham cracker chunks on top of each cookie.
- Bake for 10-12 minutes or until the edges are set.
- Top each cookie with a piece of dark chocolate right after baking.
- Cool for 5 minutes before transferring to a wire rack.
Notes
For best results, chill the dough to prevent spreading and achieve a chewy texture.
Nutrition
- Serving Size: 1 cookie
- Calories: 200
- Sugar: 15g
- Sodium: 150mg
- Fat: 10g
- Saturated Fat: 6g
- Unsaturated Fat: 4g
- Trans Fat: 0g
- Carbohydrates: 27g
- Fiber: 1g
- Protein: 2g
- Cholesterol: 30mg
Keywords: s'mores, cookies, chocolate, dessert, baking