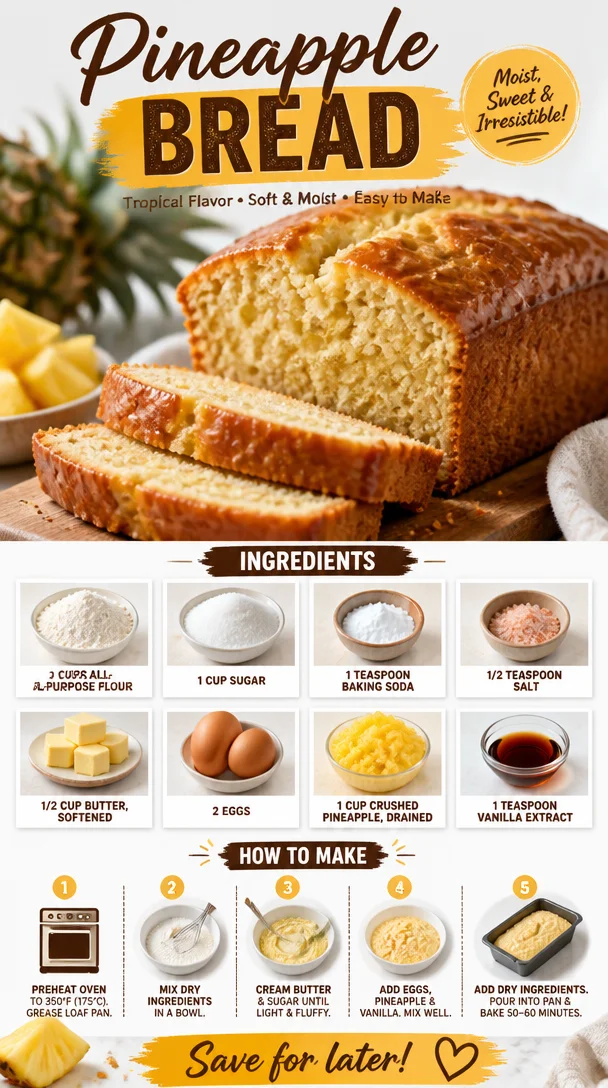
Pineapple Bread
A Slice of Sunshine: Pineapple Bread Recipe
Hello, fellow foodies! Whether you’re an experienced home chef or just starting your culinary journey, there’s something magical about baking. The aroma wafting through your kitchen, the gentle hum of your mixer—it’s as if your kitchen transforms into a cozy haven filled with warmth and creativity. Today, I’m excited to share a delightful recipe that embodies both sweetness and nostalgia—Pineapple Bread.
Picture this: it’s a bright summer afternoon, and the sun is shining through your kitchen window. The tantalizing scent of freshly baked bread made with juicy pineapple fills the air, evoking memories of family gatherings and carefree summer days. Pineapple Bread is not only incredibly easy to make but also a fantastic way to bring a tropical twist to your baking repertoire. Trust me when I say, once you get a taste of this succulent bread, you’ll be dreaming of sun-soaked beaches and endless summers no matter the season!
This recipe is perfect for breakfast, a snack, or even dessert—any time of the day is a good reason for a slice of this fruity, sweet delight. You won’t believe how simple it is, and I promise you’ll have your friends and family asking for more!
Let’s dive into this fruity adventure and make our kitchen feel like a tropical paradise!
My Pineapple Connection
Ah, Pineapple Bread! My connection to this treat goes way back to my childhood. I still remember weekends spent at my grandmother’s kitchen; the sun beaming through the curtains while she whipped up her famous Pineapple Bread. The way she’d mix the batter gently, humming softly to herself, created a rhythm that felt so comforting.
One day, I decided I wanted to help—not just to stir, but to learn the secret to that magical bread. I climbed up on a sturdy kitchen stool, and Grandma handed me the task of pouring in the crushed pineapple. The moment that juicy fruit met the batter was a revelation; I watched as the mixture transformed, realizing that cooking is more than following a recipe—it’s an experience laden with joy, love, and memories.
That Pineapple Bread recipe became synonymous with family gatherings. It was a favorite at picnics, birthday parties, and holiday celebrations. Now, I want to pass that same love and joy onto you with this easy and delightful Pineapple Bread recipe!
Ingredients
Let’s gather our ingredients. For this delightful Pineapple Bread, you’ll need:
-
2 cups all-purpose flour: This is your base for the bread. You can use whole wheat flour for a nuttier flavor or a gluten-free flour mix if you’re avoiding gluten.
-
1 cup sugar: Sweetness is key here! If you prefer, you can substitute coconut sugar for a hint of caramel flavor or reduce it to ¾ cup for a less sweet version.
-
1 teaspoon baking soda: This will give your bread a lovely rise. Make sure it’s fresh for the best results!
-
½ teaspoon salt: Just a pinch enhances all the flavors and balances the sweetness.
-
½ cup butter, softened: Butter creates a rich, tender crumb in the bread. Coconut oil or applesauce can be used for a dairy-free alternative.
-
2 eggs: They provide structure and moisture. You can substitute flax eggs (1 tbsp flaxseed meal + 2.5 tbsp water per egg) for a vegan option.
-
1 cup crushed pineapple, drained: The star of the show! Make sure to drain it well to prevent excess moisture; you can also use fresh pineapple for a fresher flavor.
-
1 teaspoon vanilla extract: For that beautiful aroma and depth of flavor. Feel free to add a splash extra if you love vanilla as much as I do!
Chef Insight
Having quality ingredients is key to delivering a mouthwatering dish. When selecting your pineapple, go for ripe, sweet fruit to ensure a luscious flavor that shines through.
Step-by-Step Instructions
Ready to bake? Grab your apron, and let’s get started!
-
Preheat the oven to 350°F (175°C). This is crucial for ensuring your bread bakes evenly and beautifully!
-
Prepare your baking pan. Grease a 9×5 inch loaf pan with butter or cooking spray. This will keep the bread from sticking and makes for easy cleanup later!
-
Mix dry ingredients. In a medium bowl, whisk together the flour, sugar, baking soda, and salt until well combined. This distributes the leavening agents and ensures your bread rises evenly!
-
Cream the butter. In a large mixing bowl, cream the softened butter until it’s light and fluffy. This usually takes about 2-3 minutes with an electric mixer. It’s a step you don’t want to skip, as it helps incorporate air into the batter for a fluffy texture.
-
Add the eggs and vanilla. Beat in the eggs one at a time, mixing well after each addition. Then, add in the vanilla extract! This is where your kitchen will start to smell wonderful.
-
Incorporate the crushed pineapple. Gently fold in the crushed pineapple. The mixture might seem a little wet, but that’s exactly what we want for a moist bread!
-
Combine wet and dry ingredients. Now, gradually add the dry ingredients into the wet mixture, stirring gently until just combined. Be careful not to overmix; a few lumps are perfectly fine!
-
Pour into the pan. Scrape the batter into your prepared loaf pan, smoothing the top with a spatula. Now’s the time to get creative—with a sprinkle of chopped nuts or coconut on top if you’d like!
-
Bake! Place the loaf in the preheated oven and bake for about 60 minutes or until a toothpick inserted in the center comes out clean. It might take a few extra minutes depending on your oven, but trust me—it’s worth the wait!
-
Cool & Enjoy! Once baked, remove the bread from the oven and let it cool in the pan for about 10 minutes before transferring it to a wire rack to cool completely. This step is tough, I know, but it’ll be worth it when you slice it warm later!
Chef Tips
- Testing for doneness: To ensure your bread is perfectly baked, give it a gentle shake. If it doesn’t jiggle, it’s ready.
- Storage: Wrap any leftover bread in plastic wrap and keep it at room temperature for about 2-3 days. You can also freeze slices for later—just make sure to wrap them tightly!
Serving Suggestions
Once your Pineapple Bread is cool, it’s time to slice into this dreamy creation! Serve a thick slice warm, perhaps spread with a bit of softened cream cheese or coconut spread for an extra delicious flair. Consider garnishing with some fresh fruit or even a sprig of mint for a refreshing touch!
Perfect for breakfast with coffee, an afternoon snack, or even a light dessert for dinner—it pairs beautifully with a scoop of vanilla ice cream or a dollop of whipped cream. Trust me; your friends will devour it in no time!
Recipe Variations
-
Nutty Delight: Add ½ cup of chopped pecans or walnuts for an added crunch and nutty flavor.
-
Coconut Twist: Mix in some shredded coconut to elevate that tropical vibe. Who doesn’t love coconut with pineapple?
-
Spice it up: Add a ½ teaspoon of cinnamon or nutmeg to the dry ingredients for a warm, comforting twist.
-
Zest it up: A tablespoon of orange or lemon zest can brighten the flavor and add a refreshing kick.
-
Fruity Fusion: Try adding ½ cup of blueberries or chopped strawberries for a delightful fruit medley!
Chef’s Notes
As I’ve made this bread through the years, I’ve found it’s one of those recipes that carries love from one kitchen to another. I’ve tweaked it in various ways, either by using whatever fruit is in season or playing around with different types of flours. Sometimes, I even reminisce about Grandma’s version and feel compelled to add a touch of nostalgia; I’ll bake this bread for family gatherings or simply to share with friends who need a bit of sunshine in their lives.
Honestly, every time I bake this bread, it feels like a warm hug from Grandma wrapped in golden slices. And that, my dear friends, is what cooking is all about—the stories we weave around the meals we make!
FAQs and Troubleshooting
1. My bread didn’t rise! What happened?
Make sure your baking soda is fresh! If your leavening agent is older, it might not work as effectively, resulting in a flat loaf.
2. Why is my Pineapple Bread too moist?
It could be due to excess moisture in the crushed pineapple. Make sure to drain it thoroughly before adding it to the batter.
3. Can I replace the eggs?
Absolutely! For each egg, use 1 tablespoon of flaxseed meal mixed with 2.5 tablespoons of water and let it sit until it forms a gel-like consistency.
4. How can I make this a low-sugar recipe?
You can reduce the sugar to ¾ cup, use a sugar substitute like monk fruit, or even omit it altogether if you have sweeter pineapple!
Nutritional Info (optional)
(Nutritional information can vary based on ingredient specifics and serving sizes, but a rough estimate for one slice of Pineapple Bread is: 200-250 calories, 8g fat, 35g carbohydrates, and 2g protein.)
And there you have it, a beautiful recipe for Pineapple Bread that’ll bring sunshine to your kitchen, no matter the season! Remember, cooking is about joy and connection, so gather those you love around your table and share this slice of happiness. With each bite, you’re wrapping your loved ones in warmth and affection—a gift that’s truly timeless. Happy baking!
PrintA Slice of Sunshine: Pineapple Bread Recipe

Delightful and easy-to-make Pineapple Bread that brings a tropical twist to your baking, perfect for breakfast, snacks or dessert.
- Prep Time: 15 minutes
- Cook Time: 60 minutes
- Total Time: 75 minutes
- Yield: 12 servings 1x
- Category: Dessert
- Method: Baking
- Cuisine: Tropical
- Diet: Vegetarian
Ingredients
- 2 cups all-purpose flour
- 1 cup sugar
- 1 teaspoon baking soda
- ½ teaspoon salt
- ½ cup butter, softened
- 2 eggs
- 1 cup crushed pineapple, drained
- 1 teaspoon vanilla extract
Instructions
- Preheat the oven to 350°F (175°C).
- Prepare your baking pan by greasing a 9×5 inch loaf pan with butter or cooking spray.
- Mix dry ingredients: In a medium bowl, whisk together the flour, sugar, baking soda, and salt until well combined.
- Cream the butter: In a large mixing bowl, cream the softened butter until light and fluffy.
- Add the eggs and vanilla, beating in the eggs one at a time, mixing well after each.
- Incorporate the crushed pineapple by folding it gently into the mixture.
- Combine the wet and dry ingredients, stirring gently until just combined.
- Pour the batter into your prepared loaf pan, smoothing the top with a spatula.
- Bake for about 60 minutes or until a toothpick inserted in the center comes out clean.
- Cool in the pan for about 10 minutes before transferring to a wire rack to cool completely.
Notes
Wrap any leftover bread in plastic wrap and keep at room temperature for 2-3 days. Freeze slices for later.
Nutrition
- Serving Size: 1 slice
- Calories: 250
- Sugar: 8g
- Sodium: 180mg
- Fat: 10g
- Saturated Fat: 5g
- Unsaturated Fat: 4g
- Trans Fat: 0g
- Carbohydrates: 35g
- Fiber: 1g
- Protein: 2g
- Cholesterol: 35mg
Keywords: Pineapple Bread, Tropical Dessert, Easy Baking
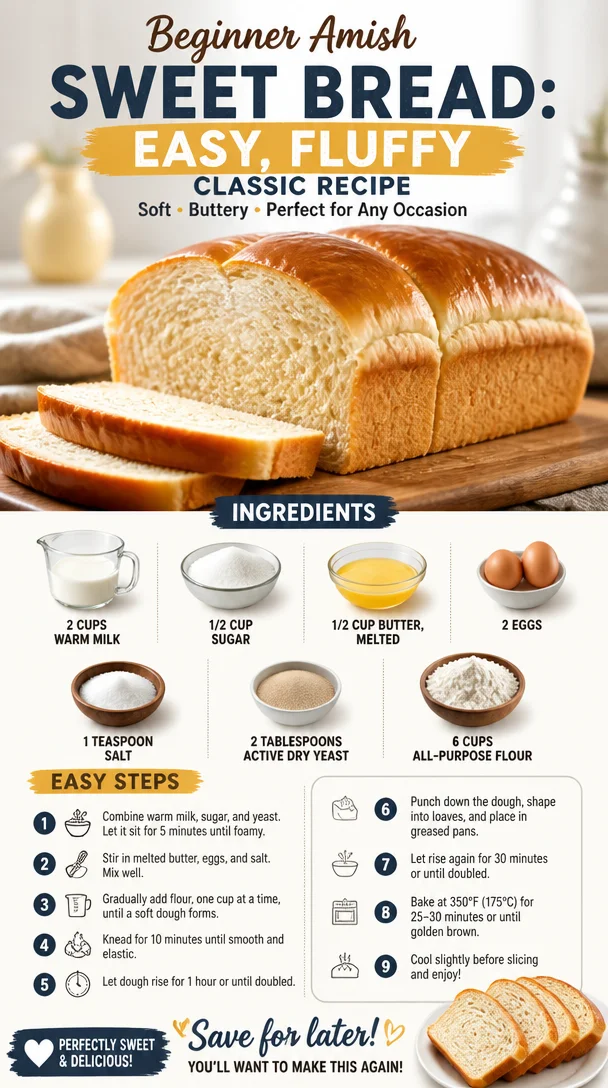
Beginner Amish Sweet Bread: Easy, Fluffy Classic Recipe
The Sweet Embrace of Amish Sweet Bread
Hello, fellow food lovers! Today, I can’t wait to share with you a recipe that’s very close to my heart: Amish Sweet Bread. The name itself conjures up warm, inviting images of rustic kitchens, the smell of freshly baked bread, and laughter shared over meals. Let’s dive into this beautiful recipe together!
A Slice of Nostalgia
Growing up, my family had a tradition where every Sunday was a day of gathering. My grandparents lived in a charming house that smelled of baked goods, and every week, my grandma would whip up a massive batch of her famous sweet bread. It wasn’t just about the bread; it was about the memories and the overwhelming sense of love that came with every loaf.
I remember lingering at the kitchen counter, eyes wide with anticipation while the dough was rising. Sometimes, I would sneak small bites of the raw dough—a no-no, I know, but oh, the thrill! Then, once the bread was out of the oven, the whole house would fill with a sweet, buttery aroma that made you want to hug the air itself. Each loaf was a little piece of heaven, perfect for sandwiches, toast, or just slathered with butter.
To me, Amish Sweet Bread symbolizes comfort, family, and tradition. So, gather your ingredients, tie that apron, and let’s make some magic!
Ingredients List
Here’s what you’ll need to create your very own Amish Sweet Bread:
-
2 cups warm milk
Warm milk activates the yeast, helping our dough rise beautifully. If you’re out of milk, you can substitute with almond milk or oat milk—just make sure it’s warmed up! -
1/2 cup sugar
This sweetener gives the bread its delightful flavor and helps activate the yeast. If you prefer, honey or maple syrup can be great substitutes. -
1/2 cup butter, melted
Buttery goodness makes everything better! If you want a lighter bread, you can substitute half the butter with applesauce. -
2 eggs
Eggs add richness and help bind the dough together. For a vegan option, use flaxseed meal mixed with water (1 tablespoon flaxseed meal + 2.5 tablespoons water = 1 egg). -
1 teaspoon salt
Salt enhances flavor and balances the sweetness in the bread. If you’re watching sodium intake, a little less will still do the trick—just remember, salt does play an important role in the fermentation process. -
2 tablespoons active dry yeast
This is our secret weapon for fluffy bread! If you only have instant yeast, you can use the same amount without needing to activate it beforehand. -
6 cups all-purpose flour
The backbone of our bread! You can use whole wheat flour for a heartier loaf, but you might need to adjust the liquid a bit since whole wheat absorbs more moisture.
Step-by-Step Instructions
-
Activate the Yeast: In a large mixing bowl, combine the warm milk and sugar. Stir until the sugar is dissolved, then sprinkle the yeast on top. Let it sit for about 5–10 minutes until it becomes bubbly and frothy. Think of this moment as the yeast waking up and getting ready to work its magic!
-
Mix the Ingredients: Once the yeast is active, stir in the melted butter and eggs, and mix well. But here’s a little chef secret: ensure the butter is not too hot; otherwise, it could cook the eggs! You want a gentle warmth, which is perfect for marrying the flavors.
-
Combine Flour and Salt: Gradually add the flour and salt to the wet mixture, stirring until a shaggy dough forms. I love using a wooden spoon for this—it gives a little bit of a workout too!
-
Knead the Dough: Turn the dough out onto a floured surface and knead for about 8–10 minutes. You’re aiming for a smooth, elastic texture. Don’t be afraid to get your hands in there; this is where the love happens! If it’s too sticky, sprinkle a little extra flour; too dry? Just a splash of warm water will help.
-
First Rise: Place the dough in a greased bowl, cover it with a damp cloth, and let it rise in a warm spot for about an hour, or until it doubles in size. I usually put mine near a warm oven or in a sunny spot.
-
Shape the Loaves: Once risen, punch down the dough (yes, it feels good!) to remove any air bubbles. Turn it out onto a floured surface and divide it into two equal pieces. Shape each piece into a loaf. Think about the love you’re putting into each loaf—imagine the smiles they’ll bring!
-
Second Rise: Place the shaped loaves into greased 9-inch loaf pans. Cover them again and let them rise for another 30–45 minutes. They should puff up nicely. During this time, preheat your oven to 350°F (175°C).
-
Bake Your Bread: After your second rise, pop those lovelies into the oven and bake for about 30–35 minutes or until golden brown. To check for doneness, gently tap the top of the loaf; it should sound hollow. Is there any better sound?
-
Cool and Serve: Once baked, let the bread cool in the pans for about 10 minutes, then turn them out onto wire racks. Let them cool completely—this is crucial to avoid a gummy interior when you slice into them.
Serving Suggestions
When it comes to serving Amish Sweet Bread, the possibilities are endless! For a cozy breakfast, toast a slice and slather it with butter and a sprinkle of cinnamon sugar. Or, elevate your brunch spread with a delightful French toast made from day-old bread. Slice it thin, drizzle with maple syrup, and garnish with fresh berries for a stunning presentation!
Recipe Variations
If you’re feeling adventurous, here are a few twists to try on this classic recipe:
-
Cinnamon Swirl: Before shaping your loaves, roll out the dough and sprinkle with a mixture of cinnamon and sugar for a delightful sweet surprise.
-
Fruit and Nut Mixture: Fold in raisins, chopped nuts, or dried fruit into the dough during kneading for added textures and flavors.
-
Herbed Bread: For a savory twist, incorporate fresh herbs like rosemary or thyme along with grated cheese into the dough.
-
Vegan Option: As mentioned, swap out eggs with flaxseed and substitute butter with coconut oil for a delicious vegan take!
Chef’s Notes
I must confess that I’ve burned a loaf or two in my baking adventures. Once, I was so caught up in a conversation over dinner that I forgot to check the oven. Let’s just say my loaf came out with a little too much "crust" and not enough "bread." Now, I always set a timer—kitchen catastrophes make great stories, but they don’t feed the tummy!
And remember, every time you make this bread, you’re not just baking; you’re creating memories—so don’t fret if it doesn’t look perfect; it will still taste divine!
FAQs and Troubleshooting
-
Why did my bread not rise?
- If your bread didn’t rise, it may be due to inactive yeast. Always check that your yeast is fresh, and don’t skip the activation step.
-
What can I do if my dough is too sticky?
- If the dough is sticky, gradually add more flour without overdoing it. Kneading the dough helps form gluten, which will create a better structure.
-
How should I store my Amish Sweet Bread?
- Let the bread cool completely, then wrap it airtight in plastic or foil. It’ll stay fresh at room temperature for a few days, but for longer storage, slice and freeze it in portions.
-
Can I make this recipe into rolls?
- Absolutely! Instead of shaping into loaves, divide the dough into smaller portions and shape them into rolls. Adjust the baking time to about 15–20 minutes.
Nutritional Info (Optional)
While bread is best enjoyed in moderation, a slice of Amish Sweet Bread offers:
- Calories: Approx. 180
- Fat: 7g
- Carbohydrates: 26g
- Protein: 4g
As always, values may vary based on additional ingredients and serving sizes.
And there you have it—a sensational homemade Amish Sweet Bread recipe to fill your home with warmth and deliciousness! I hope you enjoyed our little kitchen journey; let this recipe be a part of your family’s tradition just as it is with mine. Tie on that apron, enjoy the process, and savor every bite. Happy baking, my friends!
PrintAmish Sweet Bread
A warm and inviting recipe for Amish Sweet Bread, perfect for sandwiches, toast, or just slathered with butter.
- Prep Time: 15 minutes
- Cook Time: 35 minutes
- Total Time: 50 minutes
- Yield: 2 loaves 1x
- Category: Baking
- Method: Baking
- Cuisine: American
- Diet: Vegetarian
Ingredients
- 2 cups warm milk
- 1/2 cup sugar
- 1/2 cup butter, melted
- 2 eggs
- 1 teaspoon salt
- 2 tablespoons active dry yeast
- 6 cups all-purpose flour
Instructions
- Activate the yeast: In a large mixing bowl, combine the warm milk and sugar. Stir until the sugar is dissolved, then sprinkle the yeast on top. Let it sit for about 5–10 minutes until it becomes bubbly and frothy.
- Mix the ingredients: Once the yeast is active, stir in the melted butter and eggs, and mix well.
- Combine flour and salt: Gradually add the flour and salt to the wet mixture, stirring until a shaggy dough forms.
- Knead the dough: Turn the dough out onto a floured surface and knead for about 8–10 minutes until smooth and elastic.
- First rise: Place the dough in a greased bowl, cover it with a damp cloth, and let it rise in a warm spot for about an hour, or until it doubles in size.
- Shape the loaves: Once risen, punch down the dough and divide it into two equal pieces. Shape each piece into a loaf.
- Second rise: Place the shaped loaves into greased 9-inch loaf pans. Cover and let them rise for another 30–45 minutes.
- Bake your bread: Preheat the oven to 350°F (175°C) and bake for about 30–35 minutes or until golden brown.
- Cool and serve: Let the bread cool in the pans for about 10 minutes, then turn them out onto wire racks.
Notes
For a vegan option, use flaxseed meal for eggs and coconut oil for butter. Store in an airtight container.
Nutrition
- Serving Size: 1 slice
- Calories: 180
- Sugar: 5g
- Sodium: 350mg
- Fat: 7g
- Saturated Fat: 4g
- Unsaturated Fat: 2g
- Trans Fat: 0g
- Carbohydrates: 26g
- Fiber: 1g
- Protein: 4g
- Cholesterol: 30mg
Keywords: bread, sweet bread, Amish, baking, homemade

Easy Native American Fry Bread Recipe (15-Minute Skillet)
Discover the Joy of Indian Fry Bread: A Step-by-Step Guide
Hello, my lovely food enthusiasts! Today, we’re diving into a recipe that’s close to my heart and rich in tradition: Indian Fry Bread. This fluffy, crispy, and delicious bread has a story rooted in the culture and history of Native American cuisine. Not only is it a fantastic vehicle for toppings, but it also serves as a canvas for creativity in your kitchen. Let’s embark on this flavorful journey together!
A Personal Story: The First Time I Made Fry Bread
I remember the first time I tried making Indian Fry Bread—oh, what an adventure it was! I was invited to a gathering where the host was making this magnificent bread, and I was immediately captivated by its enticing aroma. The way it puffed up in hot oil, golden and inviting, had me mesmerized.
When I asked for the recipe, the host smiled and said, "It’s simple, but it’s about the love you put into it." As soon as I got home, I rolled up my sleeves, ready to recreate this culinary masterpiece. The kitchen filled with a fragrant warmth as I mixed the ingredients. My dog, Charlie, sat patiently at my feet, hoping for crumbs. The first batch came out surprisingly well, making me feel like a champion chef! We piled them high with honey, powdered sugar, and even savory toppings like chili and beans. From that day forward, fry bread became a staple in my kitchen.
Ingredients: What You’ll Need
Here’s what you’ll need to whip up your own Indian Fry Bread:
-
2 cups all-purpose flour
The backbone of our bread; you can substitute with whole wheat flour for a nuttier flavor. Just note that it may require extra water since whole wheat absorbs more moisture. -
1 tsp baking powder
This little magic ingredient provides that gorgeous fluffiness. If you’re out, you can use baking soda with a splash of vinegar for a similar effect, but keep an eye on your ratios! -
1/2 tsp salt
Salt enhances flavor and balances sweetness. If you’re keeping an eye on sodium, you can reduce the amount or even use a salt substitute, but flavor may suffer. -
3/4 cup water
This is essential for bringing everything together—warm water works best! You can experiment by mixing in a bit of milk for a richer flavor. -
Vegetable oil for frying
Choose a neutral oil like canola or peanut for better frying results. Avoid olive oil as it has a lower smoke point.
Step-by-Step Instructions: Let’s Get Cooking!
Ready to make some delicious fry bread? Here’s how to do it!
-
Mix the Dry Ingredients
In a large bowl, stir together the flour, baking powder, and salt. Utilizing a whisk helps to incorporate air, ensuring a fluffier texture. Trust me; this is where the magic begins! -
Add Water Gradually
Make a small well in the center of your dry ingredients and pour in the water a little at a time. Using your hands or a wooden spoon, mix until the dough comes together. You want a moist, not sticky, dough—don’t fret if it feels a bit uneven at first; it will come together! -
Knead the Dough
Turn the dough out onto a lightly floured surface. Knead it gently for about 3-4 minutes, just until it becomes smooth and elastic. Think of this as your dough getting a mini workout! If it’s sticky, sprinkle a touch more flour. Tension is your friend here. -
Let It Rest
Cover the dough with a damp cloth or plastic wrap and let it rest for about 10-15 minutes. This allows the gluten to relax, which is essential for that perfect puff! -
Prepare to Fry
In a deep skillet, heat about 2 inches of vegetable oil over medium-high heat until a thermometer registers about 350°F (180°C). You can test if it’s ready by dropping a small piece of dough into the oil—if it sizzles and bubbles, you’re good to go! -
Shape the Dough
Divide the dough into golf ball-sized portions and flatten them gently with your hands—about ¼ inch thick. Feel free to use a rolling pin if you want them more uniform. The key is to avoid making the pieces too thick; we want them to puff beautifully. -
Fry the Bread
Carefully slide the flattened dough into the hot oil. Fry for about 1-2 minutes on each side, or until they turn golden brown. Use tongs to flip—this part is exciting! The bread will puff up, creating that delightful texture we adore. Place fried bread on paper towels to drain excess oil. -
Repeat
Continue with the remaining dough, making sure the oil temperature stays consistent for even cooking. Have fun with this process; it’s all about that golden color!
Serving Suggestions: Make it Beautiful
Now that your Indian Fry Bread is all puffed and golden, it’s time to serve! You can stack the breads on a pretty platter, then drizzle with honey or maple syrup for a sweet treat. Or, go savory—top it with seasoned ground beef, beans, cheese, and a sprinkle of fresh cilantro for a delightful Navajo taco! Serve with a side of salsa or guacamole, and watch your guests indulge in pure bliss.
Recipe Variations: Get Creative!
Here are some delicious twists to make the recipe your own:
- Herb-Infused Dough: Add chopped herbs like rosemary or thyme to the dough for a fragrant twist.
- Sweet Cinnamon Variation: Mix in a spoonful of cinnamon and sugar to the dough for a sweet breakfast treat.
- Spicy Fry Bread: Incorporate a pinch of cayenne pepper or paprika to the dry mix to give the bread a nice kick!
- Gluten-Free Option: Substitute the all-purpose flour with a 1:1 gluten-free baking flour—just make sure the baking powder is gluten-free!
- Cheesy Indo-Fry Bread: Fold in shredded cheese such as cheddar or mozzarella into the dough for a cheesy delight!
Chef’s Notes: A Little Extra Love from My Kitchen
Fry bread has always had a special place in my heart, and interestingly, it evolves each time I make it. The first time was strictly traditional, but experimenting has made it even more delightful! I once hosted a taco night inspired by my fry bread. I offered various toppings, and it turned out to be such a hit that my friends keep asking for a repeat! Remember, in cooking, it’s okay to make mistakes. My first few attempts didn’t puff perfectly, and that’s part of the charm. Just laugh it off—your kitchen should be a joyful place after all!
FAQs and Troubleshooting
-
Why isn’t my fry bread puffing up?
Make sure your dough is not too thick and that the oil is hot enough. If it’s not sizzling when you drop it in, give it more time to heat! -
Can I make the dough ahead of time?
Absolutely! You can prepare the dough and store it in the fridge for up to 24 hours. Just let it come to room temp before frying. -
What’s the best way to store leftovers?
Store them in an airtight container at room temperature for up to 2 days. Reheat in the oven or microwave—but fresh is always best! -
What if my dough is too sticky?
If your dough feels too sticky, don’t despair! Just sprinkle a bit more flour and knead carefully, adjusting until it reaches the right consistency.
Nutritional Info (Optional)
While the exact nutritional values will depend on the specific ingredients and portion sizes you use, here’s a quick overview for one piece of Indian Fry Bread (without toppings):
- Calories: 200
- Fat: 10g
- Carbohydrates: 25g
- Protein: 3g
And there you have it — a delightful journey into the world of Indian Fry Bread! I hope this recipe inspires you to tie on that apron and create something delicious in your kitchen. Let’s gather our friends and family around the table, sharing stories and laughter as we savor every bite of this beautiful bread. Happy cooking, and remember: good food is all about showing up!
PrintIndian Fry Bread

Deliciously fluffy and crispy Indian Fry Bread that serves as a perfect canvas for both sweet and savory toppings.
- Prep Time: 15 minutes
- Cook Time: 15 minutes
- Total Time: 30 minutes
- Yield: 4 servings 1x
- Category: Side Dish
- Method: Frying
- Cuisine: Native American
- Diet: Vegetarian
Ingredients
- 2 cups all-purpose flour
- 1 tsp baking powder
- 1/2 tsp salt
- 3/4 cup warm water
- Vegetable oil for frying
Instructions
- Mix the dry ingredients in a large bowl.
- Add water gradually to form a dough.
- Knead the dough on a floured surface until smooth.
- Let it rest for 10-15 minutes.
- Heat vegetable oil in a deep skillet over medium-high heat.
- Shape the dough into golf ball-sized portions and flatten.
- Fry each piece until golden brown, about 1-2 minutes per side.
- Repeat with remaining dough.
Notes
Experiment with toppings and variations to personalize your fry bread. Serve with honey, savory toppings, or make taco-style dishes.
Nutrition
- Serving Size: 1 piece
- Calories: 200
- Sugar: 1g
- Sodium: 200mg
- Fat: 10g
- Saturated Fat: 1g
- Unsaturated Fat: 7g
- Trans Fat: 0g
- Carbohydrates: 25g
- Fiber: 1g
- Protein: 3g
- Cholesterol: 0mg
Keywords: fry bread, Indian fry bread, traditional recipe, Native American cuisine, easy recipes
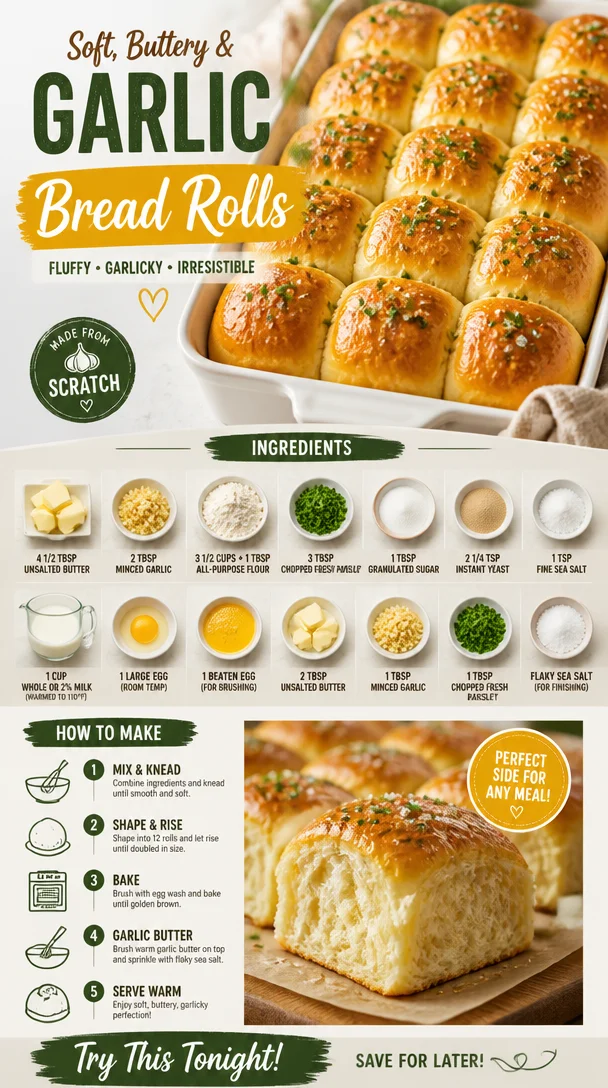
Garlic Bread Rolls
Embrace the Comfort: Homemade Garlic Bread Rolls
Hello, fellow food lovers! Today, we’re diving into the world of homemade Garlic Bread Rolls—a recipe that’ll elevate your meals and warm your heart. Imagine biting into a soft, pillowy roll, bursting with the rich flavors of garlic and parsley, paired with a golden, buttery crust. If that doesn’t make you swoon, I don’t know what will!
There’s something so enchanting about the aroma of freshly baked bread wafting through the kitchen. It’s like a warm hug for your senses, inviting everyone to gather around and share in the love. I can’t wait to share this scrumptious recipe with you! Whether it’s a cozy weeknight dinner or a festive gathering, these Garlic Bread Rolls will have your guests feeling right at home.
The Heart of the Kitchen: A Personal Story
Let me take you back to my childhood kitchen, where I first discovered the magic of bread-making. I can still picture the flour-covered countertop and my mother, donned in her trusty ivory apron, guiding me with a patient smile. One rainy afternoon, we decided to whip up her famous garlic rolls for dinner. The sound of the dough rising and the delightful aroma of roasting garlic was intoxicating.
While we baked, we laughed and shared stories—I even remember my little brother sneaking bites of the dough when he thought no one was looking (sneaky little hands!). When those rolls finally came out of the oven, they were golden brown and shimmering with butter. The whole family gathered at the table, and with each bite, we created memories that I cherish to this day.
That experience ignited my passion for cooking and hosting. And now, I’m so thrilled to share that magic with you through these Garlic Bread Rolls. Let’s roll up our sleeves and make some kitchen magic together!
Ingredients: The Building Blocks of Flavor
Here’s what you’ll need for your utterly delightful Garlic Bread Rolls:
- 4 1/2 tablespoons unsalted butter: This adds richness and moisture. You can substitute with olive oil for a lighter flavor.
- 2 tablespoons minced garlic: Fresh is best! You can use garlic powder if you’re in a pinch—1 teaspoon should do.
- 3 1/2 cups + 1 tablespoon all-purpose flour: Flour is the backbone of your rolls! Make sure to measure accurately; spoon the flour into the measuring cup and level it off. For a gluten-free option, try a 1:1 baking blend.
- 3 tablespoons chopped fresh parsley: This brightens the flavor and adds a pop of color. Dried parsley works too, but use less since it’s more concentrated.
- 1 tablespoon granulated sugar: This helps with browning and yeast activation. Honey or maple syrup can be a natural substitute.
- 2 1/4 teaspoons instant yeast: Instant yeast is a game-changer because you can mix it directly with the dry ingredients. If you only have active dry yeast, let it bloom in warm milk for about 5-10 minutes first.
- 1 teaspoon fine sea salt: Essential for flavor balance. Don’t skip this!
- 1 cup whole or 2% milk (warmed to 110°F): This hydrates the dough. If you need a dairy-free alternative, unsweetened almond or oat milk will work well.
- 1 large egg (room temperature): This enriches the dough, giving it a lovely texture.
- 1 beaten egg, for brushing the tops: This creates that beautiful golden finish on your rolls.
- 2 tablespoons unsalted butter: More butter to brush on the rolls post-bake for that extra deliciousness!
- 1 tablespoon minced garlic: Yes, more garlic! This adds a buttery, garlicky glaze on top.
- 1 tablespoon chopped fresh parsley: Because we fancy! This adds freshness to the finishing touch.
- Flaky sea salt (for finishing): A sprinkle of flaky salt elevates the flavor and makes those rolls extra special.
Step-by-Step Instructions: Roll with Me
-
Prepare Your Dough:
In a large mixing bowl, combine 3 1/2 cups of all-purpose flour, granulated sugar, instant yeast, and sea salt. Give it a good mix with a whisk to make sure everything is evenly incorporated. -
Add the Wet Ingredients:
Now, let’s bring our dough to life! Add the warmed milk, room temperature egg, and 4 1/2 tablespoons of softened unsalted butter to the flour mixture. Using a spatula or your hands, mix until a shaggy dough forms. -
Kneading:
Lightly flour your countertop and dump the dough onto it. Knead for about 6-8 minutes, or until the dough is smooth and elastic. If it’s sticky, sprinkle a little more flour as needed. Don’t worry; kneading is a great way to channel any stress. -
First Rise:
Place the kneaded dough in a greased bowl and cover it with a clean kitchen towel. Let it rise in a warm place for about 1 hour, or until it has doubled in size. Pro tip: try turning your oven on for 1 minute, then turning it off before placing the dough inside—proven cozy spot for rising! -
Shape Your Rolls:
Once the dough has risen, punch it down to release the air, and sprinkle in the minced garlic and chopped parsley. Mix gently until incorporated. Then, divide the dough into 12 equal pieces and shape each piece into a roll. -
Second Rise:
Place the shaped rolls close together in a greased 9×13-inch baking dish. Cover them again with the kitchen towel and let them rise for another 30-45 minutes. You want them to be puffy and almost touching. -
Preheat Your Oven:
While the rolls are rising, preheat your oven to 375°F (190°C). A hot oven is critical for that golden crust! -
Egg Wash:
Once they’ve risen beautifully, brush the tops with the beaten egg to enhance browning. -
Bake:
Pop those rolls in the oven and let them bake for about 20-25 minutes or until they’re golden brown and sound hollow when tapped on the bottom. -
Garlic Butter Glaze:
In a small saucepan, melt 2 tablespoons of butter over low heat and stir in the additional minced garlic and parsley. Once the rolls are out of the oven, brush this glorious mixture over the top and sprinkle with flaky sea salt.
Serving Suggestions: Plating with Love
These Garlic Bread Rolls are best served warm and fresh out of the oven. To plate, arrange them in a lovely basket lined with a clean kitchen towel for rustic charm. Serve them alongside your favorite pasta, soups, or simply enjoy them on their own with a drizzle of olive oil or balsamic vinegar. Trust me, they’ll be the star of the show!
Recipe Variations: Get Creative!
- Cheesy Garlic Rolls: Add shredded mozzarella or parmesan to the dough or on top before baking for a melty surprise!
- Herb-Infused Rolls: Mix in chopped fresh rosemary or thyme instead of parsley for an aromatic twist.
- Whole Wheat Option: Swap half of the all-purpose flour with whole wheat flour to introduce a nuttier flavor and more fiber.
- Garlic-Herb Butter: Mix in dried Italian herbs for an extra burst of flavor in your garlic butter glaze.
- Sweet Garlic Rolls: Add a hint of cinnamon and sugar to your dough for a sweet take on these rolls, perfect for breakfast!
Chef’s Notes: A Slice of Kitchen Life
Oh, where do I begin? These rolls have a special place in my heart because they remind me of family and the simple joy of cooking together. Over the years, I’ve played around with different garlic and herb combinations, and sometimes I add a splash of white wine to the dough for depth.
Funny story—one Christmas, I decided to showcase these at our dinner. I was so excited that I accidentally doubled the garlic in the glaze! Let’s just say it turned into a garlic fest that still gets talked about during family gatherings. Lesson learned—sometimes, less is more, but it sure made for a memorable holiday!
FAQs and Troubleshooting
-
Why are my rolls dense?
If your rolls turned out dense, it could be due to insufficient kneading or not allowing enough rise time. Be sure to knead until smooth and give them adequate time to rise; patience is key! -
Can I prepare the dough in advance?
Absolutely! You can prepare the dough up to the first rise, punch it down, store it in the fridge overnight, and shape the rolls the next day. Just allow them to come to room temperature before the second rise. -
What if my rolls don’t brown properly?
If your rolls aren’t browning as they should, ensure your oven is properly preheated. An egg wash not only adds golden color but also a crispy crust, so don’t skip it! -
Can I freeze these rolls?
Yes! After baking and cooling, freeze them in an airtight bag. When you’re ready to eat, pop the frozen rolls in a preheated oven at 350°F (175°C) for about 10-15 minutes.
Nutritional Info
For those who are health-conscious, a single roll packs roughly 180 calories, with a balance of carbohydrates, fats, and proteins, thanks to the butter and egg. Remember, it’s all about balance—indulging in these rolls once in a while will bring happiness into your kitchen!
There you have it—your go-to recipe for Garlic Bread Rolls that are destined to impress! Cooking should be a joyous adventure, and I hope this recipe inspires you to gather your loved ones around the table. So, tie on that apron, sprinkle in some love, and enjoy each delicious bite. Happy baking!
PrintHomemade Garlic Bread Rolls

Delight in these soft, pillowy garlic bread rolls, bursting with flavor and perfect for any meal.
- Prep Time: 15 minutes
- Cook Time: 25 minutes
- Total Time: 90 minutes
- Yield: 12 servings 1x
- Category: Side Dish
- Method: Baking
- Cuisine: Italian
- Diet: Vegetarian
Ingredients
- 4 1/2 tablespoons unsalted butter
- 2 tablespoons minced garlic
- 3 1/2 cups + 1 tablespoon all-purpose flour
- 3 tablespoons chopped fresh parsley
- 1 tablespoon granulated sugar
- 2 1/4 teaspoons instant yeast
- 1 teaspoon fine sea salt
- 1 cup whole or 2% milk, warmed to 110°F
- 1 large egg, room temperature
- 1 beaten egg, for brushing the tops
- 2 tablespoons unsalted butter, melted, for brushing
- 1 tablespoon minced garlic, for glaze
- 1 tablespoon chopped fresh parsley, for glaze
- Flaky sea salt, for finishing
Instructions
- Prepare your dough: In a large mixing bowl, combine flour, sugar, instant yeast, and salt. Mix well.
- Add the warmed milk, egg, and unsalted butter to the flour mixture. Mix until shaggy dough forms.
- Knead the dough on a floured countertop for about 6-8 minutes until smooth and elastic.
- Place the kneaded dough in a greased bowl and cover it. Let it rise in a warm place for about 60 minutes.
- Shape your rolls: Punch down the risen dough, add minced garlic and parsley, mix gently, and divide into 12 pieces, shaping each into a roll.
- Place the rolls in a greased baking dish, cover, and let them rise for another 30-45 minutes.
- Preheat your oven to 375°F (190°C).
- Brush the tops of the rolls with beaten egg.
- Bake for 20-25 minutes until golden brown.
- Melt butter in a saucepan, stir in garlic and parsley, then brush over rolls and sprinkle with flaky sea salt.
Notes
These rolls are best served warm and can be frozen after baking for later enjoyment. For a twist, try adding cheese or different herbs.
Nutrition
- Serving Size: 1 roll
- Calories: 180
- Sugar: 1g
- Sodium: 300mg
- Fat: 7g
- Saturated Fat: 4g
- Unsaturated Fat: 3g
- Trans Fat: 0g
- Carbohydrates: 23g
- Fiber: 1g
- Protein: 4g
- Cholesterol: 15mg
Keywords: garlic bread, rolls, homemade bread, vegetarian, side dish
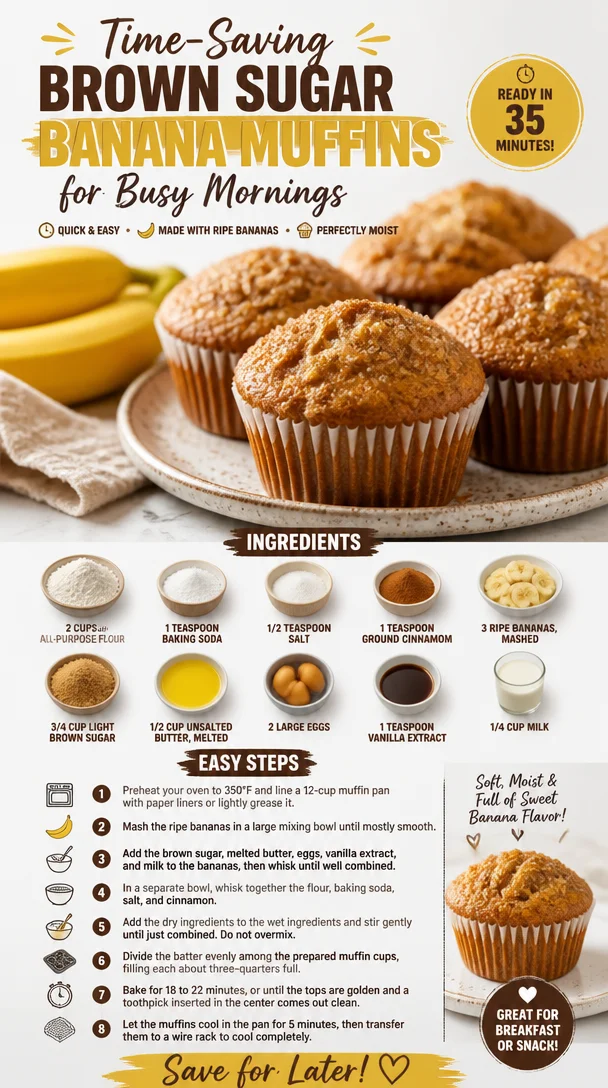
Time-Saving Brown Sugar Banana Muffins for Busy Mornings
Irresistible Brown Sugar Banana Muffins: A Cozy Delight for Any Occasion
Introduction
Hey there, fellow food lovers! Today, we’re diving into the delightful world of Brown Sugar Banana Muffins—a cozy treat that whispers comfort and nostalgia. You know those moments when you’re craving something sweet, warm, and inviting? Brown Sugar Banana Muffins are the ultimate solution! They’re perfect for breakfast, a lovely afternoon snack, or even a late-night indulgence while curling up with your favorite book.
Let’s be real: there’s something magical about the aroma of bananas and brown sugar baking in the oven. It’s like a warm hug that says, “Everything is going to be okay.” And the best part? They’re incredibly easy to whip up, even if you’re a kitchen novice! So, grab your apron, tie it on, and let’s create some scrumptiously soft muffins that will have everyone begging for the recipe—because trust me, it’s a keeper!
You don’t need a culinary degree, fancy equipment, or a Pinterest-perfect kitchen to bring these muffins to life. All you need are a few simple ingredients and a dash of love. And guess what? I’m here to guide you every step of the way! So, let’s get started on this delicious journey together.
Personal Story
Let me take you back to a sunny Saturday morning, where the gentle rays of the sun filtered through the kitchen window. My mom and I were in the kitchen, surrounded by the tantalizing aroma of baked goods. As we peeled and mashed bananas, laughter filled the air. We were making her famous banana muffins, a recipe passed down through generations.
I remember how I would sneak spoonfuls of the batter when no one was looking (don’t tell anyone!). The mix of creamy bananas and sugary goodness was irresistible. I was hooked! Fast forward to now, and whenever I bake these muffins, I’m transported back to those carefree days, awash with the scent of nostalgia. Each muffin I make carries a piece of that memory, and I’m excited to share this magic with you. Let’s recreate that sweet moment together!
Ingredients
Here’s what you’ll need for these sweet delights:
-
2 cups all-purpose flour
This is the backbone of your muffins. You can swap it out for whole wheat flour for a heartier muffin, but keep in mind the texture may vary slightly. -
1 teaspoon baking soda
This helps your muffins rise perfectly. If you don’t have baking soda on hand, a triple combination of baking powder (3 teaspoons) can serve as a substitute. -
1/2 teaspoon salt
Balances out the sweetness. If you’re cutting down on salt, you can leave it out, but it does enhance the flavors. -
1 teaspoon ground cinnamon
For that aromatic, warm flavor! If you’re a cinnamon lover—or have a big love for fall spices—feel free to add a pinch of nutmeg or ginger for a little kick. -
3 ripe bananas, mashed
Opt for bananas that have brown spots. These are the sweetest! If you don’t have bananas, apple sauce can work in a pinch (about 3/4 cup). -
3/4 cup light brown sugar
This adds a rich, caramel notes to the muffins. You can substitute with coconut sugar if you’re looking for a healthier option. -
1/2 cup unsalted butter, melted
Butter makes everything better! If you’re dairy-free, try using coconut oil or a vegan butter alternative. -
2 large eggs
Eggs hold everything together, providing moisture and depth. For a vegan swap, try flax eggs (1 tablespoon ground flaxseed mixed with 3 tablespoons water for each egg). -
1 teaspoon vanilla extract
This elevates the overall flavor! You can use almond extract for a twist if you’re feeling adventurous. -
1/4 cup milk
This adds moisture and richness to our batter. You can substitute almond or oat milk for a non-dairy version.
Step-by-Step Instructions
Let’s get baking! Follow these easy steps to create your Brown Sugar Banana Muffins:
-
Preheat Your Oven: Start by preheating your oven to 350°F (175°C). This ensures the muffins begin baking at the perfect temperature.
-
Prep Your Muffin Tin: Grease your muffin tin or line it with muffin liners for easy clean-up. A little non-stick spray does wonders!
-
Mix Dry Ingredients: In a large bowl, whisk together the flour, baking soda, salt, and cinnamon until well combined. This step helps avoid clumps and ensures the baking soda is evenly distributed.
-
Mash the Bananas: In a separate bowl, mash your bananas until smooth. If you have some chunky bits, that’s fine—they’ll add delightful texture to your muffins!
-
Blend Wet Ingredients: Add the melted butter, brown sugar, eggs, vanilla extract, and milk to the mashed bananas. Mix until everything is smoothly combined. You can use an electric mixer or whisk by hand—choose whichever you prefer!
-
Combine Wet and Dry Mixtures: Gently fold the dry ingredients into the wet mixture using a spatula. Here’s a chef hack: Do not overmix! A few lumps are perfectly fine. Overmixing can lead to tough muffins, and we want a light and tender texture.
-
Fill the Muffin Tins: Using a scoop or a spoon, fill each muffin cup about 2/3 full—this gives them room to rise without overflowing.
-
Bake Away: Pop the muffin tin into your preheated oven and bake for 20-25 minutes. Keep an eye on them! You’ll know they’re done when a toothpick inserted into the center comes out clean or with just a few crumbs.
-
Cool Down: Once baked, remove the muffins from the oven and let them cool in the pan for about 5 minutes. Then, transfer them to a wire rack to cool completely, if you have the patience. (I rarely do!)
Serving Suggestions
Time to serve up those delicious creations! For a touch of elegance, place the muffins on a pretty plate and dust them with a light sprinkle of powdered sugar or cinnamon. Pair them with a dollop of whipped cream or a pat of butter for extra richness. And let’s not forget—these muffins are fantastic with a hot cup of coffee or tea!
Recipe Variations
Want to switch things up? Here are some fun variations to try:
- Chocolate Chip Banana Muffins: Stir in 1 cup of chocolate chips for a decadent twist.
- Nutty Banana Muffins: Add 1/2 cup of chopped walnuts or pecans for added crunch and flavor.
- Berry Banana Muffins: Toss in 1/2 cup of blueberries or raspberries for a fruity burst.
- Cocoa Banana Muffins: Mix in 1/4 cup of cocoa powder for a chocolatey delight.
- Overnight Banana Muffins: Let the batter sit in the fridge overnight for an even richer flavor!
Chef’s Notes
Now, here’s a little secret from my kitchen: these muffins are incredibly versatile! Over time, I’ve experimented with different add-ins and flavors. One of my all-time favorites is adding a drizzle of peanut butter on top. It elevates the muffin to a whole new level! And don’t be afraid to embrace your creative side. If you have an idea in mind, go with it! Each batch has its own personality, and that’s what makes baking so much fun.
FAQs and Troubleshooting
1. My muffins turned out dense! What happened?
Dense muffins are often the result of overmixing the batter. Mix just until the dry ingredients are incorporated, and no more.
2. Can I freeze these muffins?
Absolutely! These muffins freeze wonderfully. Just place them in an airtight container or zip-top bag and they’ll stay fresh for up to 3 months.
3. How long do they last?
Stored in an airtight container at room temperature, these muffins can last about 3-4 days—but they never last that long in my house!
4. What if I don’t have ripe bananas?
No worries! You can speed up the ripening process by placing your bananas in a paper bag for a day or two. Alternatively, you can bake the bananas in their peel at 300°F for 15-20 minutes until they’re soft.
Nutritional Info
Each muffin is approximately 180 calories, but this can vary depending on ingredients used. Just remember, balance is key! Enjoy them in moderation as part of a delicious day.
And there you have it—your guide to making Irresistible Brown Sugar Banana Muffins! With every bite, you’re not just treating your taste buds; you’re creating memories and sharing love through food. So, the next time you’re in the kitchen, remember: good food isn’t about showing off; it’s about showing up. Happy baking!
PrintIrresistible Brown Sugar Banana Muffins
Delightful Brown Sugar Banana Muffins, perfect for breakfast or any time, with an irresistible aroma of bananas and brown sugar.
- Prep Time: 10 minutes
- Cook Time: 25 minutes
- Total Time: 35 minutes
- Yield: 12 servings 1x
- Category: Dessert
- Method: Baking
- Cuisine: American
- Diet: Vegetarian
Ingredients
- 2 cups all-purpose flour
- 1 teaspoon baking soda
- 1/2 teaspoon salt
- 1 teaspoon ground cinnamon
- 3 ripe bananas, mashed
- 3/4 cup light brown sugar
- 1/2 cup unsalted butter, melted
- 2 large eggs
- 1 teaspoon vanilla extract
- 1/4 cup milk
Instructions
- Preheat your oven to 350°F (175°C).
- Prep your muffin tin by greasing it or lining it with muffin liners.
- Mix the flour, baking soda, salt, and cinnamon together in a large bowl.
- Mash the bananas in a separate bowl until smooth.
- Blend the melted butter, brown sugar, eggs, vanilla extract, and milk into the mashed bananas.
- Combine the wet and dry mixtures using a spatula, folding gently.
- Fill each muffin cup about 2/3 full.
- Bake in the preheated oven for 20-25 minutes.
- Cool in the pan for 5 minutes before transferring to a wire rack.
Notes
These muffins are versatile; try adding chocolate chips, nuts, or different fruits for variations!
Nutrition
- Serving Size: 1 muffin
- Calories: 180
- Sugar: 9g
- Sodium: 150mg
- Fat: 7g
- Saturated Fat: 4g
- Unsaturated Fat: 3g
- Trans Fat: 0g
- Carbohydrates: 25g
- Fiber: 1g
- Protein: 2g
- Cholesterol: 40mg
Keywords: banana muffins, brown sugar muffins, easy muffin recipe
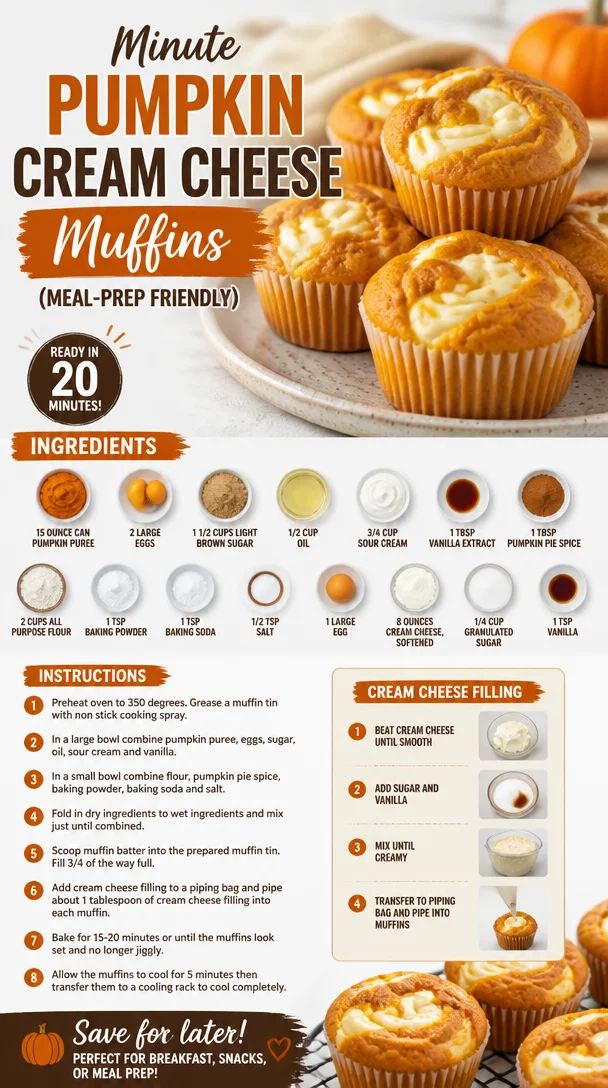
Minute Pumpkin Cream Cheese Muffins (Meal-Prep Friendly)
Pumpkin Cream Cheese Muffins: The Cozy, Fall-Inspired Treat You Need
Hello, my dear culinary adventurers! Today, we’re diving deep into the soft, aromatic world of Pumpkin Cream Cheese Muffins. Imagine waking up to a warm, spiced kitchen, the scent of baked pumpkin wafting through the air, and you, savoring a remarkable muffin that’s everything you love about fall wrapped into each delicious bite. Whether you’re enjoying it with your morning coffee or as an afternoon snack, these muffins promise to be the cozy hug you’ve been craving.
To me, the act of baking muffins feels like wrapping yourself in your favorite blanket on a crisp autumn day. There’s something profoundly comforting about measuring out ingredients, mixing them together, and coaxing them into golden perfection in the oven. And let’s face it: who doesn’t love a delectable pumpkin treat topped with a lusciously creamy filling?
A Little Slice of My Pumpkin Love Story
Let me take you back to a beautiful fall afternoon that forever changed my relationship with pumpkin baked goods. It was a few years ago, and I’d decided to host a casual get-together for my friends. Armed with my trusty recipe book and a mind buzzing with inspirations, I needed something that would delight their taste buds and warm their hearts.
As I flipped through the pages, I spotted a recipe for pumpkin muffins. Instantly, nostalgia washed over me. I recalled my grandmother’s kitchen filled with laughter, candlelight, and the heavenly scents of spiced desserts. Baking with her was pure magic; I had memories of her teaching me to mix ingredients as she told stories about her own kitchen adventures.
Determined to bring a bit of that warmth into my gathering, I put on my apron and got to work. The highlight was undoubtedly the cream cheese filling—an unexpected twist that left my friends begging for the recipe. That day defined my culinary journey, leading me to create my signature Pumpkin Cream Cheese Muffins.
Now, let’s roll up those sleeves and make some magic happen in your kitchen!
Ingredients
-
15-ounce can pumpkin puree: This is the star of our muffins. Look for 100% pumpkin puree, not pumpkin pie filling. You can use homemade puree if you’re feeling ambitious!
-
2 large eggs: They help bind the ingredients, adding moisture and richness. If you’re out of eggs, you can substitute each egg with 1/4 cup unsweetened applesauce.
-
1 ½ cups light brown sugar: This gives our muffins a warm, caramel-like sweetness. If brown sugar isn’t handy, you can use granulated sugar, but consider adding a tablespoon of molasses for that depth of flavor!
-
½ cup oil: I recommend vegetable or canola oil for that nice moisture. You can switch it with melted coconut oil or even unsweetened applesauce for a healthier alternative.
-
¾ cup sour cream: This adds moistness and a slight tang. Greek yogurt works just as well as a substitute!
-
1 tbsp vanilla extract: To brighten flavors, add complexity. Use pure vanilla for the best results; imitation can be a bit one-note.
-
1 tbsp pumpkin pie spice: This blend of fall spices elevates our recipe. If you don’t have this on hand, mix your own with equal parts cinnamon, nutmeg, and ginger.
-
2 cups all-purpose flour: A must for structure, making our muffins fluffy. For a whole grain option, try swapping half with whole wheat flour.
-
1 tsp baking powder: This is key for creating lightness. Always check the date; expired baking powder won’t give you the rise you need.
-
1 tsp baking soda: Helps with the rise and gives our muffins that lovely texture.
-
½ tsp salt: Balance is essential; it helps enhance all the flavors.
-
1 large egg (for cream cheese filling): We’ll use this to bind our delicious filling together.
-
8 ounces cream cheese, softened: The rich, velvety filling that takes these muffins to the next level.
-
¼ cup granulated sugar (for filling): To sweeten the cream cheese and pair perfectly with the pumpkin.
-
1 tsp vanilla (for filling): Just like in the muffin batter, this enhances the flavors beautifully.
Step-by-Step Instructions
Step 1: Preheat your oven to 350°F (175°C). This is the perfect temp for ensuring those muffins bake evenly and come out perfectly golden.
Step 2: In a large mixing bowl, whisk together the pumpkin puree, eggs, brown sugar, oil, sour cream, and vanilla. Make sure everything is well combined—this is crucial for a uniform batter. Feel free to use a hand mixer for about 1–2 minutes if you want to make it easy.
Step 3: In a separate bowl, combine the flour, baking powder, baking soda, pumpkin pie spice, and salt. This step is essential for evenly distributing the leavening agents. Gradually fold this dry mixture into the wet ingredients. Use a spatula or wooden spoon, and be gentle! Overmixing can lead to dense muffins.
Step 4: Prepare the cream cheese filling! In another bowl, mix the softened cream cheese, egg, granulated sugar, and vanilla until it’s smooth and well combined. You want it to be fluffy and creamy.
Step 5: Line your muffin tin with paper liners and fill each liner halfway with pumpkin batter. Next, add a dollop (about a tablespoon) of the cream cheese filling on top of this layer. Finally, top it with another spoonful of the pumpkin batter. Do a gentle swirl with a toothpick or knife to create beautiful marbled muffins.
Step 6: Bake in the preheated oven for 20-25 minutes or until a toothpick inserted into the center comes out clean. Be sure to keep an eye on them after the 20-minute mark; we want them fluffy and moist, not overdone.
Step 7: Once done, remove them from the oven and let them cool in the pan for about 5–10 minutes before transferring them to a wire rack. The cooling step is important; it allows the muffins to continue baking slightly while they cool down!
Serving Suggestions
These muffins are best enjoyed warm, lightly dusted with powdered sugar or drizzled with maple glaze for that extra flair. Pair them with a hot cup of coffee, a spiced chai, or even a cozy tea for the ultimate fall experience. If you want to get creative, try adding a sprinkle of chopped nuts or chocolate chips on top before baking for added texture.
Recipe Variations
- Nutty Pumpkin Muffins: Add about 1/2 cup of chopped walnuts or pecans to the batter for a delightful crunch.
- Chocolate Chip Pumpkin Cream Cheese Muffins: Fold in a handful of semisweet or dark chocolate chips for a decadent twist.
- Gluten-Free Option: Replace the all-purpose flour with a good gluten-free baking mix to indulge without worry.
- Sugar-Free Version: Use a sugar substitute like monk fruit sweetener in place of granulated and brown sugar.
Chef’s Notes
This recipe has evolved over time—it started as a basic pumpkin muffin but blossomed into this rich, creamy masterpiece that has graced many of my gatherings. I’ll admit, the first time I made these with a friend, the excitement got to us, and we ‘taste-tested’ quite a few before they even made it to the party itself. We couldn’t resist the fluffy, warm muffins, fresh from the oven!
FAQs and Troubleshooting
1. My muffins didn’t rise! What happened?
- Ensure your baking powder and baking soda are fresh, as old leavening agents won’t provide the rise needed. Also, avoid overmixing your batter.
2. Can I make the muffins in advance?
- Absolutely! These muffins store well in an airtight container for about 3-4 days at room temperature. You can also freeze them for up to 3 months. Just make sure to wrap them tightly!
3. My cream cheese filling oozed out during baking. What went wrong?
- Oozing usually happens when the filling is too liquidy. Make sure to mix the cream cheese filling until it’s well blended and fluffy without over-mixing.
4. Can I substitute the pumpkin?
- In a pinch, sweet potato puree works beautifully as an alternative. Just be cautious with the moisture levels; sweet potatoes can be creamier than pumpkin.
Nutritional Info
Note: Nutritional values can vary based on the exact ingredients used, but here’s a rough estimate per muffin:
- Calories: 210
- Carbohydrates: 30g
- Protein: 3g
- Fat: 9g
- Fiber: 1g
- Sugar: 12g
So there you have it! Whip up a batch of these Pumpkin Cream Cheese Muffins, pour yourself that comforting drink, and enjoy every moment spent in your kitchen. Good food isn’t just about the ingredients—it’s about the moments we create around it. Let’s set that table and bring people together, one muffin at a time! Happy baking!
PrintPumpkin Cream Cheese Muffins

Cozy, fall-inspired muffins filled with creamy pumpkin and spice, perfect for any occasion.
- Prep Time: 15 minutes
- Cook Time: 25 minutes
- Total Time: 40 minutes
- Yield: 12 servings 1x
- Category: Dessert
- Method: Baking
- Cuisine: American
- Diet: Vegetarian
Ingredients
- 1 (15-ounce) can pumpkin puree
- 2 large eggs
- 1 ½ cups light brown sugar
- ½ cup vegetable oil
- ¾ cup sour cream
- 1 tbsp vanilla extract
- 1 tbsp pumpkin pie spice
- 2 cups all-purpose flour
- 1 tsp baking powder
- 1 tsp baking soda
- ½ tsp salt
- 1 large egg (for cream cheese filling)
- 8 ounces cream cheese, softened
- ¼ cup granulated sugar (for filling)
- 1 tsp vanilla (for filling)
Instructions
- Preheat your oven to 350°F (175°C).
- In a large mixing bowl, whisk together the pumpkin puree, eggs, brown sugar, oil, sour cream, and vanilla.
- In a separate bowl, combine the flour, baking powder, baking soda, pumpkin pie spice, and salt.
- Prepare the cream cheese filling by mixing softened cream cheese, egg, granulated sugar, and vanilla until smooth.
- Line your muffin tin with paper liners and fill each liner halfway with pumpkin batter, then add a dollop of cream cheese filling.
- Top with another spoonful of pumpkin batter and swirl with a toothpick.
- Bake for 20-25 minutes or until a toothpick inserted comes out clean.
- Remove from oven and cool in the pan for 5-10 minutes before transferring to a wire rack.
Notes
These muffins are best enjoyed warm, optionally dusted with powdered sugar or drizzled with maple glaze.
Nutrition
- Serving Size: 1 muffin
- Calories: 210
- Sugar: 12g
- Sodium: 300mg
- Fat: 9g
- Saturated Fat: 3g
- Unsaturated Fat: 4g
- Trans Fat: 0g
- Carbohydrates: 30g
- Fiber: 1g
- Protein: 3g
- Cholesterol: 50mg
Keywords: pumpkin muffins, cream cheese muffins, fall baking, pumpkin recipes, cozy desserts

Orange Muffins
The Bright and Zesty Delight: Orange Muffins
Welcome, fellow food lovers! Today, I’m thrilled to share a recipe that brings a sunny burst to any breakfast table: Orange Muffins. The sight of these golden treats lining a plate is enough to make anyone smile, and their sweet citrus aroma has a way of brightening even the gloomiest mornings. Whether you’re whipping them up for a cozy Sunday brunch, an afternoon tea, or just because you love a slice of zest in your baked goods, these muffins are sure to please. Let’s dive into this delightful journey!
A Slice of Nostalgia
I can still vividly recall the first time my grandmother introduced me to the world of citrus baking. We were in her warm, inviting kitchen, the smell of fresh oranges permeating the air as she demonstrated her recipe for orange muffins. The way she expertly zested the orange, letting the colorful shavings fall into the bowl, was nothing short of magic. I watched in awe as she mixed the ingredients, each stir as gentle as the sunlight streaming through the window.
Those muffins became a staple in our family, appearing at gatherings and celebrations. My grandmother always knew how to warm hearts through her cooking, and those orange muffins were a delicious vehicle for her love. Each bite took me back to that sunlit kitchen, a moment frozen in time where the rhythm of baking and laughter melted together. Today, I’ve adapted that cherished recipe just for you, adding my own twists while keeping the essence alive. So, grab your apron—let’s embark on this flavorful adventure!
Ingredients
Here’s what you’ll need for these delightful Orange Muffins:
-
2 cups all-purpose flour: The foundation of your muffins. You can swap it with whole-wheat flour for a heartier muffin or a gluten-free blend if you prefer.
-
1 cup granulated sugar: This is what helps the muffins rise and creates that perfectly sweet flavor! Coconut sugar is a great alternative for a deeper flavor profile.
-
1 tablespoon baking powder: The key to those fluffy muffins that lift beautifully in the oven. Make sure it’s fresh; old baking powder can lead to dense muffins.
-
1/2 teaspoon baking soda: Adds extra lift and balances the acidity of the orange juice, ensuring your muffins are light and airy.
-
1/2 teaspoon salt: A little pinch to enhance all the flavors—don’t skip it!
-
1/2 cup unsalted butter, melted: This brings richness and moisture to the muffins. You can use coconut oil or a dairy-free butter for a vegan version.
-
1 cup fresh orange juice: Fresh is best! It brightens the flavor and aroma. Bottled juice works in a pinch, but the taste won’t be as vibrant.
-
Zest of 1 orange: The zest adds an extra layer of citrus flavor and aroma that you simply can’t replicate with juice alone. Feel free to toss in zest from lemons or limes for a fun twist!
-
2 large eggs: These bind the ingredients together and add moisture. For an egg-free version, use flaxseed meal mixed with water (1 tablespoon ground flaxseed + 3 tablespoons water = 1 egg).
-
1 teaspoon vanilla extract: A classic flavor enhancement that rounds out the sweetness and complements the citrus oh-so-well. You could also use almond extract for a unique twist!
Step-by-Step Instructions
Now that we have our ingredients lined up, let’s get to the fun part—baking! Here’s how to whip up these Orange Muffins step by step:
-
Preheat your oven: Let’s get that oven warmed up to 350°F (175°C). This ensures even baking and beautifully golden muffins. While it’s warming, you can prep the muffin tin.
-
Prepare the muffin tin: Grease your muffin tin with some non-stick spray or line it with paper liners—it makes for easier cleanup later and adds a lovely touch to presentation.
-
Mix dry ingredients: In a large mixing bowl, whisk together the flour, sugar, baking powder, baking soda, and salt. This mixing ensures even distribution of the leavening agents, which is key for consistent muffin texture.
-
Combine wet ingredients: In another bowl, mix the melted butter, fresh orange juice, orange zest, eggs, and vanilla extract. I love taking a moment here to breathe in that vibrant scent before whisking it all together until smooth.
-
Combine wet and dry: Now, add the wet ingredients to the dry ingredients. Gently fold them together with a spatula or wooden spoon. Don’t overmix—this is a common mistake that results in dense muffins. Just bring it together until you see no dry flour.
-
Fill the muffin cups: Using a cookie scoop or a ladle, evenly distribute the batter into the prepared muffin tin, filling each cup about 2/3 full. This allows room for the muffins to rise perfectly without spilling over.
-
Bake: Pop the muffin tin into the preheated oven and bake for about 18-20 minutes. You’ll know they’re done when a toothpick inserted in the center comes out clean—and trust me, the smell will be irresistible!
-
Cool and enjoy: Let the muffins cool in the tin for 5 minutes before transferring them to a wire rack. This step allows the muffins to firm up a bit. Enjoy these warm with a pat of butter or let them cool completely for later.
Serving Suggestions
Serving these Orange Muffins is all about presentation! For a whimsical touch, dust them lightly with confectioners’ sugar or drizzle with a simple orange glaze made from powdered sugar and a splash of orange juice. Arrange them on a bright platter or wooden board, garnished with fresh orange slices or sprigs of mint. Feel free to pair them with a light yogurt and some berries for a delightful brunch spread!
Recipe Variations
Why stop at classic when you can get creative? Here are a few variations you can try with your Orange Muffins:
-
Chocolate Chip Orange Muffins: Fold in a handful of semi-sweet chocolate chips into the batter for a delightful contrast between citrus and chocolate.
-
Cranberry Orange Muffins: Add fresh or dried cranberries for a tart kick that complements the sweetness of the muffins beautifully.
-
Orange Poppy Seed Muffins: Toss in a tablespoon of poppy seeds for added texture and a hint of nutty flavor.
-
Spiced Orange Muffins: Cinnamon or nutmeg can add a warm, comforting spice to every bite. Just a pinch goes a long way!
-
Vegan Orange Muffins: Swap out the eggs for flax eggs or applesauce and use a plant-based butter substitute to enjoy a vegan version of this delicious treat.
Chef’s Notes
When I first made these muffins, I was attempting to recreate my grandmother’s recipe, but as every good chef knows, experimentation is the heart of culinary creation! I added my own flair, adjusting sugar levels and experimenting with different fats (butter vs. oil). Each batch brought joyful memories of baking with her. If a muffin tops a little lopsided? Embrace it! It’s a sign of a home-cooked treat—a friendly reminder that perfection is overrated.
FAQs and Troubleshooting
-
My muffins didn’t rise. What went wrong?
- Ensure your baking powder and baking soda are fresh! Also, don’t overmix the batter; mixing too much can create dense muffins.
-
Why are my muffins dry?
- Overbaking can lead to dryness. Keep an eye on your oven and begin checking for doneness a few minutes before the timer goes off.
-
Can I freeze these muffins?
- Absolutely! Once cooled, you can freeze them in an airtight container for up to 3 months. Just reheat in the microwave or oven when you’re ready to enjoy!
-
Can I add different fruits?
- Yes! Try swapping out the orange juice and zest for lemon, lime, or even grapefruit for a unique twist.
Nutritional Info
(Per muffin, serves approximately 12 muffins)
- Calories: 220
- Total Fat: 8g
- Saturated Fat: 4.5g
- Cholesterol: 40mg
- Sodium: 150mg
- Total Carbohydrates: 34g
- Dietary Fiber: 0.5g
- Sugars: 12g
- Protein: 3g
With each bite, these Orange Muffins deliver familiar warmth and a spark of joy. They are more than just a treat—they carry with them a legacy of love, laughter, and community. So, gather your loved ones around the table, take out those muffins, and create your own delicious memories. Happy baking!
PrintOrange Muffins

Delightful orange muffins that bring a burst of citrus flavor to breakfast or brunch.
- Prep Time: 15 minutes
- Cook Time: 20 minutes
- Total Time: 35 minutes
- Yield: 12 muffins 1x
- Category: Breakfast
- Method: Baking
- Cuisine: American
- Diet: Vegetarian
Ingredients
- 2 cups all-purpose flour
- 1 cup granulated sugar
- 1 tablespoon baking powder
- 1/2 teaspoon baking soda
- 1/2 teaspoon salt
- 1/2 cup unsalted butter, melted
- 1 cup fresh orange juice
- Zest of 1 orange
- 2 large eggs
- 1 teaspoon vanilla extract
Instructions
- Preheat your oven to 350°F (175°C).
- Prepare the muffin tin by greasing it or lining it with paper liners.
- Mix the dry ingredients in a bowl: flour, sugar, baking powder, baking soda, and salt.
- Combine the wet ingredients in another bowl: melted butter, orange juice, zest, eggs, and vanilla extract.
- Combine the wet and dry ingredients, folding them gently together until no dry flour remains.
- Fill the muffin cups about 2/3 full with batter.
- Bake for 18-20 minutes or until a toothpick comes out clean.
- Cool in the tin for 5 minutes before transferring to a wire rack.
Notes
For a fun twist, try adding chocolate chips, cranberries, or poppy seeds.
Nutrition
- Serving Size: 1 muffin
- Calories: 220
- Sugar: 12g
- Sodium: 150mg
- Fat: 8g
- Saturated Fat: 4.5g
- Unsaturated Fat: 2g
- Trans Fat: 0g
- Carbohydrates: 34g
- Fiber: 0.5g
- Protein: 3g
- Cholesterol: 40mg
Keywords: orange muffins, breakfast muffins, citrus baking, homemade muffins
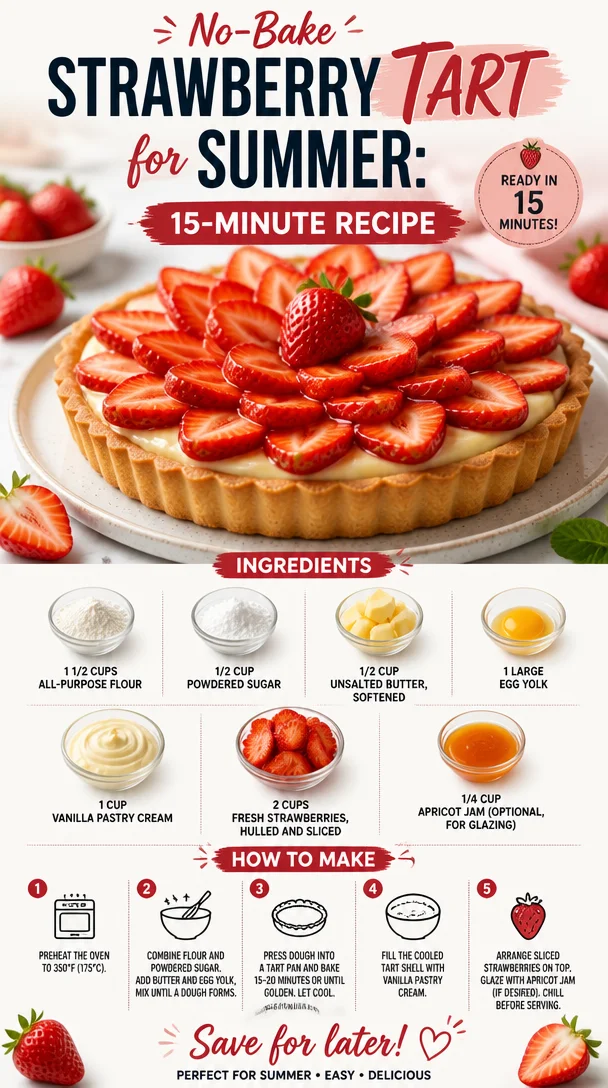
No-Bake Strawberry Tart for Summer: 15-Minute Recipe
A Love Letter to Tarte aux Fraises: The Quintessential Summer Dessert
Hello, fellow food lovers! Savannah here, and today, I’m excited to share with you a recipe that is as vibrant as a summer’s day – Tarte aux Fraises. If you’ve never tried this classic French strawberry tart, you’re in for a treat! This dessert isn’t just a feast for the eyes; it’s equally delightful for your taste buds. So, tie on your apron, and let’s dive into this elegant yet approachable recipe that is sure to impress anyone gathering around your table.
The Allure of Tarte aux Fraises
Growing up, I have vivid memories of summer days spent at my grandmother’s house. Her garden was a wonderland of vibrant colors, with strawberries spilling over the edges like little rubies beneath the sun. Every time those berries were ripe, so came the anticipation of my grandmother whipping up her famous Tarte aux Fraises. She would invite my cousins and me to help – washing strawberries, rolling out dough, and, of course, sneaking a few berries along the way. Sharing those moments, laughter ringing through the air as we worked together, is how I learned that food is more than just what’s on the plate; it’s about connection and joy.
Now, every time I make Tarte aux Fraises, I’m transported back to those sun-drenched afternoons. This recipe carries not just ingredients, but love, memories, and a bit of whimsy.
Ingredients
Let’s gather our supplies! Here’s what you’ll need for your Tarte aux Fraises:
-
1 1/2 cups all-purpose flour
The foundation of our tart crust. You can substitute with gluten-free flour for a gluten-free version, but ensure it’s a good blend that includes xanthan gum for proper texture. -
1/2 cup powdered sugar
Adds sweetness to our crust without the graininess. Don’t have any? Blend granulated sugar in a blender to make your own! -
1/2 cup unsalted butter, softened
The key player in bringing that rich flavor and tender texture to the crust. If you’re dairy-free, feel free to swap with coconut oil for a unique flavor that works surprisingly well! -
1 large egg yolk
This helps bind the dough together and adds richness. If you’re avoiding eggs, you can use a flax egg (1 tablespoon ground flaxseed mixed with 2.5 tablespoons water) as a substitute. -
1 cup vanilla pastry cream
The velvety filling that’s a real game changer for flavor! You can make your own or use a store-bought custard or pudding if you’re short on time. -
2 cups fresh strawberries, hulled and sliced
The star of our dessert! Fresh berries are essential, but frozen strawberries can work in a pinch—just thaw and drain excess liquid. -
1/4 cup apricot jam (optional, for glazing)
This adds a lovely shiny finish and extra flavor. If you prefer, try raspberry or strawberry jam for a different twist!
Step-by-Step Instructions
Now that we have our ingredients, let’s embark on creating this delightful Tarte aux Fraises. Don’t worry; I’ll guide you every step of the way!
-
Make the Tart Crust
In a mixing bowl, combine the all-purpose flour and powdered sugar. Mix well to incorporate them together. Now, add the softened butter. Use your fingers or a pastry cutter to rub the butter into the flour mixture until it resembles coarse crumbs. It’s okay to use a little muscle – channel your inner chef! -
Add the Egg Yolk
Next, add the egg yolk to the bowl. Stir until the mixture begins to clump together. Instead of kneading, lightly press it together into a ball. If it feels too dry, a teaspoon of ice water can push it into a knead-free dough. -
Chill the Dough
Wrap the dough in plastic wrap and refrigerate for at least 30 minutes. This step is crucial; it not only firms the dough but allows it to relax, which helps prevent shrinkage while baking. -
Preheat the Oven
Preheat your oven to 350°F (175°C) so it’s hot and ready for our tart. This helps create a lovely golden crust that’s both firm and flaky. -
Roll Out the Dough
Lightly flour your work surface and roll out the chilled dough to about 1/8 inch thick. Don’t stress about making it perfectly round – rustic charm is encouraged! Gently lift and place it into your tart pan. -
Blind Bake the Crust
Use a fork to prick holes in the bottom of the crust. This allows steam to escape, preventing puffing. Line the crust with parchment paper and fill with pie weights (or dried beans). Bake for 15 minutes, then remove the weights and bake for another 10-12 minutes or until lightly golden. Let it cool completely. -
Prepare the Vanilla Pastry Cream
While the crust cools, it’s time to make the pastry cream. If you’re going the homemade route, whisk together milk, sugar, and vanilla over medium heat until steaming. In a separate bowl, whisk egg yolks and cornstarch, then slowly add the warm milk mixture to temper the eggs. Return to the heat, cooking until thickened. Cool completely before assembling. -
Assemble the Tart
Once the crust and pastry cream are cooled, spread the cream evenly over the base. Arrange the sliced strawberries on top in an artful manner – this is your chance to showcase your creativity! -
Glaze with Apricot Jam
If you’re using apricot jam, warm it slightly in a saucepan until it becomes runny. Brush it generously over the strawberries for a shiny finish. -
Chill Before Serving
Allow your Tarte aux Fraises to chill in the refrigerator for about an hour. This helps set everything beautifully.
Serving Suggestions
When it’s time to serve, present your Tarte aux Fraises on a lovely cake stand. A light dusting of powdered sugar can add an elegant touch. Pair it with a dollop of whipped cream on the side for that extra indulgence. This dessert works wonderfully at dinner parties or summer gatherings, bringing smiles to the faces of everyone indulging in it.
Recipe Variations
Feeling adventurous? Here are some fun variations to mix things up:
- Berry Medley Tarte: Swap the strawberries for a mix of berries – blueberries, raspberries, and blackberries create a colorful twist.
- Chocolate Hazelnut Spread Base: Spread a thin layer of Nutella or chocolate ganache under the pastry cream for a decadent touch.
- Lemon Infusion: Add lemon zest to the pastry cream for a bright, zesty flavor that compliments the sweetness of the strawberries.
- Herbal Touch: Infuse fresh basil or mint into your pastry cream for an unexpected herbaceous note.
- Dairy-free Option: Use coconut cream instead of pastry cream for a delightful tropical twist.
Chef’s Notes
Tarte aux Fraises has evolved for me over the years. As my skills grew, so did my confidence in manipulating flavors and presentations. I remember my first attempt ended in a collapsed crust and a pastry cream that just refused to thicken. But that’s the beauty of cooking—the journey is part of the fun! I learned to embrace those kitchen mishaps as part of the learning process.
Now, my Tarte aux Fraises represents not just my culinary skills, but the warmth of those sun-soaked summers with my grandmother. It reminds me that cooking is ultimately about nurturing, both ourselves and those we love.
FAQs and Troubleshooting
-
Why did my crust shrink during baking?
Ensure your dough is well-chilled before baking, as warm dough tends to shrink. Always prick holes in the crust before baking! -
My pastry cream is too thin—what went wrong?
If the cream didn’t thicken, it may not have been heated long enough. Ensure to whisk continuously once you return it to the heat. -
Can I use frozen strawberries instead of fresh?
Yes, but be sure to thaw and drain them properly to prevent excess moisture. -
How do I store leftovers?
Tarte aux Fraises is best enjoyed fresh but can be stored in an airtight container in the fridge for up to two days. Just note the crust may lose some of its crisp texture.
Nutritional Info
While indulging in a slice of Tarte aux Fraises, consider that it’s packed with fresh strawberries, giving you a boost of vitamin C and antioxidants. Just remember to enjoy it in moderation as part of a well-balanced diet.
There you have it—my recipe for a stunning Tarte aux Fraises. May it become a staple in your kitchen, just as it has in mine. Here’s to cooking with intention, creating beautiful memories, and always remembering that good food is about showing up for one another. Happy baking, everyone!
PrintTarte aux Fraises

A classic French strawberry tart, perfect for summer gatherings, combining a crisp crust with vanilla pastry cream and fresh strawberries.
- Prep Time: 45 minutes
- Cook Time: 30 minutes
- Total Time: 75 minutes
- Yield: 8 servings 1x
- Category: Dessert
- Method: Baking
- Cuisine: French
- Diet: Vegetarian
Ingredients
- 1 1/2 cups all-purpose flour
- 1/2 cup powdered sugar
- 1/2 cup unsalted butter, softened
- 1 large egg yolk
- 1 cup vanilla pastry cream
- 2 cups fresh strawberries, hulled and sliced
- 1/4 cup apricot jam (optional, for glazing)
Instructions
- Make the Tart Crust: In a mixing bowl, combine the flour and powdered sugar. Mix well, then add the softened butter and rub it in until it resembles coarse crumbs.
- Add the Egg Yolk: Add the egg yolk and stir until the mixture clumps together. Press into a ball, adding ice water if too dry.
- Chill the Dough: Wrap in plastic wrap and refrigerate for at least 30 minutes.
- Preheat the Oven: Preheat your oven to 350°F (175°C).
- Roll Out the Dough: Lightly flour your surface and roll the dough to about 1/8 inch thick, then transfer it to the tart pan.
- Blind Bake the Crust: Prick holes in the crust, line with parchment and weights, and bake for 15 minutes. Remove weights and bake for an additional 10-12 minutes until golden.
- Prepare the Vanilla Pastry Cream: Whisk milk, sugar, and vanilla over medium heat until steaming. Temper egg yolks with cornstarch, then cook until thickened.
- Assemble the Tart: Spread pastry cream over the cooled crust and layer the strawberries on top.
- Glaze with Apricot Jam: Warm the jam and brush it over the strawberries.
- Chill Before Serving: Refrigerate for about an hour before serving.
Notes
Serve with a dusting of powdered sugar and a dollop of whipped cream.
Nutrition
- Serving Size: 1 slice
- Calories: 280
- Sugar: 15g
- Sodium: 200mg
- Fat: 16g
- Saturated Fat: 10g
- Unsaturated Fat: 4g
- Trans Fat: 0g
- Carbohydrates: 35g
- Fiber: 2g
- Protein: 3g
- Cholesterol: 40mg
Keywords: tarte aux fraises, strawberry tart, French dessert, summer dessert, classic recipes
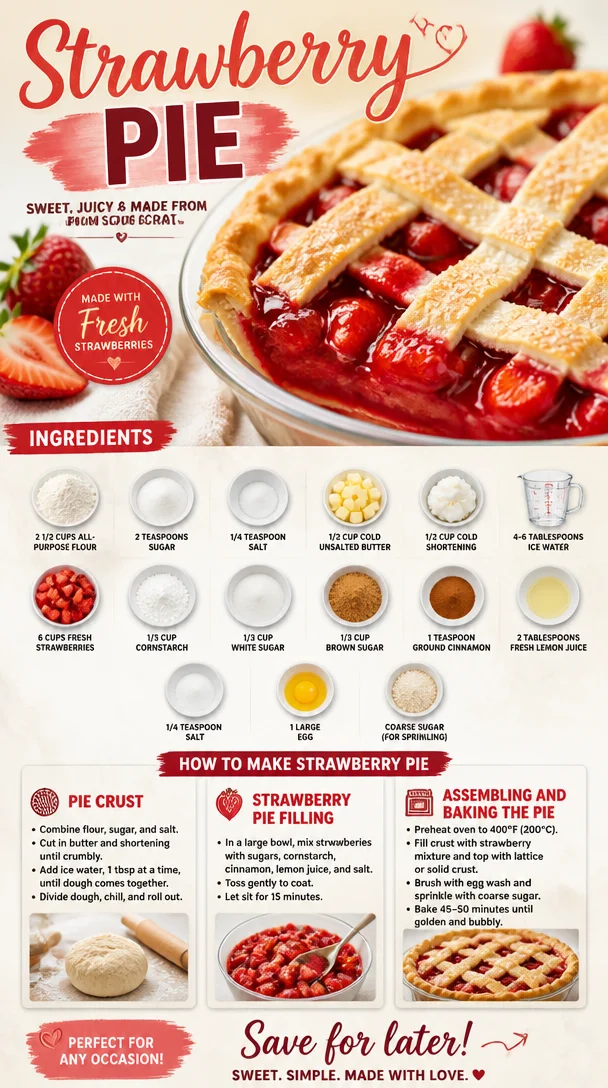
Strawberry Pie
Delightful Strawberry Pie: A Sweet Slice of Summer
Welcome to the world of vibrant flavors and joyous gatherings! If you’re anything like me, there’s something magical about biting into a slice of homemade strawberry pie—especially when the berries are at their juicy peak. This delightful dessert is not just a treat but a joyful experience that brings back memories of sun-soaked days spent under the warm sun, surrounded by friends and family.
Strawberry pie is one of those desserts that feels like a hug in a slice. It’s light yet rich with natural sweetness, a perfect expression of summer that servers can appreciate whether they are at a cozy picnic or a festive dinner gathering. Plus, its brilliant red hue makes it a showstopper on any dessert table!
Join me as we embark on a journey to create a luscious strawberry pie that captivates your tastebuds and warms your heart. So, dust off your apron, gather the ingredients, and let’s make some memories together in the kitchen!
A Nostalgic Slice of Life
Let me take you back to a summer afternoon at my grandmother’s house, when the air was fragrant with blooming flowers and ripe strawberries. She had this incredible garden, brimming with juicy berries that glistened in the sun. Each year, when it was time to harvest, I’d be her little helper, gathering baskets filled with the freshest strawberries.
One day, after a particularly bountiful harvest, we rolled up our sleeves and made our famous strawberry pie. The kitchen filled with laughter as we mixed the juicy strawberries with sugar and cinnamon, and I remember my grandma’s secret ingredient—love, of course! Little did I know that those moments would shape my love for cooking and for bringing people together around the table.
As the pie baked, the sweet aroma wafted through the house, making the anticipation all the more delightful. I could hardly wait for it to cool, but my grandma taught me the importance of patience. Finally, we enjoyed our treat—each bite bursting with goodness and nostalgia. That, my friends, is the magic of a homemade strawberry pie. Let’s recreate that same magic in your kitchen today!
Ingredients
Here’s what you’ll need to whip up your own stunning strawberry pie:
-
2 1/2 cups all-purpose flour: This will be the base for your pie crust. For a healthier option, you can substitute with whole wheat flour, but the texture will change a bit.
-
2 teaspoons sugar: This adds a little sweetness to the crust itself. You can use coconut sugar for a slightly deeper flavor.
-
1/4 teaspoon salt: A must-have for enhancing flavors and balancing the sweetness.
-
1/2 cup cold unsalted butter: Butter gives the crust its flaky texture. If you want a dairy-free option, use 1/2 cup of cold coconut oil instead.
-
1/2 cup cold shortening: Helps achieve that wonderful flaky quality. You can use lard for a more traditional flavor or stick to butter for a completely butter-based crust.
-
4–6 tablespoons ice water: Essential to bring the dough together without melting the butter.
-
6 cups fresh strawberries: Haul ’em and slice ’em! The star of the show. Frozen strawberries can work too, but fresh is always better for this pie.
-
1/3 cup cornstarch: This will help thicken your filling. You may substitute it with arrowroot for a gluten-free version.
-
1/3 cup white sugar: This gives sweetness to your filling without altering the color. Feel free to reduce this if your berries are super sweet.
-
1/3 cup brown sugar: Adds a rich, caramel-like flavor. If you don’t have brown sugar, a light drizzle of honey can work too!
-
1 teaspoon ground cinnamon: Just a hint of spice to complement the strawberries. You can also experiment with nutmeg for a different flavor.
-
2 tablespoons fresh lemon juice: Brightens up the flavors of the filling and keeps those strawberries fresh. Lime juice works in a pinch!
-
1/4 teaspoon salt: Enhances the overall flavor of the filling, balancing the sweetness.
-
1 large egg: This will help bind the crust together. For a vegan version, substitute it with a flaxseed egg (1 tablespoon ground flaxseed mixed with 2.5 tablespoons water).
-
Coarse sugar: For sprinkling on top of the pie, giving it a delightful crunch! You can use sparkling sugar for extra flair.
Step-by-Step Instructions
Now that we have our ingredients, let’s dive into the magic of making this pie!
Step 1: Making the Crust
-
Prep your workspace: Start by cleaning the countertop (or your kitchen table). You want a clean, organized area to create your pie magic!
-
Mix the dry ingredients: In a large bowl, whisk together the flour, sugar, and salt until fully blended.
-
Cut in the butter and shortening: Add the cold butter and shortening to the bowl, and using a pastry cutter or your fingers, work the fats into the flour mixture. You want a crumbly texture with some pea-sized pieces remaining. This is the secret to a flaky crust!
-
Add ice water: Slowly drizzle in the ice water, one tablespoon at a time, mixing until the dough just comes together. Be careful not to overwork it—want that tenderness!
-
Chill the dough: Form the dough into a disc, wrap it in plastic wrap, and refrigerate for at least 30 minutes. This is crucial for those flavors to meld and for the butter to firm up again.
Step 2: Prepare the Filling
-
Slice the strawberries: While the dough chills, haul and slice your strawberries. Place them in a large mixing bowl.
-
Mix the filling ingredients: In another bowl, combine the cornstarch, white sugar, brown sugar, cinnamon, lemon juice, and salt. Pour this over the strawberries and gently toss to coat. Let this mixture sit for about 15-20 minutes to allow the juices to start mixing with the sugars.
Step 3: Roll Out the Crust
-
Preheat your oven: Turn on your oven to 425°F (220°C) so it’s hot and ready when your pie is prepared.
-
Roll out the dough: After the dough has chilled, lightly flour your surface. Roll out your dough to about 1/8 inch thickness with a rolling pin, ensuring it’s big enough to fit your pie dish.
-
Transfer to the pie dish: Gently place the rolled-out dough into your pie dish. Trim the excess dough hanging over the edges and press it down gently into place. Poking holes in the crust helps prevent bubbling.
Step 4: Assemble the Pie
-
Add the filling: Pour the strawberry mixture into the prepared crust, spreading it out evenly. Make sure every bit of that sweet goodness is distributed!
-
Top the pie: Roll out any remaining dough for a lattice top or simply use additional dough to cover the pie. Create slits in the top crust if you’re making it solid to allow the steam to escape. Brush the top with a beaten egg for that beautiful golden sheen.
Step 5: Bake
-
Sprinkle with coarse sugar: Before placing it in the oven, sprinkle some coarse sugar over the top for that enticing crunch.
-
Bake: Pop the pie into your preheated oven and bake for about 40-45 minutes or until the crust is golden brown and the filling is bubbly. Keep an eye on it; if the edges brown too quickly, cover them with foil!
Step 6: Cool and Serve
- Cool: Once out of the oven, let the pie cool for at least 2 hours before slicing. This allows the filling to set up so that first slice is picture-perfect!
Serving Suggestions
When it’s finally time to serve, slice your strawberry pie and plate it with a scoop of vanilla ice cream or a dollop of whipped cream on the side. Drizzle with a bit of strawberry sauce for extra flair, and don’t forget a sprig of mint for color!
Recipe Variations
Here are some fun twists you can try with the classic strawberry pie:
-
Mixed Berry Pie: Instead of just strawberries, try combining raspberries, blueberries, and blackberries for a delightful mixed berry pie!
-
Chocolate Drizzle: Add a rich chocolate drizzle over the top of each slice for a decadent addition.
-
Lemon Basil Pie: Incorporate fresh basil with the strawberries for a surprising twist of flavor. It gives the pie an herby freshness that’s out of this world!
-
Portable Strawberry Hand Pies: Use the same filling, but make small hand-held pies by folding the dough over the filling and sealing the edges.
-
Gluten-Free Version: Use a gluten-free flour blend to make the crust. It works beautifully!
Chef’s Notes
As I look back on my love for strawberry pie, it’s evolved over the years. There are so many moments tied to this simple dish—family gatherings, summer barbecues, or cozy evenings under the stars. Each iteration teaches me something new in the kitchen, like mastering the balance between sweetness and tartness or the art of the perfect crust.
I’ll let you in on a little secret: I always keep a stash of frozen berries in my freezer. Life gets busy, and sometimes you just want that pie-decadence without a long prep time. No one has to know, right?
FAQs and Troubleshooting
Q: Why is my pie crust soggy?
A: This can occur if your filling is too watery or if the crust isn’t pre-baked. Make sure to bake the crust until it’s firm before adding the filling, and consider draining some of those strawberry juices before pouring them in!
Q: How can I prevent my pie from burning?
A: If the crust edges start to brown too fast, cover them with strips of aluminum foil for the remainder of baking.
Q: Can I make this pie ahead of time?
A: Absolutely! You can prep the filling a day ahead and store it in the fridge. Just assemble and bake the pie when you’re ready!
Q: What if I don’t have fresh strawberries?
A: Frozen strawberries can be used, but you may need to adjust the sugar and cook the filling for a few minutes on the stovetop to thicken it properly.
Nutritional Info
While I believe in enjoying dessert in moderation, here’s a basic breakdown of nutritional values per slice of strawberry pie (assuming 8 slices):
- Calories: 250
- Total Fat: 12g
- Saturated Fat: 5g
- Carbohydrates: 34g
- Fiber: 2g
- Sugar: 15g
- Protein: 3g
Enjoy this delightful strawberry pie, and remember, it’s not just about the food; it’s about gathering together, sharing stories, and creating moments that matter. So, let’s celebrate the sweetness of life, one slice at a time—happy baking!
PrintDelightful Strawberry Pie

A sweet and nostalgic homemade strawberry pie that celebrates summer with its burst of flavors and vibrant colors.
- Prep Time: 30 minutes
- Cook Time: 45 minutes
- Total Time: 75 minutes
- Yield: 8 servings 1x
- Category: Dessert
- Method: Baking
- Cuisine: American
- Diet: Vegetarian
Ingredients
- 2 1/2 cups all-purpose flour
- 2 teaspoons sugar
- 1/4 teaspoon salt
- 1/2 cup cold unsalted butter
- 1/2 cup cold shortening
- 4–6 tablespoons ice water
- 6 cups fresh strawberries
- 1/3 cup cornstarch
- 1/3 cup white sugar
- 1/3 cup brown sugar
- 1 teaspoon ground cinnamon
- 2 tablespoons fresh lemon juice
- 1/4 teaspoon salt
- 1 large egg
- Coarse sugar for sprinkling
Instructions
- Prep your workspace: Start by cleaning the countertop.
- Mix the dry ingredients: In a large bowl, whisk together the flour, sugar, and salt until blended.
- Cut in the butter and shortening: Work the fats into the flour mixture until crumbly.
- Add ice water: Slowly drizzle in the ice water, mixing until the dough just comes together.
- Chill the dough: Form into a disc, wrap, and refrigerate for at least 30 minutes.
- Slice the strawberries: After the dough chills, slice your strawberries and place in a large bowl.
- Mix the filling ingredients: Combine cornstarch, white sugar, brown sugar, cinnamon, lemon juice, and salt; pour over strawberries and toss.
- Preheat your oven: Turn on to 425°F (220°C).
- Roll out the dough: On a floured surface, roll out the dough to about 1/8 inch thickness.
- Transfer to the pie dish: Place the rolled-out dough into the pie dish, trimming edges.
- Add the filling: Pour the strawberry mixture into the prepared crust.
- Top the pie: Create a lattice top or cover the pie, making slits in the top crust.
- Sprinkle with coarse sugar: Before baking, sprinkle sugar on top.
- Bake: Bake for about 40-45 minutes until the crust is golden and filling is bubbly.
- Cool and serve: Let cool for at least 2 hours before slicing.
Notes
Serve with vanilla ice cream or whipped cream. You can create variations by adding different berries or flavors.
Nutrition
- Serving Size: 1 slice
- Calories: 250
- Sugar: 15g
- Sodium: 200mg
- Fat: 12g
- Saturated Fat: 5g
- Unsaturated Fat: 5g
- Trans Fat: 0g
- Carbohydrates: 34g
- Fiber: 2g
- Protein: 3g
- Cholesterol: 30mg
Keywords: strawberry pie, summer dessert, homemade pie
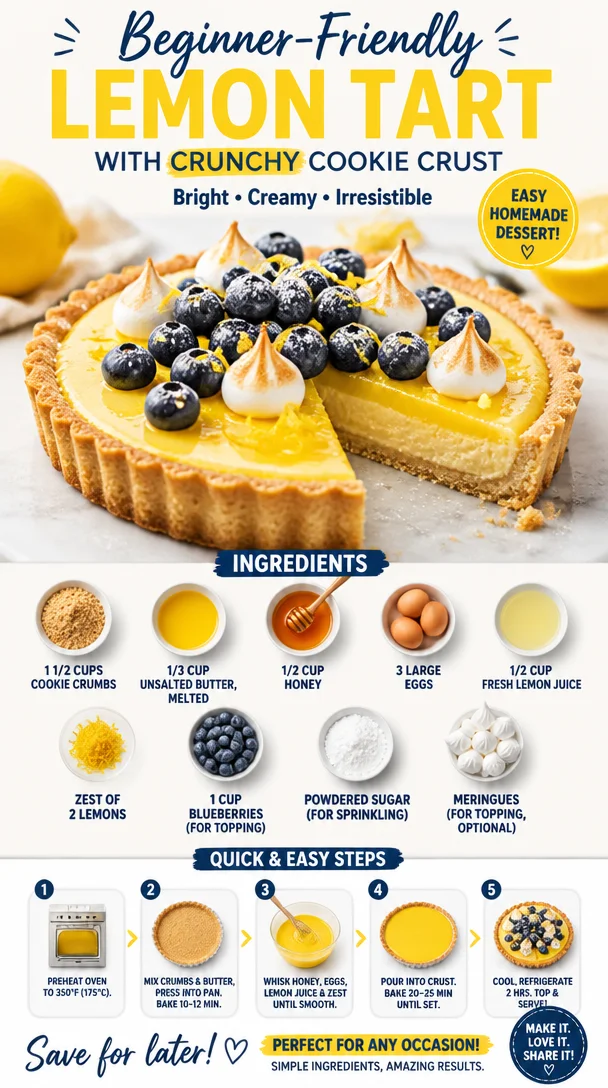
Beginner-Friendly Lemon Tart with Crunchy Cookie Crust
The Perfect Lemon Tart with Cookie Crust: An Easy Yet Elegant Dessert
Hello friends! If you’re in the mood for something refreshing, zesty, and utterly delightful, you’ve come to the right place. Today, we’re diving into the world of tangy goodness with a Lemon Tart that’s perfectly paired with a sweet cookie crust. This elegant dessert proves you don’t need fancy techniques or exhaustive ingredient lists to create something that feels gourmet. So, tie on that apron, and let’s get to it!
A Memory in Every Slice
Let me take you back to my childhood — a time when my sweet tooth had no limits. My grandmother, a petite woman with a heart as vast as her dessert repertoire, would spend hours in her cozy kitchen crafting one dessert after another. But one recipe that always brought the whole family together was her Lemon Tart. I can still picture her bustling around the kitchen, her floral apron slightly dusted with flour, as she mixed and stirred with an enthusiasm that filled the room with warmth.
One sunny afternoon, she and I decided to whip up a Lemon Tart together. The citrusy scent filled the air, and I was mesmerized as she expertly mixed the ingredients, her hands moving with a grace I admired deeply. As the tart baked in the oven, we sat on the porch, sipping lemonade and sharing stories. That Lemon Tart became not just a dessert but a symbol of love and togetherness.
Today, I’m thrilled to share my take on that cherished dessert with you — a Lemon Tart with a delightful cookie crust that’s sure to create just as many sweet memories!
Ingredients
Here’s what you’ll need to create your own slice of sunshine:
-
1 1/2 cups cookie crumbs
- Use your favorite cookies for the crust—think graham crackers, digestive biscuits, or even ginger snaps for a spicy twist! You can also crush them yourself for a more rustic texture.
-
1/3 cup unsalted butter, melted
- This is crucial for binding your cookie crust together. If you’re feeling adventurous, try substituting with coconut oil for a hint of tropical flavor.
-
1/2 cup honey
- Honey adds a lovely natural sweetness with a hint of floral notes. If you prefer, you can use agave nectar or maple syrup.
-
3 large eggs
- Fresh eggs give the tart a rich texture and help set the filling. If you’re vegan, a flax egg can be a great alternative (1 tablespoon flaxseed meal + 2.5 tablespoons water per egg).
-
1/2 cup fresh lemon juice
- Fresh is best! Store-bought lemon juice doesn’t have that same vibrant flavor. If lemons are out of season, you can try bottled, but do taste it first to ensure the tartness shines.
-
Zest of 2 lemons
- Zesting adds an incredible punch of lemon flavor. Make sure to zest before juicing to keep your hands clean and to utilize every bit of the lemon.
-
1 cup blueberries (for topping)
- Fresh blueberries add a splash of color and a burst of sweetness. Swap them with raspberries or strawberries if you prefer!
-
Powdered sugar (for sprinkling)
- It adds the final touch of sweetness and makes the tart visually appealing. A light dusting goes a long way!
-
Meringues (for topping, optional)
- Want to take it over the top? Add some meringue kisses for that café-style look! They’re surprisingly easy to make too.
Step-by-Step Instructions
Ready to embark on your lemony journey? Let’s get started!
-
Preheat the Oven
- Preheat your oven to 350°F (175°C). This is essential for getting that perfect crust and setting your filling.
-
Make the Cookie Crust
- In a mixing bowl, combine the cookie crumbs and melted butter. Stir until the crumbs are evenly moistened. You should end up with a sandy texture that holds together when pressed.
- Chef’s Tip: If you find your crust crumbling, simply add a bit more melted butter. You want it just wet enough to hold together!
-
Press the Crust into a Tart Pan
- Press the cookie mixture firmly into the bottom and up the sides of a 9-inch tart pan. Use the back of a measuring cup or your fingers to get it nice and even. Make sure to pack it tightly!
- Pro Tip: To avoid cracks in your crust, take your time and don’t rush this step. A well-pressed crust will ensure structural integrity later.
-
Bake the Crust
- Place the crust in the preheated oven and bake for about 10 minutes or until it’s golden brown. Remove from the oven and let it cool slightly.
-
Prepare the Lemon Filling
- In a mixing bowl, whisk together the honey and eggs until combined. Then, add in the fresh lemon juice and zest. Keep whisking until the filling is smooth and luscious.
- Kitchen Hack: To maximize the juice from your lemons, roll them on the countertop before cutting. It makes all the difference!
-
Pour the Filling into the Crust
- Carefully pour the lemon filling into your cooled cookie crust. Don’t be afraid to fill it up nice and full — it’ll puff up a bit while baking.
-
Bake the Tart
- Bake the tart for about 20-25 minutes, until the filling is just set and a bit wobbly in the center. It will firm up as it cools.
- Chef Insight: Avoid overbaking! You want that perfect silky texture, not a rubbery one.
-
Cool the Tart
- Allow your tart to cool at room temperature for a bit, then pop it in the fridge for at least an hour to chill and set completely.
-
Garnish and Serve
- Just before serving, sprinkle with powdered sugar, top with fresh blueberries, and add meringues if using. Cut into wedges and watch everyone’s faces light up with joy!
Serving Suggestions
Presentation is key when it comes to desserts, and this Lemon Tart is no exception! Serve slices on elegant dessert plates with a side of whipped cream, and garnish with extra fresh berries or sprigs of mint. This simple step not only enhances the visual appeal but also elevates the overall experience — because we eat with our eyes first!
Recipe Variations
This Lemon Tart is a great base for creative twists! Here are some fun ideas:
- Fruit Variations: Swap out blueberries for strawberries, raspberries, or even a mixed berry medley for a colorful topping!
- Herb Infusion: Add a teaspoon of finely chopped fresh basil or mint to the filling for a unique herbal twist.
- Chocolate Drizzle: Drizzle a bit of melted dark chocolate over the tart for an unexpected yet luxurious flavor combination.
- Gingersnap Crust: Instead of traditional cookies, use gingersnaps for a spiced cookie crust. It pairs beautifully with lemon!
- Vegan Option: Substitute eggs with a flax egg mixture and use maple syrup in place of honey to make a vegan-friendly tart.
Chef’s Notes
Making this Lemon Tart is a walk down memory lane for me. I love how desserts can evoke such strong connections to our past. Over the years, I’ve tweaked my grandmother’s original recipe, made it simpler, and added that crispy cookie crust to enhance the texture. The joy of sharing this dessert with loved ones brings me as much happiness as that sunny afternoon in my grandmother’s kitchen. And remember, it’s all about the experience — so have fun with it!
FAQs and Troubleshooting
Q: My filling turned out runny. What did I do wrong?
A: If your filling didn’t set, you might have undercooked it or not let it chill long enough. Make sure to follow baking times and allow it to cool completely in the fridge.
Q: Can I use bottled lemon juice?
A: While it’s possible, fresh lemon juice really enhances the flavor and gives you that bright tartness we all love. If you must use bottled, taste it first to ensure it has that refreshing kick.
Q: What do I do if my crust cracks?
A: Don’t fret! Cracks are common, especially if the crust is too dry. Next time, ensure you’re mixing the cookie crumbs and butter well, and pack it tightly into the pan.
Q: How long can I store leftovers?
A: Store your Lemon Tart in the refrigerator for up to 5 days. It’s a delightful treat to nibble on for dessert throughout the week!
Nutritional Info (Optional)
For those keeping track, here’s a rough breakdown for one slice (based on 8 slices):
- Calories: 230
- Total Fat: 10 g
- Saturated Fat: 5 g
- Cholesterol: 60 mg
- Sodium: 60 mg
- Total Carbohydrates: 33 g
- Dietary Fiber: 1 g
- Sugars: 15 g
- Protein: 3 g
So, there you have it! A Lemon Tart with Cookie Crust that’s not just a dessert, but a delightful way to create memories. I hope you enjoy making and sharing this recipe as much as I do. Happy cooking, dear friends—let’s create some magic in the kitchen!
PrintThe Perfect Lemon Tart with Cookie Crust

An easy yet elegant lemon tart with a delightful cookie crust, perfect for creating sweet memories.
- Prep Time: 15 minutes
- Cook Time: 30 minutes
- Total Time: 45 minutes
- Yield: 8 servings 1x
- Category: Dessert
- Method: Baking
- Cuisine: American
- Diet: Vegetarian
Ingredients
- 1 1/2 cups cookie crumbs
- 1/3 cup unsalted butter, melted
- 1/2 cup honey
- 3 large eggs
- 1/2 cup fresh lemon juice
- Zest of 2 lemons
- 1 cup blueberries (for topping)
- Powdered sugar (for sprinkling)
- Meringues (for topping, optional)
Instructions
- Preheat your oven to 350°F (175°C).
- In a mixing bowl, combine the cookie crumbs and melted butter. Stir until the crumbs are evenly moistened.
- Press the cookie mixture firmly into the bottom and sides of a 9-inch tart pan.
- Place the crust in the preheated oven and bake for about 10 minutes.
- In a mixing bowl, whisk together the honey and eggs until combined. Add in the fresh lemon juice and zest.
- Carefully pour the lemon filling into your cooled cookie crust.
- Bake the tart for about 20-25 minutes, until the filling is just set.
- Allow your tart to cool at room temperature, then chill in the fridge for at least an hour.
- Just before serving, sprinkle with powdered sugar and top with blueberries and meringues if using.
Notes
For fruit variations, try using strawberries, raspberries, or a mixed berry medley. Consider adding fresh herbs or a chocolate drizzle for a unique twist.
Nutrition
- Serving Size: 1 slice
- Calories: 230
- Sugar: 15g
- Sodium: 60mg
- Fat: 10g
- Saturated Fat: 5g
- Unsaturated Fat: 3g
- Trans Fat: 0g
- Carbohydrates: 33g
- Fiber: 1g
- Protein: 3g
- Cholesterol: 60mg
Keywords: lemon tart, dessert, cookie crust, easy dessert, citrus dessert